1
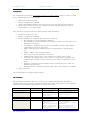
TM
SmartMaster
BTE CORPORATION
2014
ADMINISTRATOR
MANUAL
SmartMasterTM 2014
Administrator Manual
Page 1 of 36
Contents
Contents.....................................................................................................................................1
Introduction ...............................................................................................................................3
System Functions ......................................................................................................................3
Communications ....................................................................................................................3
Remote Stations ....................................................................................................................3
Applications...........................................................................................................................4
System Setup.............................................................................................................................4
Communications ........................................................................................................................5
Binding Layer Client .............................................................................................................5
Binding Layer Server ...........................................................................................................6
Application Layer Client .......................................................................................................6
Application Layer Server .....................................................................................................7
Remote Stations ........................................................................................................................8
Input Managers / Polling.......................................................................................................8
Output Managers ................................................................................................................ 10
Remote Station Definition.................................................................................................. 10
Remote Station Addressing ............................................................................................... 11
Protocols ........................................................................................................................ 11
Telescada ARS Protocol................................................................................................ 12
- Ccu7CCtl ................................................................................................................. 12
- TscRTUShortAddr .................................................................................................. 12
- TscRTULongAddr ................................................................................................... 12
- TscRTURelayAddr .................................................................................................. 12
- MotorolaDigital ....................................................................................................... 12
- GE REMS 101/102 .................................................................................................. 12
- SA REMS 101/102 .................................................................................................. 13
- SaDigital .................................................................................................................. 13
- Sa206 ....................................................................................................................... 13
I/O Points............................................................................................................................ 14
Definition ........................................................................................................................ 14
Configuration.................................................................................................................. 15
PSP Parameter ............................................................................................................... 15
Evaluation....................................................................................................................... 16
Evaluators ...................................................................................................................... 17
- Source Code Authoring .......................................................................................... 17
- Source Code Compilation ....................................................................................... 19
OVM (Output Value Management) ................................................................................ 19
Dynamic Operation Control ........................................................................................... 19
I/O Point Groups ................................................................................................................ 19
Remote Station Groups ...................................................................................................... 20
SCADA .................................................................................................................................... 21
Programs ............................................................................................................................ 21
Program Creation .......................................................................................................... 21
Database Tables ............................................................................................................ 22
Table Columns ............................................................................................................... 22
Program Execution ........................................................................................................ 23
One-Line Diagram Displays .............................................................................................. 24
BTE CORPORATION
(631) 673-8339
http://www.btecentral.com
SmartMasterTM 2014
Administrator Manual
Page 2 of 36
Display Designer............................................................................................................ 24
Display Element Types ................................................................................................. 24
- Atomic Display Elements ....................................................................................... 24
- Composite Display Elements.................................................................................. 25
Display Element Creation.............................................................................................. 25
- Line .......................................................................................................................... 25
- Polyline, Polygon .................................................................................................... 25
- Circle ....................................................................................................................... 25
- Arc ........................................................................................................................... 26
- Text ......................................................................................................................... 26
- Gauge – Relay_01 ................................................................................................... 26
- Composite................................................................................................................ 26
Change Display Element................................................................................................ 27
- Edit Display Element .............................................................................................. 27
- Configure Display Element..................................................................................... 27
Change Display Element Children ................................................................................ 28
Download Display Elements from Central Library ...................................................... 28
Display Element Colors ................................................................................................. 28
- Stroke Colors .......................................................................................................... 28
- Fill Colors ................................................................................................................ 28
Load Management .................................................................................................................. 30
Strategies ........................................................................................................................... 31
Demand Inputs ................................................................................................................... 31
Load Points......................................................................................................................... 32
Load Groups ....................................................................................................................... 32
Manual Load Point Operation ............................................................................................ 33
Load Point Operation Priority ........................................................................................... 33
Secondary Loads................................................................................................................ 34
Programs ............................................................................................................................ 34
Demand Response.......................................................................................................... 34
Load State Reinserting .................................................................................................. 35
BTE CORPORATION
(631) 673-8339
http://www.btecentral.com
SmartMasterTM 2014
Administrator Manual
Page 3 of 36
Introduction
This manual is intended for users who are able to set up and / or reconfigure SmartMasterTM (SM)
so it better reflects the monitored distribution system. It is assumed that the reader has read SM
User Manual.
System Functions
Below is SM block diagram depicting main system functions.
Application
COMM
Application
DBMS
RSM
At the highest level, SM performs three functions:
1.
2.
3.
Communications (COMM)
Management of remote stations (RSM)
Applications
Communications
The COMM block in above figure manages communications between SM and remote stations in the
field. Its basic function is to get data from remote stations into SM database management system
(DBMS), and to push data from SM to remote stations. In SM, communications are managed by
Communications service running on the server.
Remote Stations
The RSM block in above figure is Remote Stations Manager. It manages remote stations in the field,
such as IEDs, RTUs, switches, etc. It ensures that proper remote station parameters are defined
and used, appropriate communications channels are assigned for communications between SM and
respective remote stations, that communications take place at appropriate times, and that all data
going to and coming from I/O points (inputs, such as analog and status readings, and outputs such
as controls) is properly processed and stored. In SM, these functions are done by RemoteStations
service running on the server.
BTE CORPORATION
(631) 673-8339
http://www.btecentral.com
SmartMasterTM 2014
Administrator Manual
Page 4 of 36
Applications
Applications use I/O point database records. Each application also creates its own database
records. These applications, such as SCADA, load management, etc. run algorithms appropriate to
those applications, using above mentioned database records. In SM, each application has its own
service on the server.
System Setup
To set up a functioning SM system, the following need to be set up first in the order listed below:
•
•
•
•
•
All communications channels that will be used by SM. (Communications service)
Remote station polling (RemoteStations service)
All remote stations that will be managed by SM need to be defined and properly configured
(RemoteStations service)
All I/O points need to be defined and properly configured (RemoteStations service)
All Evaluators (scripts of source code, authored by the Administrator, which process I/O
point data) need to be defined. (RemoteStations service)
Above constitute a minimum set of objects that need to be defined so SM can operate. Above
minimal configuration allows SM to function as a data concentrator or a small, basic SCADA master
controller which can poll remote stations for data, and can dispatch control codes.
Beyond these, further system objects need to be defined to get additional functionality. They are
listed below in no particular order:
•
•
•
•
•
•
•
•
•
•
•
•
•
•
•
•
•
•
•
•
•
System backup schedule (SmartMaster service)
Holiday list (SmartMaster service)
Evaluators (RemoteStations service)
RemoteStation filters (RemoteStations service)
RemoteStation groups (RemoteStations service)
I/O point groups (RemoteStations service)
OutputManagers (RemoteStations service)
Event Log Filters (Event Viewer)
Data Filters (Data Viewer)
Security accounts (SystemUsers service)
System users (SystemUsers service)
User notifications (SystemUsers service and Database Mail in SQL Server)
User Authored Programs (SCADA service)
One-Line Diagrams (SCADA service)
Demand inputs (LoadManagement service)
Load points (LoadManagement service)
Load groups (LoadManagement service)
Demand response (LoadManagement service)
Load state reinserting (LoadManagement service)
Load rotation (LoadManagement service)
Reports (Report Services in SQL Server and Internet Explorer)
BTE CORPORATION
(631) 673-8339
http://www.btecentral.com
SmartMasterTM 2014
Administrator Manual
Page 5 of 36
Communications
Communications service manages communications between SM and remote stations via
communications chanels. In SM, each communications channel consists of two parts:
•
•
Binding layer – moves data in and out of the computer
Application layer – runs communications protocol layers
Communications channels can share the same binding layer. This way SM can run multiple
protocols over the same physical channel.
Users can create and delete communications channels as needed. Internal, service broker channels
should not be deleted as they are used by SM internally for communications between the various
services and viewers.
Binding Layer Client
To define a new binding layer client proceed as follows:
•
•
•
•
•
•
Start the Main Viewer
Open Communications service window
Right-click anywhere in the Binding Layer Clients display
Execute the New Client... command
Enter the new client name. In SM, client names are preceded with an underscore character
‘_’.
From the list of client types select the new client type
The new client appears in Binding Layer Clients display. To configure the new client:
•
Right-click on the new client
BTE CORPORATION
(631) 673-8339
http://www.btecentral.com
SmartMasterTM 2014
•
•
•
Administrator Manual
Page 6 of 36
Execute Configuration – Client command
Modify parameters as needed. At the very least one must set the value the new object
Manager to Enabled.
Select Save+Exit
Object modifications are logged in SM event log.
Binding Layer Server
To define a new binding layer server proceed as follows:
•
•
•
•
•
•
Start the Main Viewer
Open Communications service window
Right-click anywhere in the Binding Layer Servers display
Execute the New Server... command
Enter the new server name.
From the list of server types select the new server type
The new client appears in Binding Layer Servers display. To configure the new server:
•
•
•
•
Right-click on the new server
Execute Configuration – Server command
Modify parameters as needed. At the very least one must set the value the new object
Manager to Enabled.
Select Save+Exit
Object modifications are logged in SM event log.
Application Layer Client
Client
To define a new application layer client proceed as follows:
•
•
•
•
•
•
•
Start the Main Viewer
Open Communications service window
Right-click anywhere in the Application Layer Clients display
Execute the New Client... command
Enter the new client name. In SM, client names are preceded with an underscore character
‘_’.
From the list of client types select the new client type
From the list of binding layer clients select a client
The new client appears in Binding Layer Clients display. The last step above associates application
layer client with a binding layer counterpart. Associating clients with servers is not supported. To
configure the new client:
•
•
•
•
Right-click on the new client
Execute Configuration – Client command
Modify parameters as needed. At the very least one must set the value the new object
Manager to Enabled.
Select Save+Exit
Object modifications are logged in SM event log.
BTE CORPORATION
(631) 673-8339
http://www.btecentral.com
SmartMasterTM 2014
Administrator Manual
Page 7 of 36
Application Layer Server
To define a new application layer server proceed as follows:
•
•
•
•
•
•
•
Start the Main Viewer
Open Communications service window
Right-click anywhere in the Application Layer Servers display
Execute the New Server... command
Enter the new server name.
From the list of server types select the new server type
From the list of binding layer servers select a server
The new server appears in Binding Layer Servers display. The last step above associates
application layer server with a binding layer counterpart. Associating servers with clients is not
supported. To configure the new server:
•
•
•
•
Right-click on the new server
Execute Configuration – Server command
Modify parameters as needed. At the very least one must set the value the new object
Manager to Enabled.
Select Save+Exit
Object modifications are logged in SM event log.
BTE CORPORATION
(631) 673-8339
http://www.btecentral.com
SmartMasterTM 2014
Administrator Manual
Page 8 of 36
Remote Stations
SM sends data to remote stations, and receives data from remote stations. The latter is
coordinated by input managers in RemoteStations service.
Input Managers / Polling
Polling remote stations for data can be manually initiated by an operator, or periodic. At the end of
every poll cycle, after all data has arrived from remote stations, an evaluation cycle needs to
execute. This cycle performs all calculations on the newly arrived data by executing evaluators
defined by system administrator. It is important that evaluation cycle happens last, i.e. after polling
cycle is complete.
Input managers execute periodic remote station polls. In addition, if so configured, a designated
input manager is also a trigger for evaluation cycles. There should be at least one input manager
designated as an Evaluation Cycle Trigger (ECT). If multiple input managers are defined, the one
which executes (or whose execution ends) last should be designated as an ECT.
To define a new input manager:
•
•
•
•
•
Start the Main Viewer
Open RemoteStations service window
Right-click anywhere in the Input Managers display
Execute New Input Manager... command
Enter new input manager’s name
The new input manager appears in the Input Managers display.
BTE CORPORATION
(631) 673-8339
http://www.btecentral.com
SmartMasterTM 2014
Administrator Manual
Page 9 of 36
To configure the new manager:
•
•
•
Right-click on the new object
Execute Configuration command
Modify parameters as needed. At the very least one must set
o The value the new object Manager to Enabled
o CommChannel parameter - this associates one of the application layer clients with
the new input manager
BTE CORPORATION
(631) 673-8339
http://www.btecentral.com
SmartMasterTM 2014
o
•
Administrator Manual
Page 10 of 36
The ECT parameter designates the new input manager as an Evaluation Cycle
Trigger (see discussion above).
Select Save+Exit
Object modifications are logged in SM event log.
Output Managers
Output managers run in RemoteStations service. They perform several functions, each of which can
be enabled or disabled:
•
•
•
Output Value Management (OVM) – This is enforcement of computed output values. User
written SCADA programs compute output values of the various outputs. Output managers
send control codes to the various outputs, making sure that output states in the field are in
congruence with their respective output values in the database.
Timed Switch Management (TSM) – This is updating of timed switch states before they
time out.
Remote Station Time Synchronization (RSTS) – This is dispatching of periodic time
synchronization messages to remote stations that consume such messages.
To define a new output manager:
•
•
•
•
•
Start the Main Viewer
Open RemoteStations service window
Right-click anywhere in the Output Managers display
Execute New Output Manager... command
Enter new output manager’s name
The new output manager appears in the Output Managers display.
To configure the new manager:
•
•
•
•
Right-click on the new object
Execute Configuration command
Modify parameters as needed. At the very least one must set
o The value the new object Manager to Enabled
o CommChannel parameter - this associates one of the application layer clients with
the new output manager
o ExecutionPeriod must be set to a value greater than zero, otherwise output
manager never executes. Execution period is in seconds.
o OVM must be Enabled if output value management is to execute.
o TSM must be Enabled if time switch management is to execute.
o RSTSPeriod must be set to a value greater than zero for time synchronization of
remote stations to execute.
Select Save+Exit
Object modifications are logged in SM event log.
Remote Station Definition
RemoteStation managers run all activities associated with remote station management. To define
new RemoteStation object:
BTE CORPORATION
(631) 673-8339
http://www.btecentral.com
SmartMasterTM 2014
•
•
•
•
•
•
Administrator Manual
Page 11 of 36
Start the Main Viewer
Open RemoteStations service window
Right-click anywhere in the Remote Stations display
Execute New Remote Station... command
Enter new remote station name
Select remote station type from the Station Type list
Alternatively, new remote station can be created from an existing one by executing the Copy
Remote Station... command:
•
•
•
•
•
Start the Main Viewer
Open RemoteStations service window
Right-click anywhere in the Remote Stations display
Execute Copy Remote Station... command
Enter new input manager’s name
Note that copying remote station copies all remote station parameters, as well as all associated I/O
points. At the least the new remote station address needs to be changed.
The new remote station appears in the Remote Stations display. To configure remote station:
•
•
•
•
Right-click on the new object
Execute Configuration command
Modify parameters as needed. At the very least one must set
o The value the new object Manager to Enabled.
o InputManager – parameter determines input channel and scheduling
o OutputManager – parameter defines output channel and scheduling
o Address – remote station address, to distinguish it from all others. Format and
number of addressing parameters varies depending on remote station type (see
below)
Select Save+Exit
Remote Station Addressing
Remote station address parameters are self-documented, as described in the User Manual.
Nevertheless, since some protocols have a variety of addressing options, they are documented
here.
Protocols
PROTOCOL
DNP 3.0
Modbus
Comverge RTC
Comverge RTC
Comverge RTC
Comverge RTC
Comverge RTC
Comverge RTC
Comverge RTC
ADDR. PARAMETER
Address
Address
SerialNumber
OpAddress0
OpAddress1
OpAddress2
OpAddress3
OpAddress4
OpAddress5
BTE CORPORATION
COMMENTS
Destination Address, 16 bits
Modbus Address, 8 bits
Used for programming the switch
Switch operational address #0
Switch operational address #1
Switch operational address #2
Switch operational address #3
Switch operational address #4
Switch operational address #5
(631) 673-8339
http://www.btecentral.com
SmartMasterTM 2014
Administrator Manual
Page 12 of 36
Telescada ARS Protocol
Following are the Telescada ARS protocol addressing options for the various device types
supported by the protocol:
-
Ccu7
Ccu7CCtl
Internal use only, do not use.
-
TscRTUShortAddr
This is a Telescada RTU. Addressing is short addressing, no routing.
Address: 16 bits
Address2: Not used
RouteNo: Not used
-
TscRTULongAddr
This is a Telescada RTU. Addressing is long addressing, no routing.
Address: 24 bits
Address2: Not used
RouteNo: Not used
-
TscRTURelayAddr
This is a Telescada RTU. Addressing is short addressing with routing.
Address: 16 bits, RTU address
Address2: 16 bits, first repeater address
RouteNo: 8 bits, route number
-
MotorolaDigital
This is a Motorola digital switch.
Bits
Address: 24 bits, PC1 = Plug Code 1, PC2 = Plug Code 2, PC3 = Plug Code 3
23 - 16
15 - 8
7-0
PC1
PC2
PC3
Bits
Address2: 16 bits, FC1 = Function Code 1, FC2 = Function Code 2
15 - 8
7-0
FC1
FC2
RouteNo: Not used.
-
GE REMS 101/102
This is a GE REMS 101/102 protocol switch.
BTE CORPORATION
(631) 673-8339
http://www.btecentral.com
SmartMasterTM 2014
Administrator Manual
Bits
Address: 12 bits, A = Address Bits
11 - 8
7-4
3-0
A
A
A
Bits
Address2: 4 bits, FC1 = Function code 1
3-0
FC1
Bits
RouteNo: 4 bits, FC2 = Function code 2
3–0
FC2
-
Page 13 of 36
SA REMS 101/102
This is a Scientific Atlanta REMS 101/102 protocol switch.
Bits
Address: 12 bits, A = Address Bits
11 - 8
7-4
3-0
A
A
A
Bits
Address2: 4 bits, FC1 = Function code 1
3-0
FC1
Bits
RouteNo: 4 bits, FC2 = Function code 2
3–0
FC2
-
SaDigital
This is a Scientific Atlanta digital switch.
Address: 16 bits, A = Address 1, PC2 = Address 2
15 - 8
7-0
A1
A2
Bits
Address2: Not used.
RouteNo: Not used.
-
Sa206
This is a Scientific Atlanta 206 switch.
Bits
Bits
Address: 32 bits, S = Start Bits, A = Utility Address, B = Switch Address
31 - 28
27 - 24
23 - 20
19 - 16
15 - 12
11 - 8
7-4
0
S
0
A
0
B
B
3-0
B
Address2: 16 bits, A = Function Code 0, B = Function Code 1
15 - 12
11 - 8
7-4
3-0
BTE CORPORATION
(631) 673-8339
http://www.btecentral.com
SmartMasterTM 2014
0
Administrator Manual
B
0
Page 14 of 36
A
RouteNo: Not used.
I/O Points
In SM, I/O points are subsystems which manage data associated with corresponding data sources
and data consumers in the field. Each input has two value registers: AValue (actual value), and
CValue (computed value). The first holds the value found at remote data source / consumer,
preserving remote register encoding. The second holds the computed value when one is needed.
There are two kinds of I/O points:
•
•
Inputs – manage data associated with corresponding data sources in the field, such as
voltage readings, current readings, etc.
Outputs - manage data associated with corresponding data consumers in the field, such as
relay coils on switches, analog outputs, etc.
Definition
To define a new I/O point:
•
•
•
•
•
•
•
•
•
•
Start the Main Viewer
Open RemoteStations service window
Open I/O Points window
Right-click anywhere in the I/O Points display
Execute New Input... command to define a new input, or New Output... command to define
a new output
Enter new object’s name, do not use two underscore characters (__) in point names.
Enter new object’s type
Enter the name of I/O group that the new I/O point will belong to
Enter new I/O point’s Actual Value SQL Type (See below)
Enter new I/O point’s Computed Value SQL Type (See Below)
The new I/O point appears in the I/O Points display.
A new point can also be created by copying an existing one. This is useful when creating a number
of points that require lots of careful configuration, but differ only in remote station association.
Point RemoteAddress parameter can stay the same as long as points belong to different remote
stations. Point LocalAddress parameters, however, need to be distinct, but these are only defined
for points reported by a local communications server. To copy an existing I/O point, proceed as
follows:
•
•
•
•
•
Start the Main Viewer
Open RemoteStations service window
Open I/O points window
Right-click on I/O point to copy
Enter new I/O point name
The new I/O point appears in the I/O Points display.
BTE CORPORATION
(631) 673-8339
http://www.btecentral.com
SmartMasterTM 2014
Administrator Manual
Page 15 of 36
Configuration
To configure the new manager first assign I/O point to a remote station, unless I/O point is a standalone, computed point. Proceed as follows:
•
•
•
•
Right-click on the new object
Execute Configuration command
Modify StationName parameter, this associates I/O point with specified remote station
Select Save+Exit, this saves the re-configured I/O point and also changes its name to
<Station Name>__<I/O Point Name>
Only after above association has been defined, modify other parameters:
•
•
•
•
Right-click on the new object
Execute Configuration command
Modify parameters as needed. At the very least one must set
o The value the new object Manager to Enabled
o RemoteAddress – parameter defines point’s address / index on remote station. See
Evaluation section below
o LocalAddress – parameter defined point’s local address used by locally defined
communications server(s). See below.
o VERS – Value Encoding on Remote Station. (Unsigned Integer, Signed Integer,
etc.)
o WORS - Width, in bits, On Remote Station
o PSP – Protocol Specific Parameter – see below.
o DataRecording – must be set to True if SM is to record this point’s values.
o UseCValue – Parameter must be set to True if I/O point value is computed, and
computed value (CValue) is to be used as I/O point value. See Evaluation section
below
o Evaluator – parameter assigns evaluator used to evaluate this point’s value. See
Evaluation section below
o EvaluationPriority – parameter determines the order in which points are evaluated.
Select Save+Exit
Object modifications are logged in SM event log.
PSP Parameter
This parameter is shared by all types of I/O points. It is interpreted differently, depending on
communications protocol used to communicate with remote station hosting the I/O point. The table
below describes parameter interpretation on a case by case basis.
Analog Inputs
Binary Status Inputs
Generic DNP 3.0
DNP Class.
DNP Class.
Multi-Val Status Inputs
Pulse Counters
Binary Control Outputs
DNP Class.
DNP Class.
DNP Class.
BTE CORPORATION
Generic Modbus
Telescada NeXGen Modbus
A single bit mask which
indentifies the status bit. If that
bit is 1, I/O point value = 1, else
I/O point value = 0.
A single bit mask which indentifies the
status bit. If that bit is 1, I/O point value
= 1, else I/O point value = 0.
Operational bit patterns, as
dictated by target device
specification.
Bits 0 - 15 are used to define bit
pattern to set control to state 0.
Bits 16 - 31 define bit pattern to
set control to state 1.
Bits 0 - 15 are used to define bit pattern
to set control to state 0.
Bits 15 - 8 = 0; Bits 7 - 0 = 0 (See CCDC
Technical Notes).
Bits 16 - 31 are bits used to define bit
pattern to set control to state 1.
Bits 31 - 24 = 1; Bits 23 - 16 = 0 (See
(631) 673-8339
http://www.btecentral.com
SmartMasterTM 2014
Administrator Manual
Timed Control Outputs
DNP Class.
Mom. Control Outputs
DNP Class.
Operational bit patterns, as
dictated by target device
specification.
Bits 0 - 15 are used to define bit
pattern to set control to state 0.
Bits 16 - 31 are used to define
bit pattern to set control to state
1.
Operational bit patterns, as
dictated by target device
specification.
Bits 0 - 15 are to define bit
pattern to operate control.
Page 16 of 36
CCDC Technical Notes).
PSP = 16777216, or 256 (Reverse
operation logic).
Bits 0 - 15 are used to define bit pattern
to set control to state 0.
Bits 15 - 8 = 0; Bits 7 - 0 = 1 or 2 (See
CCDC Technical Notes).
Bits 16 - 31 are bits used to define bit
pattern to set control to state 1.
Bits 31 - 24 = 1; Bits 23 - 16 = 1 or 2
(See CCDC Technical Notes).
Bits 15 - 8 = Pulse duration, ms; Bits 7 0 = 0x03 or 0x04 (See CCDC Technical
Notes).
Notes:
•
•
•
•
Protocols not listed below do not use the parameter, i.e. parameter is ignored.
In all cases, bit 0 is the least significant bit.
CCDC Technical Notes is the NeXGen firmware technical manual available from Telescada.
Empty table cell means parameter is ignored in that case.
Evaluation
Each I/O point manager holds two values:
•
•
Actual value, stored in point’s AValue register – this is unscaled value as reported by
remote station, and
Computed value, stored in point’s CValue register, this is a value computed from point’s
AValue, and / or other values in the database.
Evaluators are short data conversion programs, written by SM administrators in T-SQL, which
compute CValue from AValue and, possibly, from other values. Please see the section on
Evaluators below.
Every poll cycle is followed by an evaluation cycle where point computed values are recalculated.
The order in which this happens is dependent on values of I/O point EvaluationPriority parameters.
For every I/O point, the lower the EvaluationPriority parameter value, the higher the point’s
evaluation priority. Evaluation order is important when results are interdependent. For example,
when calculating power factor, kW and VAr numbers should be available before power factor
calculation takes place.
If parameter UseCValue is set to True, I/O point’s CValue is used as I/O point’s value. In this case
the following I/O point parameters need to be defined as follows:
•
•
•
UseCValue = True
RemoteAddress – see below.
Evaluator – parameter must be defined, and not equal to NONE.
In the opposite case, if parameter UseCValue = False, I/O point’s AValue is used as I/O point’s
value. In this case the following I/O point parameters need to be defined as follows:
•
•
•
UseCValue = False
RemoteAddress >= 0
Evaluator = NONE.
BTE CORPORATION
(631) 673-8339
http://www.btecentral.com
SmartMasterTM 2014
Administrator Manual
Page 17 of 36
If remote station poll is to include a query for I/O point value, that I/O point value RemoteAddress
parameter value must be >= 0. This populates I/O point’s AValue register. One can then use AValue
as I/O point value, or use an evaluator which uses AValue, and possible other values, to compute
point’s CValue.
If, on the other hand, I/O point is a purely computed one (only CValue is of interest),
RemoteAddress parameter value must be -1. In this case remote station poll does not include a
query for I/O point value.
Evaluators
Evaluators are short data conversion programs, written by SM administrators in T-SQL. When an
evaluator is mapped to an I/O point via point’s Evaluator parameter, the point’s CValue is computed
from point’s AValue, and possibly from other values, as dictated by the said Evaluator.
To define a new Evaluator:
•
•
•
•
•
•
Start the Main Viewer
Open RemoteStations service window
Open Evaluators window
Right-click anywhere in the Evaluators display
Execute New Evaluator... command
Enter new object’s name
The new Evaluator appears in the Evaluators display.
To configure the new manager:
•
•
•
•
Right-click on the new object
Execute Configuration command
Modify parameters as needed. At the very least one must set
o The value the new object Manager to Enabled
o SourceCode – must be written in T-SQL language (see below)
Select Save+Exit
Object modifications are logged in SM event log.
-
Source Code Authoring
SM Administrators write Evaluator source code in T-SQL language. For convenience, SM
generated source code provides for a number of variables which can be used by Evaluator author
without declaration, including:
-
@Name (varchar(64)) – Name of input executing the Evaluator
@StationName (varchar(64)) – Name of remote station associated with I/O point
@AValue (float) – Input current actual value
@OldAValue (float) – Input previous value of @AValue
@CValue (float) – Input current value of @CValue (about to be computed)
@OldCValue (float) – Input previous value of @CValue
@AValueDT (datetime2) – Date and time of @AValue
@OldAValueDT (datetime2) – Date and time of @OldAValue
BTE CORPORATION
(631) 673-8339
http://www.btecentral.com
SmartMasterTM 2014
-
Administrator Manual
Page 18 of 36
@OldCValueDT (datetime2) – Date and time of @OldCValue
@UseCValue (bit) – this variable is either true or false. When true, input CValue is
used as point’s value, when false input’s AValue is used as point’s value.
@CanCtl – See section Dynamic Operation Control below.
In the simplest case the author can use @CValue to store result of his / her computation. This
computation can involve variables listed above. For convenience, SM simply pre-fetches those
values before calculation, and saves @CValue after calculation. In more elaborate calculations, if
other variables need to be used, they have to be read from database explicitly. Also, if other
variables need to be saved, they need to be written into database explicitly.
For example, to simply rescale I/O point’s actual value by a factor of 10, use the following:
SET @CValue = @AValue * 10
As another example, to calculate the difference between the new and old values, proceed as
follows:
SET @CValue = @AValue - @OldAValue
As a third example, suppose there are a number of remote stations each of which is reporting
power on phases A, B, C via I/O points <…>__KWA, <…>__KWB, and <…>__KWB, respectively.
Here, <…> stands for remote station name hosting above analog inputs. Suppose one needs to
create a purely computed I/O point on each remote station which displays total power consumed on
all three phases. One could write one Evaluator for each of the remote stations, in each case read
in power from the three phases, and sum them up. Instead, one can use only one evaluator for all
substations (lines which start with two dashes are comments ignored by compiler):
-- Declare local variables
DECLARE @APW float = 0
DECLARE @BPW float = 0
DECLARE @CPW float = 0
DECLARE @InputAName varchar(128)
DECLARE @InputBName varchar(128)
DECLARE @InputCName varchar(128)
-- Read in power from pahse A
SET @InputAName = @StationName + '__KWA'
SELECT @APW = AValue
FROM [RSExec].[IOPoints]
WHERE Name = @InputAName
-- Read in power from pahse B
SET @InputBName = @StationName + '__KWB'
SELECT @BPW = AValue
FROM [RSExec].[IOPoints]
WHERE Name = @InputBName
-- Read in power from pahse C
SET @InputCName = @StationName + '__KWC'
SELECT @CPW = AValue
FROM [RSExec].[IOPoints]
WHERE Name = @InputCName
BTE CORPORATION
(631) 673-8339
http://www.btecentral.com
SmartMasterTM 2014
Administrator Manual
Page 19 of 36
-- Compute Total Power
SET @CValue = @APW + @BPW + @CPW
The author may opt to use any other variables from SM database; however those need to be read
into memory explicitly by authored code.
Note also that source code can include calls to stored procedures associated with SMPrograms
(see SCADA section).
-
Source Code Compilation
Once the SourceCode parameter has been defined (i.e. Evaluator source code has been written),
save the modified Evaluator by pressing the Save+Exit button. SM saves Evaluator in database and
tries to compile the source code. If Evaluator compiles successfully the Compiled column in
Evaluators display shows a Yes value, otherwise the value displayed is No. In addition, an
appropriate event log entry is generated.
OVM (Output Value Management)
OVM is driven by administrator written program(s) in SCADA service (see SCADA section). A
program computes I/O point’s CValue, and RemoteStations service OutputManager subsystem
whose OVM parameter is enabled, sends appropriate control code to output point in the field, so
associated I/O point CValue and AValue are in congruence.
For an output point to be involved in OVM, its OVM parameter must be Enabled, and its
StationName parameter must point to a valid remote station identifier.
Dynamic Operation Control
Output availability for control can be manipulated dynamically by changing the value of @CanCtl
I/O point parameter in Evaluators. When @CanCtl value is 0 (False) output is not available for
operation, manually or automatically by any of SM algorithms. Parameter value is ignored by
inputs.
I/O Point Groups
I/O points can be bundled into groups. Users can filter I/O points in I/O Points window by groups.
All I/O points in a group can also be enabled or disabled by enabling or disabling their group.
To define a new I/O point group:
•
•
•
•
•
Start the Main Viewer
Open RemoteStations service window
Right-click anywhere in the I/O Point Groups display
Execute New I/O Group... command
Enter new group’s name
The new I/O group appears in the I/O Point Groups display.
To reconfigure a group:
BTE CORPORATION
(631) 673-8339
http://www.btecentral.com
SmartMasterTM 2014
•
•
•
•
Administrator Manual
Page 20 of 36
Right-click on the group of interest
Execute Configuration command
Modify parameters as needed.
Select Save+Exit
To make an I/O point a member of a group, proceed as follows:
•
•
•
•
Right-click on I/O point of interest
Execute Configuration command
Set IOGroup parameter by selecting appropriate I/O group from the list of defined groups
Select Save+Exit
Remote Station Groups
Remote stations can be bundled into groups. Users can filter remote stations in Remote Stations
service window by groups. All remote stations in a group can also be enabled or disabled by
enabling or disabling their group.
To define a new remote stations group:
•
•
•
•
•
Start the Main Viewer
Open RemoteStations service window
Right-click anywhere in the Remote Station Groups display
Execute New Remote Station Group... command
Enter new group’s name
The new remote stations group appears in the Remote Stations Groups display.
To reconfigure a group:
•
•
•
•
Right-click on the group of interest
Execute Configuration command
Modify parameters as needed.
Select Save+Exit
To make a remote station a member of a group, proceed as follows:
•
•
•
•
Right-click on remote station of interest
Execute Configuration command
Set RSGroup parameter by selecting appropriate remote station group from the list of
defined groups
Select Save+Exit
BTE CORPORATION
(631) 673-8339
http://www.btecentral.com
SmartMasterTM 2014
Administrator Manual
Page 21 of 36
SCADA
SCADA service is an application which depends on RemoteStations and Communicstion services, as
well as those of DBMS. Before SCADA functions can be configured RemoteStations and
Communications must be fully configured.
In SM, SCADA service provides two functions:
•
•
Programs - Written by SM administrators
One-Line Diagram Displays – Interactive one-line diagrams of the system managed by SM
Programs
SCADA programs are written in T-SQL. As opposed to Evaluators, SCADA progrms are
completely open, unrestricted, and provide complete freedom as to which variables are used as
program inputs and outputs. With that freedom come dangers and responsibilities that program
authors must be aware of. While one can use any database variables as inputs, it is strongly
advised that only I/O point CValue registers are used for program output.
When using programs to do other tasks – such as, for example, global database value changes, it is
advisable to diable all services affected by such programs. Failure to disable services increases the
risk of database concurrencies.
Programs are meant to execute control algorithms and logic authored by SM administrators. It is
not advisable to use programs for simple I/O point scaling & calculations – Evaluators already do
that.
Program Creation
To create a new program proceed as follows:
•
Open SCADA service window
BTE CORPORATION
(631) 673-8339
http://www.btecentral.com
SmartMasterTM 2014
•
•
•
•
Administrator Manual
Page 22 of 36
Right-click onto Programs display
Execute New Program... command
Enter new program name
Select Save+Exit
The new program appears in the Programs display. To configure the new program:
•
•
•
•
Right-click on the new program
Execute Configuration – Program command
Modify parameters as needed. At the very least one must set the value the new object
Manager to Enabled and write program source code (SourceCode parameter).
Select Save+Exit
Object modifications are logged in SM event log. If the program compiles the Compiled column in
Programs display is set to Yes, else it is set to No and alarm is generated.
One should always make sure that the progrogram compiles and works as intended before it is set
for automatic, scheduled execution. This should be done by first manually executing the program
as diescribed in the User Manual, and observing program execution results.
Database Tables
Program input comes from parameteres in system tables. The DBMS contains many tables and
other system objects. To locate SM related tables and parameters contained within proceed as
follows:
•
•
•
•
•
•
Start Microsoft SQL Server Management Studio (SSMS)
Log on using your SM account
Open Object Explorer
Expand Databases
Under Databases expand the database bearing the same name as your system site code
Under the database expand Tables
Above lists the tables used by SM. It is strongly advised that no modifications to tables or table
column values be done via SSMS.
Table Columns
Table columns are SM configuration parameteres. Parameter names can be referenced by their
names in SM programs. Parameter values are thus used as input for SCADA service programs.
When referencing parameter name in SM programs, it is advised that their full names
Schema.Table.Column
are used, where Schema is DBMS security schema associated with the table, Table is the name of
the table of interest, and Column is the name of the column of interest.
For example, the full name of I/O Point Cvalue register is
RSExec.IOPoints.CValue
BTE CORPORATION
(631) 673-8339
http://www.btecentral.com
SmartMasterTM 2014
Administrator Manual
Page 23 of 36
Above, RSExec is the security schema name, IOPoints is the table name, and Cvalue is the column
name.
To get a list of columns in a specific table proceed as follows:
•
•
•
•
•
•
•
•
Start Microsoft SQL Server Management Studio (SSMS)
Log on using your SM account
Open Object Explorer
Expand Databases
Under Databases expand the database bearing the same name as your system site code
Under the database expand Tables
Under Tables expand the table of interest
Under the table expand Columns
Program Execution
Programs can be executed manually as described in the User Manual. They can also be configured
to run automatically by SCADA service on a periodic basis. To do that proceed as follows:
•
•
•
•
Right-click on the program of interest
Execute Configuration – Program command
Modify parameters ExecutionPeriod and OffsetFromMidnight parameteres as needed.
Select Save+Exit
Parameter ExecutionPeriod specifies how often the program should execute (in seconds), the value
of zero disables periodic execution.
Parameter OffsetFromMidnight specifies the number of seconds above time grid shold be offset
from last midnight.
Periodic program execution can also be disabled by setting the Manager parameter to Disabled.
Programs can also be cascaded, i.e. one program can call (execute) other programs by executing
their associated stored procedures. Each program is stored in the DBMS as a stored procedure
named as follows:
SMPrograms.SP_<name>
where <name> is the name of the program as listed in the SCADA service Programs display.
Program stored procedures have no arguments.
Programs can also call Evaluators executing their associated stored procedures. Each Evaluaotr is
stored in the DBMS as a stored procedure named as follows:
Evaluators.SP_<name>
where <name> is the name of the Evaluator as listed in the RemoteStations service Evaluators
display. Evaluators are specialized programs associated with I/O points mapped to them.
Consequently, evaluator stored procedures have one argument, I/O point number:
RSExec.IOPoints.Number
which is of (SQL) bigint type (signed 64 bit integer). This number uniquely identifes the I/O point.
BTE CORPORATION
(631) 673-8339
http://www.btecentral.com
SmartMasterTM 2014
Administrator Manual
Page 24 of 36
Beware of circular references. A circular reference, in its simplest form, is when program A calls
program B, and program B calls program A. When a program gets into circular reference endless
loop, results are unpredictable.
OneOne-Line Diagram Displays
User Manual describes how to open and view one-line diagram displays (OLDDs). This section
describes how to create OLDDs.
Each OLDD is a collection of display elements (DEs) created by SM administrator. Some of those
DEs are usually mapped onto respective I/O points so they display real time information and
provide interactivity with SM. For example, a DE can be mapped onto a control output I/O point.
That DE can show the state of that output in real time, as well as provide commands to operate the
output right from the OLDD.
DEs can be atomic or composite. In the latter case the are collections of simpler DEs. To create an
OLDD, a DE must be declared as such by setting DE parameter IsDisplay to Yes.
Display Designer
Designer
OLDDs are created via Display Designer (DD). To open DD proceed as follows:
•
•
In Main Viewer open SCADA service window
Right-click on SCADA service window title and execute Display Designer command
DD has two displays, Canvas and Library. Canvas is where display elements (DEs) are designed,
and Library is where they are stored for later use in building more complex DEs. This library is a
local (customer server resident) library. There exists another library on BTE server, called central
library, which contains DEs designed by BTE. Those DEs can be downloaded into local library as
described later in this section. Local library holds locally designed DEs and DES downloaded from
central library.
Display Element Types
There are two types of DEs: atomic and composite.
-
Atomic Display Elements
These are DEs which contain no children, i.e. they are not made of any other DEs. Current list of
atomic DEs contains the following DE types:
Line
Polyline
Polygon
Circle
Arc
Gauge
BTE CORPORATION
Straight line, two end points
Collection of interconnected straight line segments, no limit on number of
segments. Polyline start and end points are distinct (open figure)
Collection of interconnected straight line segments, no limit on number of
segments. Polyline start and end points match (closed figure)
Circle of arbitrary radius
Arbittrary open curve
DE which changes appearance based on associated I/O point
(631) 673-8339
http://www.btecentral.com
SmartMasterTM 2014
Text
Administrator Manual
Page 25 of 36
DE for displaying text.
-
Composite Display Elements
These are DEs made of other DEs (children). Multiple generations of children are allowed, this
allows for building of more complex DEs and, ultimately, OLDDs.
Display Element Creation
To create a new DE proceed as follows:
•
•
•
Open Display Designer
Right-click anywhere in the Canvas
Select DE type from the list
After this procedure depends on the type of DE one is buliding.
•
•
•
•
•
•
•
•
Line
Click in the Canvas where first point is supposed to be located
Click in the Canvas where second point is supposed to be located
Drag the points to their intended final locations
Right-click anywhere in the Canvas
Execute Attach to Grid command
Right-click anywhere in the Canvas
Save to Library... command
Enter the new DE name
This saves the new DE to local library.
•
•
•
•
•
•
•
•
•
•
Polyline,
Polyline, Polygon
Click in the Canvas where first point is supposed to be located
Repeat above unitil all points have been defined
Right-click anywhere in the Canvas
Execute Done Adding Points command
Drag the points to their intended final locations
Right-click anywhere in the Canvas
Execute Attach to Grid command
Right-click anywhere in the Canvas
Execute Save to Library... command
Enter the new DE name
This saves the new DE to local library.
•
Circle
Click in the Canvas where first point on circle perimeter is supposed to be located
BTE CORPORATION
(631) 673-8339
http://www.btecentral.com
SmartMasterTM 2014
•
•
•
•
•
•
•
Administrator Manual
Page 26 of 36
Repeat above three more times until the cirle appears
Drag the points to their intended final locations
Right-click anywhere in the Canvas
Execute Attach to Grid command
Right-click anywhere in the Canvas
Execute Save to Library... command
Enter the new DE name
This saves the new DE to local library.
•
•
•
•
•
•
•
Arc
Click in the Canvas at three different locations
Drag the points to their intended final locations, this manipulates arc shape
Right-click anywhere in the Canvas
Execute Attach to Grid command
Right-click anywhere in the Canvas
Execute Save to Library... command
Enter the new DE name
This saves the new DE to local library.
•
•
•
•
•
•
•
•
Text
Click in the Canvas at where the top left text corner is supposed to be located
Click in the Canvas at where the bottom right text corner is supposed to be located
Drag the points to their intended final locations
Right-click anywhere in the Canvas
Execute Attach to Grid command
Right-click anywhere in the Canvas
Execute Save to Library... command
Enter the new DE name
This saves the new DE to local library.
•
•
•
•
•
•
•
Gauge – Relay_01
Relay_01
Click in the Canvas at four differrent places in approxiamtely straight line. The middle line
segment opens / closes when DE is mapped to a control output, matching that output state
Drag the points to their intended final locations
Right-click anywhere in the Canvas
Execute Attach to Grid command
Right-click anywhere in the Canvas
Execute Save to Library... command
Enter the new DE name
This saves the new DE to local library.
-
Composite
BTE CORPORATION
(631) 673-8339
http://www.btecentral.com
SmartMasterTM 2014
•
•
•
•
•
•
•
•
Administrator Manual
Page 27 of 36
Right-Click on a DE in the library
Execute Add Display Element to Canvas command – DE appears in Canvas
Drag DE to desired location in Canvas
Size DE to desired size (see below for procedure)
Repeat above steps to add as many DEs to Canvas as desired
Right-click anywhere in the Canvas
Execute Save to Library... command
Enter the new DE name
This saves the new DE to local library.
Change Display Element
User authored DEs can be changed in two ways: editing and reconfiguration.
-
Edit Display Element
Editing DE means to change DE appearance. To edit DE proceed as follows:
•
•
•
Open Display Deigner
Right-Click on the DE of interest in the Library
Execute Edit Display Element... command
This places the DE onto the Canvas. If DE is atomic one can drag DE points to new locations. If DE
is composite one can drag DE children to new locations. In either case DE appearance changes..
When done the mofified DE can be saved as follows:
•
•
•
Right-Click anywhere in Canvas
Execute Save Modifications... command
Confirm command execution
Alternatively one can save DE as a Display by excuting the Save Modifications as Display...
command. This saves DE modifications in library and makes DE an OLDD.
DEs downloaded from central library can not be edited. They can be edited once used as children
of a composite DE.
-
Configure Display Element
Configuring DE means changing DE parameters. To configure DE proceed as follows:
•
•
•
•
•
Open Display Deigner
Right-Click on the DE of interest in the Library
Execute Configuration - Display Element... command
Change parameters of interest
Select Save+Exit
DEs downloaded from central library can not be reconfigured. They can be configured once used as
children of a composite DE.
BTE CORPORATION
(631) 673-8339
http://www.btecentral.com
SmartMasterTM 2014
Administrator Manual
Page 28 of 36
Change Display Element Children
To change (edit or reconfigure) a DE child proceed as follows:
•
•
•
Open Display Deigner
Right-Click on the DE of interest in the Library
Execute Show Children command
At this point DE children are visible in the library. They can be changed like any other DE as
described in previous sections.
Download Display Elements from Central Library
To download or update DEs from central library proceed as follows:
•
•
•
•
Open Display Deigner
Right-Click onto DD title
Execute Update Local Library... command
Confirm command execution
Above updates DEs in local library downloaded from central library. It does not affect locally
authored DEs.
Display Element Colors
Each DE is assigned default colors. Colors can be changed by reconfiguring DE. Each DE has six
color parameteres: Two stroke colors (Parameters SC0 and SC1), and four fill colors (FC0 – FC3).
-
Stroke Colors
Stroke colors are used to color line elements and text letters. All DEs are colored using stroke
color SC0 when DE is unmapped or is mapped to an object in normal state, and SC1 when DE is
mapped to an object in alarm state.
-
Fill Colors
Fill colors are used to color DEs which form two dimensional areas bordered by stroke colored line
elements.
All DEs are colored using fill color FC0 when unmapped, or when mapped to I/O point of unknown
type or state.
All DEs are colored using standard alarm brush (alternating red / yellow) when mapped to objects
in alarm state.
When mapped to binary status or any of the control outputs, fill colors FC1 and FC2 are used for
the two possible I/O point states.
When mapped to a multi-valued status point, Fill color FC1 is used when status point is in state 0,
and FC2 is used when in any of the other possible states.
BTE CORPORATION
(631) 673-8339
http://www.btecentral.com
SmartMasterTM 2014
Administrator Manual
Page 29 of 36
When mapped to an analog point, fill colors are used as follows:
FC1
FC2
FC3
Analog point in low or very low region
Analog point in normal region
Analog point in high or very high region
BTE CORPORATION
(631) 673-8339
http://www.btecentral.com
SmartMasterTM 2014
Administrator Manual
Page 30 of 36
Load Management
LoadManagement service is an application which depends on RemoteStations and Communicstion
services, as well as those of DBMS. Before LoadManagement functions can be configured
RemoteStations and Communications must be fully configured.
In SM, LoadManagement service provides the following functions:
•
•
•
Peak shaving
Load state reinserting
Load rotation
The service uses demand inputs to account for managed system power demand, and load points to
manage demand response. Each load point can be used to connect / disconnect one or more power
consumers. Load point operations can be manually initiated by an operator, or automatically
executed by SM based on program settings. One can create as many programs as necessary. Three
types of program managers are available: peak shavers, load state reinserting managers, and load
rotation managers. Finally, load points can be grouped in load groups for group management.
Ton configure LoadManagement service proceed as follows:
BTE CORPORATION
(631) 673-8339
http://www.btecentral.com
SmartMasterTM 2014
•
•
•
•
•
Administrator Manual
Page 31 of 36
Start the Main Viewer
Right-click on LoadManagement
Execute Configuration – Service command
Modify parameters as needed. At the very least one must set
o Manager to Enabled.
Select Save+Exit
Alternatively, with LoadManagement service window already open, proceed as follows:
•
•
•
•
Right-click on window title
Execute Configuration – LoadManagement command
Modify parameters as needed.
Select Save+Exit
Strategies
The service allows for three possible strategies: Primary, Secondary, and Emergency. One can
define a set of load groups for each strategy, and assign each load point to appropriate laod group
for each strategy as described in Load Points section. Switching between strategies can only be
manually initiated by an operator.
Single strategy load management is possible – one can leave Strategy parameter set to Primary and
never change it. In this case load point parameters Group2 and GroupE can remain undefined.
Demand Inputs
Demand inputs are used to account for managed system power demand. To crate a new demand
input proceed as follows:
•
•
•
•
•
Start the Main Viewer
Open LoadManagement service window
Right-click anywhere in the Demand Inputs display
Execute the New Demand Input... command
Enter the new demand input name
The new demand input appears in Demand Inputs display. To configure the new demand input:
•
•
•
•
Right-click on the new demand input
Execute Configuration – Demand Input command
Modify parameters as needed. At the very least one must set
o Manager to Enabled.
o AnalogInput to appropriate analog input reading demand at the point of interest
Select Save+Exit
Object modifications are logged in SM event log.
It is advisable to configure associated RemoteStations demand input configured so it’s value is
never more than input’s very high threshold, and never less than input’s very low threshold. This
way out of range values are still reported via alarms when demand input value is either high or low,
but are never so far out of range as to cause inapropriate peak shaver demand response. This
behavior can be accomplished by computing demand input value using appropriate evaluator.
BTE CORPORATION
(631) 673-8339
http://www.btecentral.com
SmartMasterTM 2014
Administrator Manual
Page 32 of 36
Load Points
Load points are objects used by LoadManagement service to connect and disconnect power users
from the power grid. To crate a new demand input proceed as follows:
•
•
•
•
•
Start the Main Viewer
Open LoadManagement service window
Right-click anywhere in the Load Points display
Execute the New Load Point... command
Enter the new load point name
The new load point appears in Load Points display. To configure the new load point:
•
•
•
•
Right-click on the new load point
Execute Configuration – Load Point command
Modify parameters as needed. At the very least one must set
o Manager to Enabled.
o ControlOutput to appropriate control output of interest
Select Save+Exit
Object modifications are logged in SM event log.
Above minimum configuration is enough so the new load point can be used to manually operate
associated control output. For automatic operations a few more load point parameteres need to be
defined:
•
•
•
•
•
•
•
PowerRating – parameter needs to be defined for all load points that are managed by a
peak shaving program.
LoadType – must be set to Primary for load point to be managed by any of the programs.
See the section on Secondary Loads below.
Group1 – parameter must be defined for load points involved in Primary strategy load
management.
Group2 – parameter must be defined for load points involved in Secondary strategy load
management.
GroupE – parameter must be defined for load points involved in Emergency strategy load
management.
DemandResponder – every load that is to be managed by a demand responder type
program must specify that program.
LSR - every load point whose state is to be automatically reinserted by any LSR type
program must have this parameter set to Enabled.
To configure associated RemoteStations service control point click on load point
ControlOutputConfiguration parameter. Control point ManualMode parameter must be set to False,
otherwise LoadManagement servoice programs ignore (do not operate) that load point.
Load
Load Groups
Load groups are objects for grouping load points. They contain parameters shared by associated
load points. A group can also be used to operate all loads assigned to that group. To crate a new
load group proceed as follows:
•
•
Start the Main Viewer
Open LoadManagement service window
BTE CORPORATION
(631) 673-8339
http://www.btecentral.com
SmartMasterTM 2014
•
•
•
Administrator Manual
Page 33 of 36
Right-click anywhere in the Load Groups display
Execute the New Load Group... command
Enter the new load group name
The new load group appears in Load Groups display. To configure the new load group:
•
•
•
•
Right-click on the new load group
Execute Configuration – Load Group command
Modify parameters as needed. At the very least one must set
o Manager to Enabled.
Select Save+Exit
Object modifications are logged in SM event log.
Above minimum configuration is enough to run group default settings. Usually one will want to set
up days of week when load managamant is allowed, AOTBaseDT, and AOTMode. The latter
parameter can have one of the following values:
•
•
CurrentDay – Current day of week Accumulated Off Time (AOT) only is used
EnabledDays – AOT sum of all management enabled days of week is used
Manual Load Point Operation
To operate load point manually proceed as follows:
•
•
•
Right-Click on the load point of interest in the LoadManagement service window
Execute Operate Load Point... command
Confirm command execution
To operate a number of load points simultaneously:
•
•
•
•
Select load points of interest in the LoadManagement service window
Right-Click on any of the selected load points
Execute Operate Load Point... command
Confirm command execution
To operate all load points assigned to the same load group:
•
•
•
Right-Click on the load group of interest in the LoadManagement service window
Execute Operate Load Points... command
Confirm command execution
Load Point Operation Priority
Load point disconnect priority is computed in the following order:
•
•
•
Associated load group DisconnectPriority parameter values are compared. Load points with
lower parameter value have higher disconnect priority.
Load point DisconnectPriority parameter values are compared. Load points with lower
parameter value have higher disconnect priority.
Load point AOT values are compared. Load points with lower AOT value have higher
disconnect priority.
BTE CORPORATION
(631) 673-8339
http://www.btecentral.com
SmartMasterTM 2014
Administrator Manual
Page 34 of 36
Load point reconnect priority is computed in the following order:
•
•
•
Associated load group ReconnectPriority parameter values are compared. Load points with
lower parameter value have higher reconnect priority.
Load point ResconnectPriority parameter values are compared. Load points with lower
parameter value have higher reconnect priority.
Load point AOT values are compared. Load points with higher AOT value have higher
reconnect priority.
Secondary Loads
Secondary loads are load points which operate only when associated primary load operates.
Secondary loads are not operated directly by any LoadManagement program. A load point is a
primary load point when parameter LoadType is set to Primary. A load point is secondary when
parameter LoadType is set to identify associated primary load. Beware of circular references. For
example, when load A is secondary to load B and vice versa, neither load point will operate
automatically under any LoadManagement program.
Programs
LoadManagement service offers three types of programs: demand responder, load state reinserting
(LSR) manager, and load rotation (LR) manager.
Demand Response
Demand response is done by DemandResponder type program(s). One can create and run as many
programs as necessary. DemandResponder type programs run a peak shaving algorithm which
attempts to keep power demand below operator specified high threshold.
To crate a new program proceed as follows:
•
•
•
•
•
•
Start the Main Viewer
Open LoadManagement service window
Right-click anywhere in the Programs display
Execute the New Program... command
Enter the new program name
Select DemandResponder for program type
The new program appears in the Programs display. To configure the new program:
•
•
•
•
Right-click on the new program
Execute Configuration – Program command
Modify parameters as needed. For the program to run correctly all parameteres need to be
defined properly.
Select Save+Exit
Object modifications are logged in SM event log.
BTE CORPORATION
(631) 673-8339
http://www.btecentral.com
SmartMasterTM 2014
Administrator Manual
Page 35 of 36
Parameter TDAI (Total Demand Analog Input) must be set to identify RemoteStations service
analog input responsible for reporting total demand managed by the program. TDAI threshold
parameter values must satisfy the following condition for the program to be able to function:
VlowThr <= LowThr < HighThr <= VhighThr
TDAI Low threshold (LowThr) and high threshold (HighThr) parameter values are used for load
management. When TDAI demand reading is higher than HighThr setting enough load points are
disconnected to bring demand below HighThr setting if possible. When TDAI demand reading is
lower than LowThr setting enough load points are reconnected to bring demand just below HighThr
setting if possible. TDAI VlowAlarm, LowAlarm, NormalAlarm, and HighAlarm parameteres should
be set to False to avoid unnecessary alarms.
TDAIConfiguration parameter can be used to configure TDAI. By clicking on TDAIConfiguration
one goes straight to TDAI configuration window.
InputManagerName must identify RemoteStations service input manager responsible for polling
analog inputs which serve as LoadManagement service demand inputs. This way the program
executes automatically right after every poll initiated by the input manager completes. If
InputManagerName is set to NONE, the program never executes, except when executed manually.
To execute a program manually:
•
•
Right-click on the program in the Programs display
Select Execute management Cycle... command
It is not advisable to execute DemandResponder type program manually more than once in a row.
When program execution completes demand readings are still the same as they were before
program execution. The readings change only after a poll. Repeated program execution may
disconnect too many customers from the power grid.
Load State Reinserting
Load state reinserting (LSR) is done by LSRManager type program(s). One can create and run as
many programs as necessary. LSRManager type programs run an algorithm which attempts to
reinsert load states by dispatching appropriate control messages. If a load point is thought to be
ON at the time of LSRManager execution, an ON command is sent to that load. If a load point is
thought to be OFF at the time of LSRManager execution, an OFF command is sent to that load.
To crate a new program proceed as follows:
•
•
•
•
•
•
Start the Main Viewer
Open LoadManagement service window
Right-click anywhere in the Programs display
Execute the New Program... command
Enter the new program name
Select LSRManager for program type
The new program appears in the Programs display. To configure the new program:
•
•
•
•
Right-click on the new program
Execute Configuration – Program command
Modify parameters as needed. For the program to run correctly all parameteres need to be
defined properly.
Select Save+Exit
BTE CORPORATION
(631) 673-8339
http://www.btecentral.com
SmartMasterTM 2014
Administrator Manual
Page 36 of 36
Object modifications are logged in SM event log.
Program parameter SchedulingMethod must be set to MngStartTOD if the program is to execute
daily at the time of day specified by MngStartTOD parameter.
Program parameter SchedulingMethod must be set to MinAfterEndOfPP if the program is to
execute daily MinAfterEndOfPP minutes after peak period.
Program parameter OperationMode must be defined appropriately to specify which load points are
to be issued LSR commands. The table below lists available options:
OffAndOn
OffOnly
OnOnly
OffAndOnOperatedToday
OffOnlyOperatedToday
OnOnlyOperatedToday
BTE CORPORATION
All load points are issued LSR commands
Only loads in OFF state are issued LSR commands
Only loads in ON state are issued LSR commands
Only loads operated previously on the day of program execution are
issued LSR commands
Only loads in OFF state operated previously on the day of program
execution are issued LSR commands
Only loads in ON state operated previously on the day of program
execution are issued LSR commands
(631) 673-8339
http://www.btecentral.com


![RUMD User Manual [Version 3.0]](http://vs1.manualzilla.com/store/data/005734566_1-539a984f38202face31c4a646ef91457-150x150.png)