1
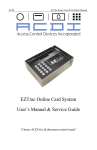
EX2000 Series Vending System User’s Manual “Choose ACDI for all your document vending needs” User’s Manual ACDI EX2000 Series User & Technical Manual ACDI EX2000 Series User & Technical Manual INTRODUCTION ............................................................................................. 1 OVERVIEW ....................................................................................................... 1 Staff Copies............................................................................................. 1 SETUP ................................................................................................................ 2 UNPACKING THE VENDING SYSTEM ................................................................. 2 Physical Mounting .................................................................................. 2 POWER-UP........................................................................................................ 2 LOADING COINS ............................................................................................... 3 Coin Tube Capacity................................................................................. 3 SELECTING THE COPIER ................................................................................... 3 Changing the Copier Type ...................................................................... 3 SETTING THE PRICE PER COPY ......................................................................... 4 SETTING THE MINIMUM VEND ......................................................................... 5 SETTING THE MAXIMUM REFUND .................................................................... 5 SETTING THE MAXIMUM ESCROW ................................................................... 5 IDENTIFYING THE FIRMWARE VERSION ........................................................... 6 Show EX2000 Firmware Version ........................................................... 6 FEATURES ........................................................................................................ 7 MEMBRANE SWITCH/OVERLAY ....................................................................... 7 ELECTRONIC CHANGER AND BILL ACCEPTOR.................................................. 7 Key Benefits............................................................................................ 7 RS232 SERIAL INTERFACE ............................................................................... 7 PROGRAMMING YOUR EX SERIES VENDING SYSTEM...................... 8 OVERVIEW ....................................................................................................... 8 ASSIGNING SUPERVISOR AND USER PIN NUMBERS ......................................... 8 Pin Menu ................................................................................................. 8 Adding User PIN Numbers ..................................................................... 8 Clearing User PIN Numbers.................................................................... 9 Adding Supervisor PIN Numbers............................................................ 9 Clearing Supervisor PIN Numbers........................................................ 10 ADJUSTING THE WELCOME SCREENS ............................................................. 10 Edit Text on the Display........................................................................ 10 Edit Time Each Screen is Displayed ..................................................... 11 METERS MENU - ACCOUNTING ...................................................................... 12 View Meters Menu................................................................................ 12 Reading Meters ..................................................................................... 12 Printing Meters (See Illustration 1.01) .................................................. 13 Clearing Meters in the Meters Menu..................................................... 16 CASH RECONCILIATION MENU ...................................................................... 17 Print Reconcile Reports......................................................................... 17 Removing Cash ..................................................................................... 17 Resetting Cash Box and Bill Stacker Totals.......................................... 17 EDITING AND READING CASH SETTINGS ........................................................ 19 Editing Cash Settings ............................................................................ 19 ACDI EX2000 Series User & Technical Manual View Cash Settings ............................................................................... 20 RECORDS MENU ............................................................................................ 20 Print Records Report ............................................................................. 20 ENABLING OR DISABLING THE KEYPAD ......................................................... 21 Turning Keypad ON or OFF ................................................................. 21 ENABLING THE BYPASS KEY.......................................................................... 21 Turning the Bypass Key ON or OFF..................................................... 21 ENABLING ONLINE ACCOUNTS ...................................................................... 22 Turning the Online Accounts ON or OFF ............................................. 22 ENABLING HIDDEN PINS MODE ..................................................................... 22 Turning the Hidden Pins Mode ON or OFF .......................................... 22 MINIMUM CREDIT CARD PURCHASE .............................................................. 23 Setting the Minimum Credit Vend ........................................................ 23 DELAY SETTINGS ........................................................................................... 24 Disable Delay ........................................................................................ 24 Blind Time ............................................................................................ 24 Card Time Out....................................................................................... 25 Pin Time Out......................................................................................... 25 Force Vend............................................................................................ 25 CARD READER SERVICE ................................................................................. 26 Encode Cards - Cash ............................................................................. 26 Encode Cards - Units............................................................................. 26 Card Max............................................................................................... 27 Card Time Out....................................................................................... 27 Group Code 1 ........................................................................................ 28 Group Code 2 ........................................................................................ 28 Group Code 3 ........................................................................................ 28 Site Code ............................................................................................... 29 Rom Code ............................................................................................. 29 ACDI EX2000 Series User & Technical Manual Introduction Overview This document describes the operation and service of the EX2000 series copy/print controller. The EX2000 Series is an advance generation of copy/print control, combining innovation and engineering to meet the demand of the ever-changing market. This EX2000 has up to 4 separate Price Lines to allow for the charging of black and white copies, color copies, and large paper sizes. For Staff Copies, the EX2000 has an external keypad to allow User and Supervisor copies at no charge. In addition, the user may also select they “Bypass Key” option for Staff Copies. The EX2000 is also equipped with a serial interface to allow for communication with Print Management Software and an external printer for reports and meter readings. This interface allows the EX2000 to be field programmable for software updates. The EX2000 series is available in a variety of options and configurations including coin, bill, stored value, and credit card options. The EX2000 Series vending system will accept any combination of nickels, dimes, quarters, or dollar coins, as well as $1, $5, $10, and $20 bills and the ACDI CopyMate Cards intended for use with this system. Insert coins through the top of the unit and insert bills in the slot on the front of the housing. Once the money is deposited, the display shows the $ amount available, also known as ESCROW Amount. For normal operation, when the escrow amount is greater than or equal to a given Price Line the EX2000 will enable that feature on the Copier. The EX2000 receives signals from the copier that indicate a copy has been made and at what Price Line. The copy is then metered by the EX2000 and a new escrow value is calculated, in addition, Price Lines are re-assessed for validity. Up to 8 distinct price lines are supported depending on copier or M.F.P. our coin-op is interfaced to.Press EJECT or the coin return plunger to dispense remaining balance. Staff Copies Staff Copies are available using the Bypass key, Supervisor PIN, or User PIN. As copies are made in any of these modes, the EX2000 meters each copy and provides reports to verify usage. (Please refer to illustration 1.01) Introduction 1 ACDI EX2000 Series User & Technical Manual Setup Unpacking the Vending System The following equipment is included in your EX2000 Series shipment: EX2000 Series vending unit 2015PD Pedestal Stand or FRONT LOCKING CASSETTE STAND (FLC) Parts Box including: o Operation and Service Manuals o 24V Power Supply o Sign Kit o Key Chain with keys (Bypass/Door/Cashbox) o Bolt Pack for mounting the EX2000 to the pedestal stand o H10-Interface Harness (Copier Specific) o Interface Installation Instructions Physical Mounting Your ACDI Vending System will mount easily to any of the stands designed and offered by ACDI or it can mount to the wall, or cabinet. If mounting to a wall or cabinet, route all cabling through the cutouts at the bottom. Power-up When powering on the EX2000 Series, the display will read “Initializing Coinop #. ##” (version #) If the unit is new and coins are not loaded into the Coin Changer, the LCD Display will read as follows: “Please Use Exact Change” “B&W $0.10” “Color $0.50” After loading coins into the EX2000 Series, the LCD Display will read as follows: “Please Insert Coin or Bill” “B&W “Color $0.10” $0.50” ***Please refer to “ADJUSTING WELCOME SCREENS” for information on editing Text and the Amount of Time each screen is displayed. Setup 2 ACDI EX2000 Series User & Technical Manual Loading Coins Manual Fill Mode o Insert Operators Key; turn to the “On” position and Enter 8digit supervisor pin number (DEFAULT - 73784230) o Press FWD until display reads “Manual Fill” o Press ENTER and begin loading the coins through the Coin Insert slot on top of the EX2000 Series vending system (The system will automatically sort and store the currency) o When complete, press ENTER to save in memory FOR ACCURATE REPORTS: DO NOT LOAD COINS DIRECTLY INTO THE COIN TUBES. Coin Tube Capacity Low Sensor Level Full Sensor Level Hand Load Level 5¢ tube 10¢ tube 25¢ tube 7(35¢) 78($3.90) 86($4.30) 9(90¢) 113($11.30) 125($12.50) 7($1.75) 77($19.25) 95($23.75) LO 25¢ 7($1.75) 22($5.50) 95($23.75) Selecting the Copier The EX2000 Series has several preconfigured settings for Copier Type. In Default mode, the EX2000 Series interfaces with most B&W copiers and printers. Choose the copier from the list that most closely matches your model copier. This will adjust the prices and screens to reflect the newly selected copier model. Specific Interface Instructions are included with each order and better explain the interface to the mfp. Changing the Copier Type 1. 2. 3. 4. 5. 6. 7. 8. 9. 10. 11. Enter Supervisor Pin – 73784230 Press FWD until display reads “Service Mode” Press ENTER to select “Service Mode” Press FWD until display reads “Setup Menu” Press ENTER to select the Setup Menu Press FWD until display reads “Select Copier” Press ENTER, display will read “Copier Default” (Or, current copier type) Press ENTER and a flashing cursor will appear Press FWD or BACK to change the copier type Once display show your preferred Copier Type, press ENTER to save it Press EXIT 2 times followed by EJECT to exit the Service Mode. Setup 3 ACDI EX2000 Series User & Technical Manual Setting the Price per Copy The EX2000 series allows a wide array of pricing options based on the copier or mfp connected as well as the ability to charge different prices based on the type of currency source being used. To set the price for credit card or stored value card systems addons, set the price for the appropriate price group. You can adjust the cash price per copy by following the steps below: 1. Enter Supervisor Pin – 73784230 2. Press FWD until display reads “Service Mode” 3. Press ENTER to select “Service Mode” 4. Press FWD until display reads “Price Menu” 5. Press ENTER, then display will read “Edit Prices Cash Customers” 6. Press FWD until display shows price group you want to edit. 7. Press ENTER, then display will read “Cash Customers Price 1 $0.10”, or whatever Price Line 1 has been programmed for 8. Press ENTER to Edit Price 1 (cursor will appear on the display) 9. Using the keypad enter the new price per copy and press ENTER to save 10. Press FWD to edit Price Line 2 and follow steps 6-8 Note: Price Lines 3 & 4 are “adders” to price lines 1 & 2 to account for duplex or premium paper size. For a better understanding of the pricing matrix, please review example shown below. EX2000 Price Menu Price 1 $0.10 Price 2 $0.50 Price 3 $0.20 Price 4 $0.20 Price 5 $0.40 Price 6 $0.60 Price 7 $1.00 Price 8 $1.20 Price Label (Example) B&W Color B&W Premium Paper B&W Duplex B&W Premium Paper Duplex Color Premium Paper Color Duplex Color Premium Paper Duplex Setup 4 ACDI EX2000 Series User & Technical Manual Setting the Minimum Vend The EX2000 series has a feature called the minimum vend. This is the smallest amount that must be entered to enable the copier or mfp. By having this setting independent from the price lines, the EX2000 series can force a patron to deposit enough money to cover all vend options on copiers that do not give advanced signaling for color, duplex, and paper size options. You can adjust the minimum vend by following the steps below: 1. Enter Supervisor Pin – 73784230 2. Press FWD until display reads “Service Mode” 3. Press ENTER to select “Service Mode” 4. Press FWD until display reads “Price Menu” 5. Press ENTER, then display will read “Edit Prices Cash Customers” 6. Press FWD until display reads “Edit Prices Minimum Vend” 7. Press ENTER, then display will read “Minimum Vend Price $0.00”. 8. Press ENTER to Edit Price (cursor will appear on the display) 9. Using the keypad enter the new price and press ENTER to save. 10. Press EXIT 2 times followed by EJECT to exit the Service Mode. Setting the Maximum Refund The EX2000 series maximum refund setting requires a patron to continue making copies until the escrow balance goes below this setting. This ensures that the coinop is not required to give out excessive change when larger paper currency denominations are used. You can adjust the minimum vend by following the steps below: 1. Enter Supervisor Pin – 73784230 2. Press FWD until display reads “Service Mode” 3. Press ENTER to select “Service Mode” 4. Press FWD until display reads “Price Menu” 5. Press ENTER, then display will read “Edit Prices Cash Customers” 6. Press FWD until display reads “Edit Prices Maximum Refund” 7. Press ENTER, then display will read “Maximum Refund Price $20.00”. 8. Press ENTER to Edit Price (cursor will appear on the display) 9. Using the keypad enter the new price and press ENTER to save. 10. Press EXIT 2 times followed by EJECT to exit the Service Mode. Setting the Maximum Escrow The EX2000 series maximum escrow setting disables the bill and coin acceptor once the escrow balance goes above this setting. This prevents patron placing too much money into the vend tower. You can adjust the maximum escrow by following the steps below: Setup 5 ACDI 1. 2. 3. 4. 5. 6. 7. 8. 9. 10. EX2000 Series User & Technical Manual Enter Supervisor Pin – 73784230 Press FWD until display reads “Service Mode” Press ENTER to select “Service Mode” Press FWD until display reads “Price Menu” Press ENTER, then display will read “Edit Prices Cash Customers” Press FWD until display reads “Edit Prices Maximum Refund” Press ENTER, then display will read “Maximum Refund Price $20.00”. Press ENTER to Edit Price (cursor will appear on the display) Using the keypad enter the new price and press ENTER to save. Press EXIT 2 times followed by EJECT to exit the Service Mode. Identifying the Firmware Version The EX2000 Series provides the ability to for on-site upgrades (Refer to the RS232 To know whether your machine requires an upgrade, you can check to see which Version is currently loaded on your EX2000 by following the instructions below. Interface Section). Show EX2000 Firmware Version 1. 2. 3. 4. 5. 6. 7. 8. Enter Supervisor Pin – 73784230 Press FWD until display reads “Service Mode” Press ENTER to select “Service Mode” Press FWD until display reads “Setup Menu” Press ENTER to select Setup Menu Press FWD until display reads “Other Settings” Press ENTER, display will read “Coin-Op X.XX” (current version #) Press EXIT 2 times followed by EJECT to exit the Service Mode. Setup 6 ACDI EX2000 Series User & Technical Manual Features Membrane Switch/Overlay The EX2000 features a membrane switch keypad built in to the graphic overlay. This keypad provides access to all menus and options as well as supervisor pin accounts and user pin accounts. The graphic overlay illustrates the proper instructions for operating the EX2000. There are several different options and models available. The model number indicates which options are installed in each EX2000. The LCD is a 2 line, 16character display with a backlight allowing for multiple lines of text and instructions to be displayed. Electronic Changer and Bill Acceptor The electronic changer features nickel, dime, and quarter payout along with electronic interface featuring MDB. Reliable 3-tube changer offers enhanced electronics in the acceptance of the Susan B. Anthony and Sacagawea coins. The Bill Acceptor series accepts $1, $5, $10, and $20 bills along with electronic interface featuring MDB. With the new bill path clearing software routine, the Acceptor has significant transport reliability Key Benefits Expandable programmable memory for easy updates. Patented Coin Sensing technology for resistance to counterfeiting Changer capacity of $40.55 in nickel, dime, and quarter payout. On site field programming. Innovative Flexstack bill box expands to hold up to 650 bills. Resists counterfeiting by subjecting each bill to two types of test unlike any other bill acceptor. Flash programmable microcontroller, simplified upgrades for future feature additions. Resists cheating and vandalism. RS232 Serial Interface With the addition of a RS232 serial interface, the EX2000 series has expanded areas of use and has eased the hassle of upgrades and service. This standard 9pin serial connector allows the EX2000 to interface with software applications as well as ACDI’s Bootloader program. The Bootloader program allows users to reload the software on to the unit. Features 7 Programming your EX Series Vending System Overview Your EX2000 Series Vending System provides numerous levels of customization. With the Bypass key or Operators Key in the “On” position and an Active Supervisor Pin Number, the following features are programmable within the Service Mode: Setting the Price per Copy Amount of Time each welcome screen appears on the display Text for 2 of the 4 welcome screens are editable on the display Supervisor and User Pin Numbers (Default Supervisor Pin is 73784230) Delay Settings Assigning Supervisor and User PIN Numbers Assigning Supervisor and User PIN Numbers Pin Menu 100 User and 25 Supervisor PIN numbers are programmable within the EX2000 Series vending system. This feature provides multiple users’ access to “Staff Copies” and gives control and accountability to the Owner by recording the number of copies per User or Supervisor. Therefore, you have vending and account management all in one machine. To view PIN usage, refer to the METERS MENU. Adding User PIN Numbers 1. 2. 3. 4. 5. 6. 7. 8. Enter Supervisor Pin – 73784230 Press FWD until display reads “Service Mode” Press ENTER to select “Service Mode” Press FWD until display reads “PIN Menu” Press ENTER, display will read “User PIN” Press ENTER, display will read “Add User” Press ENTER, display will read “Begin Entering PIN” Enter up to 6-digit PIN that you want to add. Note: Longer pin numbers are more secure. 9. Press ENTER, display quickly flashes “Adding PIN”, “PIN Added” then defaults to “Begin Entering PIN” 10. Repeat steps 8 and 9 until all desired PINs are added. 11. Press EXIT, display will read “Add User” 12. Press EXIT 3 times followed by EJECT to exit the Service Mode. ACDI EX2000 Series User & Technical Manual Clearing User PIN Numbers 1. 2. 3. 4. 5. 6. 7. 8. 9. 10. 11. Enter Supervisor Pin – 73784230 Press FWD until display reads “Service Mode” Press ENTER to select “Service Mode” Press FWD until display reads “PIN Menu” Press ENTER, display will read “User PIN” Press ENTER, display will read “Add User” Press FWD until display reads “Clear PIN” Press ENTER, display will read “Begin Entering PIN” Enter up to 6-digit PIN that you want to delete and press ENTER Display will read, “Are you sure?” Press ENTER, display quickly flashes “Deleting PIN” and defaults to “PIN Deleted” 12. Press EXIT, display will read “Clear PIN” and follow steps 7-10 to delete additional PINs 13. Press EXIT 3 times followed by EJECT to exit the Service Mode . Adding Supervisor PIN Numbers 1. 2. 3. 4. 5. 6. 7. 8. 9. Enter Supervisor Pin – 73784230 Press FWD until display reads “Service Mode” Press ENTER to select “Service Mode” Press FWD until display reads “PIN Menu” Press ENTER, display will read “User PIN” Press FWD until display reads “Supervisor PIN” Press ENTER, display will read “Add Supervisor” Press ENTER, display will read “Begin Entering PIN” Enter up to 6-digit PIN that you want to add. Note: Longer pin numbers are more secure. 10. Press ENTER, display quickly flashes “Adding PIN”, “PIN Added” then defaults to “Begin Entering PIN” 11. Press EXIT, display will read “Add Supervisor” and follow steps 7-8 to add additional PINs 12. Press EXIT 3 times followed by EJECT to exit the Service Mode. Programming your EX Series Vending System 9 ACDI EX2000 Series User & Technical Manual Clearing Supervisor PIN Numbers 1. 2. 3. 4. 5. 6. 7. 8. 9. 10. 11. 12. Enter Supervisor Pin – 73784230 Press FWD until display reads “Service Mode” Press ENTER to select “Service Mode” Press FWD until display reads “PIN Menu” Press ENTER, display will read “User PIN” Press FWD until display reads “Supervisor PIN” Press ENTER, display will read “Add Supervisor ” Press FWD until display reads “Clear PIN” Press ENTER, display will read “Begin Entering PIN” Enter the 8-digit PIN that you want to delete and press ENTER Display will read, “Are you sure?” Press ENTER, display quickly flashes “Deleting PIN” and defaults to “PIN Deleted” 13. Press EXIT, display will read “Clear PIN” and follow steps 9-12 to delete additional PINs 14. Press EXIT 3 times followed by EJECT to exit the Service Mode. Adjusting the Welcome Screens Edit Text on the Display You can adjust the text that is displayed on Screens 1 through Screens 12 by following the steps below: 1. Enter Supervisor Pin – 73784230 2. Press FWD until display reads “Service Mode” 3. Press ENTER to select “Service Mode” 4. Press FWD until display reads “Setup Menu” 5. Press ENTER, then screen will display “Cash Settings” 6. Press FWD until display reads “Edit Welcome Screens” 7. Press ENTER, then screen will display “Edit Screen 1” 8. Press FWD until display reads “Edit Screen 2” or the number of screen desired to be edited. 9. Press ENTER, then screen will read “Edit Text” 10. Press ENTER, then screen will display “Color $0.50” 11. Press ENTER, then screen will display a line under the first character on the screen “Color $0.50” 12. Pressing FWD, the character currently underlined will change to the next valid character “Dolor $0.50” 13. Pressing BACK, the character currently underlined will change to the prior valid character “Color $0.50” 14. Pressing 6 will switch the underlined cursor to the right Programming your EX Series Vending System 10 ACDI 15. 16. 17. 18. 19. 20. 21. 22. 23. 24. 25. EX2000 Series User & Technical Manual Pressing 4 will switch the underlined cursor to the left Pressing 8 will move the underlined cursor down Pressing 2 will move the underlined cursor up Pressing 0 will delete the underlined character. Pressing 5 will clear the text from the whole screen. Pressing FWD and BACK to edit the character. Pressing 7 and 9 to edit the character from lower case to upper case. Press ENTER to disable editing. Press EXIT, then screen will display “Edit Text” Press EXIT, then screen will display “Edit Screen 2” Press FWD to edit other screens and follow steps 9-22 Note: Welcome Screens 1 thru 8 are automatically set to price lines 1 thru 8 respectively. Therefore all but the lower right 7 characters are editable. Edit Time Each Screen is Displayed You can adjust the time that each welcome screen is displayed by following the steps below: 1. Enter default Supervisor Pin – 73784230 2. Press FWD until display reads “Service Mode” 3. Press ENTER to select “Service Mode” 4. Press FWD until display reads “Setup Menu” 5. Press ENTER, then screen will display “Cash Settings” 6. Press FWD until display reads “Edit Welcome Screens” 7. Press ENTER, then screen will display “Edit Screen 1” 8. Press ENTER, then screen will read “Edit Text” 9. Press FWD until the display reads “Edit Time” 10. Press ENTER, then screen will display “Time 2” (Default is 2 sec.) 11. Press ENTER, the cursor will blink 12. Pressing FWD will increase the value. 13. Pressing BACK will decrease the value. 14. Press ENTER to lock in value. 15. Press EXIT, then screen will display “Edit Time” 16. Press EXIT, then screen will display “Edit Screen 1” 17. Press FWD to edit Welcome Screen 2 and follow steps 8-16 Programming your EX Series Vending System 11 ACDI EX2000 Series User & Technical Manual Meters Menu - Accounting The EX2000 Series allows you to track revenue by reading and recording meter amounts shown on the display or printing a hard copy to a portable SKT40 dot Matrix Printer. The meter readings show the total number of copies made and paid for, as well as the number of “Bypass” copies. These meters are resettable, preventing you from having to dictate the current copy count. Our unit also offers a persistent total clicks meter. This number is non-resettable and will continue to increment for the life of the product. This meter is useful as an added form of accountability to the copier and coin-op resettable counters. View Meters Menu To View Meters Menu, Enter Meter Menu by following these commands: 1. Enter default Supervisor Pin while Operators Key is in the “ON” position – 73784230 2. Press FWD until display reads “Service Mode” 3. Press ENTER to select “Service Mode” 4. Press FWD until display reads “Meters Menu” 5. Press ENTER, display will read “Read Meters” 6. Press FWD to scroll through options: a. b. c. Read Meters i. Cash Customers – Displays paid copies per copy type or price line ii. User – Displays number of copies made per PIN Account iii. Supervisor – Displays number of copies made per SUPERVISOR Account iv. Total – Displays total number of metered copies v. Persistent Total – Displays total number of metered copies for life of product.(NONRESETTABLE) Print Meters Clear Meters Reading Meters (See Illustration 1.01) 1. 2. 3. 4. Follow steps 1-5 from “View Meters Menu” above. Press ENTER, display will read “Read Groups” Press ENTER, display will read “ Read Cash Customers” Press ENTER, display will read “ Cash Customers Price1 #” Programming your EX Series Vending System 12 ACDI 5. 6. 7. 8. 9. 10. 11. 12. 13. 14. 15. 16. EX2000 Series User & Technical Manual Press FWD to scroll through the options: a. Cash Customers Price 1 # b. Cash Customers Price 2 # c. Cash Customers Price 3 # d. Cash Customers Price 4 # e. Cash Customers Price 5 # f. Cash Customers Price 6 # g. Cash Customers Price 7 # h. Cash Customers Price 8 # i. Cash Customers Total # Press EXIT 2 times until display reads “Read Groups” Press FWD, display will read “Read User” Press ENTER, the first User Account will appear: a. 123456 # Press FWD to scroll through each User Account Press EXIT, display will read “Read Groups” Press FWD until display reads “Read Supervisor” Press ENTER, the first Supervisor Account will appear: a. 73784230 (Default Supervisor PIN) Press FWD to scroll through each Supervisor Account Press EXIT, display will read “Read Groups” Press FWD until display reads “Read Total” Press ENTER, display will read “Total #” Printing Meters (See Illustration 1.01) To print, you must have an ACDI certified Serial Printer with a printer cable. 1. Enter Supervisor Pin – 73784230 2. Press FWD until display reads “Service Mode” 3. Press ENTER to select “Service Mode” 4. Press FWD until display reads “Meters Menu” 5. Press ENTER, display will read “Read Meters” 6. Press FWD, display will read “Print Meters” 7. Press ENTER, display will read “Press Enter To Print” 8. Press ENTER to print, display will read “Printing” while in process and default back to “Press Enter To Print” 9. Press EXIT, display will read “Read Meters” Programming your EX Series Vending System 13 ACDI EX2000 Series User & Technical Manual Group Meters Price8 Meter: 6 Price8 Cost: $ 1.20 Cash Customers Price1 Meter: 0 Total Meters: 50 Price1 Cost: $ 0.10 Cash Value: $ 27.80 Price2 Meter: 1 Price2 Cost: $ 0.50 Price3 Meter: 0 Price3 Cost: $ 0.20 Price4 Meter: 2 Price4 Cost: $ 0.20 Price5 Meter: 1 Price5 Cost: $ 0.40 Price6 Meter: 0 Price6 Cost: $ 0.60 Price7 Meter: 0 Price7 Cost: $1.00 Price8 Meter: 0 Price8 Cost: $ 1.20 Total Meters: 4 Cash Value: $ 1.30 Supervisors Users Price1 Meter: 5 Price1 Cost: $ 0.10 Price2 Meter: 13 Price2 Cost: $ 0.50 Price3 Meter: 4 Price3 Cost: $ 0.20 Price4 Meter: 5 Price4 Cost: $ 0.20 Price5 Meter: 2 Price5 Cost: $ 0.40 Price6 Meter: 10 Price6 Cost: $ 0.60 Price7 Meter: 5 Price7 Cost: $ 1.00 Price1 Meter: 7 Price1 Cost: $ 0.10 Price2 Meter: 6 Price2 Cost: $ 0.50 Price3 Meter: 7 Price3 Cost: $ 0.20 Price4 Meter: 3 Price4 Cost: $ 0.20 Price5 Meter: 5 Price5 Cost: $ 0.40 Price6 Meter: 3 Price6 Cost: $ 0.60 Price7 Meter: 3 Price7 Cost: $ 1.00 Price8 Meter: 12 Price8 Cost: $ 1.20 Total Meters: 46 Cash Value: $ 26.90 Total Pages Metered: Total Cash Value: 100 $ 56.00 Programming your EX Series Vending System 14 ACDI EX2000 Series User & Technical Manual Supervisor PIN Account Meters ACD00000 - - No Usage 73784230 Price1 Meter: 7 Price2 Meter: 6 Price3 Meter: 7 Price4 Meter: 3 Price5 Meter: 5 Price6 Meter: 3 Price7 Meter: 3 Price8 Meter: 12 Total Meters Cash Value: 46 $ 26.90 User PIN Account Meters 123456 Price1 Meter: 5 Price2 Meter: 13 Price3 Meter: 4 Price4 Meter: 5 Price5 Meter: 2 Price6 Meter: 10 Price7 Meter: 5 Price8 Meter: 6 Total Meters: Cash Value: 50 $ 27.80 Programming your EX Series Vending System 15 ACDI EX2000 Series User & Technical Manual Clearing Meters in the Meters Menu Clearing Meters resets the copy counts for Cash Customers, USERS and SUPERVIORS. It is useful to clear meters after you have reconciled copies-tocash and have printed the records on the SKT-40 Dot Matrix Printer, enabling a good starting point for the next recording period. 1. 2. 3. 4. 5. 6. 7. Enter Supervisor Pin – 73784230 Press FWD until display reads “Service Mode” Press ENTER to select “Service Mode” Press FWD until display reads “Meters Menu” Press ENTER, display will reads “Read Meters” Press FWD until display reads “Clear Meters” Press ENTER 2 time to select Clear Meters, display will read “Press Enter To Clear” 8. Press ENTER to clear, display will read, “Are you sure?” 9. Press ENTER to select continue clearing, display will read “Clearing” while in process and default back to “Meters Clear” 10. Press EXIT 2 times followed by EJECT to exit out of the Service Mode and to return to the default Idle Screen Programming your EX Series Vending System 16 ACDI EX2000 Series User & Technical Manual Cash Reconciliation Menu Print Reconcile Reports I Print Reconciliation Report by attaching an SKT40-Dot Matrix Printer to the EX2000 series vending system and follow the instructions below: 1. Enter Supervisor Pin – 73784230 2. Press FWD until display reads “Service Mode” 3. Press ENTER to select “Service Mode” 4. Press FWD until display reads “Reconcile Menu” 5. Press ENTER, display will read “Print Reports” 6. Press ENTER, display will read “Press Enter to Print” 7. Press ENTER to print, display will read “Printing” while in process and default back to “Print Report” (Please refer to illustration 1.02) Removing Cash Cash Reconciliation Report Nickels $ 0.20 Dimes $ 0.90 Quarters $ 0.75 Dollar Coin $ 0.00 Ones $ 4.00 Fives $ 20.00 Tens $ 40.00 Twenties $ 80.00 Cash Box $ 325.55 Total: $ 471.40 Coin Tubes: $ 1.85 Cash Box: $ 325.55 Bill Stacker: $ 144.00 With the door of the EX2000 open, use the key to open the cash box. Remove the coins and place cash box back into the EX2000 cabinet. Next, remove the Bill Stacker and extract the bills. Resetting Cash Box and Bill Stacker Totals Resetting Cash Box and Bill Stacker totals provides a starting point without having to add or subtract beginning totals from one period to the next. We advise you reset the totals after each reconciliation period. Once the change and bills are removed, and reconciled, reset the Cash Box and Bill Stacker amounts to $0.00 by following these instructions: 1. 2. 3. 4. 5. 6. 7. 8. Enter Supervisor Pin – 73784230 Press FWD until display reads “Service Mode” Press ENTER to select “Service Mode” Press FWD until display reads “Reconcile Menu” Press ENTER, display will read “Print Report” Press FWD until display reads “Clear Totals” Press ENTER, display will read “Clear Cash Box” Press ENTER, display will read “Confirm Clear? Cash Box” Programming your EX Series Vending System 17 ACDI EX2000 Series User & Technical Manual 9. 10. 11. 12. 13. Press ENTER to clear cash box, screen returns to “Clear Totals” Press ENTER, display will read Clear Cash Box” Press FWD until display reads “Clear Bill Stacker” Press ENTER, display will read “Confirm Clear? Bill Stacker” Press ENTER to clear bill stacker, screen returns to “Clear Totals” 14. Press EXIT followed by EJECT to return to the main Idle Screen. After printing the Meter Reports and the Cash Reconciliation Report, compare the physical cash with the total from the Reconciliation Report. Reconciliation Report Total = (Total Physical Cash – Initial Balance) ***Always document your beginning cash balance. The “Cash Reconciliation Report” shows the total amount of money stored inside the EX2000. (See Illustration 1.02) Programming your EX Series Vending System 18 ACDI EX2000 Series User & Technical Manual Editing and Reading Cash Settings The EX2000 Series vending systems allows you to view and edit the amount of change residing in the coin tubes. This is useful when the coins are loaded into the tubes from the back of the unit and not in the MANUAL FILL MODE. If there is not enough change in the tubes, the Display will read “Please Use Exact Change”. If there are coins in the tubes and the display reads “Please Use Exact Change”, by going to Cash Settings, you can check to see how much money in Nickels, Dimes, and Quarters the EX2000 has recorded. Moreover, if the amount in the systems differs with the amount in the tubes, you can change the value in the Cash Settings Menu by following these instructions: Editing Cash Settings 1. 2. 3. 4. 5. 6. 7. 8. 9. 10. 11. 12. 13. 14. Enter Supervisor Pin – 73784230 Press FWD until display reads “Service Mode” Press ENTER to select “Service Mode” Press FWD until display reads “Setup Menu” Press ENTER, display will read “Cash Settings” Press ENTER, display will read “Nickels $###.##” Press ENTER to edit the value and a cursor will appear with a value of $000.00 will appear Enter the dollar amount in Nickels currently in the coin tubes and press ENTER to save this value Press FWD, display will read “Dimes $###.##” Repeat steps 7-8 to modify the current balance in Dimes Press FWD, display will read “Quarters $###.##” Repeat steps 7-8 to modify the current balance in Quarters Press FWD, display will read “Dollar Coins $###.##” Repeat steps 7-8 to modify the current balance in Dollar Coins (Standard Changers do NOT store Dollar Coins, they are deposited directly to the Cash Box) Programming your EX Series Vending System 19 ACDI EX2000 Series User & Technical Manual View Cash Settings 1. 2. 3. 4. 5. 6. 7. Enter Supervisor Pin – 73784230 Press FWD until display reads “Service Mode” Press ENTER to select “Service Mode” Press FWD until display reads “Setup Menu” Press ENTER, display will read “Cash Settings” Press ENTER, display will read “Nickels $###.##” Press FWD to scroll through the following Cash Settings: a. b. c. d. e. f. g. h. i. Nickels (editable) Dimes (editable) Quarters (editable) Dollar Coin (editable) Cash Box Ones Fives Tens Twenties Records Menu Print Records Report Print Security Records Report by attaching an Serial Receipt Printer to the EX2000 series vending system and follow the instructions below: 1. Enter Supervisor Pin – 73784230 2. Press FWD until display reads “Service Mode” 3. Press ENTER to select “Service Mode” 4. Press FWD until display reads “Setup Menu” 5. Press ENTER, display will read “Cash Settings” 6. Press FWD, until display reads “Records Menu” 7. Press ENTER, display will read “Print Pin Records” 8. Press ENTER to print, display will read “Printing” while in process and default back to “Print Pin Records” Programming your EX Series Vending System 20 ACDI EX2000 Series User & Technical Manual Enabling or Disabling the Keypad For security reasons, the EX2000 Series vending systems provides the ability to activate or deactivate the keypad. It is ENABLED in default mode, allowing programmed User and Supervisor PIN numbers access to the copier. To disable the Keypad, change the setting to OFF. Therefore, without the Operators’ Key, the Keypad will not respond to key entries and will require the Operators’ Key to make copies or enter the Service Mode. To change the Enable Keypad Setting, follow the steps below. Turning Keypad ON or OFF 1. 2. 3. 4. 5. 6. 7. 8. 9. Enter Supervisor Pin – 73784230 Press FWD until display reads “Service Mode” Press ENTER to select “Service Mode” Press FWD until display reads “Setup Menu” Press ENTER, display will read “Cash Settings” Press FWD until display reads “Other Settings” Press FWD until display reads “Keypad Enabled” Press ENTER, will toggle between Enabled and Disabled Press EXIT 3 times followed by EJECT to exit the Service Mode and return to the main Idle Screen Enabling the Bypass Key When the Bypass Key is ON, a PIN is not required for copying; when Key Bypass is enabled copies being made are metered to the Supercard account. ACDI advises use of supervisor or user pin accounts instead of key bypass for security reasons. To change the Bypass Key Setting, follow the steps below: Turning the Bypass Key ON or OFF 1. 2. 3. 4. 5. 6. 7. Enter Supervisor Pin – 73784230 Press FWD until display reads “Service Mode” Press ENTER to select “Service Mode” Press FWD until display reads “Setup Menu” Press ENTER, display will read “Cash Settings” Press FWD until display reads “Other Settings” Press FWD until display reads “Key Bypass Enabled” (Current setting will 8. 9. Press ENTER to toggle between Enabled and Disabled Press EXIT 3 times followed by EJECT to exit the Service Mode. be displayed) Programming your EX Series Vending System 21 ACDI EX2000 Series User & Technical Manual Enabling Online Accounts The EX2000 series coin-op has the ability to interface with several software options and provide online pin user accounts for vending of copies. Turning the Online Accounts ON or OFF 1. 2. 3. 4. 5. 6. 7. Enter Supervisor Pin – 73784230 Press FWD until display reads “Service Mode” Press ENTER to select “Service Mode” Press FWD until display reads “Setup Menu” Press ENTER, display will read “Cash Settings” Press FWD until display reads “Other Settings” Press FWD until display reads “Online Accounts Enabled” (Current setting will be displayed) 8. 9. Press ENTER to toggle between Enabled and Disabled Press EXIT 3 times followed by EJECT to exit the Service Mode. Enabling Hidden Pins Mode The EX2000 series coin-op has the ability to hide the display of pins as entered on the top keypad. This added security feature allows for discrete entering of access pins in public venues. Turning the Hidden Pins Mode ON or OFF 1. 2. 3. 4. 5. 6. 7. Enter Supervisor Pin – 73784230 Press FWD until display reads “Service Mode” Press ENTER to select “Service Mode” Press FWD until display reads “Setup Menu” Press ENTER, display will read “Cash Settings” Press FWD until display reads “Other Settings” Press FWD until display reads “Hidden Pins Mode Enabled” (Current 8. 9. Press ENTER to toggle between Enabled and Disabled Press EXIT 3 times followed by EJECT to exit the Service Mode and return to the main Idle Screen setting will be displayed) Programming your EX Series Vending System 22 ACDI EX2000 Series User & Technical Manual Minimum Credit Card Purchase The EX2000 series coin-op when equipped with a credit card module has the ability to set a minimum purchase price. This setting can ensure that small transactions do not occur keeping banking fees to a minimum. Setting the Minimum Credit Vend 1. 2. 3. 4. 5. 6. 7. 8. 9. Enter Supervisor Pin – 73784230 Press FWD until display reads “Service Mode” Press ENTER to select “Service Mode” Press FWD until display reads “Setup Menu” Press ENTER, display will read “Cash Settings” Press FWD until display reads “Other Settings” Press FWD until display reads “Min Credit Vend $00.00”. Enter the value desired then press ENTER. Press EXIT 3 times followed by EJECT to exit the Service Mode and return to the main Idle Screen Programming your EX Series Vending System 23 ACDI EX2000 Series User & Technical Manual Delay Settings Disable Delay This setting determines how long the EX2000 waits before disabling the copier. Useful when last vend or partial pages are an issue. 1. Enter Supervisor Pin – 73784230 2. Press FWD until display reads “Service Mode” 3. Press ENTER to select “Service Mode” 4. Press FWD until display reads “Setup Menu” 5. Press ENTER, display will read “Cash Settings” 6. Press FWD until display reads “Delay Menu” 7. Press ENTER, display will read “Disable Delay 25 mSec” (Default Disable Delay is 25 mSec) 8. Press ENTER to edit Disable Delay and a flashing cursor will appear 9. Press FWD to increase the delay or press BACK to decrease the delay 10. Press ENTER to save your new delay 11. Press EXIT, display will read “Delay Menu” Blind Time This setting determines how long the EX2000 waits before accepting another copy charge pulse. Useful when more than one charge is made per copy, this setting can correct the problem. By extending the Blind Time, the EX2000 can ignore additional pulses. 1. Follow steps 1 thru 7 from “Disable Delay” above 2. Press FWD until display reads “Blind time 250 mSec” (Default Blind Time is 250 mSec) 3. Press ENTER to edit Blind Time and a flashing cursor will appear 4. Press FWD to increase Blind Time or press BACK to decrease blind time 5. Press ENTER to save your new Blind Time 6. Press EXIT, display will read “Delay Menu” Programming your EX Series Vending System 24 ACDI EX2000 Series User & Technical Manual Card Time Out This setting determines how long a card will remain in the reader without activity and how long Online Accounts enable the copier before disabling it due to inactivity. 1. Follow steps 1 thru7 from “Disable Delay” above 2. Press FWD until display reads “Card Time Out 00:06:00” (Default Blind Time is 6 min.) 3. Press ENTER to edit Card Time Out and a flashing cursor will appear 4. Press FWD to increase Card Time Out or press BACK to decrease Card Time Out 5. Press ENTER to save your new Card Time Out 6. Press EXIT, display will read “Delay Menu” Pin Time Out This setting determines the amount of time the EX2000 displays a balance of “$0.00” before returning to the Idle Menu. 1. Follow steps 1 thru 6 from “Disable Delay” above 2. Press ENTER, display will read “Disable Delay” 3. Press FWD until display reads “Pin Time Out 00:05:00” (Default Blind Time is 5 min.) 4. Press ENTER to edit Pin Time Out and a flashing cursor will appear 5. Press FWD to increase Pin Time Out or press BACK to decrease Pin Time Out 6. Press ENTER to save your new Pin Time Out 7. Press EXIT, display will read “Delay Menu” Force Vend This setting determines whether a copy must be made prior to ejecting change. “Yes” means that Force Vend is turned on and therefore a copy must be made prior to ejecting change. “No” means that Force Vend is turned off and therefore change can be given without making a copy. ***Note: DEFAULT SETTING = “NO”. Turning Force Vend Off allows the EX2000 Series Vending System with $bills to become a change machine and could cause coin levels to remain low. Programming your EX Series Vending System 25 ACDI EX2000 Series User & Technical Manual Card Reader Service The EX2000BC , EX2000SBC, and EX2000NBC are equipped with the Copymate Express magnetic card system. There are unique settings and card programming modes available only in the card reader service menu. The following pages will walk you through functions specific to the card reader service menu. Note: The functions differently when in Card Reader Service Mode. Encode Cards - Cash 1. 2. 3. 4. Enter default Supervisor Pin– 73784230. Press FWD until display reads “Card Reader Service” Press ENTER to screen should read “Encode Cards?” Press FWD screen will read “G1 Code: 9” ‘9 is default (your actual group 1 code will display) 5. 6. 7. 8. 9. 10. 11. 12. 13. 14. 15. 16. 17. 18. If group 2 or group 3 cards are needed Press ENTER until G2 or G3 appears. Press FWD screen will read “Encode Cash?” Press FWD screen will read “Balance:$ .000” Press FWD to increase value to encode by .01 Press 6 to increase value to encode by .10 Press 7 to increase value to encode by 1.00 Press BACK to decrease value to encode by .01 Press 4 to decrease value to encode by .10 Press 1 to decrease value to encode by 1.00 When you have the card at the desired value, Press ENTER. Wait for card reader to prompt “To Encode, Insert Card” Insert card to be encode. You may continue to encode as many cards as you want at this value. Press FWD will leave the Service Mode. Encode Cards - Units 1. 2. 3. 4. 5. 6. 7. Enter default Supervisor Pin– 73784230. Press FWD until display reads “Card Reader Service” Press ENTER to screen will read “Encode Cards?” Press FWD screen will read “G1 Code: 9” ‘ 9 is default (your actual group 1 code will display) If group 2 or group 3 cards are needed Press ENTER until G2 or G3 appears. Press FWD screen will read “Encode Cash?” Press ENTER screen will read “Encode Units?” Programming your EX Series Vending System 26 ACDI 8. 9. 10. 11. 12. 13. 14. 15. 16. 17. 18. 19. EX2000 Series User & Technical Manual Press FWD screen will read “Balance: 0” Press FWD to increase value to encode by 1 unit Press 6 to increase value to encode by 10 units Press 7 to increase value to encode by 100 units Press BACK to decrease value to encode by 1 unit Press 4 to decrease value to encode by 10 units Press 1 to decrease value to encode by 100 units When you have the card at the desired value, Press ENTER. Wait for card reader to prompt “To Encode, Insert Card” Insert card to be encode. You may continue to encode as many cards as you want at this value. Press FWD will leave the Service Mode. Card Max 1. 2. 3. 4. 5. 6. 7. 8. 9. 10. 11. 12. 13. Enter default Supervisor Pin– 73784230. Press FWD until display reads “Card Reader Service” Press ENTER to screen will read “Encode Cards?” Press ENTER until screen reads “Crd Max:$ .000” or current max. Note you will step through several menus. Press FWD to increase value by .01 Press 6 to increase value by .10 Press 7 to increase value by 1.00 Press BACK to decrease value by .01 Press 4 to decrease value by .10 Press 1 to decrease value by 1.00 Press ENTER until screen reads “Exit Use Bypass” Press BACK to leave the Service Mode. Card Time Out 1. 2. 3. 4. 5. 6. 7. 8. 9. 10. 11. 12. 13. Enter default Supervisor Pin– 73784230. Press FWD until display reads “Card Reader Service” Press ENTER to screen will read “Encode Cards?” Press ENTER until screen reads “Crd Timeout: $ .000”. Note you will step through several menus. Press FWD to increase value by 1 minute Press 6 to increase value by 10 minute Press 7 to increase value by 100 minute Press BACK to decrease value by 1 minute Press 4 to decrease value by 10 minute Press 1 to decrease value by 100 minute Press ENTER until screen reads “Exit Use Bypass” Press BACK to leave the Service Mode. Programming your EX Series Vending System 27 ACDI EX2000 Series User & Technical Manual Group Code 1 – Setting is preset and should only be changed if instructed. 1. 2. 3. 4. 5. 6. 7. 8. 9. 10. 11. Enter default Supervisor Pin– 73784230. Press FWD until display reads “Card Reader Service” Press ENTER to screen will read “Encode Cards?” Press ENTER until screen reads “G1 Code: 9” or current group 1 code. Note you will step through several menus. Press FWD to increase value by 1 Press 6 to increase value by 10 Press BACK to decrease value by 1 Press 4 to decrease value by 10 Press ENTER until screen reads “Exit Use Bypass” Press BACK to leave the Service Mode. Group Code 2 – Setting is preset and should only be changed if instructed. 1. 2. 3. 4. 5. 6. 7. 8. 9. 10. 11. Enter default Supervisor Pin– 73784230. Press FWD until display reads “Card Reader Service” Press ENTER to screen will read “Encode Cards?” Press ENTER until screen reads “G2 Code: 2” or current group 1 code. Note you will step through several menus. Press FWD to increase value by 1 Press 6 to increase value by 10 Press BACK to decrease value by 1 Press 4 to decrease value by 10 Press ENTER until screen reads “Exit Use Bypass” Press BACK to leave the Service Mode. Group Code 3 – Setting is preset and should only be changed if instructed. 1. 2. 3. 4. 5. 6. 7. 8. 9. 10. 11. Enter default Supervisor Pin– 73784230. Press FWD until display reads “Card Reader Service” Press ENTER to screen will read “Encode Cards?” Press ENTER until screen reads “G3 Code: 3” or current group 1 code Note you will step through several menus. Press FWD to increase value by 1 Press 6 to increase value by 10 Press BACK to decrease value by 1 Press 4 to decrease value by 10 Press ENTER until screen reads “Exit Use Bypass” Press BACK to leave the Service Mode. Programming your EX Series Vending System 28 ACDI EX2000 Series User & Technical Manual Site Code – Setting is preset and should only be changed if instructed. 1. 2. 3. 4. 5. 6. 7. 8. 9. 10. Enter default Supervisor Pin– 73784230. Press FWD until display reads “Card Reader Service” Press ENTER to screen will read “Encode Cards?” Press ENTER until screen reads “G3 Code: 3” or current group 1 code. Note you will step through several menus. Press FWD to increase value by 1 Press 6 to increase value by 10 Press BACK to decrease value by 1 Press 4 to decrease value by 10 Press ENTER until unit exits the Service Mode Rom Code –Setting is preset and should only be changed if instructed. 1. 2. 3. 4. 5. 6. 7. 8. 9. 10. Enter default Supervisor Pin– 73784230. Press FWD until display reads “Card Reader Service” Press ENTER to screen will read “Encode Cards?” Press ENTER until screen reads “G3 Code: 3” or current group 1 code. Note you will step through several menus. Press FWD to increase value by 1 Press 6 to increase value by 10 Press BACK to decrease value by 1 Press 4 to decrease value by 10 Press ENTER until unit exits the Service Mode. Programming your EX Series Vending System 29 ACDI EX2000 Series User & Technical Manual Programming your EX Series Vending System 30 ACDI EX2000 Series User & Technical Manual Access Control Devices Inc. 7428 Lindsey Rd. Suite 2 Little Rock, AR 72206 1-877-290-3327