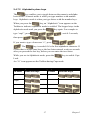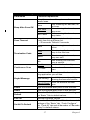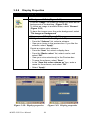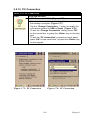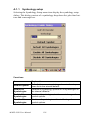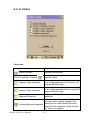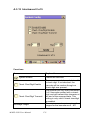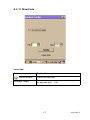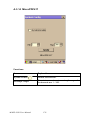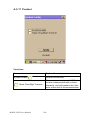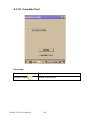
1
MARS-1030
WinCE. NET Rugged Portable
Data Terminal
User Manual
Copyright
The documentation and the software included with this product are copyrighted 2006 by Advantech Co., Ltd. All rights are reserved. Advantech
Co., Ltd. reserves the right to make improvements in the products
described in this manual at any time without notice. No part of this manual may be reproduced, copied, translated or transmitted in any form or
by any means without the prior written permission of Advantech Co., Ltd.
Information provided in this manual is intended to be accurate and reliable. However, Advantech Co., Ltd. assumes no responsibility for its use,
nor for any infringements of the rights of third parties, which may result
from its use.
Acknowledgements
Intel is a trademark of Intel Corporation.
Microsoft Windows is a registered trademark of Microsoft Corp.
All other product names or trademarks are properties of their respective
owners.
Part No. 2006103001
Edition 2
Printed in Taiwan
January 2007
MARS-1030 User Manual
ii
Contents
Chapter
1 Introduction ..................................................... 2
1.1
1.2
1.3
1.4
1.5
1.6
1.7
1.8
1.9
Chapter
About this Manual............................................................. 2
User and Product Safety.................................................... 3
Declaration of conformity ................................................. 5
Product Labeling ............................................................... 7
System Specifications ....................................................... 9
Environment Standard..................................................... 11
Warranty and after service .............................................. 12
Technical Support and Assistance................................... 12
Document Feedback........................................................ 12
2 Getting Started .............................................. 14
2.1
2.2
2.3
2.4
2.5
2.6
2.7
Check the package........................................................... 14
General View of the PDT................................................ 15
2.2.1
2.2.2
PDT front side view ..................................................... 15
PDT back side view ..................................................... 15
Charging the Battery Pack............................................... 17
2.3.1
2.3.2
2.3.3
Installing the battery pack ............................................ 17
Charging the battery pack with a Power Adapter ........ 21
Charging the battery pack with a Single Dock ............ 22
Handling the PDT............................................................ 24
2.4.1
2.4.2
2.4.3
2.4.4
2.4.5
2.4.6
2.4.7
2.4.8
Starting the PDT .......................................................... 24
Power on/off ................................................................ 25
Calibration of the touch Screen ................ 25
Adjusting the brightness .............................................. 26
To mute the Sound ....................................................... 26
Using the Stylus ........................................................... 26
Using the Keypad ......................................................... 27
Using Earphones and a Microphone ............................ 41
Navigating the Display.................................................... 42
2.5.1
2.5.2
2.5.3
2.5.4
2.5.5
2.5.6
2.5.7
2.5.8
Setting Time and Date ................................................. 42
Entering the Data ......................................................... 43
The Command Bar ....................................................... 43
The Taskbar ................................................................. 44
The Soft Keypad .......................................................... 44
Setting Up a Wireless LAN ......................................... 45
Scanning Barcode ........................................................ 47
Help .............................................................................. 48
Power Management......................................................... 49
2.6.1
2.6.2
Suspend Mode .............................................................. 49
Resuming ..................................................................... 50
Resetting the PDT ........................................................... 51
2.7.1
2.7.2
Software (Warm) Reset ............................................... 51
Cold Reset .................................................................... 51
iii
Table of Contents
Chapter
Chapter
3 Setting............................................................. 54
3.1
3.2
Introduction ..................................................................... 54
Control Panel................................................................... 54
3.3
Taskbar and Start Menu ................................................ 120
Barcode Setting ............................................................ 55
Symbologies List ......................................................... 64
Bluetooth Device Properties ........................................ 83
Certificates ................................................................... 87
Control Center .............................................................. 89
Date/Time ................................. 94
Dialing Properties ........................... 94
Display Properties ........................... 96
Input Panel ................................................................... 98
Internet Options ........................................................... 99
Keyboard .................................................................... 101
Network and Dial-up Connections ............................ 102
Owner ......................................................................... 107
Password .................................................................... 108
PC Connection ........................................................... 109
Power ......................................................................... 110
Regional Settings ....................................................... 112
Remove Programs ...................................................... 113
Storage Manager ........................................................ 114
Stylus ......................................................................... 115
System ........................................................................ 117
Volume & Sounds Properties .................................... 119
4 Communication ........................................... 122
4.1
4.2
4.3
Chapter
3.2.1
3.2.2
3.2.3
3.2.4
3.2.5
3.2.6
3.2.7
3.2.8
3.2.9
3.2.10
3.2.11
3.2.12
3.2.13
3.2.14
3.2.15
3.2.16
3.2.17
3.2.18
3.2.19
3.2.20
3.2.21
3.2.22
Installing & Setting Up Microsoft ActiveSync ............. 122
4.1.1
4.1.2
Installing Microsoft ActiveSync on the Host PC ....... 122
Connecting PDT to Host PC ...................................... 122
Using ActiveSync.......................................................... 123
4.2.1
4.2.2
Setting up a Partnership ............................................. 123
ActiveSync File Synchronization .............................. 124
Networking.................................................................... 124
5 Software Applications ................................. 126
5.1
5.2
Introduction ................................................................... 126
Software Applications ................................................... 126
5.2.1
5.2.2
5.2.3
5.2.4
5.2.5
5.2.6
5.2.7
5.2.8
MARS-1030 User Manual
Calculator ................................................................... 126
Inbox .......................................................................... 126
Internet Explorer ........................................................ 136
Media Player .............................................................. 140
Messenger .................................................................. 140
Microsoft WordPad .................................................... 141
Remote connection .................................................... 147
Windows Explorer ..................................................... 148
iv
5.3
DiskOnChip .................................................................. 150
5.3.1
5.3.2
5.3.3
Saving to flash ........................................................... 150
DiskOnChip location ................................................. 150
DiskOnChip size ........................................................ 151
Appendix A Barcode Setting............................................ 154
A.1
A.2
A.3
Setup Tab....................................................................... 154
A.1.1
A.1.2
A.1.3
Symbology setup ........................................................ 156
Decoder setup ............................................................ 157
Options ....................................................................... 159
Update Tab .................................................................... 160
Symbologies List........................................................... 162
A.3.1
A.3.2
A.3.3
A.3.4
A.3.5
A.3.6
A.3.7
A.3.8
A.3.9
A.3.10
A.3.11
A.3.12
A.3.13
A.3.14
A.3.15
A.3.16
A.3.17
A.3.18
A.3.19
A.3.20
A.3.21
A.3.22
A.3.23
A.3.24
A.3.25
A.3.26
A.3.27
A.3.28
A.3.29
A.3.30
A.3.31
A.3.32
A.3.33
A.3.34
Aztec .......................................................................... 162
Codabar ...................................................................... 163
Code 11 ...................................................................... 164
Code 128 .................................................................... 165
Code 39 ...................................................................... 166
Code 49 ...................................................................... 168
Code 93 ...................................................................... 169
Composite Codes ....................................................... 170
Data Matrix ................................................................ 171
EAN-8 ........................................................................ 172
EAN-13 ...................................................................... 173
Interleaved 2 of 5 ....................................................... 174
MaxiCode ................................................................... 175
MicroPDF417 ............................................................ 176
OCR-A, OCR-B, US Currency .................................. 177
PDF417 ...................................................................... 189
Postnet ........................................................................ 190
QR Code .................................................................... 191
Reduced Space Symbology ....................................... 192
UPC-A ....................................................................... 193
UPC-E ........................................................................ 194
UPC-E1 ...................................................................... 195
ISBT ........................................................................... 196
British Post ................................................................. 197
Canadian Post ............................................................ 198
Australian Post ........................................................... 199
IATA 2 of 5 ................................................................ 200
Codablock F ............................................................... 201
Japanese Post ............................................................. 202
Planet Code ................................................................ 203
KIX (Netherlands) Post ............................................. 204
MSI ............................................................................ 205
TCIF Linked Code 39 ................................................ 206
Matrix 2 of 5 .............................................................. 207
v
Table of Contents
A.3.35 Korean Post ................................................................ 208
MARS-1030 User Manual
vi
CHAPTER
1
Introduction
This chapter presents general information about the PDT.
Chapter 1
Introduction
Congratulations on purchasing the MARS-1030 Portable Data Terminal
(PDT), a Microsoft Windows® CE .Net rugged PDT. Its special combination of features makes it perfect for using in a wide range of applications.
These features are:
•
•
•
•
•
•
•
•
Intel® XScale™ PXA255 400 MHz 32 bits RISC Processor
Windows® CE .NET 4.2 Operating System
64/128/256 MB SDRAM & 64/128 MB Flash ROM
Open Architecture: User Accessible SD/CF/PCMCIA Slot
240 x 320, 3.5" Color TFT Display with Touch Panel
1 Numeric Keyboards with LED backlight
802.11b Radio Support (Bluetooth Optional)
Integrated 1D or 2D Barcode Scanner
1.1 About this Manual
The following chapters contained in this manual are:
Chapter 1:
Introduction—Presents general information about the
PDT.
Chapter 2:
Getting started—Describes the basic use of the PDT.
Chapter 3:
Setting—Provides basic instructions for customizing the
PDT by adjusting settings.
Chapter 4:
Communication—Describes how to use the communication features of the PDT.
Chapter 5:
Software Application—Software implement procedures.
Appendix A:
Barcode Setting—Provides instructions for customizing
the barcode engine.
MARS-1030 User Manual
2
1.2 User and Product Safety
•
•
•
•
•
•
•
Do not stare into the laser beam directly or shine it into eyes.
Never use strong pressure onto the screen or subject it to severe
impact, as the LCD panel could become cracked and possibly cause
personal injury. If the LCD panel is broken, never touch the liquid
inside, for such contact would irritate the skin.
Although the MARS-1030 PDT has passed IP54 standard tests for
water and dust resistance, avoid prolonged exposure to rain or other
concentrated moisture. For these conditions exceed the IP54 standard, and could result in water or other contaminants entering the
PDT.
Use only the approved AC Adapter with the PDT. Use of an unapproved AC Adapter could result in electrical problems, or even
cause a fire or electrical shock to the user.
Be sure that only authorized suppliers are allowed to disassemble
and reassemble the device. If the device or parts has been damaged
due to wrong handling, the product and parts warranty shall be
void.
Always make backup copies of all important data. This is easily
one by using a cable or Single Cradle (sold as an option) to transfer
data to the computer. The manufacturer is not liable for any data
damage or loss caused by deletion or corruption of data when using
this device or caused by a drained battery.
Lithium-ion battery packs might get hot, explode, ignite and/or
cause serious injury abused. Please follow the safety warnings
listed as below:
– Do not place the battery pack in fire or heat the battery.
– Do not install the battery pack backwards so the polarity is
reversed.
– Do not connect the positive and negative terminals of the battery pack together with any electrically conductive object.
– Do not carry or store battery pack together with metal objects.
– Do not pierce the battery pack with nails, strike the battery pack
with a hammer, step on the battery pack or otherwise subject it
to strong impacts or shocks.
– Do not solder directly onto the battery pack.
– Do not expose battery pack to liquid, or allow the battery contacts to get wet.
3
Chapter 1
– Do not disassemble or modify the battery pack. The battery
pack contains safety and protection devices, which, if damaged,
may cause the battery pack to generate heat, explode or ignite.
– Do not discharge the battery pack using any device except for
the specified device. When it is used in devices other than the
specified devices, the battery pack can be damaged or its life
expectancy reduced. If the device causes any abnormal current
to flow, it may cause the battery pack to become hot, explode or
ignite and cause serious injury.
– In the event the battery pack leaks and the fluid gets into one’s
eye, do not rub the eye. Rinse well with water and immediately
seek medical care. If left untreated, the battery fluid could cause
damage to the eye.
Caution!
There is a danger of a new battery exploding if it is
incorrectly installed. Do not attempt to recharge,
force open, or heat the battery. Replace the battery
only with the same or equivalent type recommended
by the manufacturer. Discard used batteries according to the manufacturer’s instructions.
Achtung!
MARS-1030 User Manual
4
1.3 Declaration of conformity
FCC Class B
This equipment has been tested and found to comply with the limits for a
Class B digital device, pursuant to Part 15 of the FCC Rules. These limits
are designed to provide reasonable protection against harmful interference in a residential installation. This equipment generates uses and can
radiate radio frequency energy and, if not installed and used in accordance with the instructions, may cause harmful interference to radio communications. However, there is no guarantee that interference will not
occur in a particular installation. If this equipment does cause harmful
interference to radio or television reception, which can be determined by
turning the equipment off and on, the user is encouraged to try to correct
the interference by one of the following measures:
– Reorient or relocate the receiving antenna.
– Increase the separation between the equipment and receiver.
– Connect the equipment into an outlet on a circuit different from
that to which the receiver is connected.
– Consult the dealer or an experienced radio/TV technician for
help.
FCC Caution: Any changes or modifications not expressly approved by
the party responsible for compliance could void the user's authority to
operate this equipment.
This device complies with Part 15 of the FCC Rules. Operation is subject
to the following two conditions: (1) This device may not cause harmful
interference, and (2) this device must accept any interference received,
including interference that may cause undesired operation.
IMPORTANT NOTE:
FCC Radiation Exposure Statement:
This equipment complies with FCC RF radiation exposure limits set forth
for an uncontrolled environment. To maintain compliance with FCC RF
exposure compliance requirements, please avoid direct contact to the
transmitting antenna during transmitting.
This transmitter must not be co-located or operated in conjunction with
any other antenna or transmitter.
5
Chapter 1
Caution: Advantech declares that MARS-1030 ID:M82-MARS1030 is limited in CH1~CH11 for 2.4GHz by specified firmware
controlled in U.S.A.
The FCC ID of MARS-1030 is M82-MARS-1030
CE
This product has passed the CE test for environmental specifications. Test
conditions for passing included the equipment being operated within an
industrial enclosure. In order to protect the product from being damaged
by ESD (Electrostatic Discharge) and EMI leakage, we strongly recommend the use of CE-compliant industrial enclosure products.
IMPORTANT FOR LASER PRODUCTS
1.
2.
3.
4.
5.
6.
Class II Laser Product
Caution - use of controls or adjustments or performance of procedures other than those specified herein may result in hazardous
radiation exposure.
“Laser Radiation—Do not stare into beam”
Do not allow young children to use the product without adult supervision.
Do not replace/repair the LED/Laser. These are not user replaceable.
Do not shine the LED/Laser on a reflective surface.
MARS-1030 User Manual
6
1.4 Product Labeling
The PDT has several labels as shown in Figure 1-1 and 1-2.
Figure 1.1: Product Labeling (Front side view)
7
Chapter 1
Figure 1.2: Product Labeling (Back side view)
MARS-1030 User Manual
8
1.5 System Specifications
The MARS-1030 PDT detailed specifications follow. Unless otherwise
noted, all the specifications are subject to change without prior notification.
Table 1.1: System Specification
MARS-1030
Processor
Memory
Display
Audio
Radio Support
-
Communication Ports
Scan Engine
(Optional)
Expansion Slot
-
LED
-
Power System
-
400 MHz Intel PXA255 32 bits RISC CPU
64 or 128 MB Flash ROM
64,128 or 256 MB SDRAM
240 x 320 3.5" TFT 256K Color LCD with LED
backlight
One mono speaker
2.5 mm DIA Stereo Earphone Jack with
Microphone input
Wireless LAN: 802.11b (optional)
Bluetooth: Class II (optional)
USB: Support USB v1.1 both host and client.
(PDT and Cradle)
Serial: RS-232 via optional cable or Cradle.
Opticon Laser (1D) Engine
HHP 2D Imager.
One Compact Flash Type-II slot
One PCMCIA slot
One SD Card slot (supports SD memory only)
One Triple-Color LED for Charger Indicator
and Alarm Notification
One Dual-Color LED for Scanner Indicator
Standard Li-Ion Battery Pack, 3.7 V, 3000
mAh
Advanced Smart Battery with Gas-Gauge
Built-in Battery Charger
2.4 V / 15 mAh rechargeable backup battery
One Battery Cover Sensor Switch
Power Adapter: 100 ~ 240 V AC, 50/60 Hz
Input; 5 V DC / 2.6 A, 3 A Output
9
Chapter 1
-
Power button
4-way navigation button
4 Application Keys
Button/Key
3 Scanner Enable Keys
SW Reset input button
16 Alpha-numeric key keyboard
Dimensions: 192.5 mm (L) x 91.3 mm / 78
mm (W) x 42.2 mm / 60.6 mm (H)
Dimensions and Weight
- Weight: 560 g with Standard Battery Pack
500 g without Battery Pack
Color
- Black
- Standard Packing list:
1. MARS-1030 Terminal
2. Stylus
3. USB Client Cable for Terminal
4. Earphone/ Microphone Set
5. Standard AC Adapter 5 V DC / 2.6 A
6. AC Power Cord
7. Standard Battery Pack (3.7 V, 3000 mAh)
8. CF Support Guide
9. Quick Guide
Standard packing list
and Optional
- Optional Accessory:
accessories
1. RS-232 Serial Cable for Terminal
2. USB Host Cable for Terminal
3. High-Capacity Li-Ion Battery Pack
(3.7 V, 4000 mAh)
4. RFID Card Cover
5. Single Dock
6. Pistol Grip
7. 4-Slot Battery Charger
8. Car Adapter
9. Holster
10. Protect Film
Software
- Microsoft Windows CE.NET 4.2 Professional
MARS-1030 User Manual
10
1.6 Environment Standard
Table 1.2: Environment Standard
Operating Temperature
Storage Temperature
Humidity
Drop
Water & Dust proof
Vibration
14 ~ 122° F (-10 ~ 50° C)
-4 ~ 158° F (-20 ~ 70° C)
5 ~ 80% (non-condensing)
5 ft (1.5 m) Drop to Concrete
IP54 Certificated
MIL STD 810F
11
Chapter 1
1.7 Warranty and after service
Should this PDT malfunction, please contact your original retailer providing information about the product name, the serial number, and the details
about the problem.
1.8 Technical Support and Assistance
1.
2.
Visit the Advantech web site at www.advantech.com/support
where you can find the latest information about the product.
Contact your distributor, sales representative, or Advantech's customer service center for technical support if you need additional
assistance. Please have the following information ready before you
call:
– Product name and serial number
– Description of your peripheral attachments
– Description of your software (operating system, version, application software, etc.)
– A complete description of the problem
– The exact wording of any error messages
1.9 Document Feedback
To assist us in making improvements to this manual, we would welcome
comments and constructive criticism. Please send all such - in writing to:
[email protected]
MARS-1030 User Manual
12
CHAPTER
2
Getting Started
This chapter describes the basic use of
the PDT.
Chapter 2
Getting Started
2.1 Check the package
Open the package and check that nothing is missing or damaged.
Figure 2.1: Inside the package
1.
2.
3.
4.
5.
6.
7.
8.
9.
MARS-1030 Terminal
Standard Battery Pack (3.7 V, 3000 mAh)
Earphone/Microphone Set
Stylus
USB Client Cable for Terminal
CF Support Guide
Standard AC Adapter 5 VDC / 2.6 A
AC Power Cord
Quick Guide (Not Shown)
MARS-1030 User Manual
14
2.2 General View of the PDT
2.2.1
PDT front side view
Figure 2.2: PDT Front side view
2.2.2
PDT back side view
Figure 2.3: PDT back side view
15
Chapter 2
Table 2.1: Description of PDT General View
1
Scanner LED Indicator
2
Charge LED Indicator
3
LCM / Touch Panel
4
Left Scan key
Right Scan key
Scan key
5
Power key
6
F1 ~ F4 key
7
Navigation key
8
Alphanumeric keys
9
Alphabetic key
10
Fn key
11
14
Enter key
Earphone Jack Connector
USB / Serial / Synchronization port
Scan window
15
Stylus
16
Battery Cover
17
18
19
20
Battery Cover Latch
Hand-strap
Speaker
DC Power Jack
12
13
MARS-1030 User Manual
“Red” color
Reading barcode
“Green” color
Successful reading
“Red” color
Charging battery
“Green” color
Battery charged full
Do specific actions with touch panel and
stylus
Start scanning the barcode by pressing any
one of these three scan keys
Puts the terminal into and wakes the terminal from suspend mode.
Four application program keys and hot keys
as defined by the end user.
Navigation keys for left, right, up and down
directions
Numeric keys, Change to Alphabetic keys
after pressing Alphabetic key
Toggle Alphabetic-mode for Alphanumeric
keys
This key is used in combination with other
keys to type special characters and perform
system functions.
This key confirms data entry
A connector to plug a earphone
A connector to support USB Host/Client
and serial functions
A window for scanning of barcode reader
Use the stylus for selecting items and entering information.
Protects the battery pack and keeps the
battery switch covered to keep the system
in suspend mode
To keep the Battery Cover locked
This strap can be sealed tighter or looser
1.5 W speaker for audio sound
A connector to support AC power.
16
21
End Cap
Protects the CF and SD slots from dust and
water
2.3 Charging the Battery Pack
Charge the battery pack before using the PDT by following these steps.
2.3.1
1.
Installing the battery pack
Detach and loosen the hand-strap.
Figure 2.4: Release the hand-strap from PDT
17
Chapter 2
2.
Turn the locking screws (right and left) downwards and lift the battery cover away from the PDT.
Figure 2.5: Detach the battery cover from PDT
MARS-1030 User Manual
18
3.
Insert the battery pack into the battery compartment with the label
facing out, and ensure the battery snaps into place.
Figure 2.6: Insert the battery pack
19
Chapter 2
4.
Replace the battery cover by inserting the top first, and then press
the bottom in firmly. Turn the locking screws (right and left)
upwards to secure the cover to the PDT.
Figure 2.7: Replace the battery cover
5.
Charge the battery pack for about 6 hours, when charging for the
first time. Subsequent charges need about 4 hours.
When charging the battery pack, the charge indicator on the PDT turns
Red. After the battery pack is fully charged, the indicator turns Green.
MARS-1030 User Manual
20
2.3.2
1.
2.
3.
Charging the battery pack with a Power Adapter
Connect the Power cord to the Power adapter.
Plug in the connector of the power adapter.
Connect the power cord to a power source.
Figure 2.8: Charging with a power adapter
When charging the battery pack, the charge indicator on the PDT turns
Red. After the battery pack is fully charged, the indicator turns Green.
21
Chapter 2
2.3.3
Charging the battery pack with a Single Dock
a)
Leave the battery pack inside the PDT
1.
2.
3.
4.
Connect the power cord to the power adapter.
Connect the power cord to a power source.
Plug in the connector of the power adapter into the Single Dock.
Insert the PDT into the Single Dock.
Figure 2.9: Charging with a Single Dock
When charging the battery pack, the charge indicator on the PDT turns
Red. After the battery pack is fully charged, the indicator turns Green.
CAUTION: Single Cradle Adapter supplies 5 V DC / 6.5 A. This is
different from the PDT Adapter (5 V DC / 2.6 A). Please use the
Single Cradle Adapter only.
MARS-1030 User Manual
22
b)
Place the spare battery pack into the Single Cradle’s spare Battery
charging slot.
1.
2.
3.
4.
Connect the power cord to the power adapter.
Connect the power cord to a power source.
Plug the connector of the power adapter into the Single Cradle.
Insert the battery pack into the Single Cradle’s spare Battery slot.
When charging the battery pack, the charge indicator on the PDT turns
Red. After the battery pack is fully charged, the indicator turns Green.
CAUTION: If the battery pack is removed from the PDT for too
long, the data stored inside the SDRAM will be lost. Switch off the
PDT if you want to change the main battery pack.
23
Chapter 2
2.4 Handling the PDT
2.4.1
Starting the PDT
Press the power key to turn on/off the PDT. If the PDT does not power on,
perform a cold boot. See “Resetting the PDT” on page 51.
CAUTION: When a battery is inserted into the PDT for the first
time, upon the PDT’s first power up, the device boots and powers on
automatically.
When the PDT is powered
on for the first time, it initializes its system. A splash
screen appears for a short
period of time followed by
the Win CE .NET 4.2 window.
Figure 2.10: Starting the PDT
MARS-1030 User Manual
24
2.4.2
Power on/off
To turn on the PDT:
Press the power key briefly ( ). If the PDT does not power on, perform
a cold reset. See “Resetting the PDT” on page 51.
As the PDT initializes its file system, it shows a splash screen for about
30 seconds followed by calibration screen. Every time you perform a cold
reset, these screens will also appear.
To turn off the PDT, just press the power key again. This action does not
actually turn off the PDT, it only puts the PDT into suspend mode. All
running applications remain as you left them, until you press the power
key again to resume operation of the PDT.
2.4.3
Calibration of the touch Screen
On the initial boot-up of the PDT, the stylus calibration screen (Labeled Align
Screen) opens. Briefly press and hold the
stylus on the center of each target as it
moves around the screen.
If necessary, adjust the backlight on the
PDT to make the screen readable.
The touchscreen can be recalibrated at any
time using Start > Settings > Control
Panel > Stylus, to open the Calibration
program.
Figure 2.11: Calibration
25
Chapter 2
2.4.4
Adjusting the brightness
Middle brightness is the factory default. You can adjust the brightness to
meet your environment and comfort as follows.
•
Press the
key
•
Press the
key
•
key and then press on the right key of Navigation
to increase brightness.
key and then press on the left key of Navigation
to decrease brightness.
The display will become dimmer automatically, if you do not perform any operation for a specific period of time. This helps to save
battery power.
2.4.5
To mute the Sound
To mute the sound, press the
key first, and then press the
key to turn the sound off or on.
2.4.6
Using the Stylus
The stylus is located next to the hand-strap on the left rear side of the
PDT as illustrated in “PDT back side view” on page 15. The stylus function is same as the mouse on a PC. Use the stylus to:
Navigate the display, select menu items and open applications.
Type characters on soft keyboard panel.
Select an item from a drop-down list.
CAUTION: Never use a pen, pencil, or other sharp object on the
display to avoid damage of the touch screen.
MARS-1030 User Manual
26
2.4.7
Using the Keypad
Figure 2.12: MARS-1030 Keypad
27
Chapter 2
Table 2.2: Table 2-2 Keypad List
Key
Fn + Main
Function
Main Function
Alphabetic +
Main
Function
None. (Reserved for
Customer)
Main Barcode Scan
Key
Power On/Off
Internet Explorer
Microsoft WordPad
Inbox
File Explorer
Right
Backlight
Increase
Left
Backlight
Decrease
Down
Page Down
Up
Page Up
ESC
Audio Mute
Backspace
TAB (Tabulation) Caps
MARS-1030 User Manual
28
€
Change to letters
Key
Fn + Main
Function
Main Function
Alphabetic +
Main
Function
Function change
1
(at)
2
’
3
(Plus Sign)
4
Paste
5
Del (Delete)
6
(Minus Sign)
7
Copy
8
(AND)
9
(Asterisk)
0
Space
. (Point)
Start Menu
Enter
(Backslash)
Table 2.3: Special Key Combinations
Key Combination
Functionality
Definition
Warm Reset
Press “F1” and “F4” simultaneously.
Cold Reset
Press “Power”, “F1” and “F4”
simultaneously.
29
Chapter 2
MARS-1030 User Manual
30
Table 2.4: Definition of Main Function
Key
Main Function
Definition
None.
Keep its function or by customer
demand.
Main Barcode Scan
The
key activates the
Key
scan function of MARS-1030.
Power On/Off
The
key puts the terminal into
and out of suspend mode.
Internet Explorer
Application key 1. This key can
be redefined.
Microsoft WordPad
Application key 2. This key can
be redefined.
Inbox
Application key 3. This key can
be redefined.
File Explorer
Application key 4. This key can
be redefined.
Move the cursor one character to
the right. The cursor will move
continuously if this button is
pressed continuously.
Move the cursor one character to
the left. The cursor will move continuously if this button is pressed
continuously.
Move the cursor down one row or
line. The cursor will move continuously if this button is pressed continuously.
Move the cursor up one row or
line. The cursor will move continuously if this button is pressed continuously.
Right
Left
Down
Up
ESC
This key performs a cancel action
31
Chapter 2
Key
Main Function
Definition
Backspace
“Backspace” key, it moves the
cursor back one space each time
the key is pressed. It deletes the
previous character each time it is
pressed if you are typing text. The
cursor will move continuously if
this button is pressed continuously.
1. The
Change to letters
key enables you to
toggle between the numeric
and alphabetic modes. Numeric
mode is when you type numbers with number keys. Alphabetic mode is when you type
letters with the number keys.
2. When you press the
key, an “Alphabetic” icon
appears on the taskbar to indicate alphabetic mode is
enabled. The keypad stays in
the alphabetic mode until you
press the
Function change
MARS-1030 User Manual
32
key again.
The
key is used in combination with other keys to type special characters and perform
system functions.
Key
Main Function
Definition
1
Number key “1”
2
Number key “2”
3
Number key “3”
4
Number key “4”
5
Number key “5”
6
Number key “6”
7
Number key “7”
8
Number key “8”
9
Number key “9”
0
Number key “0”
.
Point key
Enter
This key confirms data entry
33
Chapter 2
2.4.7.1 Special Function and Character Access
The “Fn” key is used in combination with other keys to type special characters and perform system functions.
Table 2.5: Special Function Key Definitions
Key Sequence
Fn + Main
Function
Definition
Increase the LED backlight brightness of
display screen (Lighter)
Backlight
Increase
You must press the
key, then the
key to increase backlight brightness.
Decrease the LED backlight brightness of
display screen (darker)
Backlight
Decrease
You must press the
key, then the
key to decrease backlight brightness.
Move the cursor down one page. The cursor will move continuously if this button is
pressed continuously.
Page Down You must press the
key, then the
key to move the cursor down
one page.
Move the cursor up one page. The cursor
will move continuously if this button is
pressed continuously.
Page Up
You must press this
key, then the
key to move the cursor up one
page.
Mute or enable audio.
Audio Mute Press the
key, then the
key to mute or enable audio.
MARS-1030 User Manual
34
Key Sequence
Fn + Main
Function
Definition
The “TAB” function moves the cursor to
the next tab stop or the next control on a
form.
TAB
(Tabulation) Press the
the
key first, and then press
key.
Enter an {@, at} symbol by pressing the
@ (at)
key, then the
key.
Enter a {’} by pressing the
’
then the
(Plus Sign)
key.
Enter a plus sign by pressing the
key, then the
Paste
key,
key
Paste objects by pressing the
and then the
key,
key.
Delete the next character by pressing the
Del (Delete)
key, and then the
key.
Enter a minus sign by pressing the
(Minus
Sign)
Copy
key, then the
Copy objects by pressing the
then the
35
key.
key,
key.
Chapter 2
Key Sequence
Fn + Main
Function
(Ampersand)
(Asterisk)
Definition
Enter an ampersand sign by pressing the
key, then the
key.
Enter an asterisk by pressing the
key first, and then the
Space
key.
Enter a space by pressing the
and then the
key,
key.
Enter the Start Menu by pressing the
Start Menu
(Backslash)
MARS-1030 User Manual
key, and then the
key.
Enter a backslash by pressing the
key, and then the
36
key.
2.4.7.2 Alphabetic plane keys
The
key enables you to toggle between the numeric and alphabetic modes. Numeric mode is when you type numbers with number
keys. Alphabetic mode is when you type letters with the number keys.
When you press the
key, an “Alphabetic” icon appears on the
Taskbar to indicate Alphabetic mode is enabled. The keypad stays in the
alphabetic mode until you press the
key again. For example to
type “cap1”, press
, wait 0.5 seconds,
.
then press
If you want to type a lowercase “c”, press
. The
key is needed if it’s the first alphabetic character. If
a letter that is on the same key as the last letter entered, wait two seconds
after you pressed the last key, before you can enter the next letter.
While you are in Alphabetic mode, press the
Lock.
key to enable Caps
An “A” icon appears on the Taskbar during Caps mode.
Table 2.6: Alphabetic + Numeric keys define
To enter
Press the Keys
To enter
Press the Keys
€
$
Caps
:
\
a
A
37
Chapter 2
To enter
Press the Keys
To enter
b
B
c
C
d
D
e
E
f
F
g
G
h
H
i
I
j
J
k
K
l
L
m
M
MARS-1030 User Manual
38
Press the Keys
To enter
Press the Keys
To enter
n
N
o
O
p
P
q
Q
r
R
s
S
t
T
u
U
v
V
w
W
x
X
39
Press the Keys
Chapter 2
To enter
Press the Keys
To enter
y
Y
z
Z
[
]
,
;
=
%
Press the Keys
Note:
•
The
key is not needed to key in a character if it isn’t the
first alphabetic character being keyed in.
•
The
key is not needed to key in a character if it isn’t the
first capital alphabetic character being keyed in.
MARS-1030 User Manual
40
2.4.8
Using Earphones and a Microphone
Connect earphones and a microphone to PDT earphone jack connector.
The PDT doesn’t have a built in microphone; if you want to make voice
recordings, you have to use an external microphone.
Figure 2.13: Earphones
41
Chapter 2
2.5 Navigating the Display
2.5.1
Setting Time and Date
In the Date/Time options, you can change the year, month, date, time,
time zone, or select automatically adjust for Daylight Saving Time. To set
or change the date and time:
Figure 2.14: Date/Time properties
1.
2.
3.
4.
5.
6.
7.
Select Start > Settings > Control Panel > Date/Time
To change the year, select the year or open a numeric dial. Select
the up arrow to increase the value; select the down arrow to
decrease the value. Or you can type a new value in the field.
Select the month to open a pull-down list of months or press the
arrow buttons on either side of the month to increase or decrease
the month.
To change the time, select the hour, minute, second, or AM/PM
value, then select the up arrow to increase the value or select the
down arrow to decrease the value, or type a new value into the
field.
Select the correct time zone from the pull-down list.
To automatically adjust the clock for Daylight Saving Time, enable
the checkbox at the bottom of the screen.
Select Apply to save your changes [and make additional modifications] or select OK to exit the Date/Time settings.
MARS-1030 User Manual
42
2.5.2
Entering the Data
To select and open programs, select Start > Programs from the taskbar
to open a list of available programs. Or if the program has a icon on the
desktop, double-tap it to open it.
There are several ways to enter data on the PDT once in an application.
•
•
•
•
•
Use the keypad to enter alphanumeric characters, Refer to “Using
the Keypad” on page 27.
Use the keypad to enter alphanumeric characters, Refer to “Using
the Stylus” on page 26.
Select text in the same way you select the text on a PC. Use the stylus to highlight the desired text by dragging the stylus across the
desired text; double-tapping to select one word and triple-tapping
to select an entire line/paragraph. Refer to “Navigating the Display” on page 42.
Use the soft input panel (digital keyboard) with the stylus. Refer to
“The Soft Keypad” on page 44.
Use barcode scanning to enter data. Press the trigger or “Bar Code
Start” key to initiate a scan. The scanned data will enter the current
application’s open file. Refer to “Scanning Barcode” on page 47 for
more information on using a scanner.
For more information on factory installed applications, Refer to “Software Applications” on page 126.
2.5.3
The Command Bar
Use the Command bar at top of the screen to perform tasks in programs,
such a opening or editing a file.
43
Chapter 2
2.5.4
The Taskbar
The Taskbar at the bottom of the screen displays an icon for the active
program, the current time, and system icons for utilities loaded in memory. The Taskbar includes menu names, buttons, and the keyboard icon,
which opens and closes the soft input panel (SIP). The Taskbar allows
you to select and close programs.
Command Bar
Task Bar
Figure 2.15: Taskbar & Command Bar
2.5.5
The Soft Keypad
In applications that accept keypad input, the soft input panel (SIP) can be
used to enter data using the stylus. The SIP is a digital, QWERTY-style
keyboard.
To open the SIP, tap the keyboard icon to open the menu and select Hide
Input Panel to close the keyboard.
Use the stylus to select letters, numbers, or symbols from the Soft Input
Panel for the current application.
MARS-1030 User Manual
44
2.5.6
Setting Up a Wireless LAN
1) Press “Start” > “Settings” > “Control Panel” > “WLAN Manager”.
2) Launch the WLAN Manager to Enable the WLAN device.
3) In the AP Browser tab, tap the Scan button to refresh the network.
4) Select a network, tap the Join button or double tap it for more options.
5) Press OK to save all your Wireless LAN settings.
6) Tap the “Exit” button to Disable the WLAN device.
Figure 2.16: WLAN Manager
Figure 2.17: WLAN Manager
45
Chapter 2
Note:
The 802.11b WLAN is not connected to the network.
The 802.11b WLAN has no signal.
The 802.11b WLAN signal is low.
The 802.11b WLAN signal is OK.
The 802.11b WLAN signal is good.
Figure 2.18: WLAN Manager
MARS-1030 User Manual
Figure 2.19: WLAN Manager
46
2.5.7
Scanning Barcode
To use the scanning function, complete the following steps:
1.
2.
3.
4.
5.
6.
If you have not already done so, remove the protective plastic film
before using devices equipped with a laser scanner.
Select Start > Settings > Control Panel > Barcode Setting. Configure settings as described in “Barcode Setting” on page 55.
Start WordPad.
Aim the scanning beam at the center of bar code.
– Position the device close to bar code when scanning
– Position the device further away when scanning larger bar
codes.
– The scanner is disabled after you release the key or after five
seconds.
Press the right/left/central scan key. The scanner scans as long as
you hold the key or for five seconds.
Upon reading a bar code, the red LED indicator comes on until the
trigger is release or five seconds. The green LED and the beep tone
indicate a good read.
47
Chapter 2
7.
Barcode Scanning Position
This device can read from 40 to 300 mm.
– Position the laser scanner close to the barcode when scanning
small barcodes and position it further away from the barcode
when scanning large barcodes.
– The reader emits a red beam.
8.
Bad Scanning Position
– Make sure that the bars enter the laser beam when scanning
large barcodes.
– Scanning operations may fail if the laser beam is in the positions shown below.
Note: this product scans using laser light. Never look directly into the
laser light or shine the laser light into the eyes.
2.5.8
Help
To tap “?” can get help information for each program.
MARS-1030 User Manual
48
2.6 Power Management
2.6.1
Suspend Mode
The PDT will go into a suspend
mode when it is idle for a period
of time. The idle duration can be
customized using the Power control panel. Suspend mode works
and looks just like you have
turned the unit off. Press the
key to suspend the PDT, Press the
key again for the PDT to
resume its Previous state.
Use the Battery power control
panel to set the duration to switch
state to Suspend mode when the
system is using battery power.
This will save battery power
when the PDT is not in use.
Figure 2.20: Schemes Tab
49
Chapter 2
Suspending:
The following conditions will suspend:
•
•
•
•
2.6.2
Press the <Power> key while the unit is on.
The “Switch state to Suspend” time expires, which indicates that
there has been no use for a specified of time.
The battery pack is completely discharged.
Tap Start > Suspend
Resuming
Use one of following methods to resume (wake up the PDT):
•
•
Press the <Power> key to suspend or resume (wake up).
Put the PDT into a dock.
When a battery pack completely discharges while the unit is in suspend
mode, the PDT remains suspended until the battery is charged.
MARS-1030 User Manual
50
2.7 Resetting the PDT
2.7.1
Software (Warm) Reset
A warm reset is a transition from the on, idle, or suspend power state that
closes all applications and clears the working RAM, but preserves the file
system.
Reason to Warm Reset: If an application “hangs”, initiate a warm reset
to terminate the application only.
Warm Reset Process: To execute a warm reset, press the “F1” and “F4”
buttons simultaneously.
After Warm Reset:
•
•
The desktop appears with the application shortcuts on the screen.
The custom settings in the registry are persistent.
2.7.2
Cold Reset
You can use Cold Reset to a initiate device if the Win CE .NET OS locks
up or the Warm Reset still doesn’t work.
To perform a Cold Reset, press “Power”, “F1” and “F4” buttons simultaneously.
Devices will initiate after Cold Reset.
CAUTION: Try warm reset before Cold Reset. All applications will
be Closed and working RAM and all files will be cleared if you initiate a Cold Reset. It’s better usually to back up your files to Flash
ROM, Flash Card or PC.
51
Chapter 2
MARS-1030 User Manual
52
CHAPTER
3
Setting
This chapter provides basic instructions for customizing the PDT by
adjusting settings.
Chapter 3
Setting
3.1 Introduction
To view the available options for the PDT’s settings, tap Start > Settings.
There are three items inside Settings: “Control Panel”, “Network and
Dial-up” and “Taskbar and Start”.
3.2 Control Panel
To view the Control Panel and settings tapping Start > Settings > Control Panel.
Figure 3.1:
Control Panel
MARS-1030 User Manual
54
3.2.1
Barcode Setting
CAUTION: Please do not enter any Barcode Applications before
completing barcode configuration.
There are three tabs for scanner configuration setting: “Basic”, “Code Configure” and “Code ID”.
In addition, there is a “Barcode Setup” for the
“Code Configure” tab.
55
Chapter 3
3.2.1.1 “Basic” Tab
Figure 3.2:
Basic Tab
MARS-1030 User Manual
56
Table 3.1: Basic Explanation
Field Name
Beep After Scan OK
Scan Timeout
Termination Code
Continuous Scan
Keybd Message
Function Explanation
Select the number of beep tones after a successful scan.
After scanning the barcode, do
None
not beep.
After scanning the barcode,
One Time
beep once.
After scanning the barcode,
Two Times
beep twice.
Select the scanning timeout duration (in seconds) from this pull-down list.
2 ~ 20 seconds. Default: 5 seconds
After showing barcode, do not
None
action.
After showing the barcode,
CRLF
jump to the next row.
After showing the barcode,
Space
jump one unit.
After showing the barcode,
Tab
jump a section.
Disable
Disable this functionality.
The duration of a continuous
1 ~ 5 sec
scan.
Select a method based upon the barcode scanning application you will use.
A unit follows a unit, quickly
Type Writing
showing the barcode number.
Show the barcode number
Copy & Paste
once.
Prefix
Type the desired label prefix in this text box.
Suffix
Type the desired label suffix in this text box.
Default
Press the “Default” button to reset all settings of
the “Basic” Tab to default values.
F/W ver.
Decoder firmware version.
Set All To Default
Press the “Set All To Default” button to reset all
settings of the “Basic” tab, “Code Configure”
tab, “Code ID” tab and all barcodes of “Barcode
Setup” to default values.
57
Chapter 3
3.2.1.2 “Barcode” Tab
Select the barcode symbologies you plan to scan from the list. Tap to
enable/disable the desired symbologies.
Figure 3.3:
Code Configure Tab
Table 3.2: Code Configure Explanation
Barcode Symbology
Explanation
Type A. Numeric-only Barcodes
UPC-E
UPC-A
EAN-13 / ISBN
MARS-1030 User Manual
Compressed version of UPC code for
use on small products.
Universal product code seen on almost
all retail products in the USA and Canada.
EAN-13: European Article Numbering
international retail product code.
ISBN: Special use of the EAN-13 symbol
to used internationally to mark books.
58
Barcode Symbology
EAN-8 / JAN-8
UPC-EAN Add-ON 2/5
Industrial 2 of 5 / IATA
Interleaved 2 of 5
Plessey / MSI
Code 11
Codabar / NW 7
Matrix 2 of 5
Explanation
Compressed version of EAN code for
use on small products.
UPC-A, UPC-E, EAN-13, and EAN-8
may all include an additional barcode to
the right of the main barcode. This second barcode, which is usually not as tall
as the primary barcode, is used to
encode additional information for newspapers, books, and other periodicals.
Older code not in common use.
Compact numeric code, widely used in
industry, air cargo and other applications.
Plessey: Older code commonly used for
retail shelf marking.
MSI: Variation of the Plessey code commonly used in the USA.
Used primarily for labeling telecommunications equipment.
Older code often used in library systems,
sometimes in blood banks.
Used in miscellaneous industrial applications, and mechanical numbering systems.
Type B. Alphanumeric Barcodes
Code 39 / Code32
General purpose code in very wide use
worldwide.
Code 93
Compact code similar to Code 39.
Code128 / UCC
EAN128
Very capable code, excellent density,
high reliability; in very wide use worldwide.
Widely used data formatting model for
Code 128
Type C. Others Barcodes
China Post
Used by China Postal Service for automated mail sorting.
Code 4
---
59
Chapter 3
Barcode Symbology
Explanation
GTIN
Global Trade Identification Number
Korea Code 3 of 5
---
RSS
Reduced Space Symbology
MARS-1030 User Manual
60
3.2.1.3 “Code ID” Tab
Figure 3.4:
Code ID Tab
Table 3.3: Code ID Explanation
The code ID is added to the prefix of the barcode to let users identify
which kind of barcode is being scanned.
Enable this functionality.
Enable Code ID
Set 1 ~ Set 5
User Define
Barcode List
Default
61
Select one default value:
Set 1 ~ Set 5.
(See the table: “Code ID Set1 ~
Set5 Table” on page 62)
User defined value.
Set 1 ~ Set 5: default settings.
User Define: select barcode to
define.
Press the “Default” button to
reset all settings of the “Code ID”
tab to default values.
Chapter 3
Table 3.4: Code ID Set1 ~ Set5 Table
Set 1
Set 2
Set 3
Set 4
Set 5
UPC-E
S
E
C
E
E
UPC-A
M
A
A
A
E
EAN-13 / ISBN
M
A
A
F
E
EAN-8 / JAN-8
P
B
B
F
E
Industrial 2 of 5 / IATA
C
H
H
H
S
Interleaved 2 of 5
D
I
Z
I
S
Plessey / MSI
V
V
D
P
M
Code 11
J
J
J
J
J
Codabar / NW 7
F
N
X
N
F
Matrix 2 of 5
E
G
G
G
S
Code 39 / Code 32
A
C
Y
M
A
Code 93
I
L
L
L
G
Code 128
H
K
K
K
C
Code 4
U
U
U
U
U
Korea Code 3 of 5
R
R
R
R
R
RSS
R
R
R
R
R
UCC128 / EAN128
W
W
W
W
W
MARS-1030 User Manual
62
3.2.1.4 Barcode Setup
A.
First select the barcode type then select a barcode setting.
B.
Press the “Default” button to reset all settings of this barcode to
default values.
C.
Press the “Apply” button to apply these changes.
Please see “Symbologies List” on page 64 for more detailed information on each barcode.
Figure 3.5:
Barcode Setup
63
Chapter 3
3.2.2
Symbologies List
A Type -- Numeric-only Barcodes
3.2.2.1 UPC-E
Figure 3.6:
UPC-E
Table 3.5: UPC-E Explanation
Item
Explanation
Format
Ignore 1st digit
Transmit 1st digit
Send Check Digit
MARS-1030 User Manual
Do not transmit 1st digit of the barcode.
Transmit 1st digit of the barcode.
This controls whether or not to send the
check digit of the barcode.
64
3.2.2.2 UPC-A
If you set UPC-A, then those settings will be automatically applied to
EAN-13 too.
Figure 3.7:
UPC-A
Table 3.6: UPC-A Explanation
Item
Explanation
Ignore 1st & 2nd digits
Transmit 1st digit
Format
Transmit 2nd digit
Transmit 1st & 2nd digits
Send Check Digit
65
Do not transmit the 1st digit of the
barcode.
Transmit the 1st digit of the barcode.
Transmit the 2nd digit of the barcode.
Transmit the 1st and 2nd digits of the
barcode.
This controls whether or not to send
the check digit of the barcode.
Chapter 3
3.2.2.3 EAN-13 / ISBN
Figure 3.8:
EAN-13/ISBN
Table 3.7: EAN-13 / ISBN Explanation
Item
Explanation
Ignore 1st & 2nd digits
Transmit 1st digit
Format
Transmit 2nd digit
Transmit 1st & 2nd digits
Send Check Digit
Enable ISBN Code
MARS-1030 User Manual
66
Do not transmit the 1st digit of the
barcode.
Transmit the 1st digit of the barcode.
Transmit the 2nd digit of the barcode.
Transmit the 1st and 2nd digits of
the barcode.
This controls whether or not to send
the check digit of the barcode.
This controls whether or not to use
the ISBN Code.
3.2.2.4 EAN-8/JAN-8
Figure 3.9:
EAN-8/JAN-8
Table 3.8: EAN-8/JAN-8 Explanation
Item
Explanation
Format
Ignore 1st digit
Transmit 1st digit
Send Check Digit
Convert to EAN-13
Add five 0
Do not transmit 1st digit by barcode.
Transmit 1st digit by barcode.
Whether send check digit by barcode.
When this option is selected the scanner
will convert UPC-E to UPC-A by
transmitting five zeroes …
Ahead of
Add five zeroes at prefix of the barcode.
code
After 3 digits Add five zeroes from 4th digits.
67
Chapter 3
3.2.2.5 UPC-EAN Add on 2/5
•
UPC-E, UPC-A, EAN-13/ISBN and EAN-8/JAN-8 may all include
an additional barcode to the right of the main barcode.
•
This barcode will show primary and additional codes together.
•
The UPC-EAN Add-ON 2/5 code cannot be used alone. It must
operate with UPC-E, UPC-A, EAN-13/ISBN or EAN-8/JAN-8.
Figure 3.10: UPC-EAN Add on 2/5
UPC-EAN Add-On 2/5 Explanation
Item
2/5
Explanation
Only read the code with Addon Only reads the codes that have
addenda.
MARS-1030 User Manual
68
3.2.2.6 Industrial 2 of 5 / IATA
Figure 3.11: Industrial 2 of 5 / IATA
Table 3.9: Industrial 2 of 5 / IATA Explanation
Item
Explanation
Send Check Digit
This controls whether or not to
send the check digits of the barcode.
Enable IATA Code
This controls whether or not to use
this IATA Code.
Checksum
This controls whether to verify the
checksum of the barcode.
Verify
Min-Max
(Default: 2 / 48)
Length
Min Length can be from 2 to 48
Max Length can be from 2 to 48
Length 1 can be from 2 to 48
Length 2 can be from 2 to 48
Fixed
Length 3 can be from 2 to 48
69
Chapter 3
3.2.2.7 Interleaved 2 of 5
Figure 3.12: Interleaved 2 of 5
Table 3.10: Interleaved 2 of 5 Explanation
Item
Explanation
This controls whether or not to
send the check digit of the barcode.
This controls whether or not to
verify the checksum of the barcode.
Min Length can be from 4 to 48
Send Check Digit
Checksum
Verify
Length
MARS-1030 User Manual
Min / Max
(Default: 4 / 48) Max Length can be from 4 to 48
Length 1 can be from 4 to 48
Length 2 can be from 4 to 48
Fixed
Length 3 can be from 4 to 48
70
3.2.2.8 Plessey / MSI
Figure 3.13: Plessey / MSI
Table 3.11: Plessey / MSI Explanation
Item
Explanation
Format
Mode 10
Mode 10-10
Mode 11-10
Send Check Digit
1 Digit
2 Digits
Checksum mode for this barcode.
This controls whether or not to send the
check digit of the barcode.
1 digit checksum.
2 digit checksum.
71
Chapter 3
3.2.2.9 Code 11
Figure 3.14: Code 11
Table 3.12: Code 11 Explanation
Item
Explanation
Send Check Digit
1 Digit
2 Digits
MARS-1030 User Manual
This controls whether or not to send the check
digit of the barcode.
1 digit checksum.
2 digits checksum.
72
3.2.2.10 Codabar / NW7
Figure 3.15: Codabar / NW7
Table 3.13: Codabar / NW7 Explanation
Item
Explanation
Start / Stop Digit
ABCD
abcd
TN*E
tn*e
Checksum
Verify
This controls whether or not to send start
and stop digits.
Start / Stop transmit type
This controls whether or not to verify the
checksum of the barcode.
73
Chapter 3
3.2.2.11 Matrix 2 of 5
Figure 3.16: Matrix 2 of 5
Table 3.14: Matrix 2 of 5 Explanation
Item
Send Check Digit
Checksum
Verify
Length
MARS-1030 User Manual
Explanation
This controls whether or not to
send the check digits of the
barcode.
This controls whether or not to
verify the checksum of the barcode.
Min Length can be from 4 to 48
Min-Max
Max Length can be from 4 to
(Default: 4 / 48) 48
Length 1 can be from 4 to 48
Length 2 can be from 4 to 48
Fixed
Length 3 can be from 4 to 48
74
B Type -- Alphanumeric Barcodes
3.2.2.12 Code39 / Code32
Figure 3.17: Code39 / Code32
Table 3.15: Code39 / Code32 Explanation
Item
Explanation
Format
Code39 Standard
Code39 Full ASCII
Code32
Start / Stop Digit
Checksum
Verify
Transmit
Enable Code 39 Standard characters
Enable Code 39 Full ASCII character
Enable Code 32
This controls whether or not to transmit
start and stop digits.
This controls whether to verify the
checksum of the barcode.
This controls whether or not to transmit
the checksum of the barcode.
75
Chapter 3
3.2.2.13 Code93
Code93 has no configuration.
Figure 3.18: Code93
MARS-1030 User Manual
76
3.2.2.14 Code128 / UCC EAN128
Figure 3.19: Code 128 / UCC EAN128
Code128 / UCC EAN128 Explanation
Item
Explanation
Enable UCC128/EAN128.
Enable UCC128/EAN128
77
Chapter 3
C Type -- Other Barcodes
3.2.2.15 China Post
Figure 3.20: China Post
Table 3.16: China Post Explanation
Item
Explanation
Checksum
Verify
Send Check Digit
Min-Max
(Default: 4 / 48)
Length
Fixed
MARS-1030 User Manual
This controls whether or not to verify
the checksum of the barcode.
This controls whether or not to send
the check digit of the barcode.
Min Length can be from 4 to 48
Max Length can be from 4 to 48
Length 1 can be from 4 to 48
Length 2 can be from 4 to 48
Length 3 can be from 4 to 48
78
3.2.2.16 Code4
Code4 has no configuration.
Figure 3.21: Code4
79
Chapter 3
3.2.2.17 GTIN
GTIN has no configuration.
Figure 3.22: GTIN
MARS-1030 User Manual
80
3.2.2.18 Korea Code 3 of 5
Korea Code 3 of 5 has no configuration.
Figure 3.23: Korea Code 3 of 5
81
Chapter 3
3.2.2.19 RSS
Figure 3.24: RSS
RSS Explanation
Item
Explanation
Convert to UCC128
Checksum
MARS-1030 User Manual
Verify
The scanner will convert RSS to
UCC128.
This controls whether or not to verify
the checksum of the barcode.
82
3.2.3
Bluetooth Device Properties
Table 3.17: Bluetooth Device Properties
Icon
Item and function
• “Scan Device” Tab (See “Bluetooth Manager Windows”
on page 84
* Tap the Scan Device button to initiate a scan for Bluetooth
hardware. The Bluetooth manager lists the Bluetooth devices
that it finds, see “Bluetooth Manager Windows” on page 84. If
Bluetooth hardware is not found, the Bluetooth Hardware
Error window appears. See “Bluetooth Error Windows” on
page 84. See “Bluetooth Icon” on page 86 for a description of
Bluetooth icons.
* Double tap the device add it to the device list. The Bluetooth
Manager Authentication window appears. Tap No to connect
to the device without authentication, or tap Yes to authenticate
the device before connecting. (“Bluetooth Manager Windows”
on page 84)
* If the Yes was selected in the Bluetooth Manager Authentication window, the enter PIN windows appears. Enter a PIN
between 1 and 16 characters in the Enter PIN: text box, and
tap OK. The mobile computer sends the PIN request to the
device for bonding. See “Bluetooth Enter PIN Windows” on
page 85.
* When prompted, the same PIN must be entered on the other
device. When the PIN is entered correctly on the other device,
the bonded icon,
appears in the device list. See “Blue-
tooth Manager Windows” on page 85.
83
Chapter 3
Figure 3.25: Bluetooth Manager
Windows
Figure 3.26: Bluetooth Manager
Windows
Figure 3.27: Bluetooth Error
Windows
Figure 3.28: Bluetooth Manager
Windows
MARS-1030 User Manual
84
Figure 3.29: Bluetooth Enter PIN Figure 3.30: Bluetooth Manager
Windows
Windows
Note: If the device to which the mobile computer is bonding
does not appear in the list, ensure it is turned on, in discovery
mode, and within range (30 feet / 10 meters) of the mobile
computer.
85
Chapter 3
Table 3.18: Bluetooth Icon
Icon
Description
Unknown device icon
Locked icon
Not locked icon
Device is not defined
Device is locked and cannot be
bonded to.
Device is not locked and can be
bonded to.
Bluetooth device icon
Bluetooth device
Bonded device icon
Bonded Bluetooth device
Mobile device icon
Device is a mobile device
Phone icon
Device is a phone.
Printer icon
Device is a printer
Network icon
Device is a network.
Linked icon
Device is linked.
MARS-1030 User Manual
86
3.2.4
Certificates
Certificates are used by some applications for establishing trust and for
secure communications.
Certificates are signed and issued by certificate authorities and are valid
for a prescribed period of time. Windows CE manages multiple certificate
stores.
Table 3.19: Certificates
Icon
Item and function
• “Store” Tab (Figure 3-31)
* In the Stores tab, select the certificate store you wish to
view or modify from the drop-down list (Figure 3-32).
* The “Trusted Authorities “store lists the top-level certificates for authorities you trust. (Figure 3-33, Figure
3-34)
* The “My Certificates “store contains your personal certificates, which you use to identify yourself.
* Intermediate certificate authorities that help establish a
chain of trust are stored in the “Other Authorities”
store.
• “Store” Tab
* To add a certificate or associated private key to the
selected store, select “Import” (Figure 3-35).
* To view more details of the selected certificate, such as
the expanded name or expiration date, choose “View”.
* To delete the selected certificate from the store, choose
“Remove”.
87
Chapter 3
Figure 3.31: Certificates
Figure 3.32: Certificates
Figure 3.33: Certificates
Figure 3.34: Certificates
Figure 3.35: Certificates
MARS-1030 User Manual
88
3.2.5
Control Center
The Control Center includes four applications, described below.
Figure 3.36: Control Center
3.2.5.1 Information
Table 3.20: Information
Icon
Item and function
• “Information” Tab:
* Provide Software version, MAC address, Bluetooth ID,
Serial No. and Configuration No.
89
Chapter 3
3.2.5.2 Brightness
Table 3.21: Brightness
Icon
Item and function
LCD Brightness
Change the LCD brightness by tapping right-arrow or leftarrow. You can also change the LCD brightness by pressing
the right-direction key or left-direction key on the keypad.
The brightness setting has seven steps: Every step has a corresponding icon.
1.
2.
6.
7.
3.
Enable Keypad Brightness
4.
5.
Open keypad brightness or
not.
Backlight Timeout
Save battery life by automatically turning off the backlight
when not used.
The table must be disabled when its
Battery
item is not marked.
Power, turn off
The table has 15 seconds, 30 seconds,
backlight after
1 minute, 2 minutes and 5 minutes.
AC Power, turn off The table must be disabled when its
item is not marked.
backlight after
The table has 15 seconds, 30 seconds,
1 minute, 2 minutes and 5 minutes.
Dim backlight Save battery life functionally of idleness.
after 20 seconds of
idleness.
MARS-1030 User Manual
90
Figure 3.37: Brightness
3.2.5.3 Backup Restore
Table 3.22: Backup Restore
Icon
Item and function
1. You can backup/restore the system to/from a flash disk
or inserted memory card. (A. Disk on Chip, B. CF
Card, C. SD Card) (Figure 3-38)
2. This application must check the backup file on the
DOC first. If you select other storage, this item will be
checked again.
3. If the file exists, the date appears next to “Last backup
date:”. If the file doesn’t exist, the “Restore Now” button is disabled.
4. When you press the Backup/Restore button, a warning
dialog box will appear. (Figure 3-39)
5. When the system backup/restore is finished, a message dialog will appear. (A. Backup: Figure 3-40, B.
Restore: Figure 3-41)
91
Chapter 3
Figure 3.38: Backup Restore
Figure 3.39: Backup & Restore
Start
Figure 3.40: Backup OK
MARS-1030 User Manual
Figure 3.41: Restore OK
92
3.2.5.4 Fn-key Settings
Table 3.23: Fn-Key
Icon
Item and function
Fn-Key Setting (Figure 3-42)
Fn Key
The application program default settings
F1
Internet Explorer
F2
Microsoft WordPad
F3
Inbox
F4
My Computer
To assign your favorite application program to F1, F2, F3
and F4 hot keys:
* Choose F1, F2, F3 or F4 from the pull-down list.
(Figure 3-43)
* Tap “Browse…” inside the “Assign program” applet.
* Select one application program you want from the program list, then choose “OK”. (Figure 3-43)
* Tap “Default” to return to the default settings.
(Figure 3-42)
Figure 3.42: Fn-Key Settings
Figure 3.43: Fn-Key Settings
93
Chapter 3
3.2.6
Date/Time
Table 3.24: Date/Time
Icon
Item and function
• “Date/Time” Tab: (Figure 2-14)
* See “Setting Time and Date” on page 42
3.2.7
Dialing Properties
Table 3.25: Dialing properties
Icon
Icon and function
• “Dialing Properties” Tab (Figure 3-44)
* In the When dialing from list, select the “Location” for
which you want to change settings. (Figure 3-45)
* To create a new location, select “New”. Enter the name
of the location, and then select “OK”. (Figure 3-46)
* Enter or edit the area code and local country code as
needed.
* In Dial using, select “Tone dialing” or “Pulse dialing”.
Most phones use tone dialing.
* To automatically disable call waiting, select “Disable
call waiting by dialing”, select the appropriate number
sequence in the list, or enter a new sequence.
• Editing dialing patterns (Figure 3-47)
* Using the codes listed, edit the dialing patterns as
needed.
Notes:
- If you need to use characters other than the ones
listed here, use manual dialing.
- Hyphens and spaces in dialing strings are ignored.
- Some modems may not respond to the following
characters, even though your device lets you add
them to the dial string.
MARS-1030 User Manual
94
Figure 3.44: Dialing Properties
Figure 3.45: Dialing Properties
Figure 3.46: Dialing Properties
Figure 3.47: Dialing Properties
95
Chapter 3
3.2.8
Display Properties
Table 3.26: Display properties
Icon
Icon and function
• “Background” Tab: (Figure 3-48)
* From the “Image” list, select an image you want as the
background of the desktop. (Figure 3-49)
* To locate an image in another folder, select “Browse”.
(Figure 3-50)
* To have the image cover the entire background, select
“Tile image on background”
• “Appearance” Tab (Figure 3-51)
* Change the color scheme: (Figure 3-52)
- From the” Scheme” list, select a scheme.
- View your choice in the preview box. If you like the
scheme, select “Apply”.
* Create a custom color scheme:
- From the “Item” list, select a display item.
- From the “Basic colors” list, select a color, and
select “OK”.
- View your color selection(s) in the Preview box.
- To save the scheme, select “Save”.
- In the “Save this color scheme as” box, enter a
name for the scheme, and select “OK”.
- Select “Apply”.
Figure 3.48: Display properties
MARS-1030 User Manual
Figure 3.49: Display properties
96
Figure 3.50: Display properties
Figure 3.51: Display properties
Figure 3.52: Display properties
97
Chapter 3
3.2.9
Input Panel
Table 3.27: Display properties
Icon
Icon and function
• “Input panel” Tab: (Figure 3-53)
* Select the input method you want to change.
* To change the Soft Keyboard Options, tap “Option”
(Figure 3-54).
• “Options” Tab:
* Change the soft keyboard options as desired, selecting
from:
- Large or small keys
- Using gestures for space, black-space shift, and
enter.
* To exit the soft keyboard Options, press “OK” on the
control bar, or press the <Enter> key on the keypad.
* To exit the Input Panel, press “OK” on the control bar,
or press the <Enter> key on the keypad.
Figure 3.53: Input Panel
Properties
MARS-1030 User Manual
Figure 3.54: Input Panel
Properties
98
3.2.10 Internet Options
Table 3.28: Internet Options
Icon
Icon and function
• “General” Tab: (Figure 3-55)
* Type in the URL of desired start page and the desired
search engine. You can also change the Cache Size,
clear the Cache and clear the History.
• “Connection” Tab: (Figure 3-56)
* Modify the network access settings as desired.
• “Security” Tab (Figure 3-57)
* Modify the security settings as desired. You can enable
any of the following by tapping the checkbox:
- Allow cookies
- Allow TLS 1.0 security
- Allow SSL 2.0 security
- Allow SSL 3.0 security
- Warm when switching between secure and insecure
areas.
• “Advanced” Tab (Figure 3-58)
* Modify the security settings as desired. You can enable
any of the following by tapping the checkbox:
- Display Image in pages
- Play sounds in pages
- Enable scripting
- Display a notification about every script error
- Underline links> Never
> Always
> Hover
99
Chapter 3
Figure 3.55: Internet Settings
Figure 3.56: Internet Settings
Figure 3.57: Internet Settings
Figure 3.58: Internet Settings
MARS-1030 User Manual
100
3.2.11 Keyboard
Table 3.29: Keyboard
Icon
Icon and function
• “Repeat” Tab: (Figure 3-59)
* To change the amount of time between depressions
before repetition starts, adjust the Repeat delay slider
* To change the repeat rate, adjust the Repeat rate
slider.
* Test your new setting.
* Tap “OK” to exit the “Keyboard” tab.
Figure 3.59: Keyboard Properties
101
Chapter 3
3.2.12 Network and Dial-up Connections
Table 3.30: Network and Dial-up Connections
Icon
Icon and function
• “Connection” Tab:
* To create a “Dial-up Connection”:
- Double-tap “Make New connection”.
- In the “Make New Connection” dialog box, enter a
name for the connection.
- Select “Dial-Up Connection”.
- Select the “Next” button.
- Select the modem you want use.
- Select “Configure”
- Under “Connection Reference”, use the default settings provided. If you can’t connect using these settings, see your ISP or network administrator for
specific information. If you want to always enter a
phone number before connecting, select “Manual
Dial”. Select “OK”.
- Select “TCP/IP Settings”. In the “General” tab,
ensure “Use Server-assigned IP address” is
selected. In the “Name Servers” tab, ensure “Use
Server-assigned addresses” is selected, and select
“OK”. If you are unable to connect with these default
settings, see your ISP or network administrator for
specific TCP/IP information.
- Select the “Next” button and type the telephone number.
- Select the “Finish” button.
The connection you just created appears as an icon in the
“Network and Dial-up Connections” folder.
- Set up a Point-to-Point Protocol (PPP) account
with an ISP and obtain the following information:
> Access telephone number
> User name
> Password
MARS-1030 User Manual
102
Icon
Icon and function
Once you have established an account, create a new
connection on your device. When creating this connection, you should be able to use all of the default TCP/IP
settings provided in the Make New Connection Wizard. If
you can’t connect using the default settings, contact your
ISP or access your ISP’s Web site for specific TCP/IP
information such as primary and secondary DNS
addresses.
* To modify connection settings:
- Select Start > Settings > Network and Dialup
Connections
- Select the icon for connection settings you want to
modify.
- Select File > Properties, or double- tap the appropriate icon.
- Select desired options. There may be additional settings that depend on the connection. To modify,
select the icon and then select Advanced Settings… from the menu.
Figure 3.60: Network and Dial-up Figure 3.61: Network and Dial-up
Connections
Connections
103
Chapter 3
Figure 3.62: Network and Dial-up Figure 3.63: Network and Dial-up
Connections
Connections
Figure 3.64: Network and Dial-up Figure 3.65: Network and Dial-up
Connections
Connections
MARS-1030 User Manual
104
Figure 3.66: Network and Dial-up Figure 3.67: Network and Dial-up
Connections
Connections
Figure 3.68: Network and Dial-up Figure 3.69: Network and Dial-up
Connections
Connections
105
Chapter 3
Figure 3.70: Network and
Figure 3.71: Network and Dial-up
Dial-up Connections
Connections
MARS-1030 User Manual
106
3.2.13 Owner
Table 3.31: Owner
Icon
Icon and function
• “Identification” Tab: (Figure 3-74)
* Fill in or edit the data as desired.
* To have this information displayed when you start your
device, select “Display Owner Identification” at
Power On.
* To set up identification for remote networks, see Setting
up identification for remote networks.
• “Network ID” Tab: (Figure 3-75)
* Enter the user name, password, and domain name you
use to log on to remote network.
Figure 3.72: Owner Properties
Figure 3.73: Owner Properties
107
Chapter 3
3.2.14 Password
Table 3.32: Password
Icon
Icon and function
• “Password Setting” Tab: (Figure 3-76)
* Enter the password
* In the “Confirm password“ box, enter the password
again.
* To require the password on startup, select “Enable
password protection at power-on“ and/or select
“Enable password protection for screen saver”.
* To exit the Password control panel, press “OK” from
the control bar, or press the <Enter> key on the keypad.
Figure 3.74: Password Properties
MARS-1030 User Manual
108
3.2.15 PC Connection
Table 3.33: PC Connection
Icon
Icon and function
• “PC Connection” Tab: (Figure 3-77)
* Select the first checkbox to enable direct connections to
the desktop computer. (Figure 3-77)
* Tap the “Change Connection…” button to modify the
connection method to USB or Serial. (Figure 3-78)
* To exit the “Change Connection” dialog, press “OK”
on the control bar, or press the <Enter> key on the keypad.
* To exit the “PC Connection” properties control panel,
press “OK” on the control bar, or press the <Enter> key
on the keypad.
Figure 3.75: PC Connection
Figure 3.76: PC Connection
109
Chapter 3
3.2.16 Power
Table 3.34: Power
Icon
Icon and function
• “Battery” Tab: (Figure 3-79)
* Provide change level indicators for the Main battery
and the Backup battery.
* Show the remaining power capacity of the main battery.
* If a “Main Batteries Very Low” warning message shows,
the MARS-1030 will shut down in 30 minutes. (Figure
3-83)
* The PDT will shutdown when the main battery’s capacity is around 0%.
* To exit the battery control panel, press “OK” from the
command bar, or press <Enter> key on keypad.
• “Schemes” Tab: (Figure 3-80)
* The Scheme tab allows you to determine when to
switch to suspend mode when using either Battery
Power or AC Power.
* Select Battery Power or AC Power as the power
scheme from the pull-down list. (Figure 3-80)
* Select the time to suspend mode from the pull-down
list. (Figure 3-81)
• “Device Status” Tab: (Figure 3-82)
Show the power level of device. The power level ranges
from “High(D0)” which means the device is at the highest
power level to “Off(D4)” which means the device is at the
lowest power level.
Note:
This icon on the taskbar shows that the AC adapter provides power to the PDT.
The icon on the taskbar shows that Main Batteries provide power to the PDT.
The icon on the taskbar shows that the AC adapter provides power to the PDT while charging the main batteries.
MARS-1030 User Manual
110
Figure 3.77: Power
Figure 3.78: Power
Figure 3.79: Power
Figure 3.80: Power
Figure 3.81: Power
111
Chapter 3
3.2.17 Regional Settings
Table 3.35: Regional Settings
Icon
Icon and function
• “Region” Tab: (Figure 3-84)
* Select the desired location/language.
* Review the Appearance samples in the bottom half of
the screen.
* Select the tab at the top for any settings you wish to
change. Settings to modify include Number, Currency,
Time, and Date.
Figure 3.82: Regional Settings
MARS-1030 User Manual
112
3.2.18 Remove Programs
Table 3.36: Remove Programs
Icon
Icon and function
• “Remove Programs” Tab:
* Only user installed programs can be removed.
- Select the program you wish to remove from the list
and press the “remove” button.
113
Chapter 3
3.2.19 Storage Manager
Table 3.37: Storage Manager
Icon
Icon and function
• “Storage Manager” Tab: (Figure 3-83)
* To change storage properties control panel default settings:
- Insert a Compact Flash (CF) or Secure digital (SD)
storage card into the unit.
- Select Start > Settings > Control Panel > Storage
Properties
- From the “Storage Info” pull-down list, select the
desired storage device.
- You can also format, dismount, and create partitions on storage devices using this control panel.
- To save and exit the Storage Properties control
panel, press “OK” from the control bar, or press the
<Enter> key on the keypad.
- Caution: Dismounting or formatting the DiskOnChip
will erase all files and programs stored in flash memory.
Figure 3.83: Storage Manager
MARS-1030 User Manual
114
3.2.20 Stylus
Table 3.38: Stylus
Icon
Icon and function
• “Double-Tap” Tab: (Figure 3-86, Figure 3-87)
* Double-tap the checkerboard grip at a comfortable
speed.
* Double-tap clapboard to test your settings.
* The function is OK if the figures are changed from Figure 3-86 to Figure 3-87.
* Tap “OK” to exit the Stylus Properties dialog box.
• “Calibration”: (Figure 3-88, Figure 3-89)
* In the Welcome Wizard, you tapped a target with the
stylus to set the amount of pressure needed for the
screen to respond to your stylus taps.
* Please also see 2.4.3 Calibration of the touch screen
Figure 3.84: Stylus Properties
Figure 3.85: Stylus Properties
115
Chapter 3
Figure 3.86: Stylus Properties
MARS-1030 User Manual
Figure 3.87: Stylus Properties
116
3.2.21 System
Table 3.39: System
Icon
Icon and function
• “General” Tab: (Figure 3-90)
* To show:
- Firmware information
- Information about processor type, memory size, and
expansion cards
• “Memory”: (Figure 3-91)
* Move the slider to adjust memory allocation. Default
storage memory is normally is normally set to about 8
MB with the reminder assigned to program memory.
* Press the “OK” key on the Keypad.
Note: The difference between the memory occupied by
the OS and the RAM size is shown in Information properties, along with the total size of storage memory and program memory
• “Device Name” Tab: (Figure 3-92)
* Your device uses this information to identify itself to
other computers.
* The input panel will open to for data entry.
* To close the Device Name, press the “OK” button, or
press the <Enter> key on the keypad.
• “Copyrights” Tab: (Figure3-93)
* Refer to this tab for specific copyright data. As a user,
you are responsible for reading this statement.
117
Chapter 3
Figure 3.88: System Properties
Figure 3.89: System Properties
Figure 3.90: System Properties
Figure 3.91: System Properties
MARS-1030 User Manual
118
3.2.22 Volume & Sounds Properties
Table 3.40: Volume & Sound
Icon
Icon and function
• “Volume” Tab: (Figure 3-94)
* The factory default volume level is the four. You can
adjust the volume to your environment and comfort.
- Set the volume by adjusting the slider from Soft to
Loud, or press the right or left edge of the navigation
keys.
• “Sounds” Tab: (Figure3-95)
* Enable the desired sounds for key clicks, screen taps,
notifications, and applications.
Figure 3.92: Volume & Sound
Figure 3.93: Volume & Sound
119
Chapter 3
3.3 Taskbar and Start Menu
Table 3.41: Taskbar and Start Menu
Icon
Taskbar and
Start Menu
Icon and function
• “General” Tab:
* In this tab, You can change the position of the Taskbar
and Start Menu
- Is always on top or not
- Auto hide or not
- Show Clock or not
• “Advanced” Tab:
* Tap the “Clear” button to remove the contents of the
Documents Menu.
* Enable “Expand Control Panel” to list all icons of the
Control Panel from top to bottom.
MARS-1030 User Manual
120
CHAPTER
4
Communication
This chapter describes how to use the
communication features of the PDT.
Chapter 4
Communication
4.1 Installing & Setting Up Microsoft ActiveSync
4.1.1
Installing Microsoft ActiveSync on the Host PC
Microsoft ActiveSync is a file transfer tool to synchronize the files on a
PC with the files on your PDT.
To install Microsoft ActiveSync, complete the following steps on the PC:
1.
2.
3.
4.
5.
4.1.2
1.
•
•
2.
3.
Go to the Microsoft Windows CE.NET website and download the
latest current version of ActiveSync:
http://www.microsoft.com/mobile/pockeypc/downloads/.
Install the latest version of Microsoft ActiveSync on the host PC.
Open ActiveSync.
Select File > Communication Settings from AtiveSync’s menu
bar.
Go to “Using ActiveSync” on page 4-1 to continue using ActiveSync.
Connecting PDT to Host PC
You can use either the USB/Serial (RS232) port of Single Dock or a
USB/Serial (RS232) cable to connect the PDT to the Host PC.
To use the dock, you must first insert the PDT into the slot, making
sure that the unit is firmly seated the dock.
To use the cable, connect the USB/Serial cable to the PDT.
Connect the USB/Serial dock or cable to the Host PC’s serial port
or USB port.
Connect the dock or PDT to the power adapter and power source.
MARS-1030 User Manual
122
4.2 Using ActiveSync
Use ActiveSync to transfer and synchronize files between the PDT and
the Host PC.
4.2.1
Setting up a Partnership
During the Microsoft ActiveSync installation, you were prompted to
create a partnership with your mobile device. When you set up a
partnership, you select synchronization and file conversation settings,
which are contained in a file on your desktop computer. This file enables
your desktop computer to recognize your device. Only devices that have a
partnership with a desktop computer can synchronize information
between the two computers.
For more information on partnerships, please refer to your Microsoft
ActiveSync documentation or help file.
Transferring Files:
To transfer files, complete the following steps on the host PC:
•
•
•
•
Select Start> Programs >Communication > (Serial, or USB)
Activesync.
Double-click on the selected ActiveSync icon
After you have established a connection with PDT, tap the
“Explore” button at the top of the ActiveSync window (or select
Explore from the File menu).
Navigate to the target directory on your PDT and copy the desired
file by using the Copy/paste method or dragging and dropping the
desired file(s) into the folder.
Figure 4.1: Communication
123
Chapter 4
4.2.2
ActiveSync File Synchronization
ActiveSync files synchronization requires an ActiveSync partnership
between the PDT and the Host PC. Refer to “Setting up a Partnership”,
above:
•
•
•
Select the files in the synchronization configuration for the PDT
partnership.
Select Tools > Options from the ActiveSync command bar to configure the synchronization options.
Place the file to be synchronized in the Synchronization folder
created you’re My Documents directory. Defaults to the desktop.
During the ActiveSync connection, all files in the Synchronization
folder will be synchronized to the \My Documents directory on the
PDT.
Figure 4.2: Connected
4.3 Networking
Please see the 3.2.14 Owner, Table 3-33 Owner on page 3-45 for setting
up the network ID. And see the 2.5.6 Setting Up Wireless LAN RF to
setup the 802.11b Wireless LAN for RF connecting.
MARS-1030 User Manual
124
CHAPTER
5
Software Applications
This chapter describes software implementation procedures.
Chapter 5
Software Applications
5.1 Introduction
The PDT includes Calculator and Inbox applications.
You can start any program by tapping the Start Menu.
5.2 Software Applications
5.2.1
Calculator
This can process basic numeric calculations with “+”, “-”, “*” and “/”.
*
*
5.2.2
Procedure:
– Tap a number
– Tap an operator “+”, “-“, “*” or “/”
– Then, tap another number
– Tap another operator or number if needed
– Tap “=” to get the result
Button Function:
– “MC” – Clear memory
– “MS” – Store the displayed number in the memory
– “MR” – Read the last number that was stored
– “M+” – Add the stored number to the displayed number
– “Backspace” – Same as the “backspace” key
– “CE” – Clear current number. Same as the “Delete” key
– “C” – Clear the current calculation. Same as the “ESC” key
Inbox
Use Inbox to send and receive e-mail messages in the following ways:
*
*
Synchronize e-mail messages with Microsoft Exchange or Outlook
on the Host Computer.
Send and receive e-mail messages by connecting directly to an email server through an Internet server provider (ISP) or a network.
To setup “Inbox”:
*
Select Start> Programs> Inbox.
MARS-1030 User Manual
126
*
*
*
*
*
Select Service> Options from the command bar. Drag the dialog to
show the right edge so that you can configure e-mail.
Select “Add…” (Note 1)
In the “Service Type” list, select POP3 Mail or IMAP4 Mail.
(POP3 is the most common mail protocol for ISPs). Enter a unique
name for the e-mail service in the “Service name” field. This name
cannot be changed later.
Select “OK”.
The Mail Service Setup wizard appears after you add a service. If
you are adjusting the settings of an existing service, select Service>
Options, select the service you want to modify, and then selectProperties. In the Service Definition dialog box, complete the following entries as needed:
– Connection: Select the name of the connection you created to
connect to the mail server. If you are receiving e-mail through a
network (Ethernet) connection, select Network Connection. If
you want Inbox to use your current connection, select (none). If
you have not created a connection, select Create new connection. Double-tap the “Make new Connection” icon, and follow
the instructions in the wizard. When finished, select Inbox on
the Taskbar and continue setting up the Inbox.
– POP3 Host (POP3 only): Enter the name of the mail server you
use to receive and send messages.
– Server (IMPA4 only): Enter the name of the mail server you
use to receive and send messages.
– User ID: Enter the user name or mailbox ID assigned to you.
– Password: Enter the password you use to access this mail
account. If you do not want to be prompted to enter the password each time you connect, select “Save password”.
– Domain (Windows NT): Enter your Windows NT domain
name. This name is required only when connecting to networks,
such as a corporate network, that use Windows NT domain
security. This is not required for most ISP accounts. If you have
trouble connecting, try clearing this box.
– SMTP Host: If your mail service uses a separate server for
SMTP, enter the name in the box. If you’re setting up a POP3
Mail service with an ISP, the ISP must use an SMTP mail gateway.
– Return Address: By default, the return address is set to
username@POP3host or username@Servername. This
127
Chapter 5
*
*
depends on the service you are using. If this is not your e-mail
address, enter the correct address in the box.
Set general preferences:
If you are adjusting the setting of an existing service, select Service> Options, select the service you are using, select Properties,
and then select Next. In the General Preferences dialog box,
choose any of the following settings, all of which are optional:
– Disconnect service after actions are performed: Select to
automatically disconnect from the server upon completion of all
pending actions. This option minimizes connection time and
cost.
– Check for new messages every: Select how often (in minutes)
you want the device to check for new mail. If this option is
turned off, you must check for new mail manually by selecting
Services> Send/Receive Mail.
– Display a message box when new mail arrives (POP3 only):
Select this to be informed that new mail has arrived.
– Display a message box when new mail arrives (IMAP4 only):
Select this to be informed that new mail has arrived.
– Send using MIME format (POP3 only): Select this to send
messages with extended characters.
– Only display messages from last 3 days: Select how many
messages per day you want downloaded.
Set inbox preferences
If you are adjusting the settings of an existing service, select Services> Options, select the service you are using, select Properties,
and then select New twice. In the Inbox Preferences dialog box,
choose any of the following options:
– Get message headers only: Select to save storage space and
time by downloading only headers. You can download a full
copy of the message later by selecting the message and then
Services> Get Full Copy.
– Include <number> lines: Select to set the message length
(approximate number of lines) that you want to download.
– Get Full Copy of messages: Select to receive a full copy of all
messages. In addition to the message body, any options you
select in When getting full copy will be downloaded. Selecting
this option increases the amount of time needed to download
messages.
MARS-1030 User Manual
128
*
*
*
– Only synchronize folder hierarchy under Inbox (IMAP4
only): Select to reduce download time by preventing the complete downloaded of the folder list every time you connect.
– Get meeting requests (POP3 only): Select to download and
store copies of meeting requests when getting full copies of
messages. This setting applies whether you have chosen to
download full copies of messages by default, or you selectively
download full copies of messages by opening the message and
selecting Services> Get Full Copy Limitations apply.
– Get file attachments (POP3 only): Select to download and
save message attachments when getting full copies of messages.
This option may use significant RAM and network bandwidth.
This setting applies whether you download full copies of messages by default, or selectively download full copies of messages by selecting Services> Get Full Copy.
– Get file attachments and meeting requests (IMAP4 only):
Select to download and store meeting requests and message
attachments when getting full copies of messages. This setting
applies whether you download full copies of messages by
default, or selectively download full copies of messages by
selecting Services> Get Full Copy. Limitations apply.
– Only if small than (IMAP4 only): Select this to restrict the size
of the attachments you download. Set this to 10 KB if you want
to receive meeting requests only.
Include the original message in a reply:
– Select Services> Options> Compose tab.
– Under Reply, select Include Body. This setting will place a
copy of the original message beneath your response text.
– To indent the original message, select Indent.
– To add leading characters (such as>) to the original message
lines, select Add leading character, and enter the character
you want.
Save copies of sent messages:
By default, sent messages are not saved on your device. To enable
messages to be saved automatically:
– Select Services> Options> Compose tab.
– Select Keep copy of sent mail in Sent folder.
Set the action to follow deleting, moving, or responding to a
message:
129
Chapter 5
– Select the Services> Options> Read tab.
– Select the desired options.
Delete a message:
Select the message and then select File> Delete. Messages are
moved to the Deleted (local) folder and deleted according to the
option you have selected in the Services> Options> Delete tab:
– On connect/disconnect: Deletes messages when you connect
or disconnect from your mail service or exit the Inbox.
– Immediately: Deletes messages as soon as you select File>
Delete.
– Manual: Deletes messages when you select File> Empty
Deleted (local)
*
Note: If you are working offline, messages are deleted from the device
the next time you connect.
*
Empty the Deleted (local) folder:
– Select File> Empty Deleted (local) to permanently delete messages in the Deleted (local) folder.
– To check or adjust the current settings for deleting messages,
select the Services> Options> Delete tab.
Move or copy a message:
– Select the message
– Select File> Move To or File> Copy To.
– Select the destination folder. If you are working offline, the
message will be moved or copied from the server the next time
you connect.
*
Caution: When you move a message that you have received
through POP3 or synchronization to a folder you created on your
device, the copy of the message on the server is deleted. This prevents duplicate copies of messages. Although the complete message
is moved, message attachments will be deleted if you have not
selected the option to download attachments. Once the message is
moved, you will be able to access the message only from your
device.
*
•
FolderCreate a folder:
– Select File> Folder> New Folder
– Type a name for the folder.
MARS-1030 User Manual
130
•
•
•
Delete a folder:
– Select the folder you want to delete
– Select File> Delete
Designate a folder as offline:
Only IMAP4 folders can be designated as offline. All IMAP4
default folders, such as Inbox, are automatically designated as
offline. Messages in offline folders can be viewed when you are
disconnected from your mail server. If a folder is not designated as
offline, you will be able to read and respond to messages in that
folder only when connected to the server.
– To designate a folder as offline, select the folder and then select
Service > Offline Folder.
Rename a folder:
– Select the folder you want to rename.
– Select File> Folder> Rename Folder.
– Type the new name for the folder.
Notes:
•
•
•
*
Default folders, such as Inbox, can’t be renamed.
Folders you create for IMAP4 mail servers can’t be renamed.
Synchronize folders while connected:
When you synchronize folders, the contents of your device folders
and mail server folders are compared and updated. New mail messages are downloaded, and messages in your device Outbox folder
are sent. The synchronization behavior depends on how you connect to your mail server.
– When you connect to a POP3 server, the Inbox and Outbox
folders on your device are synchronized with the corresponding
folders on the mail server. To synchronize after the initial connection, select Services> Send/Receive Mail.
– When you connect to an IMAP4 server, all folders, including
the Inbox and Outbox, that are marked as offline are synchronized. To synchronize all folders after the initial connection,
select Services> Synchronize Folders. To synchronize just the
selected folder and the Outbox folder, select Services> Send/
Receive Mail.
Compose and send a message:
– In list view, select Compose> New Message
– Enter the address of one or more recipients, separating them
with a semicolon. If the recipient is listed in the Address Book,
131
Chapter 5
enter a few letters of the recipient’s name and select Compose>
Check Name. If there is only one match, the e-mail address is
inserted. If there is more than one match, select the correct
address from the Choose E-mail Recipients dialog box. If
there is no match then add a new e-mail address through
Choose E-mail Recipients.
– To attach a file, select File> attachments> Add Attachment.
– Select File> Send. If you are working offline, the message is
moved to the Outbox folder and will be sent the next time you
connect.
Tip: To see more header information, select the triangle in the lower-right
corner of the header area. Select the triangle again to collapse the header
area.
*
*
Save a message:
– Select File> Save to save the message you are composing or
editing.
The message is not sent and is saved in the inbox folder of the
active service.
Reply to or forward a message:
– Open the message, and then select Compose> Reply to Sender,
Reply to All, or Forward.
– Enter your response.
– Select File> Send.
Tips:
•
•
*
*
Selections in the Options dialog box determine whether the original
text is included.
To see more header information, select the inverted triangle in the
lower-right corner of the header area. Select the triangle again to
collapse the header area.
Check Inbox status:
– In list view, select Compose> Status. You can view details such
as the number of messages to be sent, deleted, and copied, and
the number of attachments to be downloaded.
Download message from the server:
– When you download messages, you need to create two connections: a remote connection and a mail server connection. The
remote connection connects you and your ISP or network. The
MARS-1030 User Manual
132
–
–
–
–
mail server connection enables messages to be downloaded
from your mail server to the Inbox on your device. When you
select Services> Connect to Inbox, the Inbox starts a remote
connection using the connection you specified when setting up
the current mail service. If you are already connected through a
remote connection other than the one you specified in the service, you will be asked if you want to use the current connection. If you choose not to, you will need to disconnect from the
current connection before you can check for new messages.
Select the Services menu and make sure that the service you
want to use is selected (the selected service has a bullet next to
it).
Select Services> Connect. The messages on your device and
mail server are synchronized: new messages are downloaded to
the device Inbox folder, messages in the device Outbox folder
are sent, and messages that have been deleted on the server are
removed from the device Inbox. Double-tap a message list to
open it.
If you read a message and decide that you need a full copy,
select File> Get Full Copy while in the message window or
Services> Get Full Copy while in list view. This will also
download message attachments and meeting requests if you
have those options selected in the Inbox Preferences dialog
box. You can also choose to download full copies of messages
by default.
When finished, select Services> Connect to disconnect. You
also need to disconnect your dial-up connection by double-tapping the icon in the status bar and selecting Disconnect.
Notes:
•
•
•
Receiving entire messages consumes memory.
The size column in the Inbox list view displays the local size and
server size of a message. Even when a message has been downloaded fully, these numbers may differ because the size of a message can very between the server and the device.
When using IMAP4 to get Outlook data, you will see the contents
of your Journal folder. File editing transactions and documents
(such as Task items, e-mail message, and Word documents)
attached using drag and drop will appear as shortcuts on the device.
A copy of the document will not be moved to your device, and the
shortcut on the device cannot be used. To access the documents
133
Chapter 5
*
associated with a journal entry on the device, attach the document
to the entry rather than dragging and dropping it. Also, be sure to
set your IMAP4 service to receive full copies of messages, attachments, and meeting requests. For more information on using the
Journal, see the Help for the desktop version of Outlook.
Working with Message Attachments:
– If you receive messages through a remote mail server, in Inbox
on the device, select the Get file attachments and meeting
requests (IMAP4) or Get meeting requests (POP3) setting in
the Inbox Preferences dialog box. For more information, see
Set Inbox preferences.
Notes:
•
•
*
*
*
Embedded images and OLE objects cannot be received as attachments.
Embedded messages can be viewed as an attachment when using
IMAP4 to receive e-mail. However, this features does not work if
TNEF is enabled so that you can receive meeting requests.
Check attachments status:
– An attachment sent with an e-mail message, whether it has been
downloaded or not, will appear as an icon at the bottom of the
message in its own window. If you don’t see this pane, select
File> Attachments> Show Attachments. If TNEF is turned on
so you can receive meeting requests, you will not see attachments until they are fully downloaded.
– To mark an attachment for downloading in a POP3 or IMAP4
service, double-click it. The attachment will be downloaded the
next time you connect. You can also set Inbox to download
attachments automatically when you get a full copy of a message. For more information, see Receive attachments.
Open an attachment:
– With the message open, double-tap the attachment’s icon at the
bottom of the message. If you don’t see this pane, select File>
Attachments> Show Attachments.
Store an attachment:
– Select Service> Options> Storage tab.
– Select to store attachments in internal RAM or on a storage
card.
– If you use more than one storage card, select it from the list.
MARS-1030 User Manual
134
Note: Once you make the above selection, all attachments will be moved
to the selected card.
*
*
Delete an attachment:
– To delete an attachment from a message you are sending, select
the attachment, and then select Edit> Clear or press the DEL
key on the keypad.
– To delete an attachment you have received, delete the message.
Attach a file to a message:
– With the message open, select File> Attachments> Add
Attachment.
– Select the file you want to attach.
Note:
OLE objects cannot be attached to Inbox messages.
Note 1: To add a mail service, select “Add”, To remove a mail service,
select the service from the Installed service box and select “Remove”.
To view a mail service’s properties, select the service from the Installed
service box and then select Properties.
Figure 5.1: Inbox
135
Chapter 5
5.2.3
Internet Explorer
With the Internet Explorer, it is possible to view the Web or intranet Web
pages. A modem or WLAN is required to connect to an Internet server
provider (ISP) or network.
5.2.3.1 Connect to the Internet
To view Web pages, set up a remote
connection to your ISP or network.
5.2.3.2 Start Internet Explorer
*
Open Internet Explorer by
selecting Start > Programs >
Internet Explorer.
*
To setup the default home page,
navigate to the web page that is
desired for use as the default web
page.
*
Select View > Internet Options
from the command bar.
*
Enter the desired URL in the
Start page field.
*
Press the OK button.
Figure 5.2: Internet Explorer
5.2.3.3 Navigation control
Internet Explorer uses sliding menus for navigation control. Tap and drag
the sliding menus to the left or right to reveal hidden menu items and
toolbars.
To view a larger screen space in the Internet Explorer, hide the Status bar
and the View menu. From the top menu bar, select View > Hide Toolbars.
Once hidden, it is necessary to “cold reset” these features to access them
again. (Refer to “2.7.2 Cold Reset” for more information.)
MARS-1030 User Manual
136
5.2.3.4 Set up a proxy server
Proxy servers are often used when connecting to the Internet through a
local network for added security.
*
*
*
*
Select View > Internet Options > Connection Tab.
Select Access the Internet using a proxy server.
Enter the proxy server address and port. For more information, see
your administrator.
To bypass the proxy server of a local address, such as corporate
intranet pages, select Bypass proxy for local address.
5.2.3.5 Enable cookies
A cookie file contains information about identity and preferences so that
a website can tailor information. The website automatically sends the file
to the receiving device.
*
*
Select View > Internet Options > Security Tab.
Select Allow cookies.
5.2.3.6 Search for an internet site
*
Select View > Go > Search to search the web.
5.2.3.7 Go to an internet address
*
Select Address Bar, if necessary to display the Address bar
*
Enter the address.
*
Press “ENTER” key.
5.2.3.8 View previously visited sites
*
Tap the Arrow button at the right site of the Address Bar.
*
Select the desired Web Address to view.
5.2.3.9 Add and view favorites
*
Go to the desired page.
*
Select Favorites > Add To Favorites.
*
If necessary, locate the appropriate folder.
*
Confirm or change the name and save the site address.
137
Chapter 5
*
To view favorite Web sites, select Favorites and highlight the Web
page to view. IE automatically navigates to the website.
Note:
To organize the favorites list, select Favorites > Organize Favorites.
5.2.3.10 Browse Web pages
*
To view a page previously visited, select View > Back.
*
To move forward again to the next page (provided it was viewed
previously,) select View > Forward.
*
To return to the Home page, select View > Go > Home.
5.2.3.11 Refresh current page
*
Select View > Refresh.
5.2.3.12 Stop loading a page
*
Select View > Stop.
5.2.3.13 View current page
*
Select View > Internet Options.
*
To view the protocol, page type, size, and address, select the General tab.
*
To view the security information about the page, select the Security tab.
5.2.3.14 View HTML source code
*
While viewing the page, select File > Save As and save the file as a
.txt file.
*
Open the file in a word processing program, such as WordPad.
5.2.3.15 Change home and search page settings
*
Select and open the page to use as the home or search page.
*
Select View > Go > Home or Search.
MARS-1030 User Manual
138
5.2.3.16 Save a copy of current page
It is possible to save web pages and view them later when disconnected
from the Internet or Intranet, without using cached memory.
*
*
Select File > Save As
Specify a folder location and give the file a name.
5.2.3.17 Copy a web page to a document
*
Select all or part of the web page to be copied.
*
Select Edit > Copy.
*
Go to the text or html document to place the information, and select
the location in the text.
*
Select Edit > Paste.
5.2.3.18 Select security options
*
Select View > Internet Options > Security tab.
*
Select the necessary security protocols.
5.2.3.19 Change the font size
*
Select View > Text Size and select the desired size.
139
Chapter 5
5.2.4
Media Player
The PDT comes with Media
Player for Windows CE.NET
installed.
*
*
*
Open Media Player by
selecting Start > Programs > Media Player
from the desktop.
Select File > Open to
open a new media file.
Please refer to
www.microsoft.com for
additional information
and help with your
Microsoft Windows
Media Player.
Figure 5.3: Media Player
5.2.5
*
*
*
*
Messenger
The Windows CE Messenger client application in Windows
CE.NET allows real-time communication using text-based messaging, VOIP, and more.
See who’s online, and when colleagues are online. Notify a predefined list of watchers about any pertinent information.
Talk with a colleague anywhere in the world using a microphone
and speakers. Windows Messenger supports high-quality voice
calling on a Windows CE device.
Communicate using Session Initiation Protocol (SIP) or Hotmail
contacts Windows Messenger supports. Communication with colleagues using a SIP based communications service. Talk to Hotmail
contacts using .NET Messenger.
MARS-1030 User Manual
140
5.2.6
Microsoft WordPad
Create and edit documents and templates in WordPad, using buttons and
menu commands that are similar to those in the desktop version of
Microsoft Word. It is possible to work with files in Normal or Outline
views.
WordPad documents are usually saved as .pwd files, but it is possible to
save documents in other file formats, like .rtf or .doc.
5.2.6.1 Selecting and editing text
*
Select text
To select
Do this
Any amount of text
A word
A single paragraph
An entire document
An picture
Drag the stylus over the text.
Double-tap the word.
Triple-tap within the paragraph.
Select Edit > Select All
Tap the picture
*
Find text
– To search for text in one part of a document, select that part.
Otherwise, the whole document is searched.
– Select Edit > Find
– Enter the text you want to find. For a paragraph, enter ^p. For a
tab stop, enter ^t.
– Select the search options you want.
– To continue searching, select Edit > Find > Next.
*
Replace text
– To replace text in one part of a document, select that part. Otherwise, the whole document is searched.
– Select Edit > Replace.
– Enter the text to replace and the text to substitute. For a paragraph, enter ^p. For a tab stop, enter ^t.
– Select the replacement options.
– Select Find Next.
– On the Find/Replace toolbar, select the appropriate button.
141
Chapter 5
*
Move, copy, or delete text
– Select the text you want to move, copy, or delete.
– To move or delete text, select the Cut button. To copy text,
select the Copy button.
– To paste the information, move the insertion point to the desired
location, then press the cursor over a Paste button.
Notes:
•
•
To undo an action, select Edit > Undo.
To restore the action, select Edit > Redo.
5.2.6.2 Formatting text
*
Creating bulleted and numbered lists.
– Select the Bullets or Numbering button.
– Type the first item.
– Press ENTER, type the next item, and repeat as needed.
– Select the button again to end list formatting.
Note: To change the number style for the selected list, select Format >
Paragraph, In the Format list, select the style you want.
*
Set the default font
– Select Format > Font.
– Select the font from the list of available fonts.
– Select Set As Default
– To confirm that changes will be applied to subsequent documents, select Yes.
Note: To apply the default font and stylus to selected text, select Apply
Default.
*
Select a different font
– Select the text you want to change. To select all text, select Edit
> Select All.
– From the Font list, select the desired font.
– From the Font Size list, select a size.
Note: To see more formatting options, select Format > Font.
MARS-1030 User Manual
142
*
*
Change font formatting
– Select desired text.
– Select the Bold, Italic, or Underline button.
– To change the font color, select Format > Font and select the
color from the Color list.
Adjust the paragraph alignment
– Select the paragraph to align using the mouse and cursor.
– Select the Align Left, Center, or Align Right button.
Note: To see more formatting options, select Format > Paragraph.
*
Indent a paragraph
– Select the paragraph to indent.
– Select Format > paragraph.
– Adjust the indentation settings as needed.
*
Set tabs
– Select Format > Tabs.
– Change the tab settings as needed.
5.2.6.3 Adjusting the Display
*
Wrap text in the window
– Select View > Wrap to Window.
*
Display the document in full screen view
– Select View > Full Screen.
– To exit Full Screen view, select Restore.
– To move the Restore button, drag the bar on the left side.
*
Display or hide scroll bars
– Select View > Horizontal Scroll Bar or Vertical Scroll Bar.
*
Zoom in or out
– Select View > Zoom, and select the desired percentage.
Note: For Custom, enter the exact percentage and select OK.
143
Chapter 5
5.2.6.4 Working in outline view
*
Switch between Normal and Outline views
– Select View > Normal or Outline.
*
Assign and change outline levels
– Select View > Outline.
– Select the appropriate buttons on the toolbar.
5.2.6.5 Inserting symbols
*
Place the insertion point where you want to insert the symbol.
*
Select Tools > Insert Symbols.
*
Select the symbol you want, and then select Insert.
Tips:
If selecting a different font (or subset of a font), a different set of symbols
will be displayed.
5.2.6.6 Printing a document
*
Select File > Print.
*
Select the desired printing options.
Tips:
•
•
Port lists the available printer ports.
If Network is selected from the Port list, enter the path to the network printer to the Net Path box.
5.2.6.7 Setting a password for a document
*
Select File > password.
*
Type and verify the password.
*
Saving the document is necessary (File > Save) to return the password.
MARS-1030 User Manual
144
5.2.6.8 Converting Documents
*
About document conversion
If an e-mail program is installed and receives an attached Word
document or template created in Word version 6.0 or later, WordPad can convert the file. To view the document, simply open the
attachment in WordPad.
During conversion, some formatting attributes may be changed or
lost. To avoid losing these attributes permanently, close the file
after viewing it, rather saving the file on the device. If saving the
file, save it with a different file name.
For more information about performing conversions on your
device, study the following topics:
*
Changes caused by Word document conversion
•
Formatting
– Borders and Shading
Borders and shading are not displayed in WordPad, but are
restored if converted back to a Word document. Shading is not
restored when used in a table, but simple borders are restored.
– Character formatting
Bold, italic, strikethrough, superscript, subscript, and hidden
text are retained and displayed. Other effects are changed or
removed.
– Colors
Colors are retained and mapped to the colors available on the
current system.
– Fonts and font sizes
Fonts not supported by your mobile device are mapped to the
closest font available in WordPad.
– Page Formatting
Headers, footers, footnotes, columns, pages setup information,
and style sheets are removed during conversion to WordPad.
WordPad supports built-in headings.
– Paragraph formatting
Tabs, alignment, bullets, indentation, simple numbered lists,
and paragraph spacing are retailed and displayed in WordPad.
145
Chapter 5
•
Pictures
Pictures are removed during conversion.
•
Table of Contents
Table of Contents text and some formatting are preserved. However, any text set at right-aligned tab stops may wrap to the next
line.
•
Index
Index text and some formatting are preserved.
•
Tables
Tables appear as tab-delimited text. Cells containing wrapped text,
tabs, or paragraph markers may be difficult to read. Simple tables
are displayed accurately and restored when converting a WordPad
file back to a WordPad document.
•
OLE Objects
OLE Objects are removed during conversion.
•
Revisions marks, annotations, and comments
Revision marks are visible but cannot be changed. Annotations
and documents are removed during conversion.
MARS-1030 User Manual
146
5.2.7
Remote connection
The Remote Desktop Connection can log onto the Windows Terminal
Server and then access and use all the programs installed on the server.
For example, instead of running Microsoft Pocket Word, you can run the
desktop version of Microsoft Word.
5.2.7.1 Connecting to terminal server
*
*
*
*
Select Start > Programs
> Remote Connection, or
run ‘CETSC’ from the
command prompt.
In the Server box, type or
select a Terminal Server, a
name or TCP/IP address,
or select a server in the
drop-down list.
Select Connect.
In the Remote Connection window, type your
user name, password, and
domain, (if required), and
then select OK.
Figure 5.4: Remote Connected
5.2.7.2 Disconnecting without ending a session
*
In the Remote Connection window, select Start > Shutdown.
*
Select Disconnect > OK.
Note: If previously disconnected from a Terminal Server without ending
the session, the Terminal Server will continue to execute any running processes; the Remote Connection can later reconnect to this
same session (provided that the administrator has configured
Remote Connection to reconnect later to disconnected sessions).
5.2.7.3 Disconnecting and ending a session
*
In the Remote Connection window, select Start > Shutdown.
*
Select Log Off > OK.
147
Chapter 5
5.2.8
Windows Explorer
Windows Explorer works almost the
same on a PDT as it does on the PC. See
the topics below for information about
the difference between Windows
Explorer on each device.
Figure 5.5: Windows Explorer
5.2.8.1 Navigating in file view
*
Go forwards and back
– To go back to the previous folder, select Go > Back.
– To go forward again to the folder previously viewed, after having gone back, select Go > Forward.
*
Use the Go menu
– To quickly access the My Documents folder, select Go > My
Documents
– To see all folders that have been accessed, select Go > History.
Double-tap a folder to return to it.
5.2.8.2 Viewing files as icons lists
*
To view icons, select View > Large Icons or Small Icons.
*
To view a list, select View > Details.
5.2.8.3 Working with files and folders
*
Create a new folder
– If necessary, open the folder in which the new folder is to be
placed.
MARS-1030 User Manual
148
*
– Select File > New Folder.
Add a folder to your Favorites list
– Open the folder
– Select Favorites > Add to Favorites.
– In the Name box, type the shortcut name.
Tips:
•
•
*
To open a favorite file or folder, select Favorites and then select
the folder.
To organize your favorites, select Favorites > Organize Favorites.
Transfer a file using infrared
– To send a file, select it, line up the infrared ports, and select File
> Send To > Infrared Recipient.
– To receive a file, line up the infrared ports, and select File >
Receive.
5.2.8.4 Creating desktop shortcuts
*
Display the file or web page for which a shortcut is needed.
*
Select File > Send to.
*
Select Desktop as Shortcut.
5.2.8.5 Switch to internet
*
Type a URL in the address bar.
149
Chapter 5
5.3 DiskOnChip
The DiskOnChip helps to save applications or data files onto a Flash
Memory device.
Note: The DiskOnChip storage memory resists all reset (warm/cold
reboot) conditions and software/firmware updates.
It is strongly recommended to install all applications, applets, programs
and important data files onto a DiskOnChip Flash.
Caution:
If an application or a data file is only installed or saved in the RAM,
a hard reset will result in the loss of that application or data file.
5.3.1
Saving to flash
To save an application or data to the Flash Memory, from the current
application, select File > Save As > navigate to the DiskOnChip location
and save it.
5.3.2
DiskOnChip location
To access the contents of files in the DiskOnChip storage:
*
*
Double-tap the My Computer icon on the desltop.
Double-tap the DiskOnChip icon to view DiskOnChip.
Figure 5.6: DiskOnChip
MARS-1030 User Manual
150
5.3.3
DiskOnChip size
The size of the DiskOnChip will vary,
depending on the size of system
firmware.
*
*
Inside the DiskOnChip
directory, tap File > Properties.
The DiskOnChip Properties
dialog:
The number listed after Free is the
amount of memory bytes currently
available on the device for the DiskOnChip system.
Figure 5.7: DiskOnChip Size
151
Chapter 5
APPENDIX
A
Barcode Setting
This appendix provides instructions
for customizing the barcode engine.
Appendix A Barcode Setting
A.1 Setup Tab
Functions:
Item
Symbology
Setup
Decoder Setup
Options
MARS-1030 User Manual
Explanation
Selecting the Symbology Setup menu item causes the
symbology setup dialog to be displayed. This dialog
consists of a symbology drop down list, plus four buttons and a message box.
Selecting the decode menu item displays the decode
options dialog box.
Selecting the Options Menu item displays the Setup
dialog box
154
Item
Save Current
Config to File
Restore Config
From File
Exit
Explanation
The application has the capacity to save the Config
file. The Config file that is saved when this item is
selected is correlated to the Config that is currently
active. A dialog is presented and requests selection of
a name for the file to save. The default file extension
matches the current active Config. Saving a Config file
this way is independent from the Config Format option
of the Imager menu. In this case, the Config file is
saved as it appears on the screen instead of how it
was received.
This selection restores the Config from any file. The
restored Config file is full size, uncompressed, and
unprocessed.
Selecting Exit shuts down the Application Program.
155
Appendix A
A.1.1
Symbology setup
Selecting the Symbology Setup menu item display the symbology setup
dialog. This dialog consists of a symbology drop down list, plus four buttons and a message box.
Functions:
Item
Explanation
Default Symbol
Defaults the current symbology shown in the drop
down list to the internal default.
Default All
Symbologies
Defaults all symbology options for all symbologies to
the internal defaults.
Enable All
Symbologies
Enables all symbologies, but does not change other
symbol options.
Disable All
Symbologies
Disables all symbologies without affecting other
symbol options.
MARS-1030 User Manual
156
A.1.2
Decoder setup
Functions:
Item
No Read
Timeout
Multiple
Symbols Mode
Explanation
Maximum time (in milliseconds) that the imager
attempts to decode before declaring a “No Decode”
condition. If attempting to decode using the trigger key,
the imager quits decode attempts even if the trigger key
remains depressed. A new decode using the trigger
can only begin after the trigger is released. The timeout
also applies to the decode operation of the imaging
technology. The Timeout range is 0, meaning no timeout, (i.e., infinite) to 300,000.
Enables/Disables multiple symbols decoding. Normally
the imager stops attempting to decode when a bar
code symbol is decoded. In multiple symbols mode, the
imager does not stop until the trigger is released or a
“No Decode” timeout occurs. The same bar code will
not be read again until the current decoding stops.
157
Appendix A
Item
Explanation
Aimers During
Capture
Enables/Disables aimers during decoding.
Center Window A decoded symbol is returned only if it intersects a
Decode Enable rectangle specified by the center window.
Center Window indicates the percent-age of width and
height of the center decode rectangle, relative to the
Center Window
entire image. The limits are 0-100%. The default is
20x20 (128x96 pixels).
The Display Symbol Information option enables /
Display Symbol disables display of decoded symbol information, which
Information
includes the AIM ID, SymID (Code ID), and symbol
modifier.
Display No
Decode
Message
Enables / disables display “No Decode” message if no
bar code symbol is decoded by either a timeout or trigger release.
MARS-1030 User Manual
158
A.1.3
Options
Functions:
Item
Trigger Timeout
Termination
Code
Beep after data
collect
Explanation
Select the scanning timeout duration (in seconds) from
the pull-down list. <3 ~ 10 sec, Default: 6>
None
After showing barcode, no action.
After showing the barcode, jump to next
CRLF
row.
Space
After showing the barcode, jump one unit.
Tab
After showing the barcode, jump a section.
Select a beep tone after data is collected.
Disable
Auto Scan
Label
Disable this function.
Alternate number of seconds for Continuous
1 ~ 5 sec
Scan.
Prefix
Type the desired label prefix in this text box.
Suffix
Type the desired label suffix in this text box.
159
Appendix A
A.2 Update Tab
MARS-1030 User Manual
160
Functions:
Item
Explanation
When this item is selected, the imager is queried
for the current firmware version information. The
Firmware Revision
version information is then displayed in the text
window.
This item allows new engine firmware to be
installed into the imager. When Flash New
Firmware is selected, a prompt to select the firmware file appears. The file, which must have the
extension “.bin”, must reside on the PDT. The
firmware file can be copied to the PDT using
Microsoft Explorer as long as the PDT is linked to
the PC via Microsoft's Active Sync. The default
search location is the My Documents folder. Once
a file is selected, the file is transferred to the
Flash New Firmware
engine. The engine then writes the new firmware
into flash memory and re-initializes. The flashing
of the firmware and subsequent restart takes
approximately 30 seconds. The application
insures that the unit does not enter suspend
mode during that time.
Note: It is very important that the device remains
awake during this time. Failure to do so can
cause the scan engine to become unusable.
161
Appendix A
A.3 Symbologies List
A.3.1
Aztec
Functions:
Item
Explanation
Symbol Enable
Enable Aztec Runes
Message Length
MARS-1030 User Manual
Enable this barcode.
Enable if you are scanning Aztec Runes, the
smallest type of Aztec Code symbols, which
have the capacity to encode a very short
license plate message.
The minimum and maximum length ranges
for the barcodes are 1 - 3750.
162
A.3.2
Codabar
Functions:
Item
Explanation
Symbol Enable
Check Char/Digit
Enable
Check Char/Digit
Transmit
Start/Stop Transmit
Message Length
Enable this barcode.
The scanner can read barcode data with a
check digit. If this item is not checked, the bar
code is read as though no check digit was
present.
The scanner will only read Codabar bar codes
printed with a check digit, and will transmit
this character at the end of the scanned data.
This setting is only valid if check char/digit is
enabled.
Start/Stop characters identify the leading and
trailing ends of the barcode.
The minimum and maximum length ranges
for the barcode are 2 - 60.
163
Appendix A
A.3.3
Code 11
Functions:
Item
Explanation
Symbol Enable
Enable this barcode.
This option sets whether 1 or 2
check digits are required with Code
11 type barcode.
The minimum and maximum length
ranges for the barcode are 1 - 80.
Check Char/Digit Enable
Message Length
Check Digits Required
Default = Two Check Digits.
MARS-1030 User Manual
164
A.3.4
Code 128
Functions:
Item
Explanation
Symbol Enable
Message Length
Enable this barcode.
The minimum and maximum length ranges for
the barcode are 0 - 80.
165
Appendix A
A.3.5
Code 39
Functions:
Item
Explanation
Symbol Enable
Check Char/Digit
Enable
Check Char/Digit
Transmit
Start/Stop Transmit
MARS-1030 User Manual
Enable this barcode.
The scanner reads barcode data with a
check digit. If not checked, the barcode will
be read as though no check digit was
present.
The scanner will only read Code 39 type
barcodes printed with a check digit, and will
transmit this character at the end of the
scanned data. This setting is only valid if
check char/digit is enabled.
Start/Stop characters identify the leading
and trailing ends of the barcode.
166
Item
Explanation
If this box is checked, the scanner can
Append Mode Enable append the data from several Code 39
barcodes together before transmitting them
to the host computer. When this function is
enabled, the scanner stores those Code 39
barcodes that start with a space (excluding
the start and stop symbols), and doesn’t
immediately transmit the data. The scanner
stores the data in the order in which the barcode are read, deleting the first space from
each. The scanner transmits the appended
data when it reads a Code 39 bar code that
starts with a character other than a space, or
when it reads a barcode that is not Code 39.
If Full ASCII Code 39 decoding is turned on,
Full ASCII Translation
certain character pairs within the barcode
symbol will be interpreted as a single character.
Message Length
The minimum and maximum length ranges
for the barcode are 0 - 48.
167
Appendix A
A.3.6
Code 49
Functions:
Item
Explanation
Symbol Enable
Message Length
MARS-1030 User Manual
Enable this barcode.
The minimum and maximum length ranges for the
barcode are 1 - 81.
168
A.3.7
Code 93
Functions:
Item
Explanation
Symbol Enable
Message Length
Enable this barcode.
The minimum and maximum length ranges for
the barcode are 0 - 80.
169
Appendix A
A.3.8
Composite Codes
Functions:
Item
Explanation
Symbol Enable
Enable this barcode.
Enable
Enable to scan UPC-A/EAN-13 Composite
codes.
UPC-A/
EAN-13 Composite
Message Length
MARS-1030 User Manual
The minimum and maximum length ranges for
the barcode are 1 - 2435.
170
A.3.9
Data Matrix
Functions:
Item
Explanation
Symbol Enable
Message Length
Enable this barcode.
The minimum and maximum length ranges for
the barcode are 1 - 1500.
171
Appendix A
A.3.10 EAN-8
Functions:
Item
Explanation
Symbol Enable
Enable this barcode.
Output the check digit at the end of the
scanned data.
Option allows decoding and outputting
of a 2 digit addendum at the end of all
Enable 2 Digit Addenda
scanned EAN-8 data.
Option allows decoding and outputting
of a 5 digits addendum at the end of all
Enable 5 Digit Addenda
scanned EAN-8 data.
Only reads EAN-8 barcodes that have
Addenda Required
addenda.
When this feature is selected, the data
is output with a space between the
Include Addenda Separator data from the main barcode and the
data from the addenda. When turned
off, there is no space.
Check Char/Digit Transmit
MARS-1030 User Manual
172
A.3.11 EAN-13
Functions:
Item
Explanation
Symbol Enable
Enable this barcode
The output of the check digit at the end
of the scanned data.
Option allows decoding and outputting
of a 2 digits addendum on the end of
Enable 2 Digit Addenda
all scanned EAN-13 data.
Option allows decoding and outputting
of a 5 digits addendum on the end of
Enable 5 Digit Addenda
all scanned EAN-13 data.
Only reads EAN-13 barcodes that
Addenda Required
have addenda.
When this feature is selected, the data
is output with a space between the
Include Addenda Separator data from the main barcode and the
data from the addenda. When turned
off, there is no space.
Check Char/Digit Transmit
173
Appendix A
A.3.12 Interleaved 2 of 5
Functions:
Item
Explanation
Symbol Enable
Check Char/Digit Enable
Check Char/Digit Transmit
Message Length
MARS-1030 User Manual
Enable this barcode.
The scanner reads barcode data with
a check digit. If not checked, the
barcode will be read as though no
check digit was present.
The scanner will only read Interleaved
2 of 5 barcodes printed with a check
digit, and will transmit this character at
the end of the scanned data. This
setting is only valid if check char/digit
is enabled.
The minimum and maximum length
ranges for the barcode are 2 - 80.
174
A.3.13 MaxiCode
Functions:
Item
Explanation
Symbol Enable
Message Length
Enable this barcode
The minimum and maximum length ranges for
the barcode are 1 - 150.
175
Appendix A
A.3.14 MicroPDF417
Functions:
Item
Explanation
Symbol Enable
Enable this barcode.
Message Length
The minimum and maximum length ranges for
the barcode are 1 - 366.
MARS-1030 User Manual
176
A.3.15 OCR-A, OCR-B, US Currency
The imager is able to read machine readable fonts used in optical character recognition (OCR). The imager can read from 6 to 60 point OCR typeface.
OCR Mode
•
OCR-A
•
OCR-B
177
Appendix A
•
U.S. Currency Serial Number (Money)
•
MICR E-13B
•
SEMI Font
Either select an OCR default, or create a custom template for the type of
OCR format intended to read. (See “OCR Templates” to create a custom
“template” or character string that defines the length and content of OCR
strings to be read with the imager.)
Note: Setting the template and check character options are essential for
OCR reading.
OCR Off turns off all OCR capability in the scanner, so the scanner will
be able to scan linear, stacked, matrix, and composite bar codes, but not
OCR fonts. In addition, any OCR templates previously created are erased.
The 8 digit default templates are reinstated for any future use of the OCRA, OCR-B, or U.S. Currency fonts.
If OCR-A, OCR-B, or U.S. Currency are selected, it is possible to scan
characters in that font. The default setting allows scanning of any 8 digit
combination. If creating an OCR template, character combinations that fit
the template can be scanned. (see Creating an OCR Template).
OCR Direction
The OCR Direction setting helps to prevent misreading of character
strings that could be interpreted differently in unique orientations if the
orientation of the characters being read is specific in relation to the position of the imager; for example, “80086996” can read as “80086996” or
“96698008.” The default is Left-to-Right, (LtoR).
MARS-1030 User Manual
178
A.3.15.1 OCR Templates
A custom “template,” or character string defines the length and content of
OCR strings that will be read with the imager. Several choices are available when creating a custom template for the application. Create a template for a single format, string together several formats, or you can create
a template for a user-defined variable. These choices are described in
more detail below.
A.3.15.2 Creating an OCR Template
A single template programs the imager to read any combination of characters in the specified order. Refer to examples according to the Template
Characters table below.
Template Characters
a
Represents any alphanumeric character (digit or letter)
c
Represents a check character position
d
Represents any digit
e
Represents any available OCR character
g
Represents character from user-defined variable “g”
h
Represents character from user-defined variable “h”
l
Represents any uppercase letter
t
Marks the start of a new template
r
Multi row indicator
All other characters represent themselves. Spaces can be used.
Note: In MICR E13 B templates, TOAD characters (capital letters T, O, A,
and D), represent Transit, On Us, Amount, and Dash.
Note: OCR templates default to eight digits, no check character.
179
Appendix A
A.3.15.3 To Add an OCR Template
There are four main steps required for creating an OCR template. Below
them follows detailed descriptions and examples of specific situations
that require precise programming of the coding strings.
1.
2.
3.
4.
Turn on the OCR font to be read.
Begin building the template.
Scan the Enter OCR Template symbol.
Scan the characters for the string.
Exit OCR Template Editor
Scan Save OCR Template to save your entries. Discard OCR
Template exits without saving any OCR Template changes.
A.3.15.4 Scanning Characters
Use the Template Characters chart to determine what characters are
needed to create the required format. Use the OCR Programming Chart
(after the Sample Codes in the back of this manual) to scan the characters
for the template.
Example: It is required to read any combination of eight digits. The
template should be:
To create this template, first enable the OCR-A font. Scan the Enter
OCR Template symbol, and then scan the d from the OCR Programming
Chart in the back of this manual eight times. Scan Save OCR Template.
This would let you read any string of eight digits, for example:
A.3.15.5 Character Match Sequences
On the ASCII Conversion Chart (Code Page 1252), page A-4, find the
Hex value that represents the character(s) to match. Use the Programming
Chart (inside the back cover) to scan the numbers that represent these
characters.
Example: It is required to read three digits, three specific characters like
“ABC” and then three more digits.
MARS-1030 User Manual
180
The template would be:
To create this template, enable the OCR-A font. Scan the Enter OCR
Template symbol. Scan the d from the OCR Programming Chart three
times. Then scan 414243 from the inside back cover (the hex characters
for “A,” “B,” and “C”), and scan the d three more times. Scan Save OCR
Template.
This would read any string of three digits, then “ABC,” then any string of
three digits, for example:
A.3.15.6 Adding Spaces
You may also need to put spaces in your template.
Example: You need to read three digits, space, three specific characters,
like “ABC,” a space, and three more digits. The template would be:
To create this template, enable the OCR-A font. Scan the Enter OCR
Template symbol. Scan the d from the OCR Programming Chart three
times, and then scan 2041424320 from the Programming Chart (the hex
characters for “space,” “A,” “B,” “C,” “space”). Scan the d three more
times, and then scan Save OCR Template. This program will read any
string of three digits, space, “ABC,” space, and then any string of three
digits. For example:
Note: If using Quick * View to program, use the space bar to designate a
space and not the hex value of 20.
181
Appendix A
A.3.15.7 Stringing Together Multiple Formats (Creating
“Or” Statements)
To program the imager to accept and recognize many OCR formats, it is
necessary to string together each format beginning with a “t.” This unit
commands the imager to read optical characters that match any one of the
formats in the template.
Example: To read any combination of eight digits, or a combination of
four digits, two uppercase letters, and two digits.
The template would be:
To create this template, enable the OCR-A font. Scan the Enter OCR
Template symbol. Scan the d from the OCR Programming Chart eight
times, then scan the t to create the “or” statement. Then scan the characters for the second template. Scan d four times, scan l two times, then
scan d two more times. Scan Save OCR Template. This would let you
read either type of format, for example:
It is possible to string together as many templates as are required.
MARS-1030 User Manual
182
A.3.15.8 OCR Template Codes
Note: Reading more than three rows of OCR is not recommended.
Contact the factory if you have an application that requires reading four
or more rows of OCR.
† One or more two-digit numbers and Save are required after reading this
programming symbol. (Refer to the Programming Chart on the inside the
back cover of this manual.)
Exit Selections
183
Appendix A
ASCII Conversion Chart (Code Page 1252)
MARS-1030 User Manual
184
ASCII Conversion Chart (Code Page 1252)
185
Appendix A
OCR Programming Chart
MARS-1030 User Manual
186
Programming Chart
187
Appendix A
MARS-1030 User Manual
188
A.3.16 PDF417
Functions:
Item
Explanation
Symbol Enable
Message Length
Enable this barcode.
The minimum and maximum length ranges for the
barcode are 1 - 2750.
189
Appendix A
A.3.17 Postnet
Functions:
Item
Explanation
Symbol Enable
Enable this barcode.
Check Char/Digit Transmit
MARS-1030 User Manual
The scanner can only read US Postnet bar codes printed with a check
character, and will transmit this character at the end of the scanned data.
190
A.3.18 QR Code
Functions:
Item
Explanation
Symbol Enable
Enable this barcode.
Message Length
The minimum and maximum length ranges for
the barcode are 1 - 3500.
191
Appendix A
A.3.19 Reduced Space Symbology
Functions:
Item
Explanation
RSS Expanded Enable
Enable RSS Expanded code.
RSS Limited Enable
Enable RSS Limited code.
RSS 14 Enable
Enable RSS 14 code.
Message Length
MARS-1030 User Manual
The minimum and maximum length
ranges for the barcode are 4 - 74.
192
A.3.20 UPC-A
Functions:
Item
Explanation
Symbol Enable
Enable this barcode.
The output of the check digit at the end
of the scanned data.
Option allows decoding and outputting
of a 2 digit addendum at the end of all
Enable 2 Digit Addenda
scanned UPC-A data.
Option allows decoding and outputting
of a 5 digit addendum at the end of all
Enable 5 Digit Addenda
scanned UPC-A data.
Only reads UPC-A barcodes that have
Addenda Required
addenda.
When this feature is selected, the data
is output with a space between the
Include Addenda Separator data from the main barcode and the
data from the addenda. When turned
off, there is no space.
Transmits the numeric system digit of
Send Number System
a UPC symbol.
Check Char/Digit Transmit
193
Appendix A
A.3.21 UPC-E
Functions:
Item
Explanation
Symbol Enable
Check Char/Digit Transmit
Enable 2 Digit Addenda
Enable Expanded UPC-E
Enable this barcode.
The output of the check digit at the
end of the scanned data.
Option allows decoding and outputting
of a 2 digit addendum at the end of all
scanned UPC-E data.
Enable UPC-E Expanded code.
Option allows decoding and outputting
of a 5 digit addendum at the end of all
scanned UPC-E data.
Only reads UPC-E barcodes that have
Addenda Required
addenda.
When this feature is selected, the data
is output with a space between the
Include Addenda Separator data from the main barcode and the
data from the addenda. When turned
off, there is no space.
Transmits the numeric system digit of
Send Number System
a UPC-E symbol.
Enable 5 Digit Addenda
MARS-1030 User Manual
194
A.3.22 UPC-E1
Functions:
Item
Explanation
Symbol Enable
Enable this barcode.
The output of the check digit at the
end of the scanned data.
Option allows decoding and outputting of a 2 digit addendum at the end
of all scanned UPC-E1 data.
Check Char/Digit Transmit
Enable 2 Digit Addenda
Enable UPC-E Expanded code.
Enable Expanded UPC-E
Enable 5 Digit Addenda
Addenda Required
Include Addenda Separator
Send Number System
Option allows decoding and outputting of a 5 digit addendum at the end
of all scanned UPC-E1 data.
Only reads UPC-E1 barcodes that
have addenda.
When this feature is selected, the
data is output with a space between
the data from the main barcode and
the data from the addenda. When
turned off, there is no space.
Transmits the numeric system digit of
a UPC-E1 symbol.
195
Appendix A
A.3.23 ISBT
Functions:
Item
Explanation
Symbol Enable
Enable this barcode.
MARS-1030 User Manual
196
A.3.24 British Post
Functions:
Item
Explanation
Symbol Enable
Enable this barcode.
197
Appendix A
A.3.25 Canadian Post
Functions:
Item
Explanation
Symbol Enable
Enable this barcode.
MARS-1030 User Manual
198
A.3.26 Australian Post
Functions:
Item
Explanation
Symbol Enable
Enable this barcode.
Send Bar
Australian Post is a 4-state symbology that
was designed with a non-defined user area.
The user can define how that area field is
interpreted. Most systems have dedicated
decoders that will not decode a symbology
that is not already defined. If you select
Send Bar Width Data, the bar levels will be
outputted (0 - 3 for the four states) so that
the receiving device can decode appropriately.
Width Data
199
Appendix A
A.3.27 IATA 2 of 5
Functions:
Item
Explanation
Symbol Enable
Enable this barcode.
Message Length
The minimum and maximum length ranges for
the barcode are 1 - 48.
MARS-1030 User Manual
200
A.3.28 Codablock F
Functions:
Item
Explanation
Symbol Enable
Enable this barcode.
Message Length
The minimum and maximum length ranges for
the barcode are 1 - 2048.
201
Appendix A
A.3.29 Japanese Post
Functions:
Item
Explanation
Symbol Enable
Enable this barcode.
MARS-1030 User Manual
202
A.3.30 Planet Code
Functions:
Item
Explanation
Symbol Enable
Enable this barcode.
Check Char/Digit Transmit
The scanner only reads Planet barcodes printed with a check character,
and transmits this character at the end
of the scanned data.
203
Appendix A
A.3.31 KIX (Netherlands) Post
Functions:
Item
Explanation
Symbol Enable
Enable this barcode.
MARS-1030 User Manual
204
A.3.32 MSI
Functions:
Item
Explanation
Symbol Enable
Enable this barcode.
Check Char/Digit Transmit
Message Length
The scanner only reads MSI barcodes
printed with a check character, and
transmits this character at the end of
the scanned data.
The minimum and maximum length
ranges for the barcode are 4 - 48.
205
Appendix A
A.3.33 TCIF Linked Code 39
Functions:
Item
Explanation
Symbol Enable
Enable this barcode.
MARS-1030 User Manual
206
A.3.34 Matrix 2 of 5
Functions:
Item
Explanation
Symbol Enable
Enable this barcode.
Message Length
The minimum and maximum length ranges for the
barcode are 1 - 80.
207
Appendix A
A.3.35 Korean Post
Functions:
Item
Explanation
Symbol Enable
Enable this barcode.
Message Length
The minimum and maximum length ranges for
the barcode are 2 - 80.
MARS-1030 User Manual
208