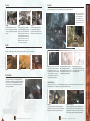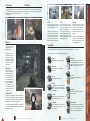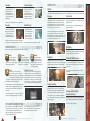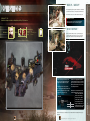
1
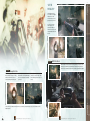
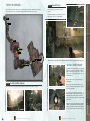
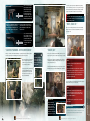
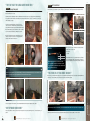
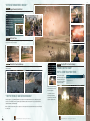
This section of the guide is spoiler-free, and it’s primarily aimed at players new to the Call of Duty franchise,
or players who want a refresher on game basics. Here we cover basic tactics that can help you survive any
tactical scenario in the field.
When you equip a firearm in Call of Duty: Black Ops, a crosshair appears in the middle of the screen. This crosshair represents the spread
of your weapon if you “fire from the hip,” which means simply to shoot your gun without targeting it.
While firing from the hip is less accurate than aiming down the sights, and it’s generally
not the best way to kill enemies, it does have its purpose. Short-range guns like SMGs
and shotguns actually work quite well firing from the hip. If an enemy surprises you at
close range, it’s much better to fire from the hip rather than carefully try to aim.
n MULTIPLAYER
nn
Intelligence Briefing
Specialized Training
General
Tips & Tricks
5
Firing from the Hip
The only time you should never fire from the hip is when you are equipped with
a sniper rifle or rifle. These weapons are completely inaccurate from the hip, and
it’s better to switch to your alternate weapon rather than try for a blind rifle shot.
The Bare Basics
Call of Duty: Black Ops, like all other Call of Duty games, is a first-person shooter (FPS). This means you play most of the game looking
through the eyes of the main character as he fights his way through the campaign’s many scenarios.
This section of the guide is for users new to first-person shooters, or those who haven’t played an FPS in a few years.
Controls
Throughout the guide, we refer to the basic
controls by the official name of the command
(Fire, Aim Down Sight, Melee, Interact, etc.). To
determine which controls are bound to which
buttons on your system of choice, refer to your
user manual or the game’s Options Menu.
Aim Down Sight
The game doesn’t have an official tutorial, but
the onscreen prompts found throughout should
give you hints on how to handle any
new situations.
Most of the time, you should fire your
weapon while holding the Aim Down Sight
button. This gives you a realistic view of
your weapon as your character’s eye lines
up with its sights.
As mentioned in the previous section,
Aiming Down Sight is generally not
necessary for short-range weapons, but
doing so can increase the range and
accuracy of SMGs and shotguns.
Cover
In the Call of Duty: Black Ops campaign, you can carry two weapons
(no matter how large the weapons are) and two grenade types.
Within the campaign, you don’t get to pick the types of grenades you
carry, but the tactical grenades are tailored to each mission.
Cover is a vital concept in Call of Duty: Black Ops, and we refer
to finding cover frequently in the walkthrough. Cover is simply any
obstacle that you can put between yourself and the enemies to get
some level of protection from their incoming fire.
You also carry a knife that you
can deploy at any time via the
Melee button. Some campaign
sequences introduce you to
special weapons beyond the
primary and secondary weapons
in your loadout.
Whenever you encounter enemies, you should try to find and move
to cover before returning fire on the enemies. Trying to take them
down in the open frequently results in death on the harder
difficulty settings.
4
©2010 DK/BradyGAMES®, a division of Penguin Group (USA) Inc. All Rights Reserved.
©2010 DK/BradyGAMES®, a division of Penguin Group (USA) Inc. All Rights Reserved.
SPECIALIZED TRAINING
Basic Loadout
Aiming Down Sight automatically triggers
sniper mode if you’re using a weapon
with a long-range sight, like a Dragunov
sniper rifle.
7
Grenades
There are three stances in Call of Duty: Black Ops: crouched, prone, and standing.
Grenades are your most common tactical tool in Call of Duty: Black Ops. There are two basic types of grenades: frag and tactical. While the
primary use for frag grenades is to blow your enemies to pieces, they also have a tactical purpose.
When you throw a frag grenade
at enemies behind cover, they
run from the grenade and out
from cover. While they may
escape your grenade’s blast, you
can pick them off with your rifle.
Standing:
This is your regular stance. It offers no
increase to your firing accuracy, but it allows
you to move quickly. You must be standing
to Sprint.
Prone:
In the prone position, you are crawling
on the ground. This makes you a difficult
target for your enemy, and it dramatically
increases your firing accuracy. When you
get caught in bad situations, going prone
is often a good tactic to reduce the visual
target you present to the enemy. It is very
difficult to move while you’re prone; you
move at an extremely slow speed.
n MULTIPLAYER
nn
Intelligence Briefing
Stances
Crouched:
Crouching is a happy medium between
the standing and prone positions. We
recommend crouching when you advance
forward in an area with an enemy presence.
Health
Health in Call of Duty: Black Ops is represented by actual damage that you see onscreen.
Generally, if you take hits beyond a graze, you should find cover and wait a few seconds for your health to restore.
Light Hit
Heavy Hit
Get to Cover!
Melee Attacks
As long as your character is not in a vehicle, you always have
access to melee attacks. Melee is extremely deadly and almost
always delivers a one-hit kill. However, the enemy must be directly
in front of you for the melee to actually hit him. Reserve melee for
when you sneak up on an enemy from behind, or for desperate
close-range combat situations.
When you throw a frag grenade, you should
always “cook” it first. To do this, simply hold
the Frag Grenade button until you see your
crosshair pulse onscreen. Throw the grenade
when you see roughly two or three pulses
to reduce the amount of time between your
release and the grenade detonating.
Most tactical grenades in the Call of Duty:
Black Ops campaign are flashbangs.
Flashbang grenades stun enemies in a large
radius, causing them to stumble out of cover
and making them completely helpless.
Be careful, though—it’s easy to stun
yourself with your own flashbang. Make sure
you look behind cover whenever one of your
own flashbangs detonates.
Grenade Indicators
Grenades can be very hard to see, so Call of Duty: Black Ops puts a grenade icon on your screen to help you locate a live grenade on the
battlefield. Whenever you see a grenade icon, you have to make a split-second decision:
Throw the Grenade Back:
If you find the grenade quickly enough, you can move toward it
to make a special icon appear onscreen. When it does, hold the
Grenade button to toss it back at the enemy. Be careful; sometimes
enemies cooks their grenades, particularly on harder difficulties.
6
©2010 DK/BradyGAMES®, a division of Penguin Group (USA) Inc. All Rights Reserved.
©2010 DK/BradyGAMES®, a division of Penguin Group (USA) Inc. All Rights Reserved.
SPECIALIZED TRAINING
Run Away:
If you aren’t sure exactly where the grenade is based on the
indicator, your best option is to run away. Press the Sprint button
and dash to another area, but be careful about leaving cover.
Sprint Diving
You are required to Sprint Jump at different points in the campaign.
To do this, hold the Sprint Button while you’re moving. When you get
to an edge, hold the Jump button to add extra distance to your jump.
This also makes you a harder target to hit and is a decent
evasive maneuver.
A new feature in Call of Duty: Black Ops is the ability to Sprint Dive.
To Sprint Dive, Sprint as normal, and then hold the Crouch button.
This causes you to dive forward, making you a very difficult target
for your enemies.
9
Rifles
Pistols
Shotguns
Rifles are single-fire, long-range weapons.
Rifles are practically useless fired from the
hip, but they are deadly at long range.
Pistols aren’t exactly the most effective
weapons in Call of Duty: Black Ops. When
you use a pistol, it’s often your last option
thanks to an event that prohibits your
customary loadout. Don’t discount them
completely, though. The Python and other
high-caliber weapons can be very effective
at short range, ripping through your enemies
with high-damage rounds.
Shotguns are an old favorite. Each shotgun
has its own personality, and you should try
each one before you bring it into combat.
Some shotguns, like the KS-23, have
moderate range, but most are good only at
short-range.
Additionally, rifles can have sniper scopes
attached to them. These scopes allow you
to pick off enemies at incredible distances.
This allows you to kill enemies before you
get within their firing range, making rifles
great tactical weapons for strategic players.
Weapons
Weapons are the tools of your
success in Call of Duty: Black
Ops, and knowing how to
handle them is vital.
n MULTIPLAYER
nn
Intelligence Briefing
Sprint Jumping
All shotguns in the single-player campaign
have lengthy reload times, but that’s a minor
tradeoff for the extreme damage they inflict
on enemies in tight spaces.
Weapon Mods
The weapons you find in the field during a campaign mission usually feature some type of modification, or mod. These mods give found
weapons an added edge or enhancement to your combat style as you sift through the weapons of your fallen enemies.
Each weapon has its own
specific attributes, including
accuracy, penetration power,
damage, rate of fire, reload time,
and weight. Weapons within
the same class tend to share
similar attributes.
Here are the types of mods you can find on your weapons and what they do:
Dual Mag:
This mod halves your weapon’s reload speed.
Extended Mag:
This mod increases your weapon’s clip size
by about 25%.
Assault Rifles
Assault rifles deliver high
damage, they’re highly accurate
at mid to long range, and they
generally have mid-sized clips.
You can fire assault rifles
from the hip (without pressing
the Aim Down Sight button),
but they are somewhat less
effective in this role. Due to
their versatility, assault rifles are
often your primary weapon on
campaign missions.
Suppressor:
This mod makes your weapon silent.
ACOG Sight:
The ACOG sight is a medium- to long-range sight
that allows you to pick off enemies from afar, but
doesn’t cut off your field of view. It’s great in almost
all tactical situations.
Submachine Guns
You can also find dual SMGs on some missions of the single-player
game. Fire the left SMG by holding the Aim Down Sight button. Dual
SMGs cannot be modded.
Reflex Sight:
The Reflex Sight is an optic that makes aiming your
short- and medium-range weapons easier.
Red Dot Sight:
The Red Dot Sight is perfect for short- to mediumrange weapons. It increases your weapon’s accuracy
by a moderate amount.
Masterkey:
The Masterkey is a shotgun attachment for
assault rifles.
Flamethrower:
The Flamethrower attachment is available only for
the AK-47 assault rifle.
Grenade Launcher:
Grenade Launcher attachments are available for
most assault rifles, and they’re fantastic for blowing
enemies out of cover. If a grenade fired by a
launcher is smothered, it may not explode.
8
©2010 DK/BradyGAMES®, a division of Penguin Group (USA) Inc. All Rights Reserved.
©2010 DK/BradyGAMES®, a division of Penguin Group (USA) Inc. All Rights Reserved.
SPECIALIZED TRAINING
Submachine guns, or SMGs, are close-range combat weapons. You
can squeeze some extra range out of them with a decent sight, such
as the Reflex, but they cannot replace an assault rifle. SMGs have
extremely high rates of fire and very quick reload times.
Infrared Scope:
The Infrared Scope displays a black-and-white
image. Enemies (and friends) are outlined in white,
making it easy to see targets in any combat condition:
nighttime, in fog, through smoke, and so forth.
Planting Explosives
Swimming should come
naturally if you’ve played other
FPS games in the past. Use
your Analog and Movement to
move around in the water. You
can freely move up and down
while swimming.
Several points in the campaign
require you to plant explosives.
To do this, move to your
objective marker and press the
Interact button. Take a few steps
back and trigger the activator
switch to blow the explosives.
General Tips
Subtitles
Consider turning on Subtitles via the Main Menu. This allows you to receive your commanding officer’s orders even in the heat of an intense gunfight.
You cannot use your weapons underwater in Call of Duty: Black Ops.
Breaching
Guided Missiles
Several points in the campaign
require you to breach a doorway.
When you breach, you temporarily
yield control of your character’s
movement, allowing you to focus
entirely on shooting your weapon.
The Black Ops team in the
campaign frequently employs
player-controlled missiles. After
you fire one of these special
missiles (classified as TOW
and Valkyrie), you control its
movement in first-person mode.
When a breach event starts, the game enters slow motion, giving
you more time to make a shot against an enemy in the next room.
11
Reloading
Critical Shots
Timing a reload is very important. If you get caught in the middle of
a long reload, you can perish as the enemy pummels you with fire.
Knowing when to reload is a crucial skill to learn for both singleplayer and multiplayer. Keep an eye on your ammo count in the
bottom-right of your HUD. When your ammo counter is low, look
around for cover to protect you from enemy fire.
Always aim for an enemy’s upper body. While headshots are ideal,
they aren’t always possible due to your foe’s distance, whether it be
unusually close or far.
n MULTIPLAYER
nn
Intelligence Briefing
Swimming
Aim for the upper torso to score a critical hit and likely down the
enemy with any weapon.
The AI in Call of Duty: Black Ops tends to wait for you to reload
before popping out of cover. This is especially true on harder
difficulties. Sometimes an area you think is clear might have several
enemies waiting for you to give them an opening. Be sure to find
cover whenever you reload in a dangerous area.
Guide the missile into your targets to inflict massive damage.
Game Difficulty
Short Bursts
When you first start your game, you can select the difficulty on which you want to play.
Recruit
Firing your weapons in short bursts is essential to maintain
maximum accuracy. This has the added benefit of conserving your
ammo, which can be a lifesaver on longer levels.
Regular
If you are here for the story
and cinematic experience,
we recommend the Recruit
difficulty. You run into only a few challenging
situations during your playthrough.
Hardened
The default difficulty is for the
average player that wants some
challenge, but doesn’t want to
run into anything too overwhelming. This is
a good balance for a first playthrough.
Veteran
This is the ideal difficulty for
veterans of the FPS genre. You
will be challenged throughout the
game, and you’ll have to use cover tactics to
survive. The enemy AI is more dangerous and
more likely to throw grenades.
Red Barrels
You frequently encounter red barrels in battle. These are filled with
explosive materials that you can detonate by shooting the barrel.
Whenever you see these barrels amongst a group of foes, detonate them
to soften up enemy resistance. Oh, and don’t take cover behind them.
Lower Difficulty Option
This difficulty is reserved for masochists and
achievement-hunters. The enemies are absolutely
brutal, deadly accurate, and you have very little health. If
you’ve completed Veteran playthroughs on previous Call
of Duty games, you should find the enemies here a bit easier than
World at War and about par with Modern Warfare 2.
To get the most out of Call of Duty: Black Ops, we suggest you
challenge yourself with at least the Regular difficulty. If you find
yourself getting frustrated in a tough spot, remember that the game
doesn’t get progressively harder; some of the hardest spots are
in the early levels. If you really get stuck, you can always use the
Lower Difficulty option in the Pause Menu. This great feature allows
you to soften the enemies without interrupting your playthrough.
This guide’s walkthrough focuses on the Hardened difficulty setting.
This doesn’t affect the basic gameplay and strategy, but you may
breeze through a section that we belabor if you’re playing on an
easier setting.
Sprinting and Melee Attacks
Interrupt Your Reload
Some guns take a very long time to reload. Avoid interrupting the
process with a Sprint or a melee attack while the reload plays out.
That’s it for now—let’s get to the action!
If you decide the game’s violence is too much for you, you can
always exit the campaign and toggle the setting in the game’s
Option Menu under the “Graphic Content” setting.
10
©2010 DK/BradyGAMES®, a division of Penguin Group (USA) Inc. All Rights Reserved.
©2010 DK/BradyGAMES®, a division of Penguin Group (USA) Inc. All Rights Reserved.
SPECIALIZED TRAINING
When you first start a new Call of Duty: Black Ops campaign, you
are given the option to turn down the violence. Call of Duty: Black
Ops is an extremely gory and violent game that features closeup kills, executions, and torture. If you are at all squeamish, we
recommend you turn down the violence.
Weapon Penetration
Often, if you hit the very edge of a wall made of a hard substance,
such as concrete or brick, you can use weapon penetration to kill or
injure the enemy in cover.
The Lower Violence Setting
Enemies in Call of Duty: Black Ops are a crafty lot. Just because a
foe is knocked to the ground, it doesn’t necessarily mean he’s out of
the fight. Enemies that are still up on one elbow can attack you with
their sidearms.
Be sure to end their rally quickly by firing extra shots into them
from a distance.
Most weapons, but particularly assault rifles, have good weapon
penetration. This means you can fire your weapon through soft
objects like wood crates and plaster walls and still hit the enemy.
Use this tactic to your advantage when enemies are using cover.
If you’re playing on Veteran, you can still use our strategies, but you
have to be extra patient and especially wary of enemy grenades.
Downed (But Not Out) Enemies
Single-Player Walkthrough
©2010 DK/BradyGAMES®, a division of Penguin Group (USA) Inc. All Rights Reserved.
©2010 DK/BradyGAMES®, a division of Penguin Group (USA) Inc. All Rights Reserved.
15
OPERATION 40
The campaign takes place through an extended series of flashbacks
as the main character, Mason, is interrogated by an unknown man.
The first memory takes you to a smoke-filled bar in Cuba, 1961.
0500 April 17, 1961
Undertake a daring assassination attempt during the Bay of Pigs invasion.
Alex Mason
Support
Woods
Bowman
n Operation 40
“Wake Up… Wake Up!”
Improvised Outfitting
Black Ops specialists use the weapons they find in the
battlefield, and rarely start a mission fully equipped.
“We Got Company.”
Transmission# 15-18.
Designate:
X-RAY
Location:
Cayo Santa Maria, Cuba
Target:
Fidel Castro
After the bartender outlines your route to your mission objective,
your team is made by local security forces—your cover is blown.
Check your aim, and take out the soldier with the jammed gun.
to escape car
bar
The M16, the weapon with which you start
this mission, is incredibly versatile. It fires
deadly rounds at medium to long range.
In a pinch, it can be used to “spray and
pray” a close-up target, but you should start
looking for a short-range weapon to replace
your pistol as you escape the city.
Weapon: M16
The M16 is also equipped with a Grenade
Launcher attachment, which you can activate
by pressing left on the D-Pad. You also start
with ten grenades, which is a lot—use them
freely throughout the level.
After the bartender tosses you an M16, move to the window and wait for the signal from Woods, your
team leader.
©2010 DK/BradyGAMES®, a division of Penguin Group (USA) Inc. All Rights Reserved.
©2010 DK/BradyGAMES®, a division of Penguin Group (USA) Inc. All Rights Reserved.
Walkthrough
Hitting targets accurately with the Grenade
Launcher attachment takes some practice.
Be aware that, unlike bullets,
Grenades follow an arcing
trajectory as they’re lobbed
from the muzzle. If you hit
an enemy directly with one,
Clip Size
30
the impact usually causes an
Range
Medium to Long Range
instant kill, but it also prevents
Weapon Type Assault Rifle
the grenade from exploding.
17
n Operation 40
“Get to
the Alley!”
About halfway up the street,
two cars drive past your squad.
Quickly turn to face these
vehicles where they stop; fire a
grenade to destroy them both.
As you move up the street,
it isn’t long before police
completely overwhelm your
team. A line of police cars forms
a deadly roadblock at the end of
the street.
OBJECTIVE
Get Off the Streets
Follow Woods into the alley on the left to the running car. When you reach the car, move
toward it to get into the driver’s seat automatically. You don’t have many options here—
follow the onscreen instructions to back out of the alley and escape through the roadblock.
OBJECTIVE
Escape the Police
When the door opens, provide cover as
Woods advances on the police car. Using
the M16, fire into the front of the car to
detonate it, taking out the nearby police.
Your team detonates a second car as it
hurtles down the street. Stay behind Woods,
move to a crouched position, and advance
up the street.
In this section, it’s important to use objects
on the street for cover as hordes of police
reinforcements respond to the locals’ call
for help.
Walkthrough
Take your time as you advanced down the street. Be very careful not to get ahead of Woods—if you do, you’re vulnerable to fire from
multiple directions.
16
©2010 DK/BradyGAMES®, a division of Penguin Group (USA) Inc. All Rights Reserved.
©2010 DK/BradyGAMES®, a division of Penguin Group (USA) Inc. All Rights Reserved.
19
OBJECTIVE
After a brief return to the interrogation chair, you flash to a mountainside locale overlooking a large compound. This mission takes place
shortly after the previous car escape, so your weapons—including your remaining Grenade Launcher ammo—carry over.
Find and Kill Castro
n Operation 40
“There’s the Compound…”
All channels are go on your mission to kill Castro. Bowman and
Woods have point as you begin your advance into Castro’s
compound.
The soldier that Woods lands on is carrying an FN FAL, which is an
adequate weapon to switch out for your pistol temporarily.
start
zip line
intel 1
castro
intel 2
escape plane
intel 3
sugar fields
Follow the team inside the nearby building, and move behind the soldier talking on the radio. Press the Melee button to kill the enemy silently.
“Sit Tight, Do Not Engage”
Your allies have created a major distraction on a nearby airfield, and
the bulk of the compound’s forces are headed that way. Wait with
Woods as the enemies pass your location. If you fire on the troops
or try to cross the street before Woods gives the order to cross, you
fail the mission instantly.
When Woods gives the order, cross the street toward the next
compound building.
OBJECTIVE
Use Zipline to Infiltrate Compound
After your advance team sets off a flare, follow Woods down the zipline by moving behind him and holding the Interact button.
Two soldiers emerge from a vehicle on your right; take them out,
and more soldiers advance from the stairs above. Shoot them before
you search the nearby building.
Before you follow your team up the stairs, you can search the
building for a Skorpion with Supressor attachment, a Skorpion with
Extended Mag, an FN FAL with ACOG Scope, and a RPK with
ACOG scope. The soldiers are armed with more weapons, including
a KS-23 Shotgun.
18
©2010 DK/BradyGAMES®, a division of Penguin Group (USA) Inc. All Rights Reserved.
©2010 DK/BradyGAMES®, a division of Penguin Group (USA) Inc. All Rights Reserved.
Walkthrough
The Skorpion is a great close-range weapon and our recommended
companion for your primary M16 weapon. Take the Extended Mag
version, because the Suppressor is useless in this area. Alternatively,
you can try out the KS-23 Shotgun if you’re a fan of the weapon type.
21
Clip Size
20
Range
Short Range
Weapon Type Submachine Gun
The KS-23 is a straightforward shotgun, close
to what you should expect if you’ve used
shotguns in other Call of Duty games. The
weapon balances its faults of long reload
Castro has spared no expense decorating his manor, providing
plenty of expensive objects to use for cover as you move through
the villa. Remember that your M16 can shoot through penetrable
objects such as furniture if enemies take cover behind them.
Frag Out
You should’ve picked up some grenades by this point.
Toss some of these babies to clear out enemies holed up in
entrenched firing positions.
“Okay, Stack Up.”
time and slow firing rate with its virtue of
extreme damage at close range. One wellplaced shotgun blast can take out three
soldiers at once!
Weapon: KS-23
Clip Size
7
Range
Short to Medium Range
Weapon Type Shotgun
n Operation 40
It’s best to use the Skorpion
in close-quarters combat to
riddle a nearby target with
its tremendous rate of fire.
Be warned—the Skorpion
can empty a regular clip in
less than five seconds, so it
demands frequent reloading.
Weapon: Skorpion
When you reach the large double doors at the end of the hallway,
Woods readies for a breach. Move in behind him to activate your
first breach event.
One of the KS-23’s advantages
is its extra range over most
other shotguns. You can pick
off enemies with it from a
good 50 feet away if you take
careful aim looking down
the barrel.
“Castro’s Paranoid…with Good Reason.”
At the top of the stairs, wait for Bowman and Woods to go through the door, but follow close behind.
Provide fire support against the attacking enemies, and proceed out to the open area.
More soldiers attack your team through
the stone archway ahead. Find cover
behind a nearby concrete barrier, and
use your M16 to take them out.
Just before the archway, more Grenade
Launcher-enabled M16 assault rifles
rest against some crates to your right.
These guns do not possess the scope
that your default M16 has.
“Inside, Go!”
Intel
Before you proceed inside to the next building, switch to your closerange weapon. As you move in, watch out for enemies on your right.
Look on the wall on the
room’s opposite side for
your first piece of Intel. It’s
just above an RPG leaning
against a crate.
Now your job is to search the entire mansion until you find Castro.
Unfortunately, the building is crawling with enemies, and a tough
room-to-room fight awaits you.
Stay low and advance with Woods. Use your close-range weapon to
kill enemies as they pop out from surrounding doorways and fixtures.
breach
Use any gun except the shotgun for this breach—the
shotgun is too slow.
There are three enemies to worry about. Shoot the middle
guy first, before he can dive behind the sofa. Follow up with
the guy on the left, because he has a clear shot at you. You
have a few moments before you need to worry about the
advancing soldier to the right.
The room contains more FAL and RPK weapons. Now move behind
Woods again to activate your second breach.
breach
This breach has you firing on Castro while he holds a
hostage. It’s imperative that you aim carefully with your
pistol. If your shot hits the prostitute without also killing
Castro, he will fire and kill you.
Alternate Route
Death to Dictators
Score a headshot on Castro in this second breach to earn
this Achievement/Trophy. You know you triggered it correctly
if a slow-motion mini-cinema plays during the headshot.
20
©2010 DK/BradyGAMES®, a division of Penguin Group (USA) Inc. All Rights Reserved.
©2010 DK/BradyGAMES®, a division of Penguin Group (USA) Inc. All Rights Reserved.
Walkthrough
Instead of advancing
through the hallways with
Woods, you can move
through the door on your
left. This allows you to
flank some of the enemies
defending the compound.
To end the breach, use your pistol to shoot Castro in the
head or hand.
23
OBJECTIVE
Escape Compound
OBJECTIVE
Get to the Airfield
An RPG is directly ahead, next to the left set of sandbags. Swap out your short-range weapon for the RPG. Use the RPG to blow up the
truck on which the .50 cal is mounted. If you have extra rockets, use them to destroy other nearby trucks and several soldiers with them.
With your mission complete, you must now execute the escape plan. Unfortunately, most of the Cuban forces have moved to the airfield, and
that’s your primary route for escape.
n Operation 40
“They Got Half the Cuban Army Down Here.”
Follow Woods into the next building to rendezvous with Bowman. This next area requires you to engage the enemy at medium range, so
it’s a good idea to switch to the M16. You should have some grenades left in the launcher, so feel free to use them here to soften up any
enemies blocking your escape.
This is the first truly challenging part of the level. The enemies
can be very hard to see through the debris, and they have deadly
accuracy with their long-range weapons. Rather than advancing with
Woods and Bowman, stay far back, behind cover, and use your M16
to pick off enemies from a distance by aiming down your sights.
Watch out for further reinforcements from the double doors at the
other end of the room. Also, beware of some stragglers that may
arrive late from the mansion entrance below.
Weapon: RPG
Clip Size
N/A
Range
Long Range
Weapon Type Rocket Launcher
While the RPG is powerful, it is notoriously inaccurate.
Successfully hitting your targets from a distance requires
some practice. When you fire the RPG, try to aim lower than
where you want the rocket to go.
Intel
A bedroom is on the right side of this extended hallway (the side through which Bowman breaches). You can find the second
Intel piece on the dresser. Be sure you grab this before you descend the master staircase.
“We’re Pinned Down Here!”
Outside, a large number of Cuban forces have arrived on transport trucks. A .50cal heavy machinegun on one of the trucks tears into your
position.
Stay behind the first line of cover, crouch down, and use your M16 to
pick off remaining Cuban soldiers. Shortly, your ally Carlos arrives at
the east wall, unleashing rockets to devastate the nearby Cuban forces.
“You Think I’d Let You Down, Woods?!”
Woods orders you forward, but don’t rush up quite yet—an enemy armored assault vehicle arrives on the left side of the battlefield. Wait for
Carlos’ troops to destroy the tank before you make your way past the fountain in the courtyard.
Taking Matters into Your Own Hands
Instead of waiting for Carlos to blow the APC, you can use the RPG mentioned earlier to destroy the armored car upon its arrival.
Follow Woods and Bowman into the nearby sugar field. This field is enemy-free, but it soon leads back out over the airfield.
22
©2010 DK/BradyGAMES®, a division of Penguin Group (USA) Inc. All Rights Reserved.
©2010 DK/BradyGAMES®, a division of Penguin Group (USA) Inc. All Rights Reserved.
Walkthrough
Follow your squad down the stairs, but be careful of the additional enemies that may be defending the doorway outside.
When you run out of RPGs, switch back to the Grenade Launcher,
using any leftover rounds to clear
the courtyard
of enemies.
25
OBJECTIVE
n Operation 40
“Better Get Down There, Hook Up.”
Rappel Down into the Airfield
Hold the Interact button to rappel down to the airfield. Follow your team to the hangar ahead.
Intel
Before you start your mad dash across the runway, you can
find the third and final piece of Intel in the first hangar here.
It’s located at the top of
the movable stairs at the
hangar’s left side. Climb
the stairs to find it hiding
at the top.
OBJECTIVE
Get to the Plane
No time for complex strategy—use the Sprint button to keep up with Woods and Bowman as they dash
across the field to reach your escape plane.
OBJECTIVE
Protect the Plane from Damage
When you reach the plane, move to the rear to enter it automatically. You operate the plane’s machine gun, and it’s your job to defend the
aircraft as it takes off.
ZPU
A ZPU is a soviet anti-aircraft
gun. It fires rounds designed
to take down vehicles. These
are your biggest threat in
this sequence.
OBJECTIVE
Use the ZPU to Clear the Runway
“Mason, Are You Crazy?
They’ll Chew You Up Out There.”
When you jump off the plane,
sprint forward to the ZPU to mount
it automatically. Fire on the gas
trucks at the end of the runway to
clear a path for your allies.
Sacrifice
You automatically receive this Achievement/Trophy for
completing this level.
Watch out for the RPG-wielders
in the low airfield tower between
the two ZPU positions.
“They’re Trying to Take Out Our Engines!”
Walkthrough
During this sequence, you get unlimited ammunition, and your gun can’t overheat. Exploit this awesome power, aiming down your sight
to direct fire onto the attacking enemies. Your primary targets should be any red barrels or nearby trucks you see. Both provide massive
explosions that kill any surrounding soldiers.
If you make it to the end of
the airfield, your teammates
report that a line of vehicles has
conspired to block the runway.
When your plane turns up the runway to take off, a larger force of enemy weaponry lines the airfield. Prioritize the explosive fuel trucks and
the enemy ZPUs.
24
©2010 DK/BradyGAMES®, a division of Penguin Group (USA) Inc. All Rights Reserved.
©2010 DK/BradyGAMES®, a division of Penguin Group (USA) Inc. All Rights Reserved.
MULTIPLAYER Maps
These map briefings give you an overview of the major features and terrain on each of the 14
multiplayer maps in Call of Duty: Black Ops.
It’s very important to remember that the game mode you select for a map dictates the level’s flow.
High-traffic hotspots in Team Deathmatch may see little or no significant conflict in a Capture the
Flag or Domination match.
We’ve included route maps to highlight a few primary travel pathways in Capture the Flag,
Demolition, Domination, Sabotage, and Search & Destroy. Generally, you can expect to see enemy
(and friendly) movement along these routes, as well as a good amount of fighting. Of course, each
match will have its own personality, so consider the high-traffic paths marked on the following
maps to be flexible.
If you need to avoid combat for one reason or another, staying off the hot routes is a good idea.
Finding a good location to cover an objective is usually a matter of finding a spot with sight lines to
both the objective and at least one hot route that sees a lot of traffic.
Conversely, if you want to hit an objective on offense, you can often find a safer route by avoiding
the most obvious pathways to the objective. Coupled with a proper custom class, this approach can
often inflict more damage than making a faster but more exposed assault.
When you want to drop a package on the level, areas away from routes and preferably near or
behind your friendly spawn area are the safest places to use. This also applies if you seek a hideyhole to use a guided Killstreak of any sort.
In Free for All, Team Deathmatch, and, to some extent, Wager Matches, it’s easy to see the hotspots
in-game by viewing the heatmaps of matches you’ve played. In most cases, they’re exactly what
you’d expect. Centrally located areas with many routes for ingress and egress are usually the
hottest zones.
Surviving in the preceding modes is a matter of skirting hot zones to find targets. Avoid traveling
through them as much as possible to limit your exposure to unfriendly eyes.
Headquarters is distinct among all objective modes in terms of flow; combat hotspots and routes
change dynamically as the Headquarters moves around the map. See the Modes chapter to learn
more about the implications of this.
Take the time to look over the HQ locations marked on the maps. After you spend some time playing,
you should get a better feel for good routes to approach the HQ safely, cover the HQ, or cut off the
enemy team.
On any map, good, solid Call of Duty play is always important. Stay behind cover, move quickly from
cover to cover, don’t sprint around blind corners, and be alert around doorways and windows.
Communicate with your teammates and learn the maps. By using the alpha-numeric coordinates
on the map (these match up identically with the in-game minimap), you can quickly call out enemy
positions and movement. A well-coordinated team that communicates is very tough to beat.
230
©2010 DK/BradyGAMES®, a division of Penguin Group (USA) Inc. All Rights Reserved.
©2010 DK/BradyGAMES®, a division of Penguin Group (USA) Inc. All Rights Reserved.
233
Terrain
Arctic
Key Features
Huge, centrally located communications array; open, snowy exterior.
Map Size
Large
Map Profile
Scattered exterior building cover. Some CQB in array interior.
The bulk of this level’s conflict occurs in
and around the communication array. The
inner structure has sight lines to most areas
outside, allowing any gunner inside to take
out enemies in the open.
When you traverse the outer “ring,” it’s
important to use the available cover to
protect you from multiple sight lines. If
you’re careful and you move fast from cover
to cover, you should have little to worry
about from enemies inside the array. Keep
your focus on external threats. Just be
aware if someone in the array targets you—
don’t make yourself an easy target.
2
The level’s northwest attracts action
because it’s an open area that the center
structure’s windows can cover. Several
pathways and spawn points intersect
in the area.
3
4
Be cautious about hiding out in the
northwest. There aren’t a lot of great places
to hide. Because this area acts as a highway
for conflict just outside the array, it’s
usually not a safe place in which to fight for
any length of time.
1
5
SEARCH & DESTROY
nnn MULTIPLAYER
Array is a large, snowy level set around
a huge communication array station
in the center.
Array
KEY
Black Ops Spawn
Spetznaz Spawn
Bomb-Search & Destroy / Sabotage Modes
Search & Destroy / Demolition Plant Site
Domination
Medium to long-range combat reigns
supreme here, so bring your Assault Rifle or
Sniper Rifle. You can make good use of an
LMG, but the movement penalty is rough.
Take Marathon to let you get around the
map if you’re insistent on using an LMG.
Domination Flags
Black Ops CTF Flag
Spetznaz CTF Flag
Headquarters Point
Ladder
Black Ops Sabotage Plant Destination
Spetznaz Sabotage Plant Destination
Arrows are color-coded to match the levels that
they lead to
The center communication structure gives sight lines to most of the map, with a blind spot to the southeast. There are entrances in the west and
northeast. Expect heavy fighting if you choose to stay inside the array.
2
This sniper tower provides excellent, elevated sight lines, but it’s also highly exposed to incoming fire. Use with caution.
3
The map’s eastern portion has a significant amount of cover. In most modes, it’s not a hotspot for conflict. As a result, this area is good for
moving around from the north to the south without coming into conflict with the level’s more active central region. You can also use this area as
a drop zone for packages.
4
The northwest hill acts as a meeting point for several pathways between the north and the south to the west of the array. As a result, expect
plenty of combat in this area. Remember that the larger finished building acts as solid cover and blocks sight lines. Meanwhile, the smaller
unfinished building is not a safe place to take cover.
5
The map’s southwest isn’t a great place to camp, but it does provide access to one of the two array entrances. You can get around the array
safely by moving through its blind spot to the east.
MAPS
1
If you want to force shorter-range
engagement, bring an SMG and go for the
array itself. Don’t bring a Shotgun because
there’s too much ranged combat and few
areas where you can continually fight in
close quarters.
232
©2010 DK/BradyGAMES®, a division of Penguin Group (USA) Inc. All Rights Reserved.
©2010 DK/BradyGAMES®, a division of Penguin Group (USA) Inc. All Rights Reserved.
235
Can be used at the entrances to the array itself, difficult
to use as a booby trap elsewhere.
Camera Spike
If you plan on sticking around in one part of the
outer ring, you can use a Camera Spike to cover your
blind spot.
Claymore
Not a lot of great chokepoints to cover, but it can block
an entrance to the array.
Jammer
Fairly useful if placed in the array itself, less so in the
outer ring. To clear the array, set one up before you
assault it. Alternatively, place one inside once you’ve
claimed it.
Motion Sensor
Useful in the array, but due to the structure’s size,
covering all possible entryways isn’t possible.
Tactical Insertion
Be careful where you place your Insertion—the glow
can reveal it from a good distance.
Capture the Flag
Demolition
Sabotage
nnn MULTIPLAYER
C4
Headquarters
ARRAY
Equipment Tips
Suggested
Custom Classes
Silent Serpent
Primary/
Secondary
PSG1/Crossbow
Attachments
Variable Zoom
Lethal/Tactical/
Tomahawk/Decoy/Motion Sensor
Equipment
Perk 1
Ghost
Perk 2
Scout
Perk 3
Ninja
Killstreaks
RC-XD/Counter Spy Plane/
Mortar Team
This class has you fully outfitted with everything
you need to be the best sniper you can be.
Winter
Wonderland
Primary/
Secondary
Enfield/Crossbow
Attachments
ACOG
Lethal/Tactical/
Frag/Nova Gas/ Tactical Insertion
Equipment
Perk 1
Hardline
Perk 2
Sleight of Hand
Perk 3
Ninja
Killstreaks
RC-XD/Mortar Team/Valkyrie
Rockets
Put on your snowy best and cover long-range and
close-quarters engagements with this class.
MAPS
234
©2010 DK/BradyGAMES®, a division of Penguin Group (USA) Inc. All Rights Reserved.
©2010 DK/BradyGAMES®, a division of Penguin Group (USA) Inc. All Rights Reserved.
237
WAGER MATCH VARIANT
SEARCH & DESTROY
KEY
SOG Spawn
NVA Spawn
Terrain
Urban
Bomb-Search & Destroy / Sabotage Modes
Key Features
Bombed-out central “hill” area; many damaged rooms and buildings.
Search & Destroy / Demolition Plant Site
Map Size
Medium
Domination Flags
Map Profile
Intense building-to-building CQB. Many windows and doorways; dangerously exposed open streets.
SOG CTF Flag
nnn MULTIPLAYER
Cracked
NVA CTF Flag
Headquarters Point
Ladder
SOG Sabotage Plant Destination
NVA Sabotage Plant Destination
Arrows are color-coded to match the levels that
they lead to
Cracked is a small urban warfare map,
the bombed-out remains of a riverfront
Vietnamese city.
Cracked demands good situational
awareness. Use caution when you set up for
camping, or employ rapid movement and
aggression to cover ground and take down
your targets.
5
4
We recommend either running a CQB build
with a Shotgun or SMG, or a build designed
for medium-range combat with an AR or
LMG. You can use sniping on this map, but
few locations are completely safe from
being flanked. Getting a good sight line over
the entire level is impossible.
1
Domination
If you’re going for CQB, use defensive and
stealthy gear choices. You need to cross
open streets and alleyways likely to be
covered by campers in various buildings
with longer-range weaponry.
3
2
The bombed-out and ruined center of the map is a constant hotspot. Avoid moving through here whenever possible.
2
The far southeast building has a window that provides sight lines all the way up toward B4, which is useful if you’re using a strong
long-range weapon.
3
This cracked building provides coverage of the western corridor up toward C2. However, be wary of your exposure to the east toward D3.
4
The two buildings at C3 and C4 are conveniently connected. Moving around in them provides plenty of cover and sight lines through the center
and east of the map.
5
This building is the only structure on the map’s northwest that has a window looking south. Use it with caution, because anyone in the center of
the level can easily spot you and shoot through the thin wall.
For medium-range combat, consider
camping to cover the alleys and streets.
Many buildings with windows overlook
various parts of the map. Because you can’t
cover all possible approaches, either work
solo and bring equipment to cover your own
tail, or communicate with your teammates
to block routes from the enemy spawn to
your position.
You become very vulnerable to long-range
retaliation or an explosive lobbed through
the window if you hang out for too long. Try
one spot, grab a few kills, and then move
to another position. At the very least, try
another angle on the same area.
MAPS
1
If you can get behind the enemy position,
you can deal a lot of damage with a CQB
setup. This is especially true if you’re
running a silencer and opponents don’t pick
up on your presence until it’s much too late.
236
©2010 DK/BradyGAMES®, a division of Penguin Group (USA) Inc. All Rights Reserved.
©2010 DK/BradyGAMES®, a division of Penguin Group (USA) Inc. All Rights Reserved.
239
Camera Spike
Claymore
Jammer
Motion Sensor
Tactical Insertion
Capture the Flag
Demolition
Sabotage
nnn MULTIPLAYER
C4
Headquarters
CRACKED
Equipment Tips
When you’re advancing, C4 is useful as an extra
explosive to toss into a room. When camping, you can
plant it in an alleyway approach that you’re already
covering. You can occasionally use it to cover your
six as well.
Very useful. Plant it at the end of one of the streets and
slice a visual tripwire directly across the entire map.
If the other team doesn’t notice it, you always know
when they’re coming. Just watch out for people using
Ghost Pro or smoke to evade your all-seeing eye.
Very useful as well. If you’re camping, drop it to guard
one of the main entrances to your hideout. Even when
you play aggressive, you’re almost guaranteed to get
a kill out of your Claymore if you place it properly in a
high-traffic area.
Strong in the center of the map. Cracked isn’t a large
map, and the Jammer can cover a lot of it, shutting
down enemy equipment and blinding them as they
approach midfield.
Very helpful when camping. Be highly sensitive to
enemy Motion Sensor usage on offense. Either run
Hacker Pro or use a Jammer to shut down enemy
Sensors.
Very useful in a lot of modes. There are tons of nooks
and crannies where you can hide a Tactical Insertion.
If you’re running a CQB build, bring an Insertion to
move your spawn point once you get behind enemy
lines. The only thing better than clearing out the enemy
team once is doing it twice because you spawned
behind them.
Suggested
Custom Classes
wall-ey
Primary/
Secondary
HK21/Python
Attachments
Extended Mag/ACOG
Lethal/Tactical/
Frag/Flashbang/Motion Sensor
Equipment
Perk 1
Scavenger
Perk 2
Hardened
Perk 3
Marathon
Killstreaks
Spy Plane/Sentry Gun/Attack Dogs
This powerful combo keeps you stocked with
ammo to spray through this map’s many walls
with deadly results.
Pain Train
Primary/
Secondary
RPK/China Lake
Attachments
Extended Mag
Lethal/Tactical/
Semtex/Nova Gas/Claymore
Equipment
Perk 1
Lightweight
Perk 2
Steady Aim
Perk 3
Marathon
Killstreaks
Counter Spy Plane/Care Package/
Sentry Gun
Use this class to run-and-gun your way through
the many buildings with plenty of rounds to spare.
MAPS
238
©2010 DK/BradyGAMES®, a division of Penguin Group (USA) Inc. All Rights Reserved.
©2010 DK/BradyGAMES®, a division of Penguin Group (USA) Inc. All Rights Reserved.