1
Xperia™ Z4
User Guide
1
Introduction
About the User Guide........................................................ 3
Accessing Instructions on Handset................................... 3
Getting Started
Parts & Functions.............................................................. 6
SIM Card.............................................................................. 7
Internal Memory and SD Card............................................9
Xperia™ Z4 User Guide
Contents
Charging Battery.............................................................. 11
Power On/Off................................................................... 11
Using Touchscreen............................................................ 12
Initial Settings..................................................................13
Basic Operations
Basic Operation.................................................................16
Applications.......................................................................17
Phone Number................................................................... 20
Silent Mode....................................................................... 21
Airplane Mode................................................................... 21
Text Entry.........................................................................22
Using a Google Account................................................... 24
Google Play....................................................................... 26
Security Codes.................................................................. 28
SIM PIN.............................................................................. 29
Locking Screen.................................................................. 30
Updating Software........................................................... 30
Handset Interface
Home Screen Basics.......................................................... 34
Status Bar......................................................................... 35
Using Notifications Window/Quick Settings.................. 36
Activating/Canceling Recently-Used Applications......... 37
Using Small Apps.............................................................. 38
Rearranging Home Screen.................................................41
Phone
Placing/Answering Calls................................................... 46
Placing a Call from Contacts/Call History..................... 49
Optional Services..............................................................51
Making Call Settings........................................................ 56
Using Contacts..................................................................57
Importing Contacts...........................................................60
Backing Up Contacts........................................................ 60
Messaging & Internet
Messaging.......................................................................... 62
S! Mail Initial Setup......................................................... 62
Thread List/Folder List................................................... 64
Sending S! Mail/SMS.........................................................65
Sending Decore Mail by S! Mail....................................... 66
Opening & Replying to S! Mail/SMS................................ 67
Managing S! Mail/SMS...................................................... 69
S! Mail/SMS Settings........................................................78
Using Gmail....................................................................... 81
Using Email........................................................................84
Xperia™ Z4
Operations When Creating S! Mail/SMS..........................75
2
Using Chrome.................................................................... 87
Display............................................................................. 159
Camera
Storage............................................................................ 161
Sound & notification......................................................160
Capturing Still Images/Videos......................................... 92
Viewing Captured Still Images/Videos (Album).............. 94
Editing Captured Still Images (Album)............................95
Sharing Still Images and Videos......................................97
Making Camera Settings.................................................. 98
Full Seg/One Seg
Viewing TV (Full Seg/One Seg)..................................... 104
Recording/Playing Back Programs................................. 107
Recording/Viewing at Preset Times..............................109
Useful Functions
Using Urgent News.........................................................112
Power management.........................................................162
Apps................................................................................. 162
Tap & pay....................................................................... 163
Location........................................................................... 163
Security........................................................................... 164
Accounts.......................................................................... 166
Language & input........................................................... 167
Backup & reset............................................................... 168
Setup guide..................................................................... 169
Date & time.................................................................... 169
Accessibility.................................................................... 170
Printing............................................................................171
About phone....................................................................171
Using Google Maps......................................................... 113
For Assistance
Using Hangouts............................................................... 114
Saving Data..................................................................... 174
Using Google Search.......................................................115
Using Calculator............................................................. 116
Using Calendar................................................................ 116
Using Alarm & Clock...................................................... 118
Using Twitter................................................................. 120
Using Facebook............................................................... 121
Using YouTube................................................................ 121
Listening to Music (Music)............................................ 122
Using PC Files.................................................................122
Using NFC/Osaifu-Keitai ® ............................................. 123
Using Downloads.............................................................126
Using Drive......................................................................127
Using Play Books............................................................ 127
Using Play Movies & TV................................................ 128
Using Play Games........................................................... 128
Using Google+.................................................................129
Using Google Settings....................................................129
Connectivity
Connecting to PC via USB............................................. 132
Connecting via Wi-Fi......................................................132
Using Tethering.............................................................. 137
Using Bluetooth ® Function............................................138
Using DLNA Function..................................................... 141
Global Services
Before Using Handset Abroad....................................... 146
Making Calls while Abroad............................................ 148
Handset Settings
Handset Settings............................................................ 152
Wi-Fi................................................................................ 153
Bluetooth.........................................................................154
Data usage...................................................................... 154
Xperia™ Connectivity.....................................................155
More................................................................................. 156
Personalization............................................................... 157
Home................................................................................ 158
Backing up & Restoring................................................. 174
Troubleshooting.............................................................. 175
Specifications..................................................................176
Warranty & After-Sales Service................................... 176
Customer Service............................................................ 177
Safety Precautions
Safety Precautions......................................................... 180
Important Product Information.....................................187
Bluetooth ® /Wi-Fi (WLAN)..............................................188
Waterproofing/Dustproofing......................................... 190
End User License Agreement......................................... 192
Export Controls and Regulations.................................. 192
Intellectual Property Rights..........................................193
RF Exposure Information/Specific Absorption Rate (SAR)
Information..................................................................... 195
Declaration of Conformity for 402SO..........................196
VCCI..................................................................................197
3
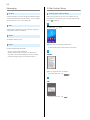
Introduction
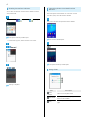
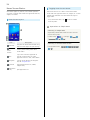
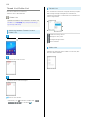
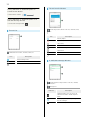
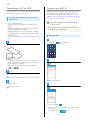
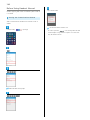
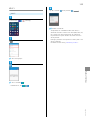
Accessing Instructions on Handset
Thank you for purchasing this product.
Use Guide application to learn touch operations or making
settings.
Before Using This Product
Launching Guide
Read "Safety Precautions" and this guide thoroughly
Introduction
About the User Guide
beforehand for proper usage.
Accessible services may be limited by subscription contract
conditions.
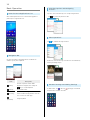
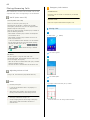
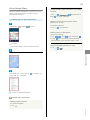
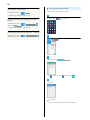
In Home Screen,
(SoftBank)
(Guide)
Descriptions in the User Guide
In the User Guide, most operation descriptions are based on
handset at time of purchase.
Unless noted otherwise, descriptions are for Home Screen.
Some operation descriptions may be simplified.
Screenshots & Key Labels
Screenshots in the User Guide may differ in appearance with
actual Display. Key labels in the User Guide are simplified for
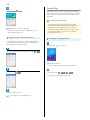
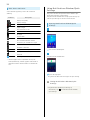
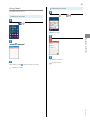
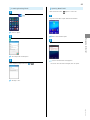
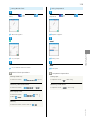
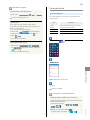
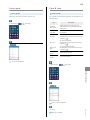
Smartphone Guide top window opens.
・If using Smartphone Guide for the first time, Usage notes
and Auto Update confirmation appear. Follow onscreen
instructions.
description purposes and differ with actual Display.
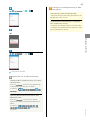
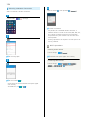
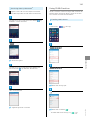
Setting Auto Update
Other Notations
In the User Guide, the product is referred to as "handset."
In Smartphone Guide top window,
on / off
Auto Update
BACK
microSD™/microSDHC™/microSDXC™ Card is referred to as "SD
Card."
Xperia™ Z4
4
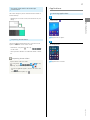
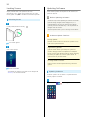
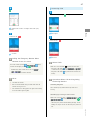
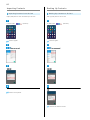
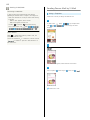
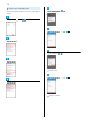
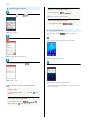
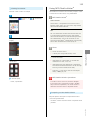
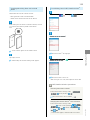
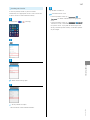
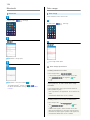
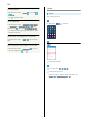
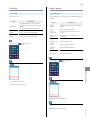
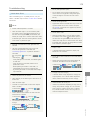
Showing Status Bar Indicator
Launching Guide from Notifications
Window
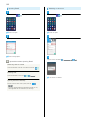
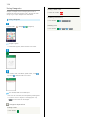
Set to show the indicator on Notifications Window to launch
Smartphone Guide.
Show Smartphone Guide indicator on Status Bar to check
functions quickly from Notifications Window.
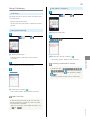
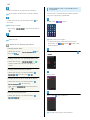
In Home Screen,
(SoftBank)
(Guide)
Drag Status Bar down to open Notifications Window
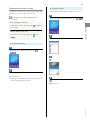
Smartphone Guide top window opens.
・If confirmation appears, follow onscreen instructions.
Indicator
Notifications Window opens.
Guide
Smartphone Guide top window opens.
on
BACK
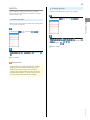
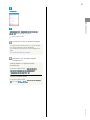
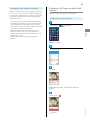
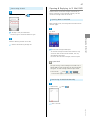
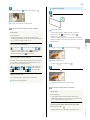
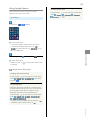
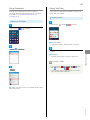
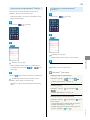
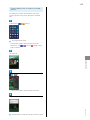
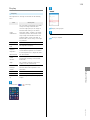
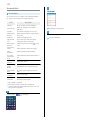
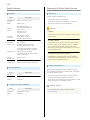
Using Guide
Setting is complete.
Item
Enter
Keyword
Open Guide
FAQ
Description
Search for Smartphone Guide.
Check operations for usage purpose. Voice
search is also available.
Check FAQ. Or access FAQ mobile web
page.
Getting Started
Parts & Functions.............................................................. 6
SIM Card.............................................................................. 7
Internal Memory and SD Card............................................9
Charging Battery.............................................................. 11
Power On/Off................................................................... 11
Using Touchscreen............................................................ 12
Initial Settings..................................................................13
6
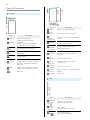
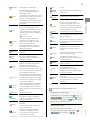
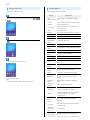
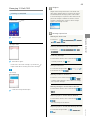
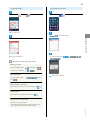
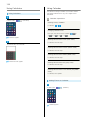
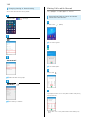
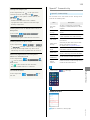
Parts & Functions
Handset
Item
Description
Capture still images and videos.
Camera
Flash/
Photo Light
Part
Second Mic
Description
Reduces noise for calling.
Connect commercially available
Headphone
Port
headphones.
This port supports tetrapolar headset
that conform to the CTIA standard.
Earpiece/
Speaker
Notification
Lamp
Front
Camera
Hear the other party's voice here.
Flashes for incoming transmissions. Lights
while charging.
Capture yourself.
Detects surrounding brightness to
Proximity
Sensor
automatically adjust Display or backlight
and prevent Touchscreen misoperation
during a call.
Display
Mic/
Speaker
Handset uses a touchscreen-type Display.
Operate with your fingers on Display.
Speak here.
Wi-Fi/
Use as camera flash in a dark place.
Internal Antenna for Wi-Fi and Bluetooth ®
Bluetooth ®
Antenna Area
NFC Mark
Internal
Antenna/GPS
Antenna Area
feature.
Hold mark up to reader/writer to use
NFC/Osaifu-Keitai ® feature.
Internal Antenna for calls, data
communication and GPS.
CE mark, FCC ID, IMEI information printed
Nameplate
sticker is attached. Do not remove
nameplate.
Wi-Fi
Antenna Area
Internal Antenna for Wi-Fi.
Internal Antenna for call and data
Internal
Antenna Area
SIM Card/
SD Card Slot
External
Device Port
Strap Hole
communication.
Insert SIM Card/SD Card.
Connect commercially available Micro USB
Cable etc.
Attach strap.
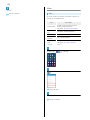
Keys
Part
Description
Power Key/
Screen Lock
Key (
)
Volume/
Zoom Up/
Press for sleep mode on/off.
Adjust Volume.
Adjust Zoom while using Camera.
Down Key
Camera
Key (
Long Press for power on/off.
Use as Camera shutter.
)
Long Press to launch Camera.
7
SIM Card
SIM Card is an IC card containing phone number and other
customer information.
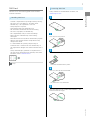
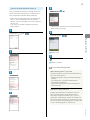
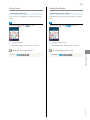
Inserting SIM Card
Always unmount SD Card beforehand. For details, see
"Unmounting SD Card."
Open Slot Cover using groove
・Customer is responsible for any damage caused by inserting
SIM Card in an IC card reader, etc. of another brand.
・SoftBank Corp. is not responsible in such case.
・Always keep the IC chip clean.
Getting Started
Handling SIM Card
・Avoid applying labels. May damage SIM Card.
・See instructions included with SIM Card for handling.
・SIM Card is the property of SoftBank Corp.
・SIM is replaceable (at cost) in case of loss/damage.
・Return SIM Card to SoftBank Corp. when canceling
subscription.
Draw Tray out using the tab
・Returned SIM Cards are recycled for environmental purposes.
・Note that SIM Card specifications and performance may
change without notice.
・It is recommended that you keep a separate copy of
information that is stored on SIM Card. SoftBank Corp. is
not responsible for damages from stored information that is
lost.
・Always follow emergency procedures to suspend service if
your SIM Card or handset (SIM Card inserted) is lost/stolen.
For details, contact Customer Service.
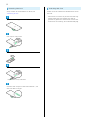
IC chip
Set SIM Card into Tray with IC chip facing up
・Check SIM Card orientation by notch.
Insert Tray with SIM Card into handset
・Pay attention to Tray orientation.
Close Slot Cover and press it down where indicated ○, and
make sure there are no gaps
Xperia™ Z4
8
Removing SIM Card
Unlocking SIM Card
Always unmount SD Card beforehand. For details, see
Handset can be SIM-unlocked to accommodate other-carrier
"Unmounting SD Card."
SIM cards.
・Some services or functions may be restricted when using
another mobile's SIM Card. SoftBank Corp. does not
Open Slot Cover using groove
guarantee any operation of those services and functions.
・For details on SIM unlocking, see the SoftBank Web page.
Draw Tray out using the tab
Remove SIM Card from Tray
Insert Tray into handset
・Pay attention to Tray orientation.
Close Slot Cover and press it down where indicated ○, and
make sure there are no gaps
9
Internal Memory and SD Card
Save data to handset memory or SD Card.
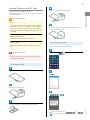
Insert Tray with SD Card into handset
Handset supports SD Cards up to 128 GB. Some SD Cards may
not operate properly.
Data
Information stored on SD Card can become lost or changed
accidentally or as a result of damage. It is recommended
that you keep a separate copy of important data. SoftBank
Corp. is not responsible for damages from data that is lost
Close Slot Cover and press it down where indicated ○, and
Getting Started
SD Card Cautions
make sure there are no gaps
or changed.
Reading/Writing Data
Never power off while reading or writing data.
Battery Level
A low battery charge may prevent reading/writing to SD
Card.
Handling SD Card
Unmounting SD Card
Always unmount SD Card before removing.
In Home Screen,
(Settings)
Use/store SD Cards away from the reach of infants. May
cause choking if swallowed.
Inserting SD Card
Open Slot Cover using groove
Storage
Draw Tray out using the tab
Unmount SD card
OK
Set SD Card into Tray with metal terminals facing up
Xperia™ Z4
Item name changes from Unmount SD card to Mount SD
card . SD Card is unmounted.
10
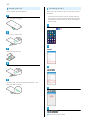
Removing SD Card
Always unmount SD Card beforehand.
Formatting SD Card
When using a new SD Card for the first time, always format it
on handset.
・Formatting erases all data on SD Card. Carefully check any
Open Slot Cover using groove
SD Card that was used on another device before formatting.
・Charge Battery while formatting, or format with adequate
battery charge.
In Home Screen,
(Settings)
Draw Tray out using the tab
Storage
Remove SD Card from Tray
Insert Tray into handset
Erase SD card
Close Slot Cover and press it down where indicated ○, and
make sure there are no gaps
ERASE SD CARD
ERASE EVERYTHING
All data on SD Card is erased.
11
Charging Battery
Charging with AC Charger
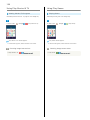
Power On/Off
Powering On
(SoftBank SELECTION Quick Charge 2.0) (SB-AC12-HDQC) or
AC Charger (Micro USB 1.8A) (ZTDAD1).
(Long Press)
For other devices, see the SoftBank Web page.
Operation using AC Charger (Micro USB 1.8A) (ZTDAD1) is
explained here.
Getting Started
AC Charger is an optional accessory. Use specified AC Charger
・See instructions included with AC Charger.
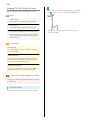
Insert Micro USB connector of AC Charger straight into
External Device Port
Lock screen appears.
・See "Unlocking Screen" to unlock the screen.
・Startup wizard appears the first time handset is powered
on. See "Making Initial Settings" to make settings.
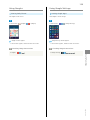
Powering Off
・Pay attention to connector orientation. Forcible connection
may cause damage.
(Long Press)
Raise power plug of AC Charger to plug into power outlet
Notification Lamp on handset lights up when charging
starts.
Power off
When charging is complete, unplug AC Charger and remove
straight from handset
Handset powers off.
Xperia™ Z4
12
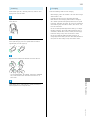
Using Touchscreen
Handset uses a touchscreen-type Display. Operate with your
fingers on Display.
Tap
Contact Display lightly and briefly.
Touch & Hold
Touch screen lightly and hold it for a while. When the screen
changes, release finger.
Drag
Touch icon or other item lightly, move it where desired, and
release finger.
Swipe/Flick
Contact Display lightly, then brush screen up/down or left/
right.
Pinch/Spread
Contact Display lightly, then close/widen fingers.
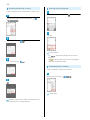
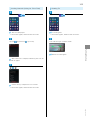
13
Initial Settings
Startup wizard appears the first time handset is powered
Set world of Sony (Connect Sony Entertainment Network)
on. Set a Google™ account and Wi-Fi. Follow onscreen
instructions.
Getting Started
Making Initial Settings
Some steps are different in use environment. Follow onscreen
instructions.
English (United States)
DONE
Set online service account or auto sync
Set Wi-Fi network
FINISH
Initial settings are made.
GET STARTED
Set Google account
・For details on Google account, see "Using a Google Account."
・To cancel Google account setting, Tap GET STARTED
.
Xperia™ Z4
14
Basic Operations
Basic Operation.................................................................16
Applications.......................................................................17
Phone Number................................................................... 20
Silent Mode....................................................................... 21
Airplane Mode................................................................... 21
Text Entry.........................................................................22
Using a Google Account................................................... 24
Google Play....................................................................... 26
Security Codes.................................................................. 28
SIM PIN.............................................................................. 29
Locking Screen.................................................................. 30
Updating Software........................................................... 30
16
Basic Operation
Selecting Options and Navigating
Screens
Home Screen & Applications List
Most handset operations start in Home Screen (appears at
Tap items, icons, onscreen keys, etc. to open assigned items.
・Tap
to go back to previous screen.
power on) or in Applications List.
Menu Operations
Tap
for available settings and items.
Navigation Bar
Key icons are shown in Navigation Bar at the bottom of
window. Tap Key icon to operate.
Item
Touching & Holding Display.
Description
Go back to previous screen. When
(Back)
Screens may also have settings and items that are available by
keyboard is displayed, this changes to
Handset Settings and Making Settings
. Tap it to close keyboard.
(Home)
Go to Home Screen.
Open recently-used applications list to
(History)
launch or delete the applications from the
list. Or use or set small apps.
(Keyboard)
Change keyboard.
In Home Screen, Tap
then Tap
the operation of handset functions.
(Settings) to customize
17
Applications
Portrait Orientation & Landscape
Orientation
The screen changes to portrait orientation when handset is
Launching Applications
rotated sideways.
・Depending on the current screen, the orientation may not
change.
In Home Screen,
Basic Operations
Applications list opens.
Capturing Screenshots
Long Press
and Volume Down Key at the same time to
capture a screenshot of the current screen.
・Alternatively, Long Press
Tap the application
then Tap Take screenshot
on the screen.
・View captured screenshots in Screenshots folder in Album,
etc.
Capturing Screen Video
Application is activated.
Capture shown screen as a video.
(Long Press)
Record screen
To stop
capturing, Tap the recording time button
・If terms of agreement appears, confirm the content and
Tap AGREE .
・To close the control panel, Tap
.
Xperia™ Z4
18
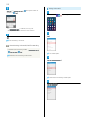
Applications List
(Play
Movies & TV)
Applications pre-installed by default are as follows.
・In Applications list, some applications are contained in "ツー
ル," "Sony Service," "SoftBank" and "安心・安全" folders.
Icon
Function/Service
applications in tool, entertainment,
(App Pass)
music, fortune-telling, game, lifestyle, or
business categories.
(PSN)
Use PlayStation™ Network services.
(Smart
Set operations for connecting external
Connect™)
(TrackID™
(Chrome)
(Email)
title and artist name.
Check information for currently showing
TV program.
TV)
(TV
SideView)
Receive perks such as free tickets for
purchasing additional items every month.
device or activating/ending applications.
Recognize music played and search the
(TrackID™)
All-you-can-download service application
for top-rated and standard paid
Rent Google Play movies.
Use handset as remote controller for Sony
TV.
Twitter official client application for
(Twitter)
publishing short messages on websites to
Access Internet via Google Chrome.
share with others.
Send and receive emails. Multiple accounts
All-you-can-view general entertainment
application offering more than 100,000
can be set.
(UULA)
contents in various categories such as
(Facebook)
Launch Facebook client application.
(File
Search for still images, videos, music, or
videos, live performances, and karaoke;
downloaded files.
Original UULA contents are also available.
Commander)
(FM radio)
Use FM radio.
(Gmail)
Send or receive mails for Google accounts.
(Google)
(Google+)
(Google
Settings)
(What's
New)
Search on handset or web pages by
keywords.
Launch "Google+" social networking client
application provided by Google.
Make settings for Google applications.
SagiWall)
Spot Settings)
page is detected.
(Lifelog)
(Xperia™
Lounge Japan)
Sony's high sound quality download web
Automatically create and edit photo
movies from capture photos and videos.
Various search menus such as "リアルタ
(Yahoo!)
(YouTube)
ス)
features, and recommended products/
contents.
View and edit Word, Excel, and other files.
Connect to PlayStation and operate or
(Play
Games)
(Play
Store)
(Play
Books)
イム検索" (real time search) for catching
"tweets."
enter text with PlayStation.
Download games from Google Play.
Download or purchase a variety of
applications from Google Play.
Download books from Google Play.
Play videos on YouTube.
All-you-can-view popular anime programs:
(AnimeHodai)
(Alarm &
clock)
(Album)
old favorites, latest on the air, and more.
Set and use alarms, world clock,
stopwatch and timer.
View still images and videos.
Save handset data for Contacts/
information from SoftBank.
SoftBankプラ
(PlayStation)
Communications products and campaigns.
other information.
Check your charges, convenient handset
(OfficeSuite)
Access web pages for Sony Mobile
Also, check news, weather, disaster, or
Guide application providing useful
(My
Subscription to SoftBank Wi-Fi Spot
number of steps, used calories, shooting,
store.
Creator)
automatically in SoftBank Wi-Fi Spot area.
Activate Yahoo! JAPAN for smartphones.
Purchase music and music videos from
(Movie
applications.
Record user's daily activities such as
and music listening with handset.
(mora)
movies, or update information for
service is needed.
and other malicious web pages.
Alert window appears if dangerous web
Check latest information for music,
Enable login to SoftBank Wi-Fi Spot
(Wi-Fi
Protect handset from "one-click fraud"
(Internet
popular movies, dramas, animes, music
(あんしん
バックアップ)
Bookmarks/Calendar/S! Mail to the cloud
server or SD Card, or load the server data
to your handset.
Convenient when changing models.
(位置ナビ
Link)
(OsaifuKeitai)
(Voice
Search)
(Audio
Recorder)
(Camera)
Let others find your handset location.
Requires subscription to optional 位置ナビ
service.
Use Osaifu-Keitai ® .
Use Google Voice Search.
Record voice or music in high sound
quality.
Capture photos or videos.
19
(Calendar)
View calendar to manage events.
Receive Earthquake Early Warning
(Urgent
News)
籍 Reader by
Meteorological Agency.
Sony)
the target area, handset sounds an alert,
vibrates, and a message appears.
(Calculator)
(Phone)
videos from special topics updated every
(Drive)
(News
from
disaster, such as a "6弱" (roku-jyaku, "6
Message
Lower") or larger earthquake.
Board)
And saved whereabouts information is
automatically sent to specified email
address set in advance.
Socialife)
(Hangouts)
(Video)
(Maps)
(Music)
leakage of personal information.
application, email attachment files, or SD
Play back music data saved in handset
memory or SD Card.
"@x.vodafone.ne.jp" mail address.
pictograms is available.
Free information service providing news
Application for subscribers of ケータイな
100 special contents every day available
sites or harmful applications for more
(Remote
Support)
んでもサポート.
Use this application to share your screen
and receive support for operations,
settings, etc.
(Contacts)
Manage contacts.
secure smartphone use. Use paid options
to limit usage time or check usage status/
Make handset settings.
View downloaded file list.
Rearrange files listed in chronological
order to in file size order, select, and
delete downloaded files.
Check how to use SoftBank smartphone
Operations on Applications List
Adding Icon to Home Screen
In Applications List, Touch & Hold an icon
Add to Home screen
Drag it to
at the top of window
icon anywhere in Home Screen area
Drag the
When Home Screen
appears, Drag it to desired position
operations.
Also view User Guide for handset, and
access FAQ web page.
smartphone as mobile Wi-Fi router.
To use the feature, subscription to
Tethering option is needed.
Deleting Applications
Some application cannot be uninstalled.
Flick right from the left edge of Applications list
Uninstall
Tap an icon with "×"
OK
Xperia™ Z4
Application for using 4G compatible
(Tethering)
positioning current location or searching
Sending or receiving of decorated mail or
location.
(Guide)
to back up photos and videos.
can be handled by applications.
Protect young people from inappropriate
(Downloads)
View photos or videos. Sign in to Google+
Use "@softbank.ne.jp" or
(Mail)
entertainment, and gossip.
(Settings)
other devices on handset using Wi-Fi
Card. Also, rate personal information that
only here such as important news, sports,
(スマホ安
transferred etc. Play back videos from
Use SMS/S! Mail on SoftBank smartphones.
Eliminate virus via infected installed
and entertainment information. More than
心サービス)
also available.
other places or route.
McAfee ® "
protects your handset from viruses or
(スマトピ)
pictograms. Voice calls and video calls are
Use Google map services such as
devices that enables download of
ringtones as a package.
Security)
websites altogether.
feature.
Customizing application for Android
"Smart Security powered by
View and manage social networks or news
Play back videos downloaded or
(Photos)
applications, widgets, wallpapers, and
View and edit files saved in Google Drive.
Send and receive messages using photos or
Create illustration or load photo image
and edit it.
gift code draws, and more than 500,000
coupons/complimentary tickets.
SoftBank Corp. recommends. Easily search
various contents such as music, games,
merchandise exchange tickets, electronic
Basic Operations
(TokuHodai)
information in the event of a major
(Smart
Place calls or make call settings.
shopping sites of food, leisure, travel,
Post, view, and delete whereabouts
(Smart
Perform basic and other operations.
All-you-can-use premium discount
"新着," "ランキング," etc.
Custom)
"Reader Store."
governments.
day, "カテゴリ,"
(Sketch)
Purchase e-books from Sony eBook store
be received from the national and local
official sites and applications that
(Disaster
View TV.
If the warning is received when you are in
Comprehensive navigation site introducing
List)
(電子書
or Tsunami warning delivered by the
Disaster/evacuation information can also
(Menu
(TV)
20
Rearranging Icons
Flick right from the left edge of Applications list
Custom order / Alphabetical / Most used
Phone Number
Checking Your Phone Number
・With "Custom order" set, Touch & Hold an icon to
rearrange to desired position.
In Home Screen,
About phone
Status
Check phone number.
(Settings)
21
Silent Mode
Airplane Mode
Using Silent Mode
Using Airplane Mode
Set ringtone, operation sounds, etc. not to sound to avoid
Disable all functions that emit signals. Handset remains
disturbing others around you.
powered on.
sound even in Silent mode.
Drag Status Bar down with two fingers
Touch & hold Volume Key down
Basic Operations
・Camera shutter, video start/stop tones, video and music
Quick Settings opens.
Icon on sound volume adjustment bar turns to
and
Silent mode (without vibration) is set.
・Press upper or lower side of Volume key
Airplane mode
Tap
to
change icon on the sound volume adjustment bar to
and
set Silent mode (without vibration).
・Press upper side of Volume key while in Silent mode to
cancel.
Handset is in Airplane mode.
・Use same operation again while in Airplane mode to cancel.
Xperia™ Z4
22
Text Entry
Entering Emoticons/Pictograms
Keyboard
In Text Entry window,
Enter text with on-screen QWERTY keyboard by Tapping each
character individually, or use Gesture input feature and slide
finger from character to character to form words.
・Tap
to hide keyboard.
・Touch & Hold text in text entry window and magnified text
appears in small balloon.
・Input method is set to International keyboard (Xperia™
keyboard) by default. To input Japanese, change default
keyboard to Xperia™ Japanese keyboard. For settings, see
"Language & input."
Toggle option tab above the keyboard
Keyboard Layout
Scroll down to view more options on each list.
Tap emoticon or pictogram
Enter a character.
Switch between lower-case
caps
, upper-case
, and
. For some languages, this key is used to
access extra characters in the language.
Toggle with numbers and symbols keyboard. For even
more symbols, Tap
.
Show Emoticon/Pictogram list.
Show entry candidates.
Emoticon or pictogram is entered.
Delete a character before cursor.
・Pictograms can be entered consecutively.
Enter line break or confirm text input.
・To return to QWERTY keyboard, Tap
Enter a space.
Entering Alphabet
・To enter character visible on keyboard, Tap the character.
・To enter character variant, Touch & Hold keyboard character
to show option list, then select from the list.
・To enter a period, Double-Tap the space bar.
/
.
23
Pasting Cut/Copied Text
Making Text Entry Settings
Double-Tap text
Tap
Basic Operations
Text is highlighted by tabs on both sides and editing tool
, then Tap
Option menu appears.
appears.
・To enter all text, Tap
.
Keyboard settings
Drag
/
to select range
Settings menu opens.
Personalization guide
or
Setting guidance window opens.
・Follow onscreen instructions to customize keyboard.
Touch & Hold Text Entry window
PASTE
Other Options
Changing Keyboard Skin
In Option menu, Tap
Keyboard skins
right to choose desired skin
Flick left or
SELECT
Keyboard skin is set.
Cut/Copied text is pasted.
・Alternatively, Tap
(Paste) to paste text.
Using One-handed Keyboard
In Option menu, Tap
One-handed keyboard
or
accordingly.
・To return to the regular keyboard, Tap
or
.
Xperia™ Z4
・To move One-handed keyboard to left or right side, Tap
24
Editing/Deleting Words in User Dictionary
In Option menu, Tap
delete
My words
Select word to edit/
Edit word / Delete word
Word in User Dictionary is edited/deleted.
Using a Google Account
Use a Google account and get more convenience with Google
services. A Google account is required to use some services or
fully use some applications.
Google Account Cautions
Be careful not to forget your Google account ID or
password.
Obtaining a Google Account
In Home Screen,
Accounts
(Settings)
Add account
Google
Add a Google Account appears.
25
Or create a new account
VERIFY
Enter First name
Last name
NEXT
・If a telephone number other than the one on your SIM Card
is entered, confirmation screen appears. Enter notified
security code
Basic Operations
SMS is sent.
Tap NEXT .
I AGREE
Enter user name (mail address)
NEXT
Your Google account is obtained.
NEXT
・If confirmation appears, follow onscreen instructions.
Enter password
Enter password again (for confirmation)
NEXT
Set Google service
Check Recovery phone number
NEXT
NEXT
Xperia™ Z4
・Telephone number of your SIM Card is entered automatically.
26
Google Play
Remind me later
NEXT
Download a variety of applications (free/paid) from Google
Play. Change the setting of downloaded applications to enable
manual or automatic updates. Log in to your Google account
beforehand.
Installing Applications
Many different kinds of applications can be installed
on handset from Google Play (provided by Google Inc.).
SoftBank Corp. is not responsible in any way for user-
Google account creation is completed.
installed applications (quality, reliability, legality, fitness
・To create a second or subsequent Google account, Sync
setting window appears next.
for a purpose, credibility, accuracy, etc.) or resulting
malfunctions (viruses, etc.).
Logging In with a Google Account
Installing Free Applications
If an application is activated that requires a Google account,
Add a Google Account appears. Sign in with the obtained
Google account to use the application.
Enter mail address on Add a Google Account screen
In Home Screen,
(Play Store)
NEXT
Google Play appears.
・If confirmation appears, follow onscreen instructions.
Enter password
NEXT
Tap free application
INSTALL
ACCEPT
Application is downloaded and installed.
Follow onscreen instructions
You are signed in to your Google account.
27
Purchasing Paid Applications
In Home Screen,
(Play Store)
Updating Applications
In Home Screen,
Basic Operations
Google Play appears.
(Play Store)
Google Play appears.
・If confirmation appears, follow onscreen instructions.
・If confirmation appears, follow onscreen instructions.
Tap paid application
Flick right from the left end of Google Play window
Tap amount
Follow onscreen
instructions
My apps
Application is downloaded and installed.
Tap application to update
UPDATE
ACCEPT
Application is downloaded and installed.
Purchased Applications
・If confirmation appears, follow onscreen instructions.
Payment
Application Updates
Pay only once. Redownloads of uninstalled applications are
free of charge.
Setting Automatic Updates Application
On Other Android Devices
Flick right from the left end of Google Play window
Settings
Install an application on any Android device under the same
Auto-update apps
Set update method
Google account for free.
Setting Automatic Updates Application
Flick right from the left end of Google Play window
Requesting Refunds
My apps
Refund is possible within a limited time. By requesting
a refund, the application is deleted and the charge is
(
Tap application
Auto-update
)
・Automatic updates are unavailable for some applications.
cancelled. A refund request is valid only once per one
application.
Flick right from the left end of Google Play window
My apps
Tap application
REFUND
Purchasing Applications
Purchase applications at your own risk. SoftBank Corp. is
not responsible for any disadvantage resulting for user or
third parties.
Xperia™ Z4
28
Security Codes
Uninstalling Applications
Applications installed from Google Play can also be
Security Codes
uninstalled.
An Operation Access Code or Center Access Code (Call Barring
In Home Screen,
Password) is required for using handset.
(Play Store)
Operation Access Code: Security code to use each function. At
time of purchase, no code is set.
Center Access Code (Call Barring Password): Four-digit
security code at time of subscription. It is required when
using option services from a landline phone or subscribing to
fee-based Web information.
・Be careful not to forget Center Access Code (Call Barring
Password). If you forget your code, you will require
assistance. For details, contact Customer Service.
・Be careful to keep Operation Access Code and Center Access
Google Play appears.
Code (Call Barring Password) secret. SoftBank Corp. is not
・If confirmation appears, follow onscreen instructions.
responsible for damages resulting from misuse by other
parties.
Flick right from the left end of Google Play window
apps
Tap application to uninstall
My
UNINSTALL
OK
Resetting Operation Access Code
In Operation Access Code input screen,
RESET
Application is activated.
PASSWORD
OK
・Follow onscreen instructions.
・My SoftBank recognition is required to reset Operation
Getting Help with Google Play
Flick right from the left end of Google Play window
Access Code. My SoftBank recognition can be set with My
SoftBankプラス.
Help
& Feedback
The Web browser will take you to the Google Play Help Web
page.
Follow onscreen instructions
A description for each item appears.
29
SIM PIN
Changing SIM PIN
PIN is the security code for your SIM Card. It prevents
third parties from unauthorized use of handset. At time of
Operation can be performed only when PIN is enabled.
purchase, "9999" is set.
In Home Screen,
Enabling SIM PIN
(Settings)
Security
Basic Operations
Enable SIM PIN to show PIN entry window when handset power
is on with SIM Card inserted.
In Home Screen,
(Settings)
Security
Set up SIM card lock
OK
Change SIM PIN
Enter new PIN
(for confirmation)
OK
Enter PIN
Enter new PIN again
OK
PIN is changed.
Set up SIM card lock
Lock SIM card
Enter PIN
OK
PIN is enabled.
PIN Cautions
Entering incorrect PIN three times locks PIN. To release
locked PIN, enter PUK (Personal Unblocking Key). For
details on PIN, contact Customer Service. Entering
incorrect PUK ten times consecutively locks SIM Card to
disable handset operations. In that case, reissue of SIM
Card at a SoftBank Shop (paid service) is needed.
Xperia™ Z4
30
Locking Screen
Updating Software
Display is locked after a set period of inactivity.
Check whether updates are required via the Internet, and
Alternatively, Press
update as required.
for manual screen lock. This saves
battery power and prevents accidental Touchscreen operation.
Before Updating Software
Unlocking Screen
Saved data may be lost depending on condition of handset
(malfunctioning, damaged, water seepage, etc.). It is
recommended that you back up important data before
In sleep mode (Screen lock active),
updating software. SoftBank Corp. is not responsible for
damages from loss of data.
Software Update makes a part of settings to the default.
Software Update Cautions
During Update
Handset cannot be used until software is updated. It may
Lock screen appears.
take time to update software.
Signal during Update
Flick screen upwards
Operate handset where signal reception is good and
without changing location. Also operate with adequate
battery charge. Signal becoming weak or Battery becoming
low during an update may cause an update failure. An
update failure may disable handset.
If Using Other Functions
Other functions cannot be operated during a software
update.
Screen is unlocked.
・The method for unlocking the screen can be changed. See
Updating Software
"Security" for the unlock method.
Automatic update is set by default. To update software
manually, operate as follows.
In Home Screen,
(Settings)
31
About phone
Update
Software Update
Software
Follow onscreen instructions
Basic Operations
System Update
Software update starts.
Connecting to PC to Update Software
To update software connecting to a PC, install software
for "Software Update" on the PC beforehand.
For installation of the software, see the following web
page.
http://www.sonymobile.co.jp/support/
Operations for Software Update
Configuration
Setting whether to update Software
Automatically
On Software Update window,
Settings
Automatic Update
NOT AUTOMATICALLY UPDATE /
AUTOMATICALLY UPDATE
OK
Setting Scheduled Update
On Software Update window,
Set a time
OK
Update Schedule Settings
OK
Xperia™ Z4
32
Handset Interface
Home Screen Basics.......................................................... 34
Status Bar......................................................................... 35
Using Notifications Window/Quick Settings.................. 36
Activating/Canceling Recently-Used Applications......... 37
Using Small Apps.............................................................. 38
Rearranging Home Screen.................................................41
34
Home Screen Basics
Home Screen appears at power on; most handset operations
start here. Customize Home Screen with application shortcuts,
widgets, and folders.
Toggling Home Screen Sheets
Home Screen consists of 7 sheets. Customize each Home
Screen sheet with application shortcuts, widgets, etc. to make
handset more convenient. Flick Home Screen left/right to
toggle sheets.
Home Screen Layout
・In any Home Screen sheet, Tap
to return to Home
Screen top sheet.
Operations on Simple Home
Switching to Simple Home
Simple Home provides Home Screen with basic functions
and main setting items.
In Home Screen,
Simple Home
Item
Status Bar
Home
Screen
Position
Description
Drag down for Notifications Window. Drag
down with two fingers for Quick Settings.
Current position among several Home
Screen sheets.
Tap an icon to activate application or
Dock
function. Customize with up to four
application shortcuts. Also, create folders.
Navigation
Bar
Customize
Area
Applications
List Key
Tap Key icon to operate. For Navigation
Bar, see "Navigation Bar."
Place application shortcuts, folders,
widgets freely.
Open applications list.
(Settings)
OK
Home
OK
Switching to Standard Home Screen
In Simple Home screen,
OK
Settings
Exit Simple Home
35
Status Bar
Status Bar appears at the top of Display. Notification
Indicators for new mail, etc. and Status Indicators for handset
appear here.
Status Bar Layout
Main Notification Indicators
Notification Indicators appearing in Status Bar include the
following.
Indicator
Description
Launch Guide (Drag Status Bar down and
open from Notifications Window)
Missed Call
Call Arriving
Answer on Hold 1 /Call on Hold 1
New Recorded Message
New Voicemail
New Gmail
Handset Interface
Calling 1 /Dialing 1
New Email
Notification Indicators
New Text Message (SMS)/S! Mail
Status Indicators
Urgent News
Wi-Fi Open Network Available
USB Connected
Sharing File via Bluetooth ®
Data Uploading
Data Downloading
Application Update Available
Application Installation Complete
Screenshot/Screen Recording Saved
Viewing TV 1 /Scheduled Viewing Started
Recording TV 1 /Scheduled Recording
Started
Playing Back Music
Calendar Event Reminder
Snoozing/Unchecked Alarm
NFC/Osaifu-Keitai ® Locked
Unmount SD Card
Software Update Notice, Downloading
Complete, Stopped
1 Appears when switching to other window such as Home
Screen.
Xperia™ Z4
36
Main Status Indicators
Status Indicators appearing in Status Bar include the
following.
Using Notifications Window/Quick
Settings
Drag Status Bar down to open Notifications Window. Open
Notification Indicators to check details.
Indicator
Description
Battery Full (100%)
Battery Charging
Battery Low (4% or less)
Drag Notifications Window down to open Quick Settings. Tap
icons on Quick Settings to set each function On/Off.
Opening Notifications Window/Quick
Settings
Signal Strength
4G LTE/4G Data in Use 1
3G Data in Use
Drag Status Bar down
No Signal
Airplane Mode
Wi-Fi Connected
Wi-Fi Connected without Internet
accessibility, or unstable Wi-Fi signal
Bluetooth ® ON
Bluetooth ® Connected
Silent (with Vibration) Mode
Notifications Window opens.
Silent (without Vibration) Mode
Alarm Set
Obtaining Current Location
Drag Notifications Window down
1 Handset supports FDD-LTE (SoftBank 4G LTE) and
AXGP (SoftBank 4G); indicator appears when handset is
connected to either. Handset connects to SoftBank 4G
first.
Quick Settings opens.
・Drag Status Bar down with two fingers for Quick Settings.
Closing Notifications Window/Quick
Settings
Drag Notifications Window/Quick Settings up
・Alternatively, Tap
Quick Settings.
to close Notifications Window/
37
Notifications Window Layout
Activating/Canceling RecentlyUsed Applications
Check recently-used applications and exit them.
Activating Recently-Used Applications
View recently-used applications in thumbnail list and launch
application from the list.
Handset Interface
Open Quick Settings
Display notifications (incoming, functions being
executed, etc.)
Clear all notifications. Some notifications are not
clearable.
Quick Settings Layout
Tap application in thumbnail list
Display "Power management" of Handset Settings
Application is activated.
Add/Delete, change order of Quick Settings
Display Handset Settings
Display your contact information
Adjust brightness of Display
On/Off of Wi-Fi
On/Off of NFC Reader/Writer and P2P function
Set On/Off of location information
Mirror the screen of handset on Google Cast devices
On/Off of Light
On/Off of Bluetooth ®
On/Off of Airplane mode
On/Off of Auto-rotate screen
On/Off of Glove mode
Set Silent mode (with Vibration)/Silent mode (without
Vibration)/Clear Silent mode
Xperia™ Z4
38
Canceling All Running Applications
Cancel all running applications.
Using Small Apps
Activate small app while using another application in a small
window.
Activating Small Apps
Activate small app.
Tap a small app icon
All running applications are canceled.
Deleting Recently-Used Application
from List
Flick left or right application in thumbnail list
Favorites bar
Activate small app from here.
・If one or more small apps are set, Flick Favorite bar left or
right to find desired small app.
・To close running small app, Tap
.
39
Adding Small Apps
Operations in Small Apps List
Adding Small App to Favorites Bar
In Small Apps list, Touch & Hold an icon
Drag to
anywhere on Favorites Bar
Deleting Small App from Favorites Bar
In Favorites Bar, Touch & Hold a small app
Drag to
OK
In Small Apps list,
widget
Enter name
Rename widget
OK
Tap a
Handset Interface
Renaming Widget
Small Apps list opens.
Play Store
Google Play activates.
・Tap Widgets and then select widget to add the small app
to Small Apps list.
Small app is installed to Small Apps list.
Xperia™ Z4
Tap small app to download
40
Deleting Small Apps
Delete widgets or small apps in Small Apps list.
Select widget/small app
OK
Widget or small app is deleted.
Small Apps list opens.
Delete widget / Uninstall small app
41
Rearranging Home Screen
Changing Themes
Set Wallpaper to Home Screen, or add shortcuts, widgets and
folders for quick access to applications and files.
Operations for Rearranging Home
Screen
Change theme for Home Screen or wallpaper of Lock Screen.
Touch & Hold area of Home Screen without icons
Themes
Moving Widgets and Icons
In Home Screen, Touch & Hold target item
Drag where
Deleting Widgets and Icons
In Home Screen, Touch & Hold target item
Drag to
Remove
Tap theme
Handset Interface
to move widget
Changing Wallpaper
Touch & Hold area of Home Screen without icons
Wallpapers
Tap Wallpaper
Wallpaper is set.
・Depending on selected Wallpaper, additional settings may be
required. Follow onscreen instructions.
OK
Theme is set.
Xperia™ Z4
42
Adding Shortcuts
Adding Widgets
Add shortcuts for applications.
The following widgets can be added.
Widget
Touch & Hold area of Home Screen without icons
& Apps
Widgets
Description
Play
View contents recommended by Google
Recommendation
Play.
Cameras
Select capturing mode then launch Camera.
Calendar
Show calendar events.
Quick Throw
Search and display device to play back
handset contents.
Drive
Use Google Drive.
Hangouts
Chat using photos, pictograms, or videos.
Bookmarks
Show Chrome bookmarks.
Music
Play back, pause, or skip songs.
Mail (easy
Apps
mode)/(detail
Top Contacts
Play-My
Library
Clocks
Photos and
videos
Tap application to add a shortcut to
Launch SoftBank Mail.
mode)
Show frequently used contacts.
View contents such as videos and e-books.
Show clock. Tap to launch "Alarm & clock."
View still images or videos.
World clock
Show World clock.
Weather
Show weather.
Email
Select Email account or the folder to
view.
Facebook
Post comment on Facebook or upload
Buttons
images.
Facebook
Status
Gmail
View or post Facebook comments.
Check mails for selected label quickly.
View information automatically according
Google Now
Shortcut is added.
・If settings appear, follow onscreen instructions.
to time, current location, or location
history.
Google Play
Read e-books purchased in Google Play
Books
Books.
Google+ User
Location
Show Google+ user location.
Google+ posts
View Google+ posts.
Google App
Search for web pages or handset.
Record and display user's daily activities
Lifelog
such as number of steps, calorie
consumption, etc.
OfficeSuite
Recent
History
Play Store
Show recent history for OfficeSuite
documents.
Show applications provided by Play Store
in random order.
Pocket WiFi
(1x1)/(2x1)/
Set tethering.
(4x1)
Reader™
Store widget
Display Sony eBook store "ReaderStore."
43
Socialife
Post message to social networks such as
Share
Facebook or Twitter.
Socialife
Timelines
Socialife
Headline
STAMINA
mode
TV SideView
Show one topic from social networks such
as Facebook or Twitter, or favorite news
In Home Screen, Touch & Hold icon to place in a folder
website.
Show headlines from social networks such
as Facebook or Twitter, or favorite news
website.
Toggle STAMINA mode on/off.
Show TrackID™.
Use handset as remote controller for Sony
TV.
Twitter
View Twitter tweet comments. Direct
(small)/(large)
posting is also available.
What's New
View What's New.
Touch & Hold area of Home Screen without icons
Drag the icon above another icon to place in the same folder
Handset Interface
TrackID™
Adding Folders
Widgets
& Apps
Folder is added.
Changing Folder Names
Widgets list opens.
In Home Screen, Tap folder
Enter folder name
DONE
Touch & Hold target widget
Drag to target location
Widget is added.
Xperia™ Z4
・If settings appear, follow onscreen instructions.
44
Phone
Placing/Answering Calls................................................... 46
Placing a Call from Contacts/Call History..................... 49
Optional Services..............................................................51
Making Call Settings........................................................ 56
Using Contacts..................................................................57
Importing Contacts...........................................................60
Backing Up Contacts........................................................ 60
46
Placing/Answering Calls
How to dial directly to make a call and answer a call, as well
as options when a call is arriving/during a call are described.
VoLTE (Voice over LTE)
VoLTE (Voice over LTE)
VoLTE is a voice call system using LTE.
Emergency Call Cautions
Available Area
Emergency calls for handset is available only in SoftBank
service area.
Airplane Mode
Note that Airplane mode disables Emergency calls.
Compared with 3G network, it enables calls in higher
sound quality and shorter time until call ringback sounds.
(Requires separate subscription.)
Placing Calls
Using VoLTE requires handset and other party's handset to
meet the following conditions.
・Both handset and other party's handset are compatible
with SoftBank VoLTE.
In Home Screen,
(Phone)
・Both handset and other party's handset are in 4G LTE
(FDD LTE) service area.
* VoLTE is disabled if either handset is out of SoftBank
4G LTE (FDD-LTE) area or using international roaming.
・Preferred network type is set to 4G (preferred)/3G/
GSM or 4G/3G (
).
・ Enable VoLTE of Mobile network settings is enabled
(
).
HD Voice
Call screen appears.
HD Voice supports a range of tones wider than
conventional models, which enables calls that have a more
natural and higher sound quality.
・Note that HD Voice is enabled when other party's handset
supports SoftBank HD Voice.
・Call with HD Voice is available with VoLTE and 3G calls.
Adjusting Volume of Call
During a call, Press Volume Up Key/Volume Down Key.
Call window opens.
Hints
Tap dialpad to enter the other party's number
Q. Difficulty during call
A. It may not be possible to make a call properly in a
noisy location.
A. When calling using Speaker, check the call volume.
Raising the call volume may make calling difficult.
Q. Sound pops momentarily during a call
A. Are you changing location while calling? Sound pops
when signal is weak and handset switches to a
different area.
・Enter area code first for calling landline numbers.
47
Answering Calls
When a call arrives, Drag
to right
Handset dials number. Call begins when other party
answers.
Phone
Call begins.
To end the call,
To end the call,
Call ends.
Calling the Emergency Number When
Handset Screen is Locked
Flick Lock Screen upwards
Emergency call
Enter
number for emergency service
・Available only when Screen lock is set to Pattern /
PIN / Password .
・See "Security" for the unlock method.
Hints
Q. Call does not connect
A. Was the number dialed using the area code? Dial the
number starting with "0."
A. Are conditions for calling poor? Call again after moving
to an area where signal is good.
Call ends.
Missed Calls
When call is not answered,
・Drag Status Bar down
appears on Status Bar.
Tap CALL BACK / MESSAGE
in notification to place a call or send a message.
・Drag Status Bar down
Tap notification to show Call
History.
Operations When Call Arriving/Using
Answering Machine
Canceling Ringtone
Press Volume Up Key/Volume Down Key when call is
arriving
Answering by Putting a Call on Hold
While a call is arriving, Drag
Put caller on hold
Response options
up
To answer the call, Drag
right
・The other party hears answer-holding message. To end
holding call, reject the call or the other party ends the
call.
Xperia™ Z4
48
In-Call Screen Layout/In-Call Operations
Rejecting Call
Drag
During a call, Tap the icon to use the following functions.
to left when call is arriving
Rejecting and Sending Message
While a call is arriving, Drag
Reject with message
Response options
up
Select message
・Tap Write new message to write message to send.
Answering Calls While Application is Activated
While a call is arriving, when backlight is on (except for
Lock Screen) or application is activated, notification
appears at the top of Display.
While a call is arriving,
Show image saved to contact
ANSWER
Show phone number saved to contact
・To reject call, Tap DECLINE .
・While a call is arriving, Press
Show using HD Voice call
to display call arriving
Show name/phone number saved to contact
Show dialpad to send push signals while calling
screen.
Call using Speaker
Using Answering Machine
While a call is arriving, Drag
Show call time
Response options
up
Mute your voice to the other party
Place call on hold
Reject with Answering Machine
・Activate Answering Machine in advance. See "Making Call
Settings" for details.
Show Dial window to place a second call
End call
Playing Back Recorded Message from Status Bar
When new message is recorded,
Drag Status Bar down
appears on Status Bar.
Tap notification
・Recorded messages list opens. Tap a message to play
back.
Turning off Backlight During Call
Handset detects face coming too close during a call and
Playing Back Recorded Message from Call
History
When new message is recorded,
turns off backlight for preventing erroneous operations.
Bring handset away from face or Press
to turn on
backlight.
appears in Call
Screen.
Lock Screen During Call
In Call Screen, Tap
・Recorded message is played back. When the message is
played back,
Preventing Erroneous Operations During
Call
appears.
Display is locked after a set period of inactivity even
during a call. Alternatively, Press
manually. To unlock screen, Press
to lock Display
.
・When "Power button ends call" is set, Pressing
Deleting a Recorded Message
In Call Screen,
Messages
Answering Machine settings
Touch & Hold a recorded message
Delete / Delete all
OK
ends
call. Instead, Press Volume Up Key/Down Key to unlock
screen while "Power button ends call" is set. For details,
see "Accessibility."
49
Emergency Call Location Information
If handset is used to place a call to emergency numbers such
as 110, 119, or 118, your location is automatically reported
Placing a Call from Contacts/Call
History
Make calls quickly using Contacts and Call History.
to the emergency organization such as Police. Location report
is calculated from positioning information provided by call
accepted base station.
Placing a Call from Contacts
・This service requires no application or communication fee.
・The emergency organization may not be able to determine
your precise location due to where the call was made or
In Home Screen,
(Contacts)
signal conditions. Be sure to give your location and purpose
of the call to the emergency organization.
・Location cannot be reported if you dial with caller ID
hidden, for example, using "184" prefix. However, the
Phone
emergency organization may obtain your location in a lifethreatening, etc. crisis.
・While using international roaming, Location report is
disabled.
Contacts appear.
Tap target contact
Tap number
Handset dials number. Call begins when other party
answers.
To end the call,
Xperia™ Z4
Call ends.
50
Placing a Call from Call History
Filtering Call Logs
In Call History,
In Home Screen,
)
(Phone)
Filter call log
Tap option (
OK
Enabling Answering Machine
In Call History,
Answering Machine
Answering Machine settings
(
)
・See "Making Call Settings" for details.
Call screen appears.
Tap target call log
Handset dials number. Call begins when other party
answers.
To end the call,
Call ends.
Operations On Call History
Checking Call History Detail
In Call History, Tap
of target log
Detailed log screen appears.
Deleting All Call Logs
In Call History,
Clear call log
CLEAR
51
Optional Services
Using Call Forwarding
Use the following optional services.
In Home Screen,
Optional Services
(Settings)
Use the following optional services.
Service
Description
Call
Divert all/unanswered calls to a preset
Forwarding
number.
Voicemail
Group
Calling 1
Caller ID
Call Barring
Voice Call
Using LTE 1
Center.
Phone
Call
Waiting 1
Divert all/unanswered calls to Voicemail
Answer calls during a call.
Connect multiple lines.
Call
Show or hide your number when placing
calls.
Restrict calls according to situation.
Enable LTE for voice call.
1 Requires separate subscription.
Call window opens.
Voicemail/Call Forwarding
Voicemail/Call Forwarding window opens.
Activate Call Forwarding
Xperia™ Z4
52
Using Voicemail
All calls / Unanswered calls
forward to
Enter phone number to
OK
In Home Screen,
(Settings)
・If Unanswered calls is selected, set ring time.
・Select phone number to forward to from Contacts.
Call
OK
Call Forwarding is activated.
Deactivating Voicemail/Call Forwarding
In Voicemail/Call Forwarding window,
DEACTIVATE
Deactivate service
OK
Call window opens.
Voicemail/Call Forwarding is deactivated.
Voicemail/Call Forwarding
Voicemail/Call Forwarding window opens.
Activate Voicemail
53
Using Call Waiting
All calls / Unanswered calls
This service requires subscription.
In Home Screen,
(Settings)
・If Unanswered calls is selected, set ring time.
Phone
OK
Voicemail is activated.
・When new message is recorded,
appears on Status Bar.
Call
Drag Status Bar down and Tap New voicemail , then follow
the voice prompts.
Deactivating Voicemail/Call Forwarding
In Voicemail/Call Forwarding window,
DEACTIVATE
Deactivate service
OK
Voicemail/Call Forwarding is deactivated.
Call window opens.
Additional settings
Call waiting
(
)
Call Waiting is activated.
・When a second call arrives during a call, Call Waiting tone is
heard. Drag
right to answer.
Xperia™ Z4
54
Using Group Calling
Using Caller ID Notification
This service requires subscription.
In Home Screen,
During a call,
(Settings)
Add call
Call
Call screen appears.
Enter phone number
Call window opens.
Additional settings
Call is added.
・In Call Screen, Tap a contact on "Top Contacts" or "RECENT
CALLS" to add a call.
When the other party answers,
Merge
Group Calling starts.
Caller ID
Hide number / Show number
Caller ID is set.
55
Using Call Barring
ENABLE
Restrict call and SMS.
・If a call or SMS is attempted while calling is restricted, a
message appears. Message may take time to appear in some
areas.
In Home Screen,
Call Barring is set.
・To disable all call barring, Tap Deactivate Call Barring ,
then Tap DISABLE .
(Settings)
Using VoLTE (Voice Call Using LTE)
This service requires subscription.
Phone
In Home Screen,
(Settings)
Call
More
Call window opens.
Call Barring
Mobile networks
Enable VoLTE
(
)
Tap target option to restrict
VoLTE is enabled.
Xperia™ Z4
56
Making Call Settings
Call
Making Call Settings
Make call-related settings. Settings can be made for the
following items.
Item
Phone
ringtone
Also vibrate
for calls
Description
Set ringtone.
Call window opens.
Enable vibration for ringtone.
Increasing
Set whether to increase ringtone
ringtone
gradually.
Phone account
settings
Dialpad tones
Answering
Machine
Set items
Make settings for an IP call account.
Set whether to sound when Tapping
dialpad.
Set Answering Machine.
Reject call
Edit messages for sending when rejecting
with message
a call.
Call Blocking
Set call rejection.
TTY mode
Make settings for TTY Mode.
Hearing aids
Activate Hearing aids.
Voicemail/Call
Forwarding
Call Barring
Additional
settings
Call-related settings are complete.
Call Settings Operations
Set use or operations of Voicemail/Call
Forwarding.
For details, see "Optional Services."
Restrict call/SMS.
For details, see "Using Call Barring."
Set Caller ID or Call waiting.
For details, see "Using Call Waiting,"
"Using Caller ID Notification."
Equalizer
Adjust call sound quality.
Slow talk
Slow the other party's talking speed.
Enabling Answering Machine
Enable Answering Machine to receive the other party's
message for unanswered calls. It is different feature from
Voicemail service.
In Call settings,
Answering Machine
Machine
)
(
Answering
・If confirmation appears, follow onscreen instructions.
・Change ring time or set whether to enable Answering
Machine during International roaming.
Playing Back Recorded Messages
In Home Screen,
(Settings)
In Call settings,
Answering Machine
Messages
Tap recorded message
Recorded message is played back.
Deleting a Recorded Message
In Call settings,
Answering Machine
Touch & Hold a recorded message
all
OK
Messages
Delete / Delete
57
Using Contacts
Setting Call Blocking
Save phone numbers, mail addresses, etc. to Contacts.
Set blocks by call type.
In Call settings,
Call Blocking
Block calls
Confirm Note for emergency call,
of call to block (
)
Call Blocking is set.
OK
(
)
Tap type
Contacts Cautions
If handset is left uncharged, contact may be altered/lost.
Accident or malfunction may also cause loss or change to
information. It is recommended that you keep a separate
copy of contacts and other important information.
SoftBank Corp. is not responsible for any damages from
lost or changed contacts.
In Home Screen,
Phone
Adding New Contacts
(Contacts)
Contacts appear.
・If confirmation appears, follow onscreen instructions.
Enter items
SAVE
Contact is added.
Xperia™ Z4
58
Saving Contacts from Call Window
Contacts Screen Layout
Save a number entered in call window directly to Contacts.
In Home Screen,
number to save
(Phone)
Tap dialpad to enter
Add to Contacts
Checking Contacts
In Home Screen,
(Contacts)
Item
Favorites
tab
Contacts
tab
ICE
Contacts appear.
Tap contact to check
Show Favorites list.
Show contacts list.
Save medical information or relatives'
contacts in case of emergencies.
Myself
View or edit your contact.
Contact
Tap to show contact details.
Search
Search contacts.
Menu
Make contact settings.
Groups tab
Show contact groups.
Index
Add new
Contact details appear.
Description
Show index to search contact by Japanese
syllabary or alphabetical order.
Add a new contact.
59
Editing Contacts
In Home Screen,
Deleting Contacts
(Contacts)
Contacts appear.
Tap target contact
Edit items
SAVE
Contact changes are complete.
(Contacts)
Phone
Contacts appear.
In Home Screen,
Mark several
Tap target contact
・Only one contact is also selectable. To select all contacts,
Tap 0 selected and Mark all .
DELETE
Contacts are deleted.
Xperia™ Z4
60
Importing Contacts
Backing Up Contacts
Importing Contacts from SD Card
Backing Up Contacts to SD Card
Import (load) contacts that are backed up on SD Card.
Back up (save) contacts to SD Card.
In Home Screen,
In Home Screen,
(Contacts)
Contacts appear.
(Contacts)
Contacts appear.
Import contacts
Export contacts
SD card
SD card
Follow onscreen instructions
OK
Contacts are imported.
Contacts are saved to SD Card.
Messaging & Internet
Messaging.......................................................................... 62
S! Mail Initial Setup......................................................... 62
Thread List/Folder List................................................... 64
Sending S! Mail/SMS.........................................................65
Sending Decore Mail by S! Mail....................................... 66
Opening & Replying to S! Mail/SMS................................ 67
Managing S! Mail/SMS...................................................... 69
Operations When Creating S! Mail/SMS..........................75
S! Mail/SMS Settings........................................................78
Using Gmail....................................................................... 81
Using Email........................................................................84
Using Chrome.................................................................... 87
62
Messaging
S! Mail Initial Setup
S! Mail
Setting Up S! Mail Initially
Exchange messages with S! Mail-compatible SoftBank handsets
When activating mail for the first time, complete setup to
and email compatible devices (other mobiles, PCs, etc.) beyond
send/receive S! Mail using Wi-Fi and to import sent/received
SMS character entry limit; attach media files.
SMS by
(Hangouts).
SMS
In Home Screen,
(Mail)
Exchange short messages (up to 140 single-byte characters)
using handset numbers as addresses.
Gmail
Use Google's webmail service.
Email
Use email (POP3/IMAP4) on handset.
Setup to Wi-Fi connection window opens.
・If confirmation appears, follow onscreen instructions.
・Set up an email account beforehand.
・Sending/receiving email on handset syncs handset and
mail server; sent/received messages (in the POP protocol,
Set Now
received messages only) are also accessible from PCs.
Wi-Fi connection setup is complete.
・To perform setup later, Tap Set Later .
OK
・To perform setup later, Tap Later .
63
OK
Airplane mode
(
Cautions for Sending/Receiving S! Mail
Using Wi-Fi
)
International S! Mail Transmission Fees
Transmission fees apply when sending international S! Mail
messages even if Wi-Fi is in use.
S! Mail Reception while Display is Completely
Dark (Screen Lock Active)
To receive S! Mail messages using Wi-Fi even when Display
is completely dark (Screen lock active), disable Wi-Fi sleep
policy in Advanced Wi-Fi settings.
OK
Airplane mode
(
Messaging & Internet
OK
)
Initial settings are made.
Description for S! Mail Initial Setup
Completing Wi-Fi Connection Setup for S! Mail
via Menu Items
If you Tap Set Later at initial startup, complete setup
to send/receive S! Mail using Wi-Fi as follows.
In thread list,
Send/Receive Settings
Wi-Fi
Connection
Importing Mails Received with Default SMS
Application Later
If you Tap Set Later at initial startup, complete
importing mails received with default SMS application as
follows.
In thread list,
Save&Load
Copy Messages
Mail
Follow onscreen
Xperia™ Z4
instructions
Common Settings
64
Thread List/Folder List
Thread List
View mail in folder list or thread list.
Sent and received S! Mail/SMS is displayed sorted by recipient.
Thread list view is described here.
When viewing messages exchanged with Yamamoto-san,
messages are displayed as a conversation with Yamamoto-san
Folder List
within a single thread.
Operation for folder list may be different. For details, see
SoftBankメールの取扱説明書 (http://help.mb.softbank.jp/
app/smail/pc/index.html).
Switching between Thread List and
Folder List
Thread with mailing contact
Message text entry field
In Home Screen,
(Mail)
Exchanged message content
Send S! Mail/SMS
Folder List
Messages are sorted and saved in folders such as Inbox, Sent
Box, and created subfolders.
Tap name of the current list view
Tap name of the list view to change to
The list view switches.
・Alternatively, Tap
at bottom of window when SMS/S!
Mail Automatic Switching is activated (
).
65
Sending S! Mail/SMS
Select recipients
OK
Sending S! Mail/SMS
In Home Screen,
(Mail)
・Tap Phonebook / Outgoing History / Incoming History /
Mail Group to change recipient lists.
・After setting recipients, Tap
to check recipients'
phone numbers/email addresses or set them to Cc/Bcc.
・To send as S! Mail, set Cc or Bcc.
・To delete a recipient, Tap
and then
.
and then Delete recipient .
Tap Subject/Compose email field
Enter subject/text
Messaging & Internet
Alternatively, Tap
・Alternatively, enter phone numbers or email addresses in
Recipient field directly.
・Tap
to attach a file. See "Attaching Files" for details.
・To send as S! Mail, enter subject or attach file.
Phonebook / Outgoing History / Incoming History /
Mail Group
Send
・Tap Phonebook , Outgoing History , or Incoming
History to select recipients from Address Book, Outgoing
History, or Incoming History.
・Tap Mail Group to select a mail group and set all the
S! Mail/SMS is sent.
・Failed S! Mail/SMS messages are saved as drafts.
members on the list as recipients.
Xperia™ Z4
66
Sending Decore Mail by S! Mail
Sending S! Mail/SMS
Switching S! Mail/SMS
Using a Template
S! Mail and SMS switch automatically when sending,
depending on whether there is a subject, text length, etc.
・Check with indication at the top of screen when creating
Choose from a variety of designs to decorate mail.
a message.
・ When "S! Mail" appears, send as S! Mail.
・ When "SMS" appears, send as SMS.
・To select
(S! Mail) or
mail, in Home Screen, Tap
Settings
In Home Screen,
(SMS) when creating
(Mail)
Common
SMS/S!Mail Automatic Switching (
).
field
(Mail)
Template
Tap Compose email
Flick left/right to select
template
About Drafts
When
is Tapped while creating S! Mail or SMS, the
message is saved as a draft.
Drafts are indicated as
in thread list, and are saved to
Draft Box in folder list. Open an S! Mail/SMS draft to
edit and send it.
SELECT
・If confirmation appears, follow onscreen instructions.
Enter recipients
Enter subject
Decore mail is sent.
Enter text
Send
67
Opening & Replying to S! Mail/SMS
Decorating S! Mail
Handset receives S! Mail/SMS messages automatically by
default. Optionally, retrieve messages manually, and also
While entering message text,
Tap decoration type
retrieve all messages stored on the server.
Opening New S! Mail/SMS
When message arrives, new message notice and Notification
Indicator appear.
Message is ready to be decorated.
Tap notice
・Flick left/right to view other decoration types.
Decorate while entering message text.
S! Mail/SMS message window opens.
・To view new message from Notification Indicator, Drag
Messaging & Internet
Decorate following onscreen instructions
Status Bar down for Notifications Window, then Tap
corresponding notification.
・For two or more new email messages, thread list opens.
Spam Mail
Set spam filtering to move messages from senders not in
Address Book to Spam Thread. New mail notification does
not appear. To check messages moved to Spam Thread:
In Home Screen,
(Mail)
Spam mail
・If confirmation appears, follow onscreen instructions.
Retrieving S! Mail/SMS Manually
In Home Screen,
(Mail)
Mail is received.
Xperia™ Z4
68
Retrieving Server Mail
In Home Screen,
Forwarding S! Mail/SMS
(Mail)
Handle Server Mail
Receive whole content for all server mails / Receive subject
In S! Mail/SMS message window,
Enter recipient(s)
Enter text
and sender for all server mails
Message is forwarded.
Server mail is received.
Replying to S! Mail/SMS
In S! Mail/SMS message window,
Enter text
Send
Message is sent.
/
Send
69
Managing S! Mail/SMS
Viewing S! Mail/SMS
Widgets
Widgets allow message information to be viewed from
Home Screen. Widgets appear in simple (top of Display)
and detailed (bottom of Display) views. Check number
of unread messages in simple view. Check date/time and
preview of messages in addition to number of unread
In Home Screen,
(Mail)
messages in detailed view. Content of latest message
appears if all messages are read.
Message Operations
Deleting All Server Mail
In thread list,
Handle Server Mail
mails
OK
Delete
Delete all
Tap target thread
Checking Available Storage on Mail Server
In thread list,
Handle Server Mail
Check
storage space
Messaging & Internet
Thread list opens.
Protecting Messages
In thread details window, Touch & Hold message
Thread details appear.
・To view drafts and unsent messages, Tap thread with
to open thread details including draft/unsent messages.
・To cancel protection, Tap
again.
Saving Attachments
In S! Mail/SMS message window,
of attachments to save
Tap
(
)
Save
Tap message
Deleting Threads in Thread List
In thread list, Touch & Hold message
Delete
・To select several messages, Touch & Hold first message,
then Tap other messages.
Deleting Message in Thread Details Window
S! Mail/SMS message window opens.
In thread details window, Touch & Hold message
Delete
Reporting Spam in Thread Details Window
In thread details window, Touch & Hold message
Yes
・Only one message can be selected.
Reporting Spam in S! Mail/SMS Message Window
Yes
Declare Spam
Xperia™ Z4
In S! Mail/SMS message window,
70
Listing Addresses of Sender/Recipients in
Thread Details Window
In thread details window,
Thread Details Window
List Address
Listing Addresses of Sender/Recipients in S!
Mail/SMS Message Window
In S! Mail/SMS message window,
Sender/subject/text/date & time sent, received, saved,
Thread List
etc.
Icon
Description
Delivery Report
High Priority
Low Priority
Protected
Scheduled Sending
Send Failure
Sender/date & time sent, received, saved, etc.
Scheduled Auto Resend
Draft
Icon
Description
Unread message exists
Draft
S! Mail/SMS Message Window
Send failure
Sender/recipients/subject/date & time sent, received,
saved, etc.
Message text
Indicator
Description
Sender/recipients list. Tap for list of
addresses included in sender/recipient
fields.
Delivery report. Tap for report. Appears
for sent messages.
Attachment. Tap to save attachment.
71
Backing Up S! Mail/SMS Data
Back up message data on handset to SD Card or other media.
Backup(S!Mail Specific)
OK
・Back up message data saved on handset. Data for all
messages must be backed up together at the same time.
・If SD Card is not installed, messages are backed up in
handset memory.
In Home Screen,
(Mail)
OK
Airplane mode
)
(
)
Messaging & Internet
(
Common Settings
Backup starts.
OK
Airplane mode
Mail Save&Load
Backup is complete.
Backup/Restore
Xperia™ Z4
72
Restoring S! Mail/SMS Data
Restore message data backed up to SD Card or other media to
Restore(S!Mail Specific)
OK
handset.
In Home Screen,
(Mail)
OK
Airplane mode
(
)
Common Settings
Tap files to restore
OK
Mail Save&Load
Restore starts.
OK
Airplane mode
Backup/Restore
Restore is complete.
(
)
73
Moving S! Mail/SMS Data (Export)
Export message data on handset in vMessage format to SD
Export(vMessage)
OK
Card or other media. vMessage format is compatible with
other smartphones and SoftBank mobile phones (3G).
・Export either received message data, sent message data,
drafts, or unsent message data saved on handset all
together. Data for all messages must be saved together at
the same time.
・If SD Card is not installed, messages are exported in
handset memory.
・If download confirmation and terms of agreement appear,
follow onscreen instructions.
In Home Screen,
(Mail)
Tap message category
実行
Messaging & Internet
Export starts.
Common Settings
OK
Export is complete.
Exporting Message Data
Where Message Data is Exported
Mail Save&Load
Exported message data is saved to the locations below in
SD Card or handset memory.
・Received message data: private/MYFOLDER/Mail/Inbox/
Inbox.BCK
・Sent message data: private/MYFOLDER/Mail/Sent
Messages/Sent Messages.BCK
・Draft/unsent message data: private/MYFOLDER/Mail/
Drafts/Drafts.BCK
Filenames of Exported Data
Filenames of exported data are formatted as the year,
Export/Import
month, and date saved to SD Card/handset memory.
For example, message data saved on June 1st, 2015 is
formatted as "15060100.vmg." Several files saved on the
same day are formatted starting as "15060101.vmg," with
the last two digits increasing sequentially. If handset clock
is unset, formatting appears as "XXXXXX.vmg."
Xperia™ Z4
74
Moving S! Mail/SMS Data (Import)
Import message data exported to SD Card or other media in
Import(vMessage)
OK
vMessage format to handset.
・To import data from a previously used mobile phone, etc.,
first save the data you want to import to SD Card or other
media.
In Home Screen,
(Mail)
Tap message category
OK
Common Settings
OK
Airplane mode
(
Mail Save&Load
Tap files to restore
Export/Import
Import starts.
OK
)
75
OK
Airplane mode
(
)
Operations When Creating S! Mail/
SMS
Use these functions when sending, replying to, or forwarding
messages.
Attaching Files
While creating S! Mail,
Contacts are imported.
Importing Message Data
Imported message data is loaded to the locations below in
SD Card or handset memory.
・Received message data: private/MYFOLDER/Mail/Inbox/
Inbox.BCK
・Sent message data: private/MYFOLDER/Mail/Sent
Messages/Sent Messages.BCK
・Draft/unsent message data: private/MYFOLDER/Mail/
Drafts/Drafts.BCK
Tap file category
File is attached.
Follow onscreen instructions
Messaging & Internet
Where Message Data is Imported
Importing Message Data with Security Set
This application also imports messages for which privacy
settings, such as secret mode, were configured on a
previous mobile phone. Imported data can be viewed.
Unimportable Message Data
Message data that was encrypted and backed up on a
previous mobile phone cannot be imported with this
application.
Xperia™ Z4
76
Specifying Date/Time to Send
Entering Emoji Pictograms
Create a message to be sent automatically at a specific time.
While entering subject/message text,
After entering recipients/subject/message text,
Sending Reservation
Tap emoji
Specify date to send on
Set
Emoji is entered.
・Tap My PIC while entering message text to select My
pictograms.
・Tap
Specify time to send at
Set
on the My pictogram tab to select My pictograms
saved to SD Card/handset memory.
Previewing before Sending
Check how created S! Mail/SMS will be viewed.
While creating S! Mail/SMS,
OK
Preview opens.
Message is saved to drafts folder, and automatically sent
at the specified time on the specified date.
Preview
77
Setting Priority Levels
Deleting Message Drafts
Delete a message that is being created without saving it as a
draft.
While creating S! Mail,
Set priority
While creating S! Mail/SMS,
Tap priority level
Delete
OK
Mail draft is discarded.
Switching to S! Mail
Available when SMS/S!Mail Automatic Switching is
Priority level is set.
Messaging & Internet
Delete
deactivated. See "Common Settings" for details.
Requesting Delivery Reports
While creating SMS,
While creating S! Mail/SMS,
Switch to S!Mail
Delivery reports
OK
Request a delivery report for this message you send
(
)
Handset switches to S! Mail.
OK
Requesting of delivery reports is set.
Xperia™ Z4
78
S! Mail/SMS Settings
Switching to SMS
Available when SMS/S!Mail Automatic Switching is
Make settings for S! Mail/SMS.
deactivated. See "Common Settings" for details.
Common Settings
While creating S! Mail,
Switch to SMS
Settings can be made for the following items.
Item
Message
Set items indicating in notice for new
Notice
messages.
Sound/
Set ringtone, vibration, new mail lamp,
Vibration
etc. for new messages.
Thread Mode
Color Style
Setting
OK
Font Size
Handset switches to SMS.
Description
options
Enable conversation thread view for
messages.
Set the screen design.
Set the font size.
SMS/S!Mail
Set whether to switch automatically
Automatic
between
Switching
S! Mail and SMS when sending.
Show Subject
Set whether to display subject input field
Field
in thread mode.
Double enlarge
image
Show small images at double-size.
My Pictogram
Change the display order of or delete My
Setting
pictograms.
Decore Picture
Change the display order of or delete
Setting
decore pictures.
Back up/restore message data or export/
Mail
Save&Load
import message data in vMessage format.
vMessage format is compatible with other
smartphones and SoftBank mobile phones
(3G).
Spam mail
Enable sorting of messages from senders
folder
not in Address Book to Spam Box.
Initialization
Return message settings to defaults.
Enable old messages to be automatically
Advanced
deleted and set number of messages that
Settings
can be saved. Check used space on SD Card
and handset.
In Home Screen,
(Mail)
79
Send/Receive Settings
Common Settings
Set each item
Settings can be made for the following items.
Item
Description
Make S! Mail/SMS receive settings. Set
Receive
what portions of S! Mail to first retrieve,
Settings
and whether to automatically check new
messages when activating S! Mail.
Make S! Mail/SMS send settings. Set
Setting is complete.
whether to quote a message when
Send Settings
replying, whether to request delivery
reports for sent messages, and whether to
show confirmations.
Wi-Fi
Make S! Mail settings for Wi-Fi
Connection
connections.
Receive
Settings
Set the application used for sending/
receiving SMS.
Display
Set whether to send and receive messages
Progress
in the background.
In Home Screen,
(Mail)
Send/Receive Settings
Messaging & Internet
SMS Send/
Set each item
Setting is complete.
Xperia™ Z4
80
Mail Group Settings
Number/Address Settings
Settings and viewing can be made for the following items.
In Home Screen,
(Mail)
Item
Description
Phone Number
View phone number.
Mail Address
View mail address.
Change Mail
Navigate to My SoftBank to change mail
Address
address, etc.
In Home Screen,
(Mail)
Mail Group Settings
Number/Address Settings
Mail Group Settings open.
Mail Group Setting Operations
Adding a Mail Group
In Mail Group Settings,
name
Add Mail Group
Enter group
OK
・To enter emoji pictograms, Tap
.
Setting is complete.
Adding Members to a Group
In Mail Group Settings, Tap group
Add Group Member
Phonebook / Outgoing History / Incoming
History / Direct Input
Select/enter contact to add
OK
Editing a Group Name
In Mail Group Settings, Touch & Hold group
name
Edit group
OK
・To enter emoji pictograms, Tap
.
Deleting a Group
In Mail Group Settings, Tap
next to group
Delete
Deleting Members
In Mail Group Settings, Tap group
member
Delete
Tap
next to
Set each item
81
Using Gmail
Switching Accounts
Use Google's webmail service.
In Home Screen,
Adding an Account
In Home Screen,
(Google)
(Gmail)
(Settings)
Mail list opens.
Messaging & Internet
Accounts
Add account
Tap account to switch to
Account switches.
Select account to add
Follow onscreen instructions
The account is added.
Xperia™ Z4
82
Creating/Sending Gmail
Saving as a Draft (Send Later)
While composing mail,
In Home Screen,
(Google)
(Gmail)
Save draft
Mail is saved as a draft for later.
Deleting Mail Being Composed
In mail composition window,
Discard
Opening New Gmail
Mail list opens.
When new Gmail arrives,
/
appears in Status Bar.
Drag Status Bar down to open Notifications Window
Mail composition window opens.
Notifications Window opens.
Enter recipient/subject/mail text
Tap new Gmail
Message is sent.
The new received Gmail message opens.
Operations when Composing Gmail
・For two or more new Gmail messages, Gmail list opens. Tap
new Gmail to open.
Adding Cc/Bcc
In mail composition window,
in recipient
recipients
Attaching Still Images/Videos
In mail composition window,
Select application
Attach file
Select file to attach
Enter
83
Opening Gmail
In Home Screen,
(Google)
Deleting an Account
(Gmail)
In Home Screen,
(Settings)
Mail list opens.
Accounts
Tap account category
Messaging & Internet
Tap target mail
Gmail message opens.
Tap account(s) to delete
Remove account
REMOVE ACCOUNT
Operations when Opening Gmail
Replying to Mail
In Gmail message window,
Compose mail
・To reply to all recipients,
Reply all .
Forwarding Mail
In Gmail message window,
The account is deleted.
Forward
Compose
mail
Resetting Mail as Unread
Touch & Hold mail to be set as unread in email list
Deleting Mail
Touch & Hold mail to be deleted in email list
Syncing Accounts Manually
In Gmail list, Drag screen down
・Sync sent and received email messages manually at any
time regardless of the automatic sync settings.
Xperia™ Z4
84
Using Email
Adding an Account
Setting an Account
In Home Screen,
(Email)
Check username (user ID), password, server name, etc.
beforehand for the email account.
In Home Screen,
(Email)
Email list opens.
Settings
A window for adding an account appears the first time
only.
Follow onscreen instructions to set account
Email is set.
Add account
Follow onscreen instructions
An email account is added.
85
Creating/Sending Email
Opening New Email
When new email arrives,
In Home Screen,
appears in Status Bar.
(Email)
Drag Status Bar down to open Notifications Window
Email list opens.
Notifications Window opens.
Messaging & Internet
Tap new email
Mail composition window opens.
The new received email message opens.
Enter recipients/subject/mail text
SEND
・For two or more new email messages, email list opens.
Message is sent.
Xperia™ Z4
86
Opening Email
In Home Screen,
Deleting an Account
(Email)
In Home Screen,
Email list opens.
(Email)
Email list opens.
Tap target mail
Settings
Email message opens.
Operations when Opening Email
Tap the account to delete
Resetting Mail as Unread
Touch & Hold mail to be set as unread in email list
Deleting Mail
Touch & Hold mail in email list
DELETE
The account is deleted.
Syncing Accounts Manually
Switch to the account to be synced, and Tap
Refresh
・Sync sent and received email messages manually at any
time regardless of the automatic sync settings.
Delete account
OK
87
Using Chrome
Chrome Operations
Use the browser simply by entering search words and URLs.
My SoftBank Sign-in
In My SoftBank, check your charges or points, change
SSL/TLS
subscriptions or mail address, or set spam countermeasure.
In Chrome,
SSL (Secure Sockets Layer) and TLS (Transport Layer
Security) are protocols for encrypting sent/received data.
Bookmarks
MySoftBank
Follow onscreen instructions
While in a screen connected by SSL/TLS, data is encrypted
Searching within Web Page
to safely send/receive private information, credit card
numbers, corporate secrets, etc., and provide protection
In Web page,
against online threats (eavesdropping, falsification,
impersonation, etc.).
Find in page
Enter search text
Search results are shown highlighted.
SSL/TLS Cautions
responsibility whether or not to open the page with use of
SSL/TLS. SoftBank Corp. and the Certification Authorities
Symantec Website Security G.K. and Cybertrust Japan Co.,
Ltd. make no guarantees whatsoever to users regarding
security of SSL/TLS.
Using Chrome
In Home Screen,
(Google)
Messaging & Internet
When opening a secured page, users must decide as their
(Chrome)
Chrome opens.
・If confirmation appears, follow onscreen instructions.
・Tap URL in text message (SMS) or mail to automatically
activate Chrome.
Tap entry box at top
Enter search words or URL
Xperia™ Z4
Search results appear or a Web page opens.
Go
88
Adding Bookmarks
In Home Screen,
Showing Browsed History
(Google)
(Chrome)
In Home Screen,
Chrome opens.
Chrome opens.
Show Web page to add
History
Add bookmark window opens.
Check/change name, URL, etc.
History opens.
Tap target history
Save
Web page opens.
Current Web page is added to Bookmarks.
Bookmark Operations
Editing Bookmarks
In Chrome,
bookmark
Bookmarks
Edit bookmark
Touch & Hold target
Edit items
Save
Deleting Bookmarks
In Chrome,
bookmark
Bookmarks
Delete bookmark
Touch & Hold target
(Google)
(Chrome)
89
Opening New Tabs
Setting Chrome
Open several tabs to switch between Web pages easily.
Make various settings for Chrome.
In Home Screen,
In Home Screen,
(Google)
(Chrome)
Chrome opens.
(Chrome)
Chrome opens.
Settings
New tab appears.
Set items
Messaging & Internet
New tab
・To switch tabs, Tap
(Google)
Setting is complete.
, and then Tap target tab.
Xperia™ Z4
90
Camera
Capturing Still Images/Videos......................................... 92
Viewing Captured Still Images/Videos (Album).............. 94
Editing Captured Still Images (Album)............................95
Sharing Still Images and Videos......................................97
Making Camera Settings.................................................. 98
92
Capturing Still Images/Videos
Capturing Still Images/Videos
File Format for Still Images
File format for still images is JPEG.
Camera Cautions
All captured still images are saved to handset memory or
SD Card. Insert SD Card before using Camera.
If handset temperature rises, Camera may not activate or
may stop operation.
Shutter sound or capturing start/stop sound may be faint
if commercially available earphone set or Bluetooth ® device
File Format for Videos
Camera supports MPEG4 format.
is connected to handset.
Capturing at high resolution requires significant memory.
If autofocus frame does not appear when capturing still
images, the subject may be out of focus.
At a high ISO setting, images will be bright even in low-
Camera Cautions
If Lens Becomes Dirty
light conditions and have no camera shake, but will be
grainy (noise).
At a low ISO setting, images will be clear (no noise), but
will also be dark when captured in low-light conditions and
Fingerprints/smudges on lens prevent capturing of clear
may be blurry with camera shake.
still images/videos. Wipe lens with a soft cloth beforehand.
Do not cover Mic when capturing videos.
Capture videos with adequate battery charge.
Avoiding Exposure to Direct Sunlight
Be careful not to expose lens to direct sunlight for long
Flash/Photo Light Warning
periods. May discolor color filter and affect color of
images.
Do not shine Flash/Photo Light close to eyes. Do not look
at Flash/Photo Light directly while in use. Do not shine
Cautions on Capturing Still Images/
Videos
Copyrights and Portrait Rights
Still images and videos captured by handset are prohibited
by copyright law from use without consent of the
copyright holders, unless intended for personal use or any
other purpose permitted by law. Also, use or alteration
of another person's portrait or name without his or her
Mobile Light at other people's eyes. May affect eyesight,
etc.
Capturing Still Images
Captured still images are saved to handset (memory).
・When SD Card is inserted, saving destination can be changed
to SD Card.
permission may be a violation of portrait rights.
When you post recorded still images and videos on Internet
Web pages, etc., make sure to observe copyrights and
portrait rights. Note that some performances, shows,
(Long Press)
and exhibitions may place limitations on recording even
for personal use. Transmission of images protected by
copyright or beyond the scope provided in copyright law is
not possible.
Capturing or Sending Images
Be considerate of the privacy of individuals around you
when taking and sending photos using Camera.
Causing a public nuisance by using handset may be
punishable under law.
Viewfinder appears.
・If confirmation appears, follow onscreen instructions.
・Alternatively, Tap
in Home Screen, and Tap
(Camera) to activate Camera.
・If there is no operation for about 3 minutes on Viewfinder
(about 30 seconds if activated using "Quick launch"), Camera
operation ends.
93
Capturing Videos
Aim Camera at subject
Check Viewfinder, then
(Long Press)
Shutter clicks and still image is saved.
Capturing Operations (Still Images)
Using Zoom
Viewfinder appears.
・If confirmation appears, follow onscreen instructions.
・Alternatively, Tap
Press Volume Key
・Pinch/Spread fingers on Viewfinder to zoom in/out.
・Volume Key operations vary by setting of Use Volume key
as. At time of purchase, "Zoom" is set.
in Home Screen, and Tap
(Camera) to activate Camera.
・If there is no operation for about 3 minutes on Viewfinder
(about 30 seconds if activated using "Quick launch"), Camera
operation ends.
(Long Press)
Aim Camera at subject
・To capture using autofocus, Press
Aim Camera at subject
Check Viewfinder, then
Camera
Capturing with Camera Key
halfway until
autofocus frame changes to blue and shutter tone
all the way.
sounds, then Press down
Capturing with "Touch capture"
Use Touch capture when Capturing mode is set to "Superior
auto," "Manual," "Sound Photo" or "Sweep Panorama." Turn
on "Touch capture" before capturing.
(Long Press)
mode
Video recording starts.
・To pause, Tap
or to resume, Tap
.
Tap indicator to select Capturing
Tap "
" tab
on "Touch capture"
Tap or Drag right
Tap Viewfinder
To stop recording,
Viewing Thumbnails
Tap thumbnail image at upper right on Viewfinder
Captured still image opens.
Video recording stops and video is saved.
Capturing Operations (Videos)
Using Zoom
Press Volume Key
・Pinch/Spread fingers on Viewfinder to zoom in/out.
・Volume Key operations vary by setting of Use Volume key
as. At time of purchase, "Zoom" is set.
Capturing Still Image While Recording Video
While recording video,
Xperia™ Z4
・Image resolution varies by Video resolution setting.
94
Viewing Captured Still Images/
Videos (Album)
Capturing with Camera Key
Use Camera Key when Capturing mode is set to "Manual,"
"4K video" or "Timeshift video."
(Long Press)
Tap icon to select Capturing mode
When "Manual" is set, Tap
Press
to show Viewfinder
to start/stop capturing
Showing Still Images/Videos
Show captured or downloaded still images/videos. Supported
file formats are as follow.
Capturing with "Touch capture"
Type
Use Camera Key when Capturing mode is set to "Manual,"
"4K video" or "Timeshift video." Turn on "Touch capture"
Still image
before capturing.
Tap indicator to select Capturing
When "Manual" is set, Tap
Tap "
Viewfinder
Drag right
JPEG (.jpeg, .jpg), GIF (.gif), PNG (.png),
BMP (.bmp), WEBP (.webp)
H263 (.3gp, .3gpp, .mp4, .m4v),
(Long Press)
mode
File Format
" tab
to show
Tap or
of "Touch capture"
H264 (.3gp, .3gpp, .mp4, .m4v, .mnv),
Video
H265 (.mp4), MPEG2 (.ts), MPEG4
(.3gp, .3gpp, .mp4, .m4v), VP8
(.webm, .mkv), VP9 (.webm), Xvid
Tap
(.avi, .xvid, .mkv)
Viewfinder to start/stop capturing
Viewing Thumbnails
Tap thumbnail image at upper right on Viewfinder
In Home Screen,
(Album)
Captured still image opens.
Photo/Video Viewfinder Layout
Images are shown in chronological order.
・When using Album for the first time, service guide screen
appears. When Tapping SIGN UP or LOG IN , follow
Zoom indicator
onscreen instructions.
Autofocus frame
Status Indicators area: Smile shutter, Geotagging or
other set item are shown.
Tap still image/video
Thumbnail: Tap to view captured still image or open
video playback window.
Setting Indicators area
Camera Switch: Switch between Camera and Front
Camera.
Option Menu: Make Camera settings.
Shutter Icon (Still image)/Pause Icon (Video)
Start/Stop Recording Icon (Video)
Scene Indicator: Recognized Scene mode when "Superior
auto" is set. Other indicator appears when Camera is
moving or fixed, or subject is moving.
Capturing mode Icon: Set Capturing mode.
Image playback appears.
・Tap window to show captured date & time or option menu
icons.
・For Burst with longpress files, Tap the still image.
・For Sound Photo files, the sound is played back.
・For Timeshift video files containing slow motion,
appears.
・For video, Tap
and follow onscreen instructions.
・To select other files, Tap
to return to list, then select
file again or Flick playback window left or right.
95
Operations when Viewing Still Images/
Videos
Editing Captured Still Images
(Album)
Zooming In or Out Still Image
Tap Display twice or pinch to check a still image
Rotating Still Images
Playing Burst with longpress Files in Slideshow
In still image playback,
In Home Screen,
(Album)
Still image/video list opens.
Camera
Tap still image
Still image playback appears.
In still image playback, Tap a screen
Rotate
Still image is rotated and overwritten.
Xperia™ Z4
96
Trimming Still Images
Operation using Photo editor application is explained here.
SAVE
Cropped still image is saved as a separate file.
In Home Screen,
(Album)
Still image/video list opens.
Tap still image
Still image playback appears.
In still image playback, Tap a screen
Cropping window opens.
・If application selection appears, select "Photo editor."
Adjust cropping frame by Dragging
Crop
97
Sharing Still Images and Videos
Album lets you send still images and videos using email or
multimedia messages. You can also send them to a PC or
another phone using Bluetooth ® .
Sending Still Images or Videos Using
Bluetooth ®
You can select several still images, videos, or both and send
them to someone's phone or your computer using Bluetooth ® .
Sending Still Images or Videos by Email
In Home Screen,
(Album)
Send still images/videos as email attachments.
In Home Screen,
(Album)
Still image/video list opens.
Camera
Tap still image/video to share
Still image/video list opens.
Tap still image/video to share
Image playback appears.
In image playback, Tap a screen
Image playback appears.
Bluetooth
・To select multiple items, Touch & Hold an image to turn on
multiple select. Then, Tap all the items you want to include.
Tap the Image playback
Email / Gmail / Mail
Follow onscreen instructions.
Follow onscreen instructions.
・If you have multiple email accounts, the default email
account will be used.
Xperia™ Z4
98
Making Camera Settings
Switch Camera mode according to your purpose. Set Camera
(Long Press)
operations according to your purpose.
Switching Capturing Mode
Switch Capturing mode according to your purpose. Selectable
modes are the following.
・In Capturing mode selection, Tap +Apps /
DOWNLOADABLE tab to download and add Camera
application to Capturing mode selection. Applications
downloaded by "AR fun," "AR effect," or "+Apps" will be
stored in internal storage.
Viewfinder appears.
・If confirmation appears, follow onscreen instructions.
・Alternatively, Tap
in Home Screen, and Tap
(Camera) to activate Camera.
・If there is no operation for about 3 minutes on Viewfinder
(about 30 seconds if activated using "Quick launch"), Camera
Capturing
mode
Description
operation ends.
Capture still images or videos with
automatically optimized settings.
Superior
auto
Camera detects conditions such as moving
(
), fixed (
(
), recognizes scenes, and captures
Tap the indicator
Select a Capturing mode
), or moving subject
still images or videos automatically at
most suitable setting.
Manual
Style
portrait
AR mask
Face in
picture
Sound
Photo
AR fun
Multi
camera
Change Camera settings for still images or
video capturing manually.
Check various image effects and enjoy
self-photography.
・If confirmation appears, follow onscreen instructions.
Paste your face on your friend's to make
still images or videos more fun.
Use Camera and Front Camera to capture
still images or videos that include
yourself.
Record conversation or sound with still
images.
Capture with virtual objects to make still
images or videos more fun.
Using Capture Mode
Multi Camera
Up to three Xperia™ devices including yours are
connectable in "Multi camera." If you connect a Sony WiFi/NFC compatible camera, your Xperia™ and only one Sony
camera can be connected. Connecting other devices or
capturing while connected may not be available.
Connect friend's camera to capture multiviewed still images or videos.
4K video
Capture high resolution 4K videos.
Timeshift
Select best moment from video captured
video
Capturing mode switches.
at 120fps to show in slow-motion.
4K Video/Timeshift Video
Use SD Card for high-speed writing (Speed Class 10 or
more) to save photos using "4K video" or "Timeshift video."
Capture still images or videos against
AR effect
a virtual world such as the age of the
dinosaurs or under the sea.
Creative
effect
Add various effects to capture impressive
still images or videos.
Move Camera to capture a panorama
Sweep
Panorama
photo.
Move Camera keeping the arrow aligned
on the center line of the white frame on
Viewfinder to capture.
Cautions on Capturing
Multi Camera
Connecting other devices in "Multi camera" turns off other
Wi-Fi Direct connections.
99
Sweep Panorama
Capture in landscape view using "Sweep Panorama."
Moving objects or background are not suitable for Sweep
Panorama capturing.
Uncaptured portions are recorded in gray. In this case,
move Camera quickly to capture full shooting range for a
Sweep Panorama photo.
This function joins multiple images, and the locations
where images are joined may not be smoothly recorded.
In a dim place, image may be blurred or capturing may fail.
Under flickering light such as fluorescent lighting,
brightness and color may be uneven.
Avoid extreme differences in brightness, color or focus
Setting Camera Functioning
Main setting items are as follows.
・Setting items vary by Capturing mode or Viewfinder.
・Some settings cannot be made with other items at the same
time.
Item
Aspect ratio
(Still image
only)
Resolution
(Still image
Description
When "Superior auto" is set, aspect ratio
of still images is set to "16:9" or "4:3."
When "Manual" is set, set still image
resolution.
position between the whole image and each focused image
only)
so as to capture a good Sweep Panorama photo.
Video
Camera movement that is too quick or too slow, or moving
resolution
the camera in reverse to the direction of sweeping may
(Video only)
stop Sweep Panorama capture.
Recording file
When recording videos with "4K video,"
type (Video
select the file method from "H.264" or
only)
"H.265."
When "Manual" is set, set video resolution.
elapses. Use Self-timer to avoid camera
shake when capturing still images.
Camera
Camera shutter clicks when set timer
Self-timer
Smile Shutter/
Smile Shutter
Set smile level for camera detection.
(video)
Set focus type.
Single autofocus
Multi autofocus (Still image only): Move
autofocus frame to multiple positions on
Viewfinder. Tap
or Viewfinder, or
autofocus frame of positions focused by
Focus mode
pressing
when it turns from white
to blue.
Face detection: Detect faces to focus on.
Touch focus (Still image only): Move
autofocus frame to position where Tapped
on Viewfinder.
Object tracking: Track subject to focus
on.
Use high dynamic range feature to capture
HDR/HDR
still images with a natural impression even
video
in a place with lighting contrasts such as
backlight.
ISO (Still
image only)
Set ISO.
Meter to determine exposure balance
automatically.
Face: Detect faces to measure and adjust
exposure of images.
Multi: Divide an image into several smaller
Metering
ones to measure and balance to adjust
exposure.
Center: Set to center of Viewfinder to
measure whole image to adjust exposure.
center of Viewfinder to adjust exposure.
Xperia™ Z4
Spot: Measure at only one spot in the
100
Set to camera shake reduction. For
Image
stabilizer/
SteadyShot™
capturing videos, "Intelligent active" is
available; it reduces camera shake when
Tap "
"/"
"/"
" tab
zooming or while walking.
Soft skin
effect (Front
Set skin tone effect.
camera only)
Preview
Set preview time after capturing.
Set continuous capturing while Touching
& Holding
Burst with
longpress
(Still image
only)
or Long Pressing
for
Settings open.
over a second.
Set when Capturing mode is "Superior
auto" or using Front camera in "Manual."
Select "High speed" or "Standard"
according to subject movement when
Capturing mode is "Superior auto" and
Tap setting item
Set items
Setting is complete.
using main camera.
Operations on Using Camera
Face
recognition
Set to show name and put focus priority
(Still image
on face tagged in "Album" application.
only)
Microphone
Set to record surrounding sound when
(Video only)
capturing video.
Quick launch
Set operation when using Quick launch.
Set geotagging for detail location
Geotagging
information included in still images or
videos.
Touch capture
Use Volume
key as
Data storage
Set to capture by touching.
In Viewfinder,
Select a scene
・Set when Capturing mode is "Manual."
Adjusting Brightness/White Balance
In Viewfinder,
brightness
Tap or Drag Bar to adjust
Tap Indicator to set white balance
Assign function to Volume Key.
Setting Flash
Set saving destination for captured still
In Viewfinder,
images/videos.
Set to avoid response when Viewfinder is
Touch Block
Setting Scene Selection
Set Flash
touched. Display can be set not to react
Using Quick Launch
by touching on Viewfinder.
Long Press
, or in Lock Screen, flick
upwards to
set operation when launching Camera (Quick launch).
In Viewfinder,
Tap "
" tab
Quick launch
Launch only / Launch and capture / Launch and
(Long Press)
record video
・To cancel setting, Tap Off .
・When launching Camera from Quick launch, Capturing
mode is set to "Superior auto" automatically.
Capturing Using Face Detection
Camera focuses on face even out of center in Viewfinder.
Viewfinder appears.
In Viewfinder, Tap Capturing mode icon
・If confirmation appears, follow onscreen instructions.
・Alternatively, Tap
in Home Screen, and Tap
(Camera) to activate Camera.
・If there is no operation for about 3 minutes on Viewfinder
(about 30 seconds if activated using "Quick launch"), Camera
operation ends.
Tap "
"/"
" tab
Face detection
Manual
Focus mode
Aim Camera at subject
Tap as autofocus frame or enable Camera to detect face
to focus on
Capture a still image/video
・When Capturing mode is set to "Superior auto," Camera
detects face automatically.
101
Capturing Using Smile Shutter
Capture a smiling face.
In Viewfinder,
"
"/"
" tab
Shutter / Smile Shutter (video)
Aim Camera at subject
Smile
Select a smile level
Camera captures
automatically when focused face smiles
Camera
Xperia™ Z4
102
Full Seg/One Seg
Viewing TV (Full Seg/One Seg)..................................... 104
Recording/Playing Back Programs................................. 107
Recording/Viewing at Preset Times..............................109
104
Viewing TV (Full Seg/One Seg)
Both Full Seg and One Seg are available (only in Japan).
Connect commercially available headphones plug to TV Antenna
Cable
Connect TV Antenna Cable plug to Headphone Port
Hints
Q. Cannot launch TV
A. Battery may be low. Handset needs to be charged.
Q. Cannot view TV
A. Check signal reception. Move where signal is good.
Q. Cannot obtain the desired result of channel setting
A. Update broadcasting area. Channel setting may not be
set correctly depending on area, beginning period of
broadcasting, etc.
TV Cautions
Use Overseas
TV is unavailable due to different broadcast frequencies
and formats abroad.
Channel Setting
Channel setting with Change area may not be available
when the broadcasting frequency is changed or in some
areas. In this case, set channel list again.
Viewing Environment
TV may be unavailable due to different signal reception
depending on environment. Use where signal is good.
Do Not Use TV while Walking or Driving
Do not use TV while riding a bicycle or motorcycle, walking
or driving a car.
TV Antenna Cable
Before watching TV, be sure to connect TV Antenna Cable.
・Connect only TV Antenna Cable to handset to output TV
sound from Speaker.
105
Setting Channels (Using for First Time)
In Home Screen,
(TV)
Select area (Area) opens.
Viewing TV
In Home Screen,
(TV)
TV screen appears.
・If confirmation appears, follow onscreen instructions.
・If confirmation appears, follow onscreen instructions.
Tap Area
Flick screen left/right and select channel
Tap Prefecture
Tap Locality
When channel scan is complete, broadcasting area is set and
channel list appears.
OK
Full Seg/One Seg
Selected TV screen appears.
OK
Channels setting is complete and TV is activated.
・If confirmation appears, follow onscreen instructions.
Xperia™ Z4
106
TV Screen Layout
Saving Channel to Channel List
・Tap image on TV screen to show/hide indicators.
In TV screen, Touch & Hold image
channel to save
Touch & Hold
YES
・To overwrite, Tap Overwrite registered channel .
Ending TV
In TV screen,
Checking Program Information Currently Viewed
In TV screen,
Program
Program information
・In program info screen, Tap program name to check
program detail information. In program detail info screen,
Tap
for scheduled recording/viewing. For details on
scheduling recording/viewing, see "Scheduling Recording/
Viewing."
Using TV Link
In TV screen,
TV link
Follow onscreen
instructions
Present broadcast service (Full Seg/One Seg)
・Methods of saving TV link differ depending on program.
Switch Full Seg/One Seg
Full Seg data broadcasting
Adding Broadcasting Area
Remote
Option menu
Reception level
Channel/broadcast stations name/program information
In TV screen,
Change area
broadcasting area
Area info setting
Touch & Hold
・For details on broadcasting area, see "Setting Channels
(Using for First Time)."
Record program
Switching Broadcasting Area
Channel selector
Remote for data broadcasting
In TV screen,
Channel list
Change area
Tap broadcasting
In TV screen,
Change area
Touch & Hold
broadcasting area
Update channel
area
Detailed information on program
Updating Channel
TV operation
Switching Full Seg/One Seg
In TV screen,
・If you Tap Update all , Tap YES in confirmation
Tap item
screen.
Operating Data Broadcasting
In TV screen,
Update all /
Update addition
(Data)
Renaming Area
(Remote)
onscreen instructions
Follow
In TV screen,
Change area
Touch & Hold
broadcasting area
Rename area
Enter area name
OK
Scanning Channels
In TV screen, Touch & Hold
or
Deleting Broadcasting Area
In TV screen,
Change area
broadcasting area
Delete settings
Touch & Hold
YES
107
Recording/Playing Back Programs
Deleting a Channel
Record programs on SD Card and play them back later.
In TV screen, Touch & Hold image
channel
Delete channel
Touch & Hold
YES
Making Subtitles/Sound Settings
In TV screen,
Subtitle/Sound/Video setting
Follow onscreen instructions
Record/Playback Cautions
Recording
Note the following when recording.
・Recorded videos are saved on SD Card. Recording is not
available if SD Card is not installed.
・Record where signal is good. Programs may not be
Making TV Settings
recorded where signal is not stable.
Set Superimpose setting, Data Broadcasting, Auto Exit
Timer, etc.
In TV screen,
instructions
・For One Seg, maximum savable recorded data file size
is 2GB, and maximum recordable time is approximately
24 consecutive hours. For Full Seg, maximum savable
Settings
Follow onscreen
recorded data file size is 128GB, and maximum recordable
time is approximately 21 hours and 20 minutes
consecutively (for SD Card (128GB)). Up to 99 items can
be saved between One Seg and Full Seg.
・When SD Card is used from another application while
recording, recording may fail.
Restriction on Recorded Programs
other devices.
Recording Programs
In Home Screen,
Full Seg/One Seg
Programs recorded on handset cannot be played back on
(TV)
TV screen appears.
・If confirmation appears, follow onscreen instructions.
On channel to record,
(Record)
Recording starts.
・If confirmation appears, follow onscreen instructions.
(Stop).
Xperia™ Z4
・To stop recording, Tap
108
Playing Back Recorded Programs
Playback Screen Layout
・To show playback controller, Tap image while a recorded
program is playing.
In Home Screen,
(TV)
Skip (rewinding 15 seconds)
TV screen appears.
・If confirmation appears, follow onscreen instructions.
Rewind (switch to 2x, 10x, 30x and 120x for every Tap)
Pause/play
Fast forward (switch to 2x, 10x, 30x and 120x for every
Tap)
Recorded program list
Skip (fast forwarding 30 seconds)
Playback point (drag to adjust)
Recorded program name
Play time/Recording time
Operations during Recording/Playback
Recorded program list appears.
Setting Playback pattern
In recorded program list screen,
pattern
Playback
Normal playback / Repeat playback
Tap file
Playback starts.
Checking Free Space on SD Card
In recorded program list screen,
Remaining
memory
Deleting Recorded Program
In recorded program list screen, Touch & Hold a recorded
file
YES
Checking Property
In recorded program list screen, Touch & Hold a recorded
file
Property
Renaming Title
In recorded program list screen, Touch & Hold a recorded
file
Enter title
OK
109
Recording/Viewing at Preset Times
From Program guide / Viewing reservation / Recording
Scheduling Recording/Viewing
In Home Screen,
reservation
(TV)
Reservation setting screen opens.
・When Tapping From Program guide , follow onscreen
instructions.
TV screen appears.
・If confirmation appears, follow onscreen instructions.
Set items
Save
Reserve Recording/Viewing
(Fullseg)" or "Recording reservation(Oneseg)" from
"Reservation type setting."
Full Seg/One Seg
・For Recording reservation, select "Recording reservation
Reserve recording/viewing list opens.
YES
New reservation
Reservation is complete.
Reservation Cautions
Check the signal status, battery charge and storage
capacity before recording. Insert SD Card beforehand to
record.
Xperia™ Z4
110
Checking Scheduling
Deleting Failed Reservation
In Reserve recording/viewing list,
In Home Screen,
Reservation List
(TV)
Delete
Failed
Touch & Hold Failed Reservation
YES
Setting Reservation Notice
In Reserve recording/viewing list,
notice
TV screen appears.
・If confirmation appears, follow onscreen instructions.
Reserve Recording/Viewing
Reserve recording/viewing list opens.
Tap reservation
Reservation list opens.
Operations in Reserve Recording/
Viewing List
Deleting Recording/Viewing Reservation
Touch & Hold target reservation in reserve recording/
viewing list
Delete
YES
Editing Recording/Viewing Reservation
Touch & Hold target reservation in Reserve recording/
viewing list to edit
Edit
・For details on scheduling recording/viewing, see
"Scheduling Recording/Viewing."
Checking Failed Reservation List
In Reserve recording/viewing list,
Reservation List
Failed
Tap Failed Reservation
Follow onscreen instructions
Reservation
Useful Functions
Using Urgent News.........................................................112
Using Google Maps......................................................... 113
Using Hangouts............................................................... 114
Using Google Search.......................................................115
Using Calculator............................................................. 116
Using Calendar................................................................ 116
Using Alarm & Clock...................................................... 118
Using Twitter................................................................. 120
Using Facebook............................................................... 121
Using YouTube................................................................ 121
Listening to Music (Music)............................................ 122
Using PC Files.................................................................122
Using NFC/Osaifu-Keitai ® ............................................. 123
Using Downloads.............................................................126
Using Drive......................................................................127
Using Play Books............................................................ 127
Using Play Movies & TV................................................ 128
Using Play Games........................................................... 128
Using Google+.................................................................129
Using Google Settings....................................................129
112
Using Urgent News
View received "Earthquake Early Warning" or "Tsunami
Tap the Urgent News notification
Warning" distributed by the Meteorological Agency, and
"Disaster and Refuge Information" issued by national or local
authorities (receive setting is enabled at time of purchase).
Disabling Urgent News
In Received message list,
Urgent News receiving settings
Receive settings
(
)
Received Urgent News list opens.
Urgent News Cautions
Tap the Urgent News
Reception
Depending on usage/situation, handset may receive Urgent
The received Urgent News opens.
News for other areas or no Urgent News. SoftBank Corp. is
not responsible for damages caused by using this service,
including accidents resulting from received information,
Opening Old Urgent News
reception timing, or reception/reception failure.
Standby Time
While Urgent News is enabled, standby time is shorter.
In Home Screen,
(安心・安全)
News)
If Urgent News Arrives
and a message appear in Status Bar. Handset ringtones and
are different for quake alerts, tsunami warnings and disaster/
evacuation information.
・Urgent News is not received during calls or transmissions, or
when signal is weak.
Received Urgent News list opens.
・Alert sounds for arriving Urgent News even if in Silent
mode.
Tap the Urgent News
Drag Status Bar down to open Notifications Window
Notifications Window opens.
The Urgent News opens.
(Urgent
113
Using Google Maps
Features available with Google Maps include maps of current
location, routes to destinations, and views of traffic
Obtaining Useful Area Information for Current
Location
In map,
conditions and aerial views.
obtain
Viewing Maps of Specified Places
In Home Screen,
(Google)
(Maps)
Explore nearby
Tap information to
Tap target information
Viewing Traffic Jam Information, Aerial
Photos, Etc. in Map
Set Location beforehand.
In map,
Tap information
Checking Route to Destination
Use route to destination.
In map,
(on foot)
(car)/
(public transport)/
Enter Your Location/Choose destination
・Route candidates to the destination appear in a list.
Map opens.
・If confirmation appears, follow onscreen instructions.
Checking Detailed Operation for Map
In map,
Help
Tap search bar
Useful Functions
Enter address, city, facility name, etc.
Tap address, city,
facility name, etc. in candidates
A map of the specified place opens.
Google Maps Operations
Viewing Current Location
Set Location beforehand.
In map,
Xperia™ Z4
114
Using Hangouts
Hangouts is Google's instant messaging service. Use to
communicate with other Hangouts users, and also use video
Ending a Video Chat
In video chat window,
calling. Log in to your Google account beforehand.
Disabling Chat History
Using Hangouts
In Home Screen,
(Google)
In chat window,
(Hangouts)
Deleting Chat
In chat window,
Hangouts appears.
・If confirmation appears, follow onscreen instructions.
Enter friend's name, mail address, phone number, circle
Tap friend
Follow onscreen instructions
Chat window/video chat window opens.
・Each time text is entered, the corresponding friend appears.
・If a friend is not in a Hangout, a message appears. Tap
INVITE to invite them to the Hangout.
Hangouts Operations
Ending a Chat
In chat window,
Turn history off
Delete
DELETE
115
Using Google Search
Search information saved on handset and in handset
Canceling Google Now
In search window,
applications as well as on the Internet.
screen
TURN OFF
Searching
In Home Screen,
or Flick right from the left end of
Settings
(
Now cards
Show cards
)
(Google)
Search window opens.
・If confirmation appears, follow onscreen instructions.
・If a description for Google Now appears, Tap GET
STARTED and read information. Tap YES, I'M IN on last
page to use Google Now.
Tap search result/
Search results appear.
・To search by voice, Tap
and speak words to search with
into handset.
Useful Functions
Enter search keywords
Google Search Operations
Changing Search Information
In search window,
screen
to search (
or Flick right from the left end of
Settings
Phone search
Select where
)
Using Google Now
Google Now automatically searches for information based
on search keywords used until now, user's current location,
etc. and presents search results in the search screen.
Google Now also informs user of scheduled events.
In search window,
screen
SET UP
or Flick right from the left end of
Settings
Now cards
Show cards
YES, I'M IN
・To use all functions of Google Now, set Location to On
beforehand, and set Location History to On .
Xperia™ Z4
116
Using Calculator
Using Calendar
Use Calendar to manage a schedule. Sync handset Calendar
Using Calculator
In Home Screen,
with Google Calendar online. Log in to a Google account
beforehand.
(Calculator)
Calendar Operations
Viewing Today's Calendar
In Calendar,
/
Changing Calendar View
Flick right from the left end of Calendar
Year /
Month / Week / Day / Tasks
Calculator appears.
Viewing Next/Previous Year (Year View)
In Calendar, Flick left/right
Tap onscreen keys for calculation
Viewing Next/Previous Month (Month View)
In Calendar, Flick left/right
Viewing Next/Previous Week (Week View)
In Calendar, Flick left/right
Calculation result appears.
Viewing Next/Previous Day (Day View)
In Calendar, Flick left/right
Viewing Next/Previous Time Period (Day/Week
View)
In Calendar, Flick up/down
Adding Events to Calendar
In Home Screen,
Calendar appears.
(Calendar)
117
Syncing Calendar
In Home Screen,
(Calendar)
Add event window opens.
Calendar appears.
Enter title, start date/time, end date/time, etc.
SAVE
Flick right from the left end of Calendar
Tap sync item (
)
Event is added.
In Home Screen,
Sync setting is changed.
(Calendar)
Useful Functions
Checking Events
Calendar appears.
Tap date
Tap event
Event details appear.
to edit event.
・In event details, Tap
to delete event.
Xperia™ Z4
・In event details, Tap
118
Using Alarm & Clock
Alarm Operations
Set and use alarms, world clock, stopwatch and timer.
In alarm screen,
Setting Alarms
・Set alarm. Settings can be made for the following items.
Item
alarm (
Time
Set alarm time.
Repeat
Set days to repeat alarm.
Alarm text
Set text that appears during alarm.
Alarm sound
Change sound.
Alarm volume
Set alarm volume.
Snooze
Set interval until alarm restarts after it
duration
has stopped.
Vibrate
Enable vibration during alarm.
Side keys
Set behavior of Volume Key when pressed
behavior
during alarm.
Auto silent
Set time to automatically shift alarm
time
volume to silent.
(Alarm & clock)
Alarm appears.
Alarm setting opens.
Set items
SAVE
Alarm is set.
・To disable Alarms, in Alarm screen, Tap
(
).
Desk clock
Deleting Alarms
In alarm screen,
Description
In Home Screen,
Viewing Desk Clock
)
Delete alarms
DELETE
YES
Tap target
119
Using World Clock
In Home Screen,
Using Stopwatch
(Alarm & clock)
(World
clock)
In Home Screen,
(Alarm & clock)
(Stopwatch)
World clock appears.
Stopwatch appears.
START
Useful Functions
City list opens.
Timing starts.
Tap city to add
STOP
City is added to world clock screen.
Time opens.
World Clock Operations
Stopwatch Operations
Setting Home City
In world clock screen,
Timing Laps
Set home city
Tap city
In Stopwatch screen,
LAP
Switching Celsius/Fahrenheit
Resetting Timed Result
In world clock screen,
In Stopwatch screen,
Fahrenheit / Celsius
RESET
while timing
after timing
Rearranging Cities
In world clock screen,
up/down
Rearrange
Drag
DONE
Deleting
In world clock screen, Touch & Hold city
YES
Xperia™ Z4
120
Using Twitter
Using Timer
Tweet (post messages) and view other people's tweets on
Twitter. Login may be required to use Twitter. For details on
In Home Screen,
(Alarm & clock)
(Timer)
Twitter, visit the Twitter website (https://twitter.com/).
Tweeting on Twitter
In Home Screen,
(Twitter)
Timer appears.
SET TIME
Set time
OK
Twitter appears.
・If using Twitter for the first time, Tap Log in and log in,
or Tap Sign up and register an account.
・Set time history opens in "MOST USED TIMERS" when timer
What's happening?
Enter a tweet
Tweet
has been already used. Alternatively, Tap history to set
time.
The tweet is sent and appears on Twitter.
Twitter Operations
START
Viewing a Timeline
In Twitter window,
Home
Tweets etc. by user and others following user appear.
Searching Information on Twitter
In Twitter window,
Countdown starts.
・When set time has passed, handset sounds alarm. To stop
countdown or alarm, Tap STOP .
candidate/
Enter search text
Tap target item
Tap
121
Using Facebook
Using YouTube
Exchange recent happenings with friends or browse
View a variety of video contents uploaded to YouTube, and
information about companies, organizations, etc. For details
upload videos from handset.
on Facebook, visit the Facebook website (https://jajp.facebook.com/).
Viewing Videos
Adding to Facebook
In Home Screen,
In Home Screen,
(Google)
(YouTube)
(Settings)
YouTube appears.
・If confirmation appears, follow onscreen instructions.
Accounts
Add account
Tap video
・Tap Display while a video is playing for play/pause.
Posting a Video
In YouTube screen,
video
Facebook
Uploads
Select
Useful Functions
Video plays.
Enter title etc.
・If confirmation appears, follow onscreen instructions.
・Set a YouTube account beforehand.
Follow the prompts to enter your Facebook account details
and complete sign-in.
Xperia™ Z4
122
Listening to Music (Music)
Using PC Files
Create/view/edit documents, spreadsheets, and slides. View
Playing Music
and edit files created in Microsoft ® Office (Word, Excel ® ,
PowerPoint ® ).
Play back music, playlists, etc. Supported file formats are as
follow.
Creating Document
・WAV (PCM, G.711) (.wav), AAC (.3gp, .m4a, .mp4), AAC+
(.3gp, .m4a, .mp4), eAAC+ (.3gp, .m4a, .mp4), MP3 (.mp3),
・Document screen is used as an example.
AMR-NB (.3gp), AMR-WB (.3gp), MIDI (SPMIDI/GM/GML
(.mid), XMF (.xmf), Mobile XMF 1.0 (.mxmf), RTTTL/RTX
(.rtttl, .rtx), OTA (.ota), iMelody (.imy)), Ogg Vorbis (.ogg),
FLAC (.flac), WMA (.wma), ALAC (.m4a), DSD (.dsf, .dff),
In Home Screen,
(ツール)
(OfficeSuite)
Opus (.opus), AIFF (.aiff, .aif, .aifc)
In Home Screen,
(Music)
OfficeSuite appears.
・If terms of use appear, follow onscreen instructions.
Home screen of Music appears.
Document / Spreadsheet / Presentation
・Follow onscreen instructions.
Playing Back Conventional Music Data
at Near-Hi-Res Audio Quality
In Music Home screen, Tap and enable
Sound effects
(
Sound effects
Settings
DSEE HX
) to play back conventional music data at near-Hi-
Res Audio Quality. Music data is played back only with a
headphone compatible with Hi-Resolution Audio.
Create document
Document is saved.
Follow onscreen instructions
123
Using NFC/Osaifu-Keitai ®
Viewing Documents
Use handset with internal IC card as money, coupon, or ticket.
Document screen is used as an example.
In Home Screen,
(ツール)
Transfer data with NFC device, using Android Beam.
(OfficeSuite)
NFC/Osaifu-Keitai ®
Osaifu-Keitai ®
Osaifu-Keitai ® is the general term for services such as
electronic money, points, etc. with a short range wireless
communication method called NFC.
NFC
NFC is an abbreviation for Near Field Communication and
is the international standard for short range wireless
communication defined by ISO (International Organization
Flick right from the left end of screen to select document
category
for Standardization). You can use contactless IC card
functions including FeliCa ® , Reader/Writer function (R/W),
Peer-to-Peer communications function (P2P), etc.
Hints
Q. Cannot use Osaifu-Keitai ®
Q. Cannot be scanned
Tap document
A. Hold handset for a few seconds. If time held over
reader/writer is short, it may fail.
A. Hold handset level with reader/writer. Alternatively,
move handset backwards/forwards or to the left/right
Useful Functions
A. Is battery low? Charge when battery is low.
and bring it close to reader/writer slowly.
A. Check the
mark side. If there are metal objects
nearby, scanning may fail.
Document opens.
・To Edit, Tap document.
NFC/Osaifu-Keitai ® Operations
If the data in the IC card is lost, altered or damaged
by any means such as malfunction or repairs, SoftBank
Corp. assumes no responsibility for the loss of data in
connection with Osaifu-Keitai ® compatible services.
Preparing to Use Osaifu-Keitai ®
Requires separate subscription to compatible services or
initial settings beforehand.
・For details, contact NFC/Osaifu-Keitai ® compatible service
providers.
Xperia™ Z4
124
Preparing to Use NFC
In Home Screen,
(Osaifu-Keitai)
In Home Screen,
(Settings)
More
Osaifu-Keitai ® appears.
・If confirmation appears, follow onscreen instructions.
NFC / Osaifu-Keitai settings
Tap service to use
OK
NFC/Osaifu-Keitai ® settings open.
My Service screen appears.
・Follow onscreen instructions.
Reader/Writer,P2P
OK
(
)
Preparing NFC is complete.
・Android Beam is also available (
).
Using This Service
Hold handset over reader/writer (scanner) to scan data in IC
card.
Bring the
mark close to reader/writer
Scanning is complete.
・Check that scanning is complete by the sound, indication,
etc. of reader/writer.
125
Sending/Receiving Data via Android
Beam
Prohibiting Use of NFC/Osaifu-Keitai ®
Send/receive data to/from a device with NFC.
In Home Screen,
(Settings)
More
・Some applications cannot use Android Beam.
・Handset cannot communicate with all NFC devices.
While showing data to send on the sender's handset, face the
marks on both devices parallel to one another
NFC / Osaifu-Keitai settings
"Touch to beam" appears on the sender's device.
NFC/Osaifu-Keitai ® settings open.
Useful Functions
Tap Display to send
Handset beeps and the data sending screen appears.
NFC / Osaifu-Keitai lock
(
)
NFC/Osaifu-Keitai ® lock is set.
・When setting for first time, enter operation access code.
NFC/Osaifu-Keitai ® Operations
Unlocking NFC/Osaifu-Keitai ®
In NFC/Osaifu-Keitai ® settings screen,
Keitai lock
Enter password
NFC / Osaifu-
OK
NFC/Osaifu-Keitai ® lock is disabled (
).
Changing NFC/Osaifu-Keitai ® Lock Password
In NFC/Osaifu-Keitai ® settings screen,
password
Enter current password
new password
Enter
Reenter new password
OK
・If confirmation appears, follow onscreen instructions.
Xperia™ Z4
OK
OK
Change
OK
126
Using Downloads
Disabling Android Beam
In NFC/Osaifu-Keitai ® settings screen,
Android Beam
(
)
Managing Downloaded Files
View downloaded file list using Chrome.
Android Beam is disabled.
・To enable Android Beam, Android Beam
OK
).
(
In Home Screen,
(ツール)
Setting Remote Lock via Mail
Set to lock NFC/Osaifu-Keitai ® via mail when handset is
lost/stolen.
In NFC/Osaifu-Keitai ® settings screen,
Mail
Remote Lock via
Enter operation access code
on the mail remote lock
(
)
OK
Address 1 / Registered Mail Address 2
For "Text input,"
method
OK
Turn
Registered Mail
OK
Select entry
SAVE
Downloads window appears.
OK
Mail describing how to lock/unlock is sent to saved mail
address.
・Tap Turn on the mail remote lock to toggle on (
off (
)/
).
Viewing Help of Remote Lock via Mail
In NFC/Osaifu-Keitai ® settings screen,
Mail
Enter password
OK
Remote Lock via
Help
(Downloads)
127
Using Drive
Using Play Books
Saving/Sharing Files
Reading Favorite e-Book
Save or share files in "Google Drive," Google's online storage
Download/purchase new or best-selling e-books from Google
service.
Play.
In Home Screen,
(Google)
(Drive)
Drive window appears.
・If confirmation appears, follow onscreen instructions.
Checking Usage Instructions
Help & Feedback
(Google)
(Play Books)
Play Books window appears.
・If confirmation appears, follow onscreen instructions.
Checking Usage Instructions
In Play Books,
Help & Feedback
Useful Functions
In Drive,
In Home Screen,
Xperia™ Z4
128
Using Play Movies & TV
Viewing Movies/TV Programs
Using Play Games
Playing Games
Download/purchase movies or TV programs from Google Play.
Download/purchase games from Google Play.
In Home Screen,
In Home Screen,
(Google)
(Play Movies & TV)
Play Movies & TV window appears.
・If confirmation appears, follow onscreen instructions.
Checking Usage Instructions
In Play Movies & TV,
Help & feedback
(Google)
(Play Games)
Play Games window appears.
・If confirmation appears, follow onscreen instructions.
Checking Usage Instructions
In Play Games,
Help & Feedback
129
Using Google+
Using Google Settings
Sharing Daily Events
Setting Google Apps
Use Google's social service.
In Home Screen,
(Google)
Make Google's service settings.
(Google+)
Google+ window appears.
・If confirmation appears, follow onscreen instructions.
Checking Usage Instructions
In Google+,
Help
In Home Screen,
(Google Settings)
Google Settings window appears.
・If confirmation appears, follow onscreen instructions.
Checking Usage Instructions
In Google Settings,
Help & feedback
Useful Functions
Xperia™ Z4
130
Connectivity
Connecting to PC via USB............................................. 132
Connecting via Wi-Fi......................................................132
Using Tethering.............................................................. 137
Using Bluetooth ® Function............................................138
Using DLNA Function..................................................... 141
132
Connecting to PC via USB
Connecting via Wi-Fi
Connect handset to a PC via Micro USB Cable and use handset
Handset supports Wi-Fi (wireless LAN). Access the Internet
memory and data in SD Card from the PC.
via a household Wi-Fi connection environment. For Wi-Fi
router (manufactured by FON) users, see "Fonルーター かんた
Transferring Data between Handset SD
Card and PC
・Insert SD Card beforehand.
・Avoid removing Micro USB Cable or SD Card during data
transfer.
・Windows Vista/Windows 7/Windows 8/8.1 are supported.
Some PCs may not operate properly.
ん設定ガイド (http://mb.softbank.jp/mb/special/network/pdf/
wifi_howto_01.pdf)" for details.
Automatic Updates for Optimizing WiFi Connection
While using Wi-Fi, updates for optimizing connection may
be received or applied automatically.
・Download "Bridge for Mac" to use this on Mac. For details
on compatible products and recommended systems, see the
following web page.
http://www.sonymobile.co.jp/support/software/bridge-for-
Enabling Wi-Fi
mac/
In Home Screen,
(Settings)
Connect handset and PC with Micro USB Cable
・If connecting Micro USB Cable for the first time, driver
software of handset is installed to PC. Wait for a while
until installation is completed.
Wi-Fi
・When "Install software" screen appears on handset, Tap
SKIP or CANCEL .
Follow instructions on PC screen
Operating handset data directly from the PC is available.
Wi-Fi settings open.
Operate data on PC
Data is transferred.
Wi-Fi is enabled (
).
・Access points are scanned. Available access points appear
after scanning.
・To disable Wi-Fi, Tap
(
).
133
Wi-Fi and Mobile Data Traffic
Setting Passpoint Networks
Mobile data traffic is available even when Wi-Fi is on.
In Wi-Fi settings,
networks
Advanced
Passpoint
Enter passpoint network setting
SAVE
Wi-Fi Operations
・Setting is available when Wi-Fi is ON.
Enabling Notification when Open Network Is
Available
Checking MAC Address
In Wi-Fi settings,
In Wi-Fi settings,
Advanced
Network
notification
Advanced
・MAC address appears below "MAC address."
・Available when Wi-Fi is on.
・Tap Network notification to toggle on (
(
)/off
Checking IP Address
).
In Wi-Fi settings,
・IP address appears below "IP address."
Setting Timing for Pausing Connection
In Wi-Fi settings,
during sleep
Advanced
Advanced
Keep Wi-Fi on
Tap setting item
Enabling Scanning with Location Services or
Applications while Wi-Fi Is Off
In Wi-Fi settings,
Advanced
Scanning always
available
・Tap Scanning always available to toggle on (
(
)/off
).
Connectivity
Enabling Wi-Fi Only for Stable Connection
In Wi-Fi settings,
Advanced
Avoid poor
connections
・Available when Wi-Fi is on.
・Tap Avoid poor connections to toggle on (
(
)/off
).
Installing Certificates
In Wi-Fi settings,
certificates
Advanced
Install
Follow onscreen instructions
Enabling Auto IP Support
In Wi-Fi settings,
Advanced
Auto IP
support
・Tap Auto IP support to toggle on (
)/off (
).
Enabling Automatic Connection with Available
Passpoint Networks
In Wi-Fi settings,
Advanced
Passpoint
・If enabling, read onscreen information and Tap OK .
・Tap Passpoint to toggle on (
)/off (
).
Xperia™ Z4
134
Selecting a Network Connection
Select a scanned Wi-Fi network and connect.
In Home Screen,
Tap Wi-Fi network
Enter password
CONNECT
(Settings)
Handset is connected.
・The password, for a household wireless LAN router, is
sometimes found on a sticker on the router (WEP, WPA, KEY,
etc.). Contact the router manufacturer for information.
For password for a public wireless LAN, check with user's
service provider.
Wi-Fi
・Entering a password is not required if an access point is not
security protected.
Wi-Fi Operations
Scanning Access Points
In Wi-Fi settings,
Refresh
Available access points appear after scanning.
Wi-Fi settings open.
Connecting WPS Devices
In Wi-Fi settings,
Button / WPS PIN Entry
instructions
Wi-Fi is enabled (
).
・Access points are scanned. Available access points appear
after scanning.
・To disable Wi-Fi, Tap
(
).
Advanced
WPS Push
Follow onscreen
135
Making Settings Manually for
Connecting
In Home Screen,
Enter Wi-Fi network setting
SAVE
(Settings)
Handset is connected.
・Entering a password is not required if an access point is not
security protected.
Disconnecting Wi-Fi
Wi-Fi
In Home Screen,
(Settings)
Wi-Fi settings open.
Wi-Fi is enabled (
).
・Access points are scanned. Available access points appear
after scanning.
・To disable Wi-Fi, Tap
Tap connected access point
Connectivity
Wi-Fi
(
Wi-Fi settings open.
).
FORGET
Add network
Wi-Fi is disconnected.
password may need to be entered again to reconnect.
Xperia™ Z4
・After disconnecting from an access point connection, the
136
Using Wi-Fi Direct
Use Wi-Fi Direct to connect to other Wi-Fi Direct devices
Wi-Fi Direct
simply via Wi-Fi, without an access point or via the Internet.
In Home Screen,
(Settings)
Wi-Fi Direct settings open.
・Nearby Wi-Fi Direct devices appear in "Peer devices."
・If a target device is not found, Tap SEARCH FOR DEVICES
and search again.
Wi-Fi
Tap device to connect to
Wi-Fi settings open.
Invitation for connection to other devices is sent.
Accept invitation for connection to other devices
Handset is connected via Wi-Fi Direct.
・If connection is not accepted after a certain period, the
connection request is canceled.
・Tap the connected device and then OK to disconnect.
Wi-Fi is enabled (
Advanced
).
137
Using Tethering
Using Wi-Fi Tethering
Tethering
In Home Screen,
(ツール)
(Tethering)
Use handset like a Wi-Fi router to access the Internet from a
PC or game devices.
・Requires separate subscription.
・Use after confirming that handset is updated to the latest
software.
Using USB Tethering
Tethering window opens.
In Home Screen,
(ツール)
(Tethering)
Portable Wi-Fi hotspot
Tethering window opens.
・If tethering option screen appears, follow onscreen
instructions.
Portable Wi-Fi hotspot is enabled (
).
Connect handset and PC with Micro USB Cable
Setting Portable Wi-Fi hotspot
In Tethering screen,
Portable Wi-Fi hotspot settings
Configure Wi-Fi hotspot
USB tethering
Select security type
Connectivity
・If confirmation appears, follow onscreen instructions.
Enter network name (SSID)
Enter password as needed
SAVE
・At time of purchase, password is set in random order.
USB tethering is enabled (
).
・If confirmation appears, follow onscreen instructions.
USB Connection
If connecting Micro USB Cable for the first time, driver
software of handset is installed to PC. Wait for a while
until installation is completed.
・When "Install software" screen appears on handset, Tap
SKIP or CANCEL .
Xperia™ Z4
138
Using Bluetooth ® Function
Connect to a Bluetooth ® -capable wireless phone, etc. for calls
or to a hands-free device such as a headset.
Enabling Bluetooth ® Function
・Wireless connection to all Bluetooth ® functions is not
guaranteed for handset.
・Handset may not connect properly depending on the other
Hints
device.
・Noise may be experienced with wireless calls and hands-free
calls depending on the conditions.
Q. Cannot use Bluetooth ®
A. Is handset in Airplane mode? Bluetooth ® function is
disabled in Airplane mode with Bluetooth ® function
enabled. Bluetooth ® function can be enabled again in
In Home Screen,
(Settings)
Airplane mode.
Bluetooth ® Function Cautions
Information may not appear correctly on both devices
depending on the transferred data.
Using Bluetooth ® Function
Bluetooth
The Bluetooth ® function is a technology that enables wireless
connection with PCs, Bluetooth ® devices with hands-free
functionality, etc. You can do the followings.
Function
Description
Audio output
Listen to music, etc. wirelessly.
Hands-free
Call hands-free, using Bluetooth ® -capable
calls
hands-free devices and headsets.
Data exchange
Exchange data with Bluetooth ® devices.
Bluetooth ® settings open.
Bluetooth ® function is enabled (
・To disable Bluetooth ® function, Tap
).
(
).
139
Pairing/Connecting Bluetooth ® Devices
Connecting to Paired Bluetooth ®
Devices
Search for and pair nearby Bluetooth ® devices. Paired
Bluetooth ® devices can be connected simply.
・Enable the Bluetooth ® function on the Bluetooth ® devices
In Home Screen,
(Settings)
being paired beforehand.
In Home Screen,
(Settings)
Bluetooth
Bluetooth
Bluetooth ® settings open.
・Paired Bluetooth ® devices appear in "Paired devices."
Connectivity
Bluetooth ® settings open.
Tap device
・Nearby Bluetooth ® devices appear in "Available devices."
・If a target device is not found,
Tap Refresh and
Handset connects to Tapped device.
search again.
Bluetooth ® Operations
Tap device
Follow onscreen instructions to accept device
The Bluetooth ® device is paired to handset. Paired
Bluetooth ®
devices appear in "Paired devices."
Changing Name of Paired Device
In Bluetooth ® settings,
Enter name
OK
・Available when Bluetooth ® function is on.
・Methods for accepting differ depending on devices being
paired.
Canceling Pairing
In Bluetooth ® settings,
for paired device
FORGET
・Available when Bluetooth ® function is on.
Enabling Service from Paired Device
In Bluetooth ® settings,
for paired device
Tap an
item in "Use for"
・If confirmation appears, follow onscreen instructions.
・Available when Bluetooth ® function is on.
・Available when paired with device providing a service.
)/off (
).
Xperia™ Z4
・Tap item to toggle on (
140
Searching for Other Devices
In Bluetooth ® settings,
Refresh
Sending Data by Bluetooth ®
Contacts data is described as an example.
・Available when Bluetooth ® function is on.
Changing Handset Name Appearing on Other
Device
In Bluetooth ® settings,
Enter name
In Home Screen,
(Contacts)
Rename this device
RENAME
・Available when Bluetooth ® function is on.
Checking Files Received by Bluetooth ® Transfer
In Bluetooth ® settings,
Show received files
Follow onscreen instructions
Mark several
Tap target contact
・Tap
to operate, when
Bluetooth
appears next to
.
Tap device
Data is sent.
・If confirmation appears, follow onscreen instructions.
141
Receiving Data by Bluetooth ®
Using DLNA Function
appears in Status Bar for a data request from another
Use Wi-Fi transfers to share still image, video, and other files
device. Follow steps below for other device to receive data.
Drag down Status Bar to open Notifications Window
Tap
between handset and external devices. Connect to the same
Wi-Fi network with DLNA device beforehand.
Enabling Media Server
Bluetooth ® transfer notification
In Home Screen,
(Settings)
ACCEPT
Xperia™ Connectivity
Connectivity
Notification appears.
Drag down Status Bar to open Notifications Window after
files are received
Tap "Bluetooth: Received files"
Media server settings
Media server settings open.
Select the received data
for "Share media"
Supported application is activated.
).
・To disable Media server settings, Tap
(
).
Xperia™ Z4
Media server is enabled (
142
Playing Media Files in the DLNA Device
on Handset
Connect to handset with an application on DLNA device
Access request for media server is notified to handset.
In Media server settings, Tap pending DLNA device
Set
access level
Play media files in the DLNA device on handset. Operation
using "Music" application is explained here.
In Home Screen,
(Music)
DLNA device is added.
・When Tapping Allow this time , read information and Tap
OK .
Select media files on handset from DLNA device and play back
Home screen of Music appears.
Media files play.
・If confirmation appears, follow onscreen instructions.
・Alternatively, Tap
Media Server Setting Operations
(Album)/
(Video) in Home
Screen to operate.
Changing Server Name
In Media server settings,
server name
Change server name
Enter
OK
Flick right from the left edge of Home Screen of Music
Devices
Enabling Permission for Uploading Media Files
In media server settings,
Upload to Xperia™ (
)
・Enable to upload media files from DLNA device to
handset.
Changing Saved DLNA Device Names
In Media server settings, Tap saved DLNA device
Change name
Enter device name
OK
Select a device
Changing Access Level of Saved DLNA Device
In Media server settings, Tap saved DLNA device
Change access level
Set access level
・When Tapping Allow this time , read information and
Tap OK .
Deleting Saved DLNA Device
In Media server settings, Tap saved DLNA device
Delete
Select a folder
Select a media file
DELETE
The media file is played in the DLNA device.
143
Playing Media Files in Handset on DLNA
Device
Play media files in handset on DLNA device using Throw
function. Operation using "Album" application is explained
here.
In Home Screen,
(Album)
Still image/video list opens.
・If confirmation appears, follow onscreen instructions.
・Alternatively, Tap
(Music)/
(Video) in Home
Screen to operate.
Tap target file
Connectivity
Throw
・If confirmation appears, follow onscreen instructions.
Tap a device on the device list
Xperia™ Z4
The DLNA device is connected, and the media file is played.
144
Global Services
Before Using Handset Abroad....................................... 146
Making Calls while Abroad............................................ 148
146
Before Using Handset Abroad
Handset supports global travel. Use handset's phone number as
Tap a network mode
it is abroad.
Setting the Communications Method
Select a communications method for an overseas carrier as
needed.
The communication's method is set.
In Home Screen,
(Settings)
・At time of purchase, 4G/3G is set. Setting does not need
to be changed if using handset in Japan or in an area with
only 3G network carriers.
More
Mobile networks
Mobile network settings open.
Preferred network type
147
Setting the Carrier
At time of purchase, handset is preset to connect
automatically to an appropriate carrier in user's current area.
A specific carrier can also be selected manually.
Tap network to connect to
The selected carrier is set.
・In Service providers screen, Tap Search mode
Automatic to connect automatically to an appropriate
In Home Screen,
(Settings)
carrier.
・In Service providers screen, Tap Search mode
Manual
and select a carrier in AVAILABLE NETWORKS to connect
to a specific carrier. If you power on handset again after
setting a network operator manually, the network operator
may be changed.
More
Mobile networks
Global Services
Mobile network settings open.
Service providers
Service providers list opens.
・Search networks to show available networks.
Xperia™ Z4
148
Changing Setting of Data Roaming
Switch data communication setting abroad.
In Home Screen,
(Settings)
Making Calls while Abroad
Carry "世界対応ケータイ海外ご利用ガイド" overseas.
International Calls to Japan and Other
Countries from Abroad
In Home Screen,
(Phone)
More
Call screen appears.
Mobile networks
Call window opens.
Touch & Hold
Mobile network settings open.
Data roaming
(
)
Tap dialpad and omit first 0 from phone numbers when placing
international calls
Data roaming is disabled.
・Do not omit first 0 from phone numbers when dialing Italy
(39).
149
Calls to Landline Phones/Cell Phones in
Country of Stay
Handset dials number. Call begins when other party
answers.
Place calls the same way you would within Japan.
・Do not enter country code or omit first 0 from phone
numbers.
In Home Screen,
(Phone)
Call screen appears.
Tap dialpad to enter the other party's number
answers.
Xperia™ Z4
Handset dials number. Call begins when other party
Global Services
Call window opens.
150
Handset Settings
Handset Settings............................................................ 152
Wi-Fi................................................................................ 153
Bluetooth.........................................................................154
Data usage...................................................................... 154
Xperia™ Connectivity.....................................................155
More................................................................................. 156
Personalization............................................................... 157
Home................................................................................ 158
Display............................................................................. 159
Sound & notification......................................................160
Storage............................................................................ 161
Power management.........................................................162
Apps................................................................................. 162
Tap & pay....................................................................... 163
Location........................................................................... 163
Security........................................................................... 164
Accounts.......................................................................... 166
Language & input........................................................... 167
Backup & reset............................................................... 168
Setup guide..................................................................... 169
Date & time.................................................................... 169
Accessibility.................................................................... 170
Printing............................................................................171
About phone....................................................................171
152
Handset Settings
In Home Screen,
Handset Settings
In Home Screen,
Tap
(Settings) to customize
operation of handset functions.
Handset settings include the following items.
Item
Wi-Fi
Description
Enable Wi-Fi connection.
For details, see "Connecting via Wi-Fi."
Handset settings open.
Enable Bluetooth ® connection.
Bluetooth
For details, see "Using Bluetooth ®
Data usage
Check mobile data traffic and set limit.
Xperia™
Set to connect PC etc. with USB or via Wi-
Connectivity
Fi.
Function."
More
Personalization
Set other functions for wireless and
networks.
Set Themes, Wallpaper, etc.
Set network services such as Voicemail,
Call
Call Forwarding, and Answering Machine.
See "Making Call Settings" for details.
Home
Switch Home application.
Display
Set brightness etc.
Sound &
notification
Set ringtone, touch sounds, etc.
Check handset and SD Card memory space.
Storage
Also, perform SD Card mount and erase SD
Card data.
Power
Set power saving items and check battery
management
usage.
Apps
Check installed and running applications.
Tap & pay
Location
Security
Accounts
Language &
input
Manage billing information on cloud and
handset with supported application.
Enable location information.
Set security functions such as Screen lock,
SIM card lock, etc.
Create/add accounts and sync accounts.
Set functions for language and text entry.
Backup &
Back up handset information and initialize
reset
handset.
Setup guide
Make initial settings on functions,
services, etc.
Date & time
Set functions for date and time.
Accessibility
Set functions for text-to-speech, etc.
Printing
Set Cloud Print, etc.
About phone
Check handset status.
Set items
Setting is complete.
(Settings)
153
Wi-Fi
Tap Wi-Fi network
Enter password
CONNECT
Wi-Fi
In Home Screen,
(Settings)
Handset is connected.
・The password, for a household wireless LAN router, is
sometimes found on a sticker on the router (WEP, WPA, KEY,
etc.). Contact the router manufacturer for information.
For password for a public wireless LAN, check with user's
service provider.
・Entering a password is not required if an access point is not
Wi-Fi
security protected.
・For details on Wi-Fi setting, "Connecting via Wi-Fi."
Wi-Fi settings open.
・To disable Wi-Fi, Tap
Handset Settings
Wi-Fi is enabled (
).
(
).
Xperia™ Z4
154
Bluetooth
Data usage
Bluetooth
Data usage
Check mobile data traffic and set limit.
In Home Screen,
(Settings)
In Home Screen,
(Settings)
Bluetooth
Data usage
Bluetooth ® settings open.
Data usage window opens.
Data Usage Operations
Enabling Mobile Data Traffic
In data usage window,
Mobile data traffic
・If confirmation appears, follow onscreen instructions.
・Tap Mobile data traffic to toggle on (
(
Bluetooth ® function is enabled (
・To disable Bluetooth ® function, Tap
).
(
).
・For details on Bluetooth ® setting, see "Using Bluetooth ®
Function."
)/off
).
Setting Amount for Alert when Data Usage
Increases
In data usage window, Drag right end of horizontal bar
(black) up/down on graph
・Data usage amounts are approximate. Actual amounts may
differ.
・Available when Mobile data traffic is enabled.
Enabling Restriction on Use of Mobile Data
In data usage screen,
Set mobile data limit
・Tap Set mobile data limit to toggle on (
(
)/off
).
・If confirmation appears, follow onscreen instructions.
・When use of mobile data is restricted, Drag right end of
horizontal bar (red) on graph up/down to set upper limit.
・Available when Mobile data traffic is enabled.
155
Xperia™ Connectivity
Setting Data Usage Cycle
In data usage window, Tap
on the right side of
calculation period for Data usage cycle
cycle...
Xperia™ Connectivity
Change
Flick date up/down to select reset day for
SET
each month
Set to connect PC etc. with USB or via Wi-Fi. Settings can be
made for the following items.
・Available when Mobile data traffic is enabled.
・Tap application name at bottom to check data usage
Item
according to application.
One-touch
Enabling Restriction on Mobile Data Traffic in
Background
In data window,
Restrict background data /
Allow background data
・If confirmation appears, follow onscreen instructions.
setup
・If Show Wi-Fi is enabled, "MOBILE"/"WI-FI" tabs appear
at the top of data usage window. Tap "WI-FI" tab to
make settings for restricting mobile data use with Wi-Fi.
In data usage window,
devices.
Screen
Mirror the screen of handset on TV or
mirroring
tablet compatible with screen mirroring.
settings
Network restrictions
Mirror the screen of handset on Google
Cast devices.
Share and play back media files on DLNA
devices and handset using Wi-Fi.
For details, see "Using DLNA Function."
DUALSHOCK™
Connect a wireless controller of
series
DUALSHOCK ® 4 series to handset.
Connectivity
Wi-Fi network
・Tap
Media server
USB
of Wi-Fi network to restrict applications from using
together.
Play back handset contents on other
MirrorLink™
Restricting Applications from Using Wi-Fi
Network in the Background
and Xperia™ tablet (Android 4.4 or later)
settings
Enabling Showing of Wi-Fi usage
Show Wi-Fi / Hide Wi-Fi
Set with a single touch to use handset
Throw
Cast screen
In data usage window,
Description
Keep your
device's
screen on
Control handset from MirrorLink™ in-car
devices, connecting with Micro USB Cable.
Install software or detect USB devices.
Enable to maintain screen backlight during
connection of external device.
of Wi-Fi network to clear restriction.
・Setting is available when Wi-Fi is connected.
In data usage screen,
Mobile networks
(Settings)
Set
each item
Handset Settings
In Home Screen,
Set Mobile Networks
Xperia™ Connectivity
Xperia™ Z4
Xperia™ Connectivity settings open.
156
More
Set items
Setting is complete.
More
Set other functions for wireless and networks. Settings can
be made for the following items.
Item
Description
Disable all settings that emit signals.
Airplane mode
Handset remains powered on.
For details, see "Using Airplane Mode."
Default SMS
app
VPN
Mobile
networks
Set default message application.
Add a VPN.
Set a network mode, etc.
NFC / Osaifu-
Set NFC/Osaifu-Keitai ® settings.
Keitai
For details, see "Using NFC/Osaifu-
settings
Keitai ® ."
In Home Screen,
More
More screen open.
Set items
Setting is complete.
(Settings)
157
Personalization
Operations in More
Setting Default SMS Application
In More screen,
Default SMS app
Mail / Hangouts
Personalization
Set Themes, Wallpaper, etc. Settings can be made for the
Default SMS application is set.
following items.
Setting VPN
Item
To set VPN access from handset, obtain security
Description
Motion
Enable handset operation with motion.
Themes
Change or download Themes.
http://www.sonymobile.co.jp/support/
Wallpaper
Set Wallpaper.
In More screen,
Clocks
Set clock that appears in lock screen.
System icons
Set Indicators that appear in Status Bar.
information from network administrator in advance. For
details, visit the website.
VPN
Tap items following
instructions of the network administrator
contents
Set
SAVE
・Set Screen lock beforehand.
In Home Screen,
Enabling/Disabling VoLTE
In More screen,
Mobile networks
(Settings)
Enable VoLTE
・Tap Enable VoLTE the mail remote lock to toggle on
(
)/off (
).
・This service requires subscription.
Personalization
Handset Settings
Personalization settings open.
Set items
Setting is complete.
Operations in Personalization
Enabling Handset Operation with Motion
Enable Answer/Reject/Ringer off with only handset motion
instead of touching Display.
In Personalization screen,
Motion
Smart call
handling
).
(
).
Xperia™ Z4
Smart call handling is enabled (
・To disable Smart call handling, Tap
158
Home
Changing Themes
In Personalization screen,
Themes
Tap theme
OK
・Tap
Home
Switch Home application.
to download theme.
Setting Wallpaper
In Personalization screen,
Wallpaper
Lock screen
/ Home screen / Home and lock screen
Wallpaper type
Select image
In Home Screen,
(Settings)
Select
SET WALLPAPER
・If a window for selecting an application appears, follow
onscreen instructions.
Setting Clock That Appears in Lock Screen.
In Personalization screen,
Clocks
Tap the desired
clock
Setting Indicators That Appear in Status Bar
In Personalization screen,
System icons
・Tap item to toggle on (
)/off (
Home
Tap icon
).
Home selection opens.
of "Simple Home"
OK
OK
Home applications switch.
・To switch to Xperia™ Home, in Simple Home screen, Tap
Settings
Exit Simple Home
OK .
159
Display
Display
Display
Set brightness etc. Settings can be made for the following
items.
Item
Description
Set the screen to show photos and videos
vividly and at high resolution. Note
that the image quality of still images is
Display settings open.
enhanced when viewing in the "Album"
Image
application. Select "X-Reality for mobile"
enhancement
to enhance patterns and outlines so that
sharp images with detailed textures are
produced. Select "Super-vivid mode" to
enhance colors so that sharp, vivid images
Set items
Setting is complete.
are produced.
Glove mode
Brightness
level
Adaptive
brightness
White balance
Screen
rotation
Sleep
Enable touch operation with gloved hand.
Set brightness of Display.
Adjust brightness automatically according
to the ambient brightness as a reference
of the brightness set in "Brightness level."
Set white balance.
Enable Display orientation to switch
automatically according to the handset
orientation.
Set a period of inactivity after which
Display turns off automatically.
Enable the backlight to remain on while
backlight
held even while touch operation is not
control
performed.
Daydream
Set screen saver.
Font size
Set size of font for Display.
Tap to wake
Enable backlight on by Double-Tapping
up
Display.
In Home Screen,
Handset Settings
Smart
(Settings)
Xperia™ Z4
160
Sound & notification
Sound & notification
Sound & notification
Set ringtone, touch sounds, etc. Settings can be made for the
following items.
Item
Description
Audio settings
Make settings for sound.
Accessory
Set sound quality etc. when connecting
settings
accessories.
Media volume/
Alarm volume/
Ring volume
Also vibrate
for calls
Interruptions
Phone
ringtone
Increasing
ringtone
Notification
sound
Startup sound
Other sounds
Adjust Media volume, Alarm volume, Ring
volume, and Notification sound.
Enable vibration for ringtone.
Make settings for sound when calls and
notifications arrive.
Set phone ringtone.
Set whether to increase ringtone.
Set notification sound.
Enable tone for activation.
Dialpad tones/Screen locking sounds/
Touch sounds/Vibrate on touch.
Notification
Enable Notification Lamp for missed calls,
light
etc.
When device
Enable to show notification contents in
is locked
lock screen.
App
Set notification setting for each
notifications
application.
Notification
Enable application for reading
access
notifications.
In Home Screen,
Sound & notification settings open.
(Settings)
Set items
Setting is complete.
161
Storage
Check/Tap items
Storage
Check handset and SD Card memory space.
Check handset and SD Card memory space. Also, perform SD
Card mount and erase SD Card data. Settings can be made for
the following items.
USB Storage Operations
Connecting USB Storage
Item
Total space
Unmount SD
Card 1
Mount SD
card 1
Description
Check total space/free space on handset
memory and SD Card.
Cancel recognition of SD Card for safe
removal.
For details, see "Unmounting SD Card."
Recognize SD Card.
Insert Micro USB Plug of USB storage straight into
In Home Screen,
External Device Port
(Settings)
Connectivity
Xperia™ Connectivity
Detect USB device
Item name in Storage screen changes to Unmount USB
storage , and USB storage is mounted.
・If confirmation appears, follow onscreen instructions.
・For details on connection with External Device Port, visit
Erase SD
Initialize SC Card.
card 1
For details, see "Formatting SD Card."
Unmount USB
Cancel recognition of USB storage for safe
storage 1
removal.
Unmounting USB Storage
Recognize USB storage.
In Storage screen,
Mount USB
storage 1
Erase USB
storage 1
USB
"Charging with AC Charger."
Unmount USB storage
OK
Check that item name in Storage screen changes to
Initialize USB storage.
Transfer data
Transfer data from handset memory to SD
to SD card 2
Card.
1 Shown items depend on the recognition of SD Card or USB
storage.
2 Transfer files only in the specified folder on handset
memory to SD Card.
Mount USB storage , and pull out Micro USB plug of USB
storage straight from handset
・Always unmount USB storage beforehand.
Mounting USB Storage
Mount USB storage again.
In Storage screen,
Mount USB storage
Item name in Storage screen changes to Unmount USB
In Home Screen,
(Settings)
Formatting USB Storage
When using new USB storage for the first time, always
format it on handset.
Connect USB storage and, in Storage screen,
USB storage
ERASE USB STORAGE
Erase
ERASE
Handset Settings
storage , and USB storage is mounted.
EVERYTHING
・Formatting erases all data on USB storage. Carefully
check any USB storage that was used on another device
before formatting.
Storage
adequate battery charge.
Xperia™ Z4
Storage window opens.
・Charge Battery while formatting, or format with
162
Power management
Apps
Power management
Apps
Set power saving items and check battery usage. Settings and
Check installed and running applications. Items that can be
viewing can be made for the following items.
checked are the following.
Item
Description
Item
Restrict functions of specific applications
DOWNLOADED
Check downloaded applications.
to reduce power consumption in sleep
RUNNING
Check running applications.
ALL
Check all applications.
STAMINA
(Standby) mode.
mode
Estimated standby time linked with
Description
STAMINA mode appears on "Estimated
battery time."
Disable time until entering sleep,
Low battery
brightness, a portion of handset functions
mode
when the battery charge is below a preset
In Home Screen,
level.
Emergency
mode
Restrict functions of specific applications
to reduce power consumption in an
emergency.
App power
Manage behavior of unused applications
consumption
for reducing power consumption.
Battery usage
Check battery charge, battery usage, etc.
Apps
In Home Screen,
(Settings)
Apps confirmation opens.
Power management
Tap items
Check applications.
Power management settings open.
Tap items
Confirm battery status and change settings.
(Settings)
163
Tap & pay
Location
GPS
Tap & pay
Manage billing information on cloud and handset with
Handset has a GPS receiver that uses satellite signals
supported application.
to calculate your location. Some GPS features use the
Internet.
・When GPS function is used to find your location, make
sure there is a clear view of the sky. If GPS does not
In Home Screen,
(Settings)
find your location after several minutes, move to another
location. To help the search, stand still and do not cover
GPS Antenna Area. When using GPS for the first time, it
may take about 10 minutes to find your location.
・Use the GPS system with great care. SoftBank Corp. is
not liable for any damages caused by abnormality of the
system.
・Note that SoftBank Corp. is not liable for any damages
including those due to missing a chance to check the
positioning (communication) results because of external
factors (including the running out of Battery), such as a
failure, malfunction, or any other problems of handset or
Tap & pay
the power failure.
・Handset cannot be used as a navigation device for an
aircraft, vehicle, or person. Note that SoftBank Corp.
is not liable whatsoever even if you suffer damages or
loss while performing a navigation using the location
information.
・Handset cannot be used as a high-accuracy measurement
GPS. Note that SoftBank Corp. is not liable whatsoever
even if you suffer damages or loss due to a deviation in
the location information.
Tap & pay opens.
・Global Positioning System (GPS) is created and managed
by the U.S. Department of Defense. The Department is
in charge of controlling the accuracy and maintenance
of the system. Therefore, any changes made by the U.S.
Department of Defense might affect the accuracy or
instability of signal reception.
・Some maps based on location information (latitude/
longitude information) may not be accurate due to
countries' or regions' regulations.
・Note that radio signals may not be received or it may be
Handset Settings
functions of the GPS system.
・Handset blocks satellite signals and also causes
difficult to receive radio signals in such conditions such
as inside a building or car or near a high-voltage cable,
since GPS uses radio signals from a satellite.
・SoftBank Corp. is not liable for navigation services or for
the accuracy of location services.
Location
Enable location information. Settings can be made for the
following items.
Item
Mode
Enable wireless network and GPS for
obtaining current location information.
Set a mode to identify location
information.
Xperia™ Z4
Location
Description
164
Recent
location
requests
Location
services
Show applications to recently used
Security
location.
Enable applications to use location.
Security
Set security functions such as Screen lock, SIM card lock, etc.
Settings can be made for the following items.
In Home Screen,
(Settings)
・Shown items depend on the setting for "Screen lock."
Item
Screen lock
Set Screen lock.
Make pattern
Enable pattern to be visible as pattern is
visible
traced to unlock screen.
Automatically
Set time until screen locks after Display
lock
light goes out after period of inactivity.
Power button
instantly
locks
Location
Description
Owner info
Enable Screen lock soon after Pressing
.
Set owner information that appears in
lock screen.
When unlock method of Screen lock is set
Smart Lock
to "Pattern"/"PIN"/"Password," enable to
unlock automatically.
Encrypt phone
Encrypt handset data.
Encrypt SD
Encrypt file that will be stored in SD
Card
Card.
Set up SIM
Location settings open.
card lock
Make
passwords
visible
Device
administrators
Make settings for SIM Card lock.
Show the input character before "●"
appears when entering PIN/Password.
Enable device administrator to be shown.
Unknown
Enable installation of applications from
sources
unknown sources.
Storage type
Show type of credential storage.
Trusted
credentials
Show trusted credentials.
Install
Location is ON (
).
・If confirmation appears, follow onscreen instructions.
from device
Install certificates from handset memory
memory/SD
or SD Card.
card
Clear
credentials
Set items
Trust agents
Screen pinning
Setting is complete.
Delete all certificates.
Show trusted agents.
Set to pin screen. When ON is set, pinned
screen cannot be moved.
Apps with
Enable application for reading usage
usage access
access.
165
In Home Screen,
Unlocking Screen with PIN
(Settings)
In security settings,
New PIN
OK
Screen lock
CONTINUE
PIN
Enter
Enter new PIN again
Select notification method
DONE
・If method for unlocking screen is setting other than
None or Swipe before changing setting, first Tap
Screen lock and unlock screen.
Unlocking Screen with Password
In security settings,
Security
Screen lock
Enter new password
password again
CONTINUE
OK
Password
Enter new
Select notification method
DONE
・If method for unlocking screen is setting other than
None or Swipe before changing setting, first Tap
Screen lock and unlock screen.
Showing Owner Information in Lock Screen
In security settings,
Security settings open.
Owner info
Show owner info
on lock screen
・Tap Show owner info on lock screen to toggle on
(
Set items
)/off (
).
・Enter owner information to be shown after enabling
Show owner info on lock screen .
Setting is complete.
Security Operations
Setting Screen Not to Lock
Screen lock
None
・If method for unlocking screen is setting other than
None or Swipe before changing setting, first Tap
Screen lock and unlock screen.
Unlocking Screen by Swiping on Screen
In security settings,
Screen lock
Handset Settings
In security settings,
Swipe
・If method for unlocking screen is setting other than
None or Swipe before changing setting, first Tap
Screen lock and unlock screen.
Unlocking Screen by Tracing Pattern
In security settings,
new pattern
CONFIRM
Screen lock
CONTINUE
Pattern
Trace
Trace new pattern again
Select notification method
DONE
・If method for unlocking screen is setting other than
None or Swipe before changing setting, first Tap
Screen lock and unlock screen.
Xperia™ Z4
166
Accounts
Setting Applications to Sync for Each Account
Tap account to set
Accounts
Tap account
・Tap item to toggle on (
(Settings)
Accounts
Add account
A window to add an account opens.
Select account to add
Follow onscreen instructions
Account is added.
Account Operations
Setting Auto-sync
In Account window,
Auto-sync is enabled (
Auto-sync data
).
).
・Tap item to synchronize when Auto-sync is disabled.
Create/add accounts and sync accounts.
In Home Screen,
)/off (
Tap sync item
OK
167
Language & input
Set items
Language & input
Setting is complete.
Set functions for language and text entry. Settings can be
Language & Input Operations
made for the following items.
Item
Language
Current
Keyboard
Description
Set the shown language.
Set keyboard.
Xperia™
Chinese
Set operation of Chinese keyboard.
Setting the Display Language
In Language & input screen,
In Language & input screen,
Xperia™
keyboard
Google voice
typing
Xperia™
Japanese
keyboard
Spell checker
Personal
dictionary
Voice input
Text-tospeech output
Pointer speed
Set operation of international keyboard.
Setting Google Voice Typing.
Set operation of Xperia™ Japanese
keyboard.
Enable spelling to be checked during
entry.
Add words to the user dictionary.
Enable language and speech output in
Tap language
Setting Keyboard
keyboard
keyboard
Language
OK
Current Keyboard
Tap
Setting Google Voice Typing
In Language & input screen,
Google voice typing
Set
items
Setting Operation of Google Voice Typing
In Language & input screen,
Voice input
Select voice
input service
・Tap
to set the detailed setting.
Google voice typing.
Enable Text-to-speech engine or speech
rate, or play a demonstration. Text-tospeech engine is not available in Japanese.
Set the speed of the pointer for a mouse/
trackpad.
Setting Text-to-speech
In Language & input screen,
Tap item
Text-to-speech output
Follow onscreen instructions
・Text-to-speech engine is not available in Japanese.
In Home Screen,
(Settings)
In Language & input screen,
bar to adjust speed
OK
Pointer speed
Drag on
Handset Settings
Setting Speed of Pointer for Mouse/Trackpad
Language & input
Xperia™ Z4
Language & input settings open.
168
Backup & reset
Operations in Backup & Reset
Backing Up Data
Backup & reset
In Backup & reset screen,
Back up my data
Make settings for backing up information and initializing data.
・If confirmation appears, follow onscreen instructions.
Settings can be made for the following items.
・Tap Back up my data to toggle on (
Item
Back up my
data
Description
Enable backup for application data, etc.
Backup
Check the account used for backing up
account
data.
Automatic
Enable restoring of backed-up settings or
restore
data when reinstalling application.
Factory data
reset
Initialize handset data.
).
Setting Backup Account
In Backup & reset screen,
Backup account
Select
account
・Settings can be made when Back up my data is enabled.
Enabling Automatic Restore
In Backup & reset screen,
Automatic restore
・Tap Automatic restore to toggle on (
・Initializing handset erases all data on handset. It is
)/off (
)/off (
).
・Settings can be made when Back up my data is enabled.
recommended that you back up important data beforehand.
・Erased information cannot be restored. Erase after checking
adequately.
Resetting Handset
In Backup & reset screen,
PHONE
In Home Screen,
(Settings)
Factory data reset
Input operation access code
RESET
OK
ERASE EVERYTHING
・If operation access code is unset, set operation access
code.
・Tap Erase internal storage (
handset containing user data.
Backup & reset
Backup & reset settings open.
Set items
Setting is complete.
) when resetting
169
Setup guide
Date & time
Setup guide
Date & time
Make initial settings on functions, services, etc.
Set functions for date and time. Settings can be made for the
following items.
In Home Screen,
Item
(Settings)
Automatic
date & time
Description
Enable adjustment of date and time
automatically by using network-provided
information.
Automatic
Enable use of time zone information from
time zone
the network.
Set the date manually.
Set date
Available when "Automatic date & time" is
canceled (
).
Set the time manually.
Set time
Available when "Automatic date & time" is
canceled (
Setup guide
Select time
zone
Use 24-hour
format
Select date
format
).
Set the time zone manually.
Available when "Automatic date & time" is
canceled (
).
Enable 24-hour format.
Set the date format.
Startup wizard appears.
In Home Screen,
(Settings)
Handset Settings
Date & time
Date & Time settings open.
Setting is complete.
Xperia™ Z4
Set items
170
Accessibility
Accessibility
Accessibility
Set functions for text-to-speech, touch operation guidance,
etc. Settings can be made for the following items.
Item
TalkBack 1
Switch Access
Description
Set Accessibility service (TalkBack).
Enable key assignment for handset
Accessibility settings open.
operations.
Captions
Set captions, language, text size, etc.
Magnification
Enable zooming in/out by Triple-Tapping
gestures
the screen.
Large text
Enable to enlarge font size.
High contrast
Set to make text color clear against
text 2
background color in the display.
Power button
Enable end of call by Pressing
ends call 3
a call.
Auto-rotate
screen
Speak
passwords
Play sound
when battery
is full
Accessibility
shortcut
during
Enable automatic rotation of Display.
Enable password to be read aloud.
Enable sound notification when Battery is
full.
Enable Accessibility.
Text-tospeech
Make detailed Text-to-speech settings.
output 1
Touch & hold
Set time to press Display for Touch &
delay
Hold.
Color
inversion 2
Invert screen colors.
Color
Correct colors when it is difficult to
correction 2
distinguish red and green.
1 Not available in Japanese.
2 Experimental version; may not work as expected.
3 To revert from sleep while "Power button ends call" is on,
Press Volume Key up/down.
In Home Screen,
(Settings)
Set items
Setting is complete.
171
Printing
About phone
Printing
About phone
Set Cloud Print, etc.
Check handset status. Items that can be checked/set are the
following.
Item
Description
Set Google Cloud Print to use printers
Item
Description
of your home or office for printing from
System
Make settings for carriers and Software
handset.
Update
Update.
Set up a Google account beforehand.
Status
Check condition of handset.
Epson Print
Set Google Cloud Print to use Epson
Enabler
printer for printing from handset.
Legal
Check copyright information, terms of
information
use, etc.
Canon Print
Set Google Cloud Print to use Canon
Service
printer for printing from handset.
Usage info
Set whether to send handset usage
settings
information.
Model number
Check model number.
Processor info
Check processor info.
Cloud Print
In Home Screen,
(Settings)
Android
version
Baseband
version
Check the Android version.
Check the baseband version.
Kernel version
Check the kernel version.
Build number
Check the build number.
In Home Screen,
(Settings)
Printing
About phone
Handset Settings
Printing window opens.
・Follow onscreen instructions.
About phone window opens.
Check items
Xperia™ Z4
Check handset information.
172
For Assistance
Saving Data..................................................................... 174
Backing up & Restoring................................................. 174
Troubleshooting.............................................................. 175
Specifications..................................................................176
Warranty & After-Sales Service................................... 176
Customer Service............................................................ 177
174
Saving Data
Backing up & Restoring
Saving Destination
Backing up & Restoring
・Save data to handset memory or SD Card. For details on
The methods of backing up/restoring are the following.
inserting/removing SD Card, see "Internal Memory and SD
Card."
・Saving destination when creating data can be changed on
Method
some data. Main saving destinations are the following.
Operation
Data type
application
Description
Contacts,
Bookmarks,
Saves to handset memory when creating
Calendar,
data.
Mail, Memo
Still Images,
Saves to SD Card/handset memory when
Videos
creating data.
on each
Description
Changes setting on some applications.
Connection to
Connects to PC etc. to transfer data. For
PC etc.
details, see "Connecting to PC via USB."
175
Troubleshooting
Q. Battery level goes down quickly
A. Are you where signal is weak or have been out of
Check Here First
service area for a long period? Calling where signal
is weak or being out of service area uses a lot of
Check the following Q & A. If problem persists, visit your
Battery.
nearest a SoftBank Shop or contact Customer Service General
Information.
Q. Cannot install applications
A. Applications cannot be installed with only a little free
Hints
space on handset or SD Card. To check free space,
see "Storage." Applications not supported by handset
cannot be installed.
Q. Handset freezes/operation is unstable
A. Power on handset again. If you are unable to power
and Volume Up Key at
off handset, Press & Hold
the same time for approximately three seconds, and
release your finger after it vibrates three times. Power
on handset again. Data that was being edited is erased
after handset is powered on again.
Q. Cannot unlock screen
A. Power on handset again. If you are unable to power
off handset, Press & Hold
and Volume Up Key at
the same time for approximately three seconds, and
release your finger after it vibrates three times. Power
on handset again. Data that was being edited is erased
Q. Operation is unstable after a new application was
after handset is powered on again.
installed
A. The newly installed application may be the cause.
Uninstall the application in Safe mode. See
"Uninstalling Applications." To power on handset in
Safe mode:
(Long Press)
Check Display,
Touch & Hold
Power off
OK
Q. Display is dark
A. If handset becomes high temperature, Display may
become dim. This is normal.
Q. Cannot detect device connected via Micro USB Cable or
MHL Cable
・After powering on in Safe mode, "Safe Mode" appears
at lower left.
・After restarting in Safe mode, handset can be
powered on as usual.
・Before powering on handset in Safe mode, it is
recommended that you back up important data.
A. Detach then reattach device, and then establish the
connection. Some devices may not be detected.
In Home Screen,
Connectivity
device
(Settings)
USB Connectivity
Xperia™
Detect USB
OK
・By powering on handset in Safe mode, added widgets
may be deleted.
Q. Charging stops while charging
A. If handset reaches a high temperature, charging may
stop temporarily. This is normal. When temperature
A. Check whether you are where signal is weak or out of
lowers, handset automatically restarts charging.
service area.
A. Power on handset again.
Q. Handset becomes hot during use
A. Is handset in Airplane mode? To check that Airplane
A. Handset may become hot depending on usage, such as
mode is canceled:
calling, using browser, charging, etc. This is normal.
In Home Screen,
Airplane mode
(Settings)
(
More
For Assistance
Q. Cannot use phone, mail, or Internet
Direct contact or indirect contact (put in a pocket,
etc.) between handset and skin for a long time can
)
A. Is data communication disabled? To check that data
cause low-temperature burns.
communication is enabled:
In Home Screen,
usage
(Settings)
Mobile data traffic
(
Data
)
A. Is a disabled access point set? To reset to initial
settings:
In Home Screen,
Mobile networks
More
Access Point Names
Xperia™ Z4
Reset to default
(Settings)
176
Specifications
Warranty & After-Sales Service
Handset
Warranty
Item
Dimensions (W
x H x D)
Weight
Description
Approx. 72 × 146 × 6.9 mm
Handset purchase includes Warranty.
・Confirm shop name and purchase date.
・Read contents of Warranty and keep it in a safe place.
・The warranty period is found in the Warranty.
Approx. 144 g
GSM (850/900 MHz): 2 W
Maximum
Output
GSM (1800/1900 MHz): 1 W
UMTS: 0.25 W
4G (AXGP): 0.2 W
4G (LTE): 0.2 W
Continuous
Talk Time
GSM: Approx. 12 hours
UMTS: Approx. 22 hours
Caution
Damages
SoftBank Corp. is not liable for any damages resulting from
use of handset.
4G (LTE): Approx. 14 hours
3G: 590 hours
Accidents/Repair
Continuous
GSM: 520 hours
Files and settings may be lost or altered due to accidents
Standby Time
4G (AXGP): Approx. 510 hours
or repairs. Keep a copy of important files, etc. SoftBank
4G (FDD-LTE): Approx. 550 hours
Corp. is not liable for damages resulting from loss or
AC Charger compatible with SoftBank
alteration of files (contacts/images/sound etc.) or settings
SELECTION Quick Charge 2.0 (SB-AC12-
due to accident or repair.
Charging Time
HDQC): Approx. 140 minutes
AC Charger (Micro USB 1.8A) (ZTDAD1):
Approx. 170 minutes
One Seg
viewing time
Approx. 8 hours
Full Seg
Approx. 3.4 hours (maximum brightness)
viewing time
Approx. 6.9 hours (minimum brightness)
Disassembling/Modifying Handset
Disassembling or modifying handset may be a violation
of Radio Law. Note that SoftBank Corp. does not accept
repair requests for modified products.
After-Sales Service
Internal Battery
Item
Before submitting handset for repairs, contact Customer
Description
Voltage
DC 3.8 V
Type
Lithium-ion
Capacity
2930 mAh
Service General Information or a SoftBank Shop; be prepared
to describe problem in detail.
・During the warranty period, repairs are made under the
terms and conditions described in the Warranty.
・After the warranty period, repairs are upon request. If said
repairs are made, you are charged for them.
TV Antenna Cable (SODAB1)
Item
Description
Dimensions
Length approx. 148 mm
Weight
Approx. 5 g
Further Inquiry
For more information, contact a SoftBank Shop or
Customer Service.
177
Customer Service
For SoftBank handset or service information, call General
Information. For repairs, call Customer Assistance.
SoftBank Customer Support
General Information
From a SoftBank handset, dial toll free at 157
From a landline/IP phone, dial toll free at
0800-919-0157
Customer Assistance (Repairs/Lost
Handsets)
From a SoftBank handset, dial toll free at 113
From a landline/IP phone, dial toll free at
0800-919-0113
If you cannot reach a toll free number, use the number
(charges apply) below for your service area:
Hokkaido Area, Tohoku Area, Hokuriku Area, Kanto &
Koshinetsu Area: 022-380-4380 (Charges apply)
Tokai Area: 052-388-2002 (Charges apply)
Kansai Area: 06-7669-0180 (Charges apply)
Chugoku Area & Shikoku Area, Kyushu & Okinawa Area:
092-687-0010 (Charges apply)
Smartphone Technical Support Center
For Smartphone operation
From a SoftBank handset, dial toll free at 151
From a landline/IP phone, dial toll free at
0800-1700-151
From outside Japan, dial +81-92-687-0025 (toll free from
SoftBank handsets)
If handset is lost/stolen, call this number immediately
For Assistance
SoftBank Global Call Center
(international charges apply)
Xperia™ Z4
178
Safety Precautions
Safety Precautions......................................................... 180
Important Product Information.....................................187
Bluetooth ® /Wi-Fi (WLAN)..............................................188
Waterproofing/Dustproofing......................................... 190
End User License Agreement......................................... 192
Export Controls and Regulations.................................. 192
Intellectual Property Rights..........................................193
RF Exposure Information/Specific Absorption Rate (SAR)
Information..................................................................... 195
Declaration of Conformity for 402SO..........................196
VCCI..................................................................................197
180
Safety Precautions
Read safety precautions before using handset.
Observe precautions to avoid injury to self or others, or
Handset, SIM Card, TV Antenna Cable,
Desktop Holder (Optional Accessory), AC
Charger (Optional Accessory)
damage to property.
SoftBank Corp. is not liable for any damages resulting from
use of this product.
Safety Precautions
Make sure you thoroughly understand their meanings before
Use specified TV Antenna Cable, Desktop
Holder (optional accessory) and AC Charger
(optional accessory) only.
reading on.
Non-specified accessory use may cause Internal Battery
These labels indicate the degree of risk from improper use.
to leak, overheat, burst or ignite, or cause TV Antenna
Mark
Descriptions
Great risk of death or serious injury 1
Cable, Desktop Holder, AC Charger to overheat, ignite,
malfunction, etc.
from improper use
Risk of death or serious injury 1 from
improper use
Risk of minor injury 2 or damage to
Do not disassemble, modify or solder.
property 3
May cause fire, injury, electric shock or malfunction.
from improper use
1 Serious injury includes: Loss of eyesight, physical injury,
high temperature burns, low temperature burns, electric
shock, fractures, poisoning and other conditions having
Internal Battery may leak, overheat, burst or ignite.
Modifying handsets is prohibited by the Radio Law and
subject to penalty.
side effects or requiring hospitalization or long term
treatment.
2 Minor injury includes: Physical burns (high-temperature and
low-temperature), electric shock, and other conditions not
requiring hospitalization or long-term treatment.
3 Damage to property includes: Incidental damage to
structures and household property and/or to pets and
livestock.
Keep away from water.
Do not let handset/related hardware exposed to liquid
remain wet. May cause overheating, electric shock, fire,
injury or malfunction. Use handset/related hardware
properly/appropriately.
These symbols indicate prohibited or compulsory actions. Make
sure you thoroughly understand their meanings before reading
on.
Mark
Descriptions
Prohibited actions
Disassembly prohibited
Exposure to liquids prohibited
Do not charge Internal Battery, or use or
expose handset/related hardware to extreme
heat (e.g. near fire or heat appliances, in direct
sunlight, inside sun-heated vehicles, etc.) Do
not charge Internal Battery, or use, leave,
or wear handset/related hardware in a place
where heat collects, such as under a kotatsu
(blanketed warming table) or next to a kairo
(worn warming patch), etc.
May cause warping/malfunction. Internal Battery may leak,
Use with wet hands prohibited
overheat, ignite or burst. Handset or related hardware may
become too hot to touch, leading to burn injuries, etc.
Compulsory actions
Unplug AC Charger from outlet
Do not force AC Charger plug to connect to
handset.
Internal Battery may leak, overheat, burst, ignite, etc. or
External Device Port may be damaged or burn out.
181
Do not subject handset to excessive force
such as stomping while AC Charger (optional
accessory) is connected.
Charging with damaged port may cause malfunction or fire.
Charge only as directed.
Do not put handset, TV Antenna Cable, Desktop
Holder (optional accessory), or AC Charger
(optional accessory) in cooking appliances
such as a microwave, pressure cooker, or on IH
cooking heaters.
May cause Internal Battery to leak, overheat, burst or
ignite, or cause handset, TV Antenna Cable, Desktop
Holder, AC Charger to overheat, ignite, malfunction, etc.
Keep handset off and do not charge battery
near gas stations or places with fire/explosion
risk.
Handset use near petrochemicals or other flammables may
cause fire/explosion. Be sure to power off handset before
using NFC (including Osaifu-Keitai ® ) in gas stations. (When
NFC/Osaifu-Keitai ® Lock is set, power off handset after
unlocking setting.)
Do not drop, throw or otherwise subject to
strong force or impact.
Internal Battery may leak, overheat, burst, or ignite, and
may result in fire, cause electric shock, malfunction, etc.
Take these actions in case of odd sound, odor,
smoke or abnormalities:
1. Grasp AC Charger power plug from power outlet. Be
careful not to burn when disconnecting handset since it
may be hot.
2. Power off handset.
Keep liquids (tap water, beverages, sea water,
pet urine, etc.) and conductive material (pencil
lead, metal parts, necklaces, hairpins, etc.)
away from Headphone Port, External Device
Port or SIM Card/SD Card Slot. Also, prevent
them from adhering onto them.
Safety Precautions
Continued use may cause fire, electric shock, etc.
Failure to do so may cause short circuit, resulting in fire,
malfunction, etc. Although handset complies with IPX
waterproof and dustproof standards, short circuit may be
caused by adhering foreign substance or liquid.
Sea water, water in pool, hot water, etc. is out of
substance or liquid before charging.
Xperia™ Z4
waterproof protection target. Remove adhered foreign
182
Handset
Internal Battery type is as follows.
Do not place handset on unstable/uneven
surfaces.
Handset or related hardware may fall, resulting in injury,
Symbol
on Label
Li-ion00
Battery Type
Lithium-ion
malfunction, etc. Take added care when vibration is set or
while charging.
Grasp Micro USB plug of AC Charger (optional
accessory) when removing handset from AC
Charger (optional accessory). Do not pull the
cord/cable.
Do not dispose of handset in fire.
Internal Battery may leak, burst, ignite, etc.
Pulling plug by cord/cable may damage cord/cable and
cause fire, electric shock, etc.
Do not damage (nail, hammer, stomp, etc.)
handset or subject it to strong impact.
Avoid touching handset, Desktop Holder
(optional accessory), AC Charger (optional
accessory) for a long time while charging.
Failure to do so may cause low-temperature burn injury.
Keep handset and related hardware out of
infants' or pets reach.
Infants and pets may swallow handset or related hardware
resulting in injuries.
A guardian should supervise use by children and
insure handset is used as instructed.
Failure to do so may result in injuries.
Internal Battery may leak, overheat, burst, ignite, etc.
If battery fluid gets into eyes, do not
rub; rinse with water and consult a doctor
immediately.
May cause blindness.
183
Do not use handset while driving a vehicle,
motorbike or riding a bicycle.
Do not cover/wrap handset with cloth or futon
while charging. Do not cover/wrap handset
with cloth or futon at bedtime.
May cause an accident. Drivers/riders using handsets while
Handset may overheat, resulting in fire, burns,
driving/riding are subject to penalty. Stop your vehicle and
malfunction, etc.
park in a safe place before using handset.
Power off near electronic devices or equipment
operating on high precision control or weak
signals.
If battery fluid contacts skin or clothes,
stop handset use and rinse with clean water
immediately.
Handset use may cause skin damage.
Handset use may cause electronic malfunctions, etc.
*Take added care near these devices: Hearing aids,
implanted cardiac pacemakers, implanted cardioverter
defibrillators, other electronic medical equipment, fire
detectors, automatic doors, and other automatically
controlled devices or equipment.
If battery does not charge after specified
time, stop charging.
Internal Battery may leak, overheat, burst, ignite, etc.
Follow airline's instructions to use handset
properly in aircraft.
Radio waves may interfere with aircraft operations.
Users with heart conditions should adjust
vibration and ringtone volume as needed.
Strong vibration or loud volume may affect heart
conditions.
Lightning strikes or electric shock may occur.
Do not position Flash/Photo Light close to
others' faces. Do not look at Flash/Photo Light
directly while in use. Do not point Flash/Photo
Light at others' eyes.
Safety Precautions
If thunder is audible while outdoors, power off
immediately and seek shelter.
May harm eyesight. Do not photograph infants up close.
Flash may impair vision, causing accidents.
Xperia™ Z4
184
Watch TV from a distance in good light.
Do not use handset when it may affect
vehicle's electronic equipment.
Failure to do so may impair vision.
Handset use may affect devices and lead to unsafe driving.
Moderate handset volume when using Headsets.
If you experience any skin irritation associated
with handset use, stop handset use and consult
a doctor.
Metal and other materials may cause skin irritation, rashes,
or itchiness depending on your physical condition.
Keep handset away from magnetic cards, etc.
Data on bank cards, credit cards, telephone cards, floppy
disks, etc. may be lost.
Do not swing handset by Strap, etc.
Handset may harm yourself or others, or Strap may break
resulting in injury or handset malfunction/ breakage.
Avoid a prolonged use of handset in a place
where temperature becomes high (e.g.
near fire, heater appliances, in the direct
sunlight, inside sun-heated car, etc.), warm or
overheated (under kotatsu, electric blanket,
near pocket warmer). Handset may become hot.
Prolonged contact with skin may cause low-temperature
burns.
Handset or AC Charger (optional accessory)
may become hot when calling or using
application (game etc.) while charging. Avoid a
prolonged touch of the hot section.
Prolonged contact with skin may cause low-temperature
burns.
Always keep your ear some distance from
Speaker while ringtones, music or other
handset sounds play.
If it sounds in excessive volume, ears or hearing may be
damaged.
Prolonged use and excessive volume may damage ears or
hearing.
185
Desktop Holder (Optional Accessory), AC
Charger (Optional Accessory)
Do not plug in/unplug AC Charger power plug
with wet hands.
May cause electric shock or malfunction.
Do not cover/wrap with cloth or futon while
charging.
Heat may build up resulting in fire, burns, malfunction, etc.
Do not touch AC Charger if thunder is audible.
May cause electric shock, etc.
Use specified power supply and voltage.
Failure to do so may cause fire, malfunction, etc.
AC Charger: 100 V to 240 V AC (household AC outlet only)
Do not use commercially available voltage converters,
as when traveling. May cause fire, electric shock or
malfunction.
Unplug AC Charger power plug when you do not
use it.
Adhering foreign substance or liquid to AC Charger power
plug or stomping AC Charger power plug may cause electric
shock, fire or malfunction.
If liquids (water, pet urine, etc.) seep inside AC
Charger power plug, unplug it immediately.
Failure to do so may cause electric shock, smoke or fire.
Failure to do so may cause fire.
When plugging AC Charger power plug into
outlet, keep conductive materials (pencil leads,
metal parts, necklaces, hair pins, etc.) away
from AC Charger power plug/connector and
plug AC Charger power plug firmly into outlet.
Safety Precautions
If plug is dusty, grasp AC Charger power plug
and unplug it, then clean with a dry cloth.
Failure to do so may cause electric shock, short circuit,
fire, etc.
Xperia™ Z4
186
Handset Use & Electronic Medical
Equipment
This section is based on "医療機関内での携帯電話等の使用
Grasp AC Charger power plug and unplug it
before cleaning.
に関する指針" (Electromagnetic Compatibility Conference,
Failure to do so may cause electric shock, etc.
Implantable Medical Equipment" (Ministry of Internal Affairs
August 2014) and "Guidelines for Prevention of Effects of
Radio Waves from Various Equipment Using Radio Waves on
and Communications).
Always grasp AC Charger power plug (not
cable) to disconnect it.
Pulling cable may damage cable, causing electric shock, fire,
etc.
Do not subject AC Charger (optional accessory)
to strong shock or impact while it is plugged
into the outlet.
Persons with an implanted pacemaker or
defibrillator should keep handset at least 15
cm away from the device.
Radio waves may interfere with implanted pacemakers or
defibrillators.
May cause injury or malfunction.
Do not subject AC Charger (optional accessory)
to strong impact such as pulling the cable
while it is plugged in.
When using electronic medical equipment
(other than implanted cardiac pacemakers/
defibrillators) outside medical facilities, check
with the equipment vendor or distributor for
information about the effects of radio waves.
Handset radio waves may affect electronic medical
May cause injury or malfunction.
equipment.
Do not touch Charging Terminal of Desktop
Holder (optional accessory) for a long time
while charging.
Handset radio waves may affect electronic
medical equipment. Observe these guidelines in
medical institutions:
May result in low-temperature burns.
・Observe each medical facility's instruction when using a
mobile phone.
・Always power off handset in operation rooms, intensive
care units, etc.
Do not touch Charging Terminal with your
hands, fingers, etc.
・Ensure necessary distance from electronic medical
equipment nearby even where mobile phone use is
permitted such as medical ward or lobby.
May cause electric shock, injury or malfunction.
There may be someone who is wearing an
implanted pacemaker or defibrillator. Disable
handset transmissions (e.g. airplane mode) or
power off handset when it is difficult to keep
a distance of at least 15 cm away from others
such as in a crowd.
Radio waves may interfere with implanted pacemakers or
defibrillators causing such devices to malfunction.
187
Important Product Information
Handset, SIM Card, TV Antenna Cable,
Desktop Holder (Optional Accessory), AC
Charger (Optional Accessory)
Charging
・AC Charger (optional accessory) may become warm while
charging. It is not abnormal.
・If charging is started, handset can power on although it is
unavailable for operation. For this reason, avoid charging
in a place where handset use is prohibited (in aircraft,
・Do not get wet. Desktop Holder (optional accessory), AC
Charger (optional accessory) and packaged accessories
are not waterproof. Avoid using in humid places such as a
bathroom and exposing it to rain. Contact to dampness from
sweat by wearing on your body may cause corrosion inside
resulting in malfunction. If malfunction is determined to be
caused by above water exposures, warranty will not apply
to repair. In the case that repair is possible, repair charge is
hospital, etc.)
・Check battery level with Status Indicator at the top of
screen.
・Operation time of Internal Battery varies by usage
environment or the battery condition.
・Internal Battery is consumable item. Operation time per
charge decreases by charging repeatedly.
・Internal Battery is consumable item. When operation time
with full-charged is extremely shortened, it is time to
incurred.
・Use handset, SIM Card (inserted in handset) within
replace. Internal Battery is not customer-replaceable. Bring
temperatures of 5°C to 35°C and humidity 35% to 85%.
handset to a SoftBank Shop etc. to replace Internal Battery.
Avoid extreme temperatures, humidity, direct sunlight
Fee is incurred for the replacement. Contact a SoftBank
(temporary use at 36°C to 40°C and humidity 86% to 90%).
・Charge battery within temperatures of 5°C to 35°C.
・Do not use handset, SIM Card, or AC Charger (optional
Shop or SoftBank Customer Support.
・Using application while charging may shorten Internal
Battery life.
accessory) in a dusty place, where there is much vibration,
or near landline phone, TV, radio, etc.
・For using power outlet with drop-off prevention structure,
Touchscreen
see the user's manual.
・Storing handset with full-charged or insufficient battery
level deteriorates battery performance. It is recommenced
to store handset with 40% battery level.
・Turning off by pressing
does not shut off handset
from power source completely. Unplug AC Charger power
plug to completely turn it off. Use AC Charger (optional
・Handset uses a touchscreen Display. Operate with your
fingers on Display.
・Touch with your fingers lightly. Do not press forcibly with
fingers or push with a sharp-pointed object (nail, ball-point
pen, pins, etc.)
・Touchscreen may not work or malfunction in the following
accessory) near a power outlet for easy unplugging in case
cases:
that malfunction is detected.
-Operation with fingernail
・Display may become dim when handset temperature rises. It
is not abnormal.
・Do not subject handset to excessive shock. Do not deform
External Device Port; may cause malfunction.
・Occasionally clean Charging Terminals with a dry, cotton
-Foreign object, protection sheet or sticker applied, or
waterdrop or dew condensation on Display
-Operation with fingers wet or sweaty
-Operation under water
・Although Display is made with hardened and shatterproof
swab etc. Dirt on Charging Terminals may cause power
glass, touching scattered or exposed parts accidentally may
shut-off or insufficient charging. Take care not to damage
cause injuries.
Charging Terminals when cleaning.
・Clean handset, SIM Card, or AC Charger (optional accessory)
may scratch them. Wiping off with wet dustcloth may cause
malfunction. Using benzine, thinner, alcohol, detergent, etc.
may fade color/print.
・Occasionally clean Headphone Port and External Device Port
with a dry cotton swab etc. Dirt on them may cause contact
failure. Do not deform Headphone Port, External Device Port
or connecting plug by putting pressure when cleaning.
Safety Precautions
with a dry, soft cloth. Rubbing hard with a dry cloth etc.
・Do not leave Camera in direct sunlight. Concentrated
sunlight through Lens may cause handset to malfunction.
・Do not bring magnetic data or magnetic objects close to
handset. Magnetic data on cash card, credit card, etc. may
be erased or may cause handset malfunction.
・Do not remove IMEI printed sticker or Nameplate.
Xperia™ Z4
188
Bluetooth ® /Wi-Fi (WLAN)
Technical Conformity
Handset is certified as wireless equipment for low power
electric data communication based on the Radio Law. No
Frequencies
license is required for using handset as the wireless radio
station. However, disassembling/modifying handset may be
Frequency band used by handset Bluetooth ® /Wi-Fi (WLAN)
subject to penalty by law.
functions are as follows:
・Never use modified handset. Using modified handset is a
violation of the Radio Law.
・Handset is compliant with the technical standard
conformance of specified wireless equipment based on the
Radio Law, and as a proof of it, the "Technical Compliance
Mark
" appears on the electronic nameplate of handset.
To view the electronic nameplate, in Home Screen,
Settings
About phone
Legal information
Certificates .
The technical standard conformance certification etc. is
2.4: Frequency band is 2400 MHz
FH/XX/DS/OF: Modulations are FH-SS, other modulation, DSSS, OFDM
4: Estimated range of radio frequency interference is up to
40 m
8: Estimated range of radio frequency interference is up to
80 m
invalidated by removing the screws and altering the inside
:Utilizes 2,400 MHz to 2,483.5 MHz band
of handset. Using handset with invalid technical standard
conformance certification etc. is a violation of the Radio
without mobile device bandwidth differentiation
Law.
・Available channels may vary by country.
・Do not alter the basic software illegally. May be regarded as
・For use in an airplane, contact your airline.
software modification and repairs may be refused.
Notes on Using Bluetooth ® Devices
Handset operates on the same frequency band used by home
electric appliances such as microwave ovens, industrial,
scientific and medical equipment, premises radio stations
for identifying mobile units used in the manufacturing lines
of plants (radio stations requiring a license), specified low
power radio stations (radio stations requiring no license) and
amateur radio stations (hereinafter referred to as "another
station.")
・Before using handset Bluetooth ® function, confirm that
premises radio stations, specified low power radios and
amateur radios are not in use nearby.
・In the event of handset causing harmful radio wave
interference with "another station," promptly change the
operating frequency or stop radio wave emission by turning
off the power, etc.
・For further questions, contact a SoftBank Shop or SoftBank
Customer Support.
Reception Interference Caused by Wi-Fi
(WLAN) Devices
Handset Bluetooth ® function uses the same frequency band as
Wi-Fi (WLAN) devices. Using near Wi-Fi (WLAN) devices may
cause radio interference, low-communication speed, noise or
connection failure. In that case, take the following measures.
・Provide distance between Bluetooth ® device and Wi-Fi
(WLAN) device. Required distance varies by device.
・If the problem persists, power off Bluetooth ® device or WiFi (WLAN) device.
189
Wi-Fi (WLAN)
・Wi-Fi (WLAN) uses radio waves to exchange information
and LAN connection is freely established within an area
where the radio wave reaches. Meanwhile, if no security is
set, Wi-Fi communications may be intercepted or hacked
by malicious parties. It is recommended to make necessary
security settings on your responsibility.
・Use handset WLAN function only in Japan.
・Do not use Wi-Fi near magnetic devices such as electrical
appliances or AV/OA devices. Magnetic/radio waves
may hinder or disable communication. Avoid microwave
Notes on Using 5 GHz Devices
In 5 GHz frequency bandwidth, handset can use following
bands:
・5.2 GHz band (W52/36, 40, 44, 48 ch)
・5.3 GHz band (W53/52, 56, 60, 64 ch)
・5.6 GHz band (W56/100, 104, 108, 112, 116, 120, 124,
128, 132, 136, 140 ch)
Using wireless LAN built-into handset in 5.2/5.3 GHz outside
is prohibited by the Radio Law.
ovens especially. Using near a TV or radio, etc. may cause
interference; may affect TV reception.
・If there are multiple Wi-Fi access points using the same
channel, search may fail.
・Enable Wi-Fi to search available Wi-Fi networks and then
establish connection.
・Connect to Wi-Fi network before accessing Internet via WiFi (WLAN).
・Take care with radio signal strength for Wi-Fi (WLAN).
Radio signal strength for Wi-Fi network differs depending
on the access point location. Moving close to a Wi-Fi router
may improve radio signal strength.
・To save battery power, disable Wi-Fi (WLAN) when not used.
Reception Interference Caused by
Bluetooth ® Devices
Bluetooth ® and WLAN (IEEE802.11b/g/n) use the same
frequency band. Using near Wi-Fi (WLAN) devices may cause
radio interference, low-communication speed, noise or
connection fault. Or may cause communication interruption or
sound distortion when streaming data is played. In that case,
take the following measures.
・Provide distance between Wi-Fi (WLAN) device and
Bluetooth ® device. Required distance varies by device.
・If the problem persists, power off Bluetooth ® device.
Notes on Using 2.4 GHz Devices
WLAN devices operate on the same frequency band used by
home electric appliances such as microwave ovens, industrial,
scientific and medical equipment, premises radio stations
for identifying mobile units used in the manufacturing lines
of plants (radio stations requiring a license), specified low
power radio stations (radio stations requiring no license) and
amateur radio stations.
・Before using handset, confirm that premises radio stations,
specified low power radios, and amateur radio stations are
not in use nearby.
・In the event of handset causing harmful radio wave
interference with premises radio stations for identifying
mobile units, promptly change the operating frequency or
then contact a SoftBank Shop or SoftBank Customer Support
for measurement against the cross talk (e.g. installing
partition.)
・Also, in the event of handset causing radio wave
interference with specified low power radios and amateur
radio stations, contact a SoftBank Shop or SoftBank
Customer Support.
Safety Precautions
stop radio wave emission by turning off the power, etc. and
Xperia™ Z4
190
Waterproofing/Dustproofing
Handset complies with IPX5 1 , IPX8 2 waterproof standards and
IP6X 3 dustproof standard with SIM Card/SD Card Slot Cover
firmly closed.
1 Protection against water jet (at 12.5 L/min. from every
direction from a distance of approximately 3 m for over 3
minutes through 6.3 mm nozzle)
2 Protection against seepage when slowly submerged in still
tap water at room temperature to depth of 1.5 m for 30
minutes
3 Protection against dust ingress when being placed in an
Precautions
Do not perform the following actions.
-Washing with Soap/Detergent/Bath powder
-Washing using brush/sponge
-Machine-washing
-Applying strong water flow
-Soaking in ocean water
-Using in hot spring
-Exposing to sand/mud
Observe the following precautions to use handset properly.
apparatus with grit and dust of diameters of 75 μm or less
・Packaged accessories are not waterproof/dustproof.
and shaken for 8 hours.
・Do not apply water flow stronger than allowed directly
from a tap or shower. Handset provides IPX5 waterproof
Handset Waterproofing/Dustproofing
performance, but doing so may cause malfunction.
・If handset gets wet with salt water, sea water, beverage,
or mud or sand adheres, wash it immediately. If they dry,
Handset waterproofing/dustproofing provides the following:
Calling in the rain without umbrella (approximately 20 mm
rainfall per hour)
・Do not open or close SIM Card/SD Card Slot Cover with wet
hands or when handset gets wet.
Washing handset when it gets dirty or stained with liquid
other than tap water
・Wash with tap water at normal temperature (5°C - 35°C)
they become hard to remove and may cause damage or
malfunction.
・Do not put in hot water, use in a sauna or apply hot airflow
(from a hair dryer etc.).
・Do not move handset in water or slam handset against
surface of water.
・Soaking handset in tap water should be no more than 30
minutes.
・For using handset at a swimming pool, obey rules of the
facility.
with weak water flow (less than 6L/min.) at distance of
・Handset does not float on water.
approximately 10 cm away from the tap or shower.
・Do not let water remain on handset. In cold region, water
・When washing handset, make sure to securely close SIM
Card/SD Card Slot Cover. Do not use a brush or sponge.
Drain and the use handset after washing.
Using handset at a poolside
・Do not get water from a pool on handset or soak it in pool
water.
freezes up and may cause malfunction.
・Do not let water remain on Earpiece/Speaker, Mic/Speaker,
Second Mic or External Device Port. Such water may
interfere with calls or get clothes or bag wet.
・If handset gets splashed with water or other liquid while
SIM Card/SD Card Slot Cover is opened, seepage may occur
resulting in electric shock or malfunction. In that case, stop
using and power off handset, then contact a SoftBank Shop
or SoftBank Customer Support.
Maintaining Waterproof/Dustproof
Performance
Observe the following to avoid water or dust ingress.
・Do not get any liquid other than room temperature tap
water on handset, or soak it in such liquid.
・Firmly close SIM Card/SD Card Slot Cover. Even a fine
particle (one hair, one grain of sand, tiny fiber, etc.) put
between the port contact surfaces may allow water or dust
to ingress.
・Do not push Earpiece/Speaker, Mic/Speaker, Second Mic,
Headphone Port, External Device Port or Strap Hole with a
sharp-pointed object.
・Do not let handset fall. Scratch on handset may degrade
waterproof/dustproof performance.
・Rubber gaskets on inner side of SIM Card/SD Card Slot Cover
play important roles for waterproofing/dustproofing. Do not
remove or damage them. Also, prevent dust from adhering
onto them.
・If rubber gaskets on inner side of SIM Card/SD Card Slot
Cover are damaged or deformed, have them replaced at a
SoftBank Shop or SoftBank Customer Support.
・Do not connect earphones, etc. to handset that is wet with
water. May cause malfunction.
・Do not use handset when Headphone Port or External
Device Port is wet or dusty. May lose waterproof
performance, cause electric shock, short circuit, fire, burns
or malfunction.
・Do not leave handset in a humid place for a long time. Take
handset out from bathroom after using.
・Avoid moving handset from cold place to warm place
suddenly. Wait until handset temperature gets warm and
before bringing it to bathroom etc.
・Complete protection is not guaranteed under all conditions.
Malfunctions due to improper handling by the user are not
covered by Warranty.
191
Draining
When handset gets wet, remaining water may flow out after
wiping it off. Drain as shown.
Charging
Check the following while and after charging.
・While charging, check that handset is not wet. Never charge
while handset is wet.
・Packaged accessories are not waterproof/dustproof.
Wipe off moisture on handset surface and back side with dry,
clean cloth etc.
・Never connect Micro USB plug when handset or charger is
wet. Handset provides waterproof performance, but liquids
(tap water, beverages, sea water, pet urine, etc.) adhered to
Micro USB Plug may cause electric shock, short circuit, fire,
burns or malfunction.
・Do not use Desktop Holder (optional accessory), AC Charger
(optional accessory), Micro USB Cable (commercial item) in
a bathroom, shower room, kitchen, lavatory or other highly
humid area. Doing so may cause fire or electric shock.
・Do not touch Desktop Holder (optional accessory), AC
Charger (optional accessory) or Micro USB Cable (commercial
Shake handset approximately 20 times until there is no more
item) with wet hand. Doing so may cause electric shock.
water splattering (1), then turn upside down and shake it
approximately 20 times again (2)
Wipe off water drained from handset with clean cloth etc.
・Turn Earpiece/Speaker, Mic/Speaker, Second Mic, Headphone
Port, External Device Port face down onto cloth etc. to
drain water.
room temperature for a couple of hours
Safety Precautions
Place handset on dry, clean cloth etc., and dry naturally at
Xperia™ Z4
192
End User License Agreement
End User License Agreement
Export Controls and Regulations
Export Controls and Regulations
Software delivered with this device and its media are owned
The products and accessories may be subject to the
by Sony Mobile Communications Inc., and/or its affiliated
application of the Foreign Exchange and Foreign Trade Act and
companies and its suppliers and licensers.
other related laws and regulations in Japan.
Sony Mobile grants you a non-exclusive limited license to use
In addition, the Export Administration Regulations (EAR) of
the Software solely in conjunction with the Device on which it
the United States may be applicable.
is installed or delivered.
In cases of exporting or reexporting the products and
Ownership of the Software is not sold, transferred or
accessories, customers are requested to follow the necessary
otherwise conveyed. Do not use any means to discover the
procedures at their own responsibility and cost. Please
source code or any component of the Software, reproduce and
contact the Ministry of Economy, Trade and Industry of Japan
distribute the Software, or modify the Software.
or the Department of Commerce of the United States for
You are entitled to transfer rights and obligations of the
details about procedures.
Software to a third party, solely together with the Device
with which you received the Software, provided the third
party agrees in writing to be bound by the terms of this
License.
This license exists throughout the useful life of this Device.
It can be terminated by transferring your rights to the
Device to a third party in writing. Failure to comply with
any of these terms and conditions will terminate the license
immediately.
Sony Mobile and its third party suppliers and licensers retain
all rights, titles and interest in and to the Software.
To the extent that the Software contains material or code
of a third party, such third parties shall be beneficiaries of
these terms.
This license is governed by the laws of Japan.
When applicable, the foregoing applies to statutory consumer
rights. In the event Software accompanying or provided in
conjunction with your device is provided with additional
terms and conditions, such provisions shall also govern your
possession and usage of the Software.
193
Intellectual Property Rights
Copyrights and Portrait Rights
Trademarks
The company names and product names appearing in this
manual are trademarks or registered trademarks of their
respective holders.
Copyrighted contents you recorded or obtained from sites
or Internet home pages using this product by downloading
or other means, such as documents, images, music data,
software, are prohibited from reproduction, transformation
and transmission over public lines without consent of the
copyright holders, unless intended for personal use or any
other purpose permitted by law.
Note that some performances, shows, and exhibitions may not
permit photography, movie shooting, or sound recording even
for personal use.
You should also refrain from taking a picture of other people
and disclosing it by such means as posting it on a site on
the Internet without their consent because of possible
infringement of their right of portrait.
・SOFTBANK, SOFTBANK's equivalent in Japanese and the
SOFTBANK logo are registered trademarks or trademarks of
SOFTBANK GROUP CORP. in Japan and other countries.
・S!メール and デコレメール are trademarks or registered
trademarks of SoftBank Corp.
・This product contains technologies provided by ACCESS CO.,
LTD.
©2011 ACCESS CO., LTD. All rights reserved.
Copyright © 2009 The Android Open Source Project
Licensed under the Apache License, Version 2.0 (the
"License");
you may not use this file except in compliance with the
License.
You may obtain a copy of the License at
http://www.apache.org/licenses/LICENSE-2.0
Unless required by applicable law or agreed to in writing,
software distributed under the License is distributed on an
"AS IS" BASIS, WITHOUT WARRANTIES OR CONDITIONS OF
ANY KIND, either express or implied.
See the License for the specific language governing
permissions and limitations under the License.
ACCESS and the ACCESS logo are registered trademarks or
trademarks of ACCESS CO., LTD. in the United States, Japan
and/or other countries.
・Yahoo! and the "Yahoo!" or "Y!" logos are trademarks and/or
registered trademarks of Yahoo! Inc. in the U.S.
・Copyright © 2012 Yahoo Japan Corporation. All Rights
Reserved.
・"スグデコ!" is a registered trademark of I-FREEK MOBILE
INC.
・Internet SagiWall is a trademark or registered trademark of
BB Softservice Corp.
・UULA ® is a registered trademark of UULA Inc.
・McAfee and/or additional marks herein are registered
trademarks or trademarks of McAfee, Inc. and/or its
McAfee Red in connection with security is distinctive of
McAfee brand products.
・©SoftBank Corp. /Powered by MediaDo
・©Disney
The handset may contain content and other works that
the Walt Disney Company (Japan) Ltd., its parent or their
affiliates (collectively, "Disney") own, co-own or license
copyright and other intellectual property rights.
Safety Precautions
affiliates in the US and/or other countries.
Please read the applicable Terms of Use (ディズニー公式ス
マートフォンメンバー会員規約) before use.
"DISNEY STYLE" and "DISNEY MARKET" are registered
trademarks of Disney.
・"Bluetooth ® " is a registered trademark of Bluetooth SIG.
Inc., and Sony Mobile Communications is licensed to use
them.
Wi-Fi Direct and Wi-Fi CERTIFIED Miracast are trademarks
of Wi-Fi Alliance.
Xperia™ Z4
・Wi-Fi Protected Setup, Wi-Fi Protected Setup logo, WPA,
194
・Xperia, TrackID and Socialife are trademarks or registered
trademarks of Sony Mobile Communications Inc.
・PlayStation,
and DUALSHOCK are trademarks or
registered trademarks or Sony Computer Entertainment Inc.
・Sony, Sweep Panorama, X-Reality, PlayMemories, Reader,
・Using your device as a fitness hub with ANT+™
You can use your device with health and fitness products
that also support ANT+™ technology. For example, if you go
running with an ANT+™ compatible heart rate monitor and a
foot pod (to measure pace and distance), you can collect all
STAMINA and Sony Entertainment Network are trademarks
the data from the run on your device. You can then analyze
or registered trademarks of Sony Corporation.
your performance and see how you can improve.
・SmartAR ®
is an augmented reality technology developed
You can download a range of applications from Google Play™
by Sony Corporation and it is a registered trademark or
that support ANT+™ sport, fitness, and health devices.
trademark in Japan and other countries.
For information about ANT+™ compatible products, go to
・POBox and POBox logo are registered trademarks of Sony
Computer Science Laboratories, Inc. POBox is a co-developed
technology of Sony Computer Science Laboratories, Inc. and
Sony Mobile Communications, Inc.
・microSD logo, microSDHC logo and microSDXC logo are
trademarks of SD-3C, LLC.
・"おサイフケータイ" is a registered trademark of NTT
DOCOMO, INC.
・FeliCa is a contactless IC card technology developed by Sony
Corporation.
FeliCa is a registered trademark of Sony Corporation.
・
is a trademark or registered trademark of NFC Forum,
Inc. in the US and other countries.
・QR code is a registered trademark of DENSO WAVE
INCORPORATED.
・"Google" and "Google" logo, "Android," "Google Play," "Google
+," "Gmail," "Google Maps," "Hangouts," "YouTube," "Google
Chrome" are trademarks or registered trademarks of Google,
Inc.
・Facebook is a registered trademark of Facebook, Inc.
・"Twitter" and the logo are registered trademarks of
Twitter, Inc.
・"DLNA" and the "DLNA" logo are trademarks or registered
trademarks of Digital Living Network Alliance.
・MirrorLink and MirrorLink logo are trademarks or registered
trademarks of Car Connectivity Consortium LLC.
・"Microsoft," "Windows," "Windows Vista," "Microsoft Excel,"
"Microsoft PowerPoint" and "Windows Media" are trademarks
or registered trademarks of Microsoft Corporation in the
United States and other countries.
・"Microsoft Word" is a product name of Microsoft
Corporation in the United States.
・This product contains technology subject to certain
intellectual property rights of Microsoft. Use or
distribution of this technology outside of this product
is prohibited without the appropriate license(s) from
Microsoft.
・This product is licensed under the MPEG-4 visual and AVC
patent portfolio license for the personal and non-commercial
use of a consumer for (i) encoding video in compliance with
the MPEG-4 visual standard ("MPEG-4 video") or the AVC
standard ("AVC video") and/or (ii) decoding MPEG-4 or AVC
video that was encoded by a consumer engaged in a personal
and non-commercial activity and/or was obtained from a
video provider licensed by MPEG LA to provide MPEG-4
and/or AVC video. No license is granted or shall be implied
for any other use. Additional information including that
relating to promotional, internal and commercial uses and
licensing may be obtained MPEG LA, L.L.C. (See http://
www.mpegla.com). MPEG Layer-3 audio decoding technology
licensed from Fraunhofer IIS and Thomson.
・ANT and ANT+ are trademarks or registered trademarks of
ANT Wireless
www.thisisant.com/directory (http://www.thisisant.com/
directory).
・Other product and company names mentioned herein may be
the trademarks of their respective owners.
In context, TM and
®
mark are omitted.
・Any rights not expressly granted herein are reserved. All
other trademarks are property of their respective owners.
195
RF Exposure Information/Specific
Absorption Rate (SAR) Information
http://www.tele.soumu.go.jp/e/sys/ele/body/index.htm
・Association of Radio Industries and Businesses (ARIB)
http://www.arib-emf.org/index02.html (Japanese)
Specific Absorption Rate (SAR) for This
Product (for Japan)
"402SO" here refers to this mobile phone "Xperia™ Z4."
This mobile phone 402SO is confirmed to comply with
guidelines relating to effects of radio wave exposure as
set forth by the Council of Europe (CE) and the Federal
Communications Commission (FCC). Refer to the following.
European RF Exposure Information
This mobile phone 402SO meets Japanese technical
regulations* and international guidelines for exposure to radio
waves.
The Japanese technical regulations for exposure to radio
frequency energy established permitted levels of radio
frequency energy, based on standards developed by
independent scientific organizations through periodic and
thorough evaluation of scientific studies.
The regulations employ a unit of measurement known as the
Specific Absorption Rate, or SAR.
The SAR limit is 2 watts/kilogram (W/kg) averaged over ten
grams of tissue.
The limit includes a substantial safety margin designed to
assure the safety of all persons, regardless of age and health.
The value of the limit is equal to the value given in
international guidelines recommended by ICNIRP**, which is in
collaboration with the World Health Organization (WHO).
The highest SAR value for this mobile phone is 0.47 W/kg
Your mobile device is a radio transmitter and receiver. It is
designed not to exceed the limits for exposure to radio waves
recommended by international guidelines. These guidelines
were developed by the independent scientific organization
ICNIRP and include safety margins designed to assure the
protection of all persons, regardless of age and health. The
guidelines use a unit of measurement known as the Specific
Absorption Rate, or SAR. The SAR limit for mobile devices
is 2.0 W/kg and the highest SAR value for this device when
tested at the ear is 0.74 W/kg * . As mobile devices offer a
range of functions, they can be used in other positions, such
as on the body as described in this User Guide. In this case,
the highest tested SAR value is 0.46 W/kg * .
* The tests are carried out in accordance with international
guidelines for testing.
when tested for used at the ear, and 0.47 W/kg*** when worn
on the body in the below manner****.
While there may be differences between the SAR levels of
various phones and at various positions, all phones meet the
Japanese technical regulations.
Although the SAR is determined at the highest certified power
level, the actual SAR of the phone during operation can be
well below the maximum value.
Use at positions other than at the ear****
This mobile phone may be used at positions other than at
the ear. By using an accessory such as a belt clip holster
that maintains a 1.5cm separation with no metal (parts)
between it and the body and the mobile phone, this mobile
protection.
* The technical regulations are provided in Article 14-2 of the
Ministry Ordinance Regulating Radio Equipment.
** International Commission on Non-Ionizing Radiation
Protection
Safety Precautions
phone will comply with international guidelines for radio wave
*** The value is under simultaneous transmission use
conditions.
The World Health Organization has announced that "A large
number of studies have been performed over the last two
decades to assess whether mobile phones pose a potential
health risk. To date, no adverse health effects have been
For more information about SAR, see the following websites:
・Ministry of Internal Affairs and Communications (MIC)
Xperia™ Z4
established as being caused by mobile phone use."
196
FCC RF Exposure Information
Your handset is a radio transmitter and receiver. It is
Declaration of Conformity for
402SO
designed and manufactured not to exceed the emission limits
for exposure to radio frequency (RF) energy set by the Federal
Communications Commission of the U.S. Government.
Declaration of Conformity for 402SO
The guidelines are based on standards that were developed
by independent scientific organization through periodic and
thorough evaluation of scientific studies. The standards
include a substantial safety margin designed to assure the
The Product "402SO" is declared to conform with the essential
safety of all persons, regardless of age and health.
requirements of European Union Directive 1999/5/EC Radio
The exposure standard for wireless handsets employs a unit of
and Telecommunications Terminal Equipment Directive 3.1(a),
measurement known as the Specific Absorption Rate, or SAR.
3.1(b) and 3.2. The Declaration of Conformity can be found on
The SAR limit set by the FCC is 1.6 W/kg. The tests are
http://www.sonymobile.co.jp/product/SAR/doc/.
performed in positions and locations (e.g. at the ear and worn
on the body) as required by the FCC for each model.
The highest SAR value for this model handset as reported to
the FCC when tested for use at the ear is 0.54 W/kg, and
when worn on the body in a holder or carry case, is 0.58 W/kg.
Body-worn Operation; This device was tested for typical
body-worn operations with the handset kept 1.5 cm from
the body. To maintain compliance with FCC RF exposure
requirements, use accessories that maintain a 1.5 cm
separation distance between the user's body and the handset.
The use of beltclips, holsters and similar accessories should
not contain metallic components in its assembly.
The use of accessories that do not satisfy these requirements
may not comply with FCC RF exposure requirements, and
should be avoided. The FCC has granted an Equipment
Authorization for this model handset with all reported SAR
levels evaluated as in compliance with the FCC RF emission
guidelines. SAR information on this model handset is on
file with the FCC and can be found under the Display Grant
section of http://www.fcc.gov/oet/ea/) after searching on
FCC ID PY7-PM0794.
Additional information on Specific Absorption Rates (SAR) can
be found on the FCC website at http://transition.fcc.gov/oet/
rfsafety/.
The World Health Organization has stated that present
scientific information does not indicate the need for any
special precautions for the use of mobile devices. They note
that if you want to reduce your exposure then you can do so
by limiting the length of calls or using a hands-free device to
keep the mobile phone away from the head and body.
World Health Organization
http://www.who.int/emf
List of Specific Absorption Rates (SAR) for radio waves by
smartphone/3G model
http://www.softbank.jp/mobile/support/sar/ (Japanese)
197
VCCI
VCCI
Handset complies with a technical standards based on VCCI
RULES FOR VOLUNTARY CONTROL MEASURES and the mark of
conformity is depicted electronically on the screen.
Safety Precautions
Xperia™ Z4
198
199
A
About phone....................................................................171
About the User Guide........................................................ 3
Accessibility.................................................................... 170
Accessing Instructions on Handset................................... 3
Accounts.......................................................................... 166
Activating/Canceling Recently-Used Applications......... 37
Airplane Mode................................................................... 21
Xperia™ Z4 User Guide Index
Applications.......................................................................17
Apps................................................................................. 162
B
Backing up & Restoring................................................. 174
Backing Up Contacts........................................................ 60
Backup & reset............................................................... 168
Basic Operation.................................................................16
Before Using Handset Abroad....................................... 146
Bluetooth.........................................................................154
Bluetooth ® /Wi-Fi (WLAN)..............................................188
C
Capturing Still Images/Videos......................................... 92
Charging Battery.............................................................. 11
Connecting to PC via USB............................................. 132
Connecting via Wi-Fi......................................................132
Customer Service............................................................ 177
D
Data usage...................................................................... 154
Date & time.................................................................... 169
Declaration of Conformity for 402SO..........................196
Display............................................................................. 159
E
Editing Captured Still Images (Album)............................95
End User License Agreement......................................... 192
Export Controls and Regulations.................................. 192
G
Google Play....................................................................... 26
H
Handset Settings............................................................ 152
Home................................................................................ 158
Home Screen Basics.......................................................... 34
Important Product Information.....................................187
Xperia™ Z4
I
200
Importing Contacts...........................................................60
Silent Mode....................................................................... 21
Initial Settings..................................................................13
SIM Card.............................................................................. 7
Intellectual Property Rights..........................................193
SIM PIN.............................................................................. 29
Internal Memory and SD Card............................................9
S! Mail Initial Setup......................................................... 62
S! Mail/SMS Settings........................................................78
L
Language & input........................................................... 167
Listening to Music (Music)............................................ 122
Sound & notification......................................................160
Specifications..................................................................176
Status Bar......................................................................... 35
Storage............................................................................ 161
Location........................................................................... 163
Locking Screen.................................................................. 30
M
Making Call Settings........................................................ 56
Making Calls while Abroad............................................ 148
T
Tap & pay....................................................................... 163
Text Entry.........................................................................22
Thread List/Folder List................................................... 64
Troubleshooting.............................................................. 175
Making Camera Settings.................................................. 98
Managing S! Mail/SMS...................................................... 69
Messaging.......................................................................... 62
More................................................................................. 156
U
Updating Software........................................................... 30
Using a Google Account................................................... 24
O
Opening & Replying to S! Mail/SMS................................ 67
Operations When Creating S! Mail/SMS.......................... 75
Optional Services..............................................................51
Using Alarm & Clock...................................................... 118
Using Bluetooth ® Function............................................138
Using Calculator............................................................. 116
Using Calendar................................................................ 116
Using Chrome.................................................................... 87
Using Contacts..................................................................57
Using DLNA Function..................................................... 141
P
Parts & Functions...............................................................6
Personalization............................................................... 157
Phone Number................................................................... 20
Placing a Call from Contacts/Call History..................... 49
Placing/Answering Calls................................................... 46
Power management.........................................................162
Power On/Off................................................................... 11
Printing............................................................................171
Using Downloads.............................................................126
Using Drive......................................................................127
Using Email........................................................................84
Using Facebook............................................................... 121
Using Gmail....................................................................... 81
Using Google+.................................................................129
Using Google Maps......................................................... 113
Using Google Search.......................................................115
Using Google Settings....................................................129
Using Hangouts............................................................... 114
Using NFC/Osaifu-Keitai ® ............................................. 123
R
Using Notifications Window/Quick Settings.................. 36
Using PC Files.................................................................122
Rearranging Home Screen.................................................41
Using Play Books............................................................ 127
Recording/Playing Back Programs................................. 107
Using Play Games........................................................... 128
Recording/Viewing at Preset Times..............................109
Using Play Movies & TV................................................ 128
RF Exposure Information/Specific Absorption Rate (SAR)
Using Small Apps.............................................................. 38
Information..................................................................... 195
Using Tethering.............................................................. 137
Using Touchscreen............................................................ 12
S
Safety Precautions......................................................... 180
Using Twitter................................................................. 120
Using Urgent News.........................................................112
Using YouTube................................................................ 121
Saving Data..................................................................... 174
Security........................................................................... 164
Security Codes.................................................................. 28
V
Sending Decore Mail by S! Mail....................................... 66
VCCI..................................................................................197
Sending S! Mail/SMS.........................................................65
Viewing Captured Still Images/Videos (Album).............. 94
Setup guide..................................................................... 169
Viewing TV (Full Seg/One Seg)..................................... 104
Sharing Still Images and Videos...................................... 97
201
W
Warranty & After-Sales Service................................... 176
Waterproofing/Dustproofing......................................... 190
Wi-Fi................................................................................ 153
X
Xperia™ Connectivity.....................................................155
Xperia™ Z4
202
Xperia™ Z4 User Guide
July 2015, First Edition
SoftBank Corp.
Visit SoftBank Shop for assistance
Model : Xperia™ Z4
Manufacturer : Sony Mobile Communications Inc.