1
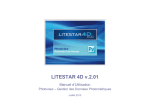
LITESTAR 10
Tunnel Plus User’s Manual
June 2011
Index
Configuration.............................................................................................................................................................................................................. 3
Minimum computer configuration ............................................................................................................................................................................................................................ 3
Program limits ......................................................................................................................................................................................................................................................... 3
To start ....................................................................................................................................................................................................................... 4
Program installation and start up ............................................................................................................................................................................................................................ 4
Program start .......................................................................................................................................................................................................................................................... 4
Data updating............................................................................................................................................................................................................. 5
Introductory Notes...................................................................................................................................................................................................... 6
To access the tunnels module ................................................................................................................................................................................................................................ 6
Cartesian references and luminaire aiming ................................................................................................................................................................ 7
The project step by step ............................................................................................................................................................................................. 8
The project step by step ............................................................................................................................................................................................. 9
Main screen.............................................................................................................................................................................................................. 10
Luminance curve...................................................................................................................................................................................................... 11
File Menu............................................................................................................................................................................................................................................................... 12
Operations Menu................................................................................................................................................................................................................................................... 12
Project Data TABS ................................................................................................................................................................................................................................................ 13
Image TAB – Adrian diagram................................................................................................................................................................................................................................ 15
Inserting an image.............................................................................................................................................................................................................................................. 16
Calculating the veiling luminance ...................................................................................................................................................................................................................... 17
Situation TAB – Luminance Curve ........................................................................................................................................................................................................................ 18
Curve printout........................................................................................................................................................................................................................................................ 19
Calculation of lighting engineering parameters ........................................................................................................................................................ 20
Definition of project data and luminaire insertion for permanent illumination ....................................................................................................................................................... 20
Definition of complex carriageways ...................................................................................................................................................................................................................... 23
Luminaire insertion for reinforced illumination ...................................................................................................................................................................................................... 25
Calculation settings ............................................................................................................................................................................................................................................... 26
Results .................................................................................................................................................................................................................................................................. 27
Results visualization.............................................................................................................................................................................................................................................. 28
Comparison of theoretical luminance curve with real curve ................................................................................................................................................................................. 29
Rendering.............................................................................................................................................................................................................................................................. 30
Print ....................................................................................................................................................................................................................................................................... 31
Pag. 2/31
Configuration
Minimum computer configuration
Notes
It is advisable, before carrying out program installation, to verify that the configuration of your computer is at least of the following type
(minimum configuration):
Computer:
PC Pentium of latest generation with updated Open graphic libraries GL 2.0 and 2.1
RAM Memory:
1 Gb
Hard Disk:
With at least 100 Mb free for the program. The space for archives depends on the number of products loaded
Video:
Resolution preferable 1024x768 pixel
Mouse:
Windows compatible
Operating System:
Windows7® - Windows®Vista - Windows XP®
Program limits
The program has been configured according to the following limits:
Room/environment plan:
various types of tunnel sections with lengths defined by the user
Maximum dimensions:
X=5.000 m Y=5.000 m Z=5.000 m
Maximum number of luminaires:
Unlimited depending on RAM memory limits
Maximum number of luminaire types:
Unlimited depending on RAM memory limits
Pag. 3/31
To start
Program installation and start up
Notes
If the software has been downloaded from internet the program will first have to be run, then follow the instructions:
When the menu window appears, select the language of installation
Follow the on-screen instructions
When installation is complete, enter the program and type in the activation code received from Oxytech in the window that opens at
start up. To carry out this operation the computer must be connected to internet:
•
The Activation Code can only be used on one PC at a time. To use the program on another PC first you must deregister by
selecting Register + Deregister + OK and repeat the Registration operation from the other computer
•
Should the computer be broken, leaving you unable to carry out the Deregistration operation, please contact OxyTech’s
Customer Service
Exit the program and relaunch to activate the new configuration: the program is now ready to use
During installation both the program destination
folder and that of the data required for project
development will have to be defined.
Should these folders not be modified, the program
will use the default folders, visualized at the time of
installation.
More precisely, definition of the following folders is
required:
•
DATA, which is an installation folder with
write permission, for those operative systems
(e.g. Windows 7) that do not include the
possibility of writing in the PROGRAMS folder
•
DOCUMENT, where data related to the
projects and manufacturers’ catalogs is
gathered
Program start
The simplest way to launch the program is to double click on the LITESTAR 10 icon directly from the desktop.
When Litecalc is opened, the Photowin module will
also open automatically since it is necessary for
the correct functioning of the calculation program
and for selection of the manufacturers’ luminaires
in the Plug-ins.
It is advisable never to close the application, but to
minimize it as an icon in the applications bar.
Alternatively you can:
Select the Litecalc program from the window Start/All programs/Oxytech
Select Start/Run and type d:\Directory Name\LTS.EXE finally pressing Enter
Pag. 4/31
Data updating
Notes
LITESTAR tunnels is equipped with a photometric database
(Fotom.FDB), visualizable in Photowin.
The photometric file contains all information related to the
luminaire identification plate and technical data.
In Photowin the product graphs (polar curve, beam opening, etc.)
can be visualized.
The Fotom.FDB is created by downloading the manufacturers’
Plug-ins (unmodifiable data) directly into Photowin, or by directly
importing the curves in the main international formats.
To download the company plug-ins from the net it is first necessary
to connect to internet. At this point you must:
Select the Data Updating/Maintenance via WEB menu
Select with a flag the manufacturers you would like to
download on the left-hand side of the window that opens
Click on the OK key to start downloading the data
Pag. 5/31
For a more detailed explanation on how to import
data
please see
the
Photowin
tutorial
downloadable from the Oxytech site.
Introductory Notes
Notes
The program is designed for the calculation of lighting engineering
parameters for lighting installations with luminaires measured
according to the C-Gamma system of CIE24 and CIE 27
Recommendations (road lights) and V-H (floodlights). The program
calculates the illuminances and luminances on all the surfaces
present in the calculation area, taking into consideration the
shadows created by them (if the flag is selected).
Data insertion is effected in tabular form in the Tunnels TAB, after
having calculated the theoretical luminance curve with the Adrian
method, importing a image or directly setting the value of the
veiling luminance.
To access the tunnels module
Once the program has been launched, to access the Tunnels
module window:
Select the Wizard Project/Tunnels menu
Pag. 6/31
The calculation grids are set in accordance with
relative regulations in force.
Cartesian references and luminaire aiming
Notes
Absolute and Local Cartesian Axes: Objects are always
associated with a triplet of Cartesian axes X, Y, Z which is found in
the center of the design area.
The area is characterized by a grid in which the space between
one intersection and the other is established as 0.5 m.
Selecting the Grid command from the Views menu
accesses the window in which to modify the grid
step shown in the design.
Relative Cartesian Axes and Luminaires: Each luminaire is
associated to its triplet of intrinsic Cartesian axes x’, y’ and z’
relative to the absolute triplet X, Y and Z, on which movements,
rotations or aimings are based.
The photometric system of C- semiplanes, according to which the
photometry is referred, is integral with the system of intrinsic axes
x’,y’, and z’ of the luminaires, where the semiplane C-0°
corresponds with the plane formed by the axes z’ and the positive
part of y’. Each rotation around the intrinsic axes brings about the
rotation also of the group of C- planes.
The semiplane C-0° is, generally, perpendicular to the lamp.
The rotations of a luminaire around its own
intrinsic axes are considered positive when the
observer sees them occur anticlockwise when
situated on the positive side of the x’, or y’ or z’
axes.
Pag. 7/31
The project step by step
The module allows calculation of the parameters required by regulations, by means of tabular data insertion, as described below:
Select the Wizard Project /Tunnels menu
In this way an interface window will be shown in which to set firstly:
The tunnel type section to be calculated (rectangular, vaulted,
etc.)
The physical characteristics of the tunnel (height and
reflection coefficients)
At this point it is necessary to calculate the entry luminance and
luminance curve by means of the Adrian diagram and to set the
physical characteristics of the area.
To do this just click on the Adrian key, so as to access the data
settings window, in which to define:
Tunnel length
Direction of travel
Type of installation and relative qc
Atmospheric conditions
Road classification according to EN 13201 (11248)
Direction
Interior luminance
Luminance curve
Geographical position of tunnel
Traffic speed
Slope
Carriageway conditions
Type of road
To define the veiling luminance the Adrian diagram is used, by
clicking on the Image TAB or by inserting a image, (via the
Operations/Substitute insert image menu) or by directly setting
the value. For a more detailed explanation of how to complete the
Adrian graph, please see the Adrian Diagram chapter.
Once the veiling luminance has been found, the program will
automatically calculate the luminance curve to apply in the project,
by clicking on the Situation TAB, which can also be printed using
the File/print menu.
Still using the File menu, the calculations carried out can be saved
(Save Project) and finally you can exit the window (Exit) to return
to the main module and start to insert the luminaires.
Entering at this point in the General TAB it is possible:
To set the type of installation and road characteristics
(carriageways, lanes, etc.)
To select the luminaire to be used in the calculation of the
permanent illumination
To set the characteristics of the installation relative to the
calculation of the permanent illumination
Press the Calculations key in the design area to visualize the
tunnel design and inserted luminaires and to launch the window for
calculating the parameters required by the norms (already reset).
Once the permanent illumination calculation has been carried out,
the results obtained will be automatically shown in the Results
table.
Click twice on the result you wish to visualize and the values
relative to the selected area will be shown (for a more precise
explanation of the available graphs please see the Results
chapter).
Pag. 8/31
Notes
To save the general project, select Save Project
from the File menu.
The project step by step
Notes
To access the tunnels management window again from the
Results window, you will need to:
Select the icon, situated on the top right, or reselect the
Wizard Project /Tunnels menu.
At this point by accessing the Luminaires TAB it is possible to
insert new luminaire rows, of different types, for calculating the
reinforced illumination, then relaunching calculations and
visualizing the results again (for a more detailed explanation on the
available graphs please see the Inserting luminaires for reinforced
illumination chapter).
Pag. 9/31
Main screen
Notes
Program launch opens the main operative area, from which it is
possible to insert all the information necessary for the realization of
the project, such as type and height of the tunnel and reflection
coefficients of the walls.
From here it is also possible to access the Adrian diagram
calculation module.
Physical and geometrical characteristics of the
tunnel:
Types of section
available
•
Tunnel Height: this represents the height of
the central part of the tunnel under calculation
•
Right Wall Ref.: this represents the reflection
coefficient of the right-hand wall of the tunnel,
expressed in percentage
•
Left Wall Ref.: this represents the reflection
coefficient of the left-hand wall of the tunnel,
expressed in percentage
Insertion modules TABS
The value is set by default at 60% for each of the
walls, since a light surface is considered.
Images of
available sections
Access key to Adrian
calculation module
•
Physical tunnel
characteristics
definition fields
Pag. 10/31
Ceiling Ref.: represents the ceiling reflection
coefficient, expressed in percentage
Luminance curve
Notes
Clicking on the Adrian key opens a window in which to set the data
necessary for calculating the entry luminance and thence the
luminance curve.
The window consists of two menus (described in the following
paragraph) and by three TABS, i.e.:
Project Data: in which to set the data relative to the road
characteristics and atmospheric conditions
Image: where the veiling luminance is calculated using
Adrian
Situation: where the luminance curve is visualized
Modules TABS
Dropdown menu bar
Road characteristics and
atmospheric conditions
settings window
Pag. 11/31
Luminance curve
Notes
The
project
is
automatically
saved
in
…Data/Workdir with the project name saved in
Litestar.
File Menu
For all operations linked with opening, exporting and saving a project:
New Project: to start a new project
Saving the project means you will later be able to
compare the hypothetical luminance curve with
that really obtained in the project phase.
Save Project: to save the current project
Export curve: to export the luminance curve values in a .CSV file
Import curve: to import a previously created AdrXml file
Print: to print the calculated luminance curve
Print preview: to view the preview
Printer Setting: to set up the printer
Exit: to exit the program
Operations Menu
For all operations that can assist the project design:
New Situation: to create a new scene to be analyzed
Eliminate Situation: to remove a scene
Substitute or insert Image: to change or insert a image to be analyzed with the Adrian
diagram
Pag. 12/31
Luminance curve
Project Data TABS
In this section the data relative to the physical characteristics of the
road and atmospheric conditions can be inserted.
Once the fields are completed the program will automatically
update the relative data:
Notes
Interior luminance (Li)
Horizontal illuminance (relative to the latitude)
Stopping distance (dv)
Atmospheric luminance (Latm)
In the case of short tunnels the program will
proceed to halve the entry luminance values,
visualized in the Situation TAB.
There are two types of fields to be completed:
Dropdown: in this case click with the mouse on the arrow
situated on the right and select the item of interest
Insertion: in this case just click with the mouse inside the
blank line and type the descriptions
The following fields are found on the left hand side of the window:
Customer: here the data relative to the project customer
should be typed
Tunnel Name: here the tunnel name should be typed
Image: here the image path is shown
Tunnel Length where:
•
To type the tunnel length
•
To set whether the tunnel is to be considered long or
short
Direction of Tunnel: to indicate the direction of the tunnel
Type of installation: here the type of installation and relative
qc are set. The installation may be:
•
Pro-beam (the luminaires are aimed in the direction
of traffic flow)
•
Symmetric
•
Counter-beam (the luminaires are aimed in the
opposite direction to that of the traffic)
Atmospheric Conditions: here the more frequent atmospheric
characteristics are indicated
ME Class: here the road lighting engineering class according
to the EN 13201 norm should be selected
Direction: to indicate if the traffic flow inside the tunnel is oneway or two-way
Interior Luminance (Li): here the value of interior luminance is
shown, in accordance with norms, on the basis of the
selected lighting engineering class
Pag. 13/31
Luminance curve
Notes
On the right of the window are the following fields:
The slope values are taken directly from the
trapezoidal table shown in the norm. Should the
slope values associated with the speed exceed the
table, in the Stopping distance box the text Outside
Table will appear.
Luminance curve
Latitude: here the data relative to the latitude of the tunnel’s
geographic position should be typed
Speed: to set the driving speed
Slope: to define the slope of the road
Negative slope values show descending roads,
while positive slope values show upwardly
climbing roads.
Carriageway conditions where:
•
Wet, indicates predominantly wet road surface
conditions
•
Dry, indicates
conditions
predominantly dry road
surface
Type of road: to indicate if it is a normal road or a freeway
Stopping distance (dv): where according to the slope values
and set speeds the distance necessary to stop the vehicle is
shown (reaction and stopping time)
Atmospheric luminance (Latm): indicates the atmospheric
luminance values on the basis of the data inserted
Luminance curve: here you can choose whether to calculate
the curve on the basis of the veiling luminance or to set the
curve steps directly. In this sense, setting:
•
Calculated, the Adrian procedure will begin
•
Set by user, there will be a table to complete with the
luminance value and stretch lengths
Pag. 14/31
Luminance curve
Image TAB – Adrian diagram
Notes
Click on the Image TAB to open the window in which the data
necessary for calculating the veiling luminance using the Adrian
diagram should be set.
Dropdown menu
to choose how to
calculate veiling
luminance
Luminance values
setting modes
In this section the images of the tunnel can be inserted and the
relative veiling luminance calculated. Alternatively the veiling
luminance can be set directly by typing in the value.
To insert the image just press with the right mouse button and click
on Substitute/Insert Image, selecting it from its folder.
Click with the
right mouse to
open the image
management
dropdown
menu
Adrian diagram and image
Pag. 15/31
The image management dropdown menu contains
the following items:
•
Set center: this indicates where to position
the center of the entrance
•
Set first measurement point: this indicates the
first
point
to
effect
the
reference
measurement
•
Set second measurement point: this indicates
the second point to effect the reference
measurement
•
Values: this opens the values table relative to
the selected segment
•
Show Measurement Segment: this shows the
reference measurements
•
Hide Measurement Segment: this hides the
reference measurements
•
Substitute or insert image: to insert or
substitute the reference image
Luminance curve
Inserting an image
Notes
The image of the tunnel, as required by the norms,
must be taken in the center of the carriageway (if
possible), but above all at a distance at least equal
to the stopping distance and with a lens that
covers a horizontal visual angle greater than 60°.
The first step to follow is to calculate the veiling luminance, having a image
available, and to insert the image of the tunnel under examination.
To do this you must click with the right mouse button in the center of the TAB,
so as to open the dropdown menu from which to select Substitute or insert
image.
This will open a dialog window that allows you to search the image to be
loaded.
Should you not possess an image of the tunnel
under examination or if measurements have been
made with the luminance meter, the veiling
luminance value can be inserted directly, selecting
Lv from the drop down menu, then Set by user and
typing the value in the box to the right of the menu.
After inserting the image it will need to be centered in the diagram and rescaled,
in such a way that the diagram and tunnel images are in the same scale.
To do this you must:
Click with the right mouse button on the first point you intend setting for
measurement (for example the left side of the entrance), and select Set
first measurement point
Click with the right mouse button on the second point you intend setting for
measurement (for example the right side of the entrance) and select Set
second measurement point
At this point, a window opens in which the reference value should be typed
in meters
Finally to center the image in the center of the diagram at a height of 1.5m
just click with the right mouse button on the central point of the entrance, at
a presumed height of 1.5m and select Set center
The image will then be visualized with the graph, highlighting the reference
value and insertion center (to hide these values just click with the right mouse
button on Hide Measurement Segment).
Pag. 16/31
Luminance curve
Calculating the veiling luminance
Notes
To calculate the veiling luminance it is essential to allocate an “environmental” value to each segment of the Adrian diagram.
To do this you must:
Flag the field A click of the mouse with the left mouse button, so as to activate the various luminance values available, subdivided
into types of environmental conditions (positioned on the bottom left)
Set the type to be highlighted in the graph: for example 100% entrance means all the segments selected will take on the luminance
characteristics relative to the entrance
At this point select the diagram segments belonging to this type with a click of the left mouse button inside the segment
Then position the mouse on the highlighted segment and click with the right mouse button to select the Values command, with which
you can modify the characteristics of the quadrant, should the area not belong entirely to a single category (in the image below, the
highlighted area shows characteristics that are 70% rock and 30% meadows)
The luminance values related to the different types
of environmental conditions can be seen in the
Situation TAB, and vary according to what has
been set in the Project Data TAB, in the Traffic
direction field.
If some segments are unselected it will be
impossible to calculate the luminance curve. To
verify the accuracy of analysis just access the
Situation TAB and verify that no segment is
highlighted in red at the top right of the summary
graph.
Once the operation is complete you can access the Situation TAB to visualize the luminance curve obtained
Segment with
two types of
environment
By setting the Yellow Tips option it is possible to
visualize a values summary window, relative to the
individual segment. Just place the mouse cursor
on the segment to open the window.
Select Superimpose data to visualize
percentages inside each individual sector.
the
The Set everything to 0% option instead allows
you to reset the values in the image.
Types of
environment
luminances
available
Summary
table
Pag. 17/31
Luminance curve
Situation TAB – Luminance Curve
Notes
Click on the Situation TAB to open the window where the results of
the Adrian analysis are shown. In this section the various
luminance values calculated in accordance with norms, the results
obtained for the individual segments and, finally, the theoretical
luminance curve can be visualized.
In this section it is also possible to check whether all the Adrian
segments have been examined (the sectors that have not been
analyzed will be marked in red): if any segment has been left
unexamined the luminance curve will not be calculated.
Luminance values
calculated
Reference luminance
values for Adrian
calculation
Graphic Adrian
representation
Visualization of
luminance curve
Length of transition zone
Curve visualization modes
Pag. 18/31
To set up a new situation, in which to change the
luminance parameters of the environment
manually, you must select New Situation in the
Operations menu.
Luminance curve
Curve printout
Notes
In the Adrian module the luminance curve obtained from
parameter analysis can be printed.
Access the print window from the File/Print menu, where the
printer can be set, the number of copies and the pages to be
printed can be chosen.
By selecting File/Print Preview the preview of the pages can be
visualized and then sent to print.
Pag. 19/31
Calculation of lighting engineering parameters
Definition of project data and luminaire insertion for permanent illumination
Once the values of the single items have been set
and the lighting device with which to carry out
calculation has been selected, click with the left
mouse button on the Calculations key, and the
program will automatically open the calculation
window preset in accordance with the norm.
Once the main screen parameters have been defined (Norm TAB),
and Adrian calculation is complete, click on the General TAB to
access the window for definition of
the physical road
characteristics, installation type and luminaire characteristics for
pemanent illumination.
In this section the project values can be set, typing them directly in
the boxes or selecting an item from the dropdown menu.
Here the following can be set:
It is however always possible to access the TAB to
modify the parameters set.
Carriageway Type: it is possible to choose among the
following options (dropdown menu, by clicking on the right
hand arrow):
•
Single Carriageway: in this case the program creates
one carriageway and 2 sidewalks at its sides with the
dimensions defined in the Carriageway Data section
•
2 Symmetrical Carriageways: the program creates two
carriageways of equal width, a central reservation and
two sidewalks at the sides with the dimensions defined
in the Carriageway Data section
•
2 Asymmetrical Carriageways: the program creates
two carriageways of different widths, a central
reservation and 2 sidewalks at the sides with the
dimensions defined in the Carriageway Data section
Notes
One Way: this is a flag that allows you to define whether the
grouping of lanes (carriageway) is traveled in only one
direction (activated) or in 2 opposing directions (deactivated).
A road with double carriageways is considered by default a
two-way traffic system: should the double carriageway road be
one-way, you must select the option ‘One Way’.
In this case the program considers circulation from left to right.
Pag. 20/31
Calculation of lighting engineering parameters
Notes
Luminaire Distribution: it is possible to choose among the
following options which vary according to the type of
carriageway chosen (dropdown menu, by clicking on the right
hand arrow):
•
•
Single Carriageway
• 1 row on the right
• 1 row on the left
• 2 opposite rows
• 2 staggered rows
Two symmetrical carriageways
2 opposite rows
• 2 staggered rows
• 1 central row in each carriageway
• 2 opposite rows in each carriageway
• 2 staggered rows in each carriageway
Carriageway Data: these data are defined here for each
road element/component (sidewalk A, sidewalk B,
carriageway A, central reservation, carriageway B):
•
The width [m]
•
The number of transversal calculation points for the
calculation of illuminances
•
The number of lanes in each carriageway
•
The number of transversal calculation points
corresponding to the single lanes, for the calculation
of luminances and illuminances (for the calculation
of longitudinal uniformity, they must be an odd
number)
•
The reduced reflection factors (Tables R: C1, C2,
R1, ….) with the corresponding q0 factor
•
•
Two asymmetrical carriageways
2 facing rows
• 2 staggered rows
• 2 rows on central reservation
• 2 facing rows on each carriageway
• 2 rows facing carriageway A – 1 row on verge of
carriageway B
• 2 staggered rows on carriageway A – 1 row on
verge of carriageway B
• 1 row on verge of carriageway A – 2 rows on the
central reservation
• 1 staggered row on verge of carriageway A – 2
rows on central reservation
•
Pag. 21/31
When carrying out calculation in accordance with
norms, certain parameters, such as the number
and position of calculation points, will be inserted
automatically in accordance with reference norm
requirements, and can no longer be modified by
the user.
In the case of sidewalks and central reservations
the program automatically attributes regular
reflection (Lambertian) to the surface defining a
preset reflection factor. It is however always
possible to modify these data by accessing the
Roads TAB.
Calculation of lighting engineering parameters
Notes
Calculation Data: here you can define certain calculation
elements such as
•
Number of longitudinal calculation points: calculation
points in a longitudinal sense (parallel to the road axis)
•
Length of stretch under Examination (XC) [m]: this
refers to the length of the section that will be analyzed
if the Auto option is deactivated. If the Auto option has
been activated, the program will consider the section
of the road that lies between two successive
luminaires.
The program automatically adds a number of
luminaires/poles to the stretch suitable for norm
requirements.
Installation Data: here you define the data relative to
luminaire installation such as:
•
Luminaire-Verge Distance (LC) [m]: the distance
between the luminaire upright and the verge on which
the pole stands
•
Bracket (L) [m]: the projection length of the pole
bracket on the horizontal plane
•
Luminaire Height (H) [m]: the height at which the
luminaires are positioned, taken as the height of the
luminous center from the road surface at height 0 m
•
Interdistance (D) [m]: the interdistance between two
consecutive poles/luminaires positioned on the same
side
•
Rotation Angle (RY) [°] : this is the inclination
according to which the luminaire is rotated around the
intrinsic y axis of the luminaire itself and parallelly to
the road axis. Inclination is at 0° with the lumina ire
horizontal and the luminous axis vertical, and rotation
is positive when the luminaire rotates anticlockwise
with respect to the observer who has the pole
supporting the luminaire on his left
•
Additional Bracket Rotation (ARZ) [°] : when a
luminaire
is
positioned
by
default
the
bracket/luminaire is rotated by 90°, if positioned to
the right with respect to a driver arriving from the left
or by 270° if to the left, with respect to the refe rence
of 0 taken along the positive X access. Additional
rotation (ARZ) is necessary when rotation beyond
90° or 270° is required. ARZ additional rotation
depends also on the traffic direction: if an additional
rotation (for example 20°) is applied to a
configuration of 2 opposite rows in a single traffic
direction there will be a rotation of 90+20° for th e
right-hand row and of 270+20° for the left-hand row ;
in the case of two way traffic it will be 90+20° an d
270+20°
•
Lateral Inclination (RX) [°] : this inclination allows you
to rotate the luminaire around its own intrinsic x axis,
that is around the axis parallel to the lamp and
passing through it
•
Maintenance Coefficient [%]: the maintenance
coefficient which is the same for all luminaires takes
into account the reduction of the lamp flux in time as
well as the dirt factor which causes a further
reduction of luminous flow from the luminaire
Select Luminaire button allows access to the selection
window of the luminaire to be used in the calculation
Pag. 22/31
Calculation of lighting engineering parameters
Definition of complex carriageways
Notes
The division of the zones and sub-zones is
important in the printing phase, where the
elements will be printed in the order in which they
are visualized in the table.
Selecting the Roads TAB opens a pop-up window in which it is
possible to define new road elements (if present) such as
carriageways, bikeways, sidewalks or central reservations
(separating areas between two carriageways or between a sidewalk
and a carriageway).
The keys on the right of the window command the main operations
which are:
Duplicate: to add a new element of the same type to the
selected area. The zone is identified by the name that appears
in the left-hand column of the grid. Each zone can be
composed of a number of elements. The name of the
duplicated element will be visualized in the Name column,
under the selected zone
Delete: this eliminates the selected element from the table
New: this allows insertion of a new zone or a new element.
Click on the button to open a window (see below) where you
can choose, by scrolling the items with the mouse pointer,
whether to insert a new element in the selected zone or a new
zone below that selected
Pag. 23/31
Calculation of lighting engineering parameters
Notes
To define the different features of a zone or sub-zone the following
fields can be edited:
Description: the name we intend to give to each road element
Width [m]: this refers to the width of the lane/sidewalk/central
reservation
Traffic direction: this identifies the direction of the traffic
Area Description: this is the name given to the entire area
(e.g. carriageway made up of 3 lanes: the carriageway
represents the area while the lanes the sub-area)
Zone Type : this represents the main feature of the zone
under examination. The available zone types are as follows:
Secondary, Carriageable and Cycling/Pedestrian. Depending
on the zone type chosen, the calculation to be made will
automatically be set. If, for instance, we choose Carriageable,
the luminance calculation will be made
Diffusive/Non Diffusive: defines the type of reflection of the
surface under examination. In the case of Diffusive reflection
(Lambert’s Law of regular reflection is applicable), it is only
necessary to define the reflection factor (percentage value
between 0% and 100%). In the case of non Diffusive
reflection, it will be necessary to define the Reduced
Reflection Factors Table among tables C1, C2, R1 … R4 and
the reflection factor q0
Surround width: sets the dimension for the calculation of
the sr lateral visibility parameter
Color: this option offers the possibility of changing the colors
of the different surfaces. A cycling lane, for instance, could
have red asphalt. This option is particularly useful when we
wish to create a rendering after the calculation
Zone Height [m]: this is the zone height with respect to the
reference plane of 0m height; the program in actual fact allows
calculation of road sections situated at different heights from
0m as happens with overpasses and sidewalks
Lighting Class: this represents the different classes of project
references, to be verified and respected when carrying out the
calculation, according to norm EN13201
Pag. 24/31
In the case of non Diffusive surfaces it becomes
necessary to set the observer’s position (x with
respect to the origin and y with respect to the
right-hand verge of the carriageway) to allow the
calculation of luminance on the road section under
examination. Please be aware that the program
automatically sets the observer’s position
according to the norm.
In the case of diffusive reflection
necessary to define the observer
luminance values are independent
position (all observers see the same
values).
it is not
since the
from their
luminance
The field “width” - regarding the zone - indicates
the total width of the zone, as the sum of the
different elements that make it up. This field
cannot be edited.
Calculation of lighting engineering parameters
Luminaire insertion for reinforced illumination
Notes
Selection of the Luminaires TAB accesses the window in which to
insert the luminaires relative to reinforced lighting.
The table presents as a list of rows of luminaires, with the same
properties, where the main parameters, position, installation height,
total number of luminaires with those given characteristics and
interdistance, are summarized.
The keys on the right of the window perform the main operations
such as:
Once the values of the individual items have been
set, click with the left mouse button on the
Calculations key, and the program will
immediately open the calculation window already
reset in accordance with the norm.
Insert: this allows you to insert a row of luminaires, with the
same characteristics as the selected row, below the selected
row
In the Data Installation window, on the bottom left,
you can visualize the total length of the stretch
relative to the selected row and the distance of the
last luminaire in the row from the beginning of the
tunnel (considered on the bottom left). The latter is
important for establishing the start distance of the
next row with respect to the previous one.
It is however always possible to access the TAB to
modify the parameters set.
Delete: this eliminates the selected element from the table
Add: this allows you to add a row of luminaires, with the same
characteristics as the selected row, at the bottom of the list
The Select Lum. key allows you to modify the luminaire in the
selected row, without altering the installation data.
To define installation data, the following fields are editable:
Adding new rows, the program automatically
proceeds to update the length of the tunnel, in the
graphic visualization.
Row Name: this is the reference name of the row, visualized
also in the printout phase
Position X and Y first post: this is the position of the
luminous center with respect to the origin of the X and Y axes,
positioned on the vertex on the bottom left of the area
Luminaire height (H) [m] : this is the height at which the
luminaires are positioned, intended as the height of the
luminous center from the road surface situated at 0 m height
Luminaire Rotation [°]: this is the rotation around the
vertical axis (z) of the luminaire outreach taking the positive
X axis reference as 0
Interdistance(D) [m]: this is the inter-distance between 2
consecutive luminaires in the same row
Lateral Luminaire Inclination [°]: this is the inclination
(rotation) of the luminaire around its own x axis
Arm (L) [m]: the projection length of the pole bracket on the
horizontal plane
Maintenance Coeff. [%]: this is the maintenance factor
which is the same for all the luminaires in the row and which
takes into account the reduction in lamp flux in time as well
as the dirt factor
Luminaire tilting [°]: this is the inclination (rotation) of the
luminaire around its own y axis
Pag. 25/31
Calculation of lighting engineering parameters
Calculation settings
Notes
Clicking on the Calculations key accesses the calculations settings
window.
The window appears already set for the correct calculation of the
tunnel, in accordance with norms.
The compulsory fields, such as luminance, illuminances and glare
cannot therefore be edited.
By default, furthermore, calculation will be carried out with one
inter-reflection (it is however possible to modify the number of interreflections manually).
All the other fields (vertical, cylindrical and semi-cylindrical) instead
can be flagged additionally and represent:
To access the window it is also possible to select
Start from the Calculations menu.
Vertical illuminance [lux]: these illuminances are calculated
in the 4 directions +X, -X, +Y and -Y parallel to the Cartesian
axes on vertical planes situated in the points of the calculation
grid at the height of the working plane
Calculation Times
It is difficult to define a precise calculation time
since it depends on a series of factors, among
which:
the number of surfaces making up the
environment
•
the number of luminaires inserted
•
the number of pieces of furniture and their
surfaces
If the Shadows box is flagged, in addition to
calculating the furniture elements, also the
shadows they produce on other surfaces will be
calculated. In this case however the calculation
times will increase also altering the carriageway
luminances results; for example by adding a
vehicle in one lane, the shadows created by the
vehicle on the road surface will modify the values
calculated on the asphalt, inevitably reducing the
uniformities.
Cylindrical illuminance
[lux]: these illuminances are
calculated on the cylinder situated in each of the calculation
grid points at the defined height. These illuminances do not
correspond, as may be thought, to the average of the 4 vertical
illuminances in the 4 directions but are proportional to them by
less than a factor of 2/π
Semi-cylindrical illuminance [lux]: these illuminances are
calculated on the semi-cylinder situated in each of the
calculation grid points at the defined height; by selecting the
calculation, the height will be automatically visualized in the
cylindrical illuminance box (1.5m), where it can be modified.
The semi-cylindrical illuminance depends on the position of the
observer, therefore by clicking on the Observer Position key
you can define, alternatively, either the position of the observer
(in this case the illuminances are calculated in the direction of
the latter) or the direction defined by means of the β [°] angle,
deviation angle (in this case the illuminances in the various
points are all parallel to each other according to the direction
defined). The rotations origin axis for evaluating the angle is
the X positive axis
•
The automatically set calculation grid can be set manually by
removing the Automatic flag. In this way the longitudinal and
transversal boxes in which to set the points interdistances will be
activated. By selecting Inside or on edge it will be possible to set
whether the grid should start from the center or the perimeter.
This grid will however be used only for calculating the
illuminances, since the luminances will be calculated according to
the grid set to norm.
Pag. 26/31
Calculation of lighting engineering parameters
Results
Notes
The program automatically calculates the values
relative to the walls at 1m and at 1.7m, both as
regards luminances (with lambertian method) and
illuminances.
Once calculations are complete, the results window opens
automatically, showing in the section relative to Summary Results
the values to be verified in accordance with the norm, marking the
worst values with an asterisk at the side. The name of the zone
shown here is the same as that set in the Roads TAB.
In Results Detail instead all calculated results are shown subdivided
by calculation type. In each line the maximum, minimum and
average values are shown, in addition to the uniformity ratios.
To open the values table of a surface just click on it twice.
Selecting the surface with the right mouse button instead opens a
dropdown menu from which to select the graph you wish to
visualize.
As far as luminances are concerned, by clicking on the observer the
data relative to the entire carriageway for that observer will be
visualized. Click on the lane instead to visualize the data of the
single lane, relative to the reference observer.
The values will be visualized as in the figure.
Click on this icon to access the rendering module.
Click on this icon to return to the tunnel module.
Pag. 27/31
Calculation of lighting engineering parameters
Results visualization
Notes
The following graphs can be visualized for each surface:
Values
Isovalues
Spot Diagram
To access the graphs just click twice with the left mouse button on
the surface of interest, inside the results summary window.
To print the visualized graphs it is necessary to keep the graph
window open, under the project, scrolling the arrows in the
Properties TAB to return to the main screen.
Three-dimensional
Ill. Curve /Lum.
It is possible to highlight smaller parts of the graph
by “cutting out” a smaller detail with the right
mouse button.
Design and print
management icons
It is also possible to “turn off” the values by
clicking with the left mouse button on the value
you do not wish to visualize. When the value is
turned off, the parameter summary will also be
updated.
Selection
Icone
di selezione
icons
degli
for
other
altretypes of
tipologie di grafici
graphs
In the luminance graphs, on the bottom left, the
position of the observer and the longitudinal
uniformity value (if calculated) are visualized.
Turned off values
Observer’s
Posizione
osservatore
position
Detail ofdell’area
Ritaglio
area of
di interesse
interest
Properties and graph
parameters summary TABS
Pag. 28/31
Calculation of lighting engineering parameters
Comparison of theoretical luminance curve with real curve
Clicking on the icon opens the comparison graph between
the theoretical luminance curve (in green) and the real curve
(in black).
Notes
The summary of the calculated data is visualized in the graph: in
addition to the two luminance curves, the luminaire sequences as
they are inserted in the project are visualized.
Calculated results
summary
Real luminance
curve
Luminaire rows
inserted in project
Theoretical
luminance curve
Pag. 29/31
Calculation of lighting engineering parameters
Rendering
Notes
Click on the icon to open the rendering management
module.
Here it is possible to manage the functions of 3D visualization and
dynamic rendering of the area with the possibility of adding texture
to its surfaces.
Menu bar
Rendering
visualization icons
Design
management icons
Save image to
screen icons
Rendering
visualization
List of objects
present in the areas
Pag. 30/31
The window is composed of the following menus:
•
File: to save the images and return to the
project
•
View: to define the position of the point of
observation with respect to the scene
•
Tools:
functions for recording videos,
modifying tones
•
Texture:
functions
•
Rendering:
radiosity
to access texture management
to manage the images in
The images are saved in a default imp/exp folder
of the program, from which they can be moved at
any time.
Calculation of lighting engineering parameters
Print
From the drop-down menu File/Print you can access the dialog
window of project printing.
This window allows you to print the whole project and associated
images, to insert information related to the project and to choose
the elements of the project to be printed.
Notes
Moreover here the printout language and favorite printer can be
chosen.
To select the items to be printed just flag the relative boxes (the
window opens by default with all elements selected).
To visualize the graphs to be printed in the results
list, the window showing these data must remain
open in the project.
Data available for print
List of results open
in the project
List of renderings
saved in the project
Dropdown menu for
printout language
selection
Printer and project information
management keys
Pag. 31/31
To move from one window to the other just click
on the arrows situated at the bottom in the
Properties TAB.