1
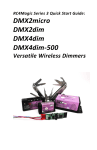
RC4Magic DMX2flkr & DMX4flkr
Wireless Dimmers with Integrated
RC4 Flkr Effects Engine
Flicker Engine Overview
The RC4 Wireless Flicker Engine is a versatile DMX-controlled tool for
creating modulating light effects. Such effects are often described as
dancing, wavering, flickering, shimmering, strobing, and as fire effects, and
candle effects. They are often used in theatre and film for the look of candle
light, welding light, fire in a barrel, simulated electrical faults or failures, the
light and shadow cast by a television screen, and much, much more.
Rather than provide preprogrammed or “canned” flicker effects, the RC4
Wireless Flicker Engine provides numerous control channels to build and finetune an infinite range of effects that can utilize a wide range of light sources.
For effect engine demonstration, an RGBA (red-green-blue-amber) LED light
is often used, and this certainly provides the widest range of different looks
from a single piece of hardware. But some specific effects are better
achieved with other sources of light. For example, a Disney Pirates of the
Caribbean effect is best done with multiple channels of simple incandescent
lamps running dimly. A bright and buzzy arc welding look is easily generated
with white and blue LEDs. Fire often looks best with red, amber, and yellow
sources, perhaps with a little bit of blue.
The primary tools provided by the RC4 Flicker Engine are Low Frequency
Oscillators (LFOs), and Random Number Generators (RNGs). These can
be used separately, or combined in various ways, to influence the output
levels of multiple dimmers. The RC4Magic DMX2flkr provides two dimmers;
the RC4Magic DMX4flkr provides four dimmers.
The Low Frequency Oscillator (LFO) generates a triangle wave, sometimes
called a saw-tooth wave. It is a signal that steadily rises and falls, over and
over again, at speeds ranging from one cycle over several seconds, up to
several cycles in a single second. When a simple LFO modulates the
brightness of a dimmer over its full range, you will see the dimmer get
brighter and brighter, reach its peak at 100%, then get dimmer and dimmer,
go completely out at 0%, then come back on and get brighter and brighter,
and so on. But it is not necessary to modulate over the full range of a
dimmer from 0 to 100% – it is usually more appealing to establish a base
level, then use the LFO to gently and subtly animate the look.
For a more natural affect, it is best if the LFO frequency is not absolutely
steady. Using a Random Number Generator (RNG) to influence the LFO
frequency, the rate of LFO rise and fall can vary over time. As we saw with
LFO modulation of brightness, this feature is usually most pleasing when
applied subtly, but it can also be used to create very sudden, extreme, and
irregular changes in speed.
The RC4 Flicker Engine provides one LFO with two outputs: normal, and
inverted. When the normal output is rising, the inverted output is falling.
They are exactly 180 degrees out of phase; they are compliments of each
other.
RNGs can also be applied directly to the brightness of dimmers. Unlike the
ebb and flow of an LFO, RNGs are quick, crisp, and shimmery. In the RC4
Flicker Engine, a stream of random numbers is generated 32 times faster
than the LFO cycles up and down. That is, the LFO frequency also affects the
frequency of RNG shimmer, but is a much faster element of the overall look.
The best way to learn how to build flicker effects is to play and experiment
with the effects engine. It certainly helps to understand what each of the
controls is actually doing, so try playing with individual controls first, and
then simple combinations of just two controls. Once you have an
understanding of how various controls influence one another, you can start to
build more complex effects that use many or all of the control channels.
Keep in mind, of course, that effects engine controls are somewhat like
colors – it’s often best if you don’t use all of them all the time.
The final level of control is from your DMX console. Because you can vary all
the control channels continuously, in real time, you don’t need to find single
flicker effect settings and hold them. You can use your console to cross-fade
between effects, or manipulate them with an additional layer of dynamic
control.
When setting up an RC4 Flicker Engine, two DMX channels must be assigned:
the Master Fader Channel, and the Controls Start Channel. The Master Fader
is any single channel. The Controls Start Channel is the first of a contiguous
series of several DMX channels.
Nothing in the flicker engine prevents you from setting the Master Fader in
the same range as the control channels. Nonetheless, it is best to avoid this
overlap – keep them separate!
You can control multiple RC4 Flicker Engine devices with the same series of
DMX channels, but have individual Master Faders for each one. This is great
for things like fire-barrel effects spread across the stage. They will all have a
similar look controlled by the same channels, but they will not be shifting and
dancing identically, because the RNG in each unit generates its own series of
random numbers. Separate master faders let you separately control the
brightness of each barrel.
Setup and Configuration
The DMX2flkr and DMX4flkr can be switched between standard dimmer mode
(identical to DMX2dim and DMX4dim) and RC4 Flicker Effects Engine mode
(DMX2flkr, DMX4flkr):
Press and release the SetA and SetB buttons simultaneously for half a
second, and the unit will restart in the alternate mode. In dimmer mode, the
startup LED sequence will be the normal end-to-end chase (see the
RC4Magic Series 2 User Manual for additional information). In flicker mode,
the indicator LEDs alternate or wobble, rather than chase.
DMX channel assignment is done using the same method as the DMX2dim
and DMX4dim – by pressing a dimmer Set button while a single channel is up
on your DMX console.
In flicker mode, the SetA button sets the Master Fader channel, and the SetB
button sets the Controls Start Channel. The rest of the controls are a
contiguous series. For the DMX2flkr, 7 control channels are used. For the
DMX4flkr, 11control channels are used.
Refer to the RC4Magic Series 2 User Manual for additional details, noting
that the dimmer curve for all RC4 Flicker Engine outputs is determined when
you set the Master Fader channel.
In dimmer mode (not flicker mode), the two or four buttons operate as usual
for a DMX2dim or DMX4dim, setting DMX channel/curve for each individual
dimmer output.
On a DMX4flkr in flicker mode, SetD will save the current flicker effect.
When the device powers up, before it receives DMX control data, it will
assume the saved look. SetC clears any flicker effect that may have been
saved. Most of the time, the saved look should be cleared so that all outputs
are off on power-up.
The best way to use the flicker engine from a smart lighting console is to
create a fixture profile based on the control channel functions:
------------------------------------------------------------
DMX2Flkr 8-Channel DMX profile:
- Master Fader (base DMX channel)
- A base level (base Control channel)
- B base level (base+1)
- LFO triangle: depth to Dimmer A, CENTER-OFF (base+2)
- LFO triangle: depth to Dimmer B, CENTER-OFF (base+3)
- LFO frequency (base+4)
- random: depth to LFO frequency (base+5)
- random: depth to A, B (base+6)
------------------------------------------------------------
------------------------------------------------------------
DMX4Flkr 12-Channel DMX profile:
- Master Fader (base DMX channel)
- A base level (base Control channel)
- B base level (base+1)
- C base level (base+2)
- D base level (base+3)
- LFO triangle: depth to Dimmer A, CENTER-OFF (base+4)
- LFO triangle: depth to Dimmer B, CENTER-OFF (base+5)
- LFO triangle: depth to Dimmer C, CENTER-OFF (base+6)
- LFO triangle: depth to Dimmer C, CENTER-OFF (base+7)
- LFO frequency (base+8)
- random: depth to LFO frequency (base+9)
- random: depth to A, B, C, and D (base+10)
------------------------------------------------------------
If all DMX control channels are at zero and you raise only the Master Fader
channel, you will see all dimmer channels slowly fading up and down. This is
because the LFO (low frequency oscillator) depth settings are off at 50%
(center off). At a DMX level of zero, LFO depth is at the maximum inverted
modulation setting. To have all channels off, you need the base dimmer
levels at zero and the LFO depth levels at 50% (center).
LFO depth is positive (normal) above center (50 up to 100%), and negative
(inverted) below center (50 down to 0%). If you send LFO positive to one
channel and LFO negative to another, those channels will cross-fade.
Another DMX channel controls the speed of the LFO.
Several independent random number generators are provided. The first one
is used to randomize the LFO frequency, causing it to behave irregularly.
The degree of this irregularity, or “natural variation”, is controlled with the
DMX channel for Random Depth to LFO Frequency.
Separate random values are used to modulate each dimmer output level.
When you add randomness to dimmers, they are each individually random,
they do not track together. That is, a different random number is applied to
each dimmer. The result is an effect sometimes referred to as “shimmer,” or
“sparkle,” controlled with the DMX channel for Random Depth to Dimmers.
The channel for LFO frequency also controls the frequency of random number
generation. New random numbers are generated 32 times faster than the
LFO triangle wave rises and falls.
Overall, this array of controls allows generation of a huge range of different
effects, from slow smooth color shifting to bright buzzy arc welding. Further
variation can be achieved by changing DMX control values in real-time.
Getting Started
1. Read and understand the RC4Magic Series 2 User Manual. It
describes the fundamentals of the underlying wireless DMX system,
and how DMX channels are assigned to RC4Magic dimmers.
2. Set the Master Fader DMX Channel:
Clear your DMX console.
Bring up a single channel, the one you want to assign as Master Fader
for an RC4 Flicker Engine device. Follow the chart in the RC4Magic
Series 2 User Manual to select a dimmer curve. In flicker mode, the
same curve will be used for all outputs on the device.
For the simplest test setup using LEDs, set DMX channel 1 to 40% (for
the ISL-Slow curve).
Press the SetA button on the RC4 Flicker Engine device, hold for half a
second, and release. The fader channel is now set, and will remain
unchanged until you choose to reassign it by repeating these steps.
3. Set the Controls Start Channel:
Clear your DMX console.
Bring up a single channel, the one you want to assign as the first RC4
Flicker Engine control channel. For a simple setup, make it the next
channel up from the Master Fader Channel. The evel of this channel
does not set a dimmer curve, and must simply be higher than 25%.
For the simplest test setup, set DMX channel 2 to 40%.
Press the SetB button the RC4 Flicker Engine device, hold for half a
second, and release. The control start channel is now set, and will
remain unchanged until you choose to reassign it by repeating these
steps.
4. Initialize the look, so that all dimmers are off. Remember than LFO
depth channels must be at 50% to be off:
a. Set the two (DMX2flkr) or four (DMX4flkr) base dimmer levels to
zero.
b. Set the two or four LFO Depth levels to 50% (for zero depth).
c. Set the LFO frequency around 50%.
d. Set both Random Depth channels to zero.
Now, you can start building a new RC4 Flicker Engine look:
Start by bringing up the base dimmer levels. If you are mixing colors, create
a base color for your effect. Keep levels in the lower 50% of the dimmer
range, leaving headroom for effect modulation.
Experiment with LFO depth to dimmers, both positive (normal) and negative
(inverted). Start with one control at a time, then move on to pairs of
controls. Be sure to experiment with LFO modulation pairs in the same
polarity (they fade up and down together) and in opposite polarity (they
crossfade).
Experiment with the LFO frequency control, from very slow color changing, to
fast strobing and flashing.
Experiment with varying amount of random depth to LFO frequency.
To initially experiment with the “shimmer” or “sparkle” effect, return all LFO
depth levels to 50% (center off). Have one or more base dimmer levels up
around 50%.
Shimmer has no effect on dimmers that are not on – a base level must be
set in order to see shimmer.
Experiment with varying degrees of Random Depth to Dimmers (A, B on the
2flkr, A, B, C, D on the 4flkr).
Experiment with LFO frequency, which also sets shimmer speed. Shimmer is
always 32 times faster than the LFO.
Synchronization
In most cases, flicker effects are more pleasing with a degree of randomness
via RNGs. Multiple units side by side and controlled by the same DMX
channels will each look a little different, thanks to independent streams of
random numbers from the separate RNGs in each device.
But sometimes an appearance of synchronization, rather than randomness,
may be desired. In this case, RNGs should not be used in the effect setup –
random depth to LFO and “shimmer” should both be at zero.
LFOs in multiple units can be synchronized, regardless of what they were
doing previously. This is done by setting all four LFO depth to dimmer
channels off (50%), and setting random to LFO off(0%). When these five
channels are in this state, the internal LFO is stopped and locked to the
midpoint of its wave. As soon as any LFO depth channel becomes non-zero
(not 50%), or the random to LFO channel changes to be non-zero (higher
than 0%), the LFO is released and begins rising at the speed determined by
the LFO frequency channel. If the random to LFO remains at zero, all the
LFOs in multiple units will restart together and track together for quite a long
time.
There is no physical synchronization between units – they simple follow the
same control channel “instructions” at the same time, with no randomness.
Due to very small inaccuracies in quartz-crystal timers, multiple units will
eventually drift apart. In most cases they will appear to be synchronized for
many minutes, even hours. In other cases – particular if temperatures and
battery voltages are different for each unit – they may drift apart more
quickly. You can combat this by routinely resynchronizing.