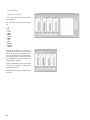
1
ers. 2
ergoline Rehabilitation System
Operator‘s Manual
201000414000 • Version 2014-04-15 / Rev 00 • English
This manual was written with the utmost care. Should you still find details that do
not correspond with the system, please let us know and we will correct the issue
as soon as possible.
We reserve the right to modify the design and technical features of the device
and are not bound by the information and illustrations provided in this manual. All
trademarks appearing in this document are trademarks of their respective owners.
Their protection is acknowledged.
No part of this manual may be reprinted, translated, or reproduced without the
manufacturer's written permission.
This manual is not subject to any change order service.
Please contact the manufacturer for the most recent version.
ergoline GmbH
Lindenstrasse 5
72475 Bitz
Germany
Phone:
Fax:
e-mail:
http:
+49-(0) 7431 98 94 - 0
+49-(0) 7431 98 94 - 128
[email protected]
www.ergoline.com
Contents
Introduction . . . . . . . . . . . . . . . . . . . . . . . . . . . . . . . . . . . . . . . . . . . . . . . . . 7
CE Marking Information . . . . . . . . . . . . . . . . . . . . . . . . . . . . . . . . . . . . . . . . . . . . . . . 7
License Terms . . . . . . . . . . . . . . . . . . . . . . . . . . . . . . . . . . . . . . . . . . . . . . . . . . . . . . . . 7
Revision History . . . . . . . . . . . . . . . . . . . . . . . . . . . . . . . . . . . . . . . . . . . . . . . . . . . . . . 8
Intended Audience . . . . . . . . . . . . . . . . . . . . . . . . . . . . . . . . . . . . . . . . . . . . . . . . . . . . 8
Stylistic Conventions . . . . . . . . . . . . . . . . . . . . . . . . . . . . . . . . . . . . . . . . . . . . . . . . . . 8
Safety Information. . . . . . . . . . . . . . . . . . . . . . . . . . . . . . . . . . . . . . . . . . . . . . . . . . . . 8
General Information . . . . . . . . . . . . . . . . . . . . . . . . . . . . . . . . . . . . . . . . . . . . . . . . . . 8
Definitions . . . . . . . . . . . . . . . . . . . . . . . . . . . . . . . . . . . . . . . . . . . . . . . . . . . . . . . . . . 9
Safety Notices . . . . . . . . . . . . . . . . . . . . . . . . . . . . . . . . . . . . . . . . . . . . . . . . . . . . . . . 9
System Requirements . . . . . . . . . . . . . . . . . . . . . . . . . . . . . . . . . . . . . . . . . . . . . . . . .11
Equipment Symbols . . . . . . . . . . . . . . . . . . . . . . . . . . . . . . . . . . . . . . . . . . . . . . . . . . 12
Intended Use . . . . . . . . . . . . . . . . . . . . . . . . . . . . . . . . . . . . . . . . . . . . . . . . . . . . . . . 12
Ers 2 System . . . . . . . . . . . . . . . . . . . . . . . . . . . . . . . . . . . . . . . . . . . . . . . . . . . . . . . . 12
Introduction . . . . . . . . . . . . . . . . . . . . . . . . . . . . . . . . . . . . . . . . . . . . . . . . . . . . . . . . 12
An overview of the key performance features of the software . . . . . . . . . . . . . . . 13
System Configuration . . . . . . . . . . . . . . . . . . . . . . . . . . . . . . . . . . . . . . . . . . . . . . . . 14
Starting the Program . . . . . . . . . . . . . . . . . . . . . . . . . . . . . . . . . . . . . . . . . 17
Patient Data > General. . . . . . . . . . . . . . . . . . . . . . . . . . . . . . . . . . . . . . . . 19
Personal Data . . . . . . . . . . . . . . . . . . . . . . . . . . . . . . . . . . . . . . . . . . . . . . . . . . . . . . . 19
Contact Data . . . . . . . . . . . . . . . . . . . . . . . . . . . . . . . . . . . . . . . . . . . . . . . . . . . . . . . 21
Physician . . . . . . . . . . . . . . . . . . . . . . . . . . . . . . . . . . . . . . . . . . . . . . . . . . . . . . . . . . . 21
Patient Data > Medical . . . . . . . . . . . . . . . . . . . . . . . . . . . . . . . . . . . . . . . 22
Therapy . . . . . . . . . . . . . . . . . . . . . . . . . . . . . . . . . . . . . . . . . . . . . . . . . . . . . . . . . . . . 22
Examinations . . . . . . . . . . . . . . . . . . . . . . . . . . . . . . . . . . . . . . . . . . . . . . . . . . . . . . . 23
Alarms. . . . . . . . . . . . . . . . . . . . . . . . . . . . . . . . . . . . . . . . . . . . . . . . . . . . . . . . . . . . . 24
Findings. . . . . . . . . . . . . . . . . . . . . . . . . . . . . . . . . . . . . . . . . . . . . . . . . . . . . . . . . . . . 25
Patient Data > Protocols
Bicycle . . . . . . . . . . . . . . . . . . . . . . . . . . . . . . . . . . . . . . . . . . . . . . . . . . . . 26
Creating a Protocol . . . . . . . . . . . . . . . . . . . . . . . . . . . . . . . . . . . . . . . . . . . . . . . . . . 26
Selecting the Protocol Type . . . . . . . . . . . . . . . . . . . . . . . . . . . . . . . . . . . . . . . . . . . 27
Protocol Type ‘SpO2-controlled’. . . . . . . . . . . . . . . . . . . . . . . . . . . . . . . . . . . . . . . . 27
Protocol Type ‘Interval HR-controlled‘ . . . . . . . . . . . . . . . . . . . . . . . . . . . . . . . . . . . 28
Protocol Type ‚Custom‘ . . . . . . . . . . . . . . . . . . . . . . . . . . . . . . . . . . . . . . . . . . . . . . . 29
Editing a Protocol . . . . . . . . . . . . . . . . . . . . . . . . . . . . . . . . . . . . . . . . . . . . . . . . . . . 30
Activating a Protocol. . . . . . . . . . . . . . . . . . . . . . . . . . . . . . . . . . . . . . . . . . . . . . . . . 30
Deleting a Protocol . . . . . . . . . . . . . . . . . . . . . . . . . . . . . . . . . . . . . . . . . . . . . . . . . . 30
Saving a Protocol as Default. . . . . . . . . . . . . . . . . . . . . . . . . . . . . . . . . . . . . . . . . . . 31
Loading a Default Protocol . . . . . . . . . . . . . . . . . . . . . . . . . . . . . . . . . . . . . . . . . . . . 31
|3
Patient Data > Protocols
Treadmill. . . . . . . . . . . . . . . . . . . . . . . . . . . . . . . . . . . . . . . . . . . . . . . . . . . 32
Creating a Protocol . . . . . . . . . . . . . . . . . . . . . . . . . . . . . . . . . . . . . . . . . . . . . . . . . . 32
Selecting the Protocol Type . . . . . . . . . . . . . . . . . . . . . . . . . . . . . . . . . . . . . . . . . . . 33
Protocol Type ‘HR-controlled’. . . . . . . . . . . . . . . . . . . . . . . . . . . . . . . . . . . . . . . . . . 33
Protocol Type ‚Custom‘ . . . . . . . . . . . . . . . . . . . . . . . . . . . . . . . . . . . . . . . . . . . . . . . 34
Editing a Protocol . . . . . . . . . . . . . . . . . . . . . . . . . . . . . . . . . . . . . . . . . . . . . . . . . . . 35
Activating a Protocol. . . . . . . . . . . . . . . . . . . . . . . . . . . . . . . . . . . . . . . . . . . . . . . . . 35
Deleting a Protocol . . . . . . . . . . . . . . . . . . . . . . . . . . . . . . . . . . . . . . . . . . . . . . . . . . 35
Saving a Protocol as Default. . . . . . . . . . . . . . . . . . . . . . . . . . . . . . . . . . . . . . . . . . . 36
Loading a Default Protocol . . . . . . . . . . . . . . . . . . . . . . . . . . . . . . . . . . . . . . . . . . . . 36
Management
Groups . . . . . . . . . . . . . . . . . . . . . . . . . . . . . . . . . . . . . . . . . . . . . . . . . . . . 37
General . . . . . . . . . . . . . . . . . . . . . . . . . . . . . . . . . . . . . . . . . . . . . . . . . . . . . . . . . . . . 37
Creating Groups . . . . . . . . . . . . . . . . . . . . . . . . . . . . . . . . . . . . . . . . . . . . . . . . . . . . . 38
Selecting the Group Type . . . . . . . . . . . . . . . . . . . . . . . . . . . . . . . . . . . . . . . . . . . . . 38
Adding Patients to a Group. . . . . . . . . . . . . . . . . . . . . . . . . . . . . . . . . . . . . . . . . . . . 38
Deleting Patients from a Group . . . . . . . . . . . . . . . . . . . . . . . . . . . . . . . . . . . . . . . . 39
Editing a Group . . . . . . . . . . . . . . . . . . . . . . . . . . . . . . . . . . . . . . . . . . . . . . . . . . . . . 39
Management > Protocols
Bicycle . . . . . . . . . . . . . . . . . . . . . . . . . . . . . . . . . . . . . . . . . . . . . . . . . . . . 40
Saving the Default Protocol . . . . . . . . . . . . . . . . . . . . . . . . . . . . . . . . . . . . . . . . . . . 40
Selecting the Protocol Type . . . . . . . . . . . . . . . . . . . . . . . . . . . . . . . . . . . . . . . . . . . 40
Protocol Type ‘SpO2-controlled‘. . . . . . . . . . . . . . . . . . . . . . . . . . . . . . . . . . . . . . . . 41
Protocol Type ‘Interval HR-controlled‘ . . . . . . . . . . . . . . . . . . . . . . . . . . . . . . . . . . . 42
Protocol Type ‚Custom‘ . . . . . . . . . . . . . . . . . . . . . . . . . . . . . . . . . . . . . . . . . . . . . . . 43
Editing the Default Protocol . . . . . . . . . . . . . . . . . . . . . . . . . . . . . . . . . . . . . . . . . . . 44
Activating the Default Protocol . . . . . . . . . . . . . . . . . . . . . . . . . . . . . . . . . . . . . . . . 44
Deleting the Default Protocol . . . . . . . . . . . . . . . . . . . . . . . . . . . . . . . . . . . . . . . . . . 44
Management > Protocols
Treadmill. . . . . . . . . . . . . . . . . . . . . . . . . . . . . . . . . . . . . . . . . . . . . . . . . . . 45
Saving the Default Protocol . . . . . . . . . . . . . . . . . . . . . . . . . . . . . . . . . . . . . . . . . . . 45
Selecting the Protocol Type . . . . . . . . . . . . . . . . . . . . . . . . . . . . . . . . . . . . . . . . . . . 45
Protocol Type ‘HR-controlled‘. . . . . . . . . . . . . . . . . . . . . . . . . . . . . . . . . . . . . . . . . . 46
Protocol Type ‚Custom‘ . . . . . . . . . . . . . . . . . . . . . . . . . . . . . . . . . . . . . . . . . . . . . . . 47
Editing the Default Protocol . . . . . . . . . . . . . . . . . . . . . . . . . . . . . . . . . . . . . . . . . . . 48
Activating the Default Protocol . . . . . . . . . . . . . . . . . . . . . . . . . . . . . . . . . . . . . . . . 48
Deleting the Default Protocol . . . . . . . . . . . . . . . . . . . . . . . . . . . . . . . . . . . . . . . . . . 48
4|
Training . . . . . . . . . . . . . . . . . . . . . . . . . . . . . . . . . . . . . . . . . . . . . . . . . . . 49
Monitoring . . . . . . . . . . . . . . . . . . . . . . . . . . . . . . . . . . . . . . . . . . . . . . . . . . . . . . . . . 49
Assigning a Patient . . . . . . . . . . . . . . . . . . . . . . . . . . . . . . . . . . . . . . . . . . . . . . . . . . 49
Removing a Patient . . . . . . . . . . . . . . . . . . . . . . . . . . . . . . . . . . . . . . . . . . . . . . . . . . 50
Assigning a Device . . . . . . . . . . . . . . . . . . . . . . . . . . . . . . . . . . . . . . . . . . . . . . . . . . . 50
Removing a Device. . . . . . . . . . . . . . . . . . . . . . . . . . . . . . . . . . . . . . . . . . . . . . . . . . . 50
Switching Devices . . . . . . . . . . . . . . . . . . . . . . . . . . . . . . . . . . . . . . . . . . . . . . . . . . . 50
Starting a Training Session . . . . . . . . . . . . . . . . . . . . . . . . . . . . . . . . . . . . . . . . . . . . 50
Ending a Training Session . . . . . . . . . . . . . . . . . . . . . . . . . . . . . . . . . . . . . . . . . . . . . 51
Changing from the Training Phase to the Recovery Phase (RP) . . . . . . . . . . . . . . . 51
Suspending Heart-Rate Control during a Training . . . . . . . . . . . . . . . . . . . . . . . . . 51
Patient Data . . . . . . . . . . . . . . . . . . . . . . . . . . . . . . . . . . . . . . . . . . . . . . . . . . . . . . . . 52
Patient Analysis . . . . . . . . . . . . . . . . . . . . . . . . . . . . . . . . . . . . . . . . . . . . . . . . . . . . . 52
Editing the Borg Value. . . . . . . . . . . . . . . . . . . . . . . . . . . . . . . . . . . . . . . . . . . . . . . . 52
Editing Effort . . . . . . . . . . . . . . . . . . . . . . . . . . . . . . . . . . . . . . . . . . . . . . . . . . . . . . . 52
ECG Display . . . . . . . . . . . . . . . . . . . . . . . . . . . . . . . . . . . . . . . . . . . . . . . . . . . . . . . . 53
Measuring Blood Pressure. . . . . . . . . . . . . . . . . . . . . . . . . . . . . . . . . . . . . . . . . . . . . 53
Adding Blood-Pressure Readings . . . . . . . . . . . . . . . . . . . . . . . . . . . . . . . . . . . . . . . 53
Marking the ECG . . . . . . . . . . . . . . . . . . . . . . . . . . . . . . . . . . . . . . . . . . . . . . . . . . . . 54
Turning the ECG Pump On. . . . . . . . . . . . . . . . . . . . . . . . . . . . . . . . . . . . . . . . . . . . . 54
Turning the ECG Pump Off . . . . . . . . . . . . . . . . . . . . . . . . . . . . . . . . . . . . . . . . . . . . 54
Training View . . . . . . . . . . . . . . . . . . . . . . . . . . . . . . . . . . . . . . . . . . . . . . . . . . . . . . . 54
Selecting the Training Protocol. . . . . . . . . . . . . . . . . . . . . . . . . . . . . . . . . . . . . . . . . 55
Management . . . . . . . . . . . . . . . . . . . . . . . . . . . . . . . . . . . . . . . . . . . . . . . . . . . . . . . 56
Patients. . . . . . . . . . . . . . . . . . . . . . . . . . . . . . . . . . . . . . . . . . . . . . . . . . . . . . . . . . . . 56
Training . . . . . . . . . . . . . . . . . . . . . . . . . . . . . . . . . . . . . . . . . . . . . . . . . . . . . . . . . . . . 56
Analysis . . . . . . . . . . . . . . . . . . . . . . . . . . . . . . . . . . . . . . . . . . . . . . . . . . . 57
Patient Analysis . . . . . . . . . . . . . . . . . . . . . . . . . . . . . . . . . . . . . . . . . . . . . . . . . . . . . 57
Overview - Trend . . . . . . . . . . . . . . . . . . . . . . . . . . . . . . . . . . . . . . . . . . . . . . . . . . . . 58
Analyzing the Training Sessions . . . . . . . . . . . . . . . . . . . . . . . . . . . . . . . . . . . . . . . . 58
Editing / Deleting a Training Session . . . . . . . . . . . . . . . . . . . . . . . . . . . . . . . . . . . . 59
Training Details. . . . . . . . . . . . . . . . . . . . . . . . . . . . . . . . . . . . . . . . . . . . . . . . . . . . . . 59
Overview - Compare . . . . . . . . . . . . . . . . . . . . . . . . . . . . . . . . . . . . . . . . . . . . . . . . . 60
Training - Single . . . . . . . . . . . . . . . . . . . . . . . . . . . . . . . . . . . . . . . . . . . . . . . . . . . . . 61
Analyzing the Training Sessions . . . . . . . . . . . . . . . . . . . . . . . . . . . . . . . . . . . . . . . . 61
Training - Compare . . . . . . . . . . . . . . . . . . . . . . . . . . . . . . . . . . . . . . . . . . . . . . . . . . 63
Analyzing the Training Sessions . . . . . . . . . . . . . . . . . . . . . . . . . . . . . . . . . . . . . . . . 63
Tools . . . . . . . . . . . . . . . . . . . . . . . . . . . . . . . . . . . . . . . . . . . . . . . . . . . . . . 64
Karvonen Formula . . . . . . . . . . . . . . . . . . . . . . . . . . . . . . . . . . . . . . . . . . . . . . . . . . . 64
Abbreviations . . . . . . . . . . . . . . . . . . . . . . . . . . . . . . . . . . . . . . . . . . . . . . . 65
|5
6|
IntroduCtIon
CE Marking inforMation
The product ERS 2 system bears the CE marking CE-0123 (notified body TÜV SÜD
Produkt Service GmbH, Ridlerstrasse 65, 80339 München, Germany) indicating its
compliance with the provisions of the Council Directive 93/42/EEC about medical
devices and fulfills the essential requirements of Annex I of this directive.
The product ERS 2 system has been assigned to class IIa in accordance with Annex
IX of the Directive 93/42/EEC.
The product fulfills the requirements of the standard EN 60601-1 “Medical Electrical Equipment, Part 1: General Requirements for Safety“ as well as of the standard
DIN EN 62304 “Medical Device Software“.
Magnetic and electrical fields are capable of interfering with the proper performance of the device. For this reason make sure that all external devices operated
in the vicinity of the equipment comply with the relevant EMC requirements.
X-ray equipment, MRI devices, radio systems, cellular telephones, etc. are possible
sources of interference as they may emit higher levels of electromagnetic radiation. Keep the equipment away from these devices and verify its performance
before use.
LiCEnsE tErMs
By installing the software, you accept the following terms:
Subject of this agreement is the granting of a license to use the software program
and the product documentation.
Ergoline GmbH grants you the personal, non-exclusive and non-transferable right
to use the software and documentation. The software and the accompanying
documentation are protected by copyright. The licensee shall comply with the
provisions of copyright law.
Ownership and all other rights to the software are retained by Ergoline GmbH. You
are not entitled to transfer the software to another computer via network or data
channel. The program and the accompanying product documentation shall not be
modified, copied or, in an altered version, merged with other software and made
accessible to third parties.
The licensee is liable to the licenser for any damage arising from the breach of the
copyright or infringement of the conditions of this agreement.
|7
rEvision History
Revision:
Date:
Comments:
1.0
2014-04-15
Applies to software version 1.0 and later
intEndEd audiEnCE
This manual is geared for clinical professionals. Clinical professionals are expected
to have working knowledge of medical procedures, practices, and terminology as
required for completing these examinations.
styListiC ConvEntions
Control keys (soft keys and hard keys) are emphasized by different styles, e.g.,
Start training or [ Create ].
safEty inforMation
General Information
This manual is an integral part of the device. It should be available to the equipment operator at all times. Close observance of the information given in the manual is a prerequisite for proper equipment performance and correct operation and
ensures patient and operator safety. Please note that information pertinent to
several chapters is given only once. Therefore, read the manual once in its entirety. Also observe the information given in the enclosed separate user manuals (e.g.,
the PC and ergometer user manuals).
To ensure maximum patient safety, the specified measuring accuracy, and interference-free operation, we recommend using only original accessories available
through Ergoline GmbH. The user is responsible if accessories from other manufacturers are used.
Ergoline GmbH is responsible for the effects on safety, reliability, and performance of the equipment, only if
· assembly operations, extensions, readjustments, modifications, or repairs are
carried out by Ergoline GmbH or persons authorized by Ergoline GmbH
· the device is used in accordance with the instructions given in this manual.
The warranty does not cover damage resulting from the use of unsuitable accessories and consumables from other manufacturers.
Always consult with Ergoline GmbH if you intend to connect equipment not mentioned in this manual.
Parts and accessories must comply with the applicable IEC 60601 safety standards and/or the configured system must comply with the collateral standard IEC
60601-1-1 "Safety requirements for medical electrical systems".
8|
safEty inforMation
General Information
Operate the equipment only with power cords certified for the country of use.
All publications reflect the equipment specifications and standards on the safety
of medical electrical equipment valid at the time of printing. All rights are reserved for devices, circuits, techniques, software programs, and names appearing
in this manual.
No part of this manual may be reprinted without written permission from
Ergoline GmbH.
© 2013 Ergoline GmbH, Lindenstrasse 5, 72475 Bitz, Germany.
Definitions
The safety information in this manual is classified as follows:
Danger
indicates an imminent hazard. If not avoided, the hazard will result in death or serious injury.
Warning
indicates a hazard. If not avoided, the hazard can result in death or serious injury.
Caution
indicates a potential hazard. If not avoided, the hazard may result in minor injury
and/or product/property damage.
Safety Notices
Explosion Hazard
The ERS 2 system is not designed for use in areas of rooms used for medical purposes where an explosion hazard may occur. Potentially explosive atmospheres may
result from the use of flammable anesthetics, skin cleansing agents or disinfectants. Furthermore, great care must be exercised when the system is used in an
oxygen-enriched atmosphere. The atmosphere is considered to be oxygen-enriched
when the room air contains more than 25% of oxygen or nitrous oxide.
Shock Hazard
Before use, verify that the equipment is in correct working order and operating
condition. Check the cables and connectors, in particular, for signs of damage. Replace damaged cables and connectors immediately, before use.
Do not expose the equipment to direct sunlight to prevent system components from
reaching inadmissible, high temperatures. The equipment has no additional protection against the ingress of humidity.
|9
safEty inforMation
Safety Information
Shock Hazard
When disconnecting the device from the power line, remove the plug from the wall
outlet first, before disconnecting the cable from the device.
Do not use multiple portable socket outlets (MPSO) to connect devices to the power
line.
If a printer is operated in the patient environment, the printer must comply with
IEC 60601 requirements or it must be a modified printer with additional protective
earth conductor (potential equalization).
All devices of a system must be connected to the same electric circuit. Devices that
are not connected to the same circuit must be electrically isolated when operated,
e.g., by means of an isolated RS232 interface (not required in the USA).
Devices may be connected to other devices or to parts of systems only when it has
been made certain that there is no danger to the patient, the operators, or the environment as a result.
In those instances where there is any element of doubt concerning the safety of
connected equipment, the user must contact the manufacturers concerned or other informed experts as to whether there is any possible danger to the patient, the
operator, or the environment as a result of the proposed combination of equipment.
Standard IEC 60601-1-1/EN60601-1-1 must be complied with in all cases.
All bicycle ergometers and treadmills connected to the system must meet
IEC 60601-1 requirements.
Liquids must not be allowed to enter the devices. If liquids have entered the devices,
the ERS 2 system must be checked by a service technician before being used again
Do not open any of the devices. There are no user-replaceable components inside
the devices.
Do not insert objects of any kind into the device. They may touch live components
and you might suffer an electric shock, cause fire, or damage the device.
Warning
Patient Hazard — For stress-test examinations, a defibrillator and a pacemaker,
regularly checked for proper functioning, must be readily accessible at all times.
Patient Hazard, Interpretation Hazard — A qualified physician must overread all
computer-generated records.
Patient Hazard — The operator must be trained in the use of the device.
Patient Hazard, Equipment Damage — Do not modify the ERS 2 system in any way.
10 |
safEty inforMation
Safety Information
Warning
Risk of Poisoning — Observe all information provided by the manufacturers of
chemical products required for the use and care of the devices. Always keep these
chemical products in their original containers to avoid any confusion which may
have severe consequences.
RF Interference — Known RF sources, such as cell phones, radio or TV stations, and
two-way radios, may cause unexpected or adverse operation of the ERS 2 system.
Check the performance before each use.
Caution
Equipment Damage — Before connecting the device to the power line, check that
the voltage and frequency ratings of your power line match the values indicated on
the device nameplate.
Equipment Damage — Make sure that viruses, malware, etc. do not infect your PC
(check USB sticks for viruses before connecting them).
Equipment Damage — Do not set up the PC or the ergometers in the direct vicinity of
a window. Rain, humidity, and sunlight may damage the equipment.
Loss of Data — Back up the program directory and the database directory (as determined during installation) every day to avoid loss of data.
Equipment Damage — Set up the device in a location which affords sufficient ventilation. The ventilation openings must not be obstructed. The ambient conditions
stated in the user manual must be ensured at all times.
Equipment Configuration — The PC should not be used adjacent to, or stacked with,
other equipment. If adjacent or stacked use is necessary, the equipment or system
should be tested to verify normal operation in the configuration in which it is being
used.
systEM rEquirEMEnts
Processor
RAM
Hard drive
Graphics card
Monitor(s)
Input devices
Interfaces
Printer
Operating system
x86 or x64 processor with 2 gigahertz (GHz) minimum
1 gigabyte (GB) RAM (32 bit), 2 gigabyte (GB) RAM (64 bit)
recommended: minimum storage capacity of 250GB
with 1 or 2 monitor outputs, depending on configuration
1920 x 1080 pixels
keyboard, mouse
1 USB interface for connection of the hardware key,
1 USB interface for connection of a printer,
1 to 16 serial interfaces for connection of the ergometers
ink jet or laser printer with USB connector
Windows XP, Windows Vista, Windows 7
| 11
EquipMEnt syMboLs
The symbols that you will find on the PC and on the ergometer are explained in
the corresponding user manuals. Text labels explain the function of all symbols
displayed on the screen.
Double-click the icon to start the program.
intEndEd usE
The ERS 2 system automatically controls up to 16 ergometers (bicycles or treadmills) and offers individual training protocols. Each phase of the training protocol
is documented, providing the therapist/physician with up-to-date information
about the patient's status, performance data, and training progress at any time.
The ergometers used must be medical ergometers that meet IEC 60601-1-1 requirements. Both bicycle ergometers and treadmills are supported.
The ERS 2 system is only designed for operation in rooms used for medical purposes. It is intended for use in rehabilitation centers, cardiology offices and fitness
centers with medical cardiac programs.
The ERS 2 system is intended to be used only by trained operators under the direct
supervision of a licensed health care practitioner on adult and pediatric patients.
Parts and accessories must comply with the applicable safety standards of the IEC
60601 series and/or the system configuration must comply with the requirements
of the standard IEC 60601-1-1 for medical electrical equipment.
Ers 2 systEM
Introduction
The role of exercise therapy as part of the rehabilitation of cardiac patients in
the follow-up treatment phase II is viewed positively by most experts, based on
decades of favorable experience.
In recent years, various studies have been able to show the positive impact of
exercise therapy on coronary patients (KELLERMANN et al., 1967; HELLERSTEIN,
1973; KÖNlG et al., 1977; HOLLMANN et al., 1983; ROST et al., 1991, among others).
Through constant advancement of new diagnostic and therapeutic methods, there
has additionally been a fundamental transformation of the rehabilitation process
of cardiology patients in the past few years. Along with the phases of early mobilization and exercise therapy, sports therapy has also taken on greater importance
today. "Early mobilization" refers to passive and active mobilization as soon as
permitted by the patient's clinical condition.
"Exercise therapy" is medically indicated and prescribed movement which is
planned and regulated by the specialist therapist, monitored together with the
physician, and performed with the patient alone or in a group.
12 |
Ers 2 systEM
Introduction
"Sports therapy" is an exercise therapy measure which uses appropriate sports
means to compensate for and regenerate disrupted physical, mental, and social
functions, prevent secondary injuries, and promote health-oriented behavior. It is
based on laws of biology and includes, in particular, pedagogical, psychological
and sociotherapeutic methods and aims to achieve lasting health literacy.
Ergometer training is used in this case, particularly in the areas of early mobilization and exercise therapy within the scope of inpatient and increasingly also in
outpatient rehabilitation in order to increase the performance capacity of cardiovascular patients.
As studies have been able to show, the performance capacity and thus also the
quality of life can be significantly improved even in patients with heart failure by
selecting an appropriate form of training (interval training).
The increased requirements with regard to efficient work but also quality assurance and complete documentation ("efficiency monitoring") of the training
performed with all acquired data can, however, only be met by an appropriately
designed ergometer training system.
The development of the new ergoline ERS 2 rehabilitation system was able to
draw on the experience of more than 250 installed ergoline rehabilitation systems. Through intensive collaboration with many users, therapists, sports scientists, and physicians, a new, modular system for controlled ergometer training was
developed which meets all of the requirements listed. The PC software controls
the patients' entire predefined training protocols, simultaneously documents all
relevant data (e.g., ECG, heart rate, training data) and thus frees therapists from
routine tasks, allowing them to focus on patient care. But even with the training
device itself, the ergoselect Reha ergometer, the focus is on the patient. Options for modular expansion and upgrades allow the equipment to be adapted
to increasing demands (e.g., automatic blood-pressure measurement, options for
adjusting the saddle, etc.).
An overview of the key performance features of the software
· Control of up to 16 ergometers or treadmills
· Clear display and intuitive operation
· Integrated patient and analysis database
· Admission of new patients possible even while a training session is in progress
· The most important data of all patients are always visible
· Access at any time to all relevant additional information
(even while a training session is in progress)
· Patient data, diagnosis, previous examinations
· ECG trends
· Training sessions stored earlier
· Comparison with other training sessions of the same patient
· Acquisition of the patient's complete diagnosis allows optimal creation, monitoring, and adaptation of individual training protocols
| 13
Ers 2 systEM
An overview of the key performance features of the software
· Comprehensive individual training protocols for each patient
· Constant load
· Constant pulse
(the software controls the ergometer load such
that the patient’s heart rate is constantly
kept at a defined level)
· Interval training
· Universal warmup and recovery phase definition
· The therapist can change the training parameters directly at any time
· Group training (all patients start at the same time)
· Individual training (patients come when desired and train as long as desired)
· Immediate printout of a patient’s current ECG is possible at any time
Quality assurance
· Full documentation of the complete training session
· Storage of all data recorded during the training session
· Full-disclosure ECG
(the ECGs of all patients and all training sessions are stored)
System Configuration
The central component of the ERS 2 system is a PC with an MS Windows operating system and special software which runs the training programs. The training
ergometers are connected to the PC system via control lines. All data are shown
on 1 or 2 large TFT monitors; up to eight patients can be displayed and monitored
on each monitor. For ECG monitoring, the ergometers are equipped with single-channel ECG amplifiers, whose signals are transmitted to the PC via the serial
interfaces. In addition, automatic blood-pressure measurement can be integrated
in the training protocols if the ergometers are equipped accordingly.
up to 16 ergometers
adaptor
17" TFT monitor
Printer
CD burner (archive)
14 |
PC system
| 15
16 |
starting tHE prograM
Start the program by
double-clicking the icon.
The initial screen is displayed.
ManagEMEnt
training
anaLysis
Configuration
Exit
ManagEMEnt
In the Management window, you will find
the patient database with these tabs:
patiEnts
groups
protoCoLs
From some of the tabs you can access
further sub-categories which will be explained in detail on the following pages.
| 17
ManagEMEnt
patiEnts
This is a list of all patients stored in the
database with their name, ID, and SSN
(social security number).
The Find function allows you to conveniently access any patient in the database. Entering the first characters of a
patient name or of the ID (highlighted
yellow) is sufficient. The search function
returns all patients matching the search
criteria.
With [ Create ] you can add a patient to
the database.
If you double-click an existing entry in
the list or click the entry (highlighted
blue) and then the [ Edit ] button, the
window Patient Data - General - Personal Data opens.
18 |
patiEnt data > gEnEraL
pErsonaL data
· Patient Data
At this point in the program, patients are
added to the database. Type the patient's
personal data such as last name and first
name in the appropriate text boxes.
Mandatory fields are identified with an
asterisk *. You can activate the text boxes by clicking them or you can press the
TAB key [ ] to navigate between the
fields.
If boxes are left blank or are only partially filled, they turn red when you click the
[ Save ] button.
A warning will be displayed. Check all
entries and make changes where appropriate. Confirm by clicking [ Save ].
The patient's picture can be added with
the [ Camera ] (web cam) or with the
[ File ] button (as a BMP, PNG, JPG, or GIF
file). With the [ Delete ] button, you can
remove the picture.
The date of birth is entered in the form
of digits, separated by blanks or periods
(DD [ space bar ], MM [ space bar ], YYYY).
With the drop-down arrow
you open
the menu for selection of the gender
(male or female). As an alternative, you
can place the cursor in the text box and
type the initial letter(s) of the word (for
example, m for male).
Weight and height can be entered directly into the appropriate boxes. You
or the
can use the arrow buttons
keys [ ] [ ] on the keyboard to increase
or decrease the value.
Add options to ethnicity and language
via the
button. Enter a designation
(name) and click [ OK ]. When you click
the arrow button , you can insert an
option from the drop-down list. Each
new entry will be appended to the list.
| 19
patiEnt data > gEnEraL
pErsonaL data
· Chip Card
Via Standard [ Write ] you save the data
to the chip card. Via Extended [ View ] you
can review the entered data once more.
With [ Format ] you prepare data for their
first use or delete the data on the chip
card.
· Remark
Remarks concerning the patient or particular conditions can be entered in
this text box. After you click the [ Save ]
button, the entries will be saved to the
database. With [ Close ], your entries will
be discarded.
A warning will be displayed. Click [ Yes ] to
save the entries, or click [ No ] to exit the
menu without saving.
New entries are always adopted via the
button. If the entry already exists in
the list, a warning will be displayed: The
input is not unique. This prevents double
entries in the database.
With the [ Close ] button you always exit
the current level and return to the parent
menu.
Click the [ Exit ] button to return to the
initial screen.
20 |
patiEnt data > gEnEraL
ContaCt data
· Patient Contact Data
· Emergency Contact Data
Enter address, names, etc. on this screen.
These inputs are optional.
State, Country, or Relation are added via
the
button. Type a name and save it
with [ OK ]. The new entries will be added
to the drop-down list. Click the [ Save ]
button to save your entries, or click
[ Close ] to exit the contact data.
patiEnt data > gEnEraL
pHysiCian
· General Practitioner
· Medical Specialist
Enter the physician's last name, first
name, title, etc. (via the combo box) into
the appropriate fields.
button, you add a
By clicking the
physician to the database. In the new
window, fill out all mandatory fields
(identified with an asterisk *).
The medical specialty can be added by
clicking the
button. Click [ OK ] to
save the medical specialty. Clicking [ OK ]
again will add the physician to the dropdown list. Click [ Save ] to finish the procedure.
| 21
patiEnt data > MEdiCaL
tHErapy
· Diagnoses
· Medications
· Remark
This screen accommodates all fields for
entry of the diagnosis, the medications,
and any remarks. This information is essential for the therapist. Existing medical
findings and / or instructions for the use
of medications are adopted with [ Create ].
The Create/edit diagnosis or Create/edit
medication window opens.
If you select Type
, another window
with the title Create/edit diagnosis type
or Create/edit medication type opens.
Specify the type in the Name text box
and click [ OK ] to close the window. After
you click the [ OK ] button once more, the
type will be added to the drop-down list.
All entries are saved with [ Save ]. With
[ Close ] you exit the menu.
22 |
patiEnt data > MEdiCaL
ExaMinations
· Exercise ECG
· Echocardiogram
· Ergospirometry
· Remark
You will find a number of different entry fields. Enter values for HR at rest,
BP at rest, etc.
Use the arrow buttons
or [ ] [ ]
on the keyboard to change values.
With the drop-down arrow
you can
choose the training device. When the
text box is active (blue), you can select
the device by typing the first letter b for
the bicycle and t for the treadmill.
If you click the [ Edit ] button in the
Echocardigram or Ergospirometry pane,
another window opens. Enter all relevant
data and click [ OK ] and [ Save ] to close
the window.
If data were entered for these items, a
date in a gray text box will be displayed.
Additional information can be entered in
the Remarks text box.
| 23
patiEnt data > MEdiCaL
aLarMs
· Heart Rate
· Blood Pressure
· SpO2
· Bicycle
· Treadmill
It is recommended to enter all values
concerning the patient's condition at the
beginning of the physical therapy.
The settings for bicycle and treadmill
entered here override the settings in the
different protocols. The action selected
in the Heart Rate, Blood Pressure and
SpO2 panes will be performed.
The action determines how the training
session continues if a patient's parameter values exceed or fall below the individual alarm limits / ranges.
· None
the training continues (alarm is ignored)
· Alarm
initiates visual and audible signals, refer to “Training Monitoring” on page
49.
· Recover
the patient enters the recovery phase
· Terminate
the training session will immediately be
terminated
Click the drop-down arrow and select
an option from the list box. As an alternative, you can click in the text box and
type the first letter from the keyboard or
choose an option with the [ ] [ ] keys.
Save the selection with [ Save ].
24 |
patiEnt data > MEdiCaL
findings
Use this space to document findings or
results concerning the patients.
Frequently used phrases can be assigned
to the buttons on the right with [ Edit ].
The Findings text samples dialog opens.
Use the buttons [ Insert before ] or
[ Insert after ] to define the position of
the button in the list (for example, after
[ Signature ]).
Assign a unique name and create your
text sample by manual inputs or by using the placeholders (System , Patient
, Training ), and then click [ Insert ].
When you finally confirm your input with
[ OK ], you return to the Findings window.
The text sample you created appears as
a button.
The text samples corresponding to the
buttons can be modified and supplemented. Click [ Edit ] and select the button you want to edit (highlighted blue).
Modify the text and click [ OK ] to close
the window.
To emphasize text blocks or paragraphs,
highlight them with the cursor or by double-clicking. Select the font, character
size, and style (bold, italic, underlined).
Editorial changes in the findings text can
be entered directly in the text box. Then
click [ Save ] to save the entry.
| 25
patiEnt data > protoCoLs
biCyCLE
The graphic shows relevant information
such as:
- training heart rate
- warmup phase
- training duration
- blood-pressure measurement
- load control
- recovery phase
The Protocol drop-down list that you
open with the arrow button shows all
protocols that you configured. You can
configure a number of protocols for a
patient and save them.
The text below explains how to configure patient-specific training protocols. It
is very easy to define the exact training
parameters.
· Warmup
· Increase
· Training
· Decrease
· Recover
Creating a Protocol
A new protocol is set up with [ Create ].
Assign a name (for example, Protocol 1)
and insert a protocol type. Depending on
the type, additional parameters have to
be specified.
The protocol just created is saved with
[ Apply ]. With [ Discard ], all entries will be
lost.
The new protocol will be included in the
list.
26 |
patiEnt data > protoCoLs
biCyCLE
Selecting the Protocol Type
You can choose from various protocol
types:
· Constant Workload
· HR-controlled
· SpO2-controlled
· Interval
· Interval (HR-controlled)
· Custom
· Constant Workload
permanent load without interruptions
at a constant intensity
· HR-controlled
the load controls the predefined training heart rate
· SpO2-controlled
the SpO2 value is the basis for optimally
correcting the load to the defined value
· Interval
short, strenuous exercise intervals alternating with short recovery phases
· Interval (HR-controlled)
the training workload is adjusted on the
basis of the measured heart rate
· Custom
describe custom-configured training
sessions by specifying step types
Protocol Type ‘SpO2-controlled’
In the Training pane of this protocol,
you will find the Duration [min] and the
Load [W] as well as the Limit [%] and the
Threshold [%]. At Limit [%], enter the
lower SpO2 value, at Threshold [%], enter
the difference to the upper SpO2 value.
If the oxygen saturation drops below the
set limit value, the exercise load will be
adjusted accordingly.
| 27
patiEnt data > protoCoLs
biCyCLE
Protocol Type ‘SpO2-controlled’
Click [ Extended ] to open the SpO2 control window. In this window you define
the parameters for the SpO2-controlled
exercise.
The settings under Workload Reduction
define how the current SpO2 value will
be controlled. If the SpO2 value is below
the limit value for the entire duration of
the Delay [s], the load will be reduced
once.
Then the Workload Control will take over.
These settings determine the intervals
for subsequent checks of the oxygen
saturation. The load will be increased or
decreased depending on how much the
measured oxygen saturation deviates
from the limits.
Entries can be made as absolute or relative values with respect to the training
load.
If you do not specify any values, the system will use the preset defaults.
Protocol Type ‘Interval HR-controlled‘
In the Training pane of this protocol, you
will find the [ Extended ] button which
leads you to the interval HR control with
the Workload Control.
Under Workload Control, you define the
permitted deviation of the heart rate at
Threshold [1/min] and the time interval
at Delay [s]. If the measured heart rate
differs for the entire duration, the load
will be corrected.
At Type, you define the parameters for
modification of the workload (Absolute
or Relative).
28 |
patiEnt data > protoCoLs
biCyCLE
Protocol Type 'Custom'
Additional entries are mandatory for
custom protocols. With [ Insert before ]
or [ Insert after ] you define the first step
type. Your choices are:
· constant (absolute),
the training workload is kept at a constant level for the specified duration
· constant (relative),
the load value depends on the previous
step, the load is increased or decreased
by the entered value
· Ramp (absolute),
the training load increases continuously for the duration
· Ramp (relative),
the load value depends on the previous
step, the load is continuously increased
or decreased by the entered value
Enter the duration and training
load for each step. If you select the
blood-pressure option (BP)
, a
blood-pressure measurement will take
place.
Additional step types can be added
with [ Insert before ] and [ Insert after ].
With [ Up ] and [ Down ] you change the
sequence. As an alternative, you can select a row in the table (highlighted blue)
and drag it to its appropriate position.
[ Remove ] allows you to delete a step.
If the created steps are to be used as
exercise phases (without warmup and
recovery), highlight one step or several
consecutive steps. Then click Training
under [ Extended ]. The steps are now
marked as training steps, identified with
the X mark in the Trng. column.
| 29
patiEnt data > protoCoLs
biCyCLE
Protocol Type ‘Custom’
Repeat under [ Extended ] allows you to
copy one step or multiple steps. The copied steps will be appended to the existing
steps.
With [ Edit ] you can change the duration
and load of individual or of all steps.
Highlight the steps you would like to
change and enter the value in the appropriate field or by means of the arrow
keys
. When you select [ Apply ],
the Load (abs. [W]/rel. [%]) and/or the
Duration (abs. [s]/rel. [%]) will change by
the entered value. Close the window by
selecting [ Apply ] again.
Editing a Protocol
To edit or reconfigure an existing protocol, select the protocol, and then click
[ Edit ]. The parameter fields are populated
with the set standard values. Edit these
values and exit the menu with [ Apply ].
Activating a Protocol
When you click [ Extended ] and then
choose Activate, a dialog window will
be displayed. If you agree and click [ Yes ],
the protocol will be activated, which is
marked by an asterisk *. This protocol is
now the patient's Training Protocol.
Deleting a Protocol
Display the protocol that is not needed
any more. Under [ Extended ], select Delete and then confirm the question asked
in the dialog window with [ Yes ] to delete
the protocol.
Please note that it is not possible to delete an active protocol!
30 |
patiEnt data > protoCoLs
biCyCLE
Saving a Protocol as Default
At this point you can define one of the
protocols as the Default. Having entered
the protocol name, protocol type, etc,
you click [ Extended ] and choose Save
def..
The default protocols can be viewed and
edited
· on the Management Protocols tab,
see “Bicycle Saving the Default Protocol” on page 40. The protocols are
very flexible and can be applied to other
patients as templates.
Loading a Default Protocol
Created default protocols can be loaded
via [ Create ], [ Extended ], Load def..
Choose your default protocol in the next
window. Double-click or click [ OK ] and
[ Apply ] to add the default protocol to
the patient's protocol list. All parameters
of this protocol can now be adapted to
the patient's needs and then you can Activate the protocol.
| 31
patiEnt data > protoCoLs
trEadMiLL
The illustration shows relevant information such as:
- training heart rate
- warmup phase
- training duration
- blood-pressure measurement
- speed and slope
- recovery phase
Under Protocols, you will find the Treadmill Default* protocol. This is a preconfigured protocol. More than one protocol
can be assigned to a patient.
The description below explains the configuration of custom training protocols.
All parameters can be defined easily and
accurately.
· Warmup
· Increase
· Training
· Decrease
· Recover
Creating a Protocol
With [ Create ] you configure a new protocol. Enter a protocol name (for example, Protocol 1) and select a protocol
type. Specify all required criteria.
Save the protocol with [ Apply ] or delete
all entries with [ Discard ].
By saving the protocol, you add it to the
drop-down list of protocols.
32 |
patiEnt data > protoCoLs
trEadMiLL
Selecting the Protocol Type
These are the protocol type choices:
· Constant Workload
· HR-controlled (Speed)
· HR-controlled (Slope)
· HR-controlled
· Custom
· Constant Workload
permanent load without interruptions
at a constant intensity
· HR-controlled (Speed)
the predefined training heart rate is
achieved via the speed
· HR-controlled (Slope)
the predefined training heart rate is
achieved via the slope
· HR-controlled
the predefined training heart rate is
achieved both via the speed and the
slope
· Custom
use individual step types to configure
personalized training sessions
Protocol Type ‘HR-controlled’
With this protocol, the speed regulation
for the training phase always starts with
a slope setting of 0. The slope will be increased only if the heart rate cannot be
achieved via the speed during the training phase.
| 33
patiEnt data > protoCoLs
trEadMiLL
Protocol Type 'Custom'
Additional entries are mandatory for
custom protocols. Define the first step
with [ Insert before ] or [ Insert after ] and
choose the step type:
· constant (absolute),
the training workload is kept at a constant level for the specified duration
· constant (relative),
the load value depends on the previous
step, the load is continuously increased
or decreased by the entered value
· Ramp (absolute),
the training load increases continuously for the duration
· Ramp (relative),
the load value depends on the previous
step, the load is continuously increased
or decreased by the entered value
Enter the duration, speed, and slope for
each step. If you select the blood-pressure option (BP)
, a blood-pressure
measurement will take place.
Additionally, you can use [ Insert before ]
or [ Insert after ] to add further step types.
You change the order of steps with [ Up ]
and[ Down ] or by drag-&-drop.
If one step or more are to be used as
exercise phases (without warmup and
recovery), highlight these steps. Then
select Training under [ Extended ]. The
steps are now marked with an X in the
Trng. column.
Steps can easily be copied with Repeat
under [ Extended ].
Save the custom protocol with [ Apply ].
34 |
patiEnt data > protoCoLs
trEadMiLL
Protocol Type ‘Custom’
With [ Edit ] you can modify the duration
(abs. [s]/rel. [%]), the speed (abs. [km/h]/
rel. [%]) as well as the slope (abs. [%]/
rel. [%]) of the steps. Highlight the steps
you want to modify and enter a value in
the appropriate field using the keyboard
or the arrow keys
. When you click
[ Apply ], the modifications will be adopted. Clicking [ Apply ] again will save the
modifications.
Editing a Protocol
If you wish to modify a protocol, you can
do so at any time with [ Edit ]. Select a
protocol, perform the changes and conclude your inputs with [ Apply ].
Activating a Protocol
To Activate a protocol, click [ Extended ].
If you click [ Yes ] in the new window,
the protocol becomes active, which is
marked by an asterisk *. This protocol is
now the patient's Training Protocol.
Deleting a Protocol
To delete protocol you must first call it
up. Then select Delete via [ Extended ].
If you exit the dialog with [ Yes ], the protocol will be deleted; if you choose [ No ],
it remains available for future use.
Please note that it is not possible to delete an active protocol!
| 35
patiEnt data > protoCoLs
trEadMiLL
Saving a Protocol as Default
Frequently used protocols can be saved as
the Default protocol. Select [ Extended ]
Save Def. The default protocols can be
edited
· on the Management Protocols tab,
see “Treadmill Saving the Default Protocol” on page 45.
The protocols are very flexible and can
be applied to other patients as templates.
Loading a Default Protocol
Existing Default Protocols can be opened
via [ Create ], [ Extended ], Load Def..
The existing default protocols are shown
in the next window. Select the protocol, then click [ OK ] and [ Apply ] or double-click to transfer the Default Protocol
(e.g., Protocol 1) to the patient's list of
protocols. Then you can adapt the protocol parameters to this patient and activate it with the Activate button.
36 |
ManagEMEnt
groups
On this tab you configure different training groups for your patients.
The illustration shows an overview of
existing groups with these group details:
- Name
- Type
- Number of patients (Pat. Cnt.)
- Maximum number of patients
(Pat. Lim.)
The Find text box allows you to search
for existing groups. After you type the
initial letters of the group name (highlighted yellow) into the text box, the
group matching the criteria will be displayed.
With [ Create ] you create a new group.
By selecting a group (highlighted blue)
and clicking the [ Edit ] button or with
a double-click you open the tab Group
Data - General.
group data
gEnEraL
· Group Patients
· System Patients
Under Group Data - General you first
find all patients belonging to a group,
followed by the system patients.
Via the Find text box, you can search for
a specific patient.
drop-down list, you
From the Group
can select a group to view only the patients of that group.
| 37
group data
gEnEraL
Creating Groups
To configure a new group, go to Management - Groups and click the [ Create ]
button. First enter the name (e.g., Group 1),
the type and, if needed, the patient limit.
Selecting the Group Type
You can choose between:
· Assignment and
· Arrangement.
Assignment means that you assign a
specific training device to a particular
patient. You can change the order with
the [ Up ] and [ Down ] buttons.
The option Arrangement allows you to
assign the patients consecutively to free
training stations.
Adding Patients to a Group
After you created a group, you can add
patients to this group. To do so, select
a system patient (highlighted blue) and
then click [ Add ]. Add more patients as
described above or by Drag & Drop (drag
the patient name to a training station).
Click the [ Save ] button to save the group.
38 |
group data
gEnEraL
Deleting Patients from a Group
To delete a patient, click the patient
name (highlighted blue) and then click
[ Remove ]. As an alternative you can double-click the name of a group patient to
delete it.
To remove all patients of a group at once,
click the [ Empty ] button.
Editing a Group
If you wish to edit a group, highlight the
group name by double-clicking or by
selecting the group via Management Groups and click the [ Edit ] button.
Change the data as appropriate and terminate the procedure with [ Save ].
| 39
ManagEMEnt > protoCoLs
biCyCLE
On the Management - Protocols - Bicycle tab, you define protocols for bicycle
exercise tests for multiple uses. The window shows the exercise test parameters,
such as:
· Warmup
· Increase
· Training
· Decrease
· Recovery
Saving the Default Protocol
The system offers two methods for saving Protocols as Defaults:
· on the Management - Protocols tab
and
· on the Patient Data - Protocols tab
see “Bicycle Saving a Protocol as Default” on page 31.
On the Management - Protocols tab, you
create a Default Protocol with [ Create ].
In the new window, enter all necessary
data, such as the name (Protocol 1, for
example), the type, etc. Save the entries
with [ Apply ].
Selecting the Protocol Type
These are the protocol types that you
can choose:
· Constant Workload
· HR-controlled
· SpO2-controlled
· Interval
· Interval (HR-controlled)
· Custom
40 |
ManagEMEnt > protoCoLs
biCyCLE
Selecting the Protocol Type
· Constant Workload
permanent load at a constant intensity
without interruptions
· HR-controlled
the load controls the predefined training heart rate
· SpO2-controlled
the training workload is controlled to
ensure that the SpO2 value will not
permanently drop below the lower limit
· Interval
short, strenuous exercise intervals alternating with short recovery phases
· Interval (HR-controlled)
the training workload is adjusted on the
basis of the measured heart rate
· Custom
use this option to define your own
training session by means of different
step types
Protocol Type ‘SpO2-controlled‘
In the Training pane, you have the parameters Limit [%] and Threshold [%].
At Limit [%], enter the lower SpO2 value,
at Threshold [%], enter the difference to
the upper SpO2 value.
If the oxygen saturation drops below the
set limit value, the training workload will
be adjusted accordingly.
Click [ Extended ] to open the SpO2 control window. In this window you define
the parameters for the SpO2-controlled
exercise.
First of all, the current SpO2 value is
checked once on the basis of the values
entered under Workload Reduction. If
the SpO2 value is below the limit for the
entire duration of the delay period [s],
the load will be reduced once.
| 41
ManagEMEnt > protoCoLs
biCyCLE
Protocol Type ‘SpO2-controlled‘
Subsequently, the SpO2 value is checked
on the basis of the Workload Control parameters. If another deviation is detected, the training load will automatically
be adjusted.
Entries can be made as absolute or relative values with respect to the training
load.
If you do not enter any values in the SpO2
Control window, the system will use the
preset defaults.
Protocol Type ‘Interval HR-controlled‘
In the Training pane click [ Extended ] to
open the Interval HR Control window
with the Workload Control parameters.
In this window, enter the permitted deviation at Threshold [1/min] and the time
interval at Delay [s]. If the heart rate
deviates for the entire time interval, the
workload will be adjusted accordingly.
At Type, you determine the nature of the
workload change: absolute or relative.
42 |
ManagEMEnt > protoCoLs
biCyCLE
Protocol Type 'Custom'
Various training steps can be configured
for this protocol type. With [ Insert before ]
or [ Insert after ] you define the first step
and choose a step type:
· constant (absolute),
the training workload is kept at a constant level for the specified duration
· constant (relative),
the load value depends on the previous
step, the load is increased or decreased
by the entered value
· Ramp (absolute),
the load increases continuously for the
duration of the training
· Ramp (relative),
the load value depends on the previous
step, the load is continuously increased
or decreased by the entered value
Enter the duration and load for each step.
If a blood-pressure measurement is to be
performed, select
the blood-pressure
option.
Additional steps can be added with
[ Insert before ] and [ Insert after ]. You can
change the order of the steps with [ Up ]
and [ Down ]. As an alternative, you can
select the step (highlighted blue) and
drag it to its appropriate position.
If the created steps are to be used as
training phases (without warmup and
recovery), highlight one step or several consecutive steps. Then choose
[ Extended ] and Training. The steps are
now marked as training steps with an X
in the Trng. column.
With Repeat in the [ Extended ] menu,
you can copy step types.
| 43
ManagEMEnt > protoCoLs
biCyCLE
Protocol Type ‘Custom’
With [ Edit ] you can change the duration
and load of the steps. Mark individual or
consecutive steps (highlighted blue) and
enter the values for Duration (abs. [s]/
rel. [%]) or Load (abs. [W]/rel. [%]) using the keyboard or the arrow buttons
. Select [ Apply ] to adopt the new
values. To close the window, click [ Apply ]
once more.
Editing the Default Protocol
To edit a Default Protocol click [ Edit ].
Edit the settings and close the window
with [ Apply ]. The changes will be effective from now on.
Activating the Default Protocol
You activate a Default Protocol by clicking [ Extended ] and Activate. Answer the
question in the next window with [ Yes ].
The Default Protocol is now active which
can be recognized by the asterisk *.
Deleting the Default Protocol
To delete a Default Protocol, click
[ Extended ] and select Delete.
If you confirm the command with [ Yes ],
the protocol will be deleted. It is no longer available for selection.
Please note that it is not possible to delete an active protocol!
44 |
ManagEMEnt > protoCoLs
trEadMiLL
On the Management - Protocols Treadmill tab, you define general Default
Protocols. The following parameters are
presented for configuration:
· Warmup
· Increase
· Training
· Decrease
· Recovery
Saving the Default Protocol
The program allows you to create and
save Default Protocols (as templates)
· on the Management - Protocols tab and
· on the Patient Data - Protocols tab
see “Treadmill Loading a Default Protocol” on page 36.
The Default Protocols can be swiftly
transferred to other patients in the system; various settings need to be entered
only once.
On the Management - Protocols tab, you
create Default Protocols with [ Create ].
In the new window, enter all necessary
data, such as the name (Protocol 1, for
example), the type, etc. Save the entries
with [ Apply ].
Selecting the Protocol Type
At Type, you can choose from various
options:
· Constant Workload
· HR-controlled (Speed)
· HR-controlled (Slope)
· HR-controlled
· Custom
| 45
ManagEMEnt > protoCoLs
trEadMiLL
Selecting the Protocol Type
· Constant Workload
permanent load without interruptions
at a constant intensity
· HR-controlled (Speed)
the predefined training heart rate is
achieved via the speed
· HR-controlled (Slope)
the predefined training heart rate is
achieved via the slope
· HR-controlled
the predefined training heart rate is
achieved both via the speed and the
slope
· Custom
use individual step types to configure
personalized training sessions
Protocol Type ‘HR-controlled‘
With this protocol, the speed regulation
for the training phase always starts with
a slope setting of 0. The slope will be increased only if the heart rate cannot be
achieved via the speed during the training
phase.
46 |
ManagEMEnt > protoCoLs
trEadMiLL
Protocol Type 'Custom'
This protocol type allows you to configure your own training steps. With
[ Insert before ] or [ Insert after ] you define
the first step and choose a step type:
· constant (absolute),
the training workload is kept at a constant level for the specified duration
· constant (relative),
the load value depends on the previous
step, the load is increased or decreased
by the entered value
· Ramp (absolute),
the load increases continuously for the
duration of the training
· Ramp (relative),
the load value depends on the previous
step, the load is continuously increased
or decreased by the entered value
Enter the duration, speed, and slope for
each step. A blood-pressure measurement will be performed when you select
the blood-pressure option.
Click [ Insert before ] or [ Insert after ] to
add additional steps. You can change the
order of the steps with [ Up ] and [ Down ].
As an alternative, you can select the step
(highlighted blue) and drag it to its appropriate position.
If the created steps are to be used as
exercise phases (without warmup and
recovery), highlight one step or several consecutive steps. Then choose
[ Extended ] and Training. The steps are
now marked as training steps with an X
in the Trng. column.
| 47
ManagEMEnt > protoCoLs
trEadMiLL
Protocol Type ‘Custom’
Via [ Extended ] and Repeat you can easily copy the step types.
With [ Edit ] you can modify the duration, speed, and slope of individual or of
all steps. Highlight the steps you want
to modify (they turn blue) and enter
a value for Duration (abs. [s]/rel. [%]),
Speed
(abs. [km/h]/rel. [%])
and/or
Slope (abs. [%]/rel. [%]). When you click
[ Apply ], the modifications will be adopted. To close the window, click [ Apply ].
Editing the Default Protocol
To edit a Default Protocol click [ Edit ].
Edit the settings and close the window
with [ Apply ]. The changes will be effective from now on.
Activating the Default Protocol
You activate a Default Protocol by clicking [ Extended ] and Activate. Answer the
question in the next window with [ Yes ].
The Default Protocol is now active which
can be recognized by the asterisk *.
Deleting the Default Protocol
To delete a Default Protocol click
[ Extended ] and select Delete.
When you click [ Yes ], the protocol will be
removed and is no longer available.
Please note that it is not possible to delete an active protocol!
48 |
training
Monitoring
The overview presents the different areas
in the form of tabs:
Monitoring
Training station
ManagEMEnt
patiEnts
training
From this screen you start training sessions, assign patients, and review training data. If the measured values exceed or
drop below the preset limits, the system
emits an audible and visual alarm (in the
illustration: training station 01) to allow
the user (physician, therapist) to respond
promptly to the problem. You silence the
signal by clicking the red button.
Area 1
Area 2
Area 3
All settings can be modified even while
the training is in progress. These changes
affect the individual patient or this particular training station. On this screen
you can access three areas. With a right
mouse click in one of these areas, you
open the shortcut menu.
Assigning a Patient
Right-click a training station and select
Assign Patient.
In the following window, highlight a patient and click [ OK ]. As an alternative,
you can double-click the patient name.
The correspondence between patients
and training devices can be swiftly
changed by dragging the patient name
to another training station (not during a
training session).
| 49
training
Monitoring
Removing a Patient
To remove a patient, right-click the command Remove Patient: the patient will
immediately be deleted.
Please note that it is not possible to
remove a patient while a training is in
progress!
Assigning a Device
To assign a monitoring / training device
to a training station, right-click and
select the Assign Mon. Device/Assign
Trng. Device. Then select the appropriate device in the window that opens and
confirm your selection with [ OK ].
Removing a Device
Select Remove Mon. Device/Remove
Trng. Device from the shortcut menu to
disconnect the device.
Switching Devices
With Switch Mon. Device/Switch Tra.
Device, you can exchange monitoring
and training devices. Select another device and close the window with [ OK ].
Starting a Training Session
To start an individual training session,
choose the Start Training command from
the shortcut menu. The screen displays
all relevant training data.
The values for HR, THR (in area 2) and the
duration of a training session (in area 3)
are shown.
50 |
training
Monitoring
Starting a Training Session
The difference between HR and THR is
graphically represented by three elements. A minor deviation is indicated
yellow, no deviation is indicated by a
green symbol, a major deviation is indicated red. The colored symbols appear on
the left if the value is too low and on the
right if the value is too high.
The length of the bar represents the duration of the activity (completed duration,
overall duration, remaining duration).
A protocol can be edited at any time. By
double-clicking the training graph you
can reconfigure the protocol (or via the
shortcut menu). Modify the protocol and
confirm the procedure with [ Apply ].
Ending a Training Session
To terminate a training session, press
the right mouse button and select Stop
Training from the shortcut menu.
Changing from the Training Phase to
the Recovery Phase (RP)
From the actual exercise phase, you can
choose Change trng. to RP from the
shortcut menu to initiate the recovery
phase for the patient. The workload is
reduced and the recovery phase starts
(as configured in the settings in Patient
Data - Protocols).
Suspending Heart-Rate Control
during a Training
When working with a HR-controlled
protocol, you can suspend the heartrate control with the command Suspend
HR-ctrld trng. from the shortcut menu
during the training (which is defined in
the protocol). The training continues
with the current workload.
| 51
training
Monitoring
Patient Data
Via the shortcut menu (in area 1), you
go to the Patient Data, while all training
stations and ECGs remain displayed on
the right side.
With [ Patients ], Patient Data and selection of a patient, you also reach the
Patient Data window. The shortcut menu
is available here, too.
Area 1
Patient Analysis
By selecting Patient Analysis from the
shortcut menu (in area 1), you display the
overview of all analyses.
With [ Print ] you can print an overview
(diagram, activities and report), with
[ Export ] you create a CSV file (comma
separated values, default storage path
C: \ ers2 \ ers2exchange).
Editing the Borg Value
Right-click (in area 1) to edit the Borg
value either by typing it into the text box
or by using the arrow buttons
(depending on your configuration, the value
may not be displayed).
Editing Effort
From the shortcut menu (in area 1), select Edit Effort. You can enter the patient's perceived exertion level in the
window that opens. Choose an option
and confirm with [ OK ] (depending on
your configuration, the value may not be
displayed).
52 |
Area 2
Area 3
training
Monitoring
ECG Display
The parameters currently displayed are
the ECG, the HR, and the THR. If your
training device supports the required
functions, you will also see the most
recent BP value and the SpO2 value.
From the ECG Display shortcut menu (in
area 2), you go to the Patient Training
ECG. A faster way to display the Patient
Training ECG is to double-click the ECG
segment.
This window allows you to view, monitor, analyze, and print real-time ECGs.
Additional markers can be created directly in the ECG by clicking the mouse
button and dragging the mouse cursor.
With the keys [ l < ] and [ > l ], you navigate from the first to the last marker,
and with [ < ] and [ > ], you navigate between the individual segments, refer to
“Patient Analysis Training - Single” on
page 61.
When you select the Scroll Position
Automatic check box (default setting),
the ECG will be continuously displayed.
All training stations can be seen on the
right side, and in these areas, too, the
shortcut menus can be selected.
Optional settings for the channels, sweep
speed, and amplitude can be determined
after a right mouse click in the Patient
Training ECG or in Training Monitoring
(in area 2).
Measuring Blood Pressure
A blood-pressure measurement can be
initiated from the Measure BP shortcut
menu (in area 2).
Adding Blood-Pressure Readings
The results of a manual blood pressure
measurement can be added with the Insert BP function.
| 53
training
Monitoring
Marking the ECG
To highlight artifacts in the ECG, rightclick in area 2 and select Mark ECG.
Turning the ECG Pump On
To turn on the ECG pump from the shortcut menu in area 2, select Turn on ECG
Pump.
Turning the ECG Pump Off
To turn off the ECG pump from the
shortcut menu in area 2, select Turn off
ECG Pump.
Training View
This screen provides an overview of the
training session, the protocol, the duration, and the METs value (additional
parameters if provided by the training
device). Depending on the configuration and device type, various parameter
values can be selected from the shortcut menu for graphic representation.
With a right mouse click into area 3 and
choosing Training Display or with a double-click on the curve display you switch
to the Patient Training.
This view presents all parameters selected via Patient Data - Protocols or in
Management - Protocols. The training
stations are displayed on the right side.
54 |
training
Monitoring
Selecting the Training Protocol
With a right click in area 3 and by choosing Select Training Protocol you access
the protocols (this is not possible while a
training is in progress). The new window
shows all Protocols created in Patient Data
or Management.
Define a protocol for the patient either with
a double-click or by selecting the protocol
and clicking [ OK ].
| 55
training
ManagEMEnt
Via [ Management ] you display the tabs
patiEnts
groups
protoCoLs
The pane on the right shows all training
stations with the most important data.
Frequently used commands are easily accessible via shortcut menus.
patiEnts
With the [ Patients ] button you access
the options Create Patient, Patient Data,
Patient Analysis, Create Group, and
Group Data. These functions allow you to
create, view, and modify numerous data.
training
This [ Training ] menu refers to all associated training stations. You can assign an
entire group with Assign Group, remove
all patients with Remove Patients, start
all training sessions with Start Trainings, stop all training sessions with Stop
Trainings, switch from the training phase
to the recovery phase with to RP, view
the training overview with Show Trng.
Overview, switch on all ECG pumps with
Turn on ECG Pumps, or switch them off
with Turn off ECG Pumps.
56 |
Area 1
Area 2
Area 3
anaLysis
patiEnts
The Analysis - Patients view provides
an organized overview of all patients in
the system. The Group list comprises all
groups that were created. If you select a
group, the patients of that group will be
displayed.
With Find you can quickly access the patient data. After typing the first letters
or a part of the patient's name or the ID,
the patient will be displayed.
With [ Select ] or by double-clicking the
patient highlighted blue, you open the
Patient Analysis.
patiEnt anaLysis
These are the tabs of the Patient Analysis windows:
gEnEraL
MEdiCaL
protoCoLs
ovErviEw
training
Some of the tabs offer further options.
The following paragraphs discuss the
Overview and Training tabs.
The tabs General, Medical, and Protocols
are discussed in “Patient Data > General”
on page 19, “Patient Data > Medical”
on page 22 and “Patient Data > Protocols Bicycle” on page 26.
| 57
patiEnt anaLysis
ovErviEw - trEnd
This screen provides an overview of all
analyzed parameters, such as:
- HR
- BP
- SpO2
- METs
- W/kg
- Load
- RPM
- Spd.
- Slp.
- Energy
- Distance
- Weight
When you move the mouse cursor over
the curves, the values will be updated
and displayed.
At Period, you can choose from various
options. You can change the displayed
time window easily be selecting the highlighted option (blue) and scrolling or you
can use the arrow keys on the keyboard
[ ] [ ] . All training sessions are listed in
the area below the curves.
Analyzing the Training Sessions
In the corners of the diagram, choose the
values to be displayed (e.g., the minimum,
maximum, first/last average value).
When you click [ Show ], the corresponding values and training sessions (data
points) will be alternately shown and
hidden. The different colors make the
differentiation easier. The selected training session is highlighted with a dark bar
cursor.
Additional details of all trainings are provided in text form below the curves.
58 |
patiEnt anaLysis
ovErviEw - trEnd
Analyzing the Training Sessions
With the [ Export ] command, you create
a CSV file (comma separated values,
default storage path C: \ ers2 \ ers2exchange) of the training session.
By double-clicking a training session
(data point) you change to the Training Single tab.
Editing / Deleting a Training Session
With a right mouse click you can edit the
weight, the Borg value, and the effort,
or you can delete a training session. Edit
the values as needed and confirm the
modification with [ OK ].
If you wish to delete a training session,
answer the question in the window that
pops up by selecting [ Yes ].
Training Details
In addition to the diagram, there is ample space for commenting on the training
sessions. The buttons on the right contain sample phrases. With [ Edit ] you can
save new, frequently used sample phrases and easily add them to your comment
with a mouse click. The default phrases
assigned to the buttons can be modified
if needed, see “Patient Data > Medical
Findings” on page 25.
Click [ Save ] to save all entries. To create
a printout, click [ Print ].
| 59
patiEnt anaLysis
ovErviEw - CoMparE
In this overview, two training sessions
are compared.
The illustration shows measured values
for:
- HR
- BP
- SpO2
- METs
- W/kg
- Load
- RPM
- Spd.
- Slp.
- Energy
- Distance
- Weight
From the drop-down lists, select the period of time of the training sessions and
the values you want to compare. The results will be displayed in the form of bar
charts. All parameter values (such as HR,
BP, or SpO2) from the two sessions can
be compared in this way.
Again, all information about the training
sessions are presented in tabular form
below the bar charts.
With [ Print ] you obtain a printout of the
overview.
60 |
patiEnt anaLysis
training - singLE
The diagram presents the parameter values obtained during the training:
- HR
- BP
- SpO2
- METs
- W/kg
- Load
- RPM
- Spd.
- Slp.
Next to the diagram you see the full-disclosure ECG. As you move the mouse
cursor over the diagram, the corresponding values will be displayed in a window.
The exercise phase is identified with a
dark background color.
Under Training you will find all training
sessions of this patient, sorted by date
and time.
Analyzing the Training Sessions
In the corners of the diagram, select the
events to be shown in the diagram (HR,
BP, SpO2, etc.).
Click [ Show ] to alternately show and hide
the line. Click the [ Predicted ] button to
show the predicted value.
If you click any point on the diagram, the
ECG display will be updated to show the
corresponding segment.
You can drag the scroll box over the
entire length of the scroll bar to get an
overview of the ECG.
If you detect signs of a dysrhythmia, for
example, highlight the corresponding
segment by clicking the mouse button
and dragging the mouse.
| 61
patiEnt anaLysis
training - singLE
Analyzing the Training Sessions
In the new window you can enter a written comment. With [ OK ] you exit the
window, with [ Cancel ] no marker will be
set.
All markers are listed in the Marker dropdown list, annotated with the time of
their occurrence. With the [ l < ] and [ > l ]
buttons, you change between the first
and last marker; with [ < ] and [ > ], you
navigate between the segments.
All segments for which a marker exists,
are identified with a dark background. To
change a remark, click the [ Edit ] button
and close the dialog window with [ OK ].
To remove a remark, select [ Delete] and
answer the next question with [ Yes ].
Via the shortcut menu, you can change
the displayed channels, the sweep speed,
and the amplitude.
By clicking the [ Print ] button, you obtain
a printout of the training session or of
the page of ECG data.
62 |
patiEnt anaLysis
training - CoMparE
This view allows two training sessions to
be compared. The following parameter
values are shown:
- HR
- BP
- SpO2
- METs
- W/kg
- Load
- RPM
- Spd.
- Slp.
As you move the mouse cursor over a
diagram, the corresponding measured
values will be displayed. The actual exercise phase is identified with a dark background. The ECGs are shown next to the
diagrams.
Under First and Second you will find the
completed training sessions. Choose the
periods of time from the drop-down lists.
Analyzing the Training Sessions
In the area between the diagrams you
can choose the parameter values to be
displayed in the diagrams (HR, BP, SpO2,
etc.).
When you click [ Show ], the corresponding values will be alternately shown and
hidden. With [ Predicted ] you display the
predicted value (of the HR, for example).
An overview of all data is shown below
the diagrams.
By clicking a point on the diagram you
update the ECG display which changes to
display the corresponding segment.
You can drag the scroll boxes over the
entire length of the scroll bars to get an
overview of the ECG.
A printout is initiated with the [ Print ]
button.
| 63
tooLs
Karvonen Formula
The [ Tools ] menu is available on all tabs
of the ers. 2 software. Via [ Tools ] you can
configure the Karvonen formula.
The Karvonen formula is used to determine the optimal heart rate (HR) for
different forms of exercise. This value is
different for each patient.
The formula takes the patient‘s resting
heart rate (HR at Rest) and maximum
heart rate (HR max.) into account. The
factor for the training intensity is indicated as a percentage.
ExpLanations
Borg Rating
The Borg rating is an evaluation of the
patient‘s perceived exertion during the
physical exercise phase (the patient‘s
own impression of how hard and strenuous the required exercise level is). The
scale ranges from 0 to 20 (no exertion at
all to maximum exertion). The patient is
asked to describe the degree of perceived
exertion and rate it using the Borg scale.
64 |
AbbrevIAtIons
Bc. const
BP
BPM
Ctrl.
ctrld.
HR
ID
Load abs.
Load rel.
Mon. Device
Pat. Cnt.
Pat. Lim.
Rev.
RP
Slope abs.
Slope rel.
Slope
Speed abs.
Speed rel.
Speed
SpO2
SSN
THR
Trng.-HR
Trng. Device
Trng.
bicycle constant
blood pressure in
beats per minute
control
controlled
heart rate
identification number
absolute load
relative load
monitoring device
patient count
patient limit
RPM
recovery phase
absolute slope
relative slope
slope
absolute speed
relative speed
speed
oxygen saturation
social security number
training heart rate
training heart rate
training device
training
| 65
ergoline GmbH
Lindenstrasse 5
72475 Bitz
Germany
Phone:
Fax:
e-mail:
http:
+49-(0) 7431 98 94 - 0
+49-(0) 7431 98 94 - 128
[email protected]
www.ergoline.com