1
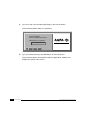
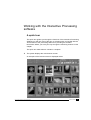
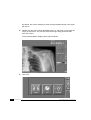
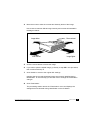
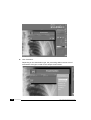
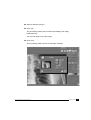
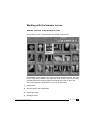
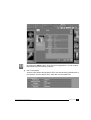
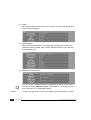
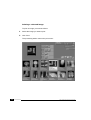
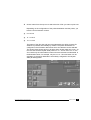
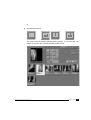
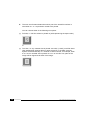
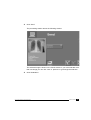
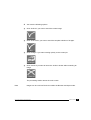
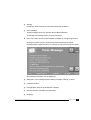
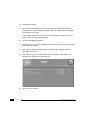
ADC COMPACT
INTERACTIVE
PROCESSING SOFTWARE
USER MANUAL
TABLE OF CONTENTS
MAIN FUNCTION OF THE PROCESSING STATION
Interactive image processing
1
Storage function of the processing station
1
Components of the processing station
2
SWITCHING THE PROCESSING STATION ON AND
GETTING THE SYSTEM MAIN SCREEN
Switching the processing station on
3
Switching the processing station off
5
ADC Compact Interactive Processing Software
2204B GB 199806
i
WORKING WITH THE INTERACTIVE PROCESSING SOFTWARE
A quick tour
7
Working with the browser screen
13
General overview of the browser screen
13
Selecting and de-selecting images
14
Selecting by criteria
14
Sorting images
15
Retrieving information about an image
16
Deleting a selected image
21
Printing a selected image
22
Sending images to review stations
31
Archiving images
35
Monitoring the status of the processing station
38
Managing messages
38
Opening a selected image
41
Locking Screen
42
Working with the Interactive Processing screen
ii
2204B GB 199806
43
Mirroring and rotating
45
Changing window and level
47
Using the Burn function
48
Applying a different sensitometry
49
Modifying individual processing parameters (MUSICA)
50
Storing new processing parameters
52
Changing examination data
53
Collimation border definition
54
Invert
62
Saving a modified image
63
Deleting an image
64
Printing
64
Zoom
65
Measuring histogram and intensity within a selected window
68
Measuring distance
68
ADC Compact Interactive Processing Software
SYSTEM MONITORING
Disk management
70
Waste bin management
71
Input queue management
73
Output queue management
75
Setup
77
User menu management
82
Queues
83
Devices
85
TROUBLESHOOTING
Automatic anticipation
86
General procedures in case of malfunctions
86
TECHNICAL SPECIFICATIONS OF THE PROCESSING STATION
90
TECHNICAL SPECIFICATIONS - MONITORS
92
ADC Compact Interactive Processing Software
2204B GB 199806
iii
iv
2204B GB 199806
ADC Compact Interactive Processing Software
Main function of the processing station
Interactive image processing
The processing station provides a powerful tool for interactive image
processing. It allows you to use the capabilities of the ADC Compact System
-such as Agfa’s proprietary image processing software- to their fullest extent.
It also allows you to correct any mistakes during identification of a cassette
and to post-process the image using the newly set parameters.
For example: a given cassette is mistakenly identified as ‘Spine’ whereas in
reality it is a chest image. As the signal level of the bone structures is
different from the signal level of the lung tissue, the printed image will not
provide optimal information for the radiologist. However, the signal range of
the digitized image -the electronically stored image- is much larger than the
final printed image. By selecting a different application you just highlight
another region of the original digital image. Merely editing the information in
the processing station, automatically post-processes the image with the
parameters suitable for lung images.
The ADC Compact Interactive Processing software enables you to make
such corrections interactively and instantaneously and thus further reduce the
number of re-takes to an absolute minimum.
The Interactive Processing software is not designed for monitor diagnose, as
the contrast resolution of the local display function is limited.
Storage function of the processing station
Each time the Digitizer has digitized an image it is sent automatically to the
processing station using the DICOM communication protocol. The processed
image is then sent to the ADC Compact preview station, to printers or
networked Impax stations, and temporarily stored in the processing station.
The standard processing station can store up to 190 images. In an extended
version, the number of storable images is dependent on total disk space e.g.
2000 images. As more images are received by the processing station, the
oldest images will be deleted. Images can be protected (i.e. locked) from
automatic removal.
ADC Compact Interactive Processing Software
2204B GB 199806
1
Components of the processing station
The illustration below shows the main components of the processing station:
Central
Processing
Unit
On/off
1869
CD ROM / floppy
DAT
Mouse
Mouse pad
2
2204B GB 199806
ADC Compact Interactive Processing Software
Switching the processing station on
and getting the system main screen
Normally, the processing station may be left on day and night. The
processing station is equipped with a screen saver to prevent the screen from
burning in when it is not used for a long period of time. However, if you need
to move the processing station to a different location or if it has to be
disconnected from the mains, proceed as follows when switching the
processing station on or off.
Switching the processing station on
Proceed as follows to switch the processing station on:
1
Put the main switch in the ON position. The main switch is located on the
back of the processing station close to the power supply cable.
The processing station performs its initialization procedure and asks your
login name.
Welcome to Host Name
Please enter your user name
MIMOSA
OK
ADC Compact Interactive Processing Software
Start Over
Options
Help
2204B GB 199806
3
2
Type your user name and press [ENTER] or click the OK button.
The processing station asks your password.
Welcome MIMOSA
Common Desktop Environment
Please enter your password
OK
3
Start Over
Options
Help
Type your password and press [ENTER] or click the OK button.
The processing station automatically loads the application software and
displays the system main screen.
4
2204B GB 199806
ADC Compact Interactive Processing Software
Switching the processing station off
Never switch the processing station off if you are in your application.
Caution
If you want to switch off the processing station, always proceed as follows:
1
Click ‘Controller’ in the system main screen.
ADC Compact Interactive Processing Software
2204B GB 199806
5
2
Click ‘Stop user interface’.
The processing station displays the Log-out menu.
3
Click the Power Off button for a complete shut-down of the processing
station.
If you click the Log-out button, the system returns to the Log-in prompt.
4
6
2204B GB 199806
Click the OK button to proceed.
ADC Compact Interactive Processing Software
Working with the Interactive Processing
software
A quick tour
This quick tour guides you through the functions of the Interactive Processing
Software you will use most of the time. It will also make you familiar with the
‘look and feel’ of the processing station thus providing an excellent
introduction before you work your way through the remaining sections in this
chapter.
This quick tour takes about 5 minutes to complete.
1
The system displays the main browser screen.
An example of the browser screen is displayed below:
ADC Compact Interactive Processing Software
2204B GB 199806
7
By default, the screen displays the most recently identified image in the upper
left corner.
2
Double click the most recently identified image, i.e. the image in the upper left
corner of the screen. You can also select the image using the mouse and
then click “Open”.
The processing station displays the image as follows:
3
8
2204B GB 199806
Click ‘W/L’.
ADC Compact Interactive Processing Software
4
Move the mouse to alter the contrast and intensity levels of the image.
How mouse movement affects image intensity and contrast is illustrated in
the diagram below:
Image darker
More contrast
114
3
Less contrast
Image lighter
5
Click the mouse button to freeze the image.
6
If you wish to print the edited image, go directly to step 12 in this procedure,
then continue with step 7.
7
Click ‘Default’ to revert to the original W/L settings.
Imagine that the currently displayed image was wrongly identified during
identification. In the next step you will learn how to change the examination
sub-type.
8
Click ‘Examination’.
The processing station returns the ‘Examination’ menu and displays the
settings that were entered during identification on the ID Station.
ADC Compact Interactive Processing Software
2204B GB 199806
9
9
Click ‘Submenu’.
Depending on the examination type, the processing station returns a list of
examination sub-types, similar to the sample screen below.
10
2204B GB 199806
ADC Compact Interactive Processing Software
10 Select a different sub-type.
11 Click ‘OK’.
The processing station post-processes and displays the image
instantaneously.
You are now ready to print the image.
12 Click ‘Print’.
The processing station returns the following message:
ADC Compact Interactive Processing Software
2204B GB 199806
11
13 Click ‘Print’.
The processing station transmits the image to the imager for printing. The
imager prints the image according to the default settings associated with the
examination sub-type you have selected in step 10.
14 Click ‘Select’ to go back to the main menu.
12
2204B GB 199806
ADC Compact Interactive Processing Software
Working with the browser screen
General overview of the browser screen
The browser screen is reproduced in the sample screen below.
The browser screen displays the 18 most recently identified images, the most
recent image being located in the upper left corner of the screen. Each image
is displayed with the following default information (the order in which the
items are displayed is dependent on the ‘Sort on’ selection):
■
patient name
■
date and time of the identification
■
examination type
■
radiologist name.
ADC Compact Interactive Processing Software
2204B GB 199806
13
Whenever an image is digitized in the Digitizer, it is automatically stored in
the processing station. The standard processing station allows for short term
storage of 190 images in total. In an extended version, the number of
storable images is dependent on the total disk space available and can be
increased considerably. As more images are received by the processing
station, the oldest images will be deleted. You can secure images against this
automatic deletion with the lock feature. Locked images are displayed with an
icon that represents a closed lock. For more information about this feature,
refer to the part ‘Retrieving information about an image’.
To display more images, click ‘Pg Down’ in the upper right corner of the
screen.
Selecting and de-selecting images
To perform an operation on an image such as printing, sending or archiving
an image, you first have to select it.
You can select an image by just clicking on it. A selected image appears on a
white background.
You can deselect an image by clicking it again, or you can click ‘Deselect’ to
de-select all the currently selected images.
Selecting by criteria
You can also use selection criteria. The following criteria are available:
14
■
by identification date
■
by patient ID
■
by patient name
■
by patient last name
■
by radiologist
■
by examination type
■
by examination subtype
2204B GB 199806
ADC Compact Interactive Processing Software
■
by RIS ID
■
by Digitizer ID
■
by User Info (i.e. four user configurable data fields).
■
Sent
You can configure four criteria from this list. For an explanation on how to
configure the selection criteria, we refer to the section ‘Setup’ on page 77.
Each of the selected criteria has a matching button in the upper left corner of
the screen.
When no selection is entered, all images appear on the screen (on several
successive pages).
Example: If you click ‘Patient name’ then select a given patient from the
menu, the screen will display images of this patient only. You can also
combine selection criteria: e.g. you may want to select the images of one
examination type from a given date. The images that appear on the screen all
fulfil those four conditions. If a button is marked with an asterisk ‘*’ it means
that this selection criterion is inactive.
Sorting images
The default sort algorithm puts the most recently identified images at the
head of the list. However, you can change this order by clicking the ‘Sort on:’
button.
You have 8 possibilities to sort on:
■
identification date
■
patient name
■
radiologist
■
examination
■
patient ID
■
RIS ID
ADC Compact Interactive Processing Software
2204B GB 199806
15
■
Digitizer ID
■
User Info (i.e. four user configurable data fields).
■
Sent
You can also use the ‘Sort on:’ button in combination with the selection
criteria mentioned in the previous sub-section.
Retrieving information about an image
To retrieve information about a selected image, click the
button.
The processing station returns the information screen which is similar to the
screens shown below.
16
2204B GB 199806
ADC Compact Interactive Processing Software
By clicking the ‘More’ button, which acts as a toggle button, you can request
information about the following subjects:
■
Info on the patient
These are the patient demographics which are entered during identification of
the cassette, such as patient name, birth date, sex and patient ID.
ADC Compact Interactive Processing Software
2204B GB 199806
17
The highlighted fields within the patient field are editable. These fields are:
■
patient name
■
patient first name
■
birth date
■
sex
■
Patient ID
These are the same fields as the fields in the identification screen of the
ID Station.
■
Info on the examination
This data includes information on identification date, radiologist, examination
type and sub-type, body part, laterality, patient and cassette orientation,
exposure class,etc...
The RIS ID, the four User Info fields and Comment fields within the “Info on
the examination” field are editable. These fields are:
■
RIS ID
■
Comment
■
4 User info fields
The User Info fields are freely configurable fields into which the user can
put whatever he wants. These fields can be mapped onto DICOM
elements, if this is desirable. There follows a table showing the DICOM
elements that can be mapped.
18
2204B GB 199806
ADC Compact Interactive Processing Software
dicom_group
dicom_element
Tag
Attribute
0008,1050
Performing physician’s name
0008,1080
Admitting diagnosis
0010,1000
Other patient ID
0010,2160
Ethnic group
0010,2180
Patient occupation
0010,21B0
Additional patient history
0018,0010
Contrast/bolus agent
0018,1041
Contrast/bolus volume
0018,1044
Contrast/bolus total dose
0018,0060
KVP
0018,1110
Distance source-detector
0018,1152
Exposure mAs
0018,1111
Distance source-patient
0038,0300
Current patient location
0018,1160
Filter type
0018,1180
Collimator / grid name
0010,1020
Patient size
0010,1030
Patient weight
■
Exposure info
This includes information on exposure deviation and exposure level(s).
■
Info on the cassette
The information contained in this part of the Info screen relates to plate type,
cassette format and number and usage counter.
ADC Compact Interactive Processing Software
2204B GB 199806
19
■
Image
Data in this field includes pyramid name, version numbers, path, status, pixel
matrix (width and height).
■
Processing info
Data in this info field relates to processing date, sensitometry, invert option,
collimation, MUSI-contrast, edge contrast, latitude reduction, noise reduction
and default film size.
■
Miscellaneous information
You can use the Lock/Unlock button to toggle the lock status of the image. If
an image is locked, automatic deletion has no effect on the image. You can
lock a maximum of 10 images/disk partition.
Caution
20
2204B GB 199806
Locking an image does not prevent the image from being deleted by a user.
ADC Compact Interactive Processing Software
If you have selected more than one image you can pass on directly to the
information screen of the following image by clicking the ‘Next’ button.
Click ‘Update’ to effectively implement the changes you made. If you have
selected multiple images you can click ‘All’ to update all selected images at
once.
Click ‘Cancel’ to return to the browser screen without implementing the changes.
Deleting a selected image
To delete a selected image, click the ‘Delete’ button.
Note
The processing station returns the ‘delete’ submenu displaying the first
selected image and 3 additional buttons:
■
‘Delete’
If you click this button, the originaly selected image will be deleted from the
system.
■
‘All’
If you click this button, all selected images will be deleted.
■
‘Previous/next’
If you click this button, the next image is displayed, provided you selected
more than one image before you clicked ‘Delete’.
When you double-click the ‘Delete button’ the selected image will be deleted
without the processing station returning the ‘delete’ submenu described above.
Whenever you are going to delete a raw image, the following message
appears:
Are you sure to delete the
last reference to this image?
Click ‘Cancel’ to leave the ‘delete’ submenu without deleting images. Deleted
images are stored in the waste bin. If you have accidentally deleted an
image, you can recover it by removing it from the waste bin. This is explained
in the section ‘Waste bin management’ on pages 71 and following.
Remember that the waste bin is automatically and periodically cleaned when
the system runs out of free disk space.
ADC Compact Interactive Processing Software
2204B GB 199806
21
Printing a selected image
To print an image, proceed as follows:
1
Select the image you want to print.
2
Click ‘Print’.
The processing station returns the print menu:
22
2204B GB 199806
ADC Compact Interactive Processing Software
3
Click a button from the top row to select the size of film you want to print onto.
Depending on the configuration of the printer destination and the printer, you
have the choice between 3 sizes:
■
8 x 10 inch
■
11 x 14 inch
■
14 x 17 inch
The button of the film size and layout as selected by the ADC Compact ID
Software is pressed automatically by default. The printer destination as
configured in the ID Station determines which size buttons can be selected.
The Scopix laser printers print on all three sizes, Drystar 2000 only on 8 x 10
inch film size and the Drystar 3000 printer on 11 x 14 inch and 14 x 17 inch.
As a result only the size selection buttons that are relevant are selectable. In
the illustration below, for example, only the 8 x 10 “ film size button can be
activated, as the printer destination was initially configured to the Drystar
2000 (DI 2000) printer.
ADC Compact Interactive Processing Software
2204B GB 199806
23
4
Click a button from the next row to select the number of images to be printed
on one film.
You can select:
■
One image on one film (1/0 layout)
■
Two images on one film (2/0 layout)
■
Four images on one film (4/0 layout)
Note
24
‘Image’ in this context is taken to mean whatever is exposed on the image
plate of one cassette, and that can be more than one image. So, when one
cassette has two exposed images, there is no point in selecting a 2/0 layout
when printing.
2204B GB 199806
ADC Compact Interactive Processing Software
The printer preview window on the screen below shows the selected options:
14 x 17” film size and one image on one film.
The selected image in the printer browser is highlighted. When up to 5 (10)
images are selected in the overview browser and you switch to the printer
browser, the first image shows up in the printer preview in a 1/0 layout.
ADC Compact Interactive Processing Software
2204B GB 199806
25
When a 2/0 or 4/0 layout is selected, up to 2 respectively 4 images appear in
the printer preview and are highlighted in the overview browser window.
The printer browser is fully WYSIWYG, visualising the 4-image
composition in the printer preview the way it will be printed on film.
5
Click a button from the next row to select the basic orientation of the image or
image boxes.
You can choose between:
■
26
2204B GB 199806
the portrait format
ADC Compact Interactive Processing Software
or
■
the landscape format
The screen below shows the selected printing options: 11 x 14” film size, two
images on one film and vertically divided portrait format.
ADC Compact Interactive Processing Software
2204B GB 199806
27
6
The next set of buttons determines which part of the actual film surface is
used when a 1 on 1 reproduction needs to be printed.
You can choose either of the following two options:
■
Full size, i.e. full film surface is printed on (while preserving the aspect ratio)
or
■
28
2204B GB 199806
True size, i.e. any cassette size is printed “true size” (=100%) on all film sizes
(See standard film division table on pages 23 and ff. in the ADC Compact
System Overview Manual). In a number of cases however, for example, when
a 35 x 45 cm cassette size is printed on a 8 x 10 inch film size, parts of the
image will be clipped at all sides of the image.
ADC Compact Interactive Processing Software
In the following screen a 14 x 17” size has been selected in a 1/0 portrait
format. As the True Size button has been clicked the image will be printed
(and is shown on the printer preview) on a 100% scale or smaller.
ADC Compact Interactive Processing Software
2204B GB 199806
29
In the next screen the Full Size option has been selected. When printing this
image the full film (14 x 17”) will be completely filled, thus magnifying the
image.
Note
When you wish to clear the printer preview window, click the clear button.
7
30
2204B GB 199806
In case you wish to assign the image to be printed the highest priority in the
printing queue, click the Emergency button.
ADC Compact Interactive Processing Software
8
Select the number of copies by clicking the More respectively Fewer button
next to the “Number of copies” field at the top right corner of the printer
browser menu, or change the number of copies using the keyboard.
9
Select Printer.
10 Click ‘Print’.
Or click ‘Cancel’ if you decide not to print the selected image(s).
Sending images to review stations
The IMPAX product line provides gateways, transmit, archive and review
stations (DICOM STORE = optional) and hardcopy printing (DICOM PRINT =
standard) for digital imaging. The processing station features an interface
software module to integrate ADC Compact and IMPAX. You can interactively
send 8 or 12-bit images to IMPAX modules using the DICOM protocol. 8-bit
images already have a Look-up Table, whereas 12-bit images are
MUSICA-processed with separate Look-up Table. To allow for fully-fledged
CR functionality also private elements have been defined. Refer to the
DICOM Conformance Statement.
For more information on the IMPAX product line, consult your local Agfa sales
organisation.
ADC Compact Interactive Processing Software
2204B GB 199806
31
If you want to send a processed image to an IMPAX review station, proceed
as follows:
1
Select the image that you want to send to the review station.
The ‘Send’ button becomes active.
You can select an image by just clicking on it. A selected image appears on a
white background. You can select up to 10 images at a time. The number of
currently selected images is displayed next to the ‘Sort on:’ button.
Note
The following picture shows a section of the main screen with one image
selected.
You can deselect an image by clicking on it again, or you can click ‘Deselect’
to deselect all the currently selected images.
Note
32
2204B GB 199806
ADC Compact Interactive Processing Software
2
Click ‘Send’.
The processing station returns the following window.
The selected image is shown in the ‘Send’ window. If you have selected more
than one image you can click ‘next’ or ‘previous’ to go through the selection.
3
Click ‘Destination’.
ADC Compact Interactive Processing Software
2204B GB 199806
33
The processing station returns a list of destinations as is shown in the
following picture. The actual list of destinations might differ from the list in the
example screen since the destination name is configurable.
34
4
Select a destination.
5
You have the following options:
■
Click ‘Send’ if you want to send the current image.
■
Click ‘Send all’ if you want to send the complete selection of images.
■
Click Emerge if you want to assign priority to the current job.
2204B GB 199806
ADC Compact Interactive Processing Software
■
Click ‘Cancel’ if you want to leave the ‘Send’ window without sending an
image.
The processing station returns the main screen.
Note
Images can be “sent” both from within the Browser and Open mode.
Archiving images
If you want to archive a processed image, proceed as follows:
1
Select the image that you want to archive.
The ‘Archive’ button becomes active.
You can select an image by just clicking on it. A selected image appears on a
white background. You can select a maximum of 10 images at a time. The
number of currently selected images is displayed next to the ‘Sort on:’ button.
The following picture shows a section of the main screen with one image
selected.
ADC Compact Interactive Processing Software
2204B GB 199806
35
You can deselect an image by clicking on it again, or you can click ‘Deselect’
to deselect all the currently selected images.
Note
2
Click ‘Archive’.
The processing station returns the following window.
The selected image is shown in the ‘Archive’ window. If you have selected
more than one image you can click ‘next’ or ‘previous’ to go through the
selection.
3
Click ‘Destination’.
The processing station returns a list of destinations.
4
36
2204B GB 199806
Select a destination.
ADC Compact Interactive Processing Software
5
You have the following options:
■
Click ‘Archive’ if you want to send the current image.
■
Click ‘Archive all’ if you want to send the complete selection of images.
■
Click ‘Emerge’ if you want to assign priority to the current job.
■
Click ‘Cancel’ if you want to leave the ‘Archive’ window without sending an
image.
The processing station returns the main screen.
Note
Images can be “archived” both from within the Browser and Open mode.
ADC Compact Interactive Processing Software
2204B GB 199806
37
Monitoring the status of the processing station
With the dynamic bar graph in the upper right corner of the browser screen
you can monitor the status of the processing station.
■
D: indicates the degree of occupation of the hard disk
■
I: indicates the current input rate
■
O: indicates the current output rate
These three meters indicate the activity of the processor and of the incoming
and outgoing images. The input rate and output rate indicators show between
zero and four jobs. If there are more than four jobs, the meter turns white.
The activity of the background module is indicated as well:
■
X: indicates that the background is not running
■
\ alternating with /: indicates that the background is running
Managing messages
If the application wants to inform you on certain events, conditions or
problems, it generates a message. A window pops up displaying the
message. After you have read the message and clicked ‘Cancel’, the
message is put in the message queue.
Messages can have different priorities: this is reflected in the status of the
message. The status of a message can be one of the following:
■
38
2204B GB 199806
message
A message with a ‘message’ status is intended to notify the user of certain
events.
ADC Compact Interactive Processing Software
■
warning
A ‘Warning’ status informs the user about abnormal conditions.
■
panic message
These messages inform the operator about failed operations.
To manage the message queue, proceed as follows:
1
From any screen, click the button labelled ‘message’ in the upper right corner.
Clicking this button opens a window with information about the oldest
message with the highest priority. An example of this window is shown below:
The following information can be displayed:
■
description of the message and the status (message, warning or panic)
■
a possible solution
■
the application that has generated the message
■
date and time the message was generated
■
frequency
ADC Compact Interactive Processing Software
2204B GB 199806
39
■
message ID-number
■
the number of messages as well as the position of the currently selected
message in the queue are also displayed (e.g. 2/2 means that this message
is the second out of two).
If the problem persists and you contact your Agfa service engineer, be sure
that you have this information at hand.
40
2
You have the following options:
■
Click ‘Previous’ to view the message that comes before the currently selected
message in the queue.
■
Click ‘Next’ to view the message that comes after the currently selected
message in the queue.
■
Click ‘View’ to pop up a window that lists all messages in the queue. This
window looks similar to the following one:
3
Click the ‘Cancel’ button.
2204B GB 199806
ADC Compact Interactive Processing Software
4
If you have solved the problem and you want to delete the currently selected
message from the queue, click the ‘Delete’ button.
As long as a panic message is not deleted, it continues to pop up.
Note
5
Click the ‘Cancel’ button.
Opening a selected image
If you want to modify an image, you first have to open it.
There are two ways to open an image:
■
double click the image from the browser screen
■
select the image (or multiple images), then click ‘Open’.
ADC Compact Interactive Processing Software
2204B GB 199806
41
Locking Screen
In order to forestall accidental erasure of data whenever the operator
temporarily leaves the processing station, the screen will turn blank and be
locked automatically after a (re-configurable) lapse of time.
The screen can also be locked interactively. In order to lock the screen,
proceed as follows:
1
Click the Controller menu.
2
Click Lock Screen.
The processing station returns the following message:
In order to unlock the screen, enter your password.
42
2204B GB 199806
ADC Compact Interactive Processing Software