1
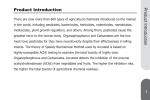
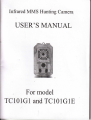
Infrared MMS Hunting Carrera
USER'S MANUAL
re
For model
TC101G1 and TC101G1E
General Information.........
1.3
Camera Interface...............
3.1,1
Setting
3.1.2
Setting
3.1.3
Setting
3.1.4
Setting
3.1.5
Setting Video fime....
22
28
3.1.6 SettingPIRSensitivity....
I
..............29
.............31
3.1.8 Setting Serial
3.1.9
Lapse...........
Setting fime
...,......39
3.1.10 SettingPIR-D time (TC101clE).....,,....,.....,.,...42
3.1.11 Setting Motion Alarm (TC101clE).......,............44
3.
l!
r
l.l
2
Setting Delay Time...................................,.,.........
46
3.1.13 Setting BIue
4A
3.1.14 Setting IR
50
Photo.................
3.1.15 Setting TY OUT.
52
3.1.16 Setting Date Stamp..........
.........53
SettingLanguage.............
3.I.18 Setting Date&Time........
.........55
3,1.17
...........56
Password..............
*..-58
MMSMenuParameterSetting--:... ---.........61
3.1.19 Setting
It
3.2.1 Manual
.........61
3.2.2
Setting Phone No.....................r........................
3.2.3
Setting
6l
3.2.4
Setting Phone or E-mail 02.........,................... 62
3.2.5
Setting Phone or E-mail 03............................. 63
3.2.6
SMTP Set
3.2.7
Setting
(TCl0lclE)
Option.
.................................. 63
....................... 64
Important
.
fips
a removable disk no matter the power switch of the device
The working voltage of the camera is 6 V. You can
use
AA batteries, or use
is ON or OFF.
. In the test mode, the camera will
an Extemal 6V DC power supply.
. Please load the batteries according to the indicated polarity
on the cover
.
Please disable the write-protect
on the card
before
inserting SD card.
.
Please insert
after 5 minutes if no key is pressed.
.
ofthe battery cabinet.
shut down automatically
The camera can work normally with High Performance
Battery discharge current is above 1.5A. We test
these
brands af,e OK, such as TOSHIBA, GP Ultra,DURACELL,
a SD
Otherwise, the camera
card before testing the camera.
will not save images
and videos.
Energizer, NANFU.
If
no SD-card is inserted or the write-protect of the card is not
disabled, the camera
will
shut down automatically
General Information
.
. It is recommended to format the SD-card by the camera
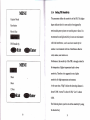
1.1 Introduction
when used for the first time.
The digital hunting camera is a surveillance device working
. Always close the
automatically.
camera before you install or remove the
SD card
. The camera will be in the USB mode when connected to
It
can be triggered by sudden change of
ambient temperature caused by moving game in a region
a
USB port of computer. In this case the SD card functions as
interest, which
is
detected
of
by a highly sensitive Passive
Infra-Red (PIR) senor, and then take pictures or video clips
automatically. Then it can send the pictures instantly to
*
mobile device/email via GSNI/GPRS network. The
in-field life( (in standby mode, up to 6 months )
Ultra low standby current (0.2mA). Extremely long
take color photos and videos until there is insufficient light
*
*
*
*
(dusk) when it begins to take infrared (monochrome) photos
PIR-D time ON,'It means the PIR detec'ting dlstance is
and videos.
about 0-8m during
Features
decided by the PIR Sensitivity (TC101G1E).
*
*
*
cen be sGnt from 6a6 f,mell acoount to the other Ernall
rccount
vtr SMTP (TC101G1E). You'Il be alerted
just
when something has happened. At sunrise the unit begins to
Simple to use
can be set on the camera,
+
+
it is more
convenient than via PC
*
*
*
12MP resolution
2.7" TFT LCD Display
PIR Sensing Distance: 65ft120m, When you set the
33pcs
the 'ne you
set.
Other 'rres it is
IR LEDs 850nm for flash range as far as 65 feet
(20m) (No-glow model 940nm has 49 feet (15m) flash range)
well-designed for portability and usefulness
* All paxameters
8xAAbafteries
Audio on Video: Yes
Notice the user by message when low battery and
memory ful1 messageAlert
MMS/SMS/SMTPGCr01G1E)
Impressively quick trigger time(1.0 second)
*
Automatic text alert when it is moved (IC101G1E)
*
Gravity Sensor function: the Screen Rotate up and down
Supports up to 32 GB SD Card
except in the MENU interface
I
i
t
*
Blue backlight for keypad:
operate at night or insufficient
*
It is convenient for you
to
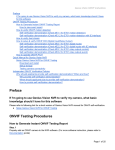
Camera Interface
'Front
light
Unique structure design and G-SENSOR make
1.3
it
easy
for user to set up the menu and change the battery
*
Laser light makes the camera focus on the optimal point
by C-SENSOR tunction.
*
Lockableandpasswordprotected
1.2
Application
'
Trail camera for hunting
'
Farm and forestry security monitoring
'
Animal or event observations
'
Motion-triggered security camera for home, office and
community
'
Law Enforcement and Environmental Agencies - Illegal
Dumping, Vandalism and Theft
'
A1l other indoor/outdoor surveillance where invasion
evidence needed
LE*
'
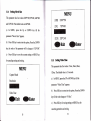
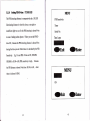
NOTE:
Laser
light Aim the target (test mode)
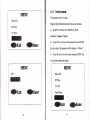
Bottom and Swttch
When the switch is at "ON" position , the camera is on the
RGBLED:
automatic infrared shooting mode. When the switch is
Red LED indicate the battery went dead (on mode)
moved to the "TEST" position, you can set parameters or
Green LED indicate memory SD card is firll (on mode)
test different fu nctions.
Blue LED indicate PIR detect the target (test mode), we
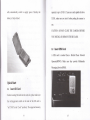
The camera provides the following connections for extemal
need close the blue LED in "on mode" in case of spooking
device: USB port, SD card slot, SIM Card slcjt, TV outjack,
the target.
tripod slot and extemal DC power in jack
LDR:
It
switches the camera'back and forth from day
pictures (color) to night pictures (monochromatic).
10
.
1
'
Battery
To supply power for the device, it is recommended to use
eight new high-performance alkaline AA batteries or low
self-leakage
NI-MH (Nickel-Metal hydride)
rechargeable
AA batteries. The discharge current is above 1.5A. We test
these brands are OK, such as TOSHIBA, GP Ultra,
DURACELL,Energizer,NANFU. According to the feature
which battery voltage (power supply) will rebound after
the battery open circuit for a period
of time wp developed
3TPS(Take tums to power suppiy
technology.
It
means the battery
camera is. equipped
life can be
)
extended. Our hunting
with two group cells, firstly
they
separately supply poweg gradually the battery is very low,
When the voltage of one group drops to a certain.value,
while the other group cell still have higher battery voltage,
3TPS technology can realize the function which A,B two
t2
cells automatically switch to supply power. Thereby the
capacity is up to 32 GB . If you use a card capable of above
battery is fully utilized.
32GB , make sure you test it before putting the camera in
use.
CAUTION: ALWAYS CLOSE THE CAMERA BEFORE
YOU INSTALLOR REMOVE THE SD CARD.
22 Insert SIM Card
A SIM card is needed
from
a Mobile Phone Network
Operator(MPNO). Make sure they provide Multimedia
Messaging Service(MMS).
Quick Start
2.1 Insert
SD Card
Before inserting SD card into the card slot, please make sure
the writing-protect switch on the side of the SD card is
"off "(NOT in the "Lock" position). The
14
supported memory
15
23
Enter into Test Mode
Moving the switch to ON position would set the device in
In the TEST mode, you should set the necessary operational
the Automatic Infrared Shooting Mode. There is a waiting
parameters, switch to the ON mode. Then the device starts
time of about 30 seconds (LED get blue)before the system
monitoring automatically.
adjusts
Under the TEST mode, you just need to aim at the object,
pictures by infrared inducement. Once tJre device is in this
and press the "SNAP" key.
A
Second later, you,ll get a
to this
mode,then the camera can start taking
mode ,there would be not need for any manual operations,
picture saved in the SD-card . The number of pictures and
and the camera
video clips at the bottom of the LCD
decrease by
pictures or videotaping the subjects such as animals, persons
one .Press the OK key to review/playback photos/videos on
that enters a certain range. The time interval or the record
the'LCD screen, or a connected TV monitor. Use Up and
time can be set before the camera is put to work. The
down key to Zoomin/ottt,left aird right to switch the picture.
camera
There is another key "MENU"on the keypad that allows you
persons) enters the area covered by the ..pIR,'. Then it
to program the camera to work the way you want.
take pictures or start videotaping once the subjects are in the
will
range.
2.4
Enter into ON Mode (Automatic Infrared
I
I
ShootlngMode)
will
will
flrnction automatically
will automatically turn on when subjects
If the subjects
(animals,
will
If the subjects leave the
of the "PIR', the camera would automatically
down after a while.
t7
J
taking
enter the range directly, the camera
be in operation immediately .
range
by
shut
The camera
will
a)
automatically send the MMS/SMS/
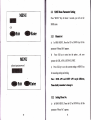
2.7"
II'T
LCD Display
SMTP(TC101G1E) When the photos are taken.
Under the test mode, press the OK key. The latest picture or
The precondition is that you set the parameters like this:
video will be displayed . Then press LEFT and RIGHT to
Mode--capture, Capture mode--single
means
Of
it won't
or 3
pictures. It
send videos to your email or mobile phone.
course; Occasionally
it is unsuccessful to send the
SMSA,IMS/SMTPGCI0IGIE) due to the network
and
weak signal strength of GPRS/GSM.
I
i
vlew.
While you are viewing images and videos, Press the MUNU,
the (Deleteland (Formatl will
( Del Image
or
Alll
will
delete all the images and videos.
Choose what you would like to delete and Press the OK key,
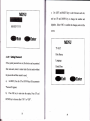
Snap
Under the Test mode, you can use camera to take pictures as
a regular
I will only delete the current image
video.
(Del Image
2.5 Manual
One
be displayed on the LCD.
digital camera by pressing "SNAP" button.
you will be asked to confirm. Press the OK key to delete or
press the MENU key to cancel and exit.
b)
Computer
2.6 Playbacl(, Delete and X'ormrt Pictures or
You can take the SD card out of the camera and use a
Videos
card reader to view or delete the pictures and videos. Or
There are three ways to playback or delete pictures or
you can connect the camera directly to your computer in
videos:
which case the camera works as a card reader.
l8
19
Advanced Operations
c) IY or Picture Viewer (such es a digttal picture
After you are familiar with the basic operations of
frame)
carnera,
You can also connect the camera to a TV or other
basic operations, only the options and parameters of the
Note that the stand-alone operations of playback and
camera are explained in more details.
l
I
2.7
Power
Press"MENU" key to enter/exit the menu, press
off in 5 minutes if no keypad input. Please note
in the OFF
l
,
v to
move the marker, atid press "OK" to confirm the change.
off
Just Hold down the power key for 3.5s. Or auto power
even
you are now ready for advanced operations. The
advanced operations in this section are very similar to the
picture viewer to view or delete the pictures or videos.
deleting can only be done in the TEST mode.
the
mode, the camera
still
that
consumes
Always remember press "OK"
$
q
s
Otherwise you will lose your new setting.
x
3.1
1
be used for a long time.
save the
change,
Basic Menu Parameter Setting
In order to do the
certain power at pA level. Therefore, be sure to take the
battery out of the battery cabinet
to
d
parameter settings, you must enter the
TEST mode firstly. Parameter settings start by pressing the
if the camera will not
j
i
I
I
I
I
I
i
MENU key in the TEST mode.
After you enter the Test mode, some suggestive information
will
be shown on the LCD. Press the UP or DOWN key to
enter the previous or next menu (the UP key for the previous
I
i
I
J
2t
menu and DOWN key for the next menu). Piess OK key to
save the current setting or
MENU key for canceling the
setting and exiting. After pressing OK key, the selected
m
MENIU
Capture Mode
value will be no more highlighted.
Resolution
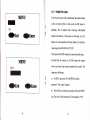
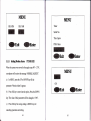
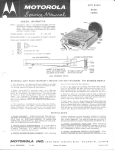
3.1.1 Setting Mode
Movie Size
There are two modes for the camera, the "Capture"mode,
Video Time
andthe "Movie"mode.
a)
In MENU, press the UP or DOWN key
till
{DExit Onnter
the
parameter "Mode" appears.
b)
Press
OK key to enter into the option ,press the DOWN
key, the value of this parameter
c)
Press
will
be changed to
"Movie".
OK key for saving setting oi MENU key for
x
MEI\U
Movie
canceling setting and exiting.
Onrit
OEot".
23
3.12
Setdng Capture Mode
This parameter affects the number ofpictures taken for each
triggering in the camera mode .It has three values: "single",
MEI\U
Mode
"Camera+Video" "3 pictures". It default value is "single".
The following shows you how to set shooting number as
Resolution
"Camera+Video" provide that the previous value is "single"
Movie Size
inMENU.
Video Time
a)
In MENU, press the UP or DOWN key
till
the
parilneter "Capture Mode" appears.
b)
Press
Onrit
JEnter
OK key to enter into the option , press the
DOWN key, the value of this parameter will be changed to
"Camera+Video".
c)
Press OK key
for saving setting or MENU key for
canceling setting and exiting.
I
MEI{U
Camera+Video
3 pictures
(DExit
Ogotu"
3.13
SettingResolution
MBI\U
This parameter has four values : 5M(2592*
19
44),8M(3264* 2448),
l0M(3456*2592),12M(4000*3000). The default value is 8M.
a)
In MENU, Press the UP or DOWN key till the parameter
"Resolution" appears.
b)
will
be change to
"l0M".
the value
"l0M"
is
highlighted.
c)
Capture Mode
T
Movie Size
Press OK key to enter into the option , Press the UP key,
the value
Mode
Video Time
Onrit
@nnter
Press OK key to save the current setting or MENU key
MEIYU
for canceling the setting and exiting.
tzM
n
10M
5M
Onrit
26
Onnter'
27
3.1.4 Setting Movie Size
MEI\U
This parameter has four values
:1
280*72 0,7 20* 480, 640*480
and320*240.The default value is 640*480.
I
a) In MENU,
I
parameter
press the
"Movie Size"
Up or DOWN key till
L,
appears.
c)
will
tDll
720*480
13201 320* 240
(DBxit
Press OK key to enter into the option, Press the DOWN
key, the value of the parameter
7280*720
the
I
b)
tHDl
be change to *320*240".
Press OK key to save the current setting or
Onnter
MENU key
3.1.5 SettingVideoTime
for canceling setting and exiting.
This parameter has four values: 15sec, 30sec, 60sec,
MEI\tU
I
20sec .The default value is 15 seconds.
Capture Mode
a)
Resolution
I
parameter "Video Time" appears.
b)
Video Time
Onrit
In MENU, press the UP or DOWN key till the
OEot
Press OK key to enter into the option ,Press the DOWN
key till the value change to "30 Sec".
"
c)
Press OK key for saving setting or MENU key
canceling operation and exiting.
28
for
MENU
3.1.6 Setting PIR Sensifivity
Capture Mode
This parameter defines the sensitivity of the PIR. The higher
Resolution
degree indicate that
n
it is more easily to be triggered by
motion,taking more pictures or recording more videos. It is
Movie Size
recommend to use high sensitivity in room or environment
PIR Sensitivity
with little interference , and to use lower sensitivity for
Onrit OBnter
outdoor or environment with lots of interference like hot
x
wind, smoke, near window etc.
Furthermore, thg sensitivity ofthe PIR is strongly related to
MENU
the"temperature. Higher temperature leads to lower
sensitiviry Therefore it is suggested to set
a
higher
30sec
sensitivity for high temperature environment.
60sec
At the same time ,"High" indicate the detecting distance is
l20sec
Onrit OEnter
about 0-20M, "normal" is about 0-12M,
*Low" is about
0-8M.
The following shows you how to set the sensitivity by using
the shortcut key:
31
,tr
.,.,
a)
In MENU, press the UP or DOWN key till the
parameter "PIR Sensitivity" appears.
b)
Press
OK key to enter into the option. Press the
DOWN key. The value of this parameter will be changed to
"Normal".
c)
Press OK key
for saving setting or MENU key for
m
MEI\U
Normal
Low
Cnrit Cnrt."
canceling setting and exiting.
3.1.7 Setting llmer
MEIYU
Select On
if you only
want the camera to work within a
Capture Mode
specified time period every day. In the rest of the time the
Resolution
device is shut off. The value ofthe hour ranges from 0 to 23
Movie Size
and the minute ranges from 0 to 59.
Video Time
Timer Switch OFF means the camera works all along
For instance,
Onrit
OErtet
if
.
the starting time is set at 13:14 and the
ending time at 5:20, the camera will firnction froml3:14 the
current day to 5:20 the next day. Outside the time period the
--
camera
will not be triggered or take
photos/videos. This
feature can be used together with Time Lapse feature.
The sleps are as following:
a)
b)
till
the
Video Time
"Timer" appears.
PIR Sensitivify
Press OK key to enter into the option ,Press the
key. The value of this parameter
c)
Resolution
Movie Size
In MENU, press the UP or DOWN key
parameter
MEIYU
DOWN
will be changed to "ON".
Use LEFT and RIGHT key to alter between each slot,
I
Onrit
Onnter
and use UP and DOWN key to change the value until the
start time changes
to 13;14 and'the stop time changes to
5:20.
d)
Press OK key
for saving settihg or MENU key for
I
MEI\U
ON
canceling setting and exiting.
Onrit
34
Ornter
b)
MENU
x
HH:MM
OK key to enter into the option ,Press the DOWN
key. The value of this parameter
HH:MM
c)
be changed to
"ON".
Use LEFT and RIGHT key to alter between each slot,
d)
Press OK key
for saving setting or MENU key for
canceling setting and exiting.
Setting Serial No.
MEI\U
Setting a serial number can print on the photo, and pointing
out the photo where it is filmed. When turned on, the serial
Movie Size
number will automatically appear with the photo's time
Video Time
stamp.You can use the combination
of4 digits
to record the
location in the photos . This helps multi-camera users
identifu the location when reviewing the photos.
a)
will
and use UP and DOWN key to change the number.
(Dnxit OErt..
3.f.8
Press
In MENU, press the UP or DOWN key till the
parameter "Serial
No." appears.
36
PIR Sensitivity
rOn*it
Timer
Ornter
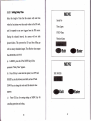
3.1.9 Setting Time Lepse
MENU
I
If
I
ON
Ourit
]Enter
i
set On, the camera
will
automatically take photos/videos
at the set interval (Note: in this mode, the.PIR sensor is
disabled). This
is helpful when
observing cold-blooded
animals like snakes, or the process of flowering, etc. This
feature can work together with Timer feature. The effective
value ranges from 00:00:00 to 23:59:59.
Time lapse Switch OFF means the camera works all along.
Provided that the camera set 3:20:40, means the camera
MEI\U
work every three hours twenty minutes forty seconds. The
Serial
steps are as following:
:
:
Onrit
OEot."
t
I
a)
In MENU, press the UP or DOWN key till the
parameter "Time Lapse" appears:
b)
Press
OK key to enter into the option ,Press the DOWN
key. The value of this parameter
39
will
be changed to
"ON".
c)
Use LEFT and RIGHT key to alter between each slot, and
use UP and
DOWN key to change the value until the start time
is 3:20:40.
d)
Press OK key
for saving setting or MENU key for
canceling setting and exiting.
f
MENU
ON
Onrt..
{Dntit
MEI{U
Video Time
MENU
PIR Sensitivity
Timer
HH: MM:SS
Serial No.
Cnrit
Note: Set-on-Will NO PIR
OEnter
Onrit
OBot
I
i
I
4l
"
3.1.10 SettingPIR-Dtine (TC101G1E)
MEIYU
The PIR detecting distance is comparatively far , IR LED
PIR Sensitivity
illuminating distance is relatively close, so at night or
Timer
insufficient light we can fix the PIR detecting is about 0-8m
Serial No.
in case of taking useless photos . When you set the PIR-D
Time Lapse
time ON, It means the PIR detecting distance is about 0-8m
during the time you set. Other times it is decided by the PIR
Sensitivity.
E.g. You set PIR -D time is ON,
HH:MM
Onrit
OErt
"
HH:MM is 18.00-6.00, PIR sensitivity is high, It means
the PIR distance is about 0-8m from 18.00 to
6.00,
other
I
times it is about 0-20M.
MEI\U
ON
Onrit
42
Jnnter
43
MEIYU
HH:
MM
IX
MEI\U
Timer
HH: MM
Serial No.
Time Lapse
(DExit
OEot."
On'it
3.1.11 SettingMotionAlarm (TC101G1E)
When the camera was moved in the angle scope 90o -- 270",
your phone will receive the message *MOBILE ALERTS".
a)
In MENU, press the UP or DOWri key till the
parameter "Motion
b]
Press
Alarm"
OK key to enter into the option ,Press the DOWN
c)
Press
t
be changed to
"ON".
OK key for saving setting or MENU key for
canceling operation and exiting.
i
will
r
Onote"
MEI\U
ON
appears.
key. The value of this parameter
PIR-D time
Onrit
Onot
"
3.1.12 Setting Delay lime
Select the length
of time that the camera will wait from
when the last picture was taken and written in the SD card,
until it responds to any new triggers from the PIR
During the selected interval, the camera
sensor.
will not take
MEI\U
Serial No
Time Lapse
PIRD-Time
MotionAlarm
pictures/videos; This prevents the SD card from filling up
with too many redundant images. The effective value ranges
from 00:00:00 to 0l:59:59.
a)
In MENU, press the UP or DOWN key till the
MEIYU
parameter "Delay Time" appears.
b)
Press
OK key to enter into the option ,Use LEFT and
RIGHT key to alter between each slo't, and use UP and
DOWN key to change the value until the desired value
Press OK key
n
HH: MM:SS
OErt
C)Bxit
appears.
c)
(DEnter
Cnrit
for saving setting or MENU key for
canceling operation and exiting.
46
47
"
f.f.ff
,
Setting Blue LED
We need set the LED off in "on mode" in case of spooking
.
the game. [n test mode, when setting the LED on, you can
find the LED get blue when PIR detect the game.There is
system adjusts to on mode.
a)
b)
"Blue LED"
Delay Time
I
Onrit
appears.
(DEnter
Press OK key to enter into the option, Press the DOWN
key , the value of the parameter will be change to " ON "
c)
MotionAlarm
IR Photo
In MENU, Press the UP or DOWN key till the
parameter
PIRD-time
a
waiting time of about 30 seconds (LED get blue)before the
F
MEI\U
.
Press OK key to save the current setting or MENU key
for canceling setting and
exiting.
:
I
MEI\U
ON
(DExit
Onot "
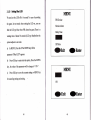
3.1.14 SettlnglRPhoto
MEI\U
The animal usually stay, pass by or run from the camera.
so we set the menu separately. "Mobile photo", "Still
PIR-D time
MotionAlarm
photo". You can set as your requirement.
a)
In MENU, Press the UP or DOWN key till the
parameter
b)
"IR Photo"
Biue LED
appears.
Press OK key to enter into the option, Press the DOWN
key , the value of the parameter will be change to "Still
photo".
c)
Delay Time
f,
(DExit
Onot."
Press OK key to save the current setting or MENU key
for canceling setting and exiting.
I
MEI\tU
Still photo
(DExit
OEot
"
3.1.15 Setting TV OUT
l
a)
In MENU, Press the UP or DOWN key till the parameter
*ry
OUT" appears.
b)
Press OK key to enter into the option, Press the DOWN
PAL
key, the value of the parameter
c)
MEI\ru
I
This parameter also has two values: NTSC and PAL.
will
be change to
Onrit ]nnter
" PAL".
Press OK key to save the current setting or MENU key
3.1.16 Setting Date stemp
for canceling setting and exiting.
If you want
MENU
the time to be stamped in the pictures and video
clips when the picture or video was taken, you can choose
MotionAlarm
the time stamp option. The default value is ON.
Delay Time
a)
Blue LED
Stamp" appeaxs.
r(DExit
b)
IR Photo
In MENU, Press the UP or DOWN key until "Date
Press
OK key to enter into the option, Press the UP key,
the value of the parameter
OEnter
c)
will
be change to "OFF".
Press OK key to save the current setting or MENU key
for canceling setting and exiting.
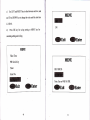
3.1.17 SetfingLenguage
MBI{U
This parameter have six values:
Blue LED
English,Chinese,Deutsch,Suomen,Francais and. Svenska.
IR Photo
a)
x
In MENU, Press the UP or DO\VN key till the
TVOUT
parameter "Language" appears.
OErt."
Qnrit
b)
Press OK key to enter into the option, Press the DOWN
key, the value of the parameter
will
c)
cirrent setting or MENU key
Press OK key to save the
be change to 'Chinese".
for canceling setting and exiting.
MEI\U
MENU
m
Blue-LED
OFF
(D,Exit
IR Photo
TVOUT
OBrt
"
n
Onrit
Date Stamp
&Enter
MEI\U
DOWN key to change the number. Select "OK" to confirm
the changes.
After the setting of the date and time are all finished, press
ItrJ
ffi,f4+r
De
Deutsch
Su
suomen
Fr
francais
Se
Svenska
the OK key to save them. Please note you'll quit the
parameter setting without any saving and no parameter is
changed
if you
press the MENU key at any time only before
pressing OK key
.
(DExit CEnter
IR Photo
3.1.18 SettingDate&Tlme
You can change the date and time of the device by setting
this parameter when necessary after every battery change.
a)
In MENU, Press the UP or DOWN key
till
the parameter
"Date &Time " appears.
b)
Press
MBI\U
OK key to enter into the option, Use LEFT and
TV OUT
Date Stamp
Language
Onrit OErt."
RIGHT key to alter between each slot, and use UP and
57
cy Use LEFT and RIGHT key to alter between each slot,
MENU
and use UP and DOWN key to change the number and
alphabet. Select
MM/DD/TYTY
"OK'to confirm
the changeS, and exit the
screen.
-
On*it
MEI\tU
TVOUT
Date Stamp
3.1.19 Setfing Password
Ifthe
Language
system password was set, the device can be protected
from non-users, since it cannot enter the test mode without
the password and thus cannot be used.
_
a)
In MENU, Press the UP or DOWN key till the parameter
'?assword" appears.
b)
Press
OK key to enter into th" option, Press UP and
DOWN key to choose either "ON " or *OFF"
I
.
Date&Time
I
Onrit
OPnter
MEI\U
I
3.2
MMS Menu Parameter Setting
Press
"MENU" Key for about 3
seconds, you
will
see the
MMS menu
ON
Onrit
Onnter
3.2.1 Manual
a)
set
In MMS MENU, Press the UP or DOWN key till the
parameter "Manual Set" appears.
b)
x
MEIYU
Press
OK key to enter into the option
,
ask your
operator for URL, APN, GATEWAY, PORT.
please input password
c)
Press OK key to save the current setting or MENU key
for canceling setting and exiting.
:
(DExit OErte"
Note
:
Pleese
32.2
a)
MMS APN and SMTP APN maybe difierent
kindly remember to change
Setting Phone No.
In MMS MENU, Press the UP or DOWN key till the
parameter "Phone
60
it
No." appears.
6t
b)
Press OK key to enter iqto the option , then input your
3.2.5
a)
the phone No.
Setting Phone or E-mail03
In MMS MENU, Press the UP or DOWN key till the
parameter "Phone or E-mail 03
3.23
b)
SettingE-meil
a) h MMS MENU, Press the UP or DOWN key till the
parameter "E-mail
b)
"
" appears.
Press OK key to enter into the option , then input your
Phone or E-mail
.
appears.
Press OK key to enter into the option , then input your
3.2.6
a)
E-mail.
SMTP set ( TC101G1E)
In MMS MENU, Press the UP or DOWN key till the
parameter "SMTP Set" appears.
32A
?)
Setting Phonb or E-metl 02
In MMS MENU, Press the UP or DOWN key till the
b)
Press OK key
to enter into the option , ask yoir
operator for SMTP SERVER, SMTP PORT, USER NAME,
parameter'?hone or E-mail 02" appbars.
SENDER MAIL, SENDER PASSWORD(24 characters--
b)
letters or numbers ), RECIPIENT MAIL.
Press OK key to enter into the option , then input your
Phone or E-mail
c)
.
Press OK key to save the current setting or MENU key
for canceling setting and exiting.
62
3.2.7
Setting Option
50, it means the camera totally sent 50 pictures until you set
The default setting is MMS. You can freely choose
MMS.
off,
SMS or SMTPCIC101G1E). MMS is to send
the parameters again.
a)
In MMS MENU, Press the UP or DOWN key till the
Pictures, while SMS is text messages(Serial No. and photo
parameter "Max Image No." appears.
name )only. SMTP means Email account send images to
b)
your email account.
DOWN key to choose *1", *10",'20", *30", *40", *50",
a)
*
In MMS MENU, Press the UP or DOWN key till the
Press
OK key to enter into the option ,Press UP and
*200-,* 5OO- .
60-,;7 O-,* 80",..90", - 1 00-,
parameter "Option" appears.
c)
b)
for canceling setting and exiting.
Press
OK key to enter into the option ,Press UP and
Press OK key to save the current setting or MENU key
*Off " "MMS"
DOWN key to choose
,"SMS" or "SMTP".
c)
Press OK key to save the current setting or
for canceling setting and
exitirg.
MENU key
?
3.2.9
Press "Yes" to Restore default settings.
a)
12.8
Setting Mex Image No.
64
In MMS MENU, Press the UP or DOWN key till the
parameter "Reset config" appears.
You can set the number of pictures sent via MMS. The
numbers are counted from entering on
Reset config
mode.
E.g: I choose
b)
Press OK key to enter into the option ,Press the DOWN
key ,the value of the parameter will be change to 'No".
c)
Press OK key to save the current setting or
3.3
MENU key
If you want
for canceling setting and exiting.
,
I
to know whether the camera can detect a certain
spot, you can test according to the following procedures:
Notice:
a)
Switch the camera to the Test mode.
TCI01G1: Mobile phone send MMS to your mobile
b)
Make movements around a certain spot in front of the
mobile phone,
I
SensibleAngle and Distance Test
It
charge
in accordance with the MMS
camera.
If
the PIR detect, Blue LED blinks,
it indicates that
numbers or SMS numbers. You need set Manual set,
position can be sensed. Otherwise, that place is out of the
Phone NO., E-nail, Phone or E-mail 02, Phone or E-mail
sensrng area.
03, Option, Max Image No as your requirement
3.4
l
I
I
Mounting tte Camera
I
When use the camera
I
TC101G1E: Email account send images to your email
account.
It
is charged lssspding td the internet flow. You
need set the APN
in Manual set
SMTP Se(SMTP
I
in outdoor environment,
such
as
hunting or monitoring the living habits of wild animals, you
need to mount the device on a certain place properly. To get
the optimal picture quality, the recommended distance is
SERYE& SMTP PORT, USER NAME, SEI[DER MAIL,
3-5m from the tree to the target monitoring area
I
SENDER PASSWORD(Max.12 characters-letters or
recommended height from the ground
t
numbers
and
t
l
I
t
),
Manual set
RECIPIENT MAIL) and set Option in
ae
SMTP.
is
1.5-2
meters.
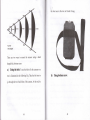
Adjust the viewing angel properly (view angle of this
camera is 53").
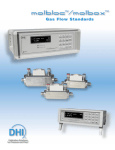
6'7
the two toes to the tree to finish fixing.
There are two ways to mount the camera: using a band
shaped belt, botlom screw.
a)
Using the belt:
To use the belt to
fix the camera on a
tree is illustrated in the following F1e. Take the belt toes to
go through the two back holes of the camera.
At the end, tie
b)
Using bottom screw.
TWO.YEAR LIMITED 1VARRANTY
We take great pride in our products. We always stand behind
applicable to the original product
our promises. Buying a our product, you are covered under
This warranf extends solely to failures due to defect in
a
We guarantee our products to be free of defects in materials
normal wear of the product
and workmanship under normal use and service for a period
Ifyou
date
of
purchase- This
warranty does not cover consumer caused damages such as
misuse, improper handing or installation. or repairs attempted
by someone other than our authorized technicians.
We will, at our option during the warranty period, repair
your camera or replace
it with tlre same or comparable
original retail buyer from our authorized dealer. Purchase
receipt or other proof of the date of the original purchase is
I
required to receive warranty benefits . The warranty on any
replacement product provided under the original warranty
i
70
L
.
materials or workmanship under use.
TWO YEAR limited warranty.
of TWO years after registered
i
shall be for the remaining portion of the warranty period
It
dose not cover
.
need to retum a product under ttris warranty, please
contact your dealer or our disfributor.
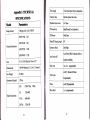
Appendix L TECHMCAL
SPECIX'ICATIONS
Model
Perameters
lmage Sensor
5 Mega
pixel Color CMOS
2592*1944 5M
3264*2448 8M
I
Picture Resolution
3456*2592 loM
3000*4000 l2M
lens
F:3. I FOV(Field of View)=53'
Dimensions
1
NetWeight
0.34KG
Operation Keypad
l7keys
Video Resolution
58*86*68mm(6.2 x 3.4x 2.7 inches)
I
5sec/30sec/60sec/ l20sec (Adjustable)
Camera+video
first take picture then video
Playback Zoom in/out
14Times
PIR sensitivity
HighNormal/Low(Adjustable)
PIR Sensor
MultiZone
Main PIR SensingAngle
600
Operation Mode
DayNight
Auto Power Offin
Auto Power
keypad
Delay time
5 minutes
Off
contolling
lsec.-2h. programmable
on/off;
I
SeconG.24Hours
Time Lapse
Programmable
HD
Dl
VGA
QVGA
I
72
t_
Video length
1280x720p 30fPs
720x480
640x480
320x240
Timer
on/off; Programmable
Photo Burst
I or 3 programmable
while no
MMS PhoneNo.
1-3 Phone Numbers
MMS E-mail
l -3
E-mail addresses
Date, time , serial no, temperature, moon
Timer stamp
phase
4 characters-Digits and alphabets set by
Password
Appendix
II: PACKAGE CONTENTS
Part name
Quenttty
Digital camera
t
Belt
1
USB cable
1
TVAV IN Cable
I
lnstruction Manual
I
Warranty Card
I
External DC cable(optional)
I
yourself
Device Serial No
4 digits
External DC Power Supply 6V
TV.OUT(NTSC/PAL), MIM USB, SD
Interface
CARD Slot,6VDC, SIM CARD Slot,
Tripod slot.
I
L
Nail
Mounting
Strap or Tripod
Waterproof
IP54
Operation Temperature
-22oF
Operation Humidity
s%----95%
Certificate
FCC&CE&ROHS
to 158'F(-30"C to 70"C)