1
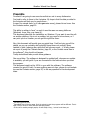
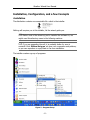
Weather Wizard User Manual A tool to superimpose weather data of different shapes, and from different origins, for better reading and understanding. 3 stacked weather faxes 3 faxes in Google Earth, with cloud layer 3 faxes in Google Map 4 faxes, including a satellite picture, plus a GRIB file Presented by Oliv Soft © Oliv Soft, 2007, 2008, and beyond Weather Wizard User Manual -2- Weather Wizard User Manual Content Preamble........................................................................................................5 Objectives......................................................................................................6 Installation, Configuration, and a few Concepts.................................................8 Installation..................................................................................................8 Configuration...............................................................................................9 Automatic Updates...................................................................................9 A few concepts............................................................................................9 Faxes.....................................................................................................10 GRIB files...............................................................................................10 Composites............................................................................................10 Patterns.................................................................................................11 Display......................................................................................................12 The File Tree Panel.................................................................................12 The Floating Toolbar...............................................................................14 Let’s just get started......................................................................................15 Menu WeatherAssistant..............................................................................15 Menu Console............................................................................................15 The program.............................................................................................16 Warning........................................................................................................17 Basic............................................................................................................18 Ashore......................................................................................................18 Patterns Usage.......................................................................................18 Google...................................................................................................19 At sea.......................................................................................................20 Patterns Usage.......................................................................................21 Using GRIB Files........................................................................................21 GRIB Data..............................................................................................21 Displaying the wind................................................................................22 Contour lines detection...........................................................................23 GRIB smoothing.....................................................................................25 3D views................................................................................................27 Using Composites......................................................................................29 Advanced......................................................................................................30 Loading and displaying faxes, without patterns............................................30 Download faxes from the Internet...............................................................33 Auto-download.......................................................................................33 Creating a Pattern......................................................................................34 Different Projections...................................................................................34 NMEA Data...............................................................................................35 Routing.....................................................................................................35 Expert..........................................................................................................41 Configuration Files.....................................................................................41 -3- Weather Wizard User Manual places.xml..............................................................................................41 predefined-zones.xml..............................................................................41 download.xml.........................................................................................41 autodownload.xml..................................................................................41 Polars........................................................................................................41 User Exits..................................................................................................41 Appendix......................................................................................................44 Preferences...............................................................................................44 GRIB email client.......................................................................................46 gribmail.properties..................................................................................47 gribrequests.properties...........................................................................47 HTTP NMEA Server....................................................................................48 Miscellaneous Hints and Tips......................................................................49 Resources..............................................................................................49 Set Fax Width/Height ratio......................................................................49 Contacts.......................................................................................................50 Notification subscription.............................................................................50 Viewlets........................................................................................................51 Known issues................................................................................................52 Routing.....................................................................................................52 External resources.........................................................................................53 -4- Weather Wizard User Manual Preamble I’m afraid I am going to use some terms that are not in every dictionaries. I’ve tried to refer to those in the footnotes. My hope is that the data provided in the footnotes will help you to google them… In case I’ve missed some (or in case you miss some), please let me know. Use the Contacts section, page 50. This utility is written in Java1, as such it runs the same on many platforms (Windows, Linux, Mac, you name it!). This document describes the installation on Windows. If you want to use the soft on another platform, this is not a problem, but you need to let me know, so I can point you to a location you can get the right files from2. Also, this document will mostly give you guide lines. It will not give you all the details, as you can probably and hopefully figure those out yourself. Never hesitate to click (meaning also right-click) an unknown zone…, if it fails, please do report it (using the Contacts section, page 50, or the Contact menu item in the software3), this should not happen. Tooltip texts should also provide some guidance. One more thing. The software is designed to update itself, whenever an update is available, you will get it if you are connected to the Internet when you start the program. This document might not be 100% in sync with the software. The software remains the point of truth. In case anything was not clear, please do not hesitate top use the Contacts section, page 50, to ask any question to the development team. 1 See http://java.sun.com Executable files will be the same. Only the scripts to start the programs will be different. That is what I have to write for each different operating system. 3 If this soft is used by enough people, we will setup a blog…, but we’re not there yet. 2 -5- Weather Wizard User Manual Objectives Weather forecasting is a very complex work. As long as we have access to the relevant data – elaborated by skilled people – the task becomes a bit easier. The main difficulty left is reading those documents. This is what the software we are presenting is after. It’s mostly about presenting and rendering the data you can gather from the appropriate sources. The software this document is about has been designed to superimpose several kinds of documents on top of a chart, in order to be able to relate the data they contain to geographical data, like longitude and latitude. Typically, we will superimpose faxes (images) and GRIB4 file renditions, on top of a chart, onto which we can plot the current location and heading of a boat. Figure 1 - Three faxes, with a GRIB file, a boat, and a bubble at the location of the mouse. Superimposing faxes and GRIB data could seem weird or useless to some people. It actually makes a lot of sense. GRIB data are computer generated, and computers in that case will be no smarter than the model they’ve been programmed to follow. Faxes, on the contrary, are elaborated by human people, 4 GRIB. GRIdded Binary -6- Weather Wizard User Manual who can put intelligence and skill into their work5, based on data gathered every day at 0000 UCT and 1200 UCT. Making sure the GRIB data match the faxes would grant some credibility to the computer... For example, the computed model the GRIBs are generated from do not show tropical phenomenons like Tropical Depressions, Tropical Storms, or Hurricanes… Faxes do. In such places, the GRIB data could predict 20 knots of wind, when at the same time, the anemometer is recording 80 steady knots… That’s part of what we mean when saying that superimposing data from different origins could make sense. 5 Lee Chesneau is extremely clear about that, to say the least! -7- Weather Wizard User Manual Installation, Configuration, and a few Concepts Installation The distribution contains one executable file, which is the installer. Nothing will surprise you in this installer, let the wizard guide you. Make a note of the directory you’ve installed the software in, we might need this directory name in the following sections. If you are upgrading the soft, it is probably better for now to uninstall it first. Before doing so, do save your composites and patterns, so you can reproduce or copy them in the new installation. The installer creates a group of programs: Figure 2 - Program Group -8- Weather Wizard User Manual Notice the two icons at the bottom, both for the Weather Assistant. In case you are behind a firewall, you need to modify the bottom one, which can be used with a proxy. To do so, right-click on the menu-item labeled “WeatherAssistant w proxy”, and choose the property menu item in the popup menu that should show up. Then in the dialog that appears, modity the “Target” field to reflect the name and port of the proxy you wish to use6. That’s all. • If you don’t need a proxy, you will use the program labeled “Weather Assistant”. • If you need a proxy, you will use the program labeled “Weather Assistant w proxy”, modified as explained above. Configuration Configuration preferences are set through the menu Tools > Preferences. Those preferences are made out of three groups. • Display • Polars, Routing, NMEA • Miscellaneous All those preferences have default values, they all can be customized. For detailed information about each of those preferences, see the Preferences section, on page 44. Automatic Updates If you have an Internet connection when you start the software, it will automatically check on the net if any recent update is available. Those potential updates can be automatically downloaded or not, based on the value of the preference named “Automatic Updates/Downloads” in the “Display” category. If it is set to “true”, then any new file will be downloaded when found (a backup of the previous one will be done). The new features or bug fixes will be available next time you restart the program. A few concepts This software has been designed with two kinds of audience in mind: • The people sailing at sea • The people preparing their trip, ashore, or routing someone else 6 The command looks like this: "C:\Program Files\OlivSoft\olivsoft.bat" -verbose n -direct y -option C -proxyHost your.proxy.com -proxyPort 80. Repalce your.proxy.com and 80 with the right values. -9- Weather Wizard User Manual The first ones have limited Internet access (if any), but they can receive faxes and GRIB files through the SSB7. Several specific paragraphs will be dedicated to SailMail users. The second ones have access to the Internet, and the resources it provides. This software can be used both at sea, and ashore. The software uses and manipulates four main kinds of documents: Faxes These are images downloaded from the Internet, or through the SSB. These files are images. From the Internet, the files are usually gif8 or jpg9. The SSB – with GetFax - usually provides faxes as tiff10 files. Satellite pictures can also be received as faxes. It is interesting to see how the satellite images are reworked before they’re released. They are not always rendered as optical projections. They can be Mercator, Lambert, or something else. GRIB files These files contain binary data, they can be obtained through an email request to various providers, like saildocs11. Those data are not readable without a dedicated software. Composites This “composite” notion belongs to the software this document is about. A composite will refer to the different documents loaded and displayed at a given time, the way they’re scaled and positioned relatively to each others, the color used to display them, and the way they are possibly rotated (some faxes arrive “on the side”, they have to be rotated of 90°. Some faxes downloaded from the SSB (they are real faxes, their shape really depends on the way they’ve been put on the fax machine, at the emitting end) need to be rotated of a couple of degrees). A comment can also be associated with a composite. A composite is stored on your system, as an XML12 file, so it can be reopened later on. Once you have a composite you are happy with, it is your responsibility to save it13, so you can reuse it again later on. SSB. Single Side Band GIF. Graphical Interchange Format 9 JPG, or JPEG. Joint Photographic Experts Group 10 TIF or TIFF. Tagged Image File Format 11 See the User Exits section, page 46 for the GRIB email client details. 12 XML. Extensible Markup Language 13 File > Save Composite 7 8 - 10 - Weather Wizard User Manual In other words, a Composite is what you see in the right pane. It can be made of a chart (you can show/hide it, show/hide the chart grid), zero or more faxes (each of them having a scale and a position in the composite), zero or one GRIB. The colors of all the components of a Composite can be modified. Composite Archive The software now provides the possibility to archive a composite. It means that a sinlge file (with the “waz”14 extension) will contain all the data needed for the rendering of the composite (all faxes, GRIB). This allows you to eliminate dependencies between a composite and the files it refers to. It can also be useful in case you want to exchange composite with someone else, just send him the composite archive, and he will be able to display the composite you’ve archived in just one click. The waz-file is actually a zip-file containg a file named composite.xml, and all the other data it refers to (faxes and grib). It can be opened with any archiver program supporting the zip format15. Once generated, an archived composite cannot be modified. The files used by the composite are not necessary anymore, they can be removed if they’re not needed anywhere else. This option is suggested when you create the archive. The archived composites are shown in the same panel as the regular composites, their icon is the same, with a “Z” superimposed on it. Figure 3 - Archived Composites Patterns What we will call a “pattern” is also a notion belonging to this software. 14 15 The “waz” stands for Weather Assistant Zip. In this regard, it is very similar to the kmz files, used by Google Earth. - 11 - Weather Wizard User Manual This concept has been elaborated after working quite a while with the early versions of the program. At that time, we had the possibility to use the faxes available on the file system to zoom each of them in or out, pan top, down, left or right, and possibly rotate them of a given amount of degrees. This can be pretty long and precise, which is fine, if this is what it takes. The thing is that, if the next day, you wish to create a new composite containing the same faxes, downloaded at different dates, the amount of work will be the same every time, and the zoom factors will be identical to what they were the previous time, as well as the pans, and rotations. Even the colors you choose for each fax might be the same. The idea behind the pattern concept is thus to store some kind of empty composite, containing everything but the file names. This way, when you load a composite from a pattern, you are prompted to enter the location of each fax components (i.e. “North Pacific Surface Analysis”, “North Pacific 500mb Analysis”, “Central Pacific Streamlines”, etc), which is convenient. All other parameters of the composite are what they were at the pattern creation time. As a matter of fact, a pattern is created after a composite. Once you have a composite you are happy with, you can create a pattern out of it. Dynamic Patterns One step beyond again, we have the concept of dynamic patterns. Those ones will not prompt you for the location of the different files, they contain instead the URL16 where those data can be downloaded from the Internet. As a result, when you invoke such a pattern, the files are automatically downloaded from the Internet, saved on your file system, and appropriately disposed on the pattern to produce the composite. The dynamic patterns can be used only if you have an Internet connection available. This probably means not at sea. Display The File Tree Panel On the left side of the main window, there is the File Tree Panel. It is made out of several panels, reflecting the directory and file structure of the documents we mentioned above, faxes, GRIBs, composites, and patterns. The root directories for each of those categories are set by the application preferences (Miscellaneous category). 16 URL. Uniform Resource Locator - 12 - Weather Wizard User Manual Notice that on top of each panel is a button that allows you to collapse or expand the panel it relates to. This can be useful for the real estate management. Figure 4 - File Tree Panel, on the left. The tree structure reflected in the Tree File Panel is the structure of the directory as they are on your system, under the root mentioned in the preferences. Typically, I arrange the faxes, GRIBs and composites by year and month, and the patterns by category, or geographical area. But there is no restriction in this domain. Whatever structure you can come up with on your file system will be reflected in those panels. In all the file panels (except the Patterns one), the files are sorted so the most recent shows up on top. The Patterns panel is sorted alphabetically. The File Tree Panel is part of the main window. It can be collapsed, to make more room for the charts and faxes. - 13 - Weather Wizard User Manual The Floating Toolbar There is a floating toolbar, containing controls for faxes, charts, GRIBs, etc. It is divided into several sections that can be collapsed or expanded by clicking on the button on top of each of them. One region of the toolbar cannot be collapsed, the top one, holding the different factors (zoom, L&G increments, fax increment, and all layers zoom button, grab scroll/drag & drop toggle). An item in the menu (Tools > Show fax toolbar) allows you to hide and show it. The toolbar can be docked (click the at the top right corner) or undocked (drag it outside the window it is docked in). - 14 - Weather Wizard User Manual Let’s just get started This section gives you an example of what you will be able to do with this software once you are used to it. Let us pretend you know what you are doing. We assume you are home, with an Internet connection available. If you are already at sea, you should have read this before… You have installed the software, and there is a shortcut created on your desktop (if you have selected this option during the installation. If not, go find the shortcut in Start > Programs > OlivSoft). Menu WeatherAssistant You can choose the “WeatherAssistant” program, or “WeatherAssistant w proxy” if you are behind a firewall. Menu Console Another possible option is to use the Console. Here is the window you should see: Figure 5 - The console Choose the option “C”, and hit the “Enter” or “Return” key. - 15 - Weather Wizard User Manual The program Whatever option you choosed to start, you should see a splash screen, followed by the Weather Assistant window. As you can see on the splash screen, all faxes, gribs, composites and patterns are scanned – that’s the reason why it takes some time – to provide the appropriate tooltip/bubble. In the File Tree Panel at the left of the main window, at the bottom, expand the node that says “Patterns” (by double-clicking on the folder icon next to its name), and then the one that says “Dynamic”. Then double-click on the file named “Pacific.Sfc.500.Streamline.ptrn”. This should start an automatic download of three faxes for the Northern and Central Pacific, which should display a brand new composite within a couple of seconds. Then go to the menu File > Save Composite, and save your work. Now, close the program, and re-open it. Once launched, go to the Composite section of the File Tree Panel, navigate to the composite you have just saved, and double-click on it. This should reopen the composite you saved just before… When creating or re-opening a composite, here is the sequence of operations that happens for each fax: 1. Fax is loaded 2. Colors are changed from black to what you choosed 3. Fax is made transparent 4. Fax is resized 5. Fax is placed on the composite This obvisouly takes some resources. To bypass that step, you have the possibility to create an image (png, jpeg, gif, etc) out of your composite, so you can then manipulate it in any imaging software. From there you can rework your images, create animated gif, etc. - 16 - Weather Wizard User Manual Warning The software is designed to update itself when necessary. Every time you start the program, if you have an Internet connection available, the sotfware will go and check on the net if some update is available for its components. There is a preference governing this behavior (see in the Preference section, page 44, the preference named “Automatic Updates/Downloads”). If you decide to go for the automatic updates, everytime an update is made, a backup file of the previous one is done. For example, if a file named resource.jar is to be updated, a backup named resource.jar_1 will be created, holding the previous version of the updated file. It resource.jar_1 already exists, resource.jar_2 will be generated, etc. The downloaded updates will be available next time the program is restarted. Also, as this soft is constantly evolving, and as the software updates itslef, you might see some mismatches between the sotfware and the current document. Nothing major though. If that would be the case, please do tell me, using the Contact section (page 50). But the very user manual you are currently reading is part of the files the software will check, to see if an update is available for it. That should help. - 17 - Weather Wizard User Manual Basic The basic user does not want to mess with difficult stuff, he wants the expected result to be no more than one click away. To achieve that goal, the basic user will use pre-defined patterns. Ashore One difference between being ashore and being sailing is the nature of the network, its bandwidth, and the type of the available documents. Patterns Usage As we said before, a pattern is going to save you quite some time. The software comes with several predefined patterns you can use, and you can create your own ones. Dynamic Patterns Dynamic patterns are the ones that will directly fetch the faxes from the Internet. Of course, it requires you to be connected. Those patterns are the easiest to use, this is probably what you should get started with. By default (factory settings), you will find them in the Tree File Panel, in the Patterns section, under the Dynamic folder. Their names are supposed to be explicit enough. You can edit them, create your own (we’ll see that later), just like any other pattern. Regular Patterns Those patterns will not reach the Internet. They will prompt you to enter the location of the fax(es) to use, from your file system. That means that the files to render have to be already somewhere on your computer. Typically, this is what a SailMail user would do. First you download the faxes you want from the SSB, and then, you display them using a composite. - 18 - Weather Wizard User Manual Google In case you have an Internet connection, you can use some facilities provided by Google, namely Google Map and Google Earth. This is especially useful to display the faxes. GRIB files can also benefit from those services, but it is snappier for the faxes. The two Google options are accessible through the menu, File > View Composite in Google… Google Map Google Map is available through an Internet connection and a browser. No special components have to be installed on your computer. Figure 6 - Faxes in Google Map Google Earth Google Earth is a program available for free, which needs to be installed on your computer for this feature to be used. One of the very cool things about Google Earth is that you can add other layers on the Earth. The cloud layer in the picture below comes from Barnabu, - 19 - Weather Wizard User Manual http://www.barnabu.co.uk/. Very useful. Figure 7 - Faxes in Google Earth When you close Google Earth, it will ask you if you want to save the current display, so you can find it again in the bottom left tree later on. I use to say no. How it works It works only – so far – for the faxes in Mercator projection. The trick is to convert those images from Mercator to Anaximandre (square) projection, which is what Google (both Map and Earth) expect. This was an interesting programming exercise. At sea This is typically what SailMail17 users are going to face. We will take the case where Internet is not available, all the documents we will be able to use – download actually – will have to come through the SSB. Namely, those documents will be Weather Faxes, and GRIB files. You can do ashore all you can do at sea. The opposite is not true. 17 For details about SailMail, see http://www.sailmail.com - 20 - Weather Wizard User Manual Depending on the radio propagation conditions, the faxes can sometimes be received a bit fuzzy. They can remain meaningful though, if appropriately superimposed with a chart… Figure 8 - Fuzzy faxes received at sea Patterns Usage At sea, the problem is a bit different, in the sense that as there is generally no Internet connection available, dynamic patterns would not work. The faxes must be downloaded first, and then displayed with a pattern, which is not a problem, SailMail comes with a GetFax18 utility that does the job. Position the preference in Miscellaneous > Fax files location to the directory used by GetFax to store the downloaded faxes, and you’re good to go. Some default patterns stored under the SailMail directory will help you in this area. Using GRIB Files GRIB files contain computer-generated data, based on a model. GRIB Data GRIB files can contain several kinds of data19. Currently, those data are accessible by sending an email request to various providers, including 18 We provide in the distribution you have installed a utility called “SailFax”, that helps you with the file SkedFile.txt, used by GetFax for the automatic download feature. 19 Send an email to [email protected] for details, with a blank subject, and a blank body. - 21 - Weather Wizard User Manual saildocs.com. At sea – using the SSB – the size of the attachment that contains the data can potentially be an issue, addressed in the GRIB smoothing section. Since February 2008, Saildocs also provides the possibility to reach GRIB files in real time throught http. We use this possibility in the dynamic patterns, as well as in the predefined downloads. Also, if in the dialog described below (Figure 11 - Notice the Contour Lines check box.) after checking the GRIB box, you enter the GRIB request instead of the GRIB file location, http will be used to get the GRIB data from the Saildocs server. This requires of course an Internet connection. The GRIB request would look like something like this: GFS:43N,17N,164W,114W|2,2|0,6..168|PRMSL,WIND,HGT50020 The program will take care of the http part. Displaying the wind Wind is probably the first data you want to display from a GRIB file. The default wind display is based on the color set at the preferences level. In the Display category, GRIB Wind base Color. The darker the color, the stronger the wind. When a GRIB file is displayed, a right-click on the chart will give you more display options. • Small dot • Heavy dot • Background • Display Wind Speed Values “Small dot” is the default. “Heavy dot” will display a disc at the head of the wind arrow, its diameter is bigger when the wind is stronger. “Background” will display a transparent background, darker when the wind is stronger, based on the GRIB Wind base Color mentioned above. “Display Wind Speed Values” can be used in conjunction with the three options above. The wind speed values are rounded to integer values (in knots), and displayed at the wind arrow head. In any of the four cases above, the wind arrows (or feathers) are always displayed. 20 For detailed syntax of the GRIB request, check out http://www.saildocs.com/gribinfo - 22 - Weather Wizard User Manual Figure 9 - Background, plus Wind Speed Values Contour lines detection In case the area you are sailing in is not covered by faxes - like south Pacific, Indian Ocean, south Atlantic, etc – you can use the GRIB data to mimic what a fax would display. This operation can be pretty demanding on the computer21, which is why it is optional. You will be prompted for the possible options when you choose to render a GRIB file. 21 I need to improve the algorithm - 23 - Weather Wizard User Manual Figure 10 – Contour lines detected for PRMSL & 500mb - 24 - Weather Wizard User Manual Figure 11 - Notice the Contour Lines check box. Preferences to drive this feature have been added. Those are: • Color for PRMSL contour lines • Color for 500mb contour lines • Color for Waves contour lines • Color for Temperature contour lines • Isobars list • Isoheight (500mb) List • Isoheight (waves) List • Isotherm List GRIB smoothing22 This section will be useful for people at sea, with limited bandwidth. It is using a linear extrapolation, based on the data of the four nearest points. This feature allows an impressive diminution of the size of the GRIB data that have to be downloaded. The smoothing is controlled from the floating toolbar, in the “GRIB Control” panel. The “GRIB Smooth” field is driving the smoothing process. Its default value is 1. A value of 2 would mean “Calculate 2 times more points”, 3 would Currently, smoothing is done only in 2 dimensions. I’m planning to add a third one, across time. As the GRIB can contain several dates, I’ll do the smoothing between dates too. 22 - 25 - Weather Wizard User Manual mean “Calculate 3 times more points”, etc. The smoothing process is triggered when you hit the button next to the “GRIB smooth” field. Figure 12 - Before smoothing - 26 - Weather Wizard User Manual Figure 13 – Exact same GRIB data, smoothed (factor 3) 3D views Those 3D views are another way to display the three dimensions data potentially contained in a GRIB file. When the GRIB file contains the appropriate data, and based on the boxes you check or uncheck in the dialog showed on Figure 11, the matching 3D graphics will be generated in the tabs of the main panel. - 27 - Weather Wizard User Manual Figure 14 - 500mb 3D view on all Pacific Those 3D views are dynamic, i.e. you can orient them the way you want by dragging the mouse on them. In those 3D views, the vertical scale is exaggerated, so it can be visualized. For example, the altitude of the 500mb isobar goes typically from 5500 meters to 6000 meters (at its maximum). This means an amplitude of about 500 meters, which is an extremely small distance, compared to the thousands of square miles the graphic above is rendering. If the vertical amplitude was at the same scale as the horizontal (surface) one, it would look absolutely flat, which would be meaningless. The waves height follows the same pattern (a 30 meters wave is huge), as well as all others. The software provides the possibility to automatically scroll from frame to frame in the GRIB. If you have requested the contour lines detection and/or the 3D displays generation, this animation might be demanding, as for each frames, the countour lines will be detected, and the 3D displays generated. If that would be the case, you would be warned before the animation starts. - 28 - Weather Wizard User Manual Using Composites At sea or ashore, when you visualize the data you wish to see, you do it through a Composite. Once you are done, you can save your composite. You can also save the composite as an image. This way, you can use the generated images with any of the image processing softwares provided on most of the operating systems, to create an animation, replay the previous X days, etc. Possibilities are endless. - 29 - Weather Wizard User Manual Advanced This is where a user is going to create his own patterns. It requires some knowledge about map projections, and a bit of time. Loading and displaying faxes, without patterns It is always possible to load and display a fax, even if no pattern has been defined for it. This is where you will have to take care yourself of the scales, orientation, and position on the fax(es) on the map. This process can be pretty long and may require some skill. This is why once you are done, you might save your work as a pattern, in order not to have to do it again when displaying the same kind of faxes. See Creating a Pattern, on page 34. Assuming the fax you want to display is already on your system, you have several possibilities to load it. • In the File Tree Panel, in the “Faxes” section, double click on the file you want to display • Using the menu File > Set Composite, use the “Faxes” table of the dialog box, add a line in it, and set its properties, like location, color, etc. Notice that those two options will lead you to the same dialog box: Figure 15 - Composite dialog box To set the color of the fax, click on the file name. Another dialog will popup and let you pick the color. Once the fax is loaded (you’ve clicked OK), it is displayed “as-is”… - 30 - Weather Wizard User Manual You can always come back to the dialog box above to make changes if necessary, by using the menu File > Set Composite. Figure 16 – The fax, "as is"! Some adjustments will be needed. This task is not trivial, and must not be underestimated. First, the chart does not match23. You can go to the menu Tools > Predefined Zones to pick up the right one, or use again the File > Set Composite menu, and set the dimension of the chart to visualize in the “Chart” section of the dialog box. This can also be done before requesting the display of the fax. You also do need to know what the projection used by the fax is. In this example, it is a Mercator projection (default). This might be changed by using the “Projection Control” panel of the floating toolbar, detailed later. This is where you need to use the “Fax Controls” section of the floating toolbar. See on the left. The drop-down list at the top represents the “Active Fax”, with is the one you are going to work on. In case several faxes are displayed, you can work on all of them, by checking the box labeled “All Faxes”. In case you just want to see the fax, and don’t care about the chart, then right-click on it, and uncheck the menu boxes labeled “Show Chart” and “Show Grid”. 23 - 31 - Weather Wizard User Manual The controls under the “Fax Controls” button are the ones driving the fax. The arrow buttons will be used to pan on the chart the fax up, down, left, or right. It will be panned by the amount of pixels (faxes are images) mentioned in the field labeled “Fax Incr.”, its default value is 10, but will probably have to be reduced when reaching the end of the process, for fine tuning. The plus and minus buttons are used to zoom in and out. In that case, the value mentioned in the “Zoom Factor” field will be used. Its default value is 1.1. That means that when you zoom in, the dimensions of the fax (height and width) will be multiplied by 1.1. Same for zoom out, but using a division. Just like before, this value might be changed for fine-tuning purpose. As you can tell by looking at the toolbar, a fax can also be rotated. This is particularly useful for faxes coming on the side, like Central Pacific Streamlines, or faxes obtained through GetFax (SailMail), they sometime need a couple of degrees of adjustment. Figure 17 - Same fax, adjusted. You will rapidly notice that the grid of the fax (its meridians and parallels) is a good clue. Notice that at any moment, you can choose to hide or show a given fax, using the check box in the rows of the “Fax” section of the Set Composite dialog box. This will allow you to keep the fax part of the composite (as positioning it on the - 32 - Weather Wizard User Manual chart, or relatively to the other faxes is something you do not necessary want to go through twice…), but to hide it. Beside moving and scaling the fax(es), you can also move and scale the chart. Just use for the controls under The “Chart Controls” section in the floating toolbar. The difference in that case will be the unit for the pan. Instead of being in pixels, the field labeled “L&G Incr. (charts)” will be used. The unit is degrees, the default value is 1.0°. What happens when you load a fax? • The fax is read from the disc • It is turned into an image • It is made transparent • The color is changed • The scale is changed • The fax is moved to its place on the chart. All this is not trivial, and may take a couple of seconds Download faxes from the Internet Under File > Download…, there is a menu item labeled “Download Fax from Internet…”. This allows you to download pre-defined faxes from known locations. Those locations are defined in a configuration file named download.xml, detailed in the section Configuration Files, on page 41. You select a fax in the list on top, and the URL will show up in the field below. Then you need to provide a name for the file to save on your system, so you can re-open it later on, in a composite. Auto-download There is also other menu items, related to auto-download. The setup (Setup Auto Download…) will allow you to define the faxes to download in one click, as - 33 - Weather Wizard User Manual well as the way to save them. For this, you define the directory where to save them, as well as the file pattern used for their name. The file name pattern is made out of three zones. 1. A file prefix 2. A pattern, possibly based on the date 3. An extension Example: You download automatically a fax from NOAA, concerning the Northern Pacific Surface Analysis. • Its file prefix could be NOAA_sfc_ • Its pattern could be yyyy_MM_dd_HH_mm_ss_z24 • Its extension could be gif, png, etc. This would – when a fax is downloaded – generate on your system a file named NOAA_sfc_2007_12_22_08_48_07_PST.gif. Notice how the yyyy has been replaced with the year, MM with the month, dd with the day, etc. That is a way to preserve the unicity of this data. Once the auto-download is setup, it can be started by using the menu item File > Download > Start Auto Download. Creating a Pattern As we have seen in the section Loading and displaying faxes, without patterns, on page 30, it can take a couple of minutes to setup all the faxes and charts you want to display. In order not to have to repeat the same operation, with the same faxes another day, you can save the configuration as a pattern. Once a composite is loaded, use the menu item File > Create Pattern… Then you are prompted to enter a hint for each file, which will be used to prompt you when using the pattern. Then it will be your responsibility to save your pattern in the pattern directory, so it can show up in the appropriate section of the File Tree Panel. Different Projections Most of the faxes come on a Mercator projection. Some others use a Lambert projection, like the ones from the Australian BOM25. Some satellite pictures will need a satellite view to be displayed with the appropriate chart on top. The software provides several types of projection, all available from the floating toolbar, in the “Projection Controls” section. 24 This pattern is a bit technical…, that one is actually the one I’m using in 99% of the cases. All the details about it can be found in the Java documentation, at http://java.sun.com/j2se/1.4.2/docs/api/java/text/SimpleDateFormat.html. 25 Bureau Of Meteorology, we have a pattern for faxes from those blokes. - 34 - Weather Wizard User Manual Figure 18 - GRIB File, on a Globe projection NMEA 26 Data A GPS can be connected to the computer you are running the program from, so the position and heading of the boat can be displayed on the chart. Routing This feature • • • • is in an alpha state. It requires two things: A GRIB file spanned over several days The polars of the vessel you want to route A position to start from A position to go to It is driven by several preferences, located in the “Polars, Routing, NMEA” category. Polar file location Locates the file containing the coefficients of the 3D polars. Routing step (degrees) For a given polar curve, defines the amount of degrees between each calculated point. Routing fork width (degrees) The “width” of the fork used for the calculation. Centered on the great circle route between origin and destination. 26 NMEA 0183. National Marine Electronics Association. See http://www.nmea.org - 35 - Weather Wizard User Manual Routing time interval (hours) Start routing from current location Avoid TWS greater than Avoid TWA lower than Stop routing when GRIB exhausted Defines the interval of time between each isochrone calculation If the boat position is plotted on the chart (through the GPS, or manually), then you can have the routing started from it. In that case, the click you will make on the chart will be to define the Destination. If the boat is not plotted, or if this preference is set to false (default), then a first click will be required to define the Origin position. For the routing calculation, tell the process not to go to places where the True Wind Speed is above this value. The value “-1” means no such restriction. Will void the places where the True Wind Angle is below the given value. The value “-1” means no such restriction. If set to true, routing will stop when the required date exceeds the validity of the last frame in the GRIB file. If set to false, in case the required date is beyond the last available data in the GRIB, the data closest to the required date will be used (the last ones, very likely). If you said in the preferences to start the routing from the boat location and if the boat is displayed, then you just need to set the Destination location. Otherwise, both Origin and Destination will need to be set. This is done by clicking on the chart, at the location you want to set the point to. If only Destination needs to be set, then the first click will define it. If both positions need to be set, then the first click will define the Origin, and a second one the Destination. - 36 - Weather Wizard User Manual Figure 19 - Origin & Destination Once Origin and Destination are set, go to the menu Tools > Routing, and a dialog box pops up. Figure 20 - Routing dialog box It gives you: • The great circle distance, of the requested route • The boundaries of the GRIB data currently loaded • The current UT date and time, to use as the origin for the routing to compute. Also, some values set at the preferences level are reminded, and you can change them, for this computation only. - 37 - Weather Wizard User Manual All editable values can be modified. Click OK, and the computation starts. Figure 21 - Routing completed Details are also available in the floating toolbar, in the “Routing Details” section. The “Steps” panel is synchronized boat position on the chart (through the slider at the bottom, or the two arrow buttons). The button at the bottom right is used - 38 - Weather Wizard User Manual to synchronize the GRIB Date. When you click it, it will display the GRIB data on the chart for the current location – and time - of the boat. Once the routing is completed, it is also available in the clipboard. “Control + V” in any editor (notepad, wordpad, etc) will return it. The routing text is returned as comma separated values (csv). As such, if it is saved into a text (.txt) file, it can be used and displayed by most of the spreadsheet tool you might have (even MS Excel for example, does the job). The separator is a semicolon, even if this is called a “comma-separated-value” file. Figure 22 - Excel rendering of a routing - 39 - Weather Wizard User Manual In case the GRIB file does not cover a big enough period of time, then the last data of the files will be used, repeatedly. In that case, the isochrones computed this way would be displayed in gray on the chart. NB: For an accurate routing, you need to have GRIB Data spanned across a period of time matching the duration of your trip. The GRIB request could look like that one: grib:60N,60S,120E,070W|2,2|12,24,36,48,60,72,96,120,144,168|WIND,PRMSL,HGT The request above covers 12, 24, …, 168 hours prediction, for WIND (Wind), PRMSL (Pressure at Mean Sea Level), HGT (500mb Height). In a next release, we will provide an automatic smoothing of the GRIB data, geographically, and across time. Keep posted. - 40 - Weather Wizard User Manual Expert The expert user will do all the above, and edit and modify the configuration files of the software. It is actually not a big deal, but it requires going on the file system, to edit a couple of files. Those configuration files are XML files, any text editor can edit them. It is highly recommended to do a backup before editing them, as they are easy to edit, and easy to screw up. Configuration Files places.xml This one is located in the all-scripts directory. It contains the names and locations of the places you want to see on the chart. This file can be accessed and modified from the application, by using the menu Tools > Pre-defined places… predefined-zones.xml Located in the config directory. It contains the predefined geographical zones that appear under the menu Tools > Predefined Zones. download.xml Located in the config directory. Defines the list of the faxes you can download from the Internet. This list will populate the one that shows up from the menu Files > Download > Download faxes from Internet… autodownload.xml Located in the config directory. But it does not need to be edited. Use the appropriate dialog instead. See the Auto-download section, on page 33. Polars Used for the routing. For now, the polar curves are polynoms. You can choose their degree. The coefficients of those polynoms are also smoothed by a polynomial function, of which you can choose the degree too. What is stored in the polar file are the coefficients of those meta polynomial functions. User Exits GRIB Rendering is an endless topic. This software is suggestiong a few options, but there are indeed hundreds of them. That is why we give here the possibility for the user to interact with the software, through user-exits. - 41 - Weather Wizard User Manual A User-Exit is a piece of Java code that is required to implement a specific Java interface named chartview.util.UserExitInterface: package chartview.util; import chartview.ctx.WWContext; import chartview.gui.right.CommandPanel; import java.util.ArrayList; public interface UserExitInterface { public boolean isAvailable(CommandPanel cp, WWContext ctx); public boolean userExitTask(CommandPanel cp, WWContext ctx) throws UserExitException; public ArrayList<String> getFeedback(); } The code must be archived as a jar-file, with a manifest structured as follow: Software-Provider: Oliv Soft Name: GRIB Bulk Data WW-User-Exit-ack: false WW-User-Exit-sync: false WW-User-Exit-Action: chartadjustmentuserexits.GRIBBulk WW-User-Exit-Comment: <html>GRIB Bulk Data Display,<br>in a Swing JTable<br><small>© 2009, Oliv Soft.</small></html> WW-User-Exit-Location: GRIB Rendering Name: GRIB Slug WW-User-Exit-sync: false WW-User-Exit-ack: true WW-User-Exit-Action: chartadjustmentuserexits.GRIBSlug WW-User-Exit-Comment: <html>GRIB Slug.<br>Smooth animation of the different data<br><small>© 2009, Oliv Soft.</small></html> WW-User-Exit-Location: GRIB Rendering The “Name” sections are mandatory, the 5 elements they contain must be present. The Name value is the one that will be displayed in the popup menu on the chart. The WW-User-Exit-ack can be true or false. Is set to true, the soft will acknowledge the good or bad execution of the user’s code. This will be based on the boolean value returned by the userExitTask method of the interface, as well as on the value returned by the getFeedback one. The WW-User-Exit-sync can be true or false. If set to true, the code will be executed synchronously, asynchronously otherwise. The WW-User-Exit-Action element contains the fully qualified name of the class to execute, which must implement the interface mentionned above. - 42 - Weather Wizard User Manual The WW-User-Exit-Comment contains the text displayed in the tooltip text. It can use html formatting. The WW-User-Exit-Location is the path in the menu, each step being separated from the previous one with a comma. - 43 - Weather Wizard User Manual Appendix Preferences Display – Colors Chart Line Color Grid Color Chart Background Color GRIB Wind base color Color for PRMSL27 contour lines Color for 500mb contour lines Color for Waves contour lines Color for Temperature contour lines Display – Others Chart line thickness (pixels) Fax transparency [0-1] 27 Defines the color used to draw the chart. Defines the color of the grid, and of its labels. Defines the color of the background of the charts. The wind in the GRIBs is displayed based on this color. A light color means light wind, a dark one means strong wind. If this is set to blue, the wind color will go from light blue to dark blue. Different contour lines can be detected from the GRIBs (based on the option chosen in File > Set Composite). This one is for PRMSL. This will give you the isobars, like a fax. This can be useful for areas where no fax is available. Unit is millibar. Same as above, for the altitude of the 500mb isobar. Unit is meter. Same as above, for the waves height. Unit is meter. Same as above, for water temperature. Unit is ° Celsius. Can be useful depending of the kind of faxes you want to superimpose on it. 0 is transparent, 1 is opaque. This is used to display the faxes. It works in conjunction with the “Transparent” check box at the fax level, available from the File > Set Composite menu. Even if the value of this preference is not set to 1, you can still have opaque faxes. For example, when you superimpose fax(es) on top of a PRMSL. PRessure at Mean Sea Level - 44 - Weather Wizard User Manual Look and Feel Polars, Routing, NMEA NMEA Server URL NMEA Polling frequency (seconds) Polar file location Routing step (degrees) Routing time interval (hours) Start routing from current location Avoid TWS greater than Avoid TWA lower than Stop routing when GRIB exhausted 28 satellite snapshot. You might want the satellite picture to remain opaque, and have the fax(es) transparent. This is a Java (Programming language) concept… See for yourself! We also provide a piece of software that reads the serial port of your computer, parses NMEA data, and makes them available through HTTP28. This way, many applications can read NMEA data, unlike if the application was reading the port directly. This port is accessed exclusively, and as a result, only one application can read it at a time. Sets how often the NMEA data are read and refreshed. Used for routing. For the routing, sets the amount of degrees between each spoke. Sets the time interval between the isochrones. If set to “false”, you will have to enter the location to start the routing from. For the routing calculation, tell the process not to go to places where the True Wind Speed is above this value. The value “-1” means no such restriction. Will void the places where the True Wind Angle is below the given value. The value “-1” means no such restriction. If set to true, routing will stop when the required date exceeds the validity of the last frame in the GRIB file. If set to false, in case the required date is beyond the last available data in the GRIB, the data closest to the required date will be used (the last ones, very HTTP. HyperText Transfer Protocol. - 45 - Weather Wizard User Manual likely). Miscellaneous GRIB files location Fax files location Composite files location Pattern directory Automatic Updates/Downloads Confirm Drag & Drop Zoom Those file locations will be used to populate the File Tree Panels. When the program starts, it will look in those directories (starting from them, and recursing through all sub-directories), scan them, and will prepare the relevant information for further display in the trees, using tooltips and bubbles. This value is actually a path, made out of possibly several directories. This way, the software starts its search from different locations. It can be useful if you wish – for example – deal with files coming from the Internet and from SailMail. Same as above, for the faxes. It is also a path. Same as above, for your composites. Same as above, for the patterns. When you start the software, it checks on the Internet is a newer version of each component is available. Setting this preference to “true” means that if a new file is found, it will update its homonym (a backup of the previous one is saved). “false” will generate just a message, after which you can choose to download it or not. Like any other data related to the Internet, you need to make sure your proxy29 is set correctly, if necessary. If this is set to “true”, when you use the drag & drop zoom (zoom with the mouse), then you will be prompted for a confirmation. This is to avoid unwanted zooms. GRIB email client Up to February 2008, GRIB files were available from saildocs through email30. 29 30 If you don’t know what an Internet proxy is, then you probably don’t need one. Since February 2008, you actually do not really need this email client anymore. - 46 - Weather Wizard User Manual The software you have installed comes with a utility you can use to facilitate the GRIB requests and the queries. At sea, you would use SailMail. This utility is to be used ashore. This utility requires some configuration, in two specific files. This is the name of a file containing the properties of your email server. This will tell the utility how to get connected on your email server to send, end receive emails from it. gribmail.properties Here is an example of the content of this file: grib.mail.protocol=pop3 grib.incoming.server=pop.mail.yahoo.com grib.outgoing.server=smtp.mail.yahoo.com grib.mail.smtpauth=true grib.outgoing.server.port=587 grib.mail.username=olivier.lediouris grib.mail.password=hidden [email protected] At the first line, the value can be pop331 or imap32. gribrequests.properties This is the name of the file where you can pre-define the GRIB queries you might want to use. Here is an example: # Comments are prefixed with # -- All Pacific grib:60N,60S,120E,070W|2,2|12|WIND,PRMSL,HGT grib:60N,60S,120E,070W|2,2|12,24,36,48|WIND,PRMSL,HGT grib:60N,60S,120E,070W|2,2|12|WIND,PRMSL,HGT,TMP,WAVES -- North Pacific grib:65N,20S,120E,090W|2,2|12|WIND,PRMSL,HGT,TMP,WAVES grib:65N,20S,120E,090W|2,2|12,24,36,48,60,72,96,120,144,168|WIND grib:65N,20S,120E,090W|2,2|12,24,36,48,60,72,96,120,144,168|WIND,HGT grib:65N,20S,120E,090W|2,2|12,24,36,48,60,72,96,120,144,168|WIND,PRMSL,HGT 31 32 POP3. Post Office Protocol, version 3 IMAP. Internet Message Access Protocol - 47 - Weather Wizard User Manual grib:65N,20S,120E,090W|2,2|12,24,36,48,60,72,96,120,144,168|WIND,PRMSL,HGT,TMP -- South Pacific grib:10S,50S,120E,090W|2,2|12|WIND -- NE Pacific …etc You can modify those requests as much as you want. Also notice that the poplist displaying all the prepared queries is editable. You can modify your query before sending it. If you wish not to use that tool – which is perfectly fine – you can use your regular email client. In that case, do make sure you are sending your request in plain text, and not in rich text (or anything equivalent). Otherwise, your request would be sent in HTML33, and as a result, ignored. HTTP NMEA Server When a GPS is connected on a laptop, it generally uses the serial port. The serial port is opened exclusively, which means that when an application reads this port, no other application can use it. To work around this problem, we have written a (very) small HTTP server. This server is connected on the serial port, and broadcast the data using HTTP, which is why you have to give an http url in the preferences for the NMEA data (NMEA Server URL). To start the HTTP server, just select “N for NMEA Logger/Http server”. Notice that you can also log the data from this utility. 33 HTML. HyperText Markup Language. - 48 - Weather Wizard User Manual To have the data emitted (though http), you must check the “Re-broadcast on HTTP port” box. The port on the right of the box will be used. To check if the data are correctly broadcasted, just use your Internet browser, and enter a URL like this: http://localhost:6666/ Some help is available from your browser, if you enter http://localhost:6666/help The sentences read by this utility is driven by the configuration file named nmea.properties. Miscellaneous Hints and Tips Resources Some faxes are gathered at • http://donpedro.lediouris.net/weather/pacific.html • http://donpedro.lediouris.net/weather/atlantic.html Lee Chesneau’s web site: http://www.marineweatherbylee.com/, priceless!, including a great article on the 500mb charts: http://www.opc.ncep.noaa.gov/articles/MWL_GUIDE_500MB-1.pdf. Set Fax Width/Height ratio Some satellite images, like http://www.ssec.wisc.edu/data/west/latest_westvishem.jpg, showing the Earth, are actually not round. You can this option to adjust the width/height ratio. To access it, right-click on the Chart, it is an option in the popup menu. - 49 - Weather Wizard User Manual Contacts All questions, requests, improvement ideas, comments, etc, can be sent to [email protected]. Notification subscription You have the possibility to subscribe to an automatic email notification. If you subscribe, you will be notified every time an update is made on the web site. This is 100% safe, you can unsubscribe at any time, and you will never receive any kind of spam. Go to http://donpedro.lediouris.net/? view=software/structure/index.html, and click the “subscribe” link to register. - 50 - Weather Wizard User Manual Viewlets Some viewlets (animated screenshots) are available at http://donpedro.lediouris.net/software/viewlets/Weather/viewlets.html They are not necessary 100% in sync with the software, but this will for sure give you some clues about the way to use it. And the list is constantly growing. - 51 - Weather Wizard User Manual Known issues Routing In alpha state for now. Feedback welcome. We will provide soon another tool for you to rework your polars. - 52 - Weather Wizard User Manual External resources • To parse the XML Documents, extensively used in this program, I use the XML Parser for Java by Oracle, found at http://www.oracle.com. - 53 -