1
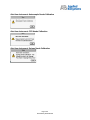
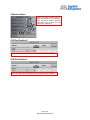
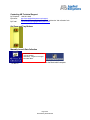
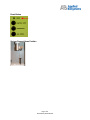
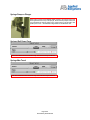
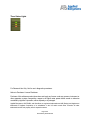
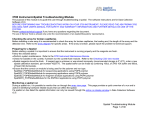
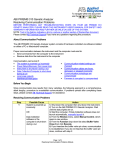
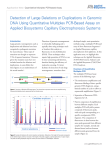
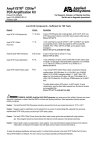
To navigate within this document
use the
or
keys
ABI PRISM® 310 Genetic Analyzer
Clear Memory Reset Procedure
BEFORE PERFORMING ANY TROUBLESHOOTING WORK ON YOUR ABI PRISM® 310
GENETIC ANALYZER, PLEASE READ THE INSTRUMENT USER’S MANUAL FOR SAFETY AND
WARRANTY INFORMATION AND FURTHER DETAILS ON USE OF THE SYSTEM.
NOTE: Text in this fashion indicates a link to a picture or another section of this/another document.
Please contact AB Technical Support if you have any questions regarding this procedure.
About the Clear Memory Reset
The Clear Memory Reset is the most comprehensive reset that can be performed on the ABI
PRISM® 310 Genetic Analyzer. This reset deletes the firmware and calibration data stored on the
instrument. Firmware is subsequently reloaded and calibration data must be manually entered.
Situations in which the Clear Memory Reset may be helpful:
•
•
•
•
When the instrument is behaving unpredictably.
When the instrument and computer are not communicating properly.
When an instrument subsystem (laser, heating, optics, EP, or autosampler) is suspect.
When data quality is compromised.
Before You Begin
Since the Clear Memory Reset deletes the calibration data, you must record the current calibration
values. Typically, these values will be written on a Calibration sticker on the inside of the instrument’s
left door. If the Calibration sticker or the values are not present, follow the procedure below.
Recording Calibration Values
Step
1
2
3
4
5
6
Action
Ensure that the Data Collection software is running. If not, manually launch it.
From the Window menu select Manual Control, which opens a new window.
From the Function drop-down list select and record the following values:
• CCD Pixel Position X (horizontal)
• CCD Pixel Position Y (vertical)
• Syringe Max Travel
• Syringe (Gel) Pump Force
From the Function drop-down list select Calibration File Make and click Execute.
Once these values are recorded, quit Data Collection software and shut down the
computer.
Turn off the ABI PRISM® 310 Genetic Analyzer.
Performing the Clear Memory Reset
Step
1
2
3
Action
Ensure that both the computer and the ABI PRISM® 310 Genetic Analyzer are turned
off. If not, shut down the computer first then shut down the instrument.
Open the instrument doors.
Press and hold the Gel Pump and Tray buttons down with your right hand.
Page 1 of 9
Clear Memory Reset Module
Step
4
5
6
7
8
9
Action
Keeping both buttons depressed, reach to the left-rear of the instrument, and turn on the
ABI PRISM® 310 Genetic Analyzer.
After turning the instrument on, release the Gel Pump and Tray buttons.
NOTE: If it is performed properly, the three status lights will be lit, indicating the firmware
has been cleared.
Start the computer. If Data Collection software does not launch automatically, manually
launch it.
A dialog box will appear indicating firmware is being reloaded.
NOTE: If firmware does not automatically load, then two problems may exist :
• No communication between instrument and computer – if this occurs, press the
Reset button once on the back of the instrument. For a detailed tutorial to resolve
communication issues, please refer to the document entitled “Resolving
Communication Problems at:
http://home.appliedbiosystems.com/support/apptech/
• Preferences are corrupted or set improperly. For a detailed tutorial regarding setting
preferences, please refer to the “Preferences” document appropriate to your
operating system at:
http://home.appliedbiosystems.com/support/apptech/
After the firmware has reloaded, open Manual Control. This will generate a series of
alerts:
• Alert from Instrument: Autosampler Needs Calibration
• Alert from Instrument: CCD Needs Calibration
• Alert from Instrument: Syringe Needs Calibration
These messages are normal. Click OK to clear the messages.
If you performed a Calibration File Make earlier, then select Calibration File Send
from the Function drop-down list and click Execute.
If you did not perform a Calibration File Make or if you are unsure, then select and
enter the calibration values for:
• CCD Pixel Position X (horizontal)
• CCD Pixel Position Y (vertical)
• Syringe Max Travel
• Syringe (Gel) Pump Force
10
11
12
NOTE: Make sure to click Execute for each value entered.
Select Syringe Home and click Execute.
This will bring the syringe pump up to its homed position.
NOTE: After homing the syringe pump, use the Syringe Down command to bring the
syringe pump back on top of the syringe plunger.
Select Autosampler Home X,Y and click Execute.
Select Autosampler Home Z and click Execute.
Page 2 of 9
Clear Memory Reset Module
13
14
15
From the Instrument menu select and perform the Autosampler Calibration. For a
detailed tutorial, refer to the document entitled “Autosampler Calibration” at:
http://home.appliedbiosystems.com/support/apptech/
NOTE: After calibrating, return the capillary into the water or buffer position.
Wait 10 minutes to perform a run. This allows the temperature circuit to calibrate.
You have completed the Clear Memory Reset Procedure.
Page 3 of 9
Clear Memory Reset Module
Alert from Instrument: Autosampler Needs Calibration
Alert from Instrument: CCD Needs Calibration
Alert from Instrument: Syringe Needs Calibration
Page 4 of 9
Clear Memory Reset Module
Calibration Sticker
NOTE: The values presented here are
NOT representative of your instrument.
They are here for reference purposes
only. Make sure to record and use
values for your instrument.
CCD Pixel Position X
NOTE: The number here is for reference only. Your instrument may be different.
CCD Pixel Position Y
NOTE: The number here is for reference only. Your instrument may be different.
Page 5 of 9
Clear Memory Reset Module
Contacting AB Technical Support
By Telephone:
By Internet:
By E-mail:
1-800-831-6844
http://www.appliedbiosystems.com/support/
Then click on “Frequently Asked Questions” and then the “Ask a Question” tab.
[email protected]
Gel Pump and Tray Buttons
Manually Launch Data Collection
Double-click on the shortcuts on the
computer desktop.
Alternatively, navigate via the Apple
Menu/Start Menu.
On the PC
On the Macintosh® computer
Page 6 of 9
Clear Memory Reset Module
Reset Button
Syringe Pump at Home Position
Page 7 of 9
Clear Memory Reset Module
Syringe Pump on Plunger
NOTE: After executing the SYRINGE HOME command, the syringe pump must
be brought back down on top of the plunger. Ensure that the pump is close to but
not compressing the syringe plunger. If the syringe pump is not returned to this
position prior to a run – the instrument will generate a “Leak Detected” error.
Syringe (Gel) Pump Force
NOTE: The number here is for reference only. Your instrument may be different.
Syringe Max Travel
NOTE: The number here is for reference only. Your instrument may be different.
Page 8 of 9
Clear Memory Reset Module
Three Status Lights
For Research Use Only. Not for use in diagnostic procedures.
Notice to Purchaser: License Disclaimer
Purchase of this software product alone does not imply any license under any process, instrument or
other apparatus, system, composition, reagent or kit rights under patent claims owned or otherwise
controlled by Applera Corporation, either expressly or by estoppel.
Applied Biosystems, ABI PRISM, and GeneScan are registered trademarks and AB (Design) and Applera are
trademarks of Applera Corporation or its subsidiaries in the US and/or certain other countries. All other
trademarks are the sole property of their respective owners.
Page 9 of 9
Clear Memory Reset Module