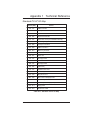
1
User Manual
PCI/Pentium® CPU Board with SCSI
109-40033-00 Rev. Y3
Tigershark
Tigershark™
T gershark
Tigershark™ PCI/Pentium® CPU Board with SCSI User Manual,
095-20046-00 Rev.Y3. Copyright ©1996 by I-Bus, Inc., a Maxwell
Technologies Company, printed and bound in the United States. All
rights reserved. No part of this manual may be reproduced in any
form or by any electronic or mechanical means, including
information storage and retrieval systems, without the written
permission of I-Bus. All trademarks are the property of their
respective companies.
Customer Service
Mailing Address: I-Bus, Inc.
A Maxwell Technologies Company
P.O. Box 84239
San Diego, CA 92123
Telephone:
(619) 974-8400
(800) 382-4229 (in the U.S.)
FAX:
(619) 268-7863
E-mail:
[email protected]
Visit our site at:
http:// www.ibus.com
LIMITED WARRANTY
I-Bus warrants this product to be free of defects in material and workmanship for an initial period
of two (2) years from date of delivery to the original purchaser from I-Bus.
During this period, I-Bus will, at its option, repair or replace this product at no additional charge to
the purchaser, except as set forth in this warranty agreement.
I-Bus will, at its option, repair or replace this product at no additional charge to the purchaser, if
the defect is related to the I-Bus manufactured product, such as power supply, backplanes, other
chassis components, or CPUs. I-Bus is not liable for any defects in material or workmanship of
any peripherals, products or parts which I-Bus does not design or manufacture. However, I-Bus
will honor the original manufacturer's warranty for these products.
I-Bus will analyze the defective component and the customer will be charged in the following
instances:
• No problem found: $75 (U.S. dollars).
• Damage: parts and labor at $75 per hour with a $100 minimum charge (U.S. dollars). Receipt of
damaged goods voids the I-Bus warranty.
Repair parts and replacement products will be furnished on an exchange basis and will be either
new or reconditioned. All replacement parts and products shall become the property of I-Bus, if
such parts or products are provided under this warranty agreement. In the event a defect is not
related to the I-Bus manufactured product, I-Bus shall repair or replace the defective parts at purchaser's cost and deliver the defective parts to the purchaser.
This Limited Warranty shall not apply if the product has been misused, carelessly handled,
defaced, modified or altered, or if unauthorized repairs have been attempted by others.
The above warranty is the only warranty authorized by I-Bus and is in lieu of any implied warranties, including implied warranty of merchantability and fitness for a particular purpose.
In no event will I-Bus be liable for any such damage as lost business, lost profits, lost savings,
downtime or delay, labor, repair or material cost, injury to person or property or any similar
or dissimilar consequential loss or damage incurred by purchaser, even if I-Bus has been
advised of the possibility of such losses or damages.
In order to obtain warranty service, the product must be delivered to the I-Bus facility, or to an
authorized I-Bus service representative, with all included parts and accessories as originally
shipped, along with proof of purchase and a Returned Merchandise Authorization (RMA) number.
The RMA number is obtained, in advance, from I-Bus Customer Service Department and is
valid for 30 days. The RMA number must be clearly marked on the exterior of the original
shipping container or equivalent. Purchaser will be responsible and liable for any missing or
damaged parts. Purchaser agrees to pay shipping charges one way, and to either insure the
product or assume the liability for loss or damage during transit. Ship to:
I-Bus
ATTENTION: RMA REPAIR DEPT.
RMA ####
9174 Sky Park Court
San Diego, CA 92123
I-Bus may issue, at its own discretion, an advanced replacement (AR) on a product if it fails within
fifteen (15) days from the date of delivery from I-Bus.
Table of Contents
Chapter 1 Introduction
About this manual . . . . . . . . . . . . . . . . . . . . . . . . . . . . . . . .1-2
Preparing the board . . . . . . . . . . . . . . . . . . . . . . . . . . . . . . .1-3
Features . . . . . . . . . . . . . . . . . . . . . . . . . . . . . . . . . . . . . . .1-5
Chapter 2 Jumpers and Connectors
Jumpers
. . . . . . . . . . . . . . . . . . . . . . . . . . . . . . . . . . . . . . .2-2
Connectors . . . . . . . . . . . . . . . . . . . . . . . . . . . . . . . . . . . . .2-9
Chapter 3 Specifications
System Components . . . . . . . . . . . . . . . . . . . . . . . . . . . . . .3-1
Environmental Specifications . . . . . . . . . . . . . . . . . . . . . . .3-2
Chapter 4 BIOS
Starting and Exiting the BIOS Setup . . . . . . . . . . . . . . . . . .4-1
Setup Screens . . . . . . . . . . . . . . . . . . . . . . . . . . . . . . . . . . .4-2
Appendix 1 Technical Reference
Standard PC-AT I/O Map . . . . . . . . . . . . . . . . . . . . . . . . . .A1-1
DMA Channel I/O Addresses . . . . . . . . . . . . . . . . . . . . . . .A1-2
DMA Channel Assignments . . . . . . . . . . . . . . . . . . . . . . . .A1-2
DMA Controller Register Functions . . . . . . . . . . . . . . . . . .A1-3
Interrupts . . . . . . . . . . . . . . . . . . . . . . . . . . . . . . . . . . . . . .A1-4
CMOS RAM Address Map . . . . . . . . . . . . . . . . . . . . . . . . .A1-5
Real-Time Clock Information (Addresses 00-0D) . . . . . . . .A1-6
ISA Connector Pin Assignments . . . . . . . . . . . . . . . . . . . . . .A1-7
PCI Connector Pin Assignments . . . . . . . . . . . . . . . . . . . . . .A1-8
i
Table of Contents
Appendix 2 Glossary of Terms
Appendix 3 Illustration
Tigershark PCI/Pentium™ CPU Board . . . . . . . . . . . . . . . . .A3-1
Index
List of Tables
Table 1-1 DRAM Configurations . . . . . . . . . . . . . . . . . . . .1-6
Table 2-1 Jumpers . . . . . . . . . . . . . . . . . . . . . . . . . . . . . . . .2-2
Table 2-2 J6, IDE IRQ14 Disable . . . . . . . . . . . . . . . . . . . .2-2
Table 2-3 J9, Cache Size . . . . . . . . . . . . . . . . . . . . . . . . . . .2-3
Table 2-4 J12, Cache Size . . . . . . . . . . . . . . . . . . . . . . . . . .2-3
Table 2-5 J14, Internal Clock Multiplier . . . . . . . . . . . . . . .2-4
Table 2-6 J32, Internal Clock Multiplier . . . . . . . . . . . . . . .2-4
Table 2-7 J22, CPU Clock Speed . . . . . . . . . . . . . . . . . . . .2-5
Table 2-8 J26, CPU Voltage Regulator . . . . . . . . . . . . . . . .2-5
Table 2-9 Jumper Settings, J14, J22, J26, J32 . . . . . . . . . . .2-5
Table 2-10 J16, Stop Clock . . . . . . . . . . . . . . . . . . . . . . . . .2-6
Table 2-11 J17, Cache Policy . . . . . . . . . . . . . . . . . . . . . . .2-6
Table 2-12 J19, Floppy Selection . . . . . . . . . . . . . . . . . . . .2-6
Table 2-13 J21, Watchdog Enable/Disable . . . . . . . . . . . . . .2-7
Table 2-14 J24, Security Password Enable . . . . . . . . . . . . .2-7
Table 2-15 J29, CMOS Clear . . . . . . . . . . . . . . . . . . . . . . .2-7
Table 2-16 J30, Mouse IRQ Enable . . . . . . . . . . . . . . . . . . .2-8
Table 2-17 J31, Parallel Port DMA . . . . . . . . . . . . . . . . . . .2-8
Table 2-18 J33, IRQ11 Usage . . . . . . . . . . . . . . . . . . . . . . .2-8
Table 2-19 Connectors . . . . . . . . . . . . . . . . . . . . . . . . . . . .2-9
Table 2-20 J1, IDE Connector . . . . . . . . . . . . . . . . . . . . . . .2-10
ii
Table of Contents
List of Tables (Continued)
Table 2-23 J4, COM2 Port . . . . . . . . . . . . . . . . . . . . . . . . .2-13
Table 2-24 J5, COM1 Port . . . . . . . . . . . . . . . . . . . . . . . . .2-14
Table 2-25 Serial Port Cable Wire List . . . . . . . . . . . . . . . .2-15
Table 2-26 J7, SCSI Connector . . . . . . . . . . . . . . . . . . . . . .2-16
Table 2-27 J8, Keyboard Connector - 10-pin . . . . . . . . . . . .2-17
Table 2-28 J10, Reset Connector . . . . . . . . . . . . . . . . . . . . .2-17
Table 2-29 J11, Speaker Connector . . . . . . . . . . . . . . . . . . .2-18
Table 2-30 J13, CPU Fan Connector . . . . . . . . . . . . . . . . . .2-18
Table 2-31 J20, Keyboard mini-DIN Connector . . . . . . . . .2-19
Table 2-32 J25, Mouse mini-DIN Connector . . . . . . . . . . . .2-19
Table 2-33 J27, External Hard Drive LED Connector . . . . .2-20
Table 2-34 J28, External Battery Connector . . . . . . . . . . . .2-20
Table 3-1
Environmental Specifications . . . . . . . . . . . . . .3-2
Table 4-1
Standard CMOS Setup Screen Entry Fields . . . .4-7
Table 4-2
BIOS Features Setup Screen Entry Fields . . . . .4-10
Table 4-3
Chipset Features Setup Screen Entry Fields . . . .4-14
Table 4-4
Power Management Setup Screen Entry Fields .4-18
Table 4-5
PCI Configuration Setup Screen Entry Fields . .4-22
Table A1-1 Standard PC-AT I/O Map . . . . . . . . . . . . . . . . .A1-1
Table A1-2 DMA Channel Page Register and I/O Addresses A1-2
Table A1-3 DMA Channel Assignments . . . . . . . . . . . . . . .A1-2
Table A1-4 DMA Controller Register Functions . . . . . . . . .A1-3
Table A1-5 Interrupts . . . . . . . . . . . . . . . . . . . . . . . . . . . . .A1-4
Table A1-6 CMOS RAM Address Map . . . . . . . . . . . . . . . .A1-5
Table A1-7 Real-Time Clock Information . . . . . . . . . . . . . .A1-6
Table A1-8 ISA Connector Pin Assignments . . . . . . . . . . . .A1-7
Table A1-9 PCI Connector Pin Assignments . . . . . . . . . . . .A1-8
iii
Table of Contents
List of Tables (Continued)
Table 2-21 J2, Floppy Disk Drive Connector . . . . . . . . . . .2-11
Table 2-22 J3, Parallel Port . . . . . . . . . . . . . . . . . . . . . . . . .2-12
Table A1-10 Post Codes . . . . . . . . . . . . . . . . . . . . . . . . . . . .A1-9
Table A1-11 Hard Disk Parameters . . . . . . . . . . . . . . . . . . .A1-12
List of Figures
Figure 1-1 Tigershark CPU Board Jumpers, Connectors, and
Components . . . . . . . . . . . . . . . . . . . . . . . . . . . . . . . . . . . . .1-4
Figure 4-1 CMOS Setup Utility Screen . . . . . . . . . . . . . . . .4-4
Figure 4-2 Standard CMOS Setup Screen . . . . . . . . . . . . . .4-6
Figure 4-3 BIOS Features Setup Screen . . . . . . . . . . . . . . .4-9
Figure 4-4 Chipset Features Setup Screen . . . . . . . . . . . . . .4-12
Figure 4-5 Power Management Setup Screen . . . . . . . . . . .4-17
Figure 4-6 PCI Configuration Setup Screen . . . . . . . . . . . .4-21
iv
Chapter 1 Introduction
Welcome to the I-Bus family of passive backplane CPU (Central
Processing Unit) boards. This manual contains information necessary to
configure your CPU board to your specific needs.
The Tigershark™ PCI/Pentium® CPU board
is IBM
PC-AT compatible, utilizing the 3.3 V Pentium processor. It provides a
passive backplane interface for both PCI and ISA expansion. It also
provides a SCSI II on-board controller and interface as well as providing conventional CPU board peripherals.
This chapter
is divided
into three sections:
• About this manual
explains how this manual is laid out and what you can expect to
find in it.
• Preparing the board
describes the procedure for unpacking the Tigershark CPU board
and preparing it for use in your system.
• Features of the board
provides a brief overview of the major components of the
Tigershark accompanied by an illustration showing its jumpers, connectors, and components. For convenient reference, a fold-out illustration is also provided at the back of this manual.
1-1
About this manual
This manual contains four chapters pertaining specifically to your CPU
board. The appendices contain technical reference material, a glossary
of terms, and a fold-out illustration of the board, followed by an index.
• Chapter 1 Introduction
introduces you to this manual and to the Tigershark CPU board.
• Chapter 2 Jumpers and Connectors
describes the jumpers and connectors on the Tigershark CPU board.
First, each jumper is described. A table shows where to place the
jumper for your specific configuration. An illustration of the
jumper indicates the pin numbers. Then, each connector is
described. A table shows the pin-out descriptions and an illustration
shows the pin numbers of each connector.
• Chapter 3 Specifications
provides the component data and environmental characteristics of
the Tigershark CPU board.
• Chapter 4 BIOS
explains how to use the BIOS setup utility firmware of the
Tigershark CPU board.
• Appendix 1 Technical Reference
provides additional information to help you configure your CPU
board and attach external peripheral devices. Included are I/O
Maps, I/O Channels, Interrupts and Address Maps and ISA and PCI
connector pin assignments.
• Appendix 2 Glossary of Terms
contains definitions of terms used in this manual as well as terms
that refer to items discussed.
• Appendix 3 Illustration
provides a convenient fold-out illustration of the Tigershark CPU
1-2
Chapter 1 Introduction
board.
• Index
provides easy access to page numbers of items discussed.
Preparing the board
• Unpacking your CPU board
The Tigershark CPU board is shipped in a sealed anti-static, shielded bag.
• Open the bag at a static-free workstation while observing proper
Electrostatic Discharge (ESD) practices.
• When not installed in a computer chassis, this board must be
sealed in an ESD approved shielded bag.
• This board must be shipped in a sealed ESD approved shielded
bag and protected with anti-static packaging material (e.g. bubble
wrap).
• I-Bus reserves the right to refuse warranty service on units not
properly packaged to protect against ESD damage.
CAUTION!
Components on this board are sensitive to damage from
Electrostatic Discharge (ESD). Handling of this board should
ONLY be done by a properly trained technician in an approved
ESD work area!
Packaged with your Tigershark CPU board is:
• Tigershark PCI/Pentium® CPU Board with SCSI User Manual
• Optional memory
• Keyboard adapter cable
• Optional cables
If any of the items have been damaged in shipping, notify the transit
company and initiate an insurance claim. If any items are missing,
contact I-Bus. Refer to the Limited Warranty in the back of this
manual for further instructions.
1-3
Features
J8
Keyboard
Connector (10-pin)
J20
Keyboard
J11
mini-DIN
Speaker
Connector
J25
Mouse
mini-DIN
J24
Security Password
Enable
J31
Parallel Port DMA
J4
COM2 Port
J28
External Battery
Connector
J10
Reset Connector
J5
COM1 Port
J30
Mouse IRQ
Enable
J6
IDE IRQ14
Disable
J3
Parallel Port
J23
Factory Test
J19
Floppy
Selection
J21
Watchdog
Enable/Disable
J2
Floppy Disk Drive
Connector
J27
External HD LED
Connector
J7
SCSI Connector
J33
IRQ11 Usage
J1
IDE Connector
J22
CPU Clock Speed
J9
Cache Size
J12
Cache Size
J26
CPU Voltage
Regulator
J29
CMOS Clear
J18
Factory Test
SIMMs
SM1
SM2
SM3
SM4
J17
Cache Policy
J16
Stop Clock
CPU
J15
Factory Test
J32
Internal Clock Multiplier
J14
Internal Clock Multiplier
J13
CPU Fan Connector
1-4
Chapter 1 Introduction
Figure 1-1: Tigershark CPU Board Jumpers, Connectors and
Components
Features
The key features of the Tigershark CPU board are:
• Supports the Pentium® Central Processing Unit (CPU)
• 512K standard cache memory
• Supports up to 256MB DRAM
• PCI interface (PICMG Compatible)
• Fast PCI SCSI II on-board controller and interface
• Two high speed serial ports with 16550 UARTs
• One bidirectional parallel port with DMA access
• Floppy disk interface
• PCI Integrated Drive Electronics (IDE) hard disk interface
• Real-time clock with on-board battery backup
• Keyboard, mouse, speaker, and reset ports
• Watchdog timer
The following are detailed descriptions of some of the above features:
• Pentium CPU
The Tigershark features the Pentium CPU operating at 75, 90, 100,
120, 133, 150, 166 or 200MHz. This 32-bit CPU with a 64-bit bus
of the same speed operates twice as fast as 486 CPUs for common
operations.
• Cache
The Pentium CPU is equipped with two separate 8K caches, one for
storing code and the other for storing data. In addition, the
Tigershark is equipped with 512K second level cache that can be
configured in the BIOS to be write-back or write-through.
• DRAM
The Tigershark CPU board supports 8MB to 256MB of 70 ns x 36
1-5
Features
DRAM SIMMs located in four sockets labeled SM1, SM2, SM3,
and SM4. The Pentium CPU has a 64-bit bus which requires
Total
SM1
SM2
SM3
SM4
8MB
16MB
32MB
64MB
128MB
16MB
24MB
40MB
4MB (1MB x 36)
8MB (2MB x 36)
16MB (4MB x 36)
32MB (8MB x 36)
64MB (16MB x 36)
4MB (1MB x 36)
4MB (1MB x 36)
4MB (1MB x 36)
4MB (1MB x 36)
8MB (2MB x 36)
16MB (4MB x 36)
32MB (8MB x 36)
64MB (16MB x 36)
4MB (1MB x 36)
4MB (1MB x 36)
4MB (1MB x 36)
-----------------------------------4MB (1MB x 36)
8MB (2MB x 36)
16MB (4MB x 36)
-----------------------------------4MB (1MB x 36)
8MB (2MB x 36)
16MB (4MB x 36)
72MB
136MB
4MB (1MB x 36)
4MB (1MB x 36)
4MB (1MB x 36)
4MB (1MB x 36)
32MB (8MB x 36)
64MB (16MB x 36)
32MB (8MB x 36)
64MB (16MB x 36)
32MB
48MB
80MB
144MB
64MB
96MB
8MB (2MB x 36)
8MB (2MB x 36)
8MB (2MB x 36)
8MB (2MB x 36)
16MB (4MB x 36)
16MB (4MB x 36)
8MB (2MB x 36)
8MB (2MB x 36)
8MB (2MB x 36)
8MB (2MB x 36)
16MB (4MB x 36)
16MB (4MB x 36)
8MB (2MB x 36)
16MB (4MB x 36)
32MB (8MB x 36)
64MB (16MB x 36)
16MB (4MB x 36)
32MB (8MB x 36)
8MB (2MB x 36)
16MB (4MB x 36)
32MB (8MB x 36)
64MB (16MB x 36)
16MB (4MB x 36)
32MB (8MB x 36)
160MB
128MB
192MB
16MB (4MB x 36)
32MB (8MB x 36)
32MB (8MB x 36)
16MB (4MB x 36)
32MB (8MB x 36)
32MB (8MB x 36)
64MB (16MB x 36)
32MB (8MB x 36)
64MB (16MB x 36)
64MB (16MB x 36)
32MB (8MB x 36)
64MB (16MB x 36)
256MB
64MB (16MB x 36)
64MB (16MB x 36)
64MB (16MB x 36)
64MB (16MB x 36)
Table 1-1: DRAM Configurations
SIMMs to be installed in matched pairs.
The following table shows some of the possible memory module
configurations. For other possible configurations, contact I-Bus.
• Multifunction Controller (XIO)
The multifunction controller provides two high speed serial ports,
one bidirectional parallel port, and a floppy disk controller.
• IDE Controller
The Tigershark CPU board provides a PCI Integrated Drive
Electronics (IDE) interface for up to two IDE hard disk drives
through the header at J1. J1 accepts a forty-pin IDE connector.
• SCSI II Controller
The Tigershark features the 53C810A SCSI processor. It has a
high-performance SCSI core and an intelligent 32-bit bus master
1-6
Chapter 1 Introduction
DMA core integrated with a SCSI SCRIPTS processor.
The 53C810A is connected to internal SCSI devices through a 50
pin connector. It can be directed to an external connector via one
of several I-Bus adapter assemblies.
• Serial I/O Interface
There are two RS232-compatible serial communication ports with
16550 type UARTS: a primary serial port located at J5 and a secondary serial port at J4.
• Parallel I/O Interface
The Tigershark CPU board provides a parallel I/O interface at J3.
While it is conventionally a printer port, it can be reconfigured by
software to be a bidirectional parallel port. Contact I-Bus for information.
• Floppy Disk Drive Interface
Three configurations are available:
two 2.88MB floppy drives,
two 1.2MB or two 1.44MB floppy drives,
one 1.2 MB and one 1.44 MB floppy drive.
• OPTi 82C556, 82C557, 82C558
The OPTi 82C556, 82C557 and 82C558 provide the major portion
of the system controller. Its features include cache interface, buffer
controller, memory interface, system and cache controllers.
• Integrated Peripheral Controller (IPC)
The 82C558 integrates two 8237 DMA controllers, two 8259 interrupt controllers and one 8254 timer/counter.
• Programmable Interrupt Controller
The 82C558 provides 15 user-selectable interrupt channels.
• Counter/Timer
The 82C558 provides three independent counter channels. Counter
1-7
Features
0 is used as a system timer. Counter 1 is used to generate pulses for
DRAM refresh. Counter 2 is a full function counter/timer.
• Direct Memory Access (DMA)
The 82C558 provides seven DMA channels. The first four DMA
channels are used for eight-bit DMA transfers. The remaining three
channels are used for sixteen-bit DMA transfers. The sixteen-bit
DMA channels function identically to the eight-bit DMA channels
except that bit 0 of the address and the length fields are assumed to
be zero. (All transfers must begin on an even address boundary and
the length must be an even number of bytes.) The sixteen-bit DMA
channels transfer up to 128 KB while the eight-bit DMA channels
transfer up to 64 KB.
•
PCI
The Tigershark CPU board is designed to drive up to,
but no more than, 3 PCI slots.
Controller
OPTi 82C556 and 82C557 PCI Bridge Chip set provides:
• up to three PCI masters are available (slots 1, 2, and 3 on the
backplane).
CAUTION!
• a central arbiter to arbitrate the bus requests between host CPU,
PCI masters, DMA/ISA masters and refresh,
• a programmable priority scheme for both central arbiter and DMA
channels; fixed, rotating or a combination of the two, and
• combine host CPU sequential writes into PCI burst write cycles.
• Keyboard Interface
The Tigershark uses the 8042 keyboard controller. This interface is
disabled when no keyboard is present on the system. A six-pin
1-8
Chapter 1 Introduction
mini-DIN connector is provided at J20. A ten-pin header is also
provided at J8. A keyboard adapter cable is provided for keyboards
with a five-pin DIN connector to connect to the PS/2 mini-DIN.
• Real-time Clock/Calendar
The Tigershark has a real-time clock/calendar backed by an onboard battery. It has 114 bytes of CMOS RAM included with the
clock. The battery has a two year life and is field replaceable.
• Reset
An external reset can be attached to the Tigershark at J10.
• Speaker
The Tigershark provides an on-board speaker and the capability of
adding an external speaker at connector J11.
• EPROM
The 27C010 EPROM contains the BIOS for the system. The system BIOS is mapped from EF000h to FFFFFh.
• Bus Drivers
The Tigershark uses buffered bus drivers capable of driving nineteen additional expansion cards.
• Watchdog Timer
The dual stage watchdog timer is enabled in 2 steps:
Step 1. The 2 Hz clock must first be started by writing the following values to the indicated addresses:
0x0A
0x2F
0x0B
0x0A
to address 0x70
to address 0x71
to address 0x70
to address 0x71
Step 2. Next, a 1 must be written to I/O address 0x160. Once the
watchdog timer is enabled, it will generate an IRQ11 after sixteen
seconds. After another sixteen seconds the board will reset. To prevent these exceptions from being generated, the timer is required to
1-9
Chapter 2 Jumpers and Connectors
This chapter describes the jumpers and connectors on the
Tigershark CPU board. Jumpers and connectors are identified by the
label shown beside them on the board (e.g. J1), followed by the description (e.g. IDE Connector). A table shows the jumper settings or connector pin-outs for each jumper and connector. Illustrations of jumpers and
connectors are shown from the component side of the board. Pin 1 is
identified by the black pin.
All of the jumpers and connectors are shown on the illustration on page
1-4, Figure 1-1, Tigershark CPU Board Jumpers, Connectors, and
Components and on the fold-out illustration on page A3-1.
Pin 1 can be identified on the solder side of the board by the square pad
in a connector or jumper.
CAUTION!
Components on this board are sensitive to damage from
Electrostatic Discharge (ESD). Handling of this board should
ONLY be done by a properly trained technician in an approved
ESD work area!
2-1
Jumpers
The following jumpers are factory-set. If the system is reconfigured,
some of the jumpers may need to be reconfigured.
Jumper
Description
No. of Pins
J6
IDE IRQ14 Disable
2
J9
Cache Size
6
Cache Size
2
J12
J14
Internal Clock Multiplier
2
J15
Factory Test
2
J16
Stop Clock
2
J17
Cache Policy
2
J18
Factory Test
4
J19
Floppy Selection
6
J21
Watchdog Enable/Disable
2
J22
CPU Clock Speed
6
J23
Factory Test
2
J24
Security Password Enable
2
J26
CPU Voltage Regulator
2
J29
CMOS Clear
2
J30
Mouse IRQ Enable
2
J31
Parallel Port DMA
8
J32
Internal Clock Multiplier
2
J33
IRQ11 Usage
4
Table 2-1: Jumpers
• J6, IDE IRQ14 Disable
Placing a jumper on J6 enables IRQ14 for an IDE drive. If no
jumper is installed on J6, IRQ14 is available for other system use.
*
Position
Function
*1 & 2
IDE on IRQ14
OFF
IRQ14 available
factory default setting
Table 2-2: J6, IDE IRQ14 Disable
2-2
2
1
Chapter 2 Jumpers and Connectors
• J9, Cache Size
Placing jumpers on pins 1 and 3 and pins 2 and 4 enables the 512 K
cache. Jumpers placed on pins 3 and 5 and pins 4 and 6 enables the
256 K cache. This cache size setting must be the same as jumper
J12.
Position
Cache Size
1 & 3, 2 & 4
512 K
3 & 5, 4 & 6
256 K
5
3
1
6
4
2
Table 2-3: J9, Cache Size
• J12, Cache Size
Placing a jumper on J12 sets the cache size at 512 K. If no jumper
is placed on J12, the cache size is set at 256 K. This cache size setting must be the same as jumper J9.
Position
Cache Size
1&2
512 K
OFF
256 K
1
2
Table 2-4: J12, Cache Size
• J15, Factory Test
For factory use only. Do not use.
For standard operation, no jumper is installed.
• J18, Factory Test
For factory use only. Do not use.
For standard operation, jumpers are installed on
pins 1 & 4 and 2 & 3.
• J23, Factory Test
For factory use only. Do not use.
For standard operation, no jumper is installed.
2-3
3
4
2
1
Jumpers
• J14, Internal Clock Multiplier (see Table 2-9)
Placing a jumper only on J14 sets the CPU speed at 2 x the speed of
the board. If no jumper is installed on either J14 or J32 (standard
operation), the CPU operates at 1.5 x the speed of the board. To set
the CPU speed at 2.5 x the speed of the board, place jumpers on
both J14 and J32.
Position
OFF (J14 & J32)
1 & 2 (J14 only)
1 & 2 of J14 & J32
OFF (J14 only)
Function
1.5 x CPU speed
1
2 x CPU speed
2
2.5 x CPU speed
3 x CPU speed
Table 2-5: J14, Internal Clock Multiplier
• J32, Internal Clock Multiplier (see Table 2-9)
Placing a jumper only on J32 sets the CPU speed at 3 x the speed of
the board. If no jumper is installed on either J32 or J14 (standard
operation), the CPU operates at 1.5 x the speed of the board. To set
the CPU speed at 2.5 x the speed of the board, place jumpers on
both J32 and J14.
Position
OFF (J32 & J14)
OFF (J32 only)
1 & 2 of J32 & J14
1 & 2 (J32 only)
Function
1.5 x CPU speed
2
2 x CPU speed
1
2.5 x CPU speed
3 x CPU speed
Table 2-6: J32, Internal Clock Multiplier
2-4
Chapter 2 Jumpers and Connectors
• J22, CPU Clock Speed (see Table 2-9)
For a 50MHz CPU no jumpers are placed on J22. For a 60MHz
CPU, place jumpers on pins 1 and 2 and pins 3 and 4. For a
66MHz CPU place a jumper on pins 1 and 2.
Position
Base Speed
None
50 MHz
1 & 2, 3 & 4
60 MHz
1&2
66 MHz
5
3
1
6
4
2
Table 2-7: J22, CPU Clock Speed
• J26, CPU Voltage Regulator (see Table 2-9)
When using a 75-100MHz CPU, install a jumper on pins 1 and 2.
When using a 120-200MHz CPU, no jumper is installed.
Position
Function
1&2
75 - 100 MHz
OFF
120 - 200 MHz
2
1
Table 2-8: J26, CPU Voltage Regulator
Use the following table to determine the proper jumper settings for
your specific board.
CPU
Internal
Speed
Clock
Multiplier
Clock
Speed
CPU Voltage
Regulator
J14
J32
J22
J26
75
OFF
OFF
None
1&2
90
OFF
OFF
1 & 2, 3 & 4
1&2
100
OFF
OFF
1&2
1&2
120
1&2
OFF
1 & 2, 3 & 4
OFF
133
1&2
OFF
1&2
OFF
150
1&2
1&2
1 & 2, 3 & 4
OFF
166
1&2
1&2
1&2
OFF
180
OFF
1&2
1 & 2, 3 & 4
OFF
200
OFF
1&2
1&2
OFF
Table 2-9: Jumper Settings, J14, J22, J26, J32
2-5
Jumpers
• J16, Stop Clock
Select the following jumper positions for extra power savings during the Green Mode. Upon entering the Green Mode, the CPU will
be stopped. It will resume operation when exiting the Green Mode.
Position
Function
2
1&2
Extra power savings
1
OFF
Standard
Table 2-10: J16, Stop Clock
• J17, Cache Policy
J17 selects whether a cache line is to be invalidated on every DMA
bus master cycle or on DMA bus cycle writes only. In normal operation a jumper is placed on pins 1 and 2.
Position
1&2
* OFF
Function
Invalidate on writes
2
Always invalidate
1
* factory default setting
Table 2-11: J17, Cache Policy
• J19, Floppy Selection
Select the density of the floppy disk drive enabled in the BIOS.
Three configurations are available:
two 2.88MB floppy drives,
two 1.2MB or two 1.44MB floppy drives,
one 1.2 MB and one 1.44 MB floppy drive.
2.88 MB floppy drives cannot be configured with either a 1.2 MB
or 1.44 MB floppy drive.
Position
Density
1
2
1&2
1.2MB/1.44 MB
3
4
3 & 4, 5 & 6
2.88 MB
5
6
Table 2-12: J19, Floppy Selection
2-6
Chapter 2 Jumpers and Connectors
• J21, Watchdog Enable/Disable
To enable the watchdog timer, place a jumper on pins 1 and 2. The
address of the watchdog timer is I/O 160 and cannot be relocated.
To free I/O 160 for use with other devices, the watchdog timer must
be disabled. To disable the watchdog timer, remove the jumper
from J21.
Position
Function
*1 & 2
Enabled
OFF
Disabled
2
1
* factory default setting
Table 2-13: J21, Watchdog Enable/Disable
• J24, Security Password Enable
Placing a jumper on pins 1 and 2 of J24 enables the security password option in the BIOS Setup Utility. With this jumper installed,
the password selection is available in the BIOS.
Position
Function
1&2
Enable Password
OFF
Password not required
2
1
Table 2-14: J24, Security Password Enable
• J29, CMOS Clear
To clear CMOS with power ON, install a jumper on 1 and 2, wait
five seconds, remove the jumper from 1 and 2, and reset.
Position
Function
1&2
Clear CMOS
1
Normal
2
* OFF
* factory default setting
Table 2-15: J29, CMOS Clear
2-7
Jumpers
• J30, Mouse IRQ Enable
Placing a jumper on J30 enables IRQ12 for the mouse. If no
jumper is placed on J30, IRQ12 is available for other use.
Position
Function
1&2
Mouse on IRQ12
OFF
IRQ12 available
1
2
Table 2-16: J30, Mouse IRQ Enable
• J31, Parallel Port DMA
Using DMA channels enables high speed transfers from memory to
the parallel port. Select DMA channels 1 or 3 to be used for the
Position
Function
1
2
1 & 2, 5 & 6
LPT1 uses DRQ3/DACK3
3
4
3 & 4, 7 & 8
LPT1 uses DRQ1/DACK1
5
6
7
8
Table 2-17: J31, Parallel Port DMA
parallel port.
• J33, IRQ11 Usage
IRQ11 can be configured to share with the ISA bus and the
Watchdog timer. To facilitate this sharing technique, the IRQ11 signal on the backplane is pulled down to ground through a 10k resisPosition
Function
1&3
IRQ11 for Watchdog timer only
* 1 & 3, 2 & 4
Share IRQ11 with ISA bus
& Watchdog timer
3&4
IRQ11 for ISA bus only
* factory default setting
Table 2-18: J33, IRQ11 Usage
2-8
1
2
3
4
Chapter 2 Jumpers and Connectors
tor. If any cards in the ISA backplane have a pullup resistor on
IRQ11, this sharing technique cannot be used.
Connectors
The following connectors can be located in Figure 1-1: Tigershark
Jumper
Description
No. of Pins
J1
IDE Connector
40
J2
Floppy Disk Drive Connector
34
J3
Parallel Port
26
J4
COM2 Port
10
J5
COM1 Port
10
J7
SCSI Connector
50
J8
Keyboard Connector
10
J10
Reset Connector
2
J11
Speaker Connector
4
J13
CPU Fan Connector
4
J20
Keyboard mini-DIN Connector
6
J25
Mouse mini-DIN Connector
6
J27
External HD LED Connector
2
J28
External Battery Connector
4
CPU Board Jumpers, Connectors, and Components on page 1-4,
and the fold-out illustration on page A3-1.
Table 2-19: Connectors
2-9
Connectors
Pin #
Name
Pin #
Name
1
RST
21
N/C
2
GND
22
GND
3
D7
23
IOW
4
D8
24
GND
5
D6
25
IOR
6
D9
26
GND
7
D5
27
N/C
8
D10
28
BALE
9
D4
29
N/C
10
D11
30
GND
11
D3
31
IRQ14
12
D12
32
IO16
13
D2
33
SAI
14
D13
34
N/C
15
D1
35
SA0
16
D14
36
SA2
17
D0
37
CS0
18
D15
38
CS1
19
GND
39
HDIND
20
N/C
40
N/C
Table 2-20: J1, IDE Connector
2 Connector
• J1, IDE
40
1
39
2-10
Chapter 2 Jumpers and Connectors
Pin #
Name
2
RMP/LC
4
N/C
6
ID0
8
INDEX
10
MTRO
12
DRV1
14
DRV0
16
MTR1
18
DIR
20
STEP
22
WDATA
24
WGATE
26
TRK0
28
WPRT
29
ID0
30
RDATA
32
HDSEL
33
GND
34
DSKCHG
*
GND
Table 2-21: J2, Floppy Disk Drive Connector
* TheFloppy
remainderDisk
of theDrive
odd numbered
pins are GND.
• J2,
Connector
2
34
1
33
2-11
Connectors
• J3, Parallel Port
Pin #
Name
Pin #
Name
1
Strobe
2
AutoFeed
3
+ Data bit 0
4
Error
5
+ Data bit 1
6
Init
7
+ Data bit 2
8
SLCT IN
9
+ Data bit 3
10
GND
11
+ Data bit 4
12
GND
13
+ Data bit 5
14
GND
15
+ Data bit 6
16
GND
17
+ Data bit 7
18
GND
19
ACK
20
GND
21
Busy
22
GND
23
Paper Empty
24
GND
25
GND
26
N/C
Table 2-22: J3, Parallel Port
2
26
1
25
2-12
Chapter 2 Jumpers and Connectors
The optional parallel port cable connects to J3. Its DB25 connector
attaches to the I/O panel on the back of the chassis.
• J4, COM2 Port
The secondary serial port is a ten-pin header located at J4. The secondary serial port can be terminated in a DB9 connector by obtaining the optional serial port cable from I-Bus. A wire list is also provided on page 2-15 for a third-party cable.
Another optional cable from I-Bus is
Pin #
Name
1
DCD
2
DSR
3
RXD
4
RTS
5
TXD
6
CTS
7
DTR
8
RI
9
GND
10
N/C
Table 2-23: J4, COM2 Port
equipped with a retaining bracket mounting a
DB9 and a DB25 connector terminating in a
ten-pin and twenty-six pin header, respectively.
2-13
2 4 6 8 10
1 3 5 7 9
Connectors
• J5, COM1 Port
The primary serial port is a ten-pin header located at J5. The primary serial port can be terminated in a DB9 connector by obtaining the
optional serial port cable from I-Bus. A wire list is also provided on
page 2-15 for a third-party cable.
Pin #
Name
1
DCD
2
DSR
3
RXD
4
RTS
5
TXD
6
CTS
7
DTR
8
RI
9
GND
10
N/C
2 4 6 8 10
1 3 5 7 9
Table 2-24: J5, COM1 Port
Another optional cable from I-Bus is equipped
with a retaining bracket mounting a DB9 and a DB25 connector terminating in a ten-pin and twenty-six pin header, respectively.
2-14
Chapter 2 Jumpers and Connectors
• Serial Port Cable Wire List
Signal
Name
Connector
Onboard 10 Pin
Connectors (J4 & J5)
25 Pin
9 Pin
DCD
1
8
1
DSR
2
6
6
RXD
3
3
2
RTS
4
4
7
TXD
5
2
3
CTS
6
5
8
DTR
7
20
4
RI
8
22
9
GND
9
2
5
N/C
10
N/C
N/C
Table 2-25: Serial Port Cable Wire List
Pin 1
10-pin Connector
DB9 Connector
2-15
Connectors
The following wire list is provided for users who want to make a
Pin #
Name
Pin #
Name
2
DB0
1
GND
4
DB1
3
GND
6
DB2
5
GND
8
DB3
7
GND
10
DB4
9
GND
12
DB5
11
GND
14
DB6
13
GND
16
DB7
15
GND
18
DBP
17
GND
20
GND
19
GND
22
GND
21
GND
24
GND
23
GND
26
TRMPWR
25
N/C
28
GND
27
GND
30
GND
29
GND
32
ATN
31
GND
34
GND
33
GND
36
BSY
35
GND
38
ACK
37
GND
40
RST
39
GND
42
MSG
41
GND
44
SEL
43
GND
46
C/D
45
GND
48
REQ
47
GND
50
I/O
49
GND
Table
J7,port
SCSI
Connector
cable that connects
to 2-26:
a serial
connector
(J4 or J5) and terminates
with
either
a
DB9
or
DB25
(RS232)
connector.
2
50
• J7, SCSI Connector
1
49
2-16
Chapter 2 Jumpers and Connectors
Pin #
Name
1
CLOCK
2
GND
3
DATA
4
N/C
5
N/C
6
N/C
7
+5 V
8
Key
9
N/C
10
GND
2 4 6 8 10
1 3 5 7 9
Indicates connector
key position
Table 2-27: J8, Keyboard Connector - 10-pin
• J8, Keyboard Connector - 10-pin
Pin #
Name
2
Reset
1
GND
2
1
Table
2-28: J10,
Reset Connector
• J10,
Reset
Connector
An external reset cable can be attached to the Tigershark at J10.
2-17
Connectors
• J11, Speaker Connector
Pin #
Name
1
External Speaker
2
Internal Speaker
3
Vcc
4
Vcc
1
2
3
4
Table 2-29: J11, Speaker Connector
Placing a jumper on pins 1 and 2 of J11 enables the on-board speaker. An external speaker can be used with the Tigershark CPU board
by installing a four-pin connector on J11.
Pin #
Name
1
1
+12 V
2
2
N/C
3
3
N/C
4
4
GND
Table 2-30: J13, CPU Fan Connector
• J13, CPU Fan Connector
To connect a CPU fan to the board, install a 4-pin connector on J13.
2-18
Chapter 2 Jumpers and Connectors
• J20, Keyboard mini-DIN Connector
Pin #
Name
1
DATA
2
N/C
3
GND
4
+5 V
5
CLOCK
6
N/C
6
5
4
3
2
1
View from end
of board
Table 2-31: J20, Keyboard mini-DIN Connector
J20 is a six-pin mini-DIN keyboard connector located on the retaining bracket. A standard PC-AT compatible keyboard can be used
when fitted with the keyboard adapter cable furnished with the CPU
board. The ten-pin keyboard header at J8 can also be used.
Pin #
Name
1
DATA
2
N/C
3
GND
4
+5 V
5
CLOCK
6
N/C
6
5
4
3
2
1
View from end
of board
Table 2-32: J25, Mouse mini-DIN Connector
• J25, Mouse mini-DIN Connector
The mouse and keyboard mini-DIN connectors are
identical. Make sure the correct accessory is plugged
into it’s proper connector.
2-19
Connectors
J25 is a six-pin mini-DIN mouse connector located on the retaining
bracket.
CAUTION!
Pin #
Name
2
Anode
1
Cathode
2
1
Table 2-33: J27, External Hard Drive LED
• J27, External Hard Drive LED Connector
An LED can be connected at J27 to indicate IDE or SCSI harddrive activity.
Pin #
1
Name
Positive Terminal
2
N/C
3
N/C
4
1
2
3
4
Negative Terminal
Table 2-34: J28, External Battery Connector
• J28, External Battery Connector
If specific safety restrictions prevent the use of the on-board lithium
battery, an external battery can be connected at J28.
2-20
Chapter 3 Specifications
System Components
CPU:
3.3V Pentium®
Form Factor:
Standard full length AT
Interrupts:
15 levels available
Power Requirements:
Input Power
+5V @ 3.5A
+12V @ 50mA
-12V @ 50mA
Cache:
512K write-back /write-through
cache
Dynamic RAM:
Supports up to 256MB on-board 36-bit
DRAM SIMM using 70ns x 36
SIMMs
System ROM:
Contains system BIOS
Clock/Calendar:
Real-time clock backed by an onboard lithium battery
External Connections:
IDE & floppy (shrouded headers)
Bidirectional parallel port (shrouded
header)
Serial port 1 (shrouded header)
Serial port 2 (shrouded header)
Keyboard (mini-DIN on retaining
bracket)
Mouse (mini-DIN on retaining
bracket)
Keyboard (Ten-pin header)
Speaker (header)
Reset (header)
Hard Drive LED (header)
Watchdog Timer:
Two-stage, software programmable
3-1
Environmental Specifications
Environmental
Operating
Non-operating
Temperature
0° to +55°C
-40° to +65°C
Humidity
5 to 95% @ 40°C
non-condensing
5 to 95% @ 40°C
non-condensing
Shock
2.5 g @ 10 ms
10 g @ 10 ms
Vibration
0.25 g @ 5-100 Hz
5 g @ 5-100 Hz
Table 3-1: Environmental Specifications
3-2
Chapter 4 BIOS
The BIOS Setup Utility allows you to configure your CPU
board to your system. The BIOS, or Basic Input/Output System, is the
on-board firmware that communicates with the display, keyboard, printers and other peripheral devices.
Starting and Exiting the BIOS Setup
When you turn on your computer, a test is conducted called the Power
On Self Test, or POST. During this test the system checks for certain
hardware configurations and compares them to the BIOS Setup Utility.
If, at boot, the system status does not match the system configuration
stored in CMOS, you will be prompted to start the BIOS Setup Utility.
To Start the BIOS Setup:
•
During a cold boot, press <Del> when prompted.
To Exit the BIOS Setup and boot the computer:
•
While in any utility screen, press <Esc> to return to the CMOS
Setup Utility Screen. If SAVE & EXIT SETUP is selected, all
configuration changes edited in the various screens are recorded
in CMOS memory at this time. If EXIT WITHOUT SAVING
is selected, or if power is turned off, or the front-panel reset button is pressed, the changes made in the BIOS will not be saved
and the original configuration will remain unchanged.
4-1
Setup Screens
• All BIOS screens contain:
•
body consisting of the entry fields containing the utility's
parameters.
•
bottom line indicating the keystrokes that you can use to
manipulate the cursor in that screen.
• Manipulating the screens
Basically, the arrow keys are used to highlight items, Enter is used
to select, the PageUp and PageDown keys are used to change
entries, F1 is pressed for help and Esc is pressed to quit.
• <Up arrow>
Move to previous item
<Down arrow> Move to next item
<Left arrow> Move to the item on the left
<Right arrow> Move to the item on the right
•
Esc key - CMOS Setup Utility Screen - Quit and do not save
changes into CMOS. All other screens, return to CMOS Setup
Utility Screen.
•
PgUp key - Increase the numeric value or make changes.
PgDn key - Decrease the numeric value or make changes.
•
+ key - Increase the numeric value or make changes.
- key - Decrease the numeric value or make changes.
•
F1 key - General help - Press F1 to pop up a small help window
that describes the appropriate keys to use and the possible selections for the highlighted item. To exit, press Esc or the F1 key
again.
•
F2 key - Change color from total 16 colors. F2 to select color
forward, (Shift) F2 to select color backward.
•
F3 key - Calendar, only for Standard CMOS Setup Screen.
•
F5 key - Restore the previous CMOS value from CMOS, only
for BIOS Features Setup Screen.
•
F6 key - Load the default CMOS value from BIOS default
table, only for BIOS Features Setup Screen.
•
F7 key - Load Setup defaults.
•
F10 key - Save all CMOS changes, only for CMOS Setup
4-2
Chapter 4 BIOS
Utility Screen.
This section describes each setup screen in the CMOS Setup
Utility.
Screens and Commands identified on the CMOS Setup Utility Menu
are:
• Standard CMOS Setup
• Load Setup Defaults
• BIOS Features Setup
• Password Setting
• Chipset Features Setup
• IDE HDD Auto Setting
• Power Management Setup
• Save & Exit Setup
• PCI Configuration Setup
• Exit Without Saving
In this section each utility is represented by:
• Screen Illustration
• Explanation
• Entry Fields
Screen Illustration
The screens presented in this manual reflect the same format as your
screens. However, entry values and selections shown on these screens
are examples only.
Explanation
The Explanation following each screen illustration describes the utility
and the available choices.
Entry Fields
Each entry field in the body of the screen is described and all available
choices, or parameters, are listed.
• CMOS Override
If the system fails to boot after changes are made to the BIOS
Setup, a CMOS override can be invoked by pressing the Insert key
when the computer is rebooted. This resets the system to its
defaults.
The system can be restarted by power-cycling the computer (turning
the power switch OFF and then ON), or by pressing the RESET
4-3
Setup Screens
button or by pressing Ctrl, Alt and Delete.
ROM PCI/ISA BIOS
CMOS SETUP UTILITY
AWARD SOFTWARE, INC.
STANDARD CMOS SETUP
INTEGRATED PERIPHERALS
BIOS FEATURES SETUP
SUPERVISOR PASSWORD
CHIPSET FEATURES SETUP
USER PASSWORD
POWER MANAGEMENT SETUP
IDE HDD AUTO DETECTION
PNP/PCI CONFIGURATION SETUP
HDD LOW LEVEL FORMAT
LOAD BIOS DEFAULTS
SAVE & EXIT SETUP
LOAD SETUP DEFAULTS
EXIT WITHOUT SAVING
Esc
: Select Item
: Quit
(Shift) F2 : Change Color
F10 : Save & Exit Setup
Time, Date, Hard Disk Type...
• CMOS Setup Utility Screen
Figure 4-1: CMOS Setup Utility Screen
Explanation
The CMOS Setup Utility screen allows selection of eight setup screens
and two exit choices. Use the arrow keys to move between choices and
press Enter to select the highlighted choice.
Entry Fields
Standard CMOS Setup
This setup screen allows you to configure the calendar, hard drives,
floppy drives, video mode and the “Halt On” command.
BIOS Features Setup
This setup screen allows you to configure virus warning, cache,
boot sequence, keyboard, security, shadowing and SCSI.
Chipset Features Setup
This setup screen allows you to configure the system memory.
4-4
Chapter 4 BIOS
Power Management Setup
This setup screen only displays if the system supports Power
Management (Green PC) standards.
PCI Configuration Setup
This setup screen is available only on systems that support PCI.
Load Setup Defaults
This screen allows you to load the chipset defaults for maximum
system performance.
Password Setting
This screen allows you to configure the change, set, or disable
functions of the password option.
IDE HDD Auto Detection
Functions on this screen automatically detect and configure the hard
disk parameters.
Save Exit Setup
Save CMOS changes and exit setup.
Exit Without Saving
Abandon all CMOS value changes and exit setup.
4-5
Setup Screens
ROM PCI/ISA BIOS (2A5UNA2I)
STANDARD CMOS SETUP
AWARD SOFTWARE, INC.
Date (mm:dd:yy) : Mon. Jan 2 1995
Time (hh:mm:ss) : 19 : 40 : 56
Drive C : None
Drive D : None
(
(
0Mb)
0Mb)
Drive A
Drive B
: None
: None
Video
: EGA/VGA
Halt On
: All Errors
CYLS.
0
0
HEADS
0
0
PRECOMP
0
0
LANDZONE
0
0
SECTORS
0
0
MODE
---------------
Base Memory : 640K
Extended Memory : 7168K
Other Memory : 384K
Total Memory : 8192K
: Select Item
F1 : Help
PU/PD/+/- : Modify
(Shift) F2 : Change Color
• Standard CMOS Setup Screen
Figure 4-2: Standard CMOS Setup Screen
Explanation
The parameters in the Standard CMOS Setup Screen are divided into
groups. Each group includes one or more setup items. Use the arrow
keys to highlight the item and then use the PgUp or PgDn keys to select
the value for each item.
Date: The month is highlighted first, then the date and year. Day is
automatically calculated when the month and year are entered.
Drives C/D. C: and D: identify the hard disk drives installed on the
system. When numbers 1 to 46 are selected, the drive parameters are
automatically configured. When Type User is selected the drive parameters must be entered directly from the keyboard. Press Enter when
the entry is complete.
Drives A/B. A: and B: identify the types of floppy disk drives installed
on the system.
4-6
Chapter 4 BIOS
Video. This selection pertains to the primary system monitor.
Secondary system monitors are supported but do not have to be selected
in Setup.
Halt On. After boot up and during POST (Power On Self Test), the
system will stop when it encounters an error or device not present.
Select the the way the system will boot up.
Memory. The memory is auto-sensed during POST. No user entry
is allowed. Base Memory is the amount of memory at or about the
640K boundary. Extended Memory is above the 1MB boundary. Other
Memory is the portion of memory, usually 384K, allocated for Shadow
RAM or remapped to the Extended Memory pool.
Entry Fields
Fields
Description
Choices
Date
Format is day, month, day, year.
1. Jan - Dec
2. 1 - 31
3. 1990 - 2099
Time
Format is hour, minute, second on 24-hour
clock.
1. 1 - 24
2. 1 - 60
3. 1 - 60
Drive C
Drive D
Press PgUp or PgDn to move between
numbers. Press Enter to select type.
Select Type User to define individual
parameters. See Table A1-11 on page
A1-12.
1. 1-46
2. Type User
3. None
Drive A
Drive B
Press PgUp or PgDn to move
between choices. Press Enter
to select type.
1. None
2. 360, 5.25 in
3. 1.2M, 5.25 in
4. 720K, 3.5 in
5. 1.44M, 3.5 in
6. 2.88M, 3.5 in
Table 4-1: Standard CMOS Setup Screen Entry Fields
4-7
Setup Screens
Fields
Description
Choices
Video
Select the type of video adapter
used for the primary system
monitor.
1. EGA/VGA
2. CGA40
3. CGA80
4. MONO
Halt On
Select the condition that would
cause the system to stop at
boot up.
1. No errors
2. All errors
3. All, but keyboard
4. All, but diskette
5. All, but disk/key
Table 4-1: Standard CMOS Setup Screen Entry Fields Cont’
4-8
Chapter 4 BIOS
• BIOS Features Setup Screen
ROM PCI/ISA BIOS (2A5UNA2I)
BIOS FEATURES SETUP
AWARD SOFTWARE, INC.
Virus Warning
CPU Internal Cache
External Cache
: Disabled
: Enabled
: Enabled
Boot Sequence
Swap Floppy Drive
: A,C
: Disabled
Boot Up NumLock Status
: On
Gate A20 Option
Typematic Rate Setting
Typematic Rate (Char/Sec)
Typematic Delay (Msec)
Security Option
: Fast
: Disabled
:6
: 250
: Setup
Select Item
PCI/VGA Palette Snoop
: Disabled
Video BIOS Shadow
C8000-CBFFF Shadow
CC000-CFFFF Shadow
D0000-D3FFF Shadow
D4000-D7FFF Shadow
D8000-DBFFF Shadow
DC000-DFFFF Shadow
Onboard SCSI Controller
Delay For SCSI/HDD (Secs)
F1
F5
F6
F7
:
:
:
:
:
:
:
:
:
:
:
Enabled
Disabled
Disabled
Disabled
Disabled
Disabled
Disabled
: Enabled
:
0
Help
PU/PD/+/- : Modify
Old Values
(Shift)F2
: Color
Load BIOS Defaults
Load Setup Defaults
Figure 4-3: BIOS Features Setup Screen
Explanation
This setup screen contains parameters that configure the system for
basic operation. Use the arrow keys to highlight the item and then use
the PgUp or PgDn keys to select the value for each item.
Virus Warning. You will need to disable this option while using certain fixed disk maintenance programs (e.g., DOS FDISK), because their
actions would be interpreted as a violation.
Boot Sequence. The BIOS assumes that Drive C is the hard disk drive
and Drive A is the floppy disk drive.
Security Option. To disable the Security Option, select PASSWORD
SETTING from the CMOS Setup Utility screen. When prompted to
enter a new password, do not enter anything, just press Enter. This disables security. Once security is disabled, the system will boot and Setup
can be entered.
4-9
Setup Screens
Shadow RAM. Shadow RAM is a mechanism that copies Read Only
Memory into main memory, then substitutes that memory image for the
original ROM. This increases the execution speed of programming that
resides in ROM. BIOS and VGA Adapters are two main examples of
ROMs that demonstrate significant performance gains when they are
shadowed.
Since ROMs are by definition Read-Only, it is usually desirable to write
protect the Shadow RAM. However, Shadow RAM can also be used as
general purpose memory by certain programs. In this case, it should be
enabled as Read-Write memory. While most Adapter ROMs can be
shadowed either way, some permit only the RW or WP option, and a
rare few cannot be shadowed at all. You may need to experiment a little.
Shadow RAM is obtained from a gap in the otherwise contiguous memory space of the computer. The 384K region between the 640K and
1MB boundaries is occupied not by memory, but instead by ROMs,
video memory, and possibly other system-level devices. The memory
that should appear there is simply inaccessible and unused. One way to
make use of this lost memory is to activate it as Shadow RAM. Certain
designs can also remap a portion of this 384K into the Extended
Memory pool, provided it is not already enabled as Shadow RAM. In
most designs with this capability, remap will be prevented if any
Shadow segment is enabled in the D000 through E000 regions.
Entry Fields
Fields
Virus
Warning
Description
Enable to activate automatically when
system boots, causing message to display.
Choices
1. Enabled
2. Disabled
CPU Internal Enable to allow access to CPU internal
Cache
cache.
1. Enabled
2. Disabled
Boot
Sequence
1. C, A
2. A, C (default)
Enter the drive sequence used to boot the
system.
Swap Floppy Enable to reassign floppy drive designation
Drive
if more than one floppy drive is installed in
the system.
4-10
1. Enabled
2. Disabled
Chapter 4 BIOS
Table 4-2: BIOS Features Setup Screen Entry Fields
Fields
Description
Choices
Boot Up
NumLock
Enter the default state of the numeric
keypad at boot up.
1. On (default)
2. Off
Gate A20
Option
“Normal” handles A20 gate through the
keyboard. Fast handles A20 gate through
the chipset.
1. Normal
2. Fast
Typematic
Rate
Setting
Enable to allow a key to repeat when
pressed. Disable to keep a key from
repeating when it is pressed.
1.Enabled
2. Disabled
Typematic
Rate
(Char/Sec)
Enter the rate at which a key repeats when 1-8. 6, 8, 10,
pressed. (Typematic Rate Setting must
12, 15, 20,
be enabled.)
24, 30
Typematic
Delay
(msec)
Enter the length of time a key can be
1. 250
pressed before it will begin to repeat.
2. 500
(Typematic Rate Setting must be enabled.) 3. 750
4. 1000
Security
Option
Enter “System” to require password to
access system. Enter “Setup” to require
password to enter Setup.
1. System
2. Setup
PCI/VGA
Palette
Snoop
Enable the VGA feature connector
port.
1. Enabled
2. Disabled
(default)
Video BIOS
Shadow
Enabling video shadow copies video
shadow to RAM, increasing video speed.
1. Enabled
2. Disabled
C8000-CFFFF/ Enable optional ROM to RAM in each
D0000-DFFFF of the defined areas
Shadow
1. Enabled
2. Disabled
Onboard
SCSI
Enable the onboard SCSI controller.
Disable if a high-performance SCSI
controller board is installed.
1. Enabled
2. Disabled
Delay For
SCSI/HDD
Enter the delay time, in seconds to allow
for hard drive spin-up.
1. 0 - 60
4-11
Setup Screens
Table 4-2: BIOS Features Setup Screen Entry Fields Cont’
ROM PCI/ISA BIOS (2A5UNA2I)
CHIPSET FEATURES SETUP
AWARD SOFTWARE, INC.
Auto Configuration
: Disabled
AT Bus Clock
Hidden Refresh
: 8 MHz
: Enabled
DRAM Posted Write
DRAM Slow Refresh
CPU Addr. Pipelining
Byte Merger Support
:
:
:
:
Disabled
Disabled
Disabled
Disabled
Tag RAM Size
Tag/Dirty implement
Dirty pin selection
L1 Cache Policy
L2 Cache Write Policy
Select Item
Cache Write Burst
Video BIOS Cacheable
System BIOS Cacheable
DRAM Timing
:
:
:
:
:
8 bit
Separate
IN
Write Back
Write Back
:
:
:
:
4-2-2-2
Enabled
Enabled
70 ns
1st Fast DMA Channel
2nd Fast DMA Channel
Onboard FDC Controller
Onboard Serial Port 1
Onboard Serial Port 2
Onboard Parallel Port
F1
F5
F6
F7
:
:
:
:
:
:
:
:
:
:
NONE
NONE
Enabled
COM1
COM2
LPT1
Help
PU/PD/+/Old Values
(Shift)F2
Load BIOS Defaults
Load Setup Defaults
: Modify
: Color
• Chipset Features Setup Screen
Figure 4-4: Chipset Features Setup Screen
Explanation
The Chipset Features Setup screen manages bus speeds and access to
system memory resources, such as DRAM and the external cache. It
also coordinates communications between the conventional ISA bus and
the PCI bus. Normally, these items never need to be altered. The
default settings provide optimum conditions for the system. The only
time changes would be warranted is if data was being lost during system use.
AT Bus Clock. The AT bus clock speed is the local speed at which the
CPU communicates with memory. The speed is measured in terms of a
fraction of LCLK, the timing of the local clock of the PCI bus.
DRAM Settings. The first chipset settings deal with CPU access to
DRAM (dynamic random access memory).
4-12
Chapter 4 BIOS
Hidden Refresh. When enabled, a cycle is eliminated by “hiding” the
refresh in the Hidden mode. Not only is the Hidden mode faster and
more efficient, but it also allows the CPU to maintain the status of the
cache even if the system goes into a power management “suspend”
mode.
DRAM Posted Write. When enabled, a CPU write cycle to DRAM
will not require the CPU to wait during the external DRAM cycle.
Byte Merge Support. When enabled, this allows 8- or 16-bit data sent
from the CPU to the PCI bus to be held in a buffer where it is accumulated, or merged, into 32-bit data for faster performance. The chipset
will then write the data in the buffer to the PCI bus when appropriate.
Tag RAM Size. Tag bits are used by the system to determine the status
of data contained in the cache.
Tag/Dirty implement. The system cache controller supports two methods of determining the state of data in the cache. One implementation
separates the tag signal from the “dirty” signal while the other combines
the two to a single 8- (if 7 bits are selected in Tag RAM Size) or 9-bit
(8 bits selected) signal.
L1 Cache Policy. This parameter sets the write policy for the CPU’s
internal or Level 1 cache.
L2 Cache Write Policy. This parameter sets the write policy for the
Level 2 cache (cache not located in the CPU).
1st/2nd Fast DMA Channels. The chipset provides a form of compressed timing on the DMA called Type F DMA. This mode provides
ISA compatible timing for fast DRAM slave devices. Type F timing
basically runs at 360ns/cycle or three ISA clock cycles during the
repeated portion of a Block or Demand mode transfer.
4-13
Setup Screens
Entry Fields
Fields
Description
Choices
Auto
Configuration
Enable to reset most of the chipset setup
parameters to their defaults preventing
them from being changed individually.
Disable to change the chipset setup
parameters individually.
1. Enabled
2. Disabled
AT Bus Clock
LCLK/1 = same rate as the PCI clock.
LCLK/2 = 1/2 the rate of the PCI clock.
LCLK/3 = 1/3 the rate of the PCI clock.
LCLK/2 = 1/4 the rate of the PCI clock.
1. LCLK/1
2. LCLK/2
3. LCLK/3
4. LCLK/4
Hidden
Refresh
Enable allows DRAM refresh to use hidden 1. Enabled
CPU cycles. Disabled, the DRAM
2. Disabled
refresh uses normal CPU cycles.
(default)
DRAM
Posted Write
Enable to eliminate a wait state to DRAM.
Disable for CPU write cycles to wait for
DRAM cycle.
1. Enabled
2. Disabled
(default)
DRAM Slow
Refresh
Enable to allow a slower refresh rate
providing a marginal increase in system
performance.
1. Enabled
2. Disabled
(default)
CPU Address
Pipelining
Enable results in increased throughput.
Disable for no address pipelining.
1. Enabled
2. Disabled
(default)
Byte Merge
Support
Enable buffers CPU to PCI writes. When
disabled, writes are not buffered.
1. Enabled
2. Disabled
Tag RAM
Size
Enter 7 or 8 bits to be used for tag RAM
information.
1. 7 bit (default)
2. 8 bit
Tag/Dirty
Implement
Combine Tag and Dirty signals into a single 1. Combine
signal or Separate Tag and Dirty signals.
2. Separate
Dirty pin
selection
I/O selects bi-directional input/output.
IN selects input only.
1. I/O
2. IN
Table 4-3: Chipset Features Setup Screen Entry Fields
4-14
Chapter 4 BIOS
Fields
Description
Choices
L1 Cache
Policy
“Write Back” causes memory to be updated
1. Write Back
only under certain conditions such as read
2. Write Through
requests to the memory whose contents are
currently in the cache, allowing the CPU to
operate with fewer interruptions and
increasing its efficiency. “Write Through”
means that memory is updated with data held
in the cache whenever the CPU issues a
write cycle.
L2 Cache
Policy
Same as L1 Cache Policy.
1. Write Back
2. Write Through
Cache Write
Burst
Select the precise timing used during burst
writes to the cache by scrolling though the
choices.
1. 2-1-1-1 to
5-4-4-4
Video BIOS
Cacheable
When enabled, the Video BIOS cache will
cause access to video BIOS addressed at
C0000H to C7FFFH to be cached, if the
cache controller is also enabled. When
disabled, the video BIOS access is not
cached.
1. Enabled
2. Disabled
(default)
System BIOS As with caching the Video BIOS above,
Cacheable
enabling allows accesses to the system
BIOS ROM addressed at F0000HFFFFFH to be cached, provided that the
cache controller is enabled.
1. Enabled
2. Disabled
(default)
DRAM
Timing
Set to the type of DRAM SIMMs installed in
the system.
1. 60ns
2. 70ns
1st/2nd Fast
DMA
Channels
Two DMA channels, “0” or “1”, can be
selected to support Type F timing.
1. None
2. 0
3. 1
Table 4-3: Chipset Features Setup Screen Entry Fields Cont’
4-15
Setup Screens
Fields
Description
Choices
Onboard
FDC
Controller
Enable to use the system onboard floppy
disk controller. Disable if FDC board is
installed in system.
1. Enabled
(default)
2. Disabled
Onboard
Serial Port 1
Select the IRQ for serial port 1 or disable it
COM1 = 3F8 IRQ4 / COM2 = 2F8 IRQ3
COM3 = 2E8 IRQ3 / COM4 = 3E8 IRQ4
1. COM1
(default)
2. COM2
3. COM3
4. COM4
5. Disabled
Onboard
Serial Port 2
Select the IRQ for serial port 2 or disable it
COM1 = 3F8 IRQ4 / COM2 = 2F8 IRQ3
COM3 = 2E8 IRQ3
1. COM1
(default)
2. COM2
3. COM3
4. Disabled
Onboard
Parallel Port
Change the default port address of the
onboard parallel (printer) port or disable it.
1. = standard LPT1 address
2. = standard LPT2 address
3. = alternate LPT1 address
1. 378/IRQ7
(default)
2. 278/IRQ5
3. 3BC/IRQ7
4. Disabled
Table 4-3: Chipset Features Setup Screen Entry Fields Cont’
4-16
Chapter 4 BIOS
• Power Management Setup Screen
ROM PCI/ISA BIOS (2A5UNA2I)
POWER MANAGEMENT SETUP
AWARD SOFTWARE, INC.
Power Management
PM Control by APM
Video Off Option
Video Off Method
: Disable
: Yes
: Susp,Stby >Off
: V/H SYNC+Blank
** PM Timers **
HDD Off After
Doze Mode
Standby Mode
Suspend Mode
: Disable
: Disable
: Disable
: Disable
** PM Events **
DMA Request
Video Activity
HDD Port (1F0,170)
Select Item
LPT (3BC,378,278)
COM Port (3F8,3E8)
COM Port (2F8,2E8)
PCI Masters
: Enable
: Disable
: Enable
: Enable
: Enable
: Enable
: Enable
Local
IRQ3
IRQ4
IRQ5
IRQ6
IRQ7
IRQ9
IRQ10
IRQ11
IRQ12
IRQ13
IRQ14
IRQ15
Devices
(COM 2)
(COM 1)
(LPT 2)
(Floppy Disk)
(LPT 1)
(IRQ2 Redir)
(Reserved)
(Reserved)
(PS/2 Mouse)
(Coprocessor)
(Hard Disk)
(Reserved)
: Enable
: Enable
: Enable
: Enable
: Enable
: Enable
: Disable
: Enable
: Enable
: Enable
: Enable
: Disable
: Enable
F1 : Help
PU/PD/+/- : Modify
F5 : Old Values
(Shift)F2 : Color
F6 : joad BIOS Defaults
F7 : joad Setup Defaults
Figure 4-5: Power Management Setup Screen
Explanation
The Power Management Setup screen allows you to configure the system to most effectively save energy.
Power Management. The type of power saving selected here is directly related to the four PM Timers: HDD Off After, Doze Mode, Standby
Mode, and Suspend Mode. You can choose one of the fixed mode
choices or disable it. Min. Power Saving = HDD Off After = 15 min.,
Doze Mode = 1 hr., Standby Mode = 1 hr., Suspend Mode = 1 min.
Max. Power Saving is only available for SL CPUs. HDD Off After = 1
min., Doze Mode = 1 min., Standby Mode = 1 min., Suspend Mode = 1
min. User Defined allows each mode to be set individually. When not
disabled, each of the ranges are from 1 min. to 1 hr. except for HDD Off
After which ranges from 1 min. to 15 min. and disable.
PM Timers. The four parameters are Green PC power saving functions
that are user configureable when User Defined is selected from the
Power Management parameter.
4-17
Setup Screens
PM Events. PM events are I/O events whose occurrence can prevent
the system from entering a power saving mode or can awaken the system from a power saving mode. In effect, the system remains alert for
any device configured as Enable, even when the system is in a power
down mode.
Entry Fields
Fields
Description
Power
Management
See Explanation, page 4-17.
Choices
1. Disable
(default)
2. Min Pwr. Sav
3. Max Pwr. Sav.
4. User Defined
PM Control
by APM
Yes to activate Advanced Power Mgmnt.,
1. Yes
enhancing the Max. Pwr. Sav mode and stop 2. No
the CPU internal clock.
Video Off
Option
Selects which combination of the PM Timers 1. Susp,Stby
modes causes video to turn off. (Selection 3,
-> Off
Always On, means none). See page 4-17
2. All Modes
an explanation.
-> Off
3. Always On
4. Suspend
-> Off
Video Off
Method
Selecting “1” causes the system to turn off the 1. V/H SYNC +
vertical and horizontal synchronization ports
Blank
and write blanks to the video buffer. Selecting 2. Blank Screen
“2” causes the system to only write blanks to
the video buffer.
HDD Off
After
When enabled, and after a set time of system 1. Enabled
inactivity, the hard disk drive will be powered 2. Disabled
down while all other devices remain active.
Doze Mode
When enabled and after the set time of
system inactivity, the CPU clock will run at a
slower speed while all other devices still
operate at full speed.
1. Enabled
2. Disabled
Table 4-4: Power Management Setup Screen Entry Fields
4-18
Chapter 4 BIOS
Fields
Description
Choices
Standby
Mode
When enabled and after the set time of
1. Enabled
system inactivity, the fixed disk drive and the 2. Disabled
video would be shut off while all other devices
still operate at full speed.
Suspend
Mode
When enabled and after the set time of
system inactivity, all devices except the CPU
will be shut off.
1. Enabled
2. Disabled
DMA
Request
When Enabled is selected, any request
to the DMA controller will awaken
the system.
1. Enabled
(default)
2. Disabled
Video
Activity
If this is enabled, any video activity will
awaken the system.
1. Enabled
2. Disabled
(default)
HDD Port
(1F0,170)
When set to Enable, any event
occurring at a hard disk drive will awaken
the system.
1. Enabled
(default)
2. Disabled
LPT
When set to Enable, any event
(3BC,378,278) occurring at a printer port (LPT 1-3) will
awaken the system.
1. Enabled
(default)
2. Disabled
COM Port
(3F8, 3E8)
When set to Enable, any event occurring
at a COM 1 or COM 3 port will awaken
the system.
1. Enabled
(default)
2. Disabled
COM Port
(2F8, 2E8)
When set to Enable, any event occurring
at a COM 2 or COM 4 port will awaken
the system.
1. Enabled
(default)
2. Disabled
PCI Masters When set to Enable, any event from
a PCI bus master will awaken the system.
1. Enabled
(default)
2. Disabled
Table 4-4: Power Management Setup Screen Entry Fields Cont’
4-19
Setup Screens
Fields
Local Devices
IRQ3 (C2 )
IRQ4 (C1)
IRQ5 (LPT2)
IRQ6 (Floppy)
IRQ7 (LPT1)
IRQ9 (IRQ2)
IRQ10 (Rsvd)
IRQ11 (Rsvd)
IRQ12 (Mouse)
IRQ13 (Coproc)
IRQ14 (HD)
IRQ15 (Rsvd)
Description
When set to Enable (default), any
event at any of these local devices
will awaken the system.
Enable is the default for all except
IRQ14.
Choices
1. Enabled
2. Disabled
Table 4-4: Power Management Setup Screen Entry Fields Cont’
4-20
Chapter 4 BIOS
• PCI Configuration Setup Screen
ROM PCI/ISA BIOS (2A5UNA2I)
PCI CONFIGURATION SETUP
AWARD SOFTWARE, INC.
PnP BIOS Auto-Config
Slot 1 Using INT#
Slot 2 Using INT#
Slot 3 Using INT#
Slot 4 Using INT#
: Disabled
: AUTO
: AUTO
: AUTO
: AUTO
1st Available IRQ
2nd Available IRQ
3rd Available IRQ
4th Available IRQ
: 15
: 10
:9
:5
PCI Read burst WS
PCI Write burst WS
Master Retry Timer
PCI Pre-Snoop
Select Item
PCI Preempt Timer
CPU to PCI POST/BURST
PCI CLK
: 2 Cycles
: 2 Cycles
: 10 PCICLKs
: Disabled
: Disabled
: POST/CON.BURST
: Async
Onboard IDE
IDE HDD Block Mode
IDE Primary Master PI0
IDE Primary Slave PI0
: Enabled
: Enabled
: AUTO
: AUTO
F1
F5
F6
F7
: Modify
: Color
:
:
:
:
Help
PU/PD/+/Old Values
(Shift)F2
Load BIOS Defaults
Load Setup Defaults
Figure 4-6: PCI Configuration Setup Screen
Explanation
This screen is for configuring the PCI bus. PCI, or Peripheral
Component Interconnect, is a local bus that provides a high-speed data
path between the CPU and peripheral devices such as graphic adapters,
disk controllers, and network cards.
PnP BIOS Auto-Config. This parameter supports the “Plug and Play”
Microsoft/Intel standard for operating systems (Windows® 95) and
expansion boards. This feature should only be enabled when using an
operating system that supports “Plug and Play.”
IDE Primary Master/Slave PIO. This parameter controls the data
transfer rate of the IDE drive(s). Selections are from Mode 0 to Mode 4
and AUTO. Mode 0 is the slowest, Mode 4 the fastest. AUTO allows
the BIOS to query the drive(s) and select the optimum speed.
4-21
Setup Screens
Entry Fields
Fields
Description
Choices
PnP BIOS
Auto-Config
Enables or Disables the “Plug and
Play” feature.
1. Enabled
2. Disabled
(default)
Slot x Using
INT#
Each PCI slot is capable of activating up to
four interrupts, INT#A, INT#B, INT#C and
INT#D. Selecting AUTO allows the PCI
controller to automatically allocate
the interrupts.
1. AUTO
(default)
2. A
3. B
4. C
5. D
1st/2nd/3rd/4th
Available IRQ
Select which interrupt is associated with
each PCI slot. By default, IRQ’s 9 and
10 are mapped to PCI devices. The IRQ
settings must be the same as the jumper
settings on the CPU board.
“NA” means the IRQ has been assigned to
the ISA bus and is not available.
1.
2.
3.
4.
5.
6.
7.
PCI Read
burst WS
Determine how long (in CPU cycles) the
system will wait for completion of a
PCI burst read.
1. 4 CYCLES
(default)
2. 3 CYCLES
3. 2 CYCLES
PCI Write
burst WS
Determine how long (in CPU cycles) the
system will wait for completion of a
PCI burst write.
1. 4 CYCLES
(default)
2. 3 CYCLES
3. 2 CYCLES
Master Retry
Timer
Determine how long the CPU master
attempts a PCI cycle before the cycle
is unmasked (terminated).
1. 10 PCICLKs
(default)
2. 18 PCICLKs
3. 34 PCICLKs
4. 66 PCICLKs
NA
5
9
10
11
14
15
Table 4-5: PCI Configuration Setup Screen Entry Fields
4-22
Chapter 4 BIOS
Fields
Description
Choices
PCI
Pre-Snoop
Enable allows you to use external video
boards using frame grabbers to “snoop”
VGA activity on the PCI bus.
1. Enabled
2. Disabled
(default)
PCI Preempt
Timer
Sets the length of time before one PCI
master preempts another when a service
request is pending. See page 4-12 for
an explanation of LCLK.
1. Disabled
(default)
2. 260 LCLKs
3. 132 LCLKs
4. 68 LCLKs
5. 36 LCLKs
6. 20 LCLKs
7. 12 LCLKs
8. 5 LCLKs
CPU to PCI
POST/BURST
Data from the CPU to the PCI bus can be
posted and/or burst.
1. POST/
CON.BURST
(default)
2. NONE/NONE
3. POST/NONE
PCI CLK
Select “Sync” to synchronize the PCI clock 1. Async
with the CPU clock.
(default)
2. Sync
Onboard IDE
Enable to use the system onboard IDE
controller. Disable if an IDE board is
installed in the system.
1. Enable
2. Disable
IDE HDD
Block Mode
By enabling the block mode for hard
drive data transfer, the system can read
and write to the drive using large blocks of
data instead of individual bytes.
1. Enabled
2. Disabled
IDE Primary
Master/Slave
PIO
Select the data transfer rate of the primary
master/slave IDE drive. Auto allows the
BIOS to query the drive(s) and select
the optimum speed.
1. Auto
2. Mode 0
3. Mode 1
4. Mode 2
5. Mode 3
6. Mode 4
(fastest)
Table 4-5: PCI Configuration Setup Screen Entry Fields Cont’
4-23
Password Setting
• Password Setting
When this function is selected, the following message will be displayed
at the center of the screen:
ENTER PASSWORD:
Type the password, up to eight characters in length, and press Enter.
The entered password will clear any previously entered password from
CMOS memory. A statement will be displayed requesting confirmation.
Type the password again and press Enter. To abort this process, press
Esc.
To disable a password, press Enter when prompted to enter the password. The following message will be displayed at the center of the
screen:
PASSWORD DISABLED
Once the password is disabled, the system will boot and Setup can be
entered.
When a password has been enabled, it will have to be entered every
time Setup is entered. This prevents an unauthorized person from
changing any part of the system configuration.
Additionally, when a password is enabled, you can also require the
BIOS to request a password every time your system is rebooted. This
would prevent unauthorized use of your computer.
You determine when the password is required within the BIOS Features
Setup Menu and its Security option. If the Security option is set to
“System,” the password will be required both at boot and at entry to
Setup. If set to “Setup,” prompting only occurs when trying to enter
Setup.
4-24
Chapter 4 BIOS
• POST Messages
During the Power On Self Test (POST), if the BIOS detects an error
requiring a fix, it will either sound a beep code or display a message. However, there is only one beep code in BIOS. This code
indicates that a video error has occurred and the BIOS cannot initialize the video screen to display any additional information. This
beep code consists of a single long beep followed by two short
beeps.
When a POST message is displayed, it will be accompanied by:
PRESS F1 TO CONTINUE, DEL TO ENTER SETUP
Error Messages
One or more of the following messages may be displayed if the BIOS
detects an error during the POST.
CMOS BATTERY HAS FAILED CMOS battery is no longer
functional. It should be replaced.
CMOS CHECKSUM ERROR Checksum of CMOS is incorrect.
This can indicate that CMOS has become corrupt. This error may
have been caused by a weak battery. Check the battery and replace
if necessary.
DISK BOOT FAILURE, INSERT SYSTEM DISK AND
PRESS ENTER No boot device was found. This could mean that
either a boot drive was not detected or the drive does not contain
proper system boot files. Insert a system disk into Drive A: and
press Enter. If you assumed the system would boot from the hard
drive, make sure the controller is inserted correctly and all cables
are properly attached. Also be sure the disk is formatted as a boot
device. Then reboot the system.
DISKETTE DRIVES OR TYPES MISMATCH ERROR - RUN
SETUP Type of diskette drive installed in the system is different
from the CMOS definition. Run Setup to reconfigure the drive type
correctly.
4-25
Post Messages
DISPLAY SWITCH IS SET INCORRECTLY Display switch on
the CPU board can be set to either monochrome or color. This indicates the switch is set to a different setting than indicated in Setup.
Determine which setting is correct,and then either turn off the system and change the jumper, or enter Setup and change the VIDEO
selection.
DISPLAY TYPE HAS CHANGED SINCE LAST BOOT Since
last powering off the system, the display adapter has been changed.
You must configure the system for the new display type.
ERROR ENCOUNTERED INITIALIZING HARD DRIVE Hard
drive cannot be initialized. Make sure the adapter is installed correctly and all cables are correctly and firmly attached. Also make
sure the correct hard drive type is selected in Setup.
ERROR INITIALIZING HARD DISK CONTROLLER Cannot
initialize controller. Make sure the cord is correctly and firmly
installed in the bus. Be sure the correct hard drive type is selected in
Setup. Also check to see if any jumper needs to be set correctly on
the hard drive.
FLOPPY DISK CNTRLR ERROR OR NO CNTRLR
PRESENT Cannot find or initialize the floppy drive controller.
make sure the controller is correctly installed. If there are no floppy
drives installed, make sure the Diskette Drive selection in Setup is
set to NONE.
KEYBOARD ERROR OR NO KEYBOARD PRESENT
Cannot initialize the keyboard. Make sure the keyboard is attached
correctly and no keys are being pressed during the boot.
If you are purposely configuring the system without a keyboard, set
the error halt condition in Setup to HALT ON ALL, BUT KEYBOARD. This will cause the BIOS to ignore the missing keyboard
and continue to boot.
Memory Address Error at ... Indicates a memory address error
at a specific location. You can use this location along with the memory map for your system to find and replace the bad memory chips.
4-26
Chapter 4 BIOS
Memory parity Error at ... Indicates a memory parity error at a
specific location. You can use this location along with the memory
map for your system to find and replace the bad memory chips.
Memory Verify Error at ... Indicates an error verifying a value
already written to memory. Use the location along with your system’s memory map to locate the bad chip.
OFFENDING ADDRESS NOT FOUND This message is used in
conjunction with the I/O CHANNEL CHECK and RAM PARITY
ERROR messages when the segment that has caused the problem
cannot be isolated.
OFFENDING SEGMENT: This message is used in conjunction
with the I/O CHANNEL CHECK and RAM PARITY ERROR messages when the segment that has caused the problem has been isolated.
PRESS A KEY TO REBOOT This will be displayed at the bottom screen when an error occurs that requires you to reboot. Press
any key and the system will reboot.
PRESS F1 TO DISABLE NMI, F2 TO REBOOT When BIOS
detects a Non-maskable Interrupt condition during boot, this will
allow you to disable the NMI and continue to boot, or you can
reboot the system with the NMI enabled.
RAM PARITY ERROR - CHECKING FOR SEGMENT ...
Indicates a parity error in Random Access Memory.
SYSTEM HALTED, (CTRL-ALT-DEL) TO REBOOT ...
Indicates the present boot attempt has been aborted and the system
must be rebooted. Press and hold down the CTRL and ALT keys
and press DEL.
4-27
Troubleshooting
This section contains questions that are most frequently asked of
our Customer Support Department about the BIOS setup utility. You
may be able to diagnose any difficulty you have by referring to them
prior to calling our Customer Support.
Q1
I’ve made BIOS changes and saved them and now the system
won’t boot. What can I do?
A
Q2
Do I have to use the on board IDE or floppy disk controllers?
A
Q3
Q6
No, you may relocate or disable them.
What if you are using a different controller other than the one
built into the CPU?
A
Q5
No.
Do you have to use the serial or parallel ports built onto the
CPUs?
A
Q4
A CMOS override can be invoked by pressing the
Insert key when the computer is rebooted. This resets
the system to its defaults.
This is not a problem if you adjust the BIOS to use an
off-board controller.
Can I use a SCSI controller and where should I set the address?
A1
You can use a SCSI controller. You must set the card
address for the primary controller in the system. Then
find an available appropriate address to set the SCSI
BIOS to.
A2
YOU MUST DISABLE THE ON-BOARD IDE
CONTROLLER IF YOU WANT THE SCSI
CONTROLLER TO BE THE BOOT DEVICE.
Can I use an ESDI controller and where should I set the
address?
A1
You can use an ESDI controller. The address should
be set for the primary controller in the system, Then
find an available appropriate address to set the ESDI
BIOS to.
4-28
Chapter 4 BIOS
A2
Q7
YOU MUST DISABLE THE ON-BOARD IDE
CONTROLLER IF YOU WANT THE ESDI
CONTROLLER TO BE THE BOOT DEVICE.
What preventive maintenance steps can I take?
A
Ensure all fans in the chassis are working.
Clean the filter with warm water or compressed air.
Replace brittle or torn filters.
Allow ample air circulation behind the chassis.
Keep all cables free from tangles.
CAUTION!
Electrostatic Discharge (ESD) may damage memory chips,
programmed devices and other electrical components. ESD can be
prevented by wearing a wrist strap attached to a ground post
on a static mat. Grounding can also occur by touching a
chassis that is plugged into a power outlet.
4-29
Appendix 1 Technical Reference
Standard PC-AT I/O Map
Device
Address (Hex)
000 - 01F
DMA Controller
020 - 03F
Interrupt Controller 1
040 - 05F
Timer
060 - 06F
Keyboard Controller
070 - 07F
Real Time Clock (non-maskable interrupt)
080 - 09F
DMA Page Registers
0A0 - 0BF
Interrupt Controller 2
0C0 - 0DF
DMA Controller 2
0F8 - 0FF
Math Co-processor
1F0 - 1FF
Hard Disk Controller
200 - 207
Game I/O
278 - 27F
Prototype Card
2F8 - 2FF
Serial Port 2
300 - 31F
Prototype Card
360 - 36F
(Reserved)
378 - 37F
Parallel Printer Port
380 - 38F
SDLC Bisynchronous 2
3A0 - 3AF
Bisynchronous 1
3B0 - 3BF
Monochrome Display/Printer
3C0 - 3CF
(Reserved)
3D0 - 3DF
Color Graphics Display Adapter
3F0 - 3F7
Floppy Disk
3F8 - 3FF
Serial Port COM1
Table A1-1: Standard PC-AT I/O Map
A1-1
DMA
DMA Channel Page Register and I/O Addresses
Controller 1: 8-bit (ports 000-00F)
Page Register
I/O Hex Address
Channel 0
087
Channel 1
083
Channel 2
081
Channel 3
082
Controller 2: 16-bit (AT Only - ports 0C0-0DF)
Channel 5
08 B
Channel 6
089
Channel 7
08 A
Refresh (AT)
08 F
Table A1-2: DMA Channel Page Register and I/O Addresses
DMA Channel Assignments
Channel
Function
0
Reserved
1
SDLC
2
Floppy Disk
3
Spare
4
Cascade for CTRL
5
Spare (Reserved)
6
Spare (Reserved)
7
Spare (Reserved)
Table A1-3: DMA Channel Assignments
A1-2
Appendix 1 Technical Reference
DMA Controller Register Functions
DMA#
Description
1
2
000
0C0
CH0 base and current address
001
0C2
CH0 base and current word count
002
0C4
CH1 base and current address
003
0C6
CH1 base and current word count
004
0C8
CH2 base and current address
005
0CA
CH2 base and current word count
006
0CC
CH3 base and current address
007
0CE
CH3 base and current word count
008
0D0
Read status register/write command register
009
0D2
Write request register
00A
0D4
Write single mask register bit
00B
0D6
Write mode register
00C
0D8
Clear byte pointer flip-flop
00D
0DA
Read temporary register/write master clear
00E
0DC
Clear mask register
00F
0DE
Write all mask register bits
Table A1-4: DMA Controller Register Functions
A1-3
Interrupts
Channel
Name
Function
NMI
NMI
Parity
0
IRQ0
System Timer Output 0*
1
KYBIRQ
Keyboard Output Buffer Full
2
IRQ2
CTRL2 Interrupt (IRQ8 - IRQ15)
3
IRQ3
Serial Port 2 (COM2)
4
IRQ4
Serial Port 1 (COM1)
5
IRQ5
Parallel Port 2
6
IRQ6
Floppy Disk Controller
7
IRQ7
Parallel Port 1
8
RTCIRQ
Real Time Clock
9
IRQ9
Software redirected to INT 0Ah
10
IRQ10
External ISA Bus Device (Reserved)
11
IRQ11
External ISA Bus Device (Reserved)
12
IRQ12
External ISA Bus Device (Reserved)
13
IRQ13
Math Coprocessor
14
IRQ14
Hard Disk Controller
15
IRQ15
External ISA Bus Device (Reserved)
Table A1-5: Interrupts
* These interrupts exist on the system board and are not available
on the ISA Bus Connectors.
A1-4
Appendix 1 Technical Reference
CMOS RAM Address Map
Description
Address
00 - 0D
*Real Time clock information
0E
*Diagnostic status byte
0F
*Shutdown status byte
10
Floppy disk drive type byte - drives A & B
11
Reserved
12
Hard disk type byte - drives C & D
13
Reserved
14
Equipment byte
15
Low base memory size below 1 MB
16
High base memory size below 1 MB
17
Low expansion memory size above 1 MB
18
High expansion memory size above 1 MB
19 - 2D
Reserved
2E - 2F
Checksum for bytes 10 - 2D
30
*Low memory size determined by Pwr Up
31
*High memory size determined by Pwr Up
32
*BCD century byte
33
Information flags (set during power on)
34 - 3F
Reserved
Table A1-6: CMOS RAM Address Map
* These addresses are not verified by CHECKSUM.
A1-5
Real-Time Clock Information (Addresses 00-0D)
Byte
Function
Address
0
Seconds
00
1
Seconds alarm
01
2
Minutes
02
3
Minutes alarm
03
4
Hours
04
5
Hours alarm
05
6
Day of week
06
7
Day of month
07
8
Month
08
9
Year
09
10
Status Register B
0A
11
Status Register C
0B
12
Status Register D
0C
13
Status Register E
0D
Table A1-7: Real-Time Clock Information
A1-6
Appendix 1 Technical Reference
ISA Connector Pin Assignments
Pin #
Assign.
Pin #
Assign.
A01
IOCHCHK#
B01
A02
SD 7
A03
SD6
A04
A05
Pin #
Assign.
Pin #
Assign.
GND
C01
SBHE#
D01
EMCS16#
B02
RESETDRV
C02
LA23
D02
IOCS16#
B03
+5 V
C03
LA22
D03
IRQ10
SD5
B04
IRQ9
C04
LA21
D04
IRQ11
SD4
B05
+5 V
C05
LA20
D05
IRQ12
A06
SD3
B06
DRQ2
C06
LA19
D06
IRQ15
A07
SD2
B07
-12 V
C07
LA18
D07
IRQ14
A08
SD1
B08
ENDXFR#
C08
LA17
D08
DACK0#
A09
SD 0
B09
+12 V
C09
MEMR#
D09
DRQ0
A10
IOCHRDY
B10
GND
C10
MEMW#
D10
DACK5#
A11
AEN
B11
SMEMW#
C11
SD8
D11
DRQ5
A12
SA19
B12
SMEMR#
C12
SD9
D12
DACK6#
A13
SA18
B13
IOW#
C13
SD10
D 13
DRQ6
A14
SA17
B14
IOR#
C14
SD11
D 14
DACK7#
A15
SA16
B15
DACK3#
C15
SD12
D15
DRQ7
A16
SA15
B16
DRQ3
C16
SD13
D16
+5 V
A17
SA14
B17
DACK1#
C17
SD14
D17
MASTER#
A18
SA13
B18
DRQ1
C18
SD15
D18
GND
A19
SA12
B19
REFRSH#
A20
SA11
B20
SYSCLK
A21
SA10
B21
IRQ7
A22
SA9
B22
IRQ6
A23
SA8
B23
IRQ5
A24
SA7
B24
IRQ4
A25
SA6
B25
IRQ3
A26
SA5
B26
DACK2#
A27
SA4
B27
TC
A28
SA3
B28
BALE
A29
SA2
B29
+5 V
A30
SA1
B30
OSC
A31
SA0
B31
GND
Table A1-8: ISA Connector Pin Assignments
A1-7
PCI Connector Pin Assignments
Pin #
Assign.
Pin #
A01
TRST#
A32
AD16
A02
+12 V
A33
+3.3 V
A03
TMS
A34
A04
TDI
A35
A05
+5 V
A06
INTA#
A07
A08
Assign.
Pin #
B01
-12 V
B32
AD17
B02
TCK
B33
C/BE2#
FRAME#
B03
GND
B34
GND
GND
B04
TDO
B35
IRDY#
A36
TRDY#
B05
+5 V
B36
+3.3 V
A37
GND
B06
+5 V
B37
DEVSEL#
INTC#
A38
STOP#
B07
INTB#
B38
GND
+5 V
A39
+3.3 V
B08
INTD#
B39
LOCK#
A09
CLKC
A40
SDONE
B09
REQ3#
B40
PERR#
A10
+5 V (I/O)
A41
SB0#
B10
REQ1#1
B41
+3.3 V
A11
CLKD
A42
GND
B11
GNT3#
B42
SERR#
A12
GND
A43
PAR
B12
GND
B43
+3.3 V
A13
GND
A44
AD15
B13
GND
B44
C/BE1#
A14
GNT1#
A45
+3.3 V
B14
CLKA
B45
AD14
A15
RST#
A46
AD13
B15
GND
B46
GND
A16
+5 V (I/O)
A47
AD11
B16
CLKB
B47
AD12
A17
GNT0#
A48
GND
B17
GND
B48
AD10
A18
GND
A49
AD09
B18
REQ0#
B49
GND
A19
REQ2#
A50
KEY
B19
+5 V (I/O)
B50
KEY
A20
AD30
A51
KEY
B20
AD31
B51
KEY
A21
+3.3 V
A52
C/BE0#
B21
AD29
B52
AD08
A22
AD28
A53
+3.3 V
B22
GND
B53
AD07
A23
AD26
A54
AD06
B23
AD27
B54
+3.3 V
A24
GND
A55
AD04
B24
AD25
B55
AD05
A25
AD24
A56
GND
B25
+3.3 V
B56
AD03
A26
GNT2#
A57
AD02
B26
C/BE3#
B57
GND
A27
+3.3 V
A58
AD00
B27
AD23
B58
AD01
A28
AD22
A59
+5 V (I/O)
B28
GND
B59
+5 V (I/O)
A29
AD20
A60
REQ64#
B29
AD21
B60
ACK64#
B30
AD19
B61
+5 V
B31
+3.3 V
B62
+5 V
A30
A31
GND
AD18
A61
A62
Assign.
+5 V
+5 V
Pin #
Table A1-9: PCI Connector Pin Assignments
A1-8
Assign.
Appendix 1 Technical Reference
Post Code #
Name
Description
C0
Turn Off Chipset
OEM Specific-Cache control Cache
01
Processor Test 1
Processor Status (1FLAGS) verification. Tests the
following processor status flags:
carry, zero, sign, overflow
The BIOS will set each of these flags, verify they are set,
then turn each flag off and verify it is off.
02
Processor Test 2
Read/Write/Verify all CPU registers except SS, SP, and
BP with data pattern FF and 00.
03
Initialize Chips
Disable NMI, PIE, AIE, UEI, SQWV
Disable video, parity checking, DMA
Reset math coprocessor
Clear all page registers, CMOS shutdown byte
Initialize timer 0, 1, and 2, including set EISA timer to a
known state.
Initialize DMA controllers 0 & 1
Initialize interrupt controllers 0 & 1
Initialize EISA extended registers
04
Test Memory
Refresh
Toggle
RAM must be periodically refreshed in order to keep the
memory from decaying. This function assures that the
memory refresh function is working properly.
05
Blank video,
Initialize keyboard
Keyboard controller initialization
06
Reserved
07
Test CMOS
Interface &
Battery Status
Verifies CMOS is working correctly, detects bad battery.
BE
Chipset Default
Initialization
Program chipset registers with power-on BIOS defaults.
C1
Memory
Presence Test
OEM Specific, Test to size on-board memory.
C5
Early Shadow
OEM Specific, Early Shadow enable for fast boot.
C6
Cache Presence
Test
External Cache size detection
08
Setup Low
Memory
Early chip set initialization
Memory presence test
OEM chip set routines
Clear low 64K of memory
Test first 64K of memory
Table A1-10: Post Codes
A1-9
Post Codes
Post Code #
Name
Description
09
Early Cache
Initialization
Cyrix CPU Initialization, Cache Initialization.
0A
Setup Interrupt
Vector Table
Initialize first 120 interrupt vectors with
SPURIOUS_INT_HDLR and initialize INT 00h-1Fh
according to INT_TBL.
0B
Test CMOS RAM
Checksum
Test CMOS RAM Checksum, if bad, or insert key
pressed, load defaults.
0C
Initialize
Keyboard
Detect type of keyboard controller (optional). Set
NUM_LOCK status.
0D
Initialize Video
Interface, Detect
CPU clock
Read CMOS location 14h to find out type of video in use.
0E
Test Video
Memory
Test video memory, write sign-on message to screen.
Setup shadow RAM, Enable shadow according to Setup.
0F
Test DMA
Controller 0
BIOS checksum test. Keyboard detect and initialization.
10
Test DMA
Controller 1
11
Test DMA Page
Registers.
Test DMA Page Registers.
12 - 13
Reserved
14
Test Timer
Counter 2
Test 8254 Timer 0 Counter 2.
15
Test 8259-1 Mask
Bits
Verify 8259 Channel 1 masked interrupts by alternately
turning off and on the interrupt lines.
16
Test 8259-2 Mask
Bits
Verify 8259 Channel 2 masked interrupts by alternately
turning off and on the interrupt lines.
17
Test Stuck 8259's
Interrupt Bits
Turn off interrupts then verify no interrupt mask register is
on.
18
Test 8259
Interrupt
Functionality
Force an interrupt and verify the interrupt occurred.
19
Test Stuck NMI
Bits (Parity I/O
Check)
Verify NMI can be cleared.
1A
Display CPU
Clock
1B - 1E
Reserved
Table A1-10: Post Codes (continued)
A1-10
Appendix 1 Technical Reference
Post Code #
Name
46
Reserved
47
Reserved
48 - 4D
Reserved
Description
4E
Manufacturing
POST Loop or
Display
Messages
Reboot if Manufacturing POST Loop pin is set. Otherwise
display any messages (i.e., any non-fatal errors that were
detected during POST) and enter setup.
4F
Security Check
Ask password security (optional)
50
Write CMOS
Write all CMOS values back to RAM and clear screen.
51
Pre-boot Enable
Enable parity checker, enable NMI, enable cache before
boot.
52
Initialize Option
ROMs
Initialize any option ROMs present from C8000h to
EFFFFh.
NOTE: When FSCAN option is enabled, will initialize
from C8000h to F7FFFh.
53
Initialize Time
Value
Initialize time value in 40h: BIOS area.
60
Setup Virus
Protect
Setup virus protect according to Setup.
61
Set Boot Speed
Set system speed for boot.
62
Setup NumLock
Setup NumLock status according to Setup.
63
Boot Attempt
Set low stack boot via INT 19h.
B0
Spurious
If interrupt occurs in protected mode.
B1
Unclaimed NMI
In unmasked NMI occurs, display Press F1 to disable
NMI, F2 reboot.
Setup Pages
E1 - Page 1, E2 - Page 2 . . . EF - Page 16.
E1 - EF
FF
Boot
Table A1-10: Post Codes (continued)
A1-11
Hard Disk Parameter Table
Type
Size
(MB)
Cylinders
Heads
1
2
3
4
5
6
7
8
9
10
11
12
13
14
15
16
17
18
19
20
21
22
23
24
25
26
27
28
29
30
31
32
33
34
35
36
37
38
39
40
41
42
43
44
45
46
10
20
30
62
46
20
30
30
112
20
35
49
20
42
0
20
40
56
59
30
42
30
10
40
76
71
111
152
68
93
83
69
85
102
110
119
17
136
114
40
42
65
40
61
100
203
306
615
615
940
940
615
462
733
900
820
855
855
306
733
0
612
977
977
1024
733
733
306
977
1024
1224
1224
1224
1024
1024
918
925
1024
1024
1024
1024
1024
1024
1024
918
820
1024
1024
809
809
776
684
4
4
6
8
6
4
8
5
15
3
5
7
8
7
0
4
5
7
7
5
7
5
4
5
9
7
11
15
8
11
11
9
10
12
13
14
2
16
15
6
5
5
6
6
8
16
Sectors/
Landing
Write
Track Precomp
Zone
17
17
17
17
17
17
17
17
17
17
17
17
17
17
0
17
17
17
17
17
17
17
17
17
17
17
17
17
17
17
17
17
17
17
17
17
17
17
17
17
17
26
17
26
33
38
128
300
300
512
512
None
256
None
None
None
None
None
128
None
None
0
300
None
512
300
300
300
0
None
None
None
None
None
None
None
None
None
None
None
None
None
None
None
None
None
None
None
None
None
None
None
Table A1-11: Hard Disk Parameter Table
A1-12
305
615
615
940
940
615
511
733
901
820
855
855
319
733
0
663
977
977
1023
732
732
733
336
976
1023
1223
1223
1223
1023
1023
1023
926
1023
1023
1023
1023
1023
1023
1023
820
1023
1023
852
852
775
685
Appendix 2 Glossary of Terms
B
bidirectional parallel port: An eight-bit port that can be used for an
input as well as an output device.
BIOS (Basic Input/Output Systems): The on-board firmware which
communicates with the display, keyboard, printers and other
peripheral devices.
bus: A common pathway, or channel, between multiple devices
consisting of one or more electrical conductors that transmit
power or binary data to the various sections of a computer.
C
cache: A collection of the most recently accessed data or instructions.
CMOS (Complementary Metal Oxide Semiconductor): A technique
of using PMOS and NMOS transistors in a complementary
fashion where power is consumed only during the switching
phase. With the input statically high or low, the power dissipation is essentially zero.
CMOS RAM: Random Access Memory made from CMOS transistors.
D
DMA (Direct Memory Access Channel): A channel for transferring
data from host main memory to and from peripherals without
direct involvement of the CPU resources.
DRAM (Dynamic Random-Access Memory): The main memory in
your computer. It needs to be refreshed by a memory controller
or it will lose its information.
A2-1
Appendix 2 Glossary of Terms
E
EPROM (Erasable Programmable Read-Only Memory): A
programmable device which stores information regardless of
power. The information can be erased and new information
written.
F
Floating Point Unit (FPU): A device which can perform calculations
on numbers in floating point format as opposed to simple
integers.
I
IDE (Integrated Drive Electronics): A standard of signalling and
communicating with a device.
interleave: Multiple banks of memory that overlap to reduce the access
time and eliminate wait states.
interrupt: Temporarily halting the operation of a digital computer to
respond to (service) an external event.
interval timer: A device that can generate a pulse at a defined interval
for background tasks.
IRQ (Interrupt Request): A signal channel used to trigger the CPU to
temporarily change tasks.
K
Kilobyte (KB): 1,024 bytes.
N
ns (nano seconds): 1 x 10⁻⁹ seconds. (There are one billion
nanoseconds in one second.)
A2-2
Appendix 2 Glossary of Terms
P
page mode: The ability to read a whole line (page) of memory to
reduce access time.
parity: A way to detect corrupted data in DRAM.
parallel port: An eight-bit port usually used for connecting a printer.
PCI (Peripheral Component Interconnect): Local bus for PCs that
provide a high-speed data path between the CPU and peripher
als (video, disk, network, etc.). The PCI bus coexists in the PC
with the ISA or EISA bus. ISA and EISA boards still plug into
an ISA or EISA slot, while high- speed PCI controllers plug
into a PCI slot. The PCI bus runs at 33 MHz, supports 32-bit
and 64-bit data paths and bus mastering. The first PCs with
PCI buses became available toward the end of 1993.
port: Ports are used to connect peripheral devices such as external
drives and printers to your computer.
R
RAM (Random Access Memory): The memory used to execute
applications while your computer is turned ON. When you turn
your computer OFF, all data stored in RAM is lost.
real-time clock (RTC): A CMOS counter used to maintain local time.
retaining bracket: The bracket on the end of the board that attaches to
the back of the chassis and contains connectors, usually key
board, mouse, serial port, and/or parallel port.
S
serial port: A two channel port, one channel used for "In" transmissions and one for "Out" transmissions.
A2-3
Appendix 2 Glossary of Terms
SCSI (Small Computer System Interface): A high speed, general purpose interface to storage devices.
SRAM (Static Random Access Memory): As opposed to DRAM, this
memory does not need to be refreshed by a controller and holds
its information as long as the power is on.
T
tag comparator: A memory that tells whether an address is available in
the cache.
W
wait states: Extra time inserted to allow access to slower devices (e.g.
DRAM) or EPROMS.
watchdog timer: A device that watches for CPU inactivity and then
resets the CPU after a specified duration of inactivity.
write-back cache: The process where the CPU updates the cache and
the DRAM simultaneously but does not wait for the DRAM to
complete the update.
write-through cache: The process where the CPU updates the cache
and the DRAM simultaneously but the CPU waits for the
DRAM to complete the update, resulting in more time being
consumed than in write-back.
A2-4
CPU
J16
J15
Stop
Factory Clock
Test
J14
Internal Clock J32
Multiplier
Internal Clock
Multiplier
J13
CPU Fan
Connector
J22
CPU Clock
Speed
J26
CPU Voltage
Regulator
J33
IRQ11
Usage
J27
External HD
LED Connector
J21
Watchdog
Enable/Disable
J23
Factory
Test
J19
Floppy
Selection
J3
Parallel
Port
J30
Mouse IRQ
Enable
J31
Parallel
Port DMA
J24
Security
Password
Enable
J11
Speaker
Connector
J20
Keyboard
mini-DIN
J25
Mouse
mini-DIN
J8
Keyboard
Connector
(10-pin)
J4
COM2
Port
A3-1
J28
External Battery
Connector
J5
COM1
Port
J10
J6
Reset
IDE IRQ14
Connector
Disable
Tigershark™ PCI/Pentium® CPU Board
J18
J17
Factory
Cache Test
Policy
J9
J7
Cache
J12
SCSI
Cache Size
Connector
J29
J1
Size
CMOS
IDE
Clear
Connector
J2
Floppy Disk
Drive
Connector