Download Liquid Handling BioMek 3K , Plate Washer, Fraction Collectors
Transcript
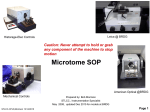
Beckman Coulter BioMek 3K
At BRDG Park R126B
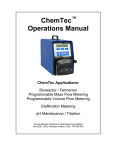
Plate Washer, Bio-Plex Pro II
@BRDG used with
BioPlex Array reader
Liquid Handling:
BioMek 3000; Protocol
Plate Washer; SOP
Fraction Collector; Description
Select instrument picture to jump to that section of the SOP
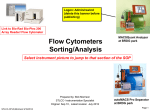
Fraction Collection
FRAC -100 @ FV
STLCC_CPLS:Morrison 8/3/2012
Prepared by: Bob Morrison
STLCC- Instrumentation Specialist
Original June08, Latest Revision Aug2012
Slide 1
Link to Beckman
BioMek3000 User
Manual – pdf (15MB)
Link to Beckman
BioMek3000 Quick
Start Guide – pdf
(2MB)
Link to Beckman
BioMek3000 Software
Manual – pdf ( 23MB)
Beckman Coulter BioMek 3K
At BRDG Park R126B
Host PC Login
Username: Biomek
Password: 15Biomek
STLCC_CPLS:Morrison 8/3/2012
Slide 2
Liquid Handling: BioMek, Configuration
Pod; holds Tools
BioMek 3K
Software
Bridge, moves Pod
in “Z” axis
On/Off Toggle,
rear at power cord
Back Support
Z axis
Tools, mounted on
Pod operate in
“D” axis
Deck
Emergency Stop
Button, Push in
STLCC_CPLS:Morrison 8/3/2012
Caution: Razor
Sharp, Do not put
finger or objects
In these slots
Front Rail
3
Liquid Handling: BioMek, Deck and Tools
Pod; holds Tools
Pod Tool Release
(push to rear)
On/Off Toggle,
rear at power cord
Available Tools
Emergency Stop
Button, Push in
STLCC_CPLS:Morrison 8/3/2012
4
Liquid Handling: BioMek3000, Available Tools and Tips
• P20 Single-Tip Pipette Tool — a single probe tool for aspirating and
dispensing 1-20 μL to a single well using P20 or P250 tips. Tested @ 1ul, %CV 1.2
• P200L Single-Tip Pipette Tool — a single probe tool for aspirating and
dispensing 5-200 μL to a single well using P250 tips, with liquid-level
sensing capabilities. Tested @ 5ul, %CV 4.1
• MP20 Multi-Tip Pipette Tool — an eight-probe tool for aspirating and
dispensing 1-20 μL to eight wells simultaneously using P20 or P250 tips.
Tested @ 1ul, % CV .6
• MP200 Multi-Tip Pipette Tool — an eight-probe tool for aspirating and
dispensing 5-200 μL to eight wells simultaneously using P250 tips.
Tested @ 5ul, %CV 1.1
• WASH-1 200ul, Tested @ 200ul, %CV 1.3
• WASH-8 200ul, Tested @ 200ul, %CV .6
• Gripper
• Deck Framing/Calibration Tool
Tips (Beckman) Currently On Hand for BioMek @ FV
• P250, AP96, 20ul, Barrier, Part# 717256, quantity 1
• P250, AP96, 125uL, Barrier, Part# 717253, quantity 1
• P250, Ap96, 240uL, Non-sterile, Part # 717251, quantity 4
STLCC_CPLS:Morrison 8/3/2012
5
Liquid Handling: Software , Screen Areas Defined
STLCC_CPLS:Morrison 8/3/2012
6
Liquid Handling: Biomek; Instrument Setup, Deck Labware Options
1. Always “Home all Axes” under the
Instrument heading before work.
2. Drag and Drop Instrument
Setup into the Methods View
area which will start a new
method, ex: Method1
STLCC_CPLS:Morrison 8/3/2012
7
Liquid Handling: Biomek; Method, Drag-Drop Labware to Deck Locations
For the Method you are creating,
Drag needed labware to positions on
the Deck.
In this sample, a Reservoir is at P3
and a AP96_200uL is at P7.
Note: To remove labware, drag that
item to the Clear/trashbin on the
screen
Note: ML1 = manual latch, AL1=
autolatch
STLCC_CPLS:Morrison 8/3/2012
8
Liquid Handling: Biomek; Define Tools in their Rack Positions
Double Click on the Tool Rack to
bring up available tools and drag
them to their desired/current
positions for this Method.
STLCC_CPLS:Morrison 8/3/2012
9
Liquid Handling: Biomek; Define Labware Properties/volumes
Double-click on Reservoir to enter
properties and volumes.
STLCC_CPLS:Morrison 8/3/2012
10
Liquid Handling: Biomek; Transfer Step, Define Tip Source
1.
2.
3.
4.
STLCC_CPLS: Morrison 8/3/2012
Drag and Drop a Transfer Step into the
Method screen area.
Make sure Load is checked and select
the source for this step from pull
down menu.
Check boxes for actions to take on
tips after this transfer.
Click faint arrow next to Tip Handling
to make room for the next step on
this screen.
11
Liquid Handling: Biomek; Define Labware Source
1.
2.
3.
4.
5.
STLCC_CPLS:Morrison 8/3/2012
Select “ Click here to add source”
or select source labware in deck
view. Ex: Resv (reservoir) on P3
Leave Auto-Select as checked
Right Click on the tip to see popup
menu and select measurement
options
Note, hover on tip to adjust
up/down measurement from
bottom.
Use keyboard up an down arrows
to set precise values.
12
Liquid Handling: Biomek; Define Destination Labware
1.
2.
3.
Dest1
4.
STLCC_CPLS: Morrison 8/3/2012
Select Destination Labware from
the Deck view
Right Click on the tip to see popup
menu and select measurement
options
Note, hover on tip to adjust
up/down measurement from
bottom.
Use keyboard up/down to set
precise values.
13
Liquid Handling: Biomek; Adding a Move Labware Step
1. Drag “Move Labware” from the
left menu to the Method section
2. Enter locations on deck for From
and To positions.
STLCC_CPLS:Morrison 8/3/2012
14
Liquid Handling: Biomek; Finish Step, Estimated Time for Completion
1. Double-click on Finish in
Methods screen and examine
Estimated time to complete in
status bar at bottom.
2. If there are Errors in the method
they will be displayed here.
STLCC_CPLS:Morrison 8/3/2012
15
Liquid Handling: Biomek; Saving this Method
1. Use File-Save-as, then enter a
name in the pop-up menu for
this Method for future use.
STLCC_CPLS: Morrison 8/3/2012
16
Liquid Handling: Biomek; Simulation Mode Setup
1. Under the Instrument Tab at top,
select “Hardware Setup”
2. In the popup menu, select
“Simulate” for the Port.
3. Select Accept.
4. Be sure to reset this to COM1
after simulation to reconnect to
the actual device
STLCC_CPLS: Morrison 8/3/2012
17
Liquid Handling: Biomek; Simulation Mode, Set View Parameters
1. Highlight “Simulate” in the left
panel, then adjust these items;
2. Warp Factor = slower or faster
than real time in simulation
3. Perspective = Nicest
4. Labware Texture > = finer detail
5. Max Poly size < = better detail
6. Blending , check
7. Show Camera navigation, check
8. Hardware accel, check
9. Hide front bridge, check
10. Then ACCEPT at top
STLCC_CPLS: Morrison 8/3/2012
18
Liquid Handling: Biomek; Simulation, Camera Control Buttons
1.
2.
3.
4.
5.
RESET View, restores to start view
Bold Up arrow, zoom in
Bold Down arrow, zoom out
Up/Down/Left/Right movement
STORE camera/zoom positions for
future using RESTORE buttons above
6. RESET View if you get lost
STLCC_CPLS: Morrison 8/3/2012
19
Liquid Handling: Biomek; Simulation Mode, Restore Button #3
Example, Zoomed in view of tips
1. Zoomed view was STORED in position #3
2. Zoomed view is activated by selecting
RESTORE #3 button
3. Use RESET to go to original view at
startup
STLCC_CPLS: Morrison 8/3/2012
20
Liquid Handling: Biomek; Simulation, Lighting Control
1. During a simulation run, Hit the tilde (~)
key on the keyboard to set or modify
Global (ambient) light or local intensity of
lighting effects during simulation
2. The menu shown here is enabled where
you may adjust lighting conditions and
then “APPLY” them to the simulation.
3. “WARP Factor” controls the speed of
simulation.
4. “NAVIGATION” adds or removes the
camera control buttons on the lower
portion of the screen
STLCC_CPLS: Morrison 8/3/2012
21
Liquid Handling: Biomek; Running Simulation
1. Select the Green Arrow in the
top menu bar to begin
simulation mode.
2. Select the Red box to stop the
simulation.
STLCC_CPLS: Morrison 8/3/2012
22
Liquid Handling: Biomek; Running the Method
1. Under the Instrument tab select
Hardware Setup
2. After initialization, a popup
menu will show tools available
and the Method to be run
3. Ensure that COM1 is selected to
connect to the device vs.
simulators or other devices
4. Select Accept to start the run
using the device (not simulation).
STLCC_CPLS: Morrison 8/3/2012
23
Liquid Handling: BioMek;
ExampleMxPro, QPCR Lab1, Move
Mastermix from P2 to ML2
P2_A1 to ML2
STLCC_CPLS: Morrison 8/3/2012
24
Liquid Handling: BioMek; MxPro, QPCR
Lab1, Move all Primers from P3 to ML2
STLCC_CPLS: Morrison 8/3/2012
25
Liquid Handling: BioMek; Adding Deck Hardware/Devices
1. Under Instrument Tab, Select
“Deck Editor”
2. On this page, select the Deck
position to be loaded or
recalibrated (Framed)
STLCC_CPLS: Morrison 8/3/2012
26
Liquid Handling: BioMek, Maintenance, Calibrating X-Y, Weekly
STLCC_CPLS: Morrison 8/3/2012
27
Liquid Handling:
BioMek; Framing
Tool Installation
STLCC_CPLS: Morrison 8/3/2012
28
Liquid Handling: Biomek,
Framing to Target on
each Deck Position
STLCC_CPLS: Morrison 8/3/2012
29
Liquid Handling: Biomek, Framing, Manual Teach, X-Y to Target
1. Select Manual Teach
2. Follow Wizard commands
3. Drag circle to show present location of
the tip, then select GO
4. The system will incorporate this
adjustment, Continue until tip is
located exactly over the target center
STLCC_CPLS: Morrison 8/3/2012
30
Liquid Handling;
Biomek, Framing the
Z-Axis
STLCC_CPLS: Morrison 8/3/2012
31
Liquid Handling: BioMek; Deck Editor, Advanced MC
STLCC_CPLS: Morrison 8/3/2012
32
Liquid Handling: BioMek-Manuals
Link to Beckman BioMek3000 User Manual – pdf (15MB)
Link to Beckman BioMek3000 Quick Start Guide – pdf (2MB)
Link to Beckman BioMek3000 Software Manual – pdf ( 23MB)
STLCC_CPLS:Morrison 8/3/2012
33
Liquid Handling: BioMek; Tip Combatability and Volume Ranges on Tools
Section 2.3 in Users Manual
FVCC: Morrison; 8/3/2012
Slide 34
Liquid Handling: BioMek; Labware and Tool/Tip Compatability
FVCC: Morrison; 8/3/2012
Slide 35
Liquid Handling: Shaker Integration Kit
DPC Shaker Integration Kit for Biomek
2000/3000 , Part No 380561
(380713 CD, 380535 Mplatex2, 380534 standoff x
4, 380535 cable)
Includes mounting brackets, support legs for
Biomek 2000/3000, shaker top plate, two shaker
labware holders, communications cable,
instructions and installation.
Refer to Appendix C of the Users Manual for
details on attachment, assembly, and operation.
The DPC Micromix 5 Shaker is part No 380560 ,
a separate component, but requires the
integration kit (380561). This device is ordered
through and shipped directly by Beckman
Coulter. DPC (Diagnostics Products Corporation
has been acquired by Siemens) which
apparently no longer sells the Shaker.
8/3/2012
36
Liquid Handling: BioMek3K, Thermal Exchange Unit Required and Pump
Biomek® Thermal Exchange Unit and Reservoir Holder Kit
The Biomek 2000/Biomek 3000 Thermal Exchange Unit
(TEU) accessory heats or cools a reservoir, microplate or
other standard labware on the Biomek 3000 work surface.
Labware placed on the deck.
TEU can be maintained at temperatures from 0° to 50°C.
The TEU comes with a metal Thermal Reservoir Holder for
standard Biomek reservoirs.
Includes Thermal Exchange Unit, Thermal Reservoir
Holder, Tubing and Manual.
Requires BioWorks 2.1 or later.
STLCC_CPLS: Morrison 8/3/2012
SciLog Peristaltic Pump (shown)
The Circulating Reservoir provides a continuous supply of
buffers, solvents or reagents on the Biomek worksurface. A fourwell Teflon* reservoir is placed in one position on the Biomek
worksurface. A peristaltic pump circulates liquid between two
wells of the reservoir and supply bottles.
37
Liquid Handling: Plate Washer, Bio-Rad Bio-Plex Pro II
Input voltage range 100–240 V, 1.8 A, 47 – 63 Hz
Physical dimensions 44 x 61 x 8 cm (W x D x H)
Weight 14.4 kg (32 lb)
Communications interface RS – 232
Plate capacity One 96 –well microtiter plate "≤0.75"
Bio-Plex Pro II wash station — includes both a magnetic carrier and an interchangeable vacuum manifold for handsfree wash steps on any xMAP assay (magnetic and nonmagnetic bead-based assays)
Both options include preset wash programs that have been optimized for Bio-Plex assays. Using Bio-Plex Pro wash
stations in an assay workflow can reduce manual intervention and help decrease variability between independent
experiments.
Eliminates manual wash steps from Bio-Plex assays, making Bio-Plex assays as easy as ELISAs. The wash stations
are specifically designed to perform Bio-Plex assay wash steps, but are compatible with any standard xMAP assay.
Hot link to Bio-Rad Bio-Plex Pro II User Manual…. Pdf (3mb)
STLCC_CPLS: Morrison 8/3/2012
38
Liquid Handling: Plate
Washer, Bio-Plex Pro II,
Configuration
STLCC_CPLS: Morrison 8/3/2012
39
Liquid Handling: Bio-Plex Pro II, Primary and Secondary Menus
Secondary Menus; Programs example
STLCC_CPLS: Morrison 8/3/2012
40
Liquid Handling: Plate
Washer, Bio-Plex Pro II
Priming
STLCC_CPLS: Morrison 8/3/2012
41
Liquid Handling: Bio-Plex Pro II, Selecting Wash Program
STLCC_CPLS: Morrison 8/3/2012
42
Liquid Handling: Bio-Plex Pro II, Which Wash Program?
STLCC_CPLS: Morrison 8/3/2012
43
Liquid Handling: BioPlex,
Quick Guide to Wash
Programs
STLCC_CPLS: Morrison 8/3/2012
44
Liquid Handling: BioPlex Pro, Using Wash Station for Daily Operations
STLCC_CPLS: Morrison 8/3/2012
45
Liquid Handling: Bio-Plex Pro, Short Term Maintenance
STLCC_CPLS: Morrison 8/3/2012
46
Liquid Handling: Bio-Plex, Long Term Maintenance
STLCC_CPLS: Morrison 8/3/2012
47
Fraction Collection; FRAC-100,200
• Peak detection and location capability, programmable collection
modes.
• Communication with external components, tube and level
sensors.
• Chromatogram evaluation function real-time integration of peak
height, area
• 95 places rack for 10-18mm tubes
• Time mode 0.01-9.999 min, volume mode 0.01-9.999 ml
• Pharmacia part # 19-6000-01
Delivery Arm
Setup, Collection Mode,
Control Keys
Alphanumeric Display
STLCC_CPLS:Morrison 8/3/2012
48
Fraction Collector: Definition
•
•
•
•
Fraction Collector A fraction detector is a device that allows regular or specified
samples to be taken from a column eluate and stored in a retrievable form. The
storage vessels are usually small sample tubes or vials that are oriented in a
rotating disk or in a moving belt, there movement usually being controlled by a
microprocessor.
On receiving a signal from the microprocessor, the next vial is placed under the
column outlet and the eluate collected until receiving another signal from the
computer. Once the properties of the chromatogram that describes the separation
has been ascertained, then the collection program can be defined.
The fractions can be collected on a basis of time either at regular intervals or a
specific times to collect specific peaks. Alternatively the fractions can be collected
by monitoring the detector output and when a peak starts to elute the fraction
collector is activated and the peak collected in a specific vial. When the peak
returns to base line the column eluate is then directed to waste until the next peak
starts eluting.
Fraction collectors are in common use with most liquid chromatographs. They are
used to collect samples for further purification, subsequent exmination by
spectroscopic techniques or for biological or organoleptic testing.
STLCC_CPLS:Morrison
8/3/2012
49


