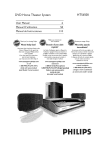
1
37MF231D1331DI321D
LCD TV
Thank you for choosing A4agnavox.
Need
help
fast?
Read your user Manual
Quick-Use
and/or
Guide first for quick tips
that make using your Magnavox
product
more enjoyable.
If you have read your instructions
still need assistance,
and
you may access our online help at:
www.usasupport.magnavox.com
or call
1-800-705-2000
while
(and
Model
No:
Serial
with
Model
your
/ Serial
No:
3138 155 24393
produc_
number)
Registering your model with MAGNAVOX
out. Complete
and return
makes you eligible for all of the valuable benefits listed below, so don't miss
your Product Registration
Card at once to ensure:
Know
CAUllSN:
PENSVE
Congratulations
on your
and welcome
to the "family!"
Dear
PIA(;NAVOX
purchase,
product
best-backed
We'll do everything
happy with your
As a member
entitled
What's
BA_3_, ,IP USEP,SERVIREASLE
TO QUAIJFIES
This "bolt of lightning" indicates
uninsulated material within your unit may
cause an electrical
eryone
products
available today.
in our power
to keep you
by one of the most
warranties
service
you're
and
in your
product
networks
receive all the information
_hk
household,
enclosed
literature
closely to
operating
and maintenance
you'll
and special offers for
WARNING:
electric
To reduce
on this apparatus.
to rain or moisture
and objects
filled
you can count on our
commitment
thanks for investing
to your total
CAUTION:
To prevent
electric
shock, match
wide blade of plug to wide slot, fully insert.
in a P1AGNAVOX
- and
product.
ATTENTION:
Pour
61ectriques, introduire
get the most from
your MAGNAVOX
be sure to complete
Warranty
should not be
with liquids, such as vases, should not be placed
network.
All of this is our way of saying welcome
your
the risk of fire or
shock, this apparatus
shopping
purchase,
problems.
in the industry.
exposed
RS.To
please do not remove
covering.
which you qualify, plus easy access to
accessories from our convenient home
uncompromising
satisfaction.
shock. For the safety of ev-
he "exclamation
point" calls attention
to features for which you should read the
prevent
more, your purchase guarantees
Most importantly,
PARTS
SEII_,/ICE PERSONI_IEL,
purchase for many years to come.
to protection
outstanding
CO!_ER log
owner:
of the MAGNAVOX"family,"
comprehensive
symbols
TO SEDUCE THE RISK OF ELECTRIC SHOCK, DO _OT
INSIDE. REFER SER_CING
Thank you for your confidence in
MAGNAVOX.You've
selected one of the
best-built,
these safety
Registration
and return
Card
fiche dans la borne
6viter
les choc
la lame la plus large de la
correspondante
de la prise et
pousser jusqu'au fond.
at once.
For Customer
Enter below
Use
the Serial No. which
is located
on the rear of the cabinet. Retain this
information
Model
No.
Serial No.
for future
reference.
IHPORTANT
SAFETY
Read before
iNSTRUCTiONS
operating
equipment
1.
Read these
instructions.
exhibits
2.
Keep these
instructions.
E. The
3.
Heed
4.
Follow
all instructions.
S.
Do not
use this
6.
Clean
7.
Do not block any of the ventilation
openings.
Install in accordance
with the manufacturers
8.
all warnings.
only
Do not
install
registers,
that
9.
a dry
stoves,
Do not
and third
prong
are provided
[ 1.
exit
they
safety.
apparatus
for
19.
on or pinched
receptacles,
20.
and the point
For
local
could
• Also,
do
Requiring
enclosure
personnel.
or
into
dam-
lead
and mercury.
cause
product
Wall
or
supply
have fallen,
recycling
- The
appliance
personnel
when:
Service
service
cord
or
or the
liquid
has been
and/or
Mounting
- The
to a wall or ceiling
only
Power
Lines
- An outdoor
power
of the
Such
set
and
injury.
should
be
by the
antenna
Outdoor
Antenna
connected
to the
Grounding
receiver,
so as to provide
and built
810
of the
un-
70-1984,
some
up static
connection
is
21.
has
appara-
22.
operate
Electric
and
do not
please
Code,
voltage
to proper
ground-
discharge
unit,
size of
of antenna-discharge
and
are
unit,
requirements
for
below.
- Care
liquids
ANSI/NFPA
respect
structure,
See Figure
Entry
CAUTION
in bodily
damage
to the
• Install
all batteries
marked
on the
unit.
should
not
be taken
spilled
into
so that
the
enclo-
mix
batteries
- To prevent
injury,
property
battery
damage,
leakage
or
unit:
correctly,
with
(old
and
+ and
new
or
- aligned
carbon
as
and
etc.).
• Remove
time.
be
is
is
openings.
Osage
all<aline,
system
against
with
electrodes,
fall and
may result
• Do not
Industries
Liquid
through
Battery
location
electrode.
objects
that
of
grounding
antenna
antenna
protection
information
to grounding
Object
sure
away
charges.
National
provides
the
connectors,
tip-over.
be located
- If an outside
be sure
grounding
the
should
lines.
to an antenna
should
top
appliance
wire
the
cabinet.
as recommended
lead-in
not
the
cabinet
by placing
of the
personal
ing of the
liquid
plug has been
fall from
moving
information,
Electronic
children,
top
and supporting
Disposal
or the
or
on the
damage
Ceiling
product.
yourself,
unsuspectingly
by applying
of the
the
mast
due to environmental
or
endanger
for tilt
design.
standards
of the
in any way,
does
overturn
with
standards
or top,
grounding
apparatus,
moisture,
design
front,
or table
the ap-
Servicing
damaged
these
to the
equipment/toys
could
comply
safety
No.
dropped.
by qualified
power
not
must
global
of its cabinet
ultimately
items
surges
or when
plug is damaged,
rain
disposal
www.eiae.org
B. Objects
service
authorities
Damage
from
storms
has been
may be regulated
Alliance:
serviced
which
the
or
may contain
considerations.
when
iniury
lightning
have fallen
to
or has been
materials
tripod,
bracket,
or sold with
to avoid
cord
exposed
your
pull force
grounded
by the
use caution
apparatus
or objects
contact
compromise
excessive
from
specified
to qualified
the
spilled
product
or the
manufacturer.
provided
an electrician
of time.
has been
normally,
properties
• Do not
mounted
apparatus.
during
periods
when
A. The
18.
blade or third
being walked
is used,
as power-supply
these
with
plug has two
the
consult
with a cart, stand,
by the manufacturer,
all servicing
been
- All televisions
international
Section
a cart
for long
such
When
blades
outlet.
from
the
type
The wide
outlet,
combination
this
required
This
prong.
convenience
from
When
Refer
tus
plug has two
or
rer.
Use only
specified
used
heat
amplifiers)
of the polarized
use attachments/accessories
cart/apparatus
16.
cord
where
Unplug
(including
A grounding
for your
the power
paratus.
15.
other.
grounding
at plugs,
12 _
-za_
14.
purpose
of the obsolete
_rr_ufactu
13.
safety
particularly
Only
instructions.
such as radiators,
apparatus
fit into your
replacement
dropped,
recommended
electronic
than the
blades
Protect
sources
plug. A polarized
plug does not
in performance;
Tilt/Stability
and stability
or other
the
grounding-type
10.
cloth.
heat.
defeat
one wider
17.
near water.
near any heat
produce
change
has been
aged.
apparatus
with
a marked
appliance
batteries
when
the
unit
is not
used
for a long
damaged;
spilled
into
the
appliance;
C. The
appliance
has been
exposed
D. The
appliance
does
appear
not
to
to
rain
operate
normally
or
Note to the CATV system
installer:
This reminder is provided to call the CATV system installer's attention to Article
820-40 of the NEC that provides guidelines for proper grounding and, in particular, specifies that the cable ground shall be
connected
to the grounding system of the building, as close to the point of cable entry as practical.
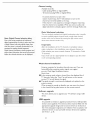
Example of Antenna Grounding as
per NEC - National Electric Code
...........
ELECTRIC
SERVICE
EQUIPMENT
POWER
SERVICE
GROUNDING
ELECTRODE
SYSTEM
(NEC
ART
250,
PART
H)
(PreCa o)
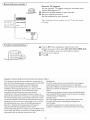
ADDITIONAL SAFETY PRECAUTIONS
• ENSURE that LCD TV stand is tightened properly to the set (See Quick Guide) on the right way of tightening of
the screw of the stand to the set. Improper tightening of screw may render the set unsafe.
• If LCD TV is installed on the wall, installation should be carried out by qualified servicemen. Improper or incorrect
installation may render the set unsafe.
• Disconnect main plug when :
--
cleaning the TV screen, never use abrasive cleaning agents.
--
there is a lightning storm.
--
the set is/eft unattended for a prolonged period of time.
• Do not shift or move the LCD TV around when it is powered on.
• Do not touch, push or rub the surface of the LCD screen with any sharp or hard objects.
• When the surface of the LCD screen becomes dusty, wipe it gently with an absorbent cotton doth or
other soft material like chamois. DO NOT USE acetone, toluene or alcohol to dean the surface of the screen.
These chemicals will cause damage to the surface.
• Wipe offwater
or saliva as soon as possible. These liquids can cause deformation and color fading of the
LCD screen when left exposed for some time.
• Be careful of condensation when temperature changes occur. Condensation can cause damage to the LCD
screen and electrically parts. After condensation fades, spots or blemishes will be present on the LCD screen.
POSITIONING THE LCD TELEVISION
• Place the LCD TV on a solid, sturdy base or stand. Be sure the stand is strong enough to handle the weight of
the LCD TV.
• Try to leave at least 6" of space around each side of the LCD TV cabinet to allow for proper ventilation.
• Do not place the LCD TV near a radiator or other sources of heat.
Do not place the LCD TV where it can be exposed to rain or excessive moisture.
RECYCLING PROCEDURE/END OF LIFE DISPOSAL
To minimize harm to the environment, the batteries supplied with the LCD TV do not contain mercury or
nickel cadmium. If possible, when disposing of batteries, use recycling means available in your area.
• The LCD TV uses materials that can be recycled. To minimize the amount of waste in the environment, check
your area for companies that will recover used televisions for dismantling and collection of reusable
materials, or contact your dealer for TV recycling tips.
• Please dispose of the carton and packing material through the proper waste disposal management in your
area.
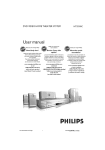
Content
Welcome/registration
IMPORTANT
SAFETY
Help
if this instruction
manual does not give an
answer or if 'Trouble
shooting
not solve your TV problem,
your Local Magnavox
Service Center.
tips' does
you can call
Customer
which you can find at the back of your
set or on the
before calling the
1-800-705-2000
Model:
Serial
37MF23!
Content
Use
packaging,
Magnavox
ready.
helpline
of the
remote
control
6
.......................
9
on the top of the TM ....................
the menus
.............................
How to navigate through
Select
the Settings
II
12
menu
12
..................................
Installation
No: .............................................
5
...................................
Introduction
D1331D/321D
4
......................................
Buttons
To use
12
...................................
the menu
13
language
13
Store TV channels
is paying a lot of attention
to pro-
ducing environmentally-friendly
in product.
Your new TV contains materials which can
be recycled
specialized
and reused. At the end of its life
companies
can dismantle
the dis-
carded TV to recycle the reusable materials
and to minimize the amount of materials to
13
Weal< channel installation
14
Setup
15
menu
..................................
Preferences
15
Source
18
Clock
19
TV
Magnavox
menu
Picture
Sound
....................................
20
menu
20
menu
Features
22
menu
Channels
23
menu
Connect
24
accessory
devices
(vcr-dvd+rw)
be disposed of. Please ensure you dispose of
Recorder
and other
your old TV according
Recorder
and cable box with
Satellite
Receiver
2.8
.....................
Recorder
to local regulations.
2.
3
...................................
Preparation
or
Please, have the Model and Serial number
televisIon
Precaution
of your TV ................
INSTRUCTIONS
.........
28
A/V
devices
29
RF output
29
/ cable box with AV outputs
29
Recorder and satellite Receiver / cable box with AV outputs
30
Digital Surround
30
receiver
DVD Player or other accessory digital source devices
HDMI (High Definition
Multimedia interface) connectors
Side connections
Record
with
your
recorder.
devices
.....................
33
....................
33
33
Regulatory
33
shooting
tips
..........................
Care
and cleaning
.............................
Annex
I- Magnavox
software
Limited
warranty
32
32
Record a TV program
To select connected
Trouble
31
TV
upgrade
.............................
34
35
with
portable
memory..
36
38
O Do not
insert
connections
all
the power
plug
are made.
in a wall
socket
before
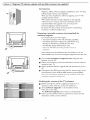
Place the TV on a solid surface.
For ventilation,
leave at least 4" to 6" free all around the TV.
Do not place the TV on a carpet. To prevent any unsafe situations, no naked flame sources, such as lighted candles, should be
placed in the vicinity. Avoid heat, direct sunlight and exposure to
rain or water. The equipment shall not be exposed to dripping
or splashing.
Mounting
the
TV
on the
wall
This TV set complies with the VESA standard for wall mounting.
Caution:
Installing
be performed
do the work
yourself.
responsibility
accident
Make
that
the TV requires
by qualified
for
special
personnel.
Magnavox
improper
bears
mounting
skill that
You should
should
or mounting
that
results
it meets
the wall
safety
mount
is being fixed
securely
enough
standards.
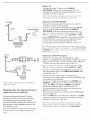
ANTENNA
connections
(480-line
video.
CABLE
to the
TV
Your integrated
digital TV automatically
decodes and
displays the four basic DTV picture resolution
standards.
- SDTV (Standard
Definition TV) are broadcast
as 480i
CABLE
--o
OR ANTENNA
-lr"
QTs
interlaced)
or 480p
(480-line
progressive
scan)
- HDTV (High-Definition
TV) are broadcast
either in the
1080i or 720p formats, always with a widescreen
picture.
Note: Progressive scan video (p) is more like that you see in a
movie theater. Images are much more distinct,
and motion is smoother.
Your TV has an integrated
HDTV tuner,
which
_ree of flicker
receives
decodes terrestrial
ATSC and unscrambled
cable (QAM)
signals and displays them. There are two ways to obtain
HDTV content:
- through
- through
to
no
in
or injury.
sure that
O Basic
only
not attempt
a cable provider
an antenna.
Note: Use the illustrations on the left for cable or Antenna
connections.
and
so
= Cable
TV
Connect the cable TV signal to the CABLE/
ANTENNA
75 O'_r" jack at the bottom of the TV.
See page 14 for details on using Autoprogram
to store
channels in the TV's memory.
Note: This connection will supply stereo sound to the TV if
the station you are viewing broadcasts stereo sound.
= Cable
CABLE
OR ANTENNA
=IF
@
TO TV
OUTPUT
OUT
box
with
RF IN/OUT
• Connect the incoming cable TV signal to the cable IN
jack (_ on the back of the cable box.
• Connect a coaxial cable (not supplied) from the TO TV
jack on the back of the cable box to the CABLE/
ANTENNA
75 _ _r jack (_) at the bottom of the TV.
Note: Your cable box may have a different label for the TO
TV jack. Commonly used labels include OUTPUT
or OUT.
• Set the OUTPUT
CH switch (_) on the cable box to CH
3 or 4 (whichever is correct for your cable box), Next,
tune the TV to the corresponding
channel. Once
tuned,change channels using the cable box, not the TV.
Note: This connection will not supply stereo sound to the TV. The
reason is that the RF output on a cable box - labeled TO TV, OUT
or OUTPUT for example ,- will not send a stereo signal to the tuner
(VHF/UH_I input on a TV.
CaMe Box
ANTENNA
- Cable
AV3
HDMI
)
CABLE
VDI
AV2
AV1
® ffb,o0o
Cable
AIV
outputs
cable TV
box
programs
• Connect a coaxial cable (not supplied) to a connector on
the signal splitter and to the CABLE/ANTENNA
75
-_r- jack @ on the TV.
• Connect another coaxial cable (not supplied) to a
connector on the signal splitter and to the cable IN jack O
on the back of the cable box.
Note: Video In signal input can be handled by
AVL AV3 as well
that don't
require the use of a cable box.
Since you've connected the cable TV signal
directly to the TV's tuner, you can also watch
unscrambled programs by simply tuning to
the desired channel: however, you must first use
Auto program to store available channels in the
TV's memory. (p. 13)
Note: This connection will supply stereo sound to t_e
TV i" the station you are wew_n_ broadcasts stereo
soun(i'
with
Note: Your cable box may have a different label for the TO
TV jack. Commonly used labels include OUTPUT
or OUT.
O
Watching
"lf"
box
• Connect the incoming cable TV signal (!) to a signal
splitter (not supplied). The signal splitter enables you to avoid
having to use the TO TV jack on the back of the cable box.
This jack will not supply stereo sound to the TV.
• Connect A/V cables (not supplied) to the VIDEO
and
AUDIO
L and R outputs on the back of the cable box
and to the AV2 video (labeled VIDEO)
and AUDIO
(labeled L and R) jacks ® on the back of the TV.
• To view programs from your cable box, first press the
AV button on the remote control.
• Press the cursor down or up buttons
source is selected.
until the AV2 signal
• Press the OK button to confirm your selection. The AV2
input source becomes current for the viewing of cable TV
programs through your cable box.
Note: If your cable box audio/video outputs do not supply
video and stereo audio to the TV, you will need to make the
connection shown above in "Cable box with RF INIOUT.
ANTENNA
= Cable
box
or HDMI
See Connect
with S-Video,
connectors
Accessory
component
video
(YPbPr)
Devices, p. 28.
CABLE
-o
- Antenna
Through
CABLE
an antenna, you can watch any HDTV
programs
that are broadcast in your area without paying fees.
If you're not sure what HDTV programming is available in
your area, contact your local content provider or your
local electronics retailer.
OFt ANTENNA
"iF"
Broadcasters are currently transitioning
from analog to digital
TV. This means that a given broadcaster will have two
channels on the air, one analog and one digital.
Connect the incoming antenna signal to the (::ABLE/
ANTENNA
75 ¢__t jack at the bottom of the TV.
See page 14 for details on using Autoprogram
to store
channels in the TV's memory.
Note:This _:onne_:donwill supply stereo sound to the TV if it is
QTS_
being broadcast by the station you are watching.
= Direct
Broadcast
Satellite
(DBS)
Satellite systems offer many of the same premium channels
available on cable systems, often at a lower price. To view
these channels, you'll need to install a small dish antenna
outside your home.
The two main DBS systems, DirecTV and DishNetwork,
require separate,
proprietary
set-top receiver boxes to
decode their signals and send them to your digital TV set.
These boxes may include a digital TV tuner for off-air DTV
broadcasts.
Satellite broadcasters
also provide major local
channels, depending
on the market in which you live.
DBS also provides service in areas not covered by cable
because the are in rural areas or other areas not passed
cable line.
DBS also
allows
you to watch
accessory
devices,
pay-per-view
by a
events.
O
To connect
O
Refer to the bottom
of the set for the correct operation
voltage.
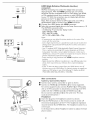
Insert the power cord into the wall socket.
Consult your local dealer if your main power supply voltage is
different than that indicated for the TV. Never place the TV on
top of the (AC) cord. Placing the TV at top the AC cord could
cause a fire or electric shock.
see p. 28.
O
Remote
O
Insert the two supplied AA batteries.
The batteries supplied do not contain the heavy metals mercury
and cadmium. Please determine and comply with local
regulations when disposing of depleted batteries.
Turn the TV on:
control:
Press the power switch (_ at the front side of the TV. An
indicator on the front of the TV lights up.
Press the POWER
buttons or the CH A/v button on the
remote control.
Use of the
remote
control
Note: Pressing most buttons once will activate the assigned function. Pressing a second time will de-activate
it.
When a button enables multiple options, a small list will be shown. Press repeatedly to select the next item in the list.
The list will be removed automatically
after six seconds or press OK to remove immediately.
VOL A / v Volume
POWER
Press A or v to adjust the volume.
Press to turn on/off the TV from or to standby
mode.
OK
Note: The TV is never powered of_
completely unless it is physically unplugged.
- to activate a setting
- to display the list of channels stored
(according to the selecion made in the
Installation mode (Antenna or Cable),
AICH
Pressto alternate
between the
p. 13.
currently viewed channel and the
previously viewed channel.
Color
buttons
When
functions
buttons,
the
attached
color
buttons
to the
are
color
shown
AV
on
Press this button repeatedly to select AVI,
AV2, AV3, HDMII, SIDE or TV when in TV
screen.
mode, according to where you connected the
MUTE
accessory devices (p. 28).
Interrupt
the sound or restore it.
VIEW
INFO
To display a list of all channels marked as
favorite (incl. subchannels).
Smart
Sound
Picture
bUttOn
Press repeatedly
to select among
Personal, Rich, Natural, Soft,
Multimedia
or Eco picture
_/
SOUND
PICTURE
@©
button
Press repeatedly to select among the four
settings; Personal, Speech, Music, Movies,
or Multimedia.
Smart
VILW
@@0
FORMAt
Type the dot for digital channels.
Channel
selection
-To browse through the TV channels or
sources stored in the preferred channel list
(see p. 26).
-To select between Antenna or Cable TV
channels, first make your selection in the
Settings menu, see, p. 13.
Note: You don_t have to start the installation
again once you have searched for and stored
the available TV channels.
settings.
MENU
INFO
button
Display information:
Press to display
(when available) information about the
selected TV channel and program or
accessory device.
Settings menu on/off, see p. 12.
To add or remove a channel in the favorite
of TV channels.
list
FORMAT
Press this button
to display a list of available display formats.
Available display formats are determined
by the type of signal you
are receiving.
To choose the display format you prefer, press the FORMAT
button repeatedly: Formats:
Automatic,
Super Zoom, 4:3, Movie expand
14:9, Movie expand
16:9, 16:9 subtitle
and widescreen.
O
Automatic
i_;
_...........................
Hovie expand
Super zoom
.;
4:3
Hovie expand
; 11: ...............................
16:9
16:9 subdde
Widescreen
Automatic makes the picture fill the screen as much as
possible. It is recommended
to press the cursor up/down
left/right key to adjust the picture position on the screen.
Super zoom
14:9
removes
or
the black bars on the sides of 4:3
programs with minimal distortion. When in the Movie expand 14:9,
Movie expand 16:9 or Super zoom picture format, you can make
subtitles visible with the cursor up/down.
Note: Not all screen formats are available when displaying HD sources.
I0
,Buttons
on the top of theTV
,_
Should your remote be lost or broken you can still change some
of the basic settings with the buttons on the top of your TV.
Press the power switch ® to switch the TV on.
Press:
•the + VOL -button to adjust to volume;
•the + CH -buttons to select the TV channels or
sources.
The MENU
button can be used to display the Settings menu
without the remote control.
Use:
•the + VOL
buttons
- buttons
and the + CH -
to select menu items in the directions
•the + VOL
button to confirm
as shown;
your selection.
Note:
When a menu is activated through the MENU button on the top of
the T_ a menu can be closed only by navigating to Exit and pressing
the MENU button.
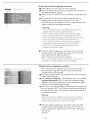
To use th e me nus
| ntroduction
When you use a menu or take an action, convenient
instructions,
help texts and messages will be displayed on your TV.
Please. follow the displayed instructions
and read the help text on the specific item highlighted
The color buttons govern different actions you can take on an activated device. Press the corresponding
color button on
the remote control to perform the required action on a selected device.
How
Settings
TV
to
The
V
navigate
through
the
Settings
Settings
settings
and
menu
allows
preferences
Press the MENU
button
you
to access
and
change
settings.
on the remote
display the Settings menu.
Use cursor up/down to highlight
on the left panel.
The right panel shows the content
highlighted in the left panel.
Info
menus
i
control
and select
of the
to
a menu
menu
item
you have
Note: Sometimes not all the menu items are visible on the
screen. Use cursor down to scroll down to additional items.
Use the cursor
Settings
TV
Picture
right to enter
the right panel.
The content of the right panel is moved to the left panel
and the right panel shows the content
of the newly
highlighted item in the left panel.
Note: In some cases, you wifl want to vvatch the picture on
your screen while adjusting settings. This means that when the
highlight is on the right side panel, the other menu items are
hidden. When the cursor left is pressed again, the hidden
menu items re._appear and the highlight moves to the/eft
[Info
• Press the cursor left to go one menu level up again.
- Press the OK button on the highlighted item to activate
and to dismiss the menu.
- Press
the MENU
button
again to exit the Settings
menu.
Note: The menu is also dismissed by pressing one of the color
buttons (if present) referring to certain actions which may be
executed.
12
_!nstalladon_
Select
Settings
Installation
the
menu
language
O Press the MENU button on the remote control.
Use the cursor down to select Installation in the Settings menu.
_]_ Use the cursor right to enter the Installation menu.
_D Select Language and enter the list of available languages with the
cursor right.
Select your preferred language with the cursor up/down and press
the OK button to confirm you selection.
@ Proceed with the Installation menu.
Store
Info
Settings
Installation
Aut0pr0gram
O
O
TV
channels
Select Autoprogram
in the Installation menu.
Use the cursor right to enter the Autoprogram
menu.
Press the OK button.
Select Cable or Antenna
in the Installation mode.
When Antenna
is selected, the TV will detect antenna
signals and will search for antenna
available in your local area.
TV (NTSC and ATSC) channels
When Cable is selected, the TV will detect cable company
supplied signal sand will search for cable TV (NTSC, ATSC, QAM
modulated) channels available in your area.
Make sure that registration
with your cable TV provider and
connection
of equipment are completed.
Info
O
Press the green
button
"Next"
on the remote
control.
Note: All channels must be unlocked in order to autoprograrn. If
requested, enter your PIN code to unlock all channels. See Menu
preT%rencesin the Settings, TV menu, p. 17.
TeUevision Installation
insta!lation
mode
O
Press the green button "Start"
to start autoprogramming. The
menu screen disappears and the progress of autoprogramming is
displayed. The progress bar indicates the number of analog and
digital TV channels found.
O
Previous
_
Next
....
@
When Autoprogramming
is complete, a message appears
confirming the completion and the TV switches to the first
installed TV channel.
Notes:
° When _'ouhave locked TV channels beSbre initiating Autoprogmrno a message appears asking _o enter your PiN code m
order to con ,plate Autoprogromrn_ng:
<TSC channel information is updated au_omancallywhen the TV i_ in standby a_er 3 minutes and every 3 hours thereafter.
o Whe,_ t:bannel ubdate is interruptc :L the new updated channel _ntormadon B retained along with the old m-updatec
channel _n:ormat_on
° backgrnund Autoprogrammmg occurs only when the TV is turned Jn
o Channel information aeou_ an ATSC channel is updated only tar tt_e ATSC channe_cuffently _unea
o if an NTSC channel n tuned, then in backgmund Autoprogramm_ng _he TV shall scan all the, _ossibleATSC _equendes
and update inl :_rmanun.
" Weak charnel installation allows _'outo manually tune weak ATSC channels in order to adius_ the antet na and thus
optimize sigrtd qualit}, _or that channe, /See installation rnenu. Weak channel _nstallat_on_p. 14t
o Once ¢ou have searched fbr the available Antenna as well as the Cable TV channels, they are stored in the mernor_
o If Antennalcable s_gna_ss_nterrur t:ea more than ten minutes TV will go into offmode You are req _ested to bress Power button
or CH A / v button to turn on the TV
13
Channel
tuning
Available channels:
- Cable (analog NTSC or digital QAM)
- Terrestrial (analog NTSC or digital ATSC)
If a tuned channel is not yet in the
master channel map, the TV will attempt to tune to the
channel and it will be added to the map.
If the channel is not acquired, a message will appear reporting
that the channel is not available. When you tune an audio-only
digital subchannel, a display appears with the message Audio only.
Note:
$ubchannel
selections
The new standards employed with digital broadcasting make it possible
to receive multiple program channels under a single major channel
number which can be selected by pressing the digit remote control
Note: Digital Channel selection delay
Due to the tuning complexity ofsubchannel
digital programming, the time to select and view
a digital channel may take slightly longer than
direct-access channel number entry.
Important:
what the viewer is normally accustomed to fas
compared to analog channel programs).
Digital channel broadcasts contain program and
system data information that must be brocessed
After the instafladon of the TV channels is completed, aMays
make a selection in the Instaflation menu between Antenna or
Cable whether you want to watch Antenna TV channels or Cable
before the channel selection can be displayed.
If you make use of a signal splitter do not forget to put the switch
in the corresponding position,
Weak
channel
Antenna
installation
reception
having difficulties
you use: Weak
Here's how:
O
In the antenna
TV channels.
control;
O
weaker
mode,
select
strength
signals, we suggest
list by green
from
the displayed
by red button
list of
on the remote
the signal.
is continuously
is enough
may vary. If you are
feature.
a channel
Select the "Start"
TV set will detect
in the channel
Settings
acquiring
channels
Signal Installation
The signal strength
antenna rotates.
When
for broadcast
displayed
to identify,
button
and updated
user can store
on the remote
as the
the channel
control.
Installation
Software
upgrade
This menu allows you to upgrade your TV software using a USB
device.
USB
[[nfo
upgrade
It is possible to initiate an upgrade procedure from a USB portable
memory (not supplied). The memory device must be filled with the
appropriate upgrade image (and structure) which can be found on
the www.usasupport.magnavox.com
website. How to upload a new
software version on your portable memory device (not supplied),
see Annex I, p. 36.
14
This menu is used to control
Settings
Setting
the settings
of special TV
functions, features and accessory devices.
The Preferences
menu allows you to change settings that will
typically be accessed only occasionally.
The Source
menu allows you to select a source.
The Clock menu allows you to use your TV as a clock. This setup
is necessary for the correct working of the Loci( after feature.
Setup
Preferences
Info
Settings
Setup
Preferences
O
Press the MENU
O
Select Setup with the cursor down key and press the cursor
key to select the Preferences
menu.
Press the cursor right key again to select Sound preferences.
O
button.
Press the cursor right key once more to enter
preferences
menu.
Auto
the Sound
surround
Sometimes
the broadcaster
transmits
special signals for
Surround sound encoded programs. The TV automatically
to the best surround sound mode when Auto
surround
is switched On.
i lnfo
right
Features
switches
preferences
i Settings
Preferences
Sound
Sound
i
Caption
p_efelences
service
This allows
you to select the Closed
analog broadcasting
Closed
Captioning
television
hearing
dialogue
j lnfo
Note:
The captions
do not always use correct
spelling
and grammar.
product
commercials
Closed
Caption
Not all TV programs
are made
informations
for broadcast
included.
Refer to your area's
TV program
channels
of Closed Caption
and times
programming,
Captioned
Usually
noted in the TV listings with service
,CC _.
Often
are usually
marks
while
'text
the TV program
during
of
to help the
boxes'
to show
is in progress.
captioned
broadcasts.
Caption
service:
for the
action
on the
captioned
TV
on screen.
is the
most
used.
CC 2 may be used
for alternate
languages if they are being transmitted.
• T 1,2,3 or4
listings for the TV
programs
shows
CCI
uses on-screen
on the screen
(and descriptions)
program
with
Designed
right key.
Select the desired
• CC 1,2,3 or 4
Dialogue
and
levels of
service.
Press the cursor
0
this feature
will appear
Captions
Select
on the TV screen.
and conversations
Captions
service
allows you to read the voice content
programs
impaired,
Captions
to be displayed.
such as
used for channel guide,
information
for Closed
informations
or stock
Not
all Caption
channel
O
during
market
services
Caption
the Caption
service
bulletin
programs,
board
news, weather
reports.
are necessarily
the transmission
See Closed
schedules,
Captions
being used by a TV
of a Closed
in the TV, Features
menu,
Caption
On or Off.
Note: This television provides display of tdevision
dosed captioning
conforming with the EIA-608 standard and in accordance
Sections 15.119 of the FCC rules.
15
program.
see p. 23, to turn
with
Digital caption
service
This allows you to configure the way you choose to view digital
Settings
Preferences
j lnfo
Features preferences
captioning.
Select one of the digital service channels made available by the
caption providen
There are six standard services. Service I is designated as the
Primary Caption Service. This service contains the verbatim, or
near-verbatim captions for the primary language being spoken in
the accompanying program audio.
Service 2 is designated as the Secondary Language Service.
This service contains captions in a secondary language, which
is a translation of the captions in the primary Caption
Service. The other service subchannels are not pre-assigned.
It is up to the discretion of the individual caption provider to
utilize the remaining service channels.
Digital caption
options
This allows you to modify how digital captions are displayed on your
TV. Select from the following options to change the visual
characteristics
• Reset
of your TV's digital captioning.
to default
Select this option to reset the digital caption options to the
captions provider default settings.
Press the OK button to confirm.
• Size
Select this option to choose a caption display size according
to your own preference. Select Default: (Automatic),
Small, Standard
or Large and press the OK button to
confirm.
• Style
Select this option to choose a caption display font style
according to your own preference. Select Default,
Mono
spaced serif, Serif, Monospaced
sans serif, Sans serif,
Casual, Cursive or Small caps,
• Text
Select this option to choose
caption
display text box, text
color and/or the opacity according to your own preference.
Select a color and an opacity option.
• Background
Select this option to choose caption display character back
ground color or one of the background opacity options
according to your own preference.
the opacity options.
16
Select a color and one
of
Menu preferences
OSD
Settings
Preferences
Menu preferences
i_nf0
Note: EmergencyAiert Signallingis not #OSsibte-
O Select OSD.
0 Press the cursor right key to select Normal
or Minimum.
Normal
activates a continuous display of the channel number
for a maximum of I0 minutes and extended display of TV
channel and program information on screen. For example,
information on the main or auxiliary program, input signal quality
of connected accessory devices, the display format, sound mode,
availability of Closed Caption service, the audio language, the
rating, sleep timer setup is displayed.
Minimum
activates the display of reduced channel information.
Note: When Closed Captions is switched on, continuous display of the
channel number and dock is not possible.
-with analoguevideosources,
Show
-You always have the possibility to remove the
messagefrOm the screen:
This allows you to select the alert priority level of the information
disseminated by the cable operator. The standard SCTEI8 defines
an Emergency Alert signalling method for use by cable TV
systems to signal emergencies to digital devices such as digital
set-top boxes, digital TVs and digital VCRs.
The Emergency alert signalling scheme defined in the standard
allows a cable operator to disseminate emergency alert
information related to state and local-level emergencies and
warnings in a cost-effective and efficient way, while minimizing
disruption of programming.
An Emergency alert message will have one of the following
priorities: Low, Medium, High or Maximum.
The Emergency alert message with priority High or Maximum
will always be presented. Low or Medium will be present or
ignored depending on the setting you select.
-The messagedisplay wil! Overlapwhatever
menu element or other meSsageis on the
screen.
emergency
alerts
(EAS)
Important: When the TV clock is undefined (See Setup menu, Clock,
p. 19), the Emergency Alerts will be ignored.
The Emergency Alert
information:
message display will contain following
- The Emergency Alert text
- The start time + date
- The end time + date.
0 Select Show Emergency Alerts in the Menu preferences menu.
0 Press the cursor right key and select one of the Emergency alerts
Impartant:
yau have fargatten
your PINt
O Select Change PIN in the Menu preferences
menu and press the cursor right key.
O Press the cursor right key to enter the
overriding
personal
Set/Change
PIN code O-7-1-I.
Press the cursor
4-digit
code is erased
stored_
again and enter
a new
PIN code. The previous
and your new PIN-code
options:
- Always: You always want available Emergency alert messages to
be displayed;
- Skip low priority: You want low level messages to be ignored;
- Skip low/medium priority: You only want the high priority
message to be displayed.
is
PIN
O Select Set or Change P|N with the cursor down.
If no PIN-code exists, the menu item is set to Set P|N.
Follow the instructions on screen. If a PIN-code has previously
been entered, the menu item is set to Change P|N. Follow the
instructions on screen. All number combinations from 0000 to
9999 are valid numbers.
The Menu preferences
menu reappears with a message
confirming that the PIN has been created.
17
Settings
Preferences
Reset AV settings
i
Reset AV settings
This function allows you to reset most of the picture and sound
settings to their default factory levels.
@ Select Reset AV settings with the cursor down key.
Press the cursor right key.
Press the OK button to erase settings and reset them to their
default values.
i_nf0
Source
Settings
Setup
Source
This menu allows you to identify the accessory
connected
o
o
o
i_nf0
to the external
devices you have
inputs/outputs.
Select Source in the Setup menu.
Press the cursor right to enter the list of types of devices
connected to the selected input.
Select the accessory device with the cursor up/down.
When you select AVI, AV2, AV3, HDMII, Side or Analog Audio
In, a list appears allowing you to identify which type of accessory
device is attached to this input. The TV detects the presence of
the connected
Analog
Audio
device and the signal is routed appropriately.
In
If your accessory device has a DVI output connector, only the
video signal is transmitted in digital format. To input an audio
signal, please connect the analog audio L and R outputs to the TV's
L and R AVI audio input plugs. To activate the audio function,
select HDHI from the Analog Audio In menu to activate.
DI
_
AV1
Q
Digital Audio Out
In addition to accepting audio input through HDM|, the TV can
output Digital audio through the DIGITAL
AUDIO
OUT
(SPDIF OUT) connector to an external amplifier or receiver.
If your amplifier or receiver has a matching connector for Digital
Audio In, you can connect it with a single cable to the TV's
DIGITAL AUDIO OUT (SPDIF OUT). See Connect
Accessory
18
Devices, Digital Surround Receiver, p. 30.
Clock
settin_
Setup
Clock
This allows you to use your TV as a clock.
Note: Adjusting the clock is necessary for the correct operation of Lock after
(See TV settings, Channels, p. 24) features.
Auto
O
O
O
if0
iVlcst TVchannels
do not transmit clock
mode
Select Clock in
Press the cursor
Press the cursor
automatically
or
Auto
the Setup menu.
right key to select the Auto clock mode.
right key to instruct the TV to get the time
manually.
clock channel
(onlyavailablewhenAuto clo,d_mode is_t to Automa_c)
With the cursor buttons, select the channel number where time
can be found by the TV. Typically time can be found on PBS as well
as some other channels.
information. A few cable channels do,but they
are at the end of the channel ring.Antenna
channels do not transmit dock information.
If clock information does not appear, you can
assume that eitherdock extraction
long fime or lhat there is no dock.
clock
Note: If Ntanual has been selected in the Auto dock mode, the Auto
dock channel menu item can net be selected.
is taking a
Time
- Day (only available when Auto clock mode is s_t to Marmal)
With the cursor buttons, select and enter the correct time and
day. ff Auto dock mode Manual
has been selected, and no clock
search has been done, the system will keep the entered time and
day.
Time
0
0
zone
(only available vdmnAuto clock mode is set to Automatic)
This function allows you to select your local time zone.
Broadcasted
time information will correct the clock display for
your local time.
Select Time zone with the cursor down.
Press the cursor
Daylight
right to select your local time zone.
saving (only available when At to dock mode is set to Automatic)
Daylight saving time is automatically
set by spedally
broadcasted
signals. This menu item allows you to disable the
automatic setting of daylight saving time. This is useful if you live
in an area or state where daylight saving is not applied, but you
receive channels from other areas where daylight saving signals are
broadcasted.
O Select Daylight
saving with the cursor down.
O Press the cursor right key to select Automatic
for automatic
clock correction
for daylight saving time, based on specially broadcasted signals.
O Select Offto
disable automatic clock correction
based on the specially broadcasted
signals.
19
Press the MENU
Settings
V
TV
button on the remote control to display the
Settings menu. The TV menu gives you an overview
can select.
of the menus you
Note: Depending on the input signal, one or more menu items may not be
selectabM
Picture
menu
Note: Some menu items are not available in case of liD sources,
i_nfo
O
Press the cursor right key to select Picture.
Press the cursor right key again to enter the Picture menu.
Settings
TV
Picture
O
Select the menu items with the cursor up/down key.
O
Adjust the settings with the cursor left/right
key or enter the list of
submenu items with the cursor right key. Select a
submenu item with the cursor up/down key.
Smart
O
picture
Select Smart
picture
to display a list of predefined picture
settings, each corresponding
Personal
i_nf0
with specific factory settings.
refers to the personal preference settings of picture in
the picture menu.
Note: This Magnavox TV has been set at the _ctory to look best in
bright store environments, which typically use fluorescent lighting: As your
home will likely not be as well lit as a store, we recommend that you
cycle through the various smart picture modes to find the one that best
suits your own viewing conditions, Most consumers will find that
NaturaJ is the correct choice_
O You can press the Smart
picture button repeatedly to select
either Personal, Rich, Natural, Soft, Multimedia or Eco picture
settings.
Note: When you watch programs using VCR,it_ recommended to select
$o_t Mode via smart picture,
Contrast
This will adjust the intensity of bright parts in the _icture but keep
the dark parts unchanged.
Brightness
This will adjust the light output of the complete picture, which will
mainly affect the darker areas of the picture.
Color
This will adjust the saturation
personal preference.
20
level of the colors to suit your
Sharpness
This will adiust the sharpness
Color
of fine details
in the picture.
temperature
This will increase
to suit personal
Select Cool
the white
red tint.
or decrease
(red) and Cool
(blue) colors
preferences.
to give the white
colors
Warm
a neutral
tint,
colors
Warm
a blue tint,
Normal
to give the white
to give
colors
a
Tint
Allows you to select the picture's
Picture
color mix or hue.
format
This menu item performs
the same as the FORMAT button on the
remote control. See Use of the remote control, p. 9.
21
Sound
Settings
-1
menu
O Select Sound in the TV Settings menu.
Press the cursor right key to enter the sound menu.
TV
Select the menu items with the cursor up/down key and adjust the
settings with the cursor left/right key.
_}t Remember, control settings are at normal mid-range levels when the
bar scale is entered.
Smart sound
Select Smart sound to display a list of predefined sound settings,
each corresponding with specific factory settings of Treble and Bass.
Press the cursor right key to enter the list.
Press the cursor up/down key to select a predefined sound setting.
Personal refers to the personal preference sound settings in the sound
menu.
lef0
Settings
TV
Sound
Note: The moment you are in a preder_nedSmart sound setting and you
modify,a setting in the Sound menu, all valuesof the menu wifl overwrite the
previouslymade personal settbg.
Volume
This will adjust the sound output level.
Balance
lefo
This will adjust the output of the right and left speakers to obtain the
best stereo reproduction for your listening position.
Headphone
volume
This controls the level of sound through the headphones.
Sound mode
Settings
TV
This select the modes for more spatial or surround sound
reproduction dependent on the broadcast signals or signals from
external inputs received.
Sound
Alternate
audio (only sdectable with analog broadcast signals)
This gives you the possibility to swap between the Main and
Second Audio Program (SAP) when it is available.
Digital
Audio language (only sdectable with digital broadcast signals)
Selects your language preference when digital broadcast
signal muldlingual audio track programs are available.
i lnfo
Note: The de_bultlanguagefor the digital Channelsisthe installed menu
MonolStereo
Selects
perTV channel,
Mono or Stereosound when analogstereo
broadcasts
areavailable.
AVL (Automatic
Volume
Leveler) (only available with analog
broadcast and non Digi;_l signals)
Automatically reduces the volume differences between channels and
programs, providing a more constant overall level. This will also reduce
the dynamics of sound.
Delta volume
Corrects for any permanent volume differences between TV channels
or external sources.
'a u_t f" aj_, _ Manufactured
F']a_
Laboratories.
under license from Dolby
"Dolby" "Pro Logic" and
SURROUNO the double-D symbol are trademarks
Dolby Laboratories.
of
22
Features
Settings
TV
menu
Features
0
0
Select Features in the TV Settings menu.
Press the cursor right key to enter the features menu.
Select the menu items with the cursor up/down key and
adjust the settings with the cursor left/right
Closed
i lnfo
key.
captions
This displays the transmitted
CC- or CS-text on the screen
according to your chosen CC or CS service in the Setup menu,
Features preferences
menu, p. IS. This text can either be
permanently
displayed (assuming that the service is
available in the broadcast)
or only when mute is active.
Press the cursor right key after having selected Closed captions.
Select On, Off or On during mute.
Sleeptimer
This sets a time period
standby.
after which the TV automatically
turns
to
0 Select Sleeptimer.
O Press the cursor right key.
O Select a value with the cursor up/down
from Off to 180 minutes.
turned off.
When
key. The list will have values
Off is selected, the sleeptimer
is
You can always turn off your TV earlier
23
or select another
time set.
Channels
Settings
TV
menu
This menu can control
Channels
0
Select Channels
spedal
functions
for the TV channels.
in the "iV settings menu with the cursor up/down
Press the cursor
right to enter
Press the cursor
up/down
the channels
key.
menu.
key to select a channels
menu item.
Lock after
Note: Lock after is only sdectable if dme and date are known. See Setup,
Clock menu p. 19.
Info
This allows you to prevent the viewing of the channels after a selectable
time delay. Locked channels can still be tuned, but the picture is blanked
and the audio is muted.
Settings/TV
CI)annels
Lock after
Press the cursor right and select Timer
i
On or Off.
When set to On this allows you to set the clock.
When having selected Timer On, you will be asked to enter your PIN
(See Set/Change PIN, p. 17). Follow the instructions on screen.
Select Time and press the cursor right. This allows you to set the time
after which the lock is set.
O
Inf0
Select AM or PI*I to select the correct period of the day.
Enter the time with the digit or the cursor buttons and press OK to
confirm.
Channel
lock
This allows you to completely lock a certain TV channel or external
source. Select the channels or subchannels you want to lock and press
OK to confirm.
TV ratings lock
SetfingslTV
Channels
TVratings 10ck
O
Inf0
O
O
O
Your TV is equipped with a V-chip. This allows you to control
access to individual programs based on their movie and TV ratings. All
settings apply to all AV inputs, except HDMI. The program content
advisory data are sent by the broadcaster or program provider.
Select TV ratings lock with the cursor down. A list appears, showing
the age-based TV ratings and a corresponding content-based ratings
list.
Press the cursor right to enter the list.
Select an age-based TV rating with the cursor up/down, and enter, if
present, the list with content-based ratings with the cursor right, and
select one content-based rating.
Press OK to activate/de-activate the selected rating. You are asked to
enter your PIN-code (see Set/Change PIN, p. 18). If the code is correct,
the TV ratings lock menu reappears.
Select another content-based rating if you like and press OK again.
You need only enter your PIN-code once while the menu is active. You
can lock/unlock any number of ratings on the list without re-entering your
code.
Each ratings item has a box-graphic in front of it to indicate whether or not
programs carrying that rating are currently locked:
• [] : all items in the contents-based list are locked as well;
• [] : the item is unselected;
• [] : some content-based ratings are selected/unselected.
24
Age-based
Rating
Content-based
Rating
All
none
None
none
TV-Y
none
TV-Y7
(FV) Fantasy Violence
TV-G
none
TV-PG
(D) Dialog
(L) Language
(S) Sex
When All has been selected, all items in the age-based and in
the contents-based
lists are locked. If, while All is selected,
any other
unselected,
None
item,
either
an age-based
then All is automatically
is
information or have a rating of None. Both will be locked.
When an item on the age-based list is selected, all items below
that item of the same group are locked as well. When you
select a content-based rating, all identical content- based
ratings in the younger age-based categories are also selected.
(D) Dialog
(L) Language
(S) Sex
(V) Violence
TV-MA
item,
unselected.
is the selection for items that either have no rating
(V) Violence
TV-14
or content-based
(D) Dialog
(L) Language
(S) Sex
TV-Y
appropriate for children of all ages with themes and
elements suitable for children aged 2-6
TV-Y7
programs designed for children age 7 and older
TV-YT-FV
programs include fantasy violence more intense than other
programs in the TV-Y7 category
TV-G
programs suitable for all ages. These programs contain little
or no violence, no strong language and little or no sexual
dialogue or situations
TV-PG
programs contain elements that
unsuitable for younger children
parental guidance. The program
violence, sexual dialogue and/or
language.
TV-I4
programs contain elements that may not be
suitable for children under 14 years of age. These programs
include one or more of the following: intense violence.
intense sexual situations, suggestive dialogue and strong
language.
TV-MA
programs are designed to be viewed by adults and may be
unsuitable for children under the age of 17.These programs
may contain graphic violence, explicit sexual activity and/or
crude or indecent language.
2S
some parents may find
and which may need
may contain moderate
situations and some strong
Movie
SettingstTV
Channels
Ratings Lock
This function allows you to controlaccessto individualmovies basedon
Movie ratings lock
their MPAA ratings (Motion Picture Association of America).
O
Select Movie ratings lock with the cursor down. A list appears, showing
all valid MPAA content ratings.
Press the cursor right to enter the list. You are asked to enter your
code. (See Set/Change PIN, p. 17.)If the code is correct, the Movie
ratings lock menu reappears.
Inf0
O
Select a movie rating with the cursor up/clown.
O
Press OK to activate/de-activate the selected rating.
Each rating item has a box-graphic in front of it to indicate
whether or not programs carrying that rating are currently locked:
• [] : movies with this rating are locked;
• []
: movies with this rating are unlocked.
When AU has been selected, all items on the movie ratings list become
selected. (All movies are locked.) If, while All is selected, any other item is
unselected, then All is automatically unselected.
When NR has been selected, no other item is selected.
When any other item has been selected, all ratings below are selected as
well, thus all movies with those ratings will be locked.
N R
not rated
G
movies with
PG
movies for which
may contain
a mild content,
suitable for all ages
parental guidance is recommended.
a few racy or violent
They
scenes or maybe some bad
language
PG- I 3 R
movies for which
parental guidance may be recommended
if
under age J3
R
restricted.
The movies usualty contain offensive
language and may 0e unsuitable
for children
17. Parental guidance or permission
hit-17
even with
More
x
movies
parental
offensive
which
language. Also
Preferred
Settings/TV
Channels
Prefered channels
i
permission,
sex. violence
generally
known
focus
sex or bad
under the age of
needed.
forbidden
under
age !7.
or bad language.
on sex, violence
and/or
bad
as pornography.
channels
A channel, when installed, is marked as preferred
by default and
added to the channel list, This feature provides the ability to
remove a channel number from the channel list.
O
0
[[nfo
Select Preferred channels with the cursor down key.
Press the cursor right key to enter a list with all stored
channel numbers.
O
Select the channel you want to remove with the cursor down key.
Press OK.
O
Repeat to remove other channels.
Note:
Region ratings lock: This allows you to control access to individual programs base on their broadcasted regional radng.
Clear region ratings: This allows you to clear all the locks that you have set in the Region ratings lock table.
26
Region
SettingstTV
Channels
ratings
lock
Region ratings 10ck
This allows you to control access to individual programs base on their
broadcasted regional rating.
O
[nfo
O
{)
O
Select Region ratings lock with the cursor down. A list appears,
showing the age-based Region ratings and a corresponding contentbased ratings list.
Press the cursor right to enter the list.
Select an age-based Region rating with the cursor up/down, and enter,
if present, the list with content-based
ratings with the cursor right, and
select one content-based rating.
Press OK to activate/de-activate
the selected rating. You are asked to
enter your PIN-code (see Set/Change PIN, p. 17). If the code is correct,
the Region ratings lock menu reappears.
Select another content-based
rating if you like and press OK again.
You need only enter your PIN-code once while the menu is active. You
can lock/unlock any number of ratings on the list without re-entering your
code.
Each ratings item has a box-graphic in front of it to indicate whether
programs carrying that rating are currently locked:
• [] : all items in the contents-based
list are locked as well;
• [] : the item is unselected;
• [] : some content-based
ratings are selected/unselected.
Clear
SettingsiTV
Channels
Clear region ratings
region
or not
ratings
This allows you to clear all the locks that you have set in the Region
ratings lock table.
O Select Clear
region
ratings
with the cursor down.
Enter your PIN-code to clear all region ratings' status.
i info
27
There is a wide range of audio and video devices that can be connected
connection diagrams show you how to connect them to the TV.
to your TV.The following
AVI YPbPr, VIDEO and L/R Audio,
AV2 YPbPr, VIDEO and L/R Audio,
AV9 VIDEO, S-VIDEO, L/R Audio and Digital Audio out (SPDIF OUT)
SIDE VIDEO, S-VIDEO and L/R Audio, Headphone
SPEAKERS
HDMI
75n
_Don't
insert any cable here. This area isfor repair center use only.
(_)
c-
_j
.....
AUDIOIN
AV2
AV_
)
Recorder
(VCR-DVD+RW)
Note: Do not place your recorder too close to the TV screen. Some
ANTENNA
HDMI
__
AW
750
recorders may be susceptible for signals From the display. Keep recorders
a minimum distance of 20" _rorn the screen.
i
0
an optional two-way signal splitter and/or Cable TV converter
Connect the RF Antenna or Cable TV cable (eventually through
box) (D to the RF IN socket of your
0
recorder.
Connect another RF cable 0 from the output OUT
recorder to the TV's CABLE/ANTENNA
75 (_ _
_
AV1
AV_
(_)
L÷
R ÷VIDEO
OUT
For
better
playback
the
Video,
Audio
quality
Left
and
cables_ to the VIDEO,
if your
recorder
for
stereo
Right
(only
AUDIO
has an S-VHS
device
for
only,
stereo
of your
jack.
also
devices)
connect
AV
L and R inputjacks of AV3.
video
jack:
For improved picture quality, connect an S-video cable to the
S-VIDEO
input instead
of connecting
the recorder
to the
VIDEO
jack of AV3. S-Video does not provide audio, so audio
cables must still be connected to provide sound.
28
Recorder
and
other
A/V
devices
O Connect the RF antenna cable (D of the RF IN socket of your
other AV device.
ANTENNA
?s_
_0
Connect
recorder
O Connect
recorder
L÷a÷VmEO
the RF output
Q.
of the AV device to the RF input of the
another
RE cable G from the output
to the TV's input CABLE/ANTENNA
OUT
of your
75 _ _r jack.
O To obtain better quality, also connect the Video or S-Video,
Audio left and Audio right cables of both devices to AVI
(VIDEO
or AUDIO
L and R,) O and to AV2 (VIDEO
or
AUDIO
L and R) O.
Notes:
RECORDER
- When you use mono equipment, only the left loudspeaker
reproduces sound. Use a rnono-toostereo adapter (not supplied) for
sound reproduction through all internal loudspeakers.
- When using the S-VIDEO
connector do not connect any device to
the AV3 VIDEO
input.
ANTENNA
Recorder
and
cable
box
Use an signal splitter
wO
{_
AV2_
L ÷ R + VIDEO
Connect
outputs
with
RF output
(not supplied).
one of the cable TV signal splitter
O to the cable box's IN jack.
(not supplied)
O Connect
the other cable TV signal splitter output (D to the
CABLE/ANTENNA
75 _ _ plug on the bottom of the TV.
O Connect
the cable box's OUT jack (_) to the recorders
RF IN
socket.
O Connect
the Video,
Audio
Left and Right (only for stereo
sound) recorder
AV cables Q to the VIDEO, audio
input AM2 jacks on the TV,
STB
L and R
RECORDER
Satellite
Receiver
O Connect
the satellite
the satellite
4[_ Connect
VIDEO,
If your
antenna
receiver's
satellite
S-VIDEO
receiver
picture
input
29
cable
or cable
quality,
instead
the audio
and to the
STB
with
AV
outputs
or the Cable
or cable box's
box to the VIDEO
Connect
box
TV cable (_) to
IN jack.
the Video, Audio left and right AV cables O to the
L and R audio input jacks of AV3.
For improved
cable
/ cable
box has an S-Video
connect
of connecting
cable to the
the
receiver
satellite
or
jack.
cables to the device's
L and R audio
jack:
an S-Video
AV3
jacks
AUDIO
on the TV.
L and R jacks
Recorder
,®0_l®
'
O
AV2
$TB
O
_V_
Receiver
/ cable box with
AV outputs
JN
Connect the RF Antenna or Cable TV cable as described above.
Connect the AV cables (]) to the satellite receiver's or cable box's
AV OUT jacks and to the recorder's AV IN jacks.
O
ooT
ou_
and Satellite
,5°
Connect the recorder's AV OUT jacks (_) to the TV's AV3
jacks as described above.
Connect another RF cable (]) from the output out of your
recorder
to the TV's input CABLE/ANTE!NNA
-_r_ jack.
RECORDER
Digital
Surround
Connect
a Digital Multi Channel Surround receiver to the
DIGITAL
the TV.
AUDIO
DIGITAL
AUDIO
OUT
3O
receiver
OUT
(SPDIF OUT)
connector
at the bottom
of
DVD Player or other accessory
digital
source devices
Devices
with Component
Video Output
Connectors
(YPbPr)
This TV is capable of displaying 1080i, 720p and 480p DTV signals when
connected to a DTV tuner Set-Top Box. Select the output of the Set Top
Box to either 1080i, 720p or 480p. A DTV signal must be available in your
YPbPr
AV2
AV1
area.
(_
YPbp_AVI/AV2_
(_LAVIR
O Connect the three separate component video cables O to a
AV2_
Set-Top box, DVD-players, laser-disc players, video game players,
satellite receivers or other device with component video outputs
(YPbPr), and to the ¥, Pb and Pr jacks of AV[ or AV2 on the TV.
DVD I STB
Devices
S-VIDEO
'® PIF®I
AV2
T
O
1
®ffZo'oo=
DVD I STB
AV1
O
with
an S=Video
connector
Connect an S-Video cable to the AV3 or Side AV input O. Note:
When using the S-VIDEO connector do not connect any
device to the AV VIDEO input that you are using.
Connect the audio cables to the device's AUDIO
L and R jacks and to
the L and R audio AV3 or Side AV jacks (_) on the TV
accordingly to where you connected the S-Video cable.
Notes:
=If necessary, you can center your screen picture position with
the cursor keys.
=Labels for the component video sockets may di_er depending on
the DVD player or the device your are connecting. Although ffhe
abbreviations may vary, the letters B and R stand for the blue
and red component s_nals, respectiv@; and Y indicates the
luminance signal Refer to the DVD player_ or devices
instructions for definitions and connection details.
=This television is designed to accept high definition signal standards
720p and 1080i as specified by the Electronic Industries As
sodation standard EIA770.3. D!gital devices from different manu
fadurers may have di_ering output standards which may cause
di_Sculties for proper television display.
=Due to possible digital image distortion when aTsplayingsignals
from connected digital equipment, we suggest you sdea the
Soft setting from the Smart picture menu. See Picture menu,
Smart picture, p. 20.
Set the Personae setting "to off before storing "this setting.
Warning: If scrolling irnages, mismatched colors, no color, no
picture, or combinations of these appear on your screen, check
to make sure input cables are connected to their corresponding
color-coded inputs or connections or move your digital dew:ce
farther away from your TV
31
HDMI (High
connectors
Definition
Multimedia
Interface)
HDMI
O
0
HDMI is the leading new standard for Digital video and audio
interconnection. With the HDM! connector you can connect
HDMI Set-Top Box compatible DVD-R or DVD player with HDMI,
or DVl-equipped devices like a computer or ocher HDMI devices
to your TV. With this connection, you can display high-definition
pictures on this TV in digital format.
Note: If the accessory device has DVI output only, use a DVI to
HDMI adapter cable to connect to the HDMI connector
Connect your HDMI device with HDMI connector.
Select the connected digital device in the Setup, Source menu, p. 18
The HDMI IN connectors allow
- the following TV and monitor
SDTV 640/720 x 480i
EDTV 640/720 x 480p
HDTV 1920 xl080i/1280
Notes:
x 720p
- If necessary, you can adjust the picture position to the center of the
screen with the cursor keys.
- Due to legal requirements, it is possible that audio may be muted when
playing certain copy protected PGg) audio #rom a device connected to
the HDM! input.
- Your TV supports HDCP (Highbandwidth Digital Content Protection).
This is a system for protecting DVD content outputted via DV! from
being copied./t provides a secure digital link between a video source
(DVD, PC,etc.) and your T_KContent is encrypted at the source device to
prevent unauthorized copies from being made.
- Proper working is only guaranteed with HDNff compliant consumer
75 O
.-l(_
0
AV1
HDMI
display modes:
_]
0
- Digital devices _rorn different rnanu_cturers may di_ering output stan
dards, which may prevent your television from properly displaying
- If your TV does not detect a signal from your HDM! device, turn oft
and then turn on the HDMI device. For optimal viewing, we suggest you
adjust your DVD player to one of the [bllowing TV display standards:
/920x/O80i,/280x720p,720x480i
or 720x480p.
Side
O
connections
Camera,
Camcorder,
Game
Connect your camera, camcorder or game as shown.
Connect to VIDEO O and AUDIO L O for mono equipment.
For stereo equipment also connect AUDIO R O. S-VHS quality
with an S-VHS camcorder is obtained by connecting the S-VHS
cables with the S-VIDEO input O and AUDIO inputs Q.
O
O
Do not connect cable O and (_) at the same time. This may
cause picture distortion
!
Headphone
Insert the plug into the headphone socket ,_, as shown.
Press the MUTE button on the remote control to switch off
the internal loudspeakers of the TV. The headphone impedance
must be between 8 and 4000 Ohm. The headphone socket has a
3.5 mm jack.
In the Sound menu select Headphone volume to adjust the headphone volume.
32
(Record
wit h your
recorder
)
Record
a TV
program
You can record a TV program using your recorders
without affecting your TV.
Select the channel number on your recorder.
Set your recorder to record.
See the handbook for your recorder.
0
0
tuner
Note: Switching channel numbers on your TV does not disturb
recording [
_._ CABLE
ORANTENNA
CABLEOR
ANTENNA
75
=lr =
®
(,,Toselectconnecteddevices.
)
O Press he AV button repeatedly or select Source in the
Settings menu (see p. 18) to select AVI, AV2, AV3, HDPII,
Side
or TV, according to where you connected your devices.
Press the cursor up/down.
O Press OK.
Regulatory Notices-Federal
Commission
Communications
This equipment
has been tested and found
limits for a Class B digital device, pursuant
Rules. These limits are designed to provide
protection against harmful interference in
Notice
Modifications-
to comply with the
to part 15 of the FCC
reasonable
a residential
The FCC requires the user to be notified that any changes or
modifications made to this device that are not expressly
approved by Magnavox Consumer Electronics may void the user's
authority to operate the equipment.
Cables -
installation. This equJpmen_ generates, uses. and can radiate
radio frequency energy and. if not installed and used in
accordance with the instructions,
may cause harmful
interference to radio communications.
However. there is no
guarantee
tion.
that
If this
equipment
or television
equipment
the
separation
Connect
the
experienced
the
by one
or relocate
to which
the
the
equipment
the
radio
cause
which
off and on.
between
will not
does
reception,
interference
Reorient
that
interference
recewer
can
user
or more
recewmg
equipment
into
occur
harmful
interference
be determined
is encouraged
of the
an outlet
technician
This
the
receiver,
Consult
Class
Canadian
measures:
on a circuit
FCC
Canadian
the
to correct
Increase
and the
with
to radio
to try
different
dealer
from
or
an
for help_
33
Rules
and
notice
-
B digital
Canadien
Cet
appareil
apparatus
meets
all requirements
Equipment
of the
Regulations.
num6rique
du
hoods to maintain compliance
Regulations.
Interference-Causing
Avis
exigences
the
to this device must be made with shielded cables
with metallic RFI/EMI connector
installa-
by turning
following
antenna.
is connected.
or television
in a particular
Connections
R_glement
de la classe
B respecte
sur le mat6riel
brouilleur
routes
les
du Canada,
_Troub!
_ Shoot!ngT!ps
Symptoms
items
"Ghost"
or
double
images
No
• This
to
a highly
° Check
that
• Unplug
the
and turn
No
picture
and
Actions
to
follow
may be caused by obstruction
Using
power
Check
directional
the
TV's
• Check
antenna
• Possible
AC
television,
on the
power
wait
at the
station
the
contrast
° Check
the
Closed
• Check
if you
and
is plugged
high rise buildings
or hills.
picture.
into
Then
bottom
trouble.
the
mains
re-insert
settings.
control.
the
correct
of the
Try another
brightness
Captions
selected
cord
due to
the
socket.
plug
into
the
mains
socket
again.
connections
° Adiust
antenna
may improve
for 60 seconds.
television
broadcast
to the
antenna
TV to see
Try another
Some
if they
are
properly
connected
to the
TV.
channel.
TEXT
auto
modes
could
picture
setting.
block
the
screen.
AV source.
No picture and power
switched on
• Your TV has a protective
mode in case there is too much heat build-up. Check the
clearance around the vents of the device to be certain there are no blocking walls or
cabinets which would limit the air flow.
Picture position
adjustment
When displaying a High Definition signal from the YPbPr inputs or HDNI input, if necessary, you can
adjust the picture position to the center of the screen with the cursor left/right or up/down buttons on
the remote control. This may be needed due to slight differences in output signals from different brands
and types of HD sources boxes.
Notes: Most High Definition receiver boxes also have picture-positioning controls in their menu
systems. If the TV cursor controls run out of range before the picture is correctly positioned, the
receiver box controls v,'iHneed to be adjusted.
No photo,
music or
video play or in poor
quality only
• Check
No sound
* Increase
if the source
complies
with a supported
code.
the VOLUME.
° Check that the TV is not muted, press the MUTE button on the remote control.
° When no signal is detected,
the TV automatically
switches offthe sound. This is proper
operation
and does not indicate a malfunction.
Good sound but poor
color or no picture
• Adiust
Snowish
noise
• Check the antenna
picture
Televlslon
and
the contrast,
not
• Check
whether
responding
to
remote
control
• Clean
the
• Operating
• Check
Control
devlces
of accessory
The software
install
will not
batteries
control
between
still use the
if the
remote
setting.
Try another
auto picture
setting.
connection.
the
remote
range
° You can
color, tint and brightness
are
sensor
working.
Replace
lens on the
TV and the
buttons
on the
control
is in the
remote
right
if necessary.
monitor.
control
side
of your
correct
should
not
energy
to see which operating
Standby
Your TV consumes
After
improper
shutdown
If your TV has been shutdown in an improper
TV again will take a longer time than usual.
Miscellaneous
See Extras,
Specifications
less than lw in the standby
on this user's
approximately
twenty
feet.
sensibility of other peripherals
Solution:
E.g. keep away a wireless headphone
from
systems
are supported.
mode.
way (e.g. power
manual.
34
than
mode.
° The infrared signals of the screen may influence the reception
replace the batteries of the remote control of other devices.
within a radius of approximately
four feet.
Possibly the operating system is wrong.
Go to www.usasupport.magnavox.com
be more
TV.
drop, power
cord plug out),
starting
up the
WARNING
concerning
stationary
images on the TV
Screen: Do not leave fixed images on the screen for extended
panel. Normal
not leave moving images on screen for extended
do, subtle "ghost"
Compact
periods of time. This can cause uneven aging of the LCD
use of the TV should involve viewing of programs that have constantly
periods of time. Do not display the same images too frequently;
images can be left on the LCD screen. Sources of stationary
Discs Interactive
(CD-i),
paused Digital Video Discs (DVDs)
Here are some common examples of stationary
• DVD menus list DVD content.
moving or changing images. Do
if you
images may be Laser discs, video games,
or video tapes.
images:
• Letter box black bars that appear at the top and bottom
of the TV screen when a wide screen (16:9) movie is viewed
on a TV with standard (4:3) aspect ratio. This occurs with some DVDs.
• Video game images and scoreboards
• Television station Iogos cause a problem
if they are bright and stationary.
Moving or low-contrast
graphics are
less likely to damage the picture tube.
. Stock market tickers may appear at the bottom
of the TV screen if the TV programming
. Shopping channel Iogos, pricing displays may be bright and may appear constantly
covers this news.
during the show.
These are usually apper in the same location on the TV screen.
TV
Location
. To avoid cabinet warping, cabinet color changes, and an increased chance of TV failure, do not place the TV
where temperatures
can become excessively hot -- for example, in direct sunlight or near a heating appliance.
. Allow a free flow of air around the TV.
Cleaning
. To avoid possible shock hazard, remove the TV's power cord from the electrical
. Regularly dust the TV with a dry, non-scratching
. When
outlet before cleaning.
duster.
cleaning the TV, take care not to scratch or damage the screen surface. Avoid wearing jewelry
anything abrasive. Do not use household
Use even, easy, vertical
. Occasionally
or using
cleaners. Wipe the screen with a clean cloth dampened with water.
strokes when cleaning.
vacuum the vents on the rear of the TV.
. Never use thinners,
the cabinet.
insecticide sprays, or other
chemicals on or near the cabinet. They may permanently
35
blemish
_.Annex
{ : MagnavoxTy
software
updrade
w!t h portable
memory
(not
supp!!ed) _
Introduction
Magnavox offers software upgrade capability
USB portable memory (not supp{ied).
for your TV using
After you have completed a software upgrade,
typically perform better.
What improvements are made depends on the
software you are using as well as the software
contained before the upgrade. You can execute
software upgrade procedure yourself.
Be aware that the content
of this document
technical or software
skilled users.
Preparing
a portable
software
memory
(not
your TV will
upgrade
your TV
the
is addressing
supplied)
for
upgrade
For the procedure you will require:
• A personal computer with web browsing capability.
• An archive utility that supports the ZIP-format (e.g.
WinZip for Windows
or Stufflt for Mac OS).
• A preferably
empty USB memory stick.
Note: Only FAT/DOS°formatted portable memory is
New software
can be obtained from your dealer
downloaded
from the www.usasupport.magnavox.com
O
_)
or can be
web site:
Go to www.usasupport.magnavo×.com
using the web
browser on your PC.
Follow the procedure
to find the information
and the software
related to your TV.
O
Select
PC.
the latest
software
upgrade
file and download
it to your
O
Decompress
the ZIP-file and copy the file "autorun.upg"
to the
root directory
of the USB portable
memory (not supplied).
Note: Only use software upgrades that can be found on the www.
usasupport.rnagnavox.corn web site.
Verifying
Settings
Insta!lation
the
Before
advised
O
of
the
TV
software
starting
the software
upgrade
procedure,
to check what the current TV software
Select
Press
version
Software
the
cursor
The Software
Select Current
description
{nfo
36
Upgrade
in the
Installation
it is
is.
menu.
right.
Upgrade
Software
of the
current
menu moves to the left panel.
}nfo to observe
the version
and the
software.
Automatic
_
Soltw_e
qp(r
de/s
i/_icatior/
Please wait.
software
upgrade
procedure
O Power off your TV and remove all memory devices.
Insert the USB portable memory (not supplied) that contains the
downloaded software upgrade.
_I Switch on your TV with the power switch (b at the right side of the
TV.
O At startup the TV will scan the USB portable memory (not
supplied) until it finds the update content. The TV will
automatically go to the upgrade mode. After a few seconds it will
display the status of the upgrade procedure.
Warning:
° You are not allowed to remove the USB portable memory (not
suppfied) during the software upgrade procedure:
o In case of a power drop during the upgrade procedure, don't
remove the USB portable memory (not supplied) from the T_Z
The TV will continue the upgrade as soon as the power comes bac£
o If you try to upgrade to a so:£ware version lower than the
current version, a confirmation will be asked_ Down grading to
older so,ware should only be done incase of real necessity_
o If an error occurs during the upgrade, you should retry the
procedure or contact your dealer.
0 When the sokware upgrade was successful, remove the USB
portable memory (not supplied) and restart your TV with the
power switch (_ at the right side of the TV.
Your TV will start up with the new software.
Note: Once the upgrade is _nished use your PC to remove the TV
software from your USB portable memory (not suppfied)_
Manual
JSettings
Installation
[Info
Softwareupgrade
software
upgrade
procedure
For a manual software upgrade copy the "autorun.upg" file in a
directory called "Upgrades" located in the root of the USB
portable memory (not supplied).
O Insert the portable memory (not supplied) that contains the downloaded software upgrade.
_) Select Software Upgrade in the Installation menu. Go to Local
upgrades/applications.
The TV will list all compatible images
available on the USB portable memory (not supplied) and display
the data for each selected upgrade image.
O Select the correct upgrade image and press the red color button to
start the upgrade. Your TV will restart and will automatically go to
the upgrade mode. After a few seconds it will display the status of
the upgrade procedure.
Warning:
If you try to upgrade to a software version equal or lower than the
current version, a confirmation will be aske& Downgrading to older
software should only be done in case of real necessity.
O When the sokware upgrade was successful, remove the USB
portable memory (not supplied) and restart your TV with the
power switch Cbat the right side of the TV. Your TV will start up
with the new
software.
37
_ L,_d _ L,\Vlo):|
Ninety
NAGNAVOX
warrants
material or workmanship,
as follows:
(90) Days Labor
& One
this product against defect in
subject to any conditions set forth
PROOF OF PURCHASE:
You must have proof of the date
of purchase to receive repair on the product. A sales receipt
or other document showing the product and the date that
you purchased the product as well as the authorized retailer
included, is considered such proof.
COVERAGE:
(If product
is determined
to be defective)
LABOR: For a period of ninety (90) days from the date of
purchase, Magnavox will repair or replace the product, at its
option, at no charge, or pay the labor charges to any Magnavox
authorized repair facility. After the period of ninety (90) days,
Magnavox will no longer be responsible for charges incurred.
PARTS: For a period of one (I) year from date of purchase,
Magnavox will supply, at no charge, new or rebuilt replacement
parts in exchange for defective parts. Magnavox authorized
service centers will provide removal and installation of the
parts under the specified labor warranty.
I I _ I/ i 3 DIYI_,I ;! ;L,I _ / /"
(I) Year
Parts & One
EXCLUDED
FROM
WARRANTY
Display
TO OBTAIN
WARRANTY
SERVICE IN THE
PUERTO
RICO, OR U.S. VIRGIN
ISLANDS...
Contact Magnavox Customer
Care Center at:
1-800-705-2000
TO OBTAIN
WARRANTY
1-800-661-6162
1-800-705-2000
SERVICE
U.S.A.,
IN CANADA...
(French Speaking)
(English or Spanish Speaking)
REPAIR OR REPLACEMENT AS PROVIDED UNDER THIS
WARRANTY
IS THE EXCLUSIVE REMEDY FOR THE
CONSUMER. MAGNAVOX
SHALL NOT BE LIABLE FOR
ANY INCIDENTAL
OR CONSEQUENTIAL
DAMAGES FOR
BREACH OF ANY EXPRESS OR IMPLIED WARRANTY
ON
THIS PRODUCT. EXCEPT TO THE EXTENT PROHIBITED
BY APPLICABLE LAW, ANY IMPLIED WARRANTY
OF
MERCHANTABILITY
OR FITNESS FOR A PARTICULAR
PURPOSE ON THIS PRODUCT IS LIMITED IN DURATION
TO THE DURATION
OF THIS WARRANTY.
Some states
incidental
how
service
within
how
do not allow
the
or consequential
long an implied
exclusions
DISPLAY: For a period of One (I) year from the date of
purchase, Magnavox will supply, at no charge, a new or rebuilt
active display device in exchange for the defective display.
Magnavox authorized service centers will provide removal and
installation of the parts under the specified labor warranty.
(PTV screens carry a thirty (30) day replacement warranty.)
(I) Year
may not
contract
ninety
(90)
damages,
warranty
with
days of the
warranty
or limitation
or allow
lasts, so the
apply to you.
agreement
long an implied
exclusions
the
limitations
above
In addition,
lasts does
on
limitations
if you enter
MAGNAVOX
date of sale, the
of
or
into
partnership
limitation
on
not apply.
COVERAGE
Your warranty does not cover:
• Labor chargesfor installation
or setup of the product,
adjust-mentof customer controlson the product,and
installation
or repairof antenna systems outsideofthe
product.
° Product repairand/or partreplacement because of
improper installation,
connectionsto improper voltage
supply, abuse, neglect, misuse, accident, unauthorized repair
or other cause not within the control of Magnavox.
° A product that requires modification or adaptation to enable
it to operate in any country other than the country for which
it was designed, manufactured, approved and/or authorized,
or repair of products damaged by these modifications.
• Damage occurring to product during shipping when
improperly packaged or costs associated with packaging.
• Product lost in shipment and no signature verification of
receipt can be provided.
° A product used for commercial or institutional purposes
(including but not limited to rental purposes).
• Products sold AS IS or RENEWED.
This warranty gives you specific legal rights. You may have other rights which vary from state/pr0vince to state/pr0vince.
a