1
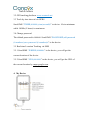
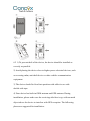
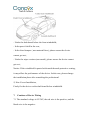
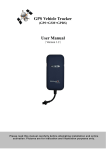
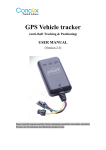
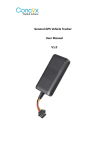
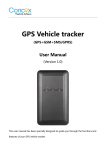
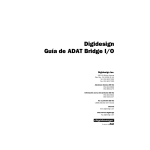
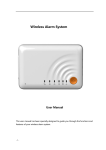
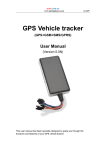
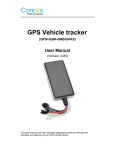
User Manual
(Version 2.0T)
This user manual has been specially designed to guide you through
the functions and features of your GPS vehicle tracker.
1.
Accessories
Charging cable (Standard)
2.
Specification
Dimension
Weight
Operation Temperature
Operation Voltage
Humidity
GSM Frequencies
GPRS
GPS Sensitivity
Acquisition Sensitivity
Position Accuracy
86.6(L) x 44(W) x 13.6(H) mm
Battery cables50.5g
(standard)
-20℃ - 70℃
9-36vDC
20% - 80%
850/900/1800/1900 MHz
Class 12
-159dBm
-144dBm
10m
Cold Start: <38s
TTFF (Open Sky)
Warm Start: <32s
Hot Start: <2s
GSM/GPS Antenna
Built-in design
LED Indicator
GSM-green, GPS-blue, Power-red
Data Transmit
TCP, SMS
Non-movement Detection
Movement alarm based on built-in 3D
motion sensor
Mileage Report
Track by time/distance interval
3. Quick Operation Instructions
Change APN parameter by sending SMS “APN,666666,APN name#” and
“SERVER,666666,1,www.cooaccess.net,8821,0# ”to the device.
3.1 Locate current position by GPRS/SMS
3.2 GPS tracking platform: www.cootrack.net
3.3 Track by time interval via GPRS
Send SMS “TIMER,666666,,time(second)#” to device. 10s in minimum
while 18000s (5 hours) in maximum.
3.4 Change password
The default password is 666666. Send SMS “PASSWORD,old password
(6 numbers),new password (6 numbers)#” to the device.
3.5 Real-time Location Tracking via SMS
3.5.1 Send SMS “WHERE,666666#” to the device, you will get the
current location of the device.
3.5.2 Send SMS “URL,666666#” to the device, you will get the URL of
the current location by maps.google.com.
4. My Device
5.
LED Indications
GPS LED Indicator
Flashing (1s on, 1s off)
Continuously bright
Continuously dark
Searching GPS signal
GPS fix
No GPS fix or initializing
GSM LED Indicator
Quick flashing
Continuously bright
Continuously dark
GSM initializing
Connected to GSM network
No GSM signal
Power Status
Flashing
Continuously bright
Continuously dark
Power on
Not working properly
Power off
6. Getting Started
Please follow below instructions for ensuring safe and correct use.
6.1 Insert the SIM Card
Place the SIM card into the device with the gold-colored side facing
down.
Note: Make sure there is enough credit on the SIM card. It is also
important that the SIM card has Called ID Display function. If you will
be using the GPRS function, you should pay attention to the current SIM
card GPRS charge.
6.2 1) To prevent theft of the device, the device should be installed as
covertly as possible.
2) Avoid placing the device close to higher power electrical devices, such
as reversing radar, anti-theft device or other vehicle communication
equipment.
3) The device should be fixed into position with cable ties or wide
double-side tape.
4) Your device has built-in GSM antenna and GPS antenna. During
installation, please make sure the receiving side face is up, with no metal
object above the device to interfere with GPS reception. The following
places are suggested for installation:
- Under the dash board below the front windshield;
- In the parcel shelf in the rear;
- In the front bumper ( non-material face), please ensure the device
cannot get wet;
- Under the wiper version (non-metal), please ensure the device cannot
get wet;
Notice: If the windshield is pasted with metal thermal-protective coating,
it may affect the performance of the device. In this case, please change
the installation place after consulting the professional.
5) Non Covert Installation,
Firstly fix the device on the dash board below windshield.
7. Cautions of Device Wiring
7.1 The standard voltage is 9V-36V, the red wire is the positive, and the
black wire is the negative.
7.2 Please connect the black wire to ground.
7.3 After connecting the power cord, run the power cord plug to the
device. After installation, supply power to device.
7.4 Covert installation: car battery cord is standard, with 2A FUSE for
short-circuit over current protection.
7.5 Non covert installation: cigar lighter cord is optional, with 2A FUSE
for short-circuit over current protection. Please contact your dealer if this
mode is needed.
8. Power On/ Off
8.1 The device will power on automatically when connected to power.
During normal operation, red power LED flashes, while blue GPS LED
and green GSM LED keep lighting. During signal searching process, GPS
or GSM LED will flash. If there is no light presenting on LEDs, the
device is not working normally.
8.2 The device will power off after power is disconnected.
9. Side Key Function
At normal-work indication status, press the side key, all the three LEDs
will extinguish and then the device will enter covert working mode. Press
the key again; the three LEDs will go back to normal-work indication
status.
10. Troubleshooting
10.1 If GPS cannot receive the signals normally, please drive to the open
areas for positioning. Generally, it needs 1-2 minutes to receive the first
coordinates. If the data cannot be received after 2-3 minutes, please check
the installation position of the device, making sure it is not being shielded
by any metal.
10.2 If GSM cannot receive the signals normally, please check whether
SIM card is installed correctly or there is no GSM signal at the current
location, such as a basement parking, please drive to a place covered by
GSM signal.
10.3 If the red LED does not work when power is connected, check
whether the fuse is blown. If so, please replace the fuse.
10.4 If the three LEDs do not turn on when power up, press the down side
key, if the three LEDs recover normally, the device is working normally.
10.5 If you have enabled the web based tracking application, and the
device displays off-line on the platform, please check 3 LEDs status
indicators first. You can check the status of the SIM card when you are in
an inconvenient situation. Please refer to the following steps:
1) Call the device to check whether you can get through.
2) Check whether the SIM card supports GPRS and a local APN.
3) Check the GSM/GPS reception area.
4) Check whether there is enough credit on the SIM card.
5) Check if the connector and terminal is loose or the fuse has blown out.
11. Please register and log onto our GPS platform by:
www.cootrack.net
The function on the GPS platform can be realized as follows:
Real-time Tracking
Receive and Display Alarms
Report and Statistics
Online Configuration
Warranty instructions and service
1. The warranty is valid only when the warranty card is properly
completed, and upon presentation of the proof of purchase consisting of
original invoice indicating the date of purchase, model and serial No. of
the product. We reserve the right to refuse warranty if this information has
been removed or changed after the original purchase of the product from
the dealer.
2. Our obligations are limited to repair of the defect or replacement the
defective part or at its discretion replacement of the product itself.
3. Warranty repairs must be carried out by our Authorized Service Centre.
Warranty cover will be void, even if a repair has been attempted by any
unauthorized service centre.
4. Repair or replacement under the terms of this warranty does not provide
right to extension or renewal of the warranty period.
5. The warranty is not applicable to cases other than defects in material,
design and workmanship.
Maintenance Record
Date
Serviced by
Product Model
IMEI Number
Fault Descriptions
Comments
ShenZhen Concox Information Technology CO.,Ltd
Tel: +86 755 2912 1200
Fax: +86 755 2912 1290
Add: 4/F, Building B, Gaoxinqi Industrial Park,
Liuxian 1st Road, No.67 Bao'an District, Shenzhen
www.iconcox.com