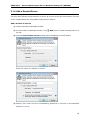
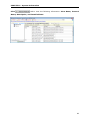
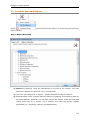
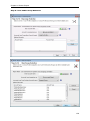
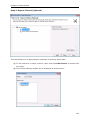
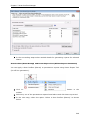
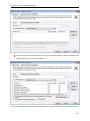
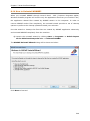
1
User Manual ARK for Windows Enterprise (ARKWE) Last Updated: January 2015 Copyright © 2015 Vyapin Software Systems Private Ltd. All rights reserved. This document is being furnished by Vyapin Software Systems Private Ltd for information purposes only to licensed users of the ARKWE software product and is furnished on an “AS IS” basis, that is, without any warranties, whatsoever, express or implied. ARKWE is a trademark of Vyapin Software Systems Private Ltd. Information in this document is subject to change without notice and does not represent any commitment on the part of Vyapin Software Systems Private Ltd. The software described in this document is furnished under a license agreement. The software may be used only in accordance with the terms of that license agreement. It is against the law to copy or use the software except as specifically allowed in that license. No part of this document may be reproduced or retransmitted in any form or by any means, whether electronically or mechanically, including, but not limited to the way of: photocopying, recording, or information recording and retrieval systems, without the express written permission of Vyapin Software Systems Private Ltd. Vyapin Software Systems Private Limited Website: http://www.vyapin.com/ Sales Contact: [email protected] Technical Support: [email protected] Table of Contents 1 2 General Information ................................................................................................... 1 1.1 About Admin Report Kit for Windows Enterprise (ARKWE) .............................................. 1 1.2 System Requirements ..................................................................................................... 2 1.3 Who Can Use ARKWE? .................................................................................................... 3 1.4 How to Activate the Software? ....................................................................................... 4 1.5 Technical Support ........................................................................................................... 6 Getting Started .......................................................................................................... 7 2.1 Configuration Wizard ...................................................................................................... 7 Configuration Settings ............................................................................................................ 13 3 4 2.1.1 Database Settings ......................................................................................................................... 13 2.1.2 Computer Enumeration ................................................................................................................ 15 2.1.3 Configuring Domain Credentials ................................................................................................... 16 2.1.4 Add a Domain/Server.................................................................................................................... 19 2.1.5 Edit a Domain/Server .................................................................................................................... 21 2.1.6 Delete a Domain/Server ............................................................................................................... 23 2.1.7 Add Domains from Forest ............................................................................................................. 24 2.1.8 Configure SMTP Server ................................................................................................................. 27 2.1.9 User Connection Profiles .............................................................................................................. 28 Standard Reports ..................................................................................................... 30 3.1 How to View Domain Information? ............................................................................... 30 3.2 How to View Shares and Resources Information? .......................................................... 33 3.3 How to View Users and Groups Information? ................................................................ 37 3.4 How to View Policies Information?................................................................................ 41 3.5 How to View Events Information? ................................................................................. 46 3.6 How to View Service Information? ................................................................................ 49 Built-in Reports ........................................................................................................ 51 4.1 About Built-in Reports .................................................................................................. 51 4.2 How to View Built-in Permissions Reports? ................................................................... 51 ii Table of Contents 5 6 7 4.3 How to View Built-in Reports for Shares and Resources? ............................................... 67 4.4 How to View Built-in Reports for Users and Groups? ..................................................... 71 4.5 How to View Built-in Reports for Domains? ................................................................... 75 System Information .................................................................................................. 79 5.1 About System Info ........................................................................................................ 79 5.2 How to View Network Configuration Reports? .............................................................. 81 5.3 How to View Operating System & Hot Fixes Reports? .................................................... 84 5.4 How to View Printer Configuration Reports? ................................................................. 86 5.5 How to View Hardware Configuration Reports?............................................................. 87 5.6 How to View Display Configuration Reports? ................................................................. 90 5.7 How to View Internet Explorer Configuration Reports? .................................................. 92 5.8 How to View Current Status Reports? ........................................................................... 93 5.9 How to View Environment Info Reports? ....................................................................... 94 Additional Features .................................................................................................. 95 6.1 How to customize fields? .............................................................................................. 95 6.2 How to Apply Filters?.................................................................................................... 96 6.3 How to Refresh Data? ................................................................................................... 98 6.4 How to Export Data?..................................................................................................... 98 6.5 How to E-mail Data? ................................................................................................... 100 6.6 How to Find Data in a Report? .................................................................................... 104 6.7 How to Scan Specific Servers in a Domain? .................................................................. 106 Power Export ......................................................................................................... 109 7.1 About Power Export ................................................................................................... 109 7.2 Task Manager-Scheduled Tasks Manager .................................................................... 110 7.3 Schedule Standard Reports ......................................................................................... 112 7.4 Schedule Built-in Reports ............................................................................................ 123 iii Table of Contents 8 7.5 Schedule Shares and Resources Built-in Reports .......................................................... 150 7.6 Schedule Users and Groups Built-in Reports ................................................................ 160 7.7 Schedule Domain Built-in Reports ............................................................................... 169 Scan Profiles Manager............................................................................................ 179 8.1 About Scan Profiles (Computers) ................................................................................. 179 8.2 How to Create Scan Profiles (Computers)?................................................................... 180 8.3 How to Manage Scan Profiles (Computers)? ................................................................ 185 8.4 How to Apply Scan Profiles (Computers)? .................................................................... 187 8.5 About Scan Profiles (Users/Groups) ............................................................................ 189 8.6 How to Create Scan Profiles (Users/Groups)? .............................................................. 189 8.7 How to Manage Scan Profiles (Users/Groups)? ............................................................ 193 8.8 How to Apply Scan Profiles (Users/Groups)? ............................................................... 195 8.9 About Scan Profiles (Shares) ....................................................................................... 199 8.10 How to Create Scan Profiles (Shares)? ...................................................................... 199 8.11 How to Manage Scan Profiles (Shares)? ................................................................... 202 8.12 How to Apply Scan Profiles (Shares)? ....................................................................... 204 References ........................................................................................................................... 208 9 8.13 Troubleshooting ...................................................................................................... 208 8.14 How to Uninstall ARKWE? ....................................................................................... 209 Index ...................................................................................................................... 213 iv Chapter 1 1 General Information 1.1 About Admin Report Kit for Windows Enterprise (ARKWE) Admin Report Kit for Windows Enterprise (ARKWE) is a powerful reporting solution for the Microsoft Windows Network. ARKWE collects configuration information about Windows domains & servers, users/groups, policies, events, services, installed applications, shares, permissions, printers, data sources etc. The reports are presented in a variety of formats that are simple, elegant and highly customizable for System Administrators, IT infrastructure Managers and Systems Audit personnel to use and act on. ARKWE's basket of Built-in reports provides powerful, ready-to-use reports that assist in both Management reporting and Compliance reporting requirements such as SOX and HIPPA. A single solution that serves your everyday needs of administrative tasks as well as complex data preparation tasks for assisting in compliance. ARKWE has been architected using the latest Microsoft .NET technology, bringing you the best-in-breed reporting solution for your entire Windows Network. ARKWE is highly optimized for performance (using native Windows API calls wherever appropriate), resulting in fast data collection of deeply embedded configuration data. Imagine scanning your vast network of workstations and servers without having to wait forever to see your reports! You can create data subsets for your network using our powerful scan options and meaningfully segment your entire network for data collection and reporting. ARKWE supports current versions of Microsoft Windows Server (2000/2003/2008/2012) and localized versions of Windows Server, including German, Spanish and French. 1 CHAPTER 1 - About Admin Report Kit for Windows Enterprise (ARKWE) 1.2 System Requirements For the computer running ARKWE Processor: Intel Pentium Processor Disk Space & Memory: 512 MB RAM and minimum of 20 MB of free disk space. Operating System: Windows 8 / Windows 7 / Windows Vista / Windows XP / Windows Server 2012 / Windows Server 2008 R2 / Windows Server 2008 / Windows Server 2003 / Windows Server 2000 with .NET Framework 4.0 or higher with the latest service packs. Database: Microsoft SQL Server 2008 (Enterprise / Standard / Developer / Express edition) or Microsoft SQL Server 2005 (Enterprise / Standard / Developer / Express edition) running in local / remote computer with latest Service Pack. Software: MDAC v2.5/2.6/2.8 For the Computers Reported by ARKWE Windows 8 / Windows 7 / Windows Vista / Windows XP / Windows Server 2012 / Windows Server 2008 R2/ Windows Server 2008 / Windows 2003 / Windows 2000 with Microsoft Remote Registry Service enabled. 2 CHAPTER 1 - About Admin Report Kit for Windows Enterprise (ARKWE) 1.3 Who Can Use ARKWE? Organizations running Microsoft Windows Servers can greatly benefit from ARKWE. It is a powerful reporting tool for Windows Server Administrators. System Administrators can monitor and manage Microsoft Windows Servers across the enterprise network in any location. You can connect to a Windows Server if you are part of global administrator's group. Typical Users Systems management personnel System Administrators Other Windows network product developers Trainers and educators Enterprise network planning personnel Typical Organizations that would benefit from this Product: Companies having their LAN/WAN based Windows Enterprise Networks Windows based data warehousing companies Windows Server based Internet Service Providers Companies having Windows based Intranets Any company having Windows Servers and planning to manage their systems 3 CHAPTER 1 - About Admin Report Kit for Windows Enterprise (ARKWE) 1.4 How to Activate the Software? Once you purchase the software online or through any one of our resellers, you will receive a sale notification through e-mail from our sales department. We will send you an e-mail with the necessary instructions to activate the software. In case you do not receive an e-mail from our sales team after you purchase the software, please send the following information to our sales department at [email protected] with the sales order number: Company Name: End-user Company Name Location: City & Country for the Company Name given above Please allow 12 to 24 hours from the time of purchase for our sales department to process your orders. Image 1 - Activate screen Perform the following steps to activate the software: 1) Download evaluation/trial copy of software from the respective product page available in our website at http://www.vyapin.com/ 2) Install the software on the desired computer. 3) You will receive a license key through e-mail as soon as the purchase process is complete. 4) Click 'Activate' in Help -> About -> Activate menu to see the Activate dialog (as shown in Image 1). 4 CHAPTER 1 - About Admin Report Kit for Windows Enterprise (ARKWE) 5) Copy the license key sent to you through email, and pastes it in the 'License Key' textbox. For help on how to copy the license key, click 'Click here to see how to copy and paste the license key' link in the Activate dialog (as shown in Image 2). Image 2 - How to copy license key screen 5 CHAPTER 1 - About Admin Report Kit for Windows Enterprise (ARKWE) 1.5 Technical Support ARKWE Frequently Asked Questions (FAQ) section is available online at our website http://www.vyapin.com. Please direct all technical support questions to [email protected]. Include the following information to expedite a response: a) Include the version of the product you are using. b) If the problem is associated with installation, include the steps that led to the problem. c) If the problem is associated with usage, please state the series of steps you performed. d) Include the version of the OS, info about any service packs or hot-fixes and local language of the OS installed. e) Attach the Error Log File available in the common application data path of ARKWE (e.g., <Application Data Folder> \ARKWE 8x\ARKWEErrorLog.log). NOTE: <Application Data Folder> is the common area where ARKWE settings will be stored in the machine running ARKWE. The <Application Data Folder> can be found from the Help -> About screen. The default path of <Application Data Folder> is as follows: a) Windows XP Windows 2003-C:\Documents and Settings\All Users\Documents b) Windows Vista, Windows 7, Windows 8, Windows 2008, Windows Server 2012 C:\Users\Public\Documents 6 CHAPTER 1 - About Admin Report Kit for Windows Enterprise (ARKWE) 2 Getting Started 2.1 Configuration Wizard Configure ARKWE There are two ways to configure ARKWE - one through the configuration wizard and the other by directly modifying the specific configuration settings. Using ARKWE Configuration Wizard ARKWE configuration wizard will help you configure the application during the startup of the first run. You can access the wizard anytime by choosing Tools > Configuration Wizard from the main application menu. Click Next to proceed. 7 CHAPTER 1 - About Admin Report Kit for Windows Enterprise (ARKWE) Step 1 of 3: Database Settings ARKWE may be configured to use either MS-Access MDB or SQL Server database for its data storage to generate reports. If you choose SQL server, ARKWE requires an SQL Server running SQL Server 2012 / 2008 / 2005 (Enterprise / Standard / Express editions) to connect and create a database. ARKWE will connect to the specified SQL Server based on the authentication mode and the user credentials to create and manage its own application databases. Database will be created in the specified SQL server based on the following database options (whichever is selected): 1) Use a single central database for all instances of the application A new database will be created in the SQL server by the name ARKWE. Inside the ARKWE database, separate tables will be created for each installation of ARKWE. The table names will be prefixed with the computer name that is running ARKWE application. Thus, each installation of ARKWE will deploy its own tables based on the computer where ARKWE is installed. For example, if you install the software on 3 different computers, single database with 3 different tables will be created inside the single database and each installed application will generate reports separately independent of each other. 8 CHAPTER 1 - About Admin Report Kit for Windows Enterprise (ARKWE) 2) Use a separate database for each instance of the application A new database will be created in the SQL server by the name ARKWE<COMPUTERNAME>, where COMPUTERNAME stands for the computer name that is running ARKWE application. Thus, each installation of ARKWE will deploy its own database based on the computer where ARKWE is installed. For example, if you install the software on 3 different computers, 3 different databases will be created and each installed application will generate reports separately independent of each other. Specify the SQL Server name, authentication mode, user name and password in the above screen. Click Next to proceed. Step 2 of 3: Computer Enumeration ARKWE uses Computer Browser Services or Active Directory services for enumerating computers in your domain. In order to automatically enumerate computers in your network, the application may be configured to use either the Computer Browser Service (uses Windows Network APIs) or your Active Directory (queries your AD for Computer Accounts). 1) Use Computer Browser Service Uses Windows Network API to enumerate computers in a domain. This displays all the computers that are currently active in your Network. This option may be used if you have a small network for faster enumeration of computers. 2) Use Active Directory Services Queries your Directory Server to enumerate its computers. This option requires Domain Administrator credentials to connect to your domain controller. 9 CHAPTER 1 - About Admin Report Kit for Windows Enterprise (ARKWE) Click Next to Proceed. Step 3 of 3: Domain Credentials Manage alternate credentials for Domain / Directory Servers. The application by default uses the currently logged on user context to enumerate computers, shares and to collect report data. If you want to specify alternate Domain Administrator credentials you may do so by clicking on the 'Add ' button below. Click 'Add domains from forest' option to enumerate domains from a different forest and then supply necessary credentials for the selected domain. 10 CHAPTER 1 - About Admin Report Kit for Windows Enterprise (ARKWE) For more information on Domain Credentials please refer Domain Credentials. Click Finish to save the configuration details. Using the Configuration Settings Dialog You may directly modify the configuration settings, once you get familiar with the user interface. You may access the Configuration Settings menu from the Tools menu in the application. Once you open the Settings window, you will see the different modules for configuration. 11 CHAPTER 1 - About Admin Report Kit for Windows Enterprise (ARKWE) 12 CHAPTER 1 - About Admin Report Kit for Windows Enterprise (ARKWE) Configuration Settings 2.1.1 Database Settings ARKWE may be configured to use either MS-Access MDB or SQL Server database for its data storage to generate reports. If you choose SQL server ARKWE requires an SQL Server running SQL Server 2005 / 2008 / 2012 (Enterprise / Standard / Express editions) to connect and create a new application database. ARKWE will connect to the specified SQL Server based on authentication mode and user credentials to manage its own application database. You can access the Database settings by clicking Tools -> Configuration Settings menu in the ARKWE main application window and choose Database settings, as shown below: User Authentication To connect to SQL Server, ARKWE uses the relevant user accounts based on the authentication mode as listed below: 13 CHAPTER 1 - About Admin Report Kit for Windows Enterprise (ARKWE) A. Windows Authentication: In this method, ARKWE uses the currently logged on user account while running reports B. SQL Authentication: In this method, ARKWE uses the specified SQL user account and password while running reports. ARKWE stores the SQL user name and password as a user profile in 'Stored User Names and Passwords' applet for its usage. Note: ARKWE expects the user account to have sufficient privileges to create, add to and delete database in the SQL server. Database Creation ARKWE creates databases in SQL Server based on the following database options (whichever is selected) as outlined below: 1) Use a single central database for all instances of the application A new database will be created in the SQL server by the name ARKWE. Inside the ARKWE database, separate tables will be created for each installation of ARKWE. The table names will be prefixed with the computer name that is running ARKWE application. Thus, each installation of ARKWE will deploy its own tables based on the computer where ARKWE is installed. For example, if you install the software on 3 different computers, single database with 3 different tables will be created inside the single database and each installed application will generate reports separately independent of each other. 2) Use a separate database for each instance of the application ARKWE creates a single application database in the default data storage location used by the SQL Server during application launch. ARKWE uses the following naming convention: ARKWE-<COMPUTERNAME>, where COMPUTERNAME is the name of the computer running ARKWE. For example, if the computer running ARKWE is ‘CLIENT01’, ARKWE creates 'ARKWE-CLIENT01' with data ('ARKWE-CLIENT01.mdf') and log (''ARKWECLIENT01_log.LDF') files stored in the default SQL data folder in the SQL server (for example, C:\Program Files\Microsoft SQL Server\MSSQL.1\MSSQL\Data). Database Cleanup ARKWE will delete the application database while uninstalling the ARKWE application from the computer. 14 CHAPTER 1 - About Admin Report Kit for Windows Enterprise (ARKWE) 2.1.2 Computer Enumeration Configure Computer Enumeration For enumerating computers in your network automatically, ARKWE uses either Computer Browser Service or Active Directory Services. Select an option for enumerating computers in your domain as shown below. You may use the Browser service if you have a smaller network, as it may take time for the Browser service to respond to data requests on large networks. The advantage of a Browser service is that it lists only those computers that are currently active or alive on your network. You may use the Active Directory Services option if you have a large network and you need a quicker enumeration of computers in your domain. However, this option requires that the domain controller is contacted and queried. Therefore, the currently logged on user must have sufficient privileges to connect to a domain controller or you may specify alternate domain credentials for a domain controller (see configuring the Domain Credentials section in the wizard). NOTE: IF you use the Browser service, ensure that NETBIOS over TCP/IP is enabled in both the client and the computers that need to be reported on. The Browser service must also be running. You can access the Computer Enumeration settings by clicking Tools -> Configuration Settings menu in the ARKWE main application window and selecting "Computer Enumeration" node as shown below: 15 CHAPTER 1 - About Admin Report Kit for Windows Enterprise (ARKWE) 2.1.3 Configuring Domain Credentials Domain Credentials Manage alternate credentials for Domain / Directory Servers. The application by default uses the currently logged on user context to enumerate computers, shares and to collect report data. If you want to specify alternate Domain Administrator credentials you may use this option. Configuring Domain Credentials You can access the Domain Credentials settings by selecting the Domain Credentials option in the Configuration Settings window. If you have chosen Active Directory Services under the Computer Enumeration settings, you can launch the ARKWE Domain Credentials window within a report window by doing the following: 1) Select any one of the reports from the ARKWE main application window. For example Standard Reports -> Domains-Shares option. 2) The action will launch the Domains-Shares report window. 16 CHAPTER 1 - About Admin Report Kit for Windows Enterprise (ARKWE) 3) In the report window, at the bottom of the treeview click Add Domains button. This action will launch the "Domain Credentials" window as shown below. 17 CHAPTER 1 - About Admin Report Kit for Windows Enterprise (ARKWE) The various operations that can be performed in the Domain Credentials screen are given below: Operation Description Add To Add a new domain to the list. Edit To Edit the properties of a domain/server in the list. Select a domain/server and click Edit button. Delete To Delete a domain/server from the list. Select a domain/server and click Delete button. Connect To connect to a domain/server in the list. Select a domain/server and click Connect button. 18 CHAPTER 1 - About Admin Report Kit for Windows Enterprise (ARKWE) 2.1.4 Add a Domain/Server You may also add one single domain or server at a time to the list of domains or servers in the credentials list by using Add Domain/Server feature. Add a domain to the list 1) Launch Domain Credentials window. 2) In the Domain Credentials window, click Add button to add a domain/server to the list. 3) The New Add domain/server dialog will be displayed as shown below: Enter the name of a domain or server. 4) Specify user name and the corresponding password to connect to the specified domain or server. 19 CHAPTER 1 - About Admin Report Kit for Windows Enterprise (ARKWE) Store the above user credential in Microsoft Windows Stored User Names and Passwords applet - ARKWE allows the user to enter different user credentials to connect to the domain/server. Uncheck the checkbox 'Log on using current user' if you like to connect to the domain/server using a different user context. ARKWE will store the user credential to connect to domain/server in the Microsoft Windows Stored User Names and Passwords applet / Credential Manager for security reasons. The stored user profile is tied to the user context (currently logged on user account) in which the profile is created. 5) Click OK to add the domain/server to the Domain Credentials list. 6) ARKWE will connect to the domain/server with the newly provided connection parameters and add it to the list, upon successful connection to the domain/server. 7) Click Cancel to abort the add process of the domain/server to the Domain Credentials list. 20 CHAPTER 1 - About Admin Report Kit for Windows Enterprise (ARKWE) 2.1.5 Edit a Domain/Server To Edit a domain/server in the Domain Credentials, follow the steps given below: 1) Launch Domain Credentials window. 2) In the Domain Credentials window, select any row (domain), Click Edit button to Edit an existing domain/server in the list, as shown below: 3) The domain/server name cannot be modified during the edit operation. 4) Specify user name and the corresponding password to connect to the specified domain/server. 5) Click OK to save and connect to the domain/server with the newly provided connection parameters and update the domain/server in the Domain Credentials list. 6) ARKWE will connect to the domain/server with the newly provided connection parameters and modify it in the list, upon successful connection to the domain/server. 21 CHAPTER 1 - About Admin Report Kit for Windows Enterprise (ARKWE) 7) Click Cancel to retain the existing connection parameters of the domain/server in the Domain Credentials list. 22 CHAPTER 1 - About Admin Report Kit for Windows Enterprise (ARKWE) 2.1.6 Delete a Domain/Server Perform the following steps to delete a domain/server: 1) Launch Domain Credentials window. 2) In the Domain Credentials window, select any row (domain), click Delete button to delete the forest from the Domain Enumeration Manager list. 3) An alert message asking for confirmation to delete the domain/server will be displayed as shown below: 4) Click Yes to delete the selected forest. 5) Click No to abort the delete process of the selected forest. 23 CHAPTER 1 - About Admin Report Kit for Windows Enterprise (ARKWE) 2.1.7 Add Domains from Forest In order to connect to a different forest in your Active Directory and configure these domains for enumerating computers and generating reports on them, you may use the ‘Add Domains from Forest’ feature. Add domains from forest to the list 1) Launch Domain Credentials window. 2) In the Domain Credentials window, click to add domains from forest button to add domains in the forest to the list. 3) The Enumerate All domains in a forest dialog will be displayed as shown below: Enter the name of a forest. 24 CHAPTER 1 - About Admin Report Kit for Windows Enterprise (ARKWE) 4) Specify user name and the corresponding password to connect to the specified forest. Store the above user credential in Microsoft Windows Stored User Names and Passwords applet - ARKWE allows the user to enter different user credentials to connect to the forest. Uncheck the checkbox 'Log on using current user' if you like to connect to the forest using a different user context. ARKWE will store the user credential to connect to forest in the Microsoft Windows Stored User Names and Passwords applet / Credential Manager for security reasons. The stored user profile is tied to the user context (currently logged on user account) in which the profile is created. 5) Click 'Show Domains' button to add the domains in the specified forest to the list and select the desired domains in the list. Click OK to add the selected domains to the Domain Credentials list as shown below: 25 CHAPTER 1 - About Admin Report Kit for Windows Enterprise (ARKWE) 6) ARKWE will add the selected domains to the Domain Credentials list. 26 CHAPTER 1 - About Admin Report Kit for Windows Enterprise (ARKWE) 2.1.8 Configure SMTP Server ARKWE provides the option to e-mail the reports generated. For e-mailing reports, ARKWE requires SMTP Server, From E-mail Address, To E-mail Addresses (recipients separated by semicolon) and the e-mail report format. ARKWE maintains a single SMTP Server and a From E-mail Address for use by all reports. You can specify a separate set of “To” e-mail addresses (recipients), e-mail report format, subject and body of the message for each report. You can set SMTP Server and From Address by clicking Tools -> Configuration Settings menu in the ARKWE main application window, as shown below: 27 CHAPTER 1 - About Admin Report Kit for Windows Enterprise (ARKWE) 2.1.9 User Connection Profiles ARKWE creates a user profile in Windows Stored User Names and Passwords applet / Credential Manager, in order to store the domain user context for enumerating servers using ADSI. The stored user profile will be useful for generating reports using ARKWE under the following scenarios: Using an alternate user account to connect to the domain to retrieve servers using ADSI. Providing credentials that have sufficient rights to enumerate shares present in computers within a domain. The stored user profile persists for all subsequent logon sessions on the same computer where ARKWE is installed. The stored user profiles are visible to the application under other logon sessions on the same computer. The stored user profile created by ARKWE is restricted to the Windows User Profile context. If the Windows User Profile is maintained locally, ARKWE stored user profile is accessible only by the same user in the same computer. If the user who creates ARKWE stored user profile, has a Roaming user account in the enterprise, the ARKWE stored user profile can be accessed by the same user in any computer in the Windows enterprise. The stored user profile is a generic credential of Windows Stored User Names and Passwords applet / Credential Manager and can be used by the application only. The credential information is stored securely in a 256 bit encrypted format in Windows Stored User Names and Passwords applet / Credential Manager. The stored user profile corresponding to the user account will be used by the application in order to connect to the domain, if 'Use ADSI' is selected in ARKWE Enumeration Settings. Using the Connection Profile dialog shown below, new profile can be created and available profiles can be removed from the profiles list. 28 CHAPTER 1 - About Admin Report Kit for Windows Enterprise (ARKWE) Click Add button to add a new profile and a dialog will appear as shown below: Click Edit button in the Connection Profile dialog to edit available profiles. Click Remove button in the Connection Profile dialog to remove available profiles. 29 Chapter 2 3 Standard Reports 3.1 How to View Domain Information? Domain Summary Information Click to view domain summary information for a domain. The summary report lists information like computer's operating system, browsing capability, participation in LanMan networks, membership in Windows workgroups etc., for the server(s) in the domain. NOTE: For information on restricting the domain scan for generating this report, please see 'How to scan specific servers in a domain?' The output would be displayed as shown below: 30 CHAPTER 2 – Standard Reports Domain Trust Information Click to view the trusted and trusting domains for a given domain. Domain Shares Information Click to view the shares for a given domain. 31 CHAPTER 2 – Standard Reports Domain Application Information Click to view the applications installed for a given domain. NOTE: For information on restricting the domain scan for generating this report, please see How to scan specific servers in a domain? 32 CHAPTER 2 – Standard Reports 3.2 How to View Shares and Resources Information? Click to view the following information: Share Name, Path, User Name, Security, Maximum, and Comment How to View Permissions of Folders in a Share? Click tab. The “Folders and Permissions” dialog appears. 33 CHAPTER 2 – Standard Reports You can view permissions of folder(s) in a share or for all the shares in the selected server by selecting “All shares” option or “Select share(s)” option respectively. You can also optionally include the sub-folder(s) information by selecting the “Include sub-folders” option. The sub-folder(s) having permissions identical as the parent folder would be shown in bold text with "Same as parent" in both User Name and Security fields in the report. If you do not want folders with identical permissions as the parent folder reported, then select, the "Do not display folders that have same permissions as the parent folder" option. This option will not report folders with identical permissions as the parent folder. To view up to a certain level of sub-folders, select the "Traverse only 'n' level(s) of subfolder in the share" option and specify a sub-folder level, where the levels are numbered as follows: \\server\sharename\Level 1\Level 2\Level 3... NOTE: The "Include sub-folders" option defaults to enumerating all the sub-folders unless you specify a sub-folder level in "Traverse only 'n' level(s) of sub-folder in the share" option. NOTE: The "Do not display folders that have same permissions as the parent folder" option would be enabled by default. 34 CHAPTER 2 – Standard Reports The report would be displayed as shown below: How to view permissions of files in a share? Click tab. The "Files and Permissions" dialog appears. You can view permissions of files in a share or for all the shares in the selected server by selecting "All shares" option or "Select share(s)" option respectively. 35 CHAPTER 2 – Standard Reports You can also optionally include the sub-folder(s) information by selecting the "Include sub-folders" option. The files having permissions identical to the parent folder would show up with "Same as parent" in both User Name and Security fields in the report. If you do not want files with identical permissions as the parent folder reported, then select, the "Do not display files that have same permissions as the parent folder" option. This option will not report files with identical permissions as the parent folder. To view up to a certain level of sub-folders and files, select the "Traverse only 'n' level(s) of sub-folder in the share" option and specify a sub-folder level, where the levels are numbered as follows: \\server\sharename\Level 1\Level 2\Level 3... NOTE: The "Include sub-folders" option defaults to enumerating all the sub-folders unless you specify a sub-folder level in "Traverse only 'n' level(s) of sub-folder in the share" option. NOTE: The "Do not display files that have same permissions as the parent folder" option would be enabled by default. The report would be displayed as shown below: 36 CHAPTER 2 – Standard Reports 3.3 How to View Users and Groups Information? Click on to view the following information: User Name, Full Name, Description, Home Path, Logon Script, and User Profile Path. Click on to view the following information: User Name, Full Name, Description, Account Expiry, Password Editable, Password Age, Account Locked, and Account Disabled. 37 CHAPTER 2 – Standard Reports Click on to view the following information: User Name, Logon Machines, Last Logon. 38 CHAPTER 2 – Standard Reports Click on to view the following information: Displays privilege lists on a per-user and per-privilege basis. Click on to view the following information: Displays group lists on a per-user and per-group basis. 39 CHAPTER 2 – Standard Reports Click on to view the following information: Displays group member’s lists on a per-group basis 40 CHAPTER 2 – Standard Reports 3.4 How to View Policies Information? Click to view the following information: Enforce Password History, Maximum Password Age, Minimum Password Age, Minimum Password Length; Password must meet complexity requirements, Store password using reversible encryption for all domain users 41 CHAPTER 2 – Standard Reports Click tab to view the following information: Account Lockout Duration, Account Lockout Threshold, and Reset Account Lockout Click to view the following information: Policy Name, Log Success, and Log Failure 42 CHAPTER 2 – Standard Reports Click to view the following information: Privilege, Account Name 43 CHAPTER 2 – Standard Reports Click to view the following information: Policy Name, Value Click to view the following information: Policy Name, Description, Policy Assigned, and Last Modified 44 CHAPTER 2 – Standard Reports 45 CHAPTER 2 – Standard Reports 3.5 How to View Events Information? Click to view the following information: Event Date, Event Time, Description, Source Name, Event End, Computer Name, User Name, Event Type, and Category Click to view the following information: Event Date, Event Time, Description, Source Name, Event End, Computer Name, User Name, Event Type, and Category 46 CHAPTER 2 – Standard Reports Click to view the following information: Event Date, Event Time, Description, Source Name, Event End, Computer Name, User Name, Event Type, and Category 47 CHAPTER 2 – Standard Reports Click to view the following information: Opens the saved log stored in current system or network share. 48 CHAPTER 2 – Standard Reports 3.6 How to View Service Information? Click to view the following information: Display Name, Start up, Service Type, Account, and Current State Click to view the following information: Display Name, Service Name, Error Control, Group, and Path 49 CHAPTER 2 – Standard Reports Click to view the following information: Display Name, Dependencies 50 Chapter 3 4 Built-in Reports 4.1 About Built-in Reports Built-in reports are a set of predefined reports that are based on some of the common tasks in Systems management reporting. Built-in reports are easy to use and speeds-up the report generation process. Built-in reports encompass some of the significant standard resource reports, and added to that, additional reports, all of which could be generated across domains. The built-in reports feature provides reports on the following resource categories: Permissions Reports Shares and Resources Users and Groups Domains 4.2 How to View Built-in Permissions Reports? Permissions Reports Permissions Reports includes reports that focus solely on reporting the access permissions assigned to users and groups on objects such as folders etcetera. Click on button under Built-in Reports in button in the toolbar. 51 CHAPTER 3 – Built-in Reports List of Permissions Reports Report Name Description List of permissions for specific users and groups on folders Reports the folder permissions assigned to specific users and/or groups on a selected set of folders. List of permissions for folders Reports the permissions associated with a selected set of folders. List of permissions for specific users and groups on files Reports the files permissions assigned to specific users and/or groups under a selected set of folders. List of permissions for files Reports the permissions associated with files under a selected set of folders How to View Built-in Permissions Reports? List of Permissions for Specific Users and Groups on Folders This report allows you to view folder permissions for specific users and groups. Click on button under Built-in Reports button in the toolbar. The Built-in Reports window with the list of reports will be displayed as shown below: Step 1: Report Selection Select the report to be generated. Only one report can be generated at a time. 52 CHAPTER 3 – Built-in Reports Click Next to proceed to the next step. Step 2: Select User/Group Accounts: Select user and/or group accounts for which you would like to view the permissions for folders/files. 53 CHAPTER 3 – Built-in Reports Enter the name of User/Group in domain\account name format and click Add to List to add the name to selected accounts list Use Select a Scan Profile (Users/Groups) option to use the users and groups added in the profile. Use Browse and Select option to retrieve users and groups from servers or Scan Profile (Computers). Use the Find option to search desired user/group accounts. Click Next to Proceed. 54 CHAPTER 3 – Built-in Reports Step 3: Select shared folders Select one or more servers to retrieve available shares. 55 CHAPTER 3 – Built-in Reports You may also type the UNC path of a folder that is not in the list, such as a folder that is not shared, and then click Add, to add it to the list. In addition, you may also import a list of UNC paths to shared and non-shared folders from a text file by using the Import button. Folders that have identical permissions as the parent folder would show up with "Same as parent" in User Name and/or Security fields in the report. However, if you do not want folders with identical permissions as the parent folder reported, then select Do not display folders that have same permissions as the parent folder option. This option will not report folders with identical permissions as the parent folder. NOTE: The "Do not display folders that have same permissions as the parent folder" option would be enabled by default. ARKWE defaults to scanning all the sub-folders under a given shared folder. If you want to change the Include sub-folders and Folder level options click Edit Folder Options Click OK to Proceed. Click Finish to generate the selected report. After the data collection process is complete, the report would be generated in a report window as shown below: 56 CHAPTER 3 – Built-in Reports How to view Built-in Permissions Reports? List of Permissions for Folders Click on button under Built-in Reports button in the toolbar. The Built-in Reports window with the list of reports will be displayed as shown below: Step 1: Report Selection Select the report to be generated. Only one report can be generated at a time. Click Next to the Proceed to the Next Step. 57 CHAPTER 3 – Built-in Reports Step 2: Select shared folders: Select one or more servers to retrieve available shares You may also type the UNC path of a folder that is not in the list, such as a folder that is not shared, and then click Add, to add it to the list. In addition, you may also import a 58 CHAPTER 3 – Built-in Reports list of UNC paths to shared and non-shared folders from a text file by using the Import button. Folders that have identical permissions as the parent folder would show up with "Same as parent" in User Name and/or Security fields in the report. However, if you do not want folders with identical permissions as the parent folder reported, then select Do not display folders that have same permissions as the parent folder option. This option will not report folders with identical permissions as the parent folder. NOTE: The "Do not display folders that have same permissions as the parent folder" option would be enabled by default. ARKWE defaults to scanning all the sub-folders under a given shared folder. If you want to change the Include sub-folders and Folder level options click Edit Folder Options. Click OK to Proceed. Click Finish to generate the selected report. After the data collection process is complete, the report would be generated in a report window as shown below: 59 CHAPTER 3 – Built-in Reports How to view Built-in Permissions Reports? List of Permissions for Specific Users and Groups on Files This report allows you to view file permissions for specific users and groups. Click on button under Built-in Reports button in the toolbar. The Built-in Reports window with the list of reports will be displayed as shown below: Step 1: Report Selection Select the report to be generated. Only one report can be generated at a time. Click Next to Proceed to the Next step. Step 2: Select User/Group Accounts: Select user and/or group accounts for which you would like to view the permissions for folders/files. 60 CHAPTER 3 – Built-in Reports Enter the name of User/Group in domain\account name format and click Add to List to add the name to selected accounts list. Use Select a Scan Profile (Users/Groups) option to use the users and groups added in the profile. Use Browse and Select option to retrieve users and groups from servers or Scan Profile (Computers). Use the Find option to search desired user/group accounts. Click Next to Proceed. 61 CHAPTER 3 – Built-in Reports Step 3: Select Shared Folders Select one or more servers to retrieve available shares. 62 CHAPTER 3 – Built-in Reports You may also type the UNC path of a folder that is not in the list, such as a folder that is not shared, and then click Add, to add it to the list. In addition, you may also import a list of UNC paths to shared and non-shared folders from a text file by using the Import button. Folders that have identical permissions as the parent folder would show up with "Same as parent" in User Name and/or Security fields in the report. However, if you do not want folders with identical permissions as the parent folder reported, then select Do not display folders that have same permissions as the parent folder option. This option will not report folders with identical permissions as the parent folder. NOTE: The "Do not display folders that have same permissions as the parent folder" option would be enabled by default. ARKWE defaults to scanning all the sub-folders under a given shared folder. If you want to change the Include sub-folders and Folder level options click Edit Folder Options. Click OK to Proceed. Click Finish to generate the selected report. After the data collection process is complete, the report would be generated in a report window as shown below: 63 CHAPTER 3 – Built-in Reports How to View Built-in Permissions Reports? List of Permissions for Files This report allows you to view the associated permissions for specific files. Click on button under Built-in Reports button in the toolbar. The Built-in Reports window with the list of reports will be displayed as shown below: Step 1: Report Selection Select the report to be generated. Only one report can be generated at a time. Click Next to Proceed to the Next step. 64 CHAPTER 3 – Built-in Reports Step 2: Select Shared Folders: Select one or more servers to retrieve available shares 65 CHAPTER 3 – Built-in Reports You may also type the UNC path of a folder that is not in the list, such as a folder that is not shared, and then click Add, to add it to the list. In addition, you may also import a list of UNC paths to shared and non-shared folders from a text file by using the Import button. Folders that have identical permissions as the parent folder would show up with "Same as parent" in User Name and/or Security fields in the report. However, if you do not want folders with identical permissions as the parent folder reported, then select Do not display folders that have same permissions as the parent folder option. This option will not report folders with identical permissions as the parent folder. NOTE: The "Do not display folders that have same permissions as the parent folder" option would be enabled by default. ARKWE defaults to scanning all the sub-folders under a given shared folder. If you want to change the Include sub-folders and Folder level options click Edit Folder Optionsfolders and Folder level options click Edit Folder Options. Click OK to Proceed. Click Finish to generate the selected report. After the data collection process is complete, the report would be generated in a report window as shown below: 66 CHAPTER 3 – Built-in Reports 4.3 How to View Built-in Reports for Shares and Resources? Shares and Resources Reports The Shares and Resources reports can be generated against domain(s) and specific server(s) as well. Click on toolbar. button under Built-in Reports in button in the The Built-in Reports window with the list of reports will be displayed as shown below: Step 1: Report Selection Select the report to be generated. Only one report can be generated at a time. Click Next to proceed to the next step. 67 CHAPTER 3 – Built-in Reports Step 2: Select Domain (s) / Server(s) Select the server(s)/Domain (s), for which the report needs to be generated. The default option selected is All Domains, for all the reports. Click Next to proceed to the next step. 68 CHAPTER 3 – Built-in Reports Step 3: Select Report Criteria To view the part of the report that is of more significance, change the report criteria settings. Only the data that matches the specified criteria will be displayed in the generated report. Click Finish to generate the selected report. After the data collection process is complete, the report would be generated in a report window as shown below: 69 CHAPTER 3 – Built-in Reports List of Reports: Report Name Description List of Shares Reports all the shares and their properties excluding the permission information. List of Shares with Permissions Reports all the shares and their properties including the permission information. 70 CHAPTER 3 – Built-in Reports 4.4 How to View Built-in Reports for Users and Groups? Users and Groups Reports The Users and Groups reports, contains reports that can be generated against domain(s) and specific sever(s) as well. Click on toolbar. button under Built-in Reports in button in the The Built-in Reports window with the list of reports will be displayed as shown below: Step 1: Report Selection Select the report to be generated. Only one report can be generated at a time. Click Next to proceed to the next step. 71 CHAPTER 3 – Built-in Reports Step 2: Select Domain (s) / Server(s) Select the server(s)/Domain (s) or Select a Scan Profile, for which the report needs to be generated. The default option selected is All Domains, for all the reports. Click Next to proceed to the next step. Step 3: Select Report Criteria To view the part of the report that is of more significance, change the report criteria settings. Only the data that matches the specified criteria will be displayed in the generated report. 72 CHAPTER 3 – Built-in Reports Click Finish to generate the selected report. After the data collection process is complete, the report would be generated in a report window as shown below: 73 CHAPTER 3 – Built-in Reports List of Reports: Report Name Description List of Users and Groups Reports both the user and group accounts. List of User accounts Reports only the user accounts. This report lists both built-in and custom users. List of Local and Global groups Reports only the group accounts with member information. This report lists all Local groups for all the servers and also the Global groups if the server happens to be a PDC. List of disabled user accounts Reports only the user accounts, both built-in and custom, that have been disabled and/or otherwise. List of locked-out user accounts Reports only the user accounts, both built-in and custom, that have been locked out and/or otherwise. Password settings of all user accounts (Password never expires etc.) Reports password settings of the users’ viz., Password never expires, User must change password at next logon, User cannot change password. Members of Local Administrators group Reports user and/or group members for the given group(s). Log on rights assigned for all accounts (Log on locally etc.) Reports user and/or group accounts having the logon rights viz., Log on locally, Log on as a service, Log on as a batch job. Privileges assigned for all accounts Reports the assigned privileges for both user and group accounts. Group membership with nested groups Reports all the members of a group along with their sub-group members. 74 CHAPTER 3 – Built-in Reports 4.5 How to View Built-in Reports for Domains? Domains Reports Domain Reports are generated across for the entire domain. Click on button under Built-in Reports in button in the toolbar. The Built-in Reports window with the list of reports will be displayed as shown below: Step 1: Report Selection Select the report to be generated. Only one report can be generated at a time. Click Next to proceed to the next step. 75 CHAPTER 3 – Built-in Reports Step 2: Select Domain (s) / Server(s) Select the server(s)/Domain (s) or Select a Scan Profile, for which the report needs to be generated. The default option selected is All Domains, for all the reports. Click Next to proceed to the next step. 76 CHAPTER 3 – Built-in Reports Step 3: Select Report Criteria To view the part of the report that is of more significance, change the report criteria settings. Only the data that matches the specified criteria will be displayed in the generated report. Click Finish to generate the selected report. After the data collection process is complete, the report would be generated in a report window as shown below: 77 CHAPTER 3 – Built-in Reports List of Reports: Report Name Description List of trusted and trusting domains Reports the trusted and/or trusting domains. List of machines with their OS and Reports the configuration information of service pack all the servers in the domain(s). List of Windows Servers Reports the OS installed in all the servers in the domain(s). List of Domain Controllers Reports the Primary and/or Backup Domain Controllers in the domain(s). List of Application servers (IIS, Reports servers running IIS and/or Exchange Server, SQL Server etc.) Exchange Server and/or SQL Server in the domain(s). List of machines that run TCPIP services Reports Servers running network (FTP, telnet etc.) services viz., TCP/IP, FTP, and Telnet in the domain. List of machines that have auditing Reports the Auditing status of servers in enabled (or disabled) the domain(s)... 78 Chapter 5 System Information 4 5.1 About System Info This page covers the following topics: Introduction Prerequisites and Initial Configuration System Info reports Introduction The System Info feature provides significant hardware and software inventory-based reports that can be generated across domains. Further, all the System Info reports can also be scheduled for off-line generation using the Power Export tool. Please be aware that the System Info feature uses WMI (Windows Management Instrumentation) to collect report data. Hence, all System Info reports require WMI to be installed and enabled on the source computer and target computers. For more information refer to "Prerequisites and Initial Configuration" section. Prerequisites and Initial Configuration The System Info feature uses WMI to collect report data. WMI uses DCOM protocol and is affected by Windows Firewall and DCOM security settings. In order to generate System Info reports both Windows Firewall and DCOM must be properly configured. Windows Firewall and DCOM, when not properly configured on your remote computers, can cause errors such as an "RPC Server Unavailable" error or an "Access is denied" error. Also, ensure that the current user context or specified user context, under which the application runs, is a local administrator on target computers. In order to generate System Info reports ensure the following settings are set appropriately: Remote Administration setting is enabled on Windows Firewall. By default, Windows Firewall blocks all unsolicited incoming traffic except for Group Policy. This is a 79 CHAPTER 4 - System Information common issue you might encounter while generating System Info reports. To resolve this issue, you need to enable the remote administration setting on the Firewall. For more information see Technical FAQ #19. For more information about configuring the Windows Firewall connections with a script, see http://www.microsoft.com/technet/community/columns/scripts/sg1104.mspx#EJAA WMI is installed and the Startup Type for WMI service is set to Automatic and the service is running under Local System Account. DCOM is enabled and ensure that security settings for DCOM allow remote connections 1) Run the DCOM Configuration Utility (dcomcnfg.exe) 2) In the Component Services dialog box, expand Component Services, expand Computers, and then right-click My Computer and click Properties 3) In the My Computer Properties dialog box, click the Default Properties tab 4) Select Enable Distributed COM on this computer 5) The Default Authentication Level is set to Connect and the Default Impersonation Level is set to Identify in Windows XP and later operating systems. For Windows NT, however, the Default Authentication Level is set to Connect and Default Impersonation Level is set to Impersonate 6) The default DCOM security settings for Access Permissions and Launch and Activation Permissions in the COM Security tab in the My Computer Properties dialog includes at least INTERACTIVE, SYSTEM and Administrators In Windows XP SP2 and later operating systems the SERVICE account is granted Impersonate a client after authentication right under User Rights Assignment under Local Policies The Data Execution Prevention in Windows XP SP2 and Windows 2003 SP1 is enabled for essential windows programs only System Info Reports: The System Info feature provides reports on the following resource categories: Network Configuration Operating System & Hot Fixes Printer Info Hardware Info Display Configuration Internet Explorer Configuration Current Status Environment Info 80 CHAPTER 4 - System Information 5.2 How to View Network Configuration Reports? Click on under System Info button to view Network Configuration information available under each tab as listed below. NOTE: For information on restricting the domain scan for generating Network Configuration reports, please see How to scan specific servers in a domain? Click tab to view the following information: Network Adapter Name, IP Address, Subnet Mask, DHCP Enabled, Default Gateway, DHCP Server, DNS Servers, DNS Domain DHCP Lease Obtained, and DHCP Lease Expires. 81 CHAPTER 4 - System Information Click tab to view the following information: Host Name, Account Name, and Last Logon to Computer. Click tab to view the following information: Host Name, Adapter Name, Adapter Type, Adapter ID, Description, and Physical Address. 82 CHAPTER 4 - System Information Click tab to view the following information: Host Name, Protocol Name, Description, and Installed Date. 83 CHAPTER 4 - System Information 5.3 How to View Operating System & Hot Fixes Reports? Click on under System Info button to view OS and Hot Fixes information available under each tab as listed below. NOTE: For information on restricting the domain scan for generating Operating System and Hot Fixes reports, please see How to scan specific servers in a domain? Click tab to view the following information: Host Name, Operating System, Service Pack, Version, Product ID, Build Type, Total Virtual Memory (MB), Installed Date, Time Zone, and Page File Location(s). 84 CHAPTER 4 - System Information Click tab to view the following information: Host Name, Hot Fix, Description, Installed By, Installed Date, Fix Comments, and Service Pack. 85 CHAPTER 4 - System Information 5.4 How to View Printer Configuration Reports? Click on under System Info button to view Printer Configuration information available under each tab as listed below. NOTE: For information on restricting the domain scan for generating Printer Configuration reports, please see How to scan specific servers in a domain? Click tab to view the following information: Host Name, Printer Name, Description, Location, Share Name, Port Name, and Driver Name. 86 CHAPTER 4 - System Information 5.5 How to View Hardware Configuration Reports? Click on under System Info button to view Hardware Configuration information available under each tab as listed. NOTE: For information on restricting the domain scan for generating Hardware Configuration reports, please see How to scan specific servers in a domain? Click tab to view the following information: Host Name, Number of Processor(s), System Model, System Manufacturer, System type, Total Physical Memory (MB), BIOS Version, Boot Device, Windows Directory, System Directory, System Locale, Processor(s), Network Adapter(s), IP Address, Disk(s), Disk Capacity (GB), and Number of Partitions in Disk. 87 CHAPTER 4 - System Information Click tab to view the following information: Host Name, BIOS Name, Version, and Release Date. Click tab to view the following information: Host Name, Processor, Type, Description, Version, and Number of Processors. Click tab to view the following information: Host Name, Memory Identifier, Type, Capacity (MB), and Memory Bank. 88 CHAPTER 4 - System Information Click tab to view the following information: Host Name, Drive, Type, Capacity (GB), Space Used (GB), and Space Free (GB). 89 CHAPTER 4 - System Information 5.6 How to View Display Configuration Reports? Click on under System Info button to view Display configuration information available under each tab as listed below. NOTE: For information on restricting the domain scan for generating Display configuration reports, please see How to scan specific servers in a domain? Click tab to view the following information: Host Name, Monitor Name, DPI Setting, Screen Refresh Rate, Screen Resolution, and Manufacturer. 90 CHAPTER 4 - System Information Click tab to view the following information: Host Name, Adapter Name, Video Mode, Color Quality, Memory Size (MB), Driver Date, Driver Version, and DAC Type. 91 CHAPTER 4 - System Information 5.7 How to View Internet Explorer Configuration Reports? Click on under System Info button to view Internet Explorer configuration information available under each tab as listed below: NOTE: For information on restricting the domain scan for generating Internet Explorer configuration reports, please see How to scan specific servers in a domain? Click tab to view the following information: Host Name, Version, Cipher Strength, Product ID, Build Number, Content Advisor, Location, and Language. 92 CHAPTER 4 - System Information 5.8 How to View Current Status Reports? Click on under System Info button to view Current Status information available under each tab as listed below: NOTE: For information on restricting the domain scan for generating Current Status reports, please see How to scan specific servers in a domain? Click tab to view the following information: Host Name, Current Local Time, Last Boot up Time, System Uptime, Percentage of Memory Used, CPU Busy (in percentage), Currently Logged on User, User Logged on Since, Time Elapsed since Logon, and Status Recorded as on. NOTE: The Current Local Time field displays the local time of the target computer (reported in Host Name field). The Status Recorded as on field displays the time at which report data was collected for the respective target computer. 93 CHAPTER 4 - System Information 5.9 How to View Environment Info Reports? Click on under System Info button to view Environment Information available under each tab as listed below. NOTE: For information on restricting the domain scan for generating Environment Info reports, please see How to scan specific servers in a domain? Click tab to view the following information: Host Name, OS, System Drive, System Root, Temp (System), Tmp (System), Path extension, Path, Default User Domain User DNS Domain, Common Program Files, Program Files, All Users APP Data, All User Profile, and Command Prompt Location. 94 Chapter 6 Additional Features 5 6.1 How to customize fields? Click on for customizing the information. Click for selecting all the check boxes. Click for clearing all the check boxes. Click Click button for confirming the changes. button for cancelling the operation. 95 Chapter-5-Additional Features 6.2 How to Apply Filters? Click for setting filter options The ARKWE Filter window will be displayed. . To set a filter condition, follow these steps. 1) Click (Clear All) button and clear the filter. 2) Choose a field name, an operator and a possible value from the respective dropdown options. 3) Click 4) The Add to Filter will change to AND to Filter. The OR to Filter button will be enabled. The selected condition will be set as a filter and displayed (as shown below). 96 Chapter-5-Additional Features 5) Click OK to apply the filter. NOTE: Use the , and to build enhanced filter condition as shown below: (Field A = Value 1 AND Field B = Value 2) OR (Field C = Value 3 AND Field D = Value 4) Use Use to remove the parenthesis to delete a selected condition. The status bar’s FILTERED indicator is used to indicate whether the current data is filtered or not. For a normal view, the status bar will appear as For a filtered view, the status bar will appear as 97 Chapter-5-Additional Features 6.3 How to Refresh Data? Refresh the current report data to view the latest information from the Domain Controller. Click on button in the toolbar available in the report window or press F5 to refresh report data. Alternatively, you can right-click on the grid, in the right pane of the report window, and then select ‘Refresh Data’ from the context menu. The existing data will be cleared and latest data will be loaded in the report window. 6.4 How to Export Data? The Export feature helps the user to export report data generated by ARKWE to a file using various formats namely HTML/CSV/XLSX/SQL. Click for exporting the information in the desired format or select Export option under Tools menu to export report data to a file in the desired format. 98 Chapter-5-Additional Features Specify a file name to export report data to or accept the default file name. Specify the export path and select a desired file format. The path refers to the destination location where the output file generated should be stored. It can be given using the Browse button. To avoid overwrite existing files, if any, in the specified export path, By default, the report will be exported to a time-stamped sub-folder, in the format 'YYYY-MM-DD HH.MM.SS', under the specified export path. In XLSX file format, the information is stored as sheets in Excel file. For each report, a XLSX file will be generated. The name of the XLSX file will be the name of the report and is stored in the specified destination path if "Export to time-stamped folder" option is cleared. The XLSX file will be stored under a sub-folder, of the form YYYY-MM-DD HH.MM.SS, under the specified export path, if "Export to time-stamped folder" option is set. In CSV file format, the information is stored as comma separated values. For each report, a CSV file will be generated. The name of the CSV file will be the name of the report and is stored in the specified destination path if "Export to time-stamped folder" option is cleared or under a sub-folder, of the form YYYY-MM-DD HH.MM.SS, under the specified export path if "Export to time-stamped folder" option is set. In SQL table format, the information is stored as SQL tables in the application database in the specified SQL server based on the selected SQL database option. For each report, a separate table will be created. The name of the table will be the name of the report. In HTML file format, the information is stored as an html file. For each report, a HTML file will be generated. The name of the HTML file will be the name of the report and is stored in the specified destination path if "Export to time-stamped folder" option is cleared or under a sub-folder, of the form YYYY-MM-DD HH.MM.SS, under the specified export path if "Export to time-stamped folder" option is set. 99 Chapter-5-Additional Features 6.5 How to E-mail Data? ARKWE provides the option to e-mail the reports generated. Click button in the toolbar to e-mail the report to e-mail recipients. E-mail dialog will be displayed as shown below: For e-mailing reports, ARKWE requires SMTP Server, From E-mail Address, To E-mail Addresses (recipients separated by semicolon) and the report attachment format. Specify SMTP server name, from Address, “To” address, mail subject, mail content, attachment format and option to compress the attachment. Click button to send the report by e-mail to the selected recipients. 100 Chapter-5-Additional Features Check names ARKWE provides check name feature to check the existence of corresponding mailenabled recipient object in Active Directory. To check name, click button. If the entered name matches with a mail object in the Active directory / its trusted domain, name entered in From Address textbox will be replaced by the corresponding active directory recipient object. If there is more than one match, a dialog which contains matching Active Directory recipients will appear as shown below. You can select one or more recipient and click OK. To get more information about the listed recipients under Change to, select the name, and then click 101 Chapter-5-Additional Features If there is no match for the name entered by the user in Active Directory, a dialog will appear as shown below: Select Delete option in the above dialog to remove the recipient name from to address text box. Click Cancel button to close this dialog and the unresolved recipient(s) will appear in red color. 102 Chapter-5-Additional Features Address Book ARKWE provides Address Book feature to search for any mail enabled recipient object (say, person, distribution list, contact, public folder) you want to send a message to. Click button and then use the Find Names dialog box to search for the recipient object you want to send a message to. (Note that you can't use the Find Names dialog box to search for distribution lists in your Contacts folder.) Select the object's name in the list and then click Add recipient to...To. To get more information about one of the names in the list, such as department or phone number, select the name, and then click 103 Chapter-5-Additional Features 6.6 How to Find Data in a Report? You can use the find feature in ARKWE to search for specific data in a report. To search for data in a report, just type the characters or words you want to find in the find edit box available in the report window and click on .. 1) ARKWE performs a case insensitive search of the specified search criteria in the report. 2) The search criteria should not be enclosed within quotation marks. 3) You can use the "*" wildcard character in the search criteria. The "*" wildcard character act as a place holder for zero or more characters. However, note that you cannot use the "?" wildcard character in the search criteria. For instance, if you want to search for 'Domain' in a report, Type Domain, without quotations, in the edit box, and then clicks on Find Button. By default, ARKWE adds an asterisk as a suffix to the specified search criteria, if no wildcard character is present in it. In this case, ARKWE finds a match in the report for all fields that have the text Domain followed by zero or more characters, that is, Domain, Domain Controllers, Domain Admins, etc. For all the matches found, ARKWE highlights the corresponding columns in the grid, and scrolls the grid automatically to the first occurrence. 4) ARKWE finds additional occurrences of the specified search criteria instantaneously. To locate other occurrences of the same search criteria in a report you need to scroll the report grid downwards. 104 Chapter-5-Additional Features 105 Chapter-5-Additional Features 6.7 How to Scan Specific Servers in a Domain? You can have the System Info reports and summary information of a domain (namely Summary, Shares and Applications) generated either for an entire domain or for selected servers in the domain, using the 'Scan option for ...' dialog. NOTE: This dialog appears, if either it is the first time the report is run against the domain or when you refresh the report. ARKWE defaults to scanning the entire domain, with the provision to enumerate Domain Controllers, Servers, Workstations only. To scan only selected servers, you can either select the computers by using Scan Selected Server(s) in Domain option or by selecting Select a Scan Profile option. By using the Scan Selected Server(s) in Domain option you can specify a computer list by manually typing in the computer name and adding it to the list, or by selecting computers from the network using the Add From button as shown below: 106 Chapter-5-Additional Features You may also apply a scan profile to the report to restrict the list of computers for which you want the report to be generated. A Scan Profile essentially contains a list of computers that ARKWE can read and generate the report only for computers in the selected profile. Click button to create a new Scan Profile. Click button to edit an existing Scan Profile. 107 Chapter-5-Additional Features However, please be aware, that the report will be generated only for computers, in the applied profile, belonging to the currently selected domain. This restriction does not apply if the report is being generated off-line using Power Export tool. Click OK in the "Scan Option for..." dialog to generate the report. If ARKWE could not find any computers belonging to the currently selected domain in the applied Scan Profile, you may see the following message show up on screen: NOTE: Clicking Cancel in "Scan option for..." dialog will display previously collected report data (if any) for the domain. 108 Chapter 7 Power Export 6 7.1 About Power Export ARKWE provides a powerful offline report generation tool called Power Export. Power Export allows the user to select multiple reports to be run for several domains and servers across the enterprise at scheduled intervals. The Power Export tool has the ability to export the reports in different file formats. Please note the following while using the Power Export Wizard: a) Scheduled reports will be created as a "task" in Windows Task Scheduler. b) The scheduled job will generate and export the reports in different file formats (HTML MDB, CSV, PDF, XLSX and TIFF) to the desired folder path/printer. c) By default, for each task, a sub-folder with the task name will be created under the specified export path. All selected Reports will be exported to a time-stamped sub-folder, in the format "yyyy-mm-dd hh.mm.ss", under the task name folder. Therefore, the full folder path for all the exported reports refers to the following directory: <Export path><Task name><Time stamp>. d) A separate file will be created for each report in the desired file format. For example, in the HTML file format, each report will be created as an .html file. NOTE: ARKWE Power Export Wizard will help you create and store the settings for a task, which you may view or modify later using the Scheduled Tasks Manager. The task will be created with the settings (Schedule Type and Run As parameter) provided using the Power Export Wizard. A valid password must be specified for the Run As parameter of the task. You can schedule the two types of reports (Standard report and Built-in report) available in ARKWE. 109 Chapter-6-Power Export 7.2 Task Manager-Scheduled Tasks Manager The Scheduled Tasks Manager allows you to perform the following operations: View summary information for the tasks created View exported files of the task Edit an existing task Delete a task View Summary Information of a Task The pane on the left hand side in the Scheduled Tasks Manager window lists the tasks maintained in ARKWE. To view summary information of a task, select the desired task on the left pane. The summary information of the selected task will be displayed in the right pane as shown below: The task summary includes information about the task information, reports selected, export settings. To view the selected servers/domains for a report in the task, click on the hyperlink in the Servers/Domains column in the right pane. The Selected Servers/Domains window will be displayed as shown below: 110 Chapter-6-Power Export View Exported Files To view the reports generated and exported by the task, perform either one of the following steps: Select Scheduled Tasks node on the left pane, and then click on the hyperlink in the Exported Files column in the right pane for the desired task. OR Select the desired task on the left pane, and then click on the hyperlink next to Exported Files. Edit Task 1) Select a task from the Scheduled Tasks Manager Window and Click Edit Task. 2) Perform the steps as in Schedule Standard Report or Schedule Built-in Report based on the scheduled report type. While proceeding through the wizard you may change the settings, add a new report, delete a report, edit a report, change the export path etc., 3) The new settings will be used when the task runs the next time. Delete Task To delete a task from the Power Reports Task Manager Window, select the task and Click Delete Task. The deleted task will be removed permanently from the Windows Task Scheduler. 111 Chapter-6-Power Export 7.3 Schedule Standard Reports Select option under Power Export. This will bring up the Power Export Wizard. Step 1: Report Selection 1) Select the report(s) using the checkboxes to the left of the reports. You may select any number of reports to run in a single task. 2) There are two categories of reports - Domain Reports and Server Reports. 3) Reports falling under 'Domain Reports' default to scanning and collecting data for the entire domain. However, you can also restrict the domain scope and scan and collect data only for a specific set of servers and have the domain reports generated (viz., Summary, Shares, and Applications). 112 Chapter-6-Power Export 4) Reports falling under 'Server Reports' scan each server and collect data specific to each server. They are further classified by the category they report on (viz. Users, Policies, and Events etc.). 5) Click Next to proceed to the next step. You may Click Back button anytime to come back to a previous step. Step 2: Domain Selection for Domain Reports NOTE: This step is applicable only if a Domain Report is selected in step 1. 1) Click Add Domains button to select the domains for which you wish to run the domain reports selected in Step 1. This will display a window where you can select the domains you want to add. 113 Chapter-6-Power Export 2) You can restrict the domain scope and scan and collect data only for a specific set of computers by either selecting specific computers under a domain or by selecting a Scan Profile. 3) Click OK to apply the selected domains or a Scan Profile to the current report or click Apply to Reports to apply the selection to the rest of the selected domain reports. The selected domains will be added to the wizard as shown below: 114 Chapter-6-Power Export 4) Click Next to proceed to the next Step. Step 3: Server Selection for Server Reports NOTE: This step is applicable only if a Server Report is selected in step 1. 115 Chapter-6-Power Export 1) Click Add Servers button to select the servers for which you wish to run the server reports selected in Step 1. This will display a window where you can select the servers you want to add. Selecting a domain will add all the servers in that domain to the report. 116 Chapter-6-Power Export 2) You can restrict the domain scope and scan and collect data only for a specific set of computers by either selecting specific computers under a domain or by selecting a Scan Profile. 3) Click OK to apply the selected servers or a Scan Profile to the current report or click Apply to Reports to apply the selection to the rest of the selected server reports. The selected servers will be added to the wizard as shown below: 117 Chapter-6-Power Export 4) Click Next to proceed to the Next step. 118 Chapter-6-Power Export Step 4: Delivery Options 1) Change the Export or E-mail settings as necessary. 2) Use Browse button to change the export path. Click Additional E-mail Settings button to specify optional e-mail settings as shown below: 119 Chapter-6-Power Export Step 5: Schedule Settings 120 Chapter-6-Power Export 1) Enter a unique name for the task. 2) Change the Run as parameter, if necessary and set the password for the specified user. 3) Change the task schedule settings as required. 4) Click Next to proceed to the next and final step. Step 6: Summary 1) This step displays the summary information of the task. 2) Click Finish to save the task details. 3) The task will be added to Windows Schedule Tasks and will be displayed in the Scheduled Tasks Manager Window as shown below: 121 Chapter-6-Power Export 122 Chapter-6-Power Export 7.4 Schedule Built-in Reports The built-in reports have been categorized to the following: Permissions Reports Shares and Resources reports Users and Groups reports Domains reports 123 Chapter-6-Power Export Schedule Permissions Built-in Reports Permissions Reports Permissions Reports includes reports that focus solely on reporting the access permissions assigned to users and groups on objects such as folders etcetera. List of permissions for specific users and groups on folders List of permissions for folders List of permissions for specific users and groups on files List of permissions for files Schedule Permissions Built-in Reports List of Permissions for Specific Users and Groups on Folders This report allows you to view folder permissions for specific users and groups. Select option under Power Export. This will bring up the Power Export Wizard. 124 Chapter-6-Power Export Step 1: Report Selection 1) Select "Permissions Reports" from the select report category drop-down list. 2) Select the desired report. Only one report may be selected to run in a single task. 3) Click Next to proceed to the next step. You may Click Back button anytime to come back to a previous step. 125 Chapter-6-Power Export Step 2: User and/or Group Selection 126 Chapter-6-Power Export Use Select a Scan Profile (Users/Groups) option to use the users and groups added in the profile. For more information on Scan Profiles, click About Scan Profiles (Users/Groups). 1) Select the user or group, for which you wish to run the permissions report. 2) The selected users will be added to the wizard as shown above: 3) Click Next to proceed to the Next step. Step 3: Shared Folder Selection 1) Select the desired folder(s) for which you wish to run the permissions report. 2) You may also click Import button to import a list of UNC folder paths from a text file. 3) Folders that have identical permissions as the parent folder would show up with "Same as parent" in User Name and/or Security fields in the report. However, if you do not want folders with identical permissions as the parent folder reported, then select Do not display folders that have same permissions as the parent folder option. This option will not report folders with identical permissions as the parent folder. 127 Chapter-6-Power Export 4) ARKWE defaults to scanning all the sub-folders for a given folder. If you want to modify the Include sub-folders and sub-folder level options click Edit Folder Options button. That will show up a window as shown below: 5) Modify the folder options as required and click OK. 6) Select the Validate for Errors option for validating the folders / files based on the folder traversal option selected, before proceeding to report generation. Generate report ignoring any errors found – This option will validate the folders/ files path(s) and generate the report even if errors are encountered during the validation option. Generate report only if no error were found. Send error report through e-mail – This option will validate the folders/ files path(s) and skip the report generation if errors were encountered during the validation option. It will then email the error(s) encountered during the validation process to users 7) You may select Include Error Details option for including the error information of folders / files into report data. 8) Click Next to proceed to the Next step. 128 Chapter-6-Power Export Step 4: Delivery Options 1) Change the Export or E-mail settings as necessary. 2) Use Browse button to change the export path. Click Additional E-mail Settings button to specify optional e-mail settings as shown below: 129 Chapter-6-Power Export Step 5: Schedule Settings 130 Chapter-6-Power Export 1) Enter a unique name for the task. 2) Change the Run as parameter, if necessary and set the password for the specified user. 3) Change the task schedule settings as required. 4) Click Next to proceed to the next and final step. Step 6: Summary 1) This step displays the summary information of the task. 2) Click Finish to save the task details. 3) The task will be added to Windows Schedule Tasks. 131 Chapter-6-Power Export Schedule Permissions Built-in Reports List of Permissions for Folders This report, allows you to view the associated folder permissions for a set of folders. Select option under Power Export. This will bring up the Power Export Wizard. Step 1: Report Selection 1) Select "Permissions Reports" from the select report category drop-down list. 2) Select the desired report. Only one report may be selected to run in a single task. 3) Click Next to proceed to the next step. You may Click Back button anytime to come back to a previous step. 132 Chapter-6-Power Export Step 2: Shared Folder Selection 1) Select the desired folder(s) for which you wish to run the permissions report. 2) You may also click Import button to import a list of UNC folder paths from a text file. 3) Folders that have identical permissions as the parent folder would show up with "Same as parent" in User Name and/or Security fields in the report. However, if you do not want folders with identical permissions as the parent folder reported, then select Do not display folders that have same permissions as the parent folder option. This option will not report folders with identical permissions as the parent folder. 4) ARKWE defaults to scanning all the sub-folders for a given folder. If you want to modify the Include sub-folders and sub-folder level options click Edit Folder Options button. That will show up a window as shown below: 133 Chapter-6-Power Export 5) Modify the folder options as required and click OK. 6) Select the Validate for Errors option for validating the folders / files based on the folder traversal option selected, before proceeding to report generation. Generate report ignoring any errors found – This option will validate the folders/ files path(s) and generate the report even if errors are encountered during the validation option. Generate report only if no error were found. Send error report through e-mail – This option will validate the folders/ files path(s) and skip the report generation if errors were encountered during the validation option. It will then email the error(s) encountered during the validation process to users. 7) You may select Include Error Details option for including the error information of folders / files into report data. 8) Click Next to proceed to t to proceed to the Next step. Step 3: Delivery Options 1) Change the Export or E-mail settings as necessary. 2) Use Browse button to change the export path. 134 Chapter-6-Power Export Click Additional E-mail Settings button to specify optional e-mail settings as shown below: Step 4: Schedule Settings 135 Chapter-6-Power Export 1) Enter a unique name for the task. 2) Change the Run as parameter, if necessary and set the password for the specified user. 3) Change the task schedule settings as required. 4) Click Next to proceed to the next and final step. Step 5: Summary 1) This step displays the summary information of the task. 2) Click Finish to save the task details. 3) The task will be added to Windows Schedule Tasks. 136 Chapter-6-Power Export Schedule Permissions Built-in Reports List of Permissions for Specific Users and Groups on Files This report allows you to view file permissions for specific users and groups. Select option under Power Export. This will bring up the Power Export Wizard. Step 1: Report Selection 1) Select "Permissions Reports" from the select report category drop-down list. 2) Select the desired report. Only one report may be selected to run in a single task. 3) Click Next to proceed to the next step. You may Click Back button anytime to come back to a previous step. 137 Chapter-6-Power Export Step 2: User and/or Group Selection 138 Chapter-6-Power Export Use Select a Scan Profile (Users/Groups) option to use the users and groups added in the profile. For more information on Scan Profiles, Please refer, “About Scan Profiles (Users/Groups).” 1) Select the user or group, for which you wish to run the permissions report. 2) The selected users will be added to the wizard as shown above: 3) Click Next to proceed to the Next step. Step 3: Shared Folder Selection 1) Select the desired folder(s) for which you wish to run the permissions report. 2) You may also click Import button to import a list of UNC folder paths from a text file. 3) Files that have identical permissions as the parent folder would show up with "Same as parent" in User Name and/or Security fields in the report. However, if you do not want files with identical permissions as the parent folder reported, then select Do not display files that have same permissions as the parent folder option. This option will not report files with identical permissions as the parent folder. 139 Chapter-6-Power Export 4) ARKWE defaults to scanning all the sub-folders for a given folder. If you want to modify the Include sub-folders and sub-folder level options click Edit Folder Options button. That will show up a window as shown below: 5) Modify the folder options as required and click OK. 6) Select the Validate for Errors option for validating the folders / files based on the folder traversal option selected, before proceeding to report generation. Generate report ignoring any errors found – This option will validate the folders/ files path(s) and generate the report even if errors are encountered during the validation option. Generate report only if no error were found. Send error report through e-mail– This option will validate the folders/ files path(s) and skip the report generation if errors were encountered during the validation option. It will then email the error(s) encountered during the validation process to users. 7) You may select Include Error Details option for including the error information of folders / files into report data. 8) Click Next. 140 Chapter-6-Power Export Step 4: Delivery Options 1) Change the Export or E-mail settings as necessary. 2) Use Browse button to change the export path. Click Additional E-mail Settings button to specify optional e-mail settings as shown below: 141 Chapter-6-Power Export Step 5: Schedule Settings 1) Enter a unique name for the task. 2) Change the Run as parameter, if necessary and set the password for the specified user. 142 Chapter-6-Power Export 3) Change the task schedule settings as required. 4) Click Next to proceed to the next and final step. Step 6: Summary 1) This step displays the summary information of the task. 2) Click Finish to save the task details. 3) The task will be added to Windows Scheduled Tasks folder. 143 Chapter-6-Power Export Schedule Permissions Built-in Reports List of Permissions for Files This report allows you to view the associated file permissions under a specific set of folders. Select option under Power Export. This will bring up the Power Export Wizard. Step 1: Report Selection 1) Select "Permissions Reports" from the select report category drop-down list. 2) Select the desired report. Only one report may be selected to run in a single task. 144 Chapter-6-Power Export 3) Click Next to proceed to the next step. You may Click Back button anytime to come back to a previous step. Step 2: Shared Folder Selection 1) Select the desired folder(s) for which you wish to run the permissions report. 2) You may also click Import button to import a list of UNC folder paths from a text file. 3) Files that have identical permissions as the parent folder would show up with "Same as parent" in User Name and/or Security fields in the report. However, if you do not want files with identical permissions as the parent folder reported, then select Do not display files that have same permissions as the parent folder option. This option will not report files with identical permissions as the parent folder. 4) ARKWE defaults to scanning all the sub-folders for a given folder. If you want to modify the Include sub-folders and sub-folder level options click Edit Folder Options button. That will show up a window as shown below: 145 Chapter-6-Power Export 5) Modify the folder options as required and click OK. 6) Select the Validate for Errors option for validating the folders / files based on the folder traversal option selected, before proceeding to report generation. Generate report ignoring any errors found – This option will validate the folders/ files path(s) and generate the report even if errors are encountered during the validation option. Generate report only if no error were found. Send error report through e-mail – This option will validate the folders/ files path(s) and skip the report generation if errors were encountered during the validation option. It will then email the error(s) encountered during the validation process to users. 7) You may select Include Error Details for including the error information of folders / files into report data. 8) Click Next to proceed to the Next step. 146 Chapter-6-Power Export Step 3: Delivery Options 1) Change the Export or E-mail settings as necessary. 2) Use Browse button to change the export path. 147 Chapter-6-Power Export Click Additional E-mail Settings button to specify optional e-mail settings as shown below: Step 4: Schedule Settings 1) Enter a unique name for the task. 148 Chapter-6-Power Export 2) Change the Run as parameter, if necessary and set the password for the specified user. 3) Change the task schedule settings as required. 4) Click Next to proceed to the next and final step. Step 5: Summary 1) This step displays the summary information of the task. 2) Click Finish to save the task details. 3) The task will be added to Windows Scheduled Tasks folder. 149 Chapter-6-Power Export 7.5 Schedule Shares and Resources Built-in Reports Click option under Power Export. This will bring up the Power Export Wizard. Step 1: Report Selection 1) Select the report(s) using the checkboxes to the left of the reports. You may select any number of reports to run in a single task. 2) The above reports collect data on a server-basis. 3) Click Next to proceed to the next step. You may Click Back button anytime to come back to a previous step. 150 Chapter-6-Power Export Step 2: Server Selection 1) Click Add Servers button to select the servers for which you wish to run the server reports selected in Step 1. This will display a window where you can select the servers you want to add. Selecting a domain will add all the servers in that domain to the report. 2) Click OK to apply the selected servers to the current report or click Apply to Reports to apply the servers to the rest of the selected server reports. The selected servers will be added to the wizard as shown below: 151 Chapter-6-Power Export 3) Click Next to proceed to the next step. 152 Chapter-6-Power Export Step 3: Report Criteria (Optional) This step allows you to apply specific conditions for filtering report data. 1) To set criteria for a report, select a report and Click Edit Criteria or Double Click the report. 2) The Criteria Settings window will be displayed as shown below: 153 Chapter-6-Power Export 3) Specify the criteria to filter the report data using the checkboxes. 4) Click OK in Criteria Settings window to go back to the wizard. 5) A description of the selected criteria will be displayed under Criteria Description as shown below: 6) Click Next to proceed to the Next step. 154 Chapter-6-Power Export Step 4: Delivery Options 1) Change the Export or E-mail settings as necessary. 2) Use Browse button to change the export path. 3) Click Next to proceed to the next step. 155 Chapter-6-Power Export Click Additional E-mail Settings button to specify optional e-mail settings as shown below. 156 Chapter-6-Power Export Step 5: Schedule Settings 1) Enter a unique name for the task. 2) Change the Run as parameter, if necessary and set the password for the specified user. 3) Change the task schedule settings as required. 4) Click Next to proceed to the next and final step. 157 Chapter-6-Power Export Step 6: Summary 1) This step displays the summary information of the task. 2) Click Finish to save the task details. 158 Chapter-6-Power Export 3) The task will be added to Windows Schedule Tasks and will be displayed in the Scheduled Tasks Manager Window as shown below: 159 Chapter-6-Power Export 7.6 Schedule Users and Groups Built-in Reports Click option under Power Export. Step 1: Report Selection 1) Select the report(s) using the checkboxes to the left of the reports. You may select any number of reports to run in a single task. 2) The above reports collect data on a server-basis. 3) Click Next to proceed to the next step. You may Click Back button anytime to come back to a previous step. 160 Chapter-6-Power Export Step 2: Server Selection 1) Click Add Servers button to select the servers for which you wish to run the server reports selected in Step 1. This will display a window where you can select the servers you want to add. Selecting a domain will add all the servers in that domain to the report. 2) Click OK to apply the selected servers to the current report or click Apply to Reports to apply the servers to the rest of the selected server reports. The selected servers will be added to the wizard as shown below: 161 Chapter-6-Power Export 3) Click Next to proceed to the next Step. 162 Chapter-6-Power Export Step 3: Report Criteria (Optional) This step allows you to apply specific conditions for filtering report data. 1) To set criteria for a report, select a report and Click Edit Criteria or Double Click the report. 2) The Criteria Settings window will be displayed as shown below: 163 Chapter-6-Power Export 3) Specify the criteria to filter the report data using the checkboxes. 4) Click OK in Criteria Settings window to go back to the wizard. 5) A description of the selected criteria will be displayed under Criteria Description as shown below: 6) Click Next to proceed to the Next step. 164 Chapter-6-Power Export Step 4: Delivery Options 1) Change the Export or E-mail settings as necessary. 2) Use Browse button to change the export path. 165 Chapter-6-Power Export Click Additional E-mail Settings button to specify optional e-mail settings as shown below. 166 Chapter-6-Power Export Step 5: Schedule Settings 1) Enter a unique name for the task. 2) Change the Run as parameter, if necessary and set the password for the specified user. 3) Change the task schedule settings as required. 4) Click Next to proceed to the next and final step. 167 Chapter-6-Power Export Step 6: Summary 1) This step displays the summary information of the task. 2) Click Finish to save the task details. 3) The task will be added to Windows Schedule Tasks and will be displayed in the Scheduled Tasks Manager Window as shown below: 168 Chapter-6-Power Export 7.7 Schedule Domain Built-in Reports Click option under Power Export. This will bring up the Power Export Wizard. Step 1: Report Selection 1) Select the report(s) using the checkboxes to the left of the reports. You may select any number of reports to run in a single task. 2) The above reports collect data for the entire domain. 3) Click Next to proceed to the next step. You may Click Back button anytime to come back to a previous step. 169 Chapter-6-Power Export Step 2 Domain Selection 1) Click Add Domains button to select the domains for which you wish to run the domain reports selected in Step 1. This will display a window where you can select the domains you want to add. 2) Click OK to apply the selected domains to the current report or click Apply to Reports to apply the domains to the rest of the selected domain reports. The selected domains will be added to the wizard as shown below: 170 Chapter-6-Power Export 3) Click Next to proceed to the next Step. 171 Chapter-6-Power Export Step 3: Report Criteria (Optional) This step allows you to apply specific conditions for filtering report data. 1) To set a criterion for a report, select a report and Click Edit Criteria or Double Click the report. 2) The Criteria Settings window will be displayed as shown below: 172 Chapter-6-Power Export 3) Specify the criteria to filter the report data using the checkboxes. 4) Click OK in Criteria Settings window to go back to the wizard. 5) A description of the selected criteria will be displayed under Criteria Description as shown below: 6) Click Next to proceed to the Next step. 173 Chapter-6-Power Export Step 4: Delivery Options 1) Change the Export or E-mail settings as necessary. 2) Use Browse button to change the export path. 174 Chapter-6-Power Export Click Additional E-mail Settings button to specify optional e-mail settings as shown below. 175 Chapter-6-Power Export Step 5: Schedule Settings 1) Enter a unique name for the task. 2) Change the Run as parameter, if necessary and set the password for the specified user. 3) Change the task schedule settings as required. 4) Click Next to proceed to the next and final step. 176 Chapter-6-Power Export Step 6: Summary 1) This step displays the summary information of the task. 2) Click Finish to save the task details. 177 Chapter-6-Power Export 3) The task will be added to Windows Schedule Tasks and will be displayed in the Scheduled Tasks Manager Window as shown below: 178 Chapter 7 8 Scan Profiles Manager 8.1 About Scan Profiles (Computers) You can setup Scan Profiles to scan a subset of computers in the network and save these profiles for repeated use while generating reports (useful for repeatedly scanning and reporting on different subsets of computers). You can create Scan Profiles in one of the following ways: Selecting specific computers in the network Selecting specific Windows versions Importing list of computers from a text file Importing list of IP addresses from a text file 179 Chapter-7-Scan Profiles Manager 8.2 How to Create Scan Profiles (Computers)? The Scan Profile Dialog allows you to create or edit a Scan Profile. During edit operation, the name of a Scan Profile and its type cannot be modified. You can access the Scan Profile Dialog from the Scan Profiles Manager. Perform the following steps to create a Scan Profile. 1) Click New button in the Scan Profiles Manager window. The Scan Profile dialog will show up on screen. 2) Specify a name for the Scan Profile. You must give a unique name for the Scan Profile. 3) Specify how you want to create the profile by selecting appropriate profile type. You can create Scan Profiles in one of the following ways: A. Selecting computers from network I. II. Select computers from network option. You can type in computer name, in the format "Domain Name\Computer Name", and then click Add button to manually add it to the list. Or you may click Add from button to browse the network and select specific computers. B. Selecting specific Windows versions 180 Chapter-7-Scan Profiles Manager I. Choose Select specific Windows version(s) option. Select one or more Windows versions. Only computers running the II. selected Windows version will be included in the computer list. You may optionally select specific domains, from the list of domains, to III. include computers only from the selected domains. If you choose not to select any domains, then the Scan Profile includes all domains in the network. NOTE: o This type of profile is dynamic in nature, in that the list of computers are prepared at run-time; that is at report generation time. 181 Chapter-7-Scan Profiles Manager C. Importing list of computers from a text file i. Select Import list of computers from text file option. ii. Click browse ("...") button to select a file that contains the list of computers to be imported. iii. In the "Select File" dialog that shows up, select a text (.txt) file, and then click Open. iv. Click Import button to import the list of computers from the selected file. NOTE: o The text file should contain computer names in the format "Domain Name\Computer Name" (both Domain and Computer name should be a NETBIOS name) with each entry in a separate line as shown below: o Only valid entries of the form "Domain Name\Computer Name" will be imported, and invalid entries will be ignored. Please note that the domain specified will be matched with the domain name to which the computer belongs. The computer entry will be ignored either if the domain name 182 Chapter-7-Scan Profiles Manager does not match or if an error occurs retrieving the domain name. To view the list of entries imported, click Verify Imported List button. The list of computer names imported will be displayed as shown below: o Changes to the external text file will not automatically be reflected in the Scan Profile. You need to edit the Scan Profile and re-import the updated computer list from the file. D. Importing list of IP addresses from a text file i. ii. Select Import list of IP addresses from text file option. Click browse ("...") button to select a file that contains the list of IP addresses to be imported. 183 Chapter-7-Scan Profiles Manager iii. In the "Select File" dialog that shows up, select a text (.txt) file, and then click Open. iv. Click Import button to import the list of IP addresses from the selected file. NOTE: o The text file should contain valid IP addresses with each entry in a separate line as shown below: o During the import process each IP address will be translated to a corresponding computer name. Hence, only valid entries will be imported. To view the list of entries imported, click Verify Imported List button. The list of IP addresses and their corresponding computer names will be displayed as shown below: o Changes to the external text file will not automatically be reflected in the Scan Profile. You need to edit the Scan Profile and re-import the updated IP address list from the file. 4) Click OK to save the Scan Profile for later use. 184 Chapter-7-Scan Profiles Manager 8.3 How to Manage Scan Profiles (Computers)? Click to launch the Scan Profiles Manager. The Scan Profiles Manager shows the list of Scan Profiles available. The Scan Profiles Manager allows you to perform the following operations: Create a new Scan Profile Edit an existing Scan Profile Delete a Scan Profile Preview the list of computers in a Scan Profile Create a new Scan Profile 1) To create a new Scan Profile click New 2) Follow the steps as outlined in How to create Scan Profiles? 185 Chapter-7-Scan Profiles Manager Edit an existing Scan Profile 1) To edit a Scan Profile click Edit button in the Scan Profiles Manager. The Scan Profile Dialog will appear on the screen which will allow you to edit the selected Scan Profile. 2) During edit operation you can modify the computer list; however, you cannot modify the type of the Scan Profile. Delete a Scan Profile To delete a Scan Profile, select the profile you want to delete, and then click Delete button. The selected Scan Profile will be deleted permanently. Please note, that reports associated with the Scan Profile deleted may fail to run when generated. Preview the List of Computers in a Scan Profile To preview the list of computers in a Scan Profile, select a Scan Profile, and then click Preview button. The computer list will be displayed in a tree view as shown below: The Preview window shows the list of domains and computers selected in the Scan Profile if the computer list was either imported or selected from the network. Whereas, if specific Windows versions were selected, then only the computers that match the selected Windows versions will show up. Furthermore, if specific domains were associated with the Scan Profile, then only the selected domains will show up, otherwise all the domains in the network will show up. The Preview window allows you to view what computers in the network will be included in the profile. 186 Chapter-7-Scan Profiles Manager 8.4 How to Apply Scan Profiles (Computers)? You can apply a Scan Profile to one or more reports to restrict the list of computers during report generation. This is especially useful if you want to generate reports for a subset of computers. This page covers the following topics with regard to usage of Scan Profiles: Scan Profiles and Power Export Tool (off-line report generation) Scan Profiles and Interactive Report Generation Scan Profiles and Power Export Tool (off-line report generation) You can apply a Scan Profile to one or more reports using the Power Export Tool (for offline generation) to restrict the domain scope and to scan and collect data for a subset of computers in the network. The report data will be collected for all computers in the applied Scan Profile. However, if the applied Scan Profile becomes unavailable during report generation (likely to happen if the Scan Profile is accidentally deleted); the report data will not be collected at all and will result in an error. Furthermore, if there are no computers to be found in the Scan Profile for a domain for which the report is being generated, then the report generation will fail as well. This is likely to happen if the domain is not included in the Scan Profile or none of the computers in the domain are running the Windows version setup in the Scan Profile. Scan Profiles and Interactive Report Generation You may also apply a Scan Profile to reports and view the data in interactive mode. The way in which a Scan Profile is applied and the data collection methodology adopted slightly differs in interactive mode from off-line report generation mode (using Power Export Tool). The data collection methodology adopted also depends on the type of Scan Profile applied (static or dynamic) to the report. For instance, if a Scan Profile is associated with multiple domains, in interactive mode, data will be collected only for computers that belong to the currently selected domain. On the other hand, if there are no computers to be found for the currently selected domain, in the applied profile, the report data will not be collected at all. This is likely to happen if the currently selected domain was not included in Scan Profile (if it is a static profile) or the Scan Profile includes a Windows version filter, say Windows Computers only, and the domain does not have any computers running Windows XP. In addition, in interactive mode, there are differences on how Scan Profiles are applied to Domain-based Reports and Server-based Reports. 187 Chapter-7-Scan Profiles Manager Scan Profiles and Domain-based Reports In interactive mode, for domain-based reports, you can apply a Scan Profile by using the Scan Option Dialog. The report will be generated for the list of computers in the applied Scan Profile for the currently selected domain as mentioned earlier. Scan Profiles and Server-based Reports For server-based reports, you can apply a Scan Profile by clicking the button in the report window. The Scan Profiles Manager will show up on screen, select a Scan Profile, and then click Apply button to apply the selected profile. For server-based reports, however, a Scan Profile when applied reloads the tree view, in the left pane in the report window, with the list of computers in the selected Scan Profile. After a Scan Profile is applied, you can select the desired computer in the tree view in the report window to generate the report. Click the Clear button to clear the applied profile. This will reload tree view with the list of all domains in the network. 188 Chapter-7-Scan Profiles Manager 8.5 About Scan Profiles (Users/Groups) You can setup Scan Profiles (Users/Groups) to scan a subset of users/groups present in computers and save these profiles for repeated use (useful for repeatedly scanning and reporting on different subsets of users and groups permissions on share folders). How to create Scan Profiles (Users/Groups)? How to manage Scan Profiles (Users/Groups)? How to apply Scan Profiles (Users/Groups)? 8.6 How to Create Scan Profiles (Users/Groups)? Perform the following steps to create a Scan Profile (Users/Groups). 1) Select from the application toolbar. This action will launch the Scan Profiles Manager (Users/Groups) dialog as shown below. 189 Chapter-7-Scan Profiles Manager 2) Click new button in the Scan Profiles Manager (Users/Groups) dialog. This action will launch the Scan Profiles (Users/Groups) Wizard as shown below. 1) Enter a name for the profile. 2) Use the Browse and Select button to enumerate users/groups from servers or Scan Profiles Computers as shown below: 190 Chapter-7-Scan Profiles Manager 3) You can enter users / groups name and add to the selected account list for creating a profile. Enter the users/groups name in 'Domain\User Name' format and click the Add button to add the entered account to the list as shown below: 191 Chapter-7-Scan Profiles Manager 5) Click Finish to save the Users/Groups profile for future use. 192 Chapter-7-Scan Profiles Manager 8.7 How to Manage Scan Profiles (Users/Groups)? Click to launch the Scan Profiles Manager (Users/Groups). The Scan Profiles Manager (Users/Groups) shows the list of available profiles. The Scan Profiles Manager allows you to perform the following operations: Create a new Scan Profile (Users/Groups) Edit an existing Scan Profile (Users/Groups) Delete a Scan Profile (Users/Groups) Preview the list of users and groups in a Scan Profile (Users/Groups) 193 Chapter-7-Scan Profiles Manager Create a new Scan Profile (Users/Groups) 1) To create a new Scan Profile (Users/Groups) click New 2) Follow the steps as outlined in How to create Scan Profiles? Edit an existing Scan Profile (Users/Groups) 1) To edit a Scan Profile (Users/Groups) click Edit button in the Scan Profiles Manager. The Scan Profile (Users/Group) wizard will appear on the screen which will allow you to edit the selected profile. 2) During edit operation you can modify the Users/Groups list. Delete a Scan Profile (Users/Groups) To delete a Scan Profile (Users/Groups), select the profile you want to delete, and then click Delete button. The selected Scan Profile (Users/Groups) will be deleted permanently. Please note, that reports associated with the Scan Profile (Users/Groups) deleted may fail to run when generated. Preview the List of Users and Groups in a Scan Profile (Users/Groups) To preview the list of users and groups in a profile, select a profile, and then click Preview button The Preview window allows you to view what users and groups will be included in the profile. 194 Chapter-7-Scan Profiles Manager 8.8 How to Apply Scan Profiles (Users/Groups)? You can apply Scan Profile (Users/Groups) to permissions reports that involve generating permissions for specific users and groups on share folders. This is especially useful, if you want to generate permissions reports for certain users and groups frequently. The following shows permissions reports that involves specific users and groups Report Name Description List of permissions for specific users and Reports the folder permissions assigned groups on folders to specific users and/or groups on a selected set of folders. List of permissions for specific users and Reports the files permissions assigned groups on files to specific users and/or groups under a selected set of folders. Scan Profiles (Users and Groups) and Permission Reports for Specific Users and Groups You can apply a Scan Profile (Users/Groups) to permissions reports either using Power Export Tool (for off-line generation) or Interactive Report Generation .This option will useful, if permissions for certain Users and Groups need to be monitored frequently. Rather than searching for Users and Groups, adding then to account list and viewing their permissions. You can use create a subset of Users and Groups, save them as a profile, generating permissions reports for subset that of users and groups. The following shows how Scan Profiles (Users/Groups) can be applied to permission reports for specific users and groups in Interactive report generation and Power export tool. Scan Profiles (Users/Groups) and Interactive Report Generation Perform the following steps for applying Scan Profiles (Users/Groups) to permission reports in Interactive report generation 195 Chapter-7-Scan Profiles Manager 1) Click on under Built-in Reports in the tool bar. 2) Select any one of the permissions reports listed above and click Next to proceed. 3) In the next step, select the option 'Select a Scan Profiles (Users/Groups) ' as shown below. In this step the list of users and/or groups present in Scan Profile (Users/Groups) will be loaded to the selected Account list as shown below: 196 Chapter-7-Scan Profiles Manager In the Succeeding steps, select needed details for generating reports for selected Users and Groups. Scan Profiles (Users/Groups) and Power Export Tool (Off-line Report Generation) You can apply a Scan Profile (Users/Groups) to permissions reports using Power Export Tool (for off-line generation). 1) Click on button in the toolbar. 2) Select any one of the permissions reports listed above and click Next to proceed. 3) In the next step, select the option 'Select a Scan Profiles (Users/Groups)' as shown below. 197 Chapter-7-Scan Profiles Manager In this step the list of users and groups present in Scan Profile (Users/Groups) will be loaded to the selected account list as shown below: In the succeeding steps select needed details for generating reports for selected Scan Profile (Users/Groups). 198 Chapter-7-Scan Profiles Manager 8.9 About Scan Profiles (Shares) You can setup Scan Profiles (Shares) to scan a subset of shares present in computers and save these profiles for repeated use (useful for repeatedly scanning and reporting on different subsets of share folders permissions). How to create Scan Profiles (Shares)? How to manage Scan Profiles (Shares)? How to apply Scan Profiles (Shares)? 8.10 How to Create Scan Profiles (Shares)? Perform the following steps to create a Scan Profiles (Shares). 1) Select from the application toolbar. This action will launch the Scan Profiles Manager (Shares) dialog as shown below: 199 Chapter-7-Scan Profiles Manager 2) Click New button in the Scan Profiles Manager (Shares) dialog. This action will launch the Scan Profiles (Shares) dialog as shown below: 1) Enter a name for the profile. 2) You may type the UNC path of a folder that is not in the list, such as a folder that is not shared, and then click Add, to add it to the list as shown below: 3) You may also import a list of UNC paths to shared and non-shared folders from a text file by using the Import button. 200 Chapter-7-Scan Profiles Manager 4) Click 'Add From' to add list of share folders from computers as shown below: 5) Click Finish to save the Shares profile for future use. 201 Chapter-7-Scan Profiles Manager 8.11 How to Manage Scan Profiles (Shares)? Click to launch the Scan Profiles Manager (Shares). The Scan Profiles Manager (Shares) shows the list of available profiles. The Scan Profiles Manager allows you to perform the following operations: Create a new Scan Profile (Shares) Edit an existing Scan Profile (Shares) Delete a Scan Profile (Shares) Preview the list of Shares in a Scan Profile (Shares) Create a new Scan Profile (Shares) 1) To create a new Scan Profile (Shares) click New 2) Follow the steps as outlined in How to create Scan Profiles? 202 Chapter-7-Scan Profiles Manager Edit an existing Scan Profile (Shares) 1) To edit a Scan Profile (Shares) click Edit button in the Scan Profiles Manager. The Scan Profile (Shares) wizard will appear on the screen which will allow you to edit the selected profile. 2) During edit operation you can modify the Shares list. Delete a Scan Profile (Shares) To delete a Scan Profile (Shares), select the profile you want to delete, and then click Delete button. The selected Scan Profile (Shares) will be deleted permanently. Please note, that reports associated with the Scan Profile (Shares) deleted may fail to run when generated. Preview the List of Shares in a Scan Profile (Shares) To preview the list of shares in a profile, select a profile, and then click Preview button. The Preview window allows you to view what shares will be included in the profile. 203 Chapter-7-Scan Profiles Manager 8.12 How to Apply Scan Profiles (Shares)? You can apply Scan Profile (Shares) to permissions reports. This is especially useful, if you want to generate permissions reports for certain Shares frequently. The following shows permissions reports that involves shares profile List of Permissions Reports: Report Name Description List of permissions for specific users and Reports the folder permissions assigned groups on folders to specific users and/or groups on a selected set of folders. List of permissions for folders Reports the permissions associated with a selected set of folders. List of permissions for specific users and Reports the files permissions assigned to groups on files specific users and/or groups under a selected set of folders. List of permissions for files Reports the permissions associated with files under a selected set of folders. Scan Profiles (Shares) and Permission Reports You can apply a Scan Profile (Shares) to permissions reports either using Power Export Tool (for off-line generation) or Interactive Report Generation .This option will useful, if permissions for certain shares need to be monitored frequently. Rather than searching for shares, adding them to list and viewing their permissions. You can create a subset of shares, save them as a profile, generating permissions reports for them. The following shows how Scan Profiles (Shares) can be applied to permission reports in Interactive report generation and Power export tool. Scan Profiles (Users/Groups) and Interactive Report Generation Perform the following steps for applying Scan Profiles (Shares) to permission reports in Interactive report generation 204 Chapter-7-Scan Profiles Manager Click on under Built-in Reports in the tool bar. Select any one of the permissions reports listed above and click next to proceed. In the next step, select the option 'Select a Scan Profiles (Shares) ' as shown below: In this step the list of shares present in Scan Profile (Shares) will be loaded to the selected account list as shown below: 205 Chapter-7-Scan Profiles Manager In the succeeding steps select needed details for generating reports for selected shares. Scan Profiles (Users/Groups) and Power Export Tool (Off-line Report Generation) You can apply a Scan Profiles (Shares) to permissions reports using Power Export Tool (for off-line generation). Click on button in the toolbar. Select any one of the permissions reports listed above and click Next to proceed. In the next step, select the option 'Select a Scan Profiles (Shares)' as shown below: 206 Chapter-7-Scan Profiles Manager In this step the list of shares present in Scan Profile (Shares) will be loaded to the selected account list as shown below: In the succeeding steps select needed details for generating reports for selected shares. 207 Chapter-7-Scan Profiles Manager References 8.13 Troubleshooting If and when a problem arises, please forward the following information to [email protected] to revert back to you with a solution. These files will be available where ARKWE is installed. Error Log File E.g., <Application Data Folder>\ARKWE 8.x\ARKWEErrorLog.log NOTE: <Application Data Folder> is the common area where ARKWE settings will be stored in the machine running ARKWE. The <Application Data Folder> can be found from the Help -> About screen. The default path of <Application Data Folder> is as follows: a) Windows XP Windows 2003-C:\Documents and Settings\All Users\Documents b) Windows Vista, Windows 7, Windows 8, Windows 2008, Windows Server 2012 C:\Users\Public\Documents 208 Chapter-7-Scan Profiles Manager 8.14 How to Uninstall ARKWE? When you uninstall ARKWE through Control Panel - Add / Remove Programs applet, Windows Installer program will remove only the application files from your machine. But, the application related files created by ARKWE remain in the computer. In order to remove ARKWE worker files completely, the uninstall wizard provides a set of cleanup options to perform the cleanup operation based your selection. Use this wizard to cleanup the files that are created by ARKWE application selectively and uninstall ARKWE completely from the machine. 1) Launch the uninstall wizard by clicking Start -> Programs -> Admin Report Kit for Windows Enterprise v8.x -> Uninstall ARKWE. The ARKWE Uninstall Wizard dialog will be shown as below: Click Next to Proceed 209 Chapter-7-Scan Profiles Manager 2) Select required Cleanup Options as shown below: Click Next to Proceed. 210 Chapter-7-Scan Profiles Manager 3) Confirm the Cleanup and/or Uninstall Process. Click Finish to run cleanup and/or uninstall process. Click Cancel to close the wizard. 4) Once the file cleanup process is complete, the uninstall wizard will automatically run Windows Installer program to remove ARKWE application from the machine. 211 9 Index (ARKWE), 1 Domain Controllers, 104 About Built-in Reports, 51 Domains, 51, 170 About Power Export, 109 Edit Task, 193 About Scan Profiles (Computers), 179 Enterprise network planning personnel, About Scan Profiles (Users/Groups), 189 About System Info, 79 Active Directory, 101, 102 Additional E-mail Settings, 119, 156, 166, 175 3 Error Control, 49 Error Log File, 6, 208 evaluation/trial, 4 Hardware, 87 Additional Features, 95 HIPPA., 1 Admin Report Kit for Windows How to activate the software?, 4 Enterprise, 1, 209 applet, 209 Application Data, 208 ARKWE, 1, 2, 3, 6, 96, 100, 101, 103, 104, 107, 108, 109, 110, 208, 209, 211 Built-in Reports, 51, 67, 71, 75, 123, 124, 150, 160, 169, 196 Create Task, 79 How to Apply Filters?, 96 How to apply Scan Profiles (Computers)?, 187 How to apply Scan Profiles (Users/Groups)?, 195 How to create Scan Profiles (Computers)?, 180 How to create Scan Profiles (Users/Groups)?, 189 CSV, 109 How to customize fields?, 95 data warehousing, 3 How to E-mail data?, 100 Domain, 30, 169, 170 How to Export data?, 98 Domain Admins, 104 How to find data in a report?, 104 213 How to manage Scan Profiles (Computers)?, 185 How to manage Scan Profiles (Users/Groups)?, 193 How to Refresh data?, 98 How to scan specific servers in a domain?, 106 How to Uninstall ARKWE?, 209 How to view Built-in Permissions Reports, 51 How to view Built-in Reports for Domains?, 75 How to view Built-in Reports for Shares and Resources, 67 How to view Built-in Reports for Users and Groups, 71 How to view Operating System and Hot Fixes reports?, 84 How to view Policies information?, 41 How to view Printer Configuration reports?, 86 How to view Service information?, 49 How to view Shares and Resources information?, 33 How to view Users and Groups information?, 37 Interactive Report, 187, 195 Internet Service Providers, 3 Intranets, 3 IP address, 184 IT infrastructure Managers, 1 How to view Current Status reports?, 93 LAN, 3 How to view Display Configuration license key, 4, 5 reports?, 90 How to view Domain information?, 30 How to view Environment Info reports?, 94 How to view Events information?, 46 How to view Hardware Configuration reports?, 87 MDB, 109 Microsoft Windows Network., 1 Operating System, 84 Permissions Reports, 51, 52, 123, 124 Power Export, 109 Power Export tool., 79, 108 How to view Internet Explorer Scan Profile, 107, 108, 114, 117, 180, Configuration reports?, 92 181, 183, 184, 185, 186, 187, 188, How to view Network Configuration reports?, 81 189, 193, 194, 195 Scan Profiles, 179, 180, 185, 186, 187, 188, 189, 190, 193, 194, 195, 196 214 Scan Profiles Manager, 179 Systems Audit personnel, 1 Schedule Built-in Reports, 123 Systems management personnel, 3 Schedule Standard Reports, 112 Task Manager-Scheduled Tasks Server-based Reports, 187, 188 Server-based Reports., 187 Shares and Resources, 33, 51, 67, 123, 150 Manager, 110 Technical Support, 6 TIFF, 109 Troubleshooting, 208 SMTP server, 100 uninstall, 209, 211 SMTP Server, 100 uninstall wizard, 209 SOX, 1 Users and Groups, 37, 51, 71, 74, 123, Standard Reports (Working with Reports), 30 160, 195 WAN, 3 System Administrators, 1, 3 Windows network product developers, 3 System Information, 79 Windows Servers, 3, 78 System requirements, 2 215