1
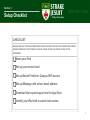
iPads @
SJ
Chapter 1
Introduction
Welcome to the iPads at SJ iBook. This chapter will
help you become familiar with using an iBook, as
well as give you the initial iPad set up steps. There
are a few steps provided by Apple to initially set up
the iPad. You will need a WiFi connection (or your
iPad plugged into your computer with iTunes open)
to set up the iPad.
Section 1
How to Use the iBook
INTERACTIVE
iBooks are digital books with interactive elements. In their most basic form, simply
1. Pinch inward to close an interactive
element, a page, or a chapter.
swipe to turn the page. They can do much more than that however. Using
2. Pinch outward to expand and interactive
element (video, picture gallery, etc.)
different hand gestures, you are able to open and close chapters, view videos and
images, and swipe from page to page.
3. Swipe to move from page to page.
4. Click to enter a chapter or interactive
element
2
Section 2
Initial Set up
Welcome screen.
1 of 12
3
Chapter 2
Setup for Day
1
This chapter walks through the basic setup to be
prepared for the first day of classes. It includes
setting up school email, iMessage, and organizing.
Section 1
Setup Checklist
CHECKLIST
MAKE SURE THAT YOU HAVE COMPLETED THESE TASKS BY THE TIME YOU ARRIVE FOR SCHOOL
MONDAY MORNING. THE TUTORIALS CAN BE FOUND IN THE FOLLOWING PAGES IN THIS
DOCUMENT.
Name your iPad
Set up your school email
Set up Meraki Profile for Campus WiFi access
Set up iMessage with school email address
Download the required apps from the App Store
Identify your iPad with a custom lock screen
5
Section 2
Name Your iPad
STEP BY STEP
About
Though the iPad is in your hands, it is important to keep in mind that it is a school
1. Click on the Settings button, then click General >
About > Name.
2. Name the iPad with your network user name (the first
part of your school email address).
owned device that has been loaned to you to help you succeed in your 21st
century education. There are a couple reasons for renaming the iPad.
First, to access the campus WiFi network, you need to be identified as a current
student. The reason for this is to maximize the speed of the internet and protect
the security of the campus. Unknown names, or names that do not match the
student who the device was loaned to will be blocked from our campus internet for
Naming your iPad tutorial
security reasons.
Secondly, in case the device is lost or stolen, we will more readily be able to help
locate and recover the device.
6
Section 3
School Email Setup
STEP BY STEP
About
Your school email is a vital part of your life at Strake Jesuit. From the
1. Click on the Settings button then click Mail > Contacts
> Calendars.
2. Under Accounts, click on Add Account.
administration, to your teachers, to your friends, the majority of communication will
come through email. It is essential that your email is working properly and
accessed frequently.
3. Click on the Microsoft Exchange button
4. Enter your school email address under "Email" (the
whole address "[email protected]")
5. Enter your password in the "Password" space. (If you
have forgotten your email password, please come by
the IT Helpdesk in the Library when you arrive at
school)
6. Under "Description" put "Strake Jesuit".
7. Once you entered, press Next at the top of the screen.
8. Under "Server", you should enter "m.google.com".
Leave the "Domain" field blank. Username should be
your full school email address again.
9. Press Next at the top of the screen. It should validate
all of your information and accept it. If it doesn't, you
should verify that the information is entered exactly as
shown.
That being said, a common distraction for students is email notifications, which
pop up at the top of the screen when you receive a new email. If you are in a
class, it is expected that you ignore emails (even those that come from counseling,
the dean or another teacher) while you are attending class. Your email should be
looked at only when
you are in your free time
or when the teacher
specifically allows for it.
Please see the following
tutorial or the steps on
the side to set up your
school email account
with the iPad.
10. On the final screen, you should see the option to turn
on your Contacts and Calendar as well. Set all three
(Mail, Contacts and Calendar) to ON and then press
Save.
7
Section 4
Campus WiFi Setup
STEP BY STEP
About
As you can imagine, it takes some organization to provide WiFi for over 1100
1. Open or install the Meraki Systems
Manager App
people on a campus as large as ours. With over 10 buildings and close to 100
2. Enter or choose Strake Jesuit College Prep network
number: 012-627-5793
provided to all student devices.
different rooms, it is important to make sure the internet is secure and being
3. Enroll in Student Devices (not Faculty)
Meraki is the system that secures and organizes our network. The Meraki system
4. Follow the prompts: Click OK to accept Profile
Installation > Click Install > Install > Enter Passcode >
Install on Warning Screen > Trust Remote Management
> Done > Allow location Access. (It should now say
enrolled in Strake Jesuit College Prep)
manager app and profile is loaded on every device for a couple reasons. To make
*When on campus, select SJSTU in the WiFi network settings.
You should now be connected to SJSTU with access to the
internet. If you are prompted to enter the SJSTU passphrase,
enter: mag1s89oo
access to our system.
sure the internet is up to speed, secure, and functioning properly, the internet is
not provided to personal devices. Installing the student profile through the Meraki
app gives the student
This profile also allows
for us to find a lost or
stolen iPad more
readily.
Please see the following
tutorial or the steps on
the side to set up the
Meraki profile.
8
Section 5
School iMessage Setup
STEP BY STEP
About
iMessage is similar to text messages, but can be sent over the internet to other
1. Click on the Settings button, then click Messages.
Make sure the green toggle switch next to iMessage is
turned ON.
apple devices with the same functionality. It uses phone numbers or email
addresses for connectivity.
2. click on Send & Receive>Add Another Email and enter
in your full school email address (eg.
[email protected]).
We ask every student to turn on iMessages using their school email address.
3.
contact you. Your email is a sure way for everyone to be able to get a hold of you
Once you press done, your school email address will
say "verifying..." next to it.
4. Finally, go to the Mail app, and in your school email
inbox you should see a verification email.
5. Click "Verify Now" in the email to complete the
process.
There are times when the administration, a faculty member, or a peer may need to
if needed.
It is up to you to add a cell phone number as well or to make iMessages for
personal communication. There is a great temptation for iMessages to be a
common distraction in class as a digital age ‘note passing’. Be aware of this
temptation as your focus should be
directed to your teacher during
class time. See the next chapter
on how to limit those distractions
during class time.
Please see the following tutorial or
the steps on the side to set up the
iMessage feature.
9
Section 6
Get Required Apps
REQUIRED APPS
The Apple App Store has over one million apps; most of them are free. Paid apps
typically cost between 99 cents and $10, averaging around $4. In order to
Paid Apps (to be purchased by student)
• Notability
purchase apps in the App Store, students must either use (1) a credit card or (2) an
Apple Gift Card. For information on how to create an App Store account without a
credit card, click here.
• iMovie
Free Apps (pre-loaded on student iPads for day 1)
• KeyNote
• Pages
• Numbers
• Dropbox
• Kindle
Once an app is purchased, it will forever be linked to the Apple ID used to
purchase it. When a student switches to a new iPad in the future, his purchases
will ‘follow’ him. As long as he uses the same Apple ID, he will not need to
purchase the app again. If he uses the same Apple ID on multiple iOS devices, the
apps he purchased will also be available on those devices using the same Apple
ID. • iBooks
Students must have the required apps listed in the sidebar on their iPad. They will
• Google Drive
be used frequently during a student’s time at Jesuit. The total cost of the paid
• Evernote
apps is approximately $15. If additional apps are required for a particular class,
• Socrative – Student Clicker
they will appear on a teacher's syllabus on the first day of class.
• iTunesU
• FindMyiPhone
Click on each App in the sidebar to go to its purchase page in the App Store
• EduCreations
*The first time you purchase an app from the app store it may ask for credit card
• Meraki
information.
• Chrome
10
Section 7
Setup Wallpaper
STEP BY STEP
About
The iPad is an expensive tool given to you by the school. It is important that it be
1. Please open Keynote on your iPad. Once open, press
the plus in the top left corner and make a new
presentation.
2. Choose black or white, and fill in the text with your
name, full school year, and number and/or email.
identifiable even when locked. Make sure you take care of it and know where it is
at all times. There may be times however when it is left in a classroom or
somewhere on campus. This will allow you to get it back in a timely manner if it is
found by a student or teacher.
3. Feel free to minimally edit and customize the screen.
4. When finished, take a screen shot (push the on/off
button and the home button at the same time)
Your lock screen should end up looking something like this:
5. Go to the Photos app, select the image, and push the
share button in the bottom left.
6. Select, Use as wallpaper, and set it up as your lock
screen.
11
Chapter 3
Family
Sharing
With the latest version of iOS, an important feature
was introduced, titled Family Sharing. In short, this
feature allows for multiple apple ID’s to be tied
together. This enables a family to use one credit
card in a single account for all purchases, as well as
sharing previously purchased items (such as an
older brother’s digital textbooks).
Section 1
About
About
Family sharing is a fantastic tool for families at Strake Jesuit.
The minimal needs are one other person in the family having an
apple ID and device apart from the device loaned to you from
Strake Jesuit.
Family Sharing makes sense to families who have multiple sons
going through Jesuit, or for families that have multiple iOS
devices. See the following slides from the Apple website to
come to know more of the features.
One of the best features is Ask to Buy. When enabled, this
feature only allows purchases that are approved by a parent.
Read more about it here. For this feature to work, the Apple ID
of the student needs to have his accurate date of birth.
13
Section 2
Setting Up
Set up Family Sharing
Use these steps to set up Family Sharing. You can
start a new family group and invite people to
join, or you can join someone else's family
group.
share photos, a family calendar, and more to help keep everyone connected.
Get started
You can be a part of only one family at a time. Here's what you'll
need to set up Family Sharing:
• An Apple ID signed in to iCloud and iTunes
• iPhone, iPad, or iPod touch with iOS 8 or Mac with OS X Yosemite
If you need to, you can create an Apple ID for your child, then add
them to your family group. When you create an account for a child,
make sure that you're using a credit card as your iTunes Store and
App Store payment method. To comply with child online privacy
protection laws, you'll use the CVV or security code from a valid
credit card as part of providing your parental consent. If you like,
you can change to a different payment method after creating the account
Start a family group
Family Sharing makes it easy for up to six people in your family to
share each other’s iTunes, iBooks, and App Store purchases without
sharing accounts. Pay for family purchases with the same credit
card and approve kids’ spending right from a parent’s device. And
One adult in the family—the family organizer—can set up Family
Sharing for the group from their iOS device or Mac. When you set
up Family Sharing, you'll be asked to confirm that you agree to pay
14
for purchases initiated by the family members you invite and that
you have a valid payment method on file. Valid payment methods for setting up Family Sharing include credit cards and debit
cards.*
Use these steps on your iPhone, iPad, or iPod touch:
1 Go to Settings > iCloud.
2 Tap Set Up Family Sharing, then tap Get Started.
3
3
4
5
4 Follow the onscreen instructions.
After you set up Family Sharing, you can invite your family members to join.
Confirm that you want to be the family organizer and that
you're signed in with your personal Apple ID.
Follow the onscreen instructions.
Use these steps on your Mac:
1 Choose Apple menu > System Preferences, then click iCloud.
2 Click Set Up Family.
15
Invite people to join your family
You can add anyone who has an Apple ID to your family, as long as
you're both using iOS 8 or OS X Yosemite on your devices. You can
also use these steps to add a child to your family group.
Invite someone from your iPhone, iPad, or iPod touch:
1 Go to Settings > iCloud > Family > Add Family Member.
2 Enter your family member's name or email address.
3 Follow the onscreen instructions.
Invite someone from your Mac:
1 Choose Apple menu > System Preferences, then click iCloud.
2 Click Manage Family.
3 Click +, then follow the onscreen instructions.
If your family member is with you, they can enter their Apple ID
password on your device to accept the invitation. You can also send
them an invitation, and they can accept from their device.
See if your family member accepted the
invitation
You can accept or decline an invitation to join a family from your
device:
• In iOS 8 on your iPhone, iPad, or iPod touch, go to Settings >
iCloud > Invitations.
• In OS X Yosemite on your Mac, choose Apple menu > System
Preferences > iCloud > Manage Family.
• If the invitation is sent to your email address, you can also respond right from your email.
To accept an invitation, follow the onscreen instructions. Here's
what you'll be asked to do when you join:
• Confirm your Apple ID and password.
• Choose if you want to share your content and which Apple ID
you want to share from.
• Choose if you want to share your location. If you agree, your
location can be displayed on family members’ devices in Find
My Friends and Messages, and the location of your shared devices will also appear on family members’ devices in Find My
iPhone.
If you can't accept the invitation, see if someone else joined a family
with your Apple ID or is sharing purchased content from your Apple
ID. Remember, you can only join one family at a time, and you can
only switch to a different family group once per year.
After you send the invitation, you can check its status under the person's name in Settings > iCloud > Family on your iOS device. On
your Mac, go to Apple menu > System Preferences, click iCloud,
and select Manage Family. Then select that person's name to see the
status of the invitation.
If you need to resend the invitation, select Resend Invitation.
Join a family group
16
Start sharing
After your family members join, the features of Family Sharing are
set up on everyone’s devices. Here's what you can do:
• Download eligible music, movies, TV shows, books, and apps
from the iTunes, iBooks, and App Store.
• Join Apple Music with a Family membership.
• Share family photos and videos. Open the Photos app, tap Family in the Shared tab, and add what you want to share.
• Use the Family calendar. Open the Calendar app to add, view,
or change events and reminders in the Family Calendar.
• Find your family with the Find My Friends app. Choose when
to share your location with your family members.
• Help find family members' devices with the Find My iPhone
app.
• Manage your child's account or turn on Ask to Buy.
computers. iOS 8 or OS X Yosemite are required to set up or join a
Family Sharing group and are recommended for full
functionality. Not all content is eligible for Family Sharing. Content
can be hidden by family members; hidden content is not available
for download. Content downloaded from family members or acquired via redemption codes is not subject to Ask to Buy.
*Accepted forms of payment vary by country or region.
Start SiteCatalyst code version: H.8. End SiteCatalyst code version:
H.8.
Last Modified: Aug 11, 2015
Information in this section comes from the apple website:
https://support.apple.com/en-us/HT201088
Get help
•
•
•
Get help if you don't see your family's shared content. To
share purchased content, you need to turn on Share My Purchases and use the iTunes Store in the same country as your
family members.
Learn how purchases work with Family Sharing.
Learn about Family Sharing.
Family Sharing requires a personal Apple ID signed in to iCloud
and iTunes. Music, movies, TV shows, and books can be downloaded on up to 10 devices per account, five of which can be
17
Section 3
Setting Up Ask to Buy
Request and make purchases
with Ask to Buy
With Ask to Buy, you can give kids the freedom to make
their own choices while still controlling your spending.
Ask to Buy is a feature of Family Sharing, and the family organizer can turn on Ask to Buy for any family member who
isn't an adult. When a family member initiates a new purchase or free download, a request is sent to the organizer if
Ask to Buy is on. For example, this could be a request for
items in the iTunes, iBooks, or App Store, In-App Purchases, iCloud storage, or Newsstand subscriptions.
The organizer can review the item and make the purchase or
decline the request right from their own iPhone, iPad, or
iPod touch with iOS 8 or Mac with OS X Yosemite. If the
family organizer makes the purchase, the content will download automatically to their family member’s device. If it's declined, no purchase or download will take place.
Turn on Ask to Buy
Use these steps to turn Ask to Buy on or off for family members who are under 18* in your family group.
iOS 8
1 Tap Settings > iCloud > Family and tap your family
member's name.
2 Tap Ask to Buy.
OS X Yosemite
1 Choose Apple menu > System Preferences > iCloud.
2 Click Manage Family and select your family member's
name.
3 Select Ask to Buy.
Ask to Buy is on by default for any children under 13, and
you'll be asked if you want to enable Ask to Buy when inviting anyone under 18 to your family group.* If you turn off
Ask to Buy for a family member after they turn 18,* you
can't turn it on again.
18
If you created your child's account using Apple ID for Students, you can use Ask to Buy for personal purchases outside
of the educational institution. It won't apply to any apps or
other content distributed by the school.
Make a request
If Ask to Buy is enabled for your account, browsing the store
is the same as always, but before a purchase is complete, a
request will be sent to your family organizer. You need to use
these steps to send a request to your organizer:
1 Tap the price on the item that you want to get.
2 If asked, enter your Apple ID and password.
3 Tap Ask. Your request will go to the organizer. You can
also tap "approve it in person" if the organizer is nearby
and they can make the purchase directly from your device. After the purchase is made, your content will
download to your device automatically.
If you're the organizer, you can use these steps to make or decline the purchase from your iOS device with iOS 8 or Mac
with OS X Yosemite:
1 Open the notification to see the item that your family
member wants to get. (See your notifications on your
Mac or iOS device.)
2 Approve or decline the purchase.
3 If you approve, you need to sign in with your Apple ID
and password to make the purchase.
After it's purchased, the item is added to the family member’s account and shared with the rest of the family group. If
a family member downloads a previous purchase again,
downloads a shared purchase, installs an update, or uses a redemption code in the store, the organizer won't get a notification.
If the organizer doesn't make the purchase or decline the request, it will be deleted after 24 hours, and the child will
need to make the request again.
4
Even if you make multiple requests for the same item, your
organizer will get only one notification.
Make or decline a purchase
Designate another approver
(parent/guardian)
The organizer can also give another adult in the group permission to manage Ask to Buy requests. In iOS 8, tap Settings > iCloud > Family, tap your family member, then tap
Parent/Guardian. In OS X Yosemite, choose Apple menu >
19
System Preferences > iCloud, select your family member,
then select Parent/Guardian.
Only one adult needs to manage each purchase, and after it's
done, the purchase is final.
*Age varies by country or region.
Start SiteCatalyst code version: H.8. End SiteCatalyst code
version: H.8.
Last Modified: Dec 17, 2014
All content in this section comes from Apple’s website:
https://support.apple.com/en-us/HT201089
20
Chapter 4
Digital
Textbooks
The majority of classes offer digital textbooks, or they give the option of buying digital or print textbooks. For the current book list, click
here. The method of purchasing textbooks depends on the source of the book listed on the book list. Teachers will walk students through
the installation of textbooks and course materials during the first week of classes. • iTunes – Purchases are made with Apple ID
• Amazon, Kno, CourseSmart, CengageBrain, Vista Higher Learning – Purchases are made with accounts set up with each provider.
• SJ Digital Bookstore – To pass along substantial savings to our families, many digital books were purchased directly from publishers
and are noted as "SJ Digital Bookstore" on the book list. Parents and students should purchase these books online by clicking here. 22
Chapter 5
Acceptable
Use Policy
iPads have been a mainstay at Strake Jesuit for a
few years now. The potential of iPads in the
classroom is endless. Like any tool, they can be
used correctly, efficiently, and ineffectively. They can
even be abused or an obstruction.
Section 1
Acceptable Use Policy
Frequently Asked Questions
Which version of the iPad will students
receive? Students enrolled at Strake Jesuit College Preparatory (the School) will be issued
an Apple iPad for the purposes of facilitating education. Strake Jesuit College
Preparatory retains all ownership rights of the iPad; the School may inspect the
iPad and all stored information at any time with or without notice, and the student
As part of our 1:1 technology program, Strake Jesuit provides
should not have an expectation of privacy as to anything stored on, sent by, or
each student with an iPad during his time at Strake Jesuit. In
received through it. At the end of the school year, students will return the iPad to
an effort to maintain cutting-edge technology and prepare our
the school, and all personal data will be deleted. The iPad must be returned upon
students for the digital world of the future, we will be
upgrading student iPads to the 64-gigabyte iPad Air 2 for the
a student withdrawing or graduating from the school.
2015-2016 school year. On April 23, 2015 current freshmen,
sophomores, and juniors will receive a new school-issued, 64
Customization
GB iPad Air 2. Click here for more information.
Certain preference settings, such as screen brightness, wallpaper, and
What cases do you recommend?
All students must have a case for their iPad. Cases should be
durable and provide protection to the iPad, particularly to the
notifications, may be changed by a student. The purchase of certain apps will be
required by course instructors, and with their parent or guardian’s permission,
students have the option to buy other apps from the Apple iTunes Store. Any app
screen, and ensure that corners are covered properly.
purchased on the iPad via the App Store will automatically be available to the
Keyboard covers are not recommended. Students are allowed
student’s iTunes account on any other iOS device at no additional charge. Hacking
to choose their own case because we want them to be able to
or jailbreaking an iPad is not allowed; if a student’s iPad is found to be hacked/
customize their iPad and be able to choose whether to use a
physical keyboard or the built-in touch screen keyboard.
jailbroken or if it is deemed that the iPad is being used inappropriately in any
Sleeves, such as the one sold in the Spirit Store, and magnetic
manner, the student will be subject to disciplinary action and/or possible financial
covers, such as Apple's SmartCover, do not provide sufficient
penalties associated with harming the device. All apps or data stored on the iPad
protection for drops and transport. Below are our
recommendations:
must be consistent with school policy and the mission and spirit of the school. The
24
responsible use of freedom is expected of all students at all
times.
Damaged or Destroyed
Students must report a damaged or destroyed iPad within 24
Standards for iPad Care and Use
•Secure the iPad in a protective cover ensuring protection to the
screen and that corners are covered properly.
•Bring a fully-charged iPad to school every day.
hours to the Technology Department, which will determine
•Keep the iPad with you or in a secure location at all times.
necessary action. The student will be billed $99 for the first repair.
•Adhere to the Internet Use Policy and Camera & Recording Device
For subsequent repairs, made during his time at Jesuit, the
Policy as outlined in Community Life.
student will be billed for the cost of the repairs. This cost typically
•Create a Passcode on the iPad and keep the Passcode confidential.
ranges from $160 to $299.
Maintain a lock screen graphic with your name, class year, and cell or
Lost iPads
home phone number displayed on the graphic.
•Set up and maintain your Strake Jesuit email account on your iPad. It
Students must report a lost iPad within 24 hours to the
is the expectation that students check their Jesuit email daily.
Technology Department. The first case of an iPad’s loss will result
Additional emails can be added.
in the student being billed $299, which is half the price of the
•Do not remove any pre-loaded apps.
iPad. In the case of the loss of a second iPad or more, anytime
•Update apps and the operating system regularly.
during his years at Jesuit, the student will be billed $599, which is
the full price of the iPad.
Financial Responsibility
•Do not lock, deface, or tamper with an iPad belonging to another
student.
•Students must take personal responsibility for the care of their iPad
and take all reasonable precautions to protect it from damage or loss.
In addition to damage and loss issues, a student is responsible
for buying applications for classes from Apple’s App Store. These
apps will be associated with a student’s iTunes account so they
•Clean the screen with a soft, dry anti-static cloth or with a screen
cleaner designed specifically for LCD type screens only. Do not use
paper towels, which may scratch the screen.
can be available on other iOS devices. Families may choose to
use Apple Gift Cards or to associate a credit card with their Apple
ID; this is solely the purview of the family.
25
Chapter 6
Tips for
Distractions
There are literally over a million apps available for
the iPad. Thousands of them created for the
purpose of education. There are a few apps that
are required at Strake Jesuit. We would like to help
you learn how to navigate to find others that can
help you succeed as well. To begin this discussion,
read this article and have a conversation as a family.
Section 1
Notifications
Notifications are great, but at the same time they can be an easy
distractions, and click on them. You have the option to turn off
distraction for most people. Are you one who can easily resist
the notifications completely. The most important option is the
temptations? Sometimes it seems trivial, but constant flashes on
alert style when unlocked. When your iPad is open and unlocked
your screen can wear down your resolve and you may find
in class, it might be best to change those distracting apps to
yourself clicking an email or text in the middle of a lecture. There
NONE under alert style when unlocked.
are two major ways to avoid this. The first is to manually update
what sends notifications, when, and where. The second is ‘Do
Not Disturb’ mode.
Setting up Notifications
Under the
Settings button,
click on the
Turning on Do Not Disturb
This feature blocks FaceTime and all alerts when it is on. When
enabled, a moon icon is present in the status bar of the iPad.
Do not disturb can be set to turn on automatically during a
certain time span (8:00 - 3:00), or it can be turned on and off
manually when you enter and exit a classroom.
Notifications
To see the other
tab. Listed are
options for Do Not
all the apps that
Disturb, you can
send you
find the tab in the
2. Facebook alerts
notifications.
Settings menu.
3. calendar events
Find those you
know will cause
EXAMPLES OF NOTIFICATIONS
1. emails
4. text messages
27
Chapter 7
Basics
iPad user manual and other basic features to
become familar with it.
Section 1
Helpful Resources
iPad User Manual
Using the Restrictions Feature
A Student’s Perspective (read and discuss as a family)
From Distraction to Learning Tool
29