1
Computing
Software Development
[INTERMEDIATE 2]
David Bethune
(Adapted for True BASIC by Alan Patterson)
CONTENTS
Acknowledgements
Alan Patterson acknowledges that he has only changed the original work by David Bethune where
it was necessary to convert any references to Visual Basic into the equivalent for True BASIC.
Every effort has been made to secure all copyright permissions prior to publication. The publishers
will be pleased to rectify any inadvertent omissions at the earliest opportunity.
Learning and Teaching Scotland gratefully acknowledge this contribution to the National
Qualifications support programme for Computing.
First published 2004
© Learning and Teaching Scotland 2004
This publication may be reproduced in whole or in part for educational purposes by educational
establishments in Scotland provided that no profit accrues at any stage.
SOFTWARE
DEVELOPMENT
(INT
2,
COMPUTING ii
INTRODUCTION
Contents
INTRODUCTION
Tutor guide
Student guide
SECTION 1
1.1 Software
1.2 The development process
1.3 A dance in the dark every Monday
1.4 Analysis
1.5 Design
1.6 Implementation
1.7 Testing
1.8 Documentation
1.9 Evaluation
1.10 Maintenance
SECTION 2
2.1 Computer languages
2.2 High and low level languages
2.3 Translators
2.4 Interpreters
2.5 Compilers
2.6 Text editors
2.7 Scripting language and macros
SECTION 3
3.1 Introducing True BASIC
3.2 Input and output – example
3.3 Input and output – tasks
3.4 Enhancing our output
3.5 Using variables
3.6 Working with numbers – example
3.7 Using Clear
3.8 Arithmetical expressions
3.9 Working with numbers – tasks
3.10 Pre-defined numeric functions
3.11 Working with words and numbers – example
3.12 Pre-defined string functions
3.13 Example program using CHR$ and ORD
SECTION 4
4.1 Making choices
4.2 If … Then … Else
4.3 Multiple Ifs
4.4 Using AND – example
4.5 Using AND – task
4.6 Complex conditions
SOFTWARE DEVELOPMENT (INT 2, COMPUTING)
3
3
4
5
5
6
8
10
11
12
12
13
13
14
15
15
15
18
18
18
19
20
25
25
26
31
32
33
35
39
39
40
40
42
44
49
52
52
52
54
57
59
60
1
INTRODUCTION
4.7 Repetition
4.8 Repetition using For … Next
4.9 Counting using For … Next
4.10 For … Next tasks
4.11 Using the loop counter
4.12 Do … Loop Until
4.13 Random numbers
4.14 Arithmetic tester
4.15 More examples using Do … Loop Until
4.16 Other forms of conditional loop
SECTION 5
5.1 Input validation
5.2 Input validation tasks
5.3 Other standard algorithms
5.4 Using arrays
5.5 Examples using arrays
ANSWERS
Section 1.1
after Section 1.10
after Section 2.1
after Section 2.5
after Section 2.7
after Section 3.1
after Section 3.12
Section 4.9
Section 5.3
SOFTWARE DEVELOPMENT (INT 2, COMPUTING)
60
61
64
68
69
70
72
73
75
78
80
80
82
83
85
88
90
90
90
91
91
91
92
92
92
92
2
INTRODUCTION
INTRODUCTION
Tutor guide
This teaching and learning material is designed to cover all the content needed by a learner to
pass the Software Development unit of Intermediate 2 Computing. However, it is the
responsibility of the tutor to check the content coverage against the SQA unit specification.
The pack covers the knowledge and understanding required for Outcome 1 assessment, and
the practical skills required for Outcome 2. There are many opportunities throughout the unit
(especially in Sections 3, 4 and 5) for students to demonstrate the practical skills required, and
generate the required evidence.
For unit assessment, use should be made of the NAB assessment materials provided by SQA
(multiple choice test and practical skills checklist).
Note that learners completing this unit as part of the Intermediate 2 Computing course should
be given opportunities to develop the higher order problem solving skills required for the
external course assessments (examination and practical coursework tasks). This can be done
by providing past exam paper questions, and further programming tasks, such as the specimen
coursework task provided by SQA.
The pack has not been designed for a student to use unsupported, although it might be
possible to use it in this way. Students will need significant tutor support, particularly while
attempting the practical programming sections of the unit. This support would include giving
help with the complexities of the True BASIC environment, providing extra example
programs where a student needs reinforcement activities, and emphasising key teaching and
learning points as they occur.
All the examples provided are exemplified in True BASIC Silver Edition on a PC. Minor
amendments might be required to run the programs in other versions, either earlier or later
versions or the Apple Mac versions. This software development environment and
programming language has been chosen, as it is one in common use in Scottish schools at
present. However, the SQA unit specification does not require any particular language or
environment, so the examples could be adapted and/or substituted by examples in any other
structured procedural high level language. To facilitate this, the examples avoid where
possible constructions that are very specific to True BASIC, and that are not easily converted
into other languages.
Answers to questions are provided at the end of the pack, but not answers to programming
tasks, as many possible correct answers are possible, and syntax may vary depending on the
version of True BASIC in use.
SOFTWARE DEVELOPMENT (INT 2, COMPUTING)
3
INTRODUCTION
Student guide
This teaching and learning material is designed to cover all the skills, knowledge and
understanding that you need to pass the Software Development unit of Intermediate 2
Computing.
To achieve this unit, you must develop and demonstrate knowledge and understanding of:
· the principles of software development (Section 1)
· software development languages and environments (Section 2)
· high level language constructs (Sections 3 and 4)
· standard algorithms (Section 5).
At the end of the unit, you will be tested on this by sitting a short 20-question multiple choice
test.
However, it is not only about passing a test. You must also develop practical skills in software
development using a suitable high level language. Almost any programming language can be
used, but these notes (especially Sections 3 to 5) assume that you are using True BASIC. If
you are using a different programming language, your tutor will need to supply you with other
materials for some parts of the unit.
Your tutor will complete a practical skills checklist for you as you work through the practical
exercises in these notes. You should keep a folio of evidence; this should include
documentation of all the stages of the software development process.
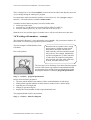
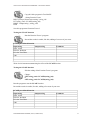
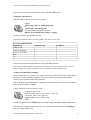
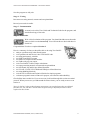
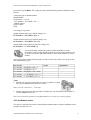
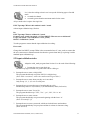
You will see the following icons throughout these notes.
Computer-based practical task – you will need access to a computer with
True BASIC installed for this task.
Questions for you to answer – you can check your own answers against
the sample answers given at the end of this pack.
Activity (non-computer-based) – this will usually require some written
work.
You should ask your tutor to check your work whenever you complete a computer-based
practical task or a non-computer-based activity.
SOFTWARE DEVELOPMENT (INT 2, COMPUTING)
4
SOFTWARE DEVELOPMENT PROCESS
SECTION 1
1.1 Software
This unit is about software.
What is software?
You should already know that any computer system is made up of hardware and software.
The term hardware is fairly easy to understand, because you can see it. It is all the pieces of
equipment that make up the system – the processor, monitor, keyboard, mouse, printer,
scanner and so on.
Software is not so obvious. It is all the programs, instructions and data that allow the
hardware to do something useful and interesting.
Think about all the different items of software that you have used in the last week or so.
Here is the list of programs that I have used recently.
·
·
·
·
·
·
·
·
·
·
·
·
·
·
·
·
·
Microsoft Word (the word processing program that I use – I regularly use three versions
of it: Word 2000, Word 98 for MacOS 8, Word v.X for MacOS X)
Microsoft Excel (spreadsheet used to keep charity accounts for which I am the treasurer)
ClarisWorks 4 (integrated package – I mainly use its word processor and simple
database sections)
Internet Explorer (both PC and Mac versions – for browsing the web)
Safari (web browser for MacOS X)
three different e-mail clients (Netscape Communicator, MS Outlook and Mail)
iPhoto (for organising my digital photographs)
iMovie (for editing digital movies)
Adobe Photoshop (for editing digital photographs)
Citrix ICA thin client (allows me to connect to my work computer from home)
Toast (for burning CDs)
Print to PDF (a shareware program for creating PDF files)
Adobe Acrobat and Preview (for viewing PDF files)
Macromedia Flash (for developing animated graphics)
Home Page (an ancient but reliable web page editor)
some game programs
Symantec Anti-virus suite.
But that’s not all! On each computer that I have used, a program (or group of programs)
called the operating system must have been running. So I must add the following to my list.
·
·
·
·
·
Windows 97 (on the ancient laptop I am using to type these notes)
Windows XP (on another laptop)
Windows 2000 (on a computer at school)
MacOS 8.1 (on my trusty old Mac clone)
MacOS X.2 (on my iMac).
Thirdly, a full list would include all the actual documents, files, web pages, e-mails and so
on, that I had accessed, as these are also software. That would be too long a list, so I’ll ignore
SOFTWARE DEVELOPMENT (INT 2, COMPUTING)
5
SOFTWARE DEVELOPMENT PROCESS
it here.
Activity
How about you? Make a list of all the software (programs and operating systems) that you
have used over the last few days.
The point about all these is this: they didn’t grow on trees! They are available for us to use
because they have been designed and created by teams of software developers. In this unit, we
are going to learn about the process of developing software, and to apply this process to
develop some (simple) programs of our own.
Questions
1. What is the meaning of the term hardware?
2. Give three examples of software.
3. Identify each of the following as either hardware or software.
Item
monitor
database
Windows 97
scanner
an e-mail
Internet Explorer
mouse
modem
a computer game
a word processor
digital camera
hardware
software
1.2 The development process
Before we think about how software is developed, it is worth
considering how any product is developed, because the process is
essentially the same. For example, think about the process of
developing a new model of TV.
Stage 1: Analysis
Before a new product is developed, someone within the company, probably in the marketing
department, analyses what people want. They consider which products are selling well, look
at what rival companies are producing, and maybe even carry out a survey to find out what
people want. From this they can work out which features are required in their newest model,
including its size, target price range and various technical requirements.
They use this information to produce a specification for the new model of TV. This states
clearly all the features that it must have.
Stage 2: Design
The next stage is to turn the specification into a design. Designers will get to work, alone or in
SOFTWARE DEVELOPMENT (INT 2, COMPUTING)
6
SOFTWARE DEVELOPMENT PROCESS
groups, to design various aspects of the new TV. What will it look like? How will the controls
be laid out? Sketches will be drawn up and checked against the specification. Another team of
designers will be planning the internal circuitry, making sure it will allow the TV to do all the
things set out in the specification.
Stage 3: Implementation
Once the design phase is over, engineers will get to work to actually build a prototype. Some
will build the case according to the design, while others will develop the electronics to go
inside. Each part will be tested on its own, then the whole thing will be assembled into a
(hopefully) working TV set.
Stage 4: Testing
Before the new model can be put on sale, it will be thoroughly tested. A wide range of tests
will be carried out.
It might be tested under ‘normal’ conditions. It could be put in a room at normal room
temperature, and checked to see that all the controls work correctly, the display is clear, it is
nice and stable and so on.
If it passes this type of testing, it might next be tested under ‘extreme’ conditions. For
example, does it still work if the temperature is below freezing, or very hot and humid, if it
used for long periods of time, or with the volume or the brightness or contrast set to their
maximum values?
Finally, it could be tested under ‘exceptional’ conditions. What happens if a 2-year old picks
up the remote and presses all the buttons at once? What happens if there is a power cut, or a
power surge?
If it fails any of these tests, it might be necessary to go back to the
implementation (or even design) stage and do some further work, before retesting.
If it passes all the tests, then the new TV can go into production.
Stage 5: Documentation
However, the development isn’t yet complete! Some documentation
will be needed to go with the TV – a User Manual containing all the
instructions about how to work the new TV, and probably a Technical
Manual for repair engineers.
Stage 6: Evaluation
Once the model is in production, the company will want to evaluate it. Does it do what it is
supposed to do? Is it easy to use? And, from the engineer’s point of view, is it easy to repair?
Stage 7: Maintenance
Stage 6 should be the end of the story, but in the real world, there needs to be stage 7 –
maintenance. There are different kinds of maintenance: fixing faults that turn up once it is
being used regularly, improving the design to make it even better, or making changes for
other situations (like making a version that will work in another country).
SOFTWARE DEVELOPMENT (INT 2, COMPUTING)
7
SOFTWARE DEVELOPMENT PROCESS
These seven stages are an essential part of the production process.
Activity
OK, let’s see if you have got the idea …
Choose any type of manufactured object – it could be a car, an item
of clothing, a readymade meal, a toy, a piece of furniture, a building
or ….
Now copy and complete this table, writing one sentence to describe
each of the seven stages in the production of your chosen object.
Object chosen: _______________________________________
Stage
1. Analysis
2. Design
3. Implementation
4. Testing
5. Documentation
6. Evaluation
7. Maintenance
Description
1.3 A dance in the dark every Monday
Exactly the same process goes into the production of a piece of software. The software
engineers and their colleagues carry out all the stages of the software development process in
order – analysis, design, implementation, testing, documentation, evaluation, maintenance.
Activity
Consider the production of a new game program by a software company.
Here are descriptions of the seven stages, but they are in the wrong order.
Copy and complete another table like the one below, and slot the stages into the correct
places:
A. Writing a user guide and technical guide for the software.
B. Deciding what type of game you want to create, and what features you want it to have.
C. Adapting the game to run on a different type of computer.
D. Actually writing all the program code.
E. Checking that the program does what it is supposed to do, is easy to use, and can be fixed
if there is a problem.
F. Working out the details of what the screens will look like, what menus and functions
SOFTWARE DEVELOPMENT (INT 2, COMPUTING)
8
SOFTWARE DEVELOPMENT PROCESS
there will be, and other detailed aspects of the program.
G. Getting users to try out the program to make sure it works under most conditions.
Stage
1. Analysis
2. Design
3. Implementation
4. Testing
5. Documentation
6. Evaluation
7. Maintenance
Description
Check your answers on the next page.
SOFTWARE DEVELOPMENT (INT 2, COMPUTING)
9
SOFTWARE DEVELOPMENT PROCESS
You should have the following.
Stage
1. Analysis
2.
Design
3.
4.
Implementation
Testing
5.
6.
Documentation
Evaluation
7.
Maintenance
Description
B. Deciding what type of game you want to create, and what
features you want it to have.
F. Working out the details of what the screens will look like,
what menus and functions there will be, and other detailed
aspects of the program.
D. Actually writing all the program code.
G. Getting users to try out the program to make sure it works
under most conditions.
A. Writing a user guide and technical guide for the software.
E. Checking that the program does what it is supposed to do, is
easy to use, and can be fixed if there is a problem.
C. Adapting the game to run on a different type of computer.
In this course, especially from Section 3 onward, you will be putting this software
development process into practice when you produce some simple programs in a high level
computer programming language.
For the moment, it is worth trying to learn the steps in the correct order. I usually use a silly
mnemonic for this:
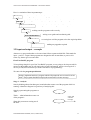
A Dance In The Dark Every Monday
… which helps me remember ADITDEM:
Analysis
Design
Implementation
Testing
Documentation
Evaluation
Maintenance.
You might be able to make up a better
mnemonic than this one – so long as it
helps you, then it’s OK!
Next, we will take a closer look at each of
the stages.
Analysis
Design
Implementation
Testing
Documentation
Evaluation
Maintenance
1.4 Analysis
The main purpose of the analysis stage is to be absolutely clear about what the program is
supposed to do. Often, a new program will start from a rough idea. Before getting started, it is
important to turn the rough idea into an exact description of how the program will behave.
What will it do? What are the inputs and the outputs? What type of computer is it to run on?
All these questions, and many more, must be asked and answered at this stage.
The result of this is the production of a program specification, agreed by both the customer
(whoever wants the program written) and the developer (the person or company who are
developing the program).
SOFTWARE DEVELOPMENT (INT 2, COMPUTING)
10
SOFTWARE DEVELOPMENT PROCESS
1.5 Design
Inexperienced programmers are often tempted to jump straight from the program specification
to coding, but this is not a good idea. It is worth spending time at the design stage working out
some of the important details, including how the program will look on the screen, how the
user will interact with the program, and how the program might be structured. Program
designers use a variety of methods for describing the program structure. Two common ones
are called pseudocode and structure diagrams. There are many others, but we will only
consider these two.
It is easy to understand these if we think about an everyday example, rather than a computer
program.
Think about making tea. Here is a list of instructions for this task.
1.
2.
3.
4.
5.
Get a mug out of the cupboard.
Put a teabag in it.
Boil the kettle.
Pour boiling water from the kettle into the mug.
Stir.
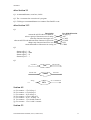
This is an example of pseudocode. It is a numbered list of instructions written in normal
human language (in this case, English). It doesn’t go into all the details, but it gives the main
steps.
Another way of showing this is as a structure diagram. It could look like this:
Making tea
Get mug
from
cupboard
Put teabag
in mug
Boil kettle
Pour water
from kettle
into mug
Stir
Each instruction goes into a separate box. You read pseudocode from top to bottom. You
read a structure diagram from left to right.
Activity
Now try a couple for yourself. Here are some simple tasks.
Going to school
Going to New York
Having a shower
Phoning a friend
SOFTWARE DEVELOPMENT (INT 2, COMPUTING)
11
SOFTWARE DEVELOPMENT PROCESS
Becoming a millionaire
Choose any two, and write a pseudocode instruction and draw a structure diagram for each
one.
Don’t make it too complicated. In the tea example, I broke making tea down into five steps.
You could have broken it down into many more detailed steps. For example, getting a mug
out of the cupboard could be broken down into smaller steps – walk across to the cupboard,
open the door, choose a mug, lift it out, close the door, walk back across the room. Try to
break the task down into between four and eight steps.
We will use pseudocode in Section 3 when we start to develop our own computer programs.
There are other graphical methods of representing the structure of a program. These include
structure charts and flowcharts. Some use a variety of ‘boxes’ to represent different types of
instruction. For example, you might see:
to represent a repeated action
to represent a choice
to represent a step which will be broken down into smaller steps.
1.6 Implementation
In software development, implementation is the process of converting a program design into a
suitable programming language.
There are thousands of different programming languages out there, all with their own
advantages and disadvantages. For the purposes of this course, you only need to know about
two main groups: machine code and high level languages. You will learn more about these
in Section 2.
1.7 Testing
We looked at testing at the start of this section. Whether we are talking about a new TV, a
new item of clothing, or a new computer program, the manufacturers will spend a great deal
of time on testing. This will be carefully planned to test a wide range of conditions. We can
divide it up into three types of testing.
·
Testing normal conditions
Making sure the program does what it should do when used ‘normally’.
·
Testing extreme conditions
Making sure the program can handle situations that are at the edge of what would be
considered normal.
·
Testing exceptional conditions
Making sure it can handle situations or inputs that it has not been designed to cope with.
You will see examples of all of these in Section 3.
SOFTWARE DEVELOPMENT (INT 2, COMPUTING)
12
SOFTWARE DEVELOPMENT PROCESS
1.8 Documentation
When you buy a product, whether it is a computer program or
anything else, you usually get some kind of User Guide with
it. This tells you how to use the product. It might also contain a
tutorial, taking you through the use of the product step by step.
Some software comes with a big fat book called User Guide or Manual; others come with the
User Guide on a CD.
As well as documentation for the user of the software, there should also be a Technical
Guide of some sort. This gives technical information which is of little interest to most users,
except that it will usually include information about the specification of computer required,
including how much RAM it needs, how fast a processor it must have, and which operating
system is required. The Technical Guide should also include instructions on how to install the
software.
Activity
Get hold of a software package that has been bought by your school or college, or one you
have bought yourself at home, open it up and take a look inside the box that it came in. Make
a list of all the items of documentation that you find there.
1.9 Evaluation
The final stage in the process before the software can be distributed or sold is evaluation.
Evaluation involves reviewing the software under various headings to see if it is of the quality
required.
In this course, we will review software under three headings: fitness for purpose, user
interface and readability.
Is the software fit for purpose? The answer is ‘yes’ if the software does all the things that it
is supposed to do, under all reasonable conditions. This means going back to the program
specification (produced at the analysis stage) and checking that all the features of the software
have been implemented. It also means considering the results of testing, and making sure that
the program works correctly and is free from bugs.
The user interface should also be evaluated. Is the program easy to use? Is it clear what all
the menus, commands and options are supposed to do? Could it be improved in any way?
The third aspect of evaluation that we will consider is readability. This is of no direct
concern to the user of the software, but is important for any programmer who may need to
understand how the program works.
It is to do with the way that the coding has been implemented. Is it possible for the program
code to be read and understood by another programmer, perhaps at a later date when the
program is being updated in some way? We will look in Section 3 at some techniques for
improving the readability of a program.
SOFTWARE DEVELOPMENT (INT 2, COMPUTING)
13
SOFTWARE DEVELOPMENT PROCESS
1.10 Maintenance
This final phase happens after the program has been put into use.
There are different types of maintenance that might be required.
These are called corrective maintenance, perfective maintenance
and adaptive maintenance. You don’t need to know these names
until Higher level, but it is useful to think about what they mean.
Corrective maintenance means fixing any bugs that appear once the program is in use. Of
course, these should all have been discovered during testing. However, most programs (but
not the ones you will be writing) are so huge and complex that some bugs are bound to slip
through unnoticed. If the bugs are serious in nature, the software company might issue a free
‘patch’ on its website, so that users can download the patch, and install it with the software, so
fixing the bug. If it is a minor bug, they may not bother.
Perfective maintenance is adding new features to the software. These might be suggested as
a result of the evaluation stage, or they might be suggested by users. These new features will
then be added to the software, and re-issued as a new version. That’s why software often has
version numbers. Each version results from corrective and perfective maintenance of the
earlier versions. So (for example), BloggProg 3.2 will be similar to BloggProg 3.1, but with
bugs fixed, and some new features added.
The third type of maintenance is adaptive maintenance. This is where the software has to be
changed to take account of new conditions. The most obvious example is when a new
operating system comes out. Perhaps BloggProg 3.2 was designed to run under Windows
2000. When Windows XP came along, changes had to be made to BloggProg so that it would
work under the new operating system.
Questions
1. Match up these descriptions of the stages of the software development process with the
correct names (one has been done for you).
Stage
Evaluation
Testing
Implementation
Design
Documentation
Analysis
Maintenance
Description
Writing a user guide and technical guide for the software.
Working out the details of what the screens will look like, what menus
and functions there will be, and other detailed aspects of the program.
Deciding what type of game you want to create, and what features you
want it to have.
Actually writing all the program code.
Adapting the game to run on a different type of computer.
Checking that the program does what it is supposed to do, is easy to
use, and can be fixed if there is a problem.
Getting users to try out the program to make sure it works under most
conditions.
2. What three criteria will be used for evaluating software in this unit?
3. What is the relationship between pseudocode and a structure diagram?
4. Name two items of documentation usually provided with a software package, and
describe what you would expect each one to contain.
5. What three types of testing should be applied to any software?
6. Describe two examples of maintenance that could be required on a game program.
SOFTWARE DEVELOPMENT (INT 2, COMPUTING)
14
LANGUAGES AND ENVIRONMENTS
SECTION 2
2.1 Computer languages
Just as there are many human languages, there are many computer programming languages
that can be used to develop software. Some are named after people, such Ada and Pascal.
Some are abbreviations, such as PL/1 and Prolog. All have different strengths and
weaknesses. FORTRAN was designed for carrying out mathematical and scientific
calculations. Prolog is good for developing programs in artificial intelligence. COBOL is for
developing commercial data processing programs.
Activity: Make a list of six or so programming languages (you can find these
in textbooks or on websites). For each one, write down where it gets its name
from, and what it is ‘good’ for.
Here are some examples to get you started:
Name
Ada
Logo
FORTRAN
Source of name
after Countess Lovelace
Greek for ‘thought’
FORmula TRANslation
Used for
US military systems
education
early scientific language
All these languages are what we call high level languages. That is to distinguish them from
low level languages! What do we mean?
2.2 High and low level languages
Inside every computer, there is a processor. This is a chip containing digital electronic
circuits. These circuits work with tiny pulses of electricity and electronic components. The
pulses of electricity can be represented by the digits 1 and 0. Every item of data and every
instruction for the processor is represented by a group of these binary digits.
Processors only ‘understand’ these binary digits. The only inputs you can make to a processor
are groups of binary digits. The only output that a processor can make is a group of binary
digits.
Instructions and commands made for processors in this binary digital form are known as
machine codes.
Here are a few machine codes for a 6502 processor:
10101001 00000001
10000101 01110000
10100101 01110000
I’m sure you’ll agree that they are not very easy to understand.
There are several problems with machine code:
· machine codes for different processors are different
· they are very hard for humans to understand and use
· they take up a lot of space to write down
· it is difficult to spot errors in the codes.
SOFTWARE DEVELOPMENT (INT 2, COMPUTING)
15
LANGUAGES AND ENVIRONMENTS
Unfortunately, processors don’t understand anything else, so machine code has to be used.
The earliest computers could only be programmed by entering these machine codes directly.
It was a slow process, easy to get wrong, and it was very difficult to track down and fix any
bugs in the programs. Machine codes are an example of low level languages, understood by
the low level components of the computer system (the processor and other electronic circuits).
To get round these difficulties, computer scientists invented high level languages.
High level languages are similar to human languages. Instead of using binary codes, they use
‘normal’ words. For example, the computer language BASIC uses words like PRINT, IF,
THEN, REPEAT, END, FOR, NEXT, INPUT and so on. That means that high level
languages are easier to understand than machine code, and are more ‘readable’, that is, it is
easier to spot and correct errors.
On the next page is a simple program written in a number of high and low level languages.
SOFTWARE DEVELOPMENT (INT 2, COMPUTING)
16
LANGUAGES AND ENVIRONMENTS
10 Number:= 1
20 Answer:= Number + 1
30 PRINT Answer
40 END
The first three are all examples of high level languages
(BASIC, Logo and Pascal). All use words that are
understandable to humans.
make ‘number 1
make ‘answer ‘number + 1
say ‘answer
PROGRAM adder;
VAR answer,number: real;
BEGIN
Number:=1;
Answer:=number+1;
WRITELN(answer);
END.
This is a low level language called 6502
assembler – not so easy to understand!
10101001 00000001
10000101 01110000
10100101 01110000
01101001 00000001
10000101 01110001
00100000 11101110
11111111 01100000
LDA #1
STA 1000
LDA 1000
ADC
STA 1001
JSR OSWRCH
RTS
And this final one is 6502 machine code, which is
completely unintelligible to (most) humans.
In fact, all five of these programs do more or less the
same job! I think you will agree that high level languages
are much more practical for writing programs than
machine code!
Questions
1.
2.
3.
4.
5.
6.
Which type of language (high or low level) is easier to understand?
Which type would be easier to correct if it had a mistake in it?
Name two low level languages.
Name two high level languages.
Explain the main differences between high and low level languages.
List two advantages of high level languages.
It looks as though high level languages have all the advantages compared to machine code.
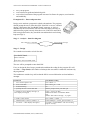
However, there is one major problem – processors don’t understand high level languages at
all! To get round this problem, computer scientists have developed translator programs which
can translate high level languages (written by humans) into machine code (understood by
processors).
high level language
translator
program
SOFTWARE DEVELOPMENT (INT 2, COMPUTING)
machine code
17
LANGUAGES AND ENVIRONMENTS
2.3 Translators
There are two main types of translator program that you need to know something about.
These are called interpreters and compilers.
To understand the difference, it is useful to think about an
analogy from the ‘non-computer’ world.
Imagine that you are the world expert in some obscure subject,
like ‘the anatomy of the microscopic tube worms of the steppes of
Kazakhstan’. You have been invited to present a lecture on this
subject at a conference to be held in Japan. Most of the delegates
at the conference do not speak or understand English, and you do
not know any Japanese. How are you going to communicate?
There are two options.
2.4 Interpreters
Option 1 is to go to the conference yourself, and deliver your speech in English one sentence
at a time. After each sentence, a professional translator (who can understand English and also
speaks fluent Japanese) will turn your sentence in Japanese. This will continue right through
your lecture, with the interpreter translating each sentence as you go along.
Computer interpreter programs work in the same way. The interpreter takes each line of high
level language code, translates it into machine code, and passes it to the processor to carry out
that instruction. It works its way through the high level language program one line at a time
in this way.
This works fine, but it has a couple of important disadvantages.
Think about the analogy again. Your one-hour lecture will take two
hours to deliver, as each sentence is spoken by you in English, then
by the interpreter in Japanese. The other disadvantage is that if you
are then asked to deliver your lecture again in another Japanese city,
you will need to have it translated all over again as you are
delivering it the second time.
The same problem is true of computer interpreters. The process of translating the high level
language (HLL) program slows down the running of the program. Secondly, the HLL
program needs to be translated every time it is used. This is a waste of computer resources
and means that the user must always have an interpreter as well as the HLL program (often
called source code).
2.5 Compilers
An alternative approach is to use a compiler.
Going back to the Japanese lecture example – instead of using a translator at the conference,
you could write down the text of your lecture in English, and get a translator to translate it all
into Japanese in advance. You could then send the translated lecture script to the conference,
and have it read out by a Japanese speaker there.
The advantages are obvious – your lecture can be delivered in the one hour allowed in the
SOFTWARE DEVELOPMENT (INT 2, COMPUTING)
18
LANGUAGES AND ENVIRONMENTS
conference programme, and it can be used as often as required without it needing to be
translated over and over again.
A compiler program works in the same way. It takes your HLL program, and translates the
whole program into machine code once. This machine code can then be saved and kept. Once
translated, it can be used over and over again without needing to be translated every time. The
compiled program therefore runs more quickly, and the user doesn’t need to have a translator
program on their own computer.
Software that you buy, such as a games program or an application, will have been compiled
into machine code before being distributed and sold. What you get on the disk or CD is a
machine code program that can run on your computer without needing to be translated.
Questions
1.
2.
3.
4.
Name the two main types of translator program.
Which one translates a whole program into machine code before it is executed?
Which one translates a program line by line as it is being executed?
Why do machine code programs run more quickly on a computer than high level
language programs?
2.6 Text editors
During the development of a high level language program, after the analysis and design
stages, the programmer (or team of programmers) has to implement the design by coding it in
a suitable high level language.
Here is an example of a Visual BASIC program.
Private Sub cmdOK_Click()
‘ coding for the OK command button
‘ displays an appropriate message for each possible number entered
‘ written by A. Programmer on 29/12/03
Dim Number as Integer
Number = txtNumber.text
If Number = 1 Then MsgBox Number & “ wins you a colour TV”
If Number = 2 Then MsgBox Number & “ wins you a mobile phone”
If Number = 3 Then MsgBox Number & “ wins you a holiday in Spain”
If Number = 4 Then MsgBox Number & “ wins you 10p”
If Number = 5 Then MsgBox Number & “ wins you a day at the beach”
If Number < 1 Then MsgBox Number & “ is too small”
If Number > 5 Then MsgBox Number & “ is too large”
End Sub
You can see that a high level language has features that make it similar to a human language –
the use of ordinary words, for example. This means that the implementation is often carried
out using similar tools to those used for writing an essay or report. For example, cut and paste
would be useful when typing the program shown above. To write an essay or report, you
would normally use a word processing package. High level language programs can also be
written using a word processing package. The source code can be saved as a text file, which
can then be translated into machine code by a compiler.
SOFTWARE DEVELOPMENT (INT 2, COMPUTING)
19
LANGUAGES AND ENVIRONMENTS
However, some software development environments provide a text editor which incorporates
many of the usual features of a word processor. The most useful of these is probably the
ability to cut and paste sections of code.
Activity: Consider the software development environment you are using for
the programming section of this unit.
Does it have a text editor, or do you use a separate word processing package? What useful
text editing features does it incorporate?
2.7 Scripting language and macros
Most of this unit is concerned with the process of developing programs written in a high level
language to create stand-alone applications.
However, small programs called macros can be developed within some existing application
packages.
Example 1: creating an Excel spreadsheet macro
Set up a small spreadsheet like this:
Save it as course.xls
Save a second copy of the same spreadsheet as course_copy.xls
From the Tools menu, select Macro, then Record New Macro.
The following dialogue box should appear (Note: date and name after ‘Macro recorded’ will
be different):
SOFTWARE DEVELOPMENT (INT 2, COMPUTING)
20
LANGUAGES AND ENVIRONMENTS
Enter the name (tidy_up_SS)
And the shortcut key (Ctrl + Shift + K)
Then click OK
Warning: follow these instructions very carefully – all your actions
are being recorded!
·
·
·
·
·
·
Select cell A1 (the title of the spreadsheet)
Change its font to 18pt Bold
Select A3 to D13 (all the data)
Centre it all using the centre button on the menu bar
Select row 3 (the column headings)
Make them bold.
The spreadsheet should now
look like this:
SOFTWARE DEVELOPMENT (INT 2, COMPUTING)
21
LANGUAGES AND ENVIRONMENTS
Click on Stop Recording
Save the improved spreadsheet as course2.xls
All the series of actions that you applied to course.xls to turn it into course2.xls have been
recorded and stored as a macro.
To see the macro you have created:
· go to the Tools menu
· select Macro
· select Macros.
A dialogue box like this should
appear, with your named macro
listed under the name you gave it.
Click on Edit.
Another window will open, which displays the code of the macro you have recorded, like this.
You should be able to
recognise the actions you
took.
For example, the first
section records the
macro’s name and shortcut
key.
Next comes the action of
selecting cell A1, changing
the font to 18 point, and so
on …
The macro is actually coded in a scripting language called Visual BASIC for Applications,
or True BASICA for short.
SOFTWARE DEVELOPMENT (INT 2, COMPUTING)
22
LANGUAGES AND ENVIRONMENTS
What use is a macro?
·
·
·
keep course 2.xls open
open course_copy.xls
hold down Ctrl + Shift + K.
The file course_copy.xls should be automatically formatted by the macro to be the same as
course2.xls.
If the user had several similar unformatted spreadsheets and wanted them all formatted in this
way, he could save a great deal of time by using the macro.
A macro is a time-saving program written in a scripting language which can be activated by a
series of key strokes for repeated use. A macro cannot exist alone – it only works with an
application program (in this case, Excel). In this example, we have seen a macro being used
with a spreadsheet. Macros can be used with many other application packages.
Example 2: creating a word processing macro
·
·
·
·
·
·
·
open any word processing document
as before, from the Tools menu, select Macro, then Record New Macro
name the macro bold_red_text
assign a shortcut key combination (perhaps Ctrl + Alt + R)
click OK (Now the macro is being recorded)
select bold and text colour red from the menu bar
click to stop the macro recording.
Now you can use the macro.
·
·
select any block of text
activate the macro by using the shortcut key combination.
You can also activate the macro by selecting it from Tools, Macro, Macros.
This macro would be useful if you have several documents to work through, in each of which
you have been asked to change the main heading to bold red text.
If you needed to change all the sub-headings to italic blue text, you could set up another
similar macro to do that. Alternatively, you could edit the macro directly by changing the
True BASICA code in the edit window. Try editing the above macro to make it produce blue
italic text.
The examples above are very simple ones. Macros can be used to automate any task within an
application program. For example, they can be used to activate long and complex data
manipulations within a database application, or specialised formatting within any type of
document.
Some applications, such as AppleWorks, allow you to record macros, but don’t allow you to
edit the code as you can in MS Office. If you have time, you could explore any other
applications that you use, to see if they have a macro facility.
SOFTWARE DEVELOPMENT (INT 2, COMPUTING)
23
LANGUAGES AND ENVIRONMENTS
Questions
1. What is a macro?
2. What type of language is used to write macros?
3. What are the advantages of using macros?
4. Describe two examples where a macro could be useful.
SOFTWARE DEVELOPMENT (INT 2, COMPUTING)
24
HIGH LEVEL LANGUAGE PROGRAMMING – GETTING STARTED
SECTION 3
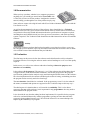
3.1 Introducing True BASIC
In this section of the course, you are going to learn to develop programs using a high level
language called True BASIC.
Before you start writing any programs it would be a good idea to create a new folder
wherever you save your work, home drive on a network, on your hard disk or wherever. I
have called my new folder My Programs.
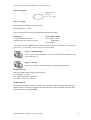
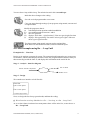
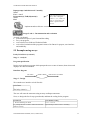
The first stage is to become familiar with the True BASIC environment. Here is what you see
when True BASIC starts up.
Navigate to your folder and open My Programs and your programs should save
automatically into it. Make sure All files is selected otherwise you may not be able to find
your programs.
Click on New and the following screen will appear.
At the top is the menu
bar, with the usual
menus (File, Edit) and
some specialised menus.
There is also the Run
menu, which you will
use most often.
At the bottom of the
screen is the Command
Menu. We will not use
this for quite a while
except to examine
occasionally to see what
has happened to our
program.
We are going to learn to develop True BASIC programs, using the steps of the software
development process that you have already met.
SOFTWARE DEVELOPMENT (INT 2, COMPUTING)
25
HIGH LEVEL LANGUAGE PROGRAMMING – GETTING STARTED
Here is a reminder of these important steps.
making sure you know what the program has to do
Analysis
Design
deciding on the form layout, the inputs, outputs and processes required
Implementation
Testing
creating the form and writing the code for any actions
making sure the program works correctly
writing a user guide and a technical guide
Documentation
Evaluation
reviewing how well the program solves the original problem
Maintenance
making any upgrades required
3.2 Input and output – example
Almost every program that has ever been written follows a pattern called IPO. This stands for
input – process – output. Most programs are designed to take in some data, to process it in
some way, then to give out some data.
First True BASIC program
To keep things simple for your first True BASIC program, we are going to develop one which
misses out the middle step! It will simply take in some information, and give it out again. It’s
not very useful, but it will teach you some of the basics of programming.
We start with the program specification.
Design, implement and test a program which will prompt the user to enter his or her
name. The program should then display the name and a welcome message.
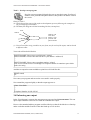
Stage 1 – Analysis
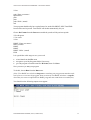
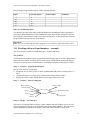
Start by thinking about what data goes in and what data comes out of the program while it is
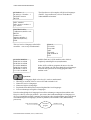
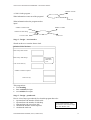
running. A data flow diagram is a good way of analysing this.
Start by representing the program as a
‘blob’ …
Think … what information comes out
of the program?
Name and
welcome
message
Show this as an arrow coming out of
the blob …
SOFTWARE DEVELOPMENT (INT 2, COMPUTING)
26
HIGH LEVEL LANGUAGE PROGRAMMING – GETTING STARTED
Now think … what information needs
to go into the program to give this
output?
Name
Name and
welcome
message
Show this as an arrow going into the
blob
Copy this diagram – you have drawn your first data flow diagram.
Stage 2 – Design – user interface
Next we need to think about what we want the program to look like.
We can write out how we want the output to look.
Enter your name?
James
Hello James
Our output has:
· a question and a question mark
· a response (James)
· an output (Hello James).
If you’re wondering where the message is going to appear, when we Run the program it will
appear in a separate output window.
Stage 2 – Design – pseudocode
Pseudocode is just a fancy name for a list of steps that the program should carry out every
time you run it. You write it in a sort of cross between English and computer language. It lets
you think about the steps carefully without getting bogged down in the actual coding. Another
advantage of pseudocode is that it can then be easily converted into almost any high level
language you want – in our case, True BASIC.
Here is a list of steps for our program (pseudocode).
1. ask for the name
2. enter the name
3. display the message.
That’s it! That is all our program is supposed to do.
Stage 3 – Implementation – coding
Now we are ready to start coding.
Start up True BASIC on your computer and select New. In the source
window type the following exactly as it written here, except for your name
and date where you should type in your name and today’s date.
! First Program
! Your name
SOFTWARE DEVELOPMENT (INT 2, COMPUTING)
27
HIGH LEVEL LANGUAGE PROGRAMMING – GETTING STARTED
! Date
print “Enter your name “
input name$
print
print
print “Hello “;name$
end
Your program should really have capital letters for words like PRINT, INPUT and END
because these are keywords. True BASIC will do this automatically for you.
Choose Do Format from the Run menu and the keywords will be put into capitals.
! First Program
! Your name
! Date
PRINT “Enter your name “
INPUT name$
PRINT
PRINT
PRINT “Hello “;name$
END
It is a good idea at this stage to save your work.
·
·
·
select Save from the File menu
navigate to your My Programs folder if necessary
give the program a sensible name like Welcome, then click Save.
Now you can try to run your program.
To do this, choose Run from the Run menu.
(Note: True BASIC uses a built-in interpreter to translate your program into machine code
line by line as it executes the program. Some versions of True BASIC also have a compiler,
which lets you convert completed True BASIC programs into stand-alone executable files.)
You should see the following output screen appear.
SOFTWARE DEVELOPMENT (INT 2, COMPUTING)
28
HIGH LEVEL LANGUAGE PROGRAMMING – GETTING STARTED
Now let us have a look at what we have done and what the keywords have done.
! – all text following ! is ignored. It is used for comments.
PRINT – causes everything on the line to be output on the screen.
INPUT – puts a question mark on the screen and allows us to type information in.
END – Every program needs an end statement.
PRINT – on its own prints a blank line.
We also used a variable and some other punctuation.
name$ – is a variable containing text. The $ tells us it is for text or a string of characters. If
you run the program several times you can enter a different name each time. The name varies
and so we call name$ a variable. Now we can call name$ a string variable.
“ and ; are used with PRINT. Everything inside “ “ is displayed and ; is used to separate items
on a print line so we can print several items, a mix of variables and text, on the same line.
Errors
If you mistyped almost anything you will have errors. If I had missed out the ; on the print
line (a very common error) I would see a screen like this one.
If I click on the highlighted line I will be taken to the error. The message is not very helpful as
illegal expression could mean one of many things were wrong. The Untitled 1:9:15 is a bit
more helpful as it tells us that the error is on line 9 and 15 characters in. We can then see that
the ; is missing from the print line.
If your program worked perfectly remove the ; and run it and follow the error message
through and correct the program then run it again.
If your program has its own errors then follow the error message and line numbers and try and
correct it.
When the program runs without errors then we can go on to the next stage, which is to test it
thoroughly.
Stage 4 – Testing
The next stage is to make sure the program works correctly.
As before, Run the program.
SOFTWARE DEVELOPMENT (INT 2, COMPUTING)
29
HIGH LEVEL LANGUAGE PROGRAMMING – GETTING STARTED
·
·
enter your name when prompted
the word Hello should appear with the appropriate name in it!
If it does work, well done!
Would you buy a piece of software that had only been tested once? Probably
not!
One test is not enough!
We need to test the program systematically.
So … run some more tests – some normal tests, like the one above – but also try some more
extreme testing. For example, what happens if you enter a number instead of a name, or if you
enter a double-barrelled name? Does it matter or does the program just print out ‘Hello’ and
whatever you type in?
Stage 5 – Documentation
First, you might want some hard copy evidence of your program – it’s your first True BASIC
program, so you may feel justifiably proud of it!
Printing your program
Select Print from the File menu. A print dialogue box does not usually appear and your
program prints out on the currently selected printer. Do you see now why it is important to put
your name as a comment? If the whole class prints at once you can at least identify your
program.
There are two ways to print the output.
1. There is a file option on the output screen and you can select Print from it. This will print
the output screen.
2. In the box at the bottom of the Command Window you can type RUN >> and everything
that is displayed will be printed.
There is a subtle difference between the two and when working with simple programs in
which all output fits onto the screen use option 1 – File Print.
Saving your program
Choose Save from the File menu to save any changes you have made.
When you exit, you will be prompted to save changes to the file. Click Yes to both of these.
User Guide
User Guide
Start the program by opening First Program.
Click on the Run menu and then choose Run.
Write a couple of sentences
describing how to use your program:
Enter your name when prompted.
A message should appear.
SOFTWARE DEVELOPMENT (INT 2, COMPUTING)
30
HIGH LEVEL LANGUAGE PROGRAMMING – GETTING STARTED
Technical Guide
Write a note of the types of hardware
and software you have used:
Technical Guide
Hardware used:
Dell Inspiron 3500 laptop
Operating System:
MS Windows 97
Software used:
True BASIC Silver
Stage 6 – Evaluation
The evaluation of your program should answer the following questions.
1. Is the program fit for purpose? (Does it do what is required by the specification?)
2. Is the user interface good to use? Could it be improved?
3. Is the program coding readable (so that another programmer could understand how it
works)?
Your answers might look like this:
Evaluation
· The program fulfils the specification. If you enter a name, it responds with an appropriate
message.
· The user interface is easy to use – it prompts for input, and the command button is clearly
labelled.
· The coding has comment lines and uses sensible variable names to make it readable.
Stage 7 – Maintenance
Maintenance might involve making the change suggested by the person who asked for the
program, or adapting the program to run on a different type of computer system. You don’t
need to do either of these for Intermediate 2!
3.3 Input and output – tasks
Task 1 – adapt the program
Adapt the program you have already written to output a personalised Happy
Birthday message. Obtain hard copies of the output and code for your new
program (if your teacher/lecturer wants you to).
Instead of writing:
PRINT “What is your name”
INPUT name$
we can use INPUT PROMPT and our two lines become:
INPUT PROMPT “What is your name “:name$
Note the use of the colon (:) in INPUT PROMPT and the semi-colon (;) in a PRINT
statement. Again confusion of these is a great source of errors.
SOFTWARE DEVELOPMENT (INT 2, COMPUTING)
31
HIGH LEVEL LANGUAGE PROGRAMMING – GETTING STARTED
Task 2 – develop a new program
Develop a new program which asks the user to enter their name, first line of
address, town, postcode and phone number, then produce an address card on
the screen.
Hints for Task 2:
(a) Work through the stages of the software development process following the example on
the previous pages as a model.
(b) The data flow diagram will look something like this (incomplete).
name
address
Address card
with name,
address, town,
postcode and
phone number
(c) You will need five string variables on your form, one for each of the inputs, and each with
a different name.
Your code will look a bit like this.
INPUT PROMPT “Please enter your full name “:name$
INPUT PROMPT “Please enter the first line of your address “:address1$
…
…
INPUT PROMPT “Please enter your phone number “:telno$
Note we use telno$ because even though it is telephone number it contains a space which
makes it a string.
And then to output the name and address print lines will look like this.
PRINT name$
etc.
Now enter your program and correct the errors until it works properly.
Now amend the program slightly so that the output appears as:
Name: John Smith
…
…
Telephone Number: 01342 452345
3.4 Enhancing our output
In the ‘First Program’ program, the output message appeared in a Print statement. This was
quite simple and there is not a lot we could do to enhance the output.
However the amended address program could be tidied up so that all the labels were lined up
under each other and the first line of the data lined up as well such as:
SOFTWARE DEVELOPMENT (INT 2, COMPUTING)
32
HIGH LEVEL LANGUAGE PROGRAMMING – GETTING STARTED
Name:
…
…
Telephone Number:
James Smith
01342 452345
We can use the TAB statement to achieve this. TAB(30) for example prints the next letter at
position 30 across the screen. Our print lines now become:
PRINT “Name:”;TAB(30);name$
etc.
Amend your program so that the data is lined up under column 20.
3.5 Using variables
The programs in Sections 3.2 and 3.3 were designed to process words – like your name or
address. The program in Task 2 also handled a phone number, but it treated this as a string of
characters.
If a program has to process numbers, then we have to ‘tell’ the computer to expect a number
rather than a ‘string’.
The reason for this (as you probably know from the Computer Systems unit) is that computers
store different types of data in different ways. It is good programming practice to consider all
the data that will need to be stored while the program is running. We do this at the design
stage. A data flow diagram is a useful tool for doing this, although it only tells us the data that
goes in and out of the program. There may also be other data which needs to be stored during
the processing between input and output.
We will consider two types of data in this course.
Activity
Look at these items of data in the box below. Can you group them into two
basic types?
120
book
5.7
TD7
Monaco
1.05
29.5
A. Einstein
5700
0.006
699
Int 2
–100
–15.3
9999
You might have grouped them into these two lists.
List 1:
List 2:
120
29.5
Int 2
699
5.7
book
–100
0.006
A. Einstein
5700
1.05
TD7
9999
–15.3
Monaco
List 1 is all numbers – we call them numeric. So does True BASIC.
SOFTWARE DEVELOPMENT (INT 2, COMPUTING)
33
HIGH LEVEL LANGUAGE PROGRAMMING – GETTING STARTED
List 2 is all groups of characters – True BASIC calls these strings.
Activity: Classify each of the following as string or numeric.
(a) 150
(e) 0.5
(i) Albert
(b) Bob the Builder
(f) –500
(j) –99.99
(c) 49.99
(g) 5S3
(k) 0.00006
(d) EH16 1AB
(h) 123
(l) 5 High Street
True BASIC does not need to know what type of data it will be storing and processing in
advance. We can use variables as we need them in the program.
The first time a numeric variable is used it has the value zero (0).
The first time a string variable is used it has the value null string (“”).
As soon as you assign a value to a variable it takes that value and we can assign values in
different ways.
LET wage = 200
LET name$ = “Fred”
INPUT wage
INPUT name$
READ wage
assigns 200 to the variable wage
assigns Fred to the variable name$
whatever value is typed in is assigned to wage
whatever string is typed in is assigned to name$
a value for wage is held in a DATA statement and is assigned when
the READ statement is executed
When the True BASIC system executes these statements during a program, it sets up a storage
space of the appropriate type, in the computer’s RAM, and labels it with the variable name
given. Of course, these are ‘electronic’ storage locations, but it is useful to imagine them as
labelled boxes in which data can be stored, like this:
A numeric variable, called no_in_class, storing
value 18
A string variable, called name$, storing value
Albert
A string variable, called price, storing value
£27.99
SOFTWARE DEVELOPMENT (INT 2, COMPUTING)
34
HIGH LEVEL LANGUAGE PROGRAMMING – GETTING STARTED
These ‘storage boxes’ are called variables, because the actual value of the data they store can
vary or change during the running of a program.
It is important to make sure that all variables are correctly used – the right type (string or
numeric) – and with sensible, readable variable names.
Variables can have almost any name, but each variable name:
· must begin with a letter
· must not be a True BASIC keyword (like END or PRINT or INPUT)
· must not contain spaces (no_in_class is OK, but no in class is not).
Note: there are several other types of variable, but we will use only these two in this unit.
3.6 Working with numbers – example
The programs in Section 3.3 were designed to process words – like your name or address. In
this section, we will develop programs to process numbers.
The first example is called Belinda’s Slab
Calculator!
Here is the problem.
Belinda works in a garden centre, selling
paving stones. Customers come in with
the plans for their patio, and ask how
many slabs they will need, and how much
they will cost. For example, Mr McInally
says his back garden is 35 slabs wide and
16 slabs deep. He wants the pink granite
slabs at £2.99 each. How many slabs will
he need, and what will they cost?
The first step is to be absolutely clear about what the program
must do. This must be agreed between the Belinda and the
programmer before starting. The agreed definition of what
the program must do is called the program specification.
Stage 1 – Analysis – program specification
Design, write and test a program to:
· input two whole numbers (the number of slabs wide and number of slabs deep)
· multiply them together (number of slabs needed = number wide * number deep)
· input the price of a single slab
· multiply to get the total price
· display the results (number of slabs required and total cost).
The program should work for any numbers.
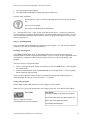
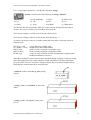
Stage 1 – Analysis – data flow diagram
SOFTWARE DEVELOPMENT (INT 2, COMPUTING)
35
HIGH LEVEL LANGUAGE PROGRAMMING – GETTING STARTED
Number of slabs
A ‘blob’ for the program …
What information comes out of the program?
Total cost
What information does the program need as
input?
Number of slabs wide
Number of slabs
Number of slabs deep
Cost of a slab
Total cost
Stage 2 – Design – user interface
Sketch out how we want the form to look.
Belinda’s Slab Calculator
How many slabs wide?
How many slabs deep?
Calculate
slabs and
cost
Cost of one slab (£)
Number of slabs required:
Total cost (£)
This program has:
· a title heading
· three variables for input
· two variables for output.
Stage 2 – Design – pseudocode
Here is a list of steps (pseudocode) for what this program has to do:
1. input and store the number of slabs wide
2. input and store the number of slabs deep
At the implementation stage,
3. input and store the cost of one slab
we will turn each of these steps
4. calculate the number of slabs required
into True BASIC code.
5. calculate the total cost
SOFTWARE DEVELOPMENT (INT 2, COMPUTING)
36
HIGH LEVEL LANGUAGE PROGRAMMING – GETTING STARTED
6. display the number of slabs required
7. display the total cost.
Stage 3 – Implementation – coding
Start True Basic and ask for a NEW program. When you are given the
source window, type in the following code very carefully.
! Belinda’s Slab program
! Your name
! Date
INPUT PROMPT “Please enter the number of slabs wide “:slabs_wide
INPUT PROMPT “Please enter the number of slabs deep “:slabs_deep
INPUT PROMPT “Please enter the cost of 1 slab “:cost
LET no_of_slabs = slabs_wide * slabs_deep
LET total_cost = no_of_slabs * cost
PRINT
PRINT
PRINT “You require “;no_of_slabs;” slabs.”
PRINT “The total cost is (£)“;totalcost
END
If it all looks correct, then:
Run the program to make sure it is working correctly.
Enter the following data.
slabs wide : 4
slabs deep : 5
cost per slab : 2.99
The following results should appear below the inputs.
total number : 20
total cost (£) : 59.8
If it has worked correctly, save it in the correct folder (my Programs, for example).
If it doesn’t work, then go back and check for errors. The commonest mistake is to make a
spelling error in the name of a variable or missing out a semicolon on the print line or a colon
on the input line, so always check these carefully!
Stage 4 – Testing
Testing is a very important stage in the software development process. Proper testing of a
commercially produced program may take as long as the implementation.
We will test this program methodically using normal, extreme and exceptional data.
Normal data is data that you would expect to be input to the program.
Extreme data is data that is on the limits of acceptability – it should work, but you need to
check to make sure. Extreme data could include zero, or very large numbers, or numbers close
to any limit relevant to the program.
SOFTWARE DEVELOPMENT (INT 2, COMPUTING)
37
HIGH LEVEL LANGUAGE PROGRAMMING – GETTING STARTED
Exceptional data is data that shouldn’t be input under normal use – for example, entering a
letter when asked for a number. True BASIC will happily accept a number in a text variable
but you will not be able to do any arithmetic with it. If you try and enter text into a numeric
variable you will get an error message and be asked to re-enter the data.
It is best to draw up a table of testing, choosing suitable test data, as shown below. Fill in the
expected results column (what the program should do). Finally, run the program using your
chosen test data, and compare the actual results with the expected results. If they agree, all is
well. If not, you may need to go back and de-bug the program.
Table of testing for Belinda’s Slab Calculator
Inputs
Wide
Normal
data
Extreme
data
4
10
4.5
10000
0
–5
Deep
5
20
5.9
9000
Any
–4
Cost of
slab
2.0
1.99
2.99
2.00
Any
2.50
Expected outputs
Total
Total cost
number
20
40.00
200
398.00
20
59.80
90000000 180000000
0
0
20
50.00
Actual outputs
Total
Total
number cost
Comment
Activity
Copy this table either in your word processor or on paper. Add some other examples of
normal and extreme data to the table, then test the program to make sure it handles them all
correctly.
Finally, run some exceptional data tests, and note the results (either in the table or as notes
below it).
Summarise your testing.
The program carries out all calculations according to the specification when supplied with
sensible data. However, the program does give results when supplied with negative data,
without generating an error message. Also, the program does not display the total cost in the
standard format (e.g. £59.80 is displayed as (£) 59.8).
Stage 5 – documentation
Print the output and code as before.
Save your working program in your correct folder especially if you have
made changes to it.
Write a brief user guide.
Write a brief technical guide.
If you need a reminder how to do these, look back to pp. 30–31.
SOFTWARE DEVELOPMENT (INT 2, COMPUTING)
38
HIGH LEVEL LANGUAGE PROGRAMMING – GETTING STARTED
Stage 6 – Evaluation
As before, write a brief report, answering these questions.
·
·
·
Does the program fulfil the specification?
Is the user interface appropriate?
Is the program coding readable?
3.7 Using Clear
You may want to clear away the inputs from the screen before displaying the
outputs. The statement we use is CLEAR and in Belinda’s slab program it
would be inserted on a line of its own before the first PRINT statement.
3.8 Arithmetical expressions
In Section 3.6, the example program carried out two simple multiplications, using the lines of
code:
no_of_slabs = wide * deep
total_cost = no_of_slabs * slab_cost
All other calculations can be carried out in a similar way. Some of the symbols used are the
same as in ‘normal’ arithmetic, but some are different.
For adding, use
Subtraction
Multiplication
Division
Raising to a power
+
–
*
/
** (check your version by referring to the manual)
For complex calculations involving several operations, multiplication and division take
precedence over addition and subtraction. However, where the order of the operators matters,
it is safest to use brackets.
Here are some examples in True BASIC.
total = first + second + third
age = 2004 – birth_year
time_in_australia = time_in_scotland + 12
tax = (salary – 4600) * 0.23
years = months / 12
area_of_circle = 3.14 * (radius ^ 2)
volume_of_sphere = (4 * 3.14 * (radius ^ 3)) / 3
Note:
(a) the use of brackets where the order is important
(b) the use of readable variable names.
SOFTWARE DEVELOPMENT (INT 2, COMPUTING)
39
HIGH LEVEL LANGUAGE PROGRAMMING – GETTING STARTED
3.9 Working with numbers – tasks
Tasks for you to try.
For each task below, you should:
1. clarify the specification (analysis)
2. draw a data flow diagram (analysis)
3. sketch the user interface (design)
4. write pseudocode (design)
5. write the coding (implementation)
6. draw up a table of testing
7. test the program with normal, extreme and exceptional data
8. write brief user and technical guides (documentation)
9. evaluate the program.
(a) Design, write and test a program to calculate the average of six test marks.
(b) Design, write and test a program to calculate the volume of a cylindrical water tank, using
the formula: volume = pr2h (r = radius of tank, h = height of tank).
(c) Design, write and test a program to calculate the number of points gained by a football
team, given the number of wins, draws and lost games, assuming a win is worth 3 points,
a draw 1 point, and no points for a lost game.
(d) Design, write and test a program to calculate the storage requirements in megabytes for a
bit-mapped graphic. The inputs should be the breadth and height of the graphic in inches,
the resolution in dots per inch and the colour depth in bits per pixel.
3.10 Pre-defined numeric functions
There are some standard mathematical calculations that you may want to use in your
programs. True BASIC (along with most other high level languages) provides pre-defined
functions to carry these out for you.
We’ll take a look at some pre-defined functions provided by True BASIC.
INT takes a number and removes any fractional part, leaving the whole number part.
ROUND takes a number and returns the nearest whole number.
SQR returns the square root of any number.
and an optional extra one for anyone who has studied some maths.
SIN returns the sine of an angle (in radians) – multiply the angle by 3.14128 and
divide by 180 if you want it to work for degrees.
Function tester program
We will use a simple True BASIC program to test these functions.
INPUT PROMPT “Please enter a number “:number
LET result = INT(number)
PRINT “The result is “;result
Run the program several times to test the INT function.
SOFTWARE DEVELOPMENT (INT 2, COMPUTING)
40
HIGH LEVEL LANGUAGE PROGRAMMING – GETTING STARTED
As you do so copy and complete a table of testing, as shown below.
Testing the INT function
Input
Expected output
Actual output
Comment
2.5
9.999
9.001
–5.5
–9.001
Testing the ROUND function
Edit the coding of the program, to change:
result = INT(number)
into
result = ROUND(number).
Run the program again and complete a similar table of testing to the one above.
Can you summarise the difference between INT and ROUND?
Testing the SQR function
Edit the coding of the program, to change:
result = ROUND(number)
into
result = SQR(number).
Run the program again and complete a similar table of testing to the one above.
What happens when you enter a negative number? Can you explain this?
What happens when you enter a number like 0.00001? What does this mean?
Optional extra:
Testing the SIN function
Edit the coding of the program, to change:
result = SQR(number)
into
result = SIN(number * 3.14128 / 180)
(the 3.14128 / 180 bit is to make it work for degrees rather than radians).
SOFTWARE DEVELOPMENT (INT 2, COMPUTING)
41
HIGH LEVEL LANGUAGE PROGRAMMING – GETTING STARTED
Run the program again and complete a table of testing like this:
Input
Expected output
0
90
180
30
–30
Actual output
Comment
0
1
0
0.5
–0.5
Other pre-defined functions
True BASIC provides many other pre-defined functions, including the other trigonometric
functions (cosine and tangent). If you complete this unit, then continue to Higher Software
Development, you will also learn to create your own functions, so that you are not limited to
the pre-defined ones provided by True BASIC.
Important!
Make sure you save this function tester program as you will use it again later in the course!
3.11 Working with words and numbers – example
The next example program uses both data types – numeric and string.
The problem
A basketball team manager wants a program which will input a player’s name, squad number
and points scored in the first three games of the season. It should then calculate the player’s
average score (to the nearest whole number), and display a summary of the player’s details.
Stage 1 – Analysis – program specification
Design, write and test a program to:
· prompt the user to enter a player’s name, squad number and points scored in games 1, 2
and 3
· calculate the player’s average score, rounded to the nearest whole number
· display the player’s name, squad number and average clearly on a form.
Stage 1 – Analysis – data flow diagram
Player’s name
Player’s name
Squad number
Squad number
Score 1
Score 2
Average points
Score 3
Stage 2 – Design – user interface
This time we need input lines for player’s name, number and each of three scores. We will
need to calculate the average score (rounded to the nearest whole number). We will need to
output and display (print lines) the player’s name and number and the average score.
SOFTWARE DEVELOPMENT (INT 2, COMPUTING)
42
HIGH LEVEL LANGUAGE PROGRAMMING – GETTING STARTED
Basketball Team Manager
Please input player’s name?
Please input the squad number?
Please enter the first score?
Please enter the second score?
Please enter the third score?
The Player’s name is Magic Simpson – Squad number is 34
Average score 56
Stage 2 – Design – pseudocode
1.
2.
3.
4.
5.
6.
prompt for and store the player’s name
prompt for and store the player’s number
prompt for and store each of the three scores
calculate the average score
display the player’s name and number
display the player’s average score (rounded to the nearest whole number).
Stage 3 – Implementation – coding
! Basketball Team Manager
! Your Name
! Date
INPUT PROMPT “Please enter the player’s name “:name$
INPUT PROMPT “Please enter the player’s squad number “:squad_number
INPUT PROMPT “Please enter the player’s first score “:score1
INPUT PROMPT “Please enter the player’s second score “:score2
INPUT PROMPT “Please enter the player’s third score “:score3
LET average_score = ROUND((score1 + score2 + score3)/3)
CLEAR
PRINT “ Basketball Team Manager”
PRINT name$;squad_number
PRINT “Average score “;average_score
END
Stage 4 – Testing
Run the program to make sure it works.
You will notice that the output looks like this:
It would be better to make it look like this:
Belinda McSporran73
Name: Belinda McSporran
Number: 73
To do this, make the following changes:
SOFTWARE DEVELOPMENT (INT 2, COMPUTING)
43
HIGH LEVEL LANGUAGE PROGRAMMING – GETTING STARTED
Change:
PRINT name$;squad_number
to:
PRINT “Name ”;name$
PRINT “Number “;squad_number.
After making these changes to improve the appearance of the output, you should carry out
methodical testing of the program. Assuming that the program displays the name and squad
number of the player correctly, you only need to test that it calculates averages correctly.
Draw up a table of testing with some:
· normal data
· extreme data
· exceptional data.
If there are any errors, correct them. A common error would be to misspell score in the
calculation I type ‘scote’ in to begin with and could not understand why the average was very
low. Of course ‘scote’ had a value of 0 as it was the first time it was used in the program.
Misspelling variables is a very common error and can cause very strange answers to
calculations appearing.
Save and print the program.
Summarise your test results by completing these three sentences.
The program gives the correct result if …
The program gives a wrong answer if … because …
The program cannot give an answer if …
Stage 5 – Documentation
Now that your program is complete, write:
· a User Guide
· a Technical Guide.
Stage 6 – Evaluation
Write a brief evaluation of the program:
· is it fit for purpose?
· does it have a good user interface
· is the code readable?
3.12 Pre-defined string functions
In Section 3.10, we looked at the pre-defined functions INT, ROUND, SQR and SIN. These
functions are all designed to work with numbers.
There are also some useful pre-defined functions for manipulating strings. We are going to
examine UCASE$, LCASE$, LEN, ORD and CHR$, and a way of isolating characters in a
string.
SOFTWARE DEVELOPMENT (INT 2, COMPUTING)
44
HIGH LEVEL LANGUAGE PROGRAMMING – GETTING STARTED
Copy this little program in True BASIC
! String Function Tester
INPUT prompt “Please enter a string “:string_in$
LET string_out$ = UCASE$(string_in$)
PRINT “Output string “; string_out$
END
Save this program as Function Tester 2.
Testing the UCASE function
Run the Function Tester 2 program.
Record the results in a table, like this, adding a few tests of your own.
UCASE pre-defined function
Input string
Output string
Hello, world
HELLO, WORLD
123 One Two Three
*?&!
Comment
Write a brief statement summarising the effect of the UCASE function.
Testing the LCASE function
Edit the coding of the Function Tester 2 program.
Change:
LET string_out$ = UCASE$(string_in$)
to
LET string_out$ = LCASE$(string_in$).
Run the program to test the LCASE function.
Record the results in a table, like this, adding a few tests of your own.
LCASE pre-defined function
Input string
Output string
Hello, world
HELLO, WORLD
123 One Two Three
*?&!
SOFTWARE DEVELOPMENT (INT 2, COMPUTING)
Comment
45
HIGH LEVEL LANGUAGE PROGRAMMING – GETTING STARTED
Write a brief statement summarising the effect of the LCASE function.
Testing the LEN function
Edit the coding of the Function Tester 2 program.
Change:
LET string_out$ = LCASE$(string_in$)
to
LET length = LEN(string_in$)
and also change the print line to read:
PRINT “Then length of the string is “;length
Run the program to test the LEN function.
Record the results in a table, like this, adding a few tests of your own.
LEN pre-defined function
Input string
Hello, world
HELLO, WORLD
123 One Two Three
*?&!
A
Output string
Comment
Write a brief statement summarising the effect of the LEN function.
Note: the Len function takes a string input, and returns a numeric output, which is why we
had to change string_out$ to length or else we would have had a potential error.
Testing string-handling techniques
We can isolate letters in a string. There is not a function as such in True BASIC for doing this
but there are string-handling techniques. We can also join strings together (concatenate)
which is also a technique rather than a function.
mid_string$[x:n] returns the characters starting at x and going on for n characters. It would be
better to see this with an example.
Edit the Function Tester 2 program to read:
! String Function Tester
INPUT prompt “Please enter a string “:string_in$
LET string_out$ = string_in$[1:2]
PRINT “Output string “; string_out$
END
Run the program and enter Edinburgh as your input string. The output string should be Ed.
Edit string_in$ so that the numbers are now [3:2]. Run the program again using Edinburgh
and your output should be in.
SOFTWARE DEVELOPMENT (INT 2, COMPUTING)
46
HIGH LEVEL LANGUAGE PROGRAMMING – GETTING STARTED
Run the program several times to test it. Record the results in a table, like this, adding a few
tests of your own until you are sure you understand how string handling works. Each time,
you will need to edit the numbers in the line of code each time you run the program.
String handling techniques
Input string
Coding used
Hello, world
String_in$[1:1]
Hello, world
String_in$[2:1]
Hello, world
String_in$[3:1]
Hello, world
String_in$[1:2]
Hello, world
String_in$[1:3]
Hello, world
String_in$[5:4]
Output string
Comment
Concatenation of strings
In True BASIC we can join two or more strings together. This could be useful for taking a
forename and a surname and combining them to make a persons name. The way we do this is
like this.
LET name$ = forename$&surname$
Assuming a user entered Albert and Einstein the command Print name$ would give the
output:
AlbertEinstein
It would be more sensible to add in a space like this:
LET name$ = forename$&” “&surname$
Copy in this small program.
! String concatenation program
INPUT prompt "Enter a forename ":forename$
INPUT prompt "Enter a surname ":surname$
LET fullname$ = name$&" "&add$
PRINT fullname$
END
String concatenation techniques
First input string
Second input string
Hello
World
Albert
Einstein
Your first name
Your surname
Output string
Comment
Testing the ORD function
Edit the coding of the Function Tester 2 program. Like LEN, ORD is another
function that takes a string as its input, and returns a number, so make the
following changes:
SOFTWARE DEVELOPMENT (INT 2, COMPUTING)
47
HIGH LEVEL LANGUAGE PROGRAMMING – GETTING STARTED
Change:
string_out$ = String_in$[5:4]
to
number_out = ORD(string_in$).
and change the Print line to:
PRINT "Output number "; number_out
You will also have to make sure you only enter a single character as your input string.
Run the program to test the ORD function.
Record the results in a table, like this, adding a few tests of your own until you are sure you
understand what ORD does.
Asc pre-defined function
Input string
A
B
C
a
b
c
Output number
Comment
Write a brief statement summarising the effect of the ORD function.
I hope you realised that the numbers produced by the ORD function are the ASCII codes for
the characters you input. As you should know from the Computer Systems unit, all characters
(letters, numerals and punctuation marks) are stored in a computer system in a numeric code
called ASCII (American Standard Code for Information Interchange). The ORD pre-defined
function returns this code.
True BASIC also provides a pre-defined function to do the opposite trick. CHR$ takes any
number, and returns the character which this ASCII code represents.
Testing the CHR$ function
Edit the coding of the Function Tester 2 program. CHR$ is a function that
takes a number as its input, and returns a string, so make the following
changes:
change …
to …
! String Function Tester
INPUT prompt "Please enter a string
":string_in$
LET number_out = ORD(string_in$)
PRINT "Output number "; number_out
END
! String Function Tester
INPUT prompt "Please enter a number
":number_in
LET string_out$ = CHR(number_in$)
PRINT "Output string "; string_out$
END
(Note: When testing this program restrict the numbers to between 1 and 255 as these are
ASCII codes.)
Run the program to test the CHR$ function.
SOFTWARE DEVELOPMENT (INT 2, COMPUTING)
48
HIGH LEVEL LANGUAGE PROGRAMMING – GETTING STARTED
Record the results in a table, like this, adding a few tests to check that CHR$ turns any ASCII
code into the character it represents.
CHR$ pre-defined function
Input number
65
66
97
98
63
20
Output character
Comment
Write a brief statement summarising the effect of the CHR$ function.
Questions
1. Match these pre-defined functions to their descriptions (one has been done for you):
Description
returns the ASCII code of a character
selects a group of characters out of a string
turns any character into upper case
takes an ASCII code and returns the character it
represents
changes any character into lower case
counts the number of characters in a string
Pre-defined function
String$[x:n]
ASC
LCASE
UCASE
LEN
CHR$
2. If sentence$ = “What is 25 times 8?”, what would be the output from:
(a)
(b)
(c)
(d)
sentence$[1:1]
sentence$[1:4]
sentence$[9:2]
sentence$[19:1]
3. Which pre-defined functions are represented by these data flow diagrams?
any letter ›
ASCII code ›
String›
› string
› character
› n o. of characters
3.13 Example program using CHR$ and ORD
Using these two pre-defined functions you can manipulate strings in all sorts of interesting
ways.
Maybe when you were younger, you tried communicating with your friends using codes.
The simplest code is the one which replaces each letter with the following letter from the
alphabet, so:
SOFTWARE DEVELOPMENT (INT 2, COMPUTING)
49
HIGH LEVEL LANGUAGE PROGRAMMING – GETTING STARTED
A› B
B› C
Hello › Ifmmp
True BASIC › Usvf CBTJD
and so on …
Let’s create a simple program to generate this type of code. It only works for single letters.
In Section 4.11 you will see how to code whole words or even sentences.
Stage 1 – Analysis – program specification
Design, write and test a program to take any character in the alphabet, and code it using the
system A › B, etc.
Stage 1 – Analysis – data flow diagram
any letter ›
› coded letter
Stage 2 – Design – user interface
Simple character coding
Enter a character
Coded character
Stage 2 – Design – pseudocode
The program must carry out the following steps:
1. enter and store the input character
2. convert it to an ASCII code
3. add 1 to the code
4. convert it back to a character
5. display the character.
Stage 3 – Implementation
The variables needed will be:
· a string variable to hold the input character:
· a string variable to hold the coded character:
· an numeric variable for the ASCII code of the input character:
· an numeric variable for the ASCII code of the coded character:
uncoded_char$
coded_char$
ascii_uncoded
ascii_coded
Complete the program by converting each step of the pseudocode into True BASIC code.
! Coding Program
INPUT prompt “Letter please “:uncoded_char$
LET ascii_uncoded = ORD(uncoded_char$)
LET ascii_coded = ascii_uncoded + 1
LET coded_char$ = CHR$(ascii_coded)
PRINT “Coded Character ”;coded_char$
END
SOFTWARE DEVELOPMENT (INT 2, COMPUTING)
Step 1
Step 2
Step 3
Step 4
Step 5
50
HIGH LEVEL LANGUAGE PROGRAMMING – GETTING STARTED
Save the program as AB_code
Stage 4 – Testing
Run some tests using normal, extreme and exceptional data.
Record your results in a table.
Stage 5 – Documentation
As usual, write a brief User Guide and Technical Guide for the program, and
attach a hard copy of the code.
Stage 6 – Evaluation
Write a brief evaluation of the program. You should include a note about the
letter(s) which it codes incorrectly. You will learn how to deal with these in
Section 4.3.
Congratulations! You have completed Section 3.
Here is a summary of what you should be able to do using True BASIC:
· analyse a problem using a data flow diagram
· write pseudocode and convert it into True BASIC code
· use string and numeric variables
· use INPUT and INPUT prompt
· use PRINT to output text and variables
· use TAB to tidy up your output.
· write True BASIC code for simple calculations
· test a program using normal, extreme and exceptional data
· use Int, Round, Sqr and Sin pre-defined functions
· use UCASE, LCASE, LEN, ORD and CHR$ pre-defined functions
· use string handling functions
· write brief User Guides and Technical Guides for simple programs
· evaluate a program in terms of fitness for purpose, user interface and readability.
Check all the items on this list. If you are not sure, look back through this section to remind
yourself. When you are sure you understand all of these items, you are ready to move on to
Section 4.
Note: for the Int 2 software development assessment, you need to know what pre-defined
functions are, but you don’t need to know the particular pre-defined functions we have
explored in this section.
SOFTWARE DEVELOPMENT (INT 2, COMPUTING)
51
HIGH LEVEL LANGUAGE PROGRAMMING – BASIC CONSTRUCTS
SECTION 4
4.1 Making choices
So far, all the programs you have written follow the
same list of steps from beginning to end, whatever
data you input. This limits the usefulness of the
program. Imagine a game program that was exactly
the same every time you ran it!
In this section, you will learn how to make programs
that do different things depending on the data that is
entered. This means that you can write programs with
choices for the user, and with different options and
branches within them.
To do this in True BASIC is very easy, as you will see.
Here are some examples of True BASIC statements that use the keywords IF, THEN and
ELSE.
If Number < 0 Then PRINT “That was a negative number!”
If Reply = “No” Then PRINT “Are you sure?”
If Salary > 5000 Then LET Pay = Salary – Tax Else LET Pay = Salary
If Guess = Correct_Answer Then PRINT “Well Done!” Else PRINT “Wrong – try again!”
The first two examples follow a simple pattern:
If condition Then action
We will study using this pattern in Section 4.2.
The last two examples follow a slightly more complex pattern:
If condition Then action Else alternative action
We will study using this pattern in Section 4.3.
Note: we will use the following symbols in this section.
>
<
>=
<=
=
<>
greater than
less than
greater than or equal to
less than or equal to
equal to
not equal to
4.2 If … Then … Else
Example 1: Credit limit
The problem: When you try to take money out of an ATM
(Automatic Teller Machine, commonly called a ‘hole in the wall’),
SOFTWARE DEVELOPMENT (INT 2, COMPUTING)
52
HIGH LEVEL LANGUAGE PROGRAMMING – BASIC CONSTRUCTS
you are only allowed to withdraw cash up to your credit limit. For example, if your credit
limit is £100, and you try to withdraw £50, then it should work fine.
However, if you try to withdraw £150, you will not be allowed to, and a message will appear
on the screen advising you that this is over your credit limit.
Stage 1 – Analysis – program specification
Design, write and test a program to:
· take a number entered by the user
· compare it with a credit limit (100)
· report ‘over the credit limit’ if the number is over 100.
Stage 1 – Analysis – data flow diagram
‘over credit limit’ message
on screen if appropriate
any number
Stage 2 – Design – user interface
The user interface should resemble the following:
ATM – credit limit check
How much do you wish to withdraw?
Within Credit limit – withdrawal allowed.
75
OR
ATM – credit limit check
How much do you wish to withdraw?
Over Credit limit – withdrawal denied.
125
Stage 2 – Design – pseudocode
1. prompt for and enter amount
2. if amount is over 100, display the warning message
3. else display the allowed message.
There is only one variable required – a numeric variable to store the amount entered by the
user.
Stage 3 – Implementation
! ATM Withdrawal Manager
! Your Name
! Date
INPUT prompt "How much do you wish to withdraw ":amount
IF amount > 100 then
PRINT "Over Credit limit - withdrawal denied."
ELSE
PRINT "Within Credit limit - withdrawal allowed."
ENDIF
END
SOFTWARE DEVELOPMENT (INT 2, COMPUTING)
53
HIGH LEVEL LANGUAGE PROGRAMMING – BASIC CONSTRUCTS
When you have entered the program choose Do Format from the Run menu and not only do
the keywords go into capitals but the IF lines are indented. This is very useful as if for
example the END statement was indented you could see that ENDIF was missing – another
common error.
Note: you must include an ENDIF statement if you cannot complete the IF…THEN statement
within one line. As soon as you use ELSE it will be over one line and so ENDIF must be used.
Stage 4 – Testing
Devise some test data. This should include:
· some normal data, like
20 (clearly under the limit)
120 (clearly over the limit)
· some extreme data, like
99.99 (just under the limit)
100.00 (exactly on the limit)
100.01 (just over the limit)
· some exceptional data, like
–5 (a negative number)
999999.9999 (a ridiculously large number)
A (a letter when a number is expected).
Run the program, using your test data, and record the results in a table.
Stages 5 and 6 – Documentation and Evaluation
As usual, you should:
· print out hard copies of your program and the output from both runs (over and under)
· save your program
· write a short User Guide and Technical Guide
· write a brief evaluation of the program in terms of its fitness for purpose, user interface
and readability.
Extra task
Modify the program so that it asks your age, and gives you the message
‘You can learn to drive’ if you are 17 or over.
Note: you will need to use one of the symbols listed in Section 4.1.
4.3 Multiple Ifs
Example: Lucky Winner
The problem: A program is required that will select a suitable prize, depending on
which number between 1 and 5 is entered by the user.
SOFTWARE DEVELOPMENT (INT 2, COMPUTING)
54
HIGH LEVEL LANGUAGE PROGRAMMING – BASIC CONSTRUCTS
Stage 1 – Analysis – program specification
Design, write and test a program to:
· prompt the user to enter a number between 1 and 5
· store the number
· output an appropriate message:
Enter a 1 -> “You have won a colour TV”
Enter a 2 -> “You have won a mobile phone”
…, etc.
(no prize if the number is not between 1 and 5).
Stage 1 – Analysis – data flow diagram
appropriate message on screen
any number
Stage 2 – Design – user interface
Prize Draw
Enter a number between 1 and 5
Congratulations you have won whatever prize
OR
Sorry but that number does not win a prize
Stage 2 – Design – pseudocode
1.
2.
3.
4.
.
.
7.
Prompt for a number entered by the user
if the number is 1, display “You have won a colour TV”
if the number is 2, display “You have won a mobile phone”
…, etc.
or else display message that you have not won a prize
There is only one variable required – a numeric variable to store the number entered by the
user.
Stage 3 – Implementation
! Prize Draw
! Your name
! Date
INPUT prompt "Enter a number between 1 and 5 ":number
IF number = 1 Then PRINT "Number ";number;" wins you a colour TV"
IF number = 2 Then PRINT "Number ";number;" wins you a mobile phone"
IF number = 3 Then PRINT "Number ";number; " wins you a holiday in Spain"
IF number = 4 Then PRINT "Number ";number;" wins you 10p"
IF number = 5 Then PRINT "Number ";number;" wins you a day at the beach"
IF number < 1 Then PRINT "Number ";number;" Sorry but that number does not win a prize
as it is too small"
SOFTWARE DEVELOPMENT (INT 2, COMPUTING)
55
HIGH LEVEL LANGUAGE PROGRAMMING – BASIC CONSTRUCTS
IF number > 5 Then PRINT "Number ";number;" Sorry but that number does not win a prize
as it is too large"
END
Stage 4 – Testing
Devise some test data. This should include:
· some normal data
· some extreme data
· some exceptional data.
Run the program, using your test data, and record the results in a table.
Stages 5 and 6 – Documentation and Evaluation
As usual, you should:
· print out a hard copy of your coding only in this case
· save your program
· write a short User Guide and Technical Guide
· write a brief evaluation of the program in terms of its fitness for purpose, user interface
and readability.
Practical task – adapt the ‘lucky winner’ program to fulfil this
specification
Design, implement and test a program that asks the user to enter a grade (A, B, C, D or F),
and gives you messages like ‘A means you got over 70%’, ‘B means you got between 60%
and 70%’, and so on.
As usual, you should:
· print out hard copies of your coding
· save your program
· write a short user guide and technical guide
· write a brief evaluation of the program in terms of its fitness for purpose, user interface
and readability.
Practical task – adapt the ‘AB_code’ program to code Z and z correctly
Remember the program we developed in Section 3.13, for coding letters using the A -> B
code. When you tested it, you should have discovered that it works well for every letter,
except Z. The problem is that if you add one to the ASCII code for Z you get the ASCII code
for a bracket symbol.
We can correct this by using two conditional statements to cover the two special cases –
upper-case and lower-case Z.
·
·
load the program AB_code which you should have saved.
alter the coding as follows (changes in bold).
SOFTWARE DEVELOPMENT (INT 2, COMPUTING)
56
HIGH LEVEL LANGUAGE PROGRAMMING – BASIC CONSTRUCTS
! Coding Program
INPUT prompt "Letter please ":uncoded_char$
LET ascii_uncoded = ORD(uncoded_char$)
LET ascii_coded = ascii_uncoded + 1
LET coded_char$ = CHR$(ascii_coded)
! special case for Z and z
If uncoded_char$ = “Z” Then coded_char$ = “A”
If uncoded_char$ = “z” Then coded_char$ = “a”
PRINT "Coded Character ";coded_char$
END
·
·
run the program, carefully testing that it handles Z and z correctly
save the program as AB_code_v2
4.4 Using AND – example
Example: Exam Mark Grader
The problem: A program is required that could be used to assign grades to exam
marks automatically. Over 70% is an A, over 60% is a B, over 50% is a C, over
45% is a D, and less than 45% is a fail.
Stage 1 – Analysis – program specification
Design, write and test a program to:
· prompt the user to enter the highest possible score for an exam (e.g. 80)
· prompt the user to enter a student’s name (first name and surname)
· prompt the user to enter the student’s mark (e.g. 63)
· calculate the percentage mark
· display a message displaying the student’s initials, percentage and grade.
Stage 1 – Analysis – data flow diagram
exam out of
Message on screen including student
initials, percentage mark and grade
student name
student mark
Stage 2 – Design – user interface
Exam Mark Grader
Enter possible score
Enter student’s first name
Enter student’s surname
Enter student’s score
Student Initials
Percentage
Grade
SOFTWARE DEVELOPMENT (INT 2, COMPUTING)
57
HIGH LEVEL LANGUAGE PROGRAMMING – BASIC CONSTRUCTS
Stage 2 – Design – pseudocode
1.
2.
3.
4.
5.
6.
7.
8.
9.
10.
11.
prompt for and input the possible score for the exam
prompt for and input the student’s first name
prompt for and input the student’s surname
prompt for and input the student’s mark
calculate the percentage mark
calculate the grade
extract the initial letter from the first name
extract the initial letter from the second name
display the student initials
display the student percentage mark
display the grade.
The program will use several variables. It is useful to write them down as a table.
Variable name
Max_mark
First_name$
Surname$
Mark
Percent
Grade&
Init1$
Init2$
Variable type
Numeric
String
String
Numeric
Numeric
String
String
String
used to store
What the exam is out of (e.g.80)
Student’s first name (e.g. Albert)
Student’s surname (e.g. Einstein)
Student’s actual mark (e.g. 63)
Student’s percentage (e.g. 53.7)
Student’s grade (e.g. D)
Student’s first initial (e.g. A)
Student’s second initial (e.g. E)
Converting the pseudocode into True BASIC, we should get the following code.
Stage 3 – Implementation
! Exam Mark Grader
! Your name
! Date
INPUT prompt "What is the exam marked out of ":max_mark
INPUT prompt "Please enter your first name ":forename$
INPUT prompt "Please enter your second name ":secname$
INPUT prompt "What is this student's mark ":mark
LET percent = ROUND((mark / max_mark) * 100)
IF percent >= 70 Then LET grade$ = "A"
IF percent >= 60 AND percent < 70 Then LET grade$ = "B"
IF percent >= 50 AND percent < 60 Then LET grade$ = "C"
IF percent >= 45 AND percent < 50 Then LET grade$ = "D"
IF percent < 45 Then LET grade$ = "Fail"
LET init1$ = forename$[1:1]
LET init2$ = secname$[1:1]
CLEAR
PRINT "Exam Mark Grader"
SOFTWARE DEVELOPMENT (INT 2, COMPUTING)
58
HIGH LEVEL LANGUAGE PROGRAMMING – BASIC CONSTRUCTS
PRINT "Student ";init1$;init2$
PRINT "Percentage ";percent
PRINT "Grade ";grade$
END
Stage 4 – Testing
·
·
·
Devise some test data. This should include:
some normal data
some extreme data
some exceptional data.
Run the program, using your test data, and record the results in a table.
Stages 5 and 6 – Documentation and evaluation
Don’t print out your program or write documentation or an evaluation report yet, as you are
going to make some minor improvements to the program first.
Extra task (1): Upper Case Initials
If you entered a student’s name as (for example) “albert einstein”, the initials
would be displayed as “ae”. It would be better if they were changed
automatically to “AE”. A simple change in the coding is required.
Hint: you will need to use the Ucase pre-defined function.
Extra task (2): A+ grade
A new grade called A+ has been introduced for marks of 80% and over.
Change the coding to reflect this new grade. Remember to change the
condition for an A as well as introducing a new condition for A+.
Stages 5 and 6 – Documentation and evaluation
As usual, you should:
· print out a hard copy of your coding
· save your program
· write a short User Guide and Technical Guide
· write a brief evaluation of the program in terms of its fitness for purpose,
user interface and readability.
4.5 Using AND – task
Example: Can I drive?
The problem: A program is required that asks the user to enter their age, then
displays one of the following messages, as appropriate:
· Sorry, you can’t drive (if you are under 16)
· You can only drive a moped (if you are 16)
· You can only drive a car or moped (if you are 17–20)
· You can drive any vehicle (if you are 21–74)
SOFTWARE DEVELOPMENT (INT 2, COMPUTING)
59
HIGH LEVEL LANGUAGE PROGRAMMING – BASIC CONSTRUCTS
·
You need a medical check (if over 75).
Design, implement and test a program to solve the problem given above.
4.6 Complex conditions
In section 4.4, we used a conditional statement with an AND in it:
If percent >= 60 AND percent < 70 THEN grade$ = “B”
This is an example of a complex condition.
Complex conditions use a combination of the terms AND, OR and NOT in logical
combinations.
Here are some examples:
If age > 60 AND gender = “F” THEN pension = “true”
If country = “UK” OR country = “USA” THEN language = “English”
If (temp < 12 AND heating = “T”) OR Heating = “X” THEN turn_heating_on
If Not(password = correct_password) THEN MsgBox “Try again”
If age < 5 OR Age > 85 THEN eligible = “No”
If Not(age >=5 AND age <=85) THEN eligible = “No”
Note: the last 2 examples are equivalent to each other!
If Answer = “Too” OR Answer = “Two” OR Answer = “To” THEN Correct = “True”
Programming task – colour chooser
Design, write and test a program that asks the user to enter a letter, and prints the word:
· red if R or D is entered
· green if G or N is entered
· blue if B or E is entered
· yellow if Y or W is entered
· black if C, A or K is entered.
The program should respond to both upper case and lower case inputs.
4.7 Repetition
So far, every program you have written starts at the beginning, executes each line once, then
stops at the end. If you want to repeat the program you have to run it again. It is often useful
in a program to be able to repeat a line or group of lines automatically.
To do this, you can use a FOR … NEXT loop.
SOFTWARE DEVELOPMENT (INT 2, COMPUTING)
60
HIGH LEVEL LANGUAGE PROGRAMMING – BASIC CONSTRUCTS
Here is a simple example program that would benefit from a FOR … NEXT loop.
Enter this coding:
! code to display 10 greetings on the screen
! by a not very good programmer
! who hasn’t been taught about FOR…NEXT loops
Print “Have a nice day!”
Print “Have a nice day!”
Print “Have a nice day!”
Print “Have a nice day!”
Print “Have a nice day!”
Print “Have a nice day!”
Print “Have a nice day!”
Print “Have a nice day!”
Print “Have a nice day!”
Print “Have a nice day!”
END
Now run the program. It should print “Have a nice day!” ten times on the
screen.
Here is a second version of the program that uses a FOR … NEXT loop to cut down the
amount of coding required:
! code to display 10 greetings on the screen
! by a much better programmer
! using a FOR … NEXT loop
For counter = 1 To 10
Print “Have a nice day!”
Next counter
END
Alter the coding as shown and run the program again. It does exactly the
same thing, but takes much less coding.
4.8 Repetition using For … Next
In this example, we will develop a program to display a repeated message across the screen.
Stage 1 – Analysis
Program specification
Design, write and test a program to display the message:
“Hello, Hello, Hello … (25 times)”.
SOFTWARE DEVELOPMENT (INT 2, COMPUTING)
61
HIGH LEVEL LANGUAGE PROGRAMMING – BASIC CONSTRUCTS
Data flow diagram
“Hello, Hello …”
message
Stage 2 – Design
We want the user interface to look like this:
Hello Hello Hello … Hello
Next, we design the list of steps (pseudocode) and then the coding.
Pseudocode
1. Do the following 25 times
2. Display the word “Hello” in a line
True BASIC coding
For Counter = 1 to 25
Print “Hello “;
Next Counter
Note that it is usual to indent the code within the loop to improve readability. Note also that a
semi-colon (;) at the end a print line suppresses the line feed.
Stage 3 – Implementation
This is quite a simple program so enter it in yourself, run it and make it error
free and the save it.
Stage 4 – Testing
There is no need for a table of testing for a simple program like this.
Modifications (1)
Alter the coding so that it displays the message:
(a) “Goodbye” 12 times
(b) “I must work harder” 200 times
(c) “This is very easy” 100 times.
Modifications (2)
The program would be much more useful if it was possible to make changes to the message
and the number of times it was displayed, without having to alter the coding each time. This
can be achieved by using variables.
SOFTWARE DEVELOPMENT (INT 2, COMPUTING)
62
HIGH LEVEL LANGUAGE PROGRAMMING – BASIC CONSTRUCTS
Change the coding as follows:
! Improved For … Next example
Input prompt “Message Required …”:message$
Input prompt “How many repetitions “:how_many
A string variable called message
will store the message, and a
numeric variable called how_many
will store the number of repetitions.
Clear
This command clears the screen
For counter = 1 To how_many
Print message$
Next counter
End
Instead of a fixed number here,
the loop will continue up to the
number stored in how_many.
Whatever string is stored in the
variable called message will be
displayed in the list box.
Testing (continued)
Now test the program thoroughly using normal, extreme and exceptional values for both
“message” and “how_many”.
Stages 5 and 6 – Documentation and evaluation
As usual, you should:
· print out a hard copy of your coding
· save your program
· write a short user guide and technical guide
· write a brief evaluation of the program in terms of its fitness for purpose, user interface
and readability.
Modifications (3)
At the moment, this program can display any message over and over again,
but it is the same message on each line.
Can you adapt the program to produce displays like:
Tick
Tock
Tick
Tock
Tick
Tock
Tick
Tock
Tick
Left
Right
Left
Right
Left
Right
Left
Right
Left
Go home
Now!
Go home
Now!
Go home
Now!
Hint: you will need two (or three) lines of code within the For … Next loop.
SOFTWARE DEVELOPMENT (INT 2, COMPUTING)
63
HIGH LEVEL LANGUAGE PROGRAMMING – BASIC CONSTRUCTS
4.9 Counting using For … Next
The standard For … Next loop that we have used so far is of the format:
For counter = 1 to maximum
Action
Next counter
Note that we have called the loop variable ‘counter’ (because that is what it does), but it can
be called anything you like. The following versions would work in exactly the same way:
For silly_name_for_a_variable = 1 to maximum
Action
Next silly_name_for_a_variable
For i = 1 to maximum
Action
Next i
The last of these (using i as the loop variable) is probably the commonest as it is less typing
and will become more obvious later.
For … Next loops are an example of ‘fixed loops’. This is because the number of times the
action is executed is fixed in advance by the programmer, using the value of maximum. Later,
we will see that it is possible to construct loops where the number of times the action is
executed is NOT known in advance.
Example 4.9.1: Counting program
Stage 1 – Analysis
Program specification
Design, write and test a program to display 1, 2, 3, 4, 5 … 99, 100.
Data flow diagram
1, 2, 3 … 99, 100
on the screen
Stage 2 – Design
We want the user interface to look like this.
Counting program
1, 2, 3, …, 100
SOFTWARE DEVELOPMENT (INT 2, COMPUTING)
64
HIGH LEVEL LANGUAGE PROGRAMMING – BASIC CONSTRUCTS
Here is the list of steps (pseudocode) and then the coding for the command button.
Pseudocode
1. Do the following 100 times
2. Display the counter on the screen
True BASIC coding
For counter = 1 to 100
Print counter;
Next counter
3.
Instead of ‘message’ being displayed on the
screen the current value of counter is displayed
instead.
Stage 3 – Implementation
! Counting program
FOR counter = 1 to 100
PRINT counter;
NEXT counter
END
Stage 4 – Testing
Run the program to make sure it works correctly (it should produce a list of
numbers from 1 to 100 on the screen over several lines).
There is no need for a table of testing for a simple program like this.
You are going to use this program as a template to experiment with For … Next loops. In
each case below:
· replace the line of code For counter = 1 To 100 with the modification suggested
· run the program
· note the results in a table like this.
coding used
For counter = 1 To 100
results
1 2 3 4 … 99 100
Modification (1) For counter = 1 To 9999
Modification (2) For counter = 1 To 100 Step 2
Modification (3) For counter = 2 To 100 Step 2
Modification (4) For counter = 0 To 100 Step 10
Modification (5) For counter = –10 To 10 Step 5
Modification (6) For counter = 100 To 1 Step –5
Modification (7) For counter = 0 To 5 Step 0.5
SOFTWARE DEVELOPMENT (INT 2, COMPUTING)
65
HIGH LEVEL LANGUAGE PROGRAMMING – BASIC CONSTRUCTS
Questions
Write the True BASIC coding of a For … Next loop to produce each of the following lists of
numbers:
(a) 3, 6, 9, 12, 15, 18 … 33, 36
(b) 0, 9, 18, 27 … 99
(c) 10, 9, 8, 7, 6, 5, 4, 3, 2, 1, 0
(d) 0, 0.75, 1.5, 2.25, 3, 3.75, 4.5
(e) 50, 40, 30, 20, 10, 0, –10, –20, –30, –40, –50
(f) 1, 4, 9, 16, 25, 36, 49, 64, 81, 100 (hint: these are all numbers squared)
(g) 2, 4, 8, 16, 32, 64, 128, 256, 512, 1024, 2048 (hint: these are powers of 2).
Example 4.9.2: General purpose counting program
Stage 1 – Analysis
Program specification
Design, write and test a program to display any list of numbers, given the starting number
(lower limit), the final number (upper limit) and the step size.
Data flow diagram (copy and complete …)
Stage 2 – Design
Sketch a user interface, something like this.
General counting program
lower limit
upper limit
step size
Here is the list of steps (pseudocode). Copy and complete the coding yourself:
Pseudocode
1. store the lower limit entered by the user
2. store the upper limit entered by the user
3. store the step size entered by the user
4. repeat the following, starting at lower
limit, and going up to upper limit in steps
of step size
5. display the counter.
SOFTWARE DEVELOPMENT (INT 2, COMPUTING)
True BASIC coding
Input prompt “Lower Limit “:lower
Input prompt “Upper Limit “:upper
Input prompt “Step size “:step
For … = … To … Step …
Print …
Next …
66
HIGH LEVEL LANGUAGE PROGRAMMING – BASIC CONSTRUCTS
Stage 3 – Implementation
Enter the code and free the program of errors, then save it.
Stage 4 – Testing
Carry out systematic testing of the program, completing a table like this:
Inputs
Normal
data
Lower
limit
10
1000
10
Expected outputs
Upper
limit
20
8000
0
Step
size
3
2500
–2
Actual
outputs
Comment
10, 13, 16, 19
1000, 1250, 1500, 1750
10, 8, 6, 4, 2, 0
Devise your own test data, covering a range of normal, extreme and exceptional data.
Write a short summary of your testing.
If all the tests results were as expected, move on to stages 5 and 6. If not, go back and correct
your coding until it works correctly.
Stages 5 and 6 – Documentation and evaluation
·
·
·
·
As usual, you should:
print out a hard copy of your coding
save your program
write a short User Guide and Technical Guide
write a brief evaluation of the program in terms of its fitness for purpose, user interface
and readability.
Example 4.9.3: Multiplication tables
Stage 1 – Analysis
Program specification
Design, write and test a program to display any multiplication table (chosen by the user) in
the form: 1 × 5 = 5, 2 × 5 = 10 and so on as far as 12 × 5 = 60.
Data flow diagram (copy and complete)
Stage 2 – Design
Sketch a user interface, something like this:
It should ask the user to enter a table.
Each line that appears on screen should look like this (made up of five parts):
SOFTWARE DEVELOPMENT (INT 2, COMPUTING)
67
HIGH LEVEL LANGUAGE PROGRAMMING – BASIC CONSTRUCTS
1
×
5
=
10
the counter
(1,2,3 …)
the symbol ×
the multiplier
chosen by the user
the symbol =
the answer
(counter
× multiplier)
To do this, we need several variables:
· the counter (numeric)
· the multiplier (a numeric supplied by the user)
· the answer (a numeric calculated by the program).
The line of code to print each line will look like:
PRINT counter;” X “;multiplier;” = “;answer
Here is the list of steps (pseudocode).
Copy and complete the coding yourself:
Pseudocode
1. Store the multiplier entered by the user
2. Repeat the following from 1 to 12 Step
…
2.1 calculate the answer
2.2 display the message
5. Next
True BASIC coding
Input prompt “What table do you want
“:multiplier
For … = … To …
answer = counter * multiplier
Print …
Next …
Stage 3 – Implementation
Enter the code from the table completing the lines yourself.
Stages 4, 5 and 6 – Testing, documentation and evaluation
Complete the testing, documentation and evaluation of the program in the
usual way.
4.10 For … Next tasks
Choose one (or more) of the following program specifications, and design, implement and test
a program to fulfil the specification. Work through all the stages of the software development
process from analysis to evaluation for your chosen task.
Remember: A Dance In The Dark Every Monday! (See p. 10.)
Times tables (advanced version)
A primary school teacher wants a program that will allow a pupil to
type in any whole number. The program will then display the relevant
times table, up to a maximum multiplier set by the pupil. The display
should be in the format:
SOFTWARE DEVELOPMENT (INT 2, COMPUTING)
68
HIGH LEVEL LANGUAGE PROGRAMMING – BASIC CONSTRUCTS
5 times 1 equals 5
5 times 2 equals 10
5 times 3 equals 15 and so on …
Cost and weight calculator
A greengrocer needs a program which will allow him to type in the price of 1
kg of any item. The program should then display the cost of 0, 0.1, 0.2 … up
to 1.8, 1.9, 2.0 kg of the item. The output might look something like this:
0 kg costs £0
1.1 kg costs £0.20
1.2 kg costs £0.40
1.3 kg costs £0.60 and so on …
Cubic numbers
A mathematician wants a list of cubic numbers (1, 8, 27, 64, 125 …) starting and
finishing at any point on the list. The results should be displayed like this:
2 cubed = 8
3 cubed = 27
4 cubed = 64 and so on …
Quadratic function calculator
A student has been asked to draw a graph of the function y = 3x2 + 4. She
needs a table of the values of the function between –5 and +5. She is not sure
about the step size between points, so wants the program to allow her to
choose any step size.
The results should be displayed like this:
x = 1 >>>>>>>> y = 7
x = 2 >>>>>>>> y = 16
x = 3 >>>>>>>> y = 31 and so on …
4.11 Using the loop counter
So far, we have only used the loop counter variable to display numbers. However, it can be
used to do other things too. In this example program, the loop counter is used to work its way
through the word to be coded. In later sections, we will see how it can be used with ‘arrays’ to
access numbered items of data.
Example 4.11.1 – adapting the AB_coder program to code whole words
Version 2 of the AB_coder program from Section 4.3 can code single characters. We can use
a For … Next loop to adapt the program to code whole words instead of single characters.
Here is how it works (in pseudocode):
1. prompt the user to enter a word
2. check how many characters there are in the word
3. create a new ‘empty’ coded word
4. repeat the following for each letter in the word
4.1. extract the letter from the word
SOFTWARE DEVELOPMENT (INT 2, COMPUTING)
69
HIGH LEVEL LANGUAGE PROGRAMMING – BASIC CONSTRUCTS
4.2. code it
4.3. add it on to the new coded word
5. next letter
6. display coded word …
… and here is the code (new code is in bold):
! Coding Program - Whole Word converter
INPUT prompt "word please ":uncoded_word$
LET length_of_word = LEN(uncoded_word$)
LET conded_word$=””
FOR counter = 1 to length_of_word
LET uncoded_char$ = uncoded_word$[counter:counter]
LET ascii_uncoded = ORD(uncoded_char$)
LET ascii_coded = ascii_uncoded + 1
LET coded_char$ = CHR$(ascii_coded)
IF uncoded_char$ = "Z" Then LET coded_char$ = "A"
IF uncoded_char$ = "z" Then LET coded_char$ = "a"
LET coded_word$ = coded_word$&coded_char$
NEXT counter
PRINT "Coded word ";coded_word$
END
Load up the AB_code_v2 program, and alter the coding like this. Save it as AB_coder_v3
Test the program thoroughly using normal, extreme and exceptional data.
4.12 Do … Loop Until
We have used For … Next loops to repeat a section of program a set number of times. This is
fine if we know how many times the section of program is to be repeated. What about when
the number of repetitions is unknown in advance?
For example, a quiz program might give the user repeated chances to get the answer correct.
The programmer doesn’t know in advance whether the user will get the question right first
time, or take 2, 3, 4 or more attempts.
In this type of situation, the programmer needs to use another kind of loop. True BASIC
provides several other types of loop. We will use a type called Do … Loop Until.
The pattern (syntax) for this type of loop is very simple.
Do
Line(s) of code
To be repeated
Loop Until condition
SOFTWARE DEVELOPMENT (INT 2, COMPUTING)
70
HIGH LEVEL LANGUAGE PROGRAMMING – BASIC CONSTRUCTS
Here is a simple example.
! generates a question to the user
! and waits for the correct answer
LET correct_answer = 4
DO
INPUT prompt "What is 2 + 2 ":user_answer
LOOP Until user_answer = correct_answer
PRINT "Well done!"
END
Run the program. Does it behave as predicted?
Adapt the program to ask:
(a) a different arithmetical question (e.g. What is 100×100?)
(b) a general-knowledge question (e.g. Who won Big Brother in 2003?).
Improvements to the program
This simple program works fine, but there are some obvious changes that would improve it!
Improvement 1
When you give the wrong answer, the program doesn’t tell you. It could be improved by
presenting a message which told the user to try again.
To do this, you need to add in the following line of code:
If user_answer <> correct_answer Then PRINT “Wrong, try again!”
Can you work out where this line of code should go?
Edit it into your program, and check that it works.
Improvement 2
The program would be improved if it told you how many guesses you made before you got
the correct answer.
To do this, we need to include a counter in the loop.
Here is the pseudocode (the new sections are in bold).
1. Set the counter equal to zero
2. Set the correct answer equal to 4
3. Do
3.1. Get the user’s answer to the question
(What is 2 + 2?)
The code for this is
3.2. Add one to the counter
LET counter = counter + 1
3.3. If the answer is not the correct answer,
display “Wrong, try again” message
4. Until user’s answer is equal to the correct answer
5. Display message (You took counter tries to get that right)
Turn the pseudocode into True BASIC, and adapt your program accordingly.
SOFTWARE DEVELOPMENT (INT 2, COMPUTING)
71
HIGH LEVEL LANGUAGE PROGRAMMING – BASIC CONSTRUCTS
Edit the changes into your program, and check that it works.
Improvement 3
The third improvement would be if the program could be made to ask a different question
each time, instead of always asking 2 + 2. To do this, we need to use True BASIC’s
random number generator.
4.13 Random numbers
True BASIC provides the programmer with a pre-defined function RND to
generate random numbers. RND generates a random number between 0 and
1 in the same sequence every time. To vary the sequence we use the
command RANDOMIZE at the start of the program. Before we use it in the
arithmetic tester program, we will use a simple program with a For … Next
loop to learn how the RND function operates.
Enter the following coding.
! Generates lists of random number
FOR counter = 1 To 10
LET number = Rnd
PRINT number
NEXT counter
END
Run this program.
Write down the list of ten random numbers produced.
The RND function produces random numbers between 0 and 1.
To produce random whole numbers between 1 and 10, we need to do three things to the
line LET number = RND.
·
·
·
First, we need to multiply by 10 to produce a random fraction between 0 and 10.
Then we need to ‘chop off’ the fraction part using the function INT (see Section 3.10).
Finally, we need to add 1, otherwise the highest number will always be 9, as it is rounded
down by the INT function.
Edit the line:
To:
LET number = RND
LET number = INT (RND * 10) + 1
Now run the program again. Write down the list of random numbers.
This time they should all be whole numbers between 1 and 10.
Stop the program.
Run the program again. AND again!
Notice that it always generates the same list of ‘random’ numbers. To make them really
random, you need to add the keyword RANDOMIZE at the start of the program (anywhere
SOFTWARE DEVELOPMENT (INT 2, COMPUTING)
72
HIGH LEVEL LANGUAGE PROGRAMMING – BASIC CONSTRUCTS
before the keyword RND). The coding for your random number generator should now look
like this:
! Generates lists of random number
RANDOMIZE
FOR counter = 1 To 10
LET number = INT (RND * 10) + 1
PRINT number
NEXT counter
END
For example, to produce:
random numbers between 1 and 20, change it to:
LET number = INT (RND * 20) + 1
random numbers between 51 and 60, change it to:
LET number = INT (RND * 10) + 51
random even numbers between 0 and 10, change it to:
LET number = 2 * INT (RND * 6)
Try experimenting with this line until you understand how it works.
Sometimes it takes a little thought to work out exactly what numbers to put
in, so that you get the right range and don’t miss out the highest or lowest
number.
Test your program with the following lines of code. In each case, make a note of the results,
and explain what you get.
line of code
LET number = INT(RND * 200) + 1
LET number = INT(RND * 20) + 1
LET number = INT(RND * 100) + 2000
LET number = 2 * (INT(RND * 50) + 1)
LET number = 2 ˆ (INT(RND * 8) + 1)
results
explanation
Tasks
· Modify your program so that when you run it, it produces a single
dice roll (a random number between 1 and 6).
Hint: you won’t need a For … Next loop.
·
Modify your program so that it produces a double dice roll, and displays the number on
each die and the total score.
Hint: you will need to generate two random numbers every time you run the program.
4.14 Arithmetic tester
We can now combine what we have learned about random numbers with our arithmetic tester
program from Section 4.12.
SOFTWARE DEVELOPMENT (INT 2, COMPUTING)
73
HIGH LEVEL LANGUAGE PROGRAMMING – BASIC CONSTRUCTS
Here is the current version of the program.
! generates a question to the user
! and waits for the correct answer
LET correct_answer = 4
DO
INPUT prompt "What is 2 + 2 ":user_answer
LOOP Until user_answer = correct_answer
PRINT "Well done!"
END
·
Modify the coding as shown (changes in bold):
! generates a random question to the user
! and waits for the correct answer
Randomize
These lines generate
LET first = INT(RND * 10) + 1
the two random
LET second = INT(RND * 10) + 1
numbers for the
LET counter = 0
question.
LET correct_answer = first + second
DO
PRINT “What is ” ; first ; “ + ” ; second ; “? ”;
INPUT user_answer
LET counter = counter + 1
If user_answer <> correct_answer PRINT “Wrong, try again!”
LOOP Until user_answer = correct_answer
PRINT “Well done! You took ” ; counter ; “ tries”
End
Print (rather than
Input Prompt)
displays the value of
the variables first
and second, rather
than the numbers 2
+ 2.
One more modification!
The program only asks one random addition question each time it is run. By adding three
lines of code, we can make it give the user a series of (say) six questions. We can do this by
putting the whole of the middle section of the program inside a For … Next loop, like this:
! generates 6 random question to the user
! and waits for the correct answer
Randomize
Here is the For …
For question = 1 To 6
Next loop to repeat the
next section six times.
LET first = INT(RND * 10) + 1
LET second = INT(RND * 10) + 1
LET counter = 0
LET correct_answer = first + second
PRINT “Question “;question
DO
PRINT “What is ” ; first ; “ + ” ; second ; “? ”;
INPUT user_answer
LET counter = counter + 1
If user_answer <> correct_answer Then PRINT “Wrong, try again!”
LOOP Until user_answer = correct_answer
PRINT “Well done! You took ” ; counter ; “ tries”
NEXT
END
SOFTWARE DEVELOPMENT (INT 2, COMPUTING)
74
HIGH LEVEL LANGUAGE PROGRAMMING – BASIC CONSTRUCTS
You now have a loop within a loop. The technical term for this is nested loops.
Make the above changes to the coding.
Save the revised program under a new name.
Carry out some thorough testing of your program, using normal, extreme and
exceptional data.
Modify the program so that it:
(a) asks multiplication questions rather than addition
(b) uses random numbers between 1 and 12
(c) asks five questions
(d) displays “Well done – right first time!” if the user gets it right first time
(e) displays “Keep practising! You took X tries to get it right!” if the user
doesn’t get it right first time.
Test the program using normal, extreme and exceptional data.
Write brief User and Technical Guides, and an evaluation report.
4.15 More examples using Do … Loop Until
Example 4.15.1 – Class lists
Design, write and test a program for a tutor. The program should prompt the user to enter any
list of names, which will be displayed on the screen. The program should count how many of
these names begin with the letter A, and display this information at the end of the list.
Stage 1 – Analysis – data flow diagram
Names entered at keyboard
List of names
Number of As
Stage 2 – Design
We want the user interface to look like this:
Class lists
Enter a name please
…
…
Enter a name please
?? names begin with A
Next, we design the list of steps (pseudocode) and then the coding:
Q: We will need to use a loop. Should it be a For … Next loop, or a Do … Loop Until?
A: As we don’t know in advance how many names there will be in the list, we need to use a
Do … Loop Until.
SOFTWARE DEVELOPMENT (INT 2, COMPUTING)
75
HIGH LEVEL LANGUAGE PROGRAMMING – BASIC CONSTRUCTS
Q: What condition will we use to stop the loop?
A: Ask the user to enter the word END after entering all the names. The loop can then
continue until name = “END”.
Pseudocode
1. set a counter equal to zero
2. do the following:
2.1 prompt the user to enter a name
2.2 extract the first letter of the name
2.3 if the first letter is A, add 1 to the counter
2.4 until the user enters end
3. display the number of A’s
True BASIC coding
counter = 0
Do
INPUT prompt “Enter a name (or END)”
:name$
LET initial$ = name${1:1]
If initial$ = “A” Then counter = counter + 1
Loop Until name = “END”
PRINT “There were “;counter;” As”
Variables required:
counter (numeric), name (string), initial (string)
Stage 3 – Implementation
Given the above coding see if you can enter the code yourself, remove any
errors and save the program.
Stage 4 – Testing
Test the program with the following sets of test data, and add some more of
your own.
test data
test data 1
Andrew
Bill
Cliff
Doris
Sarah
test data 2
Alison
Albert
Bill
Bert
Ahmed
test data 3
Alison
Alison
End
END
comment
You should have noticed three problems with the program:
· it doesn’t count names which start with a lower case ‘a’
· it doesn’t stop when you enter ‘end’ in lower case
· it counts the word END as a name.
You should be able to modify your code to solve these problems.
Hints:
· use the function UCASE in step 2.2
· make the end of loop condition into a complex condition using OR.
Stages 5 and 6 – Documentation and evaluation
As usual, you should:
· print out a hard copy of your program
SOFTWARE DEVELOPMENT (INT 2, COMPUTING)
76
HIGH LEVEL LANGUAGE PROGRAMMING – BASIC CONSTRUCTS
·
·
·
save your program
write a short user guide and technical guide
write a brief evaluation of the program in terms of its fitness for purpose, user interface
and readability.
Example 4.15.2 – Password protection
Design, write and test a program for a bank cash machine. The program
should prompt the user to enter their PIN. If the PIN is correct, it should
display “Welcome to the True BASIC Bank” (message 1). If not, it
should notify the user that their PIN was entered wrongly (message 2),
and let them try again, but only allow three tries. If the user enters their
PIN wrongly three times, they should be warned that their card is being
kept (message 3).
Stage 1 – Analysis – data flow diagram
PIN entered at keyboard
Appropriate message
Stage 2 – Design
We want the user interface to look like this:
True BASIC Bank
Please enter PIN
Welcome to the True BASIC bank
The user will be prompted to enter their PIN.
First, we design the list of steps (pseudocode) and then the coding for the program. We will
use a Do … Loop Until, as the number of attempts the user makes is unknown in advance by
the programmer.
The condition to end the loop will be that the PIN is correct OR that the user has had three
attempts.
Pseudocode
1. set a counter equal to zero
True BASIC coding
LET counter = 0
2.
LET correct_pin = 1347
store correct PIN
3. do the following:
3.1 prompt the user to enter their PIN
Do
INPUT prompt “Enter your PIN”:pin
3.2 If PIN is correct display message (1)
Else display message(2)
If pin = correct_pin then
PRINT Welcome to True BASIC Bank”
Else
PRINT “PIN entered wrongly – try again”
3.3 add 1 to the counter
LET counter = counter + 1
4.
5.
until the PIN is correct or counter = 3
If counter = 3 then display message(3)
SOFTWARE DEVELOPMENT (INT 2, COMPUTING)
LOOP Until pin = correct_pin Or counter = 3
If counter = 3 Then PRINT “The card is being
kept for security”
77
HIGH LEVEL LANGUAGE PROGRAMMING – BASIC CONSTRUCTS
Variables required:
counter (numeric), pin (numeric), correct_ pin (numeric)
Stage 3 – Implementation
Given the above coding see if you can enter the code yourself; remove any
errors and save the program.
Stage 4 – Testing
Create some suitable test data, and use it to test the program.
test data
test data 1
1347
test data 2
9999
8888
1347
test data 3
1234
4321
9999
comment
Stages 5 and 6 – Documentation and evaluation
As usual, you should:
· print out a hard copy of your program
· save your program
· write a short User Guide and Technical Guide
· write a brief evaluation of the program in terms of its fitness for purpose, user interface
and readability.
Task
Modify the program to:
· prompt the user to enter a password (which could contain letters as well
as numbers)
· allow five attempts at guessing the password.
4.16 Other forms of conditional loop
There are four variations of conditional loop in BASIC. So far, we have only used the Do …
Loop Until form of loop. In some high level languages, this is the only kind of conditional
loop, and it is possible to manage without the other kinds. However, for completeness, here is
a brief summary of all four.
SOFTWARE DEVELOPMENT (INT 2, COMPUTING)
78
HIGH LEVEL LANGUAGE PROGRAMMING – BASIC CONSTRUCTS
type of loop
Do … Loop Until
Do Until … Loop
Do … Loop While
Do … While Loop
syntax
Do
Line(s) of code to be
repeated
Loop Until condition
Do Until condition
Line(s) of code to be
repeated
Loop
Do
Line(s) of code to be
repeated
Loop While condition
Do While condition
Line(s) of code to be
repeated
Loop
comments
always executed at least
once, as condition is tested
at the end; stops when the
condition becomes true
only executed if the
condition is true, as it is
tested at the beginning
loops while the condition is
true, and stops when the
condition becomes false
only executed while the
condition is true, as it is
tested at the beginning
Question
Do I need to know about all four types?
Answer
No, for this unit it is enough to be able to use one type of conditional loop!
Congratulations! You have completed Section 4.
Here is a summary of what you should now be able to do using True BASIC:
· analyse a problem using a data flow diagram
· write pseudocode, convert it into True BASIC code, and assign it to an event
· identify string and numeric variables
· use Input and Print statements
· test a program using normal, extreme and exceptional data
· use a range of pre-defined functions
· write brief User Guides and Technical Guides for simple programs
· evaluate a program in terms of fitness for purpose, user interface and readability
· use conditional statements involving If, Then, Else and End If
· use simple and complex conditions involving comparison operators, AND, Or and Not
· create fixed loops using For … Next
· create conditional loops using Do … Loop Until
· make use of the loop counter within a loop
· create nested loops (a loop within a loop).
Check all the items on this list. If you are not sure, look back through this section to
remind yourself. When you are sure you understand all of these items, you are ready
to move on to Section 5.
SOFTWARE DEVELOPMENT (INT 2, COMPUTING)
79
STANDARD ALGORITHMS AND ARRAYS
SECTION 5
5.1 Input validation
There is a saying in Computing, which goes:
Garbage in, garbage out! (or just GIGO)
You have probably heard stories about people who have received a gas bill for £1,000,000 or
similar. Usually the company will blame this on a ‘computer error’. However, computers very
rarely make mistakes! More often, the problem is that the computer has been fed with the
wrong data to start with. If you feed in wrong data, then the answer that comes out of the
system will be wrong too.
wrong data in
wrong data out
A well designed program should prevent (or at least reduce the likelihood of) wrong data
being entered into a system.
For example, there was a program in Section 4.4 which took in a student’s exam mark and
worked out their grade. Suppose a student scored 59, so should have been given a ‘B’, but the
tutor was in a hurry, and the mark was entered as 599 by mistake. The computer doesn’t have
any ‘common sense’, so it processes the data it is given, and awards the student an ‘A’.
Garbage in, garbage out!
You could prevent this sort of error by making it impossible to enter a mark of over 100. We
would describe a mark of over 100 as being invalid. Invalid data is data which couldn’t
possibly be correct, or which doesn’t make sense in the context.
To prevent the input of invalid data, we can put the coding for input of data inside a
conditional loop, that only proceeds if the data entered is valid. A conditional (If) statement
can also be inserted to warn the use if invalid data is entered.
In True BASIC, it could look like this:
Do
INPUT prompt “Enter a mark (up to 100)”:mark
If mark > 100 then PRINT “Too high”
Loop Until mark <=100
· enter the code above
· add the line
PRINT “Mark “;mark to display the valid mark in the text box on the form.
Run the program to test that it prevents the user from entering an invalid mark (i.e. one that is
over 100).
If you tested the program thoroughly, you might have discovered that it is still possible to
enter invalid data. For example, the program would accept a negative number, which would
not be a valid mark in any exam that I know.
We can easily adapt the program to also prevent invalid negative numbers being entered, as
follows (changes in bold), using complex conditions:
SOFTWARE DEVELOPMENT (INT 2, COMPUTING)
80
STANDARD ALGORITHMS AND ARRAYS
Do
INPUT prompt “Enter a mark (between 0 and 100)” :mark
If (mark > 100) Or (mark < 0) Then PRINT “That was not a valid mark”
Loop Until (mark >=0) AND (mark <= 100)
PRINT “Valid Mark =”; mark
Make these changes and test the program again using the following test data:
Normal: 23, 55, 99, 150, –10
Extreme: 0, 100, 0.0001, 99.999, 100.001
Exceptional: A, <spacebar>
Save this program as valid_mark. You will use it as a basis for the tasks in Section 5.2
Validation or verification?
Notice that input validation doesn’t prevent wrong data being entered. For example, if a
student had scored 55 in an exam, and the operator entered the mark as 56 by mistake, the
program would accept this data.
The data would be wrong but still valid!
The process of preventing incorrect data being entered is called verification.
Many commercial data-processing systems involve both verification and validation. In this
unit, we are only considering validation.
Standard algorithm for input validation
The coding for input validation always follows a standard pattern. The details will vary
depending on the specification of the program, but the same pattern can always be used. This
standard pattern saves programmers time when designing programs. A pattern like this is
called a standard algorithm.
Here is a simple version of a standard algorithm for input validation. It involves a conditional
loop and an If statement, like this:
Do
Prompt user for valid input
If input is invalid, warn user
Loop until input is valid
Adapting program 4.4
We can use the standard algorithm for input validation to improve the exam grade program
we developed in Section 4.4. Here is the section of code used to input the data.
! store user inputs
INPUT prompt "What is the exam marked out of ":max_mark
INPUT prompt "Please enter your first name ":forename$
INPUT prompt "Please enter your second name ":secname$
INPUT prompt "What is this student's mark ":mark
As it is at the moment, you could enter any mark into the variable mark.
SOFTWARE DEVELOPMENT (INT 2, COMPUTING)
81
STANDARD ALGORITHMS AND ARRAYS
Let’s alter the coding so that it won’t accept the following types of invalid
mark:
· no marks less than 0
· no marks greater than the maximum mark for the exam.
All you need to do is replace the single line
INPUT prompt "What is this student's mark ":mark
with an input validation loop, like this:
Do
INPUT prompt "Enter a valid mark ":mark
If (mark > max_mark) Or (mark < 0) Then PRINT “That was not a valid mark”
Loop Until (mark >=0) AND (mark <= max_mark)
PRINT “Valid Mark “;mark
Test the program to ensure that the input validation is working.
Extra task:
Change the line INPUT prompt "What is the exam marked out of ":max_mark to ensure that
the user cannot enter a maximum mark less than 0 or greater than 200, by replacing it with a
standard input validation loop.
5.2 Input validation tasks
Adapt the valid_mark program from Section 5.1 to do each of the following:
1. Prompt the user to enter their age.
Do not accept ages less than 0 or greater than 120 as valid ages.
2. Prompt the user to enter a 4-digit PIN.
The program should only accept the PIN if it is 4 digits long.
(Hint: make it a numeric; what is the smallest and largest value?)
3. Prompt the user to enter what year they are in at school.
Only accept 1, 2, 3, 4, 5 or 6 as valid years.
4. Prompt the user to enter their type of membership in a club.
Membership codes are J (for Junior), I (for Intermediate) and S (for Senior).
5. Prompt the user to enter Yes or No.
The program should accept ‘YES’, ‘Yes’, ‘yes’, ‘NO’, ‘No’ or ‘no’.
6. Prompt the user to enter a name.
The program should only accept a name beginning with the letter ‘A’.
(Hint: use name$[1:1])
7. Prompt the user to enter a password, which can include letters and numbers.
The program should only accept a password that is at least six characters long.
(Hint: use LEN)
SOFTWARE DEVELOPMENT (INT 2, COMPUTING)
82
STANDARD ALGORITHMS AND ARRAYS
5.3 Other standard algorithms
There are many other standard algorithms used by programmers.
For this unit, you need to:
· be able to recognise and code the standard algorithm for input validation
· know about four other standard algorithms, and understand where and when they might
be used.
(You don’t need to be able to code these other standard algorithms unless you study the
Higher Software Development unit.)
The other standard algorithms you need to know about are:
· finding a minimum
· finding a maximum
· counting occurrences
· linear search.
All of these algorithms apply to a list of data items stored in a computer system. These could
be lists of names, or lists of numbers (student marks, for example).
Finding a minimum
This algorithm works its way through a list of numbers, and finds the number with the lowest
value. For example, here is a list of daily midday temperatures recorded at a weather station
during February 2003.
date
temperature
(°C)
1
4
2
6
3
5
4
7
5
11
6
9
7
8
8
5
9
3
10
4
11
3
12
6
13
7
14
4
date
temperature
(°C)
1
5
2
6
3
2
4
3
5
8
6
6
7
12
8
10
9
11
10
9
11
6
12
11
13
8
14
6
The finding a minimum algorithm would search through all the daily temperatures in the list,
and find the lowest one. In this case, it would be 2 °C (on the seventeenth of the month). The
algorithm would return the value 2 (the actual minimum temperature).
Other examples could include:
· finding the lowest mark in a list of exam marks
· finding the winner in a list of golf scores
· finding the youngest member in a club membership list.
Finding a minimum can also be used to search a list of names to find the first if arranged
alphabetically (this is possible because strings are stored as ASCII codes, which are numbers).
Finding a maximum
This algorithm works its way through a list of numbers, and finds the number with the
highest value. In the example above, it would find 12 °C (on the twenty first of the month).
SOFTWARE DEVELOPMENT (INT 2, COMPUTING)
83
STANDARD ALGORITHMS AND ARRAYS
Counting occurrences
This algorithm also works its way through a list of numbers. As it does so, it counts how
many occurrences of a given value there are in the list. For example, if the counting
occurrences algorithm was applied to the list of midday temperatures, with a search value of 9
°C, it would return the answer 2, as there are two days (the sixth and the twenty fourth) when
the temperature was 9 °C.
date
temperature
(°C)
1
4
2
6
3
5
4
7
5
11
6
9
7
8
8
5
9
3
10
4
11
3
12
6
13
7
14
4
date
temperature
(°C)
15
5
16
6
17
2
18
3
19
8
20
6
21
12
22
10
23
11
24
9
25
6
26
11
27
8
28
6
Linear search
The final standard algorithm which you need to know about is called linear search. The idea
is simple – it searches through a list looking for a particular item, and reports where the item
is found.
In the above list of temperatures, if linear search were given the search value 7 °C, it would
return the answer 13, as 7 °C is found at position 13 in the list.
Q1: Look at these lists of data items.
1.
2.
3.
4.
5.
6.
7.
8.
9.
10.
27.3
15.6
9.93
15.6
1.56
28.3
23.8
2.38
15.6
99.3
1.
2.
3.
4.
5.
6.
7.
8.
9.
10.
999
333
–500
0
299
929
–922
99
–99
299
1.
2.
3.
4.
5.
6.
7.
8.
9.
10.
0.001
0.002
0.010
0.100
0.020
0.111
0.001
0.002
0.200
0.120
What value would each of the following standard algorithms return (numbers in brackets
refer to columns 2 and 3)?
(a)
(b)
(c)
(d)
find minimum
find maximum
count occurrence of 15.6 (99) (0.001)
linear search for 2.38 (929) (0.111).
Q2: Which standard algorithm would be used by the national census organisation to:
(a) find out how many people called Mary live in the UK
(b) find out the oldest person living in the UK
(c) discover whether or not there was an individual called ‘Stan D. Ard al-Gorithm’ in
the UK?
SOFTWARE DEVELOPMENT (INT 2, COMPUTING)
84
STANDARD ALGORITHMS AND ARRAYS
5.4 Using arrays
All of the standard algorithms which you met in the last section operate on a list of data items.
In this section, we will see how a computer program can store a list of items.
Suppose a program was required which would prompt the user to enter and store the names
and test marks for five students. Let’s try …
Stage 1 – Analysis – data flow diagram
five names
Initials and marks displayed on screen
five sets of test marks
Stage 2 – Design
We want the user interface to look like this:
Next, we design the list of steps (pseudocode) and then the coding for the command button.
Pseudocode
True BASIC coding
1.
enter and store the 1st student’s name
Input prompt “Enter 1st name ”first_:name$
2.
3.
enter and store the 1st student’s mark
enter and store the 2nd student’s name
Input prompt “and their mark ”first_:mark
Input prompt “Enter 2nd name ”second_:name$
4.
enter and store the 2nd student’s mark
Input prompt “and their mark ”:second_mark
5.
enter and store the 3rd student’s name
and so on…
6.
7.
8.
enter and store the 3rd student’s mark
enter and store the 4th student’s name and
so on …
enter and store the 4th student’s mark
9.
enter and store the 5th student’s name
10. enter and store the 5th student’s mark
11. display the 1st student’s name and mark
Print “First name “;first_name$;” and mark
“;first_mark
12. display the 2nd student’s name and mark
Print “Second name “;second_name;” and mark
“;second_mark
13. display the 3rd student’s name and mark
14. display the 4th student’s name and mark
and so on …
15. display the 5th student’s name and mark
Variables required:
first_name, second_name, third_name, fourth_name, fifth_name (all strings)
first_mark, second_mark, third_mark, fourth_mark, fifth_mark (all numerics).
SOFTWARE DEVELOPMENT (INT 2, COMPUTING)
85
STANDARD ALGORITHMS AND ARRAYS
Stage 3 – Implementation
·
·
·
Start a new True BASIC program
Enter the code for the program using the variables above
Save the program.
Stage 4 – Testing
Test the program with some normal test data.
Here is simpler version using 2 For … Next loops:
For i = 1 to 5
Input prompt “Enter a student’s name ”:student_name$
Input prompt “and their mark ”:student_mark
Next i
For i = 1 to 5
Print student_name$;TAB(20); student_mark
Next i
End
Implement and test this new version.
You might well be thinking that this is a
very tedious example, and that there should
be an easier way of implementing the
program …
… and you are right! You should be thinking
‘Loop!’ This is an ideal situation to employ a
For … Next loop, as the same action has to
be repeated five times.
There is a problem! The program has only stored the last name and mark we entered. Each
name (and mark) has been stored in the same variable, each time overwriting the previous
value. We need to have different variable names for each name and mark, but we can’t do
that within the For … Next loop.
The answer to our problem is a special type of data structure called an array.
Rather than using five different variables for five names, like this …
INPUT first_name$
INPUT second_name$
INPUT third_name$
INPUT fourth_name$
INPUT fifth_name$
… we can set up a name array, like this:
Dim name$(5)
and rather than using another set of five variables for the marks, like this …
INPUT first_mark
INPUT second_mark
SOFTWARE DEVELOPMENT (INT 2, COMPUTING)
86
STANDARD ALGORITHMS AND ARRAYS
INPUT third_mark
INPUT fourth_mark
INPUT fifth_mark
… we can set up a mark array, like this:
Dim mark(4)
What does Dim name$(5) mean?
Instead of setting up five separately named variables to hold the five names
firstName
secondName
thirdName
fourthName
fifthName
… True BASIC sets up a variable structure called an array that can store all five names, with
each array element being referred to by its index number (1, 2, 3, 4 or 5).
studentName(1)
studentName(2)
studentName(3)
studentName(4)
studentName(5)
Similarly, Dim mark(4) sets up an array that can store five numbers:
mark(0)
mark(1)
mark(2)
mark(3)
mark(4)
The really useful thing about an array is that the program can refer to the whole array at once,
or to any single element.
Now let’s see how using arrays lets us simplify the program we have been working on.
Here is the version that doesn’t work:
For i = 1 to 5
Input prompt “Enter a student’s name ”:student_name$
Input prompt “and their mark ”:student_mark
Next i
For i = 1 to 5
Print student_name$;TAB(20); student_mark
Next i
End
… and here is a version that does work, using arrays:
Dim name$(5)
Dim mark(5)
For i = 1 to 5
Input prompt “Enter a name”:name$(i)
SOFTWARE DEVELOPMENT (INT 2, COMPUTING)
The first time through the loop,
i = 1, so the first name and
mark are stored in array
elements name$(1) and
mark(1). Next time, i = 2, so
name$(2) and mark(2) are used,
and so on.
87
STANDARD ALGORITHMS AND ARRAYS
Input prompt “and their mark ”:mark(i)
Next i
For i = 1 to 5
Print name$(i); TAB(20);mark(i)
Next i
End
The same thing happens
here, with i taking the
values 1, 2, 3, 4 and 5 in
turn, so each name and
mark is printed on the
screen.
Implement and test this new version. It should work correctly now.
Stages 5 and 6 – Documentation and evaluation
As usual, you should:
· print out hard copies of your form and the coding
· save your program
· write a short User Guide and Technical Guide
· write a brief evaluation of the program in terms of its fitness for purpose, user interface
and readability.
5.5 Examples using arrays
Lucky Prize Draw (version 1)
Stage 1 – Analysis
Program specification
Design, write and test a program which prompts the user to enter 10 names, then selects and
displays one chosen at random.
Data flow diagram
ten names
name chosen at random
Stage 2 – Design
We want the user interface to look like this:
Prize Draw
The lucky winner is …
The user will enter the ten names using an array and Input statements.
Next, we design the list of steps (pseudocode) and then the coding for the program.
Pseudocode
True BASIC coding
1. Do the following ten times
For i = 1 To 10
1.1 prompt the user to enter a name and store the
name in an array
Input Prompt “Enter a name ”:name$(i)
SOFTWARE DEVELOPMENT (INT 2, COMPUTING)
88
STANDARD ALGORITHMS AND ARRAYS
2. Next
Next i
3. Select a random number between 1 and 10
Randomize
Let Number = …
4. Display the selected array element
Print “The winner is “;name$(Number)
Variables required:
i and number (both numeric)
name$(10) (array of strings)
Stage 3 – Implementation
·
·
·
Start a new True BASIC project
Enter the code for the program.
Save the program.
Stage 4 – Testing
Run the program to make sure it works correctly, selecting a different winner every time. To
save time, you can enter the names as Q, W, E, R, T, etc., from the top row of the keyboard.
Lucky Prize Draw (version 2)
Program specification
Design, write and test a program which prompts the user to enter four names and four prizes.
The program should select a lucky winner at random, and assign them a prize chosen at
random. The program should then display the name of the winner and the chosen prize.
Work through all the stages of the software development process for this
program – Analysis, Design, Implementation, Testing, Documentation and
Evaluation.
Congratulations! You have completed Section 5.
Here is a summary of what you should now be able to do using True BASIC:
· everything from the Section 3 checklist
· everything from the Section 4 checklist
· write the pseudocode for the input validation standard algorithm
· write True BASIC coding for a standard input validation algorithm
· use complex conditions (using Or and AND) for input validation
· declare arrays
· use For … Next loops to handle arrays.
You have now completed the whole unit on software development. By working your way
through all the example programs and tasks in this package, you should have
demonstrated all the practical skills required to pass the unit, and have enough evidence to
support this.
You should also now be ready to sit the multiple-choice NAB test for this unit.
Good luck!
SOFTWARE DEVELOPMENT (INT 2, COMPUTING)
89
ANSWERS
ANSWERS
Section 1.1
Q1. Hardware is the items of equipment that make up a computer system.
Q2. Examples of software include any application packages (e.g. Microsoft Word), any
operating system (e.g. Windows 97) or any document or file.
Q3.
Item
monitor
database
Windows 97
scanner
an e-mail
Internet Explorer
mouse
modem
a computer game
a word processor
digital camera
hardware
ü
software
ü
ü
ü
ü
ü
ü
ü
ü
ü
ü
after Section 1.10
Q1.
Stage
Evaluation
Testing
Implementation
Design
Documentation
Analysis
Maintenance
Description
Writing a user guide and technical guide
for the software
Working out the details of what the screens will look
like, what menus and functions there will be, and other
detailed aspects of the program.
Deciding what type of game you want to create, and
what features you want it to have.
Actually writing all the program code.
Adapting the game to run on a different type of
computer.
Checking that the program does what it is supposed to
do, is easy to use, and can be fixed if there is a
problem.
Getting users to try out the program to make sure it
works under most conditions.
SOFTWARE DEVELOPMENT (INT 2, COMPUTING)
90
ANSWERS
Q2. The three criteria used to evaluate software in this unit are fitness for purpose, user
interface and readability.
Q3. Both show the main steps in any process. Pseudocode is read from top to bottom; a
structure diagram is read from left to right.
Q4. A User guide tells you the features of the software, how to use it, and possibly a tutorial.
The Technical Guide gives information on installation and the technical specification of
the computer required to run the program.
Q5. Normal, extreme and exceptional testing.
Q6. A game could have bugs fixed, or new features added.
after Section 2.1
Q1. High level is easier to understand.
Q2. High level is easier to correct.
Q3. Machine code and assembler are low-level languages.
Q4. Pascal and BASIC are two high-level languages (there are many more).
Q5. HLLs are designed to be understood by humans; LLLs are designed to be understood by
computers.
Q6. HLLs are more readable, easier to fix bugs, designed for problem solving.
after Section 2.5
Q1. Interpreters and compilers.
Q2. A compiler translates a whole program before executing it.
Q3. An interpreter translates line by line.
Q4. Compiled programs run more quickly because they are already in machine code, and so
don’t need to be translated.
after Section 2.7
Q1. A macro is a program to automate a process in an application; it can be activated by a
combination of keys whenever it is needed.
Q2. Macros are written in scripting languages such as VBA.
Q3. They allow automation of frequently repeated complicated combinations of actions.
Q4. For automating a complex set of formatting commands in a word processor, or
automating a complex query in a database.
SOFTWARE DEVELOPMENT (INT 2, COMPUTING)
91
ANSWERS
after Section 3.1
Q1. A command button, a text box, a label.
Q2. The >icon starts the execution of a program.
Q3. Clicking on a command button is a common True BASIC event.
after Section 3.12
Q1.
Description
returns the ASCII code of a character
selects a group of characters out of a string
turns any character into upper case
takes an ASCII code and returns the character it represents
changes any character into lower case
counts the number of characters in a string
Pre-defined function
String$[x:y]
ASC
LCASE
UCASE
LEN
CHR$
Q2.
Sentence$[1:1] – W
Sentence$[1:4] – What
Sentence$[9:2] – 25
Sentence$[19:1 – ?
Q3.
any letter
ASCII code
ASC
CHR$
string
LEN
ASCII code
character
No. of characters
Section 4.9
(a)
(b)
(c)
(d)
(e)
(f)
(g)
For counter = 3 To 36 Step 3
For counter = 0 To 99 Step 9
For counter = 10 To 0 Step –1
For counter = 0 To 4.5 Step 0.75
For counter = 50 To –50 Step –10
For counter = 1 To 10 with counter^2
For counter = 1 To 11 with 2^counter
Section 5.3
SOFTWARE DEVELOPMENT (INT 2, COMPUTING)
92
ANSWERS
Q1.
Finding minimum
Finding maximum
Count occurrences
Linear search
Column 1
1.56
99.3
(15.6) 3
(2.38) 8
Column 2
–922
999
(99) 1
(929) 6
Column 3
0.001
0.200
(0.001) 2
(0.111) 6
Q2.
(a) count occurrences
(b) finding maximum (or minimum if searching dates of birth)
(c) linear search.
SOFTWARE DEVELOPMENT (INT 2, COMPUTING)
93