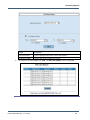
1
hotEx RADIUS Manager
User Guide
2007-2008 Hotspot Express.
All rights reserved.
No part of this work may be reproduced, stored in a retrieval system, adopted or transmitted in any form or by
any means: electronic, mechanical, photographic, graphic, optic recording or otherwise, translated in other
language or computer language, without the prior written permission of Hotspot Express.
Due care has been taken to make this User’s Guide and accompanying software package as accurate as
possible. However Hotspot Express makes no representation or warranties with respect to the contents
hereof and shall not be responsible for any loss or damage caused to the user by the direct or indirect use of
this User Manual and accompanying Software System.
Hotspot Express reserves the rights to alter, modify or otherwise change in any manner, the contents hereof,
without obligation of Hotspot Express limited to notify any person of such revision or changes.
Mention of third-party companies and products is for informational purposes only and does not constitute an
endorsement. Hotspot Express assumes no responsibility with regard to the selection, performance, or use of
these products. All understandings, agreements or warranties, if any, take place directly between the vendor
and prospective users.
Registered Office: No.5, PK Lane, North Andar Street, Trichy 620002, TN, INDIA Phone: 91-431-2702310
City Office: No. 21/8, Ramanujam St., West Saidapet, Chennai 600015, TN, INDIA. Phone: 93602 55005
hotEx RADIUS Manager - User Guide
ii
Table of Contents
About this Guide ...................................................................................... 7
Intended Audience .........................................................................................................................8
Purpose of this Guide ....................................................................................................................8
Typographical Conventions ...........................................................................................................8
Customer Support ..........................................................................................................................8
Chapter 1
9
Getting Started ......................................................................................... 9
Introduction .....................................................................................................................................10
Starting hotEx RADIUS manager ...................................................................................................10
Shutting down hotEx RADIUS manager.........................................................................................11
Understand the hotEx RADIUS manager user Interface................................................................11
Chapter 2
13
Plan Management................................................................................... 13
Adding a New Plan .........................................................................................................................14
Prepaid Plan.................................................................................................................................14
Postpaid Plan ...............................................................................................................................17
Editing a Plan..................................................................................................................................20
Prepaid Plan.................................................................................................................................20
Post-paid Plan..............................................................................................................................24
Deleting a Plan ...............................................................................................................................28
Price Table......................................................................................................................................29
Price Table 1...................................................................................................................................30
Chapter 3
32
Pack Management .................................................................................. 32
Generate Pack................................................................................................................................33
Print Codes .....................................................................................................................................34
hotEx RADIUS Manager - User Guide
3
Cancel Packs..................................................................................................................................36
Set Pack Expiry ..............................................................................................................................37
Chapter 4
39
Managing Users...................................................................................... 39
Sell Pack.........................................................................................................................................40
Register ..........................................................................................................................................43
Renew a Plan .................................................................................................................................44
Reset Password..............................................................................................................................45
Editing User Account ......................................................................................................................46
Deactivate Account.........................................................................................................................49
Activate Account .............................................................................................................................49
Renewal Settings............................................................................................................................50
Mac Authentication .........................................................................................................................51
Register........................................................................................................................................51
Renew Mac Authentication ..........................................................................................................54
Delete Mac Authentication ...........................................................................................................54
Set Idle Timeout..............................................................................................................................55
Chapter 5
57
Managing Payments............................................................................... 57
Billing for Postpaid User .................................................................................................................58
Postpaid Payment...........................................................................................................................59
Chapter 6
61
Managing Receptionist Role.................................................................. 61
Adding a Receptionist.....................................................................................................................62
Pack Distribution.............................................................................................................................63
Receiving Unsold Packs.................................................................................................................63
Chapter 7
65
Managing Resellers................................................................................ 65
Adding a Reseller ...........................................................................................................................66
hotEx RADIUS Manager - User Guide
4
Editing Reseller Information ...........................................................................................................68
Deleting a Reseller ID.....................................................................................................................71
Distributing the packs .....................................................................................................................72
Chapter 8
75
Generating Reports ................................................................................ 75
Plan Report.....................................................................................................................................77
Report for Packs ..........................................................................................................................77
Report for Users...........................................................................................................................78
Pack Report ....................................................................................................................................80
Report for Registered Pack..........................................................................................................80
Report for Unregistered Packs.....................................................................................................81
Report for Expired Packs .............................................................................................................82
Report for Receptionist Stock Holding .........................................................................................83
Report to Track a Pack ................................................................................................................84
User Report ....................................................................................................................................84
Report for List Users ....................................................................................................................84
Report for User Status .................................................................................................................86
Usage Report ...............................................................................................................................87
Payments Report .........................................................................................................................89
Unpaid Bills Report ......................................................................................................................91
Reseller Report...............................................................................................................................92
Sales Report ...................................................................................................................................94
Direct Sales Report ......................................................................................................................94
Reseller Sales Report ..................................................................................................................96
Day Report......................................................................................................................................98
Room Report ................................................................................................................................100
Sales Log Sheet ...........................................................................................................................102
To View the Sales Log Sheet.....................................................................................................102
Chapter 9
104
Managing NAS ...................................................................................... 104
Guest Management ......................................................................................................................105
Creating Guest Information........................................................................................................105
hotEx RADIUS Manager - User Guide
5
NAS Management ........................................................................................................................106
Adding NAS Management .........................................................................................................106
Deleting NAS Management .......................................................................................................107
Chapter 10
108
Managing Database.............................................................................. 108
Backing up Database ...................................................................................................................109
Restoring Database ......................................................................................................................109
Chapter 11
111
Miscellaneous....................................................................................... 111
IP Setting ......................................................................................................................................112
Admin Management .....................................................................................................................114
Setting Access Rights...................................................................................................................115
URL Redirection ...........................................................................................................................117
Currency Prefix .............................................................................................................................118
Welcome Message .......................................................................................................................118
Upload Logo .................................................................................................................................119
GB Calculator ...............................................................................................................................120
Testing Internet Connectivity ........................................................................................................121
Setting Terms & Conditions..........................................................................................................122
DynDns Setting.............................................................................................................................123
PayPal Setting ..............................................................................................................................124
Email Statement ...........................................................................................................................126
hotEx RADIUS Manager - User Guide
6
About this Guide
About this Guide
This section consists of the following sections:
Intended Audience
Purpose of this Guide
Typographical Conventions
Customer Support
hotEx RADIUS Manager - User Guide
7
About this Guide
Intended Audience
This guide is intended as a reference manual to the administrators, the agents and clients on how to
use the hotEx Billing Manager application efficiently.
Purpose of this Guide
This guide describes the features of the hotEx RADIUS Manager application and step-by-step
procedures involved in using the web-application.
Typographical Conventions
Before starting, it is important to understand the typographical conventions used in this guide.
TABLE 1: TYPOGRAPHICAL CONVENTIONS
Typeface
Meaning
Bold
Menu items, input fields, radio button names, check boxes, drop-down lists, tab names,
buttons on the screen.
CAPS
Keys on the keyboard.
“Quotes”
Messages displayed on the screen.
Note: A note that calls attention to a topic with related information.
Tip: Indicates a suggestion or hint to make things easier or more productive for the
reader.
Customer Support
If you have problems, questions, comments, or suggestions regarding Hotspot application and the
documentation, contact us by e-mail at [email protected]. You can also call our customer
support center at (+91) 9362055005.
hotEx RADIUS Manager - User Guide
8
Chapter 1
Getting Started
This chapter consists of the following sections:
Introduction
Starting hotEx RADIUS manager
Exiting hotEx RADIUS manager
Understanding the hotEx RADIUS manager user Interface
hotEx RADIUS Manager - User Guide
9
Getting Started
Introduction
Hotspot Express, the pioneer in the field of Turnkey WiFi solutions manages wired and wireless
networks. Public walking into hotspot zones with laptops can access Internet without connecting to
any wires. Usually, the WiFi zones are implemented in Hotels, Airports, Restaurants, Corporate,
SME, Resorts, and Cyber Cafes. Large Mesh WiFi zones are created in Universities and Colleges.
Starting hotEx RADIUS manager
The administrator of the software can manage the software by using Web based Control Panel
through Intranet or the Internet. The administrator will be authenticated with unique username and
password.
To start hotEx RADIUS manager
1.
In the Web browser, enter the hotEx RADIUS manager server URL.
2.
hotEx RADIUS manager displays the Login screen, as below.
3.
Type the username in User name field.
4.
Type the password in the Password field. The password should be between 4-10 characters.
5.
Click OK.
hotEx RADIUS Manager - User Guide
10
Getting Started
Shutting down hotEx RADIUS manager
This section explains how to exit hotEx RADIUS manager.
To shutdown hotEx RADIUS manager
1.
In the application, click Shutdown in the bottom left corner.
2.
hotEx billing manager displays the Shutdown/Reboot hotEx RADIUS manager Server
screen as below.
3.
Click Shutdown to close the application, click Reboot to restart the application.
Understand the hotEx RADIUS manager user Interface
After logging into ‘hotEx RADUS Manager’ as administrator, you will see the Main Screen. The
different parts of the Main Screen are described as below.
hotEx RADIUS Manager - User Guide
11
Getting Started
Header
The Header section displays the application name and logo.
Menu Bar
The Menu Bar contains relevant menu options.
Refresh Button
The Refresh Button reloads the page.
Status Bar
The Status Bar, which is a horizontal area below the workspace, provides information about the
current state of what you are viewing on a screen and any other contextual information.
Workspace
Workspace is the area within a window where you can navigate to different systems and menu
options to handle the various operations.
hotEx RADIUS Manager - User Guide
12
Chapter
2
Chapter 2
Plan Management
This chapter consists of the following sections:
Adding a New Plan
Prepaid Plan
Postpaid Plan
Editing a Plan
Prepaid Plan
Postpaid Plan
Deleting a Plan
Price Table
Price Table 1
hotEx RADIUS Manager - User Guide
13
Plan Management
Adding a New Plan
You can add any number of plans using the below menu. You can create both prepaid and postpaid
plans.
Prepaid Plan
This option allows you to add a new prepaid plan.
To add a new prepaid plan
1.
On the Main Screen, click Plan Management, select Add New Plan and click Prepaid Plan.
The Add New Plan screen is displayed.
hotEx RADIUS Manager - User Guide
14
Plan Management
Field
Description
Plan Name
Type the name of the plan.
This is the name of the prepaid plan, for example “Prepaid – 1 Hour”.
This field can contain up to 20 alphanumeric characters.
This field is mandatory.
Connection Type
Connection Type
Select the appropriate connection type.
The options are:
i. Limited
ii. Unlimited
Hours
Type the validity of the prepaid card in hours.
This field can contain values ranging from 0 to 9999 hrs. For example, to
enter 30 minutes you should enter 0.5.
This option is available only for the limited Connection Type.
Grace period
Type the grace period in days.
The Grace Period is the time provided beyond the validity of the card. For
example, if validity of the card is 10 days and the grace period is 2 days, the
user can use the prepaid card for a maximum period of 12 days.
This field can contain values ranging from 0 to 999 days. Decimal values not
accepted.
This option is available only for the limited Connection Type.
Cost
Pack Cost
Type the cost of the prepaid plan.
This field can contain numeric values ranging from 0 to 9999999. Decimal
values are accepted.
Refer to Currency Prefix in Miscellaneous chapter.
Validity
Type the validity of the prepaid plan and select the appropriate period from
the drop-down list.
The options are:
i. Minutes
ii. Hours
iii. Days
iv. Months
v. Years
This field can contain numeric values ranging from 0 to 999.
Other Limitations
Free Hours
Type the number of free hours for limited hours pack.
This field can contain values ranging from 0 to 999 hours.
hotEx RADIUS Manager - User Guide
15
Plan Management
This field is available only if Limited connection Type is selected.
Holiday Discount
Type the holiday discount percentage for used minutes in this field.
This field can contain numeric values ranging from 0 to 999.
Max. Data Transfer
Type the maximum data transfer in GB.
This field can contain numeric values ranging from 0 to 9999999.
This field is optional.
Login
Select an appropriate login mode.
The options are:
i. No restriction
ii. Allow login only in this timings
From
To
Type the time from which login is provided.
Type the time to which login is provided.
This filed can contain numeric values in hh:mm format.
This option is available only for restricted login.
Discount Details
Discount Details
Select an appropriate discount mode.
The options are:
i. No discount
ii. Off peak discount
Discount
Type the discount percentage for used minutes in this field.
This filed can contain numeric values ranging from 0 to 999.
This option is available only for Off peak discount.
From
To
Type the time from which discount is provided.
Type the time to which discount is provided.
This filed can contain numeric values ranging from 0 to 99999999.
This option is available only for Off peak discount.
Data Transfer Speed
Type the data transfer speed in kbps.
This filed can contain numeric values ranging from 0 to 9999999999.
If the field is left blank no limits are set by default.
Plan Description
Type the description of plan.
This filed can contain up to 30 alphanumeric characters and a maximum of
80 lines.
2.
Enter the appropriate details and click Create.
hotEx RADIUS Manager - User Guide
16
Plan Management
Postpaid Plan
This option allows you to add a new postpaid plan.
To add a new postpaid plan
1.
On the Main Screen, click Plan Management select Add New Plan and click Postpaid Plan
. The Add New Plan screen is displayed.
hotEx RADIUS Manager - User Guide
17
Plan Management
Field
Description
Plan Name
Type the name of the plan.
This is the name of the postpaid plan, for example “Post paid 100”
This field can contain up to 20 alphanumeric characters.
This field is mandatory.
Connection Type
Connection Type
Select the appropriate connection type.
The options are:
i.Limited
ii.Unlimited
Hours
Type the validity of the prepaid card in hours.
This field can contain values ranging from 0 to 9999 hrs. For example to
enter 30 minutes you should enter 0.5.
This option is available only for the limited Connection Type.
Grace period
Type the grace period in days.
The Grace Period is the time provided beyond the validity of the card. For
example if validity of the card is 10 days and the grace period is 2 days, the
user can use the prepaid card for a maximum period of 12 days.
This field can contain values ranging from 0 to 999 days. Decimal values not
accepted.
This option is available only for the limited Connection Type.
Cost
Pack Cost /
registration Fee
Type the cost of the prepaid plan.
This field can contain numeric values ranging from 0 to 9999999. Decimal
values are accepted.
Refer to Currency Prefix in Miscellaneous chapter.
Validity
Type the validity of the prepaid plan and select the appropriate period from
the drop-down list.
The options are:
i.Minutes
ii.Hours
iii.Days
iv.Months
v.Years
This field can contain numeric values ranging from 0 to 999.
Price Mode
Price Mode
Select the appropriate price mode.
The options are:
hotEx RADIUS Manager - User Guide
18
Plan Management
i. Price / Minute
ii. Fixed Price
iii. Price Table
iv. Price Table 1
Charge
Type the charge amount in dollars.
This field can contain values ranging from 0 to 999999999.
For Price Table and Price Table 1 modes the charge is 0 by default.
Billing Interval
Select the billing interval from the drop-down list.
The options are:
i. Monthly
ii. Bimonthly
iii. Quarterly
iv. Half yearly
v. Yearly
According to user’s convenience.
Due Days
Type the number of days provided after the billing due date.
This field can contain values ranging from 0 to 999.
Discount Details
Discount
Type the discount percentage for used minutes in this field.
This filed can contain numeric values ranging from 0 to 999.
This option is available only for Off peak discount.
From
To
Type the time from which discount is provided.
Type the time to which discount is provided.
This filed can contain numeric values in hh:mm format.
This option is available only for Off peak discount.
Other Limitations
Free Hours
Type the number of free hours for limited hours pack.
This field can contain values ranging from 0 to 999 hours.
This field is available only if Limited connection Type is selected.
Holiday Discount
Type the holiday discount percentage for used minutes in this field.
This field can contain numeric values ranging from 0 to 999.
Maximum Allowed
Data Transfer
Type the maximum allowed data transfer in GB.
This field can contain numeric values ranging from 0 to 9999999.
Leave blank for no limit.
This field is optional.
Charge for Excess
hotEx RADIUS Manager - User Guide
Type the charge for excess data transfer per MB.
19
Plan Management
Data Transfer $
Login
This field can contain numeric values ranging from 0 to 9999999.
Select an appropriate login mode.
The options are:
i.No restriction
ii.Allow login only in this timings
From
To
Type the time from which login is provided.
Type the time to which login is provided.
This filed can contain numeric values in hh:mm format.
This option is available only for restricted login.
Data Transfer Speed
Type the data transfer speed in kbps.
This filed can contain numeric values ranging from 0 to 9999999999.
If the field is left blank no limits are set by default.
Plan Description
Type the description of plan.
This filed can contain up to 30 alphanumeric characters and a maximum of
80 lines.
2.
Enter the appropriate details and click Create.
Editing a Plan
This option allows you to edit plan(s). There are two types of plans: Prepaid Plan and Post paid
plan.
Prepaid Plan
This option allows you to edit prepaid plan details if you want to make any changes.
To edit a prepaid plan
1.
On the Main Screen, click Plan Management, select Edit Plan and click Prepaid Plan . The
Edit Plan screen is displayed.
hotEx RADIUS Manager - User Guide
20
Plan Management
2.
Select the plan from drop-down list and click Next. The Edit Plan screen is displayed.
hotEx RADIUS Manager - User Guide
21
Plan Management
Field
Description
Plan Name
Type the name of the plan.
This is the name of the prepaid plan, for example “Prepaid 100”.
This field can contain up to 20 alphanumeric characters.
This field is mandatory.
Connection Type
Connection Type
Select the appropriate connection type.
The options are:
i. Limited
ii. Unlimited
Hours
Type the validity of the prepaid card in hours.
This field can contain values ranging from 0 to 9999 hrs. For example to
enter 30 minutes you should enter 0.5.
This option is available only for the limited Connection Type.
Grace period
Type the grace period in days.
The Grace Period is the time provided beyond the validity of the card. For
example if validity of the card is 10 days and the grace period is 2 days, the
user can use the prepaid card for a maximum period of 12 days.
This field can contain values ranging from 0 to 999 days. Decimal values not
accepted.
This option is available only for the limited Connection Type.
Pack Details
Cost/registration fee
Type the cost of the prepaid plan.
This field can contain numeric values ranging from 0 to 9999999. Decimal
values are accepted.
Refer to Currency Prefix in miscellaneous chapter.
Validity
Type the validity of the prepaid plan and select the appropriate period from
the drop-down list.
The options are:
i. Minutes
ii. Hours
iii. Days
iv. Months
v. Years
This field can contain numeric values ranging from 0 to999.
Other Limitations
Free Hours
Type the number of free hours for limited hours pack.
This field can contain values ranging from 0 to999 hours.
hotEx RADIUS Manager - User Guide
22
Plan Management
This field is available only if Limited connection Type is selected.
Holiday Discount
Type the holiday discount percentage for used minutes in this field.
This field can contain numeric values ranging from 0 to 999.
Max. Data Transfer
Type the maximum data transfer in GB.
This field can contain numeric values ranging from 0 to 9999999.
This field is optional.
Login
Select an appropriate login mode.
The options are:
i. No restriction
ii. Allow login only in this timings
From
To
Type the time from which login is provided.
Type the time to which login is provided.
This filed can contain numeric values in hh:mm format.
This option is available only for restricted login.
Discount Details
Discount Details
Select an appropriate discount mode.
The options are:
i. No discount
ii. Off peak discount
Discount
Type the discount percentage for used minutes in this field.
This filed can contain numeric values ranging from 0 to 999.
This option is available only for Off peak discount.
From
To
Type the time from which discount is provided.
Type the time to which discount is provided.
This filed can contain numeric values ranging from 0 to 99999999.
This option is available only for Off peak discount.
Data Transfer Speed
Type the data transfer speed in kbps.
This filed can contain numeric values ranging from 0 to 9999999999.
If the field is left blank no limits are set by default.
Plan Description
Type the description of plan.
This filed can contain up to 30 alphanumeric characters and a maximum of
80 lines.
3.
Make the necessary changes and click Update.
hotEx RADIUS Manager - User Guide
23
Plan Management
Post-paid Plan
This option allows you to edit postpaid plan details if you want to make any changes.
To edit a postpaid plan
1.
On the Main Screen, click Plan Management, select Edit Plan and click Postpaid Plan .
You will see the Edit Plan screen.
2.
Select the plan from drop-down list and click Next. You will see the Edit Plan.
hotEx RADIUS Manager - User Guide
24
Plan Management
hotEx RADIUS Manager - User Guide
25
Plan Management
Field
Description
Plan Name
Type the name of the plan.
This is the name of the prepaid plan, for example “Post paid 100”
This field can contain up to 20 alphanumeric characters.
This field is mandatory.
Connection Type
Connection Type
Select the appropriate connection type.
The options are:
i. Limited
ii. Unlimited
Hours
Type the validity of the prepaid card in hours.
This field can contain values ranging from 0 to 9999 hrs. For example to
enter 30 minutes you should enter 0.5.
This option is available only for the limited Connection Type.
Grace period
Type the grace period in days.
The Grace Period is the time provided beyond the validity of the card. For
example if validity of the card is 10 days and the grace period is 2 days, the
user can use the prepaid card for a maximum period of 12 days.
This field can contain values ranging from 0 to 999 days. Decimal values not
accepted.
This option is available only for the limited Connection Type.
Pack Cost Details
Pack Cost /
registration Fee
Type the cost of the prepaid plan.
This field can contain numeric values ranging from 0 to 9999999. Decimal
values are accepted.
Refer to currency prefix in Miscellaneous chapter.
Validity
Type the validity of the prepaid plan and select the appropriate period from
the drop-down list.
The options are:
i. Minutes
ii. Hours
iii. Days
iv. Months
v. Years
This field can contain numeric values ranging from 0 to 999.
Price Mode
Price Mode
Select the appropriate price mode.
The options are:
hotEx RADIUS Manager - User Guide
26
Plan Management
i. Price / Minute
ii. Fixed Price
iii. Price Table
iv. Price Table 1
Charge
Type the charge amount in dollars.
This field can contain values ranging from 0 to 999999999.
For Price Table and Price Table 1 modes the charge is 0 by default.
Billing Interval
Select the billing interval from the drop-down list.
The options are:
i. Monthly
ii. Bimonthly
iii. Quarterly
iv. Half yearly
v. Yearly
According to user’s convenience.
Due Days
Type the number of days provided after the billing due date.
This field can contain values ranging from 0 to 999.
Discount Details
Discount
Type the discount percentage for used minutes in this field.
This filed can contain numeric values ranging from 0 to 999.
This option is available only for Off peak discount.
From
To
Type the time from which discount is provided.
Type the time to which discount is provided.
This filed can contain numeric values in him format.
This option is available only for Off peak discount.
Other Limitations
Free Hours
Type the number of free hours for limited hours pack.
This field can contain values ranging from 0 to 999 hours.
This field is available only if Limited connection Type is selected.
Holiday Discount
Type the holiday discount percentage for used minutes in this field.
This field can contain numeric values ranging from 0 to 999.
Maximum Allowed
Data Transfer
Type the maximum allowed data transfer in GB.
This field can contain numeric values ranging from 0 to 9999999.
Leave blank for no limit.
This field is optional.
Charge for Excess
hotEx RADIUS Manager - User Guide
Type the charge for excess data transfer per MB.
27
Plan Management
Data Transfer $
Login
This field can contain numeric values ranging from 0 to 9999999.
Select an appropriate login mode.
The options are:
i. No restriction
ii. Allow login only in this timings
From
To
Type the time from which login is provided.
Type the time to which login is provided.
This filed can contain numeric values in hh: mm format.
This option is available only for restricted login.
Data Transfer Speed
Type the data transfer speed in kbps.
This filed can contain numeric values ranging from 0 to 9999999999.
If the field is left blank no limits are set by default.
Plan Description
Type the description of plan.
This filed can contain up to 30 alphanumeric characters and a maximum of
80 lines.
3.
Make the necessary changes and click Update.
Deleting a Plan
This option allows you to delete a plan. Deleting a plan will not affect active users in that plan.
They can still be able to use their account in that plan. You cannot create new packs in a deleted
plan.
To delete a plan
1.
On the Main Screen, click Plan Management and click Delete. You will see the Delete Plan
screen.
hotEx RADIUS Manager - User Guide
28
Plan Management
2.
Select a plan from the Select Plan drop-down list, and click Delete. You will be prompted to
confirm.
3.
Click OK. The plan is deleted.
Price Table
This option allows you to create a price table for user. Thus the administrator can vary the price on
each and every minute.
To create a price table
1.
On the Main Screen, click Plan Management and click Price Table. You will see the Price
Table For Used Minutes screen.
hotEx RADIUS Manager - User Guide
29
Plan Management
2.
Select appropriate option from the From and To drop-down lists.
3.
Enter the appropriate charges in the Charge field.
4.
Click Save.
Price Table 1
This option allows you to create a price table for user. If there is more than one type of user you can
use price table 1.
To create price table 1
1.
On the Main Screen, click Plan Management and click Price Table1 .
2.
You will see the Price Table #1 For Used Minutes screen
hotEx RADIUS Manager - User Guide
30
Plan Management
3.
Select appropriate option from the From and To drop-down lists.
4.
Enter the appropriate charges in the Charge field.
5.
Click Save.
hotEx RADIUS Manager - User Guide
31
Chapter 3
Pack Management
This chapter consists of the following sections:
Generate Pack
Print Codes
Cancel Packs
Set Pack Expiry
hotEx RADIUS Manager - User Guide
32
Pack Management
Generate Pack
You can generate any number of packs in any of the plan listed. The term ‘Pack’ and ‘Ticket’ are
alternatively used and mean the same through out this guide.
To generate pack
1.
On the Main Screen, click Pack Management and select Generate Pack. You will see the
Generate Pack screen.
Field
Description
Select Plan Name
Select the plan name for which you want to generate the pack.
You can select it from the drop-down list.
This field is mandatory.
Number Of Packs
Type the number of packs you want to generate.
This field can contain values ranging from 0 to 9999.
This field is mandatory.
2.
To clear the fields, click Cancel.
3.
To generate packs, click Generate. The Generated Pack Details screen is displayed.
hotEx RADIUS Manager - User Guide
33
Pack Management
Print Codes
You can either print the tickets or preview or export the ticket details. If saved, the tickets will be
saved in the CSV (Comma Separated Value) format. You can either use MsExcel or any other
suitable viewer to view and print the tickets.
To print codes
1.
On the Main Screen, click Pack Management and select Print Codes. You will see the
Print Tickets screen.
hotEx RADIUS Manager - User Guide
34
Pack Management
Field
Description
Ticket Number From
Type the ticket number from which you want to print.
Ticket number is the pack number generated when pack is generated.
This field can contain values ranging from 1 to 9999999999999.
This field is mandatory.
Ticket Number To
Type the ticket number up to which you want to print.
Ticket number is the pack number generated when pack is generated.
This field can contain values ranging from 1 to 9999999999999.
This field is mandatory.
Header Message
hotEx RADIUS Manager - User Guide
Type the Header Message.
35
Pack Management
Header Message is the identifier that runs through the top of the document.
For example, it can be the name of the ISP or hotel.
This field is optional.
Footer Message
Type the Footer Message.
Footer Message is the identifier that runs through the bottom of the
document, for example “Thank You”.
This field is optional.
2.
To export details, click Export.
3.
To view the print preview, click Preview. You will see the Preview screen.
4.
To print the pack details, click Print.
5.
To export the tickets to Excel sheet, click Export the above Tickets to Excel format.
Cancel Packs
You can cancel a single or multiple tickets.
To cancel packs
1.
On the Main Screen, click Pack Management and select Cancel Packs. You will see the
Cancel Pack screen.
hotEx RADIUS Manager - User Guide
36
Pack Management
Field
Description
Single Pack
Type the ticket number for the pack.
This option is available only for Single Pack cancellation.
Multiple Packs
Type the range of ticket numbers for the packs.
From
Type the staring ticket number in the From field.
To
Type the ending ticket number in the To field.
This option is available only for Multiple Packs cancellation.
2.
To cancel the packs, click Cancel Pack.
Set Pack Expiry
This option allows you to set pack expiry time. By default the set pack expiry is 20 days. The
administrator can take back the expired tickets.
To set pack expiry
1.
On the Main Screen, click Pack Management and select Set Pack Expiry. You will see the
Set Pack Expiry screen.
hotEx RADIUS Manager - User Guide
37
Pack Management
Field
Description
Set Packs to expire
days after sold
Type the number of days for the packs to expire after sold.
It is the number of days after which a sold packet will be expired (when not
activated).
Its default value is 20 days.
This field can contain values ranging from 0 to 9999 days.
This field is mandatory.
2.
To set pack expiry time, click Set.
hotEx RADIUS Manager - User Guide
38
Chapter 4
Managing Users
This chapter consists of the following sections:
Sell Pack
Register
Renew a Plan
Reset Password
Editing User Account
Deactivate Account
Activate Account
Renewal Settings
Mac Authentication
Register
Renew
Delete
Set Idle Timeout
hotEx RADIUS Manager - User Guide
39
Managing Users
Sell Pack
This option allows you to sell packs. The generated packs are distributed to the resellers. The
resellers will again sell these packs to the end customers.
To sell a pack
1.
On the Main Screen, select User Management and click Sell pack . You will see the Pack
Sales screen.
Field
Description
Sold To
Select the appropriate sale type.
The options are:
i.Customer
ii.Reseller
Reseller ID
Select the reseller’s id that you want to sell the packs.
Reseller ID is created automatically when we add reseller.
This field is available only if sold to reseller is selected.
Plan Name
Select the name of the plan.
You can select it from the drop-down list.
This field is mandatory.
Number Of Packs
Type the number of packs that you want to sell.
This field can contain values ranging from 1 to the maximum number of
hotEx RADIUS Manager - User Guide
40
Managing Users
packs available in the selected plan.
This field is mandatory.
2.
Click Check Availability & Proceed. You will see the Payment Details screen.
Field
Description
Payment Mode
Select the appropriate payment mode.
The options are:
i.Cash
ii.Cheque
This field is mandatory.
Bank Name
Type the name of the bank.
This field is available only if the payment mode is by cheque.
Cheque Number
Type the cheque number.
This field is available only if the payment mode is by cheque.
3.
If you want to select the packs manually, click Manual Pack Selection. The Select Packs
and Click Sell screen is displayed.
hotEx RADIUS Manager - User Guide
41
Managing Users
4.
Select the number of packs under Select and click Sell. You will the screen as below.
5.
If you want to select the packs automatically, click Auto Pack Selection on the Payment
Details page. You will see the screen as below.
hotEx RADIUS Manager - User Guide
42
Managing Users
Register
You can register a user with his PIN Number (already purchased by him) and his below registration
details..
To register a plan
1.
On the Main Screen, select User Management and click Register. You will see the User
Registration screen.
Field
Description
User Name / ID
Type the name of the user.
This field can contain up to 19 alphanumeric characters.
This field is mandatory.
Password
Type the appropriate password.
This field can contain up to 15 alphanumeric characters.
This field is mandatory.
hotEx RADIUS Manager - User Guide
43
Managing Users
Re-Type Password
Retype the password.
This field can contain up to 15 alphanumeric characters.
This field is mandatory.
PIN Number
Type the PIN number.
This field can contain up to 20 alphanumeric characters.
This field is mandatory.
First / Last name
Type the first name and last name of the user.
This field can contain up to 30 alphanumeric characters.
This field is optional.
E-Mail ID
Type the reseller’s personal e-mail address.
This field can contain up to 25 alphanumeric characters.
This field is optional.
Address
Type the reseller’s personal address.
This field can contain up to 22 alphanumeric characters per line and a
maximum of 80 lines.
This field is optional.
Ask Password on
Logout
Select the appropriate option.
The options are:
i. Yes
ii. No
This field is optional.
2.
To reset the fields, click Reset.
3.
To submit the registration form, click Submit.
Renew a Plan
You can renew any user by entering his username and the PIN Number (available in the newly
purchased ticket). You have the option to add or remove the left-over-balance-minutes.
To renew a plan
1.
On the Main Screen, select User Management and click Renew . You will see the User
Renewal screen.
hotEx RADIUS Manager - User Guide
44
Managing Users
Field
Description
User Name
Type the name of the user.
This field is mandatory.
This field can contain up to 19 alphanumeric characters.
PIN Number
Type the PIN number.
This field can contain up to 20 alphanumeric characters.
This field is mandatory.
2.
To reset the fields, click Reset.
3.
To submit the renewal form, click Submit.
Reset Password
This option allows you to reset the password. The new password is displayed in the screen after the
process.
To reset password
1.
You can reset the password of any user. The password will be reset to ‘ 123456 ‘. On the
Main Screen, select User Management and click Reset Password. You will see the Reset
Password screen is displayed.
hotEx RADIUS Manager - User Guide
45
Managing Users
Field
Description
User ID
Select the user’s id that you want to reset the password.
This field can contain up to 19 alphanumeric characters.
This filed is mandatory.
2.
To reset the password, click Reset.
Editing User Account
You can edit any user account and change the parameters such as password, name, etc.
To edit user account
1.
On the Main Screen, select User Management and click Edit User Account . The Edit User
Account screen is displayed.
Field
Description
User ID
Select the user’s id that you want to edit the account.
This field can contain up to 19 alphanumeric characters.
This filed is mandatory.
hotEx RADIUS Manager - User Guide
46
Managing Users
2.
To edit the user account, click View. You will see the Edit User Account screen.
Field
Description
General Information
User Name / ID
Type the name of the user.
This field can contain up to 19 alphanumeric characters.
This filed is mandatory.
Status
This field shows the current status of the user.
This field can contain up to 28 alphanumeric characters.
This field is optional.
Password
Type the appropriate password.
This field can contain up to 15 alphanumeric characters.
This field is mandatory.
First / Last name
Type the first name and last name of the user.
This field can contain up to 30 alphanumeric characters.
This field is optional.
Address
hotEx RADIUS Manager - User Guide
Type the reseller’s personal address.
47
Managing Users
This field can contain up to 22 alphanumeric characters per line and a
maximum of 80 lines.
This field is optional.
E-Mail ID
Type the reseller’s personal e-mail address.
This field can contain up to 50 alphanumeric characters.
This field is optional.
Phone Number
Type the phone number of the user.
This field can contain up to 28 alphanumeric characters.
This field is optional.
Plan Details
Plan Name
This field displays name of the plan.
This is the name of the prepaid plan, for example “Prepaid 100”
This field can contain up to 20 alphanumeric characters.
This field is displayed automatically.
Plan Type
This field displays the plan type.
This field is displayed automatically.
Registration /
Renewal Date
This field displays registration / renewal Date.
Expiry Date
Type the expiry date.
This field is displayed automatically.
This field should be "2008-07-02 10:26:53" In the format.
This field can contain up to 28 alphanumeric characters.
This field is mandatory.
Due Date
This field displays the due date.
This field is displayed automatically.
Remaining Minutes
Type the remaining minutes.
This field can contain up to 28 numeric characters.
This field is mandatory.
Remaining Data
This field displays the remaining data transfer limit bytes.
Transfer Limit Bytes
This field is displayed automatically.
3.
To clear the fields, click Cancel.
4.
To update the fields, click Update.
5.
To export details, click Export.
hotEx RADIUS Manager - User Guide
48
Managing Users
Deactivate Account
You can DeActivate any user using this option. You can again ReActivate the DeActivated user for
any reason.
To deactivate account
1.
On the Main Screen, select User Management and click Deactivate Account . The
Deactivate User Account screen is displayed.
Field
Description
Select User ID
Select the user’s id that you want to deactivate the account.
This field can contain up to 19 alphanumeric characters.
This filed is mandatory.
2.
To deactivate the user, click Deactivate. The user is deactivated.
Activate Account
This option allows you to activate user account.
To activate account
1.
On the Main Screen, select User Management and click Activate Account. You will see the
Activate User Account screen.
hotEx RADIUS Manager - User Guide
49
Managing Users
Field
Description
Select User ID
Select the user’s id that you want to activate the account.
This field can contain up to 19 alphanumeric characters.
This filed is mandatory.
2.
To activate a user account, click Activate. The user is activated.
Renewal Settings
You can decide whether the left-over-balance-minutes in the expired ticket/user is to be added or
abandoned during renewal.
To renew settings
1.
On the Main Screen, select User Management and click Renewal Setting. You will see the
Renewal Setting screen.
2.
To renew the settings, select appropriate option and click Submit.
hotEx RADIUS Manager - User Guide
50
Managing Users
MAC Authentication
A MAC authentication option helps the users to login without authenticating through the login page,
from the client side. In this method, the MAC address of the client (eg. IP-Phone, etc) will be
considered as the ‘User Name’ of the user. The users must submit their Mac address to
administrator and he will update the "MAC address” field accordingly. This option is available for
both wired and wireless support hotspot applications.
Register
This option allows you to register MAC authentication.
To register Mac authentication
1.
On the Main Screen, select User Management and click Mac Authentication and select
Register. You will see the Mac Authentication screen.
hotEx RADIUS Manager - User Guide
51
Managing Users
hotEx RADIUS Manager - User Guide
52
Managing Users
Field
Description
MAC Address
Type the Mac address.
This is a unique field. For example you can Type in this format (XX-XX-XXXX-XX-XX).
This filed is mandatory.
User Identity
Type the user’s id that you want to create Mac Authentication.
This field can contain up to 19 alphanumeric characters.
This filed is mandatory.
PIN Number
Type the PIN number.
Type the password of the guest as per the given User Id created during
registration.
This field can contain up to 20 alphanumeric characters.
This filed is mandatory.
LAN IP Address
Type the LAN IP address.
The LAN IP address should be in the range "192.168.104.XX /24" only.
This filed is mandatory.
WAN IP Address
Type the WAN IP address.
Type the IP address of the user's choice. For example (61.245.23.26).
This filed is mandatory.
WAN NET Mask
Type the WAN sub Net mask address.
Type the IP address of the user's choice. For example (255.255.255.0).
This filed is mandatory.
WAN Broadcast
Type the WAN Broadcast address.
Type the IP address of the user's choice. For example (61.245.23.255).
This filed is mandatory.
Note:
Tick Assign Static WAN IP for this MAC address when using a STATIC
WAN IP for the given MAC Address. There is no restriction on this but is
purely the choice of the User. When this box is checked the below fields
will be highlighted.
2.
To register Mac authentication, click Update.
3.
To clear the entered values, click Cancel.
4.
To export data, click Export.
hotEx RADIUS Manager - User Guide
53
Managing Users
Renew Mac Authentication
This option allows you to renew MAC authentication.
To renew Mac authentication
1.
On the Main Screen, select User Management and click Mac Authentication and select
Renew. You will see the MAC Authentication Renewal screen.
Field
Description
Mac Address
Type the Mac address.
This is a unique field. For e.g. you can Type in this format (XX-XX-XX-XXXX-XX).
This field is mandatory.
PIN Number
Type the PIN number.
This field can contain up to 20 alphanumeric characters.
This field is mandatory.
2.
To renew Mac authentication, click Submit.
3.
To clear the entered values, click Reset.
Delete Mac Authentication
This option allows you to delete Mac authentication.
To delete Mac authentication
1.
On the Main Screen, select User Management and click Mac Authentication and select
Delete. You will see the Delete Mac authentication screen.
hotEx RADIUS Manager - User Guide
54
Managing Users
Field
Description
Mac ID
Select the Mac id that you want to Delete.
This is a unique field. For e.g. you can Type in this format (XX-XX-XX-XXXX-XX).
This filed is mandatory.
2.
To delete Mac authentication, click Delete.
3.
Click Ok. The Mac authentication is deleted.
Set Idle Timeout
This option allows you to set the idle timeout settings. The default value is five minutes.
To set idle time out
1.
On the Main Screen, select User Management and click Set Idle Timeout. You will see the
Idle Time For Client To Logout screen.
hotEx RADIUS Manager - User Guide
55
Managing Users
2.
Field
Description
Logout the users
Automatically if they
are idle for more
than
Type the time in minutes.
This field can contain up to 99999 numeric characters.
This field is mandatory.
To set the idle timeout, click Set.
hotEx RADIUS Manager - User Guide
56
Chapter 5
Managing Payments
This chapter consists of the following sections:
Billing for Postpaid User
Postpaid Payment
hotEx RADIUS Manager - User Guide
57
Managing Payments
Billing for Postpaid User
This option allows you to bill postpaid user. The bills generated here are delivered to the users
(customers) for the payment. The user makes the payment by using the User Id.
This postpaid billing method is useful to bill the ISP’s home customers on monthly basis. The hotel
industry is also one of the major users of the postpaid method, as they need to provide the bill to the
guest at the time of room check out for the payment.
To generate a bill for postpaid user
1.
On the Main Screen, click Payment and select Bill Postpaid User . The Select User Id
screen is displayed.
Field
Description
User Id
Select the user id for which you want to bill.
User Id is created automatically when we generate pack.
You can select it from the drop-down list.
This field is mandatory.
2.
To generate a bill, click Next. The following message is displayed.
hotEx RADIUS Manager - User Guide
58
Managing Payments
Postpaid Payment
This option allows you to receive postpaid payment from the customer. The customer can make the
bill payment through cash or cheque based on the usage.
To make a postpaid payment
1.
On the Main Screen, click Payment and select Postpaid Payment . The Select User Id
screen is displayed.
Field
Description
User Id
Select the user id for which you want to make payment.
You can select it from the drop-down list.
This field is mandatory.
2.
Click Next. The Usage Bill screen is displayed.
hotEx RADIUS Manager - User Guide
59
Managing Payments
Field
Description
Usage Bill
This section displays the details of User id, Name, Start Date, End Date,
Scheme Name, Used Minutes, Charged Minutes, Charge, Excess MB
Charge and Total Charge.
Payment Details
Payment Mode
Select the payment mode that you want to make payment.
The options are Cash and Cheque.
Bank Name
Type the name of the bank.
This field is available only if the payment mode is by cheque.
Cheque Number
Type the cheque number.
This field is available only if the payment mode is by cheque.
3.
To reset the fields, click Reset.
4.
To make the payment, click Submit.
hotEx RADIUS Manager - User Guide
60
Chapter 6
Managing Receptionist Role
This chapter consists of the following sections:
Adding a Receptionist
Pack Distribution
Receiving Unsold Packs
hotEx RADIUS Manager - User Guide
61
Managing Receptionist Role
Adding a Receptionist
This option allows you to add a receptionist. These receptionists can be from hotels, airports,
restaurants and railway stations. The generated packs are distributed to these receptionists. The
receptionists will be selling the prepaid tickets to the users.
To add a receptionist
1.
On the Main Screen, select Receptionist and click Add Receptionist. You will see the Add
Receptionist screen.
Field
Description
Name
Type the name of the receptionist.
This field is mandatory.
Address
Type the address of the receptionist.
This field is mandatory.
2.
Enter the appropriate details and click Add. You will see the Receptionist Added
Successfully screen.
hotEx RADIUS Manager - User Guide
62
Managing Receptionist Role
Pack Distribution
This option allows you to distribute the packs generated. The generated packs are distributed to the
receptionists. The receptionists will sell these packs to the customers.
To distribute packs
1.
On the Main Screen, select Receptionist and click Pack Distribution . The Receptionist
Pack Distribution screen is displayed.
Field
Description
Receptionist Name/
ID
Select the name/id of the receptionist from the drop-down list.
Pack Number
Type the range of ticket numbers for the packs.
From
To
2.
Type the serial number from which you want to distribute in the From field.
Type the serial number to which you want to distribute in the To field.
To distribute the packs, click Next.
Receiving Unsold Packs
This option allows the administrator to receive the unsold packs from the receptionists. The
administrator can receive back the UnSold tickets (distributed through the receptionists). They may
be either expired or live.
To receive unsold packs
1.
On the Main Screen, select Receptionist and click Receive Unsold Packs. You will see the
Select Receptionist to get Unsold Packs screen.
hotEx RADIUS Manager - User Guide
63
Managing Receptionist Role
2.
Field
Description
Receptionist Name/
ID
Select the name/id of the receptionist from the drop-down list.
To get the unsold packs, click Next.
hotEx RADIUS Manager - User Guide
64
Chapter 7
Managing Resellers
This chapter consists of the following sections:
Adding a Reseller
Editing Reseller Information
Deleting a Reseller ID
Distributing the packs
hotEx RADIUS Manager - User Guide
65
Managing Resellers
Adding a Reseller
You can add any number of resellers. You can sell the tickets to these resellers. The resellers can
resell those tickets to their end users.
To add reseller
1.
On the Main Screen, select Reseller and click Add Reseller. You will see the Add Reseller
screen.
Field
Description
Full Name (Mr/Mrs)
Type the name of the reseller.
This field can contain up to 50 alphanumeric characters.
This field is mandatory.
Company Information
Company Name
Type the name of the company.
This field can contain up to 50 alphanumeric characters.
This field is mandatory.
Address
hotEx RADIUS Manager - User Guide
Type the address of the company.
66
Managing Resellers
This field can contain up to 22 alphanumeric characters per line and a
maximum of 80 lines.
This field is mandatory.
Zip Code
Type the zip code.
This field can contain up to 10 alphanumeric characters.
This field is mandatory.
Country
Type the name of the country.
This field can contain up to 50 alphanumeric characters.
This field is mandatory.
Phone
Type the phone number of the company.
This field can contain up to 25 alphanumeric characters.
This field is mandatory.
Email
Type the email address of the company.
This field can contain up to 50 alphanumeric characters.
This field is mandatory.
Personal Information * optional
Address
Type the reseller’s personal address.
This field can contain up to 22 alphanumeric characters per line and a
maximum of 80 lines.
This field is optional.
Zip Code
Type the reseller’s zip code.
This field can contain up to 10 alphanumeric characters.
This field is optional.
Country
Type the name of the country.
This field can contain up to 50 alphanumeric characters.
This field is optional.
Phone
Type the reseller’s personal phone number.
This field can contain up to 25 alphanumeric characters.
This field is optional.
Email
Type the reseller’s personal e-mail address.
This field can contain up to 50 alphanumeric characters.
This field is optional.
Payment Details
Commission
Percentage
Type the commission percentage.
It is the percentage, which the reseller gets as commission from the service
provider.
This field is optional.
hotEx RADIUS Manager - User Guide
67
Managing Resellers
Deposit Amount
Type the deposit amount.
It is the amount to be deposited to the service provider to become a reseller.
This field is optional.
Paymode
Select the appropriate payment mode.
The options are:
i. Cash
ii. Cheque
This field is mandatory.
Bank Name
Type the name of the bank.
This field is available only if the payment mode is by cheque.
Cheque Number
Type the cheque number.
This field is available only if the payment mode is by cheque.
2.
To reset the fields, click Reset.
3.
To add a new reseller, click Add.
Editing Reseller Information
This option allows you to edit the reseller details, if you want to make any changes.
To edit a reseller
1.
On the Main Screen, select Reseller and click Edit Reseller. You will see the Select
Reseller Id screen.
Field
Description
Reseller ID
Select the reseller’s id that you want to sell the packs.
Reseller ID is created automatically when we add reseller.
This field is available only if a reseller is created.
hotEx RADIUS Manager - User Guide
68
Managing Resellers
2.
To edit the reseller details, click Next. You will see the Edit Reseller screen.
Field
Description
Full Name (Mr/Mrs)
Type the name of the reseller.
This field can contain up to 50 alphanumeric characters.
This field is mandatory.
Company Information
Company Name
Type the name of the company.
This field can contain up to 50 alphanumeric characters.
This field is mandatory.
Address
Type the address of the company.
This field can contain up to 22 alphanumeric characters per line and a
maximum of 80 lines.
This field is mandatory.
Zip Code
Type the zip code.
This field can contain up to 10 alphanumeric characters.
This field is mandatory.
Country
hotEx RADIUS Manager - User Guide
Type the name of the country.
69
Managing Resellers
This field can contain up to 50 alphanumeric characters.
This field is mandatory.
Phone
Type the phone number of the company.
This field can contain up to 25 alphanumeric characters.
This field is mandatory.
Email
Type the email address of the company.
This field can contain up to 50 alphanumeric characters.
This field is mandatory.
Personal Information * optional
Address
Type the reseller’s personal address.
This field can contain up to 22 alphanumeric characters per line and a
maximum of 80 lines.
This field is optional.
Zip Code
Type the reseller’s zip code.
This field can contain up to 10 alphanumeric characters.
This field is optional.
Country
Type the name of the country.
This field can contain up to 50 alphanumeric characters.
This field is optional.
Phone
Type the reseller’s personal phone number.
This field can contain up to 25 alphanumeric characters.
This field is optional.
Email
Type the reseller’s personal e-mail address.
This field can contain up to 50 alphanumeric characters.
This field is optional.
Payment Details
Commission
Percentage
Type the commission percentage.
It is the percentage, which the reseller gets as commission from the service
provider.
This field is optional.
Deposit Amount
Type the deposit amount.
It is the amount to be deposited to the service provider to become a reseller.
This field is optional.
Paymode
Select the appropriate payment mode.
The options are:
i.Cash
ii.Cheque
hotEx RADIUS Manager - User Guide
70
Managing Resellers
This field is mandatory.
Bank Name
Type the name of the bank.
This field is available only if the payment mode is by cheque.
Cheque Number
Type the cheque number.
This field is available only if the payment mode is by cheque.
3.
Make the necessary changes and click Update.
4.
To reset all the fields, click Reset.
Deleting a Reseller ID
You can delete any reseller at any time. Once the reseller is deleted, the deletion is permanent. You
can not activate him again.
To delete a reseller
1.
2.
On the Main Screen, select Reseller and click Delete Reseller. You will see the Delete
Reseller screen.
Field
Description
Reseller ID
Select the reseller identification number that you want to delete from the
drop-down list.
To delete a reseller, click Delete. You will be asked to confirm.
hotEx RADIUS Manager - User Guide
71
Managing Resellers
3.
Click Ok. The reseller is deleted.
Distributing the packs
This option allows you to distribute the packs. The generated packs are distributed to the resellers.
The resellers will sell these packs to the customers.
To distribute a pack
1.
On the Main Screen, select Reseller and click Pack Distribution . The Pack Sales screen is
displayed.
Field
Description
Sold To
Select the appropriate sale type.
The options are:
i. Customer
ii. Reseller
Reseller ID
Select the reseller’s id that you want to sell the packs.
Reseller ID is created automatically when we add reseller.
This field is available only if ‘sold to reseller’ is selected.
Plan Name
Select the name of the plan.
You can select it from the drop-down list.
This field is mandatory.
hotEx RADIUS Manager - User Guide
72
Managing Resellers
Number Of Packs
Type the number of packs that you want to sell.
This field can contain values ranging from 1 to the maximum number of
packs available in the selected plan.
This field is mandatory.
2.
Click Check Availability & Proceed. You will see the Payment Details screen.
Field
Description
Payment Mode
Select the appropriate payment mode.
The options are:
i.Cash
ii.Cheque
This field is mandatory.
Bank Name
Type the name of the bank.
This field is available only if the payment mode is by cheque.
Cheque Number
Type the cheque number.
This field is available only if the payment mode is by cheque.
3.
If you want to select the packs manually, click Manual Pack Selection. You will see the
screen as below.
hotEx RADIUS Manager - User Guide
73
Managing Resellers
4.
Select the number of packs under Select and click Sell. You will see the screen as below.
5.
If you want to select the packs automatically, click Auto Pack Selection on the Payment
Details page. You will see the screen as below.
hotEx RADIUS Manager - User Guide
74
Chapter 8
Generating Reports
This chapter consists of the following sections:
Plan Report
Report for Packs
Report for Users
Pack Report
Report for Registered Pack
Report for Unregistered Packs
Report for Expired Packs
Report for Receptionist Stock Holding
Report to Track a Pack
User Report
Report for List Users
Report for User Status
Usage Report
Payments Report
Unpaid Bills Report
Reseller Report
Purchase Report
Sales Report
Direct Sales Report
Reseller Sales Report
Day Report
hotEx RADIUS Manager - User Guide
75
Generating Reports
Room Report
Sales Log Sheet
hotEx RADIUS Manager - User Guide
76
Generating Reports
Plan Report
The plan report is high-level report that lets you know the status of sold/unsold PIN.
Report for Packs
The pack report provides a more detailed view of the PIN based on all plan/specific, sold/unsold and
specific date.
To view pack status report
1.
On the Main Screen, select Reports and point to Plan Report and click Packs . The Plan
Report screen is displayed.
Field
Description
Plan
Select the appropriate Plan.
The available options are:
i. All Plan
ii. Specific Plan
Status
Select the appropriate status of the PIN.
The available options are:
i. Sold
ii. Unsold
hotEx RADIUS Manager - User Guide
77
Generating Reports
Select Date
2.
Select the appropriate From date and To date.
To view the pack status, click View. The Plan Report screen is displayed.
Report for Users
The user report provides a more detailed view of the PIN based on all plan/specific, sold/unsold and
specific date.
To view users status report
1.
On the Main Screen, select Reports, point to Plan Report and click Users . The Plan Users
Report screen is displayed.
hotEx RADIUS Manager - User Guide
78
Generating Reports
2.
Field
Description
Select Plan Name
Select the appropriate Plan Name from the drop-down list.
By Registered Date
Select the appropriate From date and To date.
To view the user status report, click View. The Plan User Report screen is displayed.
hotEx RADIUS Manager - User Guide
79
Generating Reports
Pack Report
The pack report keeps track of a particular plan distributed by a receptionist irrespective of whether
the customer/guest has registered for the usage.
Report for Registered Pack
The registered report keeps track of the registered coupon for a specific period.
To view registered pack details
1.
2.
On the Main Screen, select Reports, point to Pack Report and click Registered . The Pack
Report screen is displayed.
Field
Description
Select Plan Name
Select the appropriate Plan Name from the drop-down list.
By Registered Date
Select the appropriate From date and To date.
To view the registered pack details, click View. The Plan User Report screen is displayed.
hotEx RADIUS Manager - User Guide
80
Generating Reports
Report for Unregistered Packs
The unregistered report keeps track of the unregistered coupon for a specific period.
To view unregistered pack details
1.
On the Main Screen, select Reports, point to Pack Report and click Unregistered . The
Pack Report screen is displayed.
hotEx RADIUS Manager - User Guide
81
Generating Reports
2.
Field
Description
Select Plan Name
Select the appropriate Plan Name from the drop-down list.
By Registered Date
Select the appropriate From date and To date.
To view the unregistered pack details, click View. The Pack Report screen is displayed.
Report for Expired Packs
The expired report keeps track of the expired coupons. The coupons get expired after the validity
period.
To view pack expired details
1.
2.
On the Main Screen, select Reports, point to Pack Report and click Expired . The Pack
Report screen is displayed.
Field
Description
Select Plan Name
Select the appropriate Plan Name from the drop-down list.
By Registered Date
Select the appropriate From date and To date.
To view the expired pack details, click View. The Pack Report screen is displayed.
hotEx RADIUS Manager - User Guide
82
Generating Reports
Report for Receptionist Stock Holding
At any time, you can know which are the tickets (already distributed) are with the receptionist. Thus
you can know the stock position of the tickets.
To view receptionist stock holding report
1.
On the Main Screen, select Reports, point to Pack Report and click Receptionist Stock
Holding. You will see the Receptionist Stock Hold Report screen.
2.
To save the unsold ticket details, please click the ‘Export’ button.
hotEx RADIUS Manager - User Guide
83
Generating Reports
Report to Track a Pack
This feature is useful to track the status of a ticket, whether it is sold/unsold.
To track a pack
1.
On the Main Screen, select Reports, point to Pack Report and click Pack Report . The
Track A Pack screen is displayed.
2.
To check the status, enter the appropriate Ticket Number and click Track. The status of the
Ticket is displayed as Sold/Unsold.
User Report
The user report lists all the browsing sessions of a particular user.
Report for List Users
The list user report keeps track of the all the basic details of the current users.
Active users are the registered users whose plan is not expired.
hotEx RADIUS Manager - User Guide
84
Generating Reports
All Users include both registered and unregistered user.
Active users Report
To view active user details
1.
On the Main Screen, select Reports, point to User Report and then point to List Users and
click Active. You will see the User List screen.
2.
If you want to save the reportt, Click Export button.
All Users Report
To view all users details
1.
On the Main Screen, select Reports, point to User Report and then point to List Users and
click All Users. You will see the User List screen.
hotEx RADIUS Manager - User Guide
85
Generating Reports
2.
Click Export to save the data in Ms-Excel format.
Report for User Status
The status report gives the general information and the plan details of a particular user.
To view the user status
1.
On the Main Screen, select Reports, point to User Report and click Status. You will see the
User Status screen.
2.
Select the User ID from the drop-down list and click View. You will see the screen as below.
hotEx RADIUS Manager - User Guide
86
Generating Reports
3.
If you want to save the report, please click the button ‘Export’ to save it in Ms-Excel format.
Note:
When the ‘Deactivate’ button is clicked, the selected user is
deactivated.
When the ‘Reset’ button is clicked, the user’s password is reset. The
reset password will be “123456” by default.
Usage Report
You can take the usage report of any user using this feature.
To view usage report
1.
On the Main Screen, select Reports, point to User Report and click Usage. You will see the
Usage Report screen.
hotEx RADIUS Manager - User Guide
87
Generating Reports
Field
Description
Select User Id
Select the User Id from drop-down list.
Session
Select the appropriate Session.
The available options are:
i.Billed Session
ii.Unbilled Session
By Date
2.
Select the appropriate From date and To date.
To view the usage report, click View. You will see the Usage Report for ALL screen.
hotEx RADIUS Manager - User Guide
88
Generating Reports
Payments Report
The payment report lists the payment details made by the postpaid users for a specific period.
To view payment details
1.
On the Main Screen, select Reports, point to User Report and click Payments. You will see
the Payment Report screen.
hotEx RADIUS Manager - User Guide
89
Generating Reports
Field
Description
User Type
Select the appropriate User Type.
The available options are:
i.All Users
ii.Specific User
2.
Select User Id
Select the User Id from drop-down list.
By Date
Select the appropriate From date and To date.
To view the payment details, click View. You will see the screen as below.
hotEx RADIUS Manager - User Guide
90
Generating Reports
Unpaid Bills Report
The unpaid bill report lists the all the users who are yet to make the payment.
To view unpaid bills
1.
On the Main Screen, select Reports, point to User Report and click Unpaid Bills. You will
see the Payment Report screen.
hotEx RADIUS Manager - User Guide
91
Generating Reports
Field
Description
User Id
The available options are:
i.All Reseller
ii.Specific Reseller
Select the Reseller Id from the drop-down list.
By Date
2.
Select the appropriate From date and To date.
To view the unpaid bill, click View. You will see the screen as below.
Reseller Report
The reseller sales report lists out coupons purchased from the hotspot administrator for a particular
plan within a specified period. The reseller purchases the coupons from the hotspot administrator
and generates revenue by selling these coupons.
To view reseller report
1.
On the Main Screen, select Reports, point to Reseller Report and click Purchase Report .
You will see the Sales Report screen.
hotEx RADIUS Manager - User Guide
92
Generating Reports
Field
Description
Reseller Id
The available options are:
i.All Reseller
ii.Specific Reseller
Select the Reseller Id from the drop-down list.
Plan
Select the appropriate Plan.
The available options are:
i.All Plan
ii.Specific Plan
By Date
2.
Select the appropriate From date and To date.
To view the reseller report, click View. You will see the Sale Report screen.
hotEx RADIUS Manager - User Guide
93
Generating Reports
Sales Report
The sales report lists the total number of coupons sold.
Direct Sales Report
This gives the ‘Sales Report’ of the tickets ‘Directly Sold’ by the hotspot administrator. To be
precise, it does not include the tickets sold through receptionists or resellers.
To view direct sales report
1.
On the Main Screen, select Reports, point to Sales Report and click Direct Sales. You will
see the Sales Report screen.
hotEx RADIUS Manager - User Guide
94
Generating Reports
Field
Description
Reseller Id
The available options are:
i.All Reseller
ii.Specific Reseller
Select the Reseller Id from the drop-down list.
Plan
Select the appropriate Plan.
The available options are:
i.All Plan
ii.Specific Plan
By Date
2.
Select the appropriate From date and To date.
To view the sales report, click View. You will see the Sale Report screen.
hotEx RADIUS Manager - User Guide
95
Generating Reports
Reseller Sales Report
This gives the ‘Sales-Report’ of the tickets sold through Resellers.
To view reseller sales report
1.
On the Main Screen, select Reports, point to Sales Report and click Reseller Sales. You
will see the Sales Report screen.
hotEx RADIUS Manager - User Guide
96
Generating Reports
Field
Description
Reseller Id
The available options are:
i.All Reseller
ii.Specific Reseller
Select the Reseller Id from the drop-down list.
Plan
Select the appropriate Plan.
The available options are:
i.All Plan
ii.Specific Plan
By Date
2.
Select the appropriate From date and To date.
To view the reseller sales report, click View. You will see the Sale Report screen.
hotEx RADIUS Manager - User Guide
97
Generating Reports
Day Report
This gives the ‘Sales-Report’ of any particular day or a specific period, of the tickets sold and the
amount.
To view daily report
1.
On the Main Screen, select Reports and click Purchase Report. You will see the Day
Report screen.
hotEx RADIUS Manager - User Guide
98
Generating Reports
Field
Description
By Date/By Bill
The available options are:
i.Date
ii.Bill Number
Select the appropriate From date and To date
2.
To view the day report, click View. You will see the Pack Sales Bill screen.
hotEx RADIUS Manager - User Guide
99
Generating Reports
Room Report
This gives the report of the sold tickets on the basis of the room name. You can also view the usage
details based on all/specific rooms, billed/unbilled sessions and specific date.
To view room usage report
1.
On the Main Screen, select Reports and click Room Report. You will see the Room Usage
Report screen.
hotEx RADIUS Manager - User Guide
100
Generating Reports
Field
Description
Rooms
The available options are:
i.All Rooms
ii.Specific Room
Select the room number from the drop-down list.
Session
Select the appropriate Session.
The available options are:
i.Billed Session
ii.Unbilled Session
By Date
2.
Select the appropriate From date and To date.
Enter the appropriate information and click View. You will see the Room Usage Report
screen.
hotEx RADIUS Manager - User Guide
101
Generating Reports
Sales Log Sheet
This gives the report of the total sales, between any two ticket numbers.
To View the Sales Log Sheet
1.On the Main Screen, select Reports and click Sales Log Sheet . You will see the Sales Log
Sheet screen.
hotEx RADIUS Manager - User Guide
102
Generating Reports
3.
Field
Description
Enter Pack Number
To Enter the appropriate Pack Number.
Enter the appropriate information and click Submit and then to be displayed the Pack
Number in the Excel sheet.
hotEx RADIUS Manager - User Guide
103
Chapter 9
Managing NAS
This chapter consists of the following sections:
Guest Management
Creating Guest Information
NAS Management
Adding NAS Management
Deleting NAS Management
hotEx RADIUS Manager - User Guide
104
Managing NAS
Guest Management
You can enter the Room Number and related Guest Details. These details will be used while
checking out or changing the room.
Creating Guest Information
This option allows you to create guest information. The data will be added to the database.
To create a guest
1.
On the Main Screen, select NAS, select Guest Management and click Create Guest. You
will see the Guest Information screen.
Field
Description
Guest Name
Type the name of the guest.
This field can contain up to 20 alphanumeric characters.
This field is mandatory.
Room Number
Type the room number.
This field can contain up to 20 alphanumeric characters.
This field is mandatory.
Phone Number
Type the phone number.
This field can contain up to 20 alphanumeric characters.
This field is optional.
Select Plan
Select the name of the plan.
You can select it from the drop-down list.
This field is mandatory.
hotEx RADIUS Manager - User Guide
105
Managing NAS
NAS Management
You can enter the details of ‘client hotspot’ locations. You can add more than one location using
this. You can also delete any location.
Adding NAS Management
This option allows you to add client location. This data will be added to the database.
To adding NAS Management
1. On the Main Screen, Select NAS Management and Click Add NAS. You will see the Add
Client Location screen.
Field
Description
Domain Name/IP
Type the name of the Domain/IP address.
Secret
Type the secret of the client.
2. To add a client location, click Add. You will see the Client Location Screen.
hotEx RADIUS Manager - User Guide
106
Managing NAS
Deleting NAS Management
This feature allows you to delete client location. This data will be deleted from the database.
To Deleting NAS Management
1. On the Main Screen, Select NAS Management and Click Delete NAS. You will see the
Delete NAS screen.
Field
Description
Domain/IP
To enter the Domain/IP address.
To delete client location, click Delete. You will see the Client Location Screen.
hotEx RADIUS Manager - User Guide
107
Managing Database
Chapter 10
Managing Database
This chapter consists of the following sections:
Backing up Database
Restoring Database
hotEx RADIUS Manager - User Guide
108
Managing Database
Backing up Database
You can backup the database at any time. The database will be saved in a compressed encrypted
form. You may not open the database and read. We suggest you to save and backup the database
regularly, especially just before reinstalling the server.
To view backup database
1.
On the Main Screen, select Database and click Backup. You will see the Backup Database
screen.
2.
To download the database, click Click Here .
Restoring Database
This option allows you to restore the backedup database file. You can upload the database file and
restore it.
To restore the old database file
1.
On the Main Screen, select Database and click Restore. You will see the Restore from Old
Database screen.
2.
Click Browse, navigate and select the database file that you want to restore.
3.
Click Upload.
4.
To restore blank database, click Click Here .
hotEx RADIUS Manager - User Guide
109
Managing Database
hotEx RADIUS Manager - User Guide
110
Chapter 11
Miscellaneous
This chapter consists of the following sections:
IP Setting
Admin Management
Setting Access Rights
URL Redirection
Currency Prefix
Welcome Message
Upload Logo
GB Calculator
Testing Internet Connectivity
Setting Terms & Conditions
DynDns Setting
Pay Pal Setting
Email Statement
hotEx RADIUS Manager - User Guide
111
Miscellaneous
IP Setting
This option allows you to view IP settings of the server. You can update the IP Number accordingly.
Usually, this would be a Public Static IP which can be reachable from all the client hotspot locations.
To view IP settings
1.
On the Main Screen, select Miscellaneous and click WAN IP Setting . You will see WAN IP
Setting screen.
2.
Select the appropriate option and click Next. You will see WAN Interface Static IP Setting
screen.
hotEx RADIUS Manager - User Guide
112
Miscellaneous
Field
Description
WAN IP Address
Type the WAN IP address.
You can type in this format (XXX-XXX-XXX-XXX).
The Wan IP address depends upon the internet service provider.
This field is mandatory.
WAN NET Mask
Type the Wan net mask IP address.
You can type in this format (XXX-XXX-XXX-XXX).
This field can contain up to 15 numeric characters.
This field is mandatory.
GATEWAY IP
Type the gateway IP address.
You can type in this format (XXX-XXX-XXX-XXX).
This field can contain up to 15 numeric characters.
This field is mandatory.
PRIMARY DNS
Type the primary DNS address.
You can type in this format (XXX-XXX-XXX-XXX).
This field can contain up to 15 numeric characters.
This field is mandatory.
SEONDARY DNS
Type the secondary DNS address.
You can type in this format (XXX-XXX-XXX-XXX).
This field can contain up to 15 numeric characters.
This field is optional.
hotEx RADIUS Manager - User Guide
113
Miscellaneous
3.
To clear the fields, click Cancel.
4.
To set WAN interface static IP, click Update. You will see the screen as below.
5.
To reboot the system to effect the changes, click Click here .
Admin Management
This option allows you to view and edit user information. You can add, remove the user information
and change the user passwords.
To set Web Administrator password
1.
On the Main Screen, select Miscellaneous and click Admin Management. You will see the
Admin User Management screen.
Field
Description
UserName
Type the name of the user.
This field can contain up to 20 alphanumeric characters.
This field is mandatory.
Current Password
Type the current password.
This field can contain up to 20 alphanumeric characters.
This field is optional.
New Password
hotEx RADIUS Manager - User Guide
Type the new password.
114
Miscellaneous
This field can contain up to 20 alphanumeric characters.
This field is mandatory for new user.
Confirm New
Password
Retype the new password.
This field can contain up to 20 alphanumeric characters.
This field is mandatory for new user.
Action
Select the appropriate action.
The options are:
i.Change Password
ii.New User
iii.Remove User
2.
To change password /add/ remove a user, click Submit.
Setting Access Rights
This option allows you to set the access rights of each user.
To set access rights
1.
On the Main Screen, select Miscellaneous and click Access Rights. You will see the
Access Rights screen.
hotEx RADIUS Manager - User Guide
115
Miscellaneous
hotEx RADIUS Manager - User Guide
116
Miscellaneous
2.
To clear the fields, click Reset.
3.
Select the appropriate options and click Submit.
URL Redirection
This option allows you to redirect the URL for authenticated clients. You can set this URL as your
business website, for promotion or message broadcasting.
To redirect URL
4.
On the Main Screen, select Miscellaneous and click URL Redirection. You will see the
Redirecting Home page URL for authenticated clients screen.
Field
Description
URL Name
Type the URL name you want to redirect.
This field can contain up to 80 alphanumeric characters.
This field is optional.
If you do not want to redirect, leave the field blank.
5.
To set the URL redirection, click Set.
6.
This feature is useful to set the “URL Redirection” for the all hotspot locations. If you would
like to have a separate “URL Redirection” for each hotspot location (with unique NAS ID),
please contact [email protected] for customization.
hotEx RADIUS Manager - User Guide
117
Miscellaneous
Currency Prefix
This option allows you to set the currency prefix (currency code/symbol). The default symbol is $.
To set currency prefix
1.
On the Main Screen, select Miscellaneous and click Currency Prefix . The Currency Prefix
screen is displayed.
Field
Description
Currency Code /
Symbol
Type the appropriate currency prefix.
This field can contain up to 3 alphanumeric characters.
The default symbol is $.
This field is optional.
2.
To set currency prefix, click Update.
Welcome Message
The option allows you to configure your welcome message. This welcome message will be
displayed during the login time. You can also use your own HTML tags to format the page to suit
your requirements.
hotEx RADIUS Manager - User Guide
118
Miscellaneous
To edit welcome message
1.
On the Main Screen, select Miscellaneous and click Welcome Message. You will see the
Welcome Message to be displayed during login screen.
Field
Description
Your Messages
Type the welcome message to be displayed during login.
This field can contain up to 80 rows and 20 columns of alphanumeric
characters.
This field is optional.
You can also use HTML tags in your message.
2.
To update welcome message, click Set.
3.
This feature is useful to set the “Welcome Message” for the all hotspot locations. If you would
like to have a separate “Welcome Message” for each hotspot location (with unique NAS ID),
please contact [email protected] for customization.
Upload Logo
This option allows you to upload a logo. The image must be in .gif or .jpg format. The recommended
logo height is 175 pixels.
To upload logo
1.
On the Main Screen, select Miscellaneous and click Upload Logo. You will see the Upload
Logo screen is displayed.
hotEx RADIUS Manager - User Guide
119
Miscellaneous
2.
Click Browse, navigate and select the image that you want to upload.
3.
To upload logo, click Submit.
4.
This feature is useful to set the “Logo” for the all hotspot locations. If you would like to have a
separate “Logo” for each hotspot location (with unique NAS ID), please contact
[email protected] for customization.
GB Calculator
This option allows you to convert data size to different scales. You can enter a value in any field; the
other fields will be updated automatically.
To convert data
1.
On the Main Screen, select Miscellaneous and click GB Calculator . The Enter one known
size/variable to find the rest screen is displayed.
hotEx RADIUS Manager - User Guide
120
Miscellaneous
Field
Description
terabytes
Type the data size in terabytes.
This field can contain up to 20 numeric characters.
This field is optional.
gigabytes
Type the data size in gigabytes.
This field can contain up to 20 numeric characters.
This field is optional.
megabytes
Type the data size in megabytes.
This field can contain up to 20 numeric characters.
This field is optional.
kilobytes
Type the data size in kilobytes.
This field can contain up to 20 numeric characters.
This field is optional.
bytes
Type the data size in bytes.
This field can contain up to 20 numeric characters.
This field is optional.
2.
To view the results, click Calculate.
Testing Internet Connectivity
This option allows you to test Internet connectivity. You can PING to any other PC/Router/InternetDomain/WebSite to check the connection.
hotEx RADIUS Manager - User Guide
121
Miscellaneous
To test Internet connectivity
1.
On the Main Screen, select Miscellaneous and click Internet Connectivity. You will see the
Test Internet Connectivity screen.
Field
Description
Enter IP or Host
Type the IP address.
This field can contain up to 256 alphanumeric characters.
This field is optional.
Enter Count
Type the ping count.
This field can contain up to 256 alphanumeric characters.
This field is optional.
2.
To check the Internet connection, click Ping!. You will see the PING RESULTS as below.
Setting Terms & Conditions
This option allows you to set the ‘Terms of Service’ to be displayed to the user. The user displays
this ‘Terms of Service’ during Registration.
hotEx RADIUS Manager - User Guide
122
Miscellaneous
To set Terms and Conditions
1.
On the Main Screen, select Miscellaneous and click Terms & Conditions. You will see the
Terms & Conditions to be displayed during Registration screen.
Field
Description
Your Text messages
Type the terms and conditions to be displayed during registration page.
This field can contain up to 80 rows and 20 columns of alphanumeric
characters.
This field is optional.
2.
To set the terms and conditions, click Set.
3.
This feature is useful to set the “Terms and Conditions” for the all hotspot locations. If you
would like to have a separate “Terms and Conditions” for each hotspot location (with unique
NAS ID), please contact [email protected] for customization.
DynDns Setting
This option allows you to view DynDns setting.
To view DynDns Setting
1.
On the Main Screen, select Miscellaneous and click DynDns Setting. You will see the
Dynamic DNS Setting screen.
hotEx RADIUS Manager - User Guide
123
Miscellaneous
Field
Description
User Name
Type the name of the user.
This field can contain up to 23 alphanumeric characters.
This field is mandatory.
Password
Type the password.
This field can contain up to 23 alphanumeric characters.
This field is mandatory.
Hostname
Type the host name.
This field can contain up to 35 alphanumeric characters.
This field is mandatory.
2.
To set Dynamic DNS setting, click Save.
PayPal Setting
This option allows you to set/view PayPal parameters. The users can purchase the prepaid tickets
through their creditcards/paypal accounts, using this feature. This is an optional feature and is
disabled by default. The hotspot administrator can enable this feature. Once this is done, a caption
"PayPal Purchase" will appear with a link on the client login screen. Thus, the users can click this
link and buy the prepaid tickets online without having to contact the hotel/café reception.
To view Paypal Setting
1.
On the Main Screen, select Miscellaneous and click PayPal Setting. You will see the
PAYPAL screen.
hotEx RADIUS Manager - User Guide
124
Miscellaneous
Field
Description
Email ID
Type the email address.
This field can contain up to 32 alphanumeric characters.
This field is mandatory.
Currency Codes
Select the appropriate currency code.
This field can contain up to 32 alphanumeric characters.
This field is mandatory.
Button Caption
Type the button caption.
Enter the button caption characters from the pay pal transaction.
This field can contain up to 32 alphanumeric characters.
This field is mandatory.
2.
Note:
Enter the button caption characters from the pay pal transaction page.
This text box will show after the transact button. When you enable the
filed this will be displayed.
3.
4.
Select the appropriate option and click Update.
hotEx RADIUS Manager - User Guide
125
Miscellaneous
Email Statement
This option allows you to set/view automated email alert before account expiry. These fields are for
capturing the To and From email ids and the relevant SMTP settings. The software will
automatically email the users and intimate when their plan balace time/data is reaching the limit. For
e.g. if the customer has bought a plan for 600 minutes and has reached 541 minutes of usage and
only 59 minutes are left, the software will send an automated message “ Your hotspot account
quota is reaching the limits and your account may be expired shortly. Please renew your ticket or
contact the administrator to extend the validity.
To update email settings
1.
On the Main Screen, select Miscellaneous and click Email Statement. You will see the
hotEx billing manager Email Settings screen.
Field
Description
Email To
Type the email address of the user.
This field can contain up to 26 alphanumeric characters.
This field is mandatory.
Email From
hotEx RADIUS Manager - User Guide
Type your email address.
126
Miscellaneous
This field can contain up to 26 alphanumeric characters.
This field is mandatory.
Email Time
Type the time to set email time.
This field can contain up to 5 alphanumeric characters.
This field is mandatory.
Email Day
Type the day to set email day.
This field can contain up to 5 alphanumeric characters.
This field is mandatory.
Data limit
Type the maximum data limit.
This field can contain up to 5 alphanumeric characters.
This field is mandatory.
Subject
Type the subject of the mail.
This field can contain up to 35 alphanumeric characters.
This field is mandatory.
2.
To clear the fields, click Cancel.
3.
To update email settings, click Update.
4.
To set SMTP setting, click Click Here . The SMTP SETTING screen is displayed.
Field
Description
SMTP HOST NAME
Type the SMTP host name.
This field can contain up to 31 alphanumeric characters.
This field is mandatory.
SMTP PORT
hotEx RADIUS Manager - User Guide
Type the SMTP port number.
127
Miscellaneous
NUMBER
This field can contain up to 31 numeric characters.
This field is mandatory.
SMTP USER NAME
Type the SMTP user name.
This field can contain up to 31 alphanumeric characters.
This field is mandatory.
SMTP PASSWORD
Type the SMTP password.
This field can contain up to 31 alphanumeric characters.
This field is mandatory.
5.
To update the SMTP settings, click Update.
hotEx RADIUS Manager - User Guide
128