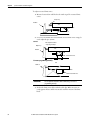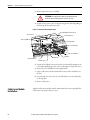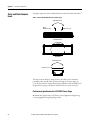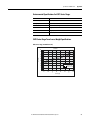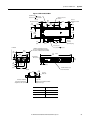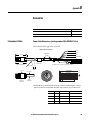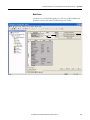
1
User Manual CHPS-Series Linear Stage Catalog Numbers CHPS-150, CHPS-200, CHPS-250 Important User Information Read this document and the documents listed in the additional resources section about installation, configuration, and operation of this equipment before you install, configure, operate, or maintain this product. Users are required to familiarize themselves with installation and wiring instructions in addition to requirements of all applicable codes, laws, and standards. Activities including installation, adjustments, putting into service, use, assembly, disassembly, and maintenance are required to be carried out by suitably trained personnel in accordance with applicable code of practice. If this equipment is used in a manner not specified by the manufacturer, the protection provided by the equipment may be impaired. In no event will Rockwell Automation, Inc. be responsible or liable for indirect or consequential damages resulting from the use or application of this equipment. The examples and diagrams in this manual are included solely for illustrative purposes. Because of the many variables and requirements associated with any particular installation, Rockwell Automation, Inc. cannot assume responsibility or liability for actual use based on the examples and diagrams. No patent liability is assumed by Rockwell Automation, Inc. with respect to use of information, circuits, equipment, or software described in this manual. Reproduction of the contents of this manual, in whole or in part, without written permission of Rockwell Automation, Inc., is prohibited. Throughout this manual, when necessary, we use notes to make you aware of safety considerations. WARNING: Identifies information about practices or circumstances that can cause an explosion in a hazardous environment, which may lead to personal injury or death, property damage, or economic loss. ATTENTION: Identifies information about practices or circumstances that can lead to personal injury or death, property damage, or economic loss. Attentions help you identify a hazard, avoid a hazard, and recognize the consequence. IMPORTANT Identifies information that is critical for successful application and understanding of the product. Labels may also be on or inside the equipment to provide specific precautions. SHOCK HAZARD: Labels may be on or inside the equipment, for example, a drive or motor, to alert people that dangerous voltage may be present. BURN HAZARD: Labels may be on or inside the equipment, for example, a drive or motor, to alert people that surfaces may reach dangerous temperatures. ARC FLASH HAZARD: Labels may be on or inside the equipment, for example, a motor control center, to alert people to potential Arc Flash. Arc Flash will cause severe injury or death. Wear proper Personal Protective Equipment (PPE). Follow ALL Regulatory requirements for safe work practices and for Personal Protective Equipment (PPE). Allen-Bradley, Kinetix, Rockwell Software, Rockwell Automation, Ultra are trademarks of Rockwell Automation, Inc. Trademarks not belonging to Rockwell Automation are property of their respective companies. Summary of Changes This manual contains new and updated information. Changes throughout this revision are marked by change bars, as shown to the right of this paragraph. New and Updated Information This table contains the changes made to this revision. Topic Page Corrected catalog numbers 18, 29, 59, 60, 87 Added maximum velocity for Kinetix 6500 and Kinetix 300 Drives 74 Rockwell Automation Publication CHPS-UM001D-EN-P - July 2014 3 Summary of Changes Notes: 4 Rockwell Automation Publication CHPS-UM001D-EN-P - July 2014 Table of Contents Preface About This Publication. . . . . . . . . . . . . . . . . . . . . . . . . . . . . . . . . . . . . . . . . . . . . 9 Who Should Use This Manual . . . . . . . . . . . . . . . . . . . . . . . . . . . . . . . . . . . . . . 9 Additional Resources . . . . . . . . . . . . . . . . . . . . . . . . . . . . . . . . . . . . . . . . . . . . . . . 9 Chapter 1 Stage Safety Safety Labels . . . . . . . . . . . . . . . . . . . . . . . . . . . . . . . . . . . . . . . . . . . . . . . . . . . . . Clearances. . . . . . . . . . . . . . . . . . . . . . . . . . . . . . . . . . . . . . . . . . . . . . . . . . . . . . . General Safety . . . . . . . . . . . . . . . . . . . . . . . . . . . . . . . . . . . . . . . . . . . . . . . . . . . Heat . . . . . . . . . . . . . . . . . . . . . . . . . . . . . . . . . . . . . . . . . . . . . . . . . . . . . . . . . . . . Vertical or Incline Payload . . . . . . . . . . . . . . . . . . . . . . . . . . . . . . . . . . . . . . . . End Cap Impacts. . . . . . . . . . . . . . . . . . . . . . . . . . . . . . . . . . . . . . . . . . . . . . . . . Air Freight Transportation . . . . . . . . . . . . . . . . . . . . . . . . . . . . . . . . . . . . . . . Standards. . . . . . . . . . . . . . . . . . . . . . . . . . . . . . . . . . . . . . . . . . . . . . . . . . . . . . . . Motor Model Identification. . . . . . . . . . . . . . . . . . . . . . . . . . . . . . . . . . . . . . . 12 13 13 13 13 13 14 14 14 Chapter 2 Understanding Your Stage Identifying the Components of Your Stage . . . . . . . . . . . . . . . . . . . . . . . . . Component Description . . . . . . . . . . . . . . . . . . . . . . . . . . . . . . . . . . . . . . Recommended Maintenance Interval . . . . . . . . . . . . . . . . . . . . . . . . . . . . . . Identifying Your Stage. . . . . . . . . . . . . . . . . . . . . . . . . . . . . . . . . . . . . . . . . . . . 16 16 18 18 Chapter 3 Planning the Stage Installation Stage Mounting Requirements . . . . . . . . . . . . . . . . . . . . . . . . . . . . . . . . . . . . General Safety Standards for Stage Installations . . . . . . . . . . . . . . . . . Mounting Restrictions . . . . . . . . . . . . . . . . . . . . . . . . . . . . . . . . . . . . . . . . Clearance Requirements . . . . . . . . . . . . . . . . . . . . . . . . . . . . . . . . . . . . . . 21 21 21 23 Chapter 4 Mounting the Stage Unpacking, Handling, and Inspection . . . . . . . . . . . . . . . . . . . . . . . . . . . . . Unpacking Procedure. . . . . . . . . . . . . . . . . . . . . . . . . . . . . . . . . . . . . . . . . Store Packaging Material . . . . . . . . . . . . . . . . . . . . . . . . . . . . . . . . . . . . . Stage Storage . . . . . . . . . . . . . . . . . . . . . . . . . . . . . . . . . . . . . . . . . . . . . . . . . . . . Mounting the Stage . . . . . . . . . . . . . . . . . . . . . . . . . . . . . . . . . . . . . . . . . . . . . . Before You Begin the Mechanical Installation. . . . . . . . . . . . . . . . . . . Mounting the Stage. . . . . . . . . . . . . . . . . . . . . . . . . . . . . . . . . . . . . . . . . . . Mount Your Application . . . . . . . . . . . . . . . . . . . . . . . . . . . . . . . . . . . . . 25 26 28 28 28 28 31 32 Chapter 5 Connector Data Kinetix Servo Drive Compatible Connectors . . . . . . . . . . . . . . . . . . . . . . . D-Type Connectors . . . . . . . . . . . . . . . . . . . . . . . . . . . . . . . . . . . . . . . . . . . . . . Flying Leads . . . . . . . . . . . . . . . . . . . . . . . . . . . . . . . . . . . . . . . . . . . . . . . . . . . . . Junction Box Connectors . . . . . . . . . . . . . . . . . . . . . . . . . . . . . . . . . . . . . . . . . Rockwell Automation Publication CHPS-UM001D-EN-P - July 2014 34 35 36 37 5 Table of Contents Limit Sensor Flying Leads . . . . . . . . . . . . . . . . . . . . . . . . . . . . . . . . . . . . . . . . . 38 Chapter 6 Connecting the Stage Connecting the Stage . . . . . . . . . . . . . . . . . . . . . . . . . . . . . . . . . . . . . . . . . . . . . Attaching the Ground Strap and Interface Cables . . . . . . . . . . . . . . . Thermal Protection . . . . . . . . . . . . . . . . . . . . . . . . . . . . . . . . . . . . . . . . . . . . . . Optional Limit Sensors . . . . . . . . . . . . . . . . . . . . . . . . . . . . . . . . . . . . . . . . . . . TTL Differential Encoder Output Signal. . . . . . . . . . . . . . . . . . . . . . . . . . . Sine/Cos Encoder Output Signals . . . . . . . . . . . . . . . . . . . . . . . . . . . . . . . . . Hall Effect Circuit. . . . . . . . . . . . . . . . . . . . . . . . . . . . . . . . . . . . . . . . . . . . . . . . Motor and Hall Phasing and Sequence . . . . . . . . . . . . . . . . . . . . . . . . . . . . . Stage Positive Direction . . . . . . . . . . . . . . . . . . . . . . . . . . . . . . . . . . . . . . . 39 40 42 43 44 45 46 46 48 Chapter 7 Operation Guidelines and Limit Configuration Introduction . . . . . . . . . . . . . . . . . . . . . . . . . . . . . . . . . . . . . . . . . . . . . . . . . . . . . Operational Guidelines . . . . . . . . . . . . . . . . . . . . . . . . . . . . . . . . . . . . . . . . . . . Travel Limits. . . . . . . . . . . . . . . . . . . . . . . . . . . . . . . . . . . . . . . . . . . . . . . . . . . . . Calculating the Stopping Distance . . . . . . . . . . . . . . . . . . . . . . . . . . . . . Overtravel Limit Sensor Position Adjustment . . . . . . . . . . . . . . . . . . . Bumper Stops . . . . . . . . . . . . . . . . . . . . . . . . . . . . . . . . . . . . . . . . . . . . . . . . 49 49 50 50 51 53 Chapter 8 Troubleshooting Before You Begin. . . . . . . . . . . . . . . . . . . . . . . . . . . . . . . . . . . . . . . . . . . . . . . . . PTC Thermal Signal. . . . . . . . . . . . . . . . . . . . . . . . . . . . . . . . . . . . . . . . . . . . . . Hall Effect Module . . . . . . . . . . . . . . . . . . . . . . . . . . . . . . . . . . . . . . . . . . . . . . . Hall to Back EMF Phasing . . . . . . . . . . . . . . . . . . . . . . . . . . . . . . . . . . . . . . . . Motor Coil Resistance Measurements . . . . . . . . . . . . . . . . . . . . . . . . . . . . . . 55 55 55 57 58 Chapter 9 Maintenance Before You Begin. . . . . . . . . . . . . . . . . . . . . . . . . . . . . . . . . . . . . . . . . . . . . . . . . Lubricate the Bearing . . . . . . . . . . . . . . . . . . . . . . . . . . . . . . . . . . . . . . . . . . . . . Optical Encoder Scale Maintenance. . . . . . . . . . . . . . . . . . . . . . . . . . . . . . . . Strip Seal Cleaning . . . . . . . . . . . . . . . . . . . . . . . . . . . . . . . . . . . . . . . . . . . . . . . Cover Cleaning . . . . . . . . . . . . . . . . . . . . . . . . . . . . . . . . . . . . . . . . . . . . . . . . . . 59 60 60 61 61 Chapter 10 Removing and Replacing Stage Components 6 Before You Begin. . . . . . . . . . . . . . . . . . . . . . . . . . . . . . . . . . . . . . . . . . . . . . . . . Cable Carrier Module Removal. . . . . . . . . . . . . . . . . . . . . . . . . . . . . . . . . . . . Cable Carrier Module Installation . . . . . . . . . . . . . . . . . . . . . . . . . . . . . . . . . Strip Seal Removal . . . . . . . . . . . . . . . . . . . . . . . . . . . . . . . . . . . . . . . . . . . . . . . Stage Cover Removal . . . . . . . . . . . . . . . . . . . . . . . . . . . . . . . . . . . . . . . . . . . . . Stage Side Cover Removal. . . . . . . . . . . . . . . . . . . . . . . . . . . . . . . . . . . . . . . . . Strip Seal Replacement. . . . . . . . . . . . . . . . . . . . . . . . . . . . . . . . . . . . . . . . . . . . Stage Cover Installation. . . . . . . . . . . . . . . . . . . . . . . . . . . . . . . . . . . . . . . . . . . Side Cover Installation. . . . . . . . . . . . . . . . . . . . . . . . . . . . . . . . . . . . . . . . . . . . Rockwell Automation Publication CHPS-UM001D-EN-P - July 2014 63 63 64 65 65 65 66 67 67 Table of Contents Appendix A Specifications and Dimensions Static and Static Moment Loads . . . . . . . . . . . . . . . . . . . . . . . . . . . . . . . . . . . Performance Specifications for 325V CHPS-Series Stage . . . . . . . . Performance Specifications for 325V or 650V CHPS-Series Stage . . . . . . . . . . . . . . . . . . . . . . . . . . . . . . General Stage Specifications. . . . . . . . . . . . . . . . . . . . . . . . . . . . . . . . . . . . . . . Accuracy Specification for the CHPS-Series Stage. . . . . . . . . . . . . . . Commutation Sensor . . . . . . . . . . . . . . . . . . . . . . . . . . . . . . . . . . . . . . . . . Limit Sensor Specification . . . . . . . . . . . . . . . . . . . . . . . . . . . . . . . . . . . . PTC Thermistor Specifications. . . . . . . . . . . . . . . . . . . . . . . . . . . . . . . . Encoder Specifications . . . . . . . . . . . . . . . . . . . . . . . . . . . . . . . . . . . . . . . . Maximum Velocity for Allen-Bradley Drives. . . . . . . . . . . . . . . . . . . . Environmental Specifications for CHPS-Series Stages . . . . . . . . . . . CHPS-Series Stage Travel versus Weight Specifications . . . . . . . . . CHPS-Series Stage Dimensions . . . . . . . . . . . . . . . . . . . . . . . . . . . . . . . . . . . CHPS-Series Stage Technical Specifications . . . . . . . . . . . . . . . . . . . . . . . . 70 70 71 73 73 73 73 73 74 74 75 75 77 83 Appendix B Accessories Interconnect Cables . . . . . . . . . . . . . . . . . . . . . . . . . . . . . . . . . . . . . . . . . . . . . . Power Cable Dimensions (catalog number 2090-XXNPMF-16Sxx) . . . . . . . . . . . . . . . Feedback Cable Dimensions (catalog number 2090-XXNFMF-Sxx). . . . . . . . . . . . . . . . . . Installation, Maintenance, and Replacement Kits . . . . . . . . . . . . . . . . . . . Accessories. . . . . . . . . . . . . . . . . . . . . . . . . . . . . . . . . . . . . . . . . . . . . . . . . . . 85 85 86 87 87 Appendix C Stacking Stages Stage Stacking . . . . . . . . . . . . . . . . . . . . . . . . . . . . . . . . . . . . . . . . . . . . . . . . . . . 89 Specifications for Stacked Stages. . . . . . . . . . . . . . . . . . . . . . . . . . . . . . . . . . . 90 Appendix D Start-up Guide for CHPS-Series Stage Using This Appendix. . . . . . . . . . . . . . . . . . . . . . . . . . . . . . . . . . . . . . . . . . . . . 91 with Ultra3000 Drive and Ultraware Wiring the CHPS-Series Stage to the Ultra3000 Drive . . . . . . . . . . . . . . 91 Linear Motor File Parameters . . . . . . . . . . . . . . . . . . . . . . . . . . . . . . . . . . . . . 92 Software Creating a CHPS-Series Stage Motor File . . . . . . . . . . . . . . . . . . . . . . . . . . 92 Recommended Start-up Sequence . . . . . . . . . . . . . . . . . . . . . . . . . . . . . . . . . 94 CHPS-Series Stage and Ultra3000 Drive Troubleshooting Reference. 96 Positive Phasing Direction . . . . . . . . . . . . . . . . . . . . . . . . . . . . . . . . . . . . 96 Encoder Counting Polarity. . . . . . . . . . . . . . . . . . . . . . . . . . . . . . . . . . . . 96 Oscilloscope Verification. . . . . . . . . . . . . . . . . . . . . . . . . . . . . . . . . . . . . . 97 Oscilloscope Diagram for Ultra3000 Drive . . . . . . . . . . . . . . . . . . . . . 98 Reference Information . . . . . . . . . . . . . . . . . . . . . . . . . . . . . . . . . . . . . . . . . . . 99 Commutation Diagnostics Utility . . . . . . . . . . . . . . . . . . . . . . . . . . . . . 99 Self-sensing Commutation and Startup. . . . . . . . . . . . . . . . . . . . . . . . 100 Main Screen Setup. . . . . . . . . . . . . . . . . . . . . . . . . . . . . . . . . . . . . . . . . . . 102 Rockwell Automation Publication CHPS-UM001D-EN-P - July 2014 7 Table of Contents Motor Screen. . . . . . . . . . . . . . . . . . . . . . . . . . . . . . . . . . . . . . . . . . . . . . . . 103 Faults Screen . . . . . . . . . . . . . . . . . . . . . . . . . . . . . . . . . . . . . . . . . . . . . . . . 104 Appendix E Mounting Bolts and Torque Values . . . . . . . . . . . . . . . . . . . . . . . . . . . . . . . . . . . . . . . . . . . . . . . . . . . . . . . . . . . . . . . . 105 Index . . . . . . . . . . . . . . . . . . . . . . . . . . . . . . . . . . . . . . . . . . . . . . . . . . . . . . . . . . . . . . . . 109 8 Rockwell Automation Publication CHPS-UM001D-EN-P - July 2014 Preface Read this preface to familiarize yourself with the manual. About This Publication This manual provides detailed installation instructions for mounting, wiring, maintaining, and troubleshooting your CHPS-Series Linear Motor Driven Stage. Who Should Use This Manual This manual is intended for engineers or technicians directly involved in the installation, wiring, and maintenance of stages. Any person that teaches, operates, maintains, or repairs these stages must be trained and demonstrate the competence to safely perform the assigned task. If you do not understand the linear motor stages, contact your local Rockwell Automation sales representative for information on training courses before using this product. Read this entire manual before you attempt to install your stage into your motion system. This familiarizes you with the stage components, their relationship to each other and the system. After installation, check the configuration of the system parameters to be sure they are properly set for the stage in your motion system. Follow all instructions carefully and pay special attention to safety concerns. Additional Resources These documents contain additional information concerning related products from Rockwell Automation. Resource Description High Precision Linear Motor Driven Stages Selection Guide, publication CHPS-SG001 Provides product specifications, ratings, certifications, system interface, and wiring diagrams to aid in product selection. Kinetix® 2000 Multi-axis Servo Drive User Manual, publication 2093-UM001 Describes how to configure and use Kinetix 2000 multi-axis servo drives. Kinetix 6000 Multi-axis Servo Drive User Manual, publication 2094-UM001 Describes how to configure and use Kinetix 6000 multi-axis servo drives. LZ Family of Linear Motors Brochure, publication PMC-BR001 Provides product specifications, outline drawing, ratings, and wiring information to aid in product selection. LC Family of Linear Motors Brochure, publication PMC-BR002 Provides product specifications, outline drawing, ratings, and wiring information to aid in product selection. Rockwell Automation Publication CHPS-UM001D-EN-P - July 2014 9 Preface Notes: 10 Rockwell Automation Publication CHPS-UM001D-EN-P - July 2014 Chapter 1 Stage Safety Topic Page Safety Labels 12 Clearances 13 General Safety 13 Heat 13 Vertical or Incline Payload 13 End Cap Impacts 13 Air Freight Transportation 14 Standards 14 Motor Model Identification 14 IMPORTANT Any person that teaches, operates, maintains, or repairs these linear stages must be trained and demonstrate the competence to safely perform the assigned task. Rockwell Automation Publication CHPS-UM001D-EN-P - July 2014 11 Chapter 1 Stage Safety To prevent injury and damage to the stage, review the safety labels and their warning details and location before using the stage. Safety Labels Location Title A Danger-Pinch Points and Heavy Objects Label Details The linear stage presents a muscle strain hazard if one person attempts to lift it. When attempting to move the linear stage use a two-person-lift to prevent personal injury or damage to the linear stage. To Installer - There exists a Crush and Cut hazard while installing the linear stage. The linear stage weighs from 13…63 kg (28…140 lb). To User - The Pinch Point label identifies a moving object hazard, caused by the movement of the carriage on the linear stage. Never put fingers, hands, or limbs near the linear stage while running motion commands. Before executing any motion command, check that all maintenance tools have been removed from linear stage. All types of linear stages, especially uncovered, present a pinch point hazard. This hazard may occur if fingers or hands come between the end cap and a moving carriage. Always lift the linear stage by the base and keep fingers and hands away from the opening and edges parallel to the carriage. B Danger-Hazardous Voltage The Hazardous Voltage label identifies the junction box as a hazardous voltage area of the linear stage. To avoid injury be sure to follow LockoutTagout procedures before attempting maintenance on these linear stages. C Danger-Strong Magnets The Strong Magnets label identifies non-ionizing radiation found in the linear stage. Magnet channels inside the linear stage are constructed with strong magnets. Strong magnets can disrupt the functionality of automatic implantable cardioverter defibrillators (AICD); people with a pacemaker should not work near the linear stage. Maintenance personnel working on the linear stage should avoid the use of metallic tools and secure items such as badge clip and other personal effects that could be attracted by the strong magnets. Strong magnets can erase magnetic media. Never allow credit cards or floppy disks to contact or come near the linear stage. D Do Not Lift by Junction Box Do not attempt to move the linear stage by grasping the cable junction box. Moving the linear stage in this manner will damage the linear stage and create a pinch or crush hazard. The junction box is attached to the carriage, which is free to move. Lifting the linear stage in this manner will allow uncontrolled movement of the heavy base. Always use a two-person lift and grasp the linear stage by the base at the end caps. Always keep fingers clear of the carriage’s path of travel. E Stay Clear Do not put hands or objects on the linear stage cover. Doing so could deform the cover and damage the linear stage, causing excessive wear on the cover supports or scraping noises when the linear stage is in motion. F Sharp Edges Always remove strip seals before removing the top or side covers. If it becomes necessary to remove the top or side covers or change the strip seal, exercise care when working near or on the strip seal. The edges of the strip seal are sharp and can cut if accidentally hit or if handled inappropriately. 12 Rockwell Automation Publication CHPS-UM001D-EN-P - July 2014 Stage Safety Chapter 1 Figure 1 - Warning Label Locations A E F DANGER POINTS PINCHparts inside Moving Lockout /Tagout ARD LIFT HAZ on Lift Two Persrequired or carry DA MA LOCGN ATEETIC Can D FIEL pac be IN THIDS senem har S sitivake mfu AR EA rs l e equ and to ipmoth enter NG ER DANGER HAZARDOU VOLTAGE AND S T LOCKOU POWER G TAGOUT SERVICIN BEFORE C F B D See Safety Labels on page 12 to identify call out letters. Clearances Install the stage to avoid interference with the building, structures, utilities, other machines and equipment that can create a trapping hazard of pinch points. Dress cables by using the Clearance Requirements diagram on page 23 as a guide. Do not cross the path of motion or interfere with the cable carrier motion. General Safety Stages are capable of sudden and fast motion. Always Lockout-Tagout stage systems before doing maintenance. Systems integrated with stages must contain interlock mechanisms that prevent motion while users are accessing the stage. Rockwell Automation is not responsible for misuse, or improper implementation of their equipment. Heat When running the stage at its maximum rating, the temperature of the slide can reach 75 ºC (167 ºF). Vertical or Incline Payload A vertically or inclined mounted stage does not maintain position with the power removed. Under the influence of gravity, the slide and its payload falls to the low end of travel. Design engineers must design in controlled power down circuits or mechanical controls to prevent the stage and its payload from being damaged when the power fails. End Cap Impacts The internal bumpers of the stage are designed to absorb a large impact from uncontrolled motion. The table on page 53 lists the energy that the bumpers can absorb before risking damage to the stage. The payload must be secured to the slide such that it does not sheer off in the event of an impact in excess of the bumper ratings. The bolts securing the end caps are not be able to sustain multiple impacts and can eventually sheer. Correct the cause of the uncontrolled motion that caused the impact before continuing the use of the stage. Rockwell Automation Publication CHPS-UM001D-EN-P - July 2014 13 Chapter 1 Stage Safety Air Freight Transportation When air freighting stages special preparations and precautions must be taken. The following information outlines the basic requirements at the publication date of this document. However, regulations are subject to change and additional area or carrier restrictions can be imposed. Check with your carrier or logistics specialist regarding current local, regional, and national transportation requirements when shipping this product. The 200 mm or a 250 mm stages contain magnetized material, as classified by International Air Transport Association (IATA) Dangerous Goods Regulations. An IATA trained individual must be involved when shipping this product via domestic or international air freight. Packing Instruction 902 provides information regarding the preparation of this product for air transportation. Follow these regulations for general marking and labeling requirements, the application of Magnetized Material Handling Labels, and instructions for preparing the Shipper's Declaration for Dangerous Goods. As a minimum, refer to the following IATA Dangerous Goods Regulations: • Subsection 1.5: Training • Subsection 3.9.2.2: Classification as Magnetized Material • Subsection 4.2: Identification as UN 2807, Magnetized Material, Class 9, Packing Instruction 902 • Subsection 7.1.5: Marking • Subsection 7.2: Labeling • Subsection 7.4.1: Magnetized Material Label • Section 8: Shipper’s Declaration for Dangerous Goods When shipped via ground in the United States, these products are not considered a U.S. D.O.T. Hazardous Material and standard shipping procedures apply. Standards Standards and requirements applicable to this product include, but are not limited to, the following: • ANSI/RIA R15.06, Industrial Robots and Robot Systems Safety Requirements - Teaching Multiple Robots • ANSI/NFPA 79, Electrical Standard for Industrial Machinery • CSA/CAN Z434, Industrial Robots and Robot Systems- General Safety Requirements • EN60204-1, Safety of Machinery. Electrical Equipment of Machines Motor Model Identification The nameplate lists the motor model for the stage. 14 Rockwell Automation Publication CHPS-UM001D-EN-P - July 2014 Chapter 2 Understanding Your Stage Topic Page Identifying the Components of Your Stage 16 Recommended Maintenance Interval 18 Identifying Your Stage 18 Rockwell Automation Publication CHPS-UM001D-EN-P - July 2014 15 Chapter 2 Understanding Your Stage Use the diagrams and descriptions to identify individual stage components. Identifying the Components of Your Stage Figure 2 - Components of Your Linear Stage 4 3 2 (4x) 10 (4x) 9 (2x) 8 1 7 (2x) 6 5 (4x) 15 6 12 13 11 14 (4x) 17 16 (2x) 21 20 18 19 16 Rockwell Automation Publication CHPS-UM001D-EN-P - July 2014 Understanding Your Stage Chapter 2 Component Description Component Number Component Description 1 Ground Screw and Ground Label Use the labeled M5 x 0.8 - 6H ground screw to connect to the linear stage to a facility safety ground. 2 Bearing Lubrication Ports These capped ports provide access to the linear bearings without dismantling the stage. In addition these tapped holes (M10 x 15. -6H) can be used to secure lifting hooks (not provided) 3 Stage Slide Your application hardware mounts to this slide by using provide mounting holes. 4 Stage Cover If the strip seals are used this protective cover the stage has magnetic edges to keep the upper edge of the strip seals in place. 5 Seal Guide These guides lets the strip seal to move smoothly around the stage slide. 6 Cable Carrier Module Facilitates quick and easy replacement. Replace the cable carrier module every 10 million cycles. 7 Stage Side Cover If the strip seals are used this protective cover the stage has magnetic edges to keep the lower edge of the strip seals in place. 8 Side Cover Support These supports are used on long stages to stabilize the side cover. 9 Stainless Steel Strip Seal These replaceable, flexible stainless steel strips permit the stage to move while isolating the internal mechanism of the stage from environmental contaminants. 10 Strip Seal Clamps These clamps hold the strip seal in place. When replacing the strip seals, they are used to position it so it lays smooth against the top and side stage covers. 11 Index Mark Part of the encoder system that provides a home location for the encoder. 12 Optical Encoder Readhead This encoder readhead comes in various resolutions and requires little maintenance. The TTL encoder option provides quadrature incremental position feedback with a differential signal on a RS-422. The Sine/Cosine encoder option provides a 1 volt peak-to-peak sine and cosine output at a period of 20 μm. The Sine/Cosine encoder is also known as an analog encoder. 13 Encoder Scale Part of the encoder system that provides an optical pattern to be read by the encoder readhead. It must be kept free of contamination for proper operation. 14 Bearing These support bearings guide the slide on the bearing rail, they require periodic lubrication. 15 Motor Coil This coil is part of the two piece linear motor. When excited by a linear drive, it generates magnetic forces that interact with the magnet track creating motion. LC linear motor option shown. LZ linear motors have a different configuration. 16 Bearing Rail These rails provide the linear track that the slide assembly rides on, they must be kept free of debris. 17 Magnet Track This track of powerful static magnets is the other half of a linear motor. LC linear motor option shown. LZ linear motor option has a magnet channel. 18 Limit Blade Provides a mechanical trigger to the limit sensor. 19 Limit Sensor These optional sensors output a signal when the limit blade passes in front of them. The position of these sensors can be adjusted to suit your application, see Operation Guidelines and Limit Configuration section on page 49. 20 Hall Sensor Module Three Hall sensors in this module are provide for commutation startup and phase alignment. They can also be use for trapezoidal commutation of the motor. 21 Bumper Stop These springs absorb slide and payload energy in the event the stage loses control. See page 53 for absorption limits. Rockwell Automation Publication CHPS-UM001D-EN-P - July 2014 17 Chapter 2 Understanding Your Stage Recommended Maintenance Interval Under normal stage use, follow these lubrication guidelines. IMPORTANT You determine the frequency of re-lubrication that is best suited to your application as an application's environment, motion profile, and duty cycle can effect the re-lubrication time period required. Lubricate the stage every 6 months or 2500 km (1550 mi) of travel, which ever comes first. Use the MPAS grease gun kit and grease cartridge (catalog numbers MPAS-GPUMP and MPAS-CART respectively). See maintenance section for lubrication procedures. Refer to Maintenance beginning on page 59 for lubrication procedures. Identifying Your Stage Use the following key to identify the options that your stage is equipped with. Be sure the information listed on the purchase order correlates to the information on the packing slip that accompanied your stage components. Inspect the assemblies and confirm, if applicable, the presence of specified options. CHPS - A 6 054 A - F LM C 2 C Bulletin Number Cable Management and Termination Voltage A = No Cables or Cable Carrier (Slide Junction Box only) B = Cables with Flying Leads and Cable Carrier(1) A= 230V AC C = Cables with Kinetix MPF Connectors and Cable Carrier(1) Frame Size D = Cables with D-Connectors and Cable Carrier(1) 6= 150 mm base Limits Stroke 2 = No limits Travel lengths start at 6 cm and are available in 6 cm increments. 5 = Two end of travel limits For example: 006 for 6 cm travel or 054 for 54 cm travel. Maximum travel = 120 cm. Protection S = Covered with strip seals (IP 30)(2)(3) Motor C = Covered without strip seals(2) A= LZ-030-T-120-D B= LZ-030-T-240-D O = Open without any cover, without strip seals C= LZ-030-T-240-E LM Specifier Feedback LM = Linear Motor F= 1.0 micron incremental optical encoder, with integral index mark G= 0.5 micron incremental optical encoder, with integral index mark H= 0.1 micron incremental optical encoder, with integral index mark I= 1V p-p sine/cosine encoder, 20 μm signal period, with integral index mark 18 Rockwell Automation Publication CHPS-UM001D-EN-P - July 2014 Understanding Your Stage Chapter 2 CHPS - A 8 054 F - F LM C 2 C Cable Management and Termination Bulletin Number A = No Cables or Cable Carrier (Slide Junction Box only) Voltage A= 230V AC B = Cables with Flying Leads and Cable Carrier(1) B= 460V AC (LC motors only) C = Cables with Kinetix MPF Connectors and Cable Carrier(1) D = Cables with D-Connectors and Cable Carrier(1) Frame Size Limits 8= 200 mm base 2 = No limits Stroke For -100 and -120 motor coil lengths Travel lengths start at 6 cm and are available in 6 cm increments. For example: 006 for 6 cm travel or 054 for 54 cm travel. Maximum travel = 126 cm. Travel lengths start at 8 cm and are available in 6 cm increments. For -200 or -240 motor coil lengths. For example: 008 for 8 cm travel or 020 for 20 cm travel. Maximum travel = 122 cm. Motor 5 = Two end of travel limits Protection S = Covered, with strip seals (IP 30)(2)(3) C = Covered, without strip seals(2) O = Open, without cover, without strip seals LM Specifier LM = Linear Motor Feedback A= LZ-030-T-120-D E= LC-050-200-D F = 1.0 micron incremental optical encoder, with integral index mark B= LZ-030-T-240-D F= LC-050-200-E G = 0.5 micron incremental optical encoder, with integral index mark C = LZ-030-T-240-E H = 0.1 micron incremental optical encoder, with integral index mark D= LC-050-100-D I = 1V p-p sine/cosine encoder, 20 μm signal period, with integral index mark CHPS - A 9 054 G - F LM C 2 C Cable Management and Termination Bulletin Number A = No Cables or Cable Carrier (Slide Junction Box only) Voltage A= 230V AC B = Cables with Flying Leads and Cable Carrier(1) B= 460V AC (LC motors only) C = Cables with Kinetix MPF Connectors and Cable Carrier(1) D = Cables with D-Connectors and Cable Carrier(1) Frame Size Limits 9= 250 mm base 2 = No limits Stroke 5 = Two end of travel limits Travel lengths start at 8 cm and are available in 6 cm increments. Protection For example: 008 for 8 cm travel or 020 for 20 cm travel. Maximum travel = 122 cm. S = Covered, with strip seals (IP 30)(2)(3) C = Covered, without strip seals(2) Motor O = Open, without cover, without strip seals G = LZ-050-T-120-D LM Specifier H = LZ-050-T-240-D LM = Linear Motor I = LZ-050-T-240-E Feedback J = LC-075-100-D K = LC-075-200-D F = 1.0 micron incremental optical encoder, with integral index mark L = LC-075-200-E G = 0.5 micron incremental optical encoder, with integral index mark (1) Not for upside down mounting. (2) Contact Applications Engineering for upside down mounting. (3) Strip seal and covers required for wall mount applications. Rockwell Automation Publication CHPS-UM001D-EN-P - July 2014 H = 0.1 micron incremental optical encoder, with integral index mark I = 1V p-p sine/cosine encoder, 20 μm signal period, with integral index mark 19 Chapter 2 Understanding Your Stage Notes: 20 Rockwell Automation Publication CHPS-UM001D-EN-P - July 2014 Chapter 3 Planning the Stage Installation Stage Mounting Requirements Topic Page Stage Mounting Requirements 21 General Safety Standards for Stage Installations 21 Mounting Restrictions 21 Environmental Factors 22 Mounting Surface Restrictions 22 Clearance Requirements 23 Requirements to be met when mounting your CHPS-Series stage include the following. General Safety Standards for Stage Installations General safety standards and requirements include, but are not limited to, the following: • ANSI/RIA R15.06, Industrial Robots and Robot Systems Safety Requirements - Teaching Multiple Robots • ANSI/NFPA 79, Electrical Standard for Industrial Machinery • CSA/CAN Z434, Industrial Robots and Robot Systems- General Safety Requirements • EN60204-1, Safety of Machinery. Electrical Equipment of Machines Mounting Restrictions When locating your CHPS-Series stage include the following. • Environmental Factors • Mounting Surface Restrictions • Mounting Orientation • Clearance Requirements Rockwell Automation Publication CHPS-UM001D-EN-P - July 2014 21 Chapter 3 Planning the Stage Installation Environmental Factors Factor Applicability Temperature The stage does not require any special cooling considerations. Avoid mounting it near any heat generating objects, such as a heat register. Sustained average temperature must not be greater than 40 °C (104 °F), nor less than 0 °C (32 °F). Humidity Avoid excessive humidity. Condensation on metal surfaces can cause stage corrosion. The maximum permissible humidity is 80% relative. Access and Interference When possible, locate the system where sufficient working space is available to perform periodic maintenance. Avoid installing where a trapping hazard or pinch point occurs as a result of interference with the building, structures, utilities, and other machines and equipment. Dust and airborne contaminants Avoid placing the stage in areas where excessive dust or other airborne contaminants are present. Chemical fumes or vapors can cause damage to internal components. Vibration Install the stage in a location free of excessive vibration. Ambient Light Have sufficient light readily available to enable inspection, testing and other functions to be performed on the stage. Mounting Surface Restrictions 22 Mounting Orientation Restriction Surface Stages are to be bolted or clamped to a flat, stable, and rigid surface along its entire length. Flatness deviation in the mounting surface must be less than or equal to 0.025 mm over a 300 x 300 mm (0.001 in. over a 12 x 12 in.) area. Flatness must be maintained during operation of the stage. Ceiling - inverted surface A ceiling mount (inverted on a horizontal surface) is not recommended. Stages mounted in this orientation are subject to premature cable carrier failure. Wall - horizontal Horizontal wall mount stages must be installed with the cable carrier below the stage. Stages mounted horizontally on a wall must have a travel of 1 m (3.28 ft) or less. Stages with a travel length greater than 1 m (3.28 ft) are subject to premature cable carrier failure. Wall - vertical or incline Stages mounted vertically on a wall must have a travel of 1 m (3.28 ft) or less. Stages with a travel length greater than 1 m (3.28 ft) are subject to premature cable carrier failure. Rockwell Automation Publication CHPS-UM001D-EN-P - July 2014 Planning the Stage Installation Chapter 3 Clearance Requirements The figures depict the minimum clearances for each stage type. Power and feedback cables can impose additional clearance requirements. Refer to Interconnect Cables on page 85 for connector and bend radius requirements. Figure 3 - Minimum Clearance Requirements Covered Stage: 419 mm (16.5 in.) Clearance on Both Ends for Lubrication Access Uncovered Stage: 3.2 mm (0.125 in.) Clearance All Around Cabling: 19 mm (0.75 in.) Clearance for Cable Routing Rockwell Automation Publication CHPS-UM001D-EN-P - July 2014 23 Chapter 3 Planning the Stage Installation Notes: 24 Rockwell Automation Publication CHPS-UM001D-EN-P - July 2014 Chapter 4 Mounting the Stage Topic Page Unpacking, Handling, and Inspection 25 Unpacking Procedure 26 Store Packaging Material 28 Stage Storage 28 Mounting the Stage 28 Before You Begin the Mechanical Installation 28 Determine the Number of Fasteners Required 28 Determine the Type of Fastener to Use 29 Mounting the Stage 31 Mount Your Application 32 IMPORTANT Unpacking, Handling, and Inspection Any person that teaches, operates, maintains, or repairs these stages must be trained and demonstrate the competence to safely perform the assigned task. Inspect packaging to make certain no damage occurred in shipment. Document any damage or suspected damage. Claims for damage due to shipment are usually made against the transportation company. If you suspect damage, contact Rockwell Automation immediately for further advice. Be sure the information listed on the purchase order correlates to the information on the packing slip for your stage and its accessories. Rockwell Automation Publication CHPS-UM001D-EN-P - July 2014 25 Chapter 4 Mounting the Stage Inspect the assemblies and confirm, if applicable, the presence of specified options. ATTENTION: Linear motor driven stages contain powerful permanent magnets that require extreme caution during handling. Do not disassemble the stage. The forces generated by permanent magnets are very powerful and can cause bodily injury. Persons with pacemakers or automatic implantable cardiac defibrillators (AICD) must maintain a minimum distance of 0.3 m (12 in.) from magnet assemblies. Additionally, unless absolutely unavoidable, a minimum distance of 1.5 m (5 ft) must be maintained between magnet assemblies and other magnetic or ferrous composite materials. Calipers, micrometers, laser equipment, and other types of instrumentation must be nonmetallic. Unpacking Procedure The following tools are recommended for unpacking the stage: • Utility knife • 2.5 mm, 5 mm, and 6 mm hex keys • Packing tape 1. Place carton on flat stable surface with the tape seam side facing you. 2. Use a utility knife to score the packing tape on the edges of the carton. 3. Lift center cover to reveal the stage. Users Manual Desiccant Packing End Caps 4. Remove the packing end caps. ATTENTION: Never attempt a single-person lift. Personal injury and equipment damage can occur if the linear stage is handled improperly. 26 Rockwell Automation Publication CHPS-UM001D-EN-P - July 2014 Mounting the Stage Chapter 4 5. Remove the linear stage from the packaging supports. • For stages shorter than 1 meter (39.3 in.), use two people and lift the linear stage by grasping the base near the end caps only. • For stages 1 meter (39.3 in.) or longer, use support straps at the 1/4 and 3/4 length points to avoid distorting the base. Use this support system whenever the linear stage must be lifted. 1/4 End Cap 1/4 1/4 1/4 End Cap Support Straps 6. Move the linear stage to a solid support surface before removing the shipping brace. ATTENTION: The carriage is free to move once the shipping brace is removed. Use additional care when handling the linear stage after the brace is removed. Unexpected carriage movement can cause personal injury. 7. Remove the four socket head cap screws (SHCS) from the shipping brace. 8. Lift the shipping brace off the stage and set it aside. M6 x 30 SHCS (2x) for CHPS-x6xxxx-xLxxx (150 mm) M8 x 30 SHCS (2x) for CHPS-x8xxxx-xLxxx (200 mm) and CHPS-x9xxxx-xLxxx (250 mm) M6 x 75 SHCS (2x) for CHPS-x6xxxx-xLxxx (150 mm) M6 x 75 SHCS (2x) for CHPS-x8xxxx-xLxxx (200 mm) or CHPS-x9xxxx-xLxxx (250 mm) Shipping Brace Shipping Clamp M3 SHCS, washer, and nut (4x) 9. Remove the plastic wrap enclosing the stage and set it aside. 10. Remove the four SHCS that secure the shipping clamp. Rockwell Automation Publication CHPS-UM001D-EN-P - July 2014 27 Chapter 4 Mounting the Stage 11. Remove the four square nuts loosened in the previous step, by sliding each nut to the end of channel. Store Packaging Material Keep the carton in case the unit needs to be returned for warranty service or stored for an extended period of time. 1. Tape screws and clamp hardware to the shipping brace. 2. Put end caps in their original positions on the center cover and place all packing material inside the carton. 3. Lightly tape carton closed and store in dry place. Stage Storage Store the stage in area that is clean, dry, vibration free, and at a relatively constant temperature. Refer to Environmental Specifications for CHPS-Series Stage on page 75 for more detailed information. Mounting the Stage This section discusses mounting methods for your stage. Before You Begin the Mechanical Installation The machine designer is most qualified to determine the number and type of fasteners to use for mounting the stage. The following information is a guide for the decision-making process. Determine the Number of Fasteners Required The length of the stage determines the number of mounting fasteners that are required. Use one of the following equations to calculate the required mounting hardware. Figure 4 - Fasteners Required for Stages with 150 mm and 200 mm frame size (CHPS-x6xxxxxLMxxx and CHPS-x8xxx-xLMxxx) stroke (cm) + 26 (cm) fasteners = ---------------------------------------------------------- round down + 1 × 2 12 Figure 5 - Fasteners Required for Stages 250 mm frame size (CHPS-x9xxx-xLMxxx) stroke (cm) + 30 (cm) fasteners = ----------------------------------------------------------- round down +1 × 2 12 or example, if you are mounting an CHPS-B8194F-ALM02C stage. 28 Rockwell Automation Publication CHPS-UM001D-EN-P - July 2014 Mounting the Stage Chapter 4 1940 mm stroke length = 194.0 cm 194 cm + 36 230 fasteners = ---------------------------------- = --------- = 19.167 12 12 round down = 19 fasteners = 19 + 1 = 20 × 2 = 40 fasteners Determine the Type of Fastener to Use Three types of fasteners that can be used to mount the stage. • Through bolts • Toe clamps • Tee nut or square nut Toe clamps are supplied with the catalog number CHPS-x6xxx stages, and covered types of the catalog number CHPS-x8xxx and CHPS-x9xxx stages. Refer to the Mounting Fastener Options table for an illustration of each fastener type. Table 1 - Mounting Fastener Options Torque User Supplies(4) Recommended For N•m (lbf•in) – M5 x 1.0 x 16 mm min Uncovered stages 2.3 (30) Toe clamps MPAS-TOE M6 x 1.0 x 16 mm min Covered stages 5.5 (48) Tee nuts(2) MPAS-x-TNUT(3) M6 x1.0 Securing a stage from beneath the mounting surface. Tee Nut 6.7 (60) Square Nut 2.3 (30) Fastener Order Through Bolt(1) (1) (2) (3) (4) Illustration Through bolt mounting is not an option for catalog number CHPS-x6xxxx-xLMxxx (150 mm) stages. The tee nut mount for a catalog number CHPS-x8xxxx-xxxxx (200 mm) stage is a square nut in a tee slot. Where x is the frame size of a stage, 6 = CHPS-x6xxxx-xxxxx (150 mm), 8 = CHPS-x8xxxx-xxxxx (200 mm), 9 = CHPS-x9xxxx-xxxxx (250 mm). You supply the bolts. Rockwell Automation Publication CHPS-UM001D-EN-P - July 2014 29 Chapter 4 Mounting the Stage Figure 6 - Through Bolt Mounting IMPORTANT Through bolt mounting is not available for the catalog number CHPS-x6xxxx-xxxxx (150 mm) stages. An uncovered stage is a good candidate for through bolt mounting. For covered stages, toe clamps are the easiest method for mounting. On sides of the base secure a toe clamps every 120 mm (4.72 in) by using M6 SHCS as shown in the Toe Clamps Mounting diagram. Use slots formed into outside edge of the stage base. Figure 7 - Toe Clamps Mounting 120 mm (4.72 in.) 30 Rockwell Automation Publication CHPS-UM001D-EN-P - July 2014 Mounting the Stage Chapter 4 Tee nuts are used to mount the stage from underneath. Insert the tee nuts every 120 mm (4.72 in.) in tee slots on the bottom of the unit. Secure the tee nuts by using M6 SHCS as shown in Tee Nut Mounting diagram. Figure 8 - Tee Nut Mounting T-Slots Mounting the Stage Follow these steps to install a stage on its mounting surface. 1. Be sure the mounting surface is clear of any and all foreign material. IMPORTANT Do not use abrasives to clean the surface. If necessary, stone the mounting surface (acetone or methanol can be applied as cleaning agent). 2. Verify that the flatness of the surface that the stage is to be mounted. The total indicator reading (TIR) is 0.0254 mm (0.001 in.) per 300 mm (120 in.). TIR or runout, correlates to an overall flatness of a surface. 3. Lift the stage onto the prepared mounting surface ATTENTION: Do not attempt to move the stage by grasping the cable junction box. Moving the stage in this manner can damage the stage and create a pinch or crush hazard. The junction box is attached to the carrier that is free to move. Lifting the stage in this manner causes uncontrolled movement of the heavy base. Always use a two person lift and grasp the stage by the base at the end caps keeping fingers clear of the carrier’s path of travel. The two lubrication ports on each end cap (four total) are M10 x1.5 tapped through holes and can be used to install lifting hooks supplied by the customer. Personal injury and equipment damage can occur if stage is handled improperly. Rockwell Automation Publication CHPS-UM001D-EN-P - July 2014 31 Chapter 4 Mounting the Stage 4. Align the stage on the mounting surface, and insert the correct number of mounting bolts. Refer to CHPS-Series Stage Dimensions beginning on page 77 for detailed mounting dimensions. 5. Secure the stage by using all mounting holes. Torque bolts to the values shown in the Mounting Fastener Options table on page 29. Mount Your Application Mount your application to the slide by using the following bolts and torque values: Cat. No. Bolt Torque N•m (lb•in) 32 CHPS-x6xxxx-xLMxxx M6 3.2 (48) CHPS-x8xxxx-xLMxxx M8 10.1 (90) CHPS-x9xxxx-xLMxxx M8 10.1 (90) Rockwell Automation Publication CHPS-UM001D-EN-P - July 2014 Chapter 5 Connector Data Topic Page Kinetix Servo Drive Compatible Connectors 34 D-Type Connectors 35 Flying Leads 36 Junction Box Connectors 37 Limit Sensor Flying Leads 38 Rockwell Automation Publication CHPS-UM001D-EN-P - July 2014 33 Chapter 5 Connector Data The following tables identify the power and feedback pinouts for the Intercontec circular connectors for use with standard Allen Bradley connectors. Kinetix Servo Drive Compatible Connectors Pin Color Signal A Red U (A) Phase B White V (B) Phase C Black W (C) Phase D Green/Yellow Ground Case Shield Cable Shield B A L C G F H D E Intercontec P/N BKUA090NN000550003500 Mating Cable: Allen-Bradley 2090-XXNPMF-16Sxx With Incremental Encoder With Analog Encoder Pin Color Wire Signal Designations Signal Description Signal Designations Signal Description 1 Yellow A+ TTL - Differential Sin+ Analog Differential 1V p-p 2 White/yellow A- TTL - Differential Sin- Analog Differential 1V p-p 3 Brown B+ TTL - Differential Cos+ Analog Differential 1V p-p 4 White/Brown B- TTL - Differential Cos- Analog Differential 1V p-p 5 Violet Index Mark+ TTL - Differential Index+ Differential Pulse 1V p-p 6 White/Violet Index Mark- TTL - Differential Index- Differential Pulse 1V p-p 7 Reserved — — Reserved — 8 Reserved — — Reserved — 9 White/Red +5V DC Encoder and Hall Sensor Power +5V DC Encoder and Hall Sensor Power 10 Black Common — Common — 11 Reserved — — Reserved — 13 Green PTC Temp+(1) PTC Thermistor PTC Temp+(1) PTC Thermistor 14 White/Black Common — Common — 15 White/Green S1 TTL - Trapezoidal Hall S1 TTL - Trapezoidal Hall 16 Blue S2 TTL - Trapezoidal Hall S2 TTL - Trapezoidal Hall 17 White/Blue S3 TTL - Trapezoidal Hall S3 TTL - Trapezoidal Hall Case Shield Shield — Shield — 12 (1) PTC Temp- is connected to Common. 11 12 1 13 2 16 14 3 9 17 15 8 6 4 7 5 10 Intercontec P/N AKUA034NN00100035000 Mating Cable: Allen-Bradley 2090-XXNFMF-Sxx 34 Rockwell Automation Publication CHPS-UM001D-EN-P - July 2014 Connector Data The following tables identify the power and feedback pinouts for D-shell connectors that enable custom cables to be used. D-Type Connectors Pin Color Signal A1 Red U (A) phase A2 White V (B) phase A3 Black W (C) phase A4 Green/Yellow Ground Case Shield Cable Shield M A1 A2 A3 A4 Positronic P/N CBD9W4M20000-1702.0 Mating Connector: Positronic P/N CBD9W4F20000-1701.0 With Incremental Encoder Signal Signal Description Designations A+ TTL - Differential B+ TTL - Differential Index Mark + TTL - Differential +5V DC Encoder and Hall Sensor Power — — Signal Designations Signal Description Sin+ Cos+ Index+ +5V DC — Analog Differential 1V p-p Analog Differential 1V p-p Differential Pulse 1V p-p Encoder and Hall Sensor Power — White/Green Green Reserved White Blue Green/Yellow White/Yellow White/Brown White/Violet Black, White/Black Reserved S1 PTC Temp+(1) — S3 Shield ABIndex MarkCommon TTL - Trapezoidal Hall PTC Thermistor — TTL - Trapezoidal Hall — TTL - Differential TTL - Differential TTL - Differential — S1 PTC Temp+* — S3 Shield SinCosIndexCommon TTL - Trapezoidal Hall PTC Thermistor — TTL - Trapezoidal Hall — — — — Blue Reserved S2 — TTL - Trapezoidal Hall — S2 — TTL - Trapezoidal Hall — Pin Color Wire 1 2 3 4 5 6 7 8 9 10 11 12 13 14 15 16 17 Yellow Brown Violet White/Red Reserved 18 19 20 21 22 23 24 25 Chapter 5 With Analog Encoder Analog Differential 1V p-p Analog Differential 1V p-p Differential Pulse 1V p-p — (1) PTC Temp- is connected to Common. 1 1 14 13 M 25 Connector Part Number AMP P/N 207464-2 Mating Connector Part Number AMP P/N 5205207-1 Rockwell Automation Publication CHPS-UM001D-EN-P - July 2014 35 Chapter 5 Connector Data The following tables identify the power and feedback pinouts for flying lead this option lest you to use your own connectors. Flying Leads ATTENTION: Disconnect input power supply before installing or servicing stage Stage lead connections can short and cause damage or injury if not well secured and insulated. Insulate the connections, equal to or better than the insulation on the supply conductors. Properly ground the stage as described in the drive manual. Color Red White Black Green/Yellow Shield Color Wire Yellow White/Yellow Brown White/Brown Violet White/Violet Red White/Red Black White/Black Green White/Green Blue White/Blue Green/Yellow Signal U (A) phase V (B) phase W (C) phase Ground Cable Shield With Incremental Encoder Signal Signal Description Designations A+ TTL - Differential ATTL - Differential B+ TTL - Differential BTTL - Differential Index Mark+ TTL - Differential Index MarkTTL - Differential +5V Encoder and Hall Sensor Power +5V Encoder and Hall Sensor Power Common — Common — PTC Thermistor PTC Temp+(1) S1 TTL - Trapezoidal Hall S2 TTL - Trapezoidal Hall S3 TTL - Trapezoidal Hall Shield — With Analog Encoder Signal Signal Description Designations Sin+ Analog - Differential 1V p-p SinAnalog - Differential 1V p-p Cos+ Analog - Differential 1V p-p CosAnalog - Differential 1V p-p Index+ Differential Pulse 1V p-p IndexDifferential Pulse 1V p-p +5V Encoder and Hall Sensor Power +5V Encoder and Hall Sensor Power Common — Common — PTC Temp+(1) PTC Thermistor S1 TTL - Trapezoidal Hall S2 TTL - Trapezoidal Hall S3 TTL - Trapezoidal Hall Shield — (1) PTC Temp- is connected to Common. 36 Rockwell Automation Publication CHPS-UM001D-EN-P - July 2014 Connector Data Junction Box Connectors Chapter 5 The following diagram and tables identify the power and feedback pinouts of the junction box connector, use this information to make custom cables B A Pin 1 9 C D 12 6 16 8 7 Pin 1 E 4 Pin 1 Item Description A J1 Feedback connector, output to flex cable, Mating connector is a Molex P/N 43025-1600 B J2 Thermistor signal connector, the input from side C J3 Hall signal connector, input from side D J4 Encoder signal connector, input from side E Mating power connector AMP 359780-1 Signals from slide Header 2x8, Vertical To flexible feedback cable Header 2X6 Right Angle J4 1 2 3 4 5 6 7 8 9 10 11 12 SHIELD HALLS3 ENCA+ ENCB+ INDEX+ POSLIM ENCA+ ENCB+ INDEX+ POSLIM GND SHIELD ENCAENCBINDEXNEGLIM 5V GND HALLS1 HALLS2 ENCAENCBINDEXNEGLIM 5V TEMP+ Header 2X3, Right Angle 6 5 4 J3 3 2 1 HALLS1 HALLS3 5V SHIELD HALLS2 GND 1 2 3 4 5 6 7 8 J1 9 10 11 12 13 14 15 16 Header 2, Right Angle J2 2 1 TEMP+ GND Shield terminates to mounting hole TP1 Rockwell Automation Publication CHPS-UM001D-EN-P - July 2014 37 Chapter 5 Connector Data Table 2 - Junction Box Power Connector Pin Color Signal 1 Red U (A) phase 2 White V (B) phase 3 Black W (C) phase 4 Green/Yellow Ground Table 3 - Junction Box J1 Connector Pin With Incremental Encoder With Analog Encoder Signal Designation Signal Description Signal Designation Signal Description 1 Shield — Shield — 2 S3 TTL - Trapezoidal Hall S3 - TTL - Trapezoidal Hall 3 A+ TTL - Differential Sin+ Analog - Differential 1V p-p 4 B+ TTL - Differential Cos+ Analog - Differential 1V p-p 5 Index Mark+ TTL - Differential Index+ Differential Pulse 1V p-p 8 Common — Common — 9 S1 TTL - Trapezoidal Hall S1 TTL - Trapezoidal Hall 10 S2 TTL - Trapezoidal Hall S2 TTL - Trapezoidal Hall 11 A- TTL - Differential Sin- Analog - Differential 1V p-p 12 B- TTL - Differential Cos- Analog - Differential 1V p-p 13 Index Mark- TTL - Differential Index- Differential Pulse 1V p-p 15 +5V Encoder and Hall Sensor Power +5V Encoder and Hall Sensor Power 16 PTC Temp+(1) PTC Thermistor PTC Temp+(1) PTC Thermistor (1) PTC Temp- is connected to Common. Limit Sensor Flying Leads The limit sensor option comes with flying leads, regardless of the power and feedback termination option ordered. Color Signal Description Brown +V Black Load+ Blue 0V(1) (1) Load- is connected to 0V. 38 Rockwell Automation Publication CHPS-UM001D-EN-P - July 2014 Chapter 6 Connecting the Stage Connecting the Stage Topic Page Connecting the Stage 39 Attaching the Ground Strap and Interface Cables 40 Thermal Protection 42 Optional Limit Sensors 43 TTL Differential Encoder Output Signal 44 Sine/Cos Encoder Output Signals 45 Hall Effect Circuit 46 Motor and Hall Phasing and Sequence 46 Stage Positive Direction 48 The installation procedure assumes you prepared your system for correct electrical bonding and understand the importance of electrical bonding for correct operation of the system. If you are unfamiliar with electrical bonding, the section Attaching the Ground Strap and Interface Cables briefly describes and illustrates correct system grounding techniques. ATTENTION: Plan the installation of your stage so that you can perform all cutting, drilling, tapping, and welding with it removed. Be careful to keep any metal debris from falling into it. Metal debris or other foreign matter can become lodged in the stage, that can result in damage to components. SHOCK HAZARD: To avoid hazard of electrical shock, perform all mounting and wiring of the stage prior to applying power. Once power is applied, connector terminals can have voltage present even when not in use. Rockwell Automation Publication CHPS-UM001D-EN-P - July 2014 39 Chapter 6 Connecting the Stage Attaching the Ground Strap and Interface Cables The only electrical connections necessary between the stage and the drive system are the ground strap and the two cables. 1. For electrical safety, connect the ground screw on the chassis of the stage to the ground bus for your system. To reduce the effects of electromagnetic interference (EMI), bond the stage with a braided ground strap, 12 mm (0.5 in.) wide minimum, to a grounded metal surface. This creates a low-impedance return path for high-frequency energy. 2. Torque the ground screw at the stage to 2 N•m (18 lb•in) M5 x 0.8 -6H Ground Screw Lug Braided Ground Wire 12 mm (0.5 in) min. 3. Form a drip loop in each cable at a point directly before it attaches to the stage. Refer to the Connecting Kinetix Type Motor and Feedback Cables diagram for a visual example. ATTENTION: Be sure that cables are installed and restrained to prevent uneven tension or flexing at the cable connectors. Excessive and uneven lateral force at the cable connectors can result in the connector’s environmental seal opening and closing as the cable flexes. Failure to observe these safety procedures could result in damage to the motor and its components. 40 Rockwell Automation Publication CHPS-UM001D-EN-P - July 2014 Connecting the Stage Chapter 6 4. Attach the feedback cable, and the power cable to the stage. ATTENTION: Do not connect or disconnect the stage feedback cable, or the power cable while power is applied to them. Inadvertent pin connections can result in unexpected motion or result in irreversible damage to the components. For Kinetix type connectors. a. Carefully align each cable connector with the respective motor connector as shown in Figure 1. b. Do not apply excessive force when mating the cable and stage connectors. If the connectors do not go together with light hand force, realign and try again. ATTENTION: Be sure that cables are installed and restrained to prevent uneven tension or flexing at the cable connectors. Excessive and uneven lateral force at the cable connectors can result in the connector’s environmental seal opening and closing as the cable flexes. Failure to observe these safety procedures could result in damage to the motor and its components. c. Hand tighten the knurled collar five to six turns to fully seat each connector. ATTENTION: Keyed connectors must be properly aligned and handtightened the recommended number of turns. Improper alignment is indicated by the need for excessive force, such as the use of tools, to fully seat connectors. Connectors must be fully tightened for connector seals to be effective. Failure to observe these safety procedures could result in damage to the motor, cables, and connector components. Figure 9 - Connecting Kinetix Type Motor and Feedback Cables Align flat surfaces. Power Connector Align flat surfaces. Rockwell Automation Publication CHPS-UM001D-EN-P - July 2014 Feedback Connector Cable Drip Loop 41 Chapter 6 Connecting the Stage Thermal Protection Connect the stage PTC thermistor signal to the drive or control system to create a thermal protection system. PTC Thermistor Signal Characteristics Temperature °C (°F) Resistance in Ohms Up to 100 (212) ≤ 750 Up to 105 (221) ≤ 7500 Up to 110 (221) ≥ 10,000 ATTENTION: PTC thermistor supplies a signal that indicates the stage temperature limit condition. Connect this signal to control system or drive system so it shuts down the stage power upon reaching a limit condition. Multiple levels of stage thermal protection are strongly recommend. The following thermal protection methods are also recommended. • Typically digital drives use RMS current protection and or estimated temperature vs. time (I2T) software protection schemes. Activated and set these available features according to the stage model ratings for your application. • Set the maximum value of ± peak-current-magnitude limits of your drive to the stage’s peak-current rating. • For drives without stage protection features, install stage fuses (current rating not to exceed stage continuous RMS) according to local and National Electrical Code. Uses time-delay type fuses that are rated for the drive PWM output voltage. 42 Rockwell Automation Publication CHPS-UM001D-EN-P - July 2014 Connecting the Stage Optional Limit Sensors Chapter 6 Two limit sensors, positive overtravel (OT) and negative OT, provide electrical protection for stage overtravel. Their physical location is shown in Component Description diagram on page 16 they and can be adjusted up to 30 mm (1.2 in.) toward the center of travel. The electric characteristics are shown here. • Input Power: 12…28V DC, 15 mA circuit draw + 50 mA maximum sourcing = 65 mA total. • Output: PNP, Open collector Normally Closed, 50 mA maximum sourcing. Brown Main Circuit Black Blue +V Limit +V com Figure 10 - Limit Sensor Orientation Adjustable Negative OT Limit on this side Limit Sensor cables exit here Adjustable Positive OT Limit on this side Rockwell Automation Publication CHPS-UM001D-EN-P - July 2014 43 Chapter 6 Connecting the Stage TTL Differential Encoder Output Signal Use the following information to connect a stage with a TTL Differential Encoder. The incremental encoder typically have the following quadrature edge separation. Encoder Typical Edge Separation @ Maximum Velocity(1) μm ns m/s 1 100 5 0.5 90 3 0.1 90 0.7 (1) Speeds based on 3 m maximum cable length and a minimum readhead input of 5V. To calculate the minimum recommended counter frequency for 1 μm and 0.5 μm encoders, use the following formula. encoder velocity ( m ⁄ s ) Counter clock frequency (MHz) = ----------------------------------------------------------- × 4 (safety factor) resolution ( μm ) The minimum recommend counter frequency for the 0.1 μm encoder is 12 MHz. Figure 11 - TTL Differential Encoder Timing Diagram Incremental 2 channels A and B in quadrature (90° phase shifted) Quadrature edge separation ENC A+ ENC B+ Index Mark pulse in synchronised to one position count. Repeatability of position (uni-directional) is maintained if temperature is 15…35 °C (59…95 °F) and speed is <250 mm/s (9.8 in./s). Reference Index Mark + Figure 12 - TTL Differential Encoder Termination Readhead ENC A +, ENC B +, & Index Mark + Square wave differential line driver to EIA RS422A (1) 120 Ω ENC A -, ENC B -, & Index Mark (1) Total termination resistance in ohms. 44 Drive or Controller Rockwell Automation Publication CHPS-UM001D-EN-P - July 2014 Standard RS422A line receive circuit Connecting the Stage Sine/Cos Encoder Output Signals Chapter 6 Use the following information to connect a stage with a Sine/Cosine Encoder option to a drive or controller that processes sine/cosine position feedback. The sine/cos encoder amplitude is 0.90V p-p minimum up to 2 meters per second. 0.60V p-p up to 4 meters per second. Figure 13 - Sine/Cos Encoder Timing Incremental 2 channels V1 and V2 differential sinusoids in quadrature (90° phase shifted) 20 μm 0.6 …1.2V p-p with green LED indication and 120 Ω termination Sine = (V1+)-(V1-) 90° Cosine = (V2+)-(V2-) Reference 0.8…1.2V p-p (V0+)- (V0-) 108º -18º 0º Differential pulse V0 - 18°…108° Duration 126° (electrical) Repeatability of position (uni-directional) is maintained if temperature is 15…35 °C and speed is <250 mm/s Recommended termination = 120 Ω resistors, V0, V1, V2. Figure 14 - Sine/Cos Encoder Termination Readhead ENC A +, ENC B +, & Index Mark + Drive or Controller 120 Ω (1) ENC A -, ENC B -, & Index Mark (1) Total termination resistance in ohms. Rockwell Automation Publication CHPS-UM001D-EN-P - July 2014 45 Chapter 6 Connecting the Stage Hall Effect Circuit Use the following information to connect the Hall Effect circuit to your servo drive. • Input power: 5…24 V DC, 10 mA maximum • Output: NPN, Open Collector, 10 mA maximum V+ Rp Hall Signal Isink Hall S1 Hall S2 Hall S3 Drive Isink = 10 mA Maximum Rp = External pull-up resistor Motor and Hall Phasing and Sequence Consult drive manual or supplier for wiring instructions for your drive. Motor wiring is phase and commutation sensitive. Motor Phasing Diagram shows the standard phase and sequence relationship of the motor when phased in the positive direction. The Hall signals are used by a compatible three-phasebrushless servo drive to perform electronic commutation. Two types of servo drive Hall-based commutation techniques are possible, Trapezoidal Hall Mode and Encoder Software Mode with Hall startup. For optimal commutation and force generation, the selected servo drive must be compatible with the motor phasing and be wired correctly. • Observe maximum applied voltage specification. • Consult drive manual or supplier for drive wiring instructions. Wiring is phase and commutation sensitive. • Terminate per drive manual instructions. • Hall Signals, 120o Spacing, Open Collector Transistor 24V maximum. • Refer to CHPS-Series Stage Connector Data starting on page 33 for termination options, pin, and wire designations. ATTENTION: Incorrect motor, Hall, or encoder wiring can cause runaway conditions. 46 Rockwell Automation Publication CHPS-UM001D-EN-P - July 2014 Connecting the Stage Chapter 6 As shown in the Motor Phasing Diagram: S1 in phase with W-U Back EMF S2 in phase with U-V Back EMF S3 in phase with V-W Back EMF Phase sequence = S1 leads S2 leads S3. Spacing is 120°. Figure 15 - Motor Phasing Diagram Back EMF Voltage vs. Hall Signals W-U Back EMF Voltage U-V V-W S1 Digital Hall Signals S2 S3 0° Linear Travel mm (in.) 60° 120° 180° 240° 300° 360° 50 (1.97) 60 (2.36) Motor Type LC LZ Phasing direction = Slide toward positive end block, IMPORTANT Phasing direction = Positive stage direction. Rockwell Automation Publication CHPS-UM001D-EN-P - July 2014 47 Chapter 6 Connecting the Stage Stage Positive Direction Stage positive direction is defined by a location of a Slide End Cap. Slide End Cap + Slide = Slide Assembly (-) (+) 48 Rockwell Automation Publication CHPS-UM001D-EN-P - July 2014 Positive Direction Chapter 7 Operation Guidelines and Limit Configuration Introduction Operational Guidelines This chapter gives you operational guidelines and limit sensor position adjustment procedures. Topic Page Operational Guidelines 49 Travel Limits 50 Calculating the Stopping Distance 50 Overtravel Limit Sensor Position Adjustment 51 Bumper Stops 53 Please read the following notices about using your stage. ATTENTION: A runway condition is caused by incorrect motor, Hall, or encoder wiring. It results in uncontrolled speeding of the stage. Keep away from the line of travel while commissioning the stage. IMPORTANT The customer is responsible for ensuring the servo control system safely controls the stage with regards to maximum force, acceleration, speed, and preventing runaway conditions. ATTENTION: Stages are capable of very high forces, accelerations and speeds. Moving parts can cause personnel injury. Before running the stage, make sure all components are secure. Check that the stage travel and air gap is clear of foreign matter and tools. Objects hit by the moving stage can cause personnel injury or damage to the equipment. ATTENTION: Do not operate the stage with protective covers removed. Do not go near electrically live parts. High voltages can cause personal injury or death. Rockwell Automation Publication CHPS-UM001D-EN-P - July 2014 49 Chapter 7 Operation Guidelines and Limit Configuration Travel Limits CHPS-Series stages offer three methods for containing slide travel: software travel limits, optional overtravel limit sensors, and standard bumpers stops. For safest operation use all three. Set software travel limits and overtravel limit sensors according to the maximum speed of the servo drive system and the payload of the application. You can determine the Deceleration Distance between the slide and the end-of-travel bumpers based on the combination of the Deceleration Rate of the load, and the available peak force from the stage-drive. Do a calculation similar to the one in Calculating the Stopping Distance for your application. Bumper Stop on the stage can stop the slide up to the ratings listed in the table on page 53. IMPORTANT Bumper stops are not intended as range of motion stops, but they can stop the moving slide up to the ratings listed in Bumper Stops on page 53. Calculating the Stopping Distance In the following example we calculate the stopping distance for a 10 kg payload on a CHPS-x8xE-xLMxxxx stage driven by a Kinetix 6000 drive (2094-xxxxx) by using the specification found in Appendix A. Substitute values for your system as necessary. Known Values: Slide Moving Mass = 10.32 kg Payload = 10 kg Maximum Programmable Velocity(1), Vmax = 2 m/s Available Peak Force(2) = 600 N @ 23.2 Ao-pk Start with: Total Moving Mass = m = Payload + Stage Moving Mass = 10 kg + 10.23 kg = 22.23 kg So the maximum deceleration rate, Dmax is 26.99 m/s2. (1) Velocity and kinetic energy can be much higher due to a uncontrolled worst-case motion constrained by the stroke and power capacity of the motor drive paring only. (2) Approximation only; actual peak force typically decreases as speed increases. 50 Rockwell Automation Publication CHPS-UM001D-EN-P - July 2014 Operation Guidelines and Limit Configuration Chapter 7 Calculate the deceleration time, Td. Use Td to calculate the deceleration distance. Therefore, you set the software travel limits to 74 mm. IMPORTANT Velocity and deceleration distance can be much higher due to an uncontrolled worst-case motion constrained by the stroke and power capacity of the motordrive paring only. Drive Current Limitation Your available peak force can be limited by your drive’s peak current. For example a drive with a peak rating of 15 Ao-pk has available peak force 386 N. Here is the calculation: Overtravel Limit Sensor Position Adjustment Maximum stage travel is defined as the distance the slide can travel between end caps such that the bumper stop can touch the end cap but not be compress. You can shorten the slide travel up to 30 mm (1.18 in.) by adjusting the overtravel limit sensor. Rockwell Automation Publication CHPS-UM001D-EN-P - July 2014 51 Chapter 7 Operation Guidelines and Limit Configuration To adjust overtravel limit sensor: 1. Measure location from end block to the inside tip of the overtravel limit sensor. Bumper Stop End Block Slide Limit Blade Overtravel Limit Sensor 2. Loosen screw and slide the overtravel limit sensor toward center of stage. It can be adjusted up to 30 mm. Correct Make adjustments without compressing the bumper. Bumper Stop Slide End Block Limit Blade 39 mm Overtravel Limit Sensor adjust up to 30 mm Original position Can cause programming anomaly. Slide End Block Limit Blade Overtravel Limit Sensor IMPORTANT Do not adjust the switch more than 30 mm. Doing so can cause a programming anomaly. 3. Redress the limit sensor cables with the cable clips. Make sure wires are neatly against the base and do not interfere with the motion of the limit blade. 52 Rockwell Automation Publication CHPS-UM001D-EN-P - July 2014 Operation Guidelines and Limit Configuration Chapter 7 Bumper Stops In addition to software overtravel limits and limit sensors the end of travel bumper stops can stop the slide up to the ratings listed. Bumper stops are not intended to be used as range of motion stops. Table 4 - Bumper Stop Energy Limits for Stage End of Travel Cat. No. Bumper Stop Energy Limit CHPS-x6xxxx-xLMxxx 37.3 J (330 in•lb) CHPS-x8xxxx-xLMxxx 45.5 J (403 in•lb) CHPS-x9xxxx-xLMxxx 35.2 J (312 in•lb) ATTENTION: If energy greater than the bumper capacity is anticipated in the application, provide additional mechanical means for safely stopping the slide. To calculate kinetic energy of the slide with your payload use the formula J in jules M = moving mass in kg (slide + payload) V = maximum velocity of stage in your application in m/s(1) (1) Velocity and kinetic energy can be much higher due to a uncontrolled worst-case motion constrained by the stroke and power capacity of the motor drive pairing only. (1) Rockwell Automation Publication CHPS-UM001D-EN-P - July 2014 53 Chapter 7 Operation Guidelines and Limit Configuration Notes: 54 Rockwell Automation Publication CHPS-UM001D-EN-P - July 2014 Chapter 8 Troubleshooting Topic Page Before You Begin 55 PTC Thermal Signal 55 Hall Effect Module 55 Hall to Back EMF Phasing 57 Motor Coil Resistance Measurements 58 Before You Begin The following test equipment is required: • Ohm meter • Two-channel storage oscilloscope PTC Thermal Signal At ambient room temperature, approximately 25 °C (77 °F), check that the resistance measurement between PTC Temp+ and Common (pins 13 and 14, respectively) on the feedback connector is ≤ 750 Ω. The table lists increase in resistance at higher temperatures outside the normal operating temperature envelope. Table 5 - PTC Thermistor Signal Characteristics Hall Effect Module Temperature °C (°F) Resistance in Ohms Up to 100 (212) ≤ 750 Up to 105 (221) ≤ 7500 Up to 110 (230) ≥ 10,000 Use this procedure to verify the Hall Effect module is operating properly. 1. With drive power OFF, verify the Hall circuit is properly connected to the drive by using stage and drive interface wiring specifications. 2. Disconnect stage power leads from the drive. 3. Apply power to the Hall device by setting the drive control power to ON. 4. Use an oscilloscope to check waveforms at S1, S2 and S3 at the feedback connector. Rockwell Automation Publication CHPS-UM001D-EN-P - July 2014 55 Chapter 8 Troubleshooting Move the slide slowly and steadily by hand in the specified phasing direction to generate the Hall waveform. 5. Check for proper logic levels (approximately 0V = low, V+= high) and correct signal sequence (S1 leads S2, and S2 leads S3) with approximately 120° electrical spacing between signal transitions. Hall Effect Leads Color Name Signal Description White/Green S1 Trapezoidal Hall, TTL-Single Blue S2 Trapezoidal Hall, TTL-Single White/Blue S3 Trapezoidal Hall, TTL-Single Figure 16 - Hall Signals Waveforms S1 S2 S3 0° TIP 60° 120° 180° 240° 300° 360° Connect the common probe from the scope to the Hall signal common. To determine the location of the signal common, refer to the Stage Power and Feedback Connections beginning on page 40. 6. Before assuming a Hall module fault check Hall field wiring or drive Hall circuit interface. 56 Rockwell Automation Publication CHPS-UM001D-EN-P - July 2014 Troubleshooting Hall to Back EMF Phasing Chapter 8 Verify the Hall to Back EMF Phasing with this procedure. 1. With drive power OFF. 2. Verify the Hall circuit is connected to the drive as describe in the CHPSSeries Connector Data beginning on page 33. 3. Disconnect the stage motor power leads from the drive. EXAMPLE To observe W-U Back EMF phase polarity, connect oscilloscope probe tip to the W phase and the common probe to the U phase. 4. Apply power to the Hall device by setting the drive control power to ON. 5. Slowly and steadily move the stage by hand to perform the Hall signal test, except this time check the motor phases are in-phase with the Hall signal as shown in the Motor Phasing Schematic on page 58. Make sure the phase error between Hall signal and in-phase Back EMF does not exceed ± 5 electrical degrees. 6. If poor results were obtained in step 5 repeat the test at the stage power terminations to check field wiring ATTENTION: Dangerous voltages, forces and energy levels exist in servo controlled systems. Extreme care must be exercised when operating, maintaining or servicing the stage to prevent harm to personnel or equipment. Rockwell Automation Publication CHPS-UM001D-EN-P - July 2014 57 Chapter 8 Troubleshooting Motor Coil Resistance Measurements If a motor coil electrical problem is suspected perform this check. 1. Let the coil attain ambient room temperature, approximately 25 °C (77 °F). 2. Verify the drive power is OFF. 3. Disconnect all stage leads (phases and ground) from the drive. 4. Measure the phase-to-phase (ptp) resistance of the phase combinations (U to V, V to W, and W to U) and record the values. Verify these three readings are approximately equal to each other. Figure 17 - Motor Phasing Schematic Rptn Rptp U V Shield Motor Phases W Lamination Frame Motor Ground Rptp = Rptn X 2 Compare the phase resistance readings to the cold resistance specification of the coil model. See CHPS-Series Stage Technical Specifications on page 83. If the three readings are balanced but vary from the specified reading, the reason can be a special coil model. Cable resistance can cause the result to be significantly higher. 5. To rule out the cable resistance, disconnect the stage cable and repeat the procedure this time at the stage motor power termination at the junction box. 6. Measure and verify the phase-to-ground resistance for each phase is >100 MΩ. A lower reading indicates a potential electrical problem. To rule out a field cable problem disconnect the stage cable and repeat the procedure this time at stage motor power termination. If any reading with the cable disconnected is ≤ 100 MΩ, consult Rockwell Automation; the stage can have an internal electrical problem IMPORTANT 58 Do not perform coil or insulation electrical stress tests (Megger or Hi-Pot test) without consulting Rockwell Automation technical support. Rockwell Automation Publication CHPS-UM001D-EN-P - July 2014 Chapter 9 Maintenance Topic Page Before You Begin 59 Lubricate the Bearing 60 Optical Encoder Scale Maintenance 60 Strip Seal Cleaning 61 Cover Cleaning 61 IMPORTANT Before You Begin Any person that teaches, operates, maintains, or repairs these stages must be trained and demonstrate the competence to safely perform the assigned task. The following tools are required to lubricate and clean your stage. ATTENTION: Lockout tagout power before servicing. • 0.5 m (14 in.) or larger clamp with soft jaws. • Grease (catalog number MPAS-CART). • Grease gun kit (catalog number MPAS-GPUMP) with tip type installed and primed. • Air line with maximum pressure of 10 psi. • Lint free cloth. • A few drops of isopropyl alcohol if necessary for cleaning encoder scale. Rockwell Automation Publication CHPS-UM001D-EN-P - July 2014 59 Chapter 9 Maintenance Lubricate the Bearing Your stage requires lubrication every 6 months or 2500 km (1550 mi) of travel, which ever comes first. Use the MPAS grease gun kit and grease cartridge, catalog numbers MPAS-GPUMP and MPAS-CART respectively. Bearing Lubrication Ports (2x per end cap) 1. Position slide at end of travel and clamp it to hold the stage against end cap. ATTENTION: Do not use clamp across the side panels. This can deform and damage the side panels. 2. Remove the lubrication port protective caps. 3. Insert the tip of grease gun in the lubrication port. Push in until contact with bearing grease nipple is felt. 4. Pump handle until back pressure is felt or two strokes are completed. 5. Repeat steps 3 and 4 to the second bearing on this side. 6. Move slide to opposite end of travel and repeat steps 1…5. 7. Remove clamp. 8. Reinstall the protective caps on all the lubrication ports. Optical Encoder Scale Maintenance 1. If installed remove strip seal and side cover on the side opposite the cable carrier. 2. Clear any coarse or abrasive particles with a clean air line with maximum pressure of 10 psi. 3. Clean scale with a clean dry cloth. Avoid the use of solvents. 4. If necessary use isopropyl alcohol sparingly, apply with a wetted cloth by using a gentle wiping action. 5. Reinstall side cover and strip seal, if used. 60 Rockwell Automation Publication CHPS-UM001D-EN-P - July 2014 Maintenance Strip Seal Cleaning Chapter 9 Clean the strip seals, if installed, by using a lint free cloth lightly saturated with isopropyl alcohol IMPORTANT Replace the strip seal if it cannot be cleaned, or if an uneven or scored surface is detected during cleaning. A buildup of foreign material on the strip seal degrades the performance of the linear stage. This buildup coupled with rapid movement of the slide and the resulting friction can score the surface and create a burnished appearance on the strip seal Elements contributing to a typical buildup on the strip seals are dust, grease, and other contaminates normally encountered in any operating environment that is not strictly controlled. Refer to the Strip Seal Removal procedure on page 65 and Strip Seal Replacement procedure on page 66 when performing this task. Cover Cleaning Clean the covers at the same time you clean the strip seals. Use pressurized air and a lint free cloth lightly saturated with isopropyl alcohol to remove any dirt or grease. Rockwell Automation Publication CHPS-UM001D-EN-P - July 2014 61 Chapter 9 Maintenance Notes: 62 Rockwell Automation Publication CHPS-UM001D-EN-P - July 2014 Chapter 10 Removing and Replacing Stage Components Topic Page Before You Begin 63 Cable Carrier Module Removal 63 Cable Carrier Module Installation 64 Strip Seal Removal 65 Stage Cover Removal 65 Stage Side Cover Removal 65 Strip Seal Replacement 66 Stage Cover Installation 67 Side Cover Installation 67 Before You Begin The following tools are required before you begin removal and replacement procedures. • Torque wrench • Phillips head screw driver • 2.5 mm hex wrench • 3 mm hex wrench • 4 mm hex wrench • Fine-point permanent marker • Tin snips • Loctite 222 Cable Carrier Module Removal Use this procedure to remove the cable carrier module assembly. TIP Mark the location of the end bracket before removing the cable carrier, this makes it easier to align the carrier when re-installing. 1. Remove the four (4) pan head screws from junction box side cover. 2. Remove the two (2) button head cap screws (BHCS) from the junction box cover. Rockwell Automation Publication CHPS-UM001D-EN-P - July 2014 63 Chapter 10 Removing and Replacing Stage Components 3. Remove junction box cover assembly. ATTENTION: Never pull on wires when disconnecting power and feedback connectors. Damage to the connector can occur. 4. Separate motor power connector by squeezing the side tabs and pulling on the housing. Do not pull on the wires Figure 18 - Cable Carrier Module Replacement M3 0.5 X8 LG Phillips Pan Head Screws (4x) Junction Box Cover Junction Box Side Cover M4 X 0.7 X 8 LG BHCS (2x) Cable Carrier Module M4 X 0.7 X 10 LG SHCS (2x) M3 X 0.5 X 8 LG SHCS (2x) Angle Bracket Motor Power Connector End Bracket Feedback Connector 5. Separate the feedback connector from the circuit board by pushing on the center tab and pulling up on the connector housing. Do not pull on wires. 6. Remove the two (2) SHCS from the angle bracket. 7. Lay the cable carrier out flat and mark the location of the end bracket on the base. 8. Loosen but do not remove the two (2) SHCS that secure the end bracket to the stage base. 9. Remove cable carrier. Cable Carrier Module Installation 64 Align the cable carrier module with the marks made before removing and follow cable carrier removal procedure in reverse. Rockwell Automation Publication CHPS-UM001D-EN-P - July 2014 Removing and Replacing Stage Components Strip Seal Removal Chapter 10 Figure 19 - Stage Seal Components . Strip Seal Clamp (4x) Seal Guide (4x) 3M SHCS (2x per guide) 3M SHCS (8x) IMPORTANT Stainless Steel Strip Seal (2x) Handle strip seal material with care. The strip seal has sharp edges that can cut if mishandled 1. Loosen the strip seal clamps at each end of the stage. 2. Carefully grasp the end of the strip seal and slide it out of the stage. Stage Cover Removal 1. Remove strip seals following strip seal removal procedure. 2. Remove the (4) M4 screws securing the stage cover to the end caps. 3. Remove cover. Figure 20 - Cover Removal Stage Side Cover Removal 1. Remove strip seals following strip seal removal procedure. 2. Remove the (2) M4 x.07 screws securing the side cover to the end caps. 3. Remove side cover by dropping it down so the lower lip clears the channel. Rockwell Automation Publication CHPS-UM001D-EN-P - July 2014 65 Chapter 10 Removing and Replacing Stage Components Strip Seal Replacement ATTENTION: Handle strip seal material with care. Strip seal has sharp edges that can cause personal injury if mishandled. 1. Remove power from unit and Lockout-Tagout the power source. 2. Follow the instructions below on how to measure, mark, and cut new strip seals. 1) Mark needed strip length. 3) Make two 45° marks to centerline. 2) Mark strip width centerline. 4) Use tin snips to cut along 45° marks. 3. Position slide at middle of travel. 4. Loosen end clamps and screws on one seal guide enough to expose center metal section of guide. 5. Thread new strip seal, point end first, through the seal guides, slide and end clamps. 6. Center and smooth strip seal against top cover and side panel magnetic strips. 7. With very light pressure hold the seal guide against the strip seal and tighten the seal guide. 8. Tighten only one end clamp. 9. Move the slide by hand through travel and make sure the strip seal seats smoothly against the cover and side panel magnet strips. Pulling against the tightened end clamp to help smooth the seal. 10. Once the seal lays flat and smooth against the top cover and side panel, tighten the second end clamp. 11. With the outside edge of the end clamps as a guide, use tin snips to cut and remove excess strip seal material. 66 Rockwell Automation Publication CHPS-UM001D-EN-P - July 2014 Removing and Replacing Stage Components Chapter 10 12. Position slide at the far ends of travel and re-adjust seal guide by inserting a 0.8 mm (0.015 in.) shim between seal guide and strip seal. Strip Seal Seal Guide 0.8 mm (0.015 in.) Shim 13. Return stage to service. Stage Cover Installation 1. Starting at the end cap with the magnetic warning label. Install (2) M3 x 25 SHCS and torque to 4 N•m (35 lbf•in). Make sure the cover makes contact with the end cap. 2. On the opposite end install (2) M3 x 30 SHCS and bottom out the screw. The cover does not contact the end cap on this side it floats on the screw. Side Cover Installation 1. Insert side cover into the stage base by holding it with the top slightly tilted outward and hooking bottom in the channel near bottom of the base. 2. Starting at the end cap with the magnetic warning label or the MP motor. Install (1) M4 x 0.7 x 30 LG SHCS and torque to 4 N•m (35 lb•in). Make sure the side cover makes contact with the end cap. 3. On the opposite end install (1) M4 x 0.7 x 30 LG SHCS and torque 2.26 N•m (20 lb•in). The side cover does not contact the end cap on this side. Rockwell Automation Publication CHPS-UM001D-EN-P - July 2014 67 Chapter 10 Removing and Replacing Stage Components Notes: 68 Rockwell Automation Publication CHPS-UM001D-EN-P - July 2014 Appendix A Specifications and Dimensions This appendix is a supplement to this document. Associated Kinetix publications listed in Additional Resources on page 9 and information in product specifications can supersede the information in this appendix. Topic Page Static and Static Moment Loads 70 Performance Specifications for 325V CHPS-Series Stage 70 Performance Specifications for 325V or 650V CHPS-Series Stage 71 Accuracy Specification for the CHPS-Series Stage 73 General Stage Specifications 73 Commutation Sensor 73 Limit Sensor Specification 73 PTC Thermistor Specifications 73 Encoder Specifications 74 Maximum Velocity for Allen-Bradley Drives 74 Environmental Specifications for CHPS-Series Stages 75 CHPS-Series Stage Travel versus Weight Specifications 75 CHPS-Series Stage Dimensions 77 CHPS-Series Stage Technical Specifications 83 Rockwell Automation Publication CHPS-UM001D-EN-P - July 2014 69 Appendix A Specifications and Dimensions Static and Static Moment Loads The figure depicts the Static and Static Moment Loads in the tables that follow. Table 6 - Static and Static Moment Loads on Linear Stages Pitch Moment Load Reverse Radial Force Load Radial Force Load Yaw Moment Load Roll Moment Load Lateral Force Load The static moment and force ratings shown in the tables are the maximum permissible values possible before permanent damage to the linear stage can occur. To determine the estimated L10 bearing and ball screw life of CHPS-Series Integrated Linear Stages, use Motion Analyzer software version 4.4 or later. Performance Specifications for 325V CHPS-Series Stage Maximum cable length 10 m (33 ft). Please contact Applications Engineering concerning application requiring longer cables. 70 Rockwell Automation Publication CHPS-UM001D-EN-P - July 2014 Specifications and Dimensions Appendix A Table 7 - Performance Specifications for 150 mm frame size CHPS-Series Linear Stages Cat. No. Slide Mass Continuous (1) (2) Peak Maximum Static Load(3) Current Thrust Current Thrust kg (lb) A rms (Ao-pk) N (lbf) A rms (Ao-pk) N (lbf) CHPS-A6xxxA-xLMxxx 4.64 (10.23) 2.3 (3.3) 80 (18) 7.0 (9.9) CHPS-A6xxxB-xLMxxx 6.48 (14.28) 4.7 (6.6) 160 (36) CHPS-A6xxxC-xLMxxx 6.48 (14.28) 2.3 (3.3) 160 (36) Max Static Moment Loads(3) Pitch Yaw Roll kN (lbf) kN (lbf) N•m (ft•lb) N•m (ft•lb) 239 (54) 38.0 (8722) 71 (52) 183 (134) 97 (71) 14.0 (19.9) 479 (108) 38.0 (8722) 128 (94) 327 (241) 97 (71) 7.0 (9.9) 479 (108) 38.0 (8722) 128 (94) 327 (241) 97 (71) (1) Measured at 20 °C (68 °F) ambient. (2) For covered and sealed stages derate by 10% (3) Values apply to bearing rating only. Contact Applications Engineering for structural considerations. Table 8 - Performance Specifications for 200 mm frame size CHPS-Series Linear Stages Cat. No. Slide Mass Continuous(1) (2) Peak Maximum Static Load(3) Current Thrust Current Thrust kg (lb) A rms (Ao-pk) N (lbf) A rms (Ao-pk) N (lbf) CHPS-A8xxxA-xLMxxx 4.59 (10.1) 2.1 (3.0) 72 (16) 6.3 (8.9) CHPS-A8xxxB-xLMxxx 6.58 (14.5) 4.2 (6.0) 144 (32) CHPS-A8xxxC-xLMxxx 6.58 (14.5) 2.1 (3.0) 144 (32) Max Static Moment Loads(3) Pitch Yaw Roll kN (lb) kN (lbf) N•m (ft•lb) N•m (ft•lb) 215 (48) 66 (14836) 171 9126) 412 (304) 270 (199) 12.6 (17.9) 431 (97) 66 (14836) 270 (199) 620 (457) 270 (199) 6.3 (8.9) 431 (97) 66 (14836) 270 (199) 620 (457) 270 (199) (1) Measured at 20 °C (68 °F) ambient. (2) For covered and sealed stages derate by 10%. (3) Values apply to bearing rating only, Contact Applications Engineering for structural considerations. Performance Specifications for 250 mm frame size CHPS-Series Linear Stages Cat. No. Slide Mass Continuous (1)(2) Peak Maximum Static Load(3) Current Thrust Current Thrust kg (lb) A rms (Ao-pk) N (lbf) A rms (Ao-pk) N (lbf) CHPS-A9xxxG-xLMxxx 8.58 (18.9) 1.9 (2.7) 109 (25) 5.8 (8.2) CHPS-A9xxxH-xLMxxx 9.62 (21.2) 3.8 (5.4) 219 (49) CHPS-A9xxxI-xLMxxx 9.62 (21.2) 1.9 (2.7) 219 (49) Max Static Moment Loads(3) Pitch Yaw Roll kN (lbf) kN (lbf) N•m (ft•lb) N•m (ft•lb) 328 (74) 93.6 (21042) 170 (125) 385 (283) 508 (375) 11.5 (16.3) 656 (147) 93.6 (21042) 324 (239) 734 (541) 508 (375) 5.8 (8.2) 656 (147) 93.6 (21042) 324 (541) 734 (541) 508 (375) (1) Measured at 20 °C (68 °F) ambient. (2) For covered and sealed stages derate by 10%. (3) Values apply to bearing rating only. Contact Applications Engineering for structural considerations. Performance Specifications for 325V or 650V CHPS-Series Stage Maximum cable length 10 m (33 ft). Please contact Applications Engineering concerning application requiring longer cables. Rockwell Automation Publication CHPS-UM001D-EN-P - July 2014 71 Appendix A Specifications and Dimensions Table 9 - Performance Specifications for 200 mm frame size CHPS-Series Linear Stages Cat. No. Slide Mass Continuous (1)(2) Peak Maximum Static Load(3) Current Thrust Current Thrust kg (lb) A rms (Ao-pk) N (lbf) A rms (Ao-pk) N (lbf) CHPS-x8xxxD-xLMxxx 5.64 (12.4) 3.1 (4.3) 132 (30) 8.3 (11.7) CHPS-x8xxxE-xLMxxx 8.34 (18.4) 6.2 (8.7) 265 (60) CHPS-x8xxxF-xLMxxx 8.34 (18.4) 3.1 (4.3) 265 (60) Max Static Moment Loads(3) Pitch Yaw Roll kN (lbf) kN (lbf) N•m (ft•lb) N•m (ft•lb) 302 (68) 66 (14836) 171 9126) 412 (304) 270 (199) 16.5 (23.3) 600 (135) 66 (14836) 270 (199) 620 (457) 270 (199) 8.2 (11.6) 600 (135) 66 (14836) 270 (199) 620 (457) 270 (199) (1) Measured at 20 °C (68 °F) ambient. (2) For covered and sealed stages derate by 10%. (3) Values apply to bearing rating only. Contact Applications Engineering for structural considerations. Performance Specifications for 250 mm frame size CHPS-Series Linear Stages Cat. No. Slide Mass Continuous (1)(2) Peak Maximum Static Load(3) Current Thrust Current Thrust kg (lb) A rms (Ao-pk) N (lbf) A rms (Ao-pk) N (lbf) CHPS-x9xxxJ-xLMxxx 11.54 (25.4) 3.0 (4.2) 385 (87) 8.1 (11.5) CHPS-x9xxxK-xLMxxx 9.69 (21.4) 3.0 (4.2) 193 (43) CHPS-x9xxxL-xLMxxx 11.54 (25.4) 6.0 (8.5) 385 (87) Pitch Yaw Roll kN (lbf) kN (lbf) N•m (ft•lb) N•m (ft•lb) 882 (198) 93.6 (21042) 170 (125) 385 (283) 508 (375) 8.1 (11.5) 441 (99) 93.6 (21042) 324 (239) 734 (541) 508 (375) 16.2 (22.9) 882 (198) 93.6 (21042) 324 (541) 734 (541) 508 (375) (1) Measured at 20 °C (68 °F) ambient. (2) For covered and sealed stages derate by 10%. (3) Values apply to bearing rating only. Contact Applications Engineering for structural considerations. 72 Max Static Moment Loads(3) Rockwell Automation Publication CHPS-UM001D-EN-P - July 2014 Specifications and Dimensions General Stage Specifications Appendix A The following sections contain general specifications. Accuracy Specification for the CHPS-Series Stage Repeatability Accuracy(1)(2)(3) Straightness and Flatness(3) μm (in.) μm (in.) μm (in.) CHPS-xxxxxx-FLMxxx ±1.0 CHPS-xxxxxx-GLMxxx ±1.5 ±3 μm/25 mm NTE ±10 μm/300 mm (±0.0001 in./1 in. NTE ±0.0004 in./12 in.) ±3 μm/25 mm NTE ±8 μm/300 mm (±0.0001 in./1 in. NTE ±0.0003 in./12 in.) CHPS-xxxxxx-HLMxxx ±2.0 CHPS-xxxxxx-ILMxxx Interpolation Dependent Cat. No (1) Non-cumulative. For higher performance or software error mapping, please contact Applications Engineering. (2) Accuracy specification is based upon a 5 kg test load, measured 35 mm above the center of the slide, fully supported on a granite surface. (3) Based upon a fully supported and clamped in place unit, mounted on a rigid surface with flatness of 0.012/300 x 300 mm, NTE 0.025 mm overall (0.0004/12 x 12 in., NTE 0.001 in. overall) Commutation Sensor Description Specifications Input Power 5…24V DC, 10 mA max. Output NPN, open collector, 10 mA max. Limit Sensor Specification Description Specifications Input Power 12…28V DC, 15 mA max. Output PNP, open collector, normally closed 50 mA max.sourcing PTC Thermistor Specifications Temp °C (°F) Resistance (Ohm) Up To 100 (212) Less than 750 Up To 105 (221) Less than 7500 Up To 110 (230) Greater than 10,000 Rockwell Automation Publication CHPS-UM001D-EN-P - July 2014 73 Appendix A Specifications and Dimensions Encoder Specifications Type Signal Specification Power Supply 5V DC ±5% Digital A/B/Index RS422 Differential Line Driver Analog Sine/Cosine 0.6…1.2V p-p Differential Analog Integral Index Mark Differential Pulse 0.8…1.3V p-p Contact Application Engineering for third party drives and controllers. The controls need to meet a minimum recommended counter clock frequency that varies with encoder type and resolution and required peak speed. IMPORTANT Maximum Velocity for Allen-Bradley Drives Table 10 - Maximum Velocity for 150 mm frame size CHPS-Series Linear Stages with Allen-Bradley Drives Incremental Encoder Option Maximum Velocity Digital Resolution Sine/Cosine Period Velocity, max Ultra™ 3000 and Ultra5000 Drives Kinetix 2000 and Kinetix 6000 Kinetix 6500 Drives Drive Kinetix 300 Drive μm/count μm m/s m/s m/s m/s m/s 1 — 5.0 4.0 4.0 1.5 2.0 0.5 — 3.0 2.0 2.0 0.7 — 0.1 — 0.7 0.5 — — — — 20 4.0 2.0 2.0 2.0 — Table 11 - Maximum Velocity for 200 and 250 mm frame size CHPS-Series Linear Stages with Allen-Bradley Drives Incremental Encoder Option Maximum Velocity Digital Resolution Sine/Cosine Period Velocity, max Ulta3000 and Ultra5000 Drives Kinetix 2000 and Kinetix 6500 Drives Kinetix 6000 Drive Kinetix 300 Drive μm/count μm m/s m/s m/s m/s m/s 1 — 5.0 4.0 4.0 1.5 2.0 0.5 — 3.0 2.0 2.0 0.7 — — — 2.0 — 0.1 — 0.7 0.5 0.5(1) — 20 4.0 2.0 2.0 (1) LC motor option only. 74 Rockwell Automation Publication CHPS-UM001D-EN-P - July 2014 Specifications and Dimensions Appendix A Environmental Specifications for CHPS-Series Stages Attribute Value Ambient temperature 0...40 °C (32...104 °F) Storage temperature -30...70 °C (-22...158 °F) Relative humidity 5…95% non-condensing Shock 20 g peak, 6 ms duration Vibration 0.1 grms @ Hz, 30…2000 Hz Cable carrier lifetime 10,000,000 cycles CHPS-Series Stage Travel versus Weight Specifications CHPS-Series Stage (150 mm frame size) Unit Mass 45 40 35 Mass (kg) 30 25 20 15 10 LZ-030-T-240-X LZ-030-T-120-D 5 960 840 720 600 480 360 240 120 0 Travel Length Rockwell Automation Publication CHPS-UM001D-EN-P - July 2014 75 Appendix A Specifications and Dimensions CHPS-Series Stage (200 mm frame size) Unit Mass 35 Mass (kg) 30 25 20 15 LC-050-100-D LZ-030-T-120-D 10 960 840 720 600 480 360 240 120 Travel Length Unit Mass 40 Mass (kg) 35 30 25 20 LC-050-200-X LZ-030-T-240-X 15 980 860 740 620 500 380 260 140 Travel Length CHPS-Series Stage (250 mm frame size) Unit Mass 70 60 Mass (kg) 50 40 30 LZ-050-T-240-X LZ-050-T-120-D LC-075-200-X LC-075-100-D 20 10 0 980 Rockwell Automation Publication CHPS-UM001D-EN-P - July 2014 860 76 740 620 500 380 260 140 Travel Length Specifications and Dimensions Appendix A Stage are designed to metric dimensions. Inch dimensions are conversions from millimeters. Dimensions without tolerances are for reference. CHPS-Series Stage Dimensions Figure 21 - CHPS-A6xxxA-xLMxxx (4X) M6 x 1.0-6H 12.0 (0.47) 30.5 (1.20) Mechanical Overtravel Slide 239 (9.41) 25.0 (0.98) Travel 165 (6.50) 25.0 (0.98) 30 (1.18) 167 (6.57) 165 (6.50) (4X) Ø 7.0 (0.28) See Detail A 46.8 (1.84) 238.6 (9.39) 181.5 (7.15) 30.5 (1.20) Mechanical Overtravel 115 (4.53) 45.0 (1.80) Thru Pilot Hole 120 (4.72) Toe Clamp/T-Nut Spacing 62 (2.44) (4X) M10 x 1.5-6H Thru (2 per end cap) Access point for lubricating linear bearings. Provision to use lifting hooks (not provided). 350.0 + Travel (13.87) Ground Screw M5 x 0.8-6H 123.8 (4.88) 8.5 (0.33) 32.0 (1.26) 30.0 (1.18) 92.0 (3.62) 150 (5.9) Detail A 7.6 (0.30) Bracket located ±51 (2.0) from center of travel. 9.3 (0.37) Depth, max Toe Clamp is standard for covered stages. Mount to base using M6 x1.0 socket cap screw. T-Nut Mount to base using M6 x1.0 hardware (optional accessory). Travel Length mm (in.) Shortest 60 (2.36) Increments 60 (2.36) Longest 1620 (63.78) Rockwell Automation Publication CHPS-UM001D-EN-P - July 2014 77 Appendix A Specifications and Dimensions Figure 22 - CHPS-A6xxxB/C-xLMxxx (4X) M6 x 1.0-6H 12.0 (0.47) 30.5 (1.20) Mechanical Overtravel Slide 339 (13.35) 165 (6.50) 25.0 (0.98) Travel 25.0 (0.98) 87 (3.42) 167 (6.57) 165 (6.50) (4X) Ø 7.0 (0.28) See Detail A 46.8 (1.84) 238.6 (9.39) 181.5 (7.15) 45.0 (1.80) Thru Pilot Hole 130 (5.12) 120 (4.72) Toe Clamp/T-Nut Spacing 104.5 (4.11) (4X) M10 x 1.5-6H Thru (2 per end cap) Access point for lubricating linear bearings. Provision to use lifting hooks (not provided). 450.0 + Travel (17.71) Ground Screw M5 x 0.8-6H 123.8 (4.88) 8.5 (0.33) 32.0 (1.26) 30.0 (1.18) 92.0 (3.62) 150 (5.9) Detail A 7.6 (0.30) Bracket located ±51 (2.0) from center of travel. 9.3 (0.37) Depth, max Toe Clamp is standard for covered stages. Mount to base using M6 x1.0 socket cap screw. 78 30.5 (1.20) Mechanical Overtravel T-Nut Mount to base using M6 x1.0 hardware (optional accessory). Travel Length mm (in.) Shortest 60 (2.36) Increments 60 (2.36) Longest 1560 (61.42) Rockwell Automation Publication CHPS-UM001D-EN-P - July 2014 Specifications and Dimensions Appendix A Figure 23 - CHPS-x8xxxA/D-xLMxxx (4X) M8 x 1.25-6H 12.0 (0.47) (4X) Ø 6.8 (0.27) 45.2 (1.78) Thru (2X) Ø 5.5 (0.22) Thru Pilot Hole 25.4 (1.0) Mechanical Overtravel Slide 239 (9.41) 25.4 (1.0) 28.0 (1.10) 25.4 (1.0) Mechanical Overtravel 25.4 (1.0) Travel 130.8 (5.15) 44 (1.72) 215.7 (8.49) 216.7 (8.53) 166.6 (6.56) 55.4 (2.18) See Detail A 46.8 (1.84) 120 (4.72) Ø 5.8 (0.23) Thru Ø 9.7 (0.38) Thru 14.2 (0.56) (4X) M10 x 1.5-6H Thru (2 per end cap) Access point for lubricating linear bearings. Provision to use lifting hooks (not provided). 288.9 (11.38) 232 (9.13) 120 (4.72) Toe Clamp/ Square Nut Spacing 56 (2.20) 340 + Travel (13.4) Ground Screw M5 x 0.8-6H 8.5 (0.33) 37.8 (1.49) 105.5 (4.15) 30.0 (1.38) 130.8 (5.15) 200 (7.9) Detail A Toe Clamp is standard for covered stages. Mount to base using M6 x1.0 socket cap screw. 5.2 (0.206) Bracket located ±51 (2.0) from center of travel. 6.0 (0.24) Depth, max Square Nut Mount to base using M6 x1.0 hardware (optional accessory). Travel Length mm (in.) Shortest 60 (2.36) Increments 60 (2.36) Longest 1680 (66.14) Rockwell Automation Publication CHPS-UM001D-EN-P - July 2014 79 Appendix A Specifications and Dimensions CHPS-x8xxxB/C/E/F-xLMxxx (4X) M8 x 1.25-6H 12.0 (0.47) (4X) Ø 6.8 (0.27) 45.2 (1.78) Thru (2X) Ø 5.5 (0.22) Thru Pilot Hole 25.4 (1.0) Mechanical Overtravel Slide 339 (13.35) 25.4 (1.0) 28.0 (1.10) 25.4 (1.0) Mechanical Overtravel 25.4 (1.0) Travel 130.8 (5.15) 104 (4.09) 215.7 (8.49) 216.7 (8.53) 166.6 (6.56) 55.4 (2.18) See Detail A 46.8 (1.84) Ø 5.8 (0.23) Thru Ø 9.7 (0.38) Thru 14.2 (0.56) (4X) M10 x 1.5-6H Thru (2 per end cap) Access point for lubricating linear bearings. Provision to use lifting hooks (not provided). 288.9 (11.38) 232 (9.13) 120 (4.72) Toe Clamp/ Square Nut Spacing 116.3 (4.58) 120 (4.72) 440 + Travel (17.35) Ground Screw M5 x 0.8-6H 8.5 (0.33) 37.8 (1.49) 30.0 (1.38) 130.8 (5.15) 200 (7.9) Detail A Toe Clamp is standard for covered stages. Mount to base 80 105.5 (4.15) 5.2 (0.206) Bracket located ±51 (2.0) from center of travel. 6.0 (0.24) Depth, max Square Nut Mount to base using M6 x1.0 hardware Travel Length mm (in.) Shortest 80 (3.15) Increments 60 (2.36) Longest 1580 (62.2) Rockwell Automation Publication CHPS-UM001D-EN-P - July 2014 Specifications and Dimensions Appendix A Figure 24 - CHPS-x9xxxG/J-xLMxxx (4X) M8 x 1.25-6H 12.0 (0.47) (4X) Ø 6.8 (0.27) 45.2 (1.78) Thru 25.4 (1.0) Mechanical Overtravel 28.0 (1.10) 264.7 (10.42) 25.4 (1.0) 46.8 (1.84) 8.5 (0.33) 38.3 (1.51) 281 (11.06) 120 (4.72) 25.4 (1.0) 56.2 (2.22) 120 (4.72) Toe Clamp/T-Nut Spacing Ø 5.8 (0.23) Thru Ø 9.7 (0.38) Thru 14.2 (0.56) 380.6 + Travel (14.96) Ground Screw M5 x 0.8-6H 105.4 (4.15) 30.0 (1.18) 172.2 (6.78) 249 (9.8) 44 (1.73) 25.4 (1.0) Mechanical Overtravel 265.7 (10.46) (4X) 9/16-12 UNC Thru (2 per end cap) Access point for lubricating linear bearings. Provision to use lifting hooks (not provided). 338.14 (13.31) Travel 208.6 (8.21) 55.4 (2.18) See Detail A (2X) Ø 5.5 (0.22) Thru Pilot Hole Slide 279 (10.98) 130.8 (5.15) Detail A 5.6 (0.22) Toe Clamp is standard for covered stages. Mount to base using M6 x1.0 socket cap screw. Bracket located ±51 (2.0) from center of travel. 6.5 (0.26) Depth, max T-Nut Mount to base using M6 x 1.0 hardware (optional accessory). Travel Length mm (in.) Shortest 80 (3.15) Increments 60 (2.36) Longest 1640 (64.6) Rockwell Automation Publication CHPS-UM001D-EN-P - July 2014 81 Appendix A Specifications and Dimensions Figure 25 - CHPS-x9xxxH/I/K/L-xLMxxx (4X) M8 x 1.25-6H 12.0 (0.47) (4X) Ø 6.8 (0.27) 45.2 (1.78) Thru 28.0 (1.10) 264.7 (10.42) 25.4 (1.0) 46.8 (1.84) 8.5 (0.33) 38.3 (1.51) 281 (11.06) 25.4 (1.0) 116 (4.58) 120 (4.72) Toe Clamp/T-Nut Spacing Ø 5.8 (0.23) Thru Ø 9.7 (0.38) Thru 14.2 (0.56) 440.6 + Travel (17.35) Ground Screw M5 x 0.8-6H 105.4 (4.15) 30.0 (1.18) Detail A 5.6 (0.22) Toe Clamp is standard for covered stages. Mount to base using M6 x1.0 socket cap screw. 82 120 (4.72) 172.2 (6.78) 249 (9.8) 104 (4.09) 25.4 (1.0) Mechanical Overtravel 265.7 (10.46) (4X) 9/16-12 UNC Thru (2 per end cap) Access point for lubricating linear bearings. Provision to use lifting hooks (not provided). 338.14 (13.31) Travel 208.6 (8.21) 55.4 (2.18) See Detail A (2X) Ø 5.5 (0.22) Thru Pilot Hole Slide 339 (13.35) 130.8 (5.15) 25.4 (1.0) Mechanical Overtravel Bracket located ±51 (2.0) from center of travel. 6.5 (0.26) Depth, max T-Nut Mount to base using M6 x 1.0 hardware (optional accessory). Travel Length mm (in.) Shortest 80 (3.15) Increments 60 (2.36) Longest 1580 (62.2) Rockwell Automation Publication CHPS-UM001D-EN-P - July 2014 Specifications and Dimensions CHPS-Series Stage Technical Specifications Cat. No. Appendix A Use this specification to make stage dependent calculations. Total Moving Mass Coil Resistance (p - p) Force Constant @25 °C (77 °F) @100 °C (212 °F) kg (lb) Ohms Ohms N/A 0 - peak (lbf/A 0 - peak) CHPS-A6xxxA-xLMxxx 5.39 (11.85) 7.2 9.3 24.1 (5.42) CHPS-A6xxxB-xLMxxx 7.09 (15.6) 3.6 4.6 24.1 (5.42) CHPS-A6xxxC-xLMxxx 7.09 (15.6) 14.3 18.6 48.2 (10.83) CHPS-A8xxxA-xLMxxx 6.70 (14.73) 7.2 9.3 24.1 (5.42) CHPS-A8xxxB-xLMxxx 8.87 (19.52) 3.6 4.6 24.1 (5.42) CHPS-A8xxxC-xLMxxx 8.87 (19.52) 14.3 18.6 48.2 (10.83) CHPS-x8xxxD-xLMxxx 7.57 (16.65) 3.8 4.9 30.3 (6.81) CHPS-x8xxxE-xLMxxx 10.23 (22.5) 1.9 2.4 30.3 (6.81) CHPS-x8xxxF-xLMxxx 10.23 (22.5) 7.5 9.8 60.7 (13.64) CHPS-A9xxxG-xLMxxx 8.56 (18.84) 9.4 12.2 40.2 (9.04) CHPS-A9xxxH-xLMxxx 10.70 (23.53) 4.7 6.1 40.2 (9.04) CHPS-A9xxxI-xLMxxx 10.70 (23.53) 18.8 24.5 80.4 (18.07) CHPS-x9xxxJ-xLMxxx 10.02 (22.04) 4.9 6.4 45.5 (10.29) CHPS-x9xxxK-xLMxxx 13.16 (28.95) 2.5 3.2 45.5 (10.29) CHPS-x9xxxL-xLMxxx 13.16 (28.95) 9.9 12.8 91.0 (20.46) Rockwell Automation Publication CHPS-UM001D-EN-P - July 2014 83 Appendix A Specifications and Dimensions Notes: 84 Rockwell Automation Publication CHPS-UM001D-EN-P - July 2014 Appendix B Accessories Topic Page Interconnect Cables 85 Installation, Maintenance, and Replacement Kits 87 Power Cable Dimensions (catalog number 2090-XXNPMF-16Sxx) Interconnect Cables The maximum cable length of 10 m (32.8 ft). Dimensions are in mm (in.) Brown Black Cable Shield (overall) 75 (2.9) Blue Green/Yellow BR+ BR- 75 (2.9) Start of Bend Radius 28.0 (1.1) Bend Radius1 Cable Shield (for brake wires, not used for linear motor stages) 142 (5.59) E H F L Connector Diameter C G 16 AWG BROWN 16 AWG BLACK 16 AWG BLUE 16 AWG GRN/YEL 18 AWG WHITE 18 AWG BLACK 18 AWG WHITE 18 AWG RED A B C 14.0 (0.55) F G E H L B A Cable Diameter U V W BR+ BR 1 2 SHIELD 1 Bend radius (BR) is the specified minimum bend radius for cable assemblies. For standard cable, BR is a one-time flex application. Flex cables have a much higher BR to withstand flex applications. BR can vary on user-fabricated cables. Pin Gauge Color Signal Designation A 16 Brown U B 16 Black V C 16 Blue W GND 16 Green/Yellow GND Rockwell Automation Publication CHPS-UM001D-EN-P - July 2014 85 Appendix B Accessories Pin Gauge Color Signal Designation F 18 White BR+ G 18 Black BR- E 18 White 1 H 18 Red 2 L N/A N/A N/A Not used for CHPS Stages SHIELD Feedback Cable Dimensions (catalog number 2090-XXNFMF-Sxx) The maximum cable length of 10 m (32.8 ft). 54 (2.1) Start of Bend Radius Dimensions are in mm (in.) 57 (2.2) Bend Radius 1 99 (3.9) 26 (1.0) Connector Diameter 1 12 11 16 10 2 13 9 3 14 15 8 17 4 7 5 6 10 (0.4) Cable Diameter 1 2 3 4 5 6 9 10 11 13 14 15 16 17 7 8 12 A+ AB+ BI+ I+5V COM +9V TS+ TS S1 S2 S3 MTR RRAME ABS COM 28 AWG BLACK 28 AWG WHITE/BLACK 28 AWG RED 28 AWG WHITE/RED 28 AWG GREEN 28 AWG WHITE/GREEN 16 AWG GRAY 16 AWG WHITE/GRAY 22 AWG ORANGE 22 AWG WHITE/ORANGE 28 AWG BLUE 28 AWG WHITE /BLUE 28 AWG YELLOW 28 AWG WHITE/YELLOW 28 AWG BROWN 28 AWG WHITE/BROWN DRAIN 1 Bend radius (BR) is the specified minimum bend radius for cable assemblies. For standard cable, BR is a one-time flex application. Flex cables have a much higher BR to withstand flex applications. BR can vary on user-fabricated cables. 86 Rockwell Automation Publication CHPS-UM001D-EN-P - July 2014 Accessories Installation, Maintenance, and Replacement Kits Appendix B Accessories available for installing stages, replacing items, and performing maintenance at regular intervals are listed in the tables that follow. Accessories Description Cat. No Comments Grease Pump Maintenance Kit MPAS-GPUMP Includes grease pump, one grease cartridge, and all necessary tips. Grease Cartridge MPAS-CART Refill cartridge for grease pump. Toe Clamp Installation Kit MPAS-TOE 10 toe clamps per package Tee Nut Installation Kit MPAS-6-TNUT 10 Tee nuts per package MPAS-8-TNUT MPAS-9-TNUT Cable Carrier Modules Strip Seal Replacement Kits Side Covers Replacement Kit Top Cover Replacement Kit MPAS-6xxxB-CABLE xxx = cm stroke: 012, 018, 024, 030, 036, 042, 054, 066, 078, 090, 102, or 114 MPAS-8xxxE-CABLE xxx = cm stroke: 014, 020, 026, 032, 038, 044, 056, 068, 080, 092, 104, 128, 152, 176, or 194 MPAS-9xxxK-CABLE xxx = cm stroke: 014, 020, 026, 032, 038, 044, 056, 068, 080, 092, 104, 128, 152, 176, or 194 MPAS-6xxxB-SEAL xxx = cm stroke: 012, 018, 024, 030, 036, 042, 054, 066, 078, 090, 102, or 114 MPAS-8xxxE-SEAL xxx = cm stroke: 014, 020, 026, 032, 038, 044, 056, 068, 080, 092, 104, 128, 152, 176, or 194 MPAS-9xxxK-SEAL xxx = cm stroke: 014, 020, 026, 032, 038, 044, 056, 068, 080, 092, 104, 128, 152, 176, or 194 MPAS-6xxxB-SIDE xxx = cm stroke: 012, 018, 024, 030, 036, 042, 054, 066, 078, 090, 102, or 114 MPAS-8xxxE-SIDE xxx = cm stroke: 014, 020, 026, 032, 038, 044, 056, 068, 080, 092, 104, 128, 152, 176, or 194 MPAS-9xxxK-SIDE xxx = cm stroke: 014, 020, 026, 032, 038, 044, 056, 068, 080, 092, 104, 128, 152, 176, or 194 MPAS-6xxxB-TOP xxx = cm stroke: 012, 018, 024, 030, 036, 042, 054, 066, 078, 090, 102, or 114 MPAS-8xxxE-TOP xxx = cm stroke: 014, 020, 026, 032, 038, 044, 056, 068, 080, 092, 104, 128, 152, 176, or 194 MPAS-9xxxK-TOP xxx = cm stroke: 014, 020, 026, 032, 038, 044, 056, 068, 080, 092, 104, 128, 152, 176, or 194 Rockwell Automation Publication CHPS-UM001D-EN-P - July 2014 87 Appendix B Accessories Notes: 88 Rockwell Automation Publication CHPS-UM001D-EN-P - July 2014 Appendix C Stacking Stages This appendix provides information about center-stacked stage configurations. Stage Stacking Topic Page Stage Stacking 89 Specifications for Stacked Stages 90 Certain combinations of MPAS linear stages are designed to be stacked on top of one another. Stacking forms an X-Y axis arrangement. A center-stack arrangement mounts the top axis in the middle of the bottom axis. The top stage is centered on the bottom stage. Table 12 - Stacking Stages The MPAS-x6xxxx is capable of mounting to the top of another MPAS-x6xxxx by bolting through toe-clamps to the slide on the bottom stage. The MPAS-x8xxxx is capable of mounting to the top of either a MPAS-x8xxxx or a MPAS-x9xxxx by bolting through the slide on the bottom stage and into T-nut slots on the top stage. Rockwell Automation Publication CHPS-UM001D-EN-P - July 2014 89 Appendix C Stacking Stages Specifications for Stacked Stages Linear stage specifications are based on mounting the stage to a precision base along the entire length of the stage, and MPAS stage specifications follow this convention. In the case of stacked stages, the top axis is no longer supported along its entire length, and this alters both the precision and the load carrying capability of that stage. Furthermore, linear stage specifications are based on a specified test payload with a low center of gravity that is centered on the carriage. Deviations from the test payload condition can impact the performance of both the top and bottom linear stages. The following table provides information about the payload that the top stage, or axis, can carry without derating the life of its bearings from those specified for the same stage mounted as a single-axis stage on a precision base. Table 13 - Centered Stack Combinations Not Requiring Derating Catalog Numbers of Centered Stack Linear Stages Y-axis Travel Mass of Payload (1) MPAS-x6xxxx on MPAS-x6xxxx Ball Screw or Direct Drive 300 10.0 kg (22 lb) MPAS-x8xxxx on MPAS-x8xxxx Direct Drive MPAS-x8xxxx on MPAS-x9xxxx Direct Drive MPAS-x8xxxx on MPAS-x8xxxx Ball Screw MPAS-x8xxxx on MPAS-x9xxxx Ball Screw 420 8.0 kg (17.6 lb) 540 5.0 kg (11 lb) 660 4.0 kg (8.8 lb) 320 14.0 kg (30.8 lb) 560 6.5 kg (14.3 lb) 800 3.0 kg (6.6 lb) 320 14.0 kg (30.8 lb) 560 6.5 kg (14.3 lb) 800 3.0 kg (6.6 lb) 300 14.0 kg (30.8 lb) 540 6.5 kg (14.3 lb) 780 3.0 kg (6.6 lb) 300 14.0 kg (30.8 lb) 540 6.5 kg (14.3 lb) 780 3.0 kg (6.6 lb) (1) Payload is based solely on bearing and structure limitations. For other stacking arrangements, please contact Rockwell Automation Application Engineering. 90 Rockwell Automation Publication CHPS-UM001D-EN-P - July 2014 Appendix D Start-up Guide for CHPS-Series Stage with Ultra3000 Drive and Ultraware Software This appendix is a supplement to CHPS-Series stage and Kinetix drive manuals. The information in the current product manuals supersedes this appendix. Using This Appendix Topic Page Using This Appendix 91 Wiring the CHPS-Series Stage to the Ultra3000 Drive 91 Linear Motor File Parameters 92 Creating a CHPS-Series Stage Motor File 92 Recommended Start-up Sequence 94 CHPS-Series Stage and Ultra3000 Drive Troubleshooting Reference 96 Reference Information 99 This appendix is for use with CHPS-Series stages. This document addresses CHPS-Series stage-motor file parameter values and commutation wiring. Basic start-up test procedures and troubleshooting information is also given. IMPORTANT Wiring the CHPS-Series Stage to the Ultra3000 Drive Motor, commutation, feedback parameters, and wiring affect commutation, and must be correct for proper motor-drive operation. Improper setup can cause stage control problems including erratic behavior, bad spots, runaway, and thermal failure. The CHPS-Series stage has four termination options. The Kinetix/MPF option is recommended for plug & play to Kinetix and Ultra family servo drives. Kinetix MPF interconnect cable makes it easy to wire the stage and set-up commutation with the Ultra3000 Drive. The wiring for non-Logix Ultra3000 drives and Logix® version Ultra3000 drives are the same. If you are not using Kinetix/MPF termination option, properly wire the stage to the Ultra drive by using the following connectivity information. Refer to the CHPS-Series Stage Connector Data for additional information. Rockwell Automation Publication CHPS-UM001D-EN-P - July 2014 91 Appendix D Start-up Guide for CHPS-Series Stage with Ultra3000 Drive and Ultraware Software Connector Data Summary CHPS-Series Stage Signal Designation Motor phase U Motor phase V Motor phase W Encoder A+ (digital) or Sin+ (analog) Encoder A - (digital) or Sin - (analog) Encoder B+ (digital) or Cos+ (analog) Encoder B - (digital) or Cos - (analog) Hall S1 Hall S2 Hall S3 Linear Motor File Parameters Ultra3000 Drive Terminal or Pin U V W CN2-1 CN2-2 CN2-3 CN2-4 CN2-12 CN2-13 CN2-8 Signal Designation Motor phase U Motor phase V Motor phase W Encoder A+ (digital) or Sin+ (analog) Encoder A - (digital) or Sin - (analog) Encoder B+ (digital) or Cos+ (analog) Encoder B - (digital) or Cos - (analog) Hall S1 Hall S2 Hall S3 The following guide supplements the information found in the Ultra3000 drive manuals. Some of the motor parameters are critical for commutation and motor protection. Incorrect entry of theses motor parameters can cause motor problems, Ultraware assumes a linear motor is functionally equivalent to a rotary motor. However, the functional equivalent to a rotary motor is a complete linear motor driven stage. To account for the difference, the parameters highlighted in bold in the Linear Motor Parameter File (.mdb extension) table shown below must be adjusted to stage level specifications. Creating a CHPS-Series Stage Motor File Complete CHPS-Series stage motor specifications are in the linear motor specifications information contained in this manual or the motor’s data sheet. Identify the stage motor option for your CHPS-Series stage and use the corresponding data. Conversion Factors: • Ultra3000 drive ampere units are measured at the peak of the sine wave, not RMS. Standard CHPS-Series stage motors are rated both ways. Be sure to select the correct value. If necessary, use the following conversion. ampere peak = 1.4 x RMS 92 Rockwell Automation Publication CHPS-UM001D-EN-P - July 2014 Start-up Guide for CHPS-Series Stage with Ultra3000 Drive and Ultraware Software Appendix D • All Ultra drive electrical parameters are defined phase-to-phase. Standard CHPS-Series stage motors are specified phase-to-phase. If necessary, use the following conversion. phase-to-phase = 2 x phase-to-neutral Table 14 - Linear Motor Parameter File (.mdb extension) Parameter Units Enter Comment Force Constant N/A0-peak Motor’s linear region force constant Convert if necessary. Standard CHPS-Series stage motors specify the correct unit value. Mass kg Motor model coil mass Standard CHPS-Series stages are intended for moving coil (slide) use. Electrical Cycle Length m 0.05 for LC motors or 0.06 for LZ motors Standard CHPS-Series stage motors specify the electrical cycle length in mm. Electrical cycle equals 2 x magnet pitch. Resistance Ohms Motor’s cold resistance Phase-to-phase directly from motor specifications. Inductance mH Motor’s inductance Phase-to-phase directly from motor specifications. Rated Voltage V AC Drive’s input AC voltage. LC motors are rated up to 460V AC. LZ motors are rated up to 230V AC. For stages with 0.1 um encoder option, the maximum drive input is 115V AC. Flux Saturation table — — Leave default values. Maximum Speed m/s Lowest maximum velocity Choose the lowest maximum velocity between the encoder or the application restriction. The encoder maximum velocity for the Ultra3000 drive is found in the CHPS-Series stage specifications. Intermittent Current: A0-peak Motor’s peak current rating Use the motor rating in the CHPS-Series Stage Selection Guide. Do not use the values from the Motor Product Profile. The CHPS-Series LZ motors are restricted to 3x continuous current. Consult with an application engineer if you are considering increasing this value. Continuous Current A0-peak Motor’s continuous current rating Use the motor rating in the CHPS-Series Stage Selection Guide. Do not use the values from the Motor Product Profile. For CHPS-Series stages with cover and seals option, derate the base value by 10%. Max Current Boost — 0% For standard CHPS-Series stages without forced cooling. Encoder Type — Select applicable type per CHPSSeries stage option code Use Incremental for digital encoder or Sine/Cosine for analog encoder. Sine/Cosine requires additional set up per the Ultra3000 Drive manual. Commutation Type — Sinusoidal Startup Type — Desired commutation mode The recommended and default setting Hall Inputs and has no motion on startup. For self-sensing, refer to the section on Self-Sensing Commutation and Startup. Hall Input Offset degrees 0 For standard CHPS-Series stage motor models. Lines/Meter — lines/m Enter the encoder lines per meter of travel. Lines are pre-quadrature resolution. Alternatively, for incremental encoders, calculate the counts/meter and divide by 4 to get lines/meter. Following are the values for the standard CHPS-Series stage encoders: 250,000 1 μm/count incremental 500,000 0.5 μm/count incremental 2,500,000 0.1 μm/count incremental 12,500 Analog sin/cos, 20 μm period Integral Limits — Unchecked For the standard CHPS-Series stage limits option. The standard limits option is not compatible with the CN2 input circuit that expects an NPN open collector limit signal. Integral Thermostat — Check For the standard CHPS-Series stage motor options. The PTC thermistor signal is compatible with the Ultra3000 drive thermal input circuit. Except for very earliest Ultra Drives. Rockwell Automation Publication CHPS-UM001D-EN-P - July 2014 93 Appendix D Start-up Guide for CHPS-Series Stage with Ultra3000 Drive and Ultraware Software Table 14 - Linear Motor Parameter File (.mdb extension) Parameter Units Enter Comment Software Protection — — — Thermal Protection Rth(w-a) ºC /W Calculate The thermal resistance with the winding at ambient temperature: For LC motors, enter the rated thermal resistance value, multiply by 1.1 for covered and sealed stages. For 150 frame stage that use only LZ motor, enter the rated thermal resistance value. For 200 and 250 frame stages: LZ motors, enter 1.1x the rated thermal resistance value. In addition for all stages with LZ motors, multiply this value again by 1.1 for a covered and sealed stage. Thermal Protection Cth(w-a) W/s/ ºC Calculate Energy absorption: Cth = tm/Rth where tm is the motor's thermal time constant in seconds. Leave the value as found if a valid LC or LZ file is used. If necessary, use the following tm values based on the heat sink size and cooling method: LC motors: tm = 1800 (seconds) LZ motors: tm = 1200 (seconds) Recommended Start-up Sequence Follow these steps for optimal motor commutation, performance, overcurrent, and overtemperature protection. 1. Set General Axis Parameters (.udb file extension) a. Auto Motor Iden = disabled for linear motors. b. Motor Model: select as needed. c. Total Moving Mass in kg = coil mass or magnet mass + moving structure mass+ moving cable assembly mass + customer load. d. Current Limits in Amperes peak - set as needed for the application. The drive uses the lowest value between the drive rating and the motor rating. e. Display Precision - Set to 2 decimal places. f. User Current Fault in Amperes peak - this is the continuous current. Set as needed for the application. The drive uses the lowest value between drive rating and the motor rating. To avoid nuisance tripping of the fastacting protection, it can need to be set slightly higher. 2. Follow instructions from the standard drive manual and other applicable documentation. Pay special attention to electrical noise control by using cable shielding, shield termination, grounding, and bonding. 3. Wiring must match the CHPS-Series stage and Ultra drive connectivity table provided on page 92. Incorrect wiring or Hall offset combinations can result in motor motion that has excessive force ripple and increased current, temperature, or reduced force per unit of current. 4. Verify that the correct motor file is selected or correct custom motor parameter values are entered. 5. User Current Fault parameter - this value must not exceed the CHPSSeries stage motor’s continuous current rating. 94 Rockwell Automation Publication CHPS-UM001D-EN-P - July 2014 Start-up Guide for CHPS-Series Stage with Ultra3000 Drive and Ultraware Software Appendix D 6. Current Limit parameters - the positive and negative current limit, must not exceed the CHPS-Series stage motor’s intermittent current rating. Set per the application requirements. 7. Verify correct encoder polarity and test distance count. Encoder must count in positive direction when CHPS-Series stage is moving in the positive stage direction as shown in Stage Positive Direction on page 48. Also see CHPS-Series Stage and Ultra3000 Drive Troubleshooting Reference on page 96. Incorrect encoder sequencing can cause a runaway motor condition or incorrect commutation. 8. Perform Commutation Diagnostics only if enough free +/- travel distance is available. You can guarantee optimal commutation only by doing oscilloscope verification. You can use the following checks for non-optimal commutation verification. These tests cannot detect bad spots and other anomalies. • Use Current Control Panel mode to give a small positive current command. Verify the stage moves in the positive direction. • Check for consistent force resistance over whole travel by pushing the slide to multiple locations. • Check that the amount of current to move the load and overcome friction forces at a low steady speed are correct. • The motor’s force constant (Kf ) can also be verified with a force gauge. The Ultraware software command units for current scaling are in A0-peak/V. 9. When current mode tests successfully, perform auto velocity or manual velocity tuning with the Ultraware oscilloscope function, do this even if you are using current mode to control your application. This further evaluates commutation and check for a good step response. Rockwell Automation Publication CHPS-UM001D-EN-P - July 2014 95 Appendix D Start-up Guide for CHPS-Series Stage with Ultra3000 Drive and Ultraware Software CHPS-Series Stage and Ultra3000 Drive Troubleshooting Reference The section contains troubleshooting reference for the CHPS-Series stage and Ultra3000 drive combination. Positive Phasing Direction Positive stage direction = slide moving towards junction box or cable exit end as shown here. Slide End Cap + Slide = Slide Assembly (-) (+) Positive Direction Encoder Counting Polarity Encoder must count in positive direction when moving in the positive direction. IMPORTANT 96 Incorrect encoder sequencing can cause a runaway motor condition or incorrect commutation. Rockwell Automation Publication CHPS-UM001D-EN-P - July 2014 Start-up Guide for CHPS-Series Stage with Ultra3000 Drive and Ultraware Software Appendix D Oscilloscope Verification Correct stage and Ultra3000 drive wiring yields the phase relationship shown in Hall Oscilloscope Diagram. Figure 26 - Hall Oscilloscope Diagram S1 S2 S3 0° 60° 120° 180° 240° 300° 360° • Data capture direction - stage positive phasing direction as shown in Positive Phasing Direction on page 96. • S1 leads S2 leads S3, 120° electrical spacing. • For standard stages have following phase relationship: S1 in phase with W-U S2 in phase with U-V S3 in phase with V-W • Hall probe GND to Hall common and, for W-U for example, coil probe tip = W and probe GND = U • If wiring is correct the causes for incorrect phasing are: – non-standard coil or Hall assembly – coil electrical problem – Hall module electrical or mechanical problem Rockwell Automation Publication CHPS-UM001D-EN-P - July 2014 97 Appendix D Start-up Guide for CHPS-Series Stage with Ultra3000 Drive and Ultraware Software Oscilloscope Diagram for Ultra3000 Drive Motor with Hall offset = 0° While moving slide in positive direction. BEMF Hall 0° 60° 120° 180° 240° Ultra Drive phasing pairs: S1 vs. W-U S2 vs. U-V Ultra3000 Drive S3 vs. V-W 98 Rockwell Automation Publication CHPS-UM001D-EN-P - July 2014 300° 360° Start-up Guide for CHPS-Series Stage with Ultra3000 Drive and Ultraware Software Reference Information Appendix D Refer to these sections for information about the following: • Commutation Diagnostics Utility • Self-sensing Commutation and Startup • Main Screen Setup • Motor Screen • Motor Screen • Faults Screen Commutation Diagnostics Utility This test utility is intended for custom motors that do not have verified optimal phasing information. It can be used instead of the Ultraware oscilloscope based phasing method given in the Ultra3000 Drive Manual (1). The test utility can make false recommendations if the test set-up current level is too low, or an obstruction is encountered during the test motion. The CHPS-Series stage wiring must not deviate from the standard wiring. Do not use the utility if the free travel distance of the application is less than the required ± test motion. These are the pre-test requirements. 1. Check for mechanical problems with the stage assembly. 2. Use a test current value high enough to overcome non-acceleration forces of stiction and friction, cable drag, magnetic attraction. A typical value used is 15…20%. But values as high as 40% can be necessary. 3. Verify the free travel range from motor starting position is at least two magnet pitches or 1 electrical cycle, in the negative direction, and four magnet pitches or 2 electrical cycles, in the positive direction. (1) The phasing diagram in the drive manual is for phase-to-neutral measurements. This requires use of a balanced resistor Y network to create a virtual neutral. Alternatively, the phase-to-phase diagrams and procedures in the Ultra 100/200 can be used because they are equivalent to each other after the phase shift correction is made. Rockwell Automation Publication CHPS-UM001D-EN-P - July 2014 99 Appendix D Start-up Guide for CHPS-Series Stage with Ultra3000 Drive and Ultraware Software Self-sensing Commutation and Startup This type of commutation does not use the Hall effect sensor. Motors with a Hall effect sensor connection can be set to self-sensing commutation, the Hall effect signals are ignored. Self-sensing start-up is not commutation diagnostics. You can perform commutation diagnostics at any time on Hall effect or self-sensing motors. Self-sensing start-up refers to the motor motion initialization that is executed automatically after every power-up and enabling of the system. It synchronizes the arbitrary encoder position or count to the drive’s initial commutation angle. This is the self-sensing start-up sequence: • Enable is activated. • Motor locks into detent or zero force position > up to ± one magnet pitch (½ electrical cycle) of motion jerk. • After jerk motion settles out in 1 or 2 seconds, motor executes a slow speed test move of approximately two magnet pitches or one electrical cycle in the positive direction. • Drive disables, ready for normal operation. During this startup, the drive evaluates the test motion. A fault indicates that the motor motion was not as expected. Possible reasons include the following: • Mechanical problem with the stage such as excessive stiction, friction, or cable drag. • Obstruction during test motion. • Incorrect coil or encoder wiring. • Encoder or signal problems, device fault, wiring problem, noise. • During startup, the drive uses a fixed 1/6 of the peak motor or drive current, whichever is lower. Ultraware software version 1.3 with firmware revision 1.16 (or greater) has improved functionality with proper alignment under any single obstruction: • If during the positive test move, after detent, an obstruction is encountered, a test move is done in the opposite direction after reinitializing the new detent. • If an obstruction prevents the motor from going to the real detent, for example, detent past negative hard stop, the Ultra drive senses a false detent during the test move due to false alignment. After re-initializing of the new detent a second test move is done in the positive direction. • The self-sensing routine can take 2x longer because of obstructions. • If a second obstruction is detected during whole routine, such as low test current or too high friction, the test faults. • The new versions lets a user programmable test current value. • Limit signals sent to the Ultra Drive are ignored during self-sensing startup. 100 Rockwell Automation Publication CHPS-UM001D-EN-P - July 2014 Start-up Guide for CHPS-Series Stage with Ultra3000 Drive and Ultraware Software Appendix D The following in an example of a CHPS-Series stage custom motor file created in Ultraware Motor Database utility. For linear stages with a size 200 frame, LZ-030-T-120-D linear motor, 1 μm encoder, cover/seals, and no integral limits. Rockwell Automation Publication CHPS-UM001D-EN-P - July 2014 101 Appendix D Start-up Guide for CHPS-Series Stage with Ultra3000 Drive and Ultraware Software Main Screen Setup On this screen, enter CHPS-Series stage motor file, Current Limits not-toexceed motor file, Display Precision, and access the Current Control Panel. 102 Rockwell Automation Publication CHPS-UM001D-EN-P - July 2014 Start-up Guide for CHPS-Series Stage with Ultra3000 Drive and Ultraware Software Appendix D Motor Screen On this screen, enter Total Moving Mass, check for correct Motor Model and parameters, and access the Motor Feedback Diagnostics Utility. Rockwell Automation Publication CHPS-UM001D-EN-P - July 2014 103 Appendix D Start-up Guide for CHPS-Series Stage with Ultra3000 Drive and Ultraware Software Faults Screen On this screen, enter the continuous current in User Current Fault field, not to exceed the motor file continuous current value. 104 Rockwell Automation Publication CHPS-UM001D-EN-P - July 2014 Appendix E Mounting Bolts and Torque Values Table 15 - Recommended Seating Torque for Metric Bolts Plain Cadmium Plated Zinc Pitch N•m (lbf•in) N•m (lbf•in) N•m (lbf•in) 0.35 0.29 (2.6) 0.22 (1.95) 0.41(3.64) 0.40 0.60 (5.3) 0.45 (3.98) 0.84 (7.42) 0.45 1.24 (11) 0.93 (8.25) 1.74 (15.4) M3 0.5 2.15 (19) 1.61 (14.25) 3.00 (26.6) M4 0.7 4.6 (41) 3.47 (30.75) 6.48 (57.4) M5 0.8 9.6 (85) 7.20 (63.75) 13.4 (119) M6 1.0 15.8 (140) 11.9 (105) 22.1 (196) M8 1.25 39.5 (350) 29.7 (262.5) 55.4 (490) M10 1.5 76.8 (680) 57.6 (510) 115.2 (1020) Bolt Size (Metric) M1.6 M2 (2) (2) M2.5 (2) (1) (1) Mounting hardware is ISO 898/1 socket head cap bolt that meets or exceeds ANSI B113M, ISO 261, ISO 262 (coarse series only). (2) Microsize bolt. Rockwell Automation Publication CHPS-UM001D-EN-P - July 2014 105 Appendix E Mounting Bolts and Torque Values Table 16 - Recommended Seating Torque for Mild Steel Rb 87 or Cast Iron Rb 83 UNC Bolt Size (1), (2) UNF Plain Cadmium Plated Plain Cadmium Plated N•m (lbf•in) N•m (lbf•in) N•m (lbf•in) N•m (lbf•in) 0.18 (1.6) (3) #0 — — 0.24 (2.1) (3) #1 0.44 (3.89) (3) 0.53 (4.7) (3) 0.46 (4.1) (3) 0.34 (3.0) (3) #2 0.71 (6.3) (3) 0.53 (4.7) (3) 0.76 (6.8) (3) 0.58 (5.1) (3) #3 1.08 (9.6) (3) 0.81 (7.2) (3) 1.16 (10.3) (3) 0.87 (7.7) (3) #4 1.52 (13.5) (3) 1.13 (10) (3) 1.67 (14.8) (3) 1.2 (11) (3) #5 2.3 (20) (3) 1.7 (15) (3) 2.37 (21) (3) 1.8 (16) (3) #6 2.8 (25) (3) 2.1 (19) (3) 3.2 (28) (3) 2.4 (21) (3) #8 5.2 (46) (3) 3.8 (34) (3) 5.4 (48) (3) 4.1 (36) (3) #10 7.6 (67) (3) 5.6 (50) (3) 8.6 (76) (3) 6.4 (57) (3) 1/4 17.8 (158) (3) 13.4 (119) (3) 20.3 (180) (3) 15.4 (136) (3) 5/16 36.8 (326) (3) 27.7 (245) (3) 40.7 (360) (3) 30.5 (270) (3) 3/8 65.5 (580) (3) 49.1 (435) 71.7 (635) (3) 7/16 105 (930) 1/2 160 (1,420) (3) 78.9 (698) (3) 172.8 (1,530) (3) 117.5 (1,040) 254.2 (2,250) (1) Mounting hardware is 1960-series socket head cap bolt that meets or exceeds ANSI B18.3. (2) Torque is based on 80,000 psi bearing stress under the head of the bolt. (3) Denotes torque based on 100,000 psi tensile stress, with threads up to one inch in diameter. 106 Rockwell Automation Publication CHPS-UM001D-EN-P - July 2014 53.7 (476) (3) 88.1 (780) (3) 190.9 (1,690)) (3) Mounting Bolts and Torque Values Appendix E Table 17 - Recommended Seating Torque for Brass Rb 72 UNC Bolt Size (1), (2) UNF Plain Cadmium Plated Plain Cadmium Plated N•m (lbf•in) N•m (lbf•in) N•m (lbf•in) N•m (lbf•in) 0.18 (1.6) (3) #0 — — 0.24 (2.1) (3) #1 0.43(3.8) (3) 0.33 (2.9) (3) 0.46 (4.1) 0.34 (3.0) (3) #2 0.71 (6.3) (3) 0.53 (4.7) (3) 0.77 (6.8) (3) 0.58 (5.1) (3) #3 1.08 (9.6) (3) 0.81 (7.2) (3) 1.16 (10.3) (3) 0.87 (7.7) (3) #4 1.52 (13.5) (3) 1.1 (10) (3) 1.67 (14.8) (3) 1.24 (11) (3) #5 2.2 (20) (3) 1.7 (15) (3) 2.4 (21) (3) 1.8 (16) (3) #6 2.8 (25) (3) 2.1 (19) (3) 3.2 (28) (3) 2.4 (21) (3) #8 5.2 (46) (3) 3.8 (34) 5.4 (48) (3) 4.1 (36) (3) #10 7.6 (67) (3) 5.6 (50) (3) 8.6 (76) (3) 6.4 (57) (3) 1/4 15.3 (136) 11.5 (102) 15.4 (136) 11.5 (102) 5/16 25.8 (228) 19.3 (171) 25.8 (228) 19.3 (171) 3/8 53.7 (476) 40.3 (357) 53.7 (476) 40.3 (357) 7/16 76.8 (680) 57.6 (510) 76.8 (680) 57.6 (510) (1) Mounting hardware is 1960-series socket head cap bolt that meets or exceeds ANSI B18.3. (2) Torque is based on 60,000 psi bearing stress under the head of the bolt. (3) Denotes torques based on 100,000 psi tensile stress with threads up to one inch in diameter. Rockwell Automation Publication CHPS-UM001D-EN-P - July 2014 107 Appendix E Mounting Bolts and Torque Values Table 18 - Recommended Seating Torque for Aluminum Rb 72 (2024-T4) UNC Bolt Size (1), (2) UNF Plain Cadmium Plated Plain N•m (lbf•in) N•m (lbf•in) N•m (lbf•in) N•m (lbf•in) (3) 0.18 (1.6) (3) #0 — — 0.24 (2.1) #1 0.44 (3.8) (3) 0.33 (2.9) (3) 0.46 (4.1) (3) #2 0.71 (6.3) (3) (3) (3) #3 1.08 (9.6) (3) 0.81 (7.2) (3) 1.16 (10.3) (3) 0.87 (7.7) (3) #4 1.52 (13.5) (3) 1.1 (10) (3) 1.67 (14.8) (3) 1.24 (11) (3) #5 2.3 (20) (3) 1.7 (15) (3) 2.37 (21) (3) 1.8 (16) (3) #6 2.8 (25) (3) 2.1 (19) (3) 3.2 (28) (3) 2.37 (21) (3) #8 5.2 (46) (3) 3.8 (34) (3) 3.2 (48) (3) 4.1 (36) (3) #10 7.6 (67) (3) 5.6 (50) (3) 8. 6 (76) (3) 6.4 (57) (3) 1/4 12.8 (113) 9.6 (85) 12.8 (113) 9.6 (85) 5/16 21.5 (190) 16.1 (143) 21.5 (190) 16.1 (143) 3/8 44.8 (397) 33.6 (298) 44.8 (397) 33.7 (298) 7/16 64.4 (570) 48.0 (425) 64.4 (570) 48.0 (425) 1/2 159.3 (1,410) 119.8 (1,060) 159.3 (1,410) 119.8 (1,060) 0.53 (4.7) 0.77 (6.8) (1) Mounting hardware is 1960-series socket head cap bolt that meets or exceeds ANSI B18.3. (2) Torque is based on 50,000 psi bearing stress under the head of the bolt. (3) Denotes torques based on 100,000 psi tensile stress with threads up to one inch in diameter. 108 Cadmium Plated Rockwell Automation Publication CHPS-UM001D-EN-P - July 2014 0.34 3.0v 0.58 (5.1) (3) Index A accessibility 22 accessories feedback interconnect cable 86 power interconnect cable 85 accuracy specifications 73 ambient temperature defined 75 analog differential encoder 45 ANSI/NFPA 79 - electrical for industrial machines 21 ANSI/RIA R15.06 - industrial robot, multiple teaching 21 feedback 35 power 35 Kinetix feedback 34 power 34 connectors flying lead termination 36 counter clock frequency 44 cover 17 cleaning 61 installation 67 removal 65 torque 67 D B bearing 17 lubrication ports 17 bearing lubrication 60 bearing rail 17 bolt through 29 C cable carrier module about 17 installation 64 lifetime 75 replacement 63 center-stacked stage 89 clamps 17 cleaning 18 cover 61 strip seal 61 clearance 23 coil resistance 83 commutation 46 commutation sensor specifications 73 component description bearing 17 lubrication ports 17 bearing rail 17 cable carrier module 17 cover 17 index mark 17 limit blade 17 optical encoder readhead 17 optical encoder scale 17 side cover 17 side cover support 17 slide 17 strip seal 17 strip seal clamp 17 strip seal guide 17 components 18 connector pinout d-type Rockwell Automation Publication CHPS-UM001D-EN-P - July 2014 dimensions 150 mm 77, 78 200 mm 79, 80 250 mm 81, 82 direction 47, 48 drip loop 40 dust 22 E edge separation 44 EMI 40 encoder analog differential 45 maintenance 60 TTL differential 44 encoder scale maintenance 60 optical encoder scale 17 example fastener calculation 28 stopping distance calculation 50 Ultraware custom motor file 101 extension cables 85 F fastener quanity calculation 28 square nut 31 tee nut 31 through bolt 30 toe clamp 30 feedback interconnect cable 86 flatness specifications 73 flying lead termination 36 force constant 83 109 Index G ground screw 40 torque 40 strap 40 grounding 40 H Hall effect circuit 46 Hall effect module 55 Hall phasing 46 heat 13 high-frequency energy 40 humidity 22 humidity range 75 I incline payload 13 index mark 17 installation clearance requirements 22 installation 66 removal 65 maitenance 59 metric bolts torque 105 motor file creating 92 motor phasing 46 mounting 22 before mounting 23, 28 bolt through 29 ceiling 22 incline 22 inverted 22 square nut 31 square nuts 29 surface 22 surface restrictions 23 tee nut 31 through bolt 30 toe clamp 29, 30 vertical 13, 22 wall 22 O K Kinetix connector 34 interconnect cables 85 Ultra3000 drive set-up 91 L lighting 22 limit blade 17 limit sensor setting 50 signals wires 38 specification 73 wiring 43 lubrication 17, 18, 60 M maintenance 18 bearing lubrication 60 cable carrier installation 64 cable carrier module removal 63 cover installation 67 removal 65 torque 67 optical encoder scale 60 replacement kits 87 side cover installation 67 removal 65 torque 67 strip seal 110 Rockwell Automation Publication CHPS-UM001D-EN-P - July 2014 operating temperature 75 operational guidelines 49 optical encoder readhead sin/cos encoder 17 TTL encoder 17 options 18 orientation 48 overtravel 43 P packaging material storage 28 packing air transportion restrictions 14 unpacking 26 pitch 70 polarity encoder counting 96 positive direction 47, 48 power interconnect cables 85 procdeure cover cleaning 61 lubrication 60 procedure connecting stage 40 drip loop 40 EMI bonding 40 grounding 40 number of fasteners 28 stage storage 28 store packing material 28 strip seal cleaning 61 PTC thermal signal 55 Index PTC thermistor resistance values 42 R readhead 17 reference documents standards 21 CSA/CAN Z434 - industrial robot safety 21 repeatability specifications 73 requirements 22, 23 restrictions 22 clearance 23 mounting 23 roll 70 S safety bolts 12 cover 12 end caps 13 hazardous voltage 12 heat 12 impacts 13 junction box 12 labels 12 pinch points 12 sharp edges 12 strong magnets 12 sudden motion 13 seal guide 17 shearing bolts 13 shipping brace 28 clamp 28 container storage 28 dangerous goods declaration 14 form 902 instructions 14 shock 75 side cover 17 installation 67 removal 65 torque 67 side cover support 17 sin/cos encoder 17 slide 17 specifications commutation sensor 73 flatness 73 humidity range 75 limit sensor 73 repeatability 73 shock and vibration 75 storage and operating temperature 75 straightness 73 technical 83 travel vs. weight 150 mm frame 75 200 mm frame 76 Rockwell Automation Publication CHPS-UM001D-EN-P - July 2014 250 mm frame 76 square nut 29, 30, 31 spacing 31 stacking of stages 89 stage cover 17 side cover 17 slide 17 storage 28 standards EN60204-1 safety of electrical machines 21 static load, rotational movement definitions 70 stoping distance 50 storage 28 storage temperature 75 straightness specifications 73 strip seal about 17 clamps 17 cleaning 61 guide 17 installation 66 T temperature 22, 42 temperature max. 13 thermal protection 42 through bolt 30 toe clamp 29, 30 spacing 30 torque cover 67 ground screw 40 side cover 67 values for different metals 105 total moving mass 83 trapezoidal Hall mode 46 travel vs. weight specifications 150 mm frame 75 200 mm frame 76 250 mm frame 76 troubleshooting Hall effect module 55 Hall to back EMF phasing 57 motor coil resistance measurements 58 PTC thermal signal 55 TTL differential encoder 44 TTL encoder 17 U Ultra3000 drive 91 set-up 91 111 Index Ultraware .mbd file 93 commutation diagnostics utility 99 self-sensing commutation and start-up 100 start-up 94 verification 97 V vertical payload 13 vibration 22, 75 W wiring Hall effect 46 limit sensor 43 sin/cos encoder 45 TTL differential encoder 44 Ultra3000 drive 91 Y yaw 70 112 Rockwell Automation Publication CHPS-UM001D-EN-P - July 2014 Index Notes: Rockwell Automation Publication CHPS-UM001D-EN-P - July 2014 113 Rockwell Automation Support Rockwell Automation provides technical information on the Web to assist you in using its products. At http://www.rockwellautomation.com/support you can find technical and application notes, sample code, and links to software service packs. You can also visit our Support Center at https://rockwellautomation.custhelp.com/ for software updates, support chats and forums, technical information, FAQs, and to sign up for product notification updates. In addition, we offer multiple support programs for installation, configuration, and troubleshooting. For more information, contact your local distributor or Rockwell Automation representative, or visit http://www.rockwellautomation.com/services/online-phone. Installation Assistance If you experience a problem within the first 24 hours of installation, review the information that is contained in this manual. You can contact Customer Support for initial help in getting your product up and running. United States or Canada 1.440.646.3434 Outside United States or Canada Use the Worldwide Locator at http://www.rockwellautomation.com/rockwellautomation/support/overview.page, or contact your local Rockwell Automation representative. New Product Satisfaction Return Rockwell Automation tests all of its products to help ensure that they are fully operational when shipped from the manufacturing facility. However, if your product is not functioning and needs to be returned, follow these procedures. United States Contact your distributor. You must provide a Customer Support case number (call the phone number above to obtain one) to your distributor to complete the return process. Outside United States Please contact your local Rockwell Automation representative for the return procedure. Documentation Feedback Your comments will help us serve your documentation needs better. If you have any suggestions on how to improve this document, complete this form, publication RA-DU002, available at http://www.rockwellautomation.com/literature/. Rockwell Otomasyon Ticaret A.Ş., Kar Plaza İş Merkezi E Blok Kat:6 34752 İçerenköy, İstanbul, Tel: +90 (216) 5698400 Publication CHPS-UM001D-EN-P - July 2014 Supersedes Publication CHPS-UM001C-EN-P - November 2010 Copyright © 2014 Rockwell Automation, Inc. All rights reserved. Printed in the U.S.A.