1
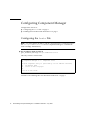
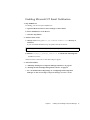
Sun StorEdge™ Component
Manager 2.1 Installation Guide
For the Microsoft NT Operating Environment
Sun Microsystems, Inc.
901 San Antonio Road
Palo Alto, CA 94303
U.S.A. 650-960-1300
Part No. 806-4812-10
July 2000, Revision A
Send comments about this document to: [email protected]
Copyright 2000 Sun Microsystems, Inc., 901 San Antonio Road • Palo Alto, CA 94303-4900 USA. All rights reserved.
This product or document is protected by copyright and distributed under licenses restricting its use, copying, distribution, and decompilation.
No part of this product or document may be reproduced in any form by any means without prior written authorization of Sun and its licensors,
if any. Third-party software, including font technology, is copyrighted and licensed from Sun suppliers.
Parts of the product may be derived from Berkeley BSD systems, licensed from the University of California. UNIX is a registered trademark in
the U.S. and other countries, exclusively licensed through X/Open Company, Ltd. For Netscape Communicator™, the following notice applies:
Copyright 1995 Netscape Communications Corporation. All rights reserved.
Sun, Sun Microsystems, the Sun logo, AnswerBook2, docs.sun.com, Sun StorEdge, Java2 and Solaris are trademarks, registered trademarks, or
service marks of Sun Microsystems, Inc. in the U.S. and other countries. All SPARC trademarks are used under license and are trademarks or
registered trademarks of SPARC International, Inc. in the U.S. and other countries. Products bearing SPARC trademarks are based upon an
architecture developed by Sun Microsystems, Inc.
The OPEN LOOK and Sun™ Graphical User Interface was developed by Sun Microsystems, Inc. for its users and licensees. Sun acknowledges
the pioneering efforts of Xerox in researching and developing the concept of visual or graphical user interfaces for the computer industry. Sun
holds a non-exclusive license from Xerox to the Xerox Graphical User Interface, which license also covers Sun’s licensees who implement OPEN
LOOK GUIs and otherwise comply with Sun’s written license agreements.
RESTRICTED RIGHTS: Use, duplication, or disclosure by the U.S. Government is subject to restrictions of FAR 52.227-14(g)(2)(6/87) and
FAR 52.227-19(6/87), or DFAR 252.227-7015(b)(6/95) and DFAR 227.7202-3(a).
DOCUMENTATION IS PROVIDED “AS IS” AND ALL EXPRESS OR IMPLIED CONDITIONS, REPRESENTATIONS AND WARRANTIES,
INCLUDING ANY IMPLIED WARRANTY OF MERCHANTABILITY, FITNESS FOR A PARTICULAR PURPOSE OR NONINFRINGEMENT, ARE DISCLAIMED, EXCEPT TO THE EXTENT THAT SUCH DISCLAIMERS ARE HELD TO BE LEGALLY INVALID.
Copyright 2000 Sun Microsystems, Inc., 901 San Antonio Road • Palo Alto, CA 94303-4900 Etats-Unis. Tous droits réservés.
Ce produit ou document est protégé par un copyright et distribué avec des licences qui en restreignent l’utilisation, la copie, la distribution, et la
décompilation. Aucune partie de ce produit ou document ne peut être reproduite sous aucune forme, par quelque moyen que ce soit, sans
l’autorisation préalable et écrite de Sun et de ses bailleurs de licence, s’il y en a. Le logiciel détenu par des tiers, et qui comprend la technologie
relative aux polices de caractères, est protégé par un copyright et licencié par des fournisseurs de Sun.
Des parties de ce produit pourront être dérivées des systèmes Berkeley BSD licenciés par l’Université de Californie. UNIX est une marque
déposée aux Etats-Unis et dans d’autres pays et licenciée exclusivement par X/Open Company, Ltd. La notice suivante est applicable à
Netscape Communicator™: Copyright 1995 Netscape Communications Corporation. Tous droits réservés.
Sun, Sun Microsystems, the Sun logo, AnswerBook2, docs.sun.com, Sun StorEdge, Java2 et Solaris sont des marques de fabrique ou des
marques déposées, ou marques de service, de Sun Microsystems, Inc. aux Etats-Unis et dans d’autres pays. Toutes les marques SPARC sont
utilisées sous licence et sont des marques de fabrique ou des marques déposées de SPARC International, Inc. aux Etats-Unis et dans d’autres
pays. Les produits portant les marques SPARC sont basés sur une architecture développée par Sun Microsystems, Inc.
L’interface d’utilisation graphique OPEN LOOK et Sun™ a été développée par Sun Microsystems, Inc. pour ses utilisateurs et licenciés. Sun
reconnaît les efforts de pionniers de Xerox pour la recherche et le développement du concept des interfaces d’utilisation visuelle ou graphique
pour l’industrie de l’informatique. Sun détient une licence non exclusive de Xerox sur l’interface d’utilisation graphique Xerox, cette licence
couvrant également les licenciés de Sun qui mettent en place l’interface d’utilisation graphique OPEN LOOK et qui en outre se conforment aux
licences écrites de Sun.
CETTE PUBLICATION EST FOURNIE "EN L’ETAT" ET AUCUNE GARANTIE, EXPRESSE OU IMPLICITE, N’EST ACCORDEE, Y COMPRIS
DES GARANTIES CONCERNANT LA VALEUR MARCHANDE, L’APTITUDE DE LA PUBLICATION A REPONDRE A UNE UTILISATION
PARTICULIERE, OU LE FAIT QU’ELLE NE SOIT PAS CONTREFAISANTE DE PRODUIT DE TIERS. CE DENI DE GARANTIE NE
S’APPLIQUERAIT PAS, DANS LA MESURE OU IL SERAIT TENU JURIDIQUEMENT NUL ET NON AVENU.
Please
Recycle
Contents
Preface
1.
v
Installing Sun StorEdge Component Manager
1
Introduction to Sun StorEdge Component Manager
Pre-installation Requirements
Memory Guidelines
Installing the Software
2
2
2
4
Installing the Sun StorEdge Management Console
Installing Sun StorEdge Component Manager
Configuring Component Manager
Configuring the hosts File
7
8
8
Enabling Microsoft NT Email Notification
Starting Component Manager
4
9
10
Manually Starting the Component Manager Daemons
Starting the Sun StorEdge Management Console
10
Manually Stopping the Component Manager Daemons
Uninstalling the Software
10
11
12
iii
iv
Sun StorEdge Component Manager 2.1 Installation Guide-NT • July 2000
Preface
The Sun StorEdge Component Manager Installation Guide provides instructions for
installing the Sun StorEdge™ Component Manager 2.1 software, verifying the
installation, launching the software, and de-installing the software.
Before You Read This Book
For the latest Component Manager information, please see the Sun StorEdge
Component Manager 2.1 Release Notes.
How This Book Is Organized
Chapter 1 describes the steps needed to install the software, as well as how to stop
and restart the software.
v
Typographic Conventions
Typeface
Meaning
Examples
AaBbCc123
The names of commands, files,
and directories; on-screen
computer output
Edit your .login file.
Use ls -a to list all files.
% You have mail.
AaBbCc123
What you type, when
contrasted with on-screen
computer output
% su
Password:
AaBbCc123
Book titles, new words or terms,
words to be emphasized
Read Chapter 6 in the User’s Guide.
These are called class options.
You must be superuser to do this.
Command-line variable; replace
with a real name or value
To delete a file, type rm filename.
Related Documentation
vi
Application
Title
Part Number
Install
Sun StorEdge Component Manager2,1 Installation Guide: For the
Solaris Operating Environment
806-4811
User
Sun StorEdge Component Manager 2.1 User’s Guide
806-4812
Release
Sun StorEdge Component Manager 2.1 Release Notes
806-4813
Help
Sun StorEdge Component Manager Online Help
Install/
User
Switch Management Installer’s User’s Manual
875-1890
User
SANbox -8 Fibre Channel Switch Installer’s/User’s Manual
875-1881
Sun StorEdge Component Manager 2.1 Installation Guide-NT • July 2000
Accessing Sun Documentation Online
The docs.sun.comsm web site enables you to access Sun technical documentation
on the Web. You can browse the docs.sun.com archive or search for a specific book
title or subject at:
http://docs.sun.com
Ordering Sun Documentation
Fatbrain.com, an Internet professional bookstore, stocks select product
documentation from Sun Microsystems, Inc.
For a list of documents and how to order them, visit the Sun Documentation Center
on Fatbrain.com at:
http://www.fatbrain.com/documentation/sun
Preface
vii
viii
Sun StorEdge Component Manager 2.1 Installation Guide-NT • July 2000
CHAPTER
1
Installing Sun StorEdge Component
Manager
This chapter contains the following topics for installing the Sun StorEdge
Component Manager 2.1 software in the Microsoft NT operating environment:
■
“Introduction to Sun StorEdge Component Manager” on page 2
■
“Pre-installation Requirements” on page 2
■
“Installing the Software” on page 4
■
“Configuring Component Manager” on page 8
■
“Starting Component Manager” on page 10
■
“Uninstalling the Software” on page 12
Note – You should read this chapter before attempting to install or operate Sun
StorEdge Component Manager on a Sun StorEdge T300, Sun StorEdge T301,or Sun
StorEdge T310 disk trays. (All supported disk trays, that is T300, T301, or T310 are
referred to as “T300” within this document.)
1
Introduction to Sun StorEdge
Component Manager
Sun StorEdge Component Manager is a graphical interface that enables you to
monitor and manage subsystem storage enclosures. Component Manager 2.1
supports Sun StorEdge T300 components and operates under the Solaris 2.6, Solaris
7, and Solaris 8 operating environments as well as the Microsoft NT operating
environment.
Specifically, Sun StorEdge Component Manager provides status monitoring, alarm
notification, email and remote service support functionality, and control capability
for a single enclosure or multiple enclosures where management information is
accessible by a single host via ethernet.
Pre-installation Requirements
Before installing the Sun StorEdge Component Manager software, verify that you
have met the following requirements:
■
A minimum of 140MB has been allotted for Sun StorEdge Component Manager
virtual memory usage. Each additional enclosure requires approximately 3MB of
virtual memory.
■
You have allotted 36 MB disk space:
■
The Sun StorEdge T300 configuration must be correct. Refer to the Sun StorEdge
T300 Installation,Operation and Service Manual and the Sun StorEdge T300
Administrator’s Guide for more details.
■
You are using Microsoft Windows NT 4.0.
Memory Guidelines
Component Manager requires a minimum of 174MB of virtual memory, and 0.5MB
of virtual memory for each additional enclosure or disk tray. Also, Component
Manager requires 8% of the CPU capacity, with .18% increase for each additional
enclosure.
As a guideline, you should have approximately 50MB of available physical memory.
(Use the vmstat command to check the Memory/Free.)
2
Sun StorEdge Component Manager 2.1 Installation Guide-NT • July 2000
If Component Manager performance is an issue due to system resource
requirements, we recommend you move the Component Manager application to
another server with less load and monitor the Sun StorEdge T300 disk trays from
that server. As the monitoring of the Sun StorEdge T300 disk trays is done through
the ethernet, Component Manager does not have to run on the same host to which
the Sun StorEdge T300 disk trays are attached.
If necessary (that is, a mixed environment of Sun StorEdge T300 disk trays and Sun
StorEdge A5x00 enclosures) you may partition the monitoring by utilizing another
host for monitoring the disk trays and continuing to monitor the enclosures from the
initial host. Sun StorEdge A5x00 enclosures may be monitored from any host on the
same FC loop.
Chapter 1
Installing Sun StorEdge Component Manager
3
Installing the Software
Installing the software is a simple process, taking up to fifteen minutes to complete.
You must be the Administrator to correctly install the software.
1. Load the disc with the label-side facing up into the CD-ROM drive.
2. Start Windows NT Explorer.
a. From the Start Menu: select Programs->Windows NT Explorer.
3. Select the CD-ROM drive in the left panel.
4. Start the installation script.
cdrom:\Component_Mgr\WinNT_4.0\StorEdgeComponentManager.exe
a. Double-click on StorEdgeComponentManager.exe.
b. Click the Next button at the Sun StorEdge Component Manager Setup window
to continue.
To install Component Manager, the Sun StorEdge Management Console must be
installed, which in turn, requires the installation of Cygwin and the Java2
Runtime Environment. The installation script checks for all of this software and
will install any which is missing.
Installing the Sun StorEdge Management Console
If not installed, you will be prompted whether to install the Sun StorEdge
Management Console.
1. Click the Yes button to continue.
2. Click the Next button at the Sun StoreEdge Management Console Setup window.
3. Click the Yes button to accept the License Agreement.
4. Click the Yes button to after reading Read Me.
4
Sun StorEdge Component Manager 2.1 Installation Guide-NT • July 2000
5. Choose the destination folder.
Select a folder by performing one of the following:
a. Click the Next button to accept the default folder.
b. Click on the Browse button to navigate to the desired location.
6. Choose the type of installation.
a. Select “Typical” from the list.
b. Click the Next button.
7. Choose the destination name.
Select a folder by performing one of the following:
a. Click the Next button to accept the default name.
b. Navigate to the desired location
▼ Installing Cygwin
If not installed, you will be prompted whether to install Cygwin.
a. Click the Yes button to proceed with the installation.
Clicking No will abort the installation of Cygwin and Component Manager.
b. Click the Next button at the Welcome window.
c. Click the Yes button to accept the License Agreement.
d. Click the Next button at the About Cygnus Solutions Welcome Box.
e. Choose the destination folder.
Select a folder by performing one of the following:
i. Click the Next button to accept the default folder.
ii. Click on the Browse button to navigate to the desired location.
f. Choose the folder name.
Name a folder by performing one of the following:
i. Click the Next button to accept the default folder name.
ii. Enter the name of the folder.
g. Click the Finish button to proceed with supplemental installations.
Chapter 1
Installing Sun StorEdge Component Manager
5
▼ Installing the Java2 Runtime Environment
If not installed, you will be prompted whether to install the Java2 Runtime
Environment (JRE).
a. Click the Yes button to proceed with the installation.
Clicking No will abort the installation of Java2 and Component Manager.
b. Click the Yes button to accept the License Agreement.
c. Choose the destination folder.
Select a folder by performing one of the following:
iii. Click the Next button to accept the default folder.
iv. Click on the Browse button to navigate to the desired location.
Completing Installation of the Sun StorEdge Management
Console
8. Click the Finish button to complete setup and continue with Component Manager
installation.
6
Sun StorEdge Component Manager 2.1 Installation Guide-NT • July 2000
Installing Sun StorEdge Component Manager
1. Click the Yes button to accept the License Agreement.
2. Choose the Next button to begin copying files.
3. Start Component Manager.
At this point, start Component Manager one of the following ways:
■
Select “No, I will restart my computer later” radio button, click the Finish button,
and proceed with “Configuring the hosts File” on page 8, “Enabling Microsoft
NT Email Notification” on page 9, and “Starting the Sun StorEdge Management
Console” on page 10.
Caution – Selecting the “Yes, I want to restart my computer now” radio button as
directed below, will not allow you to configure StorEdge T300 disk arrays without:
(1) exiting Component Manager, (2) “Manually Stopping the Component Manager
Daemons” on page 11”, (3) “Configuring the hosts File” on page 8”, (4) “Enabling
Microsoft NT Email Notification” on page 9,(5) “Manually Starting the Component
Manager Daemons” on page 10”, and (6) “Starting the Sun StorEdge Management
Console” on page 10”.
■
Click the “Yes, I want to restart my computer now” radio button and click the
Finish button.
Continue with “Configuring the hosts File” on page 8.
Chapter 1
Installing Sun StorEdge Component Manager
7
Configuring Component Manager
Configuration consists of:
■
■
“Configuring the hosts File” on page 8
“Enabling Microsoft NT Email Notification” on page 9
Configuring the hosts File
Note – You must add the IP address and the component name of T300 subsystem to
the \etc\opt\SUNWesm\mo\hosts file for Component Manager to communicate
with a StorEdge T300 disk tray.
● Use an editor to make an entry in
{your_installation_directory}\etc\opt\SUNWesm\mo\hosts.
The entry format is shown below.
# Component Manager 2.1 - Component table
#
# Each component entry is specified by its IP address and name,
#
IP address Name
#
123.45.67.890 cafejapan
#
123.45.67.890 ada48
Continue with “Enabling Microsoft NT Email Notification” on page 9.
8
Sun StorEdge Component Manager 2.1 Installation Guide-NT • July 2000
Enabling Microsoft NT Email Notification
1. Stop ESMService.
If running, you must stop the ESMService.
a. Open the Menu and select: Start->Settings->Control Panel.
b. Select “ESMService” from the list.
c. Click the Stop button.
2. Add host name to file.
a. Change to the install_path\etc\opt\SUNWesm\SUNWencc\etc directory as
indicated.
If you used the default directory, the path would be as follows:
C: cd \Program Files\Sun Microsystems\StorEdge\etc\opt\SUNWesm\SUNWencc\etc
b. Edit file enclMgr_rs_message_formats.cf to contain the following line:
mailHost=hostname
where hostname is the host for the mail transport agent.
3. Add email address.
a. “Manually Starting the Component Manager Daemons” on page 10.
b. “Starting the Sun StorEdge Management Console” on page 10.
c. See “To Enable Remote Reporting” in “Configuring With Component
Manager” in the Sun StorEdge Component Manager 2.1 User’s Guide.
Chapter 1
Installing Sun StorEdge Component Manager
9
Starting Component Manager
Manually Starting the Component Manager
Daemons
The managed object station will automatically start after each reboot or if you wish
you can start the managed station with the following procedure. If you have
rebooted the system you may now proceed directly to starting the management
console. Please see “Starting the Sun StorEdge Management Console” on page 10.
To manually start the managed object station:
1. Open the Control Panel.
2. Double-click on Services.
3. Select “ESMService” in the list.
4. Click the Start button.
You are now ready to start the console.
Starting the Sun StorEdge Management Console
After the managed object station has been started, start the console.
● Open the Menu: Start->Programs->StorEdge->Start Management Console
You may now use Component Manager.
10
Sun StorEdge Component Manager 2.1 Installation Guide-NT • July 2000
Manually Stopping the Component Manager
Daemons
When directed, you will need to manually stop the Component Manager daemons.
To manually stop the managed object station:
1. Open the Control Panel.
2. Double-click on Services.
3. Select “ESMService” in the list.
4. Click the Stop button.
Chapter 1
Installing Sun StorEdge Component Manager
11
Uninstalling the Software
To remove the Sun StorEdge Component Manager software, perform the following:
1. Stop the Component Manager daemon.
See “Starting Component Manager” on page 10.
2. Unload the NT service.
a. Open the Menu and select: Start->Programs->Command Prompt
b. In the Command Prompt window, change to the
{your_Component_Manager_directory}\usr\opt\SUNWesm\sbin directory as
indicated.
If you used the default directory, the path would be as follows:
C: cd \Program Files\Sun Microsystems\StorEdge\usr\opt\SUNWesm\sbin
c. Unload the NT service by entering the following:
C: NTService -u
3. Open the Menu and select: Start->Settings->Control Panel:
a. Click on Add/Remove Programs.
4. Remove Component Manager.
a. Select “Sun StorEdge Component Manager” from the list.
b. Click the Remove button.
c. Click the OK button to confirm removal.
d. Click the Finish button to acknowledge removal.
12
Sun StorEdge Component Manager 2.1 Installation Guide-NT • July 2000
5. Remove the Management Console.
a. Select “Sun StorEdge Management Console” from the list.
b. Click the Remove button.
c. Click the Remove radio button; then click the Next button.
d. Click the OK button to confirm removal.
e. Click the Finish button to acknowledge removal.
6. Remove the Java2 Runtime Environment.
a. Select “Java 2 Runtime Environment Standard Edition v1.2.2” from the list.
b. Click the Remove button.
c. Click the Yes button to confirm removal.
d. Click the OK button to acknowledge removal.
7. Remove Cygwin.
a. Select “Cygwin B20” from the list.
b. Click the Remove button.
c. Click the Yes button to confirm removal.
d. Click the OK button to acknowledge removal.
8. Exit the Control Panel.
Note – Note the uninstallation procedure will remove the
\etc\opt\SUNWesm\mo\hosts file. See “Configuring the hosts File” on page 8.
Chapter 1
Installing Sun StorEdge Component Manager
13
14
Sun StorEdge Component Manager 2.1 Installation Guide-NT • July 2000