Download Otis Photo Lab Flextight Scanner Demo
Transcript
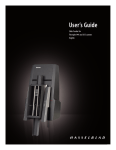
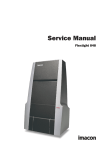
Otis Photo Lab Flextight Scanner Demo Otis Photography Lab Adam Ferriss Lab Manager [email protected] 310.665.6971 Things you will need Negatives Lint free cloth Flextight negative holders (obtained from the crib) Rocket Blower or Canned Air Portable hard drive for transporting saved files Getting Started Remove the dust cover from the Flextight scanner and power it on by pressing the red button on the right side of the front face. Gently pull the scanning bed away from the scanner and it will lower itself down. Identify the correct film holder needed for your film size. Put the holder on the feed table and slide the notched end toward the slot closest to the scanner. Magnets will pull the holder in place, securing it to the machine. Lift the black magnetic retaining flaps and carefully place your negative in the holder emulsion side down. Make sure that the negative is completely secure in the holder and that there are no hanging edges. Clean all dust from your negative before attaching it to the holder! Do not blow or spray canned air in the flextight! Flexcolor Once your negative is secured, turn on the computer and open up Flexcolor. +Click “Preview”, or Command+N and the scanner will bring up a preview scan of your negative strip. +Under Setup, choose your film type. If your film type is not listed, select Negative RGB Standard. +Setting the frame size is not necessary, as the scanner will have done this for you after the preview. +If you need the highest quality scan possible, or plan to do a lot of digital editing to your files, you may also want to set the mode to: RGB 16 bit +Click and drag on the preview window to select one frame of your film. Be careful not to select too much of the black film frame border, or the white space of the holder. You can zoom in or out on the preview by clicking the mountain range shaped icons under View or by hitting command + plus or command + minus. +Choose your output size via the PPI drop down window. If you do not see the size you are looking for, choose other. +Bring up the texture window by clicking the Christmas tree shaped icon. Set unsharp mask to 120 to turn it off completely. Setting it to 0 will not turn it off! Set flextouch to 0 to turn it off as well. +At this point you can bring up the curves and levels windows to make any necessary adjustments to the color balance or exposure. Click scan to set a destination and format for the file. Always save to the Temp Drive! Working on the desktop is a great way to lose hours of precious work. When you are finished scanning please return everything you have checked out to the crib, power down the machine and replace the dust cover. Flextight User Manual http://goo.gl/ZMeXp FlexColor Manual http://goo.gl/NkLqA


