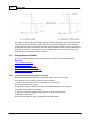
1
ADC
Version 8.4
Oasys Ltd
13 Fitzroy Street
London
W1T 4BQ
Telephone: +44 (0) 20 7755 3302
Facsimile: +44 (0) 20 7755 3720
Central Square
Forth Street
Newcastle Upon Tyne
NE1 3PL
Telephone: +44 (0) 191 238 7559
Facsimile: +44 (0) 191 238 7555
e-mail: [email protected]
Website: http://www.oasys-software.com/
© Oasys Ltd. 2014
Oasys ADC
© Oasys Ltd. 2014
All rights reserved. No parts of this work may be reproduced in any form or by any means - graphic, electronic, or
mechanical, including photocopying, recording, taping, or information storage and retrieval systems - without the
written permission of the publisher.
Products that are referred to in this document may be either trademarks and/or registered trademarks of the
respective owners. The publisher and the author make no claim to these trademarks.
While every precaution has been taken in the preparation of this document, the publisher and the author assume no
responsibility for errors or omissions, or for damages resulting from the use of information contained in this
document or from the use of programs and source code that may accompany it. In no event shall the publisher and
the author be liable for any loss of profit or any other commercial damage caused or alleged to have been caused
directly or indirectly by this document.
This document has been created to provide a guide for the use of the software. It does not provide engineering
advice, nor is it a substitute for the use of standard references. The user is deemed to be conversant with standard
engineering terms and codes of practice. It is the users responsibility to validate the program for the proposed
design use and to select suitable input data.
Printed: December 2014
I
Oasys ADC
Table of Contents
Part I About ADC
3
1 Features
................................................................................................................................... 3
Part II Step by Step Guide
7
1 Step
...................................................................................................................................
by Step Guide (Column)
7
2 Step
...................................................................................................................................
by Step Guide (Beam and Slabs)
8
Becom ing Fam
.........................................................................................................................................................
iliar w ith beam design - An Exam ple
8
Part III Working with ADC
21
1 Some
...................................................................................................................................
Basic Concepts
21
Com ponents
.........................................................................................................................................................
of the User Interface
21
Preferences
......................................................................................................................................................... 22
Toolbars ......................................................................................................................................................... 22
File Form ats
......................................................................................................................................................... 22
Using the .........................................................................................................................................................
New Model Wizard
22
Cases
......................................................................................................................................................... 22
Sign Conventions,
.........................................................................................................................................................
Geom etry and Dim ensions (Colum n)
23
2 Working
...................................................................................................................................
with the Gateway
23
3 Working
...................................................................................................................................
with Table Views
24
Single and.........................................................................................................................................................
Multi-Page Tables
24
Tabular Data
.........................................................................................................................................................
Entry and Editing
24
Wizards .................................................................................................................................................. 24
Field Types.................................................................................................................................................. 25
Defaults in..................................................................................................................................................
Tables
25
Basic Operations
.........................................................................................................................................................
in Tables
25
Selecting Blocks
.........................................................................................................................................................
of Cells in Table View s
26
Copying, Cutting
.........................................................................................................................................................
and Pasting in Tables
26
Delete, Blank
.........................................................................................................................................................
and Insert in Tables
27
Find, Replace,
.........................................................................................................................................................
Go To and Modify in Tables
27
Copying to.........................................................................................................................................................
and from Spreadsheets
28
Adjusting .........................................................................................................................................................
Data Display
28
4 Working
...................................................................................................................................
with Graphic Views
28
Identifying.........................................................................................................................................................
What is to be Draw n
28
Scaling and
.........................................................................................................................................................
Zoom ing the Im age
29
Scaling to ..................................................................................................................................................
Fit
29
Zooming and
..................................................................................................................................................
Panning
29
Right-Clicking
.........................................................................................................................................................
in the Graphic View
30
Printing from
.........................................................................................................................................................
Graphic View s
31
Output of the
.........................................................................................................................................................
Graphic Im ages
31
Copying the
..................................................................................................................................................
Graphic Image to the Clipboard
31
Saving the..................................................................................................................................................
Graphic Image to File
32
5 Working
...................................................................................................................................
with Output Views
32
© Oasys Ltd. 2014
Contents
Part IV Toolbars and Keyboard
Accelerators
II
34
1 Keyboard
...................................................................................................................................
Accelerators
34
2 Toolbars
................................................................................................................................... 34
Standard Toolbar
......................................................................................................................................................... 35
Data Options
.........................................................................................................................................................
Toolbar
35
Graphic Toolbar
......................................................................................................................................................... 35
3 ADC
...................................................................................................................................
Toolbar
36
Part V Data Tables, Dialogs and Wizards
38
1 Welcome
...................................................................................................................................
to ADC
38
2 New
...................................................................................................................................
Model Wizard
38
New Model
.........................................................................................................................................................
Wizard: Titles
39
Titles Window
..................................................................................................................................................
- Bitmaps
39
New Model
.........................................................................................................................................................
Wizard: Design Option
40
New Model
.........................................................................................................................................................
Wizard: General Specification (Colum n)
40
New Model
.........................................................................................................................................................
Wizard: Section and Material (Colum n)
41
New Model
.........................................................................................................................................................
Wizard: Slenderness Details (Colum n)
41
New Model
.........................................................................................................................................................
Wizard: Span and Support Details (Beam )
41
New Model
.........................................................................................................................................................
Wizard: Load Details (Colum n)
44
New Model
.........................................................................................................................................................
Wizard: Load Details (Beam )
45
New Model
.........................................................................................................................................................
Wizard: Reinforcem ent (Colum n)
45
New Model
.........................................................................................................................................................
Wizard: Design Details (Beam and Slabs)
46
3 Section
...................................................................................................................................
Wizard
47
Section Wizard:
.........................................................................................................................................................
Section Type
47
Section Wizard:
.........................................................................................................................................................
Section Dim ensions
47
4 Bar
...................................................................................................................................
Selection Wizard
50
Bar Selection
.........................................................................................................................................................
Wizard: Bars Available
50
Bar Selection
.........................................................................................................................................................
Wizard: Bars Lim its
50
5 Dialogs
...................................................................................................................................
and Tables
50
Analysis Cases
.........................................................................................................................................................
(Colum n & Pile)
51
Bar Selection
.........................................................................................................................................................
Criteria (Beam and Slabs)
52
Bar Spacings
.........................................................................................................................................................
(Beam )
52
Checks and
.........................................................................................................................................................
Lim its (Colum n & Pile)
52
Circular Colum
.........................................................................................................................................................
n Reinforcem ent Arrangem ents (Colum n)
54
Section (Colum
.........................................................................................................................................................
n & Pile)
54
Concrete Properties
......................................................................................................................................................... 55
Covers Dialog
......................................................................................................................................................... 55
Covers Table
.........................................................................................................................................................
(Beam and Slabs)
55
General Specification
.........................................................................................................................................................
(Colum n & Pile)
56
General Specification
.........................................................................................................................................................
(Beam and Slabs)
56
Loads (Beam
.........................................................................................................................................................
and Slabs)
57
Loads (Colum
.........................................................................................................................................................
n & Pile)
58
Load Cases
.........................................................................................................................................................
(Beam and Slabs)
59
Load Factors
.........................................................................................................................................................
(Beam and Slabs)
59
Material Specification
......................................................................................................................................................... 59
Notional Loads
.........................................................................................................................................................
(Beam )
60
Preferences
......................................................................................................................................................... 60
Rectangular
.........................................................................................................................................................
Colum n Reinforcem ent Arrangem ents (Colum n)
61
© Oasys Ltd. 2014
III
Oasys ADC
Redistribution
.........................................................................................................................................................
(Beam and Slabs)
62
Reinforcem
.........................................................................................................................................................
ent Properties
62
Slenderness
.........................................................................................................................................................
(Colum n)
63
Spans (Beam
.........................................................................................................................................................
and Slabs)
64
Supports (Beam
.........................................................................................................................................................
and Slabs)
64
Units
......................................................................................................................................................... 65
Wind Loads
.........................................................................................................................................................
(Beam and Slabs)
65
Reinforcem
.........................................................................................................................................................
ent Arrangem ent
66
External Design
.........................................................................................................................................................
Load(Beam and Slabs)
67
Part VI Output Options
69
1 Graphical
...................................................................................................................................
Output
69
2 Tabular
...................................................................................................................................
Output
69
Part VII Analysis and Design
72
1 Analysis
...................................................................................................................................
and Design (Columnl)
72
Reinforcem
.........................................................................................................................................................
ent Detailing Manual
72
Calculation
.........................................................................................................................................................
of Design Mom ents (Colum n)
73
Ultim ate Capacity
.........................................................................................................................................................
of Sections (Colum n)
73
2 Validation
...................................................................................................................................
of Sections (Column)
73
3 Analysis
...................................................................................................................................
and Design (Beam and Slabs)
75
Analysis (Beam
.........................................................................................................................................................
and Slabs)
75
Reinforcement
..................................................................................................................................................
Detailing Manual (Beam and Slabs)
75
Elastic Analysis
..................................................................................................................................................
(Beam and Slabs)
76
Redistribution
..................................................................................................................................................
(Beam and Slabs)
76
Further Notes
..................................................................................................................................................
on Redistribution (Beam and Slabs)
76
Point Moments
..................................................................................................................................................
(Beam and Slabs)
80
Design (Beam
.........................................................................................................................................................
and Slabs)
81
Critical Section
..................................................................................................................................................
for Bending (Beam and Slabs)
81
Critical Section
..................................................................................................................................................
for Shear (Beam and Slabs)
82
Preliminary..................................................................................................................................................
Design Calculations (Slabs)
82
Main Steel..................................................................................................................................................
Area Calculation (Beam)
83
Bar Selection
..................................................................................................................................................
(Beam and Ribbed Slab)
83
Main Steel Bar
...........................................................................................................................................
Selection (Ribbed Slab)
83
Continuity Steel
...........................................................................................................................................
Selection (Beam and Ribbed Slab)
84
Compatibility
...........................................................................................................................................
Steel Selection (Beam and Ribbed Slab)
85
Main Steel Curtailment
...........................................................................................................................................
(Beam and Ribbed Slab)
85
Link Steel Selection
...........................................................................................................................................
(Beam and Ribbed Slab)
85
Link Steel Curtailment
...........................................................................................................................................
(Beam and Ribbed Slab)
86
Bar Selection
..................................................................................................................................................
(One-w ay Solid Slab)
86
Top Steel ........................................................................................................................................... 86
Bottom Steel
........................................................................................................................................... 87
Bottom Steel
...........................................................................................................................................
- Curtailment
89
Shear Check
........................................................................................................................................... 91
Post-Design
.........................................................................................................................................................
(Beam and Slabs)
91
4 Eurocode
...................................................................................................................................
2
92
5 Hong
...................................................................................................................................
Kong Code of Practice : 1987
92
6 Hong
...................................................................................................................................
Kong Code of Practice : 2004 (Beam and Slabs)
93
Part VIII Interaction with Other Software
95
© Oasys Ltd. 2014
Contents
IV
1 Export
...................................................................................................................................
to Oasys AdSec (Column and Beam)
95
2 Export
...................................................................................................................................
to Oasys GSA (Beam)
95
3 Graphic
...................................................................................................................................
View Save Options
95
4 Output
...................................................................................................................................
View Output Options
96
Part IX Command line option
Part X APPENDIX
Index
© Oasys Ltd. 2014
98
100
101
I
Oasys ADC
Foreword
This is just another title page
placed between table of contents
and topics
© Oasys Ltd. 2014
About ADC
Part
I
3
1
Oasys ADC
About ADC
The ADC suite comprises Column, Beam, One way solid slab and Ribbed slab design options.
ADC performs the design in accordance with the following design codes:
ACI 318-02
ACI 318-05
ACI 318-08
ACI 318M-02
ACI 318M-05
ACI 318M-08
AS 3600-2001
AS 3600-2009
BS8110-1:1985
BS8110-1:1997
BS8110-1:1997(Rev. 2005)
EN 1992-1-1:2004 Eurocode 2
EN 1992-1-1:2004 Eurocode 2 (DE)
EN 1992-1-1:2004 Eurocode 2 (FR)
EN 1992-1-1:2004 Eurocode 2 (GB)
EN 1992-1-1:2004 Eurocode 2 (IT)
EN 1992-1-1:2004 Eurocode 2 (NL)
Hong Kong Code of Practice 1987
Hong Kong Code of Practice 2004 (AMD1 2007)
Hong Kong Code of Practice 2013
IS456:2000
In Column design module, sections are validated against design code requirements/limits for
reinforcement. Ultimate capacities for all valid sections are calculated and compared against applied
loads. Sections with adequate axial and bending capacity, and minimum area of reinforcement are
determined.
In Beam and Slab design modules, following the ultimate load analysis, support moments may be
redistributed and a complete reinforcement design is produced. If required, this initial design may be
refined by editing the design parameters and re-running the design section of the program.
See also:
Features
1.1
Features
General
New Model Wizards to guide users in setting up data.
Units may be chosen as consistent SI, kN-m, kip-ft or kip-in sets, or specified individually for each
component
Materials for concrete or reinforcement may be selected from a standard classes that are
appropriate to the chosen design code, or defined by the user
Data checks can be performed before design to identify invalid or inconsistent data and provide
clear error messages
Column Design
© Oasys Ltd. 2014
About ADC
4
Biaxial bending in accordance with chosen design code
2nd order moment in accordance with chosen design code
Eccentricity/imperfection moment in accordance with chosen design code
End Conditions selection to suit design code definitions
Cross-sections may be rectangular, circular or hollow circular
Reinforcement layout may be chosen from standard bar layouts
Beam Design/Check
Continuous reinforced concrete one-way spanning beam with or without rotational restraint
at supports.
End conditions may be encastre, free, pinned, spring or column/wall support.
Cross-sections of beams may be rectangular, taper, T, taper-T or general-I
Loads may be point, uniform, linear, patch, tri-linear or moment; they can be classed as dead,
imposed, or user; partial safety factors are attributed separately to each category in the load
combinations module.
Moment redistribution may be specified as a percentage.
Reinforcement layout under full user control with default conditions provided; bar covers,
diameters, limits, spacing and selection criteria can be specified either overall or at specified
locations.
One-way solid slabs and Ribbed slab Design/Check
Continuous reinforced concrete one-way spanning slab or ribbed slab with or without
rotational restraint at supports.
End conditions may be encastre, free, pinned, spring or column/wall support.
Cross-sections of:
ribbed slabs may have T or taper-T cross-section
solid slabs must be of uniform thickness within each span
Loads may be point, uniform, linear, patch, tri-linear or moment; they can be classed as dead,
imposed, or user; partial safety factors are attributed separately to each category in the load
combinations module.
Moment redistribution may be specified as a percentage.
Reinforcement layout under full user control with default conditions provided; bar covers,
diameters, limits, spacing and selection criteria can be specified either overall or at specified
locations.
© Oasys Ltd. 2014
5
Oasys ADC
Pile Design(Available only for EC2 design code)
Biaxial bending in accordance with chosen design code
2nd order moment in accordance with chosen design code
Eccentricity/imperfection moment in accordance with chosen design code
End Conditions selection to suit design code definitions
Cross-sections circular only
Reinforcement layout may be chosen from standard bar layouts
© Oasys Ltd. 2014
Step by Step
Guide
Part
II
7
2
Oasys ADC
Step by Step Guide
Step by Step Guide (Column)
Step by Step Guide (Beam and Slabs)
2.1
Step by Step Guide (Column)
To design a reinforced concrete column follow the steps listed below.
1.
Enter data initially via the New Model Wizard by selecting 'File | New' from the main menu, and
in accordance with the program's sign conventions.
2.
Where necessary create additional column loads via the Column Loads table. This is
accessible from the Gateway, or by selecting the 'Data | Column Loading | Column Loads' option
from the main menu.
3.
Ensure that at least one analysis case has been created. The Analysis Cases table is
accessible from the Gateway, or by selecting the 'Data | Column Loading | Analysis Cases'
option from the main menu.
4.
If automatic section validation is enabled, then ADC automatically derives valid column
sections/reinforcement arrangements using the range of input data that has been specified,
together with those design code checks and limits that have been enabled.
5.
Review the valid sections via the 'Current Section' drop list on the Graphic toolbar and the
Graphic View.
6.
Check that the input data is complete by clicking the 'Check' button of the ADC toolbar, or by
selecting the 'Analyse | Check Data' option from the main menu.
7.
Perform the design of column reinforcement by clicking the 'Design' button of the ADC toolbar,
or by selecting the 'Analyse | Design' option from the main menu.
8.
Review the results in the Output View by clicking the 'Output View' button of the ADC toolbar,
or by selecting the 'View | New Output View' option from the main menu, and choosing, from the
Column Output Options dialog, the items to be reported and the manner in which they are
ordered in the results table. Results may also be viewed on the Graphic View by clicking the
'Column Results' button of the Graphic toolbar, or by selecting the 'Graphics | Diagrams | Column
Results' option from the main menu while the Graphic View is active. Results are shown for the
current section and for the analysis case chosen from the Graphic View's own Analysis Case
drop list.
9.
If an installation of AdSec is accessible, then the analysis of a section can be refined by
exporting the data file as an AdSec data file.
10. Myy/Mzz and N/M interaction charts may be viewed directly by selecting 'Analyse | ULS Charts'
from the main menu.
11. If necessary modify the data in order to achieve an acceptable design, and return to Step 5.
To modify data after a calculation has been performed, first delete results by selecting the
'Analyse | Delete Results' option from the main menu, or by clicking the 'Delete Results' button
on any of the data input dialogs.
Steps 4 (section validation) and 6 (data checking) are executed as part of Step 7 if these have not
already been performed explicitly as above.
Step 6 (data checking) is executed as part of Step 7 if one has not already been performed explicitly
as above.
© Oasys Ltd. 2014
Step by Step Guide
2.2
8
Step by Step Guide (Beam and Slabs)
To design a reinforced concrete beam and slabs follow the steps listed below.
1.
Enter data initially via the New Model Wizard by selecting 'File | New' from the main menu.
2.
Where necessary create additional loads via the Loads, Wind Loads and Notional Loads
tables, and load cases via the User Load Cases table. These are accessible from the Gateway
or by selecting the 'Data | Beam/Slab Loading' option from the main menu.
3.
Check that the data is valid by clicking the 'Check' button of the ADC toolbar, or by selecting the
'Analyse | Check Data' option from the main menu.
4.
Perform an elastic analysis to derive shear forces and bending moments for the beam/slab by
clicking the 'Analysis' button of the ADC toolbar, or by selecting the 'Analyse | Analysis' option of
the main menu.
5.
Perform moment redistribution by clicking the 'Redistribution' button of the ADC toolbar, or by
selecting the 'Analyse | Redistribution' option of the main menu.
6.
Design the reinforcement in the beam/slab by clicking the 'Design' button of the ADC toolbar, or
by selecting the 'Analyse | Design' option of the main menu.
7.
Review the results in the Graphic View by clicking the 'Graphic View' button of the ADC toolbar
and choosing, from the Graphic toolbar, the items to be displayed, or in the Output View by
clicking the 'Output View' button of the ADC toolbar and choosing, from the Output Options
dialog, the items to be reported.
8.
If necessary modify the data in order to achieve an acceptable design, and return to Step 3.
Step 6 (design) can be selected without having first performed Step 3 (checking), Step 4 (analysis) or
Step 5 (redistribution). In this case ADC performs the earlier steps automatically first. Steps 4 and 5
can be performed similarly without their respective preparatory steps.
Before modifying the data in Step 8, results must be deleted by clicking the 'Delete Results' button of
the ADC toolbar, by selecting the 'Analyse | Delete Results' option of the main menu, or by clicking
the 'Delete Results' button on any of the input data dialogs.
See also:
Becoming Familiar with beam design - An Example
2.2.1
Becoming Familiar with beam design - An Example
To demonstrate the use of the program for the analysis and design of a continuous beam in a
building project, consider the building structure in Figure 1 and the corresponding sub frame structure
shown in Figure 2.
But first, why only a sub frame? The reason is that BS8110, the relevant British Standard Code of
Practice, suggests that this is an acceptable simplification.
The manual design procedure can be divided into a number of stages where the user:
defines a structure.
defines the structural loading.
converts the loading into bending moments and shear forces.
optionally — reduces the calculated bending moments and shear forces due to the formation of
plastic hinges, ie, performs a moment redistribution.
defines the parameters which affect the reinforcement bar, specification and layout.
converts the bending moments and shear forces into reinforcement bars.
produces a detailed specification of the individual bars in reinforcement drawings and associated
bending schedules.
© Oasys Ltd. 2014
9
Oasys ADC
The program procedure is subdivided into a number of stages which correspond directly to their
equivalents in the manual one. We will now go through all of the program stages, outlining the major
steps.
The program asks for:
information which is printed on the top of all of the output, such as job numbers and titles, i.e. the
information which an engineer puts at the top of the calculation sheet.
The structure which we will use to demonstrate the different stages of the process is given in Figure
1, which represents part of a shear wall structure.
Figure 1: Example Structure Elevation
Figure 2 : Example Structure modelling
Design Options
After confirming that beam design option is selected, and accepting the "Current units" displayed,
© Oasys Ltd. 2014
Step by Step Guide
10
the program then requires:
the design code to be used – accept the BS8110 displayed;
the "Number of spans" – input `5´, and with "Next" proceed to the next screen.
Span and support details
"Far end conditions" of the beam: the above example has five spans — the right hand end is
cantilevered i.e. `Free´. The left hand end is monolithic with a substantial thick concrete shear wall;
`Encastre´ end will model this condition most closely.
`Span length´: – input initially the most common value — 6m ; this can be amended later for
individual spans.
`Section´ type:
At present the user has a choice of five section types (Figure 3):
Figure 3 : Standard Beam Cross-sections
Enter the most common section and its cross-section dimensions; again these can be amended
later for individual spans.
© Oasys Ltd. 2014
11
Oasys ADC
'Support´ conditions: again enter the most common condition and amend it later for individual
supports. In our case, this is `Column´ with `Lower / upper / same´ .
Dimensions of the columns: click on `Columns´ button, accept the `wizard´ prompt, and input the
cross-section´s dimensions.
The program will ask for the column´s overall `Height´ and `Fixity at far end´. This is required for a
sub frame analysis and will affect the results. BS8110 Clause 3.2.1 gives recommendations.
The default values accessed through the `General Specification´ button can remain unaltered.
The last items required to define the sub frame are the `Material Specification´ for concrete grades
(defined separately for the beam, upper and lower columns) and the reinforcement types (for main
steel and links). Here C40 and 460T are used throughout.
Different values for individual spans and supports can be input either now by the drop down boxes, or
later in the input data spreadsheet tables.
Loading details
All parameters required to define the structure have now been specified and we now proceed to the
next stage, ie to define the maximum loading in normal use. At this stage we should input the most
common Dead and Imposed uniformly distributed loads; again these can be amended later in the
spreadsheet tables where other types of loading (point, patch etc) can be added.
Design details
In the next screen, we confirm the request for moment distribution by ticking the box and requesting
a target of 10%. This screen allows alteration of a variety of default design parameters; we can either
accept these defaults with `Finish´ , or tailor these to our specific requirements as below.
`Sizes´: During the bar selection, the program will try to pick a bar from a range of possible bar
diameters. These are 6, 8, 10, 12, 16, 20, 25, 32, 40 and 50mm.
`Covers´: We now have to decide on how much cover to the reinforcement is required. BS8110 gives
recommendations in Clause 3.3. The program will request the nominal cover to all steel and an
allowance for transverse steel, e.g. links. Using this data it will calculate the cover to the main steel.
The cover is asked for in three places, i.e. the top surface, the bottom surface and the vertical sides;
the program will offer standard defaults which can be edited globally or for each critical section in the
beam. These are the locations where the program will calculate the area of steel required and that
actually provided.
`Limits´: The user can select different ranges for the top, bottom and link reinforcements. Also the
program offers an option to define a smaller minimum size for continuity steel. This reinforcement is
used in the cases where bending is not a governing criterion.
The default values in the `Spacing´ and `Selection criteria´ boxes can remain unaltered.
Main screen
The program proceeds to the main screen, from which all input data items can be accessed from the
`Gateway´ contents list on the left. This list can be displayed later at any time by clicking on the
`Gate´ button in the top toolbar.
From `Gateway´ we can now access the data for individual spans, supports and loading. The details
input for `All spans´ are now expanded into components for each span. These are amended by
accessing the individual cells with the cursor, editing and moving on to another cell as one would
with a proprietary spreadsheet.
e.g. to inspect the factored loading combinations considered by the program, select, from `Gateway´,
the `Loads´, 'Load Factors for Combinations' and 'Load Cases' tables. The loading is subdivided into
dead (e.g. self-weight), and imposed (e.g. live, moveable partitions, etc) loading so that the most
© Oasys Ltd. 2014
Step by Step Guide
12
adverse cases can be calculated. We must define the safety factors, as the specified maximum
loading is a best estimate. BS8110 gives recommendations for these factors, as 1.4 for dead and 1.6
for imposed. The program offers these as the defaults. The engineer wishes to produce the most
adverse combination of loading and BS8110 recommends that a standard load pattern analysis is
used. The program again offers this as a default.
The program has now already performed the analysis, ie the calculation of bending moments and
shear forces. A summary of the results can be displayed on the screen in tabular
or graphical
form, followed by
for shear forces,
for elastic moments, and
for the design moments (which
include any redistribution).
The user can now study the results, and if desired, can edit the input data through `Data´ in the top
toolbar. e.g. increase the target moment redistribution value to reduce peak support moments.
Design
The program has also produced a full reinforcement design in accordance with the above data. The
user can study the design in detail in tabular
or graphical
form, followed by
for main
reinforcement, and
for the links. Right-clicking on an individual span will produce the detailed
calculations for it, and selecting the `Bar positions´ button will display the cross-section bar
coordinates. If unhappy with the results, the user can edit the design data through `Data´ in the top
toolbar.
The user can now, if required, optimise the reinforcement layout.
Reinforcement Optimisation
By proceeding iteratively through the process of:
amending the design data through these options;
inspecting the results in tabular and/or graphical form;
the user can produce an optimum design and the corresponding complete reinforcement drawing.
Reinforcement Drawings
The information provided in the tabular and graphical output can be used as the basis for a manually
prepared reinforcement drawing and associated bending schedules.
Alternatively, the results from the above design can be stored on disk and transferred as input to a
reinforcement drawing package to produce a final reinforcement drawing complete with bending
schedules. This drawing can be subsequently amended to allow for local discrepancies between the
above idealisation and the actual structure, e.g., small holes, nibs, etc. At present, however, this
data transfer is performed manually, but there are proposals to develop an automatic link.
Output
The printed output below relates to the above example.
Input Data
Notes:
None
General Specification
© Oasys Ltd. 2014
13
Oasys ADC
Design code
Maximum x/d
(Ratio of neutral axis depth to effective depth)
Frames provide lateral stability
Deep beam check ignored
Check code prescribed load cases
Check user defined load cases
Use concrete self weight
Concrete weight density
Adjust moments at supports
Code permissible redistribution
Redistribute moments
Bunched bar solutions allowed
Comply with Arup Reinforcement Detailing Manual
BS8110
0.6000
Yes
No
Yes
No
No
24.00kN/m³
Yes
30.00%
Yes
Yes
No
Spans
Sections are defined as follows:
STD TT Depth, Width, Web top, Web bottom, Flange
Span
Length
1
2
3
4
5
Section
[m]
6.000
6.000
6.000
6.000
2.500
STD
STD
STD
STD
STD
TT
TT
TT
TT
TT
500.
500.
500.
500.
500.
1200.
1200.
1200.
1200.
1200.
550.
550.
550.
550.
550.
400.
400.
400.
400.
400.
200.
200.
200.
200.
200.
=> Tapered T Section
Flange Effective
Width
Width
[m]
[m]
1200.
1200.
1200.
1200.
1200.
1200.
1200.
1200.
1200.
1200.
Supports
Supt. Label
Upper
Type
Lower Section
Lower
Lower
Length
Fixity
Upper Section
Upper
Length
Fixity
[m]
1 A
2 B
Pinned
3 C
4 D
Pinned
5 E
6 F
[m]
Encastre
Columns
STD R 450. 450.
3.500 Encastre
STD R 450. 450.
3.500
Columns
Columns
STD R 450. 450.
STD R 450. 450.
3.500 Encastre
3.500 Encastre
STD R 450. 450.
3.500
Columns
Free
STD R 450. 450.
3.500 Encastre
Concrete Material Specification
Name
Beam / Slab
Lower Columns
Upper Columns
C40
C40
C40
fcu
[N/mm²]
40.00
40.00
40.00
Max. Static
Max.
Agg.
E
Strain
Size
[mm] [N/mm²]
20.00 28000. 0.003500
20.00 28000. 0.003500
20.00 28000. 0.003500
© Oasys Ltd. 2014
Step by Step Guide
Reinforcement Specification
Name
Bond
Bond Young's
fy
Coeff. Coeff. Modulus
Tension Compr.
[N/mm²] [N/mm²]
Main 460T 0.5000 0.6300 200000.
460.0
Links 460T 0.5000 0.6300 200000.
460.0
Loads
Load Span
Class
Type
Pos. 1 Load Pos. Load
1
2
2
[m]
[kN] [m] [kN]
[kNm]
[kNm]
1 All Dead
Uniform
4.000
2 All Imposed Uniform
5.000
3
1 Imposed Patch
2.000 4.000
4
2 Imposed Tri-Linear 1.500 5.000
5
3 Imposed Point
3.000
6
4 Imposed Linear
3.000 5.000
7
5 Imposed Point
5.000
8
5 Imposed Point
3.000
9 All User
Uniform
0.5000
10
5 User
Point
1.500
Prescribed Load Combinations
No.
Name
1
2
3
4
5
6
7
8
9
10
Dead
D
D.I
D.I.WL
D.I.WR
D.WL
D.WR
D.I.NL
D.I.NR
D.NL
D.NR
Imposed User
1.000
1.400
1.200
1.200
1.000
1.000
1.200
1.200
1.000
1.000
0.0
1.600
1.200
1.200
0.0
0.0
1.200
1.200
0.0
0.0
0.0
0.0
0.0
0.0
0.0
0.0
0.0
0.0
0.0
0.0
Wind
Wind
Notional Notional
(left) (right) (left) (right)
0.0
0.0
0.0
0.0
0.0
0.0
0.0
0.0
1.200
0.0
0.0
0.0
0.0
1.200
0.0
0.0
1.400
0.0
0.0
0.0
0.0
1.400
0.0
0.0
0.0
0.0
1.000
0.0
0.0
0.0
0.0
-1.000
0.0
0.0
1.000
0.0
0.0
0.0
0.0
-1.000
User Load Combinations
No.
Name Dead
1
2
3
4
DIL
DIR
DL
DR
1.200
1.200
1.000
1.000
Imposed User
1.200
1.200
0.0
0.0
0.0
0.0
0.0
0.0
Prescribed Load Cases
© Oasys Ltd. 2014
Wind
Wind
Notional Notional
(left) (right) (left) (right)
1.200
0.0
0.0
0.0
0.0
1.200
0.0
0.0
1.400
0.0
0.0
0.0
0.0
1.400
0.0
0.0
14
15
Oasys ADC
No.
Name
1 1.4D+1.6I
2 1.4D+1.6I / 1.0D
3 1.0D / 1.4D+1.6I
Analyse Redistribute Span
1
Yes
Yes
D.I
Yes
No
D.I
Yes
No
D
Span
2
D.I
D
D.I
Span
3
D.I
D.I
D
Span
4
D.I
D
D.I
Span
5
D.I
D.I
D
User Load Cases
No.
1
2
3
4
Name
1.2D+1.2I+1.2WL
1.2D+1.2I+1.2WR
1.0D+1.4WL
1.0D+1.4WR
Analyse
Yes
Yes
Yes
Yes
Redistribute
No
No
No
No
Span 1
D.I.WL
D.I.WR
D.WL
D.WR
Span 2
D.I.WL
D.I.WR
D.WL
D.WR
Span 3
D.I.WL
D.I.WR
D.WL
D.WR
Span 4
D.I.WL
D.I.WR
D.WL
D.WR
Span 5
D.I.WL
D.I.WR
D.WL
D.WR
Redistribution
Span
[kNm]
1
2
3
4
5
Left
Left
reduction permitted
[%] or
reduction
Design
[%] or
moment
Design
moment
[kNm]
[kNm]
30.00%
30.00%
30.00%
30.00%
30.00%
18.75%
30.00%
27.23%
30.00%
30.00%
Right
Right
reduction permitted
[%] or
reduction
Design
[%] or
moment
Design
moment
[kNm]
30.00%
30.00%
30.00%
30.00%
30.00%
22.20%
30.00%
30.00%
30.00%
0.0%
Covers
Span Pos.
1
1
1
2
2
2
3
3
3
4
4
4
5
5
5
Left
Mid
Right
Left
Mid
Right
Left
Mid
Right
Left
Mid
Right
Left
Mid
Right
Nominal
Top
Bottom Side
[mm]
[mm] [mm]
25.00 25.00 25.00
25.00 25.00 25.00
25.00 25.00 25.00
25.00 25.00 25.00
25.00 25.00 25.00
25.00 25.00 25.00
25.00 25.00 25.00
25.00 25.00 25.00
25.00 25.00 25.00
25.00 25.00 25.00
25.00 25.00 25.00
25.00 25.00 25.00
25.00 25.00 25.00
25.00
25.00 25.00
Trans.
Allow.
Top
Bottom
[mm]
[mm]
0.0
0.0
0.0
0.0
0.0
0.0
0.0
0.0
0.0
0.0
0.0
0.0
0.0
0.0
0.0
0.0
0.0
0.0
0.0
0.0
0.0
0.0
0.0
0.0
0.0
0.0
0.0
0.0
Available Bar Sizes
© Oasys Ltd. 2014
Step by Step Guide
16
Name Size
[mm]
0 8.000
1 10.00
2 12.00
3 16.00
4 20.00
5 25.00
6 32.00
7 40.00
8 50.00
Bar Limits
Minimum Maximum
Top
Bottom
Links
[mm]
10.00
10.00
8.000
Minimum
Continuity
[mm]
[mm]
40.00
10.00
40.00
10.00
20.00
Bar Spacing and Cut-offs
Space for poker
Preferred minimum distance between bars
Main bars cut-off distance from column/concrete face
Column allowance: Cover to main column reinforcement
Column allowance: Diameter of main column bars
75.00
40.00
50.00
40.00
25.00
mm
mm
mm
mm
mm
Bar Selection Criteria
Link shape
Link arrangement
Mixing of bars at a section
Preferred maximum allowable area provided
Minimum allowable area provided
Saving in area req'd to justify more bars or mixed diameters
Analysis Results
Analysis Moment and Shear Summary
Span Moment
Peak Position Moment at Shear Shear at
at Left Moment of Peak
Right
at Left Right
Support along
Moment
Support Support Support
Span
[kNm] [kNm]
[m]
[kNm]
[kN]
[kN]
1
56.51
45.57
51.44
0.0
0.0 -28.07
3.000
0.0
0.0
-45.05
© Oasys Ltd. 2014
Trapezoidal
Outer links closed
Do not mix
1.35 x area req'd
1.05 x area req'd
10.00%
17
Oasys ADC
2
48.55
0.0 -40.96
41.83
0.0 -32.95
46.70
0.0 -46.20
59.28
0.0
3
4
5
46.90
0.0
42.20
3.000
0.0
57.80
3.273
0.0
1.059E-6
-6.843E-6
3.000
55.69
0.0
0.0
-51.99
44.00
0.0
0.0
-42.90
60.51
0.0
0.0
-63.55
46.80 39.21E-6
0.0
0.0
Redistributed Moment and Shear Summary
Span Moment
Peak Position Moment at Shear Shear at Redistribution
Redistribution
at Left Moment of Peak
Right
at Left Right
at Left
Support along
Moment
Support
Support Support
at Right
Support
Support
[%]
[%]
Span
[kNm]
[kNm]
[m]
1
56.51
0.0 -36.93
44.50
2.727
2
0.0 -46.52
32.24
3.000
3
0.0 -32.95
46.08
3.000
4
0.0 -47.53
59.28
3.000
5
[kNm]
[kN]
[kN]
31.90
51.44
0.0
0.0
0.0
36.78
0.0
55.69
-45.05
0.0
8.337
0.0
30.22
0.0
44.00
-51.99
0.0
22.93
0.0
40.46
0.0
60.51
-42.90
0.0
1.331
0.0
-63.55
46.80 39.21E-6
0.0
0.0
0.0
0.0
0.0
0.0
1.059E-6
0.0
0.0 -1.526
2.159 -6.843E-6
0.0
0.0
Analysis Support Reaction Envelopes
Support Reaction Lower Upper
Column Column
Moment Moment
1
2
3
4
5
6
[kN]
51.44
6.710
99.67
50.69
95.49
57.08
99.34
50.26
110.4
62.94
0.0
0.0
[kNm] [kNm]
0.0
0.0
0.0
0.0
17.19 1.426
-13.92 -1.744
11.45
0.0
-16.55
0.0
21.74 1.744
-17.64 -1.426
24.02
0.0
-25.01
0.0
0.0
0.0
0.0
0.0
© Oasys Ltd. 2014
Step by Step Guide
18
Design Results for Span 1
Moments
Left
Mid
Design Hogging
6.000
Elastic Hogging
[kNm] at [m]
56.51
[kNm]
56.51
Design Sagging
6.000
Elastic Sagging
[kNm] at [m]
0.0
[kNm]
0.0
0.0
7.440
Right
2.727
7.440
0.0
36.93
31.90
45.57
2.727
0.0
27.05
0.0
Top Reinforcement
Left
As.prov, As.reqd
617.5
100*As.prov/bh
0.2600
Effective Depth d, d'
[mm²]
[%]
[mm]
Mid
Right
628.3
617.5
628.3
617.5
628.3
0.2646
0.2600
0.2646
0.2600
0.2646
455.0
455.0
Governing Criterion
Minimum
Minimum
Layer 1 Bar Ref., Length [m]
2T20
2T20
Extent from support CL [m]
0
0
2.200
1.500
455.0
Minimum
(3.000)
1.500
2T20
2.200
Bottom Reinforcement
Left
As.prov, As.reqd
308.7
100*As.prov/bh
0.1300
Effective Depth d, d'
[mm²]
[%]
[mm]
Mid
Right
339.3
308.7
339.3
308.7
339.3
0.1429
0.1300
0.1429
0.1300
0.1429
459.0
459.0
Governing Criterion
Minimum
Minimum
Layer 1 Bar Ref., Length [m]
3T12
3T12
Extent from support CL [m]
0
0
1.325
0.9000
459.0
Minimum
(4.200)
3T12
0.9000
1.325
Links
Left
Right
Design Shears
5.340
v, vc
0.4708
© Oasys Ltd. 2014
[kN] at [m]
[N/mm²]
Mid
45.52
0.4350
5.290
3.000
36.08
0.1993
0.4708
0.02316
0.4708
0.1580
19
Oasys ADC
Asv prov, reqd
479.3
Governing Criterion
[mm²/m]
Bar Ref., Pitch
[m]
Extent
[m]
523.6
479.3
Minimum
523.6
479.3
Minimum
2T10
523.6
Minimum
0.3000
Span / Effective Depth Ratio
Basic Ratio
21.51
Tension Reinforcement (Table 3.10) Factor
129.1)
Comp. Zone Reinforcement (Table 3.11) Factor
2.000 (M/bd2 0.1461, Serv.Stress
Permissible Span/Depth Ratio
44.61
Actual Span/Depth Ratio
13.07 < 44.61 O.K.
1.037 (Comp Reinforcement 0.1151%)
And similarly for the remaining spans 2 to 5.
© Oasys Ltd. 2014
Working with
ADC
Part
III
21
3
Oasys ADC
Working with ADC
Some Basic Concepts
Working with the Gateway
Working with Table Views
Working with Graphic Views
Working with Output Views
3.1
Some Basic Concepts
Components of the User Interface
Preferences
Toolbars
File formats
Using the New Model Wizard
Cases
Sign Conventions and Dimensions in Column design
3.1.1
Components of the User Interface
The principal components of ADC's user interface are the Gateway, Table Views, Graphic Views
and Output Views. These are illustrated below.
© Oasys Ltd. 2014
Working with ADC
3.1.2
22
Preferences
In many cases the user will want to be able to have preferred settings. These settings or
`Preferences´ are stored between one session of ADC and the next.
Preferences are set in the Preferences Dialog available from the `Options | Preferences´ (Ctrl+F7)
menu command.
Some preferences, such as the toolbar selection and positioning and window sizes are automatically
set each time the program is closed.
Other preferences, such as the design code and country, the selected concrete and reinforcement
materials, the available bar sizes and the bar size limits are set each time they are set in any data
file. New models will then adopt these preferences by default.
3.1.3
Toolbars
Many of the commonly used commands are available on toolbars. All toolbars can be either docked
(attached to the main frame) or floating. The toolbars can be switched on and off from the `Options |
Toolbars´ menu command. Hovering the mouse over a toolbar button will display a small window
(tooltip) with the name of the command.
Toolbars are covered in detail in the Toolbars and Keyboard Accelerators section.
3.1.4
File Formats
ADC can read and write a number of file formats, however, the default file types for ADC are AdBeam
and AdCol. ADC also supports the file type 'adc' and 'adb'.
There are also options to interact with other software through Import and Export functions. These are
described in detail in the Interaction with Other Software section.
3.1.5
Using the New Model Wizard
The New Model Wizard provides a quick way of generating a model with the minimum necessary
data.
When a new document is opened the New Model Wizard guides the user through the necessary
steps involved in creating a model. At the end of this process a complete model is generated.
When creating complex models with unsymmetrical geometry and or loading parameters, it is
recommended that a simplified model is created using this facility. A uniform geometry and loading
pattern could be assigned to this model, and subsequently changed using the Gateway or program
menu which allow full access to all design parameters assigned to the model.
This wizard is covered in more detail in the Data Tables, Dialogs and Wizards section.
3.1.6
Cases
Loading and results are grouped into cases.
Column design option groups loads into Analysis Cases. Each Analysis Case comprises a
combination of loads and load factors. Analysis cases are then used in determining the capacity of
the column.
Beam and Slab design options group loads into Load Cases. Each load is given a load type (e.g.
Dead or Imposed). Each Load Case comprises a combination of Load Types and load factors. Load
Cases may then be considered for analysis.
© Oasys Ltd. 2014
23
3.1.7
Oasys ADC
Sign Conventions, Geometry and Dimensions (Column)
The sign conventions, geometry and dimension definitions used in column design are shown below.
Note that axial compression is positive, tension negative and that positive moments are given the
same direction of rotation at both the top and bottom of the column. Therefore, if top and bottom
moments act to produce tension in the same side of the column, these moments should be input
with opposite signs.
3.2
Working with the Gateway
The Gateway gives access to all the data that is available for setting up an ADC model.
Top level categories can be expanded by clicking on the `+´ symbol beside the name or by double
clicking on the name. Clicking on the `-´ symbol or double clicking on the name when expanded will
close up the item. A branch in the view is fully expanded when the items have no symbol beside
them.
© Oasys Ltd. 2014
Working with ADC
24
Double clicking on an item will open the appropriate table view or dialog for data input.
3.3
Working with Table Views
Some input data required by ADC can be entered in tables. The details of the data entered in each
table are covered in the Data Tables, Dialogs and Wizards section.
Tables in ADC are similar to spreadsheets, but there are a number of significant differences. These
are highlighted in detail below.
See also:
Single and Multi-Page Tables
Tabular Data Entry and Editing
Basic Operations in Tables
Selecting Blocks of Cells in Tables
Copying, Cutting and Pasting in Tables
Delete, Blank and Insert in Tables
Find, Replace, Go To and Modify in Tables
Copying to and from Spreadsheets
Adjusting Data Display
3.3.1
Single and Multi-Page Tables
The simplest type of table in ADC contains data on a single page, which scrolls horizontally as
required to give a view on the complete module.
In other cases the data to be displayed is more complex or several data modules are related so it is
convenient to display the data on more than one page of a table.
An example of the latter type of table is the `Concrete Properties´ table – here it is convenient to
separate the user defined properties from the standard properties on separate pages.
For multi-page tables the pages are changed by clicking on the appropriate tab.
3.3.2
Tabular Data Entry and Editing
The details of the data entered in each table are covered in the Data Tables, Dialogs and Wizards
section. This section covers the basic navigation and use of the data tables by keyboard and mouse,
and the Edit menu functions specific to tables.
Changes made in a table are, where appropriate, immediately reflected in other tables, Output Views
and Graphic Views.
Note that in general, data cannot be entered or edited if results exist.
See also:
Field Types
Defaults in Tables
3.3.2.1
Wizards
For many of the tables there is the option of defining the data in a Wizard. The data wizards are
available from the Wizard button in the Data Options toolbar. The use of wizards is necessary for
some of the modules where it is not otherwise possible to select or set up the required data.
© Oasys Ltd. 2014
25
3.3.2.2
Oasys ADC
Field Types
All the fields in ADC belong to one of the six following types:
Text - for names and labels (e.g. Property Name of the Concrete Properties table).
Numeric - for item numbers and numeric values (e.g. load Value of the Loads table).
Numeric/Percentage - for entering values such as locations that can be entered as an actual
value or as a percentage (e.g. moment redistribution reduction of the Redistribution table).
Selection fields - for selecting from a list of items (e.g. 'redistribute this case' field of the Load
Cases table).
Selection/Numeric fields - for selecting from standard items or entering a value for a user defined
property.
3.3.2.3
Defaults in Tables
The shaded cells across the top of a table contain default values, which can be changed by the user.
These are placed in the current cell when the cell contents are entered as blank.
3.3.3
Basic Operations in Tables
The current cell in the table is indicated by depression of the grey cells at the top and left of the
table. When navigating around the table the current cell is also indicated by a bold border around the
cell. When editing a cell the cursor flashes at the current position in the cell and the cell is said to be
in edit mode. Basic navigation and entry of data in tables is as follows.
Navigation
Moving around the table is done by using the arrow keys, Tab, Return, mouse clicks or the `Edit |
Go To´ (Ctrl+G) menu command.
Ctrl+Home and Ctrl+End move the current cell to the first and last cell in the table, respectively.
Page Up and Page Down move the current cell a window-full of records up and down, respectively.
Simply navigating to a cell does not put the cell into edit mode.
Editing
The following actions change a cell to edit mode:
Typing in the cell, to cause the existing data to be replaced by what is typed.
Press F2, to highlight the existing data. Subsequent typing will replace any highlighted data.
Press Home or End, to place the cursor at the beginning or end of the existing data, respectively.
Clicking in the current cell, to place the cursor at the clicked position.
Having edited the contents of a cell the contents of the cell must be registered by doing one of the
following: Press Return or Tab, moves to the next cell.
Press the up or down, moves row.
Press the left or right when the cursor is at the left-most or right-most positions, moves to the
adjacent cell.
Click on another cell.
In all cases the contents of the cell are validated and if invalid input is detected it must be corrected
before moving.
The Esc key can be used to undo an edit.
© Oasys Ltd. 2014
Working with ADC
3.3.4
26
Selecting Blocks of Cells in Table Views
To select all the cells containing data, use the `Edit | Select All´ (Ctrl+A) menu command or click on
the grey box at the very top left of the table. The selection is highlighted in inverted colours (as with
any block selection)
Select records or fields (rows or columns) of cells by clicking on their headers in the grey area.
To select any particular set of cells there are three options:
Use the `Edit | Select´ menu command, which displays a dialogue box where a set of cells can be
defined in terms of records and fields.
Drag a box around them using the mouse.
Click on the start cell of the proposed block, then click on the final cell while holding down shift.
To cancel a selection, use `Edit | Select None´ menu command or click anywhere in the table.
3.3.5
Copying, Cutting and Pasting in Tables
Any selection of table data can be cut or copied to the clipboard, and the contents of the clipboard
can be pasted into a selected location in a table. The clipboard can be used to transfer data between
table views, spreadsheets and other packages.
Cut
Cut records from the document and put them on the clipboard. Complete records must be selected
before cutting data. Cutting data to the clipboard replaces the contents previously stored there.
Many data records (e.g. loads) are deleted from the Table View after cutting the data. This avoids
empty records and causes subsequent records to be renumbered.
Records that are not renumbered are those whose record numbers are cross-referenced to other
data, and alteration would affect that other data.
Copy
Copy blocks of selected data to the clipboard as tab delimited text. Copying data to the clipboard
replaces the contents previously stored there.
Paste
Use the Paste command to insert a copy of the clipboard contents at the currently selected location.
Blocks of data (held in the clipboard in tab delimited format) are inserted if acceptable, see below.
If you highlight a destination block to paste data to, everything in the destination block will be
overwritten on pasting. The size and form of the destination block must be the same as that for data
being pasted from.
Pasting a block of data when no cells are selected results in the block being pasted starting at the
current cell. In this case:
If pasting a block to an existing record, ADC gives the option to overwrite the existing data or to
insert the new data. If insert is chosen, data is inserted before the record containing the current
cell.
If pasting a block to a cell beyond the existing data, it is pasted appended.
Note that for any of the paste operations, if partial record data is pasted resulting in blank cells, the
blank cells will be set to default values.
`=´ and `==´ commands
The `=´ and `==´ commands may be used to copy data from other records in a table. Instead of
typing a value in a cell, the following instructions may be entered:
© Oasys Ltd. 2014
27
Oasys ADC
= to copy the value from the cell above.
=n to copy the value from the same cell in record n.
== to copy the remainder of the record from the record above.
==n to copy the remainder of the record from record n.
3.3.6
Delete, Blank and Insert in Tables
Complete records can be inserted, deleted (with renumbering of subsequent records) or blanked
(without renumbering).
To delete a selected record(s), use `Edit | Delete´ (Del) menu command or the Delete key. The
action of the delete key will depend on the type of table. In tables in which no blank records are
permitted, deleted records are removed and the table is closed up. In tables in which blank records
are permitted, delete will clear or blank the selected records leaving subsequent records unchanged.
If all the selected records are already blank, the records are deleted to result in subsequent records
being renumbered.
To insert a blank record(s) above the currently selected cell or record, use the `Edit | Insert´ (Ins)
menu command. This inserts a record at a time and causes subsequent records to be renumbered.
3.3.7
Find, Replace, Go To and Modify in Tables
Use the `Edit | Find´ (Ctrl+F) menu command or the `Find´ button on the Data Options toolbar to find
specified text or numbers in a Table. The Find Dialog Box appears:
Specify the exact entry you wish to find. This can be made case sensitive by checking the `Match
case´ box.
Choose to search the `whole´ table or a just a `selection´. Note — if a selection is required, it
must be highlighted before choosing the find command.
Choose to search `up´ or `down´ from the current cell. Once the end of the table is reached, the
search reverts back to the beginning of the table.
Click the `Find Next´ button to find the first matching entry, and again for each subsequent
matching entry. ADC displays a warning message if the specified text is not found.
To find a specific record, use the `Edit | Go To´ (Ctrl+G) menu command or the `Go To´ button on
the Data Options toolbar.
Use the `Edit | Replace´ (Ctrl+H) menu command or the `Go To´ button on the Data Options toolbar
to perform a search, as for Find, and also replace the specified text or numbers. The Replace Dialog
appears. This operates as for Find dialog with additions:
Specify the new entry you wish to replace the existing entry.
Upon finding a matching entry, click the `replace´ button, or you can choose to `replace all´
matching entries.
Use the `Edit | Modify´ (Ctrl+M) menu command or the Modify button on the Data Options toolbar to
modify numerical cell entries. Cells containing text remain unmodified. The Table View Modify Dialog
appears. The modifications specified here are applied to every cell value in the `selection´ or the
`whole´ table view. Specify the `modify by´ value to be used in one of the following ways:
Add - add the value in the Modify By box.
Factor - factor by the value in the box.
Power - raise to the power of the value in the box.
Absolute - modify the selection to the absolute value (the modify by is ignored in this case).
© Oasys Ltd. 2014
Working with ADC
3.3.8
28
Copying to and from Spreadsheets
For many purposes the preparation of some part of the model or loading may require the use of
spreadsheets.
Information can be cut/copied from tables in ADC and pasted into spreadsheets and vice versa.
Data copied from ADC or spreadsheets is held as Tab delimited text.
If the user intends to create data in a spreadsheet, it is recommended that a dummy record be
created in ADC and copied to form a `template´ in the spreadsheet.
3.3.9
Adjusting Data Display
Font
The font that is used in the table can be selected from the Data Options toolbar. This gives a
standard Font selection dialog.
3.4
Working with Graphic Views
Graphic Views may be used to view a graphical representation of the model, dimensions and
reinforcement details. Shear force and bending moment results may be displayed (Beam and Slabs
only).
One Graphic View of a model may be open at a time.
The Graphic View may be opened using the `View | Graphic View´ menu command. `Graphic View´
is also available on the ADC toolbar.
See also:
Identifying What is to be Drawn
Scaling and Zooming the Image
Right-Clicking in the Graphic View
Printing from Graphic Views
Output of the Graphic Images
3.4.1
Identifying What is to be Drawn
The following information that is to be displayed on the Graphic View may be specified via the
'Graphics' menu or the Graphic Toolbar.
Beam, Column and Slabs
member/section outline
dimensions
If design has been carried out then the display of the following diagrams may be specified:
details of main reinforcement details
details of links
Beam and Slabs
loading
If an analysis has been carried out, then the display of the following diagrams may also be specified:
shear forces before moment redistribution
bending moments before redistribution
© Oasys Ltd. 2014
29
Oasys ADC
If moment redistribution has been carried out, then the display of the following diagrams may be
specified:
shear forces after moment redistribution
bending moments after redistribution
Column only
If design has been carried out, then the column results may be displayed.
3.4.2
Scaling and Zooming the Image
Scaling to Fit
Zooming and Panning
3.4.2.1
Scaling to Fit
The contents of the Graphic View may be rescaled to fit the extent of its window by selecting
'Scaling | Scale to Fit' from the Graphics menu, or by clicking the appropriate button on the Graphic
Toolbar.
3.4.2.2
Zooming and Panning
Zooming and panning affect the scale and the mid-point of the diagram displayed in the Graphic
View.
Zooming:
Dragging a rectangle in the window causes the image to be zoomed and panned to result in that
rectangle filling the Window. Only when the aspect ratios of the rectangle and window are identical
will this be exact; otherwise the scale is such that at least all of the rectangle remains visible.
Shft+Click pans. The image is panned to result in the point clicked on being at the mid-point of
the view.
Dragging:
Ctrl+Drag up and down zooms in and out respectively.
Shft+Drag pans the image.
Intellimouse wheel:
Rolling the mouse wheel forwards and backwards zooms in and out respectively.
Drag with the mouse wheel (or middle button) held down pans the image.
Ctrl+Drag with the mouse wheel (or middle button) held down operates as Ctrl+Drag.
Menu commands—The following commands (and their associated accelerator keys) are available
from the `Graphics | Scaling´ menu to allow zooming and panning.
Zoom In (Ctrl+Up). Multiplies the structure scale by a zoom factor.
Zoom Out (Ctrl+Dn). Multiplies the structure scale by (1 / zoom factor).
Reset Pan (Shft+Home). Sets the mid-point of the diagram to the mid-point of the Graphic View
window.
Pan Right (Shft+Rt). Adjusts the mid-point to result in the picture shifting left by 1/16 of the picture
width.
Pan Left (Shft+Lft). Adjusts the mid-point to result in the picture shifting right by 1/16 of the picture
width.
Pan Up (Shft+Up). Adjusts the mid-point to result in the picture shifting down by 1/16 of the picture
height.
Pan Down (Shft+Down). Adjusts the mid-point to result in the picture shifting up by 1/16 of the
© Oasys Ltd. 2014
Working with ADC
30
picture height.
3.4.3
Right-Clicking in the Graphic View
Column
Right-clicking in the Graphic View displays a context menu offering the following subset of options
for scaling and zooming the image and outputting the image to image formats:
Copy
Redraw
Rescale
Zoom In
Zoom Out
Save DXF...
Save JPEG...
Save PNG...
Save WMF...
Beam
Right clicking in the Graphic View displays a context menu offering the following subset of options
for scaling and zooming the image and outputting the image to image formats:
Redraw
Rescale
Zoom In
Zoom Out
Save DXF...
Save JPEG...
Save PNG...
Save WMF
Right clicking in the Graphic View over any span displays a context menu offering the following
subset of options for opening the Section Views, exporting the beam sections to AdSec and
displaying the Design Results.
Draw Section with sub menus Left, Mid, Right, All in selected span and Whole Beam
Export To AdSec with sub menus Left, Mid, Right, All in selected span and Whole Beam
Span Design Results
Right clicking in the Graphic View over any cross section displays a context menu offering the
following subset of options for scaling and zooming the image, outputting the image to image formats
and opening the section in new graphics view:
Redraw
Rescale
Zoom In
Zoom Out
Save DXF...
Save JPEG...
Save PNG...
Save WMF
Open in New Window
© Oasys Ltd. 2014
31
Oasys ADC
Right clicking in the Graphic View of beam cross section displays a context menu offering the
following subset of options for scaling and zooming the image, outputting the image to image
formats, Exporting the section to AdSec and changing the display properties:
Next Section >>
Previous Section <<
Redraw
Rescale
Zoom In
Zoom Out
Save DXF...
Save JPEG...
Save PNG...
Save WMF
Export to AdSec
Show Legend
Display Properties
Slabs
Right clicking in the Graphic View displays the Design Results dialog.
3.4.4
Printing from Graphic Views
The graphic image may be printed by giving the `File | Print´ (Ctrl+P) menu command. The printed
image may be previewed by giving the `File | Print Preview´ menu command. `Print´ is also available
on the Standard toolbar.
The `File | Page Setup´ command opens the Page Setup Dialog.
The underlying graphics code used for printing and print previewing is different to that used for display
to the screen. This may occasionally cause subtle differences between the screen image and the
printed image.
When printing to a monochrome device, lines, text and symbols are automatically output in black
and in-fill is converted to a shade of grey by the program. (The various printers and printer drivers
interpret colours differently, sometimes even to the extent of ignoring some colours.)
3.4.5
Output of the Graphic Images
Copying the Graphic Image to the Clipboard
Saving the Graphic Image to File
3.4.5.1
Copying the Graphic Image to the Clipboard
When the Graphic View is active the `Edit | Copy´ (Ctrl+C) menu command copies the current image
to the clipboard in both bitmap and Windows Meta-File (WMF) format. The application to which the
image is pasted will automatically select its preferred format.
In Column design option the same command can be reached by right-clicking while the cursor is in
the Graphic View.
The image copied to the clipboard is as currently displayed, including scaling, dimensions and
reinforcement details.
© Oasys Ltd. 2014
Working with ADC
32
The WMF image includes the whole of the currently drawn model, regardless of the current zoom
setting.
3.4.5.2
Saving the Graphic Image to File
The graphic image can be saved to file in various file formats. All are obtained using the `Graphics |
Save Image´ menu command, or, in Column design option, by right-clicking while the cursor is in the
Graphic View.
The following file formats are available.
WMF
WMF (Windows Metafiles) files are the native format supported by Microsoft, however their file size
is much greater than PNGs or JPEGs, and WMFs are not supported by web browsers. WMFs can
be useful for including in Microsoft Word documents, but PNGs and JPEGs still produce a much
smaller Word document when saved. A benefit is that the WMF format adds the company logo to the
image, which may be desirable.
Note that the WMF image includes the whole of the currently drawn model, regardless of the current
zoom setting.
PNG
PNG (Portable Network Graphic) files are best for images that contain mainly simple lines, text or
white space. The image quality is good, and the file size is small. PNGs are supported by
professional paint packages and most web browsers. They are also useful for including in Microsoft
Word documents.
JPEG
JPEG (Joint Photographic Experts Group) files are best for images that contain a lot of colour filling.
For this type of image the JPEG quality factor need not be set very high. For line drawings the PNG
format is recommended. JPEGs are widely supported by all paint packages and web browsers.
They are also useful for including in Microsoft Word documents.
DXF
The image saved is as currently displayed, including dimensions, reinforcement details and text. DXF
files can be read by various CAD packages. (N.B. `Print by case´ is ignored when saving to DXF.)
3.5
Working with Output Views
Output Views may be used to view input data and results in tabular format. One Output View may be
open at one time.
The Output View may be opened using the `View | Output View´ menu command. `Output View´ is
also available on the ADC toolbar.
The `Output View´ command first displays the Column Output Settings Dialog or the Beam Output
Settings Dialog. `OK´ opens an Output View containing the selected output; `Cancel´ exits the dialog
box without opening an Output View.
If the Wizard is activated while the Output View is active the appropriate Output Settings dialog is
displayed. The new selection of output is subsequently displayed in the already active Output View.
The units in which data is output are the model units.
The numeric format in which data is output is as set in the user preferences.
The selection and presentation of data that is to be shown in the Output View may be specified by
clicking the Wizard button of the Data Options Toolbar.
© Oasys Ltd. 2014
Toolbars and
Keyboard
Accelerators
Part
IV
Toolbars and Keyboard Accelerators
4
Toolbars and Keyboard Accelerators
Keyboard Accelerators
Toolbars
4.1
Keyboard Accelerators
Key
Ctrl+A
Ctrl+C
Ctrl+N
Ctrl+O
Ctrl+P
Ctrl+S
Ctrl+V
Ctrl+W
Ctrl+X
F1
Ctrl+F7
Esc
Tab
Return
Insert
Delete
Home
Shft+Home
Ctrl+Home
End
Ctrl+End
Page Up
Page Down
Up
Shft+ Up
Ctrl+ Up
Lft
Shft+ Lft
Rt
Shft+ Rt
Dn
Shft+ Dn
Ctrl+
Dn
4.2
Action
Select All
Copy
New
Open
Print
Save
Paste
Wizard
Cut
Help
Preferences
Quit
Next Cell
Next Cell
Insert
Delete
Beginning of entry
Reset pan
Move to beginning of table; Scale to fit
End of entry
Move to end of table
Scroll up
Scroll down
Row Up
Pan Up
Zoom In
Column Left
Pan Left
Column Right
Pan Right
Row Down
Pan Down
Zoom Out
Toolbars
Standard Toolbar
ADC Toolbar
Data Options Toolbar
Graphic Toolbar
© Oasys Ltd. 2014
34
35
4.2.1
Oasys ADC
Standard Toolbar
The standard toolbar handles the common Windows options:
New - create a new model
Open - open an existing file
Close - close the current model
Save - save the model to file
Cut - cut the data and place on clipboard
Copy - copy the data and place on the clipboard
Paste - paste the data from the clipboard into the model
Print - print the current view
About ADC - opens a dialog providing version information about ADC's components
Help - opens the on-line help
4.2.2
Data Options Toolbar
The Data Options toolbar gives access to various methods for modify the way data can be viewed or
edited:
Wizard—access the data wizard
Find—search data for particular value
Replace—search and replace values
Modify—modify the values in tables
Go To—go to particular record in table
Font—change the font
4.2.3
Graphic Toolbar
The graphic display toolbar governs the appearance of the graphical display:
Shrink—shrink the contents of the graphic view to fit the current extent of the view's window.
Outline (Beam and Slabs)—toggles on and off the outline displayed in the graphic view
Dimensions—toggles on and off the dimensions in the graphic view
Analysis SF Diagrams (Beam and Slabs)—toggles on and off the diagram that displays shear force
results before moment redistribution.
Analysis BM Diagrams (Beam and Slabs)—toggles on and off the diagram that displays bending
moment results before moment redistribution.
Design SF Diagrams (Beam and Slabs)—toggles on and off the diagram that displays shear force
results after moment redistribution.
© Oasys Ltd. 2014
Toolbars and Keyboard Accelerators
36
Design BM Diagrams (Beam and Slabs)—toggles on and off the diagram that displays bending
moment results after moment redistribution.
Column Results (Beam and Slabs)—toggles on and off the column results after design.
Size of Diagrams (Beam and Slabs)—increases the size of the shear force and bending moment
diagrams.
Size of Diagrams (Beam and Slabs)—decreases the size of the shear force and bending moment
diagrams.
Bar Layout Diagrams (Beam and Slabs)—toggles on and off the display of main reinforcing bars in
the graphic view.
Link Layout Diagrams (Beam and Slabs)—toggles on and off the display of links in the graphic
view.
Cross Sections (Beam and Slabs)—toggles on and off the display of cross section information in
the graphic view.
4.3
ADC Toolbar
The ADC toolbar provides access to some of the main ADC options:
Gateway—show or hide the Gateway
Graphic View—opens the graphic view
Output View—opens the output view
Check—checks the consistency and completeness of the model's data
Validate Sections (Column)—validates all possible permutations of column sections based on the
available input data.
N/M Chart (Column)—creates an axial force/moment interaction diagram for the current section.
Myy/Mzz Chart(Column)—creates an Myy/Mzz moment interaction diagram for the current section.
Analysis—analyse the model
Redistribution—perform moment redistribution (including analysis if analysis has not been performed)
Design— Beam and Slabs: design the reinforcement required; Column: calculate the ultimate
capacities of all valid column sections that can be created using the input data supplied.
Delete All Results—delete all the results (enables input data to be edited).
© Oasys Ltd. 2014
Data Tables,
Dialogs and
Wizards
Part
V
Data Tables, Dialogs and Wizards
5
38
Data Tables, Dialogs and Wizards
Welcome to ADC
New Model Wizard
Section Wizard
Bar Selection Wizard
Dialogs and Tables
5.1
Welcome to ADC
The Welcome to ADC dialog is displayed on entry to ADC and is designed to assist the user to get
started quickly. In addition to allowing the user to select what he wants to do the dialog displays a
`Did you know…´ tip.
Create a new data file
This option takes the user to the New Model Wizard to allow models to be defined with the minimum
effort.
Work on your own
This allows the user to exit from the dialog and work on his own. This is the same as selecting
`Cancel´.
Open an existing file
This activates the `File Open´ dialog, allowing the user to select a file to open
Select recent file
This allows the user to open a file that has recently been opened in ADC. The selection is made
from the list of files shown.
Show this dialog on StartUp
The `Welcome to ADC´ dialog can be disabled if required.
5.2
New Model Wizard
The New Model Wizard is accessed by selecting the `File | New´ (Ctrl+N) option from the main
menu, or by clicking the 'New' button on the ADC toolbar. The New Model Wizard is intended to
ensure that the basic settings for a model are correct before any data is generated, and that
sufficient data has been supplied in order to perform a design.
Cancelling at any time will result in no new document.
See also:
Titles
Design Option
General Specification (Column)
Section and Material (Column)
Slenderness Details (Column)
Span and Support Details (Beam and Slabs)
Load Details (Column)
Load Details (Beam and Slabs)
Reinforcement (Column)
Design Details (Beam and Slabs)
© Oasys Ltd. 2014
39
5.2.1
Oasys ADC
New Model Wizard: Titles
The first property page of the New Model Wizard is the Titles window. This allows the user to enter
the job details. By default the job details of the previous job are used.
Job Number
This is the job number, which can be any alphanumeric string.
Initials
The initials of the user used on printed output.
Edit Date
Today for new input; when last edited for retrieved files.
Job Title
The title of the job.
Subtitle
The subtitle that this model relates to.
Calc Heading
Specific to this model.
The above items are reproduced in the title block at the head of all printed information for the
calculations. The fields should therefore be used to provide as many details as possible to identify
the individual calculation runs.
An additional field for Notes has also been included to allow the entry of a detailed description of the
calculation. This is reproduced at the start of the data output. See the contents list for information on
File Handling.
See also:
Titles window – Bitmaps
5.2.1.1
Titles Window - Bitmaps
On subsequent editing of Titles, e.g. from the Gateway, the layout changes to accommodate a
bitmap image chosen by the user to aid subsequent identification of the data file. The box to the right
of the Titles window can be used to display a picture beside the file titles.
To add a picture, place an image on to the clipboard. This must be in a RGB (Red / Green / Blue)
Bitmap format. One option is to press `Print Screen´ while the Graphics View is active to place a
bitmap of the structural geometry or section on the clipboard.
Select the `Paste´ button to place the image in the box. The image is purely for use as a prompt on
the screen and cannot be copied into the output data. It is also useful when viewing the file in the
Oasys Columbus document management system.
Note: Care should be taken not to use large bitmaps, which can dramatically increase the size of the
file.
Select the 'Copy' button to copy the image to the clipboard for pasting elsewhere.
To remove a bitmap select the `Remove´ button.
© Oasys Ltd. 2014
Data Tables, Dialogs and Wizards
5.2.2
40
New Model Wizard: Design Option
The Design Option property page allows selection of the type of element to be designed, the design
code and the units to be used in the model.
Design Code
ADC performs the design in accordance with the following design codes:
ACI 318-02
ACI 318-05
ACI 318-08
ACI 318M-02
ACI 318M-05
ACI 318M-08
AS 3600-2001
AS 3600-2009
BS8110-1:1985
BS8110-1:1997
BS8110-1:1997(Rev. 2005)
EN 1992-1-1:2004 Eurocode 2
EN 1992-1-1:2004 Eurocode 2 (DE)
EN 1992-1-1:2004 Eurocode 2 (FR)
EN 1992-1-1:2004 Eurocode 2 (GB)
EN 1992-1-1:2004 Eurocode 2 (IT)
EN 1992-1-1:2004 Eurocode 2 (NL)
Hong Kong Code of Practice 1987
Hong Kong Code of Practice 2004 (AMD1 2007)
IS456:2000
The default `Design code´ for all modules is BS8110:1985. The 1997 revision to the code changed
the partial factor of safety m for steel reinforcement from 1.15 to 1.05. Hong Kong Code of Practice
retains the 1.15 value.
Units
The Units dialog is accessible by clicking 'Units'.
Nr of Spans
Include any end cantilevers as individual spans (Beam and Slabs).
Strip Width
Input the transverse distance between rib centre lines. This data is appropriate to the ribbed slab
option.
5.2.3
New Model Wizard: General Specification (Column)
This property page of the New Model Wizard allows the input of the same data as in the General
Specification (Column) dialog.
Section
Clicking the button labelled 'Section' opens the Section Wizard with which the column's section may
be specified. Alternatively the section description may be entered directly.
© Oasys Ltd. 2014
41
5.2.4
Oasys ADC
New Model Wizard: Section and Material (Column)
This property page of the New Model Wizard allows the input of the column section shape and
dimensions, together with the concrete and reinforcement materials.
Section
Section - clicking the button labeled 'Section' opens the Section Wizard with which the column's
section may be specified. Alternatively the section description may be entered directly.Effective
length and diameter of pile can be specified for pile option.
Materials
Column concrete - the grade of concrete in the column may be selected from the droplist.
Main reinforcement - the grade of steel in the main reinforcing bars may be selected from the
droplist.
Link reinforcement - the grade of steel in the links may be selected form the droplist.
Note that the droplists present the standard grades of concrete and steel that are appropriate to the
chosen design code. After completion of the New Model Wizard user defined materials can be
added to the lists via the Gateway, or by selecting 'Data | Materials | Concrete Properties...' or 'Data |
Materials | Reinforcement Properties...' from the main menu.
See also:
Sign Conventions and Dimensions
5.2.5
New Model Wizard: Slenderness Details (Column)
This property page of the New Model Wizard is used to specify the same data as in the Slenderness
dialog.
See also:
Sign Conventions and Dimensions in
5.2.6
New Model Wizard: Span and Support Details (Beam)
This property page of the New Model Wizard is used to specify the properties of each span and its
supports in the beam, solid slab and ribbed slab options.
Span Length
Enter the most common span length here. This can be altered later for individual spans. Span
lengths are specified between centrelines of supports.
Far End Conditions
The support conditions at the extreme Left and Right ends must be described. (The `Encastre´ and
`Free´ options are only available at Far Ends). From the drop-down menu, the available options are
as follows.
Encastre - the beam end is described as fully fixed, i.e. it has zero slope. The program will not
allow column/wall dimensions to be entered for a encastre support.
Free - enables a cantilever end to be described. The first or last support then becomes fictitious
with zero support width.
Support - any other type of support as described below, i.e. pinned or framed into upper/lower
© Oasys Ltd. 2014
Data Tables, Dialogs and Wizards
42
columns or walls.
Section (eam and ribbed slab options only)
Clicking the button labelled 'Section' opens the Section Wizard with which the beam or ribbed slab's
section may be specified. Alternatively the section description may be entered directly.
The cross-section can vary from span to span.
Thickness (One-way solid slab)
For the One-way solid slab option the uniform slab thickness must be defined for each span.
Supports
The continuous beam/slab may be supported either on a `Pin´ (unrestrained rotationally), or be
restrained against rotation by the presence of columns/walls, either upper, lower or both.
Spring
End restraint on the beams can be specified as a spring stiffness.
Pin
The former condition is termed `Pin´ and does not require a user input of dimensions.
Column (Beam only)
The effects of column stiffness can be included. If this option is used, the column heights and
section description above and below at each support are required and the resulting column moments
are calculated. Columns can be rectangular or circular, and encastre or pinned at the remote end. If
a column is omitted the support condition for the beam is taken as pinned.
Analysis is carried out on the basis of a linear elastic model using member stiffness considering the
entire concrete cross-section, ignoring the reinforcement..
The `support lengths´ at columns are taken as the overall column `Depth´ in the span direction (h) for
the particular lower column; those at cantilevers are zero. These values cannot be altered.
Wall (One-way solid slab and ribbed slab only)
The effects of integral wall stiffness can be included. If this option is used, the wall heights above and
below each support are required together with the fixity conditions at their remote ends. If a wall is
omitted the support condition for the slab is taken as pinned.
The user can assign a variety of different support conditions; the continuous slab may be either
`simply supported´ (unrestrained rotationally), or be restrained against rotation by the presence of
beams or walls, either upper, lower or both.
The thickness of beams and walls is important. The relative stiffness of the structure in these
locations will attract moment from the mid-span of the slab. If no moment is to be transferred to
these supporting areas, and hence a conservative design adopted for the mid-span sagging steel,
then the structure should be modelled as a simply supported beam with no beams or walls. Note
that other input boxes that are not required for a particular support condition are grayed-out and
inaccessible.
© Oasys Ltd. 2014
43
Oasys ADC
Simple Support
Beam (transverse)
Wall
© Oasys Ltd. 2014
Data Tables, Dialogs and Wizards
44
Band Beam in wall
Analysis is carried out on the basis of a linear elastic model using member stiffness which is
calculated by considering the entire concrete cross-section, ignoring the reinforcement..
The `support lengths´ at walls are taken as the overall wall `Thickness´ in the span direction for the
particular lower wall; those at cantilevers are zero. These values cannot be altered.
General Specification
Clicking the 'General Specification' button opens the General Specification dialog.
Material Specification
Clicking the 'Material Specification' button opens the Material Specification dialog.
See also:
Section Wizard
5.2.7
New Model Wizard: Load Details (Column)
This property page of the New Model Wizard is used to specify one set of loads (initial moments and
axial forces) to be applied to the column. Additional sets of loads may be entered after completion of
the New Model Wizard via the Column Loads table. These sets of column loads may be combined
and factored via the Analysis Cases table.
Ultimate Loads
Axial Force
- Force applied to the column (compression is +ve, tension is -ve).
Top Moment yy
axis.
- Initial bending moment to be applied to the top of the column about the y
Top Moment zz
- Initial bending moment to be applied to the top of the column about the z
© Oasys Ltd. 2014
45
Oasys ADC
axis.
Bottom Moment yy - Initial bending moment to be applied to the bottom of the column about the y
axis.
Bottom Moment zz - Initial bending moment to be applied to the bottom of the column about the z
axis.
Sway Moments (ACI-318 and ACI-318M)
Top Moment yy
- Sway Moment to be applied at the top of the column about the y axis.
Top Moment zz
- Sway Moment to be applied at the top of the column about the z axis.
Bottom Moment yy - Sway Moment to be applied at the bottom of the column about the y axis.
Bottom Moment zz - Sway Moment to be applied at the bottom of the column about the z axis.
Note: the moments given above exclude 2nd order moments and eccentricity/imperfection moments.
These are calculated during design.
Effective Creep Ratios (Eurocode 2 only)
y - the effective creep ratio for bending about the y axis
z - the effective creep ratio for bending about the z axis
Storey Loads (ACI 318 and AS3600)
Storey Axial Loads
- Summation of all vertical loads in a storey.
Storey Critical Loads - Summation of critical loads of all sway resisting columns in a storey.
See also:
Sign Conventions and Dimensions
5.2.8
New Model Wizard: Load Details (Beam)
This is an opportunity to enter uniform loads on all or individual spans.
To enter a load on an individual span, first select the span number from the drop down list, then
click in the appropriate load box and enter the value.
Detailed load patterns are entered after completion of the New Model Wizard via the Loads dialog.
Axial Load
Axial load in beam at end.This option is available for EN1992 and its variants.
5.2.9
New Model Wizard: Reinforcement (Column)
This property page of the New Model Wizard allows specification of reinforcement details including
allowable bar sizes to be considered in design, arrangements of bars, minimum covers, and design
code detailing checks and limits.
© Oasys Ltd. 2014
Data Tables, Dialogs and Wizards
46
Click 'Finish' to close the New Model Wizard.
Sizes and Limits
Clicking the 'Sizes and Limits' button opens the Bar Selection Wizard.
Arrangement
Clicking the 'Arrangement' button opens the Rectangular Column Reinforcement Arrangements
dialog, or the Circular Column Reinforcement Arrangements dialog depending on which section type
has been specified.
Cover
Clicking the 'Cover' button opens the Covers dialog.
Checks
Clicking the 'Checks' button opens the Checks and Limits dialog.
5.2.10 New Model Wizard: Design Details (Beam and Slabs)
This property page of the New Model Wizard allows specification of design details including chosen
reinforcement bar sizes to be considered in design, specified covers, bar spacing and criteria for bar
selection.
Click 'Finish' to close the New Model Wizard.
Redistribution
Moments are redistributed as described in Analysis and Design. A target percentage value can be
input here, either by selecting one of the defaults, 10% or 30%, or by typing another percentage (e.g.
`20%´) here. `0%´ produces no redistribution.
Redistribution is performed only on the full (DI/DI/DI…) load case (see Moment Redistribution for
details). The maximum permissible value input here should be in accordance with relevant code
clauses.
However the ICE/I StructE Manual (1985) Section 4.3.3 emphasises that:
Redistribution is a matter of engineering judgment, not analysis, and recommends that normally 15%
redistribution can be taken as a reasonable limit.
Cover
Clicking the 'Cover' button opens the Covers dialog.
Sizes
Clicking the 'Sizes and Limits' button opens the Bar Selection Wizard.
Spacing
Clicking the 'Spacing' button opens the Bar Spacing dialog.
Selection Criteria
Clicking the 'Selection Criteria' button opens the Selection Criteria dialog.
End Support
Clicking the 'End Support' button opens the Reinforcement arrangement at End Support dialog.
Mid Span
Clicking the 'Mid Span' button opens the Reinforcement arrangement at Mid Span dialog.
© Oasys Ltd. 2014
47
5.3
Oasys ADC
Section Wizard
Beam, ribbed slab and column sections can be defined in the Section Wizard.
This wizard can be activated in the following ways:
From the New Model Wizard via the appropriate property page;
In Column design option, from the Gateway or by selecting 'Data | Column | Section...' from the
main menu;
In Beam and Slabs, by clicking the wizard button of the Data Options toolbar while the appropriate
Table View e.g. Spans is active.
See also:
Section Wizard : Section Type
Section Wizard : Section Dimensions
5.3.1
Section Wizard: Section Type
The section type is where the shape type of the section is defined.
Name
The name is a label used to identify a particular section.
Definition method
The definition method specifies how the section is to be defined. Only Standard sections are enabled
for ADC. These are defined by their shape and dimensions. The properties are then calculated from
these.
The following section shape types are available in Column Design option :
rectangular
circular (either solid or hollow)
The following section shape types are available in Beam Design option:
rectangular
T section
Taper
General I section
Taper T section
The following section shape types are available in Ribbed Slab Design option:
T section
Taper T section
5.3.2
Section Wizard: Section Dimensions
Specify the overall external dimensions of the section and the thickness of component parts as
shown below. Not all shapes shown below are available in ADC.
Clicking 'Next' displays the elastic section properties, whence, via `More...´, further section
properties may be obtained.
With flanged beams the program calculates the effective flange width in accordance with BS8110
© Oasys Ltd. 2014
Data Tables, Dialogs and Wizards
48
Clause 3.4.1.5 and uses this value in all subsequent calculations. This value will be displayed when
the Sections are subsequently accessed from the Gateway. A warning is given where the effective
flange width is less than the user defined flange width.
© Oasys Ltd. 2014
49
Oasys ADC
© Oasys Ltd. 2014
Data Tables, Dialogs and Wizards
5.4
50
Bar Selection Wizard
The Bar Selection Wizard allows the specification of which sizes of reinforcement bar are to be
considered in design. Different ranges of bar sizes can be specified for main bars, links and
continuity reinforcement.
See also:
Bar Selection Wizard: Bars Available
Bar Selection Wizard: Bars Limits
5.4.1
Bar Selection Wizard: Bars Available
The Bars Available property page allows the specification of a list of bar sizes from which ranges of
sizes are subsequently chosen in the Bars Limits property page.
Clicking 'Next' closes this property page and opens the Bars Limits property page.
Available Bar Sizes
This list control shows the bar sizes that are currently available from which ranges are subsequently
chosen via the Bar Limits property page.
Add
Clicking this button opens the Add Bar Size dialog.
Delete
Select one or more bar sizes in the Available Bar Sizes list for deletion. Clicking the 'Delete' button
deletes the currently highlighted bars from the list of those available.
Default Sizes
Clicking this button replaces the list of bars shown as available with a default list comprising the
following diameters: 8, 10, 12, 16, 20, 25, 32, 40 and 50 mm.
5.4.2
Bar Selection Wizard: Bars Limits
Bar diameter limits, both minimum and maximum, for top and bottom main bars, and links can be
separately defined here, as can the minimum bar diameter for any continuity steel. Specifying a
smaller minimum diameter for continuity steel (splice bars and link hangers) allows the program to
produce an economical arrangement of these bars, without allowing it to use many small diameter
bars for design steel in bending.
Clicking 'Finish' closes the Bar Selection Wizard.
5.5
Dialogs and Tables
Analysis Cases
Bar Selection Criteria
Bar Spacings
Checks and Limits
Circular Column Reinforcement Arrangements
Column Section
Concrete Properties
Covers Dialog
Covers Table (Beam and Slabs)
© Oasys Ltd. 2014
51
Oasys ADC
General Specification (Column)
General Specification (Beam and Slabs)
Loads (Beam and Slabs)
Loads (Column)
Load Cases
Load Factors
Material Specification
Notional Loads
Preferences
Rectangular Column Reinforcement Arrangements
Redistribution
Reinforcement Properties
Slenderness
Spans
Supports
Units
Wind Loads
5.5.1
Analysis Cases (Column & Pile)
The Analysis Cases table view allows the specification of factors that are be applied to Column
Loads, and for these factored loads to be summed. This data is available in the Column design
option only.
Description
A definition of the factors to be applied to column loads, together with how these factored loads are
to be summed.
The description of an Analysis Case has the general form:
a1L1 + a2L2 + ...
where L1 represents Column Load 1 of the Column Loads table. It is therefore entered, for example,
with the description:
1.4L1 + 1.0L2
Effective Creep Ratios (Eurocode 2 only)
y - the effective creep ratio for bending about the y axis
z - the effective creep ratio for bending about the z axis
When calculating the ultimate capacity of a column's section, Program takes the total initial loading,
that results from each Analysis Case, before evaluating the final design loads to include allowance
for 2nd order moments and eccentricity/imperfection moments. Each Analysis Case will therefore
have a corresponding final design load. The final design load is shown in the Results section of the
Output View.
If no Analysis Cases have been created when a Data Check is performed, or when analysis and
design is attempted, then program will offer to create a default Analysis Case for each Column Load.
If, for instance, the Column Loads table contains three loads, then three Analysis Cases will be
created: 1.0L1; 1.0L2; and 1.0L3.
© Oasys Ltd. 2014
Data Tables, Dialogs and Wizards
5.5.2
52
Bar Selection Criteria (Beam and Slabs)
Links in beams and ribbed slabs may be rectangular or trapezoidal. Links are not provided in solid
slabs; if actual shear stresses over the cross section exceeds the prmissible value as specified the
design code, the design will stop and the user will be advised to increase the slab depth. If
rectangular links are specified in a tapered beam or rib, the top steel arrangement will be provided
within the same dimension as the bottom steel; a tapered (non-standard) link will make full use of the
additional beam width at the top for arranging top steel. If it is required that the program always
produces an even number of legs of links across the section, the `All links closed´ option may be
specified; otherwise the minimum number needed will be detailed, whether even or odd.
Bar Selection Criteria (Slabs only)
The facility is available for bar diameters to be mixed when an arrangement of main steel is selected.
If the option to mix bars is selected this may be done on the basis of either (a) or (b) below:—
a.
b.
Only adjacent sizes from the list will be mixed (e.g. 16mm bars will be mixed with either 12mm
or 20mm).
Diameters may be mixed where the smaller bar has a diameter in excess of half that of the
larger.
Main reinforcement is selected as follows:—
1.
2.
3.
4.
5.
5.5.3
Initially the smallest number of bars is chosen to provide the required number of link hangers
and satisfy the spacing rules as specified in the design code, whilst providing at least a
minimum of the specified multiple of the area required for bending.
The ideal solution uses this number of bars and a single bar diameter.
If the option to allow mixing of bar diameters has been specified, the program will select such an
arrangement if it gives a reduction in area of at least the specified percentage of the best
solution with a single diameter.
An arrangement using more bars of smaller diameter will be chosen if it gives a reduction in area
of at least the specified percentage of the best solution with a smaller number of bars.
The program always attempts to provide a solution giving, in a single layer, a main steel area
that is less than the specified preferred maximum allowable area. If this is not possible
additional layers of reinforcement will be considered, up to a maximum of three.
Bar Spacings (Beam)
The program allows specification of a space between top steel to accommodate insertion of a poker
vibrator into the pour. It also enables the preferred minimum clear distance between bars in one layer
to be chosen. The solution will produce top steel which is capable of arrangement with one gap for
the poker and all other gaps at the preferred minimum clear distance (or more).
To facilitate detailing, cut-off distances from the column face may be specified as can the cover to,
and diameter of, the main column bars.
5.5.4
Checks and Limits (Column & Pile)
The Checks and Limits dialog allows the specification of which design code/Reinforcement Detailing
Manual reinforcement detailing restrictions are to be applied when Column design option establishes
valid sections. Invalid sections will not be available for analysis and design.
This data is available in the column design option only.
Areas of Reinforcement
Maximum - indicates which limit for the maximum area of reinforcement is to be applied: design
code, the Reinforcement Detailing Manual (RDM); or none. Those combinations of bar size and
© Oasys Ltd. 2014
53
Oasys ADC
arrangement that violate this limit are deemed to be invalid sections
Minimum - indicates which limit for the minimum area of reinforcement is to be applied: design
code; RDM; or none. Those combinations of bar size and arrangement that violate this limit are
deemed to be invalid sections.
Bar Spacing
Maximum (tension) - indicates which limit for the maximum clear spacing between bars in tension
is to be applied: design code, the RDM; or none. Those combinations of bar size, link size (and
therefore bend radius where influential) and arrangement that violate this limit are deemed to be
invalid sections.
Maximum (compression) - indicates the limiting distance that is to be applied for the maximum
clear spacing between bars in compression, or whether this check is not to be applied (by unchecking the check box). Those combinations of bar size, link size (and therefore bend radius where
influential) and arrangement that violate this limit are deemed to be invalid sections.
Minimum - indicates which limit for the minimum clear spacing between bars in tension is to be
applied: design code, the RDM; or none. Those combinations of bar size, link size (and therefore
bend radius where influential) and arrangement that violate this limit are deemed to be invalid
sections.
Bar Sizes and Numbers
Minimum bar size - indicates whether the minimum bar size specified by the chosen design code
is to be applied. Those bar sizes that violate this limit are deemed to create invalid sections.
Minimum nr of bars - indicates whether the minimum number of bars specified by the chosen
design code is to be applied. Those bar arrangements that violate this limit are deemed to create
invalid sections.
Cover Checks
Bar size - indicates whether valid sections must conform to the design code's requirement for
minimum cover based on the bar size. program will then consider this requirement when determining
the positioning of bars and links in each section.
Aggregate size - indicates whether valid sections must conform to the design code's requirement
for minimum cover based on aggregate size. program will then consider this requirement when
determining the positioning of bars and links in each section.
Links
Diameter - indicates which size limits for link diameters are to be applied: design code; RDM; or
none. Those combinations of bar size and link size that violate these limits are deemed to be invalid
sections.
Maximum spacing - indicates the requirement for maximum spacing of links.
In Column design option, design of shear reinforcement is not implemented. The link sizes that are
proposed by are based on those that are made available via the Bar Selection Wizard, and on the
maximum spacing specified by the design code.
See also:
Validation of Sections
Reinforcement Detailing Manual
© Oasys Ltd. 2014
Data Tables, Dialogs and Wizards
5.5.5
54
Circular Column Reinforcement Arrangements (Column)
The Circular Column Reinforcement Arrangements dialog allows the specification of which bar
arrangements are to be considered in establishing valid sections.
This data is available only in the Column design option and if the Column Section has been specified
as circular or hollow circular.
Number of Rings
This indicates the number of concentric rings of reinforcement bars in the column's section.
Number of Bars Per Ring
This indicates the number of bars in each concentric ring. Multiple selections may be made by
selecting a number, holding the 'control' key, and then selecting other required numbers.
Alternatively, if the required numbers form a range, click the first required number in the range, then
hold the 'shift' key while clicking the last in the range.
Standard - selects 4 common numbers of bars per ring (6, 8, 10 and 12).
None - de-selects all numbers of bars per ring.
Ring Spacing
Cover/pitch - indicates that concentric rings of bars are to be spaced according to the outer cover
and a pitch set by the user (see below).
Diameter - indicates that concentric rings of bars are to be spaced according to a series of ring
diameters set explicitly by the user (see below).
Pitch - the distance between concentric rings of bars, measured between bar centres.
Ring 1 Diameter, Ring 2 Diameter etc - the diameter of each ring of bars, measured to the bar
centres.
5.5.6
Section (Column & Pile)
The Column Section dialog allows the specification of the shape and dimensions of the section.
Section
Clicking the button labeled 'Section' opens the Section Wizard with which the column's section may
be specified. Alternatively the section description may be entered directly.This input is available for
column.
Effective Length of Pile
Effective length of pile.
Diameter of Pile
Diameter of pile.
Pile with Casing
EC2 clauses 2.3.4.2 (2) is applicable in case of pile casing.
© Oasys Ltd. 2014
55
5.5.7
Oasys ADC
Concrete Properties
For convenience a set of default data is provided for Standard concrete grades that are appropriate
to the chosen design code. These default grades cannot be edited or deleted.
A number of User-defined concrete types may be specified if desired. For each concrete type the
following 7 items of data are required:
Parameter
Name
Characteristic compressive strength
Maximum aggregate size (used in
reinforcement detailing)
Characteristic tensile strength
Static Young´s Modulus
Maximum strain
In the range
Any alphanumeric string
10 to 99 N/mm2
5 to 99 mm
1 to 99 N/mm2
1 to 99 N/mm2
10–5 to 99
Only the maximum aggregate size is used in ADC (for bar spacing in detailing); the remaining
properties are however stored in the database and can be transferred to the Oasys post-processing
program (Windows) AdSec if required for more detailed section analysis.
5.5.8
Covers Dialog
This dialog is accessible via the New Model Wizard, or, in Column design option, via the Gateway or
program menu ('Data | Reinforcement | Bar Covers...').
Nominal cover (Beam and Slabs) is the design depth of concrete cover to all reinforcement,
including links.
Minimum Nominal Cover (Column) is the minimum cover to links that is required. During design
process, if necessary, this will increase, in order to conform to any design code detailing checks and
limits, but it will not decrease it below these values.
Transverse steel allowance (Beam and Slabs) is for any bars placed normal to the main beam
reinforcement, e.g., links, slab steel spanning transversely on to the beam, or a dimension for
transverse reinforcement such as might be necessary in the case of an orthogonal grid of beams
where top bars cannot be cranked.
The Code cover option will give access to code specific cover options for different types of situation
See also:
Sign Conventions and Dimensions in Column design option
Checks and Limits
5.5.9
Covers Table (Beam and Slabs)
The default covers will have already been specified in the Bar Covers dialog box in the New Model
Wizard, but as single values for the entire beam. These can be modified individually here. Definitions
of `Nominal Cover´ and `Transverse Allowance´ are given in the help for the Covers dialog.
© Oasys Ltd. 2014
Data Tables, Dialogs and Wizards
56
5.5.10 General Specification (Column & Pile)
The General Specification dialog allows the specification of column design options and the extent of
geometry validation. This dialog can be accessed from the Gateway or by selecting the 'Data |
Specification | General Specification...' option from the main menu.
Bending Axes
Uni-axial - select this option to allow column design for uniaxial bending only.
Bi-axial - select this option to allow column design for biaxial bending (whether biaxial bending is
considered will, finally, depend on the geometry, loading and design code requirements).
Moments to be Considered
2nd Order - check this option to allow column design for 2nd order moments.
Minimum My - check this option to allow column design for eccentricity/imperfection moments
about the y axis.
Minimum Mz - check this option to allow column design for eccentricity/imperfection moments
about the z axis.
Reinforcement Detailing Manual
Use RDM - check this option to include the Reinforcement Detailing Manual (RDM) as an option for
reinforcement detailing checks (see Checks and Limits and Reinforcement Detailing Manual). Note
that this option is enabled only if the RDM is available for the chosen design code.
The RDM provides no checks that are more stringent that those of the design code. For a details of
the checks that are specified, and implemented in column design, see RDM.
Geometry Validation
Check width to depth ratio - check this option to perform the width to depth ratio check of the
chosen design code. If the check fails, then no valid sections will be generated for subsequent
design.
Check height to thickness ratio - check this option to perform the height to thickness ratio check
of the chosen design code. If the check fails, then no valid sections will be generated for subsequent
design.
See also:
Validation of Sections
Calculation of Design Moments
Reinforcement Detailing Manual
Sign Conventions and Dimensions in
5.5.11 General Specification (Beam and Slabs)
Include self-weight
The option to include automatically the self-weight of the suspended elements can be selected here.
If accepted, then the weight density should include an allowance for anticipated quantities of steel
reinforcement
Frames providing lateral stability
This box must be ticked if (horizontal) wind loads are to be included in the analysis. (See Wind
Loads).
Any monolithic frame will redistribute the horizontal forces between the vertical members as a
© Oasys Ltd. 2014
57
Oasys ADC
function of their stiffness. Some elements (e.g. lift shafts, stair wells and walls) of structure are so
stiff relative to the columns that it is a legitimate simplification to assume that all the horizontal loads
are carried by these stiff vertical elements and ignore any contribution from the columns.
However if the global structure does not contain such very stiff elements, the influence of the
horizontal forces on the sub-frame cannot be ignored and it becomes a (sub) `Frame providing lateral
stability´ where horizontal loads must be considered
Load Cases
Loadcases considered can be either those prescribed in design code, or can be specified explicitly
by the user, or both.
Redistribute moments
Moments are redistributed as described in Methods of Analysis, only if this box is ticked. The target
and allowable values are input in the Design Details dialog box.
Maximum x/d
The maximum allowable ratio of neutral axis depth (x) to effective depth (d) used when designing the
reinforcement section can be specified here. This defaults to 0.6. If specified 0, then it takes the
value as recommended in the design code.
Deep beam check ignored
Deep beams are defined in design code. If this box is ticked, then deep beam checks will be ignored.
Adjust support moments
The elastic analyses are performed considering supports to have zero width (in the span direction).
This leads to unrealistically high support moment peaks, which in practice are reduced significantly
by the finite support width. For column supports, this facility allows these peak moments to be
reduced by considering the support reaction to be spread uniformly over the lower column width (in
the span direction).
Bunched bars solution allowed
Bars may be in groups of two, three or four, in contact. Where this is done, the group of bars is
treated as a single bar of equivalent area. In no situation, even at laps, should more than four bars be
in contact
Comply with Reinforcement Detailing Manual
The requirements of the Reinforcement Detailing Manual can be more onerous than those in the
design code. See Reinforcement Detailing Manual for more details.
5.5.12 Loads (Beam and Slabs)
Characteristic dead, imposed and user loads can be point, uniformly distributed, linear, patch, trilinear, or applied moment loads as below.
© Oasys Ltd. 2014
Data Tables, Dialogs and Wizards
58
External Design Load - Axial load and External Design Moment can be provided at supports.
5.5.13 Loads (Column & Pile)
The Loads table view or wizard dialog allows specification of loads (initial moments and axial forces)
to be applied to the column. The Loads table view allows input of multiple sets of loads. These may
be combined and factored via the Analysis Cases table.
Ultimate Loads
Axial Force
- Force applied to the column (compression is +ve, tension is -ve).
Top Moment yy
axis.
- Initial bending moment to be applied to the top of the column about the y
Top Moment zz
axis.
- Initial bending moment to be applied to the top of the column about the z
Bottom Moment yy - Initial bending moment to be applied to the bottom of the column about the y
axis.
Bottom Moment zz - Initial bending moment to be applied to the bottom of the column about the z
axis.
Sway Moments (ACI-318 and ACI-318M)
Top Moment yy
- Sway Moment to be applied at the top of the column about the y axis.
Top Moment zz
- Sway Moment to be applied at the top of the column about the z axis.
Bottom Moment yy - Sway Moment to be applied at the bottom of the column about the y axis.
© Oasys Ltd. 2014
59
Oasys ADC
Bottom Moment zz - Sway Moment to be applied at the bottom of the column about the z axis.
Note: the moments given above exclude 2nd order moments and eccentricity/imperfection moments.
These are calculated during design.
Effective Creep Ratios (Eurocode 2 only)
y - the effective creep ratio for bending about the y axis
z - the effective creep ratio for bending about the z axis
Storey Loads (ACI 318 and AS3600)
Storey Axial Loads
- Summation of all vertical loads in a storey.
Storey Critical Loads - Summation of critical loads of all sway resisting columns in a storey.
See also:
Sign Conventions and Dimensions
5.5.14 Load Cases (Beam and Slabs)
The program automatically generates the prescribed ultimate loading cases required by design code
unless specified otherwise.
Additional load combinations may be specified with user-defined load factors.
5.5.15 Load Factors (Beam and Slabs)
Design code prescribed load factors are used unless specified otherwise. User-defined load
factors may be specified for use instead of, or in addition to, the prescribed load factors (as selected
in the General Specification dialog box). The following abbreviations are used:
D = Dead;
I = Imposed;
WL/R = Wind from Left/Right;
NL/R = Notional Left/Right.
Load cases that include wind are not redistributed. (Thus as load cases with alternately loaded
spans are not redistributed, the only load case that is redistributed comprises full dead and imposed
load on all spans.)
5.5.16 Material Specification
This dialog defines which material grade is used in each structural component. It is accessible from
the appropriate property page of the New Model Wizard, from the Gateway, or by selecting 'Data |
Materials | Material Specification...' from the main menu.
The lists that are presented combine standard grades appropriate to the chosen design code,
together with those user-defined grades listed in the Concrete Properties table.
Grades of concrete may be selected from the appropriate droplist for each of the following:
Column concrete (Column only)
Beam concrete (Beam only)
© Oasys Ltd. 2014
Data Tables, Dialogs and Wizards
60
Rib concrete (Ribbed slab only)
Slab concrete (One-way solid slab only)
Lower columns (Beam only)
Upper columns (Beam only)
Grades of steel may be selected from the appropriate droplist for each of the following:
Main reinforcement
Link reinforcement
5.5.17 Notional Loads (Beam)
The Notional Loads table view or wizard dialog is accessible only when working in the beam option.
All buildings should be capable of resisting a notional design ultimate horizontal load applied at each
floor or roof level simultaneously, equal to 1.5% of the characteristic dead weight of the structure
between mid-height of the storey below and either mid-height of the storey above or the roof surface.
5.5.18 Preferences
This dialog provides an interface to miscellaneous preferences that do not fit clearly into any other
category.
Numeric Format
The numeric format governs the way that numbers are output. The settings in the preferences form
the default for output and apply to any new output views or diagram. Existing output views and
diagrams are not updated but the numeric format can be adjusted for each diagram or output view.
The options are:
Engineering —numbers are output to the specified number of significant figures with exponents
which are multiples of 3;
Decimal —a number of decimal places is specified; and
Scientific —numbers are output to the specified number of significant figures in exponent form.
Column Section Validation and Design Warnings
Validation warning threshold - if the number of potential column sections is not more than this
threshold value, then automatic section validation will be performed whenever relevant input data is
edited. If this threshold is exceeded then a warning is displayed. This warning states that the
operation may be time consuming. The user may choose to continue with validation, or to disable
automatic validation until it is next performed by selecting the 'Analyse | Validate Sections' option
from the main menu, or by clicking the section validation button of the ADC Toolbar. Section
validation may also be performed as part of Analysis and Design if it has not yet been performed
because automatic validation has previously been disabled.
Column design warning threshold - if the number of possible valid column sections/analysis case
combinations is greater than this threshold value, then a warning will be displayed if Analysis and
Design is attempted. This warning states that the operation may be time consuming. The user may
choose to continue with analysis and design or to cancel it.
Startup
Check for current version - allows the user to enable or disable the version check that is performed
when the program is started. This feature is available for particular versions of the program only.
© Oasys Ltd. 2014
61
Oasys ADC
Show welcome dialog - allows the user to enable or disable the display of the welcome dialog and
program tips when the program is started.
Company Info
This button opens the Company Information dialog to set up your company name and logo that
appear on printed output.
See Also:
Eurocode 2
5.5.19 Rectangular Column Reinforcement Arrangements (Column)
The Rectangular Column Reinforcement Arrangements dialog allows the specification of which bar
arrangements are to be considered in establishing valid sections.
This data is available only in the column design option and if the Column Section has been specified
as rectangular.
Column design option offers a set of 83 predefined bar arrangements for rectangular sections.
Single or multiple selections may be made. Scroll the dialog to view the bar arrangement required.
Multiple selections may be made by clicking the image of the first required arrangement, then
holding the 'control' key while clicking other arrangements that are required. Alternatively, if the
required arrangements form a range, click the image of the first required arrangement in the range,
then hold the 'shift' key while clicking the last in the range.
The following predefined groups of selections are available by clicking the relevant buttons:
All - selects all bar arrangements.
Standard - selects 23 common bar arrangements (being those with 4, 6, 8, 10 and 12 bars).
None - de-selects all bar arrangements.
Clear Distance Between Rows
The following bar arrangements require the clear distance between rows of bars to be specified:
8_4; 8_5;
10_5; 10_6;
12_6; 12_7;
14_7; 14_8;
16_6; 16_7;
18_7; 18_8;
20_6; 20_7;
24_6; 24_7;
28_5; 28_5;
30_5_30_6.
12_8; 12_9;
16_8; 16_9; 16_10;
18_9; 18_10; 18_11; 18_12;
20_8; 20_9; 20_10; 20_11; 20_12;
Specifying the clear distance between rows of bars for other arrangements will have no effect.
The clear distance between rows of bars may be specified by choosing the 'Specified As...' option,
and entering the distance required.
Alternatively the option to space rows according to the minimum bar spacings given in the design
code or Reinforcement Detailing Manual may be chosen. This will then space rows appropriately.
Click OK to confirm the selection and exit the dialog.
© Oasys Ltd. 2014
Data Tables, Dialogs and Wizards
62
5.5.20 Redistribution (Beam and Slabs)
After an ultimate load solution has been obtained, if moment redistribution has been selected, the
support moments may be redistributed. This redistribution may be specified in terms of absolute or
percentage values e.g. 15 or 15%.The program checks for compliance with design code clauses.
If moment redistribution has been selected, the target redistributed moment for each support is
automatically inserted in the table as shown.. Initially the `Permitted´ column will be blank but after
the design moment button has been activated in the graphics screen, or tabular output displayed,
then the calculated permissible values at the left and right side of each support will be displayed
here.
Standard Load Pattern
Moment redistribution when specified, will be carried out in accordance with the method described in
Analysis and Design (Beam and Slabs). As a guide to the user, the maximum elastic moment
values from the total envelope and from the `alternate spans loaded´ case are given separately,
together with the maximum permissible percentage reduction and maximum values for redistribution
moments calculated as described in Note 10. If the specified redistributions exceed these, automatic
substitution will occur. The user may use this feature to advantage, for by specifying say 10% at all
supports, the program will apply this at those supports where 10% or more is allowed and use the
maximum permissible values at other supports.
For beams, when the user specifies 30% at all supports, this has the effect of applying the maximum
permissible values throughout. If the user is satisfied that redistributions greater than that allowed by
the ``alternate spans loaded´´ case are acceptable, the following procedure will allow this:
a) Through the Gateway, select the Load Cases table.
b) Insert a further loadcase at the beginning, ie. ``D, D, D etc´´.
User Specified Loadcases
The maximum elastic moment values from the total envelope are given, as is the maximum
permissible percentage reduction and the corresponding minimum moments. Any redistribution will
be carried out in accordance with BS8110 but it will no longer be influenced by the `alternate spans
loaded´ cases. This is left to the judgement of the engineer.
Sign convention:
Positive moments — sagging
Negative moments — hogging
A warning message is printed if the specified redistributions give column moments higher than the
elastic values.
Various checks on the requested values are made in order to ensure that the design complies with
BS8110. Each individual value is checked on entry to ensure that it does not represent a
redistribution of more than 30%.
On leaving this module, further checks are carried out on the structure as a whole and if more severe
limits apply to the redistribution factors they are automatically adjusted and displayed. The program
then performs the redistribution analysis.
5.5.21 Reinforcement Properties
For convenience a set of default data is provided for Standard reinforcement grades that are
appropriate to the chosen design code. These default grades cannot be edited or deleted.
A number of User-defined reinforcement types may be specified if desired. For each reinforcement
© Oasys Ltd. 2014
63
Oasys ADC
type the following items of data are required:
Parameter
Name (e.g. Bar Mark)
Bond Coefficient Tension
Bond Coefficient Compression
Young´s Modulus
Characteristic Tensile Strength
In the range
A to Z and unique
0.01 to 99
0.01 to 99
50 to 600 kN/mm2
10 to 800 N/mm2
5.5.22 Slenderness (Column)
The Slenderness dialog allows the specification of the column's slenderness details (height, bracing
and end conditions). This dialog can be accessed from the Gateway or by selecting the 'Data |
Column | Slenderness...' option from the main menu.
Clear Height Between End Restraints
y - the clear height of the column for bending about the y axis.
z - the clear height of the column for bending about the z axis.
End Conditions (BS8110 only)
y Braced - the design code index that represents a braced end condition for bending about the y
axis.
y Unbraced - the design code index that represents an unbraced end condition for bending about
the y axis.
z Braced - the design code index that represents a braced end condition for bending about the y
axis.
z Unbraced - the design code index that represents an unbraced end condition for bending about
the y axis.
Column is compression member in regular frame (Eurocode 2 only)
When checked this option allows the effective lengths of the column to be calculated based on input
values for relative flexibilities of the column ends. When this option is unchecked the effective
lengths of the column are specified directly from five combinations of end conditions.
Bracing (Eurocode 2 only)
y Braced - select this option to indicate that the column is braced for bending about the y axis.
y Unbraced - select this option to indicate that the column is unbraced for bending about the y axis.
z Braced - select this option to indicate that the column is braced for bending about the z axis.
z Unbraced - select this option to indicate that the column is unbraced for bending about the z axis.
Relative Flexibilities of Rotational Constraints (k)
y Top - the relative flexibility of the rotational restraint at the top end of the column for bending about
the y axis.
y Bottom - the relative flexibility of the rotational restraint at the bottom end of the column for
bending about the y axis.
z Top - the relative flexibility of the rotational restraint at the top end of the column for bending about
the z axis.
z Bottom - the relative flexibility of the rotational restraint at the bottom end of the column for
© Oasys Ltd. 2014
Data Tables, Dialogs and Wizards
64
bending about the z axis.
Buckling Mode and Effective Length
y - one of five buckling modes used to determine the effective length of the column for bending about
the y axis without the need for relative flexibilities.
z - one of five buckling modes used to determine the effective length of the column for bending about
the z axis without the need for relative flexibilities.
See also:
Sign Conventions and Dimensions (Column)
5.5.23 Spans (Beam and Slabs)
The Spans table view or wizard dialog allows the specification of each span's section details and
length. In the solid slab option section is described by it's depth only.
Length
The length of the specified span measured between support centres.
Section
The description of the beam or ribbed slab section. When working in the wizard dialog, clicking the
button labelled 'Section' opens the Section Wizard with which the column's section may be
specified. Alternatively the section description may be entered directly.
Thickness
The thickness of the solid slab.
5.5.24 Supports (Beam and Slabs)
The Supports table view and wizard dialog allow the specification of a beam or slab's support details.
Type
The type of support selected from a list appropriate to the program option.
The beam and ribbed beam options allow the following types of support:
lower columns only;
upper and lower columns;
simple support;
encastre;
none.
The One-way solid slab and Ribbed slab options allow the following types of support:
beam;
simple support;
lower wall;
upper and lower walls;
beam on lower wall;
beam with upper and lower walls;
encastre;
none.
User Label
© Oasys Ltd. 2014
65
Oasys ADC
An alphanumeric label that is used to identify the support e.g. on the Graphic View.
Beam Section/Width/Depth (One-way solid slab and Ribbed slab options only)
If the support type involves beams this item this item is available. It specifies the section (width and
depth) of the rectangular beam support.
Column Section (Beam only)
If the support type involves columns then this item is available for either the lower, or lower and upper
column. It specifies the section of the appropriate column. When working in the wizard dialog,
clicking the button labelled 'Lower' or 'Upper' opens the Section Wizard with which the column's
section may be specified. Alternatively the section description may be entered directly.
Thickness (One-way solid slab and Ribbed slab options only)
If the support type involves walls then this item is available for either the lower, or lower and upper
wall. It specifies the thickness of the appropriate wall.
Length
If the support type involves columns or walls, then this item is available for either the lower, or lower
and upper column/wall. It specifies the height of the column/wall.
Fixity
If the support type involves columns or walls, then this item is available for either the lower, or lower
and upper column/wall. It specifies the end condition of the support and is selected from one of the
following:
encastre;
pinned.
5.5.25 Units
This dialog allows the user to specify the units in which data is to be entered and results are to be
reported.
The dialog is accessible from the Gateway, by selecting `Units...´ from the Design Options property
page of the New Model Wizard, or from the main menu via 'Data | Specification | Unit Specification...'.
Default options are in kN-m units as shown above, but SI, kip-ft and kip-in can be selected from
buttons. Alternatively the unit for each item can be individually selected from the following:
Force
kN, MN, lbf, kip
Length
m, cm, mm, ft, in
Section Dimensions cm, mm, ft, in
Stress
N/mm2, kip/in2, psi, psf
Once the required units have been selected, click on `OK´ to continue.
`kN-m´ units have been used as the default standard throughout this document.
5.5.26 Wind Loads (Beam and Slabs)
For `Frames providing lateral stability´ (to the structure as a whole) as specified in General
Specification, wind loads are applied following the method shown in Figure H.5 of the Handbook
[Paladian Publications Ltd (1987)].
© Oasys Ltd. 2014
Data Tables, Dialogs and Wizards
66
For all load cases of a sway frame, the upper ends of the upper columns are taken as fixed
horizontally, but constrained to have the same horizontal displacement.
Wind load applied to the structure Above the level under consideration should be applied at the top
of the columns. Wind load applied at the level under consideration should be applied at the Beam
Level .
The direction of horizontal load is from Left or Right and taken as a point load of specified Value.
Load cases that include wind are not redistributed. (Thus as load cases with alternately loaded
spans are not redistributed, the only load case that is redistributed comprises full dead and imposed
load on all spans.)
5.5.27 Reinforcement Arrangement
The Reinforcement arrangement dialog and tables allows the user to specify reinforcement at left,
right and at mid span.
Size
Size of main bar at Top/Bottom.
Number
Number of bars in row Top/Bottom.
Note:-In table view, size of reinforcement can be defined as a1@b1+a2@b2, where a1 is number of
bar in row1 and b1 is size of bar in row1 and so on.
Number of rows
Number of rows at Top/Bottom.
Bar/rows
Single bar or bar in pairs at Top/Bottom.
Diameter
© Oasys Ltd. 2014
67
Oasys ADC
Diameter of link legs.
Number of legs
Number of legs in shear reinforcement.
Note:-In table view, link reinforcement can be defined as a1@b1+a2@b2, where a1 is number of leg
and b1 is size of link leg and so on.
Spacing
Spacing of shear reinforcement along the beam span.
5.5.28 External Design Load(Beam and Slabs)
Axial Load
Axial load in beam at end.This option is available for EN1992 and its variants.
External Design Moment
External design moment can be provided at support, which will be added in to design moment
coming through applied load.
© Oasys Ltd. 2014
Output Options
Part
VI
69
6
Oasys ADC
Output Options
Output from ADC can be presented both graphically and in tabular form.
See also:
Graphical Output
Tabular Output
6.1
Graphical Output
The graphical output falls into two categories.
Section Views
Column cross section views show a graphical representation (via the Graphic View) of the column's
cross section, with the locations of bars for the current section.
Beam and slab cross section views show a graphical representation (via the Graphic View) of the
beam or slab long section and cross section. Shear force and moment diagrams may be shown on
section views only once an analysis or a design has been performed. Locations of bars, and a
summary of reinforcement details may be shown on once a design has been performed.
Graph Views (Column)
N/M and Myy/Mzz interaction charts are available in column design option for the current section.
The charts allow for easier identification of additional information such as the no tension point,
balanced yield point, and tension and compression plateau points.
To view the N/M and Myy/Mzz interaction charts select 'Analyse | ULS Charts' from the main menu.
See also:
Graphic View
Export to Oasys AdSec
6.2
Tabular Output
Tabular output is presented in the Output View by clicking the 'Output View' button of the ADC
toolbar, or by selecting 'View | Output View' from the main menu.
Input Data
All input data is available for output via the Output View in tabular form.
Invalid Sections (Column)
Those permutations of main bar size, link size and bar arrangement that violate the checks
requested in the reinforcement Checks and Limits Dialog, can be viewed in tabular form in the Output
View. The data includes identification of one or more checks that failed.
Results (Beam and Slabs)
Analysis and design results are available for output via the Output View provided the relevant design
and/or analysis has been performed, and the results have not been deleted.
Results (Column)
Column design results for valid sections are available for output via the Output View, provided a
design has been performed.
© Oasys Ltd. 2014
Output Options
70
A table of summary results is displayed. This describes each section in detail together with the
applied design loading and its ultimate capacity. The value of M/Mu represents the utilisation ratio of
the section under the derived design loading. Mu is the ultimate bending moment capacity of the
section in bending about an axis defined by the applied design moments.
Tables of intermediate data values that have been calculated and used in the derivation of design
moments are also displayed to facilitate auditing of calculations. The range of intermediate values is
dependent on the design code that is chosen.
© Oasys Ltd. 2014
Analysis and
Design
Part
VII
Analysis and Design
7
72
Analysis and Design
Column design module performs the analysis and design of reinforced concrete columns in
accordance with BS8110, Hong Kong Code of Practice and Eurocode 2.
Beam design module performs the analysis and design of reinforced concrete beams, slabs and
ribbed slabs in accordance with BS8110 and Hong Kong Code of Practice.
See also:
Analysis and Design in column design option
Analysis and Design in beam and slabs design options
Eurocode 2
7.1
Analysis and Design (Columnl)
To perform an analysis and design of column sections click the 'Design' button of the ADC toolbar or
select the 'Analysis | Design' option from the main menu. For each valid section and each analysis
case program then calculates the design moments, the total axial force, the ultimate capacity of the
section, and whether this capacity is exceeded by the applied loading. The results can be viewed in
the Output View or shown in the Graphic View for the current section and for the analysis case
chosen from the Graphic View's own Analysis Case drop list.
Tables of intermediate data values that have been calculated and used in the derivation of design
moments are also displayed in the Output View to facilitate auditing of calculations. The range of
intermediate values is dependent on the design code that is chosen.
See also:
Validation of Sections
Reinforcement Detailing Manual
Calculation of Design Moments
Ultimate Capacity of Sections
7.1.1
Reinforcement Detailing Manual
The Reinforcement Detailing Manual (RDM) may be used in determining reinforcement details in
beam and slabs design, and in performing Validation of Sections in column design. It specifies
detailing checks that are either the same as those that are specified in the design code, or are more
onerous. It is currently only available for application to BS8110 designs.
The RDM checks that are available in column design option, and which differ from the design code,
are detailed below.
BS8110(RDM)
Link Size - the diameter of links must not be less than 8 mm.
Link Spacing - the spacing of links must be the least of 12 times the diameter of the smallest
compression bar, or the least lateral dimension of the column, or 300 mm.
Maximum Bar Spacing in Compression - the spacing of compression bars must not exceed 300
mm. If the bar size is at least 20 mm, then the spacing must be no more than 200 mm at the laps.
Maximum Bar Spacing in Tension - the spacing of tension bars must not exceed 175 mm. If the
bar size is at least 20 mm, then the spacing must be no more than 200 mm at laps.
Minimum Bar Spacing - 40 mm diameter bars, or bars in pairs must have a clear spacing of 100
mm. Bars with diameter less than 40 mm must have a clear spacing of 75 mm. Allowance should
be made for lapping.
© Oasys Ltd. 2014
73
Oasys ADC
Minimum Bar Size - the bar size must not be less than 16 mm.
See also:
Validation of Sections
7.1.2
Calculation of Design Moments (Column)
Program calculates the design moments and axial force for each analysis case in accordance with
the chosen design code.
It uses the section geometry, the column end conditions, applied column loads and analysis case
factors to derive moments due to 2nd order effects and due to eccentricity/imperfection effects. The
calculation of these moments follows the method given in the appropriate design code.
These design moments and axial forces are then used to establish the ultimate capacity of the
column section, and whether this capacity is exceeded by the applied moments.
In calculating design moments to Eurocode 2 (EC2), method based on nominal curvature is
implemented.
The intermediate data that is generated in order to calculate design moments is shown in the
Results tables of the Output View.
7.1.3
Ultimate Capacity of Sections (Column)
For a each given section and analysis case the program selects three criteria to govern the solution
and assigns them target values from the data. The program then chooses a strain plane to act over
the section with the form:
This plane is then used to generate the stress distribution over the section in accordance with the
acting material stress-strain assumptions and locked in strain data (eg pre-stressing). From this,
values for the criteria are calculated and compared with the target values. If the difference between
the target and calculated values for the criteria is greater than the program's tolerance another strain
plane has to be chosen.
The above process is repeated until a strain plane is found which generates values of the criteria
which are within the program's tolerance of the target values.
Each new strain plane is selected by calculating (using a finite differences approximation) the partial
differentials of the criteria with respect to the strain plane parameters.
7.2
Validation of Sections (Column)
Column design option in ADC considers a column section to be a particular combination of section
geometry, reinforcement bar size, link size and bar arrangement. Valid column sections are those
column sections that may be created for the user's specified range of bar sizes and arrangements,
and that meet the chosen design code's requirements for geometry and reinforcement detailing.
Invalid column sections are those column sections that do not meet these requirements. The
design code geometry and reinforcement detailing requirements that are tested are those that the
user has enabled in the General Specification and Checks and Limits.
By default, section validation is performed automatically if the number of all possible column sections
is not more than the appropriate threshold value. A default threshold is set, but can be reset by the
user via the Preferences dialog. If this threshold is exceeded then a warning dialog will be presented.
© Oasys Ltd. 2014
Analysis and Design
74
The user may choose to continue with validation, or to disable automatic validation until it is next
performed by selecting 'Analyse | Validate Sections' option from the main menu, or by clicking the
section validation button of the ADC Toolbar. Section validation may also be performed as part of
Analysis and Design if it has not yet been performed because automatic validation has previously
been disabled.
Those sections that meet the design code geometry and reinforcement detailing requirements are
listed in the 'Current Section' droplist of the Graphic Toolbar. This droplist is used to select the
current section that is displayed in the Graphic View.
Those sections that fail to meet the design code geometry and reinforcement detailing requirements
are listed in the Output View only if the 'Invalid Sections' option is selected in the Column Output
Settings dialog. This listing details which of the design code requirements are violated by each invalid
section. The categories are described below.
Program attempts to perform this validation automatically when input data is amended. However, if a
large number of section permutations require validation, then it offers the user the option to switch off
automatic validation. The graphic view will then display the message 'No Valid Sections'. The Invalid
Sections table of the output view will show no invalid sections. The user can then manually validate
sections when he wishes by selecting 'Analyse | Validate Sections' from the program menu or
clicking the 'Validate Sections' button on the toolbar.
Inner Cover or Section Size - in the case of a circular section (a) the diameter of the void exceeds
that which would allow the section to host the arrangement of bars that has been specified and/or (b)
the inner cover that is required by the design code cannot be achieved.
Outer Cover or Section Size - the external section dimensions are inadequate to host the
arrangement of bars that has been specified and/or, the outer cover that is required by the design
code cannot be achieved.
Width to Depth Ratio - the width to depth ratio of the section exceeds the minimum that is
specified by the design code for a valid column.
Height to Thickness Ratio - the height to width, height to depth, or height to diameter ration of the
column is less than the minimum that is specified by the design code for a valid column.
Min. Area of Reinf. - the area of longitudinal reinforcement is less than the minimum that is
specified by the design code.
Max. Area of Reinf. - the area of longitudinal reinforcement is greater than the maximum that is
specified by the design code.
Min. Bar Spacing - the clear space between at least one pair of neighbouring bars is less than the
minimum that is specified by the design code.
Max. Bar Spacing in Tens. - no two longitudinal bars are separated by a clear spacing of less than
the maximum for bars in tension that is specified by the design code.
Max. Bar Spacing in Comp. - no two longitudinal bars are separated by a clear spacing of less
than the maximum for bars in compression that is specified by the design code.
Min. Bar Size - the minimum diameter of longitudinal bar is less than the minimum that is specified
by the design code.
Min. No or Bars - the number of longitudinal bars is less than the minimum that is specified by the
design code.
Link Size - the diameter of links is either (a) less than the minimum that is specified by the design
code, or (b) excessive given that a smaller link diameter is available that satisfies the minimum that
is specified by the design code.
Cover vs Agg. Size - the cover is less than the minimum that is specified by the design code where
© Oasys Ltd. 2014
75
Oasys ADC
this relates to aggregate size.
Cover vs Bar Size - the cover is less than the minimum that is specified by the design code where
this relates to longitudinal bar size.
See also:
General Specification (Column)
Checks and Limits
Sign Conventions and Dimensions (Column)
7.3
Analysis and Design (Beam and Slabs)
Analysis (Beam and Slabs)
Design (Beam and Slabs)
Post-Design (Beam and Slabs)
7.3.1
Analysis (Beam and Slabs)
The elastic analysis is followed, optionally, by a redistribution of the support moments within the
restrictions imposed by the selected design code.
See also:
Reinforcement Detailing Manual
Elastic Analysis
Redistribution
Further Notes on Redistribution
Point Moments
7.3.1.1
Reinforcement Detailing Manual (Beam and Slabs)
The Reinforcement Detailing Manual (RDM) may be used in determining reinforcement details in
beam design option, and in performing Validation of Sections in column design option. It specifies
detailing checks that are either the same as those that are specified in the design code, or are more
onerous.
The RDM checks that are available in beam design option, and which differ from the design code, are
detailed below.
RDM
Link Size - the diameter of links must not be less than 8 mm.
Maximum Bar Spacing in Compression - the pitch of compression bars must not exceed 300
mm. For steel with Fy <= 250 mm,this value should be increased by 25 mm.
Maximum Bar Spacing in Tension - for tension bars, the pitch must not exceed 175 mm. When
redistribution is less than 20%, the pitch must not exceed 150 mm. If the redistribution is less than
30%, the maximum pitch can be 125 mm. For steel with Fy <= 250 mm these values should be
increased by 25 mm.
Minimum Bar Spacing - the vertical spacing of bars must not be less than 25 mm or the bar
diameter.
Minimum Bottom reinforcement for Cantilevers - for a cantilever a minimum of 2T16s at the
bottom face is required.
Minimum Anchorage Length for Cantilevers - this should not be less than 0.75 times the length
© Oasys Ltd. 2014
Analysis and Design
76
of cantilever. At least 50% of cantilever bars should be continued to a distance of 1.5 times the
length of cantilever.
Maximum Pitch of Bars in Slabs - if the percentage of reinforcement is less than or equal to 0.5%,
the pitch must not exceed 300 mm. If the percentage of reinforcement is greater than or equal to
1.0%, it must not exceed 150 mm.
Minimum Pitch of Bars in Slabs - the pitch must not be less than 75 mm.
7.3.1.2
Elastic Analysis (Beam and Slabs)
The elastic analysis is performed using the stiffness method. The support points are allowed
rotational degrees of freedom only i.e. no sway is allowed. The effects of column/wall stiffness may
be included (in the Span and Support details).
The steps in the calculation are as follows.
The terms of the member stiffness matrix for each span are evaluated.
The overall stiffness matrix is assembled and inverted.
The loading pattern is set up. This is normally the standard loading pattern as defined in the
elected design code. However, alternative load patterns may be defined by the user.
For each loadcase the fixed end moments and free bending moments and shears for each span
are calculated. The node rotations and moments and shears at 20th points along each span are
then evaluated.
7.3.1.3
Redistribution (Beam and Slabs)
Summary
The calculation sequence is:
1.
Redistribute the support moments for the full load (DI/DI/DI..) case (only) by the percentage
user-specified in the General Specification dialog box; this will be a maximum of 30%, but
typically 15% (in accordance with the ICE/IstructE Manual (1985) or 10% if the structure is over
four storeys high and the structural frame provides lateral stability.
2.
Establish the maximum elastic support moment envelope from all other loadcases.
3.
At each support, test if this value in (2) exceeds that in (1); if so, establish the allowable
percentage support redistribution in (1) so that the moment values become the same as those in
(2).
4.
Calculate the redistributed full load case using these reduced percentages from (3).
5.
At each calculation point, select the envelope of the values in (2) and (4). This becomes the
moment envelope used in the design.
6.
The shear force diagrams are then recalculated based on the redistributed moment diagrams for
each load case and a redistributed shear envelope obtained.
A detailed description of the methods used is provided below in Further Notes on Redistribution
(Beam and Slabs).
7.3.1.4
Further Notes on Redistribution (Beam and Slabs)
These notes conclude that the only loadcase that should be redistributed is the full load (DI/DI/DI…)
one.
Failure Mechanisms
© Oasys Ltd. 2014
77
Oasys ADC
For continuous beams and slabs there are two categories of failure mechanisms as shown in the
figures below. Those that have a brittle failure should be avoided in favour of those that are more
ductile.
Type A failure mechanisms
Type A failure mechanisms are efficient since they are characterised by:
A minimum of three plastic hinges per span
Hinges forming at high moment positions and therefore at strong sections
Hinges forming in one span not adversely affecting the adjacent span
Low column moments
Type B failure mechanisms
Type B failure mechanisms shown above are inefficient since they are characterised by:
The possibility of hinges forming at a variety of positions causing uncertainty when predicting the
collapse mode
As few as one plastic hinge per span
Some hinges forming at low moment positions and therefore weak sections
Mechanisms involving several spans, causing the possibility of a hinge forming in one span
© Oasys Ltd. 2014
Analysis and Design
78
adversely affecting the adjacent span
Column failure
The rules set out below for redistributing moments encourages the element to fail as a Type A
mechanism and ensure that Type B mechanisms are covered by the design.
The remaining sections below review the effect of the Clauses in BS8110 and provide a set of
detailed rules.
BS8110 Clauses
The following Clauses of BS8110: Part 1 are concerned with critical load arrangements and moment
redistribution.
3.2.1.2.2 Critical load arrangements
3.2.2 Redistribution of moments
3.5.2.3 Simplification of load arrangements (for slabs) with the associated redistribution rules
3.7.4.2 Design moments transferable between slab and edge or corner columns (in solid slabs.)
Critical Load Arrangements (Clause 3.2.1.2.2)
It will normally be sufficient just to consider the following arrangements of vertical load:
All spans loaded with the full design ultimate load (1.4Gk + 1.6Qk)
Alternate spans loaded with the full design ultimate load (1.4Gk + 1.6Qk) and all other spans
loaded with the minimum design ultimate load (1.0Gk)
Moment Redistribution (Clauses 3.2.2.1 and 3.2.2.2)
The hogging support moments obtained from a maximum elastic moments diagram may be reduced
by up to 30% provided that:
Equilibrium between internal and external forces is maintained under all appropriate combinations
of design ultimate load
The neutral axis depth `x´ at the points of the largest hogging and sagging moments must not be
greater than ( b 0.4)d
where :
d
b
Effective depth
Moment at section after redistribu tion
Moment at section before redistribu tion
1
Resistance moment at any section should be at least 70% of the moment at that section obtained
from an elastic maximum moment diagram covering all appropriate combinations of design
ultimate load.
However in structures of over four storeys where the structural frame provides lateral stability, the
provisions above apply except that redistribution is limited to 10%.
Unless the column axial load is small the above provision will generally rule out reduction of the
column moments.
The neutral axis condition above can only be established after the design is completed; if it is not
met, then a warning message is produced and the user can, for example, increase the cross-section
dimensions accordingly and re-design.
Rules for Redistribution of Moments in Beams
In the figure below, the moment diagrams and associated collapse modes are shown for the three
load cases required by BS8110 for a three-span beam. Case 1 leads to a collapse Type A in the end
spans, whereas Cases 2 and 3 lead to collapse Type B across all three spans.
© Oasys Ltd. 2014
79
Oasys ADC
It is not possible, in this example, to make Cases 2 and 3 produce a Type A collapse, since the
loading patterns do not produce plastic hinges at the supports even with the maximum downward
redistribution of moments under Case 1 loading.
For most beams in practice the support moment produced from the `alternate spans loaded´ case
will be less than 70% of those produced by the `two adjacent spans loaded´ case for that particular
support. The consequence of this is to prevent downward adjustment of the `alternate spans loaded´
case.
Even when downward adjustment of the `alternate span loaded´ case is possible, the effect is not
very satisfactory, since the reduction of hogging steel required does not affect the extent of the
hogging zone (because of Clause 3.2.2.1) and might increase the extent of the sagging zone.
An upward adjustment of the support moment towards that for Case 1 is not advisable because it
would increase the value and extent of span internal hogging moments and increase the column
moments above the values obtained by an elastic analysis.
In general then it is better not to adjust the moments from load cases which lead to Type B failure,
thus ensuring that the design caters fully for the ultimate elastic condition for such load cases.
Adjustment to Load Case 1 is more straightforward. Any moment reduction, up to a maximum of
30%, may be made at a support, provided the resultant moment is not less than that for Cases 2 and
3. The span under consideration will then still fail in a Type A mode and not be affected by adjacent
spans. At loads less than total ultimate, collapse cannot occur since three hinges are required to
form a mechanism, but it is important to check that at working loads, when the beam is in some
sense behaving elastically, the serviceability of the beam is adequate. This requirement is covered by
Clause 3.2.2.1(c)) which states that `Resistance moment at any section be at least 70% of moment
at that section obtained from an elastic maximum moments diagram covering all appropriate
combinations of design ultimate load´. In this way not only is the behaviour of the beam at the
© Oasys Ltd. 2014
Analysis and Design
80
serviceability limit state assured, since we are in effect designing the beam as elastic at 70% of the
total ultimate load (always greater than the service load), but the further conditions of Clause
3.2.2.1(b), limiting the amount of permitted moment redistribution according to the plastic capacity of
the hinge, ensures that realistic values of plastic moment are selected.
The figure above shows the final redistributed moment diagram, for the centre span of the three-span
beam, constructed according to the summaries set out below.
Hogging moments at supports may be reduced by a maximum of 30% of the ultimate design elastic
envelope provided that:
no reduction is made to the `alternate spans loaded´ cases
there are not more than four storeys for frames providing structural stability (10% maximum
redistribution)
the neutral axis depth factor, x/d is not greater than 0.3 (or 0.5 for 10% redistribution)
Sagging moments in spans generally require no adjustment to the ultimate design elastic envelope.
No reduction of column moments is made to the ultimate design elastic values.
7.3.1.5
Point Moments (Beam and Slabs)
An applied point moment causes a discontinuity in the bending moment diagram (see the figure
below), such that at the point of application of the moment there are theoretically two values of
bending moment.
© Oasys Ltd. 2014
81
Oasys ADC
The method of solution calculates a single bending moment at 20th points of the span and therefore
the maximum moment caused by a point moment is not explicitly represented by the calculated
bending moment diagram. The program produces a bending moment diagram similar to that shown
by the dotted lines and circled values in the figure above. Calculations show that this underestimation
of maximum moment is never more than 7.5%. This effect would only be of any significance if the
point moments were the major loads on the beam.
7.3.2
Design (Beam and Slabs)
The force resultants obtained as described above are now used in the reinforcement design.
See also:
Critical Section for Bending
Critical Section for Shear
Preliminary Design Calculations
Main Steel Area Calculation(Beam)
Bar Selection: Beams and Ribbed Slabs
Bar Selection: Solid Slabs
7.3.2.1
Critical Section for Bending (Beam and Slabs)
Design of the top and bottom steel is carried out at critical sections in each span.
The critical section at the end of a span is chosen as follows:
1/20th of the span in from the tip of a cantilever or at a pinned end.
On the centre-line of the support.
A span critical section is defined by the first of the following conditions to be satisfied:
No span critical section for cantilevers.
The point of maximum sagging moment if this is not at the end of the span.
The point of maximum hogging moment if this is not at the end of the span.
Mid-span for other spans.
For the one-way solid slab option, the following criteria also applies :
© Oasys Ltd. 2014
Analysis and Design
82
Where there is more than one critical section for top steel design [ie at fixed ends with support beam
and internal support beams (two and three sections respectively)] the designed top steel
arrangement must be consistent across those sections.
Similarly, if the bending moment diagram shows hogging right across spans, top steel arrangements
for adjacent supports need to be at the same pitch to facilitate lapping of bars.
7.3.2.2
Critical Section for Shear (Beam and Slabs)
In the beam and ribbed slab options , design of the links is carried out at critical sections in each
span.
The critical section at the end of a span is chosen as defined in the design code:
In the solid slab option , if (v>vc) the program will display an appropriate message and recommend
that the user increases the slab depth; it will not provide a solution containing links.
7.3.2.3
Preliminary Design Calculations (Slabs)
In the ribbed slab option, nominal links are provided at the span critical section for bending, defined
above.
For each critical section the program determines the following information:
The area of steel required in bending, top and bottom (see below) and the effective depth (d).
Effective depth is calculated assuming the number of layers of steel required when using the
largest allowable diameter.
The area required for links (see below), assuming main steel area provided = area required.
The maximum transverse spacing of legs of links (d) and maximum pitch.
The minimum number of bars in the outer layer of tension steel assuming the smallest allowable
diameter of bar.
The maximum number of bars in a layer of top steel satisfying the preferred spacing rules given
below assuming the largest allowable diameter of bar.
From this information the program determines, for each width of section used, the following
© Oasys Ltd. 2014
83
Oasys ADC
information:
a) The minimum number of legs of links required.
b) A single diameter of links to be used, for each width of section, to simplify scheduling of links.
This diameter is chosen to satisfy the following criteria:
Nominal links, provided at mid-span, should not be heavily over-designed.
Designed links at supports should not be congested.
If no diameter can be found that satisfies these criteria with the number of legs selected then
additional legs may be provided at supports (either small links enclosing internal bars or
paired links).
c) A set of standard positions for longitudinal bars. These bars will be equally spaced across the
flat section of the outer link. There are the following exceptions to this rule:
For narrow beams where two large diameter bars do not fit on the flat section of the link then
for top steel two bars will be fitted between the sides of the link by reducing the effective depth
(if this is possible).
For very shallow beams the number of link hangers required may govern. In this case the link
hangers will be equally spaced across the flat section of the outer link.
7.3.2.4
Main Steel Area Calculation (Beam)
Beam design option uses the "AdSec" solver to calculate areas of tension and compression
reinforcements.
7.3.2.5
Bar Selection (Beam and Ribbed Slab)
Reinforcement bar selection in for beam and ribbed slab design is performed as described in the
sections below.
See also:
Main Steel Bar Selection
Continuity Steel Selection
Compatibility Steel Selection
Main Steel Curtailment
Link Steel Selection
Link Steel Curtailment
7.3.2.5.1 Main Steel Bar Selection (Ribbed Slab)
The program initially chooses the smallest number of bars which provides the required number of link
hangers, satisfies the spacing rules of design code and can provide at least 5% more steel area
(using the largest diameter allowed) than that required for bending. With this number of bars the most
economic diameter is chosen. A mixture of two diameters at a section will be selected if this gives a
reduction in area provided of more than 10%. If no arrangement gives an area within 25% of the area
required then using a larger number of bars will be considered.
The program chooses to put two or three layers of steel if the clear distance for bars in one layer falls
below 40mm (for top steel one gap of 75mm is left for a poker). In this case the area of steel required
is recalculated.
The user can choose to alter the clear distances and percentages given above to suit particular
requirements.
At the supports when the column is the same width as the beam the program assumes that, if the
beam is wide enough (more than about 375mm) to put 4 bars in the outer layer, then the two outer
© Oasys Ltd. 2014
Analysis and Design
84
span bars (link hangers) extend to the face of the support. These bars are included when checking
spacing and the design support steel is placed between them. If the beam is not wide enough to do
this, or it would lead to congestion of support steel, then the support steel is spread over the full
width and the link hangers are assumed to be cranked and lapped with the support steel.
For shallow beams more layers cannot be used since some steel would not reach its design stress.
In this case the program tries to find an arrangement in one layer using the minimum clear distances
as specified in design code. If this is not enough then a warning ``Bars bunched´´ is given. If the
requirements of maximum reinforcement in a layer would be violated by the bunched bars then more
layers will be used and the ``... reinforcement below yield´´ warning is given.
At this stage the program displays a summary of the steel selected by following these rules.
Information Screens
It is not always possible for the program to produce a satisfactory design. In this case one of the
following screens is displayed and the user can then choose to proceed or change the input data:
Detailing Problem — Corner Bars
The program cannot satisfy codal provision for clear distance between corner of beam and nearest
longitudinal bar in tension. e.g.30% redistribution requires corner distance of 65mm. 0mm chamfer,
40mm cover and 10mm links give corner distance of 94mm.
Design Problem — Too Narrow Beams
Two bars of the largest size will not fit in the flat section of the link. The maximum link size has
been adjusted as the original maximum will not fit in the narrow beam.
Design Problem — Too Shallow Beam — Tension
The program cannot fit enough tension steel into the tension zone of the beam to carry the
moment, or some of the tension steel is too near the neutral axis to reach its yield stress.
Design Problem — Too Shallow Beam — Compression
The program cannot fit enough compression steel into the compression zone of the beam to carry
the moment.
Design Problem — Bunch Bars
The program cannot find a satisfactory arrangement of single bars with the design code specific
minimum clear distance. An arrangement bunching the bars may be satisfactory.
Detailing Problem — Congested Steel
The program cannot satisfy the specified minimum spacing of bars (40mm clear distance with one
75mm gap for poker access). An arrangement giving the minimum clear distance has been
provided.
7.3.2.5.2 Continuity Steel Selection (Beam and Ribbed Slab)
The program checks that the steel provided satisfies the design code specific continuity steel
requirements summarised below. If more steel is required a new selection is made. In addition to the
rules given above the following rules are used to select continuity steel:
the number of bars provided must not exceed the number of designed bars with which they lap
(except when the outer two bars are link hangers which do not lap with design steel)
where bottom continuity steel is provided at a support it is placed above the designed span steel
in all other cases the continuity steel is assumed to be cranked to lap with the designed steel
Continuity Requirements for BS8110:1997 (2005) and Hong Kong Code of Practice:2004 (AMD1
2007):
20% of support top steel continues through span
50% of support top steel continues through cantilever span
© Oasys Ltd. 2014
85
Oasys ADC
30% of span bottom steel continues through internal supports
50% of span bottom steel continues through simple support
in spans with a hogging moment over the full length, at least 50% of the smaller support top steel
continues through the span
At this stage the program displays a summary of changes in steel made to comply with these rules.
7.3.2.5.3 Compatibility Steel Selection (Beam and Ribbed Slab)
The program assumes that the steel should be compatible at each side of an internal support or a
zone boundary if the sections are similar and line up. At end supports it assumes that the top and
bottom steel should be compatible (ie a U bar). The user can alter these assumptions.
When other sections have been defined as having compatible steel the program finds the section
with the highest area provided and uses as many bars from this section as are needed at each
compatible section.
At this stage the program displays a summary of the main steel selected by the program. No further
changes are made to longitudinal steel at the critical sections in the rest of the calculations.
7.3.2.5.4 Main Steel Curtailment (Beam and Ribbed Slab)
Bars are curtailed to the bending moment diagram in accordance with the design code clauses
specified in the APPENDIX.
At lap positions the program will split the bars on the side of the lap with most steel into two groups
and curtail each group separately. If the curtailment lengths of the two groups differ by less than an
anchorage length then no split will be made. The longer of the two groups will contain sufficient bars
to satisfy the spacing rules.
For top steel at supports, other than pinned ends, outer link hangers extend to 25mm short of the
face of the column if they are straight. The design top steel is curtailed to the bending moment
diagram (if there is hogging throughout the span, it is curtailed where the continuing bars are
adequate).
Otherwise the lap will always be positioned at one end of the zone. In zones adjacent to supports it
will always be positioned near the support.
All bar lengths and dimensions to the bars are rounded to extend the bar to the next multiple of
25mm. All span bars are curtailed short of the face of the column.
7.3.2.5.5 Link Steel Selection (Beam and Ribbed Slab)
Links are always provided. The area of shear reinforcement required at each design position is
calculated. A warning message `` Section not reinforceable for shear - shear stresses are too great´´,
is printed if design shear stress exceeds the maximum permissible shear stress. and the option to
abort is given.
The diameter found during preliminary design will be used. The number of legs and spacing of the
links is determined by the clauses specified in the APPENDIX.
© Oasys Ltd. 2014
Analysis and Design
86
7.3.2.5.6 Link Steel Curtailment (Beam and Ribbed Slab)
Starting from the span critical section the program finds the point on each side of this where the
minimum Asv/s v is not adequate and extends the support links to this point. If there is a significant
point load near mid-span then the minimum links may not be adequate. In this case the program
provides support links over the whole span. The user may design a more economical link
arrangement by hand.
Where compression bars are supplied at supports and the number of legs required is greater than at
mid-span, the support zone of links is extended over the whole length of the compression bars.
Curtailment dimensions are given as half the width of the support + 50mm + an integer multiple of the
pitch of links at the support.
7.3.2.6
Bar Selection (One-way Solid Slab)
Reinforcement selection for slab design is performed as described in the sections below.
See also:
Top steel
Bottom Steel
Bottom Steel — Curtailment
Shear Check
7.3.2.6.1 Top Steel
Sagging in spans
If more than one critical section is defined e.g. across a support beam, the area of steel required for
all relevant sections is calculated using the largest bar diameter in the selected range.
The critical section with the most area of steel required is the section which governs the design.
A function selects the most economical arrangement for this section. Suitable arrangements are
those which satisfy
the user´s criteria for preferred minimum and maximum areas provided (as multiples of that
required — defaults 1.05 and 1.25 respectively)
spacing criteria of design code.
min/max % reinforcement as specified in design code.
Within the function, if the support under consideration is associated with hogging throughout a span,
all suitable arrangements are saved into an array for later comparison.
In the example shown above in the Reinforcement Design for a solid slab section, arrangements for
supports 2, 3, 4, 6 and 7 would be saved.
Returning to the main steel calculation subroutine, the most economical spacing arrangement is
imposed on any other critical sections across the support.
The area of steel required at the other sections for the actual bar diameter used is also calculated.
For the special case of top steel at a pinned end, an arrangement providing the maximum of half
midspan steel or minimum percentage is calculated.
Hogging throughout spans
``Groups´´ of hogging spans are defined. In the Figure, Supports 2, 3 and 4 will form a separate group
from Supports 6 and 7.
The array containing all suitable arrangements for the relevant supports is now checked to obtain an
initial base pitch. This is set to the smallest of all the largest pitches retained in the array.
© Oasys Ltd. 2014
87
Oasys ADC
The nearest but larger pitch to this is selected for each support and the total deviation from the base
calculated.
If this deviation is greater than zero, a new base pitch smaller than the last one is selected and the
procedure repeated.
Final pitch is set to the largest base pitch, which gives the smallest deviation.
Areas of steel provided are recalculated where necessary to take account of the new smaller pitch.
Example of hogging throughout spans
Possible Arrangements
Support 2
T20 @ 300
T16 @ 250
T12 @ 200
Support 3
T16 @ 275
T12 @ 200
T10 @ 175
1st base pitch
Deviation
Next base pitch
Deviation
Next base pitch
Deviation
Last base pitch
=
=
=
=
=
=
=
Support 2
T16 @ 250
Support 3
T16 @ 250
Support 4
T16 @ 250
T12 @ 175
T10 @ 150
min {300, 275, 250}=250
25. {250, 275, 250 are nearest}
200
25. {200, 175, 175 are nearest}
175
25. {200, 175, 175 are nearest}
75. {200, 175, 150 are nearest}
Support 4
T16 @ 250
7.3.2.6.2 Bottom Steel
A function is called for each sagging design critical section, and selects the most economical
arrangement as described above for top steel.
Should there be no sagging moment anywhere in the span, an arrangement providing the minimum
percentage of As will be selected. (This can happen if a short span is between two longer spans).
For a cantilever, the minimum percentage of As is provided.
Main Steel Curtailment
Top and bottom reinforcement is curtailed in accordance with the design code clauses.
Top Steel
The main steel bars are curtailed to the bending moment envelope in accordance with the code
clauses.
Hogging across supports
The program will find the maximum and minimum distances to zero hogging moment from each
support centre-line as shown in figure below.
© Oasys Ltd. 2014
Analysis and Design
88
If the maximum and minimum distances are within a certain percentage of each other (default 10%
but user editable), the program will choose the MAX length to extend the bars either side of the
support centre-line and stagger the bars accordingly.
Alternatively, at individual supports, the staggering arrangement will be produced by extending the
longest bar an anchorage length beyond the TCP and stopping the shortest bar an anchorage length
shorter.
Hence intended arrangement:
Hogging throughout entire span
Possible BM diagrams:
Case 1 : Mid-span hogging moment greater than at adjacent supports
For the above situations the program will not continue with the design if the minimum hogging
moment across the span occurs at a support. An error message is displayed.
© Oasys Ltd. 2014
89
Oasys ADC
Case 2 : Mid-span hogging moment less than at adjacent support
Two alternatives for top steel curtailment:
Lap longer bars from A with longer bars from B
Extend short steel to point where long bars are adequate plus anchorage length
If the above violates maximum spacing rules then lap all bars and stagger as shown.
7.3.2.6.3 Bottom Steel - Curtailment
The rules for bottom steel curtailment are:
Group Number Curtailment Rule
A
At LH support:
1) a tension lap length past LH end support.
At RH support:
2) to a point on moment diagram where group B is adequate plus anchorage
length.
3) to T.C.P. if group B violates maximum spacing rules.
B
1)
2) As Group A but to opposite hand
© Oasys Ltd. 2014
Analysis and Design
90
3)
Note:If no sagging moment occurs within the span, minimum percentage tension steel will be
provided. This will extend across the entire span with ½ tension lap lengths extending into the
adjacent spans to produce the staggered arrangement.
C End supports
In general the program will not detail steel beyond the centre-line of end supports. This must be
added by the user.
Pinned end
Provide top steel at support A in accordance with design code clauses.
Extend all bottom steel to centre-line of end support
Free end
For top steel, extend longer bars to top and curtail shorter bars to the BM diagram plus tension
anchorage length.
At bottom, Use minimum percentage of tension steel and extend all bars to cantilever tip.
Fixed end
As with a pinned end extend all bottom steel to the centre-line of the fixed end.
© Oasys Ltd. 2014
91
Oasys ADC
Shear Check
For each shear critical section, the design shear will be compared to the design concrete shear
stress, vc.
If v exceeds vc the user will be warned accordingly and will be expected to either use hand
calculations to design shear reinforcement if desired or alter the input data to reduce v.
Each span will have two shear critical sections placed at each support. These positions will either be
at support centre-line or at the support beam face if support beams are specified.
For cantilevers, one shear critical section will be placed 1/20th of the span in from the tip.
7.3.2.6.4 Shear Check
Shear Check
For each shear critical section, the design shear will be compared to the design concrete shear
stress, vc.
If v exceeds vc the user will be warned accordingly and will be expected to either use hand
calculations to design shear reinforcement if desired or alter the input data to reduce v.
Each span will have two shear critical sections placed at each support. These positions will either be
at support centre-line or at the support beam face if support beams are specified.
For cantilevers, one shear critical section will be placed 1/20th of the span in from the tip.
7.3.3
Post-Design (Beam and Slabs)
Span/Depth Check
The final calculation in the program is for span/depth ratio, which is determined by design code
clauses. If the span/effective depth ratio exceeds the limit, then the warning message "Limit for
span/effective depth is exceeded" is output. For low values of service stress and for cases where
there is a possibility of hogging across the whole span, the engineer should view the span/depth
values output with some reservation and unless the section in question is obviously oversized, a
calculation of deflection should be made.
Modification of Design
A powerful feature of the program is the ability after inspecting the initial design to amend the detail
design parameters to produce a more refined reinforcement layout. These parameters include, as
appropriate:
bar selection criteria
© Oasys Ltd. 2014
Analysis and Design
92
bar spacing, cut-offs, chamfer
links, minimum bars per layer
bar types
basic bar covers and diameter limits
covers and bar limits at each section
compatibility of reinforcement at zone boundaries
Use of these facilities is described in the Input Data.
7.4
Eurocode 2
The version of EC2 used is the final version of BS EN 1992-1-1:2004 "Eurocode 2: Design of
concrete structures - General rules and rules for buildings". The national standards bodies BSI, DIN,
AFNOR etc. are responsible for the issue of the code in their language/country. This code contains
many alterations from the previous ENV version and, therefore, this version of ADC will not
necessarily give answers that are consistent with the previous code.
7.5
Hong Kong Code of Practice : 1987
ADC's design for Hong Kong Code of Practice : 1987 (HKCP:1987) is based on Clause 7 of that
code. This allows the use of BS8110 : 1985's requirements as an alternative to those of HKCP:1987.
However, HKCP:1987 requires that such an implementation should, nevertheless, consider the
specific requirements listed below. These are implemented in ADC either strictly, or by the issue of
warnings e.g. if the characteristic strengths of materials are specified by the user to exceed the
limits given below.
The characteristic dead load, imposed load and wind load should be taken as the dead load,
imposed load and wind load calculated in accordance with the provisions of the Building
(Construction) Regulations.
The characteristic strength of concrete should be taken as the specified grade given in the Building
(Construction) Regulations.
The characteristic strength of concrete used for design should not exceed 45 MPa.
The characteristic strength of concrete used for design should not be increased in respect of age
at loading.
The short-term modulus of elasticity, creep, shrinkage and other properties of concrete should be
taken from HKCP code instead of from British Standards.
In ultimate strength design each of the combinations of loading given in Clause 7 of HKCP:1987
should be considered instead of the load combinations given in BS8110.
Specified characteristic strength of grade 460/425 reinforcement, fy, should not exceed:
460 MPa - 6 mm diameter up to and including 16 mm diameter;
425 MPa - over 16 mm diameter.
Concrete material specification and construction Clauses should not be used.
© Oasys Ltd. 2014
93
7.6
Oasys ADC
Hong Kong Code of Practice : 2004 (Beam and Slabs)
The following points should be noted when design is based on Hong Kong Code of Practice : 2004
(AMD1 2007).
Clause 8.7.4 describes how the transverse reinforcement should be positioned in the lap zone.
This clause has not been considered. Refer to Figure 8.6 of HKCP:2004 to position transverse
reinforcement for lapped splices.
Clauses 8.9.2 and 8.9.3 specify requirements for staggering of bars if bundled and with equivalent
diameter 32 mm. These clauses have not been considered.
To calculate the effective width of flange (Cl 5.2.1.2), the effect of unequally spaced beams has not
been considered.
Clause 8.8 describes the provision of additional surface reinforcement for large diameter bars
(diameter greater than 40 mm) . This clause has not been considered. Refer to clause 8.8 and
figure 8.7 of HKCP:2004 (AMD1 2007) for the provision of this additional surface reinforcement.
© Oasys Ltd. 2014
Interaction with
Other Software
Part
VIII
95
8
Oasys ADC
Interaction with Other Software
Export to Oasys AdSec
Export to Oasys GSA
Graphic View Save Options
Output View Output Options
8.1
Export to Oasys AdSec (Column and Beam)
This option is enabled only in Column and Beam design options. In Column Design, If there are no
valid column sections, then the option is disabled.
This option is effected by selecting 'File | Export AdSec Data...' from the main menu or "Export to
AdSec" from section graphics view context menu.
The input data that defines the Current Section are exported to an AdSec data file. The design axial
forces and moments are first adjusted to include any 2nd order or eccentricity/imperfection moments
in accordance with the chosen design code. These 2nd order and eccentricity/imperfection
moments can only be calculated after consideration of total loads derived for each of ADC's Analysis
Cases. The resulting AdSec data will therefore contain one Loading for each of ADC's Analysis
Cases, with a corresponding Analysis Case in AdSec whose factor is set to 1.0.
If an installation of AdSec is accessible by ADC, then the file may be opened in AdSec during as
part of the export process.
It should be noted that the sign convention for applied moments in AdSec is different to that in ADC.
See Sign Conventions, Geometry and Dimensions (Column) for a description of the conventions used
in column design option . When inspecting the data that has been exported to AdSec it will be seen
that Myy has been reversed.
8.2
Export to Oasys GSA (Beam)
This option is enabled only in Beam design option.
This option is effected by selecting 'File | Export GSA Data...' from the main menu.
The input data (section details, spans and loadings) that define the current model are exported to a
GSA text file with the default file extension 'gwa'. Analysis and design results are not exported.
8.3
Graphic View Save Options
When working in Graphic Views it is convenient to be able to save an image of the displayed graphic
for transfer to some other graphics or CAD package. The graphic image can be saved directly from
Graphic Views in the following file formats:
WMF (Windows Metafiles) — The native format supported by Microsoft
PNG (Portable Network Graphic) — Best for images that contain mainly simple lines, text or white
space.
JPEG (Joint Photographic Experts Group) — Best for images that contain a lot of colour filling.
DXF — For output to CAD packages.
See also:
Saving the Graphic Image to File
© Oasys Ltd. 2014
Interaction with Other Software
8.4
Output View Output Options
Text output is available from Output views. There are three file formats supported for text output
TXT—tab delimited file for import to spreadsheets
CSV—comma delimited file for import to spreadsheets
HTML—web pages for display in browsers
These output the data displayed in the current view in the selected file format.
© Oasys Ltd. 2014
96
Command line
option
Part
IX
Command line option
9
98
Command line option
ADC can be run from command line.The user can create a batch file to execute a group of DOS
commands in a sequence to run ADC file and can save the result in text and HTML file format.
Graphics will be saved as a png file and will be clubbed together into a single html document.Below
are command which can be used in ADC.
/C :- Check specified reinforcement arrangements.
/D :- Design section for specified loads.
/A :- Analyze
/R :-Redistribute
/S :-Save on exit
/SA= directory path :-Save As text file on exit
/SB= directory path :-Save as binary on exit
/O= directory path :-Report to output stream
/PD= directory path :-Print detailed report
/PG= directory path :-Print graphic report
/PS= directory path :-Print summary
/T= time in second :-Time out of running a particular file
Note:-If directory path is not specified then it will take current executable path of ADC file.Below are
sample command
start /WAIT C:\"Program Files (x86)"\Oasys\ADC 8.3\adc.exe /C:\"Program Files (x86)"\Oasys\ADC
8.3\Samples\ADCBeamB24.adctxt /C /R= /PD=
start /WAIT C:\"Program Files (x86)"\Oasys\ADC 8.3\adc.exe /C:\"Program Files (x86)"\Oasys\ADC
8.3\Samples\ADCBeamB24.adctxt /C /R= C:\ADC /PD= C:\ADC
ADC Text File Format can be find under Sample folder in program installed directory.
© Oasys Ltd. 2014
APPENDIX
Part
X
APPENDIX
10
100
APPENDIX
Enter topic text here.
Code
BS8110:1997
Curtailment
Clause 3.12.9 - Curtailment and
anchorage of bars
Hong Kong Code of Clause 9.2.1.6 - Curtailment of tension
Practice:2004
reinforcement
EN 1992-1-1:2004
Eurocode 2"
Clause 9.2.1.3 - Curtailment of
longitudinal tension reinforcement
ACI 318-08 and ACI In tension
- Clause 12.2.1 and
318M-08
12.2.2
In compression - Clause 12.3.1,12.3.2
and 12.3.3
AS 3600 (2001) and In tension
- Clause 13.1.1 and
AS 3600 (2009)
Clause 13.1.2.2
In compression - Clause 13.1.3
IS 456 (2000)
© Oasys Ltd. 2014
Clause 26.2.3 - Curtailment of tension
reinforcement in flexure members
Link steel spacing rules
Clause 3.4.5 - Design shear
resistance of beams
Table 3.8 - Values of design
concrete shear stress
Clause 6.1.2.5 - Design shear
resistance of beams
Table 6.3 - Values of design
concrete shear stress
Clause 6.2.2 - Members not
requiring design shear
reinforcement
Clause 6.2.3 - Members requiring
design shear reinforcement
Clause 11.4.6 - Minimum shear
reinforcement
Clause 11.4.7 - Design of shear
reinforcement
Clause 11.5.4 - Maximum
longitudinal spacing of stirrups.
Clause 8.2.7.1 - Design shear
strength of concrete
Clause 8.2.8
- Minimum shear
reinforcement required
Clause 8.2.12.2 - Maximum
longitudinal and transverse spacing
of stirrups
Clause 40.2 - Design shear
strength of concrete
Clause 40.3 - Minimum shear
reinforcement
Clause 40.4 - Design of shear
reinforcement
101
Oasys ADC
Capacity of Sections
73
Cases
22, 51, 59
Checks
72, 75
Checks and Limits
52, 73
Circular Column Reinforcement Arrangements
54
Column Section
54
Company information
60
Compatibility Steel Selection (beams and ribbed
slabs)
85
Components of the User Interface
21
Concepts
21
Concrete Properties
55
Continuit Steel Selection (beams and ribbed slabs)
84
Copying
Cutting and Pasting in Tables
26
Index
A
About ADC
3
AdBeam
41, 45, 56, 57, 75
ADC Toolbar
36
AdCol
40, 41, 44, 52, 56, 58, 72
Additional moments
56
Adjusting Data Display
28
AdSec
95
Aggregate
52
Analysis (AdBeam)
75
Analysis and Design
72
Analysis and Design (AdBeam)
75
Analysis and Design (AdCol)
72
Analysis Cases
51
Area of reinforcement
52
Copying the Graphic Imae to the Clipboard
31
Copying to and from Spreadsheets
28
Cover
52
Covers Dialog
55
Covers Table (AdBeam)
55
Critical Section for Bending (AdBeam)
81
Critical Section for Shear
82
Cross Section
54
Cross Sections
54, 61, 73
B
Bar arrangements
54, 61
Bar Selection (beams and ribbed slabs)
83
Bar Selection (flat slabs)
86
Bar Selection Criteria
52
Bar Selection Wizard
50
Bar Selection Wizard: Bars Available
50
Bar Selection Wizard: Bars Limits
50
Bar size
52
Bar spacing
52
Bar Spacings
52
Bars Available
50
Bars Limits
50
Basic Operations in Tables
25
Becoming Familiar with AdBeam - An Example
Bottom Steel - Curtailment (flat slabs)
89
Bottom Steel (flat slabs)
87
Bunched bars
93
Bundled bars
93
C
Calculation of Design Moments (AdCol)
D
Data Options Toolbar
35
Data Tables
Dialogs and Wizards
38
Defaults in Tables
25
Delete
Blank and Insert in Tables
8
27
Design
72, 75
Design (AdBeam)
81
Design Codes
52
Design Details
46
Design Moments
73
Design Option
40
Detailing
72, 75
Dialogs
38
Dialogs and Tables
50
73
© Oasys Ltd. 2014
Index
Invalid sections
E
Keyboard Accelerators
27
Further Notes on Redistribution (AdBeam)
G
76
Large diameter bars
93
Layouts
54, 61
Limits
52
Link diameter
52
Link Steel Curtailment (beams and ribbed slabs)
86
Load Cases
59
Load Details (AdBeam)
45
Load Details (AdCol)
44
Load Factors
59
Loads
22, 51, 60, 65
Loads (AdBeam)
57
Loads (AdCol)
58
85,
M
Gateway
23
General Specification (AdBeam)
56
General Specification (AdCol)
40, 56
Getting started with ADC
7
Go To
27
Graph Views
69
Graphic Toolbar
35
Graphic View Save Options
95
Graphical Output
69
Graphics
28
GSA
95
H
HKCP
92, 93
Hong Kong Code of Practice
92
Hong Kong Code of Practice : 2004
I
© Oasys Ltd. 2014
34
L
F
Identifying What is to be Drawn
Interaction with Other Software
Introduction
7
73
K
EC2
60, 92
Eccentricity
56
Elastic Analysis (AdBeam)
76
End conditions
63
Eurocode 2
60, 92
Export to Oasys AdSec
95
Export to Oasys GSA
95
Factors
59
Features
3
Field Types
25
File Formats
22
Find
Go To and Modify in Tables
102
93
M/Mu
69
Main Steel Bar Selection (beams and ribbed slabs)
83
Main Steel Curtailment (beams and ribbed slabs)
85
Material Specification
59
Materials
55, 62
Maximum area of reinforcement
52
Maximum bar spacing
52
Minimum area of reinforcement
52
Minimum bar spacing
52
Minimum moments
56
Modify
27
Moment Interaction
69
Moment Redistribution
62, 76
Moments
73, 80
Mu
69
Myy/Mzz Chart
69
N
28
95
N/M Chart
69
Nationally Determined Parameters
60, 92
103
Oasys ADC
NDP
60, 92
Reinforcement arrangements
54, 61, 66
New Model Wizard
22, 38
Reinforcement Detailing Manual
56, 72, 75
New Model Wizard: Design Details
46
Reinforcement Properties
62
New Model Wizard: Design Option
40
Relative flexibility
63
New Model Wizard: General Specification (AdCol)
Replace
27
40
Right-Clicking in the Graphic View
30
New Model Wizard: Load Details (AdBeam)
45
New Model Wizard: Load Details (AdCol)
44
New Model Wizard: Reinforcement
45
New Model Wizard: Section and Material (AdCol)
Saving Files
22
41
Saving graphic views
95
New Model Wizard: Slenderness Details (AdCol)
41 Saving the Graphic Image to File
32
New Model Wizard: Span and Support Details
Scaling and Zooming the Image
29
(AdBeam)
41
Scaling to Fit
29
New Model Wizard: Titles
39
Section
54
Notional Loads
60
Section and Material (AdCol)
41
Number of bars
52
Section Dimensions
47
Numeric format
60
Section Type
47
Section Views
69
Section Wizard
47
Section Wizard: Section Dimensions
47
Opening Files
22
Section Wizard: Section Type
47
Output
32, 69
Sections
54, 61, 73
Output of the Graphic Images
31
Selecting Blocks of Cells in Table Views
26
Output Options
69
Shear Check
Output View
32
Beam, Ribbed Slab
82
Output View Output Options
96
Solid Slab
91
S
O
P
Panning
29
Pasting
28
Point Moments (AdBeam)
80
Post-Design (AdBeam)
91
Preferences
22, 60
Preliminary Design Calculations (AdBeam)
Printing from Graphic Views
31
82
R
RDM
56, 72, 75
Rectangular Column Reinforcement Arrangements
61
Redistribution
62, 76
Redistribution (AdBeam)
76
Reinforcement
45, 50, 52
Single and Multi-Page Tables
24
Size of bars
52
Slenderness
63
Slenderness Details (AdCol)
41
Some Basic Concepts
21
Spacings
52
Span and Support Details (AdBeam)
Spans
64
Spreadsheets
28
Staggering of bars
93
Standard Toolbar
35
Starting to use ADC
7
Step by Step Guide
7
Step by Step Guide (AdBeam)
8
Step by Step Guide (AdCol)
7
Supports
64
41
© Oasys Ltd. 2014
Index
T
Table Data Entry and Editing
24
Tables
24, 38, 50
Tabular Output
69
Titles
39
Titles Window - Bitmaps
39
Toolbars
22, 34
Toolbars and Keyboard Accelerators
Top Steel (flat slabs)
86
Transverse reinforcement in lap zone
34
93
U
Ultimate Capacity
69
Ultimate Capacity of Sections (AdCol)
Units
65
User Interface
21
Using the New Model Wizard
22
V
Validation of Sections
75
Validation of Sections (AdCol)
73
W
Welcome to ADC
38
Wind Loads
65
Wizard
22, 38, 47, 50
Wizards
24, 38
Working with ADC
21
Working with Graphic Views
28
Working with Output Views
32
Working with Table Views
24
Working with the Gateway
23
Z
Zooming
29
Zooming and Panning
© Oasys Ltd. 2014
29
73
104
105
Oasys ADC
Endnotes 2... (after index)
© Oasys Ltd. 2014