
1
te
op
r
i
al
y
No
tC
Ma
ea
se
Do
ce
re
n
fe
Pl
Re
Microsoft® Office Word 2007 - Level 1
(Second Edition)
te
op
r
i
al
y
Microsoft® Office Word 2007
tC
No
Do
se
ea
Pl
Re
fe
re
n
ce
Ma
Level 1 (Second Edition)
Part Number: 3254EBEE
Course Edition: 1.0
ACKNOWLEDGMENTS
Project Team
te
op
r
i
al
y
Microsoft® Office Word 2007 - Level 1
(Second Edition)
Content Developer: Nancy Curtis, Philip Abraham and Manasi V • Content Manager: Sudha K and Tacha Trimm • Graphic
Designer: Vasanth K • Project Manager: Ravindran V • Media Instructional Designer: Philip Abraham and Manasi V • Content
Editor: J-P Altieri • Materials Editor: Ambika R • Project Technical Support: Mike Toscano
Ma
NOTICES
TRADEMARK NOTICES: Element K and the Element K logo are trademarks of Element K LLC and its affiliates.
tC
DISCLAIMER: While Element K Content LLC takes care to ensure the accuracy and quality of these materials, we cannot guarantee their accuracy, and all materials are provided without any warranty
whatsoever, including, but not limited to, the implied warranties of merchantability or fitness for a particular purpose. The name used in the data files for this course is that of a fictitious company. Any
resemblance to current or future companies is purely coincidental. We do not believe we have used anyone’s name in creating this course, but if we have, please notify us and we will change the name in
the next revision of the course. Element K is an independent provider of integrated training solutions for individuals, businesses, educational institutions, and government agencies. Use of screenshots,
photographs of another entity’s products, or another entity’s product name or service in this book is for editorial purposes only. No such use should be construed to imply sponsorship or endorsement of
the book by, nor any affiliation of such entity with Element K. This courseware may contain links to sites on the Internet that are owned and operated by third parties (the ″External Sites″). Element K is
not responsible for the availability of, or the content located on or through, any External Site. Please contact Element K if you have any concerns regarding such links or External Sites.
ce
Microsoft® Word 2007 is a registered trademark of Microsoft Corporation in the U.S. and other countries; the Microsoft Corporation products and services discussed or described may be trademarks of
Microsoft Corporation. All other product names and services used throughout this course may be common law or registered trademarks of their respective proprietors.
No
Copyright © 2007 Element K Content LLC. All rights reserved. Screenshots used for illustrative purposes are the property of the software proprietor. This publication, or any part thereof, may not be
reproduced or transmitted in any form or by any means, electronic or mechanical, including photocopying, recording, storage in an information retrieval system, or otherwise, without express written
permission of Element K, 500 Canal View Boulevard, Rochester, NY 14623, (585) 240-7500, (800) 478-7788. Element K Courseware’s World Wide Web site is located at
www.elementkcourseware.com.
ii
Do
se
ea
Pl
Re
fe
re
n
This book conveys no rights in the software or other products about which it was written; all use or licensing of such software or other products is the responsibility of the user according to terms and
conditions of the owner. Do not make illegal copies of books or software. If you believe that this book, related materials, or any other Element K materials are being reproduced or transmitted without
permission, please call (800) 478-7788.
Microsoft® Office Word 2007 - Level 1 (Second Edition)
CONTENTS
te
op
r
i
al
y
MICROSOFT® OFFICE WORD 2007LEVEL 1 (SECOND EDITION)
LESSON 1 - CREATING A BASIC DOCUMENT
2
Microsoft Office Word 2007 . . . . . . . . . . . . . . . . . . . . . . . . . . . . . . . . . . . . .
2
Word Documents . . . . . . . . . . . . . . . . . . . . . . . . . . . . . . . . . . . . . . . . . . . . .
4
The Office Button . . . . . . . . . . . . . . . . . . . . . . . . . . . . . . . . . . . . . . . . . . . . .
4
The Quick Access Toolbar . . . . . . . . . . . . . . . . . . . . . . . . . . . . . . . . . . . . . .
5
The Microsoft Office Window Frame . . . . . . . . . . . . . . . . . . . . . . . . . . . . .
5
The Ribbon . . . . . . . . . . . . . . . . . . . . . . . . . . . . . . . . . . . . . . . . . . . . . . . . . .
6
Tabs on the Ribbon . . . . . . . . . . . . . . . . . . . . . . . . . . . . . . . . . . . . . . . . . . .
6
Task Panes . . . . . . . . . . . . . . . . . . . . . . . . . . . . . . . . . . . . . . . . . . . . . . . . . . .
7
tC
ce
Ma
A. Explore the User Interface . . . . . . . . . . . . . . . . . . . . . . . . . . . . . . . . . . . . . . .
No
............................................................
8
Galleries . . . . . . . . . . . . . . . . . . . . . . . . . . . . . . . . . . . . . . . . . . . . . . . . . . . .
8
Live Preview . . . . . . . . . . . . . . . . . . . . . . . . . . . . . . . . . . . . . . . . . . . . . . . . .
9
Do
re
n
B. Open and View a Document . . . . . . . . . . . . . . . . . . . . . . . . . . . . . . . . . . . . . 11
Document Views . . . . . . . . . . . . . . . . . . . . . . . . . . . . . . . . . . . . . . . . . . . . . 11
C. Customize the Word Environment . . . . . . . . . . . . . . . . . . . . . . . . . . . . . . . . . 14
se
The Word Options Dialog Box . . . . . . . . . . . . . . . . . . . . . . . . . . . . . . . . . . . 14
D. Obtain Help . . . . . . . . . . . . . . . . . . . . . . . . . . . . . . . . . . . . . . . . . . . . . . . . . . . 18
fe
Word Help . . . . . . . . . . . . . . . . . . . . . . . . . . . . . . . . . . . . . . . . . . . . . . . . . . . 18
ea
Word Help Options . . . . . . . . . . . . . . . . . . . . . . . . . . . . . . . . . . . . . . . . . . . . 18
Word Help Toolbar Options . . . . . . . . . . . . . . . . . . . . . . . . . . . . . . . . . . . . . 19
Pl
Re
E. Enter Text . . . . . . . . . . . . . . . . . . . . . . . . . . . . . . . . . . . . . . . . . . . . . . . . . . . . . . 22
Default Typing Options . . . . . . . . . . . . . . . . . . . . . . . . . . . . . . . . . . . . . . . . 22
Formatting Marks . . . . . . . . . . . . . . . . . . . . . . . . . . . . . . . . . . . . . . . . . . . . . 22
Contents
iii
CONTENTS
F. Save a Document . . . . . . . . . . . . . . . . . . . . . . . . . . . . . . . . . . . . . . . . . . . . . . . 26
Word 2007 File Types . . . . . . . . . . . . . . . . . . . . . . . . . . . . . . . . . . . . . . . . . . 26
te
op
r
i
al
y
The Save Command . . . . . . . . . . . . . . . . . . . . . . . . . . . . . . . . . . . . . . . . . . 28
The Save As Command . . . . . . . . . . . . . . . . . . . . . . . . . . . . . . . . . . . . . . . . 28
Compatibility With Other Word Formats . . . . . . . . . . . . . . . . . . . . . . . . . . 28
G. Preview and Print a Document . . . . . . . . . . . . . . . . . . . . . . . . . . . . . . . . . . . 31
Print Preview . . . . . . . . . . . . . . . . . . . . . . . . . . . . . . . . . . . . . . . . . . . . . . . . . 31
Print Preview Options . . . . . . . . . . . . . . . . . . . . . . . . . . . . . . . . . . . . . . . . . . 31
The Print Dialog Box . . . . . . . . . . . . . . . . . . . . . . . . . . . . . . . . . . . . . . . . . . . 32
Ma
LESSON 2 - EDITING A DOCUMENT
A. Navigate and Select Text in a Document . . . . . . . . . . . . . . . . . . . . . . . . . . . 38
Scroll Bars . . . . . . . . . . . . . . . . . . . . . . . . . . . . . . . . . . . . . . . . . . . . . . . . . . . 38
The Selection Bar . . . . . . . . . . . . . . . . . . . . . . . . . . . . . . . . . . . . . . . . . . . . . 39
tC
The Mini Toolbar . . . . . . . . . . . . . . . . . . . . . . . . . . . . . . . . . . . . . . . . . . . . . . 39
B. Insert, Delete, or Rearrange Text . . . . . . . . . . . . . . . . . . . . . . . . . . . . . . . . . . 43
ce
The Clipboard Group . . . . . . . . . . . . . . . . . . . . . . . . . . . . . . . . . . . . . . . . . 43
No
Text Moving and Copying Options . . . . . . . . . . . . . . . . . . . . . . . . . . . . . . 43
Text Pasting Options . . . . . . . . . . . . . . . . . . . . . . . . . . . . . . . . . . . . . . . . . . . 43
re
n
The Clipboard Task Pane . . . . . . . . . . . . . . . . . . . . . . . . . . . . . . . . . . . . . . . 44
Do
C. Undo Changes . . . . . . . . . . . . . . . . . . . . . . . . . . . . . . . . . . . . . . . . . . . . . . . . . 49
Undo Options . . . . . . . . . . . . . . . . . . . . . . . . . . . . . . . . . . . . . . . . . . . . . . . . 50
Redo Options . . . . . . . . . . . . . . . . . . . . . . . . . . . . . . . . . . . . . . . . . . . . . . . . 50
se
D. Search and Replace Text . . . . . . . . . . . . . . . . . . . . . . . . . . . . . . . . . . . . . . . . 53
fe
The Find And Replace Dialog Box . . . . . . . . . . . . . . . . . . . . . . . . . . . . . . . 53
ea
Find Options . . . . . . . . . . . . . . . . . . . . . . . . . . . . . . . . . . . . . . . . . . . . . . . . . 54
Replace Options . . . . . . . . . . . . . . . . . . . . . . . . . . . . . . . . . . . . . . . . . . . . . 54
iv
Pl
Re
Go To Options . . . . . . . . . . . . . . . . . . . . . . . . . . . . . . . . . . . . . . . . . . . . . . . . 55
Microsoft® Office Word 2007 - Level 1 (Second Edition)
CONTENTS
LESSON 3 - FORMATTING TEXT
A. Change Font Appearance . . . . . . . . . . . . . . . . . . . . . . . . . . . . . . . . . . . . . . . 62
te
op
r
i
al
y
Fonts . . . . . . . . . . . . . . . . . . . . . . . . . . . . . . . . . . . . . . . . . . . . . . . . . . . . . . . 62
Font Size. . . . . . . . . . . . . . . . . . . . . . . . . . . . . . . . . . . . . . . . . . . . . . . . . . . . . 63
Bold, Italic, and Underline . . . . . . . . . . . . . . . . . . . . . . . . . . . . . . . . . . . . . . 63
Font Case . . . . . . . . . . . . . . . . . . . . . . . . . . . . . . . . . . . . . . . . . . . . . . . . . . . 64
Font Effects . . . . . . . . . . . . . . . . . . . . . . . . . . . . . . . . . . . . . . . . . . . . . . . . . . 64
Text Color . . . . . . . . . . . . . . . . . . . . . . . . . . . . . . . . . . . . . . . . . . . . . . . . . . . 64
The Format Painter . . . . . . . . . . . . . . . . . . . . . . . . . . . . . . . . . . . . . . . . . . . . 65
B. Highlight Text . . . . . . . . . . . . . . . . . . . . . . . . . . . . . . . . . . . . . . . . . . . . . . . . . . 73
Ma
Text Highlighting Options . . . . . . . . . . . . . . . . . . . . . . . . . . . . . . . . . . . . . . . 74
LESSON 4 - FORMATTING PARAGRAPHS
A. Set Tabs to Align Text . . . . . . . . . . . . . . . . . . . . . . . . . . . . . . . . . . . . . . . . . . . . 78
tC
Tabs . . . . . . . . . . . . . . . . . . . . . . . . . . . . . . . . . . . . . . . . . . . . . . . . . . . . . . . . 79
ce
The Word Rulers . . . . . . . . . . . . . . . . . . . . . . . . . . . . . . . . . . . . . . . . . . . . . . 79
No
Tab Stops on the Ruler . . . . . . . . . . . . . . . . . . . . . . . . . . . . . . . . . . . . . . . . . 79
The Tabs Dialog Box . . . . . . . . . . . . . . . . . . . . . . . . . . . . . . . . . . . . . . . . . . . 80
B. Control Paragraph Layout . . . . . . . . . . . . . . . . . . . . . . . . . . . . . . . . . . . . . . . . 83
re
n
Margins . . . . . . . . . . . . . . . . . . . . . . . . . . . . . . . . . . . . . . . . . . . . . . . . . . . . . 83
Do
Paragraph Alignment . . . . . . . . . . . . . . . . . . . . . . . . . . . . . . . . . . . . . . . . . 84
Indents. . . . . . . . . . . . . . . . . . . . . . . . . . . . . . . . . . . . . . . . . . . . . . . . . . . . . . 85
Indent Markers . . . . . . . . . . . . . . . . . . . . . . . . . . . . . . . . . . . . . . . . . . . . . . . 85
se
Indentation Options . . . . . . . . . . . . . . . . . . . . . . . . . . . . . . . . . . . . . . . . . . 86
fe
Text Spacing Options . . . . . . . . . . . . . . . . . . . . . . . . . . . . . . . . . . . . . . . . . . 86
ea
C. Add Borders and Shading . . . . . . . . . . . . . . . . . . . . . . . . . . . . . . . . . . . . . . . 92
Borders . . . . . . . . . . . . . . . . . . . . . . . . . . . . . . . . . . . . . . . . . . . . . . . . . . . . . 92
Pl
Re
Border Types . . . . . . . . . . . . . . . . . . . . . . . . . . . . . . . . . . . . . . . . . . . . . . . . . 93
Shading . . . . . . . . . . . . . . . . . . . . . . . . . . . . . . . . . . . . . . . . . . . . . . . . . . . . . 94
The Borders And Shading Dialog Box . . . . . . . . . . . . . . . . . . . . . . . . . . . . . 95
Contents
v
CONTENTS
D. Apply Styles . . . . . . . . . . . . . . . . . . . . . . . . . . . . . . . . . . . . . . . . . . . . . . . . . . . 99
Word Styles . . . . . . . . . . . . . . . . . . . . . . . . . . . . . . . . . . . . . . . . . . . . . . . . . . 99
te
op
r
i
al
y
Quick Styles in Word . . . . . . . . . . . . . . . . . . . . . . . . . . . . . . . . . . . . . . . . . . . 100
The Styles Task Pane . . . . . . . . . . . . . . . . . . . . . . . . . . . . . . . . . . . . . . . . . . . 101
E. Create Lists . . . . . . . . . . . . . . . . . . . . . . . . . . . . . . . . . . . . . . . . . . . . . . . . . . . . 103
Lists . . . . . . . . . . . . . . . . . . . . . . . . . . . . . . . . . . . . . . . . . . . . . . . . . . . . . . . . . 104
Bulleted and Numbered Lists . . . . . . . . . . . . . . . . . . . . . . . . . . . . . . . . . . . 105
F. Manage Formatting . . . . . . . . . . . . . . . . . . . . . . . . . . . . . . . . . . . . . . . . . . . . . 108
The Reveal Formatting Task Pane . . . . . . . . . . . . . . . . . . . . . . . . . . . . . . . 108
Clear Formatting Options . . . . . . . . . . . . . . . . . . . . . . . . . . . . . . . . . . . . . . 108
LESSON 5 - ADDING TABLES
Ma
Find and Replace Text Formatting Options . . . . . . . . . . . . . . . . . . . . . . . 108
A. Create a Table . . . . . . . . . . . . . . . . . . . . . . . . . . . . . . . . . . . . . . . . . . . . . . . . . 118
tC
Tables . . . . . . . . . . . . . . . . . . . . . . . . . . . . . . . . . . . . . . . . . . . . . . . . . . . . . . 118
Table Creation Options . . . . . . . . . . . . . . . . . . . . . . . . . . . . . . . . . . . . . . . . 119
ce
Table Navigation Methods . . . . . . . . . . . . . . . . . . . . . . . . . . . . . . . . . . . . . 119
No
B. Modify the Table Structure. . . . . . . . . . . . . . . . . . . . . . . . . . . . . . . . . . . . . . . . 122
Contextual Tabs . . . . . . . . . . . . . . . . . . . . . . . . . . . . . . . . . . . . . . . . . . . . . . 123
re
n
The Table Tools Design Contextual Tab . . . . . . . . . . . . . . . . . . . . . . . . . . . 123
Do
The Table Tools Layout Contextual Tab . . . . . . . . . . . . . . . . . . . . . . . . . . . 124
Table Structure Modification Options . . . . . . . . . . . . . . . . . . . . . . . . . . . . 124
The Table Properties Dialog Box . . . . . . . . . . . . . . . . . . . . . . . . . . . . . . . . . 124
se
C. Format a Table . . . . . . . . . . . . . . . . . . . . . . . . . . . . . . . . . . . . . . . . . . . . . . . . . 129
fe
Table Styles . . . . . . . . . . . . . . . . . . . . . . . . . . . . . . . . . . . . . . . . . . . . . . . . . . 129
ea
The Table Style Options Group . . . . . . . . . . . . . . . . . . . . . . . . . . . . . . . . . . 130
Quick Tables . . . . . . . . . . . . . . . . . . . . . . . . . . . . . . . . . . . . . . . . . . . . . . . . . 130
vi
Pl
Re
D. Convert Text to a Table or Tables to Text . . . . . . . . . . . . . . . . . . . . . . . . . . . . 134
The Convert Text To Table Dialog Box. . . . . . . . . . . . . . . . . . . . . . . . . . . . . 134
The Convert Table To Text Dialog Box. . . . . . . . . . . . . . . . . . . . . . . . . . . . . 135
Microsoft® Office Word 2007 - Level 1 (Second Edition)
CONTENTS
LESSON 6 - INSERTING GRAPHIC OBJECTS
A. Add Visual Effects Using Symbols and Special Characters . . . . . . . . . . . . 142
te
op
r
i
al
y
Symbols . . . . . . . . . . . . . . . . . . . . . . . . . . . . . . . . . . . . . . . . . . . . . . . . . . . . . 142
Special Characters . . . . . . . . . . . . . . . . . . . . . . . . . . . . . . . . . . . . . . . . . . . 143
B. Insert Illustrations . . . . . . . . . . . . . . . . . . . . . . . . . . . . . . . . . . . . . . . . . . . . . . . 147
Illustrations. . . . . . . . . . . . . . . . . . . . . . . . . . . . . . . . . . . . . . . . . . . . . . . . . . . 147
Pictures . . . . . . . . . . . . . . . . . . . . . . . . . . . . . . . . . . . . . . . . . . . . . . . . . . . . . 148
Clip Art . . . . . . . . . . . . . . . . . . . . . . . . . . . . . . . . . . . . . . . . . . . . . . . . . . . . . . 148
The Illustrations Group . . . . . . . . . . . . . . . . . . . . . . . . . . . . . . . . . . . . . . . . . 149
The Clip Art Task Pane . . . . . . . . . . . . . . . . . . . . . . . . . . . . . . . . . . . . . . . . . 149
Ma
Sizing Techniques . . . . . . . . . . . . . . . . . . . . . . . . . . . . . . . . . . . . . . . . . . . . . 150
The Picture Tools Format Contextual Tab . . . . . . . . . . . . . . . . . . . . . . . . . 150
LESSON 7 - CONTROLLING PAGE APPEARANCE
tC
A. Control Page Layout . . . . . . . . . . . . . . . . . . . . . . . . . . . . . . . . . . . . . . . . . . . . 156
ce
Margin Options. . . . . . . . . . . . . . . . . . . . . . . . . . . . . . . . . . . . . . . . . . . . . . . 156
No
Page Orientation . . . . . . . . . . . . . . . . . . . . . . . . . . . . . . . . . . . . . . . . . . . . . 158
Paper Size . . . . . . . . . . . . . . . . . . . . . . . . . . . . . . . . . . . . . . . . . . . . . . . . . . . 159
The Page Setup Dialog Box . . . . . . . . . . . . . . . . . . . . . . . . . . . . . . . . . . . . . 159
re
n
Page Breaks . . . . . . . . . . . . . . . . . . . . . . . . . . . . . . . . . . . . . . . . . . . . . . . . . 160
Do
B. Apply a Page Border and Color . . . . . . . . . . . . . . . . . . . . . . . . . . . . . . . . . . . 166
Page Borders . . . . . . . . . . . . . . . . . . . . . . . . . . . . . . . . . . . . . . . . . . . . . . . . 166
Border Types . . . . . . . . . . . . . . . . . . . . . . . . . . . . . . . . . . . . . . . . . . . . . . . . . 166
se
Page Color . . . . . . . . . . . . . . . . . . . . . . . . . . . . . . . . . . . . . . . . . . . . . . . . . . 167
fe
C. Add Watermarks . . . . . . . . . . . . . . . . . . . . . . . . . . . . . . . . . . . . . . . . . . . . . . . 169
ea
Watermarks . . . . . . . . . . . . . . . . . . . . . . . . . . . . . . . . . . . . . . . . . . . . . . . . . 169
The Printed Watermark Dialog Box . . . . . . . . . . . . . . . . . . . . . . . . . . . . . . 170
Pl
Re
D. Add Headers and Footers . . . . . . . . . . . . . . . . . . . . . . . . . . . . . . . . . . . . . . . . 173
Headers and Footers . . . . . . . . . . . . . . . . . . . . . . . . . . . . . . . . . . . . . . . . . . 173
Header & Footer Tools Design Contextual Tab . . . . . . . . . . . . . . . . . . . . . 173
Page Number Options . . . . . . . . . . . . . . . . . . . . . . . . . . . . . . . . . . . . . . . . 174
Contents
vii
CONTENTS
LESSON 8 - PROOFING A DOCUMENT
A. Check Spelling, Grammar, and Word Count . . . . . . . . . . . . . . . . . . . . . . . . 184
te
op
r
i
al
y
Spelling and Grammar Check Options . . . . . . . . . . . . . . . . . . . . . . . . . . . 184
The Main Dictionary . . . . . . . . . . . . . . . . . . . . . . . . . . . . . . . . . . . . . . . . . . . 185
The Readability Statistics Dialog Box . . . . . . . . . . . . . . . . . . . . . . . . . . . . . 185
The Word Count Dialog Box . . . . . . . . . . . . . . . . . . . . . . . . . . . . . . . . . . . . 186
B. Enhance Textual Meaning Using the Thesaurus . . . . . . . . . . . . . . . . . . . . . . 192
The Thesaurus . . . . . . . . . . . . . . . . . . . . . . . . . . . . . . . . . . . . . . . . . . . . . . . . 192
The Research Task Pane . . . . . . . . . . . . . . . . . . . . . . . . . . . . . . . . . . . . . . . 193
The Research Options Dialog Box . . . . . . . . . . . . . . . . . . . . . . . . . . . . . . . 193
Ma
C. Customize AutoCorrect Options . . . . . . . . . . . . . . . . . . . . . . . . . . . . . . . . . . 196
The AutoCorrect Dialog Box . . . . . . . . . . . . . . . . . . . . . . . . . . . . . . . . . . . . 197
The AutoCorrect Tab . . . . . . . . . . . . . . . . . . . . . . . . . . . . . . . . . . . . . . . . . . 197
. . . . . . . . . . . . . . . . . . . . . . . . . . . . . . . . . . . . . . . . . . . . . . . . . . . . . . 203
tC
LESSON LABS
ce
SOLUTIONS . . . . . . . . . . . . . . . . . . . . . . . . . . . . . . . . . . . . . . . . . . . . . . . . . . . . . . . . . 211
viii
No
Do
se
ea
Pl
Re
fe
re
n
INDEX . . . . . . . . . . . . . . . . . . . . . . . . . . . . . . . . . . . . . . . . . . . . . . . . . . . . . . . . . . . . . . 213
Microsoft® Office Word 2007 - Level 1 (Second Edition)
ABOUT THIS COURSE
te
op
r
i
al
y
INTRODUCTION
Ma
Word processing is the use of computers to create, revise, and save documents for printing and
future retrieval. This course is the first in a series of three Microsoft® Office Word 2007
courses. It will provide you with the basic concepts required to produce basic business
documents.
re
n
Target Student
tC
Course Description
No
ce
This course can benefit you by providing you with basic competence in creating electronic
documents for personal and business use by using Microsoft® Word 2007. Historically, documents were painstakingly created and edited by hand. Over time, producing documents has
become more efficient. Microsoft® Word 2007 makes creating and editing documents even
easier by providing a user-friendly environment, enabling you to add text, graphics, tables, formatting, and more with just a few mouse clicks.
se
Course Prerequisites
Do
This course is intended for individuals who want to gain basic knowledge of working on
Word. Individuals who want to pursue Microsoft Certified Application Specialist certification in
Microsoft Office Word 2007 can also take this course.
•
•
ea
Pl
•
Re
fe
Students should be familiar with using personal computers and have used a mouse and
keyboard. You should be comfortable in the Windows environment and be able to use Windows to manage information on your computer. Specifically, you should be able to launch and
close programs; navigate to information stored on the computer; and manage files and folders.
Students should have completed the following courses or possess equivalent knowledge before
starting with this course:
•
Windows XP Professional - Level 1
Windows XP Professional - Level 2
Windows XP - Introduction
Windows 2000 - Introduction
Introduction
ix
INTRODUCTION
How to Use This Book
te
op
r
i
al
y
As a Learning Guide
Each lesson covers one broad topic or set of related topics. Lessons are arranged in order of
increasing proficiency with Microsoft® Word 2007; skills you acquire in one lesson are used
and developed in subsequent lessons. For this reason, you should work through the lessons in
sequence.
We organized each lesson into results-oriented topics. Topics include all the relevant and supporting information you need to master Microsoft® Word 2007, and activities allow you to
apply this information to practical hands-on examples.
Ma
Have the opportunity to try out each new skill on a specially prepared sample file. This saves
you typing time and allows you to concentrate on the skill at hand. Through the use of sample
files, hands-on activities, illustrations that give you feedback at crucial steps, and supporting
background information, this book provides you with the foundation and structure to learn
Microsoft® Word 2007 quickly and easily.
As a Review Tool
As a Reference
tC
No
ce
Any method of instruction is only as effective as the time and effort you are willing to invest
in it. In addition, some of the information that you learn in class may not be important to you
immediately, but it may become important later on. For this reason, we encourage you to
spend some time reviewing the topics and activities after the course. For additional challenge
when reviewing activities, try the “What You Do” column before looking at the “How You Do
It” column.
Do
re
n
The organization and layout of the book make it easy to use as a learning tool and as an afterclass reference. You can use this book as a first source for definitions of terms, background
information on given topics, and summaries of procedures.
se
Course Objectives
fe
In this course, you will create, edit, and enhance standard business documents using
Microsoft® Office Word 2007.
edit documents by locating and modifying text.
•
format text.
•
format paragraphs.
•
add tables to a document.
•
add graphic elements to a document.
•
control a document’s page setup and its overall appearance.
•
proof documents to make them more accurate.
Pl
•
Re
x
ea
You will:
•
create a basic document using Microsoft Word.
Microsoft® Office Word 2007 - Level 1 (Second Edition)
LESSON 1
te
op
r
i
al
y
LESSON 1
Lesson Time
1 hour(s), 15 minutes
Creating a Basic Document
Ma
In this lesson, you will create a basic document using Microsoft Word.
•
Customize the Word environment.
•
Use Microsoft Office Word Help.
•
Enter text.
•
Save a document.
•
Preview and print a document.
Do
Pl
ea
se
re
n
fe
Re
Lesson 1: Creating a Basic Document
No
Open and view a document.
ce
•
tC
You will:
•
Explore the Microsoft Office Word 2007 user interface, including the Ribbon.
1
LESSON 1
Introduction
te
op
r
i
al
y
Perhaps you have been handwriting letters or using a typewriter to create your personal and
business documents. Microsoft® Office Word 2007, with its streamlined user interface and a
host of editing and layout tools, makes the authoring experience simpler and more efficient. In
this lesson, you will create a document using Word 2007.
No matter what profession you are in, the process of learning something new requires some
basic skills to perform even the most common tasks. Learning a new computer program is no
different. Time spent familiarizing yourself with Word as you create a basic document will
help you acquire the fundamental skills you need to create more complex documents.
TOPIC A
Ma
Explore the User Interface
Before you start working in Word, you need to be aware of the various features that are available in the interface. In this topic, you will explore the user interface.
tC
ce
While working on new software, you could potentially waste a significant amount of time
searching for specific options in the work environment. You can prevent this by familiarizing
yourself with the user interface elements. This will help you achieve the output that you are
seeking when you eventually begin using the software.
No
Microsoft Office Word 2007
2
Do
se
ea
Pl
Re
fe
re
n
Microsoft Office Word 2007 is a program used to create, revise, and save documents for printing, distribution, or future retrieval. Word’s tools can help you make your documents more
accurate, concise, and correct. The Word interface consists of various elements, such as the
Office button, Ribbon, Quick Access toolbar, Microsoft Office Window Frame, as well as
others. Microsoft Word is part of the Microsoft Office system, a collection of services and programs that work together to help you perform computing tasks.
Microsoft® Office Word 2007 - Level 1 (Second Edition)
Ma
te
op
r
i
al
y
LESSON 1
Figure 1-1: Microsoft Office Word interface elements.
Description
tC
No
Mouse Pointer Shape
ce
Mouse Pointer Shapes
As you use Word, you will notice that the mouse pointer changes shape, depending on
where it is located in the program window.
re
n
In the text area, the I-beam mouse pointer is used to indicate
the point where text, graphics, tables, and pictures are to be
inserted. It is also used to select text.
Do
Outside the text area, the right-arrow mouse pointer is used
to select menu commands, toolbar, buttons, and so on.
On the selection bar, the left-arrow mouse pointer is used to
select lines, paragraphs, and the entire document.
se
ea
fe
On links, the hand-shaped mouse pointer is used to display
more information.
Lesson 1: Creating a Basic Document
Pl
Re
ScreenTips
As you position the mouse pointer over items, such as toolbar buttons, in the program
window, Word may display a descriptive label called a ScreenTip. You can use a
ScreenTip to identify program window items or to help you distinguish between similar looking items. You can customize ScreenTips on the Personalize tab of the Word
Options dialog box by selecting any of the following options:
3
LESSON 1
Description
Show Feature Description In ScreenTips
Selecting this option displays the name of the
element along with a brief description. This
option is active by default.
Don’t Show Feature Description In ScreenTips
Selecting this option displays the name of the
element alone.
Don’t Show ScreenTips
Selecting this option disables ScreenTips.
Word Documents
te
op
r
i
al
y
Option
No
Do
se
ea
fe
re
n
ce
Example:
tC
Ma
Definition:
A Word document is a document that is created using the Microsoft Office Word
software. It is a collection of pages containing information in the form of text, pictures, graphics, tables, or charts that is stored in an electronic form in a computer. You
can customize document pages according to your needs. The default file format for a
Word document created using Microsoft Office Word 2007 is .docx.
Figure 1-2: A Word document.
Pl
Re
The Office Button
Click the Offıce button, located at the top-left corner of the Word interface, to display the
Office Menu, a set of options that can be applied to a document as a whole.
4
Microsoft® Office Word 2007 - Level 1 (Second Edition)
LESSON 1
Description
New
Opens the New Document dialog box from which you can select either a blank
document, a new blog entry, or a blank template.
Open
Opens existing documents, regardless of the version in which they were created.
Save
Saves a document in the .docx format by default.
Save As
Saves a document in formats other than the default file format and also in a different location.
Print
Allows you to preview and print documents.
Prepare
Provides sub-options to check if a document is ready to be shared.
Send
Allows you to send your document either through email or fax.
Publish
Allows you to share your documents with other people through the web.
Close
Closes documents that are open. If the document hasn’t been saved, the
Microsoft Office Word message box will appear, enabling you to save your document with the latest changes.
Recent Documents
Lists the documents that were recently opened.
Word Options
Opens a dialog box, listing options to customize the Word environment.
Exit Word
Closes the Word application.
The Quick Access Toolbar
tC
Ma
te
op
r
i
al
y
Option
Do
re
n
The Microsoft Office Window Frame
No
ce
By default, the Quick Access toolbar is displayed at the top-left corner of the window, above
the Ribbon. It provides easy access to core commands such as save a document, undo a previous action, and repeat a previous action. You can customize this toolbar to include other
options based on user requirements. The Quick Access toolbar can be placed below the
Ribbon.
Description
fe
Page Number
Displays the current page number of the document that you are
working on.
ea
Frame Option
se
The Microsoft Offıce Window Frame appears at the bottom of the application window, and displays a number of options relating to overall document functionality.
Contextual Spell Checker
Checks for proofing errors in a document. A red checked sign
denotes the presence of errors that have to be corrected in the
document.
Pl
Displays the word count in a document as you are typing in it.
Re
Live Word Count
Tracked Changes Off/On
Switches on or switches off the track changes mode while you
are reviewing or editing a document.
Document Views
Displays a document as it will appear when printed or displayed
on a web page. You can also view a document’s outline for an
overview of the available content.
Lesson 1: Creating a Basic Document
5
LESSON 1
Description
Zoom Controls
Enables you to zoom in to specific portions of the document
that you might want to view and work on. It also enables you to
view several pages at the same time to get an overall perspective of the layout.
te
op
r
i
al
y
Frame Option
The Ribbon
tC
ce
Ma
The Ribbon is a panel at the top portion of a Word document and it contains a selection of
easy-to-browse commands that you may need in order to work on a document. It has seven
tabs that are organized in the order in which they will be used during document creation. Each
of these tabs is divided into groups containing features designed to perform specific tasks during the authoring process. You can hide the Ribbon by double-clicking any active tab.
No
Figure 1-3: The Ribbon in Microsoft Office Word 2007.
Tabs on the Ribbon
Do
re
n
Ribbon Buttons
The commands in the different groups of a tab are divided into large and small
buttons. While the large buttons determine features that are commonly used, the
smaller buttons represent minor features that are designed to work together to achieve
a common result.
Re
Home
Insert
6
se
Description
ea
Tab Name
The Home tab contains the most commonly used commands that enable
you to start working with a Word document. This tab contains functional
groups that allow you to format and edit text. Groups on the Home tab
include Clipboard, Font, Paragraph, Styles, and Editing.
Pl
fe
There are many useful functions on the Home, Insert, Page Layout, Review, and View tabs on
the Ribbon.
The Insert tab contains functional groups that enable quick access to different object types such as charts, tables, and pictures that can be added
to a document. Groups on the Insert tab include Pages, Tables, Illustrations, Links, Header and Footer, Text, and Symbols.
Microsoft® Office Word 2007 - Level 1 (Second Edition)
LESSON 1
Description
Page Layout
The Page Layout tab contains functional groups that are used to customize the pages in a document. The placement of text and graphics can also
be controlled using the commands on this tab. Groups on the Page Layout tab include Themes, Page Setup, Page Background, Paragraph, and
Arrange.
Review
The Review tab contains functional groups with various options to review
and edit the contents in a document. Groups on the Review tab include
Proofing, Comments, Tracking, Changes, Compare, and Protect.
View
The View tab contains functional groups with various options that enable
you to switch between different document views. Groups on the View tab
include Document Views, Show/Hide, Zoom, Window, and Macros.
te
op
r
i
al
y
Tab Name
Ma
Task Panes
No
Do
se
ea
Pl
Re
fe
re
n
ce
Example:
tC
Definition:
A task pane is a small window within the Word environment that provides a list of
feature-specific options and commands. Unlike dialog boxes, which provide controls
for configuring program or feature settings, task panes generally present a list of
choices for inserting or applying items to documents. The task pane is small enough to
keep open as you work with your document. You can open task panes from specific
groups on the Ribbon and sometimes from within other task panes.
Figure 1-4: A task pane.
Lesson 1: Creating a Basic Document
7
LESSON 1
te
op
r
i
al
y
Definition:
Dialog Box Launchers are small arrow buttons occupying the bottom-right corner of
certain groups on the Ribbon. They launch dialog boxes or task panes with commands
specific to the features found in that group. These commands are used to adjust the
settings that are not available on the Ribbon.
re
n
Galleries
tC
Do
Figure 1-5: A dialog box launcher.
No
ce
Ma
Example:
8
se
ea
Pl
Re
fe
Definition:
Galleries are libraries that list the varying outcomes of using certain commands found
within the Ribbon. They support several layouts by putting together a variety of predefined text styles, table formats, or graphical effects. These effects can also be
customized. Galleries are arranged either in a grid or menu-like layout.
Microsoft® Office Word 2007 - Level 1 (Second Edition)
LESSON 1
Ma
te
op
r
i
al
y
Example:
Figure 1-6: The Styles gallery in Word 2007.
Live Preview
tC
Do
re
n
Exploring Word’s User Interface Elements
No
ACTIVITY 1-1
ce
Some galleries support Live Preview, a feature that enables users to preview the results of
applying design and formatting changes to a document, without actually applying it. These
changes are displayed in the document as soon as the user moves the mouse pointer over the
available options in a gallery.
Lesson 1: Creating a Basic Document
se
ea
Examine the Office menu.
Re
1.
How You Do It
a. Choose Start→All Programs→Microsoft
Office→Microsoft Office Word 2007.
Pl
What You Do
fe
Scenario:
Your company has just purchased and installed the Microsoft Office Word 2007 application.
Henceforth, your manager expects you to use this software to create documents. As you will
be working on Word frequently, you decide to spend some time exploring the user interface
elements of the Word environment.
9
LESSON 1
te
op
r
i
al
y
b. In the Microsoft Word window, at the topleft corner, click the Office button to
display the Office Menu.
c. In the document, click anywhere away
from the menu to close the menu.
a. On the Ribbon, the Home tab includes
various groups such as Clipboard, Font,
Paragraph, and so on. Select the Insert
tab to see the available groups on that
tab.
Examine the groups on the Ribbon.
Ma
2.
b. On the Ribbon, select other tabs to see
the available groups.
tC
No
c. Click Cancel to close the dialog box.
a. In the Page Background group, click Page
Color to display the Page Colors gallery.
ea
se
b. In the Standard Colors section, position
the mouse pointer over the fifth color to
view the document in Light Green.
Pl
fe
Re
10
b. At the bottom-right corner of the Page
Setup group, click the Dialog Box
Launcher button.
Do
Display the Page Colors gallery.
re
n
4.
a. On the Ribbon, select the Page Layout
tab.
Examine the Page Setup dialog box.
ce
3.
c. To close the gallery, click anywhere in
the document.
Microsoft® Office Word 2007 - Level 1 (Second Edition)
LESSON 1
5.
Close the Word document and
application.
a. To close the document, click the Office
button and choose Close.
te
op
r
i
al
y
b. To close the Word application, click the
Office button and click Exit Word.
TOPIC B
Open and View a Document
Ma
You have explored the user interface. Before you start working on any document, you should
be able to identify the appropriate view in which your document should be displayed. In this
topic, you will view a document in different view modes.
Document Views
tC
Your manager has asked you to view the report that he has sent you. Word 2007 provides
options to view the document in different view modes and display the document in a mode
that best suits your requirements.
No
ce
At the bottom of the Microsoft Office Window Frame, there are options that enable users to
view a Word document in different view modes.
When printed. All sections, such as tables, text, graphics, and images,
will appear in their correct positions in the document.
se
In outline form, with bullets and plus signs that can be used to hide or
display subordinate levels of text.
In draft view, without pictures and layouts. In this view, the focus is on
the text alone.
Re
Draft
In a web browser. In this view, the entire document appears on a single
page, with tables and text wrapping to fit into the window.
ea
Outline
Full length on screen. This view is ideal for viewing two pages at a
time.
fe
Full Screen Reading
Web Layout
View of the document as it will appear:
Pl
Print Layout
Do
Document View
re
n
The view options at the bottom of the Microsoft Office Window Frame are shortcuts to the commands found on
the View tab of the Ribbon.
In Outline view, the Outlining tab appears as part of the Ribbon. In this tab, you can manipulate the existing outline by changing the heading or body text level of the chosen content and formatting it.
Lesson 1: Creating a Basic Document
11
LESSON 1
How to Open and View a Document
To open a document and set the view mode:
a.
Open a file you have viewed recently by clicking the Office button and
choosing the document from the Recent Documents section; otherwise, click
the Office button and choose Open or press Ctrl+O.
b.
In the Open dialog box, click the Look In drop-down arrow and navigate to
the location of the document you want to open.
c.
Select the desired Word document and click Open.
On the Microsoft Office Window Frame, click a view button to view the document in the desired form.
a. Use the Office button to open a file.
•
Open a file you have recently viewed by clicking the Office button and
choosing the document from the Recent Documents section.
•
Click the Office button and choose Enter.
•
Or, press Ctrl+O.
ce
ACTIVITY 1-2
tC
2.
Open a Word document.
Ma
1.
te
op
r
i
al
y
Procedure Reference: Open a Document and Set the View Mode
Data Files:
About Us.docx
re
n
•
No
Viewing a Document
12
Do
se
ea
Pl
Re
fe
Scenario:
Your company is hosting a new website and you have been asked to review the write-up on
the company. You use Word 2007 to view this document in different view modes to identify
the one that best suits your requirements.
Microsoft® Office Word 2007 - Level 1 (Second Edition)
LESSON 1
What You Do
How You Do It
1.
a. Open Microsoft Word.
Open an existing document.
te
op
r
i
al
y
b. Click the Office button and choose
Open.
c. In the Open dialog box, navigate to C:\
084893Data\Creating a Basic Document.
d. Select About Us.docx.
e. Click Open.
View the document in the different
view modes.
a. On the Microsoft Office Window Frame,
click the Web Layout button
to
change to Web Layout view.
Ma
2.
b. On the Microsoft Office Window Frame,
click the Outline button
to change to
Outline view.
tC
ce
c. On the Microsoft Office Window Frame,
click the Print Layout button
to
return to Print Layout view.
No
d. On the Microsoft Office Window Frame,
click the Zoom In button
to magnify
the document to 110 percent.
Lesson 1: Creating a Basic Document
Do
se
ea
Pl
Re
fe
re
n
e. Close the Word document.
13
LESSON 1
TOPIC C
te
op
r
i
al
y
Customize the Word Environment
You have worked with a few of the Word 2007 user interface elements. If you are not comfortable working with the display and arrangement of the default interface elements in Word, you
may wish to personalize them to suit your requirements. In this topic, you will customize the
Word environment.
When you start working with new software, the interface may not contain all the options that
you require or sometimes it may be cluttered with options that you may not require at all. This
will slow you down and make working a cumbersome process. By customizing the environment, you will be able to display only those options that you need for your current workflow.
Ma
The Word Options Dialog Box
The Word Options dialog box contains a series of tabs, each of which contains commands
required to customize the Word environment.
Popular
Personalize your work environment by setting options, such as language, color
scheme, user name, and so on. It also allows you to enable the Live Preview
feature.
Display
Modify how the text content is displayed on screen and in the print version. You
can opt to show or hide certain page elements, such as Highlighter Marks and
Formatting Marks.
Proofing
Specify how Word should correct and format text that you type. You can set auto
correction settings and ensure that Word corrects all spelling and grammatical
errors. You can also ensure that Word ignores certain words or errors in a
document.
Do
Select customization options to save documents. Depending on how often you
want to save backup information for your documents, you can specify how frequently a document will be auto saved. You can also change the locations of
where these drafts are saved.
Customize
Customize the Quick Access toolbar. Using this tab, you can select those commands that you want added to the Quick Access toolbar. You can also opt to
position the Quick Access toolbar below the Ribbon.
Resources
ea
Manage Office add-ins if you are using extensions to enhance Office applications.
Add-ins extend the capabilities of a function. Many of these add-ins are installed
with Office 2007.
Pl
Re
Trust Center
se
Select advanced options needed to work with Word. You can specify options for
editing, copying, pasting, displaying, printing, saving, and writing content.
fe
Advanced
Add-Ins
14
No
re
n
Save
tC
Enables You To:
ce
Tab
Keep the system and documents in it safe. Using the Advanced Trust Center Settings button on this tab, you can set the security measures needed to keep a
document secure.
Communicate with Microsoft for support, updates, or on how to rectify problems
in Office applications.
Microsoft® Office Word 2007 - Level 1 (Second Edition)
LESSON 1
How to Customize the Word Environment
To customize the Quick Access toolbar:
te
op
r
i
al
y
Procedure Reference: Customize the Quick Access Toolbar
Click the Office button and click Word Options.
2.
In the Word Options dialog box, select the Customize category.
3.
To add a command to a category on the Quick Access toolbar, in the Choose
Commands From drop-down list, select the category from which the command is
to be added.
4.
In the list box, select the desired command from the chosen category and click
Add.
5.
If you want to put the Quick Access toolbar below the Ribbon, check Show
Quick Access Toolbar Below The Ribbon.
6.
Click OK to close the Word Options dialog box.
Ma
1.
You can also click the Customize Quick Access Toolbar button to customize the Quick Access
toolbar.
To add a group to the Quick Access toolbar, select the tab on the Ribbon that has
the desired group, right-click the name of the group and choose Add To Quick
Access toolbar.
tC
7.
No
ce
You can add any number of groups to the Quick Access toolbar. However, the Ribbon cannot be
added to the Quick Access toolbar.
Do
re
n
Customizing the Microsoft Office Window Frame
To show or hide options on the Window Frame, right-click the Window Frame and
check or uncheck the desired options.
se
fe
Minimizing the Ribbon
Although it is not possible to move or hide the Ribbon, you can minimize it so that
you will have more space available in your work area. To minimize the Ribbon, you
can select Minimize The Ribbon from the Customize Quick Access Toolbar drop-down
list. You can also double-click the active tab on the Ribbon or press Ctrl+F1. The
interface now only displays the tabs and the corresponding groups and galleries are
hidden. To view the Ribbon, click any tab. To restore the Ribbon, double-click any tab.
To customize the save options:
Pl
Open the Word Options dialog box and select the Save category.
Re
1.
ea
Procedure Reference: Customize the Save Options
2.
In the Customize How Documents Are Saved pane, in the Save Documents section, customize the save options. You can choose a default file type and file save
location, a location for files that Word automatically recovers after a program
crash, and a time interval at which Word should save autorecovery information.
3.
Click OK to close the Word Options dialog box.
Lesson 1: Creating a Basic Document
15
LESSON 1
ACTIVITY 1-3
te
op
r
i
al
y
Customizing the Microsoft Office Word User Interface
Data Files:
•
Nolan Letter.docx
Scenario:
You have just finished your work on the About Us document and wish to work on the Nolan
Letter document. You feel that displaying frequently used commands such as New, Open, and
Close on the interface will increase your efficiency in Word. You also wish to add the paragraph group to the interface. Your company insists on maintaining all official files in a specific
folder on the C drive. You wish to set this as your default save location.
1.
How You Do It
Ma
What You Do
a. Click the Office button and click Word
Options.
Add the necessary commands to the
Quick Access toolbar.
16
tC
No
d. Click Add to add the Open command to
the Quick Access toolbar.
Do
e. In the list box below the Choose Commands From drop-down list, select New
and click Add.
f.
se
ea
c. In the list box below the Choose Commands From drop-down list, select Open.
From the Choose Commands From dropdown list, select Office Menu.
g. In the list box below the Choose Commands From drop-down list, select Close
and click Add.
h. Click OK to close the Word Options dialog
box.
Pl
Re
fe
re
n
ce
b. In the Word Options dialog box, select the
Customize category.
Microsoft® Office Word 2007 - Level 1 (Second Edition)
LESSON 1
i.
Open the Nolan Letter document
using the Quick Access toolbar.
te
op
r
i
al
y
2.
Verify that the commands appear on the
Quick Access toolbar.
a. On the Quick Access toolbar, click the
Open button.
b. In the Open dialog box, navigate to C:\
084893Data\Creating a Basic Document.
c. Select Nolan Letter.docx.
3.
Ma
d. Click Open.
a. On the Home tab of the Ribbon, in the
Paragraph group, right-click the word
Paragraph in the Paragraph group and
choose Add To Quick Access Toolbar.
Add the Paragraph group to the
Quick Access toolbar.
tC
ce
b. On the Quick Access toolbar, click the
Paragraph group button
to open the
Paragraph group.
Set Word’s default save location.
Do
a. Click the Office button and click Word
Options.
re
n
4.
No
c. All the Paragraph group options are now
available from the Quick Access toolbar.
Click the Paragraph group button again
to close the Paragraph group.
Lesson 1: Creating a Basic Document
se
ea
c. In the Save Documents section, in the
Default File Location text box, select the
existing location and type
C:\084893Data and click OK.
d. On the Quick Access toolbar, click the
Close button
to close the document.
Pl
Re
fe
b. In the Word Options dialog box, select the
Save category.
17
LESSON 1
TOPIC D
te
op
r
i
al
y
Obtain Help
In the previous topic, you configured the Word user interface to make your document-editing
tasks more efficient. Another way you can work efficiently is to use the Microsoft Word online
Help system to find information or to answer questions that might arise as you work. In this
topic, you will use Word’s built-in Help system to get assistance when you have a query.
Word’s built-in Help system enables you to help yourself whenever you have Word-related
questions. As a result, you no longer need to rely on your coworkers or technical support. You
can find the answers for all your queries quickly and easily. The Help system can increase
your knowledge of Word.
Ma
Word Help
The Word Help feature is a complete user manual on the functionality of the various features
of Microsoft Office Word 2007. The Word Help window provides a quick and easy way to find
answers to Word-related queries, online or offline. You can also search for information by
browsing through the links that are already provided or by typing in a keyword.
tC
Word Help Options
No
ce
Wildcard Characters
A Wildcard is a special symbol that stands for one or more characters. For example,
the symbol asterisk (*) is a wildcard that stands for any combination of letters. Word
Help does not qualify wildcard characters as searchable text.
Description
Word Help toolbar
Provides access to navigational, print, and format commands.
Type Words To Search For text
box
Allows you to type the keyword on which you need to search for
information. Previously asked questions can be found in the
Search Criteria drop-down list.
Pl
Re
Browse Word Help pane
Provides you options, based on the criterion you have chosen, to
search for Help information from online or offline content.
Lists the topics available in Word Help as various categories. You
can choose to either show or hide the Table Of Contents pane.
ea
fe
Table Of Contents pane
se
Option
Search drop-down list
18
Do
re
n
In the Word Help window, there are a number of options that allow you to find answers for all
your Word-related queries.
Displays the topics available on Word Help in a tabular form. You
can navigate to a topic by clicking it.
Microsoft® Office Word 2007 - Level 1 (Second Edition)
LESSON 1
Word Help Toolbar Options
te
op
r
i
al
y
On the Word Help toolbar, there are buttons that enable you to navigate through Help. For
example, you can move back and forth between pages, stop a search in progress, display the
Help Home page or Table of Contents, or print a particular Help topic. You can also control
the Help display by increasing or decreasing the size of the text or by setting the Help window
to stay on top of other windows.
Word Help with Areas of Search
In Word Help, you can specify the area of search to narrow down the search results to
a specific area. Areas of search can be either offline or online.
The following table gives a brief description of the areas of search in Word.
Option Lists
All Word
Information on the keyword from the built-in Help and takes
you to the Office online website, if required.
Word Help
Information on the keyword from the built-in Help as well as
the Office online website, but does not take you to the Office
online website.
Word Templates
Sample templates that are available on the Office online
website.
Word Training
Sample training information from the Office online website.
Developer Reference
Programming tasks, samples, and references to create customized solutions.
tC
No
ce
Ma
Area Of Search
How to Use Microsoft Office Word Help
To find information in Word Help:
Do
re
n
Procedure Reference: Find Information in Word Help
2.
If desired, click the Show Table Of Contents button to display the Table of
Contents.
3.
Click a link to view its details.
•
In the Table Of Contents pane, click a link to view its details.
Or, click a link in the Browse Word Help pane to view its details.
Pl
If desired, search for information.
a. To narrow the search to a particular area, select an option from the Search
drop-down list.
Re
4.
ea
•
se
To open the Word Help window, click the Help button on the Ribbon, or press
F1.
fe
1.
b.
In the Type Words To Search For text box, type a keyword.
c.
Click Search to display the search results.
Lesson 1: Creating a Basic Document
19
LESSON 1
te
op
r
i
al
y
Keeping the Microsoft Office Help Window on Top
You can set the Microsoft Office Help window so that it stays on top of the Word window or other Microsoft Office windows. To determine the current mode, point to the
Not On Top/Keep On Top button. The ScreenTip should tell you the mode the Help
window is in. To toggle to the other mode, click the button.
ACTIVITY 1-4
Finding Information in Word Help
What You Do
1.
Ma
Scenario:
There are new editorial guidelines that will require you to add page numbers to most
documents. As a relatively new user of Word, you do not know how to go about inserting page
numbers in a Word document.
How You Do It
Display the Word Help window.
a. At the top-right corner of the Ribbon,
click the Microsoft Office Word Help
button.
20
tC
No
ea
se
Do
c. On the toolbar, click the Show Table Of
Contents button
to display the Table
of Contents.
Pl
Re
fe
re
n
ce
b. At the top-right corner of the Word Help
window, click the Maximize button.
Microsoft® Office Word 2007 - Level 1 (Second Edition)
LESSON 1
2.
a. In the Word Help window, in the Browse
Word Help section, click the Viewing And
Navigating link.
Browse and search for Help
information.
te
op
r
i
al
y
b. The topics on viewing and navigating
appear. In the Type Words To Search For
text box, click and type insert page
numbers
c. Click the Search drop-down arrow.
Ma
d. In the Content From This Computer section, select Word Help.
e. Click Search to display links related to
Insert Page Numbers.
Keep the Word Help window on top
of the open Word window.
a. On the title bar, click the Restore Down
button
to restore the Help window.
ce
3.
To view the Help information, click the
Insert Page Numbers Help link.
tC
f.
No
Do
re
n
b. Place the mouse pointer over the Keep
On Top button to view the ScreenTip.
Lesson 1: Creating a Basic Document
se
ea
d. To verify that the Word Help window stays
on top, click anywhere in the Word
window.
e. Close the Word Help window.
Pl
Re
fe
c. Click the Keep On Top button.
21
LESSON 1
TOPIC E
te
op
r
i
al
y
Enter Text
In the first few topics in this lesson, you identified the user interface elements in Word and
arranged the Word environment to suit your needs. With your working environment organized,
you are now ready to begin basic document editing. In this topic, you will start to create a
basic Word document by entering text.
Word is a powerful word processor. However, with no words to process, the program does
little more than take up room on your computer. The first step toward creating a document is
to capture your ideas in a form that Word can use, which is by entering text into an open
document.
Ma
Default Typing Options
When you begin typing in a new blank document, certain things will happen automatically to
help you enter text neatly, quickly, and accurately.
•
The word wrap function will automatically continue a long line of text at the beginning of
the next line so that you can continue typing. There is no need to manually end each line
of text by pressing Enter when you get close to the right margin.
•
The Check Spelling And Grammar As You Type feature displays a wavy red or wavy
green underline below text that Word considers either a spelling or grammar mistake,
respectively. You can right-click the underlined item and Word will suggest corrections for
you.
•
Smart tags are hidden tags that are represented by a button that is displayed in response
to a given action. Clicking a smart tag displays a list of options related to the action
performed.
No
Do
re
n
tC
AutoCorrect fixes common typographical errors, misspelled words, and incorrect
capitalization.
ce
•
se
The AutoCorrect Options Button
The AutoCorrect Options button is a hidden tag that appears below the word or the
capitalized letter that has been modified using the AutoCorrect feature. This button provides options to change automatic corrections back, stop particular automatic
corrections, or control AutoCorrect options by using the AutoCorrect dialog box.
ea
fe
Formatting Marks
22
Pl
Re
Definition:
Formatting marks are non-printing document indicators that appear in the text area to
indicate the location of spaces, paragraphs, tabs, line breaks, and so on. By clicking
the Show/Hide button on the Home tab, you can turn the formatting marks on or off.
Microsoft® Office Word 2007 - Level 1 (Second Edition)
LESSON 1
How to Enter Text
Ma
Figure 1-7: Different formatting marks in Word.
te
op
r
i
al
y
Example:
To create a blank document and enter text:
tC
Procedure Reference: Create a Blank Document and Enter Text
2.
In the New Document dialog box, in the Blank And Recent section, select Blank
Document.
3.
Click Create.
4.
In a Word document, position the insertion point at the location where you want
to enter text.
5.
Type the desired text.
6.
If necessary, press Enter to end a paragraph or to create a blank line between
paragraphs.
7.
If necessary, on the Home tab of the Ribbon, in the Paragraph group, click the
Show/Hide button to display the formatting marks.
8.
If you need to delete a character or space, position the insertion point before or
after the character to be deleted, and press Backspace to delete one character to
the left and Delete to delete one character to the right.
9.
If you would like to, to delete a blank line, position the mouse pointer at the
beginning of the blank line and press Delete.
Do
Pl
ea
se
re
n
fe
Re
Lesson 1: Creating a Basic Document
No
Click the Office button and choose New.
ce
1.
23
LESSON 1
ACTIVITY 1-5
te
op
r
i
al
y
Entering Text in a Document
Scenario:
You work for a real estate company named Burke Properties. You took a phone message for a
client named Ms. Ellen Thomas. The client is available for a meeting on the first of next
month to discuss buying the Schyler house on Elm Street. Since this location is outside your
sales territory, you need to draft a client referral memo in Word to pass the information about
the client to the appropriate agent, Tim Jones.
What You Do
How You Do It
1.
a. Click the Office button and choose New.
Ma
Create a new blank document.
b. In the New Document dialog box, in the
Blank And Recent section, verify that
Blank Document is selected and click
Create.
ea
Pl
No
b. Type Client Referral Memo and press
Enter to end the line.
Do
c. A paragraph mark appears where you
ended the line. Press Enter to add a blank
line.
d. Type To: and press Tab.
se
re
n
fe
Re
24
tC
a. On the Home tab of the Ribbon, in the
Paragraph group, click the Show/Hide
button
to turn on the formatting
marks.
Type the memo’s heading
information.
ce
2.
e. The tab character appears as an arrow.
Type Tim Jones and press Enter.
f.
Type From: and press Tab.
g. Type your first and last name and press
Enter.
h. Type Re: and press Tab.
i.
Type Client Help
Microsoft® Office Word 2007 - Level 1 (Second Edition)
LESSON 1
3.
a. With the insertion point after the word
Help, press Backspace four times to
delete the word.
Replace the word “Help”
with “Referral”.
4.
Type the memo’s first sentence.
te
op
r
i
al
y
b. Type Referral and press Enter.
a. Press Enter to add a blank line after the
reference line.
b. Type Ms. Ellen Thomas wants to see the
Schyler house in your territory and stop
typing.
5.
Check the functionality of the
AutoCorrect feature.
Ma
c. A wavy line appears under “Schyler”
because the Check Spelling feature is
active and this is not a common dictionary
word. Press Spacebar and type (the one
on Elm Street). to conclude the sentence.
a. To start the next sentence, press the
Spacebar and type teh
tC
b. To automatically correct the word, press
Spacebar.
No
ce
c. Move the mouse pointer just below the
word “The” to display the AutoCorrect
Options button.
d. Click the AutoCorrect Options button.
Lesson 1: Creating a Basic Document
ea
se
In the AutoCorrect dialog box, scroll in
the AutoCorrect settings list to verify
that there is a setting to convert “teh” to
“the.”
Pl
Re
fe
f.
Do
re
n
e. From the AutoCorrect Options drop-down
list, select Control AutoCorrect Options.
g. Click Cancel to close the dialog box.
25
LESSON 1
a. Verify that the insertion point is after
the space after the word “The” and
type first of next month is a good meeting time. Call me for details.
Finish the memo.
te
op
r
i
al
y
6.
b. As you type, the text wraps automatically
at the right edge of the document. Press
Enter to end the paragraph.
You do not need to close the document. You
can use the same file for the next activity.
Ma
TOPIC F
Save a Document
tC
You have entered text in a document. You may want to save this document for future
reference. In this topic, you will save a document.
Word 2007 File Types
No
ce
Working on an important document for hours would be a waste if we are unable to retrieve
this information to use it later. Thus, it is necessary to save the document.
Do
re
n
All Word 2007 files use Extensible Markup Language (XML) as the basic file format. The
Word XML format is a compact, robust file format that enables easy integration of Word documents into other applications and platforms. Word 2007 supports a number of other file types
as well.
Re
.docm
26
.doc
This is the default type in which all Word 2007 documents are saved.
ea
.docx
Description
This is a basic XML file type that can store VBA macrocode. Macros are
sets of Word commands and instructions grouped together as a single command and a VBA helps us to modify these macros.
The Word 97–2003 Document (*.doc) option is used to save the document
in a format compatible with many previous versions of Word.
The Word 97–2003 & 6.0/95–RTF (*.doc) option is used to save a Word
document in the format compatible with Word 95 with Rich Text Format.
Pl
fe
File Type
se
Other Word File Formats
The following table lists some of the important file formats you can use in Word 2007.
Microsoft® Office Word 2007 - Level 1 (Second Edition)
LESSON 1
Description
.dotx/.dotm
.dotx is the default type for a Word template. It is used while saving document styles and formatting.
.dotm is the default type for a Word macro-enabled template. Microsoft
Office Word 2007 stores macro code for use with other Word documents.
By default, documents are saved as .docx files even when created from a
Office Word 2007 XML Macro-Enabled Template.
.dot
This file type enables you to save a Word template in the Word 97 through
Word 2003 versions.
.pdf
This file type enables you to save the Word document as an Adobe PDF
(Portable Document Format) file.
.htm or .html
This file type saves the Word document as a web page. This renders the
document’s contents non-editable.
Saving the Word document as a filtered web page will remove Officespecific tags and also disable a few of the Word features.
.rtf
This is a common file type which enables you to save any text document
with formatting.
.txt
This file type is used to save documents without any text formatting.
.xml
This file type is used to save the document as a Word XML document and
is very similar to the basic *.html file type.
tC
Ma
te
op
r
i
al
y
File Type
No
ce
Advantages of the XML File Format
Previous versions of Word used the .doc file format by default. The XML file format
provides several improvements to the .doc file format that are very useful for end
users.
Smaller file size
The new format uses zip compression to reduce file size by as much as
75 percent. These new file formats reduce the disk space required to store
files and the bandwidth used to share documents across networks.
Do
Advantage
re
n
Feature
Easier detection of
documents with
macros
The new file formats with their distinct file name extensions make it easy
to distinguish files that contain macros from those that don’t. File extensions ending with x cannot contain VBA macros or ActiveX controls,
whereas files ending with m can.
ea
se
The files saved in these new formats are structured modularly. Different
data components in the file are stored separately. Therefore, the file can
be opened even if a component within the file is damaged or corrupted.
fe
Improved information recovery
Lesson 1: Creating a Basic Document
Pl
Re
Information created within the Office applications can be easily used by
Easy integration
and interoperability other business applications.
of information
27
LESSON 1
The Save Command
te
op
r
i
al
y
The Save command is used to save a newly created document or to save the changes you
make to an existing document. While saving a file for the first time, the Save As dialog box is
displayed, which prompts the user to type a name for the file and to specify the location in
which the file needs to be saved. By default, a Word document is saved with the .docx file
extension.
The Save As Command
The Save As command on the Office button is used to save an existing document with a new
file name, with a new file extension, or in a new location. It also provides direct access to
options that enable you to save a copy of the file in the default Word 2007 file format, as a
template, in the Word 97-2003 file format, and also to publish a copy of the file as a PDF or
XPS file.
Ma
PDF (Portable Document Format) and XPS (XML paper Specification) are document formats that integrate creating a document and its viewing on the window. To save in either of these formats you will need to install an
add-in program from Microsoft; see the Word Help system for more information.
tC
Save vs. Save As
The Save command saves an existing document with the same name in the same location, whereas the Save As command enables you to change the name of the file, the
location in which the file need to be stored, or the type of the file.
ce
Compatibility With Other Word Formats
Convert a document
Pl
Re
Check compatibility manually
28
You can use the Convert option to convert a document
saved in an earlier version of Word to the Word 2007
file format. Click the Office button and choose Convert.
You can save a .docx document in a file format compatible with earlier versions of Word. In the Save As dialog
box, select the document type for the appropriate version of Word from the Save As dialog box. The
Compatibility Checker will run to inform you if there
are any features in the current .docx document that will
not be preserved in the earlier file format. For example,
some new text or graphic effects might be combined
into a single object in the earlier file version.
se
ea
fe
Save as an earlier version
Description
Do
re
n
Compatibility Method
No
If you share information with users of earlier versions of Word, there are various tools you can
use to ensure that the different document formats are compatible.
To run the Compatibility Checker manually, click the
Office button and choose Prepare→Run Compatibility
Checker. The Compatibility Checker will tell you if
there are any compatibility issues or not.
Microsoft® Office Word 2007 - Level 1 (Second Edition)
LESSON 1
How to Save a Document
Procedure Reference: Save a Document with the Save As Command
1.
te
op
r
i
al
y
To use the Save As command to save a document for the first time or to save a copy
of a document with a different file name or location:
Click the Office button and choose Save As to display the Save As dialog box.
The first time you save a new document, the Save As dialog box will also open if you choose
Save, click the Save button, or press Ctrl + S.
In the Save As dialog box, click the Save In drop-down arrow and navigate to the
location where you want to save the document.
3.
If you need to select a different file format, select the format from the Save As
Type drop-down list.
4.
In the File Name text box, type the name of the file.
5.
Click Save.
Ma
2.
Open and modify the document.
2.
Save the changes.
•
Click the Office button and choose Save.
ce
1.
•
Or, press Ctrl+S.
se
ea
Pl
fe
Re
Lesson 1: Creating a Basic Document
Do
On the Quick Access toolbar, click the Save button.
re
n
•
No
To save changes made to an existing document:
tC
Procedure Reference: Use the Save Command to Save Changes to an Existing
Document
29
LESSON 1
ACTIVITY 1-6
te
op
r
i
al
y
Saving a Document
Before You Begin:
The Client Referral Memo document is open.
Scenario:
After you have finished typing the client referral memo, you wish to maintain a copy of it for
your own reference. Your agent, Tim Jones, has only Word 2003 installed on his computer, and
therefore, you need to create a copy of the document for him in the Word 2003 file format.
What You Do
How You Do It
1.
a. With the Client Referral Memo open, click
the Office button and choose Save As.
Ma
Save the document.
tC
No
Do
se
ea
b. There should be no compatibility issues.
Click OK.
Pl
Re
30
c. In the File Name text box and Save As
Type text box, verify that Client Referral
Memo.docx is the file name and Word
Document (*.docx) is the Save As Type.
Click Save.
a. Click the Office button and choose
Prepare→Run Compatibility Checker.
Check the compatibility of the
memo with the 2003 version of the
Word application.
fe
2.
re
n
ce
b. In the Save As dialog box, navigate to C:\
084893Data\Creating a Basic Document.
Microsoft® Office Word 2007 - Level 1 (Second Edition)
LESSON 1
3.
Save a copy of the file on the Desktop in the Word 2003 file format.
a. Click the Office button and choose Save
As→Word 97-2003 Document.
te
op
r
i
al
y
b. In the Save As dialog box, in left pane,
click Desktop.
c. Verify that the Save As Type is Word
97–2003 Document (*.doc) and click
Save.
d. Close the document.
Ma
TOPIC G
Preview and Print a Document
tC
You have saved your work in a document and are now ready to print it. Before you print the
document, it is smart to preview the document so you can see what it might look like when
printed. In this topic, you will preview and print your document.
No
Do
re
n
Print Preview
ce
Whether you realize it or not, printing a document costs money. Each page may cost only a
few cents for paper and ink, but those pennies add up quickly if you are repeatedly printing a
multi-page document, just to see how it will look on paper or to do a quick hard copy edit. By
previewing your document before printing, you can still see how it will look and identify obvious errors without wasting money and the time it takes to print additional copies.
se
Print Preview is a view mode that enables you to view a document as it would appear on
paper when printed. You can view or modify the document in this view to suit your
requirements. You can access Print Preview from the Print selection on the Office button.
Print Preview Options
Options in This Group
Pl
Re
Print Preview Group
ea
fe
When a document is displayed in the Print Preview mode, the Print Preview tab contains several groups that provide options to print a document with desired settings.
Print
The Print group enables you to print the document or set print or display
options.
Page Setup
The Page Setup group enables you to adjust printed margins, change the
print orientation between portrait (vertical) or landscape (horizontal), or
select a different paper size.
Lesson 1: Creating a Basic Document
31
LESSON 1
Options in This Group
Zoom
The Zoom group enables you to controls the print preview appearance in
various ways such as previewing the document at a particular percentage
of its actual size, or by previewing one or two pages at a time.
Preview
The Preview group enables you to change options for the Print Preview
mode. For example, you can show or hide the ruler tools that measure
your document horizontally or vertically. You can also use buttons in the
preview group for navigating from page to page within Print Preview.
te
op
r
i
al
y
Print Preview Group
The Print Dialog Box
The most common options in the Print dialog box enable users to print documents with the
desired settings.
Ma
For information on other options in the Print dialog box, seeMicrosoft Office Word Help.
Name
Displays the name of the printer in use.
Properties
Displays the printer’s Properties dialog box. This option allows you to modify the
layout of the page to be printed.
Page Range
Enables you to print the whole document, just the current page, or a range of
pages.
Copies
Enables you to specify the number of copies of document you want to print.
Collate
Arranges each copy in sequential order when you need to print more than one
copy of the same document.
Print What
Allows you to print the document itself or other attributes of the document such as
its properties.
Print
Allows you to select and print odd pages, even pages, or all pages in the specified
page range.
No
Do
re
n
Opens the Display tab in the Word Options dialog box. The Display tab enables
you to further modify the appearance of the content on screen and on print mode.
fe
Options
se
Allows you to specify the number of pages to print on a single sheet of paper and
their scaling.
ea
Zoom
tC
Description
ce
Common Print
Option
Pl
Re
How to Preview and Print a Document
Procedure Reference: Preview a Document
32
To preview a document:
1.
Click the Office button and choose Print→Print Preview, or press Ctrl+F2.
Microsoft® Office Word 2007 - Level 1 (Second Edition)
LESSON 1
Use the tools in the Zoom group and on the Microsoft Office Window Frame to
view the document at the desired magnification level. For example, you can
specify a percentage of actual size, click buttons to preview one or two pages at
once, or click Zoom to open the Zoom dialog box and select additional options.
te
op
r
i
al
y
2.
Clicking the Magnifier mouse pointer at a particular region of the document would magnify that
region of the document to 100 percent. Clicking the magnifier again will undo the change in
magnification.
To navigate through the previewed document, click the Next Page or Previous
Page buttons in the Zoom group.
4.
To make changes to the document, uncheck the Magnifier check box in the Preview group; the mouse pointer will change to an I-beam and you will be able to
edit the document. Check Magnifier when you are done editing.
5.
Click Close Print Preview in the Preview group or press Esc to return to the original document view.
Procedure Reference: Print a Document
To print a document:
Display the Print dialog box.
•
On the Office button, click Print.
•
On the Quick Access toolbar, click the Print button.
•
On the Print Preview tab, click the Print button.
•
Or, press Ctrl+P.
ce
1.
tC
Ma
3.
3.
In the Page Range section, set the page range to be printed: All, Current Page, or
a specified range of pages.
4.
In the Copies section, in the Number Of Copies text box, type the number of copies that you want to print. If you print multiple copies, check Collate to arrange
the multiple copies of the printed document in sequential order.
5.
If necessary, set Zoom or other print options.
6.
Click OK to print the document with the specified settings.
Do
se
ea
Pl
fe
Re
Lesson 1: Creating a Basic Document
No
In the Print dialog box, in the Printer section, set the printer options.
re
n
2.
33
LESSON 1
ACTIVITY 1-7
te
op
r
i
al
y
Previewing and Printing a Document
Data Files:
•
About Us.docx
Conditions:
A print driver is installed on your computer.
Ma
Scenario:
You have been asked to provide a printed copy of the document that you have created to provide a company overview to new employees. Before printing, you want to preview the
document to verify whether the document looks as desired.
What You Do
1.
How You Do It
a. Click the Office button.
Open the About Us document from
the Recent Documents list.
Do
d. The zoom value appears on the Microsoft
Office Window Frame. On the Window
Frame, click the Zoom In button
to increase the magnification to 80
percent.
e. Click the Zoom In button three more
times to increase the magnification to
110%.
Pl
ea
b. In Print Preview mode, the mouse pointer
appears as a magnifying glass. On the
Print Preview tab, in the Zoom group,
click the Zoom button.
c. In the Zoom dialog box, in the Zoom To
section, select 75% and click OK.
se
re
n
fe
Re
34
a. Click the Office button and choose
Print→Print Preview.
No
Preview the document at different
zoom levels.
ce
2.
tC
b. In the Recent Documents list, select
About Us.docx.
Microsoft® Office Word 2007 - Level 1 (Second Edition)
LESSON 1
3.
View both pages of the document.
a. In the Preview group, click Next Page to
view the next page of the document.
te
op
r
i
al
y
b. In the Zoom group, click Two Pages to
view both pages of the document
simultaneously.
c. In the Preview group, click the Close
Print Preview button to switch to the
document view mode.
4.
Print two copies of the entire
document.
a. Click the Office button and choose Print.
b. In the Copies section, in the Number Of
Copies text box, type 2
tC
No
Print a copy of the “Our Goals”
page.
a. Click the Office button and choose Print.
re
n
5.
ce
Ma
c. Verify that the Collate check box is
checked and click OK to print the
document.
Do
b. Verify that the number of copies is set
to 1.
Lesson 1: Creating a Basic Document
se
ea
d. Click OK to print only the second page.
e. Close the document.
Pl
Re
fe
c. The “Our Goals” page is the second page
in the document. In the Page Range section, select Pages. In the Pages text box,
type 2
35
LESSON 1
Lesson 1 Follow-up
te
op
r
i
al
y
In this lesson, you created a document by entering text, saving, and printing the document. Not
only are you now ready to produce your own simple documents, but you will also use these
fundamental skills as you create more complex documents with Microsoft Word.
What do you think about Word’s default typing options? Do you think they’re useful or
distracting?
2.
How does customizing the Quick Access toolbar help you in your work?
36
tC
No
Do
se
ea
Pl
Re
fe
re
n
ce
Ma
1.
Microsoft® Office Word 2007 - Level 1 (Second Edition)
LESSON 2
Lesson Time
60 minutes
Editing a Document
Insert, delete, or rearrange text in an existing document.
•
Undo or redo changes made to a document.
•
Find and replace text.
Do
se
ea
Pl
Re
fe
re
n
ce
•
No
You will:
•
Navigate and select text in a document.
tC
Ma
In this lesson, you will edit documents by locating and modifying text.
Lesson 2: Editing a Document
te
op
r
i
al
y
LESSON 2
37
LESSON 2
Introduction
te
op
r
i
al
y
In the previous lesson, you created a basic document. Once you have created the basic structure of documents, you will often choose to perform additional editing of the text. In this
lesson, you will edit documents.
Editing a handwritten document requires you to rewrite the entire document to include the
changes. Word minimizes the effort required to revise your documents by enabling you to
change your existing documents any time, without using messy correction fluid or having to
start your document over again.
TOPIC A
Ma
Navigate and Select Text in a
Document
In this lesson, you will edit documents. Most document editing techniques require you to navigate to a desired location and select text in a document. In this topic, you will navigate and
select text within a document.
tC
No
Scroll Bars
ce
The two basic components that allow you to thoroughly view the different sections in a document are the keyboard and mouse. In order to navigate in a document, though, it is very
important to quickly decide on the component that best suits the situation. Using the most
appropriate navigation technique in a document may save you a lot of navigation time.
Do
se
re
n
In addition to using keyboard techniques to navigate, you can use Word’s two scroll bars to
move up, down, left, or right in a document. When you navigate with the scroll bars, the location of the insertion point does not change. Use the vertical scroll bar, located at the extreme
right side of the application window, to scroll up or down. Use the horizontal scroll bar, just
above the Microsoft Office Window Frame, to scroll left or right. The scroll arrows at the
extreme ends of the scroll bars allow the user to scroll a document slowly. The scroll boxes
between the scroll arrows can be dragged with the mouse to enable the user to quickly scroll
through a document.
ea
fe
The left corner of the Microsoft Office Window Frame always shows the insertion point’s current location.
38
Pl
Re
The Next and Previous Buttons
In addition to the scroll bar components, you can also use the Next and Previous buttons to navigate through a document. These buttons are located below the vertical
scroll bar in the Word environment. The Next and Previous buttons are part of the
Object Browser, which contains the options to browse through the different parts of a
document. By default, the Object Browser is configured in such a way that you can
use the Next and the Previous buttons to browse by page. You can also customize the
Object Browser to navigate to a specific location, such as a line, heading, table, or
graphic in a document.
Microsoft® Office Word 2007 - Level 1 (Second Edition)
LESSON 2
The Selection Bar
The Mini Toolbar
te
op
r
i
al
y
The selection bar is the area at the left margin of a document that is used to select text. When
positioned on the selection bar, the mouse pointer will change from an I-beam to a rightpointing arrow. On the selection bar, you can click to select a line, double-click to select a
paragraph, or triple-click to select the entire document.
Whenever you make a text selection in a document, the Mini toolbar appears above the
selected text. You can use commands on the Mini toolbar to format text without having to
move to the Ribbon. This toolbar disappears when you move the mouse pointer away from the
selection. You can also invoke the Mini toolbar along with a list of commands by rightclicking anywhere in the document.
Ma
How to Navigate and Select Text in a Document
Procedure Reference: Navigate and Select Text in a Document
To navigate and select text in a document:
Open the document.
2.
Use the appropriate navigation techniques to move to the desired location.
3.
Use the appropriate selection methods to select the text.
tC
1.
No
ce
Keyboard Navigation Techniques
The navigation keys on the keyboard allow users to easily navigate within a document.
Moves the Insertion Point To This Position
Right arrow or Left arrow
One space to the right or left.
re
n
Pressing This Key/Keys
Down arrow or Up arrow
One line down or up.
Ctrl+Down arrow or
Ctrl+Up arrow
One paragraph down or up.
Page Down or Page Up
One screen down or up.
Ctrl+Page Down or Ctrl+
Page Up
Beginning of the next page or the beginning of the previous page.
Home or End
Beginning or end of a line.
Ctrl+Home or Ctrl+End
Beginning or end of the document.
se
ea
Pl
Re
Do
One word to the right or left.
fe
Ctrl+Right arrow or
Ctrl+Left arrow
Scroll Bar Navigation Techniques
You can use the vertical and horizontal scroll bars to navigate quickly to different parts
of the document without changing the position of the insertion point.
Lesson 2: Editing a Document
39
LESSON 2
Do This
Scroll up or down one line at a time
On the vertical scroll bar, click the scroll up arrow
or the scroll down arrow.
Scroll up or down multiple lines
On the vertical scroll bar, click above or below the
scroll box.
Scroll left or right
On the horizontal scroll bar, click the scroll left
arrow or the scroll right arrow.
Display the top, bottom, or center of a
document
On the vertical scroll bar, drag the scroll box to
the top, bottom, or center of the scroll bar.
te
op
r
i
al
y
If You Need To
Ma
Text Selection Methods
In a document, you can select individual characters, words, sentences, paragraphs, or
even the entire document using the mouse, keyboard, or combination of both.
Variable amounts of text
• Click and drag with the mouse to select a block of text.
• Place the insertion point at the beginning of the text, hold
down the Shift key, and press an arrow key to extend the
selection in the desired direction.
• Place the insertion point at the beginning of the text, hold
down the Shift key, and click at the end of the desired block
of text.
Double-click the word. This selects the trailing space after the
word, but does not select punctuation.
Click in the selection bar to the left of the line. To select multiple contiguous lines, click and drag in the selection bar.
re
n
A line or lines of text
Hold Ctrl and click anywhere in the sentence. This selects the
sentence and its closing punctuation.
A paragraph
Triple-click in the paragraph or double-click in the selection bar
next to the paragraph.
Noncontiguous sections
To select items that are not adjacent, select the first item, line, or
paragraph, and then hold down Ctrl while you select additional
items.
se
ea
• Triple-click the selection bar.
• Press Ctrl+A.
• Or, on the Home tab, in the Editing group, from the Select
drop-down list, select Select All.
Pl
fe
Re
Deselect text
Do
A sentence
The entire document
40
No
A word
tC
Do This
ce
To Select This
Make another selection or click anywhere in the text area away
from the selected text.
Microsoft® Office Word 2007 - Level 1 (Second Edition)
LESSON 2
ACTIVITY 2-1
Data Files:
•
Burke Draft.docx
te
op
r
i
al
y
Navigating and Selecting Text in a Document
Before You Begin:
From the C:\084893Data\Editing a Document folder, open Burke Draft.docx
Ma
Scenario:
You need to attend an important client meeting the next day. The details about the client are
captured in the Burke Draft.docx file. This information will be very helpful for you during the
client meeting, so you need to review the document to familiarize yourself with the content.
How You Do It
1.
a. On the vertical scroll bar, click the scroll
down arrow
to display the next line
of text.
Display different parts of the document using the vertical scroll bar.
tC
What You Do
ce
b. Click the scroll bar area below the scroll
box to scroll a screen at a time.
No
Do
re
n
c. Although you are scrolling, the insertion
point remains at the top of the document.
Click the Next Page button
to move
the insertion point to the top of the next
page.
Lesson 2: Editing a Document
se
As you drag the scroll box, you may notice a
ScreenTip with the number of the current page
being displayed.
ea
e. Drag the scroll box to the top of page
two of the document.
Pl
Re
fe
d. On the vertical scroll bar, click and drag
the scroll box to the bottom of the scroll
bar.
41
LESSON 2
2.
a. If necessary, on page 2, click at the
beginning of the first paragraph.
Move the insertion point to different parts of the document.
te
op
r
i
al
y
b. Press the Right arrow key to move the
insertion point one character to the right.
c. Press the Left arrow key to move the
insertion point one character to the left.
d. Use the Up and Down arrow keys and
the Page Down and Page Up keys to
move to various document locations.
e. Press Ctrl+End to move the insertion
point to the end of the document.
Select various sections of text.
a. Return to the beginning of the
document.
Ma
3.
ea
tC
No
Do
d. To extend the selection to include the
word “firm,” Hold down Shift and press
the Right arrow key five times.
a. On the Home tab, in the Editing group,
click Select→Select All.
b. Click anywhere in the text area to deselect the text.
c. Close Burke Draft.docx.
Pl
Re
42
c. To select the line that begins with the
text “Burke Properties was founded,”
move the mouse pointer on the Selection bar until the shape of the mouse
pointer changes to a right-pointing
arrow and click.
e. To select the paragraph below “About Us”
triple-click the paragraph.
se
Select the entire Word document.
fe
4.
re
n
ce
b. At the beginning of the document, click
and drag until the end of the text “SECOND DRAFT” to select it.
Microsoft® Office Word 2007 - Level 1 (Second Edition)
LESSON 2
TOPIC B
te
op
r
i
al
y
Insert, Delete, or Rearrange Text
In the previous topic, you navigated within a document and selected document text. You can
use these basic navigation and selection skills to insert, delete, or rearrange text as needed. In
this topic, you will insert, delete, and rearrange text.
You want the content in your document to be as clear as possible. That’s not always the case
after typing a first draft. As you enter text, you often type the words as they crystallize in your
thoughts. Once you’ve reviewed a document, chances are that you will want to add or delete
text or rearrange existing text to clarify the message you are trying to convey.
The Clipboard Group
Ma
The Clipboard group on the Home tab gives you access to the Clipboard, a temporary holding
area for information that you want to move or copy to other locations. You can use the Clipboard group to move or copy text and associated text styles to the Clipboard, to paste text
from the Clipboard to other locations, or to set Clipboard options.
Text Moving and Copying Options
tC
ce
Text or a selection of text can be moved from one location to another within or between
documents.
Cut and paste
After selecting text, you can move it to the Clipboard, and then paste it in the
desired location. You can move text to the Clipboard by using the Clipboard
group, the shortcut menu, or the Ctrl+X keyboard shortcut.
Drag
After selecting text, it can be moved from the current location by directly
dragging it to the desired location. When you drag text, it is not placed on
the Clipboard.
Copy and paste
After selecting text, you can copy it to the Clipboard, and then paste it into
the desired location. You can copy text to the Clipboard by using the Clipboard group, the shortcut menu, or the Ctrl+C keyboard shortcut.
Do
se
ea
fe
Text Pasting Options
No
Description
re
n
Method
Pl
Re
Any text or sections of text that have been copied or cut can be pasted in any part of the document using the Paste options in the Clipboard group.
Option
Description
Paste
Pastes the copied or cut item in the desired location.
Paste Special
Opens the Paste Special dialog box, where you can specify the format in which
the selected item should appear when pasted.
Lesson 2: Editing a Document
43
LESSON 2
Description
Paste As Hyperlink
Pastes the text as a hyperlink so that when you hold down Ctrl and click a
pasted item, it takes you to the location from where the item has been copied or
cut.
te
op
r
i
al
y
Option
The Paste Options Smart Tag
When you paste an item, the Paste Options Smart Tag is displayed immediately next to
the pasted item. This tag holds a list of options that enables users to specify the formatting for the pasted item. You can retain the source formatting of the item; change
the formatting of the item so that it matches the text in the destination; paste the text
only; or customize cut, copy, and paste options.
The Clipboard Task Pane
Ma
The Clipboard task pane lists the objects that have been copied or cut from the document. You
can use the Clipboard task pane to paste in all the Clipboard objects, clear the Clipboard, and
to customize the task pane. Click the Clipboard Dialog Box Launcher button in the Clipboard
group to open the Clipboard task pane.
tC
Description
No
Option
ce
Customization Options in the Clipboard Task Pane
The Clipboard task pane can be customized using the options available in the Options
drop-down list.
Shows the Clipboard as soon as a document is opened.
Show Office Clipboard When
Ctrl+C Is Pressed Twice
Shows the Clipboard when Ctrl+C is pressed two times.
Collect Without Showing Office
Clipboard
Show Office Clipboard Icon On
Taskbar
Displays the Office Clipboard icon on the taskbar.
Displays the status of the task pane near the taskbar when
an item is copied.
se
fe
Show Status Near Taskbar When
Copying
Collects the items to the Clipboard without displaying the
Clipboard task pane.
Do
re
n
Show Office Clipboard Automatically
ea
How to Insert, Delete, or Rearrange Text
44
Pl
Re
Procedure Reference: Insert or Delete Text
To insert or delete text:
1.
Place the insertion point where you want to insert the new text or adjacent to the
text you want to delete.
2.
To insert new text, type the text.
3.
To delete text, use the appropriate method.
•
To delete characters to the left of the insertion point, press Backspace.
Microsoft® Office Word 2007 - Level 1 (Second Edition)
LESSON 2
•
To delete characters to the right of the insertion point, press Delete.
•
To delete a block of text, select it and press Delete.
te
op
r
i
al
y
Procedure Reference: Move or Copy Text
To move or copy text to a new location:
1.
Select the text you want to move or copy.
2.
Cut or copy the selected text.
•
On the Home tab, in the Clipboard group, click the Cut button or the Copy
button.
•
Press Ctrl+X to cut or Ctrl+C to copy.
•
Or, right-click and choose Cut or Copy.
3.
Place the insertion point at the location where you want to move or copy the text.
4.
Paste the text.
On the Home tab, in the Clipboard group, click the Paste button.
•
Press Ctrl+V.
•
Or, right-click and choose Paste.
Ma
•
6.
To paste in multiple selections, open the Clipboard task pane and make the appropriate choice.
•
In the Click An Item To Paste section, select items one after the other to
paste them to the specified location.
No
•
tC
To move or copy multiple text selections, cut or copy each selection to the
Clipboard.
ce
5.
Click Paste All to paste all the items in the clipboard to the specified
location.
Do
re
n
Moving or Copying Between Documents
You can use standard move and copy techniques between documents and within a
document. To switch between open documents, you can use any of a number of techniques:
•
On the View tab, in the Window group, choose Switch Windows to display the
list of documents that are open and to select the document you want to display.
•
Press Alt+Tab to switch between all open documents.
•
Click the appropriate button on the Windows Taskbar.
ea
Pl
Re
Lesson 2: Editing a Document
se
Press Ctrl+F6 to switch between open Word documents.
fe
•
45
LESSON 2
ACTIVITY 2-2
te
op
r
i
al
y
Inserting, Deleting, and Rearranging Text
Data Files:
•
Second Draft.docx
•
Nolan Letter.docx
Before You Begin:
From the C:\084893Data\Editing a Document folder, open Nolan Letter.docx and Second
Draft.docx.
Ma
Scenario:
As you were reviewing the draft document, you noticed some text that seems out of place. On
page one, you feel that the “Our Company Affiliations” heading and the paragraph that immediately follows it should be moved down in the document so that they precede the paragraph
on page two that begins with “Buying a Home”.
tC
a. If necessary, in the Second Draft document, click at the beginning of the
document, before the word “THE.”
Do
b. Press Delete four times to delete the
word and the trailing space after it.
a. In the sentence that begins with “We
arrange”, click to place the insertion
point at the beginning of the word “services”
ea
b. Type real estate and press Spacebar.
Pl
Re
46
se
Insert the words “real estate” into
the second full sentence.
fe
2.
In the Second Draft document,
delete the first word in the title.
re
n
1.
How You Do It
No
What You Do
ce
You also realize that some content is missing from the draft document; specifically, a list of
things a realtor does for his or her clients under the “Selling Your Home” paragraph on page
two and the Burke Properties guarantee on page three below the “Our Guarantee” paragraph.
Fortunately, you recall seeing that information in a letter written to Beth Nolan.
Microsoft® Office Word 2007 - Level 1 (Second Edition)
LESSON 2
Cut the heading “Our Company
Affiliations” paragraph and blank
line below it.
a. In the middle of page 1, select the “Our
Company Affiliations” heading and paragraph and the paragraph formatting
mark that follows.
te
op
r
i
al
y
3.
b. On the Home tab, in the Clipboard group,
click the Cut button.
Move the text to page two just
before the “Buying a Home”
heading.
a. Press Page Down twice to navigate to the
middle of the next page.
Ma
4.
b. Place the insertion point at the beginning of the Buying a Home heading.
Lesson 2: Editing a Document
tC
No
Do
se
ea
Pl
Re
fe
re
n
ce
c. On the Home tab, in the Clipboard group,
click Paste.
47
LESSON 2
5.
a. Click the Nolan Letter button on the
Taskbar.
Copy the necessary text from the
Nolan Letter.docx file.
te
op
r
i
al
y
b. On the Home tab, in the Clipboard group,
click the Dialog Box Launcher button to
display the Clipboard task pane.
c. In Nolan Letter.docx, select the “Here’s
what a realtor” list along with the paragraph mark.
d. On the Home tab, in the Clipboard group,
click the Copy button
to copy the
selection.
Ma
e. Press Page Down to reach the end of the
document.
f.
In the last paragraph, after the text
“P.S.”, select the entire sentence which
begins with the text, “We are so sure”,
along with the paragraph mark.
tC
No
c. In the last paragraph, place the insertion
point in the blank line below the text,
“Selling Your Home.”
d. Open the Clipboard task pane.
se
ea
b. Scroll to the bottom of page 1.
e. In the Clipboard task pane, in the Click An
Item To Paste list box, click the item that
begins with the text, “Here’s what a
realtor” to paste a copy of it into the
document.
Pl
fe
Re
48
a. Switch to the Second Draft document.
Do
Use the Clipboard task pane to
paste the first item of text that was
copied.
re
n
6.
ce
g. Press Ctrl+C to copy the selection and
add it to the Clipboard task pane.
Microsoft® Office Word 2007 - Level 1 (Second Edition)
LESSON 2
7.
a. Press Ctrl+Page Down to navigate to the
next page.
Paste the next item of text.
te
op
r
i
al
y
b. Place the insertion point in the blank
line below the “Our Guarantee”
heading.
c. In the Clipboard task pane, in the Click An
Item To Paste list box, click the item that
begins with the text, “We are so sure”
to paste a copy of it into the document.
d. On the Clipboard task pane, click Clear
All to clear all the items copied into the
task pane.
Save the document as My Second
Draft and close the Nolan Letter
document and the Clipboard task
pane.
a. Save the document as My Second Draft.
docx
Ma
8.
b. Close the Nolan Letter document.
Undo Changes
tC
No
re
n
TOPIC C
Do
ce
c. On the top-right corner of the Clipboard
task pane, click the Close button to close
the task pane.
se
In the previous topic, you changed your document by inserting, deleting, or rearranging text.
As you modify your document, it is typical to find that you make minor typographical errors,
or otherwise make a change that you need to reverse. In this topic, you will undo document
changes.
Lesson 2: Editing a Document
ea
Pl
Re
fe
One of the great benefits of using computers to perform business tasks electronically instead of
on paper is that you have the ability to reverse or revise the contents of documents easily,
quickly, and neatly. In a paper document, it is very difficult to reverse a change and still preserve the professional look of the content. On a computer, however, it only takes a single click
to reverse a change. Microsoft Word improves on this undo capability even further by enabling
you to reverse or redo a series of changes and revert an open document back to any previous
state that you choose.
49
LESSON 2
Undo Options
Redo Options
te
op
r
i
al
y
The Undo options on the Quick Access toolbar help correct unnecessary or erroneous actions.
You can undo an action by clicking the Undo button or by pressing Ctrl+Z. You can view the
actions that you have performed earlier, listed in the reverse order, by clicking the drop-down
list next to the Undo button. Deleted items, which are not collected by the Clipboard task
pane, can be restored only by using the Undo command.
The Redo button on the Quick Access toolbar allows you to redo a series of actions in the
reverse order that the changes were undone. The Redo option works only for the current working session. Once you close a document, the Redo list is cleared.
Ma
While you can undo or redo most actions, certain actions, such as opening, saving, or printing a document, cannot be undone. Only the actions that have been undone can be redone.
How to Undo or Redo Changes
Procedure Reference: Undo or Redo Actions
To undo or redo actions:
2.
To undo several actions, click the Undo drop-down arrow on the Quick Access
toolbar to display the list of actions and select an option to undo the corresponding change, or press Ctrl+Z several times.
3.
To redo an action, click the Redo button on the Quick Access toolbar or press
Ctrl+Y.
4.
To redo several actions, click the Redo button on the Quick Access toolbar several
times, or press Ctrl+Y several times.
No
Do
Pl
ea
se
re
n
fe
Re
50
tC
To undo an action, click the Undo button on the Quick Access toolbar or press
Ctrl+Z.
ce
1.
Microsoft® Office Word 2007 - Level 1 (Second Edition)
LESSON 2
ACTIVITY 2-3
te
op
r
i
al
y
Recovering Deleted Blocks of Text
Before You Begin:
My Second Draft.docx is open.
Lesson 2: Editing a Document
tC
No
Do
se
ea
Pl
Re
fe
re
n
ce
Ma
Scenario:
You heard that the Kentucky, Ohio, and Texas offices were going to be closed soon, so you
decide to delete those items from the Burke Properties Locations list. Before you complete
editing the document, you realize that what you heard about the offices was a
miscommunication. You decide to restore those three blocks of text to the list of offices once
again.
51
LESSON 2
What You Do
How You Do It
1.
a. Press Ctrl+End to navigate to the end of
the document.
te
op
r
i
al
y
Delete the unnecessary text.
b. Press Page Up twice to display
“Kentucky”.
Ma
c. Select the Kentucky and Lexington paragraphs and the blank line following
them.
d. Press Delete to delete the selection.
52
No
Do
Press Page Down to view the remaining
text in the page.
g. Select and delete the Texas, Dallas, and
San Antonio paragraphs.
ea
se
f.
Pl
Re
fe
re
n
ce
tC
e. Select and delete the Ohio, Cleveland,
and Toledo paragraphs and the blank
line following them.
Microsoft® Office Word 2007 - Level 1 (Second Edition)
LESSON 2
2.
Undo the deletions.
a. On the Quick Access toolbar, click the
Undo button
to restore the Texas,
Dallas, and San Antonio deletion.
te
op
r
i
al
y
b. Click the Undo drop-down arrow to display the drop-down list.
c. Move the mouse pointer over the second
Clear action to highlight both Clear
actions.
d. Click the second Clear action to restore
both the Ohio and the Kentucky text
blocks.
Ma
e. Scroll up to verify that the “Ohio” and
the “Kentucky” text blocks have been
restored.
Search and Replace Text
tC
ce
TOPIC D
Save the file as My New Draft.docx
No
f.
Do
re
n
In the previous topic, you used Undo to reverse changes in a document. Another technique you
can use to make changes throughout a document is to search for and replace specified text. In
this topic, you will search for and replace text quickly and efficiently.
se
ea
fe
If you are working on a short document, it’s not difficult to find the text you are looking for
by scrolling up and down. However, if you are looking for a client’s name in a multi-page
legal document, that method is like looking for a needle in a haystack. It could take hours to
find all the occurrences of the client’s name and, in the end, you may miss one or two occurrences of the name anyway. Word enables you to locate every occurrence of the text you want
to find and presents you with the opportunity to selectively replace an occurrence or replace all
of them with the click of a button.
Pl
The Find And Replace Dialog Box
Re
Clicking any of the Find, Replace, or Go To commands in the Editing group of the Home tab
opens the corresponding tab in the Find And Replace dialog box.
Lesson 2: Editing a Document
53
LESSON 2
Description
Find
Provides various find options that will help you specify the search criteria. The
keyboard shortcut, Ctrl+F, directly opens the Find tab in the Find And Replace
dialog box.
Replace
Provides options to replace the found text with a different text. The keyboard
shortcut, Ctrl+H, directly opens the Replace tab in the Find And Replace dialog
box.
Go To
Provides options that let you specify where exactly you want to navigate. The keyboard shortcut, Ctrl+G, directly opens the Go To tab in the Find And Replace
dialog box.
te
op
r
i
al
y
Tab
Find Options
Ma
The Find tab in the Find And Replace dialog box has various find options that will help you
specify the search criteria.
Find What
Specify the text to be located. You can use wildcard characters to expand the
search.
More
Display the advanced find options to customize your search. For example, you
can specify whether to search up or down, whether or not to match uppercase or
lowercase, to find whole words or sections of words, to include or ignore punctuation or white space, or to search for formatting.
Reading Highlight
Highlight all the instances of the search criteria in the document.
Find In
Locate every instance of the search criteria in the document.
Find Next
Locate the next instance of the search criteria in the document.
Cancel
Close the Find And Replace dialog box.
No
Do
re
n
Replace Options
tC
Used to
ce
Option
se
Find What
Specify the text to be located.
Replace With
Specify the text with which the located data should be replaced.
Replace
Pl
Used To
Re
Option
More
54
ea
fe
The Replace tab in the Find And Replace dialog box contains options to replace the found text
with different text.
Display the advanced find options. These options will allow you to customize
your search.
Replace the selected instance of the search criteria with the new data.
Replace All
Replace every instance of the search criteria with the new data.
Find Next
Locate the next instance of the search criteria in the document.
Microsoft® Office Word 2007 - Level 1 (Second Edition)
LESSON 2
Used To
Cancel
Close the Find And Replace dialog box.
te
op
r
i
al
y
Option
Go To Options
The Go To tab in the Find And Replace dialog box contains options that allow you to specify
exactly where you want to navigate to. In the Go To What list box, you can select an option to
specify the exact location. For example, if you need to navigate to page five in a document,
you can select Page, type the number 5, and click Go To. You can also navigate to the previous or next page by clicking the respective buttons on the tab.
How to Find and Replace Text
Ma
Procedure Reference: Find or Replace Text
To find or replace text in your document:
2.
In the Find What text box, type the text you want to locate. Include any special
characters, such as tabs or double spaces.
3.
If necessary, from the Reading Highlight drop-down list, select Highlight All to
highlight all the instances of the search criteria in the document.
4.
If necessary, click the More button to set advanced search options.
5.
If necessary, click the Less button to hide the advanced search options.
6.
Click Find Next to locate the first occurrence of the text in the document. Continue clicking Find Next to advance to the next occurrence.
7.
To replace text that you find, click the Replace tab.
8.
In the Replace With text box, type the text that you want to substitute for found
occurrences. Include any special characters, such as tabs or double spaces.
No
Do
re
n
tC
To open the Find And Replace dialog box, either click Find in the Editing group
or press Ctrl+F.
ce
1.
Click Find Next to begin the search.
fe
9.
se
To display the Replace tab in the Find And Replace dialog box directly, either click Replace in the
Editing group or press Ctrl+H.
Click Find Next to leave the highlighted text unchanged and continue searching for the next occurrence.
Re
•
Click Replace to replace the highlighted text and continue searching for the
next occurrence.
•
Pl
•
ea
10. Make the appropriate selection to replace each instance of the text.
Click Replace All to replace all occurrences of the text at the same time.
If you change your mind about a replace operation, click the Undo button on the Quick
Access toolbar. If you used the Replace button, Word will undo the replacements one by
one. If you used the Replace All button, Word will undo all of the replacements at the same
time.
Lesson 2: Editing a Document
55
LESSON 2
11. When Word has finished searching the document and you have made any neces-
sary replacements, click OK in the Microsoft Office Word message box.
te
op
r
i
al
y
12. Close the Find And Replace dialog box.
Procedure Reference: Navigate in a Document Using the Go To Command
To navigate in a document using the Go To command:
1.
In the Editing group, click Find and select the Go To tab, or press Ctrl+G.
2.
In the Go To What list box, select the document component you want to go to,
such as a page, section, or line.
3.
Type the number or name of the component you want to go to and click Go To.
ACTIVITY 2-4
Ma
Finding and Replacing Text
Before You Begin:
My New Draft.docx is open.
56
tC
No
Do
se
ea
Pl
Re
fe
re
n
ce
Scenario:
During the previous review of the Burke Properties document, “Burke Properties” wasn’t properly capitalized in all instances. The “B” in Burke and the “P” in Properties should always be
capitalized. As part of a new Human Resource department initiative, many job titles have been
updated. You have been asked to make sure that the job title “broker” is changed to “agent”.
You also noticed that a heading in page two needs to be modified.
Microsoft® Office Word 2007 - Level 1 (Second Edition)
LESSON 2
How You Do It
1.
a. Place your insertion point at the beginning of the document.
Search the document for any lowercase instances of “burke
properties” and highlight them.
te
op
r
i
al
y
What You Do
b. To open the Find And Replace dialog box,
on the Home tab, in the Editing group,
click Find.
Ma
c. In the Find What text box, type burke
properties with all lowercase letters.
d. From the Reading Highlight drop-down
list, select Highlight All.
Do
No
In the Search Options section, check the
Match Case check box.
re
n
f.
tC
ce
e. All the instances of the text are
highlighted. Click the More button to display the advanced search options.
Lesson 2: Editing a Document
se
ea
Pl
Re
fe
g. Click Less to hide the advanced options in
the dialog box.
57
LESSON 2
2.
a. In the Find And Replace dialog box, select
the Replace tab to display the replace
options.
Initial cap all instances of the words
“burke properties”.
te
op
r
i
al
y
b. Click in the Replace With text box and
type Burke Properties
c. Click Find Next to find the first occurrence of “burke properties”.
You can move the Find And Replace dialog box
out of the way to see the found text in the
document.
Ma
d. Click Replace to replace the lowercase
instance with the uppercase version.
e. Click Replace to replace the next
instance.
a. In the Find What text box, type broker
c. Type agent
Do
d. Click More to display the advanced search
options.
e. Uncheck the Match Case check box.
f.
Click Less to hide the advanced options in
the dialog box.
Pl
ea
se
re
n
fe
Re
58
b. Press Tab to move the insertion point into
the Replace With text box.
No
Prepare to replace instances of
the “broker” job title with
“agent”.
ce
3.
When Word has finished searching the
document, in the Microsoft Office Word
message box, click OK.
tC
f.
Microsoft® Office Word 2007 - Level 1 (Second Edition)
LESSON 2
4.
Find and replace the appropriate
instances of the word “broker”
with the word “agent”.
a. Click Find Next to find the first occurrence of “broker”.
te
op
r
i
al
y
b. In the first occurrence, “broker” is part of
the word “brokerage”. Click Find Next to
ignore that occurrence and to continue
the search.
c. In the next occurrence, click Replace to
replace “broker” with “agent” and continue the search.
d. Continue searching and replacing the
appropriate occurrences of “broker”
with “agent”.
Delete the incorrect word in page
two of the document.
a. In the Find And Replace dialog box, select
the Go To tab to display the Go To
options.
tC
5.
Ma
e. When you have finished, in the Microsoft
Office Word message box, click OK to end
the search.
ce
b. Verify that the Page option is selected
by default in the Go To What list box.
No
c. In the Enter Page Number text box, type
2
Do
re
n
d. Click Go To to move the insertion point to
the beginning of second page.
e. In the Find And Replace dialog box, click
Close to close the dialog box.
Lesson 2: Editing a Document
ea
se
In the heading “Special Network”,
double-click the word “Special” to
select it and the space after it.
Pl
Re
fe
f.
g. Press Delete to delete the selected text.
h. Save the document as My Burke
Properties.docx and close it.
59
LESSON 2
Lesson 2 Follow-up
te
op
r
i
al
y
In this lesson, you edited a document using a number of different editing techniques, such as
moving and copying text, undoing changes, and replacing text. These basic editing skills will
form the foundation of all the tasks you will perform in Microsoft Word documents.
How do you currently edit documents?
2.
How can the editing techniques in Word help you work more efficiently?
60
tC
No
Do
se
ea
Pl
Re
fe
re
n
ce
Ma
1.
Microsoft® Office Word 2007 - Level 1 (Second Edition)
te
op
r
i
al
y
LESSON 3
LESSON 3
Lesson Time
30 minutes
Formatting Text
Highlight text.
Lesson 3: Formatting Text
Do
se
ea
Pl
Re
fe
re
n
ce
•
No
You will:
•
Change font appearance.
tC
Ma
In this lesson, you will format text.
61
LESSON 3
Introduction
te
op
r
i
al
y
Now that you have entered and edited text in a document, it is a good time to make that text
more visually appealing. To make a selection stand out from the remaining text or meet a stylistic requirement, formatting is the solution to enhance your document. In this lesson, you will
format text using the various options in Word 2007.
Whether you are designing a storybook for children or preparing a business report for your
clients, you have to ensure that you hold the attention of your readers. In addition, you have to
make sure that the readers don’t lose out on any important information stated within the
document. Word 2007, with its various font colors, sizes, and styles, can make any document
attractive while ensuring that your reader is captivated by the information in your document.
TOPIC A
Ma
Change Font Appearance
In this lesson, you will format text. A fundamental aspect of the appearance of text is the
appearance of the fonts you use to enter the text. In this topic, you will change font
appearance.
tC
No
Fonts
ce
While reading the newspaper or a magazine, your eyes automatically dart toward stories presented in varying fonts or sizes, or with other text enhancements and effects. These font
appearance settings aid in drawing the attention of the audience, thereby helping them to focus
on the important information in the document. Well-chosen font appearance options can
enhance your message and help readers find the important information in the document.
62
Do
se
ea
Pl
Re
fe
re
n
Definition:
A font is a predefined typeface with a unique design and character spacing. The set of
characters in a font include letters, numbers, and punctuation marks. A single document can use more than one font. You can modify the basic appearance of a font by
using various formatting options. Word has a variety of built-in fonts that you can see
on the Font group within the Home tab. The default font in Word is Calibri.
Microsoft® Office Word 2007 - Level 1 (Second Edition)
LESSON 3
Ma
te
op
r
i
al
y
Example:
Figure 3-1: The Font drop-down list with predefined typefaces.
Font Size
tC
Description
Do
Option
re
n
In the Font group, there are four options that affect the font size.
No
ce
In Word, font size is measured in points. One point equals 1/72 of an inch. Each font starts at
a default point size, generally in the range of 10 to 12 points. You can change the font size for
selected text by using the Mini toolbar or by using the Font Size Options in the Fonts group
on the Home tab. You can also select a specific font size from the Font Size drop-down list in
the Font group or the Font dialog box.
The Grow Font option increases the font size by one point each time you click
it.
The Shrink Font option decreases the font size by one point each time you click
it.
se
The Subscript option creates small letters and moves the text below the text
baseline.
ea
fe
The Superscript option creates small letters and moves the text above the text
line.
Pl
Re
Bold, Italic, and Underline
Three of the most common text-formatting options are bold, italic, and underline. Word
enables you to apply any combination of these three options to selected text easily by using
buttons in the Font group of the Home tab on the Ribbon. You can also access these options
from the Mini toolbar and in the Font dialog box.
Lesson 3: Formatting Text
63
LESSON 3
Font Case
te
op
r
i
al
y
You can use the Change Case button in the Font group of the Home tab to apply different
combinations of uppercase and lowercase fonts to document headings, subheadings, body text,
and so on.
Description
Sentence Case
Capitalizes the first letter of every sentence in the selected text.
Lowercase
Converts all the characters of the selected text into small letters.
Uppercase
Capitalizes all the characters of the selected text.
Capitalize Each
Word
Capitalizes the first letter of each word in the selected text.
Toggle Case
Inverts the current capitalization of the selection. Lowercase letters become uppercase, and vice versa.
Ma
Font Case Option
Font Effects
tC
Effects are predefined text-enhancing options that emphasize text without affecting the typeface
or the style of the text.
Strikethrough
Runs a line through the selected text.
Double Strikethrough
Runs two lines through the selected text.
Superscript
Converts the text to small letters that appear above the text line.
Subscript
Converts the text to small letters that appear below the text baseline.
Shadow
Applies a shadow to each character of the selected text.
re
n
No
Description
ce
Effect
Emboss
Applies an etched impact on the text.
Engrave
Applies an embedded impact on the text.
Small Caps
Converts all the characters in the text to uppercase. However, the size of the first
character of the word is larger than the rest of the letters.
All Caps
Capitalizes all the characters of the text, and all characters are the same size.
Hidden
Hides the content of the selected text.
se
ea
Pl
Text Color
Do
Applies an outline to each character of the selected text.
fe
Outline
Re
Adding color to your text helps in identifying important information in the document. The
default text color is black, but you can change the color of selected text to any one of a palette
of standard colors. You can use the Font Color button, the Font dialog box, or the Mini toolbar
to change font color.
You can even mix your own custom font colors. For more information on custom colors, see Microsoft Office
Word Help.
64
Microsoft® Office Word 2007 - Level 1 (Second Edition)
LESSON 3
The Format Painter
How to Change Font Appearance
Procedure Reference: Change Font Appearance
To change the font appearance:
1.
Select the text you want to change.
2.
Apply a different font.
—
Or, on the Mini toolbar, from the Font drop-down list, select the desired
font.
Change the font using the Font dialog box.
On the Home tab, in the Font group, click the Dialog Box Launcher
button, or press Ctrl+Shift+F.
b.
In the Font dialog box, in the Font list box, select the desired font.
c.
Click OK.
No
Set the desired font size.
•
On the Home tab of the Ribbon, in the Font group, from the Font Size dropdown list, select the desired font size.
On the Mini toolbar, from the Font Size drop-down list, select the desired
font size.
•
On the Mini toolbar, click the Grow Font or Shrink Font button to increase
or decrease the font size by one point at a time.
•
Or, open the Font dialog box and select the desired font size in the Size list
box.
se
Do
•
Pl
In the Font dialog box, in the Font Style list box, select Regular, Italic, Bold,
or Bold Italic, and select an underline style from the Underline Style dropdown list.
Re
•
ea
Apply bold, italics, or underlining.
•
On the Ribbon, on the Home tab, in the Font group, click any combination
of the Bold, Italic, or Underline buttons. To change the underline style, select
a style from the Underline drop-down list.
•
5.
tC
a.
re
n
4.
On the Home tab of the Ribbon, in the Font group, from the Font dropdown list, select the desired font.
fe
3.
—
Ma
•
Change the font using the Font drop-down list.
ce
•
te
op
r
i
al
y
The Format Painter is a formatting tool in the Clipboard group that allows you to duplicate
the character or paragraph formatting in selected text and apply it to one or more additional
selections. It is also used to apply some basic graphics formatting. The Format Painter does
not provide any formatting options of its own.
Or, on the Mini toolbar, select the desired options.
To apply font effects, in the Font dialog box, check the desired effects in the
Effects section. Available effects include Strikethrough, Double Strikethrough,
Superscript, Subscript, Shadow, Outline, Emboss, Engrave, Small Caps, All Caps,
and Hidden.
Lesson 3: Formatting Text
65
LESSON 3
7.
Set the font case.
a.
On the Home tab, in the Font group, click the Change Case button to open
the Change Case gallery.
b.
In the Change Case gallery, choose the desired font case. You can choose
from Sentence Case, Lowercase, Uppercase, or Capitalize Each Word, or you
can choose Toggle Case to reverse the current casing.
Set the font color.
te
op
r
i
al
y
6.
•
On the Home tab of the Ribbon, in the Font group, click the Font Color
drop-down arrow, and select the desired color from the Font Color gallery.
•
On the Mini toolbar, click the Font Color drop-down arrow, and select the
desired color.
•
Or, open the Font dialog box, click the Font Color drop-down arrow, select
the desired color, and click OK.
Ma
Procedure Reference: Copy Formats with the Format Painter
To copy formats with the Format Painter:
2.
Click the Format Painter button in the Clipboard group on the Home tab or on the
Mini toolbar. If you want to copy to multiple selections, double-click the Format
Painter.
3.
Select the text to which you want to copy the formatting. If you double-clicked
the Format Painter button, it will remain active, and you can make additional
selections to continue copying the format.
4.
To deactivate the Format Painter, click it again or press Esc.
No
tC
Select the text that has the format you want to duplicate.
ce
1.
Do
re
n
Repeat an Action versus Redo an Action
After you perform an action, such as typing text, you can quickly repeat the action by
clicking the Repeat button on the Quick Access toolbar. To see what action you are
going to repeat, point to the Repeat button; the name of the last action you performed
is appended to the Repeat button’s ScreenTip. You can also repeat actions by pressing
F4 or Ctrl+Y.
66
se
ea
Pl
Re
fe
Repeat is not the same as Redo. You can repeat any action, but the Redo command
works only if you have first used the Undo command to undo a specific action.
Microsoft® Office Word 2007 - Level 1 (Second Edition)
LESSON 3
ACTIVITY 3-1
te
op
r
i
al
y
Changing Font Appearance
Data Files:
•
Relocation Services.docx
Before You Begin
From the C:\084893Data\Formatting Text folder, open Relocation Services.docx.
Lesson 3: Formatting Text
tC
No
Do
se
ea
Pl
Re
fe
re
n
ce
Ma
Scenario:
You have created the company report that will be emailed to all your clients. However, while
reviewing the document, you realize that some critical information might be lost amidst the
pages of plain text. You will need to ensure that your clients don’t miss this critical information even if they only give your document a quick glance.
67
LESSON 3
What You Do
How You Do It
1.
a. At the beginning of the document, select
the text “Our Relocation Services”.
te
op
r
i
al
y
Change the font of the text “Our
Relocation Services” to Arial, 24
point.
Ma
b. On the Home tab, in the Font group, from
the Font drop-down list, select Arial.
2.
68
tC
No
Do
se
ea
Pl
Re
fe
re
n
ce
c. In the Font group, from the Font Size
drop-down list, select 24.
Change the font of the remaining
titles to Arial, 24 points.
d. The text now appears as Arial, 24 pt.
Click after the word “Services” to deselect the text.
a. Below the fourth paragraph, select the
title “Our Relocation Staff”.
b. Scroll down to view the remaining titles.
Microsoft® Office Word 2007 - Level 1 (Second Edition)
LESSON 3
te
op
r
i
al
y
c. In the seventh paragraph of the document, hold Ctrl and select the title “Our
Relocation Fees”.
d. In the Font group, from the Font dropdown list, select Arial.
Ma
e. From the Font Size drop-down list, select
24.
f.
a. At the top of the document, select the
heading “Our Relocation Services”.
Change the casing of the report
heading to uppercase.
tC
3.
Click after the word “Staff” to deselect
the text.
No
Do
se
Pl
Re
Lesson 3: Formatting Text
a. At the top of the document, in the first
paragraph, select “Your Relocation
Checklist” and move your mouse up and
to the right to reveal the Mini toolbar.
ea
Italicize the text, “Your Relocation
Checklist”.
fe
4.
re
n
ce
b. In the Font group, click the Change Case
button and choose UPPERCASE to convert all the letters in the title to
uppercase.
69
LESSON 3
5.
te
op
r
i
al
y
b. On the Mini toolbar, click the Italic
button.
a. In the last paragraph of the document, in
the second line, select the text “unconditionally guarantee”.
Repeat the italic font style on the
text “unconditionally guarantee”.
b. On the Quick Access toolbar, click the
Repeat button.
a. At the top of the document, select the
title “Our Relocation Services”.
Change the text color of the title to
blue.
Ma
6.
b. In the Font group, click the Font Color
drop-down arrow.
tC
No
Do
a. In the last line of the document, select
the words “money back”.
ea
b. In the Font group, click the Font Color
drop-down arrow.
Pl
Re
70
d. The text is now blue. Click after the
word “Services” to deselect the text.
se
Change the text color of the words
“money back” to green.
fe
7.
re
n
ce
c. In the Font Color gallery, in the Standard
Colors section, select the eighth color to
apply a blue shade.
Microsoft® Office Word 2007 - Level 1 (Second Edition)
LESSON 3
te
op
r
i
al
y
c. In the Font Color gallery, in the Standard
Colors section, select the sixth color to
apply a green shade.
d. Click after the word “back” to deselect
the text.
8.
Change the font of “Relocation Network:” to Arial, bold, 11 points.
a. In the second paragraph, select “Relocation Network:”
Ma
b. When you select the text, the Mini toolbar
should appear. Use the Mini toolbar to
apply the Arial font, bold formatting,
and 11 point size.
a. Select “Relocation Network”.
b. In the Font group, click the Dialog Box
Launcher button.
No
Apply the Double Underline and the
Small Caps effect to the sub
heading.
ce
9.
tC
c. Click after the word “Network” to deselect the text and hide the Mini toolbar.
Lesson 3: Formatting Text
Do
se
ea
Pl
Re
fe
re
n
c. The font settings that display in the dialog
box match those of the selected text.
From the Underline Style drop-down list,
select Double Underline.
71
LESSON 3
te
op
r
i
al
y
d. In the Effects section, check the Small
Caps check box.
e. Click OK to apply the formatting.
a. With the subheading selected, in the Clipboard group, click the Format Painter
button
to copy the existing text
formatting.
Ma
10. Copy the text formatting of “Relocation Network:” to “Relocation
Package:”.
72
tC
a. Verify that “Relocation Package:” is still
selected and, in the Clipboard group,
double-click the Format Painter button.
ea
se
Do
b. At the beginning of the fourth paragraph,
click and drag to select “Relocation
Team:” to apply the copied text
formatting.
Pl
Re
fe
re
n
11. Apply the text formatting to the
remaining four subheadings.
No
ce
b. The mouse pointer changes to an I-beam
with a paint brush.
In the third paragraph, click and drag to select the
subheading “Relocation Package:” to
apply the copied text formatting.
Microsoft® Office Word 2007 - Level 1 (Second Edition)
LESSON 3
te
op
r
i
al
y
c. In the fifth, sixth, and eighth paragraphs,
click and drag to select “Sales Associates”, “Corporate Division”, and “Our
Guarantee” to apply the same formatting
to all of them.
Ma
d. In the Clipboard group, click the Format
Painter button to turn off the tool.
tC
No
re
n
Highlight Text
Do
TOPIC B
ce
e. Save the document as My Relocation
Services.docx
You have changed the appearance of selected text in a document by modifying font options.
Another way to change text appearance, which does not involve changing the properties of the
font, is to highlight the text. In this topic, you will highlight text.
Lesson 3: Formatting Text
se
ea
Pl
Re
fe
Whether you highlight important lines in a book you’re studying, or key points in a speech
that you’re attempting to memorize, you are merely ensuring that you do not miss any critical
information. Word 2007 functions in the same way. By highlighting key words, phrases, or
sentences in a document, you make it easier for the reader to locate important concepts or
phrases by just glancing at the document.
73
LESSON 3
Text Highlighting Options
te
op
r
i
al
y
Highlighting text draws attention to the important information in a document. The default text
highlight color in a Word document is yellow. You can turn on the highlighter by clicking the
Text Highlight Color button in the Font group. The mouse pointer then changes to an I-beam
with a highlighter when you place it over text. You can then select the desired text to apply the
default yellow highlight. If you want to modify the text highlight color, click the Text Highlight Color drop-down arrow and select the desired color. The selected color is displayed on
the Text Highlight Color button. The highlighter remains active until you turn it off by clicking
the Text Highlight Color button again.
Highlighter Tips
If you are going to print a document using a black and white printer, use a light color
or gray to highlight text. This ensures that the text is still readable.
Ma
How to Highlight Text
Procedure Reference: Highlight Text in a Document
To highlight text in a document:
Select the text you want to highlight.
2.
Apply a highlight color.
•
On the Home tab, in the Font group, click the Text Highlight Color button to
apply the default color.
•
Or, display the Mini toolbar and select a highlight.
Pl
ea
se
Do
To remove highlighting, select the text and apply the No Color highlight.
fe
Re
74
No
On the Home tab, in the Font group, click the Text Highlight Color dropdown arrow, and select the desired color from the Text Highlight Color
gallery.
ce
•
re
n
3.
tC
1.
Microsoft® Office Word 2007 - Level 1 (Second Edition)
LESSON 3
Highlighting Text in a Document
Before You Begin
My Relocation Services.docx is open.
te
op
r
i
al
y
ACTIVITY 3-2
Scenario:
You want your manager to review the fee percentages in the company report that you created.
You need to ensure that the fee percentage information stands out from the remaining text in
the document. After you apply all the formatting, you need to evaluate the overall look and
adjust the formatting, if necessary.
How You Do It
1.
a. In the last line of the document, select
the words “money back”.
Highlight “money back” in yellow.
Ma
What You Do
a. In the previous paragraph, select “5%–
10%”.
Highlight “5%–10%” in red.
ce
2.
tC
b. On the Home tab, in the Font group, click
the Text Highlight Color button.
No
b. In the Font group, click the Text Highlight Color drop-down arrow.
Do
Highlight an important phrase in
yellow.
a. In the last paragraph, select the text,
“we unconditionally guarantee your
complete satisfaction”
se
3.
re
n
c. In the Text Highlight Color gallery, select
the Red shade to highlight the text.
Lesson 3: Formatting Text
ea
c. In the Text Highlight Color gallery, select
Yellow. (The first square in the first row.)
a. In the seventh paragraph, select “5%–
10%”.
Pl
Remove the highlight on 5%–10%.
Re
4.
fe
b. In the Font group, click the Text Highlight Color drop-down arrow.
b. In the Font group, click the Text Highlight Color drop-down arrow.
75
LESSON 3
5.
te
op
r
i
al
y
c. In the Text Highlight Color gallery, select
No Color to remove the highlight.
a. Click the Office button and choose Save.
Update the saved document.
b. Close the document.
Ma
Lesson 3 Follow-up
In this lesson, you formatted text by changing font appearance and by highlighting the text.
Applying well-chosen text formatting to the relevant sections of a document can add visual
interest and enhance your message while helping the reader understand the structure and layout
of the information.
2.
When do you think you would use highlighting as opposed to modifying font appearance?
No
Do
Pl
ea
se
re
n
fe
Re
76
tC
How will you use text formatting to improve the appearance of your documents?
ce
1.
Microsoft® Office Word 2007 - Level 1 (Second Edition)
te
op
r
i
al
y
LESSON 4
LESSON 4
Lesson Time
60 minutes
Formatting Paragraphs
Control paragraph layout.
•
Add borders and shading to paragraphs.
•
Apply a style to text.
•
Create a bulleted and a numbered list.
•
Manage text formatting.
Lesson 4: Formatting Paragraphs
Do
se
ea
Pl
Re
fe
re
n
ce
•
No
You will:
•
Set tab stops to align text.
tC
Ma
In this lesson, you will format paragraphs.
77
LESSON 4
Introduction
te
op
r
i
al
y
You applied character formatting to specific text. Now, you want to format paragraphs so the
entire document is organized and easy to read. In this lesson, you will format paragraphs.
tC
Ma
Consider two documents: one with paragraph formatting and one without. The one without the
formatting is certainly legible, but the one with the formatting is much more attractive and
easier for the reader to comprehend. By formatting the paragraphs in your documents, you can
enhance their readability and visual appeal.
No
Do
re
n
TOPIC A
ce
Figure 4-1: A document without paragraph formatting (left), and one with paragraph
formatting (right).
Set Tabs to Align Text
se
You have formatted text in a document by applying different fonts, styles, effects, and colors.
Now, you need to arrange this text with appropriate spacing from the margins. In this topic,
you will customize the default tab settings.
78
ea
Pl
Re
fe
A tab stop is a very common paragraph alignment technique that is much easier to insert and
manage electronically in Word than it is to insert manually in a paper document. You can use
tabs as a simple way to align your text to give it a clean appearance as well as to organize
related information visually on the page. You can use either default tab settings or custom tab
settings in Word to ensure that your document is both professional looking and easy to read
and understand.
Microsoft® Office Word 2007 - Level 1 (Second Edition)
LESSON 4
Tabs
te
op
r
i
al
y
Definition:
Tabs or tab stops are document formatting options that enable you to align text to a
specific horizontal location. You can set one or more tab stops within a paragraph of
text. When you press the Tab key on the keyboard, the next text you type on that line
will align with the next tab stop within the paragraph. You can use tabs to align text to
the left, right, or center of the tab stop, or you can set other specialized tab types. By
default, Word sets a left tab stop every half inch within every paragraph.
Paragraph formats such as tab settings are stored within the paragraph formatting mark. You can create a new paragraph with the same formatting by copying a paragraph mark.
Figure 4-2: Text aligned using tabs.
re
n
The Word Rulers
tC
No
ce
Ma
Example:
Do
se
Tab Stops on the Ruler
ea
fe
Word provides you with two measuring tools, called rulers, to assist you in aligning
documents. The rulers help you to identify and change tab settings and other document layout
options, such as the page margins. By default, the unit of measurement for the ruler is inches.
This can be changed to centimeters, millimeters, points, or picas, depending on your
requirements. There are two rulers in Word: the horizontal ruler appears at the top and the vertical ruler appears at the extreme left of a document. The rulers are turned off by default; you
can use the Show/Hide group on the View tab or the View Ruler button above the vertical
scroll bar to display or hide the rulers.
Pl
Re
You can use the Tab Selector button above the vertical ruler to set five types of tab stops.
Tab Stop
Description
Left Tab stop
Sets the start of the text at the point of the tab stop and allows text
to flow to the right of the tab stop.
Center Tab stop
Centers the text around the point of the tab stop.
Lesson 4: Formatting Paragraphs
79
LESSON 4
Description
Right Tab stop
Sets the end of the text at the point of the tab stop and allows text to
flow to the left of the tab stop.
Decimal Tab stop
Allows text to align on the decimal point when numbers are used.
Bar Tab
Adds a vertical line through the paragraph at the tab position.
te
op
r
i
al
y
Tab Stop
To display accurate measurements correct to 0.01 of an inch in the ruler, hold down Alt as you drag the tabs.
The Tabs Dialog Box
You can set and clear tab stops by using options in the Tabs dialog box.
Description
Tab Stop Position
Displays all the tabs that have already been set.
Default Tab Stops
Specifies the spacing between default tab stops.
Alignment
Changes the tab stop selected in the Tab Stop Position text box to the
type you specify.
Leader
Adds leader characters, which are dots, dashes, or lines that appear to
fill the space before the tab stop.
Set
Sets the tab stop at the position specified in the Tab Stop Position text
box.
Clears the tab stop at the position specified in the Tab Stop Position
text box.
How to Set Tab Stops
Do
Clears all the tab stops on the ruler.
re
n
Clear All
No
Clear
tC
ce
Ma
Option
Procedure Reference: Set or Remove Tabs
Select the paragraph or paragraphs for which you need to set tab stops.
2.
If you want to use the Ruler to set the tabs and the rulers do not appear, on top of
the vertical scroll bar, click the View Ruler button.
3.
Select the tab type.
•
Click the tab selector until the desired tab is displayed.
4.
Pl
•
ea
1.
fe
Re
80
se
To set or remove tabs:
Or, in the Paragraph group on the Ribbon, click the Paragraph Dialog Box
Launcher to open the Paragraph dialog box, click the Tabs button to open the
Tabs dialog box, and select the desired tab type in the Alignment section.
Select the position to place the tab stops.
•
On the horizontal ruler, at the desired point, click to set the tab stop. To set
more tabs of the same type, click additional locations.
Microsoft® Office Word 2007 - Level 1 (Second Edition)
•
LESSON 4
Or, in the Tabs dialog box, in the Tab Stop Position text box, type the
desired position for each tab and click Set. When you are done setting tabs,
click OK.
To change the alignment of an existing tab, double-click the tab to open the Tabs
dialog box. Select the desired tab stop position, and select a tab type in the Alignment section.
6.
To add a leader, in the Tabs dialog box, in the Leader section, select the desired
leader.
7.
To move a tab stop, drag the tab to the new position on the ruler.
te
op
r
i
al
y
5.
You cannot move an existing tab stop in the Tabs dialog box, but you can clear one stop and
insert another at a new position.
To remove a tab stop, drag it off the ruler, or select it from the Tab Stop Position
list in the Tabs dialog box and click Clear.
9.
To clear all tabs for a paragraph, open the Tabs dialog box and click Clear All.
Ma
8.
Data Files:
•
Meeting Topics.docx
tC
No
re
n
Setting Tab Stops
Do
ACTIVITY 4-1
ce
Line Breaks
A line break is a formatting mark used to end the current line before it wraps to the
next line, but without starting a new paragraph. You can insert a line break by pressing
Shift+Enter. The benefit of using a line break within a paragraph, rather than pressing
Enter to start a new paragraph, is that the new line following the break remains part of
the original paragraph and shares the paragraph’s formatting.
se
Before You Begin
From C:\084893Data\Formatting Paragraphs, open Meeting Topics.docx.
Lesson 4: Formatting Paragraphs
ea
Pl
Re
fe
Scenario:
You have to submit a memo to all the regional managers of your company. As you are presenting the sales figures for each region, you need to make sure they are presented in a format that
ensures easy readability.
81
LESSON 4
What You Do
How You Do It
1.
a. Above the vertical scroll bar, click the
View Ruler button
to display the
ruler.
te
op
r
i
al
y
Set a left tab stop to indent text to
the right.
b. Select the text “Attention:” through
“Quarterly Sales Meeting”, including the
paragraph formatting mark.
c. On the left end of the horizontal ruler,
above the vertical ruler, verify that the
Left Tab stop is displayed.
82
tC
No
b. On the horizontal ruler, click and drag
the center tab stop down and away from
the horizontal ruler to remove it and
realign the text.
se
ea
fe
Pl
Set right tab stops on the horizontal
ruler.
Re
3.
a. Under the heading “First Quarter Data,”
select the text “Month” through “96”.
Do
Remove the center tab stop in the
“Houses Sold by Region” data.
re
n
2.
ce
Ma
d. On the horizontal ruler, click at 1.5
inches to move the text after the tab to
the 1.5 inch mark.
a. Above the vertical ruler, click the tab
selector two times to display the Right
Tab stop
.
b. On the horizontal ruler, click the mouse
pointer at 1 inch.
Microsoft® Office Word 2007 - Level 1 (Second Edition)
LESSON 4
4.
Move the right tab stop from 5.5
inches to 6 inches.
te
op
r
i
al
y
c. Insert right tab stops at 2 inches, 3
inches, 4 inches, 5 inches, and 5.5
inches.
a. On the horizontal ruler, select the tab
stop at 5.5 inches and drag it to the 6
inch position.
TOPIC B
tC
Ma
b. The text following the tab stop is
realigned at 6 inches. Save the document
as My Meeting Topics
No
ce
Control Paragraph Layout
In the previous topic, you set tabs to control the placement of text on a line-by-line basis
within paragraphs. You can also set paragraph formatting to control the layout of the paragraph
as a whole. In this topic, you will control paragraph layout.
Do
se
Margins
re
n
Paragraph layout options give you a great deal of control over the overall appearance of a
paragraph on the page. By making the appropriate paragraph layout choices, you can configure
common paragraph appearance settings such as paragraph alignment, paragraph margin settings, and spacing in and between paragraphs. With these layout options, you can add variety
and a professionally published look to your Word documents.
Lesson 4: Formatting Paragraphs
ea
Pl
Re
fe
Definition:
A margin is the blank area surrounding the text along the top, bottom, left, and right
edges of a page. Margins determine the overall size of the document’s text area in relation to the size of the paper it will print on, as well as the text’s vertical or horizontal
position on a page. They can also affect other layout options which may be set in relation to the size of the margin.
83
LESSON 4
Figure 4-3: Margins.
tC
Ma
te
op
r
i
al
y
Example:
ce
Paragraph Alignment
The Align Text Left option aligns the left edge of the paragraph along the
left margin. The paragraph’s right edge appears ragged.
re
n
Align Text Left
Description
Align Text Right
The Align Text Right option aligns the right edge of the paragraph along
the right margin. The paragraph’s left edge appears ragged.
Justify
The Justify option aligns both sides of the paragraph evenly along the left
and right margins. The paragraph’s left and right edges are not ragged.
Word adjusts the spacing between words so they stretch from the left margin to the right margin. When the last line of a justified paragraph is short,
however, it won’t be stretched.
Pl
ea
se
The Center option aligns both sides of the paragraph equidistant from the
left and right margins. Both the left and right edges of the paragraph appear
ragged.
fe
Center
Re
84
Do
Option
No
The paragraph alignment setting determines how an entire paragraph is positioned horizontally
between the left and right margins.
Microsoft® Office Word 2007 - Level 1 (Second Edition)
LESSON 4
Indents
te
op
r
i
al
y
Definition:
An indent enables you to align the left and right edges of a paragraph independently
from the document margins. Indents affect only the paragraphs you have selected.
Indents can be either positive, making the width of the paragraph narrower than the
margin on one or both sides, or negative, making the width of the paragraph extend
past the margin on one or both sides.
Another word for a negative indent is an outdent, because it makes the paragraph extend out into the
margin space.
Figure 4-4: Indents in a Word document.
tC
No
Do
re
n
ce
Ma
Example:
ea
fe
Indent Markers
se
Using Indents for Quoted Material
A standard way to format a lengthy section of quoted material within a document is to
place it within a paragraph that is indented on both sides.
Pl
Re
At the edges of the horizontal ruler of a Word document, there are four indent markers that
you can drag to set the active paragraph’s indentation.
Indent Marker
Description
First Line
Controls the left boundary for the first line of a paragraph.
Hanging
Controls the left boundary of every line in a paragraph, except the first line.
This is generally used to align the first line with the margin and indent the
remainder of the paragraph away from the margin.
Lesson 4: Formatting Paragraphs
85
LESSON 4
Description
Left
Controls the left boundary for every line in a paragraph.
Right
Controls the right boundary for every line in a paragraph.
te
op
r
i
al
y
Indent Marker
Indentation Options
The indentation options in the Paragraph dialog box allow you to place indents on the ruler
with an accuracy of 0.1 inch.
Description
Left
Displays the current left indentation applied to the paragraph. You can either click
the spin box to increase or decrease the indentation value, or just type the value in
the Left text box.
Right
Displays the current right indentation applied to the paragraph. You can either click
the spin box to increase or decrease the indentation value, or just type the value in
the Right text box.
Special
Displays whether a First Line or Hanging indent marker has been set on the
selected paragraph.
By
Displays the amount of indentation for any special indents in the selected
paragraphs.
Mirror Indents
Checking this check box enables you to set Inside and Outside margins for purposes of binding the document in a book or pamphlet format. The margins you set
will be mirror images on facing pages of the document, because the inside edge of
the paper is on the right for a left-hand page and the left for a right-hand page. For
example, you can set a deeper Inside margin to provide more white space on the
edge of the pages that will be inside the binding.
Text Spacing Options
tC
No
Do
re
n
ce
Ma
Option
se
Text spacing options in the Paragraph dialog box allow you to customize the amount of spacing between lines and paragraphs.
Re
Before
After
Line Spacing
86
ea
Option
Description
Adds the specified amount of space before the selected paragraph. The
spacing before a paragraph can vary from 0 to 1584 points.
Pl
fe
The spacing between paragraphs need not be uniform throughout a document.
Adds the specified amount of space after the selected paragraph. The spacing after a paragraph can vary from 0 to 1584 points.
Allows you to specify the amount of space between the lines in a
paragraph. You can set single space, one and a half space, or double space,
set the spacing to an exact or minimum amount, or choose Multiple to
adjust the spacing by a percentage of the existing spacing.
Microsoft® Office Word 2007 - Level 1 (Second Edition)
LESSON 4
Option
Description
At
Allows you to specify the amount of space between the lines in the selected
text based on the option you have selected for Line Spacing.
How to Control Paragraph Layout
Procedure Reference: Control Paragraph Layout
To control paragraph layout:
te
op
r
i
al
y
Don’t Add Space Between Adds no space between paragraphs that have the same style.
Paragraphs Of The Same
Style
Select the paragraph or paragraphs you want to adjust.
2.
Apply the desired paragraph alignment.
•
On the Home tab, in the Paragraph group, select the desired alignment: Align
Text Left, Align Text Right, Center, or Justify.
•
Ma
1.
Or, open the Paragraph dialog box, select the desired alignment from the
Alignment drop-down list, and click OK.
tC
•
Or, open the Paragraph dialog box, change the Indentation settings, and click
OK. This is the best way to get an accurate indentation setting because you
can configure a value to an accuracy of 0.1 inch.
se
Set the spacing between lines in the paragraph.
•
Open the Paragraph dialog box and select a line spacing option. If you select
At Least, Exactly, or Multiple, type the spacing value in the At spin box.
Pl
ea
Or, click the Line Spacing drop-down list in the Paragraph group and select
the desired amount of line spacing from the list of fixed spacing values. To
set a custom value or different spacing options, click Line Spacing Options
to open the Paragraph dialog box.
Re
•
5.
No
On the horizontal ruler, click and drag the appropriate indent markers to a
new position. This is best suited for quick adjustments.
Do
•
re
n
4.
Set the indent.
•
On the Home tab, in the Paragraph group, click the Increase Indent or
Decrease Indent buttons to indent the left edge of the paragraph by 0.5
inches to the right or left. This limits your accuracy to a half an inch, and
does not affect the first line, hanging, or right indents.
fe
3.
ce
If you want to change the alignment for only one paragraph, rather than selecting the paragraph,
you can just place the insertion point in it.
To set space before or after a paragraph, open the Paragraph dialog box and set
the amount of space in the Before and After spin boxes.
Lesson 4: Formatting Paragraphs
87
LESSON 4
ACTIVITY 4-2
te
op
r
i
al
y
Aligning Paragraphs
Before You Begin
My Meeting Topics.docx is open.
Ma
Scenario:
You decide to proofread the memo you prepared before presenting it to the managers. During
your review, you notice that the title of the memo does not appear at the center and the quarterly data is not easily distinguishable from the rest of the text. The disclaimer text blends in
with the content of the memo, and the paragraphs are not spaced appropriately to enable your
colleagues to take notes during the meeting. You decide to ensure that your document is easily
readable and neatly presented.
What You Do
1.
How You Do It
a. At the beginning of the document, click
before the title “Regional Memo”.
Align the title “Regional Memo” to
the center of the document.
tC
No
Do
se
ea
Pl
Re
88
a. Select the text from “Houses Sold”
through “Housing Units”.
Center align the headings above the
tabbed list.
fe
2.
re
n
ce
b. On the Home tab, in the Paragraph group,
click the Center button to center the
title.
Microsoft® Office Word 2007 - Level 1 (Second Edition)
LESSON 4
3.
te
op
r
i
al
y
b. In the Paragraph group, click the Center
button.
a. Scroll down to view the “Disclaimer”
paragraph.
Set the right and left indents.
b. In the document, select the “Disclaimer”
heading along with the three paragraphs
under it.
Ma
c. In the Paragraph group, click the Increase
Indent button
to increase the indent
by 0.5 inch.
tC
No
a. At the end of the document, under the
heading “Disclaimer”, select the text
from “Errors” to “imply an
endorsement.” and the paragraph formatting mark after it.
Do
Indent the Disclaimer paragraphs by
0.25 inch.
re
n
4.
ce
d. On the horizontal ruler, click and drag
the Right Indent marker to the 5–inch
mark.
Lesson 4: Formatting Paragraphs
se
ea
Pl
Re
fe
b. On the horizontal ruler, click and drag
the First Line Indent marker to the 1
inch position.
89
LESSON 4
5.
a. In the document, place the insertion
point before the title “Houses Sold by
Region”.
Add 6 points of space before the
title.
te
op
r
i
al
y
b. In the Paragraph group, click the Dialog
Box Launcher button.
Ma
c. In the Paragraph dialog box, in the Spacing section, in the Before spin box, click
the up arrow to change the spacing to 6
pt.
d. Click OK to apply the spacing and to close
the dialog box.
No
c. In the Paragraph dialog box, in the Spacing section, in the After spin box, click
the up arrow until the value is 6 pt.
a. In the document, select the heading
“ACTION ITEMS” along with the three
items below it.
ea
se
d. Click OK to apply spacing and to close the
dialog box.
Pl
Re
90
b. In the Paragraph group, click the Dialog
Box Launcher button.
Do
re
n
Apply line spacing for the Action
Items list.
fe
7.
tC
a. In the document, place the insertion
point before “Source: Burke
Properties”.
Add 6 points of space after the text
“Source: Burke Properties”.
ce
6.
Microsoft® Office Word 2007 - Level 1 (Second Edition)
LESSON 4
Ma
te
op
r
i
al
y
b. In the Paragraph group, from the Line
Spacing drop-down list, select 2.0 to
increase the space between the list items.
tC
No
ce
c. Click in the text area to deselect the
text.
Lesson 4: Formatting Paragraphs
Do
se
ea
Pl
Re
fe
re
n
d. Save the document.
91
LESSON 4
TOPIC C
te
op
r
i
al
y
Add Borders and Shading
You have adjusted paragraph layout to improve readability. You now want to ensure that critical components of the text clearly stand out from the rest of the page. One way to do that is
with border and shading options in Word. In this topic, you will add borders and shading to
paragraphs.
Ma
Shaded paragraphs and borders draw attention to important content and help readers to locate
critical ideas quickly. This ensures that readers who skim through documents do not miss out
on any important information.
tC
Borders
ce
Figure 4-5: A paragraph without borders and shading (left) and the same paragraph
with borders and shading (right).
No
Do
re
n
Definition:
A border is a decorative line or pattern that is displayed around objects. The Border
option in the Paragraph group of the Home tab allows you to apply the desired border
to an object. There are different types of borders that can be applied to paragraphs,
pages, and pictures to draw attention to the object to which they have been applied.
92
se
ea
Pl
Re
fe
Custom art cannot be used for borders.
Microsoft® Office Word 2007 - Level 1 (Second Edition)
LESSON 4
Border Types
No
ce
Figure 4-6: Border options in Word.
tC
Ma
te
op
r
i
al
y
Example:
Border Type
Description
Bottom Border
Inserts a line below the selected object or text.
Top Border
Inserts a line above the selected object or text.
Left Border
Inserts a line to the left of the selected object or text.
Inserts a line to the right of the selected object or text.
Re
ea
Inside Borders
Applies an outline to the selection and also inserts vertical and horizontal
lines between items. This option works only for tables.
Applies an outline to the selected object.
Inserts vertical and horizontal lines between items. This option works
only for tables.
Pl
Outside Borders
Removes an already existing border on a selected object or text.
fe
No Border
se
Right Border
All Border
Do
re
n
Click the Border drop-down arrow in the Paragraph group of the Home tab to see a list of predefined border types.
Inside Horizontal Border
Inserts horizontal lines between the selected objects or text. This option
works only for tables.
Inside Vertical Border
Inserts vertical lines between the selected objects or text. This option
works only for tables.
Diagonal Down Border
Inserts a Descending Diagonal line. This option works only for tables.
Lesson 4: Formatting Paragraphs
93
LESSON 4
Description
Diagonal Up Border
Inserts an Ascending Diagonal line. This option works only for tables.
te
op
r
i
al
y
Border Type
Additional Border Options
Apart from directly selecting a predefined border, there are also options in the Border
drop-down list that allow users to customize and specify how the borders are displayed
in a document.
Description
Horizontal Line
Inserts a horizontal line on the line where the insertion point is
placed.
Draw Table
Draws a table of the desired size.
View Gridlines
Shows or hides gridlines in tables.
Borders And Shading
Opens the Borders And Shading dialog box.
Shading
tC
Ma
Border Option
94
No
Do
se
ea
Pl
Re
fe
re
n
ce
Definition:
Shading is a percentage of color that can be added to the background of objects. Shading can be used to highlight important information in a document or to apply a shadow
effect. You can apply shading to a line, a paragraph, or table data. You can include an
overall fill color, a pattern in a contrasting color, or both.
Microsoft® Office Word 2007 - Level 1 (Second Edition)
LESSON 4
ce
Figure 4-7: Shading in Word.
tC
Ma
te
op
r
i
al
y
Example:
No
The Borders And Shading Dialog Box
re
n
The Borders And Shading dialog box has three tabs that allow you to specify the exact kind of
border or coloring you would like to apply to the selected objects.
Borders
Specify the type of border, its style, color, width, and the object to which it should
be applied. It also shows a preview of the options that you set on the Borders tab.
Page Border
Specify the type of page border, its style, color, width, art, and object to which it
should be applied. It also shows a preview of the options that you set on the Page
Border tab.
Shading
Specify the fill color, the pattern and pattern color, and the object to which it
should be applied in the document. It also shows a preview of the options that you
set on the Shading tab.
ea
se
Do
Contains Options To:
fe
Tab
Lesson 4: Formatting Paragraphs
Pl
Re
Borders Options
The Borders tab in the Borders And Shading dialog box has a number of options that
allow users to apply the desired border to objects in a document. These include the
type of border you want to apply, the style, color, and width of the border line, custom
border options, and a preview area where you can verify the appearance of your border
selections. For example, you can select border types including box borders, shadow
borders, and 3-D borders, and line styles such as single, double, or dashed, along with
many other customizable border options.
95
LESSON 4
How to Add Borders and Shading
Procedure Reference: Add a Border or Shading
te
op
r
i
al
y
To add a border or shading:
1.
Select the paragraph or paragraphs to which you want to add a border or shading.
2.
Apply the border.
•
In the Paragraph group, click the Borders drop-down arrow and choose an
existing border option to apply a predefined border.
•
Or, from the Borders drop-down list, click Borders And Shading to open the
Borders And Shading dialog box and select Custom Border Options. Click
OK.
The top and bottom borders extend from the Left Indent marker to the Right Indent marker.
Ma
Add the shading.
a. Open the Borders And Shading dialog box and select the Shading tab.
If you want to add an overall fill color, select the color from the Fill dropdown list.
c.
If you want to add a pattern, select the shading percentage or pattern from
the Style drop-down list.
d.
If you selected a pattern, select a color for the pattern from the Color dropdown list.
e.
Click OK to apply the shading and close the dialog box.
5.
To remove shading, select No Color for the fill and Clear for the pattern style.
Pl
ea
se
Do
No
To add a fill color only, click the Shading drop-down list in the Paragraph group
and select the desired color.
re
n
4.
fe
Re
96
tC
b.
ce
3.
Microsoft® Office Word 2007 - Level 1 (Second Edition)
LESSON 4
ACTIVITY 4-3
Before You Begin
My Meeting Topics.docx is open.
te
op
r
i
al
y
Applying Borders and Shading to a Paragraph
Scenario:
You have created a memo with the sales figures for all four quarters of last year. You need to
make sure that all the regional managers of your company concentrate only on the data for the
last quarter.
How You Do It
1.
a. At the beginning of the document, click
before the title “Regional Memo”.
Apply a bottom border below the
title.
Ma
What You Do
Apply a box border for the “quarterly data” paragraph.
tC
No
a. In the document, select the heading
“House Sold by Region” along with the
data below it and the text “Source:
Burke Properties”.
Do
2.
re
n
ce
b. On the Home tab, in the Paragraph group,
click the Borders drop-down arrow and
choose Bottom Border.
Lesson 4: Formatting Paragraphs
se
ea
Pl
Re
fe
b. In the Paragraph group, click the Borders
drop-down arrow and choose Borders
And Shading.
97
LESSON 4
te
op
r
i
al
y
c. In the Borders And Shading dialog box, in
the Setting section, select Box.
3.
Apply an orange shading to the
“quarterly data” paragraph.
Ma
d. From the Width drop-down list, select
11⁄2 PT and verify that your selections
appear in the Preview area.
a. In the Borders And Shading dialog box,
select the Shading tab.
b. From the Fill drop-down list, from the
Standard Colors section, select Orange.
ea
tC
No
Do
a. Scroll down to view the remaining text in
the document.
b. In the document, select the heading
“Disclaimer” and the three paragraphs
below it.
Pl
Re
98
d. Click in the text area to deselect the
text.
se
Apply the same border and shading
options to different text.
fe
4.
re
n
ce
c. Click OK to apply the borders and shading
and close the dialog box.
Microsoft® Office Word 2007 - Level 1 (Second Edition)
LESSON 4
te
op
r
i
al
y
c. On the Quick Access toolbar, click the
Repeat button to repeat the shading.
d. Click anywhere in the text area away
from the text selection to deselect it.
Apply Styles
ce
TOPIC D
tC
Ma
e. Save and close the document.
No
You added borders and shading to paragraphs, in addition to making other formatting changes
on selected text. Sometimes, you may want to reuse or apply several formatting options at the
same time. In this topic, you will apply the default styles in Word 2007.
Do
se
Word Styles
re
n
When creating official documents, you may want to apply specific design and typographical
changes to them. Instead of accessing the options from across different dialog boxes, Word
enables you to produce the desired output from preset style galleries. Styles help you quickly
achieve consistent and customized design and formatting effects.
Lesson 4: Formatting Paragraphs
ea
Pl
Re
fe
Definition:
A Word style is a named collection of appearance settings that can be applied to sections of a document as a group. Using a style can be quicker than applying individual
formatting options, and it can ensure consistency of formatting throughout a document.
A style may include text formatting options such as different typefaces, colors, and
effects, as well as paragraph formatting options such as line spacing, borders, and
shading. You can use built-in styles, modify existing styles, or create your own custom
styles.
99
LESSON 4
te
op
r
i
al
y
Example:
Ma
Figure 4-8: A document with various text styles applied.
Quick Styles in Word
100
tC
No
Do
se
ea
Pl
Re
fe
re
n
Example:
ce
Definition:
A Quick Style set is a package of styles that work well together that you can apply to a
document as a group. By changing from one Quick Style set to another, you can apply
design and formatting changes to a document all at the same time by switching from
the styles in one set to their equivalents in another set. The styles in the current Quick
Style set appear in the Styles group of the Home tab; you can scroll to select a style or
click the More button to view the Quick Styles gallery. Word includes several predefined Quick Style sets; you can build a new style or modify an existing style and
then add it to the Styles gallery.
Figure 4-9: Quick Styles in Word.
Microsoft® Office Word 2007 - Level 1 (Second Edition)
LESSON 4
The Styles Task Pane
The Styles task pane contains various options to work with styles.
te
op
r
i
al
y
When you open the Styles task pane, you might need to drag it to the edge of the window to dock it before you
can see all of the options.
Description
Clear All
Clears all the styles that have been applied to the selected text.
Styles
Displays the styles in the Styles gallery as a list.
Show Preview
Shows a preview of the styles.
Disable Linked Styles
Disables the styles that are linked.
New Style
Opens the Create New Style From Formatting dialog box where you can create
a new style and add it to the styles list.
Style Inspector
Opens the Style Inspector dialog box where you can customize the formatting
for a paragraph or the text you have selected.
Manage Styles
Opens the Manage Styles dialog box containing the tabs to edit, recommend,
restrict, and set default styles.
Options
Opens the Styles Gallery Options dialog box where you can customize the
Styles gallery.
tC
Ma
Option
No
ce
The Apply Styles Task Pane
The Apply Styles task pane is used to modify or reapply a style that has already been
applied to a document. On the Home tab, in the Styles group, click the More button
and select Apply Styles to open the Apply Styles task pane. It can also be invoked by
pressing Ctrl+Shift+S.
fe
Procedure Reference: Apply a Style
Do
How to Apply Styles
se
re
n
The Style Inspector
The Style Inspector task pane displays paragraph- and text-level formatting. It can be
used to clear formatting at the paragraph or character levels. The Style Inspector can
be displayed by clicking the Style Inspector button found within the Styles task pane.
ea
To apply a style from the current Quick Style set:
2.
Apply the desired style to the selected text.
•
On the Home tab, in the Styles group, either scroll to select the style, or
click the More button and select the desired style from the Styles gallery.
•
Pl
Select the text to which you want to apply a style.
Re
1.
Or, on the Home tab, in the Styles group, click the Dialog Box Launcher
button, and, in the Styles task pane, select the desired style.
Lesson 4: Formatting Paragraphs
101
LESSON 4
te
op
r
i
al
y
Changing the Quick Style Set
If you want to change to a different Quick Style set, click the Change Styles button in
the Styles group, choose Style Set, and select the desired set. You can point to each
style set name to see an instant preview of how text will look in that style set. When
you choose a set, all the styles in your document will update to the equivalent styles in
the new style set. For example, if you have applied the Heading 1 style in the default
Quick Style set, when you change to a different set, the Heading 1 style in the new set
will be applied to all the Heading 1 text in the document.
ACTIVITY 4-4
Applying Paragraph Styles
Data Files:
Meeting Agenda.docx
Ma
•
Before You Begin
From the C:\084893Data\Formatting Paragraphs folder, open Meeting Agenda.docx.
tC
a. At the beginning of the document, click
before the title “Quarterly Sales
Meeting”.
ea
se
b. On the Home tab, in the Styles group,
and select
click the More button
Heading 1.
Pl
fe
Re
102
How You Do It
Do
Apply the Heading 1 style to “Quarterly Sales Meeting”.
re
n
1.
No
What You Do
ce
Scenario:
You have been asked to make a presentation to some of your new clients. The presentation
handouts contain information such as Houses Sold by Region, as well as the Disclaimer of the
company. Your manager has approved the content in these handouts and asked you to ensure
that the title and headings are distinct. You decided not to apply borders or shading.
Microsoft® Office Word 2007 - Level 1 (Second Edition)
LESSON 4
2.
a. In the third line of the document, place
the insertion point at the beginning of
the heading “Agenda”.
Apply the Heading 2 style to
“Agenda”.
3.
Apply the Subtle Reference style to
the heading “Review Minutes”.
te
op
r
i
al
y
b. In the Styles group, click the More button
and select Heading 2.
a. In the ninth line of the document, select
“Review Minutes”.
b. In the Styles group, click the More
button.
c. In the fourth row, second column, select
the Subtle Reference style.
Ma
d. In the document, select the headings
“Quarterly Home Sales”, “Approve New
Disclaimer”, and “Action Items”.
e. In the Styles group, click the More button
and select the Subtle Reference style.
Create Lists
tC
No
Do
re
n
TOPIC E
Save the document as My Meeting
Agenda
ce
f.
se
fe
You applied in-built styles to specific paragraphs in your document. While reviewing some of
these formatted paragraphs, you decide that the content in some of them will be better presented if displayed in a sequential order. In this topic, you will create bulleted and numbered
lists.
Lesson 4: Formatting Paragraphs
ea
Pl
Re
Lists of various types can greatly improve the clarity and readability of text that groups similar
items together or provides a series of steps. Instructions presented in a list can be much easier
to follow that instructions presented in a continuous paragraph. Presenting information in a list
not only enhances how it looks, but also increases readability. By using the list options in
Word, you can create much more dynamic and effective documentation.
103
te
op
r
i
al
y
LESSON 4
Ma
Figure 4-10: Instructions in a paragraph without a list (left). Instructions in a list
(right).
Lists
104
tC
No
Do
se
ea
Pl
Re
fe
re
n
Example:
ce
Definition:
A list is a data grouping method in which the items in the group are displayed one
after the other. A list often has lead-in text that provides a brief description about the
items following it. There can be any number of items in a list. Word allows you to
create single- or multi-level lists that use various styles of numbers or bullets.
Figure 4-11: Single-level and multi-level lists.
Microsoft® Office Word 2007 - Level 1 (Second Edition)
LESSON 4
Bulleted and Numbered Lists
te
op
r
i
al
y
There are two main types of lists in Word.
Description
Numbered (Ordered)
A numbered list, also called an ordered list, is a list that is used to denote
a ranking among items or a sequence that must be followed. You can
customize the list by choosing different alphabetic or number formats,
such as numeric or Roman. Numbered lists can be multi-level and the
items in a list may be a single word, a short phrase, or a paragraph.
Bulleted (Unordered)
A bulleted list, also called an unordered list, is a list that is used to
denote a group of equally significant items. They are grouped under the
same heading. You can customize the list by choosing different bullet
styles. Bulleted lists can be multi-level. Each bulleted item in a list may
be a single word, a short phrase, or a paragraph.
How to Create Lists
Procedure Reference: Create a List from Existing Text
To create a list from existing text:
tC
Ma
List Type
2.
Create the list.
•
On the Home tab, within the Paragraph group, select the desired list type.
—
Click the Bullets button to create a bulleted list using the default bulletlist settings.
—
Click the Numbering button to create a numbered list using the default
numbered-list settings.
re
n
Or, right-click the selected paragraph and select the list style.
Procedure Reference: Create a New List
To create a new list:
Do
•
No
Select the paragraph(s) that will be transformed to a list.
ce
1.
2.
On the Home tab, in the Paragraph group, select the desired list style.
3.
Type the first list item and press Enter to add the next list item.
4.
If necessary, add more items to the list.
5.
To end the list, press Enter twice, or click the appropriate list button again.
ea
Pl
Re
se
Place the insertion point where you want to start the list.
fe
1.
Procedure Reference: Remove Bullets and Numbering
To remove bullets and numbering:
1.
Select the desired list.
2.
Click the appropriate button in the Paragraph group.
•
Click the Bullets button to remove bullets.
Lesson 4: Formatting Paragraphs
105
LESSON 4
•
Click the Numbering button to remove numbering.
te
op
r
i
al
y
Customizing List Formats
You can create a customized list or change the format of a list by selecting the list and
right-clicking the selected area. From the menu, choose either Bullets, to see bullet
formats, or Numbering, to see the various numbering formats. Click Define New to set
custom list formatting.
ACTIVITY 4-5
Ma
AutoFormat Lists As You Type
When you want to start a new list, you can use the AutoFormat As You Type option in
Word. To start a bulleted list, type an asterisk (*), press Tab, type the list item, and
press Enter. Word will convert the asterisk into a bullet and begin a bulleted list for
you. To start a numbered list, type the first number of the list and any trailing punctuation such as a period or open parenthesis. Press Tab, type the list item, and press Enter.
Again, Word will begin the numbered list using the numbering format you want. You
can use the AutoCorrect dialog box to control automatic list settings.
ce
Before You Begin
My Meeting Agenda.docx is open.
tC
Creating Numbered and Bulleted Lists
Do
ea
b. On the Home tab, in the Paragraph group,
click the Numbering button
to convert the text to a numbered list.
Pl
Re
106
How You Do It
a. Below the heading “Agenda”, select the
three paragraphs of text.
se
Format paragraphs as a numbered
list.
fe
1.
re
n
What You Do
No
Scenario:
You need to prepare the agenda for a meeting and circulate it among your colleagues. In the
agenda, you need to list out details that will be covered during the meeting. You also decide to
include the action items.
Microsoft® Office Word 2007 - Level 1 (Second Edition)
LESSON 4
2.
Add a fourth item to the list.
a. At the end of the numbered list, place
the insertion point after “Approve new
disclaimer”.
te
op
r
i
al
y
b. Press Enter to start a new list item.
c. Type Assign action items.
3.
Create a bulleted list.
a. Scroll to the bottom of the document,
and place the insertion point at the end
of the document in the blank line.
b. In the Paragraph group, click the Bullets
button
to create a new empty bullet
point.
Ma
c. In the new bullet point, Type Tim will
distribute the data.
d. Press Enter to create a second bullet
point.
Press Enter to include a new bullet point.
ce
f.
tC
e. Type Kris will print the inserts.
No
g. Type Ryan will plan the next meeting.
Lesson 4: Formatting Paragraphs
Press Enter to end the bulleted list.
j.
Save the document and close it.
ea
se
Do
i.
Pl
Re
fe
re
n
h. Press Enter to include a new bullet point.
107
TOPIC F
Manage Formatting
te
op
r
i
al
y
LESSON 4
In the previous topics, you applied various types of paragraph formatting. Once you have completed all your formatting, you might need to manage the formatting by copying, deleting, or
replacing it. In this topic, you will manage formatting.
Ma
Once the formatting that you choose to apply to your documents becomes more complex than
the simple addition of bold fonts or italics, you might find that you need to manage the formatting by locating where specific formatting was used, applying a set of formats from one
section of text to another, or removing specific formats from a section of text. Tasks like this
can be inefficient to accomplish by visually scanning a document and manually copying or
removing formatting. Microsoft Word provides a set of tools that you can use to manage complex document formatting with efficiency and ease.
The Reveal Formatting Task Pane
tC
The Reveal Formatting task pane can help with many format management tasks. The options
in the Reveal Formatting task pane help you to identify specific formatting options that have
been applied to a text selection, including font, alignment, indents, document margins, and
layout. The Reveal Formatting task pane lets you apply or clear formats, select text with similar formatting, or compare the formatting of one section to that of another.
ce
Clear Formatting Options
No
Do
re
n
Sometimes, instead of changing the formatting on an item, you may wish to remove all the
existing formatting and reset the selection’s appearance to the default. If you need to clear the
formatting in a selection, you can use the Reveal Formatting task pane, the Styles task pane,
the Style Inspector dialog box, or the Clear Formatting button in the Font group on the
Ribbon.
Find and Replace Text Formatting Options
se
fe
In some cases, you might want to find all instances where you have applied a particular format, or you might want to replace one set of format options with another. You can use the
Format drop-down menu in the Find And Replace dialog box to search for a specific format
option and replace it with a desired format. You can search for and replace font and paragraph
formatting, tabs and tab settings, highlighting, styles, and other formatting options.
ea
How to Manage Text Formatting
108
Pl
Re
Procedure Reference: Manage Text Formatting with the Reveal Formatting Task
Pane
To manage text formatting with the Reveal Formatting task pane:
1.
On the Home tab, in the Styles group, click the Dialog Box Launcher button to
display the Styles task pane.
2.
If the Styles task pane is not docked, you might not see the Style Inspector
button. Drag the Styles task pane to the edge of the Word window to dock it.
Microsoft® Office Word 2007 - Level 1 (Second Edition)
LESSON 4
In the Styles task pane, click the Style Inspector button.
4.
In the Style Inspector task pane, click the Reveal Formatting button to display the
Reveal Formatting task pane.
5.
To show more of the document window, close the Styles and Style Inspector task
panes.
6.
To reveal text formatting, select the desired text in the document. The Reveal Formatting pane will display the details of both Font and Paragraph formatting.
te
op
r
i
al
y
3.
You can also see the Font, Font Styles, and Font Size of the selected text in the Fonts group of
the Home tab.
To clear font and paragraph formatting from a selection, move the mouse
pointer over the Selected Text box, click the drop-down arrow and choose
Clear Formatting.
•
To make the format of a selection match the format of the text around it,
click the Selected Text drop-down arrow and choose Apply Formatting Of
Surrounding Text.
•
To select text with similar formatting, click the Selected Text drop-down
arrow, and choose Select All Text With Similar Formatting. You can then
clear the formatting or apply the surrounding formatting to all the selections
as a group.
•
To compare the formatting of two selections, check the Compare To Another
Selection check box and then select the second portion of text in the
document. The Reveal Formatting pane will list the formatting differences.
Close the Reveal Formatting task pane.
Procedure Reference: Clear Text Formatting
re
n
To clear text formatting:
tC
Ma
•
No
8.
Perform the desired format management task.
ce
7.
Select the text that contains the formatting you want to reset.
2.
Clear all formatting.
•
Open the Styles task pane and select Clear All.
ea
To clear selected formatting, open the Style Inspector dialog box and click the
Clear Paragraph Formatting or Clear Character Formatting buttons.
fe
3.
Or, open the Style Inspector dialog box and select Clear All.
se
•
Do
1.
Procedure Reference: Find and Replace Text Formatting
To find and replace text formatting in your document:
2.
On the Home tab, in the Editing group, click the Replace button.
3.
In the Find And Replace dialog box, in the Find What text box, delete any
unwanted text and formatting options.
4.
Set the Find Font options.
a. Click the More button.
Lesson 4: Formatting Paragraphs
Pl
Click at the beginning of the document.
Re
1.
109
LESSON 4
In the Replace section, click Format and select Font.
c.
In the Find Font dialog box, select the desired font attributes you want to
find.
d.
Click OK.
te
op
r
i
al
y
b.
5.
In the Replace With text box, delete unwanted text and formatting options.
6.
Set the Replace Font options.
a.
Click the More button to show the Replace options.
b.
Click Format and from the drop-down list, select Font.
c.
In the Replace Font dialog box, select the desired font attributes you want to
use instead of the existing format.
d.
Click OK.
Replace instances, as needed.
8.
In the Microsoft Office Word message box, click OK.
9.
Close the Find And Replace dialog box.
Ma
7.
If you change your mind about a replace operation, click the Undo button on the Quick Access
toolbar. If you use the Replace button, Word will undo the replacements one by one. If you used
the Replace All button, Word will undo all of the replacements at the same time.
110
tC
No
Do
se
ea
Pl
Re
fe
re
n
ce
Removing Formats from a Prior Search
When you display the Replace tab in the Find And Replace dialog box, some font formats may already be displayed in the Find What and Replace With text boxes, perhaps
left over from a previous task. Before you begin a new search, you should remove the
formats so that they don’t interfere with your new search. To remove the formats from
the Find or Replace tabs of the Find and Replace dialog box, click More to display the
Search and Replace options, and click the No Formatting button to remove the
formats.
Microsoft® Office Word 2007 - Level 1 (Second Edition)
LESSON 4
Clearing Text Formatting
Data Files:
•
Relocation Services.docx
te
op
r
i
al
y
ACTIVITY 4-6
Before You Begin
From the C:\084893Data\Formatting Paragraphs folder, open Relocation Services.docx.
Ma
Scenario:
You have to submit a business report to the clients of your company. While reviewing the
document, you find that because you are distracted by too many formatting inconsistencies,
you are unable to focus on all the ideas stated within the document. You will remove some
formatting to focus your readers’ attention back to the content.
What You Do
How You Do It
1.
a. Press Ctrl+End to navigate to the end of
the document.
Determine the existing formatting
for the “unconditionally guarantee”
text.
tC
ce
b. In the last paragraph of the document,
select the text “unconditionally
guarantee”.
No
c. On the Home tab, in the Styles group click
the Dialog Box Launcher button.
Do
re
n
d. In the Styles task pane, click the Style
Inspector button.
Lesson 4: Formatting Paragraphs
ea
The font attributes include the Times New
Roman font, 12 pt, Italic. The character
option is Highlight. Close the Style
Inspector task pane.
g. Close the Styles task pane.
Pl
Re
fe
f.
se
e. In the Style Inspector task pane, click the
Reveal Formatting button
to display
the Reveal Formatting task pane.
111
LESSON 4
a. In the Reveal Formatting task pane, move
your mouse pointer over the Selected
Text text box to reveal the drop-down
arrow.
Clear the Italic font attribute from
the “unconditionally guarantee”
text.
te
op
r
i
al
y
2.
Ma
b. To clear the Italic font attribute but not
the highlight, from the Selected Text
drop-down list, select Clear Formatting.
c. Verify that the italics have been
removed, but not the highlight.
Do
No
b. In the Reveal Formatting task pane, in the
Formatting Of Selected Text list box,
verify that the Font Color of the
selected text is Green.
c. In the Reveal Formatting task pane, move
your mouse pointer over the Selected
Text text box to reveal the drop-down
arrow.
d. From the Selected Text drop-down list
box, select Clear Formatting.
Pl
ea
se
re
n
fe
Re
112
tC
a. In the last line of the document, select
“money back.”
Clear the green font color of the
text “money back”.
ce
3.
Microsoft® Office Word 2007 - Level 1 (Second Edition)
LESSON 4
te
op
r
i
al
y
e. In the Reveal Formatting task pane, verify
that the Font Color attribute has been
successfully removed.
f.
Click after the word “back” to deselect
the selection.
g. Close the Reveal Formatting task pane.
ACTIVITY 4-7
tC
Ma
h. Save the file as My Relocation Services.
docx
No
Before You Begin
My Relocation Services.docx is open.
ce
Finding and Replacing Text Formatting
Lesson 4: Formatting Paragraphs
Do
se
ea
Pl
Re
fe
re
n
Scenario:
Your company report is ready for your manager to review. You decide to proofread the document one last time and notice that a few titles are formatted in Arial, while others are in a
different style. To maintain consistency, set Tahoma as the font for all the occurrences of Arial.
113
LESSON 4
How You Do It
1.
a. Place the insertion point at the beginning of the document.
Set Arial as the font to search for.
te
op
r
i
al
y
What You Do
b. On the Home tab, in the Editing group,
click Replace.
c. In the Find And Replace dialog box, click
More.
d. In the Replace section, click Format.
e. From the Format drop-down list, select
Font.
2.
Set Tahoma as the replacement
font.
In the Find Font dialog box, in the Font
list box, select Arial and click OK.
Ma
f.
a. In the Find And Replace dialog box, click
in the Replace With text box.
114
tC
No
c. In the Replace Font dialog box, in the
Font text box, type Tahoma and click
OK.
d. Delete any text in the Find What And
Replace With text boxes.
Do
se
Pl
Replace all instances of Arial with
Tahoma.
Re
3.
ea
fe
re
n
ce
b. In the Find And Replace dialog box, in the
Replace section, click Format and choose
Font.
e. Click Less to close the advanced options.
a. In the Find And Replace dialog box, click
Replace All.
b. In the Microsoft Office Word message box,
click OK.
Microsoft® Office Word 2007 - Level 1 (Second Edition)
LESSON 4
4.
a. In the Find And Replace dialog box, click
in the Find What text box.
Clear the font formats in the Find
And Replace dialog box.
te
op
r
i
al
y
b. Click More to display the advanced Find
options.
c. In the Replace section, click No
Formatting.
d. Click in the Replace With text box.
Ma
e. In the Replace section, click No
Formatting.
f.
Click Close.
Lesson 4 Follow-up
tC
No
ce
g. Save and close the document.
Do
re
n
In this lesson, you made a document easier to read and understand by applying paragraph formatting techniques. You also took advantage of Word’s ability to apply several formats
simultaneously.
2.
When formatting your documents, what Word tools will be most advantageous to you
and why?
ea
Pl
Re
Lesson 4: Formatting Paragraphs
se
What text formatting will you use to enhance the text in your documents? Why?
fe
1.
115
116
tC
No
Do
se
ea
Pl
Re
fe
re
n
ce
Ma
te
op
r
i
al
y
NOTES
Microsoft® Office Word 2007 - Level 1 (Second Edition)
te
op
r
i
al
y
LESSON 5
LESSON 5
Lesson Time
60 minutes
Adding Tables
Modify table structure.
•
Format a table.
•
Convert text to a table or tables to text.
Lesson 5: Adding Tables
Do
se
ea
Pl
Re
fe
re
n
ce
•
No
You will:
•
Create a table.
tC
Ma
In this lesson, you will add tables to a document.
117
LESSON 5
Introduction
te
op
r
i
al
y
Up to this point in the course, you have entered and modified text primarily in paragraph form
in a document. In addition to text that is structured into paragraphs, Word enables you to
include text that is structured in the form of a table. In this lesson, you will add tables to your
documents to organize and enhance information.
Sometimes, when data is presented as a list or a paragraph, it can be difficult for readers to
understand the content. When you use tables appropriately, they can significantly improve
reader comprehension by enabling you to organize your information and eliminate unnecessary
words.
Create a Table
Ma
TOPIC A
In this lesson, you will add tables to documents. The first step in adding a professional-looking
table is to create the basic table and its data. In this topic, you will create tables to represent
data.
tC
No
Tables
ce
Presenting textual information is what word processing is all about. But, when that text contains statistical or numerical data, the data often gets buried, making it difficult to read.
Usually, the reader will benefit from seeing the data arranged in columns and rows. Tables
make information more readily accessible to the reader with the least amount of effort by you.
118
se
ea
Pl
Re
fe
Example:
Do
re
n
Definition:
A table is a grid-style container used to organize text, data, or pictures. Tables consist
of boxes called cells that are arranged in vertical columns and horizontal rows. A table
can have specialized table formats such as borders drawn around some or all of the
cells. The default is a thin black border around every cell.
Figure 5-1: A table with data entered into it.
Microsoft® Office Word 2007 - Level 1 (Second Edition)
LESSON 5
te
op
r
i
al
y
Non-printing Characters in Tables
There are several non-printing characters that are specific to tables. Each cell contains
an end-of-cell marker to indicate the end of each cell. To the right of each row is an
end-of-row marker that indicates the end of the row. A column marker appears in the
ruler at the boundary of each column. You can use these markers to select table
elements. In addition to these markers, Word also displays non-printing gridlines
around the table cells. If a table has borders applied to it, gridlines are beneath the
borders.
Gridlines are sometimes called boundaries. On the Table Tools Layout contextual tab, in the Table
group, click View Gridlines to show or hide gridlines on the screen.
Table Creation Options
Ma
To create a table, you can select an option from the Table drop-down list on the Insert tab.
Table grids
Allows you to move the mouse pointer over the grids and click to insert a table
with the desired number of rows and columns. This option automatically defines
the column delimiters.
Insert Table
Displays the Insert Table dialog box with options to create a table.
Draw Table
Enables you to manually draw a table.
No
Table Navigation Methods
tC
Description
ce
Option
Do
To Move
re
n
Although you can click to select table cells to enter text, it is more efficient to use keyboard
techniques to navigate within a table.
Press This Key
One cell to the right
One cell to the left
Shift+Tab or Left Arrow
Down Arrow
ea
Up Arrow
fe
Up one row
se
Down one row
Tab or Right Arrow
Lesson 5: Adding Tables
Pl
Re
Add a Row to the Bottom of a Table
As you use the keyboard to navigate in a table, it is possible to inadvertently add a
new row to the bottom of the table. Pressing Tab when the insertion point is located in
the last cell will add a new row. If you don’t want the extra row, simply undo the
action.
119
LESSON 5
How to Create a Table
To create a table:
te
op
r
i
al
y
Procedure Reference: Create a Table
1.
Place the insertion point where you want to insert the table.
2.
On the Insert tab, click the Table drop-down arrow.
3.
Insert the table.
Move the mouse pointer over the grids to select the desired number of
rows and columns to be displayed in the table. Each cell in the grid represents one cell in the table.
b.
Click to insert the table.
Insert the table using the Insert Table dialog box.
a.
In the Tables group, click Table and select Insert Table.
b.
In the Insert Table dialog box, type the desired number of rows and
columns.
c.
Click OK to insert the table.
Insert the table using the Draw Table option.
a.
In the Tables group, click Table and select Draw Table.
b.
Click and drag the pencil-shaped mouse pointer to manually draw the
rows and columns.
tC
•
a.
Ma
•
Insert the table using the grids.
ce
•
Enter the table data.
re
n
4.
No
If you accidentally insert a table incorrectly, undo the command using the Undo button on the Quick Access toolbar and try again.
Do
Add a Tab Character to a Cell
You cannot use the Tab key on the keyboard to insert a tab character into a table,
because pressing Tab will move the insertion point to the next cell. To insert a tab
within a cell, press Ctrl+Tab.
120
se
ea
Pl
Re
fe
Type Text Before a Table
When a table is at the beginning of a document, there’s no obvious way to type text
above the table. The trick is to place the insertion point in the first cell of the first row
of the blank table and press Enter. This inserts a paragraph mark above the table. You
can then type as much text as you want.
Microsoft® Office Word 2007 - Level 1 (Second Edition)
LESSON 5
Inserting a Table
Data Files:
•
Sales Data.docx
Before You Begin
From the C:\084893Data\Adding Tables folder, open Sales Data.docx.
te
op
r
i
al
y
ACTIVITY 5-1
Ma
Scenario:
Your manager has supplied you with a document named Sales Data. The data is rather difficult
to follow in paragraph form. You decide that the data would work better in table form, with a
row for each salesperson and a column for each of the other pieces of data. You need to create
the table and enter the information.
What You Do
How You Do It
1.
a. Place the cursor at the end of the
document.
Insert a table using the Insert Table
dialog box.
tC
ce
b. On the Insert tab, in the Tables group,
click Table and select Insert Table.
No
c. In the Number Of Columns text box, type
3 and press Tab.
re
n
d. In the Number Of Rows text box, type 4
Enter data in the header row.
a. In the table, with the insertion point in
the first cell, type Associate and then
press Tab.
se
2.
Do
e. Click OK to close the Insert Table dialog
box and create the table.
Lesson 5: Adding Tables
ea
c. Type Territory
a. Press Shift+Tab twice to navigate to the
cell with the text “Associate”.
Pl
Edit the heading.
Re
3.
fe
b. Type Supervisor and press Tab.
b. Type New Associate to replace the old
heading with the new one.
121
LESSON 5
4.
a. Press the Down arrow to move the insertion point to the first cell in the second
row.
Enter the data for Tim Jones.
te
op
r
i
al
y
b. Type Tim Jones and press Tab.
c. Type Kris Rogers as the supervisor and
press Tab.
d. Type Los Angeles as the territory and
press Tab.
a. Based on the values given in the paragraph above the table, enter the data for
Missy Lu and Miles Rodriguez.
Enter the remaining data in the
table.
Ma
5.
tC
No
Do
re
n
TOPIC B
ce
b. Save the document as My Sales Data.
docx and close it.
Modify the Table Structure
se
You have added a table to your document and entered some data into it. As you work on the
table, you may find that it contains more rows than required, or that the cell size needs
adjusting. In this topic, you will modify the table structure.
122
ea
Pl
Re
fe
Imagine you’ve created a table for the third-quarter report that shows the year-to-date revenues
for your territory. Then, your manager decides it would be best to include a full year’s worth
of data and compare it to the same data for another territory. You’re going to need extra columns and rows and you might even need to move some of the existing information around.
You could start from scratch and create a whole new table structure, but then you would have
to re-enter all of your existing information. Instead, you could just take your existing table and
modify its structure to meet the new requirements.
Microsoft® Office Word 2007 - Level 1 (Second Edition)
LESSON 5
Contextual Tabs
te
op
r
i
al
y
Definition:
Contextual tabs are tabs with specialized commands that are displayed when the object
that they operate on, such as a table, picture, or shape, is selected. They are displayed
along with the core tabs on the Ribbon and are used to modify and format the selected
object. The contextual tabs that appear are specific to the type of object that is
selected.
tC
Do
re
n
Figure 5-2: Table Tools contextual tabs.
No
ce
Ma
Example:
The Table Tools Design Contextual Tab
se
The Table Tools Design contextual tab contains groups with options to format the table.
Table Style
Options
Enables you to format the table by differentiating specified rows or columns.
Enables you to draw borders to your table. This group contains options to change the
line style, color, and thickness of the border. You can also erase the border.
Re
Draw Borders
Provides a set of predefined styles to format a table. Also enables adding a different
shading and applying borders to the table.
Lesson 5: Adding Tables
Pl
Table Styles
ea
Description
fe
Group
123
LESSON 5
The Table Tools Layout Contextual Tab
te
op
r
i
al
y
The Table Tools Layout contextual tab contains groups with options to modify the layout of
the table.
Provides options to:
Table
Select a particular table or cells of a table, show or hide gridlines, and display the
table properties.
Rows & Columns
Modify the table structure by inserting or deleting rows or columns.
Merge
Merge or split tables and cells.
Cell Size
Resize the table.
Alignment
Modify the alignment of text inside the table. This group contains options to
change the direction in which text has been entered. You can also change the
default value of each cell’s margins.
Data
Sort, calculate, or convert the table information into text. You can also use options
in this group to repeat heading information on every page.
Ma
Group
Table Structure Modification Options
No
The Table Properties Dialog Box
tC
ce
You might need to modify the structure of an existing table to include more information or to
delete unnecessary information from the cells. You can delete or insert rows or columns, move
cells, rows, or columns, or change the overall size of the table.
Do
Row
Set the size, alignment, and text wrapping of the table.
Set the height. This tab also allows you to apply a page break and navigate to the
previous or next row.
Modify the size of the selected column. This tab also allows you to navigate to
the previous or the next column.
fe
Column
se
Table
Provides options to:
Cell
Modify the size and the vertical alignment of the selected cell.
ea
Tab
re
n
You can click Properties in the Table group of the Table Tools Layout contextual tab to open
the Table Properties dialog box and specify settings for rows, columns, individual cells, or the
entire table.
Pl
Re
How to Modify Table Structure
Procedure Reference: Insert Rows or Columns
124
To insert rows or columns:
1.
Position the insertion point next to where you want to insert or delete the columns
or rows. To insert multiple columns or rows, select that number of existing rows
or columns in the table.
Microsoft® Office Word 2007 - Level 1 (Second Edition)
LESSON 5
2.
Select the Table Tools Layout contextual tab.
3.
Insert the columns or rows.
In the Rows & Columns group, click Insert Left or Insert Right to insert a
column to the left or right of the selected column.
•
In the Rows & Columns group, click Insert Above or Insert Below to insert a
row above or below the selected row.
•
Select the last cell of the table and press Tab to insert a row at the bottom of
the table.
te
op
r
i
al
y
•
Table Selection Methods
There are many selection techniques you can use to select the components of a table
that you want to work with.
Do This
A row or rows
Move the mouse pointer in the blank space to the left of the desired row
and when the pointer changes to a right-tilted white arrow, click to select
the row. You can also click and drag to the left of the table to select several rows.
A column or columns
Move the mouse pointer at the top or bottom line border of the column
until the mouse pointer changes to a down-headed arrow and click to
select the column. You can also click and drag above the table to select
several columns.
A cell or cells
Move the mouse pointer in the blank space before the text in a cell and
when the mouse pointer changes to a right-tilted dark arrow, click to
select the cell. To select a group of cells, drag over the cells, or click a
cell, hold Shift, and click the last cell.
The entire table
Point to the table until the table selection box appears to the top left of
the table, and then click the box. Or, on the Layout tab in the Table
group, click Select and select Select Table.
Procedure Reference: Delete Rows or Columns
To delete rows or column:
tC
No
Do
re
n
ce
Ma
To Select
2.
Delete the columns or rows.
•
On the Table Tools Layout contextual tab, in the Rows & Columns group,
click Delete and select Delete Columns or Delete Rows.
ea
Pl
Or, right-click and choose Delete Cells, select Delete Entire Column or
Delete Entire Row, and click OK.
Re
•
se
Position the insertion point in the desired column or row. To delete multiple rows
or columns, select them as a group.
fe
1.
Inserting or Deleting Cells
You can insert individual cells by going to the Table Tools Layout contextual tab and
clicking the Insert Cells Dialog Box Launcher button in the Rows & Columns group or
by right-clicking and selecting Insert Cells from the Insert submenu. When you do so,
you can shift the existing cells down in the current columns or to the right in the current rows.
Lesson 5: Adding Tables
125
LESSON 5
You can delete individual cells by clicking Delete and selecting Delete Cells. When
you do so, you can shift the existing cells up in the current columns or to the left in
the current rows.
To move columns or rows:
te
op
r
i
al
y
Procedure Reference: Move Columns or Rows
1.
Select the columns or rows to move.
2.
Click the Cut button, or right-click the selection and click Cut.
3.
Place the insertion point to the right of the existing column or below the existing
row where you want to paste the content.
4.
Click the Paste button, or right-click and choose Paste Columns or Paste Rows.
Ma
Moving Cells
You cannot move individual cells by cutting and pasting. Instead, when you paste
cells, Word replaces the contents of the target cells.
Procedure Reference: Set Column Width or Row Height
To set column width or row height:
2.
On the Table Tools Layout contextual tab, in the Table group, click Properties.
3.
Set a specific column width.
a. Select the Column tab.
c.
In the Preferred Width spin box, specify the desired column width using the
up and down arrows.
d.
Click the Previous Column or Next Column button to change the width of
the previous or next column.
Do
No
In the Size section, check the Preferred Width check box.
re
n
b.
To set a specific row height, select the Row tab and follow a similar procedure.
5.
Click OK to close the Table Properties dialog box.
6.
To set an approximate row height or column width, click and drag the row or column border.
7.
To fit the row height or column width to contents of the cells, double-click the
right column boundary or the top row boundary.
Pl
ea
se
4.
fe
Re
126
tC
Place the insertion point inside the row or column, or select multiple rows or
columns.
ce
1.
Microsoft® Office Word 2007 - Level 1 (Second Edition)
LESSON 5
Modify Table Structure
Data Files:
•
Mortgage Letter.docx
te
op
r
i
al
y
ACTIVITY 5-2
Before You Begin
From the C:\084893Data\Adding Tables folder, open Mortgage Letter.docx.
Ma
Scenario:
As you are preparing your mortgage rates letter, the client calls and reminds you that the company he works for is opening a branch office in Rochester, New York later in the year and that
he might possibly be transferred to that location. He would like you to include specific information on loan rates for Rochester. You also realize that the information on the rate percentage
is more important to your customer than the effective date. Also, the columns of the table look
too large, so you decide to modify the column width within the table.
How You Do It
1.
a. In the table, click at the beginning of the
cell that contains “Seattle, WA”.
Insert an additional row into the
table.
tC
What You Do
No
ce
b. Click the Table Tools Layout contextual
tab.
c. In the Rows & Columns group, click Insert
Above.
Enter data in the new row.
Do
a. In the new row, in the first cell, type
Rochester, NY and press Tab.
re
n
2.
se
b. In the second cell, type July 8 and press
Tab.
Lesson 5: Adding Tables
ea
Pl
Re
fe
c. In the last cell, type 6.13
127
LESSON 5
a. In the table, move the mouse pointer
above the border of the “Rate” column
and when the mouse pointer changes to
a down-headed arrow, click above the
column to select the column.
Reverse the order of the last two
columns.
te
op
r
i
al
y
3.
b. On the Home tab, in the Clipboard group,
click the Cut button.
c. Verify that the insertion point is in the
“As of” column heading.
d. In the Clipboard group, click the Paste
button.
a. In the table, position the mouse pointer
anywhere on the right border of the
“Location” column and double-click
when the mouse pointer changes to a
double-headed arrow
to adjust the
width of the column to fit its contents.
Adjust the column width to fit the
column contents.
Ma
4.
128
tC
No
Do
se
ea
c. Save the file as My Mortgage
Letter.docx and close the file.
Pl
Re
fe
re
n
ce
b. Double-click the left border of the table
to adjust the width of the Rate and As Of
columns.
Microsoft® Office Word 2007 - Level 1 (Second Edition)
LESSON 5
TOPIC C
te
op
r
i
al
y
Format a Table
In the previous topic, you adjusted the structure of a table to match the data you need to
present. Once the table’s data and structure are established, all you need to do to complete
your table is to format it. In this topic, you will quickly format a table, applying a variety of
formatting options all at the same time.
Ma
A simple table can effectively organize information logically. However, if you were to insert a
plain table within an otherwise formatted document, the table might not match the overall look
of the document and might not draw the reader’s attention. You know that the right combination of formats can make the information stand out. To make it easy to achieve the right look,
Word enables you to select from an existing set of pre-formatted table designs and apply them
automatically to your table.
Table Styles
tC
No
se
ea
Pl
Re
fe
re
n
Example:
Do
ce
Definition:
A table style is a formatting option that contains a group of table-specific formatting
options packaged together to apply design and formatting changes to an existing table
all at the same time. Table formatting options include borders, shading, colors, cell
alignment, table fonts, and separate formats for the first column or row. In the Table
Tools Design contextual tab, you can select a style from the Table Styles gallery within
the Table Styles group. You can also modify an existing style, or build a new style and
add it to the Styles gallery.
Figure 5-3: Table Styles.
Lesson 5: Adding Tables
129
LESSON 5
The Table Style Options Group
te
op
r
i
al
y
The Table Style Options group contains options to differentiate the contents of the table based
on the location of the respective rows and columns. You can apply separate formats to the
header, or first row; the totals, or last row; and the first and last columns. You can also select
banded rows or banded columns, in which alternate rows or columns appear in a contrasting
shade.
Ma
Figure 5-4: Sections of a table with table style options applied.
Quick Tables
130
tC
No
se
ea
Pl
Re
fe
re
n
Example:
Do
ce
Definition:
Quick Tables are predefined tables with a style applied and sample data entered into
the cells. You can use a Quick Table to quickly insert a new table with a pre-defined
format rather than a plain grid of squares. You can then edit the placeholder text in the
Quick Table to suit your needs. In Word, Quick Tables are located in the Tables group
on the Insert tab. There are different types of Quick Tables including calendars, double
tables, and tables with subheadings. Quick Tables may apply a coordinated set of different fonts and column delimiters to your table.
Figure 5-5: Quick Tables.
To format an existing table, use a table style. To insert a new formatted table, use a Quick Table.
Microsoft® Office Word 2007 - Level 1 (Second Edition)
LESSON 5
How to Format a Table
To use a Quick Table to create a formatted table:
te
op
r
i
al
y
Procedure Reference: Use a Quick Table to Create a Formatted Table
1.
On the Insert tab, in the Tables group, click Table and select Quick Tables.
2.
In the Quick Tables gallery, select a pre-defined table.
3.
In the table, replace the existing data with the data you want to display in the
table.
Procedure Reference: Format Using Contextual Tabs
To format a table using contextual tabs:
Select the table.
2.
To format the entire table, in the Table Styles group of the Table Tools Design
contextual tab, from the Table Styles gallery, select a style.
3.
To format a section of a table, select the section and apply the format.
•
Select a row or column and select the desired option in the Table Style
Options group.
Ma
1.
•
To apply borders, in the Table Styles group, click the Borders drop-down
arrow and select the desired border. You can also draw in the borders or
erase existing borders by using the options in the Draw Borders group.
No
re
n
Formatting a Table
Do
ACTIVITY 5-3
tC
To apply shading, in the Table Styles group, click Shading and select the
desired color.
ce
•
Lesson 5: Adding Tables
se
ea
Insert a Quick Table.
Re
1.
How You Do It
a. Open a new, blank document.
b. On the Insert tab, in the Tables group,
click Table and select Quick Tables.
Pl
What You Do
fe
Scenario:
Your colleague is going to provide you with a handwritten list of the four branches with the
highest sales percentages last year. You will need to include this data in several documents,
and you think it would look best if it were in a table. You want to create and format the table
as quickly as possible so that you will be ready to enter the data when you receive it.
131
LESSON 5
132
tC
No
Do
se
ea
Pl
Re
fe
re
n
ce
Ma
te
op
r
i
al
y
c. In the Quick Tables gallery, scroll down
and select Tabular List to insert that
Quick Table.
Microsoft® Office Word 2007 - Level 1 (Second Edition)
LESSON 5
2.
Apply a style to the table.
a. Verify that the mouse pointer is at the
beginning of the table and select the
table.
te
op
r
i
al
y
b. On the Table Tools Design contextual tab,
in Table Styles group, click the More
button.
Ma
c. In the Table Styles gallery, in the Built-In
section, in the first row, select the second style, Light Shading-Accent 1.
d. Click in any cell to deselect the table.
Lesson 5: Adding Tables
tC
No
Do
se
ea
Pl
Re
fe
re
n
ce
e. In the Table Style Options group, check
the Banded Rows check box.
133
LESSON 5
3.
a. Double-click the word ITEM and type
City
Edit the default table content.
te
op
r
i
al
y
b. Double-click the word NEEDED and type
Percent
c. Select the remaining rows of the table
and press Delete to clear the contents of
the cells.
d. Select the last four rows of the table.
e. On the Table Tools Layout contextual tab,
in the Rows & Columns group, click
Delete and select Delete Rows.
tC
ce
TOPIC D
Save the document as My Sales Table.
docx and close the document.
Ma
f.
No
Convert Text to a Table or Tables to
Text
Do
re
n
In the first part of this lesson, you created tables manually. In some instances, you might have
data already in a document, in which case it could be time-consuming to retype it into a table.
In this topic, you will convert existing text into a new table, as well as convert tables back to
text.
se
ea
fe
You’ve been asked to update the new product catalog sheet. The person who originally created
the document in Word didn’t know how to create a table, so he used tabs instead. The information would certainly be more readable if it were put into a formatted table. But, since the
document is several pages long, it would take a long time to retype and format all the information in a new table, not to mention you may make mistakes as you type. However, Word can
quickly convert the existing tabbed text into a table, without the risk of mistakes, and you can
format the table at the same time.
Pl
Re
The Convert Text To Table Dialog Box
If you have used tab characters to create columns of data in your document, you can convert
the tabbed text to a table by using options in the Convert Text To Table dialog box.
134
Microsoft® Office Word 2007 - Level 1 (Second Edition)
LESSON 5
Description
Table Size
Enables you to modify the number of rows and columns to suit the text content.
AutoFit Behavior
Provides options to automatically resize the table based on the content, window
or the width of the columns.
Separate Text At
Provides options to specify whether paragraphs, tabs, commas, or any other
option should be considered as the delimiter to separate text while converting the
text to a table.
te
op
r
i
al
y
Conversion
Options
Comma-separated data is a common data format used by both government and industry.
Ma
The Convert Table To Text Dialog Box
You can use the Convert Table To Text dialog box to convert information in a table to paragraph format. This dialog box can be accessed from the Data group in the Table Tools Layout
contextual tab. The dialog box provides options to separate the data in the table using paragraph marks, tabs, commas, or other delimiting characters when it is converted into text.
tC
How to Convert Text to a Table or Tables to Text
To convert text to a table using the Text To Table dialog box:
1.
Select the text that you want to convert into a table.
No
ce
Procedure Reference: Convert Text to a Table Using the Convert Text To Table
Dialog Box
Do
re
n
It’s helpful to have non-printing characters displayed so you can see the tabs, because, if you
have extra tabs in the text, they will be converted into empty cells when the table is created. Click
the Show/Hide button to display non-printing characters.
3.
In the Convert Text To Table dialog box, set the Table properties.
•
In the Table Size section, specify the desired number of rows and columns
using the up and down arrows in the spin box.
Select Fixed Column Width to maintain a fixed column width or modify
the column width using the up and down arrow in the Fixed Column
Width spin box.
Re
—
•
4.
ea
In the AutoFit Behavior section, select the options to automatically modify
the size of the rows and columns to suit the content.
Pl
•
se
On the Insert tab, in the Tables group, click Table and select Convert Text To
Table.
fe
2.
—
Select AutoFit To Contents to automatically fit the data to a table.
—
Select AutoFit To Window to automatically fit the table to the window.
In the Separate Text At section, select an option to set the delimiter character.
Click OK to insert the table.
Lesson 5: Adding Tables
135
LESSON 5
Procedure Reference: Convert a Table to Text Using the Convert Table To Text
Dialog Box
To convert a table to text using the Convert Table To Text dialog box:
Select the desired table.
2.
On the Table Tools Layout contextual tab, in the Data group, click Convert To
Text.
3.
In the Convert Table To Text dialog box, select the desired option to set a
delimiter for the data after converting it to text.
4.
Click OK to convert the table to text.
ACTIVITY 5-4
te
op
r
i
al
y
1.
Ma
Converting Tabbed Text into a Table
Data Files:
•
Burke Review.docx
tC
Before You Begin
From the C:\084893Data\Adding Tables folder, open Burke Review.docx.
No
Do
a. In the second paragraph, select the
tabbed text “Tim Jones” through
“translates into sales.”
ea
Pl
Re
136
How You Do It
se
Convert tabbed text into a basic
table.
fe
1.
re
n
What You Do
ce
Scenario:
Your coworker has asked you to help her with the Burke Review document. She has used tabs
to separate data in the document. You want to make the data more readable without spending
much time on it, so you decide to convert the tabbed text into a table.
b. On the Insert tab, in the Tables group,
click Table and select Insert Table.
Microsoft® Office Word 2007 - Level 1 (Second Edition)
LESSON 5
2.
Convert the second block of tabbed
data into a table that fits the contents exactly.
te
op
r
i
al
y
c. Click away from the table to deselect it.
a. At the bottom of the document, select
the tabbed data, “Jr. Sales Associate”
through the last “3”.
Ma
b. On the Insert tab, in the Tables group,
click Table and select Convert Text To
Table.
Lesson 5: Adding Tables
tC
No
Do
se
ea
d. Click OK to convert the tabbed text into a
formatted table.
Pl
Re
fe
re
n
ce
c. In the Convert Text To Table dialog box,
verify that the table will have four columns, and select the AutoFit To
Contents option.
137
LESSON 5
ACTIVITY 5-5
Save the document as My Burke Review.
docx and close it.
Ma
f.
te
op
r
i
al
y
e. Click away from the table to deselect the
text in the table.
Data Files:
Rates of Interest.docx
ce
•
tC
Converting an Existing Table to Text
No
Before You Begin
From the C:\084893Data\Adding Tables folder, open Rates of Interest.docx.
What You Do
a. At the beginning of the document, select
the “Points Of Interest” table.
ea
b. On the Table Tools Layout contextual tab,
in the Data group, click Convert To Text.
c. In the Convert Table To Text dialog box,
verify that the Paragraph Marks option is
selected and click OK.
Pl
Re
138
How You Do It
se
Convert a table to text with paragraph marks as the delimiter.
fe
1.
Do
re
n
Scenario:
As you review the document, you find that the information does not require a table and is
more readable when presented in a paragraph format.
Microsoft® Office Word 2007 - Level 1 (Second Edition)
LESSON 5
a. Save the file as My Rates Of Interest.
docx and close it.
Save the document.
Lesson 5 Follow-up
Ma
2.
te
op
r
i
al
y
d. Click in the text area to deselect the
text.
2.
What type of information will you put in tables?
Do
Pl
ea
se
re
n
fe
Re
Lesson 5: Adding Tables
No
When will you use tables in your documents?
ce
1.
tC
In this lesson, you created a table, entered data, and modified the table structure to suit your
content. You also formatted the table to enhance the appearance. Lastly, you converted existing
tabbed-text into its own table. Tables can significantly improve reader comprehension by
enabling you to organize your information more clearly.
139
140
tC
No
Do
se
ea
Pl
Re
fe
re
n
ce
Ma
te
op
r
i
al
y
NOTES
Microsoft® Office Word 2007 - Level 1 (Second Edition)
LESSON 6
te
op
r
i
al
y
LESSON 6
Lesson Time
30 minutes
Inserting Graphic Objects
Insert illustrations.
Lesson 6: Inserting Graphic Objects
Do
se
ea
Pl
Re
fe
re
n
ce
•
No
You will:
•
Insert symbols and special characters.
tC
Ma
In this lesson, you will add graphic elements to a document.
141
LESSON 6
Introduction
te
op
r
i
al
y
You have been working with text and tables in documents. Now, you want to insert graphic
elements into your document to create a visual impact. In this lesson, you will enhance the
visual appeal of your documents by adding graphic elements to them.
When you create a document with only text, it can be difficult to read, follow, and understand.
If you insert a picture relating to the content, it can help the reader be more interested in and
comprehend the content.
TOPIC A
Ma
Add Visual Effects Using Symbols and
Special Characters
In this lesson, you will insert graphic objects into documents. Some of the simplest and most
common graphic objects that occur in all types of documents are basic symbols and special
characters such as the copyright symbol (©). In this topic, you will add visual effects using
symbols and special characters.
tC
No
re
n
Symbols
ce
You are drafting a copyright statement and the new department style guide requires that you
use the copyright symbol (©) along with the word “copyright.” You’ve stared at your keyboard for several minutes trying to locate the character, but it’s nowhere to be found. How are
you going to get the circle around the letter “c”? You know it can be done, but how? Word
provides convenient access to a large group of symbols and special characters, such as the
copyright character, that can be inserted quickly and correctly.
142
Do
se
ea
Pl
Re
fe
Symbols are character marks included with a font that can be used to represent an idea or word
such as copyright, trademark, or registered trademark. Each font can have a slightly different
set of symbols. Click the Symbol option in the Symbols group on the Insert tab to insert symbols from the Symbol gallery. You can also click More Symbols to open the Symbol dialog
box to insert or manage symbols.
Microsoft® Office Word 2007 - Level 1 (Second Edition)
Ma
te
op
r
i
al
y
LESSON 6
Figure 6-1: Options on the Symbols tab.
Special Characters
tC
No
Do
re
n
ce
Symbol Families and Character Codes
In the Symbols dialog box, you can choose symbols from two different standard symbol families: ASCII (American Standard Code for Information Interchange) standard
symbols or Unicode standard symbols. These are both standards that enable computers
to communicate information by representing letters as numeric values. For each symbol in each family, there is a character code in decimal or hexadecimal format that you
can use to enter the character from the keyboard or numeric keypad. The Unicode
(hex) symbol family is broken down into subsets; you can use the Subset drop-down
list to choose which subset to display to make it easier for you to scroll and locate a
particular symbol.
Lesson 6: Inserting Graphic Objects
se
ea
Pl
Re
fe
Special characters are punctuation, spacing, or typographical characters that typically are not
available on the standard keyboard. The Special Characters tab in the Symbol dialog box
allows you to access these characters and commonly used symbols such as Trademark, Registered, and Copyright.
143
Ma
te
op
r
i
al
y
LESSON 6
Figure 6-2: Options on the Special Characters tab.
tC
How to Insert Symbols and Special Characters
ce
Procedure Reference: Insert a Symbol or Special Character
2.
Insert a symbol.
•
On the Insert tab, in the Symbols group, click Symbol and select the symbol
from the Symbols gallery.
Or, insert the symbol using the Symbol dialog box.
On the Insert tab, in the Symbols group, click Symbol.
b.
In the Symbol gallery, click More Symbols to display the Symbol dialog
box.
c.
On the Symbols tab, from the Font drop-down list, select the font that
includes the symbol you want to use.
d.
In the Symbols palette, select a symbol and click Insert, or double-click
a symbol to directly insert it.
e.
Click Close to close the Symbol dialog box.
se
a.
ea
fe
Insert a special character.
a. Open the Symbol dialog box and select the Special Characters tab.
Pl
Re
3.
Do
Place the insertion point where you want to insert the symbol or special character.
re
n
1.
•
144
No
To insert a symbol or special character:
b.
Select the desired character and click Insert, or double-click the character.
c.
Click Close.
Microsoft® Office Word 2007 - Level 1 (Second Edition)
LESSON 6
ACTIVITY 6-1
Inserting Symbols and Special Characters
Data Files:
•
Rates of Interest.docx
te
op
r
i
al
y
The Wingdings Font
Wingdings is a font available in Word that includes many decorative symbols.
Wingdings represent some common computer components and other elements of
graphical user interfaces.
Ma
Before You Begin
From the C:\084893Data\Inserting Graphic Objects folder, open Rates of Interest.docx.
tC
No
Insert the Registered special
character.
a. In the second to last line of the “Legal
Information” paragraph, place the insertion point after the italicized word
“Interest”.
re
n
1.
How You Do It
Do
What You Do
ce
Scenario:
You’ve finished drafting a company newsletter called “Rates of Interest.” In the Legal Information text, the company style guide requires a registered trademark character immediately
following the “Rates of Interest” publication name and a copyright character between the
word “copyright” and the year that the document was published. Furthermore, the style guide
requires that the word “Phone” be replaced by a Wingdings telephone symbol in the “Contact
Information” text.
b. On the Insert tab, in the Symbols group,
click Symbol.
Lesson 6: Inserting Graphic Objects
se
ea
d. In the Symbol dialog box, select the Special Characters tab.
Pl
Re
fe
c. In the Symbols gallery, click More
Symbols.
145
LESSON 6
f.
2.
te
op
r
i
al
y
e. In the Character list box, select
Registered.
Click Insert and then click Close.
a. In the same paragraph, position the
insertion point before “2007”.
Insert a Copyright symbol.
b. In the Symbols group, click Symbol.
3.
Ma
c. In the Symbol gallery, click the Copyright
Sign symbol.
a. Under “Contact Information”, select the
word “Phone”.
Replace the word “Phone” with a
Wingdings telephone symbol.
146
tC
No
c. In the Symbol dialog box, click the Font
drop-down arrow and press W to view all
the fonts that begin with W.
d. Select Wingdings to view the set of symbols for this font.
Do
e. In the first row of symbols, select the
Telephone icon.
se
ea
Pl
Re
fe
re
n
ce
b. In the Symbols group, click Symbol and
select More Symbols.
f.
Click Insert and then click Close.
g. Save the document as My Rates of
Interest.docx
Microsoft® Office Word 2007 - Level 1 (Second Edition)
LESSON 6
TOPIC B
te
op
r
i
al
y
Insert Illustrations
You are not limited to inserting just text symbols and special characters to add visual interest
to your documents. Word comes with a wide variety of colorful graphics you can use to illustrate text. In this topic, you will enhance documents by adding illustrations to them.
You’ve added as much text formatting as you can without it becoming a distraction, yet your
document still needs something. You would like to insert a simple image in the document to
support the text’s message. Word provides an extensive catalog of professionally created pictures that you can add to your documents to make them more memorable.
Illustrations
tC
Ma
Definition:
Illustrations are graphic or media elements that you can insert into documents to provide visual representations of text or add visual interest to the document. Illustrations
can be static graphics such as clip art, geometric shapes, pictures, or charts, or they
can be embedded media files such as movies or audio recordings. After you insert
illustrations, you can resize them, move them, and adjust their appearance in your
document.
Figure 6-3: An illustration.
Lesson 6: Inserting Graphic Objects
No
Do
se
ea
Pl
Re
fe
re
n
ce
Example:
147
LESSON 6
te
op
r
i
al
y
SmartArt
SmartArt is a graphic element that combines text, illustration, and color. It is used to
show a timeline or developmental progression. SmartArt can also represent the sequential steps in a process or workflow. SmartArt is highly customizable to suit your exact
information needs.
Charts
A chart is a graphical representation of statistical data. It is used to form a relationship
between different groups of data. There are different types of charts such as Bar, Pie,
and Line.
Pictures
No
Do
se
fe
re
n
ce
Example:
tC
Ma
Definition:
A picture is a type of illustration that closely resembles a real object. In Word, pictures
can be digital renderings of paintings, digital photographs, or computer graphics. They
are stored in files that use a graphic format such as .jpg, .gif, or .bmp. Pictures can be
any size or shape.
Pl
Re
Clip Art
ea
Figure 6-4: A digital photograph used as a picture.
Definition:
A clip art image is type of illustration that generally is non-photographic and has a
simple two-dimensional effect. Word includes a number of default Clip Art images, and
you can use the Clip Art task pane in the Illustrations group to search for additional
Clip Art as well as other types of illustrations.
148
Microsoft® Office Word 2007 - Level 1 (Second Edition)
LESSON 6
Figure 6-5: Clip art inserted into a Word document.
tC
Ma
te
op
r
i
al
y
Example:
ce
The Illustrations Group
Do
re
n
The Clip Art Task Pane
No
The Illustrations group on the Insert tab contains options you can use to insert pictures or clip
art, as well as other types of illustrations such as geometric shapes, SmartArt, and charts. Click
Picture to open the Insert Picture dialog box to locate and insert pictures. Click Clip Art to
display the Clip Art task pane where you can search for clip art and other media types.
se
The Clip Art task pane is used to search for media files or clips of various types that are stored
on your computer and the web. You can search for clip art, photographs, movies, and sound
files by entering a word or phrase that describes the clip you want to find. You can also use
the Clip Art task pane to open the Microsoft Clip Organizer to arrange your Clip Art and other
media files, and to access Office Online to download additional clips.
Lesson 6: Inserting Graphic Objects
ea
Pl
Re
fe
Clip Art Properties
To view a clip’s properties, such as its file name, file size, creation date, or search keywords associated with the clip, or if you’d like to preview a clip, move your mouse
pointer over the clip’s thumbnail and then click the arrow that appears. Choose
Preview/Properties to open the Preview/Properties dialog box, where you can preview
the clip art and view its properties.
149
LESSON 6
Sizing Techniques
Ma
te
op
r
i
al
y
When you select an illustration in a document, small circles and squares called sizing handles
are displayed around the border of the clip. You can drag the square sizing handles to the left
or to the right of the illustration, which resizes the illustration in the direction you drag the
handle. Dragging the corner circular sizing handles proportionally resizes the illustration, while
the diagonally opposite corner remains fixed. If you hold Ctrl while you drag the corner, you
can resize the illustration around its center.
Figure 6-6: Sizing handles displayed around an image.
tC
The Picture Tools Format Contextual Tab
Group
Description
Do
Enables you to make formatting changes to images by increasing or
decreasing the color, brightness, or contrast.
re
n
Adjust
No
ce
Groups on the Picture Tools Format contextual tab enable you to control the appearance of
illustrations in the document.
Arrange
Enables you to position the image in the document. You can also rotate,
group, or align pictures within a page using the options in this group.
Size
Enables you to crop the image and to increase or decrease the height and
width of the picture.
se
Enables you to select a style, shape, border, and effects for a picture.
fe
Picture Styles
ea
How to Insert Illustrations
150
Pl
Re
Procedure Reference: Insert a Picture from a File
To insert a picture from a file:
1.
Position the insertion point where you want to insert the picture.
2.
On the Insert tab, in the Illustrations group, click Picture.
3.
In the Insert Picture dialog box, navigate to the folder where the picture is saved.
4.
Select the picture and click Insert to insert the picture in the document.
Microsoft® Office Word 2007 - Level 1 (Second Edition)
LESSON 6
5.
If desired, click and drag the sizing handles to adjust the picture size.
Procedure Reference: Insert Clip Art
1.
Position the insertion point where you want to insert the clip art image.
2.
On the Insert tab, in the Illustrations group, click Clip Art.
3.
In the Clip Art task pane, in the Search For text box, type a word or phrase that
describes the clip art image you want to locate.
4.
If necessary, narrow down the search.
•
From the Search In drop-down list, select the search locations.
•
From the Results Should Be drop-down list, specify the types of media files
you want to find.
Click Go to begin the search.
6.
In the section where clip art is displayed, click a clip to insert it where the insertion point is placed.
7.
If desired, drag the sizing handles to adjust the clip’s size.
re
n
Before You Begin
My Rates of Interest.docx is open.
No
Burke Logo.png
Do
Data Files:
ce
Inserting Illustrations
tC
Ma
5.
ACTIVITY 6-2
•
te
op
r
i
al
y
To insert a clip art image:
Lesson 6: Inserting Graphic Objects
se
ea
Pl
Re
fe
Scenario:
Since the My Rates Of Interest document is going to be a monetary guide frequently used by
your coworkers and their clients, you want the document to be instantly identifiable. You
decide to add a company logo and a simple money-oriented picture to the top of the document
to help accomplish that.
151
LESSON 6
What You Do
How You Do It
1.
a. Place the insertion point at the beginning of the heading “Rates of Interest”.
te
op
r
i
al
y
Insert the Burke Properties logo.
b. On the Insert tab, in the Illustrations
group, click Picture.
c. In the Insert Picture dialog box, navigate
to C:\084893Data\Inserting Graphic
Objects.
d. Select Burke Logo.png and click Insert.
2.
Ma
e. Click anywhere in the text area to deselect the image.
a. Place the insertion point before the
words “Rates of Interest” and press
Enter twice to add a blank line between
the picture and the heading.
Align the picture to the center of
the document.
tC
No
a. Place the insertion point at the end of
the heading “Rates of Interest”.
b. On the Insert tab, in the Illustrations
group, click Clip Art to display the Clip
Art task pane.
c. In the Search For text box, type money
se
ea
Pl
fe
Re
152
c. On the Home tab, in the Paragraph group,
click the Center align button to align the
picture to the center.
Do
Search for clip art pictures related
to money.
re
n
3.
ce
b. Click the picture to select it.
d. To limit the search to clip art, click the
Results Should Be drop-down arrow and
uncheck the Photographs, Movies, and
Sounds check boxes.
e. Click Go to display all the clip art related
to money.
f.
In the Microsoft Clip Organizer message
box, click No.
Microsoft® Office Word 2007 - Level 1 (Second Edition)
LESSON 6
a. In the Results area of the Clip Art task
pane, click the yellow-orange dollar sign
clip art image to insert it into the
document.
Insert and resize the yellow dollar
sign clip art image.
te
op
r
i
al
y
4.
b. Drag the top-right corner sizing handle
diagonally downward until the picture is
about an inch square.
Ma
c. Click anywhere in the blank area to
deselect the clip art image.
d. Close the Clip Art task pane.
tC
e. Save the document and close it.
No
ce
Lesson 6 Follow-up
In this lesson, you added graphic elements to enhance a document. With these enhancements,
you will be able to add interest and visual appeal to the output of many types of Word
documents.
2.
What is your opinion on clip art and do you intend to use it in your documents?
se
ea
Pl
fe
Re
Lesson 6: Inserting Graphic Objects
Do
What are some symbols and special characters that you find useful to use in your documents?
re
n
1.
153
154
tC
No
Do
se
ea
Pl
Re
fe
re
n
ce
Ma
te
op
r
i
al
y
NOTES
Microsoft® Office Word 2007 - Level 1 (Second Edition)
te
op
r
i
al
y
LESSON 7
LESSON 7
Lesson Time
45 minutes
Ma
Controlling Page
Appearance
Add a watermark.
•
Add headers and footers.
se
ea
Pl
fe
Re
Lesson 7: Controlling Page Appearance
No
•
Do
Apply a page border and color.
re
n
•
ce
You will:
•
Control page layout.
tC
In this lesson, you will control a document’s page setup and its overall appearance.
155
LESSON 7
Introduction
te
op
r
i
al
y
In the previous lessons, you have inserted text, tables, and graphics into your document. Now
that the page contents are complete, you can adjust the page appearance to suit your output
needs. In this lesson, you will control the appearance of pages in a document.
Altering the appearance of a page to suit the content helps to make an impression. A formal
letter needs to have a simple border, whereas a certificate can have a colorful border. By
changing a variety of page options, you can get the content to fit on the page, as well as
enhance the document’s appearance and readability.
TOPIC A
Ma
Control Page Layout
In this lesson, you will control page appearance. Adjusting various aspects of the overall page
layout is one of the most common ways to adjust the appearance of document pages. In this
topic, you will control page layout.
tC
ce
Just as an architect decides on the layout of a new home, keeping in mind visual appeal and
convenience, you must define the layout of your documents to ensure that the content appears
as you want it to. Word allows you to specify page margins and orientation, helping to ensure
that you are pleased with the print output.
No
Margin Options
156
Do
se
ea
Pl
Re
fe
re
n
The Margins gallery, in the Page Setup group of the Page Layout tab, has a list of predefined
margin types. You can apply a predefined margin type by selecting one from the Margins gallery if you want to change all the margins in a document at once. You can also customize the
size of each margin individually to increase or decrease the text area, add white space, or
adjust the overall page layout.
Microsoft® Office Word 2007 - Level 1 (Second Edition)
Ma
Figure 7-1: Preset margins in the Margins gallery.
te
op
r
i
al
y
LESSON 7
tC
No
ce
Default Margin Types
Word has six default margin types. Each type sets different dimensions for the various
margins in a document.
Normal
Top, bottom, inside, and outside margins are at a distance of 1 inch from
the page border. (Inside and outside margins refer to the edge of the
page that would be inside a binding if the document was compiled in
book form. Generally, the inside edge is the right edge for left hand
pages and vice versa.)
Top, bottom, inside, and outside margins are at a distance of 0.5 inches
from the page border.
Top and bottom margins are at a distance of 1 inch, and inside and outside margins are at a distance of 2 inches from the page border.
fe
Wide
Top and bottom margins are at a distance of 1 inch, and inside and outside margins are at a distance of 0.5 inches from the page border.
se
Moderate
ea
Narrow
Do
Description
re
n
Margin Type
Office 2003 Default
Top and bottom margins are at a distance of 1 inch, and inside and outside margins are at a distance of 1.25 inches from the page border.
Lesson 7: Controlling Page Appearance
Pl
Top and bottom margins are at a distance of 1 inch, inside margins are at
a distance of 1.25 inches and outside margins are at a distance of 1 inch
from the page border.
Re
Mirrored
157
LESSON 7
Page Orientation
te
op
r
i
al
y
Definition:
Page orientation is a page setup option that determines whether the information on a
page will be laid out vertically, in Portrait orientation, or horizontally, in Landscape
orientation. The orientation setting affects the overall layout of the text on a page and
affects how the document will print.
Ma
Example:
tC
Figure 7-2: Page Orientation can be either vertical or horizontal.
Vertical Alignment
Option
Positions the page’s text in the center of the page, providing equal
amounts of white space above and below the text.
Justified
Adds equal amounts of white space between each paragraph so that text
appears to fill the page.
ea
Aligns the text along the bottom margin of the page.
Pl
Re
No
Center
se
Positions the text along the top margin of the page. It is the default vertical alignment setting.
fe
Top
Bottom
158
Description
Do
re
n
ce
Vertical Alignment Options
You can control how text on a page is aligned vertically between the top and bottom
margins. The options are similar to the horizontal alignment options available for paragraph formatting. Vertical alignment options work the same way for both Portrait and
Landscape page orientations.
Microsoft® Office Word 2007 - Level 1 (Second Edition)
LESSON 7
Paper Size
te
op
r
i
al
y
The Paper Size option modifies the width and height of the document to suit the paper used
when printing. In Word, the Size options are found on the Page Layout tab, which is located in
the Page Setup group. The Size drop-down list contains various paper sizes to resize your
document. You can also specify a custom paper size by selecting the More Paper Sizes option
and setting the necessary options in the Page Setup dialog box.
Paper Size Options
The Size drop-down list in the Page Setup group of the Page Layout tab has a number
of paper size options. Each option has a predefined width and height specified in
inches. The sizes correspond to standard sizes for paper and envelopes that are commonly used in business correspondence in various countries and geographic regions.
The following table lists some of the most common paper and envelope sizes.
Width In Inches
Height In Inches
Letter
8.5
Legal
8.5
Executive
7.25
A3
11.69
A4
8.27
A5
5.83
11 x 17
11
17
Envelope #10
4.12
9.5
Ma
Paper Size
11
14
10.5
16.54
The Page Setup Dialog Box
No
ce
8.27
tC
11.69
Do
re
n
The Page Setup dialog box contains options to modify the overall page layout of the
document.
Margins
Enables you to set margins and orientation and to determine the content capacity of the page. It also contains options to specify whether the suggested
modification is to be applied to the whole document or just to specific pages.
Paper
Allows you to modify the paper size and the paper source for printing. It also
enables you to access the Display tab in the Word Options dialog box, which
contains options to set the display of the paper for printing.
Lesson 7: Controlling Page Appearance
ea
Pl
Enables you to modify the layout of a particular section and set different styles
for the heading regions. It also lets you set a page border.
Re
Layout
se
Description
fe
Page Setup Tab
159
LESSON 7
Page Breaks
te
op
r
i
al
y
A page break is used to split the content of a page at a specific location and move the remaining content to the next page automatically. Word inserts automatic, or soft, page breaks at the
end of each page to accommodate additional text when there is too much of it to fit on a
single page. However, there may be times when you want to force a page break in order to
control where a page ends. In those cases, you can insert a manual page break using the
Breaks button in the Page Setup group of the Page Layout tab, or by pressing Ctrl+Enter. A
manual page break appears as a non-printing dotted line.
Automatic page breaks are primarily determined by margin settings in the Page Setup dialog box. Automatic page
breaks display differently in different document views.
How to Control Page Layout
Ma
Procedure Reference: Insert or Delete a Manual Page Break
To insert or delete a manual page break:
2.
On the Page Layout tab, in the Page Setup group, click Breaks and select Page, or
press Ctrl+Enter.
3.
You can delete a manual page break by pressing Backspace or Delete as you
would delete any other typed character. It is helpful to show the formatting marks
so that the page break is visible.
tC
Place the insertion point where you want to insert a manual page break.
ce
1.
To control page layout:
2.
Change the page orientation.
•
On the Page Layout tab in editing view or the Print Preview tab in Print Preview, in the Page Setup group, click Orientation and select Portrait or
Landscape.
On the Page Layout tab, in the Page Setup group, click the Dialog Box
Launcher button.
b.
In the Page Setup dialog box, on the Margins tab, in the Orientation
section, select Portrait or Landscape to position the page vertically or
horizontally, respectively.
c.
Click OK.
se
a.
Pl
Set the paper size.
•
On the Page Layout tab in editing view or the Print Preview tab in Print Preview, in the Page Setup group, click Size and select a size.
•
4.
Or, change the page orientation using the Page Setup dialog box.
ea
fe
Re
3.
Do
Open the document in which the page layout needs to be changed.
re
n
1.
•
160
No
Procedure Reference: Control Page Layout
Or, open the Page Setup dialog box, select the Paper tab, and select the paper
size from the Paper Size drop-down list. To customize the paper size, enter
the custom values in the Width and Height text boxes. Click OK.
Set the page margins.
Microsoft® Office Word 2007 - Level 1 (Second Edition)
LESSON 7
On the Page Layout tab in the Editing view or the Print Preview tab in Print
Preview, in the Page Setup group, click Margins and select an option.
•
Drag the margin markers on the vertical and horizontal rulers. To set an
exact measurement, hold Alt as you drag.
te
op
r
i
al
y
•
The left and right margin markers might be obscured by the left and right indent markers,
so you might want to temporarily move the indent markers before setting the margins.
•
Set the vertical alignment.
a.
Open the Page Setup dialog box and select the Layout tab.
b.
In the Page section, select the desired alignment from the Vertical Alignment
drop-down list and click OK.
Ma
5.
Or, open the Page Setup dialog box, and on the Margins tab, specify the
measurements for the Top, Bottom, Left, and Right margins in the respective
spin boxes, and click OK.
•
Stockholder Report.docx
tC
Do
Data Files:
re
n
Inserting Manual Page Breaks
No
ACTIVITY 7-1
ce
White Space Between Pages
After inserting a page break, there is generally extra white space at the bottom of the
page before the break. You can hide the white space between pages to reduce the
amount of scrolling you need to do to see all the document text when you are in Print
Layout view. When you position the mouse pointer between the two pages, the mouse
pointer changes into a Hide White Space icon or a Show White Space icon. You can
toggle between Hide White Space and Show White Space modes by double-clicking or
by pressing Ctrl and clicking.
se
Before You Begin:
From the C:\084893Data\Controlling Page Appearance folder, open Stockholder Report.docx.
Lesson 7: Controlling Page Appearance
ea
Pl
Re
fe
Scenario:
The annual report’s editor says that you can use four pages of the report for your overview
text. The document contains multiple pages. The only problem is that the pages are breaking in
places that you don’t want them to and separating data that really needs to stay together. After
you adjust the page breaks, you would like to be able to scroll quickly through the document
to check the overall text flow from page to page, to see if there are any pages that you should
combine.
161
LESSON 7
What You Do
How You Do It
1.
a. Use the Window Frame to verify that
there are currently four pages in the
document.
te
op
r
i
al
y
Insert a manual page break before
the heading “REVIEW”.
b. Scroll down to the bottom of page 1.
c. At the bottom of page 1, place the insertion point before the heading “REVIEW
OF YEAR RESULTS”.
2.
Ma
d. On the Page Layout tab, in the Page Setup
group, click Breaks and select Page.
a. Scroll down to the end of page 2.
Insert a manual page break before
the heading “ADVANTAGE”.
162
tC
c. Press Ctrl+Enter to insert a manual page
break.
No
d. Verify that there are now five pages in
the document.
Do
ea
Pl
Re
4.
se
Hide the white space between page
2 and page 3.
fe
3.
re
n
ce
b. On page 2, place the insertion point
before the heading “ADVANTAGE”.
The “ADVANTAGE” text can fit on the
preceding page. Delete the extra
page break.
a. Position the insertion point over the
automatic page break between pages 2
and 3 to display the Hide White Space
icon.
b. Double-click to hide the extra white
space between the two pages.
c. Scroll up and down to verify that you can
see continuous text.
a. At the end of page 2, place the insertion
point before the Page Break formatting
mark.
b. Press Delete to delete the page break.
Microsoft® Office Word 2007 - Level 1 (Second Edition)
LESSON 7
5.
Redisplay the white space between
page 2 and page 3.
a. Scroll down to display the end of page 2.
te
op
r
i
al
y
b. Position the mouse pointer over the
automatic page break between pages 2
and 3 to display the Show White Space
icon.
c. Double-click to redisplay the white space.
Changing a Document’s Layout
Data Files:
•
Certificate.docx
tC
ACTIVITY 7-2
Ma
d. Save the file as My Stockholder Report.
docx and close the document.
Conditions:
You have a printer installed.
No
ce
Before You Begin:
From the C:\084893Data\Controlling Page Appearance folder, open Certificate.docx.
Do
b. On the View tab, in the Zoom group, click
Zoom.
Pl
Re
Lesson 7: Controlling Page Appearance
a. On the Page Layout tab, in the Page Setup
group, click Orientation and select
Landscape.
ea
Set the document’s orientation to
Landscape.
fe
1.
How You Do It
se
What You Do
re
n
Scenario:
Your manager has put you in charge of creating a new sales certificate. She has provided you
with the text and requested that you print the certificate horizontally on 11” x 17” paper. Also,
she wants you to include at least 1.5 inches of blank space at the top and bottom of the
certificate. You want to neatly align the content in the certificate.
163
LESSON 7
Ma
2.
te
op
r
i
al
y
c. In the Zoom dialog box, in the Zoom To
section, select Whole Page and click OK.
a. On the Page Layout tab, in the Page Setup
group, click the Dialog Box Launcher
button.
Change the size of the paper to 11″
x 17″.
164
tC
No
c. From the Paper Size drop-down list,
select 11x17.
ea
se
Do
d. Verify that the Height and Width values
are 11 and 17 and click OK.
Pl
Re
fe
re
n
ce
b. In the Page Setup dialog box, select the
Paper tab.
Microsoft® Office Word 2007 - Level 1 (Second Edition)
LESSON 7
3.
Set the top and bottom margins of
the document to 1.5 inches.
a. In the Page Setup group, click the Dialog
Box Launcher button.
te
op
r
i
al
y
b. Select the Margins tab.
c. Triple-click in the Top text box, type
1.5 and press Tab.
d. In the Bottom text box, type 1.5 and
press Tab.
e. Click OK.
4.
Center the text vertically on the
page.
a. In the Page Setup group, click the Dialog
Box Launcher button.
Ma
b. In the Page Setup dialog box, select the
Layout tab.
tC
No
Do
re
n
ce
c. In the Page section, from the Vertical
Alignment drop-down list, select Center
and click OK.
Lesson 7: Controlling Page Appearance
se
ea
Pl
Re
fe
d. Save the file as My Certificate.docx
165
LESSON 7
TOPIC B
te
op
r
i
al
y
Apply a Page Border and Color
You have changed the page orientation, paper size, and margins. Now, you want to enhance
the background elements in the document. In this topic, you will apply a page border and color
to a Word document.
Colored and bordered pages not only add visual interest to a document, but they also make the
content stand out clearly. This can help readers locate critical ideas quickly and stay focused as
they read it.
Page Borders
No
Do
se
ea
Pl
Re
fe
re
n
ce
Example:
tC
Ma
Definition:
Page Borders are formatting tools that apply an outline to a document. Page Borders
can be of any style, color, or width. Borders can be applied either to the whole document or to a specific section. Page borders can only be applied in the margin area of a
document. You can apply a Page Border to a document using the options in the Borders And Shading dialog box. By default, Word puts a border on all four sides of the
document, but you can remove any of the borders if you prefer.
Figure 7-3: A border applied to the entire page.
Border Types
Word provides users with two types of borders: Line borders and Art borders.
166
Microsoft® Office Word 2007 - Level 1 (Second Edition)
LESSON 7
Description
Line Borders
Word applies a Line page border as a default border style. When you select a line
page border, it is applied as a box or as a custom style. The style, color, and width
of the line can be modified.
Art Borders
Word contains numerous seasonal and professional Art page borders that can serve
as printed frames for certificates, awards, or diplomas. When you select an Art
page border, it’s applied as a box or custom style. The size and color of the art in
the border can also be modified.
te
op
r
i
al
y
Border Type
Page Color
Ma
Page Color is a formatting tool that applies a shade to the background of the entire page. You
can apply any shade to the page by choosing the desired color from the Page Color gallery. In
Word, you can access the Page Color option by clicking Page Color in the Page Background
group of the Page Layout tab.
Procedure Reference: Apply a Page Border
To apply a border to a page:
tC
How to Apply a Page Border and Color
2.
Display the Page Border tab of the Borders And Shading dialog box.
•
On the Home tab, in the Paragraph group, from the Borders drop-down list,
select Borders And Shading and select the Page Border tab.
•
Do
Set border options.
•
Select the desired Setting, Style, Color, and Width options for a line page
border.
From the Art drop-down list, select an art border and set the color and width
options.
se
3.
Or, on the Page Layout tab, in the Page Background group, click Page
Borders.
re
n
•
No
Select the page in which the border needs to be displayed.
ce
1.
5.
Click OK to apply the border.
ea
If necessary, in the Preview area, click the border buttons to add or remove
borders. This sets the new style as a custom border that is applied to all of the
borders in the document.
fe
4.
To apply a page color:
Pl
Re
Procedure Reference: Apply a Page Color
1.
On the Page Layout tab, in the Page Background group, click Page Color.
2.
From the Page Color gallery, select the desired shade.
3.
If necessary, from the Page Color gallery, select More Colors and select a different color.
Lesson 7: Controlling Page Appearance
167
ACTIVITY 7-3
Applying an Art Page Border
Before You Begin:
My Certificate.docx is open.
te
op
r
i
al
y
LESSON 7
Scenario:
The content of the sales certificate has been approved by your manager. You now have to
make the certificate visually appealing so it looks impressive when presented to the employees.
Since your company has installed a new color printer, you have the option of using colors to
enhance the visual appeal.
1.
How You Do It
Ma
What You Do
a. On the Page Layout tab, in the Page Background group, click Page Borders.
Apply an Art page border to the top
and bottom of the page.
se
tC
No
Do
c. From the Color drop-down list, in the
Standard Colors section, select the first
shade to make the border dark red.
d. Click OK to apply the Art border and to
close the dialog box.
a. On the Page Layout tab, in the Page Background group, click Page Color.
Pl
Re
168
ea
Apply a background color to the
certificate.
fe
2.
re
n
ce
b. In the Borders And Shading dialog box, in
the Art drop-down list, scroll down and
select the Music Notes border.
Microsoft® Office Word 2007 - Level 1 (Second Edition)
LESSON 7
te
op
r
i
al
y
b. In the Page Color gallery, in the Theme
Colors section, in the third row in the last
column, select Orange, Accent 6, Lighter
60%.
TOPIC C
Add Watermarks
tC
Ma
c. Save the document and close it.
No
ce
In the previous topic you applied page background options such as page color and a page
border. Another way to modify the page background is to add a watermark. In this topic, you
will add a watermark.
Do
se
fe
Watermarks
re
n
Sometimes you need to ensure that warning or informational messages appear throughout a
document, and, in particular, that the messages appear with the text itself, not only in the margins as with a header or footer. For example, you might need to protect your copyright to a
particular document by ensuring that the word “copyright” appears on any photocopy made
from the document. Or, there might be a legal requirement that you differentiate draft or internal material from material that is publicly available. A watermark is a common publication
convention that enables you to meet these requirements, protect your information, and produce
professional-looking document output in a simple and effective way.
Lesson 7: Controlling Page Appearance
ea
Pl
Re
Definition:
A watermark is a translucent image of either text or a graphic that appears behind the
primary text in a document when the document is printed or previewed. In Word, if
you add a watermark to a document, it is applied to all pages in that document. To
control watermarks, on the Page Layout tab, in the Page Background group, click
Watermark.
169
LESSON 7
Ma
te
op
r
i
al
y
Example:
Figure 7-4: Text as a watermark.
tC
The Printed Watermark Dialog Box
Do
re
n
How to Add a Watermark
No
ce
The Printed Watermark dialog box contains options you can use to customize the watermarks
that are displayed in a document. You can select a picture to use as a picture watermark, and
you can scale the picture and adjust its translucency. You can specify the text and font appearance for a text watermark, and you can decide if text watermarks run diagonally or
horizontally.
Procedure Reference: Add a Text Watermark
To add a text watermark:
2.
In the Watermark gallery, select one of the default watermarks, or click Custom
Watermark.
If you clicked Custom Watermark, in the Printed Watermark dialog box, select the
Text Watermark option and, if desired, customize the watermark.
4.
Click OK to insert the text watermark.
ea
3.
Pl
Re
se
On the Page Layout tab, in the Page Background group, click Watermark.
fe
1.
Procedure Reference: Add a Picture Watermark
170
To add a picture watermark:
1.
On the Page Layout tab, in the Page Background group, click Watermark.
2.
In the Watermark gallery, click Custom Watermark.
Microsoft® Office Word 2007 - Level 1 (Second Edition)
LESSON 7
In the Printed Watermark dialog box, select the Picture Watermark option and
then click Select Picture.
4.
In the Insert Picture dialog box, select a picture and click Insert.
5.
If necessary, customize the picture watermark.
•
In the Scale text box, enter a value to which the picture should be scaled, or
from the drop-down list, select a predefined value.
•
6.
te
op
r
i
al
y
3.
Check or uncheck the Washout check box to set the picture as opaque or
translucent.
Click OK to insert the picture watermark.
Removing a Watermark
To remove a watermark, in the Page Layout tab, from the Page Background group,
click Watermark and click Remove Watermark.
Adding a Text Watermark
Data Files:
•
Rates of Interest.docx
tC
Ma
ACTIVITY 7-4
No
ce
Before You Begin:
From the C:\084893Data\Controlling Page Appearance folder, open Rates of Interest.docx.
Display the Printed Watermark dialog box.
Lesson 7: Controlling Page Appearance
Do
a. On the Page Layout tab, in the Page Background group, click Watermark.
ea
b. In the Watermark gallery, select Custom
Watermark.
Pl
Re
fe
1.
How You Do It
se
What You Do
re
n
Scenario:
The Rates of Interest document is ready to be reviewed. However, the last time you sent something for review, it was printed without your approval and several thousand copies had to be
thrown away. To ensure that doesn’t happen again, you should mark the document as an
INTERNAL DRAFT so that there is no question about the document’s current status.
171
LESSON 7
2.
a. In the Printed Watermark dialog box,
select Text Watermark.
Apply the text “INTERNAL DRAFT”
as a watermark.
te
op
r
i
al
y
b. In the Text text box, select ASAP, which
is displayed by default.
c. Type INTERNAL DRAFT
d. Click the Font drop-down arrow.
e. Press A to display the fonts that start
with A.
Select Arial to change the font to Arial.
172
No
Do
g. Click OK to add the text watermark to the
document’s background.
i.
Save the document as My Rates of
Interest.docx and close it.
ea
se
h. Scroll down to view the result.
Pl
Re
fe
re
n
ce
tC
Ma
f.
Microsoft® Office Word 2007 - Level 1 (Second Edition)
LESSON 7
Add Headers and Footers
te
op
r
i
al
y
TOPIC D
You have added background information to your document. Another way to add consistent
information throughout the document is to add headers and footers. In this topic, you will add
headers and footers.
You just got back from a trade show and have a stack of papers to review. One article in particular is very interesting, but nowhere in the document is there any indication of who wrote it
or how many pages it has. Adding page numbers and other useful information to the header
and footer area helps to orient the reader to the information contained in the document.
Headers and Footers
tC
No
Do
se
ea
fe
re
n
ce
Ma
A header is the area in a page’s top margin and a footer is the area in a page’s bottom margin.
Headers and footers can contain textual or graphical information that is common to all or to
some of the pages in a document. Common header and footer information includes titles,
dates, and page numbers. This information can be entered into one of the three sections of
headers and footers, namely, the Left, Center, and Right sections. The Header & Footer group
within the Insert tab is used to insert the desired header and footer information into a
document.
Figure 7-5: A document with a header and a footer inserted.
Pl
Re
Header & Footer Tools Design Contextual Tab
The Header & Footer Tools Design contextual tab contains numerous option groups to work
with in the header and footer.
Lesson 7: Controlling Page Appearance
173
LESSON 7
Description
Header & Footer
Contains built-in header, footer, and page number styles that can be used to format the header and footer.
Insert
Contains options which enable you to insert objects like pictures and clip art.
You can also insert the date and time using options in this group.
Navigation
Contains options to navigate to the header, footer, and the previous or next sections in a document.
Options
Contains options to apply different formatting to the header or footer in the first
page, odd and even pages, or to the entire document.
Position
Contains options to modify the size of the header and footer. This group also
allows you to align the content of the header or footer.
Close
Enables you to close the header or footer section and return to normal document
editing.
Ma
te
op
r
i
al
y
Group
Page Number Options
Fields
tC
ce
In Word, you can insert page numbers by using the Page Number drop-down list in the Header
& Footer group of the Insert tab or from the Header & Footer Tools Design contextual tab.
The Page Numbers drop-down list provides options to insert and modify the page numbers at
the top or bottom of pages, or in the left or right margins. You can add custom formats to the
page numbers or remove page numbers entirely.
No
Do
re
n
A field is a placeholder for data that is used to dynamically represent information. A
field may include the current date, time, or page number. Though fields are normally
inserted in the header and footer sections of the document, they can be inserted
between content, too. When the insertion point is within a field, the field’s background
turns gray to help identify it as a field. Usually, a field is automatically updated based
on the information provided. To manually update a field, you can press F9. Also, using
the Field dialog box enables you to insert fields quickly.
174
•
A, B, C,...
•
i, ii, iii,...
•
I, II, III,...
se
a, b, c,...
ea
•
Pl
Re
fe
Page Number Format Options
Using the Header & Footer group of the Header & Footer Tools Design contextual tab,
you can change the page number formats from the default “1, 2, 3” format to any of
the following Arabic or Roman numeral formats:
•
-1-, -2-, -3-,...
Microsoft® Office Word 2007 - Level 1 (Second Edition)
LESSON 7
How to Add Headers and Footers
To add headers and footers to a document:
•
Double-click either the top or bottom of the document within the text area to
display the header or the footer section.
•
Or, on the Insert tab, in the Header & Footer group, click Header or Footer
and select Edit Header or Edit Footer.
Insert the header or footer text.
•
In the appropriate Header or Footer section, type the text.
•
If necessary, align your text to the center or the right of the header or footer
section.
•
—
Place the insertion pointer in the header section and press Tab.
—
Or, use the Alignment Tab dialog box.
Or, insert a built-in header or footer style.
a.
On the Header & Footer Tools Design contextual tab, in the Header &
Footer group, click Header and select a built-in header or footer style.
b.
Select the default text and type the header or footer text.
tC
2.
Display the header and footer section.
Ma
1.
te
op
r
i
al
y
Procedure Reference: Add Headers and Footers
To change page number formats:
ce
Procedure Reference: Change Page Number Formats
2.
On the Header & Footer Tools Design contextual tab, in the Header & Footer
group, click Page Number and select Format Page Numbers.
3.
In the Page Number Format dialog box, from the Number Format drop-down list,
select the desired format.
4.
Click OK to set the new format and to close the dialog box.
Do
No
Display the header or footer containing the page number.
re
n
1.
Procedure Reference: Add a Date and Time to the Header or Footer
se
To add a date and time to the header or footer:
2.
On the Header & Footer Tools Design contextual tab, in the Insert group, click
Date & Time.
3.
In the Date And Time dialog box, in the Available Formats list box, select the
desired date and time format.
Pl
Re
ea
Select the header or footer in which the date and time needs to be included.
fe
1.
4.
If necessary, check the Update Automatically check box, to update the date and
time automatically according to the computer’s system settings.
5.
Click OK to insert the date and time.
6.
To modify the date and time format, select the date and time item in the header or
footer, click Date & Time, and select a different format.
Lesson 7: Controlling Page Appearance
175
LESSON 7
Procedure Reference: Modify Headers or Footers
To modify a header or footer:
Double-click the header or footer you want to modify.
2.
On the Header & Footer Tools Design contextual tab, set the necessary formats.
•
In the Header & Footer group, select a built-in format for the header or
footer.
•
In the Insert group, insert the date and time, a picture, or clip art.
•
In the Navigation group, select an option to navigate to the desired header or
footer in the current document section or another document section.
•
In the Options group, specify the format for headers and footers on specific
pages.
Check the Different First Page check box to apply a different header and
footer to the first page of the document.
—
Check the Different Odd & Even Pages check box to apply a different
set of formats to the header and footer in the odd and even pages.
—
Check or uncheck the Show Document Text check box to display or
hide the text in the document.
Ma
—
In the Position group, set the header and footer dimensions.
In the Header From Top spin box, specify the desired values using the
up and down arrows.
—
In the Footer From Bottom spin box, specify the desired values using
the up and down arrows.
—
Click Insert Alignment Tab, and in the Alignment Tab dialog box, set
the alignment and leaders.
No
Do
Pl
ea
se
re
n
In the Close group, click Close Header And Footer.
fe
Re
176
tC
—
ce
•
3.
te
op
r
i
al
y
1.
Microsoft® Office Word 2007 - Level 1 (Second Edition)
LESSON 7
Adding Headers and Footers
Data Files:
•
Annual Overview.docx
te
op
r
i
al
y
ACTIVITY 7-5
Before You Begin:
From the C:\084893Data\Controlling Page Appearance folder, open Annual Overview.docx.
Ma
Scenario:
Your manager is giving a presentation at the Relo Expo conference and would like to leave the
company’s annual overview behind as a handout so potential clients can peruse last year’s
successes. Your job is to make the handout more identifiable as a Burke Properties document.
You find it would be helpful if the page numbers and current date and time are displayed in
the handout. Additionally, you wish to draw special attention to the first page.
How You Do It
1.
a. Double-click the top of the document to
display the header and footer sections.
Insert the text “Burke Properties
Overview” at the center of the
header.
tC
What You Do
ce
b. Press Tab to move the insertion point to
the center of the header section.
a. On the Header & Footer Tools Design contextual tab, in the Navigation group, click
Go To Footer.
Do
Add a footer that includes the current date and time, the conference
name, and the page number.
re
n
2.
No
c. Type BURKE PROPERTIES OVERVIEW
b. In the Header & Footer group, click Page
Number and select Bottom Of Page.
Lesson 7: Controlling Page Appearance
se
ea
d. In the footer section, type Relo Expo and
press Tab to separate the page number
from the text.
e. In the Insert group, click Date & Time.
Pl
Re
fe
c. In the Bottom Of Page gallery, scroll
down, click Accent Bar 4.
177
LESSON 7
In the Date And Time dialog box, in the
Available Formats list box, select the first
format that includes both the date and
the time.
Ma
te
op
r
i
al
y
f.
g. Click OK to insert the selected date and
time.
178
tC
No
Do
se
ea
Pl
Re
fe
re
n
ce
h. Press Tab to center the date and time.
Microsoft® Office Word 2007 - Level 1 (Second Edition)
LESSON 7
3.
Add a different header and footer
to the first page.
a. In the Options group, check the Different
First Page check box.
te
op
r
i
al
y
b. In the Navigation group, click Go To
Header.
c. In the Header & Footer group, click
Header and select Alphabet.
Ma
d. In the Header section, triple-click the
existing heading to select it and type
BURKE PROPERTIES ANNUAL OVERVIEW
e. In the Header & Footer group, click
Footer and select Alphabet.
Click the text “[Type text]” and type
RELO EXPO
tC
f.
Lesson 7: Controlling Page Appearance
No
Do
se
ea
Pl
Re
fe
re
n
ce
g. In the Close group, click Close Header
And Footer.
179
LESSON 7
4.
a. Click the Office button and choose
Print→Print Preview.
Preview the new header and footer
content.
Ma
te
op
r
i
al
y
b. On the Print Preview tab, in the Zoom
group, click Two Pages to verify that you
can see the separate headers and footers.
c. Close Print Preview.
tC
ACTIVITY 7-6
No
ce
d. Save the file as My Annual
Overview.docx
Before You Begin:
My Annual Overview.docx is open.
Do
re
n
Modifying Headers and Footers
180
se
ea
Pl
Re
fe
Scenario:
As you read through your document, you find that only the first page of the document briefs
you about the overview, and the remaining pages include general information on Burke
Properties. Also, you decide to change the page number format.
Microsoft® Office Word 2007 - Level 1 (Second Edition)
LESSON 7
How You Do It
1.
a. At the top of the second page, doubleclick the header section to edit the text
in the header area.
In the body of the document, change
the header to read “Burke Properties Annual Report”.
te
op
r
i
al
y
What You Do
b. Select the word “Overview” and press
Delete.
c. Type ANNUAL REPORT
2.
Edit the footer to display only the
page number at the center.
a. On the Header & Footer Tools Design contextual tab, in the Navigation group, click
Go To Footer.
Ma
b. Select all the text in the footer section
and press Delete.
c. Press Tab to place the insertion point in
the center.
tC
d. In the Header & Footer group, click Page
Number and select Bottom Of Page.
In the Header & Footer group, click Page
Number and select Format Page
Numbers.
re
n
f.
No
ce
e. In the Bottom Of Page gallery, scroll
down and, from the Plain Number section, select Brackets 1.
Lesson 7: Controlling Page Appearance
Do
se
ea
h. Click OK to apply the changes.
Pl
Re
fe
g. In the Page Number Format dialog box,
from the Number Format drop-down list,
select the second option.
i.
In the Close group, click Close Header
And Footer.
j.
Preview, save, and close the file.
181
LESSON 7
Lesson 7 Follow-up
te
op
r
i
al
y
In this lesson, you used a variety of page setup methods to arrange content on the page. You
set the page orientation, changed margin settings, added headers and footers, applied page borders, and inserted page breaks. These skills will help you to present the document with suitable
finishing touches.
How will you take advantage of the various page layout options to enhance printed
documents such as letters, reports, handouts, minutes, or itineraries?
2.
Considering your job needs, do you anticipate modifying a document’s page setup
options when you first create the document or waiting until you are almost finished
with it? Why?
182
tC
No
Do
se
ea
Pl
Re
fe
re
n
ce
Ma
1.
Microsoft® Office Word 2007 - Level 1 (Second Edition)
LESSON 8
te
op
r
i
al
y
LESSON 8
Lesson Time
45 minutes
Proofing a Document
Enhance textual meaning using the Thesaurus.
•
Customize AutoCorrect options.
Lesson 8: Proofing a Document
Do
se
ea
Pl
Re
fe
re
n
ce
•
No
You will:
•
Check spelling, grammar, and word count in a document.
tC
Ma
In this lesson, you will proof documents to make them more accurate.
183
LESSON 8
Introduction
te
op
r
i
al
y
You have entered and formatted text, tables, and graphics in a document, and adjusted the
overall document appearance. The final step before your document is complete is to proofread
the document and make corrections and updates as needed. In this lesson, you will use proofing tools that help you correct common typing mistakes and enhance your word choices.
There is no substitute for thoroughly proofreading your own work and applying your own creative judgement to finalize its contents. However, Microsoft Word’s built-in proofing tools can
simplify some of the mechanics of proofreading, and can also help you revise your document
electronically without having to reach for a dictionary or other reference book. By using these
proofing tools effectively, you can ensure your document’s accuracy while you streamline the
overall process of proofreading and finalizing a document.
Ma
TOPIC A
Check Spelling, Grammar, and Word
Count
tC
ce
In this lesson, you will proofread documents to make them more accurate and more interesting.
Probably the single most common proofreading task is to check the spelling in a document,
followed closely by checking grammar and overall document length. In this topic, you will
check the spelling, grammar, and word count.
No
Do
re
n
One of the many benefits of electronic word processing is that it makes it easy to correct the
minor spelling and other typographical errors that every typist makes. Plus, it can save you
valuable time because you can thoroughly review the overall document rather than spending
your time identifying and correcting spelling and usage manually as you go. No matter how
you choose to use them, Word’s spelling, grammar, and text count tools can make your documents more accurate, and speed the process of identifying and eliminating typographical
mistakes.
Spelling and Grammar Check Options
se
ea
fe
Microsoft Word provides electronic tools that enable you to check the spelling and grammar
usage in your document against a built-in word list and set of grammar rules. To check your
work, you can click the Spelling & Grammar button in the Proofing group on the Review tab.
You can also click the Spelling And Grammar Check button on the Microsoft Office Window
Frame and choose the desired option from the shortcut menu. Another option is to right-click
the underlined word and choose the desired option from the shortcut menu.
184
Pl
Re
Options in the Spelling and Grammar Dialog Box
The Spelling And Grammar dialog box offers various options to help you edit grammar
and spelling.
Microsoft® Office Word 2007 - Level 1 (Second Edition)
LESSON 8
Function
Not In Dictionary
Displays the words or sentences that have been identified as errors by
Word.
Suggestions
Displays a list of possible correct options.
Check Grammar
Enables you to check for erroneous grammar along with a spell check.
Ignore Once
Enables you to skip the occurrence of the error this time but find the
next occurrence. In this way, you can correct found text on a case-bycase basis.
Ignore All/Ignore
Rule
Enables you to leave all instances of the highlighted text unchanged and
continue searching for the next error.
Add To Dictionary
Enables you to add the occurrence to the dictionary. This will allow
Word to recognize the occurrence as correct any time you spell check in
the future.
Change
Replaces the found text with the selected correction in the Suggestions
list box.
Change All
Replaces all occurrences of the highlighted text with the suggested word
at the same time. While using the Change All option, users need to be
careful as you can easily make changes you didn’t intend to make.
AutoCorrect
Replaces all instances of erroneous words or sentences automatically.
Options
Displays the Proofing tab in the Word Options dialog box. This tab contains options to check and proof the document for errors.
Undo
Enables you to undo the previous edit if you want to revert to the original text.
tC
No
The Main Dictionary
ce
Ma
te
op
r
i
al
y
Option
Do
re
n
Word uses the Main Dictionary to check a document’s spelling. As you type, or when you run
the Spelling And Grammar tool, Word compares your spelling to the list of terms stored in the
main dictionary. If you have misspelled a word, or if you have used a specialized word that is
not in the dictionary, the spell checker will give you a list of possible suggestions.
se
ea
fe
Custom Dictionaries
You can also create custom dictionaries that include words specific to a particular subject matter. You can add entries to Word’s default custom dictionary, Custom.dic, or
you can create or import other custom dictionaries. To manage custom dictionaries,
open the Word Options dialog box, select the Proofing tab, and click Custom
Dictionaries. For more information on custom dictionaries, see the Microsoft Office
Word Help system.
Pl
Re
The Readability Statistics Dialog Box
Readability statistics are ratings that provide a measurement of the complexity level of text. If
you have enabled readability statistics in Word, the Readability Statistics dialog box is displayed after you check the grammar. This dialog box provides detailed information on the total
and average number of words, sentences, and paragraphs in your document, and reports the
readability scores for the content in your document.
Lesson 8: Proofing a Document
185
LESSON 8
te
op
r
i
al
y
Grading of Readability Scores
There are different readability analysis methods. The readability scores in Word are
based on the Flesch Reading Ease and the Flesch-Kincaid Grade Level scales. These
scales help to evaluate the readability and complexity of the document based on the
average number of syllables per word and words per sentence. Flesch Reading Ease
scores text as a single number, with higher scores indicating easier reading. The
Flesch-Kincaid Grade Level categorizes the text according to United States public
school grade-level reading standards. The two scales use slightly different formulas and
have a reverse correlation; a low reading ease score correlates to a high grade level
and vice versa. The readability scores should match the target reading audience; some
government agencies require that public documents match a target readability range.
In addition, Word’s readability statistics also tell you how many sentences use passive
voice (“the ball was thrown by the boy”) instead of active voice (“the boy threw the
ball”). Most writing experts recommend using active voice in the majority of
sentences.
Ma
The Word Count Dialog Box
tC
Microsoft Word can help you ensure that a document you write fits within content length limits by providing you with a running word count. When you click Words on the Microsoft
Office Window Frame, or the Word Count button in the proofing group, the Word Count dialog
box opens. The Word Count dialog box keeps track of the number of pages, words, characters,
paragraphs, and lines in the document. As you enter text in a document, Word also displays a
live word count on the Microsoft Office Window Frame.
No
ce
How to Check Spelling, Grammar, and Word
Count
Procedure Reference: Enable Readability Statistics
re
n
To enable Readability Statistics:
Click the Office button and click Word Options.
2.
In the Word Options dialog box, select the Proofing category.
3.
In the When Correcting Spelling And Grammar In Word section, check the Show
Readability Statistics check box.
4.
Click OK.
se
Do
1.
fe
Procedure Reference: Check Spelling and Grammar
186
ea
1.
To check spelling and grammar as you type, right-click text with a red wavy
underline (for spelling errors) or a green wavy underline (for grammar errors),
and select the desired correction from the context menu. You can also click the
contextual Spelling And Grammar Check button that appears in the Microsoft
Office Window Frame when Word detects a spelling or grammar error.
2.
Otherwise, to check the entire document, position the insertion point at the beginning of the document; to check a selection, select the text.
3.
Display the Spelling And Grammar dialog box.
•
On the Review tab, in the Proofing group, click Spelling & Grammar.
Pl
Re
To check spelling and grammar:
Microsoft® Office Word 2007 - Level 1 (Second Edition)
LESSON 8
•
Press F7.
•
Or, right-click text with a wavy underline and choose Spelling or Grammar.
Click a button to proceed with the first spelling or grammar error displayed.
5.
Make the appropriate selection depending on whether it is a spelling correction or
a grammar correction.
6.
Sometimes the appropriate correction does not appear. If you need to edit text
directly in the document, click in the document, edit the text, and then click
Resume in the dialog box.
7.
Edit the other errors in the document as per your discretion.
8.
Click OK to close the dialog box when you are done.
9.
If the Readability Statistics dialog box appears, review the statistics and click OK.
Procedure Reference: Check Word Count
Ma
To check the number of words in a Word document:
te
op
r
i
al
y
4.
1.
If you want to count the number of words in a specific section of text, select it;
otherwise, simply place your insertion point anywhere in the document.
2.
Display the Word Count dialog box.
•
On the Review tab, in the Proofing group, click the Word Count button.
•
Or, press Ctrl+Shift+G.
ACTIVITY 8-1
No
When you have finished reviewing the word count, click Close.
tC
On the Microsoft Office Window Frame, click the Words button.
ce
3.
•
Relocation Letter.docx
se
•
Do
Data Files:
re
n
Checking a Document’s Spelling, Grammar, and
Length
ea
fe
Before You Begin
From the C:\084893Data\Proofing a Document folder, open Relocation Letter.docx.
Lesson 8: Proofing a Document
Pl
Re
Scenario:
You typed your text quickly because you know that you can return and correct any mistakes
after you enter all of the document’s content. Now, you need to check for and correct any
typographical errors. You also need to ensure that the document is not overly difficult to read,
and that the overall length of the document will fit in the 300–word limit available to you in
the client mailing.
187
LESSON 8
What You Do
How You Do It
1.
a. Click the Office button and click Word
Options.
te
op
r
i
al
y
Enable the Readability Statistics
option.
b. In the Word Options dialog box, select the
Proofing category.
Ma
c. In the When Correcting Spelling And
Grammar In Word section, check the
Show Readability Statistics check box.
188
tC
No
Do
se
ea
Pl
Re
fe
re
n
ce
d. Click OK to close the Word Options dialog
box.
Microsoft® Office Word 2007 - Level 1 (Second Edition)
LESSON 8
2.
Correct the misspelled word and
the grammar error using the shortcut menu.
a. Verify that the mouse pointer is placed
at the beginning of the document.
te
op
r
i
al
y
b. On the Microsoft Office Window Frame,
click the Spelling And Grammar Check
button.
c. From the shortcut menu, choose Inquiring
to replace the misspelled word.
tC
No
ce
Ma
d. The Readability Statistics dialog box
appears. Click OK to close it.
Re
Lesson 8: Proofing a Document
Do
se
a. Position the insertion point at the beginning of the document.
ea
b. On the Review tab, in the Proofing group,
click Spelling & Grammar.
Pl
Make changes to the document
using the Spelling And Grammar
tool.
fe
3.
re
n
e. In the second sentence, right-click anywhere in the text “objective of Burke
Properties are” and choose objective of
Burke Properties is to correct the grammar error.
189
LESSON 8
te
op
r
i
al
y
c. To replace “complament” with “complement,” click Change.
Ma
d. The next error is a repeated word “the”.
Click Delete to delete the repeated word.
e. Next, the word “TeamServe” is not recognized, but it is correct. Click Ignore All to
skip all occurrences of this word.
190
tC
The word “Beantown” is correct. Click
Ignore All to skip all occurrences of this
word.
No
g. The word “BurkeBuddy” is correct. Click
Ignore All.
i.
The next error indicates a subject-verb
agreement grammar problem. Click
Change to replace “is” with “are”.
j.
Review the Readability Statistics and
click OK to close the Readability Statistics
dialog box.
ea
se
Do
h. Because it should be capitalized, “the”
appears in green. Click Change to replace
“the” with “The”.
Pl
Re
fe
re
n
ce
f.
Microsoft® Office Word 2007 - Level 1 (Second Edition)
LESSON 8
4.
a. In the Proofing group, click the Word
Count button.
Check the number of words in the
full document.
Ma
5.
te
op
r
i
al
y
b. There are 309 words in the document,
which is over the limit. click Close.
a. Triple-click the paragraph that begins
“It is our objective” to select it.
Count the number of words in the
last paragraph.
a. Delete the last paragraph.
No
Delete the last paragraph to reduce
the word count.
ce
6.
tC
b. On the Microsoft Office Window Frame,
verify that the live word count is 30.
b. In the Proofing group, click the Word
Count button.
Do
re
n
c. Verify that you are beneath the word
count limit and click Close.
Lesson 8: Proofing a Document
se
ea
Pl
Re
fe
d. Save the document as My Relocation
Letter.docx
191
LESSON 8
TOPIC B
te
op
r
i
al
y
Enhance Textual Meaning Using the
Thesaurus
Microsoft Word’s built-in spelling checker is an electronic substitute for a physical dictionary.
Similarly, you can use Word’s online Thesaurus as a substitute for another common writer’s
reference, a physical thesaurus. In this topic, you will use Word’s built-in Thesaurus to help
find the right words.
Ma
You have written a draft memo promoting the useful features of your company’s new email
program. When you re-read the draft, you find that you described nearly every feature the
same way — “useful”. A greater variety of words could make the memo more readable, but it
is difficult to think of a large number of appropriate synonyms on your own. A thesaurus is a
specialized reference work that many writers use to help them find alternate word choices, and
with Word’s electronic Thesaurus, this helpful writer’s resource is just a couple of clicks away.
The Thesaurus
192
tC
No
Do
se
ea
Pl
Re
fe
re
n
Example:
ce
Definition:
A thesaurus is a reference tool that gives you a collection of synonyms and antonyms.
Unlike a dictionary, a thesaurus does not provide the definition of a word. Word
includes an electronic Thesaurus that you can use to make alternate choices for the
word usage in your document. Access the Thesaurus from the Proofing group of the
Review tab. The Thesaurus is available in various languages such as English (U.S.),
French (France), and Spanish (International Sort).
Figure 8-1: Word’s Thesaurus is available in different languages.
Microsoft® Office Word 2007 - Level 1 (Second Edition)
LESSON 8
The Research Task Pane
The Research Options Dialog Box
te
op
r
i
al
y
The Research task pane lets you look up information using a wide variety of online references
including various dictionaries and thesauruses. You can even use it to translate text from one
language to another. Because the Research task pane provides access to a number of webbased research books and reference sites, you will need an active Internet connection to use all
of its research options. Open the Research task pane by clicking the Research button on the
Review tab.
The Research Options link located at the bottom of the Research task pane opens the Research
Options dialog box so that you can customize the reference books and research sites you want
to access.
Description
Services
Lists the various reference books and other services you can use to search for
information. Checking the desired Reference Book check box displays options
in the All Reference Books list.
Add Services
Opens the Add Services dialog box that allows you to specify the website
address from where you wish to avail services for research options. The desired
service can also be chosen from the Advertised Services list box. However, the
list of Advertised Services are provided by Microsoft’s Discovery Server. Once
the desired service is added, it is displayed in the Services list box.
Update/Remove
Displays the Update Or Remove Services dialog box that enables the user to
update the reference books or to remove unnecessary reference books from the
Services list box.
Parental Control
Enables you to control the change of options in the Research task pane. Protecting the research options by setting a password on the Parental Control prevents
unauthorized users from making changes to the research services.
Properties
Displays the Service Properties dialog box that contains information about the
name of the reference book, its description, copyright details, and the name of
its provider. The Properties button is active only after a particular reference
book has been selected from the Services list box.
How to Use the Thesaurus
tC
No
Do
se
re
n
ce
Ma
Options
ea
fe
Procedure Reference: Select Synonyms or Antonyms from the Thesaurus
To select synonyms or antonyms from the Thesaurus:
2.
Pl
Select the desired word. Be sure the word is spelled correctly; Word will only
suggest synonyms for words in its dictionary.
Re
1.
Display the Thesaurus in the Research task pane.
•
Right-click the word for which you want to find a synonym or antonym and
choose Synonyms→Thesaurus.
•
On the Review tab, in the Proofing group, click Thesaurus.
•
Hold down Alt and double-click the desired word.
•
Or, press Shift+F7.
Lesson 8: Proofing a Document
193
LESSON 8
3.
In the Research task pane, in the Thesaurus: English (U.S.) list box, point to the
desired synonym or antonym, click the drop-down arrow, and choose Insert to
replace the existing word.
4.
te
op
r
i
al
y
If you accidentally click the word, just click the Previous Search or Back button to return to the
previous list of options.
To choose from a list of the most common synonyms while you are typing, rightclick the word, choose Synonyms, and select the synonym.
Procedure Reference: Change Research Options
To change research options:
1.
On the Review tab, in the Proofing group, click Research.
2.
In the Research task pane, click Research Options.
3.
In the Research Options dialog box, change the research options.
In the Services list box, check or uncheck the desired check box to display
or hide the corresponding service option in the Research task pane.
•
Add the desired service to the available services.
b.
In the Add Services dialog box, in the Address box, type the URL of an
Office 2007 compatible service, or select an advertised service from the
Advertised Services list.
c.
Click Add and follow the on-screen instructions.
If necessary, insert a password to restrict use of the Research task pane.
In the Research Options dialog box, click Parental Control.
b.
In the Parental Control dialog box, check the Turn On Content Filtering
To Make Services Block Offensive Results check box to activate the
Specify A Password For The Parental Control Settings section.
No
a.
In the Specify A Password For The Parental Control Settings text box,
enter the desired password.
d.
Click OK.
ea
se
Do
c.
Pl
fe
Re
194
tC
In the Research Options dialog box, click Add Services.
ce
a.
re
n
•
Ma
•
Microsoft® Office Word 2007 - Level 1 (Second Edition)
LESSON 8
Using the Thesaurus to Replace a Word
Before You Begin
My Relocation Letter.docx is open.
te
op
r
i
al
y
ACTIVITY 8-2
Scenario:
You are writing a letter to your client. You find that some words have been used frequently.
You wish to avoid this rut and replace the words with similar ones. Additionally, you have
decided to add a research service to Word’s Research Options dialog box in order to complete
necessary research quickly when writing client letters.
How You Do It
1.
a. In the second paragraph, right-click the
word “objective”.
Replace the word “objective” in
the second paragraph with its synonym “goal”.
Ma
What You Do
b. Choose Synonyms→goal.
tC
a. Scroll down to the end of the page.
b. In the last paragraph, right-click “fair”
and choose Synonyms→Thesaurus.
No
Replace the word “fair” in the last
paragraph with the word
“impartial”.
ce
2.
Lesson 8: Proofing a Document
Do
se
ea
a. In the Research task pane, click the
Research Options link.
b. In the Research Options dialog box, click
Add Services.
Pl
Add a service to Word’s Research
Options.
Re
3.
fe
re
n
c. In the Research task pane, in the Thesaurus: English (U.S) list box, place the
mouse pointer over “impartial”, click
the drop-down arrow, and select Insert.
195
LESSON 8
te
op
r
i
al
y
c. In the Add Services dialog box, in the
Address text box, type http://mysttechnology.com/myst-service/services/
FindWhatORS
d. Click Add.
e. In the MyST Technology Partners |
FindWhat ORS Setup dialog box, click
Continue and then click Install.
In the Add Services message box, click
OK.
Ma
f.
g. In the Research Options dialog box, scroll
down and verify that FindWhat.com
appears in the list under Research Sites.
TOPIC C
tC
Clear the Research task pane, and save
and close the file.
No
i.
Do
re
n
ce
h. Click OK to close the Research Options
dialog box.
se
Customize AutoCorrect Options
ea
fe
In the first topics in this lesson, you used built-in reference sources to revise and correct your
work. Word’s AutoCorrect options also help you correct your work and you can customize the
options so that the AutoCorrect feature better meets your needs. In this topic, you will customize AutoCorrect options.
196
Pl
Re
The AutoCorrect feature is extremely helpful for catching and fixing minor typos without
requiring you to perform a complete spellcheck. However, the default behavior of AutoCorrect
might not meet your needs. A common example could be specialized words or abbreviations
that you use frequently in your work environment, such as a product or company name with
unique capitalization, that you do not want automatically corrected. The many configurable
options in the AutoCorrect dialog box enable you to set up AutoCorrect to your exact specifications and make your data entry even more accurate and efficient.
Microsoft® Office Word 2007 - Level 1 (Second Edition)
LESSON 8
The AutoCorrect Dialog Box
te
op
r
i
al
y
The AutoCorrect dialog box contains a series of tabs that you can use to control AutoCorrect
behavior.
Tab
Provides Options To:
AutoCorrect
Automatically edit typographical or capitalization errors.
Math AutoCorrect
Automatically replace expressions with the corresponding symbols.
AutoFormat As You
Type
Automatically format the document text as you type.
AutoFormat
Automatically format the style of the document.
Smart Tags
Automatically locate certain data types using hidden smart tags.
Ma
The AutoCorrect Tab
The AutoCorrect tab in the AutoCorrect Options dialog box has a number of options that
enable you to automatically edit the typographical or capitalization errors in a document.
Show AutoCorrect Options
Buttons
Display the AutoCorrect Options button whenever the AutoCorrect feature edits a typographical error.
Correct Two Initial Capitals
Correct errors of entering two initial capitals for a word.
tC
Enables You To:
ce
Option
No
Capitalize First Letter Of Sen- Automatically capitalize the initial letter of every sentence.
tences
Capitalize Names Of Days
Automatically capitalize the initial letter of days.
Do
Automatically capitalize the initial letter of words entered in each cell
of a table.
re
n
Capitalize First Letter Of
Table Cells
Correct Accidental Usage Of
Caps Lock Key
Automatically correct the casing of letters in a sentence if Caps Lock is
accidentally activated.
Exceptions
Make a list of word or characters that you would like to retain as you
type them.
ea
Pl
Re
Lesson 8: Proofing a Document
se
Replace common typographical errors or other key combinations with
designated words or characters. For example, as a shortcut for words
you type frequently, such as your company’s name, you can enter an
abbreviation that Word will expand to the full word or phrase. You
should not add words that already exist in the list as shortcuts for other
words, however. You can add words and special characters to this list,
but you cannot add shapes or other graphic objects.
fe
Replace Text As You Type
197
LESSON 8
How to Customize AutoCorrect Options
To customize AutoCorrect options:
1.
Display the AutoCorrect dialog box.
te
op
r
i
al
y
Procedure Reference: Customize AutoCorrect Options
a.
Click the Office button and click Word Options.
b.
In the Word Options dialog box, select the Proofing category.
c.
In the AutoCorrect Options section, click the AutoCorrect Options button.
In the AutoCorrect dialog box, check or uncheck the desired options.
3.
To add exceptions to AutoCorrect rules, click Exceptions, type your exceptions on
the appropriate tab, and click OK.
4.
To add shortcut text to replace as you type, enter the shortcut text in the Replace
section, enter the full text in the With section, and click Add.
5.
Click OK to close the AutoCorrect dialog box.
6.
Click OK to close the Word Options dialog box.
tC
ACTIVITY 8-3
Ma
2.
•
Relocation Staff.docx
No
Data Files:
ce
Customizing the AutoCorrect Options
Do
re
n
Before You Begin
From the C:\084893Data\Proofing A Document folder, open Relocation Staff.docx.
198
Pl
Display the AutoCorrect dialog box.
Re
1.
ea
fe
What You Do
se
Scenario:
You are creating a document that gives information about Burke Properties. As you will have
multiple occurrences of the word Burke Properties and Facility Request Form, using an abbreviation that automatically changes to the desired word would be helpful. Also, you need to
insert more text into the document.
How You Do It
a. Click the Office button and click Word
Options.
b. In the Word Options dialog box, select the
Proofing category.
c. In the AutoCorrect Options section, click
AutoCorrect Options.
Microsoft® Office Word 2007 - Level 1 (Second Edition)
LESSON 8
Set up data-entry shortcuts for
Burke Properties and Facility
Request Form.
a. In the AutoCorrect dialog box, in the
Replace Text As You Type section, in the
Replace text box, type bp and press Tab
to move to the With text box.
te
op
r
i
al
y
2.
b. In the With text box, type Burke Properties and click Add.
Ma
c. In the Replace text box, type frf and
press Tab to move to the With text box.
tC
ce
d. In the With text box, type Facility
Request Form and click Add.
se
ea
Pl
fe
Re
Lesson 8: Proofing a Document
Do
Click OK to close the Word Options dialog
box.
re
n
f.
No
e. Click OK to close the AutoCorrect dialog
box.
199
LESSON 8
a. In the third paragraph of the document,
under the subtitle, “Facility Request
Form”, type We have created a frf and
press Spacebar.
Include the necessary text in the
document.
te
op
r
i
al
y
3.
b. Verify that frf was replaced with Facility
Request Form.
c. Type for you to use whenever you
require assistance.
d. Position the insertion point below the
heading “Contact Information:”.
Ma
e. Type For information regarding bp and
press Spacebar.
f.
Verify that bp has been changed to
Burke Properties.
g. Type publications, contact:
Lesson 8 Follow-up
tC
No
ce
h. Save the document as My Relocation
Staff.docx and close the document.
2.
How do you think the proofing tools will impact the way you proof documents?
Pl
ea
se
Which proofing tools do you think will help you create more accurate documents?
fe
1.
Re
200
Do
re
n
In this lesson, you used several proofing tools, including the spellchecker, Thesaurus, and
AutoCorrect, to make your documents more accurate. These tools assist you with the mechanics of data entry and data revision so that you can concentrate on the creative aspects of your
writing and produce clear, accurate, and interesting documents with a minimum amount of
effort.
Microsoft® Office Word 2007 - Level 1 (Second Edition)
FOLLOW-UP
Follow-up
te
op
r
i
al
y
In this course you created, edited, and enhanced standard documents using Microsoft® Word
2007.
1.
Which feature in Word will help the most as you create documents?
2.
What automatic features in Word will you use most often?
3.
How will you use Word’s Help options?
What’s Next?
tC
No
Do
se
ea
Pl
Re
fe
re
n
ce
Ma
After completing this course, students may be interested in expanding their knowledge of
Microsoft® Word 2007 by taking New Horizons' Microsoft® Offıce Word 2007 - Level 2 (Second
Edition) and Microsoft® Offıce Word 2007 - Level 3 (Second Edition) courses.
201
202
tC
No
Do
se
ea
Pl
Re
fe
re
n
ce
Ma
te
op
r
i
al
y
NOTES
Microsoft® Office Word 2007 - Level 1 (Second Edition)
te
op
r
i
al
y
LESSON
LABS
LESSON LABS
Activity Time:
15 minutes
tC
ce
Creating a New Word Document
No
LESSON 1 LAB 1
Ma
Due to classroom setup constraints, some labs cannot be keyed in sequence immediately following their associated lesson. Your instructor will tell you whether your labs can be practiced
immediately following the lesson or whether they require separate setup from the main lesson
content. Lesson-level lab setup information is listed in the front of this manual in the course
setup section.
Do
se
fe
re
n
Scenario:
You work in the Human Resources department and your manager has handed you her handwritten notes regarding a new HMO that will soon be available. She has asked you to type it
as an interoffice memo that, when printed, can be distributed to all employees.
Pl
Open a new blank document and set the view to Print Layout mode.
Re
1.
ea
Figure 1-1: Your manager’s handwritten notes for the new HMO memo.
2.
In the new document, type the memo text. (See Figure 1-A.)
3.
In the C:\084893Data\Creating a Basic Document folder, save the document as My
Memo.docx in the default format.
Lesson Labs
203
Preview the document.
5.
Print a copy of the document.
6.
Close the document.
LESSON 2 LAB 1
Editing a Document
Activity Time:
Ma
10 minutes
Data Files:
•
Facility Request.docx
•
Building Security.docx
te
op
r
i
al
y
4.
tC
LESSON
LABS
ce
Before You Begin:
Word is running with no documents open.
2.
In the first sentence, “We have created a Facility Request Form”, after Facility
Request Form, insert the text (FRF).
3.
Throughout the document, replace any remaining instances of “Facility Request
Form” with “FRF”.
se
Do
Open C:\084893Data\Editing a Document\Facility Request.docx.
fe
1.
Delete the paragraph that begins with “More than any other document”
5.
Open Building Security.docx from the same location.
6.
Copy the contact names and phone numbers from the end of Building Security.
docx and paste them at the bottom of Facility Request.docx.
7.
Save the document as My Facility Request.docx and then close both
documents.
Pl
ea
4.
Re
204
No
re
n
Scenario:
You have been given the responsibility to edit procedure documents for the Human Resources
department. The draft document is available.
Microsoft® Office Word 2007 - Level 1 (Second Edition)
LESSON
LABS
LESSON 3 LAB 1
te
op
r
i
al
y
Formatting Text
Activity Time:
10 minutes
Data Files:
•
Formatting Text.docx
Setup:
From the C:\084893Data\Formatting Text folder, open Formatting Text.docx.
Ma
Scenario:
As the Assistant Manager of Books & Beyond, one of your responsibilities is to apply the finishing touch to all your official correspondence. You’ve now been given a typed document to
which you need to apply text formatting.
2.
Change the format of “Welcome to Our World of Reading and Relaxation” to
Tahoma, 14 pt., Italic.
3.
Change the font of the underlined heading “Books” to Tahoma, 11 pt.
4.
Copy the formatting of the heading “Books” and apply it to the headings
“Music” and “Other Media”.
5.
Highlight the text of your choice and then change the highlight color to a color
of your choice.
6.
Save the file as My Formatting Text.docx and close it.
No
Do
Pl
ea
se
re
n
fe
Re
Lesson Labs
tC
Format the title “Books & Beyond” as Tahoma, 18 pt., Bold.
ce
1.
205
LESSON
LABS
LESSON 4 LAB 1
te
op
r
i
al
y
Formatting Paragraphs
Activity Time:
10 minutes
Data Files:
•
Formatting Paragraphs.docx
Setup:
From the C:\084893Data\Formatting Paragraphs folder, open Formatting Paragraphs.docx.
Ma
Scenario:
Since your last assignment went so well, your manager at Books & Beyond is anxious to get
you started on your next task. She now needs you to enhance the document’s readability and
visual appeal.
2.
Apply the Heading 2 style to “Other Special Services”, and “How Are We Doing
So Far?”
3.
Change the paragraph spacing so that there is a 6-point space after each paragraph heading.
4.
Under “Other Special Services”, format the paragraphs as a bulleted list.
5.
For the “Top Music Categories” tabbed text, change the left indent to 1.75
inches, the right indent to 4.5 inches, and center the heading.
6.
In the tabbed text, set the right tab stops at 3.25 inches and 4.25 inches.
7.
Apply a box border to the “Top Music Categories” tabbed text.
No
Do
ea
se
re
n
fe
Replace all instances of underline text formatting with double-underlined bold
italics.
9.
Save the document as My Formatting Paragraphs.docx and close it.
Pl
8.
Re
206
tC
Apply the Heading 1 style to the heading “What is Books & Beyond” and center
it.
ce
1.
Microsoft® Office Word 2007 - Level 1 (Second Edition)
LESSON
LABS
Adding Tables
Activity Time:
10 minutes
Data Files:
•
Table.docx
Setup:
From the C:\084893Data\Adding Tables folder, open Table.docx.
te
op
r
i
al
y
LESSON 5 LAB 1
Ma
Scenario:
Your next task is to create a formatted table using a document provided by your coworker. You
have also been asked to add a new table that includes the various types of top selling audio
books.
2.
Format it using a table style and other formatting options of your choice.
3.
Below the Top Selling Audio Book Categories heading, create a new table to
accommodate the following text:
Biography
1,589
Fiction
3,972
Hobby/Recreation
756
No
se
Youth
2,975
Do
Sales
re
n
Category
tC
Convert the Top Selling Music Categories tabbed text into a table.
ce
1.
5.
Save the document as My Table.docx and then close it.
Pl
Re
Lesson Labs
ea
Apply a format to the new table so that its formatting matches the other table.
fe
4.
207
LESSON 6 LAB 1
Inserting Graphic Elements
Activity Time:
10 minutes
Data Files:
•
Graphic Elements.docx
te
op
r
i
al
y
LESSON
LABS
Setup:
From the C:\084893Data\Inserting Graphic Elements folder, open Graphic Elements.docx.
Ma
Scenario:
You need to complete a one-page flyer promoting the upcoming “Get Published” seminar. You
decide to include the appropriate image clip for the flyer and corresponding copyright and
trademark symbols. You also decide to mark the document as a free issue so that there is no
question about its status.
2.
Insert a book-related clip art image at the top of the document and resize it to
keep the flyer to one page.
3.
In the first paragraph of text, insert the corresponding symbols after the words
“copyright” and “trademark”.
4.
Save the document as My Graphic Elements.docx and then close it.
No
Do
Pl
ea
se
re
n
fe
Re
208
tC
Open the Graphic Elements document.
ce
1.
Microsoft® Office Word 2007 - Level 1 (Second Edition)
LESSON
LABS
Controlling Page Appearance
Activity Time:
10 minutes
Data Files:
•
Page Setup.docx
te
op
r
i
al
y
LESSON 7 LAB 1
Before You Begin:
From the C:\084893Data\Controlling Page Appearance folder, open Page Setup.docx.
Ma
Scenario:
The shop manager made some formatting suggestions for the “Get Published” flyer. You need
to implement those suggestions. As you preview the document, you also wish to change its
orientation.
2.
Add a box border to the page.
3.
In the footer area, insert the date.
4.
Change the document’s orientation to Landscape.
5.
Preview the document to verify your results.
6.
Save the document as My Page Setup.docx and then close it.
No
Do
Pl
ea
se
re
n
fe
Re
Lesson Labs
tC
Reduce the margins to get the text on a single page.
ce
1.
209
LESSON
LABS
LESSON 8 LAB 1
te
op
r
i
al
y
Proofing a Document
Activity Time:
10 minutes
Data Files:
•
Proofing.docx
Setup:
From the C:\084893Data\Proofing a Document folder, open Proofing.docx.
Ma
Scenario:
You have completed a client letter and it’s time to proof the document. There are some typing
mistakes, so make corrections, as necessary. Also, you wish to add the word BurkeBuddy to
the burke properties.dic dictionary. You also need to check the word count so that it is under
200 words.
2.
Use the Thesaurus to change some instances of the word “business” with synonyms of your choice.
3.
Verify that the letter has 200 words or fewer.
4.
Save the letter as My Proofing.docx and then close it.
No
Do
Pl
ea
se
re
n
fe
Re
210
tC
Spell check the document, correcting spelling and grammar errors as needed.
ce
1.
Microsoft® Office Word 2007 - Level 1 (Second Edition)
Solutions
ea
Pl
se
Do
te
op
r
i
al
y
Ma
tC
No
ce
re
n
fe
Re
SOLUTIONS
SOLUTIONS
211
212
tC
No
Do
se
ea
Pl
Re
fe
re
n
ce
Ma
te
op
r
i
al
y
NOTES
Microsoft® Office Word 2007 - Level 1 (Second Edition)
te
op
r
i
al
y
INDEX
INDEX
D
Apply Styles task pane, 101
area of search, 19
Also See: Word Help
AutoCorrect, 22
AutoCorrect dialog box, 197
AutoCorrect Options button, 22
AutoCorrect Options dialog box, 197
AutoCorrect tab, 197
Also See: AutoCorrect Options dialog box
Dialog Box Launchers, 8
document views, 11
Draft, 11
Drag
See: moving text
B
Find
See: search options
Find and Replace, 53
Also See: search options
Find And Replace dialog box, 54
find and replace text formatting, 108
Find options, 54
Find tab
See: Find And Replace dialog box
font, 62
Font cases, 64
Font group, 63
font size, 63
footers, 173
Format Painter, 65
Formatting marks, 22
Full Screen Reading, 11
Index
tC
No
se
G
galleries, 8
Go To, 55
See: search options
Go To tab, 55
Pl
Re
fe
Calibri
See: font
Check Spelling And Grammar As You Type, 22
clearing formats, 108
clip art, 148
Clip Art task pane, 149
Clipboard group, 43, 65
Clipboard task pane, 44
Compatibility Checker, 28
contextual tabs, 123
Design, 123
Layout, 124
Table Tools, 123
Convert Option, 28
cut and paste
See: moving text
Do
ce
F
ea
C
effects, 64
re
n
border types
art borders, 166
line borders, 166
borders, 92
border options, 94
border types, 93
Borders And Shading dialog box, 95
bulleted lists, 105
E
Ma
A
H
Header & Footer Design contextual tab, 173
headers, 173
Highlighter
213
INDEX
page breaks, 160
page color, 167
Page Layout tab, 7
Also See: Ribbon
page number options, 174
page orientation, 158
Page Setup dialog box, 159
paper size, 159
paragraph alignment, 84
Paste, 43
pasting text, 43
PDF file, 28
Picture Tools Format contextual tab, 150
pictures, 148
Print dialog box, 32
Also See: printing
Print Layout, 11
Print Preview, 31
Print Preview mode, 31
Print Preview tab, 31
Printed Watermark dialog box, 170
printing, 32
tips, 74
Home tab, 6
Also See: Ribbon
te
op
r
i
al
y
I
K
keyboard, 39
L
line break, 81
lists, 104
Live Preview, 9
se
N
O
Office button, 4
Outline, 11
Pl
Re
navigation keys, 39
Also See: keyboard
numbered lists, 105
ea
fe
re
n
Main Dictionary, 185
margins, 156
default margin types, 157
Microsoft Office Window Frame, 5, 38
Microsoft Office Word 2007, 2
Microsoft Office Word Help
See: Word Help
Mini toolbar, 39, 63
mouse pointer, 3
moving text
options, 43
No
M
Quick Access toolbar, 5, 50
Quick Styles, 100
Quick Tables, 130
R
Readability Statistics dialog box, 185
Redo, 50, 66
Repeat
versus Redo, 66
Replace, 54
See: search options
Replace tab, 54
Research task pane, 193
Research Options dialog box, 193
Research Options link, 193
Reveal Formatting task pane, 108
Review tab, 7
Also See: Ribbon
Ribbon, 5, 6, 7, 8
Ribbon buttons, 6
rulers, 79
horizontal, 79
vertical, 79
Do
ce
Q
tC
Ma
illustrations, 147
charts, 148
SmartArt, 148
Illustrations group, 149
indents, 85
indent markers, 85
indentation options, 86
Paragraph dialog box, 86
Insert tab, 6
Also See: Ribbon
insertion point
location, 39
P
Page Borders, 166
214
S
Save
Microsoft® Office Word 2007 - Level 1 (Second Edition)
INDEX
X
V
View tab, 7
Also See: Ribbon
No
se
Do
ce
ea
Pl
Re
Undo, 50
fe
re
n
tab stops, 79
Table Styles, 129
Options group, 130
tables, 118
Convert Table To Text dialog box, 135
Convert Text To Table dialog box, 134
keyboard navigation, 119
non-printing characters, 119
rows and columns selection methods, 125
structure modification options, 124
table creation options, 119
Table Properties dialog box, 124
Tabs dialog box, 80
text color, 64
text highlighting, 74
text spacing options, 86
Paragraph dialog box, 86
thesaurus, 192
tC
Ma
XML, 27, 26
Also See: Word 2007 file types
XPS file, 28
T
U
te
op
r
i
al
y
Wildcard, 18
Word 2007 file types, 26
Word Count dialog box, 186
Word document, 4
Word Help, 18, 19
options, 18
Word Help toolbar
options, 19
Word Options dialog box, 14
versus Save As, 28
Save As command, 28
Save command, 28
ScreenTips, 3
scroll bar, 38
navigation, 39
search
effective, 110
search options, 53
selecting text, 40
selection bar, 39
shading, 94
sizing handles, 150
Smart tags, 22
special characters, 143
spelling and grammar checking, 184
style, 99
Style Inspector, 101
Styles task pane, 101
symbols, 142
W
Web Layout, 11
Index
215
216
tC
No
Do
se
ea
Pl
Re
fe
re
n
ce
Ma
te
op
r
i
al
y
NOTES
Microsoft® Office Word 2007 - Level 1 (Second Edition)
ea
Pl
se
Do
te
op
r
i
al
y
Ma
tC
No
ce
re
n
fe
Re


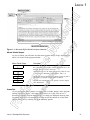


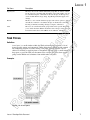
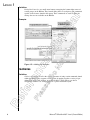
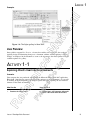


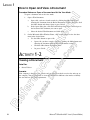
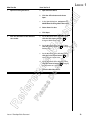


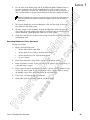

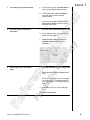


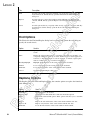
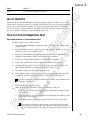

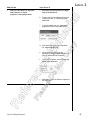


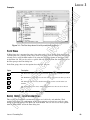


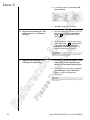


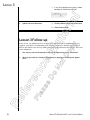


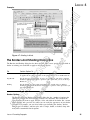


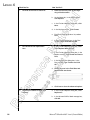
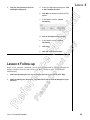


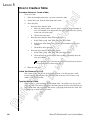


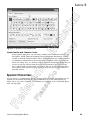
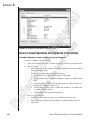

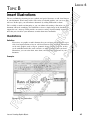


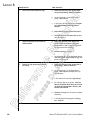
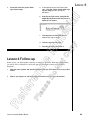


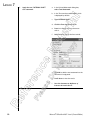


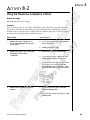


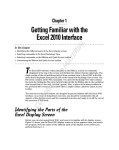


![Milton Academy User Manual 3 [Compatibility Mode]](http://vs1.manualzilla.com/store/data/005980357_1-d4de6102c0109b85acea37b5f761569b-150x150.png)