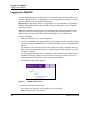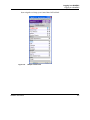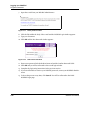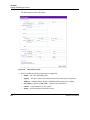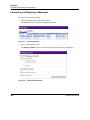
1
WebEOC
®
Version 7.0
User Manual
Crisis Information
Management
Software
ESi Acquisition, Inc. 699 Broad Street, Suite 1100 Augusta, GA 30901 (706) 823-0911
For ESi sales and operations:
ESi Acquisition, Inc.
823 Broad Street, Augusta, Georgia 30901-1400
USA
Tel: (706) 823-0911 or (800) 596-0911
Fax: (706) 826-9911
[email protected]
http://www.esi911.com/
WebEOC® and ESi® are registered trademarks of ESi Acquisition, Inc.
MapTac™ and ESiWebFUSION™ are trademarks of ESi Acquisition, Inc.
Microsoft®, Windows®, and Internet Explorer® are registered trademarks of Microsoft Corporation.
Mozilla® and Firefox® are registered trademarks of Mozilla Foundation.
All other trademarks are the property of their respective companies.
© 2002-2008 ESi Acquisition, Inc.
All rights reserved. No part of this publication may be reproduced, stored in a retrieval system or transmitted, in any form or by any
means, mechanical, photocopying, recording or otherwise, without the prior written permission of ESi Acquisition, Inc. While every
precaution has been taken in the preparation of this document, ESi assumes no responsibility for errors or omissions. Neither is any
liability assumed for damages resulting from the use of the information contained herein.
Printed in USA.
Revision history:
7.0
Revision 0
February 22, 2008
Contents
Chapter 1
Introduction
Purpose
Intended Audience
Overview
Final Remarks
About This Manual
Documentation Conventions
Related Documentation
1-1
1-1
1-1
1-2
1-5
1-6
1-7
1-8
Chapter 2
WebEOC Self-Registration
Introduction
Completing WebEOC Self-registration
2-1
2-1
2-2
Chapter 3
Logging in to WebEOC
3-1
Introduction
Logging in to WebEOC
Retrieving Misplaced Login Credentials
Forgotten Password
Logging Off
3-1
3-2
3-8
3-10
3-12
Chapter 4
Control Panel Overview
4-1
Introduction
Navigating the Control Panel
4-1
4-3
Username and Position
Log Off Button
Control Panel Features
Editing user information
4-3
4-3
4-4
4-5
WebEOC User Manual
i
Incident Name
Boards
Plug-ins and Tools
Pop up alerts
Links
Menus
Tips
4-8
4-9
4-10
4-10
4-10
4-12
4-12
Chapter 5
Status Boards
About Status Boards
WebEOC Status Boards
Significant Events
Infrastructure
Mission Task
Resources
Position Log
Press Release
Situation Reports (SITREPs): ICS and ESF
Road Closures
Shelters
FEMA/ICS/ESF Forms
FEMA Forms
ICS Forms
Status Boards - General
Navigation
Board Refresh
Viewing and Updating Entries
Spell Check
Board Attachments
E-mail
Data Linking
Dual Commit
Remote Boards
Board Operations Window Overview
Adding and Updating Entries
Data Entry Window
Adding a New Entry
Retrieve Record
ii
5-1
5-1
5-3
5-3
5-4
5-5
5-6
5-8
5-10
5-10
5-11
5-12
5-14
5-14
5-16
5-18
5-18
5-19
5-19
5-19
5-20
5-23
5-24
5-24
5-24
5-26
5-29
5-29
5-30
5-31
WebEOC User Manual
Sort Window
Filter Window
5-34
5-35
Chapter 6
Reports
About Reports
Accessing, Displaying and Printing a Report
6-1
6-1
6-2
Chapter 7
Chat
About Chat
Creating a Chat Room
Using Chat
Deleting a Chat Room
7-1
7-1
7-2
7-3
7-5
Chapter 8
Contacts
About Contacts
Permissions
Sorting Contacts 8-2
Viewing Contact Information
Adding and Editing a Contact
Searching and Printing Contacts
Importing Contacts
Exporting Contacts
Deleting a Contact
8-1
8-1
8-1
8-3
8-5
8-7
8-9
8-10
8-12
Chapter 9
Checklists
About Checklists
Accessing, displaying and viewing checklists
Setting statuses for steps
Adding, viewing and editing remarks
WebEOC User Manual
9-1
9-1
9-2
9-3
9-6
iii
Chapter 10
Messages
10-1
About Messages
Accessing Messages
Messages Window
Sorting Messages
Composing and Sending a Message
Viewing Messages
Forwarding and Replying to Messages
Printing a Message
Deleting a Message
10-1
10-1
10-2
10-3
10-3
10-9
10-14
10-19
10-23
Chapter 11
File Library
About File Library
Accessing File Library
Adding and Editing a File
Viewing a File
Deleting a File
11-1
11-1
11-2
11-2
11-4
11-5
Chapter 12
National Weather Service (NWS) Alerts
About NWS 12-1
Accessing and Viewing NWS Alerts
12-1
12-2
Chapter 13
Common Alerting Protocol (CAP) Messages
About CAP
Accessing and Viewing CAP Messages
Sending a CAP message
Emptying the CAP Trash Folder
iv
13-1
13-1
13-2
13-3
13-5
WebEOC User Manual
Chapter 14
Scroller
About Scroller
Using Scroller
14-1
14-1
14-2
Chapter 15
MapTac
About MapTac
MapTac Components
Viewing and Printing a Map
Placing Markers on a Map
Moving Markers
Resizing a Marker
Deleting a Marker
Placing a Shape on a Map
Resizing a Shape
Deleting a Shape
Adding a Label to a Marker
Clearing a Label on a Marker
Clearing All Shapes, Markers, and Labels from a Map
15-1
15-1
15-3
15-4
15-5
15-6
15-7
15-7
15-7
15-10
15-10
15-11
15-13
15-14
Chapter 16
Pocket PC Support
About Pocket PC Support
Utilizing WebEOC on a Pocket PC
Status Boards
Messages
Contacts
Checklists
Plug-ins
WebEOC User Manual
16-1
16-1
16-2
16-2
16-2
16-2
16-3
16-3
v
vi
WebEOC User Manual
Chapter 1
Introduction
Purpose
ESi’s WebEOC® Crisis Information Management Software (CIMS) products provide tools to
manage crisis information and emergency response. WebEOC:
•
Is easy to use, easy to remember, and easy to maintain.
•
Can be tailored to conditions, procedures, and policies of any agency.
•
Allows for remote access by authorized users located outside the local area network.
•
Complies with the provisions and standards for Incident Command System (ICS) as outlined in the National Incident Management System (NIMS).
•
Complies with the provisions of the Emergency Support Functions (ESFs).
•
Can be integrated with systems such as mapping, notification, and other CIMS products.
•
Allows for integration of Public Health, Emergency Management, and other disciplines.
•
Operates within a variety of network configurations.
•
Has an extensive array of user features.
•
Supports the Common Alerting Protocol (CAP).
Intended Audience
People who use WebEOC are classified as either users or administrators. This manual is written for WebEOC users.
WebEOC User Manual
1-1
Introduction
Overview
People who setup, configure, and customize WebEOC in accordance with an agency’s unique
needs are WebEOC Administrators. Administrators need not be IT professionals. WebEOC is
designed so that an average emergency manager, or other public safety official, can administer
their own system. WebEOC Administrators should refer to the WebEOC Administrator Manual supplied with the software.
Overview
WebEOC is designed to make crisis information universally available to authorized users
everywhere. More important, it is a tool that can be customized based on local requirements
while affording agencies the ability to link to a wide assortment of different systems. WebEOC
can be used during the planning, mitigation, response and recovery phases of any emergency.
It can also be used by agencies during day-to-day activities to manage routine, non-emergency
related operations.
Homeland Security Presidential Directive (HSPD)-5 requires that all federal departments and
agencies adopt the March 1, 2004 National Incident Management System (NIMS). This directive requires adoption of NIMS by state and local organizations as a condition of federal preparedness assistance (grants, contracts, and other activities). As outlined in NIMS,
jurisdictional compliance with certain aspects of NIMS is possible in the short term by adopting the basic tenets of the ICS. In the future, NIMS will also outline system interoperability
standards. WebEOC 7 supports these objectives.
WebEOC is designed to interface with any system that supports open standards and has been
successfully interfaced with Disaster Management Interoperability Services (DMIS) using the
CAP 1.0 protocol. CAP is the simple, flexible data interchange format for collecting and distributing “all-hazard” safety notifications and emergency warnings over information networks and
public alerting systems.
ESi’s WebEOC was one of the first web-based CIMS systems developed for emergency management. WebEOC contains a set of default status boards that enable any agency to begin
using WebEOC almost immediately. Within the context of WebEOC, a status board is an electronic display that provides the ability to generate, post, transmit and share information, in
real-time, among other WebEOC users. WebEOC status boards are the equivalent to the
chronological or topical paper-based boards that for years dominated every EOC and command center around the country.
Chapter 5 outlines the set of status boards that come with WebEOC. An agency can use any or
all of these boards “as is”, or build an unlimited number of status boards and forms tailored to
local requirements.
Following login, users access WebEOC through the WebEOC control panel (hereinafter
referred to as control panel). The control panel is an intuitive user interface to status boards,
Chat, Checklists, Contacts, Messages, File Library, Calendar, MapTac and the various boards,
1-2
WebEOC User Manual
Introduction
Overview
forms, and links to other systems or files. Permissions established during setup by WebEOC
administrators determine which of these items are available to each user.
In addition to the suite of default status boards, customers have access to a host of plug-ins.
•
Chat. As the name implies, agencies can implement Chat Rooms within WebEOC, providing users with an informal method of communication.
•
Contacts provide the ability to maintain and display contact information for people and
agencies inside and outside your EOC.
•
In many CIMS packages, e-mail is used to communicate incident information between
responders. In WebEOC, incident information is transmitted via status boards, making
the information universally available to all authorized users simultaneously. WebEOC
does have a Messaging plug-in that allows users to communicate between each other via
an internal messaging link unique to WebEOC. Users can send messages to any e-mail
server or e-mail addressable device, such as cell phones or pagers.
•
WebEOC’s Checklist module allows for the input of individual checklists. Steps can be
identified as a main numbered step or sub-step that can be easily ordered and reordered
using arrow buttons. Steps and sub-steps can be statused as Complete, Open (in-progress), Previously Accomplished, or Not Applicable; alternatively, users can just mark a
checklist step Complete. When running a checklist, remarks can be added to a step and
displayed or hidden as desired.
•
With WebEOC Reporter, preformatted or custom reports based on individual status
boards can be generated. They can also generate a comprehensive incident report consisting of any or all status boards in an agency’s WebEOC. Because WebEOC uses Microsoft®
SQL Server 2000 for the database, customers have the option of using Access, Crystal, or
other tools to generate reports.
•
MapTac is a unique tool in WebEOC that allows an authorized user to publish a map, dispersion model, digital photo, etc., from any map/Geographic Information System (GIS)
source or digital camera. Users can place markers, shapes, and labels on the map from
MapTac’s palette and using their web browser share the tactical map with authorized users
instantly.
MapTac is not a mapping system. It is a way to lay out a tactical scene on a map or digital
photo and perform a virtual briefing.
•
Calendar. The Calendar plug-in is included as part of WebEOC 7. With Calendar, users can
track drill and exercise schedules, training sessions, meetings, etc. through WebEOC. Calendar appointments can be sent to WebEOC users and e-mail accounts and distribution
lists external to WebEOC. Exercise objectives, testing functions, scenario information, and
the target audience can be identified, and included in the Calendar invitation. Instructions
in the use of Calendar can be found separately in the WebEOC Calendar User Guide.
•
WebEOC's Simulator allows a trainer or drill controller to build, edit, and control delivery
of scenario data to WebEOC boards in real-time. The controller interface has controls for
play, pause, stop, etc. The tool enables organizations to perform virtual tabletops and
WebEOC User Manual
1-3
Introduction
Overview
drills. Simulations can be started, stopped, and reset as necessary to meet training or
exercise objectives. It can simulate inputs that would (in an actual incident) be generated
by an entire cadre of emergency responders, while minimizing (during training or exercises) the number of support personnel needed for role-play activities.
•
Two plug-ins packaged with WebEOCAir are Team Management and Passenger Data.
Team Management provides the ability to track data on emergency response personnel
(e.g. training, skills, languages, deployment history, etc.). The Passenger Data plug-in provides the ability to track victim-specific data such as contact information, personal effects,
physical attributes etc., as well as information pertaining to the victim’s doctor, family,
hospital, funeral, and a host of other related items.
Note: Team Management can be purchased as an additional plug-in to WebEOC.
Although not all inclusive, WebEOC offers a host of other features and capabilities.
1-4
•
WebEOC can be used to manage multiple incidents (actual, exercise, or both in any combination). With WebEOC, users can track individual incidents, or multiple incidents can be
rolled up for viewing in a common, master view. Once configured by an administrator, a
user logged in to a master view can see the data from all sub-incidents together, or on a per
incident basis.
•
WebEOC can be configured to support multiple jurisdictions where a user selects their
particular agency/organization and then only their incidents are presented during login.
•
WebEOC has Dual Commit and Data Linking capabilities.
•
Dual Commit is a feature within WebEOC that allows information to be posted to a
second server. With Dual Commit, agencies can automatically, or selectively, decide
which board entries to post to an outside server, keeping sensitive information within
your organization.
•
WebEOC’s Board Builder provides the ability for data fields in one status board to be
mapped to specified fields in designated destination board(s), allowing one-time entry
of information. This feature, called Data Linking, provides the ability to push information from one status board to another. This is an option administrators can set for
individual boards. Once set, users determine what entries are linked, when they are
linked, and to which status boards.
•
Separate from Data Linking described above, WebEOC can be used to provide “links” to
any system, web site, or file (word processing, spreadsheet, .pdf, etc.) through the Control
Panel. A link typically opens a new window displaying the interface of the external system.
Links may also be configured and accessed through WebEOC’s File Library.
•
Links to modeling programs accessible over the network or installed on the local machine
can also be added to the Control Panel. Outputs from common dispersion models such as
Cameo® Aloha, can be published to WebEOC’s MapTac viewer where responders can add
markers and comments directly on the map with the plotted plume. Users can then share
their annotations or tactical scene in real-time with any other WebEOC user.
WebEOC User Manual
Introduction
Final Remarks
WebEOC Mapper. Mapper is the Geographic Information System (GIS) interface between
ESi’s WebEOC and ESRI ArcGIS®. This mapping product allows data from WebEOC boards to
be viewed on the same map and can use colors and icons to represent the state of the WebEOC
board data.
Users are able to harness GIS-based mapping in any WebEOC status board for task tracking,
inventory tracking, resource management, shelter status, etc. Using their own GIS or Microsoft MapPoint® data, agencies have the ability to plot individual addresses and view those
points on a browser based map. Additionally, the map will display the locations in a status
color defined by the agency. For example, a shelter board could display a map with shelters
designated as either red or green points indicating status (open or closed).
Final Remarks
The balance of this manual provides you, the user, the knowledge needed to operate WebEOC
during daily operations or in response to an emergency. Because WebEOC is a tool that (1) can
be customized locally based on the unique needs of your organization and (2) provides levels
of access that can be tailored to meet the unique needs of individual users, some of the items
covered in this manual may not be available to all users. Check with your WebEOC Administrator if you have questions about a specific capability.
WebEOC User Manual
1-5
Introduction
About This Manual
About This Manual
Following is a synopsis of the chapters included in this manual:
1-6
•
Chapter 1, "Introduction" -- Describes each of the chapters in this manual and provides
the user some idea of the capabilities and functionality of WebEOC.
•
Chapter 2, “Self Registration” -- Describes how to create a new user account in WebEOC.
This is an optional feature that the system administrator may or may not enable in your
WebEOC.
•
Chapter 3, “Login” -- Describes how to login to WebEOC.
•
Chapter 4, “Control Panel” -- Describes the components of the WebEOC control panel and
its use.
•
Chapter 5, “Status Boards” -- Describes status boards and explains how to display, update,
sort and filter information.
•
Chapter 6, “Reports” -- Describes how to view and print pre-defined reports.
•
Chapter 7, “Chat” -- Describes how to use the chat features incorporated in to WebEOC to
communicate with other users in real-time.
•
Chapter 8, “Contacts” -- Describes how users can manage contact information that can be
accessed by authorized users and/or agencies.
•
Chapter 9, “Checklists” -- Describes how users can run automated checklists unique to
their position.
•
Chapter 10, “Messages” -- Describes how the users can communicate with each other
using WebEOC’s internal messaging plug-in.
•
Chapter 11, “File Library” -- Describes how users can add files to a common storage location that can be shared with other WebEOC users.
•
Chapter 12, “National Weather Service Alerts (NWS)” -- Describes how to access weather
alerts and forecasts from the National Weather Service’s Interactive Weather Information
Network through WebEOC.
•
Chapter 13, “Common Alerting Protocol (CAP)” -- Describes how to post and view CAP
messages through the Disaster Management Interoperability Services (DMIS).
•
Chapter 14, “Scroller” -- Describes how to view data from multiple boards in a single window on a timed interval.
•
Chapter 15, “MapTac” -- Describes how maps or images can be displayed and annotated
with markers, shapes and labels once they are imported in to MapTac.
•
Chapter 16, “Pocket PC Support” -- Describes how to utilize WebEOC from a pocket PC
device.
WebEOC User Manual
Introduction
Documentation Conventions
Documentation Conventions
Consistent use of typographic conventions in documentation is intended to help readers locate
and interpret information easily. This table presents specific typographic conventions used in
this manual.
Table 1-1: Documentation Conventions
Item
Convention
Example
Acronyms and initialisms
All uppercase
FCC
Book titles
Title caps, italics
See the WebEOC Administrator
Manual
Chapter titles
Title caps, in quotation
marks
See Chapter 8, "Other Signs of
Trouble".
Command-line commands
All lowercase
savesrdb command
Commands on buttons
Bold; capitalization follows interface
Click Close in the Dialog Properties dialog box
Device names
All uppercase
LPT1
COM1
Dialog box titles
Title capitalization follows the convention of
the dialog box
Click Close in the Dialog Properties dialog box
File names
Bold; capitalization follows product standard
SM386.exe
File type extensions
All lowercase
.bat,.exe
Folders and directories
Capitalization follows
product standard
/WebEOC Server
Icon names
Capitalization follows
product standard
Double-click the WebEOC icon
Key names, key combinations, and key sequences
Initial capitalization
Ctrl, Tab
Ctrl+Alt+Delete
Shift, F7
Menu names
Title caps
File menu
WebEOC User Manual
1-7
Introduction
Related Documentation
Table 1-1: Documentation Conventions
Item
Convention
Example
New terms or emphasis
Italics
One module acts as a hot
standby
Programs and applications
Title capitalization
Microsoft Windows NT
User Input
Usually lowercase,
unless case-sensitive or
to match standard capitalization conventions
copy a:\SM386.exe
c:\*.*
Windows, named
Title caps
Multiple Tab window
Windows, unnamed
All lowercase
document window
Related Documentation
The following documents describe various aspects of the WebEOC system.
•
WebEOC Administrator Manual
•
WebEOC User Manual (this book)
•
WebEOC Installation Guide
Documentation files are provided in .pdf format on the WebEOC installation media.
1-8
WebEOC User Manual
Chapter 2
WebEOC Self-Registration
Introduction
The self-registration feature in WebEOC enables first-time users to create their own account
using the position name and position access code (PAC) provided by the system administrator.
Once the new user has successfully authenticated themselves by successfully entering the position name and PAC, the user will enter their personal information (e.g., phone number, e-mail,
etc.) and complete user registration.
Self-registration is an optional feature in WebEOC that the system administrator may or may
not enable in your WebEOC.
•
If you fulfill multiple EOC positions and self-registration is enabled, then you must selfregister for each position for which you qualify.
•
After you have self-registered, you will follow the instructions located in the following
chapter titled “Logging in to WebEOC” to access WebEOC using the credentials (username
and password) you created.
The following topics are covered in this chapter:
•
Completing WebEOC self-registration
WebEOC User Manual
2-1
WebEOC Self-Registration
Completing WebEOC Self-registration
Completing WebEOC Self-registration
WebEOC is accessed through your Web browser over your organization’s intranet or over the
Internet, depending on your network’s infrastructure, using Microsoft® Internet ExplorerTM
(6.5 or higher).
Note: Prior to using Mozilla Firefox or Apple Safari to access WebEOC, check with the system
administrator and confirm compatibility with these browsers.
To complete self-registration, perform the following:
1.
Obtain your Position Name and Position Access Code (PAC) from your WebEOC administrator.
2. Have the following information available to complete self-registration.
•
User name (usually the user’s proper name)
•
The password you wish to use
Note: WebEOC may require that you enter a strong password.
•
Primary e-mail address
•
(Optional) Secondary e-mail address(es)
•
Local time zone and Daylight Saving Time requirement
3. Start your web browser (e.g., Internet Explorer). Access your WebEOC site.
The first time you access WebEOC, you may need to type the address of your WebEOC site
into the Address field of your browser, then press Enter. If you do not know the address,
contact a WebEOC Administrator.
The address can be a uniform resource locator (URL) in the form of a domain name (e.g.,
http://www.countyname.gov/webeoc) or an Internet protocol (IP) address (e.g., http://
192.168.1.10/webeoc).
It is recommended that you create a bookmark, or add a shortcut to the desktop for your
WebEOC site address so that you can access the site easily. Consult your browser’s documentation to find out how to create and manage bookmarks.
2-2
WebEOC User Manual
WebEOC Self-Registration
Completing WebEOC Self-registration
4. The WebEOC Login window will display.
Figure 2-1:
5.
WebEOC Login window
Click on the “New User? Click here to create an account” link.
The Create an Account window will display.
Figure 2-2:
Create Account window
6. Enter your Position Name and Position Access Code, as provided by the WebEOC administrator.
Note: the Position Access Code is case sensitive. As you enter the, Position Access Code, it
will display as a series of dots (******).
7.
Click OK to proceed to the Create Account details window, or click Cancel to return to the
WebEOC User Manual
2-3
WebEOC Self-Registration
Completing WebEOC Self-registration
main login window and abort the operation.
Figure 2-3:
Create Account details window
8. Complete each field as applicable; those listed in bold text are required:
•
User Name: usually e-mail the user’s first and last name
•
Password: (case sensitive) values display as a series of asterisks (*****)
•
Confirm Password: re-enter password to ensure accuracy
•
Primary E-mail: the primary e-mail account the user will utilize as a mode of electronic correspondence external from WebEOC. It is important to enter an e-mail
address, in case you forget your login and password information, an administrator can
send your information to your e-mail account.
•
Secondary E-mail: optional additional e-mail accounts
For each additional e-mail account:
•
Enter the e-mail address and click Add.
To remove an e-mail account from the list pane:
•
2-4
Highlight the selection and then click Remove.
WebEOC User Manual
WebEOC Self-Registration
Completing WebEOC Self-registration
Click OK to delete the item or click Cancel to abort the operation.
Figure 2-4:
•
Delete confirmation
Time Zone: defaults to the WebEOC server time zone
If a user wishes to override the default time zone when logging into WebEOC, perform the
following. Otherwise, continue to step 6.
•
Figure 2-5:
•
Select the Override Server Default Time Zone checkbox. This activates the
Time Zone drop-down list.
Override Server Default Time Zone
If daylight savings is observed in the time zone selected, select the Use Daylight
Saving.
9. Click Save to save the new account credentials or click Cancel to abort the sequence.
WebEOC User Manual
2-5
WebEOC Self-Registration
Completing WebEOC Self-registration
Note: The new profile will not save until the required fields are complete. Those fields
that are missing will appear in red text as illustrated below.
Figure 2-6:
Missing required fields
Note: Duplicate user account names are not allowed in WebEOC. The new profile will not
save and the user is alerted as illustrated in below.
Figure 2-7:
2-6
Duplicate user name alert
WebEOC User Manual
WebEOC Self-Registration
Completing WebEOC Self-registration
10. Once self-registration is complete, the following confirmation window displays.
Figure 2-8:
11. Click OK to in the confirmation window. You will be redirected to the WebEOC Login window. Go to the following chapter titled “Logging in to WebEOC” for detailed log-in instructions.
Figure 2-9:
WebEOC User Manual
WebEOC Login window
2-7
WebEOC Self-Registration
Completing WebEOC Self-registration
2-8
WebEOC User Manual
Chapter 3
Logging in to WebEOC
Introduction
This chapter describes how to log in to WebEOC, enter additional information (if required),
and retrieving misplaced login credentials.
Note: If the WebEOC administrator has provided the position name and a position access
code (PAC), go to the chapter titled “Self-Registration” in this manual to set up the new
account and then return to this chapter for log in information.
The following topics are covered in this chapter:
•
Logging in to WebEOC
•
Entering additional login information
•
Retrieving misplaced login credentials
•
•
Forgotten username
•
Forgotten password
Logging off
WebEOC User Manual
3-1
Logging in to WebEOC
Logging in to WebEOC
Logging in to WebEOC
Access WebEOC through your web browser. You can use Microsoft® Internet ExplorerTM (6.5
or higher), Mozilla FirefoxTM, or Apple SafariTM over your organization’s intranet or over the
Internet, depending on your network infrastructure.
Important: If using Mozilla FirefoxTM or Apple SafariTM to access WebEOC, verify with the
WebEOC administrator that the status boards you have permissions to use are compatible
with these browsers.
Note: If the WebEOC administrator has provided the position name and a position access
code (PAC) so that you can self-register, go to the chapter titled “Self-Registration” in this
manual, create your account and then return to this chapter for log in instructions.
To log in to WebEOC:
1.
Start your web browser (e.g., Internet Explorer).
2. Access your WebEOC site. Type the address of your WebEOC site into the Address field of
your browser and press Enter. If you do not know the address, contact a WebEOC Administrator.
The address can be a uniform resource locator (URL) in the form of a domain name (e.g.,
http://www.countyname.com/webeoc) or an Internet protocol (IP) address (e.g., http://
192.168.1.10/webeoc).
It is recommended that you create a bookmark, or add a shortcut to the desktop for your
WebEOC site address so that you can access the site with ease. Consult your browser’s
documentation to find out how to create and manage bookmarks.
3. The WebEOC Login window displays.
Figure 3-1:
WebEOC Login window
4. Enter your username and password.
As you enter your password, values display as a series of bullets.
Note: The password is case sensitive.
3-2
WebEOC User Manual
Logging in to WebEOC
Logging in to WebEOC
5.
Click OK.
6. If you enter your password/username incorrectly, an advisory will appear. Click OK and
attempt to log in again by repeating steps 4 and 5.
Figure 3-2:
7.
Invalid username/password advisory
If you exceed the number of failed login attempts allowed, a User Account Locked window
will appear.
Figure 3-3:
User account locked advisory
Click OK and request a WebEOC Administrator unlock your account.
8. Log-in accounts can be configured as either single or multi-user. Multi-User accounts
allow more than one user to log in to the same account at any one time. Single user
accounts allow only one person at a time to login using the account.
WebEOC User Manual
3-3
Logging in to WebEOC
Logging in to WebEOC
Users cannot log in to an active “single-user” account without logging out the other user. If
this occurs, you will be prompted whether or not to log off the other user.
Figure 3-4:
Log Off User configuration dialog
If you click OK, the other user will be involuntarily logged off and will receive a pop-up
advisory on their Control Panel. Once involuntarily logged off by an administrator or
another user, the logged off user should exit the system (by clicking the Log Out button
on the control panel) and contact their WebEOC administrator for assistance in troubleshooting the problem.
Figure 3-5:
Log-Off pop-up advisory
9. After you have successfully entered your username and password, you will then be
prompted to select your Position and the Incident you wish to log in to.
Figure 3-6:
Login window: Select Position and Incident
Your position is the specific job you will be filling in the EOC.
3-4
WebEOC User Manual
Logging in to WebEOC
Logging in to WebEOC
The term “incident” refers to the specific event that the EOC is responding to. The Position
and Incident drop-down lists will be filtered to list only those to which you have been
granted access through your group assignment.
Note: If your position or incident does not appear in the drop-down list, contact your
WebEOC Administrator.
10. Select your position from the Position drop-down list.
11. From the Incident drop-down list, select either an incident or a master view.
Figure 3-7:
Incident Drop-Down list
The line containing the selected incident (or master view) is highlighted.
•
A “master view” rolls-up multiple ongoing incidents for viewing through a common
(single) view, thus eliminating the need to log out of one incident to log in to a different incident. The name of the master view is displayed flush-left immediately followed
by a group of sub-incidents, each sub-incident annotated by a long hyphen (e.g., −
Flood, −Explosion, etc.).
•
Incidents not assigned to a master view appear first in the incident drop-down list
(alphabetically) followed by master views and their assigned sub-incidents.
•
If the “Setup” incident appears in the incident list, login to it only if performing system
administration functions. It displays last in the drop-down list.
12. Click OK to continue the login.
OR
Click Cancel to return to the WebEOC login window.
13. If the WebEOC administrator has enabled the additional login information feature, the
WebEOC User Manual
3-5
Logging in to WebEOC
Logging in to WebEOC
following window displays after Incidents and Positions are selected:
Figure 3-8:
Enter Additional Login Information window
14. Enter the following information:
•
Name: (This is a required field.) distinct from your WebEOC username, this should
include first and last name
•
Location: this could be the team room in the EOC, your location in the district, precinct, etc.
•
Phone Number: primary phone number
•
e-mail: your e-mail address
•
Comments: text area provided for additional information
15. Click OK. The control panel appears.
16. The control panel that displays when you login will contain only those boards, menus,
links and plug-ins assigned to your group by a WebEOC administrator. If you have not
3-6
WebEOC User Manual
Logging in to WebEOC
Logging in to WebEOC
been assigned to a Group, your Control Panel will be blank.
Figure 3-9:
WebEOC User Manual
Sample Control Panel
3-7
Logging in to WebEOC
Retrieving Misplaced Login Credentials
Retrieving Misplaced Login Credentials
Note: This feature may not be enabled in your WebEOC. Contact your WebEOC administrator
if you have questions.
In the event you have forgotten your username:
1.
Click the “F0rgot Username/Password?” link in the WebEOC login window.
Figure 3-10:
WebEOC Login window
The following window displays.
Figure 3-11:
3-8
Retrieve Username/Reset Password window
WebEOC User Manual
Logging in to WebEOC
Retrieving Misplaced Login Credentials
2. Click Retrieve “Username” and the e-mail address window displays.
Figure 3-12:
e-mail address window
3. Enter your WebEOC user e-mail address.
4. Enter the same address a second time in the Confirm Address field.
5.
Click Continue and WebEOC will automatically e-mail your username to the address you
provided. Your password will remain unchanged.
Note: If the e-mail address entered does not match the username already configured in
WebEOC, the following window will appear, prompting you to seek the assistance of your
administrator.
Figure 3-13:
Invalid e-mail address
6. Check your e-mail account to retrieve your username. A message detailing your requested
WebEOC User Manual
3-9
Logging in to WebEOC
Retrieving Misplaced Login Credentials
account details, similar to fig. 2-9.
Figure 3-14:
7.
3-10
User account information e-mail
To abort the process at any time, click the Cancel button. You will be redirected to the
WebEOC Login page.
WebEOC User Manual
Logging in to WebEOC
Forgotten Password
Forgotten Password
If you have forgotten your password, you can reset it:
1.
Click the F0rgot Username/Password link in the WebEOC login window.
The Forgot Username/Password window will appear.
Figure 3-15:
Reset password
2. Click the Reset Password link.
3. Enter your WebEOC username.
4. Enter your WebEOC e-mail address.
5.
Click Continue. An e-mail will be sent to you containing a link to reset your password.
The following confirmation will appear:
Figure 3-16:
Reset password e-mail confirmation
6. Check your WebEOC e-mail account.
WebEOC User Manual
3-11
Logging in to WebEOC
Forgotten Password
7.
Open the e-mail from your WebEOC Administrator.
Figure 3-17:
Reset password e-mail
8. Click the link within the body of the e-mail and the WebEOC Login window appears.
9. Type your Username.
10. Click OK and the New Password window appears.
Figure 3-18:
New Password window
11. Enter a new password in both the New Password and the Confirm Password fields.
12. Click OK and you will be redirected to the second login window.
13. Complete the login using instructions in the previous section.
14. If you are still unable to retrieve your WebEOC password, contact your WebEOC administrator.
15. To abort the process at any time, click Cancel. You will be redirected to the initial
WebEOC Login page.
3-12
WebEOC User Manual
Logging in to WebEOC
Logging Off
Logging Off
Be sure to save any process(es)/record(s) that may be in progress before logging off.
There are several distinct ways to log off WebEOC:
•
Click the Log Off Button in your control panel.
•
Close the Control Panel browser window.
•
Exit your Web Browser application.
Close browser window
Click Log Off
Figure 3-19:
WebEOC User Manual
Logging off
3-13
Logging in to WebEOC
Logging Off
3-14
WebEOC User Manual
Chapter 4
Control Panel Overview
Introduction
The WebEOC control panel is the user’s interface to the functionality of WebEOC. It is a
user's means of accessing boards, menus, plug-ins and links. Your position in the EOC and
user permissions as prescribed by the WebEOC system administrator determine the feature
sets that are available to you as a user of WebEOC.
The control panel provides access to the following:
•
Boards
•
Menus
•
Tools
•
Plug-ins
•
Links
This chapter describes the parts and use of the WebEOC control panel and describes how to
display status boards, links, menus and plug-ins. The following topics are covered in this chapter:
•
Navigating the control panel
•
Username and position
•
Log Off button
•
Control panel features
•
Editing account information
•
Incident name
•
Boards
WebEOC 7 User Manual
4-1
Control Panel Overview
Introduction
4-2
•
Plug-ins and Tools
•
Pop up alerts
•
Menus
•
Other user functions
WebEOC 7 User Manual
Control Panel Overview
Navigating the Control Panel
Navigating the Control Panel
Username and Position
You will see the WebEOC and ESi logos at the top of the control panel. Just below the logos,
you will see your Username and the Position you used to log in to WebEOC.
Username
Position
Figure 4-1:
Log Off
WebEOC control panel
Log Off Button
If you are not logged in to the correct position, or you need to exit WebEOC to start a new session, click the Log Off button. This will bring you back to the Login screen.
WebEOC 7 User Manual
4-3
Control Panel Overview
Navigating the Control Panel
Control Panel Features
Based on the permissions granted to you by the WebEOC administrator, the control panel will
have various sections available. The following control panel displays certain sections (Boards,
Menus, Tools Plug-ins, Links) that reflect permissions granted to a WebEOC user for demonstration purposes; not all control panel configurations will be the same.
Note: Each section may be collapsed or expanded by clicking the section’s heading. For example, in the following figure the Plug-ins section is collapsed yet still remains available. To
expand a section, click the section’s heading again.
Access to the Admin Manager
Section Heading
Figure 4-2:
Control panel: collapsed section and admin manager
For those users who have administrative privileges, the Admin manager link will display in
blue font in the Tools section of the control panel. To access the Admin manager, simply click
4-4
WebEOC 7 User Manual
Control Panel Overview
Navigating the Control Panel
the Admin link on the control panel. The Admin manager window displays. Use of the
WebEOC Admin Manager is detailed in the WebEOC Administrator Manual.
Figure 4-3:
WebEOC 7 User Manual
Admin manager
4-5
Control Panel Overview
Navigating the Control Panel
Editing user information
The username on the control panel will be displayed as either a static line or as an active link.
If the system administrator has enabled the edit account feature in WebEOC, then all users
will be able to edit and maintain their own user account information. In addition, if you were
requested to enter additional information during your login, then data fields in the Additional
Information Window will appear in addition to user account data fields for editing. Following
provides an example of each instance.
A-Edit user account
information window
Figure 4-4:
B-Edit user account
and additional
information wino
A-Edit user account information, and B-edit user account and additional user
information screens, respectively.
If your username appears as a link on the control panel, then click the link to open the User
Account edit window.
Username link
Figure 4-5:
4-6
Username link on the control panel
WebEOC 7 User Manual
Control Panel Overview
Navigating the Control Panel
Following details the settings that may be edited by a user, depending on the features enabled
by the administrator.
1.
Enter the following information as applicable:
•
Real Name: proper name
•
Location: (e.g., Central Ops.)
•
Phone Number
•
Old Password: former password used to log into WebEOC
•
New Password: new password used to log into WebEOC
•
Confirm Password: retype password to ensure accuracy
•
Primary e-mail: default WebEOC user e-mail account used to retrieve misplaced login
credentials (username/password)
•
Secondary e-mail: optional secondary account
•
Enter e-mail account address
•
Click Add to add the account to the list.
To remove an account from the list:
•
Highlight the account in the list.
•
Click Remove to delete the account from the list.
•
Language Locales: If your WebEOC is localized in another language, then users may have
the option of selecting a different language to be used. Only language translation packs
installed locally on the server will be available for selection.
•
Format Locales: Determines the correct display of currency formats (e.g., the U.S.dollar $#, ###.## or the Argentina Peso #,###,###ARS)
•
Time Zone: The user can override the default time zone and daylight saving time configurations. Upon selecting the checkbox, the drop-down menu will be accessible:
•
Click the Override Server Default Time Zone checkbox.
•
Highlight the appropriate time zone in the drop-down menu.
•
Select the Use Daylight Saving Time checkbox, if applicable
2. Click Save to save the edited information or click Cancel to abort the operation.
3. Log out and then log back in to WebEOC in order to apply the new time zone settings to
your login session.
WebEOC 7 User Manual
4-7
Control Panel Overview
Navigating the Control Panel
Incident Name
The name of the incident (or master view) in which you are participating appears at the center
of the top portion of the control panel. If the incident name does not match the name of the
incident you should be logged in to, log off and log back in to WebEOC, and select the correct
incident from the Incident drop-down menu on the Login Page.
Incident Name or Master View
Close Input View
Select Input View
Figure 4-6:
4-8
Input View
WebEOC 7 User Manual
Control Panel Overview
Navigating the Control Panel
Boards
•
To display a Board’s Input View, click the blue plus (+) icon next to the board to which you
wish to add information.
•
To close the Input View, click the “X” in the corner of the browser window, or click the “x”
adjacent to the board name on the control panel.
•
To open a Board’s Display View, click on the name of the board you want to open
•
To close the Display View, click the “X” in the corner of the browser window, or click the
“x” adjacent to the board name on the control panel.
Display View
Figure 4-7:
•
Display view of Mission Task window
Once new data is posted, the font color of the board name on the control panel will change
black to a bold red.
Once the status board has been reviewed (opened), the font color will reset to black.
Figure 4-8:
WebEOC 7 User Manual
Board name with font change indicator
4-9
Control Panel Overview
Navigating the Control Panel
For more detailed information on status boards and their specific functions, refer to the
chapter titled “Status Boards” for a step-by-step process description.
Plug-ins and Tools
Plug-ins and Tools like Chat, Checklists, and Messages may be opened by clicking on the name
of the item. Only those items to which a User has been granted access will appear on the control panel. Clicking the “X” next to the name of the plug-in on the control panel will close the
corresponding window.
Pop up alerts
A user can receive a pop up notification for the following cases:
•
A new message has been received
Figure 4-9:
•
The user is logged (bumped) off by another user
Figure 4-10:
•
Forced logoff pop up alert
Dual commit entries are queued or have been posted data
Figure 4-11:
•
New message pop up alert
Queued or new dual commit entries pop up alert
If the pop up alert feature is configured for a board
The pop up alert will appear at the very bottom of the control panel. The alert can be dismissed
by clicking the message.
Links
Links on the WebEOC control panel offer access to Internet and intranet sites, shared folders,
and files in the File Library. As long as your administrator has provided your position with
privileges, the links may be accessed by just clicking their name on the control panel. Those
users without permissions will not have a Links section.
4-10
WebEOC 7 User Manual
Control Panel Overview
Navigating the Control Panel
Once a link is clicked, the browser window will display.
Internet link
Figure 4-12:
WebEOC 7 User Manual
Link to internet browser
4-11
Control Panel Overview
Navigating the Control Panel
Menus
Tiered menus can be created and added to the control panel. These menus can contain status
boards, plug-ins, links, or other menus in any combination. When accessed, the menu opens in
a separate window with the same look and functionality as the control panel.
Select the menu
Menu window
Figure 4-13:
Accessing the Menu window
Tips
Following are several tips and tricks to make using WebEOC even easier:
4-12
•
Any WebEOC window (e.g., control panel, board, link, etc.) may be resized using standard
Windows functions and moved to any position on the desktop.
•
WebEOC remembers the position and size of board and menu windows when closed,
allowing them to appear in the same position when reopened.
WebEOC 7 User Manual
Control Panel Overview
Navigating the Control Panel
•
Multiple status boards and/or multiple copies of a status board, menu window, plug-in or
link may be opened for simultaneous display. This feature allows you to display these windows on one or more monitor/display areas.
•
After a display has been opened, additional copies can be opened by clicking the link once
for each additional copy. These displays can then be positioned as desired.
•
Note: This does not apply to Input Views. A user can only have one input view open for a
board.
WebEOC 7 User Manual
4-13
Control Panel Overview
Navigating the Control Panel
4-14
WebEOC 7 User Manual
Chapter 5
Status Boards
About Status Boards
Status Boards are the heart of WebEOC. They provide the mechanism to share real-time information with authorized users everywhere.
Many CIMS programs rely on e-mail as the method used to communicate incident information
among responders. In WebEOC, incident information is transmitted and displayed in status
boards, making the information universally available to all authorized users simultaneously.
In the context of WebEOC, a status board is an electronic version of large, chronological or categorical paper-based status boards that for years dominated every EOC and command center
around the country. In the “manual” environment, information was typically posted to status
boards by “plotters” – people with grease pencils who posted updates from input forms provided by other emergency responders, who received their updates from counterparts in the
field. With WebEOC, individual users have the ability to input information directly into the
system.
When customers first install WebEOC, a default set of status boards is available to enable any
agency to begin use almost immediately. These default status boards are addressed in this
chapter. Your agency may use these status boards as is, modify them to meet local requirements, or implement an entirely different board set tailored to your process and method of
operation. Regardless of the process adopted, the way users view, add, and update status
boards is the same.
For information on how to display (open) status boards, see Chapter 2, “Getting Started”.
The following topics are covered in this chapter:
•
WebEOC Status Boards
•
Significant Events
•
Infrastructure
WebEOC User Manual
5-1
Status Boards
About Status Boards
5-2
•
Mission/Task
•
Resources
•
Position Log
•
Press Release
•
SITREPs: ICS and ESF
•
FEMA/ICS/ESF Forms
•
Road Closures
•
Shelters
•
Status Boards – General, Viewing and Updating
•
Status Board Features - Spell Check, Attachments, E-mails
•
Board Operations Window Overview
•
Adding and Updating Entries
WebEOC User Manual
Status Boards
WebEOC Status Boards
WebEOC Status Boards
The following provides a brief description of the default Status Boards that come standard
with WebEOC software. How to navigate within boards, add information, update, sort, filter,
and print will be described later in the chapter.
Significant Events
The Significant Events Status Board is WebEOC’s equivalent to the Event Log or the Incident
Journal. It can be used to track events and activities and log “who did what when”. The Significant Events status board provides the real-time chronology of actions taken during an event,
from beginning to end. Entries in this status board include:
•
Reporting authority
•
Event type
•
Date and time of the entry
•
Location
•
Priority level
•
A narrative summarizing event information.
WebEOC User Manual
5-3
Status Boards
WebEOC Status Boards
WebEOC’s other status boards offer essentially the same functionality, but allow information
to be grouped categorically instead of chronologically.
Figure 5-1:
5-4
Significant Events status board
WebEOC User Manual
Status Boards
WebEOC Status Boards
Infrastructure
The Infrastructure Board is used to track the effects of an emergency on the components of the
physical environment, such as pipelines, railways, roads, or bridges. The display view contains
the details of various infrastructure and a running tally of those that are marked closed.
The Infrastructure Board includes the following:
•
Types of infrastructure
•
Infrastructure name
•
Location
•
Status
•
Remarks and detours
Figure 5-2:
WebEOC User Manual
Infrastructure status board: input and display views
5-5
Status Boards
WebEOC Status Boards
Mission Task
The Mission Task Status Board provides the ability to assign missions and monitor the status
of tasks.
With the Mission Task display board, missions can be edited by clicking the Update Status
button. This gives those who have been assigned a task the ability to "reject", "complete", or
characterize it as a task "in progress". Members of the receiving staff may also provide comments with their new status.
The Mission Task Board has the following attributes:
•
Mission ID number
•
Originator
•
Assigned agency
•
Mission description
•
Task status (Assigned, Rejected, In Progress, Completed)
•
Location
•
Quantity
•
Contact
•
Details of the task
•
Update status
•
Attachment capabilities
•
Completed date/time
Figure 5-3:
5-6
Mission/Task status board
WebEOC User Manual
Status Boards
WebEOC Status Boards
Resources
The Resources status board allows agencies to track:
•
Type of resource
•
Agency (owner)
•
Info URL
•
Source (vendor)
•
Quantity available
•
Quantity committed
•
Location
•
Cost/Unit/Rate
•
Contact information
•
Last modified
•
Description and image
•
Time of commitment
Deployment information
•
Deployed location and quantity
•
Description
•
Complete status
•
Date/time of deployment
WebEOC User Manual
5-7
Status Boards
WebEOC Status Boards
Users can maintain, manage and assign current inventory or available resources. These
resources can be easily created, modified, or deleted on the fly.
Figure 5-4:
5-8
Resources: Input form and status board displays
WebEOC User Manual
Status Boards
WebEOC Status Boards
Position Log
The Position Log status board provides users with a method of documenting actions taken by
the personnel in each position in the EOC during each shift.
The Position Log allows agencies to track:
•
ID number of the position
•
Date
•
Event type
•
Priority
•
Subject
•
Detail
Figure 5-5:
WebEOC User Manual
Position Log status boards: Input, List and Display views
5-9
Status Boards
WebEOC Status Boards
Press Release
Every emergency response involves the media, and almost every emergency response organization has an Information Officer responsible for the development and release of accurate and
complete information regarding the incident.
The Information Officer usually establishes an area for the media that is away from the command post, separate from the EOC, and a safe distance from the incident scene. The Information Officer will use this area to provide news releases, answers questions, orchestrate tours,
and respond to information requests.
WebEOC’s Press Release status board provides the capability to display links to a press release
file stored internally in WebEOC’s File Library, or a file stored externally. It can be used to display press releases in their entirety. It is not uncommon for agencies to locally develop other
media-related boards, such as a Rumor Control Board.
Figure 5-6:
5-10
Press Release status board
WebEOC User Manual
Status Boards
WebEOC Status Boards
Situation Reports (SITREPs): ICS and ESF
SITREPs (SITuation REPorts) are typically published at least once every 24 hours during an
emergency. WebEOC provides a standard format that may be used based on two common
methodologies – Incident Command System (ICS) or Emergency Support Functions (ESF).
Functional elements within the emergency response organization update their portion of the
SITREP which then populates a master SITREP. The master SITREP can be viewed online and
approved before release.
The Situation Report Board allow agencies to track:
•
Report number
•
Date and time of the SITREP
•
Details
Figure 5-7:
WebEOC User Manual
SITREP-ICS status board
5-11
Status Boards
WebEOC Status Boards
Road Closures
The Road Closures status board provides a detail of the closure’s location, date/time of the closure, as well as an estimation of the road’s re-opening. The body of the entries in the display
view act as a link to the record detail where more information on the closure can be reviewed.
Road closures can be added ad-hoc as the emergency unfolds. Postings to this status board
also include the road name and jurisdiction, indicate the reason for the closure, and display
the status of repairs.
The Road Closures board contains the following attributes:
•
Road name
•
Jurisdiction
•
Address
•
Time/date closed
•
Estimated time/date opened
•
Repair and status
•
Reason for closure
Figure 5-8:
5-12
Road Closures status board: Data input and display views
WebEOC User Manual
Status Boards
WebEOC Status Boards
Shelters
Shelter information and status can be tracked in the Shelters status board. The standard list
view displays the shelter’s name, status, occupant availability, and indicates whether it is
American Red Cross (ARC) approved, Special Needs (SN), or Pet Friendly (PF).
Users can access Shelter detail by selecting the Detail button. This provides additional information such as address, contact information, capacity, and occupancy.
Figure 5-9:
WebEOC User Manual
Shelters status board
5-13
Status Boards
FEMA/ICS/ESF Forms
FEMA/ICS/ESF Forms
WebEOC contains a suite of status boards patterned after FEMA and ICS forms. ESi can also
provide examples of boards based on ESF function.
•
FEMA forms are those contained within The Federal Emergency Management Agency’s
Applicant Handbook. The handbook describes how applicants (e.g., cities, counties, etc.)
apply for federal assistance under the Public Assistance Program.
•
WebEOC’s ICS forms support the five major components common to most organizations –
Command, Operations, Planning, Logistics, and Finance. These forms are based on those
published by National Interagency Fire Center, National Wildfire Coordinating Group.
•
Unlike ICS or FEMA forms where specific formats are prescribed, ESFs contain no such
structure. Because ESFs vary so widely, examples are not shown in this manual. Typical
ESF status boards are available for download from ESi’s community website.
FEMA Forms
FEMA’s Applicant Handbook provides easy to use instructions on how to apply for Public
Assistance grants. WebEOC ships with a current set of FEMA Forms and they are also available through the DocNet system on FEMA’s website.
Preparing FEMA forms within WebEOC provides not only an electronic method of completion, but aids in document retention because data contained within each form is saved to the
database when the incident is archived.
FEMA forms included with WebEOC are listed below. Instructions for completing each form
are contained in the Applicant Handbook.
5-14
•
FEMA Form 90-49 - Request for Public Assistance
•
FEMA Form 90-91 - Project Worksheet
•
FEMA Form 90-91A - Project Worksheet - Damage Description and Scope of Work Continuation Sheet
•
FEMA Form 90-91B - Project Worksheet - Cost Estimate Continuation Sheet
•
FEMA Form 90-91C - Project Worksheet - Maps and Sketches Sheet
•
FEMA Form 90-91D - Project Worksheet - Photo Sheet
•
FEMA Form 90-120 - Special Considerations Questions
•
FEMA Form 90-121 - PNP Facility Questionnaire
•
FEMA Form 90-123 - Force Account Labor Summary Record
WebEOC User Manual
Status Boards
FEMA Forms
•
FEMA Form 90-124 - Materials Summary Record
•
FEMA Form 90-125 - Rented Equipment Summary Record)
•
FEMA Form 90-126 - Contract Work Summary Record
•
FEMA Form 90-127 - Force Account Equipment Summary Record
•
FEMA Form 90-128 - Contract Work Summary Record
•
FEMA Form 90-129 - Mission Assignment
WebEOC User Manual
5-15
Status Boards
FEMA Forms
•
FEMA Form 90-49 - Request for Public Assistance
Figure 5-10:
5-16
Example of a FEMA form: Form 90-49 - Request for Public Assistance
WebEOC User Manual
Status Boards
ICS Forms
ICS Forms
ICS Forms included with WebEOC are listed below.
•
ICS 201 - Incident Briefing Form
•
ICS 202 - Incident Objectives List
•
ICS 203 - Organizational Assignment List
•
ICS 204 - Division Assignment List
•
ICS 205 - Incident Radio Communications Plan
•
ICS 206 - Medical Plan
•
ICS 207 - Organizational Chart
•
ICS 209 - Incident Status Summary Report
•
ICS 211 - Incident Check-In List
•
ICS 213 - General Message Form
•
ICS 214 - Unit Log Form
•
ICS 215 - Operational Planning Work Sheet
•
ICS 215a - Incident Action Plan Safety Analysis
•
ICS 216 - Radio Requirements Worksheet
•
ICS 218 - Support Vehicle Inventory Form
•
ICS 220 - Air Operations Summary
•
ICS 221 - Demobilization Checkout
•
ICS 224 - Crew Performance Rating Form
•
ICS 225 - Incident Personnel Performance Rating Form
•
ICS 230 - Daily Meeting Schedule
WebEOC User Manual
5-17
Status Boards
ICS Forms
Figure 5-11:
5-18
Example of an ICS form: ICS Form 201 - Incident Briefing Form
WebEOC User Manual
Status Boards
Status Boards - General
Status Boards - General
Navigation
Because status boards are displayed in windows that can be resized, the number of entries that
can be seen at any one time will vary. If a board has more entries than can be viewed at the
same time, use the scroll bar to navigate through the window. Each status board may also be
resized to increase or decrease the viewing area.
Scroll Bar
Figure 5-12:
Status Board Window and Scroll Bar
If the status board consists of multiple pages, use the three (3) arrow buttons located at the
bottom of the window to navigate. As shown below, the left double arrow button returns to the
WebEOC User Manual
5-19
Status Boards
Status Boards - General
first page; the single left arrow button will return to the previous page, and the right arrow button advances to the next page.
Returns to
First Page
Previous Page
Next Page
Figure 5-13:
Board Refresh
Each time a new entry is posted or an entry is updated, the status board refreshes with the new
or changed entry appearing at the top of the status board (unless the board is sorted or filtered). To temporarily suspend this refresh process when scrolling through entries on a status
board, select the Disable Refresh checkbox located at the bottom of each status board.
Caution: New data will not be posted to the display until the Disable Board Refresh checkbox
is unchecked.
Figure 5-14:
Disable Board Refresh Checkbox
Viewing and Updating Entries
WebEOC Administrators can set privileges to allow a user to view only or view/update entries.
These permissions can be further restricted to allow a user to view and/or update only those
entries to which they have input. Check with your WebEOC Administrator to determine your
specific user permissions.
Spell Check
Spell Check is available in all data entry windows. This feature offers users the ability to spell
check text entered into text areas. The Spell Check button will prompt a spell check dialog
window to appear when selected. As suspect words are detected, users may ignore the alert,
add the word to the dictionary, or manually replace the word by entering the correction in the
Change To: Field. After the spell check process is complete, an internet explorer dialog will
display. Clicking OK will eliminate the spell check dialog box and return to data entry window.
5-20
WebEOC User Manual
Status Boards
Status Boards - General
Spell
Check
button
Figure 5-15:
Spell check feature and spell check dialog
Board Attachments
Sometimes it is necessary to include a map or an additional file to a board. WebEOC enables
you to attach one or more files to a board entry. File size limits are controlled by the WebEOC
administrator. The attachment feature must be added to a board prior to using it. This is also
the responsibility of the WebEOC Administrator.
Note: Board attachment(s) will be maintained when an entry containing an attachment is
data linked from one status board to another; however, attachments cannot be dual committed
or used with board e-mails and control panel notifications.
To add an attachment to an entry, perform the following in the Data Entry window:
•
Click the Browse button.
•
Navigate to the location of the file to be attached.
WebEOC User Manual
5-21
Status Boards
Status Boards - General
Select Browse to
navigate to file
Figure 5-16:
5-22
Select File Attachment
•
Click Open. (The URL for the file is inserted to field.)
•
Highlight the desired file in the Choose File dialog.
•
Click Save.
WebEOC User Manual
Status Boards
Status Boards - General
Each attachment is associated with the board entry and can be downloaded or viewed directly
from the status board display. Board attachments will be displayed as links (labeled as Attachment) in the status board entry.
Figure 5-17:
Example of an attachment link in a status board entry
To open an attachment from the status board display:
•
Click the Attachment link in the appropriate entry. The Download File dialog will display.
Figure 5-18:
Upload File dialog
•
Click Open to view the attachment or click Save to save the file.
•
Click Cancel to abort the operation.
WebEOC User Manual
5-23
Status Boards
Status Boards - General
E-mail
WebEOC users can create and send e-mails from information entered in data entry form of a
status board. This is especially valuable when used in conjunction with notification-type
boards and distribution list e-mail accounts used to notify users outside of WebEOC.
An example of a data entry screen where the e-mail feature is incorporated is illustrated below.
In this example, the data configured as the event type will become the subject of the e-mail and
the Description data will be included in the e-mail as content.
Where multiple e-mail addresses are entered, separate the addresses with a comma.
Figure 5-19:
Example of entering e-mail addresses to a data entry form and how input
information displays in the e-mail
Note: A board must be configured by a WebEOC administrator to send e-mails.
Contents of an entry can be e-mailed to individuals or groups inside or outside of the EOC.
5-24
WebEOC User Manual
Status Boards
Status Boards - General
Data Linking
Using data linking, an entry in one status board can be simultaneously posted (i.e. “pushed”)
to another board(s), allowing one-time entry of information. Data fields in one status board
are “mapped” (i.e., linked) to specified fields in the destination status board(s) by the system
administrator using utilities in Boards Manager.
Note: Only those status boards configured to allow data linking can execute this feature.
Dual Commit
Dual Commit is a feature in WebEOC that allows information to be posted to a second server.
This feature allows an organization to:
1.
Post entries outside their firewall to public status boards hosted on an outside server for
access by external agencies/users via the Internet
2. Share information between agencies having common WebEOC status boards.
You can selectively decide which status board entries to dual commit, keeping sensitive information out of the public’s eye, or status boards can be set to auto dual commit.
Note1: Only those status boards configured to allow dual commit can execute this feature.
Note 2: If you receive an advisory that the incident has not been mapped, contact your
WebEOC administrator and request they coordinate with the administrator of the target
WebEOC instance to map the incident.
Remote Boards
If your group permissions allow, you may see a link in the Plugins section of WebEOC control
panel labeled Remote Boards. Using Remote boards is a special capability in WebEOC that
allows a user on one instance of WebEOC to access a board that is hosted on a different
WebEOC system (such as a neighboring county’s WebEOC). The use of remote boards allows
all WebEOC instances to view the same set of data from the same board. Everyone has all the
information available to them and a common operational picture is maintained.
On the Control Panel, remote boards are grouped together under a single link called Remote
Boards in the Plug-ins section of the control panel. When the Remote Boards link is clicked, a
menu containing a list of remote boards to which the user has access opens.
Remote boards are used in the same way as any other board residing on a user's WebEOC Control Panel -- users can add/update, view, sort, and filter data as determined by the permissions
allowed at the board owner and local server levels -- provided that the WebEOC system hosting the board is accessible.
It is important to note that remote boards differ from local boards in that remote board displays do not refresh automatically, but instead refresh on a timed interval, which can take up
WebEOC User Manual
5-25
Status Boards
Status Boards - General
to 60 seconds to execute. Users who are logged directly in to the owner server and viewing the
same status board will see automatic refreshes.
Figure 5-20:
Remote Boards link on the control panel
When a remote board is not accessible (i.e., you do not have connectivity to the host), or if the
incident you are logged into on your WebEOC has not been mapped by an administrator on
the host system, you will receive an advisory. When this occurs, contact your WebEOC administrator and request they coordinate with the administrator of the system hosting the remote
board(s).
5-26
WebEOC User Manual
Status Boards
Board Operations Window Overview
Board Operations Window Overview
Data entry, sort, and filter functions for a status board are accessed through the Board Operations window. To access the Board Operations window, click the Add/Update button adjacent
to the status board name on the Control Panel.
Add/Update Button
Figure 5-21:
Add/Update button
The Board Operations window contains a set of buttons across the top. Each button provides
access to a specialized input window. By default, the data Entry (New Record or Update
Record) window is displayed.
Note: Users who do not have “write” permissions for the board will not have access to the
data entry function, and the “Entry” button will be grayed out.
WebEOC User Manual
5-27
Status Boards
Board Operations Window Overview
The Incident drop-down list will appear only when the user is logged in to a Master View. The
incident selected from the drop-down list during data entry determines the incident with
which the status board will be archived.
Figure 5-22:
Data Entry window (New Record)
The following functions are available in the Board Operations window depending on the permissions and options enabled by the WebEOC Administrator.
•
Entry (Data Entry) -- Used to add a new entry to a status board or update an existing
entry. The Entry window appears by default when the Board Operations window is displayed.
Note: If a user is granted “read only” privileges for a status board, the Entry function (i.e.,
New Record window) is not enabled. The Sort window appears by default for users with
“view only” permissions when the Board Operations window is displayed.
Figure 5-23:
Read Only Privileges (Entry is disabled)
Dual commit and Data link operations are also executed through the Data Entry window
when these feature(s) are enabled for the status board.
5-28
WebEOC User Manual
Status Boards
Board Operations Window Overview
Note 1: Not all status boards allow entries to be updated (add only), nor are all users
granted “read/write” privileges to status boards. See your WebEOC Administrator for
more information.
Note 2: If the Add Only option is not enabled for a status board, then whenever an
update is made to an entry, only the last update is displayed in the status board. The original entry and any updates are stored to the database.
•
A date/time tool may also be available in the Data Entry window. Simply click on the calendar icon, modify the time, and click on the date. The selected time will display in the
date/time field.
Figure 5-24:
Date and time tool
•
Sort -- used to set the sort order for entries currently displayed on the status board.
Entries can be sorted in ascending or descending order by: data id, entry date, originating
user, originating position, date/time, or any other non-text area fields on a board. Also the
number of entries displayed at a time in the status board page can be set within the Sort
tab.
•
Filter -- used to filter entries currently displayed on a board meeting specific criteria.
Because status boards can be designed and customized based on local needs, only general
instructions are provided here. Each status board functions in the same general way
regardless of the fields they may contain.
WebEOC User Manual
5-29
Status Boards
Adding and Updating Entries
Adding and Updating Entries
Data Entry Window
The Data Entry function in the Board Operations Window allows you to either add a new entry
to a status board, or update information for an existing entry.
The numbers, types, and names of fields vary among status boards, depending on the design
and features that are enabled or disabled.
Drop-down menu
Date/Time field
Text line
Text area
Figure 5-25:
Data Entry window
The Data Entry function in the Board Operations Window can have the following types of
fields:
•
Text -- This field can hold one or more lines of text.
Note: You may use the copy and paste operation to insert large amounts of text from an
external source document or file.
•
List -- A drop-down list holds items from which to select.
•
Date/Time -- The current date and time are automatically inserted in this field, but can
be changed with the date/time picker.
Note: A composite date/time field may be used instead of separate date and time fields.
5-30
•
Radio Button -- Click the adjacent radio button to select the choice.
•
Checkbox -- Check the adjacent checkbox to select or unselect.
WebEOC User Manual
Status Boards
Adding and Updating Entries
Adding a New Entry
To add a new entry to a status board, perform the following steps:
1.
If required, click Cancel in the New Record window to clear any existing data.
2. If applicable, check (or uncheck) the Data Links checkbox(es) for each status board to
which the entry will be linked.
Figure 5-26:
Data Link selected
3. If applicable, check (or uncheck) the Dual Commit Servers checkbox(es) for each target
server to which the entry will be posted.
Figure 5-27:
Dual Commit Selected
4. Complete/enter the remaining information for the entry as applicable.
5.
Click Save to post the entry or click Cancel to clear the New Record window.
The WebEOC Administrator can configure data fields to require completion before an
entry is posted to a board. If a required field is left blank and Save is clicked, an alert identifying the missing information is displayed to the user, as illustrated in the figure below.
When this occurs, click OK, enter the missing information, and then click Save.
Figure 5-28:
WebEOC User Manual
Missing information for a required field advisory
5-31
Status Boards
Adding and Updating Entries
Retrieve Record
Note: Many organizations deny users the ability to modify (i.e., update) entries after they have
been posted to the system. If you do not have the ability to edit an existing entry, it is because a
WebEOC Administrator has restricted your user privileges. Instead, corrections or status
changes are input by adding a new entry.
If the Add Only option is not enabled for a status board, then whenever an update is made to
a specific entry, only the last update appears in the status board. The original data, although
not shown, is still resident within the database and can be viewed by running a report. You
may or may not have appropriate permissions to run a report and may require assistance from
an administrator.
Authorized users can update entries in two ways: Option 1: Click the Data ID/entry on the status board; or Option 2: Use the Data ID for the entry;
Option 1: Click the Data ID or Entry on the status board
1.
Click on the applicable Data ID or board entry (where data is displayed).
Note: The cursor will change to a hand when passed over the entry.
Data
ID
Figure 5-29:
5-32
Board entry
WebEOC User Manual
Status Boards
Adding and Updating Entries
2. The Update Record (#) window appears and displays the information for that entry.
Figure 5-30:
Update Record 1 window
3. Modify the information in the Update Record (#) window as applicable.
4. Click Save to post the updated entry to its status board.
Option 2: Use the Data ID for the Entry
Note: The Data ID must be displayed on the board to use this option.
1.
Determine the Data ID of the entry to be updated on the status board.
Data
ID
Figure 5-31:
Data ID 1
2. Access the Board Operations Window and click the Retrieve Record button in the Data
WebEOC User Manual
5-33
Status Boards
Adding and Updating Entries
Entry window.
Retrieve Record Button
Figure 5-32:
Data Entry window
3. Enter the Data ID for the entry to be updated.
Figure 5-33:
Enter Data ID to be Updated
4. Click OK to load the entry or click Cancel to abort the update.
5-34
WebEOC User Manual
Status Boards
Adding and Updating Entries
5.
Modify the information in the Update Record (#) window as applicable.
Figure 5-34:
Update Record 1 window
6. Click Save to post the changes and update the entry.
Sort Window
The Sort window allows you to order the entries currently displayed in a status board according to selected parameters, as illustrated below.
Figure 5-35:
WebEOC User Manual
Sorting window example
5-35
Status Boards
Adding and Updating Entries
The default Sort criteria is descending entry date and Paging is set to twenty-five (25) entries
per page.
You may reorder status board entries based on a single status board field in ascending or
descending (alphabetical or numerical) order.
In the Paging section, the number of entries displayed at a time (per page) can also be set by
selecting 1, 10, 50 or All from the drop-down list, or remain at the default setting of 25.
When set to a numeric value, the navigation buttons (Returns to First Page, Previous Page,
and Next Page) at the bottom of the status board can be used to page through board entries.
To sort a status board, perform the following steps:
Note: A board may be filtered first and then sorted if desired.
1.
Select the Field you wish to sort on from the drop-down list.
2. Select either the Ascending (low to high, early to late, alphabetical order) or Descending
(high to low, late to early, reverse alphabetical) radio button.
3. Click Apply.
4. To clear the sort order, click Reset. The sort criteria reverts to descending entry date
order.
Filter Window
A board can be filtered to display only those entries that meet specific criteria. The graphic
below illustrates an example of the Filter window.
Figure 5-36:
5-36
Filter window example
WebEOC User Manual
Status Boards
Adding and Updating Entries
Any combination of criteria can be used to define the filter. The more criteria specified, the
fewer entries that will be displayed.
To filter a status board, perform the following steps:
1.
Enter or select a value for each field to be used in the query.
2. Click Apply.
Entries meeting the criteria are displayed on the status board and can be sorted and/or filtered again.
When a board display is filtered, a Filter Applied indicator appears in the upper right corner of the window.
Filter Applied
Indicator
Figure 5-37:
Filter Applied indicator
3. If desired, the entries displayed can then be sorted and/or filtered again.
4. To remove the filter and redisplay all board entries, click Clear.
WebEOC User Manual
5-37
Status Boards
Adding and Updating Entries
5-38
WebEOC User Manual
Chapter 6
Reports
About Reports
In addition to real-time access to emergency information, WebEOC provides an extensive
information retrieval and reporting capability. Preformatted reports can be created and then
added as a link on the Control Panel.
Report links are grouped under the Links panel on the control panel and can be identified by
an adjacent green indicator light and annotated as “Report: + Report Name” (e.g., Report: Significant Events) or may be included as a sub-menu item in a Menu.
The following topic is covered in this chapter:
•
Accessing, Displaying and Printing a Report
WebEOC User Manual
6-1
Reports
Accessing, Displaying and Printing a Report
Accessing, Displaying and Printing a Report
To access a report, perform the following steps:
1.
Click the report link on the Control Panel.
Report link:
Significant Events
Figure 6-1:
6-2
Control Panel with Report Link
WebEOC User Manual
Reports
Accessing, Displaying and Printing a Report
The Report window will display.
Figure 6-2:
Report Window
2. To refresh (i.e., update) the report window, click the [Close Window] link and re-open
the report from the Control Panel, or hold down the “Ctrl” key and the “R” key.
3. To print a report, click the [Print Report] link to generate a hardcopy.
OR
Click the [Close Window] link.
Note: You may alternatively print the board in its display format by right-clicking on the
board window and selecting Print. If you would like to print out all the records, remember
to set the Paging parameter in the Sort function of the Board Ops window to “All” for a
comprehensive print-out.
WebEOC User Manual
6-3
Reports
Accessing, Displaying and Printing a Report
6-4
WebEOC User Manual
Chapter 7
Chat
About Chat
The Chat plug-in allows WebEOC users to create chat rooms and conduct online text conversations in real time. User permissions can be granted to edit chat rooms (create and delete) or
can be limited to just participating (send text messages) in existing chat rooms. A chat room
can be password-protected by the chat room creator or WebEOC Administrator.
The following topics are covered in this chapter:
•
Creating a Chat Room
•
Using Chat
•
Deleting a Chat Room
WebEOC User Manual
7-1
Chat
Creating a Chat Room
Creating a Chat Room
1.
To access Chat, click the Chat link on the Control Panel.
The Chat Room List window will display.
Figure 7-1:
Chat Room List window
2. Click the Add Chat Room button.
The Edit Chat Room window will display.
Figure 7-2:
Edit Chat Room window
3. Enter a name for the chat room.
4. Assign (or remove) the group(s) of users that will have access to the chat room:
•
Double-click to move a group to the opposite pane (assigned or unassigned).
OR
•
Click to highlight the name of the group and then click on the < or > arrow.
OR
•
7-2
Add several groups simultaneously holding down the CTRL key and single-click each
group name.
WebEOC User Manual
Chat
Creating a Chat Room
5.
Click Save to create the chat room.
OR
Click Cancel to return to the Chat Room List window.
WebEOC User Manual
7-3
Chat
Using Chat
Using Chat
To use a chat room, perform the following steps:
1.
Click the Chat link on the Control Panel.
The Chat Room List window will display.
Figure 7-3:
Chat Room List window
2. Click the name of the chat room you want to enter.
7-4
WebEOC User Manual
Chat
Using Chat
The Chat Room window will display.
Figure 7-4:
Chat Room window
Note: Upon entering a chat room, the Messages Pane will be empty and the current participants in the chat room will appear in the Users pane.
3. Type the message in the bottom Text Message area.
4. Click Send. The message will be added to the Messages Pane.
WebEOC User Manual
7-5
Chat
Using Chat
Note: You will see all messages posted by participants unless you exit the chat room and
then subsequently re-enter.
5.
7-6
To leave the chat room, click Leave Room.
WebEOC User Manual
Chat
Deleting a Chat Room
Deleting a Chat Room
You can only delete a chat room if you are a WebEOC administrator or the have the proper
permissions (view/edit permissions) to the chat. To delete a chat room:
1.
Click the Chat plug-in on the Control Panel.
The Chat Room List window will display.
Figure 7-5:
Chat Room List window
2. Click the Delete (trash can) icon adjacent to the chat room to be deleted.
The delete confirmation dialog will display.
Figure 7-6:
Delete confirmation dialog
3. Click OK to delete the chat room.
OR:
Click Cancel to abort the operation and maintain the chat room.
WebEOC User Manual
7-7
Chat
Deleting a Chat Room
7-8
WebEOC User Manual
Chapter 8
Contacts
About Contacts
The Contacts plug-in provides the ability to maintain a notification directory of detailed contact information that can be tailored and updated as required. Information recorded for each
contact includes, but is not limited to, agency (or person) name, telephone, mobile and pager
numbers, physical and e-mail addresses, and special notes or comments for the contact.
The level of permissions granted by an administrator in conjunction with the access privileges
allowed by the creator of the contact determine the view and/or edit privileges a user may
exercise.
The following topics are covered in this chapter:
•
Permissions
•
Sorting Contacts
•
Viewing Contact Information
•
Adding and Editing a Contact
•
Searching Contacts
•
Importing Contacts
•
Exporting Contacts
•
Deleting a Contact
WebEOC User Manual
8-1
Contacts
Permissions
Permissions
As mentioned in the introduction, permissions are granted to users based on permissions
enabled by an administrator in conjunction with the access privileges allowed by the creator of
a contact. A user granted full access privileges through their Group permissions by an administrator will be able to see and edit all contacts. When restricted permissions have been
assigned, the “restricted” user will be able to add a contact, edit those contacts that they create,
and view-only those contacts that the creator has set to Do not hide from restricted users.
If you have questions about the permissions available to you in Contacts, please contact the
WebEOC Administrator.
Sorting Contacts
1.
Click the Contacts link on the Control Panel.
The Contacts window will display.
Figure 8-1:
Contacts window
2. To sort the contacts list, click on the column heading corresponding to the sort you wish to
execute: Name, Agency, Phone, Pager, or Mobile.
The list will sort and display in ascending order.
Note: The default sort is by Name in ascending order.
8-2
WebEOC User Manual
Contacts
Viewing Contact Information
Viewing Contact Information
To display detailed information for a contact, perform the following steps:
1.
Click the Contacts link on the Control Panel.
The Contacts window will display.
Figure 8-2:
Contacts window
2. Click the name of the contact to display.
WebEOC User Manual
8-3
Contacts
Viewing Contact Information
The Edit Contact window will display, complete with the details available for that contact.
Figure 8-3:
Edit Contact window
3. Click Cancel or Back to exit the Edit Contact detail window and return to the Contacts
window.
Note: Users with administrator privileges will have access to Save and Cancel buttons in
the Edit Contacts window; users who do not have administrator privileges will have access
only to the Back button.
8-4
WebEOC User Manual
Contacts
Adding and Editing a Contact
Adding and Editing a Contact
To add a new contact, or edit an existing one, perform the following steps:
1.
Click the Contacts link on the Control Panel.
Note: Users who do not have edit privileges for the contact will not be able to perform this
operation.
The Contacts window will display.
Figure 8-4:
Contacts window
2. If adding a new contact, click the Add Contact button.
OR
If editing an existing contact, click on the contact.
WebEOC User Manual
8-5
Contacts
Adding and Editing a Contact
The Edit Contact window will display.
Figure 8-5:
Edit Contact window
3. Enter or modify the following information as applicable:
8-6
•
Name -- last, first, and middle name
•
Agency -- the agency name, title and department this contact person represents
•
Address -- multiple address blocks to hold detailed information are available
•
City/State (or province)/Zip Code -- specific locale information
•
e-mail -- e-mail addresses for this contact
•
Notes -- useful information about this contact
WebEOC User Manual
Contacts
Adding and Editing a Contact
•
Phone Numbers -- phone numbers (e.g., business, pager, cell, etc.) for this contact
•
Access level -- Click the appropriate radio button:
Hide from restricted users: If selected, this contact will not display in the Contacts
window for users assigned “restricted” permissions by the administrator.
Do not hide from restricted users: Contacts set to “Do not Hide” can be viewed but
not edited by users with restricted permissions.
4. Click Save to save the information for the contact.
OR
Click Cancel to return to the Contacts window without saving information.
WebEOC User Manual
8-7
Contacts
Searching and Printing Contacts
Searching and Printing Contacts
To search for a specific contact or group of contacts, perform the following steps:
1.
Click the Contacts link on the Control Panel.
The Contacts window will display.
Figure 8-6:
Contacts window
2. Click Search.
The Search Contacts window will display.
Figure 8-7:
Search Contacts window
3. Enter search values for any combination of the following fields:
8-8
•
Last Name
•
First Name
•
Agency
•
Department
•
City
•
State
WebEOC User Manual
Contacts
Searching and Printing Contacts
4. Click Search. The Contacts window will populate with a list of contact(s) matching the
search values.
OR
Click Cancel to suspend the search and return to the Contacts window.
WebEOC User Manual
8-9
Contacts
Importing Contacts
Importing Contacts
To import contacts from an external file to the Contacts database in WebEOC, perform the following steps:
1.
Click the Contacts link on the Control Panel.
The Contacts window will display.
Figure 8-8:
Contacts window
2. Click the Import button.
The Import Contacts window will display.
Figure 8-9:
Import Contacts window
3. Set the following values and options for the import file (i.e., file being imported to Contacts):
8-10
WebEOC User Manual
Contacts
Importing Contacts
a)
Fields -- Move data fields between the Available and Selected panes using the following
options:
•
Double-click the item or highlight the item(s) in the pane and click the either the > or <
button.
•
To move all items simultaneously between the panes, click either the >> or << button.
b)
File Format -- Select either the Comma Separated or Tab Separated radio button.
c)
File -- Select the file to be imported:
•
Click Browse and navigate to the contacts file to be imported.
•
Select the file and click Open.
The name of the file selected displays in the directory field.
4. Click Import to import the contacts to WebEOC.
OR
Click Cancel to abort the operation and return to the Contacts window.
WebEOC User Manual
8-11
Contacts
Exporting Contacts
Exporting Contacts
To export the contacts database in WebEOC to an external file, perform the following steps:
1.
Click the Contacts link on the Control Panel.
The Contacts window will display.
Figure 8-10:
Contacts window
2. Click the Export button.
The Export Contacts window will display.
Figure 8-11:
Export Contacts window
3. Select the file type (separation type) by clicking either the Comma Separated or Tab
Separated radio button. Exporting as a comma-separated file will allow you to export the
contacts to a spreadsheet program such as Microsoft Excel.
4. Click the Export button. The File Download dialog will display.
OR
Click Cancel to abort the export operation and return to the Contacts window.
5.
In the File Download Display, click Save, browse to the directory where the contacts file
will be saved, and click Save.
OR
Click Cancel to return to the Export Contacts window.
8-12
WebEOC User Manual
Contacts
Exporting Contacts
6. After the export is complete, open the file and verify that the export operation is successful.
7.
Click Cancel to exit the Export Contacts window and return to the Contacts window.
WebEOC User Manual
8-13
Contacts
Deleting a Contact
Deleting a Contact
To delete a contact, perform the following steps:
Note: A user with no administrative privileges can only delete the contacts that he/she have
added.
1.
Click the Contacts link on the Control Panel.
The Contacts window will display.
Figure 8-12:
Contacts window
2. Click the Delete (trashcan) icon adjacent to the Contact to be deleted.
The Delete confirmation dialog will display.
Figure 8-13:
Delete confirmation dialog
3. Click OK to delete the contact.
OR
Click Cancel to abort the operation.
8-14
WebEOC User Manual
Chapter 9
Checklists
About Checklists
WebEOC enables an organization to automate procedures and checklists. Steps in a checklist
can be identified as a main numbered step, or a sub-step marked with a letter/number, that
can be checked off with different statuses: Open, Complete, Previously Accomplished, or Not
Applicable. If this functionality is not desired, steps can simply be marked as Completed.
Users can add remarks to any step and have the option of viewing or hiding the remarks.
Checklists are incident specific. This means a checklist (e.g., Bomb Threat) used in one incident can also be used simultaneously and independently in other incidents, but information
associated with each incident is stored with the associated incident when archived.
Administrators can create checklists and assign a due time for a step. When a step has not
been completed and the due time is exceeded, the status indicator field for the step or sub-step
turns red.
The following topics are covered in this chapter:
•
Accessing, displaying and viewing checklists
•
Setting statuses for a step
•
Adding, viewing and editing remarks
WebEOC User Manual
9-1
Checklists
Accessing, displaying and viewing checklists
Accessing, displaying and viewing checklists
To access checklists, click the Checklists link in the Tools section on the Control Panel.
The Checklists window displays.
Figure 9-1:
Checklists Window
If you are logged in to a specific incident, then only checklists applicable to that incident will
appear. If you are logged into a master view, an Incident drop-down list will appear. The incident selected from the drop-down list determines the incident with which the checklist data
will be archived.
The Checklists window defaults to the first checklist in the drop-down list. A different checklist
may be viewed by selecting it from the drop-down list.
To close the Checklists, click the “X” located in the top right corner of the Checklists window.
9-2
WebEOC User Manual
Checklists
Setting statuses for steps
Setting statuses for steps
A step can be set to one of the following statuses located in the Checklist key legend:
•
C: Complete
•
O: Open/In-Progress
•
P: Previously Accomplished
•
N: Not Applicable
•
Blank: Not started.
Statuses for steps (main steps and sub-steps) are related in the following ways:
•
A step status set to Blank will set statuses of its sub-steps to Blank
Figure 9-2:
•
Checklist Step with Sub-Step Statuses Set to Blank
A step status set to N(ot Applicable) will set statuses of its sub-steps to N(ot Applicable).
Conversely, if all sub-steps are set to N(ot Applicable) the step status will automatically be
set to N(ot Applicable).
Figure 9-3:
•
Checklist Step and Sub-Step Status Set to N
A step status set to P(reviously Accomplished) will set statuses of its sub-steps status to
P(reviously Accomplished).
WebEOC User Manual
9-3
Checklists
Setting statuses for steps
Conversely, if all sub-steps are set to P(reviously Accomplished) the step status will automatically be set to P(reviously Accomplished).
Figure 9-4:
•
A step status with sub-steps set to either N(ot Applicable), and/or C(omplete) will set the
overall step status to C(omplete).
Figure 9-5:
•
9-4
Complete Checklist Step with Sub-Step Statuses Set to N or C
A step will remain O(pen) until all sub-steps are marked C(omplete), P(reviously Accomplished) and/or N(ot Applicable).
Figure 9-6:
•
Checklist Step and Sub-Step Status Set to P
Open Checklist Step with Sub-Step Statuses Set to O, B, N, P, or C
To set the status for a step, simply select a value from the drop-down list adjacent to the
step.
WebEOC User Manual
Checklists
Setting statuses for steps
•
Steps may have a due time associated with them. The time is based on the Incident date/
time. If a step is Blank or O(pen/In-Progress) and the time for completion (due time) has
been exceeded, the background color of the status field will display in red.
Figure 9-7:
WebEOC User Manual
Step Status - Time Expired
9-5
Checklists
Adding, viewing and editing remarks
Adding, viewing and editing remarks
Users can add remarks to any step. To toggle remarks on and off, click either the Hide
Remarks or Show Remarks radio buttons next to the Checklist drop-down list
Figure 9-8:
Viewing a Checklist - Show Remarks
To add, edit or view a remark, perform the following steps:
1.
Move the cursor over the applicable step to change it to a link and click.
An input box will open below the step.
Figure 9-9:
9-6
Editing a Remark
WebEOC User Manual
Checklists
Adding, viewing and editing remarks
2. Type the remark and click Save.
Note: The remarks block is limited to 3000 characters.
The text is added to the running remarks area under the Step.
WebEOC User Manual
9-7
Checklists
Adding, viewing and editing remarks
9-8
WebEOC User Manual
Chapter 10
Messages
About Messages
Many Crisis Information Management Software (CIMS) packages use e-mail to communicate
incident information among responders. In WebEOC, incident information is transmitted via
status boards. However, WebEOC does have a Messaging plug-in that allows users to communicate with each other via an internal messaging link unique to WebEOC. Users can send messages to any e-mail server or e-mail addressable device, such as cell phones, or pagers. It also
allows users to send/forward messages to e-mail accounts external to WebEOC. All messages
sent or received by the user are seen regardless of the incident the user is logged in to. When
an incident is archived, all messages by users logged in to the incident are archived and
removed from Messages.
The following topics are covered in this chapter:
•
Accessing Messages
•
Messages Window
•
Sorting Messages
•
Composing and Sending a Message
•
Viewing Messages
•
Fowarding and Replying to Messages
•
Printing a Message
•
Deleting a Message
•
New Message Notification
WebEOC User Manual
10-1
Messages
Accessing Messages
Accessing Messages
To access messages, click the Messages link on the Control Panel.
The Messages window will display.
Figure 10-1:
Messages Window
As is typical of standard e-mail systems (e.g., Microsoft® Outlook), unread messages appear in
bold text. Messages that have been read appear in regular text.
Messages Window
The Messages window features the following:
•
Mailbox -- When the Messages link is selected from the Control Panel, the Inbox window
displays by default. A drop-down list in the upper left corner of the window allows users to
select Inbox, Sent Items, or Deleted Items. Selecting any one of these options will display messages in the same format as the Inbox.
•
Messages list -- A list of messages currently residing in the selected mailbox (inbox,
sent, deleted) is displayed. Sender, subject, priority, incident and received date/timestamp for each message is captured.
•
Compose -- Click the Compose button to create a new message.
•
Delete -- To remove a message from the Inbox, click the Delete button adjacent to the
message.
For housekeeping purposes, users can “delete” messages from the Inbox. The message is
not actually deleted, but simply removed from the Inbox and sent to the Deleted Items list,
where it is maintained until the incident through which the message was sent is archived.
Messages maintained in the Sent and Deleted Items cannot be deleted but will be removed
from these lists when the incident through which the message was sent is archived.
10-2
WebEOC User Manual
Messages
Sorting Messages
Sorting Messages
Messages can be sorted by clicking on the column title (link) corresponding to the column you
wish to sort by.
By default, messages are sorted based on the time it was received, with the most recent message at the top.
Composing and Sending a Message
To compose a new message, perform the following steps:
1.
Click the Messages link on the Control Panel.
The Messages window will open, displaying a list of messages currently residing in the
Inbox.
Figure 10-2:
WebEOC User Manual
Messages Window
10-3
Messages
Composing and Sending a Message
2. Click the Compose button.
The Compose New Message window will open.
Figure 10-3:
Compose New Message Window
3. Select or enter the following information:
•
To -- Select the recipient(s) from the Users, Groups and Positions drop-down
lists. The name will become highlighted when you click on it.
Note 1: If an e-mail account has not been configured for a user, that user name will not
appear in the To: Users list.
Note 2: To send a message to multiple recipients: press and hold the Ctrl key and click
each recipient user, group, and/or position. To deselect a choice, press and hold the Ctrl
key and then click once on the choice to deselect.
10-4
•
Subject -- Complete the subject field. This text will display in the Messages window.
•
Priority -- Select the priority for the message (High, Normal, Low). The color-code
for statuses display as:
•
Red -- High
•
Black -- Normal
•
Green -- Low
•
Message -- Enter the text of the message to the message field.
•
Attachment -- If attaching a file, click Browse to choose the file to attach.
WebEOC User Manual
Messages
Composing and Sending a Message
Note: WebEOC’s messaging can support one Word attachment. To send more than one
Word file, save the items to a zip file and then attach the compressed file to the message.
•
Generate E-mail -- If a message will also be sent out of WebEOC to selected e-mail
recipients, click the Generate E-mail checkbox. An e-mail will be sent only to
addressees who have been set up as Users in WebEOC. Configuring e-mail addresses
for a user is covered in the WebEOC Administrator Manual.
If the sender (i.e., person composing the message) of the e-mail does not have an e-mail
address configured in his/her user account, the Generate e-mail checkbox will not
appear as an option.
When the Generate E-mail box is checked, an ad hoc e-mail field displays. An unlimited
number of e-mail addressees can be added to this field. Separate each e-mail address with
a comma.
Figure 10-4:
Generate e-mail Box Checked
4. To spell check an e-mail, click the Spell Check button.
5.
Click Send to send the message. After you send your message, you will automatically
return to your inbox.
OR
Click Cancel to cancel the message and return to the Inbox.
WebEOC User Manual
10-5
Messages
Composing and Sending a Message
6. The recipients of your e-mail will receive a pop-up notification at the bottom of their
WebEOC control panel notifying them of the new message.
Figure 10-5:
10-6
New message pop-up notification
WebEOC User Manual
Messages
Viewing Messages
Viewing Messages
If you have a new message, the Message link in the WebEOC control panel will turn Bold and
red. You will also receive a pop-up notification at the bottom of your WebEOC control panel
notifying you of the new message.
To view a message:
1.
Click the Messages link on the Control Panel.
The Messages window will open and display the Inbox.
Figure 10-6:
Messages Window
2. Click on a message to open it.
3. Click on the attachment link to open or save the file enclosed with the message.
4. To change the messages list, select Sent Items or Deleted Items from the drop-down list,
and click on the message you wish to open.
5.
Click Back to return to the message list.
WebEOC User Manual
10-7
Messages
Forwarding and Replying to Messages
Forwarding and Replying to Messages
To reply to or forward a message:
1.
Click the Messages link on the Control Panel.
The Messages window will open and display the Inbox.
Figure 10-7:
Messages Window
2. Click on the message to view.
The Message Detail window for that message will open, as shown in Figure 8-8.
Figure 10-8:
10-8
Message Detail Window
WebEOC User Manual
Messages
Forwarding and Replying to Messages
3. Click Reply or Forward to reply or forward the message.
The message will open in the Compose New Message window.
Note: “Attachment enclosed” is annotated if an attachment was included in the initial email.
Figure 10-9:
WebEOC User Manual
Compose New Message Window
10-9
Messages
Forwarding and Replying to Messages
4.
Complete the following fields as required:
•
To -- Select the recipient(s) from the Users, Groups and Positions drop-down
lists. The name will become highlighted when you click on it.
Note 1: If an e-mail account has not been configured for a user, that user name will not
appear in the To Users list.
Note 2: To send a message to multiple recipients: press and hold the Ctrl key and click
each recipient user, group, and position. To deselect a choice, press and hold the Ctrl key
and then click once on the choice to deselect.
•
Subject -- Complete the subject field. This text will display in the Messages window.
•
Priority -- Select the priority for the message (High, Normal, Low). The color-code
for statuses display as:
•
Red -- High
•
Black -- Normal
•
Green -- Low
•
Message -- Enter the text in the Message field.
•
Attachment -- If attaching a file, click Browse to choose the file to attach.
Note: WebEOC’s messaging can only support one attachment. To send more than one file,
save the items to a zip file and attach the compressed file to the message.
•
Generate e-mail -- If a message will also be sent out of WebEOC to selected e-mail
recipients, click the Generate e-mail checkbox. An e-mail will be sent only to
addressees who have been set up as Users in WebEOC. Configuring e-mail addresses
for a user is covered in the WebEOC Administrator Manual.
If the sender (i.e., person composing the message) of the e-mail does not have an e-mail
address configured in his/her user account, the Generate e-mail checkbox will not appear
as an option.
When the Generate e-mail box is checked, an ad hoc e-mail field displays. An unlimited
number of e-mail addressees can be added to this field. Separate each e-mail address with
a comma.
5.
Click Send to send the message.
OR
Click Cancel to abort the message and return to the inbox.
10-10
WebEOC User Manual
Messages
Printing a Message
6. You will automatically return to the message list.
Printing a Message
To print a message:
1.
Click the Messages link on the Control Panel.
The Messages window will display.
2. Go to applicable mailbox (inbox, sent, deleted) and locate the message.
3. Click on the message to display the Message Detail window.
Figure 10-10: Message Detail Window
4. Click Print to print the message.
5.
Click Back to return to the message list.
WebEOC User Manual
10-11
Messages
Deleting a Message
Deleting a Message
Note: Messages cannot be deleted from the Sent or Deleted Item windows.
To delete a message from the Inbox (i.e., move message to Deleted Items), perform the following steps:
1.
Click the Messages link on the Control Panel.
The Messages window will display.
Figure 10-11: Messages Window
2. Click the Delete (trash can) icon adjacent to the message to delete.
A delete confirmation dialog will display.
Figure 10-12: Delete Confirmation Dialog
3. Click OK to remove the message from the Inbox and place it in Deleted Items.
OR
Click Cancel to return to the Inbox with no changes made.
10-12
WebEOC User Manual
Chapter 11
File Library
About File Library
The File Library Plug-In allows WebEOC users to upload and share documents and files with
other users through WebEOC. The file could be a standard operating procedure, a situation
report, a.pdf file, an image, or other file type. Depending on the permissions granted, users
may add, view, and/or delete files from the library.
Note 1: If a user has access to View Files, they can view-only all files in the File List window.
Note 2: Users who are unable to access the File Library or require edit and/or delete permissions should see a WebEOC Administrator to determine their privileges.
The following topics are covered in this chapter:
•
Accessing File Library
•
Adding and Editing a File
•
Viewing a File
•
Deleting a File
WebEOC User Manual
11-1
File Library
Accessing File Library
Accessing File Library
To access the file library, click the File Library link on the Control Panel.
The File List window will display.
Figure 11-1:
File List window
Adding and Editing a File
1.
Click the File Library link on the Control Panel.
The File List window will display.
Figure 11-2:
11-2
File List window
WebEOC User Manual
File Library
Adding and Editing a File
2. If adding a file, click the Add File button. The Add File window will display.
Figure 11-3:
Add File window
3. If editing an existing file, click the name of the file to be edited. The Edit File window will
display.
Note: If editing an existing file, the Description field is completed and the directory location/system-assigned file ID is provided.
Figure 11-4:
Edit File window
4. Perform the following as applicable:
a) Click the Browse button, navigate to the file directory and select the file you want to
upload.
b) Enter a name or description for the file in the Description field.
c) Click Save to save the file.
OR
Click Cancel to return to the File List window without saving.
WebEOC User Manual
11-3
File Library
Viewing a File
Viewing a File
To view a file, perform the following steps:
Note: You must have the appropriate application loaded on your PC in order to open the file.
1.
Click the File Library link on the Control Panel.
The File List window will display.
Figure 11-5:
File List window
2. Click the View (down arrow) icon adjacent to the file.
A popup box will display.
Figure 11-6:
3. Click Open to view the file.
Note: You must have the appropriate application to open the file.
4. Click Save to save the file to your computer
Or:
11-4
WebEOC User Manual
File Library
Viewing a File
Click Cancel to return to the file list.
5.
To close the window, click the “X” located in the top right corner of the File View window.
WebEOC User Manual
11-5
File Library
Deleting a File
Deleting a File
Note: Users unable to perform the delete operation should contact their WebEOC Administrator for assistance in determining if their permissions allow deletion.
To delete a file:
1.
Click the File Library link on the Control Panel.
The Folder List window will display.
Figure 11-7:
File List window
2. Click the Delete (trash can) icon adjacent to the file to be deleted.
The delete confirmation dialog will display.
Figure 11-8:
Delete File Confirmation dialog
3. Click OK to delete the file.
OR:
Click Cancel to abort.
11-6
WebEOC User Manual
Chapter 12
National Weather Service (NWS) Alerts
About NWS
WebEOC provides access to National Weather Service (NWS) watches, warnings, and advisories. The following topic is covered in this chapter:
•
Accessing and Viewing NWS Alerts
WebEOC User Manual
12-1
National Weather Service (NWS) Alerts
Accessing and Viewing NWS Alerts
Accessing and Viewing NWS Alerts
Caution: NWS alerts do not automatically refresh as new watches, warnings, and advisories
are issued. To display the latest advisory for a particular State/Territory, users must repeat the
process for Accessing and Viewing NWS Alerts, or hold down the “Ctrl” and “r” to refresh the
screen.
To access and view NWS alerts, perform the following steps:
1.
Click the NWS link on the Control Panel.
The NWS Weather Alerts window will display.
Figure 12-1:
NWS Weather Alerts Window
2. Select the desired State or Territory (region) from the State/Territory drop-down list.
Figure 12-2:
12-2
State/Territory Drop-Down List
WebEOC User Manual
National Weather Service (NWS) Alerts
Accessing and Viewing NWS Alerts
3. All alerts for the State/Territory selected will display.
Figure 12-3:
State/Territory Alerts
4. To go immediately to the alert for a specific location within a State/Territory, select the
location from the Location drop-down list.
Figure 12-4:
WebEOC User Manual
Location Drop-Down List
12-3
National Weather Service (NWS) Alerts
Accessing and Viewing NWS Alerts
The alert for the selected location will display.
Figure 12-5:
Alert for Location
Note: You may print the board in its display format by right-clicking on the board window
and selecting Print.
12-4
WebEOC User Manual
Chapter 13
Common Alerting Protocol (CAP) Messages
About CAP
The Common Alerting Protocol (CAP) Messages Plug-In is a simple, flexible data interchange
format for collecting and distributing “all hazard” safety notifications and emergency warnings
over information networks and public alerting systems.
CAP messages are managed similar to an e-mail client program such as Microsoft Outlook.
CAP messages are stored in one of three folders: the Inbox, Sent Items, and Trash.
In order to send and receive CAP messages, your agency must be registered with the Disaster
Management Interoperability Service (DMIS) CAP service as a Collaborative Operations
Group (COG) and the DMIS service must be available. If you are unable to send or receive CAP
messages, advise the WebEOC administrator and request verification that CAP is properly
configured and that the DMIS service is running.
The following topics are covered in this chapter:
•
Accessing and viewing CAP alerts
•
Sending a CAP message
•
Emptying the CAP Trash folder
WebEOC User Manual
13-1
Common Alerting Protocol (CAP) Messages
Accessing and Viewing CAP Messages
Accessing and Viewing CAP Messages
Note: In order to view, send, and receive CAP messages, your agency must be registered with
the Disaster Management Interoperability Service (DMIS) CAP service as a Collaborative
Operations Group (COG) and the DMIS service must be available. If the DMIS service is
unavailable or the connection is unusually slow, you will receive a timeout message, as illustrated below. If you are unable to send or receive CAP messages, advise the WebEOC administrator and request verification that the DMIS service is running.
Figure 13-1:
Timeout advisory
To access and view CAP messages, perform the following steps:
1.
Click the CAP link on the Control Panel.
The CAP Message List window will display.
Figure 13-2:
CAP Message List window
2. By default, the Inbox list displays. It contains all CAP messages that a WebEOC user has
received.
Unread messages are displayed in bold.
13-2
WebEOC User Manual
Common Alerting Protocol (CAP) Messages
Sending a CAP message
Clicking on a message will display the message detail in a new window.
Clicking on the trash can icon will move the message to the Trash folder.
3. Click on the message to view. The message will be displayed in the CAP Message Detail
window.
4. Click Return to List to return to the Cap Message List.
Sending a CAP message
To send a CAP message, perform the following steps:
1.
Click the CAP link on the Control Panel.
The CAP Message List window will display.
Figure 13-3:
CAP Message List window
2. Click the Send Message button.
WebEOC User Manual
13-3
Common Alerting Protocol (CAP) Messages
Sending a CAP message
The Post CAP Message window will display.
Figure 13-4:
Post CAP Message window
3. By default, the Scope dropdown list defaults to Private and available COGs are listed in the
Address to section of the screen. If the message is to be distributed system-wide, then
13-4
WebEOC User Manual
Common Alerting Protocol (CAP) Messages
Sending a CAP message
change the Scope dropdown list to Public. This action removes the list of available COGs.
Figure 13-5:
CAP Message set to Public
4. Fill out the message fields. See the CAP specification for field descriptions (http://
www.oasis-open.org/specs/index.php#capv1.1). This is the official OASIS specifications
document.
5.
Click Post Message to send the message.
OR
Click Cancel to return to the CAP Message List window.
WebEOC User Manual
13-5
Common Alerting Protocol (CAP) Messages
Emptying the CAP Trash Folder
Emptying the CAP Trash Folder
To clear CAP messages that have been marked for deletion, perform the following:
1.
In the CAP Message List window, select Trash from the Folder dropdown list. A list of all
CAP messages that this user has marked for deletion displays and the Empty Trash button
is enabled.
Figure 13-6:
Trash folder window
2. Click the Empty Trash button. This action will permanently remove all of the messages
in the Trash folder.
13-6
WebEOC User Manual
Chapter 14
Scroller
About Scroller
WebEOC scroller provides the ability to view data from multiple boards in one window on a
timed interval. This is useful in an agency that might not have sufficient room to project all of
the status boards used to manage an emergency, or they simply might want the capability to
continuously view summary data.
Only WebEOC Administrators can configure the board set and set/adjust the time interval.
The following topic is covered in this chapter:
•
Using Scroller
WebEOC User Manual
14-1
Scroller
Using Scroller
Using Scroller
1.
To access scroller, click the Scroller link on the Control Panel.
The Scroller window will display.
Back
Pause
Forward
Play
Figure 14-1:
Scroller window
You may perform the following actions:
•
Back -- The Back button (<<) returns you to the previous board. This action automatically pauses the scroller and changes the Pause button to a Play button.
To reinstate the scroll feature, simply click the Play button.
14-2
•
Pause/Play -- Allows the user to either stop (i.e., freeze) the scrolling action so that a
specific board’s data may be reviewed in more detail or restart the play feature.
•
Forward -- The Forward button (>>) manually advances to the next board in succession. This action automatically pauses the scroller and changes the Pause button to a
Play button.
WebEOC User Manual
Chapter 15
MapTac
About MapTac
MapTac was created to replace or augment static, paper-based maps and magnetic light
boards common in many EOCs. A unique tool in WebEOC, MapTac allows an authorized users
to access a static map, dispersion model, digital photo, etc., from any map/GIS source or digital camera and using their web browser, share the tactical scene with authorized users
instantly.
MapTac can be used with any GIS or mapping system to produce a static image file (.jpg, .gif,
.bmp). Existing web-based mapping resources available on the Internet, such as Yahoo Maps,
Delorme, etc., can also be used to plot an address in order to create the image file that can then
be saved to MapTac and annotated as necessary using the icon palette and drawing tools. MapTac also allows responders at geographically separate locations to view, and depending on user
privileges, update images real-time.
Users with the appropriate permissions can add markers such as push pins, fire trucks, road
blocks, etc., with or without labels, and draw shapes on the image. Labels can be added and
edited at any time. System administrators have the ability to add a URL to an icon that allows
users to access related information by simply clicking on the icon when annotated on the
image file in MapTac.
The following topics are covered in this chapter:
•
MapTac components
•
Viewing and printing a map
•
Placing markers on a map
•
Moving markers
•
Deleting a marker
•
Placing a shape on a map
WebEOC User Manual
15-1
MapTac
About MapTac
15-2
•
Deleting a shape
•
Adding a label to a marker
•
Clearing a label on a marker
•
Clearing all shapes, markers and labels from a map
WebEOC User Manual
MapTac
MapTac Components
MapTac Components
The figure below illustrates the major components of the MapTac user interface:
•
Maps: drop-down list and Clear Map button
•
Shapes: ellipse, polygon, and free-hand drawing tools, delete button and shape color dropdown list
•
Labels: add and remove label buttons
•
Marker tabs: categorized markers
•
Map view pane with Printer icon.
Each header in the tool pane can be expanded and collapsed as needed by simply clicking on
the tab/heading.
Figure 15-1:
WebEOC User Manual
MapTac window components
15-3
MapTac
Viewing and Printing a Map
Viewing and Printing a Map
To access a map for viewing, perform the following steps:
1.
To access MapTac, click the MapTac link on the control panel.
2. Select a map for display from the Maps drop-down list.
The image displays in the map view area.
Figure 15-2:
Map view area
3. To print a map, click the Print (printer) icon in the lower right hand corner of the map.
15-4
WebEOC User Manual
MapTac
Placing Markers on a Map
Placing Markers on a Map
Note: WebEOC users that have “read-only” permissions to a map will not be able to add
markers to a map. MapTac comes pre-loaded with DHS symbology. To place a marker on a
map, perform the following steps:
1.
Click the desired marker tab (e.g., Agricultural) to display the marker palette.
Figure 15-3:
Marker palette
Note: Icons may be grouped and available under different marker tabs.
Figure 15-4:
Marker palette with different marker tabs
2. In the marker palette, click on the desired marker (e.g., radiological marker) to be placed
WebEOC User Manual
15-5
MapTac
Placing Markers on a Map
in the map view area.Position the cursor at the location on the map where the marker is to
Figure 15-5:
Radiological marker selected
be placed and single-click the mouse. The marker is stationed at the position specified.
Figure 15-6:
Radiological marker placed in map view area
3. To collapse (i.e., hide) the marker list, click on the desired tab (e.g., General).
4. Note: WebEOC users that have “read-only” permissions to a map will not be able to add
markers to a map.
15-6
WebEOC User Manual
MapTac
Moving Markers
Moving Markers
To move a marker, perform the following steps:
1.
Click and hold the left mouse button on the marker you wish to move.
2. Drag the marker to the new location and release the mouse button.
Resizing a Marker
Markers can be resized by clicking one of the handles that appear around the marker when
selected and dragging the mouse.
WebEOC User Manual
15-7
MapTac
Deleting a Marker
Deleting a Marker
To delete a marker, perform the following steps:
1.
Right click on the marker.
A delete confirmation dialog will display.
Figure 15-7:
Delete confirmation dialog
2. Click OK to delete the marker or click Cancel to return to the map without deleting the
marker.
15-8
WebEOC User Manual
MapTac
Placing a Shape on a Map
Placing a Shape on a Map
To place a shape on a map, perform the following steps:
1.
Click the Shapes tab to display the shape palette.
Figure 15-8:
Shapes palette
2. Click on the desired shape button (ellipse, polygon, or line) from the shape palette.
3. Select the shape color from the shapes color selection list.
4. To draw an ellipse:
a) Click on the ellipse drawing tool.
b) Click on the map at the center point for the ellipse. Then move the mouse to draw.
WebEOC User Manual
15-9
MapTac
Placing a Shape on a Map
5.
Click the left mouse button when finished drawing.
Figure 15-9:
Ellipse shape
6. To draw a polygon:
a) Click on the Polygon drawing tool.
b) Click on the map at each of the corners for the polygon then return to the first corner.
15-10
WebEOC User Manual
MapTac
Placing a Shape on a Map
c) Click to complete the shape. The completed polygon will display.
Figure 15-10: Drawing a polygon
7.
To draw a line:
a) Click on the Line Shape drawing tool.
b) Click on the map to start the line.
c) Draw the line with the mouse. Click again to finish the line.
Figure 15-11: Line Shape
WebEOC User Manual
15-11
MapTac
Resizing a Shape
8. To collapse (i.e., hide) the shapes palette, click on the Shapes tab.
9. Note: WebEOC users that have “read-only” permissions to a map will not be able to add
shapes to a map.
Resizing a Shape
Shapes can be resized by clicking the outline around the shape when selected and dragging the
mouse.
15-12
WebEOC User Manual
MapTac
Deleting a Shape
Deleting a Shape
There are two ways to delete a shape.
Method 1
1.
Right click on the shape.
A delete confirmation dialog will display.
Figure 15-12:
2. Click OK to delete the shape or click Cancel to abort the operation.
Method 2
1.
Click the Delete Shape icon in the Shapes palette.
2. Click on the shape.
A delete confirmation dialog will display
Figure 15-13:
3. Click OK to delete the shape.
WebEOC User Manual
15-13
MapTac
Adding a Label to a Marker
Adding a Label to a Marker
Labels can be added to a marker from the marker palette.
Note: Labels cannot be added to shapes.
To add a label to a marker, perform the following steps:
1.
Click the Labels tab to display the label palette.
Figure 15-14: Label palette
2. Click the Set Label button to select the set label function.
Figure 15-15: Set Label (A) button
3. Click on the marker to be labeled.
15-14
WebEOC User Manual
MapTac
Adding a Label to a Marker
The label text prompt will display.
<lab
Figure 15-16: Label text prompt
4. Enter the text for the label and click OK. The label will appear under the marker.
Figure 15-17: Label for marker
5.
Click Cancel to abort adding a label.
WebEOC User Manual
15-15
MapTac
Clearing a Label on a Marker
6. Click the Set Label button again to deselect the set label function.
7.
Note: WebEOC users that have “read-only” permissions to a map will not be able to add
labels to a map.
Clearing a Label on a Marker
To clear a label on a marker, perform the following steps:
1.
Click the Labels tab to display the Label Palette.
Figure 15-18: Label palette
2. Click the Clear Label button to select the clear label function.
<lab
Figure 15-19: Clear label
3. Click on the marker to be removed.
4. Click the Clear Label button again to deselect the clear function.
15-16
WebEOC User Manual
MapTac
Clearing All Shapes, Markers, and Labels from a Map
Clearing All Shapes, Markers, and Labels from a Map
To clear all shapes, markers and labels from a map, simply click the Clear Map button.
Figure 15-20: Clear Map
A confirmation dialog will appear. If you wish to clear all shapes, markers, and labels form the
map, click, “OK”. If not, then click “Cancel” and return to the map.
WebEOC User Manual
15-17
MapTac
Clearing All Shapes, Markers, and Labels from a Map
15-18
WebEOC User Manual
Chapter 16
Pocket PC Support
About Pocket PC Support
WebEOC supports limited functionality on handheld devices and SmartPhones that use the
Windows Mobile 5.0 operating system and Blackberries that use the Blackberry 4.2.1 operating system. This interface allows users to employ basic functionality in status boards, messages, checklists, and contacts. Functionality available through this interface is outlined below:
•
Edit/view status boards
•
Create, send and view messages
•
Add, edit, view and search contacts
•
View and update checklists
Note: While WebEOC plug-ins to which the user has permissions will appear on his/her control panel (e.g., MapTac, Calendar, Resource Manager), plug-in functionality is not supported
in the hand-held environment.
The following topic is covered in this chapter:
•
Utilizing basic WebEOC functionality on a Pocket PC.
WebEOC User Manual
16-1
Pocket PC Support
Utilizing WebEOC on a Pocket PC
Utilizing WebEOC on a Pocket PC
Status Boards
1.
Using your Pocket PC, access your web browser and navigate to the WebEOC 7.0 URL.
WebEOC will automatically display the WebEOC Login page.
2.
Enter your username and passworth and click OK.
3.
Select your position and the incident you wish to log in to and click OK. The PDA control panel will
appear.
4.
From the Control Panel, you may utilize any status board as you normally would.
5.
•
To view a board, click the Display link to the right of the board.
•
To update an entry, click on the applicable Data ID in the status board.
•
To add a new entry, click the Add link to the right of the board and enter the information.
•
To navigate back to the control panel, click the Back to Control Panel link in the window.
To exit WebEOC, simply click the Log Off link.
Other board functions that are available include:
•
Filtering board entries
•
Sort board entries
•
Remote boards
•
Dual commit
•
Data linking
Messages
Available functionality in the Messages module in a PDA environment includes:
16-2
•
Create and send messages inside WebEOC
•
Send e-mail outside WebEOC
•
Send attachments
WebEOC User Manual
Pocket PC Support
Utilizing WebEOC on a Pocket PC
Contacts
Available functionality in the Messages module from a PDA includes:
•
Add and edit contacts
•
Search contacts
Checklists
Normal checklist functionality is available from a PDA:
•
View checklists
•
Update checklist steps
Plug-ins
While WebEOC plug-ins to which you have permissions will appear on the control panel (e.g.,
MapTac, Calendar, Resource Manager), plug-in functionality is not supported in the handheld environment.
WebEOC User Manual
16-3
Pocket PC Support
Utilizing WebEOC on a Pocket PC
16-4
WebEOC User Manual