1
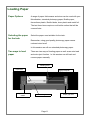
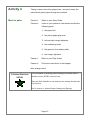
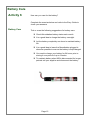
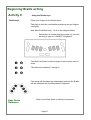
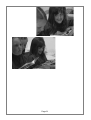
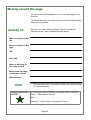
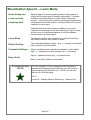
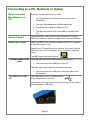
The power to achieve The Power to Achieve A Professional Development Program for the Mountbatten Brailler Workshop One Participant's Workbook © October 2010 Harpo Sp. z o. o. Poznan Poland www.mountbattenbrailler.com Introduction Welcome to this workshop for new Mountbatten users. Purpose This workshop has been designed to introduce you to the Mountbatten Brailler as a teaching/ learning tool. During the workshop you will find out how you can use the machine to empower learners to: • produce simple Braille documents • participate in mainstream class activities You will have the opportunity to develop and share strategies for producing learner documents and developing learner skills. Workshop Outcomes At the end of this one-day workshop you will be able to: • use your Mountbatten as a Braille teaching and learning tool • use connecting devices to assist learning: • • a Mimic to monitor progress • a PC keyboard as a teaching and integration tool • a PC to facilitate teaching and assist integration • a print output to assist integration locate reference resources to continue learning Page 1 Today’s Program Welcome Introduction 10 mins Workshop Purpose and Learning Outcomes Session One Getting to Know Your Mountbatten 70 mins Why work with electronic braille technology? Video 1 Discovering the Mountbatten Mountbatten Orientation Loading Paper Start Up - Battery Care The Mountbatten Keyboard Beginning Braille Writing Morning Tea Session Two Producing Braille Video 2 90 mins Introducing the Mountbatten to the Classroom Using Learn Mode to write Braille Moving around the page Using Commands Word wrap, centering, margins and line spacing Creating files in memory and Brailling the file Lunch Session Three Connectivity Technology and Learning Connecting External Devices Connecting the Mimic Using a PC keyboard Connecting the Mountbatten to a computer Using MB-Comm - a brief overview Workshop Summary Page 2 90 mins Session One Getting to Know Your Mountbatten Getting to Know Your Mountbatten Page 3 What is a Mountbatten Brailler? The Mountbatten Brailler is an electronic Braille writer with speech output. It can be used to: • write Braille documents • translate from Braille to text • translate from text to Braille • provide audio feedback • emboss files from PC or note-taker. Lord Mountbatten was the great-grandson of Queen Victoria The History of the Mountbatten Brailler and was born in 1900 in Windsor, England. In 1979 he was killed off the coast of Ireland when a bomb planted by the IRA terrorists blew up his fishing boat. A large trust fund was established in his name after his death. A portion of the money raised went into developing a new Braille writer, which became the Mountbatten Brailler. In 1991 Quantum Technology in Sydney Australia, took over the commercial development and production of the Mountbatten. And even now, when you switch it on, you will hear the friendly Australian voice saying ‘Good day!’ In 2010, Harpo in Poznan, Poland took over the manufacture of the Mountbatten from Quantum. We will continue to develop the Mountbatten Brailler so it can continue to provide the best possible start for early Braille learners and their teachers, classmates and families. Page 4 Activity 1 View Video 1 and note a variety of ways the Mountbatten can be used Page 5 Why work with electronic Braille technology? Consider some of the advantages and disadvantages of introducing Braille technology to the classroom. Why do we do it? To bring the benefits of modern technology to Braille learners so that they can enhance their learning opportunities while building skills for life and independence. ▪ To support desirable student outcomes A study conducted in the USA compared outcomes between two groups of legally blind adults consisting of those who learned to read Braille, and those who learned to read print as their original reading medium and found: “…..those who learned to read using Braille had higher employment rates and educational levels, were more financially self-sufficient, and spent more time reading than did those who learned to read using print.” From: Ryles, R. The Impact of Braille Reading Skills on Employment, Income, Education and Reading Habits. JVIB (1996) ▪ To enhance teaching and learning The reflective teacher of visually impaired students: asks what students should know and be able to do as a result of instruction with assistive technology tools evaluates the decisions they make each day about what is important for students to learn with assistive technology From: McNear: A Framework for Braille Literacy, October 2001 Page 6 Discovering the Mountbatten What’s inside the box? When you receive your Mountbatten and unpack it check that you have the following: • the Mountbatten • a 12 Volt power adaptor [separate pack] and power cable • a USB cable to connect to the PC • Mountbatten User Manual • o The Keyboard Stickers o The Warranty Sheet A starter pack of paper Important! Fill out the Warranty Sheet and make sure you store it in a safe place. If you have a warranty issue, you will need this information. Mountbatten unpacking Identify the cover and remove it by lifting the tab in the center back. Place it to the side. Follow the steps in the Mountbatten User Guide to unpack the Mountbatten safely. Important! Remove the shipping lock! Failure to do this can result in damage! Keep all the Mountbatten packaging All your Mountbatten packaging, plus any parts and accessories you aren't using every day, will fit back inside the outer carton. Make sure you keep this carton safely, in case you need to ship the Mountbatten for service. Page 7 Resources at your fingertips You can use any or all of these resources to support your use of the Mountbatten: Mountbatten User Guide Contains detailed information about the Mountbatten and about how to use it. Up-to-date versions can be downloaded from www.mountbattenbrailler.com at any time. Check online to find out the most recent version of the User Guide for your Mountbatten model. Command Summary Easy to access lists of the commands in a handy booklet. Keep it near the Mountbatten for quick reference. Up-to-date versions can be downloaded from www.mountbattenbrailler.com at any time. Check online to find out the most recent version of the Command Summary for your Mountbatten model. Student Evaluation Pages of skills that can be developed by children as they use the Mountbatten and build operating independence. Distributor Support Telephone support is available from your distributor - you will receive the support contact details with the Mountbatten. Clarify at the outset the support and service available and how you access it. HARPO HARPO is committed to providing teachers with access to professional development tools such as training programs, newsletters and on-line information. Go to www.mountbattenbrailler.com to find out about the latest teaching and learning resources. You are also very welcome to email us at: [email protected] Page 8 Mountbatten Orientation - Parts Activity 2 Work in Pairs Work in pairs to identify all the parts of the Mountbatten. If one person reads the description and the other explores it tactually you will build up a knowledge bank for introducing and using the Mountbatten with your students. Change places so that each member of a pair will do both description and identification. Tick each part as you find it on the Mountbatten. Check your answers in the Easy Guide. The spring-loaded paper bail [removable] The silver metal reading table large enough to accommodate both hands reading left to right. The two black margin adjusters. Note the left one is fixed, the right adjuster moves. The two black grip wheels on each margin adjuster that help feed the paper. The silver embossing head. This 'measures' the width of the page before you begin Brailing, and embosses Braille. The small yellow tag on the embossing head that assists when checking position on the page. The yellow paper grip lever on the right of the reading table. When moved it generates audio response. The yellow manual paper advance wheel recessed on the left of the reading table. The ergonomically designed yellow keyboard with: six black Braille keys that correspond to the 6 Braille dots, and seven blue keys that tell the Mountbatten what to do. On the left front of the Mountbatten is the black On/Off switch. The yellow knob located on the front is for volume control. The robust yellow handle offers ease of carrying in the front of the Mountbatten Page 9 Mountbatten Orientation - Ports Activity 3 Work in Pairs Work in pairs to identify all the Mountbatten ports. If one person reads the description and the other explores it tactually you will build up a knowledge bank for introducing and using the Mountbatten with your students. Change places so that each member of a pair will do both description and identification. Tick each part as you find it on the Mountbatten. Check your answers in the Easy Guide. The USB port on the right side of the case, for connecting to a PC. The Mimic port on the right side of the case for the optional Mimic LCD text display. On the right rear of the unit is a round PS2 port for a standard PC keyboard plug. In the centre of the back of the Mountbatten is a Parallel Out port for sending information to a standard text printer directly from the MB. Next to the Parallel port you will find a Serial port. You can connect a Braille note-taker or a PC using this port. On the left side of the Mountbatten is the speaker for audio output. A small socket for a standard headphone jack is located next to the speaker to enable independent listening. In front of the headphone socket is a socket for the AC Adapter input for mains power supply. A small socket near the corner supports an optional 12 Volt battery charger. Beside the On/Off switch is a port suitable for customised external keyboards to meet special needs. Page 10 Loading Paper Paper Options A range of paper thicknesses and sizes can be used with your Mountbatten, standard photocopy paper, Braille paper, thermoform plastic, Braille labels, clear plastic and metal foil. The last three items require a multi-strike action that will be covered later. Selecting the paper for the task Select the paper most suitable for the task. Remember, using good quality photocopy paper means reduced noise level! In this session we will use standard photocopy paper. Two ways to load paper There are two ways of loading paper as well as an auto-load and auto-eject function. In this session we will load and remove paper manually. Reading table Paper bail Paper advance wheel Margin adjuster Embossing head Page 11 Paper grip lever Activity 4 Taking a closer look at the paper area - and get to know the parts which guide paper through the machine. Work in pairs Partner 1: Refer to your Easy Guide. Partner 2: Listen to your partner’s instructions and find the following parts: 1. the paper bail 2. the yellow paper grip lever 3. left and right margin adjusters 4. the embossing head 5. the groove in the reading table 6. two margin adjusters. Partner 1: Refer to your Easy Guide. Partner 2: Follow the instructions to load paper. Now change roles! A Lesson Plan from SET-BC For a procedure on teaching paper loading to a student refer to Graham Cook’s SET-BC Lessons book. Scan the Skills Checklist to see what you are already familiar with in this lesson. Unit 2: Lesson A – Manual Paper Feeding and Ejecting Page 12 Starting Up the Mountbatten It is important to set up your Mountbatten using the correct procedures. Check ergonomics: When starting a student on a Mountbatten it is a good idea to check the ergonomic situation: 1. Check height and type of chair Knees and hips should be at right angles Feet flat on the floor or a solid foot stool 2. Check that they keyboard and reading table are in comfortable reach Elbows at right angles Shoulders and neck comfortable 3. Where possible have an occupational therapist assess the learning environment for some professional feed-back on seating. Important! Follow the correct procedure each time your Mountbatten is turned on. Page 13 Activity 5 Watch your instructor start up the Mountbatten, and take notes of anything special. To set up and start up your Mountbatten refer to the Easy Guide and follow the steps. Inserting paper Plugging in Hints about Plugging in Connecting cables to the Mountbatten is an important skill to develop and connecting the power adaptor promotes responsibility. Attaching cables to equipment can be a challenging fine motor activity and young children may require assistance such as starting with the hand-over method. One form of assistance to aid in connecting devices to the Mountbatten is by: labelling plugs and sockets in Braille and print placing Velcro or dot markers on top of plug to assist with orientation Page 14 Battery Care Activity 6 How can you care for the battery? Complete the exercise below and refer to the Easy Guide to check your answers. Battery Care Tick or cross the following suggestions for battery care: Check Mountbatten battery status each month. It is a good idea to charge the battery overnight. Let the battery completely run down to maintain battery life. It is a good idea to leave the Mountbatten plugged in wherever possible to ensure the battery is kept charged. You need to charge your battery for 24 hours prior to storing it over period of up to 6 weeks. To maintain battery when MB is disconnected for longer periods call your supplier and disconnect the battery. Page 15 The Mountbatten keyboard Key press action Braille cells are created electronically when you lift your fingers off the Mountbatten keys. This means: Key colour Braille learners can think about each dot that makes a cell and release the keys when they are sure it is right Key pressing requires less finger pressure than a mechanical Brailler and there is less stress on the hands and wrists A Braille learner can cancel a key mid-way through writing it without embossing anything, by pressing the New Line key. The black keys are used for brailling. The blue keys tell the machine what to do. They are the ‘function’ and ‘command’ keys. Activity 7 Mountbatten keyboard – Function Keys Place your fingers on the keyboard 1. Which key is under your right thumb?_________________ 2. Which key is under your left thumb?__________________ 3. Which key is under your left little finger?_______________ 4. Which key is under your right little finger?______________ Easy Guide reference Go to the Easy Guide to check your answers. Page 16 Beginning Braille writing Activity 8 Braille keys Using the Braille keys Place your fingers on the Braille keys. Take time to feel the comfortable positioning as your fingers rest lightly. Now label the Braille keys, 1 to 6 on the diagram below • Remember to number from the center out, just like learning to type on a QWERTY keyboard The Braille cell has six dots arranged in two vertical rows of three. The dots are numbered 1 through 6. The swing cell illustrates the relationship between the Braille cell dot numbers and the Mountbatten keyboard. Easy Guide Reference Refer to the Easy Guide to check your answers. Page 17 A Lesson Plan from SET-BC For a wonderful lesson on ways of introducing the Mountbatten to the new user refer to Graham Cook’s lesson plan. It includes the innovative use of hands-on resources: Unit 1: Lesson A – MB Pro Orientation Activity 9 The Hen & the Eggs Emergent Braille Exercises You can create simple Braille patterns to represent different elements of a story. The following activity is adapted from Switched On Braille (by Gayle Lamb and Gillian Gale) and can be used to develop an early Braille reader’s: tactile discrimination one to one correspondence The hen hid her eggs in the grass. Here is an egg 7 Here is the grass llllllll The grass is really long. Look hard for the eggs! ll7ll7ll7ll7l7l Can you count the eggs? A Lesson Plan from SET-BC For more ideas on work sheets that assist in developing tactile sensitivity see Graham Cooks lesson plan: Unit 2: Lesson D – Tactile Letter Recognition Morning Tea Page 18 Session Two Producing Braille Producing Braille Page 19 Introducing the Mountbatten to the classroom Involving the student When you introduce the Mountbatten to the classroom environment, involve the student in the orientation process. Discuss: Collaborating with the classroom teacher the student’s Braille literacy level the mode that might best suit the student (Learn or Advanced) the teaching/ learning environment - lesson ideas; opportunities for other students to interact with Braille support resources It is a good idea to meet the class teacher to discuss ways the Mountbatten can be used in the classroom. Discuss: portability power sources lesson ideas opportunities for other students to interact with Braille Encourage the class teacher to use the manual to offer technical support to the student. Interaction with classmates Generate interest and understanding from classmates through activities such as: show and tell posters of a Braille cell, Braille code and numbered Mountbatten keyboard brailling student stories Students brailling own names, return cards to teacher who shuffles and redistributes them for students to read. Page 20 Page 21 Activity 10 Watch Video 2, that describes the use of the Mountbatten by a student in an integrated setting. Note the ideas for introducing the Mountbatten to the class. Share your ideas with the group Page 22 Using Learn Mode to write Braille When you first receive your Mountbatten it will be in Learn Mode. Learn Mode provides a simple and easy learning environment to start exploring and learning. Learn Mode Advanced Mode In Learn Mode you can use the Mountbatten Brailler as an electronic Braille writer to: write Braille hear all key presses spoken produce Braille documents erase and correct simple formatting connect to Mimic LCD display The Mountbatten has another mode of operation called Advanced Mode. In the MB Pro, Advanced Mode enables synthesized speech. Advanced Mode gives access to synthetic speech, editing and connectivity. Advanced Mode is only available in the Mountbatten Writer Plus and the MB pro. Advanced Mode enables you the use of the features in Learn Mode, plus: Braille translation [forward and back] connection to a PC keyboard, printer, PC and other devices such as note takers. With the MB Pro in Advanced Mode, you can: use synthetic speech offering unlimited vocabulary adjust pitch and rate of synthetic speech speech editor for files stored in the Mountbatten Page 23 memory. This requires use of a Mountbatten command, which will be Changing between Learn and Advanced covered in Session 3. Mode You might need to refresh your Braille skills. Activity 11 Here is a simple table of the BANA Braille code; there is another copy at the end of the Easy Guide for your reference. BANA characters and contractions a b c d e f g h i j a b c d e f g h i j k l m n o p q r s t k l m n o p q r s t u v x y z & = ( ! ) u v x y z and for of the with * < % ? : $ ] \ [ w ch gh sh th wh ed er ou ow w 1 2 3 4 5 6 7 8 9 0 /ea/, be/ bb/; con/ cc/: dis/ dd/. en to/ff/! were (/gg/) his "//? in was by/ / / + # > ' - st ing num/ble /ble ar ' com - @ ^ _ " . ; , capital Page 24 Erasing and Correcting Your Mountbatten can erase or correct mistakes without removing the paper, or using your fingernail! Erasing, and erasing and correcting is a ‘function’ that can be used easily while writing Braille, giving the user the opportunity to correct their work as they go. Easy Guide Reference Activity 12 Refer to your Easy Guide and find out when you would use the following keystrokes. Complete the following table: backspace + space backspace + correct dots A Lesson Plan from SET-BC For a step by step lesson on this feature refer to Graham Cook’s lesson plans. Unit 3: Lesson A – Backspace Delete Page 25 Moving around the page You can use the Mountbatten to move around the page in any direction. The Braille ruler and the yellow pointer on the embossing head show the cell position. Activity 13 Refer to your Easy Guide and find out how to make the following moves, then complete the table below: Move one space to the left Move one space to the right Tab Back Tab Move up the page in the same column Move down the page in the same column Eject the page Hint! A Lesson Plan from SET-BC Do not confuse New Line with the ‘Enter’ key which Is used to enter commands For a fun approach to teaching ‘navigation’ refer to Graham Cook’s ‘Shark Attack’ activity! Unit 3: Lesson E – Shark Attack – Navigation Activity Page 26 Activity 14 Braille Writing Practice – Letter Use Tabs and New Line to format the "letter" below. Erase the last cell of the last sentence Correct the last cell and replace it with o = ===== == ======= ==== ===== ===== === ==== === ==== === ==== ==== ======= Activity 15 Braille Writing Practice – Maths Using ‘Moving up and down page in same column’ commands, write the following "equation". === 6 === 7 • Move up column 3 and change cell to • Move down column 3 and change cell to 7 Use New Line then use dots 2, 5 to underline the equation 333 Page 27 Activity 16 Braille Writing Practice – Columns Use Tabs to create columns as below: = = = 3333333333333 == = === === === == === = == Page 28 Using Commands Why do we use commands? Activity 17 Commands are used in Learn Mode to tell the Mountbatten to: set margins, tabs, line spacing and centring adjust dot height and paper settings turn embossing on and off give Braille page formatting commands eg. page numbers, word wrap save files to memory and emboss and delete files use graphics mode Entering Commands 1. How do you activate the command key? ________________________________________________ 2. What does toggle mean? ________________________________________________ 3. How do you enter a command? ________________________________________________ 4. If you make a mistake while entering a command, how do you fix it? ________________________________________________ Easy Guide reference Refer to your Easy Guide to check your answers. Command Hints Up until this point the Mountbatten has responded with audio and Braille output with each key press. When using Commands, the Mountbatten may have to wait and think! For example, calculating margin width, or centring a heading. You will need to press New Line to get a response! Page 29 Mountbatten Speech – Learn Mode Audio Response – a new concept, a learning skill Speech support of learning has long been recognised as a critical tool for blind users of assistive technology. The audio feedback in the Mountbatten in Learn Mode is recorded speech. It is limited to key presses and standard responses to commands and provides a warm, friendly introduction to audio response for new users. Teaching blind and vision impaired children to use audio response as a learning tool will be a skill they can go on using as they move to synthesised speech on the Mountbatten, screen readers and note takers. Learn Mode The speech function allows beginners to hear the letters as they Braille either as dots, letters or words. Default Setting The Learn Mode default setting: spk a – speaks all keyboard keys, functions and commands Command Settings Other recorded speech commands available in Learn Mode: spk c – speaks errors and prompts only – no dot keys Easy Guide A Lesson Plan from SET-BC spk d – speaks dot keys only – no function keys. Refer to the Easy Guide for commands. For a an example of how to integrate audio response to learning with Emergent Braille Learners, use the creative lesson prepared by Graham Cook. NOTE: You will also need to turn off embossing. Unit 2: Lesson B – Brailling Without Embossing – Speech Only Page 30 Word wrap, centering, margins, line spacing These formatting commands provide great flexibility in preparing a Brailled document. Use Word Wrap when you do not want the Braille writer to hyphenate words. This is particularly useful for a Beginning Reader. When Word Wrap is ‘on’ the word is not embossed till the Space Key is pressed Activity 18 Entering Formatting Commands Find out how to do the following and complete the table below Easy Guide Reference Refer to your Mountbatten Easy Guide p 17, 19 and 26 to check your answers. Center Word wrap Double line spacing Widen left margin Insert page numbers Graphics mode Page 31 Activity 19 Follow these instructions and find out how to use line spacing, centering and word wrap. 1. Turn the Command key on. Press Command Press ‘ce’ [dots 1, 4] [ dots 1,5] Press Enter 2. Braille the ‘for’ sign six times [‘for’ = dots 1, 2, 3, 4, 5, 6] Press New Line 3. Braille the letter ‘l’ ten times [‘l’ = dots 1, 2, 3] Press Space Bar Braille the letter ‘l’ ten times Press Space Bar Braille the letter ‘l’ ten times Press Space Bar Braille the letter ‘l’ ten times Press New Line 4. Press Command Press ‘ls’ [dots 1, 2, 3] [dots 2, 3, 4] Press Space Press [number sign 2] [dots 3, 4, 5, 6] [dots 1, 2] Press Enter 5. Press Command Press ww [dots 2, 4, 5, 6] [dots 2, 4, 5, 6] Press Enter 6. Braille ten [dots 1, 2, 3] Press Space Bar Braille ten [dots 1, 2, 3] Press Space Bar Braille ten [dots 1, 2, 3] Press Space Bar Braille ten dots [1, 2, 3] Press New Line Easy Guide Reference Refer to your Easy Guide to help complete this exercise and find out more about Commands. Page 32 Creating a File in Memory and Brailling the File Your Mountbatten can store up to 30 files. This can be a useful way to store the student’s work in subjects or curriculum areas, as well as storing teaching resources you want the student to access. Activity 20 Creating Files on the Mountbatten Note: Mountbatten files are named BEFORE they are written, unlike files on a computer! Start a File: To start a file we will use the command begin. Think of a name for your new file. Press the command key, type the word begin, press space and type the file name, for example big, followed by pressing the enter key. The sequence is command begin space big enter. The file name must not be longer than 16 characters. Writing your information Now begin writing. Several sentences about big, for example! End the file When you have finished your story, you will need to close your file. Press the command key, type the word end followed by pressing the enter key on the Mountbatten. command end enter. You have now saved a file into memory. It will stay there until you delete it. Easy Guide Reference Check the commands in the Easy Guide for future reference. Emboss a saved file You may want to print out on your Mountbatten the story you have written so that you can read it or save it in paper format. Emboss a Directory It is a good idea to print a copy of all the file names you have saved in memory. This is called a Directory. Press the command key, type dir, and press the enter key. You will get an embossed copy listing all file names. Easy Guide Refer to the Easy Guide for detailed information Page 33 Select and emboss a file Once you have selected the file for embossing press the command key, type pr followed by pressing the space key, type the correct name of the file from the directory you have just embossed, then press the enter key. The sequence is: command pr space [name of file] enter You will get a complete copy of your stored file! A lesson plan from SET-BC For a procedure for teaching the student how to save and then Braille files, refer to Graham Cook’s lesson. Unit 4: Lesson F – Creating a File / Brailling a File Lunch Page 34 Session Three The Power of Connectivity The Power of Connectivity Page 35 Technology and Learning Use the Mountbatten to: empower the user enhance the quality of instruction foster real integration in the classroom Empower the User Technology can: put power in the hands of the Braille users give Braille students access to literacy skills relevant to the 21st century provide educators with tools to support student access to the mainstream education curriculum From: McNear, D: A Framework for Braille Literacy, October 2001 Immersion Individualisation Immediacy Assistive technology tools can improve the quality of instruction through: immersion of students in Braille individualisation of Braille instruction immediately providing information in Braille From: McNear, D: A Framework for Braille Literacy, October 2001 Page 36 Independence and Connectivity Braille learners and their teachers can gain access to a range of literacy learning resources and media by connecting the Mountbatten to other devices: Providing text documents through the mimic, printer or PC to communicate with non- Braille users Giving the Braille student access to text files from teachers, the internet, and CD, by embossing these on the Mountbatten Developing skills for note taking and PCs From: McNear, D: A Framework for Braille Literacy , October 2001 Integration The Braille-using student and their peers in the classroom can work together in ways unavailable without this technology: With the PC keyboard and Mimic, both students can work on a single project Both print and Braille copies of worksheets can be produced Sighted classmates' exposure to Braille has benefits not only for the Braille-using student! Page 37 Connecting External Devices - Introduction Connecting devices The Mountbatten Brailler can be connected to a number of devices that extend its usage beyond an electronic Brailler. These devices provide opportunities for back and forward translation – Braille to text and text to Braille – providing support for teachers, peers and Aides to better interact with the Braille user in the classroom environment. To gain full functionality of external devices the Mountbatten will need to operate in Advanced Mode. The Mimic The LCD display assists sighted people by displaying a text copy of what is being Brailled. PC Keyboard By connecting a standard PC keyboard Aides and non-Braille users can produce Brailled documents, such as lesson notes and class hand-outs. Using MB-Comm Use the MB-Comm software provided with the Mountbatten to transfer and translate files, use Mountbatten as an embosser, and as a communication tool. Chat Mode Chat Mode - translated Braille and text without commands, useful for class work or as a communication tool Translating Transfer a Braille File to the PC as translated text Transferring Transfer a text file to the MB as translated Braille Embossing Use the MB as a low-volume embosser The Mountbatten can be connected to line printers for a text copy of what is being Brailled. Printer This requires a line printer - such as a dot-matrix printer. Page printers such as laser printers are not compatible with the Mountbatten. Braille Note takers Hint! Easy Guide Reference Not covered in this workshop - please ask your facilitator about further workshops and training. Refer to the your notes on Parts and Ports from Session One. Refer to the Easy Guide Ports page to identify the common items that can be connected to the Mountbatten Page 38 Connecting the Mimic Text display The Mimic displays text copy of work as it is brailled on the Mountbatten. The Mimic allows the classroom teacher to see [displayed in text format] the work being produced and to give prompt feedback to the student. In Learn Mode the Mimic is a useful tool to assist non-Braille readers to understand Braille work. Mimic off & on When you unplug or switch off the Mimic in Learn Mode the Mountbatten will say “Mimic off”. It does not however, say “Mimic on” but you can scroll up or down causing a soft beep to emit which tells you the Mimic is on! Automatic display In Learn Mode the Mimic works automatically when attached and will display every word, after the space key is pressed. In Advanced Mode the Mimic needs to be activated with the command mimic. Activity 21 Practice connecting your Mimic to the Mountbatten in Learn Mode Refer to your notes on Parts and Ports from Session One. Easy Guide reference Refer to the Easy Guide for information on connecting and using the Mimic What could you do to assist people setting up the machine in the class environment? Consider Velcro dots and Braille labels to support connecting for both irregular users and children. Share your ideas with the group and list below. Class Teacher Aide Page 39 Student A lesson plan from SET-BC Refer to Graham Cook’s great lesson plans for a procedure to use with the student: Unit 1: Lesson D - Mimic Page 40 Using the PC keyboard with your Mountbatten Some innovative and invaluable features of the Mountbatten: You can connect a PC keyboard You can enter text using the PC keyboard You can hear what the Mountbatten says Non-Braille users can produce Brailled output Learn Mode Advanced Mode Mimic When typing in Learn Mode on the PC keyboard you can: produce Braille documents output will be in computer Braille, suitable for teaching the alphabet correct mistakes by using backspace key on the PC keyboard hear audio response for all PC keys pressed MB Writer Plus, MB Pro and MB LS all have an Advanced Mode option. In this mode you can: use all Learn Mode functions produce Grade 2 Braille convert Print to Braille (Forward Translation) convert Braille to Print (Backward Translation) hear all PC key presses and whole words in synthetic speech The Mimic can be used in both Learn Mode and Advanced Mode at the same time as the PC keyboard. If the Mimic is turned on and connected non-Braille users can read what is being embossed as it is produced. Immediate Braille for the student Use the PC keyboard to write: sentences as student dictates words of praise on student’s work blackboard notes Page 41 class shared stories friend’s shared stories question and answer incomplete sentences Using the PC keyboard in Learn Mode Activity 22 Plug in the PC keyboard and Braille a sentence. Step 1: Make sure you are still in Learn Mode! Step 2: Switch off the Mountbatten. Always turn OFF your Mountbatten before connecting the PC keyboard! Step 3: Plug in the PC keyboard. Refer to your Parts and Ports notes in Session One Step 4: Switch on the Mountbatten and the Mimic and listen to the audio response. Step 5: Begin typing on the PC keyboard. Listen and watch the Braille output. Important! You will notice that your text is not being translated fully into correct Braille: Capital letters are ignored Numbers don't get the number sign Punctuation is not correct However, using the PC keyboard in Learn Mode is fine for very basic letters-only Braille. A lesson plan from SET-BC If you want to introduce your student to the PC keyboard and qwerty keys, Graham Cook has prepared a lesson plan for just this purpose: Unit 5: Lesson C – Qwerty keyboard – Grade 1 Braille Page 42 Using the PC keyboard in Advanced Mode Forward Translation Using the PC keyboard in Advanced Mode provides more opportunities for sighted non-Braille users to interact with a student in a learning environment. Preparation of curriculum materials for the blind student is made easier when a non-Braille user can enter information using a familiar PC keyboard connected to a Mountbatten. Text typed in is printed in Braille. This is called Forward Translation. Forward Translation needs to be switched on when a PC keyboard is connected so that the Mountbatten can ‘translate’ text to Braille. Using the Mimic No extra software is required to translate text to Braille. The Mimic uses automatic Back Translation, translating Braille to text in the visual display. To let you see what you are typing, you will need to open the Mimic port so that it can copy the text being typed for you to view. Activity 23 Mountbatten commands Switch on Advanced Mode and Forward Translation Enter Advanced Mode on your Mountbatten by pressing command adv enter - press the command key, type a d v and press the enter key. Mountbatten will say "Advanced Mode". Now turn on Forward Translation by pressing command fe enter - press the command key, type f e and press the enter key. Both adv and fe are toggle commands; enter the command again to switch it off. OR PC Keyboard commands Plug in your PC keyboard [Refer to Activity 3 on Ports for the location of the correct port]. Now you can enter commands on the PC Keyboard by Page 43 pressing: Esc adv End - press the Esc key, type a d v and press the End key. Now turn on Forward Translation by pressing Esc fe End - press the Esc key, type fe and then press the End key. Again, these commands are both toggle commands. Activating the Mimic You will have noticed that the Mimic is not displaying the text you are typing. This is because the Mimic must be activated in Advanced Mode. To provide a text display we need to activate the Mimic. Mountbatten commands Use your Mountbatten to activate the Mimic by pressing command mimic enter - press the command key, type m i m i c and press the enter key. OR PC Keyboard Commands Use your PC keyboard to activate the Mimic by pressing Esc mimic End - press the Esc key, type m i m i c and press the End key. Start typing! You can now start typing on the PC keyboard while watching the output on the Mimic display. Synthetic Speech You will now be using synthetic speech! Type a long sentence. Note how synthetic speech responds. Grade 2 Braille At this stage you are typing on the keyboard and producing Braille in Grade 2. This is the default in Advanced Mode. Press the Enter key twice on the PC keyboard to send the text or wait until the buffer is filled – 80 characters will do it. The Mountbatten will then begin embossing. Page 44 Grade 1 Braille Basic Braille Once Forward Translation is active, you can switch your keyboard input to Basic Braille with one more command: command fb enter or Esc fb End Easy Guide reference Refer to p 21 and 23 for a summary of the commands for using the PC keyboard connected to the Mountbatten Activity 24 Complete the following table Use your notes and the Easy Guide to complete the following table: Command for forward translation Command to select a Braille grade Command to reactivate Mimic Mountbatten starts embossing after? Number of characters?__________ Which Keyboard Action?_________ Now use the PC keyboard to: Write some simple sentences, for example: Good work Type a sentence containing Grade 2 contractions, for example: This afternoon the young children are learning Braille because they like to work with their friends! Activity 25 Discuss the opportunities presented by the PC keyboard What implications are evident regarding materials production by non-Braille users? Who might this connection opportunity be most suitable for? Will this affect the amount of time made available for the student to use the Mountbatten where it is a single resource? Page 45 Share your ideas! A Lesson Plan from Follow the simple procedure to have your student develop an understanding of the different modes. Look at Graham SET-BC Cook’s lesson plan: Unit 4: Lesson H – Learn Mode and Advanced Mode Page 46 Connecting to a PC, Netbook or laptop Why connect the Mountbatten to a PC? Once the two are connected, you can: Use Chat Mode for real-time communication and translation Use your Mountbatten as a Braille embosser Translate text to Braille or Braille to text Transfer files from the PC to the MB or the MB to the PC. How is it done? The Mountbatten can connect to any Windows PC running MB-Comm software, which is supplied with every Mountbatten. Before you begin: Make sure MB-Comm has been installed on the PC or laptop or netbook, ready to use. Consult your IT department or your dealer if you don't see the MB-Comm icon on your desktop, or on your Start, Programs menu. The MB-Comm icon looks like this: The Mountbatten USB cable The USB cable has a flat USB connector at one end this connects to the USB port on the PC The other end of the cable has a square connector: The USB port on the PC this connects to the USB port on the right side of the Mountbatten. The USB port on your PC should have a little picture beside it like this: You will find the same picture on the connectors at the ends of the Mountbatten USB cable. Page 47 Activity 26 Important! Step 1 Connect your Mountbatten to a PC or Laptop with MBComm Switch off the Mountbatten before you begin. Connect the USB cable from the PC to the Mountbatten. Make sure the connectors are seated firmly in the ports. Step 2 Make sure the Mountbatten has paper loaded. Step 3 Switch on the Mountbatten. After the margin seek it will say: "USB connected". Step 4: Run MB-Comm by double-clicking on the desktop icon OR Step 5: selecting MB-Comm from your Start, Programs menu Connect to the Mountbatten by clicking the right-hand red button OR Step 6: Important! Step 7: selecting "Connect Mountbatten" from the Device menu Choose the correct port from the list, if it isn't already showing If you are using a USB connection, the port you choose must say "Mountbatten USB" Click OK. A reminder will pop up to make sure: You have paper in the Mountbatten The Mountbatten is switched on Step 8: Click Continue. Mountbatten will give a series of short beeps and the red buttons will change to green. You are connected! Easy Guide Refer to the Easy Guide for more details and screenshots. Page 48 Using Chat Mode with MB-Comm Prepare Enter Chat Mode • Mountbatten must be on and loaded with paper • The PC and Mountbatten must be connected • MB-Comm must be running and connected • The two buttons on the MB-Comm screen must be green Go to the File Menu in MB-Comm and click "Chat Mode" • Mountbatten will say: "Back" This means that the Braille keyboard will send translated text to the MB screen. Important! Activity 27 • Braille goes first! Write Braille on the Mountbatten: ▪ produce text on the MB-Comm screen ▪ produce Braille on the Mountbatten Work in Pairs Partner 1 is the Braillist and Partner 2 is the keyboard user on the PC. Partner 1 types Braille on the Mountbatten. Each time Partner 1 presses space, Partner 2 will see text on the MB-Comm screen. Make sure to type some contractions to see how they are translated! Changing between users To change to the PC keyboard, the Braille user must press the tab key on the Mountbatten. To change to the Braille keyboard, the Braille user must press the backtab key on the Mountbatten. Important! • The Braille user changes between Forward and Back Translation Page 49 The PC keyboard user The Mountbatten keyboard user Activity 28 • Types text • produces Grade 2 Braille on the Mountbatten • produces text on the MB-Comm screen • Types Braille • produces Braille on the Mountbatten • produces text on the MB-Comm screen Write text on the PC ▪ produce Braille on the Mountbatten ▪ produce text on the PC screen Change Users Press tab to change to Forward mode. The partner using the PC can now type text on the keyboard. Work in Pairs Partner 1 is the Braillist and Partner 2 is the keyboard user on the PC. Partner 2 types text on the PC keyboard. Each time Partner 2 presses space, Partner 1 will be able to read the Braille output. Partner 2 can see the text on the PC screen. Make sure to type some words that should have contractions to see if they translate! Change users again Now the Braillist (Partner 1) can press backtab to return to Back Translation mode, and type Braille to be translated to text on the PC screen. Page 50 Embossing a file from the PC with MB-Comm Producing a translated Braille copy from a text file on the PC Making a Word Processor file ready to emboss on the Mountbatten. Activity 29 Convert file to Plain Text 1. In your Word Processor - for example Microsoft Word or OpenOffice Writer - save the file as Plain Text with a .txt extension. ◦ Use File, Save As ◦ At the bottom of the Save As dialog, click on the drop-down list Save File As Type ◦ Choose Plain Text or Text as the type - you will see (.txt) beside the type ◦ Save the file where you can find it again! Look at the Text file in Notepad 2. Run Notepad and open the Text file you have just saved Adding Mountbatten Commands 3. Insert any commands you need at the beginning of the file ◦ {adv} if the Mountbatten is in Learn Mode ◦ {fe} to have Mountbatten translate the file ◦ {flit} to preserve print lines in Braille ◦ {fgr 1} to have Uncontracted (Grade 1) Braille ◦ {m} to emboss at double speed 4. Insert any commands you need at the end of the file Note ◦ {adv} to return to Learn Mode ◦ {m} to return to normal speed Commands at the start of the text file will be obeyed by the Mountbatten before the text is received; commands at the end will be obeyed after the text is received. Think about when you would like things to happen to help you decide where a command belongs. Important! Insert your commands on a new line by themselves! Page 51 5. Save the file. Save the Text file again Tip: Have a folder on the PC to store ready for your text files to be embossed. Always save to this folder so you can find them again. Activity 30 Sending the prepared file to be embossed Run MB-Comm and connect to the PC See the instructions in previous sections From the File Menu MB-Comm will ask you to choose the file. select Navigate to the file and select it. Emboss file to Mountbatten Click OK. Activity 31 Use the Notepad file you just made Make sure you prepare the Mountbatten before you begin! Mountbatten will begin embossing the translated file. Creating an empty embossing template 1. Open the file again in Notepad 2. Remove the text from between the two sets of commands 3. Leave some blank lines between the two sets of commands 4. Save the file under a new name: template.txt Easy Guide See your Easy Guide for instructions and tips Page 52 Saving Mimic data on the PC using MB-Comm Activity 32 Prepare the Mimic for a transfer Use the Easy Guide for instructions on setting a bookmark on the Mimic. Jump to the bookmark you have set. Check the Mimic User Guide See also the pushbutton picture guide on the face of the Mimic. Activity 33 Connect the Mimic to the PC with MB-Comm and transfer the contents Check the Easy Guide for the steps to take. Connecting Turn the Mimic off Connect the cable while the Mimic is off Turn the Mimic on. Run MB-Comm Remember! Check the Easy Guide for the steps to take The steps are a little different for connecting the Mimic than for connecting the Mountbatten. Start the transfer from the correct place Don't scroll to the bookmark, as your transfer won't begin from the right place. Send the Data Press all 3 Mimic pushbuttons down and hold for 2 seconds. Jump to the bookmark if you haven't already done so. The screen will display Sending Memory... When the transfer is complete you will hear 3 beeps. Page 53 Connecting the Mountbatten to a printer for back translation Back translation The Mountbatten can be connected to a line printer for a text copy of what is being Brailed. Translating Braille to print is a significant advantage in classroom environments as it provides print copies of the student’s work for review by sighted teachers. Translating Braille to Print is called Back Translation. Back translation needs to be switched on when a printer is connected so that the Mountbatten can perform the ‘translation’. Important! No extra software is required to send a document from the Mountbatten to the printer. The Mimic The Mimic uses automatic Back Translation, translating Braille to text in the visual display. As we now want to translate Braille to text with a print output, the Mimic cannot be used at the same time. Leave the Mimic switched off to save battery power during this operation. Activity 34 Important! Connect a printer to your Mountbatten Always turn your Mountbatten OFF before connecting printer! Step 1: Plug the printer cable into the Mountbatten. Refer to your notes on Ports in Session One and the Easy Guide. Step 2: Switch On the Mountbatten and watch and listen. The audio response will be synthesized speech. Step 3: Switch On the printer and set the printer to ‘on-line’ and make sure you have paper in the printer. Step 4: Turn on Back Translation: Use your Mountbatten to press command, then type bp followed by enter. command bp enter Page 54 Step 5: To see that everything is working, press newline twice. Step 6: Begin typing on the Mountbatten. Note on Print As you type, the Mountbatten will produce Braille Output: automatically. However, printer output will only occur: after 80 characters if you press the New Line key twice. The Mountbatten will wait to fill the buffer which contains 80 characters before sending it to the printer. At any time you can empty the buffer by pressing the Mountbatten’s New Line key twice. Easy Guide reference Activity 35 Now use your notes, the Workbook and your Easy Guide on p 23 to go over the process and walk through the steps with your partner. Print a file saved in memory Turn on back translation and make a Braille and print copy Now print a file already in Memory Page 55 Making a Print-only copy of a file To obtain a print-only copy only you will need to tell the Mountbatten to STOP producing Braille. The sequence is: command em enter em is aToggle command! Remember! When you have completed your text only printing, you must TURN EMBOSSING ON again. As this is a Toggle command, simply enter the same command: command em enter Activity 36 Easy Guide Produce a print copy only of the file you have just used! Refer to the Easy Guide to find the right commands and list them below: Page 56 Workshop Summary Now that you have completed the workshop we will revisit each key section in the list below to assist you to consolidate your learning. Mountbatten Features, Mountbatten Orientation Parts and Ports Mountbatten Functions Loading Paper and Start Up Mountbatten Tasks Battery Care Mountbatten Keyboard Erasing and Correcting Moving around the Page Using Commands Speech Function Word Wrap, Centring, Margins, Line Space Mountbatten memory Connectivity Connecting the Mimic Connecting the PC Keyboard Using the PC Keyboard in Learn Mode Advanced Mode Forward Translation Changing Braille Grades Using MB-Comm Connecting Mountbatten to a PC Chat Mode Page 57 Implications for Teaching and Learning Embossing a File Connecting Mimic to a PC Transferring Mimic's contents to a PC Connecting a Printer Back Translation Why work with electronic Braille technology? Using the resources available Introducing the Mountbatten Brailler to the classroom SET-BC video – experiences of Eva Hall: Vision Teacher Technology and Learning The Mimic, PC keyboard and the Printer: Implications for enhancing teaching and learning activities. Thank you for your participation. We trust you have gained valuable knowledge and useful tools to support the implementation of the Mountbatten. Please complete the Workshop Evaluation and hand it to your Workshop Facilitator before you leave. Page 58