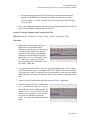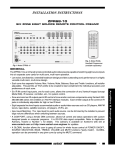
1
In Touch With ALVA: A Guide to Unleashing the Power of Your ALVA Braille Controller A Flying Blind, LLC Publication© “Empowerment Through Technology” www.flying-blind.com In Touch With ALVA: A Guide to Unleashing the Power of your ALVA Braille Controller TABLE OF CONTENTS: Introduction …………………...………………………………………………………... 2 Lesson 1: The ALVA Braille Controller As A Stand-Alone Device ……...…………. 5 Lesson 1.1: Orientation To The ALVA Braille Controller’s Physical Layout ……..………....…. 5 Lesson 1.2: Accessing ALVA’s Internal Menus ………………………………..……………..… 8 Lesson 1.3: The “Settings” Menu ………………………………..…………………...………..… 9 Lesson 2: Maximizing The Benefits Of The ALVA Braille Controller’s Internal “Notes” Application ………………………..……………………….……… 15 Lesson 2.1: Familiarization With “Notes” …………..…………………………………….….… 15 Lesson 2.2: Saving, Opening, and Creating New Files ………………………………………. 18 Lesson 2.3: The “Edit Menu”……………………...……………………………………………. 19 Lesson 2.4: Converting Braille To Text …………………………………………………...…. 21 Lesson 2.5: Moving Files Between “Notes” and a PC ……………………………………..…. 21 Lesson 3: Connecting The ALVA Braille Controller To Computers ….................... 22 Lesson 3.1: Connecting The ALVA Braille Controller to a Computer Using a USB Cable …. 24 Lesson 3.2: The ALVA Braille Controller and Data Management ……………………..……… 27 Lesson 3.3: Using ALVA Explorer ……………………..……………………………………… 29 Lesson 3.4: Installing The ALVA Braille Controller Software on A Windows-based PC …… 32 Lesson 3.5: Setting Up The ALVA Braille Controller to Interact with a PC Via A Bluetooth Connection ……………………………………….……..……… 35 Lesson 3.6: The ALVA Braille Controller and JAWS For Windows …………………..……… 37 Lesson 3.7: The ALVA Braille Controller and Hal/Supernova ………..………………..……… 39 Lesson 3.8: The ALVA Braille Controller and Window-Eyes ………………...………..……… 41 Lesson 3.9: The ALVA Braille Controller and VoiceOver ………………………..……… 42 Lesson 4: The ALVA Braille Controller And Mobile Devices ……...……………… 44 Lesson 4.1: Connecting the ALVA Braille Controller to a Mobile Device ………………...…... 45 Lesson 4.2: Connecting the ALVA Braille Controller To MobileSpeak for Symbian Phones … 46 Lesson 4.3: Connecting The ALVA Braille Controller with MobileSpeak for Pocket PCs (Windows Mobile Devices)……………………………...………. 47 Lesson 4.4: Connecting The ALVA Braille Controller to MobileSpeak for Windows Mobile Smartphones ………………………………………………. 49 Conclusion ………………………………..…….….…………...................................... 50 Page 2 of 50 In Touch With ALVA: A Guide to Unleashing the Power of your ALVA Braille Controller INTRODUCTION: Welcome to “In Touch With ALVA”, your comprehensive training guide to the countless features present within the ALVA Braille Controller. This tutorial is designed for: 1. End users who have acquired an ALVA Braille Controller with Feature Pack, and… 2. Sighted and vision impaired adaptive technology trainers who have been given the task of providing instruction on the set-up and usage of the ALVA Braille Controller. This tutorial assumes that the reader has a fundamental understanding of: 1. 2. 3. 4. Refreshable Braille terminals and stand-alone note takers. The Windows Desktop, Windows Mobile, and Symbian operating systems. The function of a desktop and mobile screen reader. The relationship between a screenreader and a refreshable Braille Terminal. While explanations will be provided, and references will be made to each of these aforementioned topics, this tutorial will focus specifically on how the ALVA Braille Controller behaves and performs as a stand-alone unit, when connected to a PC, and when interacting with today’s accessible Mobile devices. It has been written from the perspective of a user who has both the ALVA Braille Controller and its Feature Pack, which provides audio output and Braille input capabilities. This guide is divided into four sections of lessons with defined objectives, procedures for completing these objectives, and criteria for successful task completion outlined by each objective. Once a user or trainer has completed all four subsets of lessons, they should be well-equipped to maximize their utilization of this Braille Controller in each of their respective educational, employment, and home or community environments. The first section focuses on the ALVA as a stand-alone unit and, along with providing an orientation to the unit, instructs the user as to how to customize their Controller settings to their personal preferences. The second section provides detailed instruction on using the Feature Pack’s built-in notetaker to create and edit documents, share them with a PC, and retrieve information from the PC to review on the Feature Pack, when it is disconnected from the PC. The third section addresses the ALVA Braille Controller’s USB and Bluetooth connections to a Windows PC. Attention is given to initially connecting and setting up the ALVA with the PC. Also, a review of today’s screen readers and how the ALVA performs with these screen readers is addressed. The fourth and final section focuses on the ALVA Braille Controller and today’s emerging Accessible Mobile Technologies. Emphasis will be placed on connecting and using the ALVA Braille Controller via a Bluetooth connection to MobileSpeak-equipped Mobile devices. Page 3 of 50 In Touch With ALVA: A Guide to Unleashing the Power of your ALVA Braille Controller The following three points define what the ALVA Braille Controller is: 1. A stand-alone note taking device designed to fulfill the role that a pen and notepad fills for a sighted individual. 2. A PC companion with the ability to share files with, and provide tactile access to, the often complex graphical Windows environment. 3. A means by which individuals might successfully complete many of today’s mobile tasks using a mainstream mobile device rather than a traditional, proprietary note taking solution. It is our hope that you will find these lessons valuable and informative, and that they will serve to assist you in getting the greatest benefit possible out of your ALVA Braille Controller. For questions, suggestions, and/or comments, please e-mail [email protected]. Page 4 of 50 In Touch With ALVA: A Guide to Unleashing the Power of your ALVA Braille Controller LESSON 1: THE ALVA BRAILLE CONTROLLER AS A STAND-ALONE DEVICE This Lesson is devoted to providing instruction on: 1. Familiarization 2. Customizing internal menu settings. 3. Utilizing the “Notes” feature of the ALVA Braille Controller. Please ensure that all of the accessories that shipped with the ALVA Braille Controller are present, and that the unit is fully charged. A list of the contents of the ALVA Braille Controller’s “ship-kit” can be found in The ALVA Manual, Section 1.2 ALVA BC640 package contents. This manual is provided in both print and electronic formats on compact disk. Lesson 1.1: Orientation To The ALVA Braille Controller’s Physical Layout Objective: The user will be able to independently identify the various physical components of the ALVA Braille Controller which will serve as a foundation for completing subsequent lessons. Before beginning, the user should place the ALVA Braille Controller on a flat surface in front of them, with the thumb-keys of the unit being the closest in proximity to the user. This lesson is designed to quickly orient the user to the ALVA Braille Controller. For a more thorough orientation, please consult the ALVA Braille Controller User Manual located on your product CD. Procedure: 1. The Braille Controller has two components - the base unit, and the optional feature pack. The base unit houses the Braille display and internal memory for storage of system files, internal firmware, and storage face, where files from a PC can be copied and accessed when the Controller is connected to another PC. The Optional Feature Pack has a Perkins-style Braille keyboard, audio speakers, a built-in microphone, connectors for an external Microphone and headphones, and additional flash memory for the Feature Pack’s internal note taker. The optional Feature Pack is mounted to the back edge of the Controller’s base unit, a visual and tactile line can be detected below the Feature Pack’s spacebar, which defines where these two components are mounted. Page 5 of 50 In Touch With ALVA: A Guide to Unleashing the Power of your ALVA Braille Controller It will be noted here, one last time, that all references to the ALVA Braille Controller throughout this Guide will assume that the Feature Pack has been included with the unit’s base station. 2. Continue by exploring the perimeter of the ALVA Braille Controller. The volume switch on the Feature Pack is located toward the rear of the right edge of the unit - this adjusts the audio output of the feature pack and mutes / enables the audio output. Moving toward the front of the unit, the on / off switch powers the unit on and off. Along the front edge of the unit are five “Front Panel” keys - four rectangular keys and one smaller key located in the middle of the four longer keys. All five of these keys’ functionality are defined by the screen reading application being used. However, the outer two “thumb-keys” are often assigned to “panning” or moving the Braille display one display length to either the right or left while the innermost “thumb-keys” are assigned to moving up and down through a specific application, list view, or menu. The middle button’s primary function is to route the reader back to the active cursor. Moving counter-clockwise along the front left edge, there is a jack for the unit’s AC Power Supply, a mini USB jack for connecting to a PC, and an additional jack for future feature considerations not available at this time. The left edge of the Feature Pack has a microphone jack located closer to the base unit with an earphone jack located directly behind it toward the back edge of the Feature Pack. 3. Conclude by examining the top surface of the ALVA Braille Controller: From the front edge of the unit, locate the group of nine keys behind the thumb-keys on the top surface. These keys comprise the “smartpad”, a series of keys that provide the user with additional functionality when accessing today’s desktop and portable PCs and mobile devices. The Smartpad consists of four function keys and a five-way joystick. From left to right, these keys are labelled Smartpad Keys 1, Page 6 of 50 In Touch With ALVA: A Guide to Unleashing the Power of your ALVA Braille Controller 2, 3, and 4. Between keys 2 and 3 is the five way navigation joystick that serves the function of a cursor cross arrow keypad on a PC, with the fifth, center-most key serving as an ”enter” key. Moving clockwise, the other four function keys move the user up, right, down, and left within a specific menu, list view, or application. Behind the Smartpad, moving away from the thumb-keys, is a row of round buttons which run parallel to the refreshable Braille display. These buttons are called “Cursor Routing Keys”. These keys route the active cursor within an application to the corresponding Braille cell on the Braille display. Depending on the screen reading application, this cursor key may also simulate left and right mouse click functions. At either end of the Braille display are two buttons called “eTouch Navigation” buttons. The functionality of these keys varies depending on the screen reading application being used. The nine key Braille keyboard resides atop the Feature Pack and has an audio speaker at either end of the keyboard. The key farthest to the left is a “Control” key, and the key farthest to the right is an “Alt” key. Above the spacebar are two keys, the left of which is a “Windows” key, and the right of which is assigned to the “enter” key. 4. Before proceeding to the next lesson try randomly touching all of the various connectors, buttons, and keys on the ALVA Braille Controller and identifying them. Once you can identify every key, button, and connecter within a few seconds of touching them, then we are ready to proceed to the next lesson. Page 7 of 50 In Touch With ALVA: A Guide to Unleashing the Power of your ALVA Braille Controller Lesson 1.2: Accessing ALVA’s Internal Menus Objective: The user will learn to access each of the five internal menus of the ALVA Braille Controller and gain an understanding of how to navigate into, through, and then back out of each of these menus. This lesson gives a general overview of ALVA’s internal menu structure and addresses how to navigate and access options within these menus. Lesson 1.3 is devoted solely to customizing the “Settings Menu”, the menu on which the other four menu functionalities hinge. Procedure: 1. Turn on the ALVA Braille Controller by pressing in the on / off button located on the right edge toward the rear of the base unit. A series of ascending tones will sound signalling that the unit has been powered on. Also, the Braille Display should read “ALVA BC640 ready”, followed by the date and time. Setting the correct date and time will be covered in Lesson 1.3. 2. Press the space bar in conjunction with Braille Keys 1+3+4 on the Braille keyboard, the key configuration for the Braille letter M. This key combination provides entry into the Braille Controller’s five menus. These menus read from left to right: “Bluetooth”, “Settings”, “Audio”, “Split Point”, “Preferred Interface”, and “Exit”. 3. You may access any of these menus by pressing one of the cursor routing buttons located under the desired menu option. For example, locate one of the cursor routing buttons under the “Bluetooth” menu option and press it. This activates the Controller’s “Bluetooth” menu. 4. Pressing “Smartpad 1” exits out of a menu, and returns the user to the “ALVA BC640 ready” prompt. There is also an “Exit” option within the main menu options that the user may select by pressing a cursor routing button under “Exit”. Use the right-most thumb-key Page 8 of 50 In Touch With ALVA: A Guide to Unleashing the Power of your ALVA Braille Controller along the front panel of keys to move to the last two menu options and use the left-most thumb-key to pan back to the left to access the previous four menus. 5. A description of each menu follows: Bluetooth Menu: When interacting with a supported screen reader, this menu allows the user to connect the ALVA Braille Controller wirelessly to “Braille”, “keyboard”, “stereo”, and “mono” Bluetooth-enabled devices. Simply use a routing cursor to connect to the desired service and elect whether to establish a “primary” or “secondary” connection. Settings Menu: This menu will be covered in great detail in the next Lesson, 1.3. Audio Menu: This menu toggles the Controller’s audio service on / off when audio is available as an option. Simply press the routing cursor under the desired choice which will then be highlighted on the Braille display, and then exit the menu. Split Point Menu: This menu toggles on / off the Braille Controller’s “Split Point” feature, which allows the user to dedicate a portion of the Braille display to one device, and a secondary portion to another device, simultaneously. This feature can be toggled on or off simply by entering and then re-entering this menu which will enable or disable this feature. The status of whether this feature is “on” or “off” is presented on the Braille display as a temporary flash message when entering and re-entering this menu. Preferred Interface Menu: This menu toggles the Controller’s preferred connection between “Bluetooth” and “USB”, and can be altered by entering and re-entering this menu to invoke this toggle. The preferred connection will be shown first on the Braille display, followed by the secondary connection option. 6. Practice entering each of these menus and exiting them, and, without advancing through the “Settings Menu”, explore the contents of each menu. When confident in accessing these menus, please proceed to the next lesson. Lesson 1.3: The “Settings Menu” Objective: Through familiarization of the options within this menu the user will learn to customize the settings for the controller to reflect their own preferences. Procedure: 1. Ensure that the ALVA Braille Controller is turned on, and activate the Menu command covered in Lesson 1.2. Page 9 of 50 In Touch With ALVA: A Guide to Unleashing the Power of your ALVA Braille Controller 2. Use the cursor routing buttons under the “Settings” option to open the “Settings Menu”. 3. Pressing the “down” button on the five way navigation key will proceed to the next menu option, while the “up” button will move you to the previous menu option. Pressing the button in the middle of this navigation key will open up a menu option, and pressing “Smartpad 1” will escape the user out of that menu. 4. The first option shows the unit’s battery status, with “100%” reflecting that the unit is fully charged. It also indicates whether or not the battery is “charging” or “not charging”. If the unit is connected to a live electrical outlet via the power supply, both the Base Unit and the Feature Pack will charge. If the unit is connected to a PC via the USB cable, only the base unit will charge. 5. The second option in this menu is the “Notes” application which is covered in greater detail in Lesson 1.4. 6. The next menu option displays the “date / time” which can be reset, and the formats associated changed within a menu option which will be addressed later in this lesson. The default date format is dd/mm/yyyy, and the default time format is the 24 hour time format. 7. The next option shows the unit’s “Bluetooth Status”, or whether the unit is actively “connected” to another device or “disconnected” from all devices. 8. The next option allows the user to “Set Bluetooth Pairable”, or make the Braille Controller visible to other devices to which it can be connected. Simply press the middle button on the five way navigation key and “Pairable” is highlighted on the Braille display, thus making it possible to easily connect and pair of ALVA Braille Controllers to one another as Bluetooth devices. Press “Smartpad 1” and the “down” key on the five way navigation key to move to the next setting. 9. The next setting is a toggle to enable or disable the Braille Controller’s “Bluetooth Port”. It might be advantageous to disable this port in certain environments where it is suggested to not connect via Bluetooth. By default this option is “On”. To toggle this setting, press the middle button on the five way navigation key which highlights the word “Bluetooth”. Use the up and down keys to cycle between the “on” and “off” choices, and press the middle key to select the desired option. The Bluetooth message on the Braille display will now reflect the change. 10. The next setting is another toggle that allows the ALVA Braille Controller to be viewed or hidden as a “data drive” when the ALVA Braille Controller is connected to a Windows based computer via a USB connection. By default this Page 10 of 50 In Touch With ALVA: A Guide to Unleashing the Power of your ALVA Braille Controller option is “on”. To toggle this setting, press the middle button on the five way navigation key which highlights the phrase “data drive”. Use the up and down keys to cycle between the “on” and “off” choices, and press the middle key to select the desired option. The Data Drive message on the Braille display will now reflect the change. 11. The next setting presents the user with a “Bluetooth PIN” option, with a default value of “0000”. A PIN code such as this is necessary to provide a secure connection between two Bluetooth devices. Whereas “0000” is a commonly used passcode, the user may change the PIN by: Pressing the middle button on the five way navigation key to edit the four digit PIN. The first digit of the PIN will be highlighted on the Braille display; press the “up” button on the five way navigation key to select a number from 0-9 with each key press. Each “up” key press will move up a digit, and each “down” key press will move down a digit. After selecting the appropriate digit, press the “Right” button on the five way navigation key to move one digit to the right and repeat the process. You may also press the “Left” button to change prior digits. Repeat this process twice more until all four digits have been changed to the desired PIN code, and press the middle button on the five way navigation to accept the new value. The Braille display will now reflect this new “Bluetooth PIN”. 12. The “Bluetooth Name” setting allows for the default Bluetooth name of the device that is seen by other Bluetooth devices to be changed from its default name of “ALVA BC640”. Simply repeat the process outlined for changing the “Bluetooth PIN”, but instead of just having numbers from which to choose, the user has the entire alphabet, punctuation, and numbers which they may select by pressing the “up” button on the five way navigation key to move up through the list and the “down” button to move back down through the list while editing the “Bluetooth Name”. For example, you may wish to name the device “User Name’s Braille Controller”. 13. The default “Sleep” setting is set for 30 seconds. This means that if the ALVA is not used for 30 seconds, it will go into a “sleep”, or hibernation mode, to conserve battery power. The user must simply press any key or button on the Braille Controller to awaken it. You may change this value by pressing the middle button on the five way navigation key and pressing the “up” button to adjust the sleep mode upwards by 10 second intervals. If you press the “down” button, this will reduce the sleep mode to as low as 5 seconds, or simply set sleep mode to “never” which means that the unit will never hibernate while powered on. Choose the Page 11 of 50 In Touch With ALVA: A Guide to Unleashing the Power of your ALVA Braille Controller desired option and press the middle key on the five way navigation key to save this value. 14. The “Braille Configuration Menu” allows for the customization of the Braille Controller’s ability to convert ASCII text written or transcribed on the Feature Pack’s Braille keyboard into contracted Braille text. It also allows for contracted Braille characters transcribed onto the Feature Pack’s Braille keyboard to be back- translated to ASCII text, thus enabling this data to be shared with a PC. The aforementioned functionalities will all be addressed in subsequent lessons. You may enter the “Braille Configuration Menu” and change any of the default options using the methods described in changing prior menu settings. For ALVA Braille Controllers within the Continental United States, the default Braille configuration settings are: Keyboard Layout: US Braille Table: NABCC Contraction Table: EN-US-G1 15. The “Dot Pressure” setting allows you to adjust the intensity of the Braille dots displayed on the Braille display. The most intense value is 5, with the least intense value being 1. Level 5 provides relatively crisp, sharp Braille dots, while those who may prefer a flatter, spongy profile to the Braille dot, may prefer a lower intensity level, which can be set by the same methodologies described for accessing prior menus. 16. The "Number Status Cells" option is set to 0 by default. Historically, Status Cells were designed to provide to Braille users additional font information, pixel location of a given cursor, etc. With 40 cell Braille terminals growing in popularity, and with many of today's Braille users’ needs being met via alternative keystrokes, Status Cells are no longer as widely used as they have been in past years. You can set the number of Status Cells up to 20 if you desire, but typically, only 4 or 5 of them are set for users who usually have jobs relating to heavy computer programming. The following menu option allows the user who wishes to use status cells to set them to appear either at the left end, or right end of the Braille display. 17. The Braille Controller’s “Split Point Configuration Menu” allows for two independent devices to be accessed by the ALVA Braille Controller. For instance, the user may wish to have the first 15 cells of the Braille display set to display the contents of their accessible cellular phone, via a Bluetooth connection, while the remaining 24 cells might be dedicated to a PC screen reader via a USB connection. As of this writing, this feature is not present in any other Braille Terminal currently on the market, and exponentially increases the user’s productivity, making many applications available to you simultaneously. Page 12 of 50 In Touch With ALVA: A Guide to Unleashing the Power of your ALVA Braille Controller Open up the “Split Point Configuration Menu”; Smartpad 2 + Smartpad 3 + ”Enter” key on the five way navigation key is the hotkey to toggle on / off this functionality, any time the Braille Controller is powered on. The first option allows for this feature to be activated, or turned off; by default, it is set to off; toggle this functionality using the aforementioned methods for menu navigation. The next option sets the number of cells to be used to “Split” the display, so that the contents of the screens of two different devices can be displayed in Braille through the controller at the same time. By default, this is set to 5 characters and will need to be changed. It is recommended that 15 Braille cells be assigned to display the contents of the screen on a wireless Mobile device, with the remaining 24 ear marked for the second device. A Braille cell indicator with all 8 Braille dots represented serves as the “Split Point” between the contents of the two different devices’ screens. The “Display Layout Setting” allows for the first device to be assigned activation. Press the ”Enter” key on the five way navigation key to change this option. The last settings allow for the “Keys to the Left” or the “Keys to the Right” device to be active. This enables the user to control either the device assigned to the left portion of the display, or the right portion. The contents of both devices will still be visible on the display regardless of which device is being controlled by the Braille display key. Return to the “Settings Menu” once the “Split Point” functionality has been configured to your satisfaction. 18. The following nine “Settings Menu” options are fairly straightforward functions that can be easily toggled or adjusted, and are explained in greater detail in the product manual. They are: Repeat Keys: Functionality = On / Off 2nd Cursor Routing Row: = On / Off – Dual functionality out of one cursor routing button which can be held down from a preset amount of time to invoke a secondary function dependent on the screenreader to which the Braille Controller is currently engaged. The default time to hold down the cursor routing button to invoke this second action is 500 milliseconds, and can be adjusted with the following settings. “Default Volume”, “Sounds” (On / Off), “Cursor Routing”, “eTouch”, “Thumb-Key”, and “Smartpad”. Return to the “Settings Menu” once all settings have been adjusted accordingly. 19. Setting the internal time within ALVA Braille Controller: Page 13 of 50 In Touch With ALVA: A Guide to Unleashing the Power of your ALVA Braille Controller Press ”Enter” on the five way navigation key on the “Set Time” setting, which enables the user to use the “Up” and “Down” arrow keys on the five way navigation key to set the hour, minute, and second. Use “Left” and “Right” arrow keys to move between these values once they are set, then return to the “Settings Menu” when finished. By default, the ALVA Braille Controller’s time format is set to “24 hour” time. The user may toggle this to “12 hour” time by pressing the ”Enter” key and using the “Up” and “Down” keys to alternate between these two options. Return to the “Settings Menu” to preserve the desired format. Lastly, the user may choose between a colon (:) and a period (.) as “Time Separators”. By default, this is set to a colon (:). 20. To set the date: Select the “Set Date” setting by pressing “Enter”. Edit the “day”, “month”, and “year” in the same manner that the “hour”, “minute”, and “second” were edited when setting the time. Return to the “Settings Menu to preserve any changes. Select the “Date Format” setting to alter the default date format of “Day/Month/Year”. The recommended setting for North American users is “Month/Day/Year”. Finally, choose between a period (.), a colon (:), a slash (/), or a dash (-) as a date separator. The default date separator is a period (.). Return to the “Settings Menu” to preserve all changes. 21. The “Language Setting” is set to “English” by default. Feel free to change this option as needed. 22. The “Preferred Interface Setting” is a toggle to set Bluetooth or USB devices as primary and / or secondary interfaces. The default primary setting is Bluetooth. 23. The “Settings Menu” also shows the Braille Controller’s “BT MAC ADDRESS” which cannot be changed by the user. 24. This menu also displays the version of the most recent firmware installed, as well as the latest Hardware Revision. Page 14 of 50 In Touch With ALVA: A Guide to Unleashing the Power of your ALVA Braille Controller 25. The “Settings Menu” also provides a means for updating the firmware. Please consult Chapter 8 of the product manual for detailed instructions before attempting this process. 26. You may “Restore Factory Settings” ay any time if you choose to do so. 27. Lastly, this menu’s “Test Mode” provides a means for testing the units “Keys” and “Cells” to verify that all is working properly. 28. Once all of the aforementioned menu settings have been customized according to your preferences, please exit the “Settings Menu” by pressing Smartpad 1, and proceed to the next lesson. Page 15 of 50 In Touch With ALVA: A Guide to Unleashing the Power of your ALVA Braille Controller LESSON 2: MAXIMIZING THE BENEFITS OF THE ALVA BRAILLE CONTROLLER’S INTERNAL “NOTES” APPLICATION The following group of lessons will focus on using the “Notes” application as a standalone means of creating, editing, saving, and retrieving data. This application by no means fulfils all of the functionality of a proprietary note taker, but offers the user a conventional means of managing data when disconnected from a secondary device. Think of the “Notes” application as a “Pen and Paper” whereby data may be shared with others via a USB connection to a PC. Lesson 2.1: Familiarization With “Notes” Objective: The user will learn to access the “Notes” application, gain an overview of its menu structure, and use it to manage files. Procedure: 1. Ensure that the ALVA is turned on. While you may access the “Notes” application via the “Settings Menu”, simply press the space bar while also pressing Braille Keys 1+3+4+5, the key configuration for the Braille Letter “N”, to more quickly access the “Notes” application. 2. This places you within a blank note similar to “Notepad” on a PC. A blinking cursor (Braille Dots 7 and 8) represent the location of the “Notes” cursor. 3. You may now begin to write data using the Braille keyboard on the Feature Pack. Make a note of the extra keys on the Feature Pack keyboard described in the prior section, and use the space bar as an orientation key when writing on this keyboard. Proceed by writing in a preferred Grade of Braille, and Braille data will begin to appear on the Braille display. 4. At this point, you are now in the process of creating a data file which is stored on a flash memory chip located within the Feature Pack. After entering a few lines of data, press the “Alt” key, which is the furthest, right-most key on the Feature Pack. This will activate the “Notes” application’s “Menu Bar”. Four menus are displayed on the Braille display. From right to left they are: “File”, “Edit”, “Braille”, and “Help”. You may select any of these four menus by clicking the cursor routing button under the desired menu. You may then proceed back to the menu bar by pressing “Smartpad 1”, which also closes the menu bar and returns you to the application. 5. Many of the navigation keys present in full-featured standalone note takers are also present in this application: Page 16 of 50 In Touch With ALVA: A Guide to Unleashing the Power of your ALVA Braille Controller Space + Braille Key1 + Braille Key2 = Backspace Space + Braille Key4 + Braille Key5 = Delete Space + Braille Key3 will move the cursor back a character, or to the left, while Space + Braille Key6 will move the cursor forward a character, or to the right. Space + Braille Key2 will move the cursor back a word, while Space + Braille Key5 will move the cursor forward by a word. Space + Braille Key1 or Thumb-Key 2 will move the cursor back a line, with Space + Braille Key4 or Thumb-Key 3 moving the cursor forward by a line. Page 17 of 50 In Touch With ALVA: A Guide to Unleashing the Power of your ALVA Braille Controller Cursor routing buttons can also be used to move the cursor to the desired location on the Braille line. Inserting text within, or at the end of a file, is similar to doing so on a PC, whereby the point of insertion is defined by the cursor position. 6. Enter a few additional sentences and practice navigating through this file. Also, be sure to insert and delete additional text as desired. Lesson 2.2: Saving, Opening, and Creating New Files Objective: The user will learn to “Create”, “Save”, “Open”, and “Delete” files. Procedure: 1. Many of the following functions have hotkeys derived from Microsoft’s Windows-based shortcuts. From the open file with recently added data, press the control (Ctrl) key which is the furthest left-most key on the Braille keyboard + Braille Keys 2+3+4, or the Braille Letter “S”. This “Save” option can also be accessed through the “File Menu” off of the “Notes” Menu Bar. 2. You are now presented with a “Save As:” prompt pointing to the “/notes/” folder on the flash memory drive of the Feature Pack. Give the file a file name followed by pressing the “Enter” key on the five way navigation key or the enter key which is the right-most key above the spacebar. Don’t worry about file extensions at this time. 3. Turn the unit off, then back on again. Re-enter the “Notes” application. 4. Press the control (Ctrl) key + Braille Keys 1+3+5, or the Braille Letter “O”, to open the recently saved file. Either type the file name or use the “up” and “down” keys on the five way navigation key to review the saved file list, and then pressing the “enter” key on the desired file, which then opens. Page 18 of 50 In Touch With ALVA: A Guide to Unleashing the Power of your ALVA Braille Controller 5. Add to this text and repeat the process, but instead of pressing control (Ctrl) + S, select the file menu and choose the “Save As:” option. Give the file a different file name this time, for this important function mirrors the “Save as” process on a PC. 6. Also, note that the control (Ctrl) Key + Braille Keys 1+3+4+5, or the Braille Letter “N”, creates a “New” file, and offers the user the option to “Save” any unsaved changes to the recent file. Use the cursor routing buttons to select “Yes” or “No”. 7. Turn the unit off, then on again, re-enter the “Notes” application, and activate the “File” menu by pressing Alt + Braille Keys 1+2+4, or the Braille Letter “F”. Choose the “Delete” option and use the “Up” and “Down” keys to delete any unnecessary files from “Notes” memory. When comfortable performing all of these functions, please proceed to the next lesson. Lesson 2.3: The “Edit Menu” Objective: The user will learn to select, cut, copy, and / or paste text into a different location. The user will also learn to use the “Find” command to locate specific text. Procedure: Please note that all functions to hotkeys referenced can also be accessed through the “Edit Menu” within the “Notes” application. 1. Open a new file within “Notes” and write 10 sentences. 2. Press control (Ctrl) + Braille Keys 2+4+5, or the Braille Letter “J”, at the beginning of the first sentence. 3. Route the cursor to the end of the second sentence and press control (Ctrl) + Braille Keys1+3, or the Braille Letter “K”. These commands define a “Block” of text which has now been selected. Press control (Ctrl) + Braille Keys1+3+5+6, or the Braille Letter “Z”, to “Undo” this operation. Page 19 of 50 In Touch With ALVA: A Guide to Unleashing the Power of your ALVA Braille Controller 4. Press either control (Ctrl) + Braille Keys1+4, or the Braille Letter “C”, to “Copy this text to the Feature Pack’s “Clipboard”. You may also elect to “Cut” this text instead by pressing control (Ctrl) + Braille Keys1+3+4+6, which represent the Braille letter “X”. 5. Proceed to the end of the file and press control (Ctrl) + Braille Keys1+2+3+6, or the Braille Letter “V”, to paste this text at the end of the file. 6. Create a new file which is blank and press control (Ctrl) + Braille Letter “V” to paste the contents of the clipboard into the new file. 7. Press control (Ctrl) + Braille Keys1+2+4, or the Braille Letter “F”. This provides the user with a means to “Find” specific text in a file. Pick a key string of data in a file and press enter. The cursor will move to the first instance where this string of data is found within the file. Page 20 of 50 In Touch With ALVA: A Guide to Unleashing the Power of your ALVA Braille Controller 8. Please repeat these steps until you are comfortable with selecting, copying or cutting, pasting, and finding text within a document before proceeding to the next lesson. Lesson 2.4: Converting Braille To Text Objective: The user will learn how to convert a Braille file into ASCII text. Procedure: 1. Either create a new file, or open an existing file. 2. Activate the “Menu Bar” by pressing the Alt key and select the “Braille Menu”. 3. Press the cursor routing button under the “Contracted to Text” option. This will convert contracted Braille to uncontracted (Grade I) Braille text whose ASCII equivalents can be recognized by a PC as text. 4. A “Save As:” dialog appears prompting you for the uncontracted Braille file to be saved. It is recommended that the user add a “.txt” extension to the file name here so that the file might be moved to a PC where the now uncontracted Braille file can be opened within “Notepad” or “WordPad” to either edit or copy the contents to another Microsoft Office application. 5. Please repeat this process twice more before proceeding to the next lesson. Lesson 2.5: Moving Files Between “Notes” and a PC Objective: The user will learn how to move a file from “Notes” to a PC, and a file from a PC, to “Notes”. Procedure: 1. Connect the ALVA Braille Controller to a PC that has been booted to the Windows desktop. Disregard any “Add New Hardware” prompts at this point. 2. Open up either “Windows Explorer” or “My Computer” and select the second Mobile drive that should appear in the list of available drives on the PC. 3. There should be a “Notes” Folder on this drive. Open this folder. 4. Select any files that may have been saved with a “.txt” extension. If there are uncontracted Braille files saved to “Notes” without this extension, they may be opened on the PC providing that the user indicates that Windows should open it using “Notepad” or “WordPad”. Page 21 of 50 In Touch With ALVA: A Guide to Unleashing the Power of your ALVA Braille Controller 5. Either open or copy these files to the PC’s hard drive. 6. Contents from these files may also be copied and pasted into other mainstream PC applications and Microsoft Office applications. 7. Locate a file on the PC that you may wish to store in the “Notes” application and copy it to this folder. 8. Please note that data from a PC opened within the “Notes” application will appear in uncontracted Braille. 9. You may copy Braille files from the PC such as contracted Braille books or translated documents by way of Braille translation software such as Duxbury. 10. Repeat this process until comfortable manipulating both data and files between the “Notes” application and the PC. Page 22 of 50 In Touch With ALVA: A Guide to Unleashing the Power of your ALVA Braille Controller LESSON 3: CONNECTING THE ALVA BRAILLE CONTROLLER TO COMPUTERS The following group of lessons addresses the concept of connecting the ALVA Braille Controller to laptop and desktop computers. Today’s educational and employment settings are heavily dependent on the usage of PC applications. The ALVA Braille Controller provides tactile access to the “Graphical User Interfaces”, or GUIs, of both the Macintosh and Windows Operating Systems. The performance of this tactile access is largely dependent upon which Screen Reader the user selects as their primary vehicle for access to a specific operating system. In short, the ALVA Braille Controller has corresponding drivers that interface with each of these Screen Readers, providing the end user the ability to utilize the adaptive functionalities present within these applications in a Braille input / output environment. Aside from serving as an access tool for a computer, the ALVA Braille Controller has the ability to serve as both a “Human Interface Device” (such as a mouse or keyboard) and as a “Storage Drive” when connected to one’s PC via a USB cable. The ALVA Braille Controller offers the user the ability to control their PC with the Feature Pack’s Braille Keyboard before a Screen Reader application has been launched, and also provides audio input / output functionality through the computer. The ALVA Braille Controller also has the ability to connect to a computer via a Bluetooth wireless connection, which offers many of the above mentioned services available via a USB connection, only without the wires. This group of lessons will: 1. Provide direction to the end user once the ALVA Braille Controller has been initially connected to a computer via a USB cable. 2. Address how to effectively store and move files between a PC and both the ALVA Braille Controller’s system and flash drives. 3. Outline the steps necessary to install the ALVA Braille Controller software onto a computer. 4. Detail the usage of the ALVA Braille Controller’s “ALVA Explorer” utility. And, 5. Detail the ALVA Braille Controller’s relationship with the following commercial Screen Reading applications: System Access Mobile JAWS® Screen Reading Software Window-Eyes Hal VoiceOver Page 23 of 50 In Touch With ALVA: A Guide to Unleashing the Power of your ALVA Braille Controller Due to the extensive orientation to the ALVA Braille Controller complimented by accompanying photos within the two previous groups of lessons, less photos will be used to illustrate much of the functionalities described throughout the following lessons, for it is expected that the trainer and user are fairly comfortable accessing the various components of the ALVA Braille Controller. Also, this group of lessons is designed to provide direction on using the ALVA Braille Controller with two distinct operating systems and four different Screen Readers, and should not be positioned as a tutorial for how to utilize specific Screen Reading applications. Lesson 3.1: Connecting The ALVA Braille Controller to a Computer Using a USB Cable Objective: The user will connect the ALVA Braille Controller to a Windows-based PC and familiarize themselves with the resulting dialog boxes that will appear on the screen. In this exercise, it is assumed that the user will connect the ALVA Braille Controller to a PC that has one of the aforementioned Windows-based Screen Readers already authorized and installed on the PC. Procedure: 1. Once the chosen PC has booted to the Windows desktop and the desired Screen Reader has been launched, power on the ALVA Braille Controller and connect the USB cable provided to an available USB port on the PC. Connect the end of the cable with the smaller connector to the corresponding USB connector on the ALVA, which is located toward the front of the left edge of the unit, directly behind the AC power jack which allows for the unit’s batteries to be recharged. Note that when the ALVA Braille Controller is connected to a PC via a USB cable, the primary battery within the base unit will recharge (via the USB connection) while the PC is connected and running. 2. Once the USB cable is connected, the user will hear four two-toned sound notifications which will be emitted from the PC’s speakers. This is the same sound notification that is made when other USB devices are connected to the PC, and the same two-toned sound which also advises the user when a unit has been disconnected by reversing the order in which these two tones are emitted. 3. These sound notifications indicate that: The unit’s “Flash Drive” has been recognized by the PC. The unit’s “System Drive” has been recognized by the PC. The unit’s “Keyboard Input” and “Audio Output” hardware have been recognized by the PC. 4. Once the two-toned indications sound, two dialog boxes will appear on the screen inquiring as to how the user wishes to utilize Windows to access the contents of Page 24 of 50 In Touch With ALVA: A Guide to Unleashing the Power of your ALVA Braille Controller each drive. The first dialog that appears is the dialog associated with the contents of the “Flash Drive”. Depending on what printers, cameras, scanners, or other accessories are installed on the PC, the dialog will read similarly to the following: ALVA Explorer (Drive Letter:) This disk or device contains more than one type of content. What do you want Windows to do? Run ALVA Explorer (Using the program provided on the device) Copy pictures to a folder on my computer (Using Microsoft Scanner and Camera Wizard) View pictures in Media Center (Using Media Center) View a slideshow of the images (Using Windows Picture and Fax Viewer) Print the pictures (Using Photo Printing Wizard) Import pictures and videos (Using Windows Live Photo Gallery) View pictures (Using Windows Live Photo Gallery) Open folder to view files (Using Windows Explorer) Take no action Aside from running “ALVA Explorer”, or opening the drive as a folder to view files, the user will, in all likelihood, not use many of the other functions provided in this dialog. Utilizing the ALVA Explorer will be covered in a subsequent lesson. The user may press the escape key to clear this dialog box. 5. The second dialog box presents the same information for handling content on ALVA’s System Drive. As the user will notice, there is not an option to run the “ALVA Explorer” utility from this drive, hence the rationale for having the “Flash Drive” initially appear in the screen’s foreground to enable the user to independently access the “ALVA Explorer” utility. Transferring files will be covered in a subsequent lesson, so press the escape key to clear this dialog. 6. Once both dialog boxes have been cleared, the user may begin to activate Windows functions and actually transmit letters and punctuation marks to the PC if they begin to press keys on the Feature Pack’s Braille keyboard; this is because the Feature Pack is treated as a “Human Interface Device”, meaning that the Braille keyboard operates in a similar manner to any USB keyboard connected to the PC. 7. In this same vein, the Feature Pack’s audio output functionality assumes the role of a secondary “Sound Card”. What this means is that the sound of the PC is automatically routed through the ALVA Braille Controller’s two stereo audio speakers at either end of the Feature Pack. When the ALVA Braille Controller is disconnected, the PC reverts back to its default sound device, and sounds are routed back through the PC’s external or internal speakers. Some users may wish to use the ALVA Braille Controller as their default sound device when using the Braille display, and therefore may elect to leave this option unchanged. However, Page 25 of 50 In Touch With ALVA: A Guide to Unleashing the Power of your ALVA Braille Controller if a user wishes to use their PC’s sound card as their default audio device when the ALVA Braille Controller is connected, do the following: Open up the Windows “Control Panel”. Select “Sounds and Audio Devices”. This option consists of approximately five tabs, or property sheets, but this will vary based on the user’s system configuration. These property sheets are labeled: “Volume”, “Sounds”, “Audio”, “Voice”, and “Hardware”. Control + Tab enables the user to cycle through these property sheets, and Control + Shift + Tab enables the user to reverse the order in which these property sheets are cycled. The two main property sheets, “Audio” and “Voice”, dictate how sounds are both input and output through the computer. Navigate to the “Audio” property sheet which provides a dialog box which determines which Audio Devices are in use. The “Sound Playback”, “Sound Recording”, and “MIDI Music Playback” group boxes allow the user to select the desired audio device with the up and down arrows while tabbing through these three options. Each option has a “Volume” control and an “Advanced Settings” control. If the ALVA Braille Controller is connected, it will show up as a device in these group boxes, and so will the PC’s sound card. Bluetooth connectivity will be covered in a subsequent lesson, but when the necessary Bluetooth peripherals are installed, “Bluetooth Handsfree Audio” will be present in these group boxes as well. This means that one can route the PC’s sound via a Bluetooth wireless link directly to their ALVA Braille Controller. It is essential that the user be aware that when a device is selected as a default device, and the checkbox for the option “Use only default devices” is checked, then when that specific device is not present, the PC’s sound will appear muted. The “Voice” property sheet controls which devices are used for “Voice Playback” and “Voice Recording” and also have both “Volume” and “Advanced Settings” controls. There is also a “Test Hardware” control in this dialog box. When the appropriate devices have been selected, press enter on the “OK” button. In conclusion, ensure that the user is able to locate their default sound card, the ALVA Braille Controller, and, if installed, the “Bluetooth Handsfree” options, and are able to independently select and change these settings in both property sheets. Once the user is able to do this consistently and independently, they are ready to continue to the next lesson. Page 26 of 50 In Touch With ALVA: A Guide to Unleashing the Power of your ALVA Braille Controller Lesson 3.2: The ALVA Braille Controller and Data Management Objective: The user will demonstrate the ability to manage, select, copy, and move data between the ALVA Braille Controller’s “Flash Drive”, “System Drive”, and at least one computer. In this lesson, the user will learn to identify the types of data which can be stored on both the “Flash” and “System” drives. In order to realize the full experience of this lesson, it is recommended that the user have access to at least two PCs. It is also recommended that each PC have a Screen Reader installed and activated. Procedure: Connect the ALVA Braille Controller to the user’s primary PC and conduct a quick review of Lesson 2.5, focusing on the process of moving files created in the ALVA Braille Controller’s “Notes” application to a PC. Then, perform the following exercise using the ALVA Braille Controller as the catalyst for sharing data between two different PCs: Either create or locate a .txt (Text) file on the PC and copy it from the PC to the “Notes” folder on the ALVA Braille Controller using “Windows Explorer” or via the “My Computer” icon on the desktop. Disconnect the ALVA Braille Controller’s USB cable from the primary PC, and if a second PC is present, connect the unit to the second PC. When the Windows dialog box appears inquiring as to what action the user wishes to take regarding the content on the “Flash Drive” (which is the first dialog box which is maximized on the user’s screen) use the up and down arrow keys to locate and select the “Open folder to view files using Windows Explorer” option, and press enter. Locate the “Notes” folder and the desired file(s) using either “Windows Explorer” or “My Computer”. Copy them to a desired location on the second PC’s hard drive. Note that there are other folders on the “Flash” drive: “Braille” and “System” folders. It is vital to the operation of the device that the user not store, copy, move, or delete files from either of these folders. Please note that contracted Braille files may often be moved to and from the ALVA Braille Controller’s “Notes” folder in the event that the user wishes to store and read large amounts of formatted Braille text such as books, magazines, newspaper articles, etc. 1. Once the above exercise has been successfully completed, reconnect the ALVA Braille Controller to the user’s primary PC and do the following: Page 27 of 50 In Touch With ALVA: A Guide to Unleashing the Power of your ALVA Braille Controller Clear the dialog box prompting the user to take an action with the “Flash” drive by pressing the escape key. The user will now be prompted to select an action relating to handling content on the “System” drive. Use the up and down arrow keys to select “Open folder to view files using Windows Explorer”, and press enter. Explore the contents of this drive. Note that there are three primary folders on this drive: “ALVA BC640”, ALVA Explorer”, and a “System” file folder. It is vital to the operation of the device that the user not store, copy, move, or delete files from any of these folders. From the user’s PC hard drive, either create or locate a folder containing a few files of any type. Copy this folder to the ALVA Braille Controller’s “System” drive. Disconnect the ALVA Braille Controller and reconnect it to the second PC. Clear the dialog box pertaining to the ALVA Braille Controller’s “Flash” drive by pressing escape, and select the “Open folder to view files using Windows Explorer” option when prompted to access the “System” drive. Locate the folder on the “System” drive that was copied from the primary PC to the “System” drive. Copy and paste it to the hard drive of the secondary PC. The user may wish to add files and folders to this newly copied folder on the 2nd PC’s hard drive and then repeat the above steps to move (or copy) this content back to the primary PC. Note that folders and files copied to the ALVA Braille Controller’s “System” drive can only be accessed, read, edited, copied, or deleted, when the unit is connected to a PC via a USB cable. In conclusion, the “Flash” drive is used for storing files that the ALVA Braille Controller can access independently of a PC, while the “System” drive allows the user to store larger amounts of data using this space as a file storage alternative, allowing the user to access this information in their preferred file formats when using the ALVA Braille Controller with a PC. When the user is comfortable accessing the ALVA Braille Controller’s two drives, as well as transferring data to and from these drives, please proceed to the next lesson. Page 28 of 50 In Touch With ALVA: A Guide to Unleashing the Power of your ALVA Braille Controller Lesson 3.3: Using ALVA Explorer Objective: The user will learn to utilize the ALVA Explorer utility on a Windows-based PC. It is recommended that this PC not have any additional Screen Reader installed nor authorized to run on its hard drive. ALVA Explorer is a utility that comes preinstalled on the ALVA Braille Controller. This utility provides basic, fundamental access to a PC that might not have a Screen Reader installed on its hard drive. What this means is that a user may connect the ALVA Braille Controller to any PC that is able to freely interact with USB devices, and can automatically launch ALVA Explorer to provide both speech and Braille access to a number of PC-related tasks. When the ALVA Braille Controller is disconnected, ALVA Explorer disappears from the PC, and no trace of the utility is left on the hard drive. ALVA Explorer is not a full-fledged Screen Reader and should not be positioned as such. Rather, it is a utility to provide basic access to otherwise inaccessible PCs. Procedure: 1. Again, it is recommended that this PC not have any additional Screen Reader installed nor authorized to run on its hard drive. If no such PC is available, and if it is not feasible to locate one, exit any Screen Reader applications that may be running, and connect the ALVA Braille Controller. 2. Wait approximately 10 seconds and then press the enter key. Windows will default to ALVA’s “Flash” drive. The default prompt that Windows presents to the user is: “Run ALVA Explorer using the program provided on the device.” By pressing enter on this option, the ALVA Explorer utility launches. This ensures that the user can independently launch ALVA Explorer on a PC that does not have any Screen Reading access. 3. A chime will sound followed by a five to ten second pause. Then, ALVA Explorer’s text to speech engine will begin to speak, and uncontracted Braille will appear on the Braille display. 4. ALVA Explorer is simple in its design. The utility has two buttons, a “Settings” and a “Help” button. 5. The user may now use the Tab Key or Smartpad 4 on the ALVA Braille Controller to tab between these two buttons. Once the desired button is reached, press the enter key on the five way navigation key to open either of these respective options. 6. The “Settings” dialog enables the user to customize ALVA Explorer’s speech settings. The user may tab through the different speech options and use the up or down arrow keys on the five way navigation key, or the PC keyboard, to select Page 29 of 50 In Touch With ALVA: A Guide to Unleashing the Power of your ALVA Braille Controller different speech options in a list view. Also, they may utilize the space bar on the Feature Pack keyboard to “Check” or “Uncheck” various speech options. 7. For example, “Selected Text to Speech Engine”, “Speech Rate”, Volume”, “Punctuation”, and “Verbosity” can all be adjusted within this dialog box. Prompt the user to press the space bar on the “Save” button before pressing “OK” to exit the “Settings” dialog. 8. Within the ALVA Explorer Folder located on the Alva Braille Controller’s System Drive resides a text-based web browser, WebbIE, the free web browser for blind people with little or no sight. While it is not this tutorial’s intent to circumvent the usage of any mainstream web-browser by promoting the use of WebbIE, this text-based browser offers a great deal of power coupled with a simplistic user interface when using the ALVA Explorer on a PC without any Screen Reading access installed on its hard drive. WebbIE has a comprehensive “Help Menu” with “Getting Started” instructions and command summaries for both “Menu Commands” and “Control (Navigation) Commands”. The following suggested activities will introduce the user to this portable, self-contained, browsing alternative: Using Windows Explorer, locate the ALVA System Drive within the PC drives list. Open it, and use the down arrow on the five way navigation key to navigate to the “ALVA Explorer” folder. Open this folder and press the letter “w” which will highlight the “WebbIe3.exe” file, the executable file that launches the WebbIE browser. Press enter on this file, and the WebbIE home page will appear. Use either the five way navigation key or the front keys to navigate this webpage and explore its links and content. This website is a great source for news, podcasts, and other interesting pieces of information. Press enter on a desired link to open up a webpage. Press Alt + Left Arrow on the five way navigation key to move back to the previous web page, and Alt + Right Arrow on the five way navigation key to forward to the next web page. Press Alt + “d” to move to the “Address Bar” of WebbIE and enter the web address for Flying-Blind LLC, www.flying-blind.com. Press enter to open this website. WebbIE gives the user the ability to fill out forms. If interested, sign up for the Flying Blind, LLC electronic newsletters, which delivery current, adaptive technology information directly to your inbox on a regular basis. Simply use the arrow keys to locate the “Enter Email Address” text box. Press enter on the text box and a dialog box will open. Braille in the email address to which these newsletters should be sent, and either press enter or activate the “OK” button. Page 30 of 50 In Touch With ALVA: A Guide to Unleashing the Power of your ALVA Braille Controller Press Control + l to render a list of links which can be accessed by using the up and down arrow keys on the five way navigation key which are numbered for the user’s convenience. Locate the “EyePod TechnoCast Archive” link and press enter. Locate the archived podcast for the ALVA Braille Controller, http://www.flying-blind.com/ept/EyePodTechnoCast6, and press enter. Depending on the PC’s configuration, the MP3 file will either start playing, or the user will be prompted to either open or save the MP3 file. This podcast provides an audio demonstration of many of the topics addressed within these lesson plans. Finally, press Control + "w" to automatically invoke Google’s search engine which places the user within the Google Search Field. Enter a topic of interest and press enter. Press Alt + "t" to move to the main non-link text of the website. Explore the links which result from the topic entered and select one to be opened by pressing the Enter key. Press Control + "k" to “Crop” the webpage for easier viewing of the main page’s content by the user. Control + "r" will refresh the current webpage. Conclude by reviewing the WebbIE “Help Menu” which offers comprehensive commands for setting a new home page, bookmarking, accessing “Favorite” websites, and performing a variety of today’s browsing activities with easy to use keystrokes, all of which may be accessed directly from the ALVA Braille Controller. 9. The “Help” button opens up a Word document that offers a variety of Windows shortcuts and the ALVA Braille Controller key commands that can be used within Windows. Rather than list them all in this Lesson, the following suggested exercises provide a few examples for the user to practice as they review this document: On the ALVA Braille Controller, press the Windows Key in conjunction with Braille Keys 1+4+5, or the Braille letter “D”. This will “Minimize all Applications” on the PC’s desktop. Use the five way navigation key to explore the icons on the desktop. Press the Windows Key to open up the “Start Menu” and use the up and down arrows to navigate this menu. Press the enter key on “All Programs” and locate Microsoft Word, if installed, or an alternate word processing application such as “Notepad”, which is located under “Accessories” within the “All Programs” list. Page 31 of 50 In Touch With ALVA: A Guide to Unleashing the Power of your ALVA Braille Controller Have the user enter their preferred Grade of Braille in a blank document. Note that Space + Braille Keys 1+2+3+4 will toggle on and off Contracted Braille as it is entered into the PC. This means that the ALVA Braille Controller enables the user to write to a PC application using Contracted Braille. Because the ALVA Braille Controller only displays Braille in Uncontracted Braille, this may serve as a source of confusion for some users, so please use discretion when introducing this concept. Also remember to toggle Contracted Braille “Off”, so that the Braille keyboard can be used to issue other Windows commands. Use the navigation commands learned while using the ALVA Braille Controller’s internal “Notes” application to navigate and edit the document. Press the Alt Key to bring up the menu bar, or press Alt + Braille Keys 1+2+4, or the Braille letter “F”, to open the file menu. Either save the file or close the file without saving by either navigating to the chosen menu option, or by simply entering the corresponding Windows shortcut key highlighted within the chosen menu option. Teach the concept of minimizing and maximizing applications using a Braille display by navigating to the taskbar using the Windows Key followed by Space + Braille Keys 1+5, or the Braille letter “E”, followed by Smartpad 1, or the Tab Key. Illustrate how open applications are present on the taskbar and how by selecting one of these applications with the cursor routing button the user can maximize a specific application. Press Smartpad 2, which is a second Alt Key option used in conjunction with Smartpad 4 to simulate an Alt + Tab command to switch between applications. When finished with these exercises, and any similar exercises, disconnect the ALVA Braille Controller and ALVA Explorer will exit. Lesson 3.4: Installing The ALVA Braille Controller Software on A Windows-based PC Objective: The user will learn how to install the ALVA Braille Controller’s software onto a Windows-based PC while selecting the desired components appropriate for their computer. While the ALVA Explorer utility provides basic functions and sound access to PCs that are not equipped with today’s Screen Readers, the ALVA Braille Controller’s accompanying software provides the user with a means of installing the unit’s necessary documentation, as well as drivers for two of today’s most used Screen Readers. This software also allows the user to install the necessary software to enable their PC to Page 32 of 50 In Touch With ALVA: A Guide to Unleashing the Power of your ALVA Braille Controller communicate with the ALVA Braille Controller via a wireless Bluetooth connection. This lesson addresses setting up the ALVA Braille Controller via a USB connection, and the next lesson will be devoted specifically to Bluetooth connectivity. Procedure: 1. There are two ways to access the ALVA Braille Controller’s software installation. The user may locate the software CD which accompanies the ALVA Braille Controller when shipped to the user, or, the user may locate the software on the ALVA Braille Controller’s “System” drive by selecting the “ALVA BC640” file folder. If the user inserts the CD and their CD drive is set to “Auto-Run”, then the user will be able to automatically proceed with the installation process. If the CD drive is not set to “Auto-Run”, the user will need to select and then press the enter key on the “setup.exe” file on the CD. This file is located in the “ALVA BC640” folder on the ALVA Braille Controller ‘s “System” drive, and allows the user to install this software from the Braille terminal itself, rather than from the CD. This folder contains subfolders pertinent to Bluetooth setup, installation of manuals and Quick Reference Guides, setup of the ALVA Braille Controller’s “Firmware Updater”, and the installation drivers for JFW and Window-Eyes. Have the user determine their desired preference for installing this software before continuing. 2. Once the software begins the installation process, the user is presented with a series of options that they may access by using the Tab, or Shift + Tab Key, to cycle between them, pressing either the space or enter keys to activate the desired option. The “Install Screen Reader Drivers” button installs drivers for JAWS For Windows and Hal Screen Readers as well as all ALVA Braille Controller documentation (Both Manuals and Quick Reference Guides). Also, the ability to update one’s ALVA Braille Controller “Firmware” is installed. The “Bluetooth Setup” button installs the software necessary for the ALVA Braille Controller to communicate with a PC via a wireless Bluetooth connection, and is covered in Lesson 3.5. The “View Manuals” button enables the user to read ALVA documentation before installing the software. The “View Brochures” button enables the user to read marketing materials pertinent to the ALVA Braille Controller. The “View ALVA BC640 Movie” button provides the user the option to view a short movie about the ALVA Braille Controller. Finally, an “Exit” button allows for the termination of the installation process. Page 33 of 50 In Touch With ALVA: A Guide to Unleashing the Power of your ALVA Braille Controller 3. Select and activate the “Install Screen Reader Drivers” option, ensuring that the user’s desired Screen Reader has been launched in order to read the installation prompts. Proceed by doing the following: Select the “Setup Language” to use during the installation. This language will default to the language selected for the operating system being used on the PC, but one may change this option by using the arrow keys to make the necessary adjustments. Press enter to continue. Make sure all other applications are closed, and that all work has been saved, before selecting the “Next” button. Read the “License agreement” with the up and down arrow keys. Tab once and arrow up to the “I Accept the Agreement” radio button. Press enter to continue. By default, a program group for “ALVA BC6” is created in the “All Programs” sub menu of the Windows “Start Menu”. Press enter to select this option, or tab to the “Browse” button to have this program group and all software installed in an alternate location. The default installation path is recommended for optimal accessibility. The installation presents a “Combo Box” with “Full”, “Compact”, and “Custom” installation options. For one’s first installation, the “Full Installation” is recommended. By tabbing once, the user can then use their arrow keys to read the different components that are about to be installed. They may “check” or “uncheck” any of these different components by pressing space. If the user wishes to return to adjust their installation options at a later time — perhaps they wish to uninstall the documentation or drivers for a particular Screen Reader — they may do so here and remove installed components in this same manner. If the user wishes to select either “Compact” or “Custom” installations, they will be given the ability to do so, but again, it is strongly recommended that you begin with the full installation. Before continuing, ensure that the proper versions of both “JAWS for Windows” and “Dolphin Hal/Supernova” are “checked”. Press enter to continue. Again, press enter to install to the default “ALVA BC6” folder. Complete the installation, and unload and reload either JAWS For Windows or Hal/Supernova. Either Screen Reader should automatically be configured to run with the ALVA Braille Controller. If this is not the case, refer to Lessons 3.6 and 3.7 where ALVA Braille Controller usage with each Screen Reader is covered in greater detail. Locate and explore the “ALVA BC6” program group in the “All Programs” menu of the “Start Menu”, and become familiar with how to access the unit’s Page 34 of 50 In Touch With ALVA: A Guide to Unleashing the Power of your ALVA Braille Controller manuals as well as shortcuts to the unit’s “Audio” and “Bluetooth” settings. Finally, note the “Firmware Updater” option which provides a seamless means of updating the unit’s firmware when future versions are released. When finished exploring these options, proceed to the next lesson. Lesson 3.5: Setting Up The ALVA Braille Controller to Interact with a PC Via A Bluetooth Connection Objective: The user will learn to configure their primary PC to both connect and interact with the ALVA Braille Controller. Before proceeding with this lesson, please ensure that the user first understands what the Bluetooth wireless protocol is, how it differs from other wireless options and services, and how such a service will provide the user with many different opportunities to maximize their utilization of the ALVA Braille Controller. Procedure: 1. From the ALVA BC640 “Setup” Menu (which was covered in the previous lesson), locate and select the “Bluetooth Setup” button, and press either the space or enter key to activate the Bluetooth installation software. 2. This action allows the files for the installation process to be unzipped to a temporary folder on the user’s hard drive. Select and activate the “OK” button to continue. 3. Locate the Belkin Bluetooth Dongle that ships with the ALVA Braille Controller. It may be possible to use other Bluetooth dongles that implement a similar “Bluetooth Stack”, but use of the included dongle is strongly recommended for optimal results. Plug the dongle into an available USB port on the PC. This will convert the USB port into a Bluetooth access port to which numerous Bluetooth devices might be connected. 4. When prompted, select and activate the “Next” button to continue. 5. The installation wizard will automatically execute and complete the installation, and in all likelihood the installation will complete within five to ten minutes, depending on the speed of the PC. Allow the installer to automatically answer the prompts and complete the installation. More often than not, the machine will reboot upon completion of the installation, and may prompt the user to restart the PC if files are in use that need to be modified in order to complete the installation. 6. Once the PC has restarted, power on the ALVA Braille Controller. The user is now ready to connect the ALVA base unit and Feature Pack wirelessly to the Bluetooth Dongle which is now powered by the newly installed software. There are a number of methods by which this can be accomplished. However, it is Page 35 of 50 In Touch With ALVA: A Guide to Unleashing the Power of your ALVA Braille Controller recommended that the following steps be taken in order to provide a simplistic means of establishing a Bluetooth connection to all available services within ALVA Explorer: Locate and open the “My Bluetooth Places ” icon on the PC desktop. Press Alt + B to open the “Bluetooth” Menu. Once this menu has been accessed, use the down arrow to locate and access the “Search for Bluetooth Devices” menu option. This will search for all Bluetooth devices in range of the PC. Both “ALVA BC” and “ALVA BC FP” will appear. Use the arrow keys to select “ALVA BC” and press enter. Enter the PIN security code “0000” when the computer prompts for the unit’s PIN. Select the “Keyboard”, “Headphones”, and “DEV” services as authorized services for this device. It is important to select these services so that the unit’s keyboard and audio features will be available for use. The “DEV” service will allow Screen Readers to communicate with the ALVA Braille Controller and send information on to the Braille display. Repeat the same process by selecting the “ALVA BC FP” device, and install the Feature Pack using the same PIN code. Select the “Stereo Audio” service offered by the feature pack. When initially connecting these devices to communicate with a PC, the user may need to “Search” for these devices and press enter on each of them to connect each device. Subsequent connections should then occur automatically when the ALVA Braille Controller is in range of this computer. Audible tones emit from the ALVA Braille Controller’s speakers as each service connects. 1. Power off and then power on the ALVA Braille Controller and listen for the tones. If, after five to ten seconds the tones do not emit, then manually activate the “Braille”, “Keyboard”, and “Stereo”, or “Mono” audio services directly from the ALVA Braille Controller. Press Smartpad2 + Left Arrow (on the five way navigation key) + Smartpad, as a shortcut to bring up the “Bluetooth” menu. The ALVA Braille controller’s “Braille”, “Keyboard”, “Stereo”, and “Mono” audio services are displayed. The services that have a highlighted row of dashes under them are active services and the services that are inactive are not highlighted by these dashes. Simply press a cursor routing button under the Page 36 of 50 In Touch With ALVA: A Guide to Unleashing the Power of your ALVA Braille Controller desired service and then press a cursor routing button under the “primary” option, and the ALVA Braille Controller’s active connection tones sound to announce the availability of this service. One may also re-enter the “Bluetooth” menu to ensure that an active service is highlighted, or to disable a service by pressing a cursor routing button under the active service to disable it. 2. Finally, there is an “ALVA BC6 Bluetooth Settings” shortcut on the PC desktop that may be accessed to ensure that the ALVA Braille Controller’s Braille keyboard and Stereo / Mono Audio services connect either “Automatically” or “Manually”. This dialog box also provides a means of ensuring that “Bluetooth HandsFree Audio” is selected as the default audio device if the user wishes to automatically connect audio services when connecting the ALVA Braille Controller. Please note that if “Bluetooth HandsFree Audio” is selected as a default device, and the ALVA Braille Controller is not being used with the PC, the PC’s sound will in all likelihood be muted, and this default setting may require an adjustment back to the PC’s primary sound card. The following three lessons address Screen Reader usage with the ALVA Braille Controller when it is connected to a PC either via Bluetooth or USB connections. Lesson 3.6: The ALVA Braille Controller and JAWS For Windows Objective: The user will learn to verify that the ALVA Braille Controller is properly interacting with the JAWS For Windows application, customize JAWS Braille settings, and use the ALVA Braille Controller with JAWS in a variety of Windows-based applications. This lesson assumes that the user has a working knowledge of the JAWS Screen Reader. Procedure: 1. As previously stated, the ALVA Braille Controller software’s “Screen Reader Drivers” option scans the user’s PC to locate activated versions of JAWS already installed on the user’s hard drive. Thus, it automatically installs the necessary drivers in the selected version locations. Connect the ALVA Braille Controller via the USB cable to the PC and launch the JAWS Screen Reader once these drivers and corresponding key mappings have been installed. JAWS should automatically begin to interact with the ALVA Braille Controller. 2. If, for any reason, this does not occur, do the following: Invoke the JAWS “Options” menu and select the “Braille” option. Page 37 of 50 In Touch With ALVA: A Guide to Unleashing the Power of your ALVA Braille Controller Ensure that “Optelec BC6” is the default Braille display installed. If the prompt reads: “The active Braille display is no display”, then down arrow to “Optelec BC6” and press enter. Restart JAWS. If this action does not engage the ALVA Braille Controller and JAWS, return to the “Braille Options” menu and tab once to “Modify Settings” where either the space or enter key will open another dialog box. Ensure that the USB port is selected to be the active port and press enter. JAWS will prompt the user to restart JAWS so that these changes may take effect. By default, when the ALVA Braille Controller ‘s “DEV” service is connected via a Bluetooth connection, JAWS Braille functionality is automatically rerouted through the unit’s Bluetooth port, and the user does not need to make any port modifications. 3. Once the ALVA Braille Controller and JAWS are communicating, feel free to customize the JAWS Braille settings by: Returning to the “Braille Options” menu. Selecting the “Advanced” button to modify JAWS default Braille settings. This dialog box enables the user to take advantage of the various JAWS Braille options, from setting the “default Grade of Braille” to be used to setting the default JAWS Braille mode and Braille marking options. Also, highlight, cursor, and dot pattern options enable the user to customize the output on the display to their specific preferences. For more information about the Braille functionality within JAWS, consult the “JFW Help” documentation. 4. Remember, Space + Braille Keys 1+2+4+5, or the Braille letter “G” toggles contracted Braille entry from the ALVA Braille Controller On/Off. Turn this option on if the desired goal is to write in “Contracted” or “Grade II” Braille to a specific application. Remember to turn this option off when exiting this application, for if one neglects to do this, they will not be able to use the Braille keyboard to perform many Windows functions, nor take advantage of many of Microsoft’s built-in hotkeys. Also, remember that when writing “Contracted” Braille to an application, the space key serves as a means of back translating these Braille characters into recognizable text within the application. Do not be alarmed when entering Braille if this translation does not occur before the space key is pressed. 5. Conclude the lesson by: Page 38 of 50 In Touch With ALVA: A Guide to Unleashing the Power of your ALVA Braille Controller Focusing on using the Feature Pack keyboard to perform many different JAWS functions. Remember that the Feature Pack has many key combinations to simulate the many keystrokes on a PC’s QWERTY keyboard. Space + Braille Keys 2+4, or the Braille letter “I”, serves as the “Insert Key”, which is commonly used within JAWS as a “Modifier” key. Press this key combination followed by Braille Keys 2+3+4+5, or the Braille letter “T” to read the title of the active Window. Press insert followed by Braille Keys 1+2+4, or the Braille letter “F”, which locks the “Function” (FN) key so that when Braille Keys 1+2+4+5, or the Braille letter “G” is pressed, the user will have entered the “Insert+F7” command to “Select a list of links” on a webpage. Remember to toggle both the FN and insert commands off when finished with this command. Please ensure that the user has a webpage open before attempting this command. Remember, modifier keys are locked until they are pressed again, which unlocks them. Conclude by developing a strategy for incorporating as many JFW and Windows commands as possible while using the Feature Pack keyboard. The more functionality one can glean from this method of entry and navigation, the more powerful the wireless, Bluetooth functionality of this device becomes. Please be sure to refer to the “ALVA Quick Start Guide” in the submenu of the Alva Program Group for a full list of JAWS and other Windows modifier keys that can be accessed and executed from the Feature Pack’s Braille keyboard. Lesson 3.7: The ALVA Braille Controller and Hal/Supernova Objective: The user will learn how to activate and customize the ALVA Braille Controller while interacting with the Hal/Supernova Screen Reader manufactured by Dolphin Computer Access. As a point of information, Hal is the Screen Reading component of the Supernova Screen Reader / Magnifier application. In the interest of brevity, this lesson refers to all Hal functionality as the functionality available in both the Hal stand-alone application, as well as the combined speech and Braille functionality available in Supernova. Procedure: 1. Connect the ALVA Braille Controller to the PC via the USB cable. If Hal is not set to launch at Windows Start-up, press Control + Shift + H to launch Hal; Control + Shift + S launches the Supernova application. Page 39 of 50 In Touch With ALVA: A Guide to Unleashing the Power of your ALVA Braille Controller 2. The Braille terminal should come to life when this application is launched, provided the Screen Reader drivers for Dolphin Screen Readers have been initiated during the initial ALVA Braille Controller software installation. If the Braille display is not recognized, do the following: Press Control + Space to maximize Hal’s control panel. Control + Tab to the “Braille Property Sheet” and ensure that Braille is enabled. If it isn’t, enable it by pressing the space key, and the Braille display should instantly respond. If it doesn’t, go to Start Menu/All Programs/Dolphin/”Configure SAM”. SAM, or Synthesizer Access Manager, is Hal’s way of identifying which speech synthesizers, text to speech engines, and Braille terminals are activated for use. Select the “Configure SAM” option. A list of all devices will appear. If a “0” is by the device, it’s corresponding driver hasn’t been installed nor activated. If there is a “1” by the device name, then the device is active. If “ALVA BC6” is not in the list of devices, or if it is in the list but does not have a “1” by it, then tab to “Detect all Devices” and press the space key to allow Hal to search for this device. Make sure that the ALVA Braille Controller is connected to the PC before initiating this search. 3. Now that Hal and the ALVA Braille Controller are communicating, do the following to customize Hal Braille options: Return to the “Braille Property Sheet” within Hal’s Control Panel. This property sheet contains a wealth of Braille functionality which sets Hal’s Braille support apart from competitive Screen Readers. Use the tab key to move forward through the options and Shift + Tab to move backward through them. Use the space key to enable or disable functionality and features. Enable or disable Contracted Braille output. Take advantage of Hal’s “Physical Mode” which provides an accurate, special representation of an application on the Braille display. Enable Hal’s “Hooks” feature which allows for “hooked” areas to be created within an application whereby the Braille display’s focus can be directed and refocused onto these designated areas. Page 40 of 50 In Touch With ALVA: A Guide to Unleashing the Power of your ALVA Braille Controller 4. Remember, all Windows-oriented hotkeys and ALVA Braille Controller functionality discussed in the previous lesson should now be available to the user. Consult Dolphin’s Hal documentation to take advantage of the numerous Braille hotkeys that compliment the ALVA Braille Controller. 5. Try reconnecting the ALVA Braille Controller via Bluetooth, and re-launching Hal to ensure that this wireless connection is functioning properly. After taking Hal and the ALVA Braille Controller through a variety of tasks and applications, proceed to the next lesson. Lesson 3.8: The ALVA Braille Controller and Window-Eyes Objective: The user will learn how to activate, customize, and utilize the ALVA Braille Controller with Window-Eyes. Window-Eyes, manufactured by GW Micro, differs from the two previous Screen Readers in that Version 7.0 of this software contains within the Window-Eyes application the ability to select the ALVA Braille Controller as its primary Braille display. Therefore, no additional steps by the ALVA Braille Controller are necessary to activate this display within Window-Eyes. Procedure: 1. If Window-Eyes is not configured to launch during Windows start-up, press Control + Alt + W to launch Window-Eyes. 2. Ensure that Window-Eyes is maximized and press Alt + F to activate the Window-Eyes File menu. Down arrow and select the “Select Braille Display Dialog” and press enter. 3. “ALVA BC6” is in the long list of Braille displays supported by this application and is only a few devices down from the top of the list. Locate “ALVA BC6”, tab once to make sure that the USB port is selected as the active port, and then tab to “OK” and press enter to activate this display. Window-Eyes and the ALVA Braille Controller should now be communicating. 4. Next, from the Window-Eyes application, select Alt + B to activate the Braille Menu which provides three options for Braille display customization: The “Hotkeys” option opens up a Window which contains all of the keystrokes associated with the Window-Eyes application. Window-Eyes enables the user to add Braille hotkeys to these keystrokes. Consult the Window-Eyes documentation to learn how to perform these modifications in greater detail. Page 41 of 50 In Touch With ALVA: A Guide to Unleashing the Power of your ALVA Braille Controller The “Options” dialog provides the ability to customize how window-Eyes displays Braille on the Braille display. Enabling and disabling Contracted Braille, as well as showing or hiding various formatting options, provide the user with a fairly comprehensive means of customizing the ALVA Braille Controller’s Braille output to meet the access demands that many of today’s commercial applications place on their users. Finally, Window-Eyes provides its users the option to “Apply Braille settings to all programs”. Select this option only if you intend for all Braille settings that have been altered to be used with all Window-Eyes supported applications. If this option is activated, approximately 5 to 10 seconds will pass where these Braille settings are being copied to all Window-Eyes application “set files”. 5. Use as many Window-Eyes specific commands as possible from the ALVA Braille Controller’s Braille keyboard and additional buttons, and compliment these commands with Windows commands. Consult the Window-Eyes documentation for any questions about these keystrokes or their intended functionalities. Lesson 3.9: The ALVA Braille Controller and VoiceOver Objective: The user will be exposed to the ALVA Braille Controller working in conjunction with the VoiceOver Macintosh Screen Reader. This lesson is dependent upon the availability of a Mac OS X v10.5 Leopard Operating System. VoiceOver is Apple’s built-in Screen Reader which makes the Apple operating system accessible to persons who are vision impaired. This is Apple’s first attempt at providing direct access to its operating system, and unlike its third party Windows Screen Reader competitors, Apple is providing this access directly to its vision impaired customers. Procedure: 1. Connect the ALVA Braille Controller to the Mac via a USB connection. 2. VoiceOver will recognize the ALVA Braille Controller automatically, and, out of all of the Screen Reading options which have been referenced, is truly the most “Plug and Play” option utilizing the ALVA Braille Controller. 3. Press Control + Option + K in order for ALVA keys to be pressed and explored on the ALVA Braille Controller. The Mac announces these keys as they are pressed. Page 42 of 50 In Touch With ALVA: A Guide to Unleashing the Power of your ALVA Braille Controller Finally, one may reassign VoiceOver commands on the Braille display simply by selecting the VoiceOver function and then inputting the desired keystrokes on the Braille display. Hold the key combination for a few seconds while the Mac pulses and then chimes once the key has been assigned. Page 43 of 50 In Touch With ALVA: A Guide to Unleashing the Power of your ALVA Braille Controller LESSON 4: THE ALVA BRAILLE CONTROLLER AND MOBILE DEVICES This group of lessons addresses the utilization of the ALVA Braille Controller with a number of different off-the-shelf, mobile, hand-held devices that run on three distinct Mobile Operating Systems: Symbian OS, Windows Mobile, and Windows Mobile Smartphone. Each operating system offers the end user a variety of hardware PDAs and mobile phone devices from which to choose and can be summarized as follows: 1. The Symbian OS powers mobile phones that run on the GSM standard and is widely popular in Europe; it is also quite prevalent in other parts of the world including the United States. The Symbian OS is a very clean, intuitive OS which provides a comfortable mobile environment for users to complete numerous tasks using their mobile handsets. 2. Windows Mobile powered devices take advantage of the Windows Mobile operating system to synchronize data with Windows-based work stations. Windows Mobile devices are often characterized by the usage of a touch screen to perform many of today’s mobile tasks. 3. Windows Mobile Smartphone devices combine the power of Windows Mobile with the intuitive design of a mobile phone dial-put and accompanying pull-out QWERTY keyboard to offer much of the functionality of Windows Mobile in a more Mobile Phone oriented environment. With the advent of Windows Mobile 6.1, the primary difference between Windows Mobile and Windows Mobile Smartphone is the implementation of a touch screen verses the utilization of a Mobile phone pad to perform similar functions. This group of lessons addresses: 1. Setting up the ALVA Braille Controller to connect to a mobile phone via a Bluetooth wireless link, and 2. Using the ALVA Braille Controller to interact with these three operating systems. The primary Screen Reader used as a catalyst for the ALVA Braille Controller and the various operating systems described herein is the MobileSpeak suite of applications developed by Code Factory, a Spanish-based company which currently offers the only comprehensive spectrum of Screen Readers with Braille input / output interfaces for these three operating systems. The ALVA Braille Controller coupled with MobileSpeak software on a mainstream, hand-held device offers today’s Mobile user palatable alternatives to traditional “Note Takers” and classic methods of portably managing information on proprietary hardware solutions. Page 44 of 50 In Touch With ALVA: A Guide to Unleashing the Power of your ALVA Braille Controller Lesson 4.1: Connecting the ALVA Braille Controller to a Mobile Device Objective: The user will learn how to connect the ALVA Braille Controller to their desired MobileSpeak-equipped handset or PDA. The procedure for accomplishing this task is fairly similar for all three aforementioned operating systems. An explanation of how to complete this task will be given with any differences / discrepancies between the operating systems being duly noted. It is assumed that the user is familiar with the usage, functionality, and keystrokes of their preferred flavor of MobileSpeak software. Procedure: 1. Turn on the ALVA Braille Controller and your preferred Mobile device. 2. From the Mobile device, locate the “Connections” menu on the device. On Symbian based devices, typically there is a “Menu” key that will open the mobile phone menu allowing the user to utilize the joystick and left and right “Softkeys” to either select or exit a menu. On Windows Mobile powered devices, the “Connections” menu is typically located under the “Settings” menu within the device’s “Start Menu”. 3. Within the “Connections” menu, select and open the “Bluetooth” option. 4. Select and open “Add New Device”. Within Windows Mobile (the full edition) the Bluetooth option has three property sheets. The first one allows the user to enable Bluetooth on the device and to make the device “discoverable” so that other devices might find it. The second property sheet lists all paired devices and has an “Add Device” option, and the third sheet allows for various Bluetooth services to be discovered and added for utilization with a specific device. 5. The device will scan for all Bluetooth devices within range. When it finds “ALVA BC 6”. Follow the prompts on the device and select it. 6. When prompted to enter the security PIN on the device, use the keypad to enter “0000” or any other security PIN which may have previously been set as a security code for the ALVA Braille Controller. 7. When the device announces “The device has paired successfully”, proceed to the “Services” screen which allows for the ALVA Braille Controller to be set up as a “Serial” device for use with the Mobile device. This MUST be enabled before continuing. 8. Also, if it is available on the specific device, enable any “Stereo” or “Headphone” services that may be present so that the mobile device’s speech might be rerouted through the ALVA Braille Controller, thus enabling the user to listen to Page 45 of 50 In Touch With ALVA: A Guide to Unleashing the Power of your ALVA Braille Controller MobileSpeak’s prompts and other output through the speakers on the ALVA Braille Controller. The following three lessons provide brief descriptions of how to use the ALVA Braille Controller with the MobileSpeak Screen Reader specific to the three different Mobile Operating Systems. Visit Code Factory’s Documentation link to locate specific manuals, quick reference guides, and other documentation for the three flavors of MobileSpeak Screen Readers. Lesson 4.2: Connecting the ALVA Braille Controller To MobileSpeak for Symbian Phones Objective: The user will connect the ALVA Braille Controller via a Bluetooth wireless link to a Symbian phone and then access various applications on the phone with the ALVA Braille Controller. Procedure: 1. From the main screen of the Symbian device, select the “Menu” button. 2. Locate and open “Configure MobileSpeak”. 3. Navigate to the “Braille” tab within the selected MobileSpeak user profile. 4. Opening the “Configured Devices” submenu activates the “Braille Device Manager” for MobileSpeak. This allows for Braille devices to be added, deleted, or in our case, connects the Mobile device to a recently added ALVA Braille Controller. 5. Select the “Options” menu and then select “Add new device” with the left softkey. 6. Choose “Optelec ALVA BC6” from the list of supported devices, and the Mobile device will search for the paired ALVA Braille Controller and add it as a wireless Braille terminal for the Mobile device to use with MobileSpeak. 7. While a user may enter into this menu to connect and disconnect this device, they may also use the hotkey on the Mobile phone, Function + Dial from anywhere within the Mobile applications on the phone, so long as MobileSpeak is running. 8. Within the “Braille” tab in the “Configure MobileSpeak” application is the “Braille Options” menu, which allows for the appropriate Braille tables, cursor functions, and control types to be displayed upon the refreshable Braille line. Also, the user may customize how the Braille display “Pans” or follows Braille information, as the Mobile phone’s screen refreshes with new information. The Page 46 of 50 In Touch With ALVA: A Guide to Unleashing the Power of your ALVA Braille Controller user may also set Bluetooth to automatically be turned off when the ALVA Braille Controller is disconnected from the Mobile Phone. 9. Once the ALVA Braille Controller has been connected, take the ALVA Braille Controller into the applications that are used most by the user using the keys on the Braille display which are documented in the MobileSpeak Manual’s Appendices. Remember, use the Feature Pack keyboard to toggle on and off Contracted Braille input; to review, this key combination is Braille Keys 1+2+3+4, or the Braille Letter “G”, + the Space Key. 10. Before proceeding to the next lesson, please practice: Finding a contact. Use uncontracted Braille to locate a contact by entering the “Contacts” application and Brailing the first few letters of the contact’s name. Text messaging or sending an SMS to the contact. The contact will not even be aware that the user is sending them a text message composed in Braille. If e-mail or web-browsing has been set up and activated on the mobile device, perform these online tasks using the ALVA Braille Controller. Mute and un-mute speech by pressing one of the ETouch buttons for a couple of seconds, which serve as a “toggle” for this functionality. Select the “Earphone Audio” profile if you would like speech to be routed through the Feature Pack’s speakers. Use previously described Note Taker commands to navigate applications that require data entry and/or editing. Lesson 4.3: Connecting The ALVA Braille Controller with MobileSpeak for Pocket PCs (Windows Mobile Devices) Objective: The user will learn to connect the ALVA Braille Controller via a Bluetooth, wireless connection to a MobileSpeak Pocket-equipped Windows Mobile device and access various applications using the ALVA unit. Procedure: 1. After ensuring that the ALVA Braille Controller is paired and connected to the MobileSpeak Pocket-equipped Windows Mobile device, power on both the ALVA unit and the Mobile device and from the “Today Screen” use the joystick to down arrow to the MobileSpeak Pocket application. Press enter on the joystick to open the application. Page 47 of 50 In Touch With ALVA: A Guide to Unleashing the Power of your ALVA Braille Controller 2. Locate and open the MobileSpeak Pocket “Device Manager” which associates the appropriate Braille terminal drivers with the paired ALVA Braille Controller and Mobile device. 3. Press the left “Soft” button to open up the “Options” menu. This menu allows for Braille displays to be added and deleted from the MobileSpeak Pocket application. It also provides a menu-driven means of connecting and initializing the Braille display when MobileSpeak Pocket is running. 4. Select “Add New Device” followed by enter on the joystick. 5. Select “Optelec ALVA Braille Controller” from the list of Braille displays supported by MobileSpeak Pocket and press the right “soft” key to continue. 6. MobileSpeak Pocket will ask how it should search for this device. If the device is paired and the necessary Bluetooth services have been activated, press the right “soft” button to continue. 7. When MobileSpeak Pocket finds the ALVA Braille Controller, press the right “soft” key to complete the connection between the ALVA Braille Controller and MobileSpeak Pocket. 8. Rather than connect the ALVA Braille Controller using the “Connect” option in the “Device Manager” menu, use the hotkey Alt + Screen Tap 1 to auto connect and disconnect the ALVA Braille Controller to and from the Mobile device. 9. Some interesting features and functionalities shared between the ALVA Braille Controller and MobileSpeak Pocket are: The four Smartpad keys on the ALVA Braille Controller are mapped to the functionality of the four buttons typically located on a Windows Mobile device. Depending on the hardware configuration of the device, at least two of these buttons are located near the joystick. MobileSpeak maps the functionality of these buttons to the QWERTY keyboard equivalents of “Tab”, “Alt”, “Control”, and “Shift”. These four Smartpad keys are assigned to the four buttons on the mobile device. This means that the user may use their ALVA Braille Controller to wirelessly initiate these four commands to the Mobile device to perform various tasks. The two eTouch navigation keys at either end of the Braille display are assigned to the four touch screen quadrants which the user may tap on the Mobile device to initiate a MobileSpeak Pocket command. This means that the user may use the eTouch navigation keys as a substitute for tapping the device’s touch screen to issue MobileSpeak Pocket commands to the mobile device. Page 48 of 50 In Touch With ALVA: A Guide to Unleashing the Power of your ALVA Braille Controller From the “Today screen” or from a specific application, when left and right “soft” buttons are present on the Braille display, the user may press a cursor routing button under the specific “soft” key to wirelessly activate it from the ALVA Braille Controller. Control + Screen Tap 4 routes the audio output from the Mobile device through the speakers of the Feature Pack. 10. Before moving on to the next lesson, try the following: From the “Today Screen” select the right “soft” button to open up the “Contacts” application. Select a contact by entering the first few letters of the contact and using the five way navigation key on the ALVA Braille Controller to access the desired contact. Press enter on the five way navigation key. Review the details of the contact. Press the cursor routing button under the right “soft” button to bring up a menu of options. If possible, either send an SMS to this contact by selecting Contracted or Uncontracted Braille using the ALVA Braille Controller’s toggle for this functionality. Double tab the lower left eTouch navigation key to simulate tapping the fourth quadrant on the Mobile device, which is the command to close an application. Press Smartpad1 + Lower Left eTouch Navigation Key to simulate Control + Screen Tap 4 on the Mobile device. This either routes the audio from the Mobile device to the Feature Pack speakers, or returns audio output to the Mobile device, thus transforming the ALVA Braille Controller into a modular, dynamic, relevant note taking option for persons who are blind. Lesson 4.4: Connecting The ALVA Braille Controller to MobileSpeak for Windows Mobile Smartphones Objective: The user will learn how to connect the ALVA Braille Controller to a MobileSpeak powered Windows Mobile Smartphone and then use the ALVA unit to access desired applications on the Smartphone. Aside from touch screen functionality, many of the steps for initiating communication between the ALVA Braille Controller and MobileSpeak Smartphone are identical to those described in the previous lesson. Procedure: Page 49 of 50 In Touch With ALVA: A Guide to Unleashing the Power of your ALVA Braille Controller 1. Power on the ALVA Braille Controller and the Smartphone. 2. Access the MobileSpeak Smartphone “Control Panel” from the Smartphone’s “Today Screen”. 3. Find the “Device Manager” and add the ALVA Braille Controller in the same manner described in Lesson 4.3. 4. Instead of using the “Device Manager” menu to connect the ALVA Braille Controller, use the hotkey “Home” by holding NumPad 1 for approximately 3 seconds. 5. Access “Soft” keys on the Smartphone by holding down Thumbkey 3 while either pressing Smartpad 1 for the left “soft” key or Smartpad 4 for the right “soft” key. Note that Windows Mobile often refers to left and right “soft” buttons that are displayed on a touch screen while Windows Mobile Smartphone edition assigns hardware keys on either side of the joystick to perform left "soft” and right “soft” functions. 6. Perform similar exercises with various applications as explained in Lesson 4.3. As previously mentioned, these operating systems are closely related to one another and are differentiated primarily by the presence of a touch screen on the device. 7. An anomaly to note about Windows Smartphone: Some devices have issues communicating with external wireless off-the-shelf keyboards, and these devices often present difficulties for Braille entry via the Feature Pack. Code Factory and Optelec are aware of this bug in the current version of Windows Smartphone and are diligently working on a joint solution for this documented issue so that as many Smartphones as possible might receive Braille data from the ALVA Braille controller’s Feature Pack. CONCLUSION: This tutorial was designed to showcase the functionality of the ALVA Braille Controller in a variety of settings and paired with a variety of devices. The lessons contained herein offer the user a great degree of flexibility in using the ALVA Braille Controller in educational, employment, community, and residential settings. While this tutorial could not possibly present the ALVA Braille Controller’s functionality in every possible hardware scenario, it is the author’s hope that those who use these lessons as a resource for utilizing the ALVA Braille Controller might begin to shape its functionality to develop strategies for customizing and maximizing its use in completing their day to day tasks. For any questions regarding support for the ALVA Braille Controller, please contact your local Optelec sales office or distributor. For all of your distance or onsite training needs, please e-mail mailto:[email protected] and you will receive a response within 24 hours. Page 50 of 50