1
..
..
.
Effexis Software
Achieve Planner User
Manual
Getting Started with Achieve Planner
Copyright © 2005-2008 by Effexis Software, LLC. This document is protected by U.S.
and international copyright laws. All rights reserved.
No part of this document may be reproduced or transmitted in any form or by any
means without the written permission of Effexis Software, LLC.
..
..
.
Achieve Planner
Table of Contents
1
Overview ...........................................................................................2
2
Tutorials..........................................................................................14
3
Working with Projects and Tasks................................................57
4
Using Priorities ..............................................................................81
5
Weekly Schedule ...........................................................................89
6
Importing Data from Outlook .....................................................102
7
Automated Scheduling ...............................................................110
8
Working with the Task Chooser ................................................118
9
Weekly Planning Wizard .............................................................126
10
Using Achieve Planner for Goal Setting & Achievement .......131
11
Appendix: Advanced Automated Scheduling Settings ..........141
Copyright © 2005-2008 Effexis Software, LLC - www.effexis.com
1
..
..
.
1
Achieve Planner
Overview
Achieve Planner (AP for short) is a powerful time management and goal
setting software system that helps you get organized, plan your projects,
work more effectively, and make better use of your time.
This manual provides the basics that you need to get started quickly, and
describes several best practices to help you get the most out of Achieve
Planner.
The primary focus of this manual is on the time management aspects of the
software: keeping track of what you need to do, creating a schedule, and
using AP to help you get your work done.
Section 10 in the manual describes some of the main goal setting features in
Achieve Planner.
The Achieve Planner Training center contains the latest version of this
manual, plus other tutorials to help you get the most out of Achieve Planner.
http://www.effexis.com/achieve/training/
You can learn more about specific features and concepts related to Achieve
Planner by visiting the Goals to Action blog…
www.goalstoaction.com/blog/category/achieve-planner/
You can find out more about the time management concepts, principles, and
ideas behind AP by reading the articles in www.TimeThoughts.com.
This is not a comprehensive manual; it is designed to help you get up to
speed quickly on the most commonly used features of Achieve Planner.
NOTE: This manual describes functionality that is available through the
Achieve Productivity Suite edition of Achieve Planner. Other editions may not
contain all the features described in this manual. Please refer to the feature
comparison chart for the features that are available in each edition:
http://www.effexis.com/achieve/feature-comparison.htm
1.1
Achieve Planner Concepts
This section describes the basic time management concepts and terminology
used in Achieve Planner.
Copyright © 2005-2008 Effexis Software, LLC - www.effexis.com
2
..
..
.
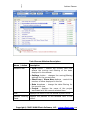
Achieve Planner
Result Area ( ) – A result area represents a life dimension or role in your
life. Examples include Health & Fitness, Finance, Romance, Children, Personal
Development, Career, Work, etc.
Here are some examples of result areas in the master outline view.
Project ( ) –A project represents any high-level outcome that you want to
track, whether it includes a single or multiple steps. Projects give you an
overview of everything that you are working on at any given time.
Projects can be complex multi-step sequence of tasks, like developing a
product, organizing an event or preparing a presentation, but they can also
be something as simple as paying a bill, responding to an e-mail or taking
the dog to the vet.
In general, if the item is an outcome you should enter it as a project (read
this online article for a more detailed description of the difference between
projects and tasks.)
Since the project list is hierarchical, each project can include sub-projects
using as many nested levels as you need.
Task (
) –Tasks are the action steps associated with a project.
Tasks are usually things like “
Call Fred,”“
Read the file,”or “
Write outline for
memo.”
Tasks can have a hierarchical structure with tasks, sub-tasks and sub-subtasks. Although you can have Tasks directly under result areas, Achieve
Planner works better if tasks are part of projects.
Copyright © 2005-2008 Effexis Software, LLC - www.effexis.com
3
..
..
.
Achieve Planner
ABCD Priorities – Achieve Planner uses ABCD priorities throughout the
software to help you categorize and rank various items based on their
relative priority. Prioritization allows you to focus your time & energy on
things that are important to you.
Achieve Planner uses priorities to sort your projects and tasks at each level in
the hierarchy with respect to its siblings.
Priorities consist of a priority range (A, B, C, D) and an optional rank (12499.) Achieve planner ranks items with a priority range but no rank, e.g.
“
A”as opposed to “
A1”or “
A256,”as though its priority is “
A2500”and puts
it at the bottom of the A’
s.
Copyright © 2005-2008 Effexis Software, LLC - www.effexis.com
4
..
..
.
Achieve Planner
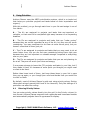
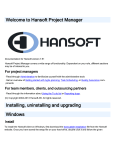
Time Chart – A time chart allows you to designate times in your weekly
schedule for different types of activities like health, finances, or work. The
weekly schedule displays time chart areas in the background behind your
active appointments. Time charts serve as visual reminders to help you give
focus and balance to your week.
Here is an example of a time chart shown in the background of the weekly
schedule (without any appointments, which would appear on top of the time
chart areas):
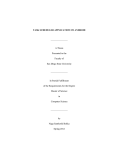
Project Block – A project block is a time block that you’
ve committed to a
specific project. You can think of it as an appointment with yourself to get
your work done. Achieve Planner provides several tools to help you work with
project blocks in your weekly schedule.
This is what a project block looks like in the weekly schedule. In this case,
the name of the project is “
Sample Project.”
Copyright © 2005-2008 Effexis Software, LLC - www.effexis.com
5
..
..
.
Achieve Planner
Appointment – An appointment represents time in your weekly schedule
that you have allocated for a specific purpose. Examples include meetings,
project blocks, and doctor’
s visits.
All-Day Event – An all-day event is a special type of appointment that
occurs on a given date, but not at a specific time.
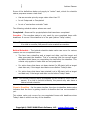
Task Chooser – The task chooser (available via Go-> Task Chooser
command) displays a list of your top-tasks across all your projects using a
combination of priority and other factors to sort the items.
You can use various views to filter the tasks that you want to display in
various ways.
For sorting tasks in the Task Chooser, sub-item priority ranks are relative to
the parent. If you change the parent priority or rank, the Task Chooser
automatically adjusts the importance of all its sub-items relative to other
items in the list.
At every level in the hierarchy, when a parent becomes more important
(higher priority), the children become more important as well. When a parent
becomes less important (lower priority) its children are also considered less
important.
Bonus ranking in the task chooser:
Copyright © 2005-2008 Effexis Software, LLC - www.effexis.com
6
..
..
.
Achieve Planner
•
Focus - Achieve Planner adds a priority “
bonus”for any project or task
with the “
Focus”field checked.
•
Deadline - Achieve Planner adds a priority bonus to items as their
deadline approaches or becomes overdue.
•
Start & End Time - Achieve Planner can also add a priority bonus as
start and end dates approach.
These factors are configurable via the Task Chooser settings.
To learn more about the Task Chooser, please see chapter 8.
Next Action List – Achieve Planner supports the concept of a “
Next Action
List”in both the Outline and Task Chooser tabs. This is useful if you want to
focus on just the actions that you can take right now across all your different
projects.
Please see Tutorial 2.6 in chapter 2 for a detailed description and examples
of how to use the Next Action list.
Getting Started
We suggest that you take your existing to do list and separate the outcomes
from the actions required to make the outcomes occur. The main outcomes
become your Projects and possibly sub-projects.
Then, prioritize the Projects first.
Prioritize any sub-projects after you have the structure and the Project
prioritized.
Finally, add the tasks.
You can add any deadlines, start dates and end dates as you go or at the
end.
Deciding Between Making an Item a Sub-project or a Task
In general, if an item:
1. Represents an outcome or result in and of itself
OR
2. It is something that you work on simultaneously with other projects/
subprojects.
Copyright © 2005-2008 Effexis Software, LLC - www.effexis.com
7
..
..
.
Achieve Planner
It’
s typically better to make it a sub-project and not a task. You can always
change it into a task (or convert a task into a sub-project) later if necessary.
Storing Detailed Information in Achieve Planner
When using Achieve Planner, you may sometimes feel like there is too much
information to record about your projects and tasks. For example, the Project
Information form allows you to record the purpose, objectives, vision, risks,
issues, and other specific details of your project.
While it can be very useful to think about and capture these details when
planning a large or complex project, it could be overkill for many smaller
projects, where just the purpose and objectives is usually more than
sufficient.
Just because you can record something in AP, doesn’
t necessarily mean that
you need to. The key is whether adding the details is valuable or not. You
can use the various fields and tabs as reminders so you can at least think
about these things and consider whether capturing the details would be
useful. If it is not useful, don’
t record it.
In the various grid views, you can easily customize which columns each view
displays so you only see the information that you need and actually use.
1.2
Achieve Planner Main Tabs
This section describes the main tabs available in the Achieve Planner
application. You can access all the tabs using the Go menu. If a tab is not
already displayed, the Go menu will display it and navigate to it, otherwise it
will just become the active tab.
Outline – The Outline tab provides a bird’
s eye view of the entire outline
including Result Areas, Dreams, Goals, Projects, and Tasks.
Result Areas – The Result Areas tab displays a list of all your result areas
sorted by priority. This tab gives you a quick overview of all the result areas
you are tracking.
Projects – The Projects tab displays a list of all your projects sorted by
priority. You can filter the list to only show projects for a particular result
area, or grouped by all your result areas.
The Projects tab can also display goals and projects together.
Copyright © 2005-2008 Effexis Software, LLC - www.effexis.com
8
..
..
.
Achieve Planner
Tasks – The Tasks tab displays a list of your tasks sorted by priority. You
can focus on tasks for a specific project or on all your tasks across all your
projects.
Weekly Schedule –The Weekly Schedule tab provides a multi-day calendar
view where you can schedule project blocks, appointments, and all-day
events.
Task Chooser – The Task Chooser tab presents a filtered list of your tasks
across all your projects. The task chooser sorts this list according to an
algorithm that gives each item a score based on several factors including its
priority, deadline, and status.
Notes – The Notes tab provides a hierarchical outline where you can keep
track of notes and general purpose information. Achieve Planner notes
provide direct support for textual information only. While storing graphics
and images is possible, doing so can cause performance degradation.
Contacts – The Contacts tab displays a list of your contacts using various
views.
File Organizer – The File Organizer tab displays a list of records
representing paper-based documents, notes, and other files. You can also
use it to keep track of other items like your CD collection or books.
Resources – The Resources tab displays a list of all the resources that you
can assign to your projects and tasks.
Time Charts –The Time Charts tab displays a list of all the time charts that
you have defined.
Wish List – The Wish List tab displays a list of your wishes for a particular
result area, or grouped across all result areas.
Goals – The Goals tab displays a list of your goals for a particular result
area, or grouped across all your result areas. You can also group your goals
based on their parent dream.
Metrics – The Metrics tab displays a list of the metrics that you have
defined, either as stand alone, or as part of an existing dream/goal.
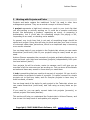
1.2.1 Working with Tabs
Achieve Planner uses a tabbed user interface where you can display and
interact with multiple main tabs simultaneously.
Copyright © 2005-2008 Effexis Software, LLC - www.effexis.com
9
..
..
.
Achieve Planner
You can rearrange the tabs using drag and drop. To close the active tab, use
the “
x”button at the far right of the tab display.
You can also close a tab using the Close command of the context menu
when you right-click on the tab.
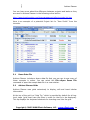
1.2.2 Splitting the Views
Achieve Planner supports split tab groups where you can have some tabs in a
different tab group than other tabs.
You can accomplish this using the split commands available from the rightclick context menu for the tabs.
Copyright © 2005-2008 Effexis Software, LLC - www.effexis.com 10
..
..
.
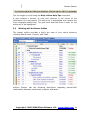
Achieve Planner
The Maximize command will toggle the maximized state of the current tab
group. When a tab group is maximized, the other tab groups are hidden and
out of view.
You can also move tabs from one group to another using drag and drop.
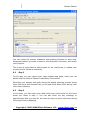
1.2.3 Performance Issues with Multiple Tabs
By default, Achieve Planner attempts to restore your layout of tabs and tab
groups when you open a data file.
Depending on your system resources, having a large number of tabs open
simultaneously could significantly increase the load time for a data file.
Normal load time for Achieve Planner is between 8 and 15 seconds, even
with multiple open tabs.
Some users have reported load times of 30+ seconds when restoring more
than a few open tabs, and a drop to about 13 seconds with only one tab.
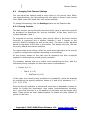
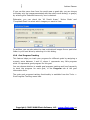
If you are experiencing long load times with multiple open tabs, you can use
the following suggestions to improve load time:
1) Use one of the “
Fast Load Layout”options available in the Display tab of
the Tools->Options dialog.
Selecting None will restore your exact layout including all open tabs.
Selecting one of the other options will only restore the specified tabs (and
only if they were open when the file was saved) and could improve load time.
2) Close all Tab windows before saving the data file and closing AP. You can
close all open tabs using the Window->Close All Windows command.
1.3
Terminology
This section describes some of the terminology used in this manual and in
the Achieve Planner documentation.
Grid – A grid refers to the spreadsheet-like interface used throughout
Achieve Planner to display information using rows and columns.
Copyright © 2005-2008 Effexis Software, LLC - www.effexis.com 11
..
..
.
Achieve Planner
Parent/Child – Achieve Planner supports hierarchical (tree-like) outlines
where items can have sub-items associated with them. For example, a task
can have sub-tasks. The main task is called the parent, and the sub-tasks
are called the children.
Menus - Achieve Planner uses menus extensively. This manual uses the ->
symbol to represent following a menu and selecting a sub-item of that menu.
For example, Go->Outline represents selecting the Outline menu item of
the Go menu.
1.4
Keyboard Shortcuts
Achieve Planner supports keyboard shortcuts associated with menu items
and toolbar buttons. There are two types of shortcuts:
Regular shortcuts consist of a single key press combination. For example,
the Edit->Delete command has the shortcut of Ctrl+D. This means you
have to press the Ctrl key and, while holding it down, press the D key.
Another example is Ctrl+Alt+O for the Tools->Options command, where
you need to press and hold the Ctrl and Alt keys and then press the O key.
Copyright © 2005-2008 Effexis Software, LLC - www.effexis.com 12
..
..
.
Achieve Planner
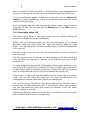
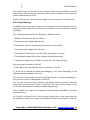
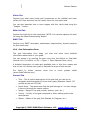
Chord shortcuts consist of two consecutive set of key press combinations.
For example, the Go->Outline command has the shortcut (Ctrl+G, L).
This means you have to press the Ctrl key and, while holding it down, press
the G key. This is the first part of the chord. You will see in the status bar the
following:
This means that Achieve Planner is waiting for you to enter the second part
of the chord. In this case, you need to press the L key (without holding down
the Ctrl or any other key) to complete the shortcut.
Some chord shortcuts require you to press a modified key (Ctrl, Alt, or Shift)
on each of the two key press combinations. For example, the Edit->Drop
Copy as Child command:
This shortcut requires Ctrl+Alt+Shift+V on the first part of the chord, and
Shift+C
on
the
second
part.
Copyright © 2005-2008 Effexis Software, LLC - www.effexis.com 13
..
..
.
2
Achieve Planner
Tutorials
This section provides several tutorials that demonstrate how you can use
Achieve Planner to get organized, track projects and tasks, and schedule
your time.
In the following tutorials, “
Jane Smith”is a contract writer. She has several
customers, multiple projects, and many, many tasks. Jane has decided to
use Achieve Planner to help her keep track of her projects and stay on
schedule.
For the purpose of this tutorial, Jane will list her customers as projects. She
will then add subprojects representing the actual projects she is working on
for each of these customers, and add any relevant tasks to these projects.
In addition, she will customize views, create project templates for reuse, and
create a time chart to help her allocate work and personal time.
You can follow along with these tutorials using a blank file, or you can see
the result in the tutorials sample file.
This is an excerpt from the projects/tasks section later in the manual (section
3):
“
Projects and tasks replace the traditional “
to-do” list used in other time
management systems. They are a central concept in Achieve Planner.
A project represents a high-level outcome or result in your to-do list that
you are tracking or actively working on. It could be a complex multi-step
project like developing a product, organizing an event, or preparing a
presentation, but it could also be something simple like paying a bill,
responding to an email, or checking out a website.
In general, any to-do item that is not part of something larger should be
stored as a project. Doing this will help you think and plan your time in terms
of outcomes rather than just actions, which is an important step in becoming
more results oriented.
You can keep track of your projects in the Outline & Projects tabs, where you
can create hierarchical (multi-level) lists of your projects using as many
levels as you need.
Copyright © 2005-2008 Effexis Software, LLC - www.effexis.com 14
..
..
.
Achieve Planner
Achieve Planner separates the concepts of projects and tasks allowing you to
view and track your high-level outcomes (projects) independently from your
low-level actions (tasks.)
Your projects list will be shorter, easier to manage, and it will give you an
overview of all the outcomes you are working on. You can store all the details
as tasks and have easy access to them when you need them.
A task is something that you need to do as part of a project. All your to-do’
s
should either be projects or tasks of a project. It is quite common for simple
projects not to have any tasks, and for complex projects to have tens, or
even hundreds, of tasks.
You can keep track of the tasks for each project in the Tasks tab, where you
can create hierarchical (multi-level) task lists using as many levels as you
need.
If you need to, you can easily convert tasks into projects (promote), or
convert projects into tasks (demote).
You can learn more about the difference between projects and tasks as they
are used in Achieve Planner in the following online articles:
http://www.timethoughts.com/timemanagement/effective-todo-list.htm
Achieve Planner has the following restrictions regarding parent/child
relationships between result areas, dreams, goals, projects, and tasks:
Record
Allowed Children
Result Area
Result Area, Dream, Goal, Project, Task
Dream or Goal
Dream, Goal, Project, Task
Project
Project, Task
Task
Task
Thus, a project can only have projects and tasks as children, and a task can
only have other tasks as children.
Copyright © 2005-2008 Effexis Software, LLC - www.effexis.com 15
..
..
.
2.1
Achieve Planner
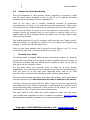
Tutorial 1 - Capturing Projects in the Master Outline
The master outline provides an overview of all result areas ( ), projects
( ), and tasks ( ). In this tutorial, Jane uses the master outline to add
three main projects and two subprojects to the Work result area. For more
information on working with the master outline, see section 3.3.
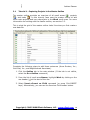
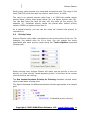
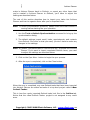
This is what the grid of the master outline looks like when you first create a
new data file.
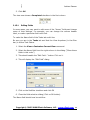
Complete the following steps to add three customers (Acme Routers, Inc.;
Irish Mail, Inc.; and Neighborhood Associates).
1. Click the Outline tab in the main window. (If the tab is not visible,
select the Go->Outline command.)
2. From the list of result area Names, highlight Work by clicking on the
row header ( ) at the start of the row.
3. Select Insert->Insert as Child command (or press Ctrl+INSERT
keys). Alternatively, you can use the Insert as Child toolbar button.
Copyright © 2005-2008 Effexis Software, LLC - www.effexis.com 16
..
..
.
Achieve Planner
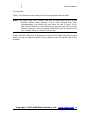
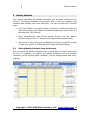
4. Select Project from the “
Select Child Type”dialog to indicate that you
want to add a child project to the Work result area.
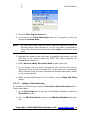
5. This will create a new Project row ( ) under the Work result area.
Enter the name of the first customer, Acme Routers, Inc., and press
ENTER key to add a new row at the same hierarchical level.
Note:
Pressing ENTER after adding a row creates a new blank row at the
same level immediately below it.
6. Enter the next customer, Irish Mail, Inc. and press ENTER.
7. Enter the name of the third customer, Neighborhood Associates.
Note:
If you pressed ENTER after Neighborhood Associates you will have
a blank row. Remove the row by pressing the ESC key now, which
will cancel the insert of the new row.
8. Save the file as Tutorial.ach using the File->Save command.
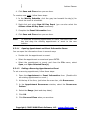
2.1.1 Making Automatic File Backups
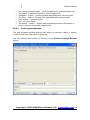
The first time you save a data file, you will see the following dialog:
Copyright © 2005-2008 Effexis Software, LLC - www.effexis.com 17
..
..
.
Achieve Planner
If you select Yes, Achieve Planner will make a backup copy of your data file
every time you save it. The backups are stored in a subdirectory located in
the same directory where you are storing your data file.
If you select No, Achieve Planner will not make backups of your data file.
You can always change your auto-backup settings in the Options dialog
(Tools->Options command.)
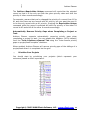
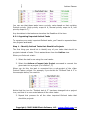
2.1.2 Adding Subprojects
Notice that the projects are assigned default priorities starting with A1, and
increasing with each new row. You can learn more about priorities in section
4 (Using Priorities.)
Complete the following steps to add two subprojects (User Manual and Help
File) to the Irish Mail project.
1. Highlight Irish Mail, Inc. project by clicking on the row header.
2. Select Insert->Insert as Child.
3. Select Project in the “
Select Child Type”dialog to indicate that you
want to add a child project to the Irish Mail, Inc. project
4. Type the project name, User Manual, for the new row.
5. Press ENTER for a new line at the same hierarchical level, and enter
Help File as the name for the name project.
6. Save the file (File->Save)
Copyright © 2005-2008 Effexis Software, LLC - www.effexis.com 18
..
..
.
Achieve Planner
Copyright © 2005-2008 Effexis Software, LLC - www.effexis.com 19
..
..
.
2.2
Achieve Planner
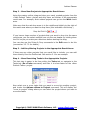
Tutorial 2 - Adding Tasks to Projects
With the projects listed, it is time to add some tasks. There are several ways
you can add Tasks to Projects. One way is very similar to the way you added
the subprojects in Tutorial 1, except that you choose Task as the child type
instead of Project.
For this exercise, you will focus on the User Manual subproject of Irish Mail,
using the Tasks tab to enter tasks. For more information on adding tasks,
see section 3.5.3.
Note: The Tasks tab only displays tasks and sub-tasks. While projects can
be displayed as groups in the “
All Projects”filter, if you want to see
the entire project/task hierarchy, you should use the Outline tab
To add tasks follow these steps:
1. Click on the Tasks tab. If the tab is not visible, use the Go->Tasks
command.
2. Select the Irish Mail, Inc./User Manual project by clicking on the
Project dropdown in the Tasks tab view bar (which might say “
All
Projects.”
) This will filter the task list to only show Tasks associated
with the selected project.
becomes
3. Press INSERT key to add a row for the first task, and enter Get latest
software.
4. Press ENTER key for a new row at the same hierarchical level, and
enter Create menu tree.
5. Press ENTER key for another row and enter Create windows tree.
(Although more tasks are probably necessary for this project, you
need only enter these.)
6. Save the file.
Copyright © 2005-2008 Effexis Software, LLC - www.effexis.com 20
..
..
.
Achieve Planner
Now add some tasks to the Help File project. To add the tasks, follow these
steps.
1. Use the Actions->Switch Project command (Ctrl+H). This will bring
up the “
Select Project”dialog. Select the Help File project from the list
and press ENTER.
NOTE: This is equivalent to selecting the Help File project from the Project
dropdown in the view bar.
2. The Task list should now display the Help File project’
s tasks. Since it
doesn’
t have any, the list will be empty. Press INSERT to add a new
top-level task for this project, and enter Develop help outline.
3. Press ENTER key for another row and enter Fill help topics.
4. Press ENTER key for another row and enter Add diagrams to topics.
(Although more tasks are probably necessary for this project, you only
need to enter these tasks.)
5. Save the file.
Copyright © 2005-2008 Effexis Software, LLC - www.effexis.com 21
..
..
.
2.3
Achieve Planner
Tutorial 3 –Zooming In the Master Outline
The Outline tab provides zooming, also called hoisting, capabilities that allow
you to see only a particular branch in the outline.
For example, if Jane only wants to see projects in the Work result area. She
can use zooming to view this particular branch of the outline only.
1. Select the row of the outline where you want to zoom in by clicking on
the row header. This row will be the new root of the hierarchy. In this
case, select the Work result area row
2. Select the Outline->Zoom In command.
The outline should now be zoomed in on the Work result area, showing only
its children. You can tell when the outline is zoomed because the caption of
the outline grid displays the root of the zoom hierarchy.
If you want to see more of the hierarchy, you can use the Outline->Zoom
Out and Outline->Clear Zoom commands.
•
Zoom Out –This command zooms out by one increment to the parent
of the current zoom root
•
Clear Zoom –This command clears the zoom completely and returns
the outline to its normal state
To continue:
1. Select the Outline->Clear Zoom command.
The normal outline should now be displayed once again.
You can zoom to a specific item in the Outline using the Outline -> Zoom to
Item… command. This command displays a dialog box that lets you select
the item that you want to use as the new zoom root in the Outline.
Copyright © 2005-2008 Effexis Software, LLC - www.effexis.com 22
..
..
.
2.4
Achieve Planner
Tutorial 4 –Using the Projects Tab
This tutorial shows you how Jane can use the Projects tab to view an
overview of all the projects for the Work result area. For more information
on the Projects tab, see section 3.4.
Note:
Only projects and subprojects are displayed in the Projects tab.
Tasks are created/displayed in the Tasks tab. If you want to see
both projects and tasks together, use the Outline tab.
The following steps illustrate some of the Projects tab options.
1. If you are in the Tasks tab, you can navigate to the project for the
current task in the Projects tab using the Actions->View Project
command (Ctrl+Shift+J.) You can also view the Projects tab using the
Go->Projects command.
2. If other result areas contained projects, they would also be visible in
the “
All Result Areas”filter of the Projects tab. To view only the Work
result area and filter out the other areas, click the Result Area arrow
on the left side of the filter bar and select Work from the list.
3. To add subprojects to the Acme Routers, Inc. project using the
Projects tab.
a. In the Projects tab, select the project named Acme Routers,
Inc.
b. Use the Insert->Insert
Ctrl+INSERT).
as
Child
command
(or
press
c. Enter the subproject, T1 Configuration Guide.
d. Press ENTER and enter the subproject E1 Configuration Guide.
e. If you added an additional row by mistake, press ESC to cancel
the new row.
4. To view only the tasks for the Acme Routers, Inc./T1 Configuration
Guide project, select that project and use the Actions->View Tasks
command (Ctrl+T). This will navigate to the Tasks tab and filter it for
the active project.
5. Save the file.
Copyright © 2005-2008 Effexis Software, LLC - www.effexis.com 23
..
..
.
Achieve Planner
Now Jane is going to prioritize her projects using the Priority field. To learn
more about priorities and how they are used, please see section 4.
1. In the Priority field, assign an ‘
A’priority to the various customers
(Acme Routers & Irish Mail). Click on the priority field for the project,
and replace the current priority by typing the letter A.
Note: For projects, an ‘
A’priority indicates that it is an active project that
you want to work on in the current week. A ranked priority (A1)
indicates you want to focus on that project in the upcoming week.
2. Now assign ‘
A’
,‘
B’
, or ‘
C’priorities to the various sub-projects for each
customer. Sub-projects and tasks are prioritized based on how
important they are relative to their immediate parent.
Note: For the purposes of this tutorial, the priority you assign doesn’
t make
that much of a difference. Just note that items in the projects and
tasks tabs are automatically sorted based on priority.
3. Now assign an ‘
A1’priority to one of the projects. Assigning a numeric
rank to projects is a convenient way to designate they are your main
focus for the week.
You can repeat a similar process to prioritize the tasks in the task lists.
Copyright © 2005-2008 Effexis Software, LLC - www.effexis.com 24
..
..
.
2.5
Achieve Planner
Tutorial 5 –Using Project Templates
If you have certain project types that require the same set of common tasks,
a project template can help you quickly create new project instances without
having to manually enter all the same tasks each time.
For example, Jane Smith writes help files and always begins with the same
common set of tasks. Therefore, creating a Help File Template is a sensible
thing to do. Here are the steps:
1. In the Outline tab, under the Work result area, create a new project
called Templates.
2. Set the priority to D to ensure that template projects are not
scheduled.
3. Add a subproject named Help File Template as a child of Templates.
4. Enter the tasks that are performed each time as children of the Help
File Template project:
•
Install latest software
•
Create menu tree (x-ref to window)
•
Create window tree (x-ref to menu)
•
Create outline
Once the template project is ready, you can create a new instance of a “
help
file”project using this template. For example, Jane needs to create a new
project for the “
Enterprise Help File” she is going to develop for Acme
Routers, Inc.
You can do this by following these steps:
1. Ensure that you are in the Projects tab and Work result area is
selected on the filter bar.
2. Press and hold down the left mouse button on the row header for the
row corresponding to the Help File Template. (This highlights the
whole row.)
3. While still pressing the left mouse button, press and hold down the Ctrl
key and drag the Help File Template row to the Acme Routers, Inc.
project row. As you drag the row, you will see the red arrow target
indicator move accordingly.
Copyright © 2005-2008 Effexis Software, LLC - www.effexis.com 25
..
..
.
Drop After à
Achieve Planner
Drop As Child à
Drop Beforeà
Note: Holding down the Ctrl key during a drag operation performs a copy of
the dragged row rather than a simple move
4. When the target indicator is over the Acme Routers, Inc. project
indicating a child drop (red arrow is in the middle and slightly to the
right of the target row), release the mouse to drop the template. Make
sure that you hold down the Ctrl to ensure that you make a copy of
the template.
5. A new copy subproject of the dragged template containing copies of
the common tasks (and any other project details) has been created as
a child of the target row. Edit the name and change it to Enterprise
Help File.
6. Update the priority of the new project as needed (make it an A
project.)
Copyright © 2005-2008 Effexis Software, LLC - www.effexis.com 26
..
..
.
2.6
Achieve Planner
Tutorial 6 –Viewing Next Actions for Projects
Starting with version 1.7, Achieve Planner supports the concept of a ‘
Next
Action List’for projects in the master Outline and Task Chooser.
In this tutorial, Jane Smith is going to create and plan a project for a
birthday party, and then use the Next Action List to focus in on the next
actions for this project.
Here is what the birthday party project looks like in the Outline:
The main ‘
Plan Party’project has three sub-projects, ‘
Make Reservations’
,
‘
Order Cake’
, and ‘
Print Invitations’
.
The reason these are sub-projects is that they represent multi-step parts of
the main project that are somewhat independent of each other, and Jane
could conceivably make progress on them in parallel.
Depending on your preferences, and how you use Achieve Planner, you could
also represent them as top-level tasks of the ‘
Plan Party’project instead of
sub-projects.
2.6.1 Viewing the Next Action List in the Outline
You can toggle the display of the ‘
Next Action List’in the master outline using
the Next Actions Only checkbox available in the Outline tab, or using the
equivalent keyboard shortcut (Ctrl+Shift+8).
Copyright © 2005-2008 Effexis Software, LLC - www.effexis.com 27
..
..
.
Achieve Planner
When the ‘
Next Action Only’mode is enabled, the outline is filtered so that
only ‘
next action’tasks are displayed under each project.
There are two versions of ‘
Next Actions,’a simpler ‘
beginner’
s’version for
new users, and an ‘
advanced’version for more experienced users who want
more freedom in defining what a next action is.
You can change the definition of ‘
Next Action’used by Achieve Planner in the
Next Actions tab of the Options Dialog (Tools -> Options) as I describe later
in this tutorial.
2.6.2 Using the Basic ‘
Next Action’Definition
By default, ‘
Next Action’tasks are defined as the first task under each project
in the Outline priority sort order.
This is what the ‘
Plan Party’project would look like with the Next Actions List
filter turned on.
You’
ll notice that the Outline now only shows one task under each subproject following the Outline priority sorting order.
When you complete a task in any of these sub-projects, the next available
task under that project is displayed. For example, this is what the outline
looks like when you’
ve completed the ‘
Find location’task of the Make
Reservations project…
Copyright © 2005-2008 Effexis Software, LLC - www.effexis.com 28
..
..
.
Achieve Planner
You can see the next action ‘
Call to make reservations’is now in the list.
2.6.3 Next Action Settings
The Options dialog (Tools -> Options) has some settings that control the
display of the Next Action List in the Outline and Task Chooser.
‘
Use task predecessor for “Next Action Only”lists’controls whether to
use the basic (unchecked) or advanced (checked) definition of ‘
Next Action.’
It’
s set to basic definition by default.
‘
Hide Result Areas that don’
t contain children’controls whether to hide
result areas that don’
t contain children when displaying the Next Action list in
the master outline.
‘
Hide D priority items in “Next Actions Only”list’controls the display of
D priority items (and their descendants) in the Next Action list of the master
outline. If the box is checked, then D priority items and their descendants
will not be included in the next actions list.
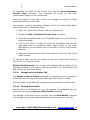
If ‘
Filter Outline to only show items with tasks’is checked, whenever
the ‘
Next Actions Only’mode is turned on, the Outline tab will automatically
be filtered in the Icon column so that only items containing tasks are
included in the list.
Copyright © 2005-2008 Effexis Software, LLC - www.effexis.com 29
..
..
.
Achieve Planner
The filter is automatically removed when ‘
Next Actions Only’mode is turned
off. You can use this setting to control the display of projects/sub-projects
that don’
t have any next actions available.
2.6.4 Using the Advanced ‘
Next Action’Definition
If you want more control over which tasks are ‘
Next Actions,’you can use the
advanced definition by enabling it from the Options dialog.
With the advanced definition, ‘
Next Action’tasks are defined as tasks that
either don’
t have predecessor tasks defined or that only have completed
predecessor tasks.
You can establish the task predecessor relationship between tasks using the
Task Predecessor field/column available in the Outline and Tasks tabs.
The Task Predecessor column is available in the ‘
Active Planning’view of the
Outline. You can also add it to any of the other views using the ‘
View ->
Customize Current View’command.
To establish a predecessor relationship between two tasks, you enter the
Row Number (in the gray header at the start of each row) of the predecessor
task in the Task Predecessor cell for the dependent task.
For example, if you have ‘
Task A’and ‘
Task B’
, and ‘
Task B’cannot start until
‘
Task A’is completed, then you would say that ‘
Task A’is a predecessor of
‘
Task B.’
The Actions -> Link Tasks command helps you establish this type of
predecessor relationship based on the order of the tasks in the Outline. You
need to select all the task rows that you want to link, and then use the
Actions -> Link Tasks command to link them in the order they appear in the
outline.
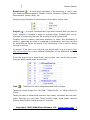
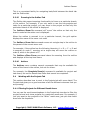
In the birthday party planning project example, let’
s say that the predecessor
relationships between the various tasks look like this…
Copyright © 2005-2008 Effexis Software, LLC - www.effexis.com 30
..
..
.
Achieve Planner
Planning Birthday Party Project
Make Reservations
Order Cake
Print Invitations
Find Location
Select Cake from
Catalog
Make Invitation List
Call & Make
Reservations
Call to Order Cake
Print Invitations
Wait for Cake Order
to Complete
Send Out Invitations
In this diagram, each box represents a task and the arrows point to the
predecessor task. For example, before you can do the ‘
Print Invitations’task,
you must do the ‘
Make Invitation List’task first. That’
s why ‘
Make Invitation
List’is the predecessor.
As you can see, you can have predecessor tasks in a different project. In this
example, ‘
Make Invitation List’is also a predecessor for ‘
Find Location’
,
because you can’
t find a suitable location until you know how many people
are invited.
This is how you would represent these predecessor relationships in the Active
Planning view of the Outline.
Copyright © 2005-2008 Effexis Software, LLC - www.effexis.com 31
..
..
.
Achieve Planner
You can see the relationships between the tasks in the Predecessor column.
For example, you can see that ‘
Make invitation list’is a predecessor for ‘
Find
location’
, ‘
Select from catalog’and ‘
Print invitations’because its task row
number (#16) is in the predecessor column for these three tasks.
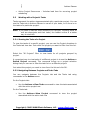
Here is what the list looks like when you turn the ‘
Next Actions Only’mode
on.
You can see that ‘
Make invitation list’is the only task shown. The list also
includes sub-projects ‘
Make Reservations’and ‘
Order Cake’since they are
sub-projects rather than tasks.
Having these ‘
empty’sub-projects in the list reminds you that there are parts
of the Plan Party project that you can’
t advance because you don’
t have any
available next actions.
NOTE: You can choose not to see these ‘
empty’sub-projects by changing
some of the settings as I describe later in the tutorial.
Copyright © 2005-2008 Effexis Software, LLC - www.effexis.com 32
..
..
.
Achieve Planner
Here’
s what the list looks like when you complete the ‘
Make invitation list’
task.
The previously dependent tasks are showing as next actions because their
predecessor task is now completed.
The ‘
OOV’in the Predecessor field indicates an “
out-of-view” predecessor
that is not visible in the current view. In this case, this is the task you just
completed that is not visible in the Active views.
2.6.5 Filtering ‘
Empty’Projects & Sub-Projects
To automatically hide empty projects and sub-projects from the Next Actions
Only display, you need to enable the ‘
Filter Outline to only show items
with tasks’setting in the Options dialog.
Here is what the original Next Action Only list (advanced NA definition) looks
like when this setting is enabled.
As you can see, the ‘
empty’sub-projects under the Plan Party project are
now filtered out of the display. You can tell that the column filter is active
because the funnel icon on the Icon column header is blue.
You can change or disable this filter manually by clicking on this funnel icon
and selecting (All) from the dropdown.
Copyright © 2005-2008 Effexis Software, LLC - www.effexis.com 33
..
..
.
Achieve Planner
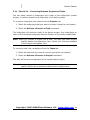
2.6.6 Viewing Next Actions in Task Chooser
Starting in the 1.7.1 release, the Task Chooser can also be used to display a
‘
Next Actions Only’list by changing some of its task chooser settings for a
view.
Checking the “
Only show next action(s) for project”limits the display of tasks
in the task chooser to next actions using the same interpretation used in the
Outline with the following exceptions:
1) The task chooser next action setting can be overridden at the project level
using a checkbox available in the Project Information form’
s general page
2) To produce the same next action list as the Outline when using the
alternate definition of next action described below, you also need to check
the “
Use task priority order for next project actions”box in the settings.
Copyright © 2005-2008 Effexis Software, LLC - www.effexis.com 34
..
..
.
2.7
Achieve Planner
Tutorial 7 - Creating a Time Chart
Time Charts serve as visual reminders to help you focus and balance your
week. Rather than focusing on specific projects, the Time Chart allocates
blocks of time in your weekly schedule for different types of activities, such
as health, finances, work, and so forth. Each of these blocks is called a time
chart area.
You can associate these time chart areas with specific Result Areas, or you
can also create independent areas. For example, you could use an
independent time chart area to represent a “
break”period, or your lunch
hour.
Showing a Time Chart in the background, behind active appointments in the
Weekly Schedule, can help remind you that you intended to pursue a
particular activity at a specific time. If you prefer, you can also display the
weekly schedule without a Time Chart.
In this example, Jane is going to create a time chart to remind her that she
would like to exercise three days a week and meet with friends once a week.
For more information, see section 5.2.
Create a time chart called Ideal Week by following these steps:
1. Select the Go->Weekly Schedule command (or click the Weekly
Schedule tab).
2. Click the New Time Chart button on the time chart bar.
3. In the General tab of the Time Chart Information form, enter the
name Ideal Week.
Copyright © 2005-2008 Effexis Software, LLC - www.effexis.com 35
..
..
.
Achieve Planner
4. Click the Time Charts Areas tab, and select the Health & Fitness
result area from the result area dropdown in the gray bar.
5. Select the time from 6:30 AM – 7:30 AM on Monday on the calendar
(using the mouse or keyboard).
6. Select the Actions->New Time Chart Area command to add that
time slot (Ctrl+N.) This will create a new time chart area associated
with the Health & Fitness result area.
7. Click on the time chart area with the left mouse button to put it in edit
mode, and enter Exercise as the name.
You’
ll often want to create repeated instances of the same time chart area in
your time chart. You can do this using a drag copy operation as follows:
8. Hold down the Ctrl key and drag & drop the time area to Wednesday
at 6:30 AM. This will create a copy of the time chart area at the drop
location.
9. Repeat the process to create another copy of this time chart area on
Friday at 6:30 AM.
10.Now select the Friends result area from the dropdown in the grey tab.
11.Select the time 1:00 PM –2:30 PM, Sunday.
12.Select the Actions->New Time Chart Area command, or press
Ctrl+N.
13.Click the Save and Close button.
Note:
To show this time chart in the background of your Weekly
Schedule, select the Ideal Week time chart from the Time Chart
box on the blue bar.
Copyright © 2005-2008 Effexis Software, LLC - www.effexis.com 36
..
..
.
2.8
Achieve Planner
Tutorial 8 –Adding Effort Estimates to Tasks
In this tutorial, Jane is going to add effort estimates to the various tasks that
she has entered into her projects.
If you plan to use automatic scheduling (see section 7), I would advise you
to add effort values soon after entering the tasks. I often add them
immediately after typing the name of the task.
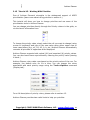
Achieve Planner maintains three types of effort values for projects and tasks:
•
Expected Effort – The amount of effort you think it will take to
complete the project/task. This is your best guess before you start
working on the project/task.
•
Effort Left – This is the amount of effort that is still required in order
to complete the project/task. For items that have not been started, the
effort left should be the same as expected effort. Once you’
ve worked
on a task, the effort left should go down appropriately based on how
much work is left to do.
•
Actual Effort – This is the actual amount of effort that you’
ve spent
on the given project/task to date.
To add effort estimates to tasks, Jane will be using the Tasks tab viewing it
across all projects.
1. Go to the Tasks tab (select Go->Tasks command, or click on the tab)
2. Select the “
All Projects”value in the Projects dropdown in the view
bar. This will display a list of all tasks grouped by project.
3. Use the Effort column (which represents the expected effort) to set
the effort value for each of the tasks. The actual values are not
important for this tutorial. Just enter values ranging from 2 hours (2 h)
to 3 days (3 d). For example, 5h, 4h, 1d, 12h, etc.
Note: Setting the expected effort for items that have not been started (State
is NS) also sets the Effort Left to the same value. Once the item is
in progress, changes to expected effort are no longer propagated to
the Effort Left column.
Copyright © 2005-2008 Effexis Software, LLC - www.effexis.com 37
..
..
.
2.9
Achieve Planner
Tutorial 9 –Using Project Blocks
Achieve Planner uses project blocks as one of the main tools for weekly and
daily planning. Project blocks represent time blocks that you have committed
to a certain project. You can think of them as appointments with yourself to
get your important work done.
Although AP does support the use of task blocks, I recommend scheduling
time blocks at the project level because project blocks make it easier to
adjust your schedule as things change, or for example, if you run out of time
before you complete the next task on your project’
s task list.
Project blocks also work better for automated scheduling purposes as
described later.
This tutorial shows you how you can create project blocks using the Weekly
Schedule’
s Project pane as well as the Schedule Block command.
If you want to perform weekly planning, an even better way to schedule
project blocks is to use the Weekly Planning Wizard described in section 9.
2.9.1 Using the Weekly Schedule Tab
To schedule a project block using the Weekly Schedule tab.
1. Navigate to the Weekly Schedule tab, or use the Go->Weekly
Schedule command.
2. You should see the Project’
s pane hidden at the right edge of the
screen. Hovering the mouse over the pane should display it.
<- expands to ->
Note: If you don’
t see the Projects pane, you can display it using the
View->Project Explorer command.
Copyright © 2005-2008 Effexis Software, LLC - www.effexis.com 38
..
..
.
Achieve Planner
3. Click on one of the Projects in the tree and, while holding down the left
mouse button, drag it into the weekly schedule area.
4. As you drag the mouse over the weekly schedule area, you should see
a“
Project Block”for the project. Drag this block to the desired location
on the weekly schedule and release the left mouse button to drop it.
You should now have a project block for the selected project in the weekly
schedule.
2.9.2 Using the Master Outline, Projects, or Tasks Tab
To create one or more project/task blocks from the master outline tab:
1. Navigate to the Outline tab, or use the Go->Outline command.
2. Select a Project or Task for which you want to create a project block
using the row header.
3. Select the Actions->Schedule Block command (or right-click on the
project/task row and select Schedule Block from the context menu.)
4. The Weekly Schedule tab should become active and enter into drop
mode. As you move the mouse around the screen, there should be a
“
project block”attached to it.
5. When you are ready to drop a project block, just click and release the
left mouse button at the desired location. This will drop a block at the
chosen location.
6. The weekly schedule will remain in “
drop mode” allowing you to
continue dropping more blocks on the schedule.
7. When you are finished dropping blocks, press the ESC key to get out
of “
drop mode.”
Project blocks work just like appointments, so you can move them, edit
them, and copy them just like other appointments. See section 5 to learn
more about working with appointments in the Weekly Schedule.
2.9.3 Changing the Project Associated With an Appointment or Project
Block
You can change the project associated with an appointment or project block
as follows:
Copyright © 2005-2008 Effexis Software, LLC - www.effexis.com 39
..
..
.
Achieve Planner
1. Right-click on an appointment or project block in the Weekly
Schedule
2. Select Set Project from the context menu.
3. Chose the destination project from the tree
4. Press ENTER key or press OK button
The appointment should now be associated with the project that you
selected. You can also accomplish the same thing from within the
appointment information form, but the right-click method is often quicker.
Copyright © 2005-2008 Effexis Software, LLC - www.effexis.com 40
..
..
.
Achieve Planner
2.10 Tutorial 10 –Copying Project Blocks
As your schedule changes, you’
ll often find it useful to rearrange your project
blocks by moving or copying them.
To move project blocks, you can use standard drag & drop:
1. Click on the project block you want to move and, while holding down
the left mouse button, move the block to its new location.
2. You should see a floating image of the block as you drag it.
3. When the block is over the desired date and time, release the left
mouse button to complete the drop.
Alternatively, you can select the project block, select the Edit->Cut
command, move the selection to the new time for the appointment, and
select the Edit->Paste command.
To copy project blocks, you can use standard drag & copy drop:
1. Click on the project block you want to copy and, while holding down
the left mouse button, move the block to its new location.
2. Press and hold down the CTRL key as you drag the block. You’
ll notice
that the cursor changes to include a (+) sign indicating a copy of the
block will be made, and the original project block is now in its previous
location.
3. When the block is over the desired date and time, release the left
mouse button (while still holding down the CTRL key) to complete the
copy drop.
Copyright © 2005-2008 Effexis Software, LLC - www.effexis.com 41
..
..
.
Achieve Planner
2.11 Tutorial 11 –Converting Between Projects and Tasks
You can easily convert a subproject into a task of the subproject’
s parent
project, or convert a task into a subproject of the task’
s project.
To convert a subproject into a task from the Projects tab:
1. Select the subproject that you want to convert (using the row header.)
2. Select the Actions->Convert to Task command.
The subproject will become a task of the parent project. Any subprojects or
tasks of the converted subproject become children of the newly created task.
Note: When you convert a project into a task, you may lose some project
specific details like objectives, risks, issues, etc. that are available
in the Project Information Form
To convert a task into a subproject from the Tasks tab:
1. Select the task that you want to convert (using the row header)
2. Select the Actions->Convert to Project command.
The task will become a subproject of the original task’
s project.
Note: When you convert a task into a subproject, you may lose some task
specific details like predecessors and resource assignments
Copyright © 2005-2008 Effexis Software, LLC - www.effexis.com 42
..
..
.
Achieve Planner
2.12 Tutorial 12 –Recording Work and Completing Projects/Tasks
Achieve Planner provides two convenient commands to help you record your
work and complete projects/tasks.
2.12.1
Project/Task States
The state column denotes the current “
state”of a project or task. You can
use this column to change to state of the item or to mark it as completed
(C). Click on the dropdown arrow to see the various state codes.
For a description of the various states, please refer to section 3.5.6.
2.12.2
Recording work for a task
When you have done some work on a task and are ready to move on to
something else without fully completing the task, you can use the Actions->
Record Work/Expenses command.
1. Navigate to the Tasks tab and select a task for which you want to
record some work
2. Select the Actions->Record Work/Expenses command. This will
bring up the Work/Expense Record dialog.
Copyright © 2005-2008 Effexis Software, LLC - www.effexis.com 43
..
..
.
Achieve Planner
3. Enter 1h in the “
Add Effort” box, 2h in the “
Effort Left” box, and
Lookup part number in database in the “
Follow up action”box.
4. Press the Add button.
The Work/Expense Record dialog provides the following fields:
•
Name –Name of the project/task for which you are recording work
•
Expected effort – Your original estimate of the amount of effort it
would take to complete the task
•
Effort to Date –This is the “
actual effort”for the task so far
•
Add Effort – Enter the amount of work that you want to record (for
example: 30m, 2h)
•
Effort Left – Enter your estimate of the amount of work that is still
needed to complete the task
•
Expected cost –Your original estimate of the cost of the task
•
Cost to Date –This is the “
actual cost”for the task so far
•
Add Cost – Enter the cost you want to add for this task (or leave
blank)
Copyright © 2005-2008 Effexis Software, LLC - www.effexis.com 44
..
..
.
•
Achieve Planner
Follow up action –Allows you to add a “
next action reminder task”as a
child of the current task to serve as a reminder of where you left off
In the example above, after entering the above information, the task list for
this project would contain:
Notice that the “
Effort Left”field has been reduced from 3h to 2h because
this is the amount entered into the Effort Left box of the dialog.
In addition, a new child task called “
Lookup part number in the database”
was added to the “
Get working unit”task. This is a “
next action reminder”
task because its effort values are both set to 0h.
This tells Achieve Planner that it is not an actual task, but just a reminder of
where you left off and what you need to do next when you continue working
on the “
Get working unit”task.
2.12.3
Completing a task
When you have completed a task or project, you can use the Actions->
Complete Task command to complete the task and record the work that
you spent on it.
1. Navigate to the Tasks tab and select the task that you want to
complete.
2. Select the Actions->Complete Task command (also available from
context menu when you right-click on a task)
Note: You can also complete a project/task by changing its state to (C)
Completed.
3. This will bring up the “
Work/Expense Record to Complete”dialog.
4. Fill in the effort and cost that you want to add, and optionally provide
the next task that you need to do for this project in the “
follow up
action”box.
5. Press the Add button to complete the task or Cancel to cancel the
completion.
Copyright © 2005-2008 Effexis Software, LLC - www.effexis.com 45
..
..
.
Achieve Planner
Notice that the “
Effort Left”box is disabled because you are completing the
task, so it won’
t have any effort left.
If you enter a task in the “
Follow up action”box, it will be placed immediately
after the task that you are completing in the task list.
In this case, the Effort and Effort Left fields are initialized to 30 min, which is
the default value for new tasks. This indicates that the task is an actual task
and not a next action reminder.
How to turn off the Work/Expense Record to Complete Dialog
If you would rather not record work/expenses when you complete a project
or task, you can disable this dialog in the General tab of the Options dialog
(Tools->Options)
Just uncheck the box and the dialog will no longer appear. Check the box to
restore the dialog when you complete a project/task.
When you complete a project/task, the completion date is recorded in the
‘
Date Completed’field.
Copyright © 2005-2008 Effexis Software, LLC - www.effexis.com 46
..
..
.
Achieve Planner
2.13 Tutorial 13 - Working With Priorities
One of Achieve Planner’
s strengths is the widespread support of ABCD
prioritization (learn more about using priorities in section 4.)
This tutorial will show you how to change priorities and use some of the
prioritization tools in Achieve Planner.
You can change priorities directly through the Priority column in the grids, or
via the item’
s information form.
To change the priority value, simply select the cell you want to change (using
mouse or keyboard) and type in the new value using either upper case or
lower case letters (e.g., a1, b3, A2, A, b, etc.) Achieve Planner automatically
converts all priorities to uppercase when displayed.
Achieve Planner supports both ranked (A1) and unranked (A) priority values.
You can also leave items unprioritized by clearing the priority value (leaving
it blank.)
Achieve Planner color-codes rows based on the priority value of the row. For
example, the default color for A’
s is blue. You can change the colors
associated with each priority range using the Tools->Options command
(Display tab.)
For a full description of priority colors, please refer to section 4.2.
Achieve Planner provides two useful tools to help you prioritize.
Copyright © 2005-2008 Effexis Software, LLC - www.effexis.com 47
..
..
.
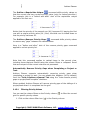
Achieve Planner
The Outline->Reprioritize Unique ( ) command shifts priority values so
that the current row has a unique priority value (only for ranked priorities.)
For example, this is a “
before and after” shot of the reprioritize unique
applied to the first row:
ß becomes à
Notice that the priority of the second row (A1) becomes A2, leaving the first
row with a unique priority value (A1.) Also, the third row is shifted down so
that its priority becomes A3.
The Outline->Remove Priority Gaps ( ) command shifts priority values
to remove any “
gaps”between the ranked values.
Here is a “
before and after” shot of the remove priority gaps command
applied to a short priority list.
ß becomes à
Note that this command applies to ranked items in the current view,
including items that are filtered using the column filters or collapsed. Items
that are not part of the current view are not processed.
Automatically Remove Priority Gaps when Completing a Project or
Task
Achieve Planner supports automatically removing priority gaps when
completing a project or task. You can enable this behavior (off by default)
from the Tools->Options->General Tab using the “
Auto-remove priority
gaps on project/task complete”checkbox.
When enabled, Achieve Planner will remove priority gaps of the siblings of a
project/task when it is completed via the grid.
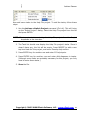
2.13.1
Filtering Priority Values
You can use the column filters on the Priority column ( ) to filter the current
grid for specific priority values.
1. Click on the column filter icon ( ) in the Priority column.
Copyright © 2005-2008 Effexis Software, LLC - www.effexis.com 48
..
..
.
Achieve Planner
2. Select the filter you want to use from the dropdown:
The display should now be filtered based on the filter you selected.
To remove the priority filter, follow the same steps but select the (All) filter
from the dropdown.
Copyright © 2005-2008 Effexis Software, LLC - www.effexis.com 49
..
..
.
Achieve Planner
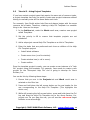
2.14 Tutorial 14 –Importing and Organizing Tasks from Outlook
Rather than repeating the same information here, please see section 6 for a
description of how to do this.
Copyright © 2005-2008 Effexis Software, LLC - www.effexis.com 50
..
..
.
Achieve Planner
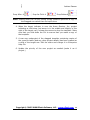
2.15 Tutorial 15 - Customizing Views
You can customize most of the main views in Achieve Planner. In this
example, you will customize the Active Task Status Tasks view to include a
“
Completed”checkbox field in the view. For more information, see section
3.3.12.
Be sure you are in the Tasks tab and that the View dropdown (in the filter
bar) is Active Task Status.
1. Select the View->Customize Current View command.
2. In the left pane of the dialog (Available Fields), click Completed.
3. Click the Add button to move Completed field to the right pane
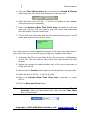
(Show Fields).
4. Click the Move Up button until the Completed field is at the top of
the list.
Copyright © 2005-2008 Effexis Software, LLC - www.effexis.com 51
..
..
.
Achieve Planner
5. Click OK.
The view now shows a Completed checkbox in the first column.
2.15.1
Editing Fields
In some cases, you may want to edit some of the “
shown”fields and change
some of their settings. For example, you can change the column header
label, or make a particular field multi-line.
To make the Name field of the Tasks tab multi-line:
Be sure you are in the Tasks tab and that the View dropdown (in the filter
bar) is Active Task Status.
1. Select the View->Customize Current View command.
2. Select the Name field from the right-column in the dialog (“
Show these
fields in this order”
)
3. This should enable the “
Edit Field…”button. Click on it.
4. This will display the “
Edit Field”dialog
5. Click on the Multiline checkbox and click OK
6. Close the field selection dialog (Click on OK button)
The Name field should now be multiline.
Copyright © 2005-2008 Effexis Software, LLC - www.effexis.com 52
..
..
.
Achieve Planner
2.16 Tutorial 16 –Quick Task Entry
This tutorial shows you how to use the “
Quick Task Entry”feature in Achieve
Planner to add some quick tasks to your outline even if you are working on
another application.
The Quick Task Entry form is available by right-clicking on the Achieve
Planner icon in the system tray area and selecting the command from the
menu.
Alternatively, you can use the quick task entry HotKey defined in the general
tab of the Options dialog (Tools ->Options). This HotKey is available even
while working on other applications.
The default HotKey is Alt+Win+T key combination.
The following Quick Task Entry dialog appears when you use the HotKey or
notify icon context menu.
Copyright © 2005-2008 Effexis Software, LLC - www.effexis.com 53
..
..
.
Achieve Planner
If you check the Enter multiple tasks… checkbox, then you can enter
multiple tasks (one per line) and use indentation (spaces) to create subtasks
at any level. For example, if you enter the following tasks:
Task # 1
Task # 2
Task # 3
Task #2 and Task # 3 will be children of Task # 1.
By default, Achieve Planner inserts the new tasks into a top-level project
called “
<New Tasks>.”You can also directly specify the parent for the new
tasks using the Parent button.
Check the Activate Achieve Planner… box if you want to activate the main
Achieve Planner window when you add the tasks. Leave it unchecked if you
want to return to the application you were working on after you add the
tasks.
You can add notes to the new tasks by using ## to separate the task name
from the note text.
Copyright © 2005-2008 Effexis Software, LLC - www.effexis.com 54
..
..
.
Achieve Planner
For example,
Task 1.1##These are the notes that will be associated with the task.
Note: The Quick Task Entry HotKey can only be associated with a single
Achieve Planner main window. If you have multiple files open
simultaneously, the HotKey will only work for one of them. If you
find that the HotKey is not working once you close all other Achieve
Planner windows, invoke the Quick Task Entry from the system tray
icon context menu to “
rehook”the hot key
Please see the ‘
Capturing & Organizing Projects and Tasks’tutorial for more
ideas on how to organize tasks you’
ve captured with the Quick Task Entry
method.
Copyright © 2005-2008 Effexis Software, LLC - www.effexis.com 55
..
..
.
Achieve Planner
2.17 Tutorial 17 –Printing the Grids
You can print most grids using the File->Print or File->Print Preview
commands. These commands use the current layout and relative size of the
current display grid when printing.
You can change the font/size used for printing in the Grids tab of the options
dialog (Tools->Options).
Make sure to check the box if you want to override the default font.
Some people have noticed that reducing the size of the main Achieve Planner
window has an effect on the printout. The reason for this is that AP uses the
relative column sizes in the display when creating the printout, which is
scaled to fit in a page.
Reducing the width of the main window also affects the width of the columns
and the resulting printout. If your printout is too small even with larger font
settings, try reducing the width of the main Achieve Planner window before
printing. This may help reduce the scaling that takes place.
Use the Print Preview to get a better idea of what will be displayed before
printing.
Copyright © 2005-2008 Effexis Software, LLC - www.effexis.com 56
..
..
.
3
Achieve Planner
Working with Projects and Tasks
Projects and tasks replace the traditional “
to-do” list used in other time
management systems. They are a central concept in Achieve Planner.
A project represents a high-level outcome or result in your to-do list that
you are tracking or actively working on. It could be a complex multi-step
project like developing a product, organizing an event, or preparing a
presentation, but it could also be something simple like paying a bill,
responding to an email, or checking out a website.
In general, any to-do item that is not part of something larger should be
stored as a project. Doing this will help you think and plan your time in terms
of outcomes rather than just actions, which is an important step in becoming
more results oriented.
You can keep track of your projects in the Projects tab, where you can create
hierarchical (multi-level) lists of your projects using as many levels as you
need.
Achieve Planner separates the concepts of projects and tasks allowing you to
view and track your high-level outcomes (projects) independently from your
low-level actions (tasks.)
Your projects list will be shorter, easier to manage, and it will give you an
overview of all the outcomes you are working on. You can store all the details
as tasks and have easy access to them when you need them.
A task is something that you need to do as part of a project. All your to-do’
s
should either be projects or tasks of a project. It is quite common for simple
projects not to have any tasks, and for complex projects to have tens, or
even hundreds, of tasks.
You can keep track of the tasks for each project in the Tasks tab, where you
can create hierarchical (multi-level) task lists using as many levels as you
need.
If you need to, you can easily convert tasks into projects (promote), or
convert projects into tasks (demote).
This section will help you understand the Projects tab in Achieve Planner, and
how to use it to keep track of and update your projects.
Copyright © 2005-2008 Effexis Software, LLC - www.effexis.com 57
..
..
.
Achieve Planner
You can learn more about the difference between projects and tasks as they
are used in Achieve Planner in the following online article:
http://www.timethoughts.com/timemanagement/effective-todo-list.htm
Here is an example of a potential Project list for “
Jane Smith” from the
tutorials.
3.1
Demo Data File
Achieve Planner includes a demo data file that you can use to see many of
these concepts in action. You can select the File->Open Demo File
command to open the sample data file in a new window.
3.2
Achieve Planner Grids
Achieve Planner uses grids extensively to display, edit and insert tabular
information.
At the top of the grid is a “
Help Tip,”which is provided by default for all toplevel views (grid must have the focus in order for the tip to be displayed).
This tip displays the keyboard shortcuts for inserting rows into the grid.
Copyright © 2005-2008 Effexis Software, LLC - www.effexis.com 58
..
..
.
Achieve Planner
You can toggle it on/off using the Help->Show Help Tips command.
A grid contains a number of rows and columns. A cell occurs at the
intersection of a row/column. The active cell is highlighted and contains the
focus rectangle (dotted line). The grid must have the focus in order for the
active cell to be highlighted.
3.3
Working with the Master Outline
The master outline provides a bird’
s eye view of your entire hierarchy
including Result Areas, Projects, and Tasks.
Achieve Planner has the following restrictions regarding
relationships between result areas, projects, and tasks:
parent/child
Copyright © 2005-2008 Effexis Software, LLC - www.effexis.com 59
..
..
.
Achieve Planner
Record
Allowed Children
Result Area
Result Area, Goal, Project, Task
Project
Project, Task
Task
Task
Thus, a project can only have projects and tasks as children, and a task can
only have other tasks as children.
3.3.1 Inserting New Rows
To insert new rows into a grid you can use the Insert key in your keyboard or
the appropriate item in the Insert menu (e.g., Insert After). Note: the grid
must have the focus in order to use the keyboard shortcuts for the insert
commands.
Some of the items in Achieve Planner like Projects, Tasks and Goals support
prioritization (see section 4 Using Priorities) while others like File Items,
Notes and Contacts do not.
Achieve Planner sorts items that support prioritization using their priority
value (A1 before A2, A before B, and so on).
For grids supporting ordering, you can use the Insert->Insert Before
(Shift+Insert) and Insert->Insert After (Insert) commands to insert the
new row into the grid before/after the active row and automatically shift the
priority of the other items.
Some of the items in Achieve also support a tree-like hierarchy of items
(parent/child, task/subtask, etc.). For example, a task can have subtasks as
children.
In these grids, you can also insert a new row as a child of the active row
using the Insert->Insert as Child (Ctrl+Insert) command. For example, in
the Demo file the "Project Proposal for New Joint Product" project is a child of
the "ACME Account" project.
You can also use the Insert->Insert at Top-Level (Ctrl+Shift+Insert)
command to insert a new top-level row (with no parents).
When you insert a row through any of the means described above, the grid
will enter insertion mode and provide a blank row where you can enter your
Copyright © 2005-2008 Effexis Software, LLC - www.effexis.com 60
..
..
.
Achieve Planner
data. Pressing the Enter key while in insertion mode saves changes to the
current row and adds a new sibling row immediately below the current one.
If you’
ve accidentally added a blank row to the grid, you can cancel the
insert by pressing the Esc key, which will remove the blank row and return
the grid to normal mode.
Once you change any cell in the new row you can no longer cancel the insert
using the Esc key, but you can use the Delete item in the Edit menu to
delete the row.
3.3.2 Moving the Active Cell
The active cell is either in edit mode (when you are actively editing cell
contents) or in selected mode (highlighted).
When a cell is in selected mode, you can move the active cell in various
directions using the cursor keys (left, right, top, bottom, page up, page
down). You can also press the Home and End keys to move to the first/last
cell in the row.
Use Ctrl+Home to move to the top row, and Ctrl+End to move to the last
row in the grid.
The Tab key will move to the next cell and advance to the first cell of the
next row when the last cell is reached, while Shift+Tab will move to the
previous cell.
For grids supporting parent/child relationships (like projects and tasks), you
can move to the parent row by pressing the Ctrl+Left keys (cell must not be
in edit mode in order to move to parent row.) Pressing the Left key while the
focus is on the leftmost cell in a row will also select the parent row.
When a cell is in edit mode, the cell's editor uses the cursor keys to move the
caret. You can still move the active cell by using the Alt+Cursor Key
combination to exit edit mode and move to an adjacent cell.
You can also use the Tab key to move to the next cell and the Enter key to
move to the cell below the current cell. If you press Alt+Enter while editing a
cell, the grid saves the value and moves the selection to the cell below
without creating a new row.
Pressing the Shift key while moving the active cell using the cursor keys will
select multiple cells (both columns and rows).
Copyright © 2005-2008 Effexis Software, LLC - www.effexis.com 61
..
..
.
Achieve Planner
As you move the active cell, the Status Bar displays a brief description of the
current column in the grid.
3.3.3 Editing Cell Values
To edit a cell's value, the cell needs to be in edit mode. You can enter edit
mode in the following ways:
Press F2 to enter or exit edit mode for the active cell, click on a cell using the
mouse, or start typing (if the cell accepts alphanumeric input) which replaces
any existing value in the cell with the typed text.
In addition, some types of cells have shortcuts for setting their values:
•
For cells with a dropdown (dates, lists) you can drop/raise the
dropdown using the F4 key (and Spacebar key for lists).
•
For cells with a checkbox, you can press the Spacebar key to toggle
the checked state of the combo without entering edit mode.
Pressing the Esc key while in edit mode will cancel the edit operation and
restore the original cell value.
3.3.4 Displaying the Information Form
In most grids, you can usually obtain a form with more details for the active
row by doing one of the following:
•
Double-clicking on a row
•
Pressing Ctrl+Enter key combination
•
For top-level grids, you can invoke the File->Open->Open Selected
Items... command.
For the Master Outline grid, this will display the Information Form associated
with the selected item.
3.3.5 Deleting Rows
You can delete the active and/or selected rows using the Edit->Delete
command. Be aware that deleting a row will automatically delete all the
children rows as well, and deleting a project will also delete any associated
tasks for that project.
In most cases, you can undo a row deletion using the Edit->Undo
command.
Copyright © 2005-2008 Effexis Software, LLC - www.effexis.com 62
..
..
.
Achieve Planner
3.3.6 “Power Paste”
Achieve Planner’
s power paste feature is useful if you want to change
multiple cell values at the same time.
For example, you might want to change the status, deadline, or priorities of
multiple tasks to the same value. A “
power paste”lets you do this in one step
rather than having to repeat the same action on each row.
To use the power paste:
1) Change the cell value of the one of the rows you want to change to the
new value that you want to propagate down to other cells below it.
2) Select the cell containing the new value and copy its value to the clipboard
using the Edit -> Copy command (Ctrl+C)
3) Select all the cells that you want to change to the new value. You don’
t
need to include the cell you modified in step 1. You can hold down the Ctrl
key while clicking on additional cells to extend the selection.
4) Invoke the Edit -> Paste command to paste the value from the clipboard
to all the selected cells in one step. This is why it’
s called “
power paste.”
3.3.7 Changing Parent/Child
For grids supporting parent/child hierarchies like projects and tasks, you can
arrange rows in several ways.
3.3.7.1
Drag & Drop
You can drag one or more selected rows through their row selector (small
rectangle at the start of the row) and drop them on a target row. As you drag
the rows, a drop target indicator will show you the target row and position
using red arrows.
Depending on the position of the mouse relative to the target row, the drop
target indicator is above (drop before), center and slightly to the right (drop
as child), or below the target row (drop after.)
Drop After à
Drop As Child à
Drop Beforeà
Note: Holding down the Ctrl key during a drag operation performs a copy of
the dragged row rather than a simple move
Copyright © 2005-2008 Effexis Software, LLC - www.effexis.com 63
..
..
.
Achieve Planner
To drop a set of rows as a child of the target row, simply drop the rows when
the drop arrows are centered and to the right (indicating a child drop) of the
desired target row.
To drag and drop multiple rows, the entire row must be selected by clicking
on the selector (hold Ctrl key while clicking on the selector to make multiple
selections).
3.3.7.2
Using Pickup & Drop Commands
The Edit->Pickup Row(s) command "marks" all the rows with selected
cells. You can tell which rows are marked because their selector is
highlighted.
Once you have one or more rows picked up, you can use the drop commands
in the Edit menu to drop them on the active row (containing active cell):
•
Drop at Same Level - Drop picked up rows at the same level as the
target row and reprioritize rows
•
Drop as Child - Drop picked up rows as children of the target row
You can also drop copies of the picked up rows instead of the originals using
the appropriate command.
3.3.7.3
Indenting and Outdenting
The Outline->Outdent command outdents all the rows with selected cells.
Outdenting a row moves it to the same level as its current parent.
The Outline->Indent command indents the active row. Indenting makes a
row a child of its immediate predecessor.
3.3.7.4
Expansion Indicator
The expansion indicator associated with each parent row expands or
collapses the view of the item’
s children.
You can toggle the expansion state of the active cell using the Spacebar key
when the cell is NOT in edit mode (move the cell to the parent row cell with
the expansion indicator and press Spacebar). You can also use commands in
the Outline menu to change the outline level.
3.3.8 Copying Rows
You can copy one or more rows using one of the following methods:
Copyright © 2005-2008 Effexis Software, LLC - www.effexis.com 64
..
..
.
Achieve Planner
•
Drag & Drop - While dragging one or more rows, press the Ctrl key to
drop copies onto the target row. Note that copying a parent row will
automatically copy all of its children.
•
Pickup and Drop Commands - You can use the Edit | Drop Copy at
Same Level and Drop Copy as Child commands to drop copies of
picked up rows onto the target row.
3.3.9 Grouping
Some of the grids in Achieve support grouping the information by one or
more values. For example, when the "All Result Areas" value is selected from
the Result Areas dropdown in the Projects tab, the project list is grouped by
Result Area. You can collapse/expand individual groups using the expansion
button (+/-) or with the keyboard (left to collapse, right to expand).
The Outline->Group->Expand All Groups and Collapse All Groups
commands can be used to expand or collapse all the groups simultaneously.
3.3.10
Outline Levels
For grids supporting parent/child hierarchies, you can expand/collapse
individual rows using the expansion button (+/-) for the row. You can also
press the Spacebar key to toggle the expansion/collapse of the row when the
cell with the expansion button is the active cell.
The Outline menu contains several commands you can use to expand all the
children of a row or expand/collapse all the rows to a certain outline level.
3.3.11
Rearranging Columns
You can change the size and positions of the columns in the grid using the
mouse.
To change the position of a column, you simply drag it by the column header
(you must select it first and then drag it once selected) and drop it in its new
location.
To change the size of a column you click between the two headers (after the
cursor has changed to a resize shape) and drag to the new size.
3.3.12
Changing the Fields Displayed in the Current View
All the main grids support customizing the displayed columns using the field
customization dialog.
Copyright © 2005-2008 Effexis Software, LLC - www.effexis.com 65
..
..
.
Achieve Planner
To customize the fields for the current view, use the View->Customize
Current View command. This command will bring up the View
Customization Dialog for the current view.
Using this dialog you can add, remove, and change the position of fields
associated with the current view.
For example, to add a Completed checkbox field to the Active Item Status
view of the outline, follow these steps:
1. Select the “
Active Item Status”view in the Outline tab.
2. Invoke the View->Customize Current View command.
3. Select the Completed field in the “
Available Fields”list on the left-hand
side of the dialog.
4. Click on the “
Add ->” button to move the Completed field into the
right-hand side list containing fields being shown in the view.
Alternatively, you can double click on the field to move it to the shown
fields list.
5. Adjust the desired position of the field using the “
Move Up”and “
Move
Down”buttons.
To remove a field from the view, select it from the “
shown fields”list and
click on the “
<- Remove”button.
Editing Field Properties. You can also edit individual field properties of the
fields being shown in the view by selecting the field in the “
shown fields”list
and clicking the “
Edit Field”button.
3.3.13
Navigating to the Outline Tab
The Outline->View in Outline command is a convenient tool to navigate to
the Outline tab from any of the other detail tabs like Projects or Tasks.
The active item in the detail tab is displayed and selected in the Outline tab.
3.3.14
Viewing Item Details
While working in the Outline tab, you can navigate to the detailed view for
the active row using the Actions->View Details command.
For example, if the active row is a project row, the View Details command
will navigate to the Projects tab and display the active project in that tab.
Copyright © 2005-2008 Effexis Software, LLC - www.effexis.com 66
..
..
.
Achieve Planner
This is a convenient facility for navigating back/forth between the detail tab
and the Outline tab.
3.3.15
Zooming in the Outline Tab
The Outline tab support zooming functionality to focus on a particular branch
of the outline. For example, if you only want to see the sub-projects and
tasks for a particular project, you can zoom to the project so that only this
particular branch of the outline is displayed.
The Outline->Zoom In command will “
zoom”the outline so that only the
branch rooted at the active row is displayed.
When the outline is zoomed in on a particular branch, the grid caption
displays the name of the zoom root node.
The Outline->Zoom Out command zooms out a single step in the outline to
the parent of the current zoom root.
For example, if the outline has the following hierarchy A -> B -> C -> D and
is zoomed on node C, zooming out a single step will zoom the outline on
node B, which is the parent of C.
The Outline->Clear Zoom command clears the zooming from the outline
and displays all the top-level items.
3.3.16
Actions
The Actions menu contains several commands that may be available for
some of the items in the outline, but not for others.
For example, the Complete Item(s) command is available for project and
task items, but not for Result Area items that cannot be completed.
3.4
Working with the Projects Tab
This section describes how to work in the Projects tab with more detail. The
Projects tab gives you a good overview of all the different outcomes that you
are pursuing.
3.4.1 Filtering Projects for Different Result Areas
You can use the result area dropdown in the Project tab view bar to filter the
project list and only show projects for a particular result area. For example, if
you only want to see projects in the “
Work”result area, just pick that result
area from the dropdown.
Copyright © 2005-2008 Effexis Software, LLC - www.effexis.com 67
..
..
.
Achieve Planner
Select “
All Result Areas”if you want to see all of the projects for all the result
areas in the same list.
The Show Groups checkbox toggles the grouping of projects by result area
on/off. The Show Groups checkbox is only enabled when you use the “
All
Result Areas”filter.
3.4.2 Moving a Project to a Different Result Area
There may be times when you want to move a project to a different result
area. You can easily do this using the Actions->Move to Result Area
command.
Just select the desired result area from the dialog and click OK.
3.4.3 Working with Project Views
The Projects tab supports multiple different views that show you your
projects list from a different perspective. You can change the view using the
view selector dropdown in the Projects tab view bar.
You can also use the commands in the View menu (available when the
Projects tab is active.)
Here is a brief description of each view:
•
Active Project Status – General status of active (non-completed)
projects
•
Active Project Schedule –Scheduling details of active projects
•
Active Project Status (Place) –Also includes place column
•
Active Project Description –Includes the project description
•
Active Project Delegation –Includes Assignee(s) column
•
Completed Projects –Only shows completed projects
•
All Projects –Shows all projects, including active and completed
Copyright © 2005-2008 Effexis Software, LLC - www.effexis.com 68
..
..
.
•
3.5
Achieve Planner
Active Project Recurrence – Includes lead time for recurring project
scheduling
Working with a Project’
s Tasks
Tasks represent the action steps associated with a particular project. You can
use the Tasks tab in Achieve Planner to see all of your tasks, or to focus in on
the tasks of a particular project.
Note: If you want to see the entire hierarchy of a project, including tasks as
well as subprojects and their tasks, the master outline is a better
way to view this.
3.5.1 Viewing the Tasks of a Project
To view the tasks of a specific project, you can use the Project dropdown in
the Tasks tab view bar. Just select the project you want to filter from the list.
Select the “
All Projects” filter to view tasks for all projects grouped by
project.
A convenient way to view tasks of a different project is to use the Actions->
Switch Project command. This command brings up a project selection
dialog that you can use to filter the task list on a different project.
Just select the project you want to view from the list and click OK.
3.5.2 Navigating Between Projects and Tasks Tabs
You can navigate between the Projects tab and the Tasks tab using
commands in the Actions menu.
On the Projects tab:
•
Use the Actions->View Tasks command to view the tasks associated
with the active project row
On the Tasks tab:
•
Use the Actions->View Project command to view the project
associated with the active task row
Copyright © 2005-2008 Effexis Software, LLC - www.effexis.com 69
..
..
.
Achieve Planner
3.5.3 Adding Tasks to a Project
You can add tasks to a project using the Outline tab or via the Tasks tab.
Please refer to Tutorial 2.2 for details.
3.5.3.1
Choosing between Sub-Projects and Tasks
Achieve Planner allows you to add two different type of children to Projects:
sub-projects and tasks.
One common question is how to choose between a sub-project and a task. In
general, use sub-projects when:
•
It represents a well-defined outcome/result in and of itself, or
•
It is something that you will work on in parallel with other
projects/sub-projects.
If the items are all part of the parent project (not really outcomes) and you
are planning to work on them sequentially, it might be better to do the
breakdown in the task list rather than using sub-projects.
For example, if you want to break down a development project into several
iterations, and then break each iteration into several phases (like planning,
design, implementation, and testing), you may want to represent these in
the task list rather than using sub-projects.
•
Iteration 1
o
o
Planning
§
Planning Task 1
§
Planning Task 2
Design
§
Design task
§
…
o
Implementation
o
Testing
The reason for this is that the various items don’
t represent independent
outcomes, and they are being done sequentially and not in parallel.
Copyright © 2005-2008 Effexis Software, LLC - www.effexis.com 70
..
..
.
Achieve Planner
You may argue about whether iterations should be tasks or sub-projects.
Fortunately, you don't have to get it perfect the first time. You can easily
convert a summary task in the task list into a sub-project, and you can
convert a sub-project into a task using simple built-in commands.
From the Tasks tab, you can convert a task into a sub-project using the
Actions->Convert to Project command.
From the Projects tab, you can convert a sub-project into a task of the
parent project using the Actions->Convert to Task command.
NOTE:
These commands are also available in the Outline tab (from the
Actions menu)
You can read more about converting between projects and tasks in Tutorial
2.11.
3.5.3.2
Handling Single-Step To-Dos
If you have single-step items like "Pick-up dry cleaning" or "Take Rover to
vet" you can track them as either top-level projects or as tasks.
One reason to track these items as projects is that they don't belong to a
higher level outcome, they are the outcome. Keeping them in your master
project list allows you to see them along with all your other outcomes and
avoid losing track of them as you plan your projects.
You could also create a “
Miscellaneous”or “
Errands”project to capture all
these items as tasks, but I personally prefer to keep them in the master
project list. That way, your master project list always gives you an idea of all
the outcomes in your plate at any given time regardless of their size.
It really depends on how many of these items you have to deal with. If your
master project list starts to become cluttered with too many of these small
projects, converting them into tasks of a grouping project like “
Errands”
might be the best alternative.
3.5.4 Working with Task Views
The Tasks tab supports multiple different views that show you your tasks
from a different perspective. You can change the view using the view selector
dropdown in the Tasks tab view bar.
Copyright © 2005-2008 Effexis Software, LLC - www.effexis.com 71
..
..
.
Achieve Planner
Brief description of each view:
•
Active Task Status –General status of active (non-completed) tasks
•
Active Task Schedule –Scheduling details of active tasks
•
Active Task Description –Also includes description field in the grid
•
Active Task Schedule Details – Includes schedule details like assignee
and predecessor
•
Active Task Estimation –Includes effort estimation columns
•
Active Task Budget –Includes budgeting columns
•
All Tasks –Shows all tasks, including active and completed
•
All Tasks Schedule – Scheduling information for all tasks (including
completed)
•
Active Task Recurrence – Includes lead time for recurring task
scheduling
3.5.5 Converting Tasks into Projects and Projects into Tasks
Please see Tutorial 2.11 for more details of converting between projects and
tasks.
3.5.6 Quick Task Entry
Please see section 2.16 for a description of quick task entry.
3.6
Project/Task State Values
Projects and Tasks can be in one of several states as indicated in the State
column.
The following states are supported:
(C) Completed - Project/Task is marked as completed and will not appear
in Active views.
Copyright © 2005-2008 Effexis Software, LLC - www.effexis.com 72
..
..
.
Achieve Planner
(Cn) Cancelled –Project/Task is marked as cancelled and will not appear in
Active views. You can only see Cancelled items in the ‘
All Items’views.
(D) Delegated – Project/Task is marked as delegated. This is just a
reminder that you’
ve delegated the task, but nothing else changes about the
task.
(IP) In Progress – The project/task is in progress. You can enter into this
state by changing the state directly or by recording work associated with the
item.
(NS) Not Started – You haven’
t started work on this project/task. This is
the default state for new items.
(P) Postponed –You’
ve decided to postpone work on the item.
(PR) Proposed –A project/task that is only proposed at this time.
(SD) Should Delegate – This is just a reminder flag indicating that you
should delegate this item instead of doing it yourself. It is different from (D)
delegated in that you haven’
t actually delegated it yet.
(W) Waiting – This is a reminder that you are waiting for something
associated with this item and can’
t proceed until you get it.
3.7
Completing Projects & Tasks
Please see section 2.12.3 for a description of how to complete a project or
task.
3.8
Schedule Status Values
The schedule status values appear in the Status columns for Projects and
Tasks.
This section describes the various status values and how they are
determined.
Copyright © 2005-2008 Effexis Software, LLC - www.effexis.com 73
..
..
.
Achieve Planner
Some of the definitions below only apply to “
active”task, which for schedule
status purposes means a task that:
•
Has an ancestor priority range value other than ‘
D’
•
Is not Postponed or Completed
•
Is not a “
next action reminder”task
The following schedule status values are used:
Completed –Reserved for projects/tasks that have been completed.
Overdue – The overdue status is only used for non-completed items with
deadlines. It occurs if the deadline is in the past (before Today’
s date.)
Note: The overdue status propagates up the hierarchy from child to parent.
If a child is overdue, the parent is also marked as overdue.
Behind Schedule – The behind schedule status value can occur for various
reasons on non-completed items:
•
The item has a deadline and a target end date, and the target end
date goes past the deadline. This is a warning that the current target
end date would have you completing the task after the deadline. This
criteria only applies to tasks that are not postponed.
•
For active items that have not been started (in NS state) with a target
start date set, if the target start date occurs before Today’
s date.
•
For active items that have been started (not in NS state) with a target
end date set, if the target end date occurs before Today’
s date.
Note: The behind schedule status propagates up the hierarchy from child to
parent. If a child is behind schedule, the parent may also have a
status behind schedule.
Close to Deadline –As the name implies, the close to deadline status value
indicates that the item is getting close to a deadline but has not exceeded it
yet.
This status value only occurs for non-completed items with deadlines when
Today’
s date is within one day of the deadline.
Copyright © 2005-2008 Effexis Software, LLC - www.effexis.com 74
..
..
.
Achieve Planner
Note: The close to deadline status propagates up the hierarchy from child to
parent. If a child is close to deadline, the parent may also have a
status close to deadline.
No Slack – A “
no slack”status value indicates that the target end date is
close to the deadline, meaning that you haven’
t provided much spare or
slack for moving the target end date without running into the deadline.
This status value only occurs for non-completed, non-postponed items with
deadlines when the target end date is within one day of the deadline.
Note: The “
no slack”status may propagate up the hierarchy from child to
parent.
Due Soon – A “
due soon”status value indicates that the deadline or target
end date for this item occurs within the next 5 days in the following
circumstances:
•
A non-completed item with a deadline occurring less than 5 days from
Today’
s date.
•
An active item that has been started and has a target end date
occurring less than 5 days from Today’
s date.
Note: The “
due soon”status may propagate up the hierarchy from child to
parent.
Postponed – An item with a “
postponed”(P) state that doesn’
t have one of
the schedule values already described above.
Need to Start – An active task not yet started with a target start date of
Today. This is an item scheduled to start today.
Waiting – Status for an item in the “
Waiting”(W) state that doesn’
t have
any of the other schedule status values already described.
Ongoing – Status for an item that has been started, is not in the “
Waiting”
state, and either doesn’
t have a target end date or the target end date is
more than 5 days in the future.
Not Scheduled – Status value for items not yet started that are not
ancestor scheduled.
Copyright © 2005-2008 Effexis Software, LLC - www.effexis.com 75
..
..
.
Achieve Planner
A task is not ancestor scheduled if it or any of its ancestors:
•
Has a priority range of D (including ranked D’
s)
•
Is a “
next action reminder”task
•
Is not effort driven
Note: Some of the schedule status values like Overdue and Behind
Schedule and Close to Deadline override Not Scheduled for
items with deadlines.
A task that is not associated with a Project will also have a Not Scheduled
status value since only Project tasks are scheduled as part of the automated
scheduling feature.
On Schedule – Status value for items that are generally on schedule and
don’
t fit any of the other status values described above.
3.9
Project/Task Recurrence
Projects and tasks can be marked as recurring. A recurring project or task
generates a new instance of itself whenever the current instance is marked
as completed.
Note: Recurring projects/tasks create a new instance immediately after the
current instance is completed. The new instance includes copies of
all children of the original regenerated instance, initialized to the
Not Started (NS) state.
Date values are only set for items that have deadlines established. If the
recurring project or task doesn’
t have a deadline, a new instance is still
generated, but none of its date values are set.
The “
recurrence pattern” is used to determine deadline values associated
with the newly created instance.
3.9.1 Recurrence Patterns
Project/task recurrence supports two types of recurrence patterns: date
based and regeneration based.
Copyright © 2005-2008 Effexis Software, LLC - www.effexis.com 76
..
..
.
Achieve Planner
Date recurrence patterns are similar to recurring appointments and follow
a fixed pattern of dates. For example, you can set the date recurrence
pattern to occur every 2 weeks on Friday. The occurrences follow a fixed
pattern.
Regeneration recurrence patterns don’
t have set dates to follow because
they are based on the date when the current instance is completed. For
example, you can set the item to regenerate 5 days after completing the
item. The date of the next occurrence is not fixed. It depends on when
current instance is completed.
3.9.2 Making a Project/Task Recurring
To make a project or task recurring, you can use the Actions->Set
Recurrence command, use the “
Set Recurrence”toolbar button, or use the
“
Recurrence”toolbar button in the Project/Task’
s information form.
This will bring up the recurrence pattern dialog described above where you
can specify the type, pattern, and range of the recurrence.
You can identify recurring projects/tasks in the various grids using the
recurrence icon ( ) on the item’
s row.
Copyright © 2005-2008 Effexis Software, LLC - www.effexis.com 77
..
..
.
Achieve Planner
3.9.3 Removing Recurrence
To remove the recurrence of a project/task, use the Actions->Set
Recurrence command, use the “
Set Recurrence”toolbar button, or use the
“
Recurrence”toolbar button in the Project/Task’
s information form.
Once the dialog is displayed, click on the Remove Recurrence button.
This removes the recurrence from the item.
3.9.4 Skipping a Recurrence
In some cases, you may want to skip a recurrence instance instead of
completing the current item. You can do this using the Actions->Skip
Recurrence command.
This command advances the date values on the current item and its children
just as if you had completed it, but it does not actually create a new instance
of the item or its children.
Note: When skipping a recurrence instance, the completed child items of the
item skipping the recurrence will not be “
uncompleted”like they
are when a new instance is generated.
3.9.5 Recurrence Item Lead Times
The “
Lead Time”field for projects and tasks controls how the “
Target Start
Date”field is initialized for newly created recurring instances.
You can set the “
Lead Time” field using the Project Information Form
(General Tab), or the Task Information Form (Schedule Tab). You can also
use the “
Active Task Recurrence”or “
Active Project Recurrence”views in the
Tasks tab and Projects tab respectively.
If the lead time is set to any value other than none and the recurring
project/task also has a deadline, the target start date is initialized to “
lead
time”days before the new deadline value in the recurring instance.
For example, if the lead time is set to 5 days, the new task instance will have
a deadline set to follow the recurrence pattern, and a target start date set to
5 days before the new deadline value.
Note: Lead times are also used as part of Lead Time based scheduling for
non-recurring projects & tasks. See section 7 for details.
Copyright © 2005-2008 Effexis Software, LLC - www.effexis.com 78
..
..
.
Achieve Planner
3.9.6 Deadlines/Lead Times for a Recurring Item’
s Children
When a new recurring instance is created, the deadline dates of the children
of the new instance are also updated based on the new recurrence date. This
only happens for children (either projects or tasks) that already have a
deadline value defined when the new instance is created.
Achieve Planner updates the deadline values of child items so that the same
date interval that currently exists between the child deadline and the parent
deadline is maintained in the new instance.
For example, lets say you have the following setup, where the deadline is the
date in parenthesis:
•
Recurring Project (11/25/06)
o
Task 1 (11/23/06)
o
Task 2 (11/24/06)
When you create a new recurring instance for this project for the next
month, the deadline values are updated as follows:
•
Recurring Project (12/25/06)
o
Task 1 (12/23/06)
o
Task 2 (12/24/06)
Notice that the deadlines of the tasks (Task 1 & Task 2) are the same relative
to the new project deadline as they were in the previous instance.
3.9.7 Initializing Lead Time Values for Child Items
When you first create a recurring project or task, the following dialog is
displayed to help you initialize the lead times for its children.
Copyright © 2005-2008 Effexis Software, LLC - www.effexis.com 79
..
..
.
Achieve Planner
If you select Yes, the lead time for all child items with existing deadlines will
be set based on the date interval between the current Target Start Date and
the Deadline of the child item.
This will preserve the same pattern of Target Start Date and Deadline in
future instances of the child items when a new instance of the parent is
created.
If you select No, then the lead time values are not modified.
Selecting Cancel stops the recurrence and leaves the parent item unchanged.
3.10 Focus Field
Projects and tasks support a “
focus”field which can either be set (checked)
or unset. Checking this field marks the project or task as part of your current
focus.
The focus field primarily affects the positioning of the project/task in the Task
Chooser, but it can also be used for filtering in the various grid views.
You can add the Focus field to any of the Projects, Tasks, or Outline views
using the View -> Customize Current View command.
You can also set/unset the focus field through the Project Information form
or Task Information form.
Copyright © 2005-2008 Effexis Software, LLC - www.effexis.com 80
..
..
.
4
Achieve Planner
Using Priorities
Achieve Planner uses the ABCD prioritization system, which is a simple tool
that helps you prioritize projects and tasks based on their importance and
urgency.
With this method, you go through each item in your list and assign it one of
four labels:
A – The A's are assigned to projects and tasks that are important or
valuable, or that need to be completed right away because of an impending
deadline.
B – The B's are assigned to projects and tasks that are “
under review”
because they are not as important as any of the A’
s, but they are still worth
considering. You may need/want to do them at some future point, but you
haven’
t committed to them just yet.
C – The C's are assigned to projects and tasks that you may want to do at
some future time, but you are not even considering doing them right now
because they are not important or valuable enough compared to everything
else on your plate.
D – The D's are assigned to projects and tasks that you are not planning to
do at all. They are not worth your time and energy.
It may seem strange to leave the C/D projects and tasks in your lists, but if
they made it there, it’
s because at some point you thought you might need
or want to do them.
Rather than loose track of them, just keep these items in your list in case
they pop up again, or you change your mind and decide that you would like
to work on them.
By default, most of Achieve Planner’
s grids sort using priority values. Sorting
takes place at each parent/child level in the hierarchy. Only the siblings of a
particular row affect its sorting.
4.1
Entering Priority Values
You can enter priority values directly into the grid (in the Priority column) in
text format. Achieve Planner supports both uppercase and lowercase formats
and automatically adjusts them to uppercase for display.
Copyright © 2005-2008 Effexis Software, LLC - www.effexis.com 81
..
..
.
Achieve Planner
Each priority value consists of a range and an optional rank. The range is the
label (A/B/C/D) while the rank is a numeric value from 1 to 2499.
The rank is an optional numeric value from 1 to 2499 with smaller values
having higher priority than larger values (A1 is a higher priority than A2).
You can also leave the rank off with only the letter as the priority (for
example 'A'). Unranked priority values are placed after ranked priority
values: A2499 is a higher priority than A.
As a special shortcut, you can use the value ‘
aa’(without the quotes) to
represent A1.
4.2
Priority Colors
Achieve Planner color-codes rows based on the priority value of the row. For
example, the default color for A’
s is blue. You can change the colors
associated with each priority range using the Tools->Options command
(Display tab.)
When coloring rows, Achieve Planner will either use the priority of the row
directly, or it can use the “
lowest ancestor priority”of the item in the current
view to perform the coloring.
The Use Lowest Ancestor Priority for Coloring checkbox controls which
style is used when coloring rows.
This figure illustrates the difference between the two approaches on a sample
grid:
ß Standard priority coloring
Copyright © 2005-2008 Effexis Software, LLC - www.effexis.com 82
..
..
.
Achieve Planner
Lowest ancestor priority coloring à
Notice how the ‘
Task # 1’row is colored in purple in the second case (even
though the priority is A) because the parent is a B. Similarly, ‘
Sub Sub Task
# 1’is colored black because its parent is a C.
Lowest ancestor priority coloring is more resource intensive than standard
coloring. If you notice performance problems, try turning it off and see if it
improves the performance.
4.3
Prioritization Tools
Achieve Planner provides several tools to help you work with priorities and
prioritized lists. The Insert Before/Insert After commands automatically
shift priorities of existing records to make room for the new items.
You can reprioritize existing records using Drag & Drop. Simply drag the row
from the row selector and drop it on the target row. Depending on the
position of the mouse relative to the target row, the drop arrows will either
be placed above (drop before), center and slightly right (drop as child) or
slightly below (drop after) the target row. The dragged row will assume the
appropriate priority based on the target row. AP automatically shifts the
priority of all other sibling rows accordingly.
You can also use drag & drop to rearrange the order of unranked rows of the
same priority.
You can also use the Edit->Pickup rows(s) and Edit->Drop at Same
Level commands to perform the drop operation using the keyboard. In this
case, the drop is always considered to be a drop before the target row.
The Outline->Move Up and Outline->Move Down commands also
reprioritize rows when used in a prioritized list.
The Outline->Remove Priority Gaps command will reprioritize the records
to remove any gaps between priority values. For example, assume you have
5 records with priorities A4, A7, A, B4 and B7. After removing the priority
gaps, the record priorities would be A1, A2, A, B1 and B2.
Copyright © 2005-2008 Effexis Software, LLC - www.effexis.com 83
..
..
.
Achieve Planner
The Outline->Reprioritize Unique command will reprioritize the selected
record so that it is the only one with the given priority value and shift the
priority of other records accordingly.
For example, assume that you've changed the priority of a record from A5 to
A1 and now there are two records with A1 priority, but you want the new A1
to be the only record with an A1 priority. Invoking the Reprioritize Unique
command while the record is selected will shift the priority of the other A1
record to A2 and shift all the other A records accordingly.
Automatically Remove Priority Gaps when Completing a Project or
Task
Achieve Planner supports automatically removing priority gaps when
completing a project or task. You can enable this behavior (off by default)
from the Tools->Options->General Tab using the “
Auto-remove priority
gaps on project/task complete”checkbox.
When enabled, Achieve Planner will remove priority gaps of the siblings of a
project/task when it is completed via the grid.
4.4
Prioritize Your Projects
You should start by prioritizing your projects (which represent your
outcomes) based on their importance.
Copyright © 2005-2008 Effexis Software, LLC - www.effexis.com 84
..
..
.
Achieve Planner
I normally assign an A priority to ongoing projects that I'm actively working
on, as well as important long-term projects that I want to continue moving
forward by committing time to them this upcoming week.
Your A projects represent outcomes that you have decided are important
enough to commit time to on a regular basis.
I then use ranking to add an element of focus to my projects. Those that
are both important and urgent get a high rank (A1, A2, A3, etc.) For me,
priority ranking identifies the items that I'm currently focusing on.
These projects will get the bulk of my time during the week, but I’
ll still
reserve some time for other A projects.
I leave the rest of the projects with an unranked priority (A) to remind me
that they are important, but not my top focus for this upcoming week.
The Weekly Planning section describes a simple mechanism you can use to
allocate some time to projects with long-term importance each week. You
would be surprised at how much progress you can make by giving even a
small amount of time to your important long-term projects on a regular
basis.
I assign a priority of B to projects that are “
under review.”They may very
well be worth moving forward, but they are not important enough to devote
time to them this upcoming week. You can then revisit your decision during
your next weekly planning process.
One common mistake while prioritizing is to automatically assign an A
priority to urgent things, and to push back important long-term projects to B
or even C status.
If a long-term project truly is important, you should make it an A and commit
time to it on a regular basis, even if it is only 30 minutes per week.
I usually leave urgent but non-important projects/tasks as either B's or C's,
which helps me to productively procrastinate on them until I can truly
determine if they are worth doing. Since I review them regularly, I don't
have to worry about them falling through cracks or becoming a crisis.
The C priority category represents projects that I may want to do at some
point in the future, but definitely not right now. Once I’
ve decided that a
project is a C, I won’
t even consider committing any time to it during the
upcoming week.
Finally, I reserve the D priority for projects and tasks that I'm not planning to
do at all. They are simply not worth my time.
Copyright © 2005-2008 Effexis Software, LLC - www.effexis.com 85
..
..
.
4.5
Achieve Planner
Review Your Priorities Weekly
One of the dangers of using priority values, especially for projects, is that
you will never make progress on any of your B or C projects and tasks
because there will always be more important A’
s.
Most of the time, this is actually beneficial because of productive
procrastination, but only if your projects are prioritized properly. That is why
the weekly priority review as part of your planning routine is very important.
Think about priorities in terms of your commitment to the project. Your A
projects should be projects that you are willing to commit time to on a
regular basis to either complete them right away, or at the very least to keep
them moving forward.
Pay special attention to your B projects, which are the ones “
under review”
that you haven’
t yet decided to commit to. If you neglect a B project long
enough, it could turn into the latest crisis.
Only you can know whether that B project is worth doing or not. If it is not
worth doing right now, it should remain a B (or even a C.)
4.6
Prioritize Your Tasks
Prioritizing tasks is slightly different than prioritizing projects. In general,
projects are things that you are going to work in parallel during the week, so
the project priorities help you decide which projects to work on, as well as
how much time to devote to them.
On the other hand, you normally work on tasks for a given project
sequentially. You work on the most important thing first until completed, and
then you move on to the next most important thing, and so on. Task
priorities help you decide the ordering of tasks within a given project.
While prioritizing tasks, sub-tasks, and even sub-projects, you should assign
priorities based only on how important the item is relative to its parent.
Let's say you have a project with four tasks. Three of them are important for
the project and one is not that important. I would assign an A priority to the
three important tasks irrespective of the priority of the project (i.e., even if
the project is a B or C) and a B to the remaining task.
You don't need to worry about any other projects or tasks you may have,
just consider how important the item is relative to its parent. Achieve Planner
automatically considers the parent priority when comparing child items.
Copyright © 2005-2008 Effexis Software, LLC - www.effexis.com 86
..
..
.
Achieve Planner
The same holds true for sub-tasks: prioritize them based only on their
importance relative to the parent task.
When prioritizing tasks, I usually start by categorizing them into one of the
ABCD labels without providing a rank. I use A’
s for tasks which must be
done, B’
s for tasks that should be done if time permits, C’
s for tasks that
would be nice to have but are not really necessary, and D’
s for tasks that I’
m
not planning to do at all.
4.6.1 Ranking the Items
Once I have assigned a priority label to all tasks, I focus on the A's and
assign individual priority rank values to the top five to ten items: A1 for
the most important, A2 for the next most important, and so on.
You can usually tell which of two items is more important just by looking at
them. If you are having trouble deciding, just ask yourself: “
If I could only
complete one of these but not both, which one would I choose?" Your choice
represents the more important task.
If you think two tasks are equally important, just assign the same priority
value to both of them.
If you have more than ten items at any given level, you don't have to assign
rank numbers to all of them. Just rank the top five to ten items and leave the
others with their general priority labels (A, B, etc.)
One important benefit of prioritizing is that it allows you to focus on your
most important tasks without getting overwhelmed by everything that you
need to do.
That's why I suggest you only rank five to ten items: it allows you to focus
on a small number of tasks at any given time. If you still find your large task
list overwhelming or distracting, simply move more of your tasks to B or
even C status.
Since Achieve Planner color-codes tasks based on priority, I often don't even
notice the B's or C's when I’
m focused on the A's. Using Achieve Planner, you
can even filter the task list based on priority to help you stay focused on your
top tasks.
4.7
Updating Priority Values
When you complete all your ranked tasks (A1, A2, A3, etc.) for a project, you
can choose the next five to ten most important items from your A's and rank
them appropriately.
Copyright © 2005-2008 Effexis Software, LLC - www.effexis.com 87
..
..
.
Achieve Planner
I usually like to quickly review my B's and C's whenever I complete all my
ranked tasks, just to make sure that they are all in their rightful categories.
You can use this quick review to upgrade any tasks that have gained
importance into A status.
When you run out of A tasks, just go through your B's, and either choose the
next set of A's, or delay working on them if they are not important enough
for you to do right now. This may be an indication that you need to lower the
priority of the project to avoid falling into perfectionism or gold plating.
Copyright © 2005-2008 Effexis Software, LLC - www.effexis.com 88
..
..
.
5
Achieve Planner
Weekly Schedule
This section describes the Weekly Schedule and provides instructions for
using it. The Weekly Schedule is a powerful tool to help you organize your
schedule and manage your time effectively. You can use the tool in several
ways:
•
Use Time Charts to set aside blocks of times for certain activities and
show these times in the Weekly Schedule background (see section 5.2
Working with Time Charts).
•
Enter appointments and all-day events directly into the Weekly
Schedule (see section 5.3 Working with Appointments and Events).
•
Add blocks of time which are allocated for working on a specific project
or task (see section 5.4 Working with Project and Task Blocks).
5.1
Setting Weekly Schedule View Preferences
You can set up the Weekly Schedule view in many ways, so that it works best
for you. For example, by default, the Weekly Schedule uses a 15-minute
resolution, and a five-day week. However, you can change these, and other,
settings.
Copyright © 2005-2008 Effexis Software, LLC - www.effexis.com 89
..
..
.
Achieve Planner
5.1.1 Changing the Time Display Resolution
To change the resolution of the weekly schedule time display, follow these
steps:
1. Right-click an empty cell on the Weekly Schedule.
2. Select the number of minutes you want for each hour increment.
Choose either 5, 6, 10, 15, 30 or 60 minutes.
5.1.2 Changing the Number of Days Displayed
To change the number of days displayed (that is, the number of columns) in
the weekly schedule, select One, Three, Five, Seven, Ten, or Twenty
Days from the View menu.
5.1.3 Viewing Reminders
To view any active reminders when the Reminders Window is closed, select
View->Reminders Window command.
5.1.4 Setting the Week Mode
The Weekly Schedule can be viewed as a five-day work week (Monday
through Friday) or the traditional seven-day week.
Copyright © 2005-2008 Effexis Software, LLC - www.effexis.com 90
..
..
.
Achieve Planner
You can toggle between the two views by selecting View->Work Week
Mode command. (A check mark next to Work Week Mode indicates the
five-day work-week is selected.)
Note: The work-week mode setting works independently of the date
selection. You can use work-week mode while viewing more than
five days.
If there are any appointments or events during a weekend while in work
week mode, you will see a red indicator on the date header between the
Friday and Monday dates.
5.1.5 Using Monthly Calendars
When selected, Monthly Calendars display to the far-right of the Weekly
Schedule. Use the calendars to advance to an upcoming date by clicking the
right arrowhead next to the name of the month. To return to a previous
month, click the left arrowhead.
Double clicking on a date in the monthly calendar will scroll the weekly
schedule display to that date.
To turn the monthly calendar display on and off, toggle the View->View
Monthly Calendars option.
5.1.6 Changing the Date Display
You can change the date displayed in the weekly schedule using various
methods.
In addition to the horizontal scroll bar, you can use the Go->Go to Date
command to pick a date that you want to display.
You can also scroll the display to Today’
s date using either the Go->Today
command, or the Today button in the time chart bar of the weekly schedule
display.
5.2
Working with Time Charts
Time Charts serve as visual reminders to help you focus and balance your
week. Rather than focusing on specific projects, the Time Chart allocates
blocks of time in your weekly schedule for different types of activities, such
Copyright © 2005-2008 Effexis Software, LLC - www.effexis.com 91
..
..
.
Achieve Planner
as health, finances, work, and so forth. Each of these blocks is called a time
chart area.
You can associate these time chart areas with specific Result Areas, or you
can also create independent areas. For example, you could use an
independent time chart area to represent a “
break”period, or your lunch
hour.
Showing a Time Chart in the background, behind active appointments in the
Weekly Schedule, can help remind you that you intended to pursue a
particular activity at a specific time. If you prefer, you can also display the
weekly schedule without a Time Chart.
See section 5.2.2 Displaying a Time Chart in the Background for additional
details.
You can create as many different time charts as you need and easily switch
between then in your weekly schedule display. By doing this, you can change
your focus from one week to another. For example, in one week you may
focus on your finances and career, while the next week you focus more on
relaxation and recreation activities.
5.2.1 Using the Time Chart Information Form
Use the Time Chart Information form to create and edit Time Chart areas
(time slots). This information form provides two tabs: General and Time
Chart Areas. Use the General tab to enter a name and a description for
the Time Chart. Use the Time Chart Areas tab to define and edit Time Chart
areas.
To open the information form, click either the Edit Time Chart or New
Time Chart button from the time chart bar of the Weekly Schedule.
5.2.1.1
Creating a Time Chart Area
To create a new Time Chart area follow these steps:
1. Click the New Time Chart button on the Weekly Schedule’
s time
chart bar.
2. In the General tab of the Time Chart Information form, enter a
name and description for the Time Chart.
Copyright © 2005-2008 Effexis Software, LLC - www.effexis.com 92
..
..
.
Achieve Planner
3. Click the Time Charts Areas tab.
4. At the top of the Time Chart Areas tab, on the gray bar, select the
appropriate Result Area.
Note:
All new Time Chart Areas are color coded and labeled according to
the last Result Area selected. If you do not want to associate a
Time Chart Area with a Result Area, select None as the Result Area
type.
5. Highlight the desired time slot either by dragging the mouse over the
time slot or by holding down the SHIFT key while pressing the
appropriate arrow keys.
6. Select Actions->New Time Chart Area to add a time slot.
7. If you choose, you can enter explanatory text into the time slot by
clicking the time slot and entering text. If this time slot is associated
with a Results Area, the text precedes the Results Area name—which
is now in parentheses.
8. When you are finished with this Time Chart, click the Save and Close
button.
5.2.1.2
Editing a Time Chart Area
To edit the Time Chart Area using the Time Chart Area Information form,
follow these steps:
1. In the Time Chart box at the top of the Weekly Schedule, select the
Time Chart to edit.
2. Click the Edit Time Chart button on the Weekly Schedule time chart
bar.
Copyright © 2005-2008 Effexis Software, LLC - www.effexis.com 93
..
..
.
Note:
Achieve Planner
You can also access the Time Chart Area Information form by
selecting the Go->Time Charts command. From the list of Time
Charts, double-click the one you want to change.
3. When the Time Chart Area Information form opens, make the
necessary changes (see Table 1 Editing Time Charts, on page 94).
4. When you are through making changes, select the Save and Close
option from the File menu.
Table 1 Editing Time Charts
To change this…
Do this…
Name
Type over the existing name.
Result Areas type
1. Click the Result Areas arrow to see the
names from which you can choose.
2. Select the new Result Areas type.
Day,
Time,
and 1. Click the Day, Time, and Duration arrows to
see the other options from which you can
Duration
of
the
choose.
Time Chart Area
2. Select the new options.
Label
1. Ensure the Label check box is selected in
the Time Chart Information form.
2. Click the Edit button.
3. To change the caption (text) color, select a
new color from Fore Color.
4. To change the label (background) color,
select a new color from Back Color.
5. To add a hatch pattern to the label, check
the Hatch box and select a pattern from
the Style box. (You can see the style in the
Preview box.)
6. Click OK.
Description
Enter or edit text in the description box.
Copyright © 2005-2008 Effexis Software, LLC - www.effexis.com 94
..
..
.
5.2.1.3
Achieve Planner
Deleting a Time Chart Area
To delete existing Time Chart Areas, follow these steps:
1. In the Time Charts tab, select the Time Chart containing the area to
delete. If the Time Charts tab is not displayed, use the Go->Time
Charts command to display it.
2. In the Time Chart Information form, right-click the Time Chart area
to delete and select Delete.
3. Click the Save and Close button.
Note:
If you unintentionally delete a Time Chart Area, you can restore the
area by selecting Undo Delete from the Edit menu of the Time
Chart Information form.
5.2.2 Displaying a Time Chart in the Background
Viewing a Time Chart in the background can help you recognize time set
aside for certain activities. To view a Time Chart in the background, follow
these steps:
1. In the Weekly Schedule, click the Time Chart arrow and select the
Time Chart you want to display in the background.
2. Select None if you do not want to display a time chart.
5.3
Working with Appointments and Events
The Weekly Schedule lets you record appointments and events without using
a Time Chart. Appointments have a start and end time; events are
considered to last the entire day (or days). You add details about an
appointment or event using the Appointment or Event Information form.
5.3.1 Creating a New Appointment or Event
To create a new appointment, follow these steps:
1. In the Weekly Schedule, select a time period.
2. Right-click and select New Appointment (you can also select the
Actions->New Appointment command).
3. Complete the Appointment Information form.
Copyright © 2005-2008 Effexis Software, LLC - www.effexis.com 95
..
..
.
Achieve Planner
4. Click Save and Close when you are done.
To create a new event, follow these steps:
1. In the Weekly Schedule, click the gray bar beneath the day(s) for
which the event is scheduled.
2. Right-click and select New All Day Event (you can also select the
Actions->New All Day Event command).
3. Complete the Event Information form.
4. Click Save and Close when you are done.
Note:
To duplicate an existing appointment or event, hold down the CTRL
key and drag the existing appointment or event to the new
location.
5.3.1.1
Opening Appointment and Event Information Forms
You can open the information forms in several ways:
•
Double-click the appointment or event.
•
Select the appointment or event and press ENTER.
•
Select the appointment or event, and from the File menu, select
Open, and Open Selected Item(s).
5.3.1.2
Setting a Recurring Appointment or Event
To set a recurring appointment, follow these steps:
1. Open the Appointment or Event Information form. (Double-click
an existing appointment or event.)
2. At the top of the form, just below the menu bar, click Recurrence.
3. In the Appointment Recurrence window, select the Recurrence
Pattern.
4. Select the Range (start and stop dates).
5. Click OK.
6. Click Save and Close when you are done.
Copyright © 2005-2008 Effexis Software, LLC - www.effexis.com 96
..
..
.
5.3.1.3
Achieve Planner
Setting an Appointment or Event Reminder
To set a reminder, follow these steps:
1. Open the Appointment or Event Information form. (Double-click
an existing appointment or event.)
2. Select the Reminder check box.
3. From the Reminder list of times, select the amount of time needed
for the reminder. Times range from five minutes to two weeks.
4. Click Save and Close when you are done.
5.3.1.4
Setting the “Show time as”Feature
You can show appointment or event times as Free, Busy, Tentative, or Out
of Office. To do this, follow these steps:
1. Open the Appointment or Event Information form. (Double-click
an existing appointment or event.)
2. Click the arrow in the Show time as box.
3. Select the appropriate option from the list.
4. Click Save and Close when you are done.
5.3.1.5
Labeling an Appointment or Event
You can label appointments and events with color-coded descriptions such as
Anniversary, Business, Must Attend, and so forth. To label an appointment or
event, follow these steps:
1. Open the Appointment or Event Information form. (Double-click
an existing appointment or event.)
2. Click the arrow in the Label box.
3. Select the appropriate label from the list.
4. Click Save and Close when you are done.
5.3.1.6
Assigning a Priority to an Appointment or Event
You can assign a priority to appointments and events by entering the priority
into the Priority box of the Appointment or Event Information form.
(Double-click the appointment or event to open the form.) For more
information on priorities, see section 4.
Copyright © 2005-2008 Effexis Software, LLC - www.effexis.com 97
..
..
.
5.3.1.7
Achieve Planner
Assigning an Appointment or Event to a Project
You can assign an appointment or event to a project by selecting a project
from the list that appears when you click the Project button of the
Appointment or Event Information form. (Double-click the appointment
or event to open the form.) For more information on projects, see Working
with Projects and Tasks.
5.3.1.8
Adding Notes and Details to Appointments and Events
You can add additional information about appointments and events by
entering text in the text box at the bottom of the Appointment or Event
Information form. (Double-click the appointment or event to open the
form.)
5.3.2 Editing an Appointment or Event Using the Weekly Schedule
After you have created an appointment or event, you can easily change
subject, date, time, and duration through the Weekly Schedule—instead of
opening the information forms. You can also duplicate the appointment or
event and drag it to a new location.
•
Subject - To change the subject, click in the appointment or event and
enter the new text.
•
Time or Date - To change the time or date, drag the appointment or
event and drop it on the new time or date. To move multiple
appointments or events, hold down the CTRL key and select them with
the mouse. Then drag and drop them as a group at the new location.
•
Appointment Duration - To change the duration of an appointment,
position the pointer at the top or bottom edge of the current allotment
of time (the pointer changes to a vertical double-arrow). Drag the
appointment to its new time duration.
•
Event Duration - To change the duration of an event, position the
pointer at the left or right edge of the current allotment of time
(pointer changes to a horizontal double-arrow). Drag the event to its
new time duration.
•
Duplicating an Appointment or Event – To create a copy of an existing
appointment or event and place it in a new location, hold down the
CTRL key and drag the appointment or event to the new location.
Release the mouse to drop the appointment or event in place.
Copyright © 2005-2008 Effexis Software, LLC - www.effexis.com 98
..
..
.
Achieve Planner
5.3.3 Deleting an Appointment or Event
To delete an appointment or event, right-click the appointment or event and
select Delete.
5.4
Working with Project and Task Blocks
Achieve Planner supports the concepts of project and task blocks, which are
blocks of time that you allocate to work on a specific project or task. These
blocks are central components of weekly planning. They represent
appointments that you have made with yourself to get your important work
done.
The most common way to add project blocks to the Weekly Schedule is to
use the Weekly Planning wizard (see section 9, Weekly Planning Wizard).
However, you can also add project and task blocks manually to the Weekly
Schedule.
5.4.1 Manually Adding Project or Task Blocks
You can manually add project or task blocks to the Weekly Schedule using
the Project Explorer, the Projects and Tasks tabs, and an existing
appointment.
5.4.1.1
Using the Project Explorer to Schedule Blocks
To open and use the Project Explorer, follow these steps:
1. Ensure that you are in the Weekly Schedule.
2. Select the View->Project Explorer command.
Note:
Depending on how you last used Project Explorer, it may open as a
small tab to the right of the calendars (if they are turned on) or it
may open in its own pane. To auto-hide the pane, click the
symbol. To keep the Project Explorer open, click the push-pin
symbol ( ).
3. If you want to add a task block, check the Show Tasks box in Project
Explorer. (If you are only adding a project block, skip this step.)
4. To add a project or task to the Weekly Schedule as a block, select,
drag, and drop the project or task onto the Weekly Schedule. You can
reposition this block by dragging and dropping it at a new location.
Copyright © 2005-2008 Effexis Software, LLC - www.effexis.com 99
..
..
.
5.4.1.2
Achieve Planner
Using Projects or Tasks Tabs to Schedule Blocks
To add a project or task block using the Projects or Tasks tabs, follow these
steps:
1. From either the Projects or Tasks tabs, select a project or task.
2. Right-click, and select Schedule Block. (Alternatively, you can select
Actions->Schedule Block command.)
3. Drop the project or task onto the Weekly Schedule.
4. When you are through placing the block(s), press ESC to close the
block.
5.4.1.3
Using an Existing Appointment to Schedule Blocks
You can link existing appointments to project or task blocks, as follows:
1. In the Weekly Schedule, select an appointment.
2. Right-click, and select Set Project. (Alternatively, you can select
Actions->Set Project command.)
3. Select a project or task (check the Show Tasks box) from the list.
4. Click OK.
5.4.2 Editing a Project or Task Block
Achieve Planner provides many ways to edit project and task blocks.
•
To change the project and task links, right-click and select Set
Project. (You can also use the Actions->Set Project command.)
•
To copy a block to a new location, hold down the CTRL key and drag
the block to the new location. (You can also the Copy and Paste
commands from the Edit menu.)
•
To move blocks to a new time or date, simply drag and drop the blocks
at the new time and dates.
•
To add additional text directly into the block, click and type.
•
To change the appointment information, use the Appointment
Information form. See section 5.3.1.1., Opening Appointment and
Event Information Forms.
Copyright © 2005-2008 Effexis Software, LLC - www.effexis.com 100
..
..
.
Achieve Planner
5.4.3 Deleting a Project or Task Block
To delete a project or task block, right-click and select Delete. You can also
select Edit->Delete command.
5.4.4 Viewing Tasks in a Project Block
To view the tasks associated with a project block, right-click the project block
and select View Tasks. You can also select Actions->View Tasks
command.
Copyright © 2005-2008 Effexis Software, LLC - www.effexis.com 101
..
..
.
6
Achieve Planner
Importing Data from Outlook
Achieve Planner supports synchronization of task, appointment, and contact
data with Outlook. In addition, you can import email messages as Achieve
Planner tasks to help you keep better track of them.
By default, Outlook synchronization only imports data from Outlook, but does
not make any changes to Outlook. If you want to perform a 2-way
synchronization or to export Achieve Planner data to Outlook, you will need
to change the synchronization settings.
6.1
Performing a Synchronization
To perform an Outlook synchronization, select the Tools->Outlook
Synchronization command. This will bring up the Outlook Synchronization
Dialog.
When you are ready to perform the synchronization, click on the Sync Now
button. If you need to change the settings before starting the
synchronization, click on the Settings… button.
You can get specific help for the synchronization dialog by clicking the Help
button, or pressing F1.
6.2
Importing Your Data from Outlook
If you use Outlook, you’
ll probably want to import your tasks, appointments,
and contacts from Outlook to populate your Achieve Planner data.
The default sync settings only import data from Outlook without making any
changes to the Outlook data. If you would like to propagate changes you
Copyright © 2005-2008 Effexis Software, LLC - www.effexis.com 102
..
..
.
Achieve Planner
make in Achieve Planner back to Outlook, or export any other items that
you’
ve created in Achieve Planner to Outlook, you’
ll have to adjust the
settings as described below.
The rest of this section describes how to import your tasks into Achieve
Planner and how to organize them after you’
ve imported them.
Note: To avoid synchronization problems, please make sure that Outlook is
running before starting the sync operation
1. Use the Tools->Outlook Synchronization command to bring up the
synchronization dialog.
2. The default settings import email, tasks, appointments, and contacts
from Outlook. Since this is what you want, you don’
t have to make any
changes to the settings.
Note: By default, completed tasks in Outlook are NOT imported into Achieve
Planner. If you want to import completed Outlook items, you need
to adjust the settings as described below.
3. Click on the Sync Now… button to begin the sync process.
4. After the sync is completed, click on the Close button.
When the sync is completed, any new Outlook tasks that have been imported
into Achieve Planner are stored as tasks of a top-level project called <New
Outlook Tasks>.
This is how four newly imported Outlook tasks look like in the Outline tab.
Notice that the <New Outlook Tasks> project is not assigned to any result
area.
Copyright © 2005-2008 Effexis Software, LLC - www.effexis.com 103
..
..
.
Achieve Planner
You can see that these tasks have a priority value based on their existing
Outlook priority (High priority maps to A, Normal priority maps to B, Low
priority maps to C.)
Any due dates in the tasks are stored as the Deadline of the item.
6.2.1 Organizing Imported Outlook Tasks
To organize your newly imported Outlook tasks, you’
ll want to separate them
into projects and tasks.
Step 1 – Identify Outlook Tasks that Should be Projects
The first thing you should do is identify any of your tasks that should be
projects instead of tasks. This is easiest done from the Outline view.
When you find such a task:
1. Select the task’
s row using the row header.
2. Select the Actions->Convert into Project command to convert the
given task into a project (Ctrl+Shift+C, P)
When you do this, the task is converted into a sub-project of the <New
Outlook Tasks> project. For example, if you do this for “
Outlook Task # 2”in
the example above, the result is:
Notice that the icon for “
Outlook task # 2”has been changed into a project
icon, and that it is now sorted above all the other tasks.
3. Repeat this process for all the other imported Outlook tasks that
should be projects.
Copyright © 2005-2008 Effexis Software, LLC - www.effexis.com 104
..
..
.
Achieve Planner
Step 2 – Move New Projects to Appropriate Result Areas
Using the master outline, drag and drop your newly created projects from the
<New Outlook Tasks> project and drop them as children of the appropriate
result area. For example, work related projects can go into the Work result
area.
Make sure that the red drop arrow is in the middle and slightly to the right of
the result area where you want to drop them (this indicates a child drop.)
Drop As Child à
If you have a large number of projects that you want to drop into the same
result area, you can select multiple rows via the row header by holding down
the Ctrl key as you make your selections before starting the drag.
You can also use the Pickup & Drop commands in the Edit menu to do this
(see section 3.3.7.2 for details.)
Step 3 – Add Any Missing Projects to the Appropriate Result Areas
If there are any other projects that you would like to include, you can add
them directly from the Outline tab. See section 2.1 for an example.
Step 4 – Move Remaining Tasks to the Appropriate Projects
This last step is easier to do from within the Tasks tab, so navigate to the
Tasks tab (Go->Tasks command) and filter it to show tasks for the <New
Outlook Tasks> project.
Now select one or more tasks that you want to move into another project,
and invoke the Actions->Move to Project command. This will display the
“
move to project”dialog where you can select the project where you want to
move the tasks.
Copyright © 2005-2008 Effexis Software, LLC - www.effexis.com 105
..
..
.
Achieve Planner
This will move all the selected tasks into the chosen project.
Just repeat this process until you’
ve assigned projects to all your Outlook
tasks.
6.3
Performing 2-way Synchronizations
By default, the Outlook sync settings are setup to only import data from
Outlook without making any changes in Outlook.
If you want to perform a 2-way sync so that changes you make in Achieve
Planner get propagated to Outlook and vice versa, you need to change the
settings.
Copyright © 2005-2008 Effexis Software, LLC - www.effexis.com 106
..
..
.
Achieve Planner
The various Import/Export checkboxes control the direction of data exchange
between Achieve Planner and Outlook for the various items (like
Appointments, Tasks, and Contacts).
Checking the Import checkboxes means that data is imported from Outlook
into Achieve Planner.
Checking the Export checkboxes means that data is exported from Achieve
Planner to Outlook.
Checking both the Import and Export checkboxes performs 2-way sync of
data between Achieve Planner and Outlook.
Copyright © 2005-2008 Effexis Software, LLC - www.effexis.com 107
..
..
.
Achieve Planner
To learn more about the various options, please refer to the help file for this
dialog (click the Help button or press F1.)
6.4
Advanced Task Settings
The advanced task settings allow you to control various aspects of task
synchronization including the Outlook task folder, encoding of priority and
task information in exported task subjects, and other details.
Please refer to the help file section of this dialog for a detailed description of
each option.
6.5
Conflict Resolution
A conflict occurs when there are changes to both Achieve Planner and
Outlook data since the last time a sync was performed.
For example, if you change a task’
s subject in both Achieve Planner and in
Outlook.
For appointments and contacts, Achieve Planner uses automatic conflict
resolution based on where the item came from originally. If the item was
imported from Outlook, then Outlook data is overwrites AP data in a conflict.
If the item was exported from Achieve Planner to Outlook, the AP data is
used in a conflict.
For tasks, you can specify different types of conflict resolution (in the
advanced task settings) including always use Achieve Planner data, always
use Outlook data, flag the AP task and continue without changes, or manual
resolution to allow you to choose how to handle each case.
Please see the help file section on the advanced task settings for a
description of how to change the conflict resolution.
6.6
Importing Email
If you use Microsoft Outlook® (XP/2003), you can track action-oriented
emails as projects/tasks in your schedule. Here's how it works.
During the first Outlook synchronization, Achieve Planner adds a couple of
folders under your Inbox: Todo, Postponed, and WaitingFor. When you
receive an email message you want to track, simply move it to one of these
folders.
Copyright © 2005-2008 Effexis Software, LLC - www.effexis.com 108
..
..
.
Achieve Planner
During the next Outlook synchronization, Achieve Planner will create a task
for each new email in these folders and set its status accordingly. The task
will remain linked to the email message so you can easily view it even if you
move it out of the Todo folder.
NOTE: In order to import emails from Outlook, you must set the Outlook
settings to Import Email AND select the folders from which you want to
import (Import Todo, Import Postponed, Import WaitingFor). Both of the
checkboxes must be checked.
All new emails are imported under a project called “
<New Email Tasks>”
visible from the master outline. You can move this project under a result
area for new imports.
If you rename this project, a new one will be created in its place.
Copyright © 2005-2008 Effexis Software, LLC - www.effexis.com 109
..
..
.
7
Achieve Planner
Automated Scheduling
Achieve Planner can help you estimate when you can expect to complete
your various projects & tasks based on your effort estimates, your
prioritization, and your weekly schedule.
This process is called “
automated scheduling” because Achieve Planner
determines the target start/end dates of your “
active” projects and tasks
based on information that you provide.
Achieve Planner performs project/task scheduling for active projects and
tasks that are not completed, postponed or in the D priority category when
you invoke the Actions->Reschedule command. This section describes the
process that Achieve Planner uses when scheduling projects and tasks.
Some benefits of automated scheduling include:
•
Get a quick estimate of when you’
ll be able to complete your various
projects & tasks via the target end date, which is based on your own
effort estimates, priorities, and project blocks.
•
Determine ahead of time if you might be unable to meet a deadline.
The schedule status will warn you (with a Behind Schedule status) so
that you can take corrective actions such as increasing the priority of a
project/task, or delaying work on non-essential projects.
•
Determine if you are trying to do too much at the same time based on
the target end dates for your various projects.
Only tasks that are children of projects are included in the automated
scheduling. Tasks that don’
t have a parent project (e.g., that are direct
children of result areas) are not included.
7.1
Turning Off Automated Scheduling
If you would like to perform all start/end date scheduling yourself, you can
disable the automated scheduling feature of Achieve Planner from the Tools
->Options dialog.
Copyright © 2005-2008 Effexis Software, LLC - www.effexis.com 110
..
..
.
Achieve Planner
You can still use lead based scheduling if you would like by checking the
Always use lead time scheduling… box.
7.2
How Automated Scheduling Works
You supply the level of effort, dependencies, resources, and project block
scheduling and Achieve Planner will calculate the target start and end dates
for the tasks and associated projects. Each task within a project has the
following scheduling values:
•
Target start date - The target start date for the task
•
Target end date - Estimated end date for the task
•
Effort Left - Amount of effort that is still required to complete the
task (this is effort and not calendar duration.) This is the value that is
used for scheduling.
•
Resource Assignments - Resources that are assigned to work on the
task. If you leave this blank, the default resource for the project
and/or result area is used instead (see below.)
•
Dependencies tasks. By default,
sense that higher
tasks. Most of the
•
Constraints - Place limits on when a task can start/end.
Specify when a task can start in relation to other
priorities are used as an implicit dependency in the
priority tasks are scheduled ahead of lower priority
time, you don’
t need to add explicit dependencies.
Achieve Planner only schedules projects and tasks that are marked as "Effort
Driven" (which is the default.)
Non-effort driven projects will use the date and effort values manually set for
their tasks but will not automatically compute them based on resource
availability or effort values.
You can set the Effort Driven flag in the Project Information Form or Task
Information Form or via one of the “
Active Recurrence”views.
7.2.1 Lead Time Based Scheduling
Lead time based scheduling provides a convenient way to schedule the target
start date for projects/tasks with deadlines.
The “
Lead Time”field value (available through the project/task information
forms and/or scheduling views) specifies the number of days prior to the
project/task deadline when you want to start the project/task.
Copyright © 2005-2008 Effexis Software, LLC - www.effexis.com 111
..
..
.
Achieve Planner
Here is the lead time in the task information form:
As well as in the project information form’
s General tab:
It is also available as a default column in the following views (you can always
add it yourself to any of the other views):
•
Active Project Recurrence
•
Active Task Lead Time
•
Active Task Recurrence
For example, if you set the lead time to 10 days, the target start date is set
to 10 days before the deadline. You could do this, for example, to set the
start date for your “
Thanksgiving Dinner”project to 20 days before the big
date.
Lead time based scheduling only applies to items with deadlines.
Projects/tasks without deadlines will not be affected by the lead time values.
The Tools->Options dialog contains a setting that controls whether to
always use lead time based scheduling for items with deadlines (and valid
lead times) irrespective of whether they are effort driven or not, or whether
to only do this for projects/tasks that are not effort driven. Please refer to
the help file for more details on this setting.
The target end date is not affected by the lead time. Depending on whether
the item is effort driven or not, Achieve Planner will either automatically
compute the target end date based on effort estimates as part of automated
scheduling (effort driven), or it will have to be set manually.
Copyright © 2005-2008 Effexis Software, LLC - www.effexis.com 112
..
..
.
Achieve Planner
7.2.2 Project Start
You can set the target start date for the project manually or leave it blank. If
you leave it blank, it will automatically be set to Today during scheduling.
You can use the Project Start value to specify that a project will begin
sometime in the future rather than now. If you've previously specified a
project start date, but now want the project start to be adjusted when
projects are rescheduled, you need to clear the existing value (clear using
backspace key on Target Start Date cell) before issuing the reschedule
command.
7.2.3 Effort Values
Achieve Planner uses level of effort values to measure the amount of work
needed to complete a task. The level of effort is the amount of work that it
would take an average person in your team to complete the task if they
spent 100% of their time on it.
It is not the same as the calendar duration of the task, which depends on
factors such as resource assignments, holidays/vacations, weekends, etc.
With the effort measure, you can compare one task against another
irrespective of what else was going on during that time. The level of effort is
the same whether you can devote one hundred percent or only fifty percent
of a resource's time to the task.
You can use the following units when setting effort values:
Minutes (m or min)
5m
Hours (h)
20.5 h or 20:30 h (20 hours 30
minutes)
Days (d)
2 d (a day is considered to be 8
hours)
Weeks (w)
1 w (a week is considered to be 40
hours)
When a project has no tasks associated with it, it is treated for scheduling
purposes as if it had a single task with no dependencies/constraints and with
the same target start and effort left as the project.
Copyright © 2005-2008 Effexis Software, LLC - www.effexis.com 113
..
..
.
Achieve Planner
You can specify the target start date for a project, which will be used to
schedule all tasks for that project.
7.2.4 Default Task Scheduling Order
The scheduling algorithm processes tasks in order of project & task priority
(A1 tasks before A2 tasks, etc) using the specified resource allocation until
the task is completed.
If multiple projects/tasks share the same resource, projects/tasks with
higher priority take precedence over projects with lower priority as follows:
"A" priority tasks of all "A" priority projects (ordered by project/task priority)
"B" priority tasks of all "A" priority projects (ordered by project/task priority)
"A" priority tasks of all "B" priority projects (ordered by project/task priority)
"B" priority tasks of all "B" priority projects (ordered by project/task priority)
"C" priority tasks of all "A" priority projects (ordered by project/task priority)
"C" priority tasks of all "B" priority projects (ordered by project/task priority)
All tasks of "C" priority projects (ordered by project/task priority)
D priority projects/tasks are not scheduled.
You can also use project or task resource assignments to limit the amount of
a resource that is available for a particular project/task therefore making part
of the resource available to spend some of his/her time in other
projects/tasks with lower priority.
Note: Project block scheduling, described in a later section, can alter the
order in which projects and/or tasks are scheduled for a particular
day
7.2.5 Next Action Reminder Tasks
A task with an expected and effort left values of 0 (0 h) is considered a “
next
action reminder”task and is not scheduled.
NOTE: This is not the same as a ‘
Next Action Only’list as used in the Outline.
Copyright © 2005-2008 Effexis Software, LLC - www.effexis.com 114
..
..
.
Achieve Planner
These tasks are useful if you just want a reminder of where you left off, or
just want to add a quick sub-note to a task without including it in the
scheduling.
When you add a new child task to an existing task that has already been
started or to a “
next action reminder”task, Achieve Planner automatically
initializes the effort values of new tasks to 0, thus making it a “
next action
reminder”task as well.
Otherwise, new tasks are initialized with an effort of 30 minutes.
7.2.6 Summary Tasks
A task with scheduled children is considered a summary task for scheduling
purposes and does not contribute directly to the level of effort for tasks. All
the scheduling information for the children is used to calculate the values for
the summary task.
The only meaningful fields are:
Dependencies - Dependencies placed at the summary task level affect all
children
Resource Assignments - Any resource assignments at the summary task
level are used by default by any child tasks that don't have explicit
assignments
Note: If a parent task only has “
next action reminder” tasks as children,
then it is NOT considered a summary task and will be scheduled
7.2.7 Project Block Scheduling
When using project block scheduling, Achieve Planner’
s scheduling algorithm
proceeds in two stages:
The scheduling algorithm proceeds in two stages:
•
Stage 1 uses ONLY the project/task blocks in the weekly schedule
(up to a user defined date) to determine how much time is available
for different projects and/or tasks
•
Stage 2 uses the project/task priorities and resource assignments to
determine in what order to schedule the projects and how much time
is available for each one.
Copyright © 2005-2008 Effexis Software, LLC - www.effexis.com 115
..
..
.
Achieve Planner
Because AP can't know when stage 1 should end and stage 2 begin, it relies
on user settings to distinguish between them.
Whenever you perform a Reschedule operation (Actions->Reschedule), the
following dialog is displayed (unless you’
ve explicitly turned it off by checking
the “
Don’
t ask again”checkbox.)
In this dialog, select “
Don’
t use project blocks for scheduling”if you would
like to perform default priority based scheduling (Stage 2 only) while
bypassing stage 1 and not considering your weekly schedule project blocks.
Select the “
Use project blocks for scheduling until the following date”option
and provide an end date if you would like to consider your weekly schedule
projects blocks (Stage 1) until the given date. Normally, this is the end of the
current week.
Any tasks scheduled beyond the end of the date range will revert to the
default priority-based scheduling algorithm (stage 2.)
You can also use the Tools->Project Block Scheduling Options command
to modify the settings and uncheck the “
Don’
t ask again”box.
Stage 2 Resources
Achieve Planner creates two default resources to represent your personal and
work time. These resources are “
Me(p)”for personal, and “
Me(w)”for work.
For tasks assigned to your personal and/or work resources, which is the
default when there is no assignment at the task or project level, you can
specify the amount of effort available on a given date based on the project
blocks scheduled in the Weekly Schedule view on that date.
Copyright © 2005-2008 Effexis Software, LLC - www.effexis.com 116
..
..
.
Achieve Planner
For example, if you have project blocks on Monday representing 5h of time
for “
Project A”and 1h for “
Project B,”then this is how much time will be
scheduled for these projects on this date. Any other projects will be
scheduled as if there is no available time on this date.
Taking advantage of project block scheduling allows you to use weekly
planning and account for interruptions and meetings when scheduling your
tasks for the week.
If you only schedule 4 hours of project blocks for a given day, Achieve
Planner will only assume that you have 4 hours to work on your projects and
the rest is taken up with interruptions, meetings, or other unscheduled
activities.
Only project/task blocks contribute to the automated scheduling. The time
chart areas (which appear in the background of your weekly schedule) are
not used during scheduling and do not influence the scheduling of projects
and tasks.
Copyright © 2005-2008 Effexis Software, LLC - www.effexis.com 117
..
..
.
8
Achieve Planner
Working with the Task Chooser
This section describes the Task Chooser and provides instructions for getting
the most from it. To open the Task Chooser, select it from the Go menu.
The Task Chooser helps you choose what task to work on next by displaying
a list of leaf tasks (and task-less projects) across all your projects sorted
using a scoring formula that is intended to display the “
best”tasks to work
on based on priorities, deadlines, and other factors. It helps you choose the
next task to work on and answer the question “
What is the best use of my
time right now?”
The Task Chooser uses a numeric score value to sort the items. It also
provides several filters to include or exclude certain items in the list.
For sorting tasks in the Task Chooser, sub-item priority ranks are relative to
the parent. If you change the parent priority or rank, the Task Chooser
automatically adjusts the importance of all its sub-items relative to other
items in the list.
At every level in the hierarchy, when a parent becomes more important
(higher priority), the children become more important as well. When a parent
becomes less important (lower priority,) its children are also considered less
important.
Bonus ranking in the task chooser:
•
Focus - Achieve Planner adds a priority “
bonus”for any item with the
“
Focus”field checked.
•
Deadline - Achieve Planner adds a priority bonus to items as their
deadline approaches or becomes overdue.
•
Start & End Time - Achieve Planner can also add a priority bonus as
start and end dates approach.
These factors are configurable via the Task Chooser settings.
8.1
Understanding the Task Chooser Window
You have a lot of control over the look and behavior of the Task Chooser. For
example, you can select the columns displayed and you can change numeric
settings and filtering that result in the displayed list. The main task chooser
window is shown below. The Task Chooser Window Description table
identifies the areas and behaviors of the main Task Chooser controls.
Copyright © 2005-2008 Effexis Software, LLC - www.effexis.com 118
..
..
.
Achieve Planner
Task Chooser Window Description
Name / Action
Selection Bar
Grid
Description
• View button - selects the current view that
affects the scoring and filtering of the tasks
displayed in the chooser.
• Settings button - changes the scoring/filtering
settings for the current view.
• Show Less / Show More buttons - control the
number of items displayed in the list.
• Date dropdown – change the date filtering for
the current view.
• Project - displays the name of the project
associated with the current selected item.
Displays the items in the list sorted by their score.
Parents Docking Displays the parents of the selected item in the
Panel
outline.
Copyright © 2005-2008 Effexis Software, LLC - www.effexis.com 119
..
..
.
Achieve Planner
Name / Action
Description
Double-click or
(CTRL+ENTER)
any row item
Navigates to the item’
s row in the corresponding
Project or Task List.
File > Open > Opens the Information form associated with the
Open Selected
item (Task Information or Project Information).
or (CTRL+O)
8.1.1 Changing the Task Chooser View
Achieve Planner currently supports the following task chooser views:
•
Best Overall – Best tasks across all your projects regardless of result
area.
•
Best in Project Block – Displays the best tasks in the current project
block (weekly schedule) for the current time. If there is no current
project block, displays best overall instead.
•
Best work-related – Displays the best tasks across all projects
belonging to work result areas (in the Work category.)
•
Best personal –Displays the best tasks across all projects belonging to
personal result areas (in the Personal category.)
•
Urgent – Displays urgent tasks across all projects. Has different
scoring values for dates.
•
Deadlines – Displays tasks with deadlines across all projects. Has
different scoring criteria for deadlines.
Note:
The Task Chooser uses a scoring formula to decide what "best"
means in each view. It is a combination of the weighted priority
score, taking into account the priority of the item and all its
ancestors, its deadline, and the target start and end dates. The
meaning of "best" is configurable by changing the Task Chooser
settings for each of the views (see section 8.2.).
To change the view, click the View arrow on the Selection Bar and select the
new view.
Copyright © 2005-2008 Effexis Software, LLC - www.effexis.com 120
..
..
.
Achieve Planner
8.1.2 Changing the Number of Visible Tasks
You can adjust the number of visible tasks by clicking the Show More and
Show Less buttons on the Selection Bar. The label in the middle indicates
how many tasks are displayed and how many total tasks are available in the
view.
In this case, only 10 of 31 total tasks are displayed in the task chooser list.
8.1.3 Filtering Tasks by Dates
To change the date filter, click the Date arrow on the Selection Bar and
select the new date filter.
The following date filtering values are supported:
•
None –No date filtering is performed
•
Current – Shows started tasks with “
In Progress” (IP) or “
Should
Delegate”(SD) states, or non-started tasks with a Target Start Date of
Today or earlier (or no start date established), or with an ancestor
deadline on or before Today.
•
Overdue –Shows tasks with an ancestor deadline before today.
•
Behind Schedule – Shows tasks with a target end date before today
or an ancestor deadline before today.
•
Due Soon – Shows tasks with a target end date or ancestor deadline
that is due soon.
•
Next Seven Days – Shows tasks with a target start date, target end
date, or ancestor deadline occurring in the next seven days or earlier.
•
Next 14 Days –Shows tasks with a target start date, target end date,
or ancestor deadline occurring in the next 14 days or earlier.
•
Next 30 Days – Shows tasks with a target start date, target end
date, or ancestor deadline occurring in the next 14 days or earlier.
The date filter only affects which tasks are displayed in the task chooser list,
but does not affect the scoring of the tasks.
Copyright © 2005-2008 Effexis Software, LLC - www.effexis.com 121
..
..
.
8.2
Achieve Planner
Changing Task Chooser Settings
You can adjust the settings used to score items in the current view. When
you change settings, the new settings will only apply to items in the current
view. Other views will retain their own unique settings.
To change the settings, click the Settings button on the Selection Bar.
8.2.1 Scoring Formula
The task chooser scoring formula uses the priority value of each item (and all
its ancestors) to determine the “
priority multiplier”of the item, which is a
number between 0 and 1.
To compute the priority multiplier, each priority value in the item's outline
hierarchy is converted into a number between 0 and 1 (based on the
priority’
s A/B/C/D category as well as the rank). The value is then adjusted
based on the depth of the item in the outline. The deeper the item, the less
its priority affects the overall multiplier.
For result areas in the outline, either the result area importance or its priority
is used to compute the multiplier depending on the settings.
All the priority values for the item and its ancestors are then multiplied
together to determine the overall priority multiplier.
For example, assume that your outline looks something like this, with the
individual priority multiplier for each item shown in parenthesis:
•
Project A (1.0)
o
Task # 1 (0.9)
§
SubTask #1 (0.9)
In this case, the overall priority multiplier for subtask#1, would be obtained
by multiplying the priority multiplier values of it and all its ancestors: 1.0 *
0.9 * 0.9 = 0.81
Once the priority multiplier is determined, each item is awarded a number of
points for things like importance, item status (overdue/behind schedule,
etc.), how close the item is to its deadline or end date, and the target start
date. These points are then added together to obtain the total number of
points for the item.
Copyright © 2005-2008 Effexis Software, LLC - www.effexis.com 122
..
..
.
Achieve Planner
The overall score of the item is the product of the priority multiplier and the
total points. Both the points and the overall priority multiplier of the item are
used to determine the score.
Tasks in the chooser are sorted according to the overall score of each item.
8.2.2 Item Filtering
In addition to the sorting of items in the list based on their individual scores,
the task chooser also performs filtering of items to limit the number of items
displayed.
The following factors affect the filtering in different views:
» Whether the item has active children
» The project associated with the item
» The amount of time remaining in the current project block
» The result area category for the item
» The position of the item in the list (filter by number of items)
» The schedule status of the item (behind schedule/overdue)
» Target Start Date and/or Deadline of the item (for date filtering)
How are items included in the list?
1) Only active (not completed) items are shown in the list.
2) If the list is filtered by result area category, only items belonging to the
selected category appear in the list.
3) If the list is filtered by current project/task block, only items belonging to
the current project or task appear in the list.
3a) You can choose to allow overdue and behind schedule items to override
the project block filtering. If that is the case, the items will be shown in the
list if they are overdue or behind schedule respectively.
This is useful if you want to be aware of overdue items regardless of project
or project block.
4) If the list is filtered to fit in the current project block, only items that can
be worked on within the current block (based on effort left) appear in the list.
Copyright © 2005-2008 Effexis Software, LLC - www.effexis.com 123
..
..
.
Achieve Planner
For example, if the current project block has 45 minutes of time remaining,
and the task list has items of 15 minutes, 2 hours, and 30 minutes ordered
based on their score, only the 15 minute and 2 hour tasks are shown.
5) Only items that don't have children, or whose children are all completed
are shown.
An exception is made for tasks with incomplete "next action" reminders, in
which case the parent task and all the reminders are shown in outline form.
Note that this rule will also allow active projects to appear in the list if they
have no tasks or sub-projects, or if all their children have been completed
but the projects themselves have not been marked as completed.
6) If the list is filtered to a certain number of items, any items over the limit
that were not filtered by any of the previous rules will not be shown.
The Show More/Show Less buttons in the task chooser extend the limits of
the filtering to change the number of items shown.
In general, show more will extend the "fit in project block" rule to allow more
items in the current project block to be shown, as well as extending the total
number of items shown. Show less has the opposite effect.
8.3
Only Show Next Item for Project
In some cases, you may want to view only the next task for each project in
the Task Chooser list, rather than all available tasks across projects. This can
greatly reduce the number of displayed tasks and can make it easier to select
the best task to work on next.
The task chooser supports this filtering logic using two flags in the Task
Chooser settings dialog (can be set independently for each view.)
Only show next item for project enables or disables the filtering of the
task chooser list to only show one item per project.
Use task priority order for next project items controls which task
associated with each project is displayed in the Task Chooser list.
If this flag is checked, then the task displayed is based on the priority order
in the project’
s task list.
Copyright © 2005-2008 Effexis Software, LLC - www.effexis.com 124
..
..
.
Achieve Planner
If the flag is unchecked, then the task displayed is the highest scoring task
for the project in the task chooser list (taking into account deadlines, and
other scoring criteria), which may not necessarily be the topmost task in the
project’
s task list.
8.4
Task Chooser Settings
Each view has its own set of settings, which can be different from other
views. This means that one view can score items in a completely different
way than another view.
For a detailed description of the task chooser settings, please refer to the
help file or press F1 in the Task Chooser Settings dialog.
8.5
Focus Projects/Tasks
Projects and tasks have a field called “
Focus”that you can use to tag projects
and tasks that represent your current focus. The focus field is available in
several of the standard project/task views, but you can easily add it to any of
the others.
The focus field affects the scoring of projects & tasks in the task chooser by
adding a “
bonus”to any item that has its focus field checked, or that has a
parent with the focus field checked.
The bonus value is configurable through the task chooser settings.
For example, if you focus tag a project, all its tasks receive the focus bonus.
If you only tag a particular task, only that task (and any of its children) get
the focus bonus.
The focus bonus is an easy way to make certain projects & tasks appear
higher in the task chooser than they would otherwise based only on their
natural score.
Copyright © 2005-2008 Effexis Software, LLC - www.effexis.com 125
..
..
.
9
Achieve Planner
Weekly Planning Wizard
Achieve Planner Pro & Productivity Suite editions contain a weekly planning
wizard that supports the weekly planning process.
I typically use the wizard as my first task Monday mornings just after doing a
quick scan on my email to identify anything important that may affect how I
plan the week.
I also do a quick review and reprioritization of projects before invoking the
wizard since it is often easier to do this from the Projects tab or the Outline
tab.
The wizard consists of five steps that pretty much follow the steps outlined in
these articles.
9.1
Step 1
This step in the wizard combines the review of your result areas and main
projects for each area.
Result areas represent your major life dimensions or roles. Examples could
be health & fitness, work, finances, career, and personal development.
Your weekly planning routine is a perfect opportunity to give a quick review
to your mission statements for each area, just to get in touch with the
general direction you want your life to take.
Doing this on a weekly basis allows you to take a longer-term perspective
into account during your short-term weekly planning sessions.
For now, just keep in mind that weekly planning helps you to connect your
longer-term perspective and goals with your short-term planning efforts.
In this step, you can also review your main projects for each area.
The purpose of this review is to make sure that all your projects are getting
the time and attention they deserve, and that the priorities that you’
ve
assigned to them are still valid for this upcoming week.
I recommend that you review all your active projects, not just the ones for
this week; by doing this, you can easily catch projects that you’
ve been
neglecting or that you may have forgotten about.
Copyright © 2005-2008 Effexis Software, LLC - www.effexis.com 126
..
..
.
Achieve Planner
If you notice that the priorities for one or more projects are not reflecting
what is most important in your life right now, or you have some new projects
that need to be prioritized, reprioritize them now before continuing.
You may also want to think about any new projects, work, action items,
commitments, or anything else that you need to get done that is not already
in your master project list.
9.1.1 Focus Areas
During your review, you should also begin to think about the areas you want
to focus on this week.
A week is often too small of a period to cram all the different types of
activities that are part of your life.
Rather than try to do a little bit of everything each week, you may want to
give each week a focus, and concentrate more deeply on a smaller number of
areas. Most people do very well with three main focus areas each week,
although you can add more if you need to.
This doesn’
t mean that you should ignore all the other areas, it just allows
you to focus more on some of them for this particular week.
You can then vary the focus from week to week to add more balance over
time.
This approach allows you to give a meaningful amount of time to each area,
while at the same time creating long-term balance and variety over a period
of several weeks.
Copyright © 2005-2008 Effexis Software, LLC - www.effexis.com 127
..
..
.
Achieve Planner
You can review the mission statement and guiding principles for each area,
designate whether you want to make it a focus area for the week, and review
your projects.
This is also a good place to add projects for the result area, or update your
project priority values as necessary.
9.2
Step 2
In this step, you can rewrite your major dreams and goals, which you can
define with the Achieve Planner Productivity Suite edition.
Rewriting your dreams and goals during the weekly planning process brings
them into focus and ensures that you at least think about them during your
short-term planning.
9.3
Step 3
In this step, you can select your ideal week time chart based on the focus
areas you chose in step 1. You can also block out any meetings or
appointments that you have for the week so that you won't use them during
the project block scheduling.
Copyright © 2005-2008 Effexis Software, LLC - www.effexis.com 128
..
..
.
9.4
Achieve Planner
Step 4
This step is where you decide the amount of time that you want to commit to
your various projects this week.
Achieve Planner automatically creates two resources for you when you create
a new file. One represents your work related time, while the other represents
your time for personal projects.
The time commitments you make in this step are used in the next step to
determine how many project blocks to create for each project.
As I mentioned before, you probably should not schedule 100% of your time
using big rock project blocks unless you have a structured work environment.
You need to leave some free time to deal with unexpected events.
You can use the "% left" field to guide you in your decision of how much time
to leave unscheduled.
By default, Achieve Planner creates two default resources for you. The first
resource ("Me(w)") represents your work time, while ("Me(p)") represents
your personal time.
In Step 4, you will see the following information for each of these resources:
The values are based on the Resource information for the two default
resources. You can change the available time and other resource details
using the Resource Information form. Navigate to the Resources tab (Go->
Resources) and double click on the resource that you want to change.
9.5
Step 5
In the final step, you use drag and drop to create project blocks for each of
your big rock projects identified in step 4.
Copyright © 2005-2008 Effexis Software, LLC - www.effexis.com 129
..
..
.
Achieve Planner
This step helps you put your big rock projects into your schedule first, and
allows you to make time for important long-term projects that may not yet
be urgent.
The project blocks are ordered based on the priority of the items and
whether you selected them as MVPs in step 4 (MVPs go first.)
You can use the controls in the form to change the project block size and the
collision resolution.
Copyright © 2005-2008 Effexis Software, LLC - www.effexis.com 130
..
..
.
Achieve Planner
10 Using Achieve Planner for Goal Setting & Achievement
Achieve Planner Productivity Suite edition contains several features to help
you identify, set, plan, track, manage and achieve your goals.
This section describes some of the main goal setting features and shows you
how to use them; however, describing the goal setting and achievement
process that the software is based on is beyond the scope of this manual.
For more information about the process of setting and achieving goals,
including
how
to
use
these
various
tools,
please
visit
www.GoalsToAction.com.
10.1 The Master Outline
The master outline tab (Go -> Outline menu item) provides a bird’
s eye view
of all your result areas, dreams, goals, projects and tasks.
It’
s one of the primary ways to view the relationships between result areas,
which represent your life dimensions or roles, your dreams/goals, which
represent targets that you are aiming for, and projects/tasks that are used to
move toward these targets.
Achieve Planner’
s dreams & goals are treated as a special kind of project in
the sense that you can have a goal at any point in the hierarchy that you
would have a project.
NOTE: Even though you technically can have goals as children of projects, we
recommend against this practice.
To add a dream or goal in the master outline, simply insert a new record, for
example, as a child of a result area, and select dream or goal as the record
type.
Copyright © 2005-2008 Effexis Software, LLC - www.effexis.com 131
..
..
.
Achieve Planner
10.2 Life Plan Tab
The Life Plan tab is accessible through the Go menu (Go -> Life Plan) and
provides a free form note editor where you can store your strategic life plan.
The details of developing a strategic life plan are beyond the scope of this
guide, so please visit www.GoalsToAction.com for more information.
10.3 Result Area Information Form
Result areas represent your top-level life dimensions or roles. You can view
them as part of the Outline tab or through the Result Areas tab, both of
which are accessible through the Go menu.
The result area information form allows you to plan and store more details
about each of your result areas.
You can access the form by double-clicking on a result area row, pressing
Ctrl+Enter, or using the File -> Open -> Open Selected Item menu item.
These are the main components of the form:
General Tab
•
•
•
•
•
•
•
•
Name –Name of the result area
Category –Main category for the result area (personal or work)
Priority –ABCD priority for the result area. It’
s used for sorting the
result areas and, depending on the settings, can be used in the task
chooser scoring formula as well
Description – Description of the result area
Importance –Importance of the result area relative to other areas. A
value from 0 to 100 that is used in the task chooser
Label –The label is used for blocks associated with this result area in
time charts
Default Resource –Default resource to use for projects/tasks in this
result area. If left blank, the default resource for the result area
category (work/personal) is used instead
Reason –The reason why this result area is important, or not as
important as other areas
Mission Tab
The mission tab is where you capture your mission statement and guiding
principles specific to this result area.
Copyright © 2005-2008 Effexis Software, LLC - www.effexis.com 132
..
..
.
Achieve Planner
Vision Tab
Capture your ideal outer (what you’
ll experience on the outside) and inner
(what you’
ll feel and think on the inside) vision for this result area.
You can also associate one or more images with this result area using the
“
Images…”button.
Wish List Tab
Capture the wish list for the result area. NOTE: You can also capture the wish
list using the Wish Brainstorming Wizard.
SWOT Tab
Perform your SWOT (strengths, weaknesses, opportunities, threats) analysis
for this result area.
10.4 Goal Information Form
The goal information form helps you plan and store more detailed
information about each of your goals.
You can access it by opening the goal rows from the Outline or Goal tabs
(double click, Ctrl+Enter, or File -> Open -> Open Selected Item menu).
A detailed description of what each available item in this form means and
how to use it to achieve your goals is beyond the scope of this manual.
Our Goals to Action courses
(www.GoalsToAction.com)
cover
this
in
much
greater
detail
General Tab
•
Title –This is a short description of the goal that you can use to
recognize and distinguish this from other goals (Example: Reach 170
pounds by the end of 2008)
•
Result Area –The result area that the goal belongs to. You can change
it here or through the master outline.
•
Range –Range of the goal (month, quarter, year, etc.)
•
Priority –Priority of the goal compared to other sibling goals of the
same parent
•
Status –Status of the goal (Not Started, In Progress, etc.)
Copyright © 2005-2008 Effexis Software, LLC - www.effexis.com 133
..
..
.
Achieve Planner
•
Dream –Checked if this is a dream, unchecked if it’
s a regular goal
•
Deadline –Deadline for the goal
•
Planned Start –Planned start for the goal (if it has one)
•
Values –Values that the goal contributes to. These are available
during the daily goal review
•
Question –A question that helps you think about the goal and the
actions you can take to make progress
•
Affirmation –A statement affirming the goal or a key belief associated
with the goal
•
Definition –More detailed definition of the goal
•
Purpose –Purpose or main reason why this goal is important
Benefits Tab
A list of the benefits associated with this goal. Listing benefits is a way to
uncover the real reasons behind the goal and provide additional motivation
and reasons why it’
s important to complete it.
Vision Tab
•
Vision –A more detailed vision of the outcome associated with the
goal and what things will be like when it is completed
•
Images –Link images in your PC with this goal
•
Review –Review images associated with this goal
•
Kind of Person –The kind of person you will need to be (or become) to
complete this goal successfully
•
Personal Changes –Specific personal changes you will need to make
to complete this goal
Obstacles Tab
•
•
•
Baseline –The baseline is the starting point or current state of your
goal
Limiting factor –The limiting factor is the single biggest bottleneck
that is most preventing you from making progress
Obstacles –List of obstacles associated with the goal. Uncovering
obstacles (and figuring out how to overcome them) is a great way to
develop a winning strategy
Copyright © 2005-2008 Effexis Software, LLC - www.effexis.com 134
..
..
.
Achieve Planner
Strategy Tab
•
•
Strategy –A description of the strategy you are planning to use to
achieve this goal. This is your high-level plan.
Actions –Actions refer to ongoing actions or activities that you will
take on a regular basis as part of your goal, as opposed to one-time
steps or projects that you need to complete.
NOTE: If you prefer, you can also capture actions as recurring projects or
tasks associated with your goal.
Beliefs Tab
•
Empowering beliefs –These are beliefs that you want to have about
your goal to counteract any negative or limiting beliefs that you may
have developed.
Resources/Environment Tab
•
•
Resources –Resources that you have at your disposal to help you
complete this goal
Environment –Changes that you can make to your environment or
lifestyle to support you in completing and maintaining this goal. You
can include developing these as part of your strategy.
Team Tab
A list of people who can help you achieve your goal.
Rewards Tab
List of rewards associated with the goal and the conditions for getting them.
Progress Tab
•
•
•
Goal Progress Reviews –Determine whether the goal is included in the
goal progress tracking feature and with what frequency.
Goal Progress –List your numeric goal progress scores for different
dates
Goal Wins –List one time “
wins,”“
milestones,”or accomplishments for
your goal
Copyright © 2005-2008 Effexis Software, LLC - www.effexis.com 135
..
..
.
Achieve Planner
Metrics Tab
List of all the metrics directly associated with this goal
Notes Tab
Freestyle notes for this goal
10.5 Goal & Result Area Images
Achieve Planner allows you to link one or more images with result areas,
dreams, and goals.
Keep in mind that these are only links to already existing images on your PC
and they are not stored within the Achieve Planner data file itself. Achieve
Planner uses the directory and filename to find and display these images, so
if you move them in your hard drive, Achieve Planner will not be able to find
them.
That’
s why we recommend creating a special folder in your hard drive where
you can store all images that you plan to associate with result areas or goals.
For example, c:\GoalImages
10.5.1
Associate Images with Result Areas
To associate images with result areas, click on the ‘
Images…’button on the
Vision tab of the result area information form. You can add, edit or remove
images from the dialog.
You can also review existing images by clicking the ‘
Review…’button on the
same tab.
10.5.2
Associate Images with Goals
To associate images with goals, click on the ‘
Images…’button on the Vision
tab of the goal information form. You can add, edit or remove images from
the dialog.
You can also review existing images by clicking the ‘
Review…’button on the
same tab.
10.5.3
Reviewing Images
You can use the Tools -> Motivational Images… menu item to review all your
motivational images.
Copyright © 2005-2008 Effexis Software, LLC - www.effexis.com 136
..
..
.
Achieve Planner
If you use this menu item from the result area or goals tab, you can choose
to display only the images associated with the select result area(s) or goal(s)
by ensuring the ‘
Selected items only’box is checked.
Otherwise, you can check the ‘
All Result Areas,’ ‘
Active Goals’ and
‘
Completed Goals’to select which images you want to view.
In addition, you can also select to view motivational images from a particular
folder in your hard drive by selecting it in this dialog.
10.6 Goal Progress Tracking
This feature helps you track your progress for different goals by assigning a
numeric score between 1 and 10, where 1 represents very little progress
while 10 represents good progress for this goal.
You can choose whether to enable goal progress tracking and how frequently
to track the progress for each goal, in the Progress tab of the goal
information form.
The main goal progress tracking functionality is available from the Tools ->
Goal Progress Tracking menu item.
Copyright © 2005-2008 Effexis Software, LLC - www.effexis.com 137
..
..
.
Achieve Planner
The top list displays a list of goals filtered based on the checkboxes below the
list:
•
•
•
Only show progress review goals –Check to only show goals that have
daily or weekly progress review
Daily review goals –Show daily review goals
Weekly review goals –Show weekly review goals
Below the list is a graph displaying the progress scores for the selected goal
over time. By default, the graph only displays progress over the last 30 days,
but you can view all the progress scores for the goal by checking the View
all progress checkbox.
By default, only the progress for the currently selected goal in the list is
displayed in the graph. You can view progress for multiple goals
simultaneously by unchecking the Only graph progress for selected goal
checkbox.
Here are some of the other options for this dialog:
Copyright © 2005-2008 Effexis Software, LLC - www.effexis.com 138
..
..
.
•
•
•
•
•
•
Achieve Planner
Only show scorecard goals –Limit the display to goals that have the
“
scorecard”checkbox checked in their Progress tab
‘
Rewards…’button –Review rewards associated with various goals
‘
My Wins…’button –Review wins associated with various goals
Print button –Print the graph
Exit –Exit the dialog
‘
Scorecard…’button –Export goal progress/scorecard information to
Excel in comma-separated value format
10.6.1
Goal Progress Reviews
The goal progress tracking feature also helps you perform a daily or weekly
review to help you keep track of progress.
You can perform the review by clicking on the Perform Today’
s Review
button.
Copyright © 2005-2008 Effexis Software, LLC - www.effexis.com 139
..
..
.
Achieve Planner
The dialog goes through all your goals that have progress review enabled
and allows you to enter a progress score from 1 (no progress) to 10 (great
progress) for the goal.
You can add a comment to help you remember why you entered a particular
score on a given day, special challenges that you faced, or ideas to help you
do better in the future.
You can also include a win for the day if you hit a particular milestone or
achieved something significant.
Once you’
ve entered the score, click on the Next button (or press Enter key)
to move to the next goal on the list.
You can also click the Skip Goal button to advance to the next goal on the
list without entering a progress score for the current goal.
The Don’
t Review button not only skips the current goal, but also disables
the goal progress tracking feature for that goal.
Include Weekly Goals checkbox determines whether goals that are flagged
for weekly review (as opposed to daily review) are also included.
The Settings… button allows you to schedule an automatic reminder time
for performing the daily goal progress review. You can also set or change the
goal progress review settings from the Tools->Options menu item.
For more information about the process of setting and achieving your goals,
please visit www.GoalsToAction.com
Copyright © 2005-2008 Effexis Software, LLC - www.effexis.com 140
..
..
.
Achieve Planner
11 Appendix: Advanced Automated Scheduling Settings
This section describes some more advanced details of the automated
scheduling capabilities of Achieve Planners. You don’
t need to review this
section unless you are planning to use some of the advanced features.
11.1 Resources
Resources represent potential for work associated with one or more people.
Typically, each resource represents a single person working on one or more
projects.
11.1.1
Project Resource Assignments
Project resource assignments can help you improve the accuracy of your
target end dates beyond the upcoming week. Because the default scheduling
algorithm uses priorities to determine the scheduling order of tasks beyond
the current week, it can give too much time to some of your projects and too
little to others.
To improve your estimates, you can limit the amount of work that you are
planning to do on a given project by using a project resource assignment.
For example, if you know that you won't be spending more than 50% of your
time on a given project, the resource assignment will ensure that this is the
maximum time scheduled for this project on any given week.
Note: If you are using Project Block scheduling on a given week, the project
blocks override the resource assignment settings for that particular
week.
Each project can also be given a default resource which is used by default for
tasks that have no assignment at the task level (none of the task's ancestors
have an assignment).
You can specify the project resource assignments for each project in the
Team tab of the project information form.
Copyright © 2005-2008 Effexis Software, LLC - www.effexis.com 141
..
..
.
Achieve Planner
This assignment indicates that you ("Me(w)" is your work resource) are only
planning to spend 50% of your time on this project.
Constrained refers to whether this is an ongoing assignment (unchecked), or
constrained to a certain time period only (checked).
You should only have to enter these types of resource assignments for longterm projects if you are concerned about getting a very accurate estimate for
the expected end date of the project.
For most projects, the default settings should work well and give you a good
indication of the changes you need to make to priorities to meet your
deadlines.
11.1.2
Task Resource Assignments
You can explicitly assign the resources assigned to each task using a task
resource assignment (using the “
Assignee(s)” field in the “
Active Task
Schedule Details”view or in the Task Information Form).
Any assignments applied to summary tasks will be used by default for all
children that don't have explicit assignments.
Each resource assignment takes the following form:
resource_name[optional assignment]
where the resource name is the name of a defined resource and the optional
assignment is a percentage value indicating the percentage of the resource
available for the task.
For example, the following assignment says that “
John”can only work 50%
of his time available for the project on this task.
By default, all resources without the optional assignment use a "variable"
assignment, which means that the resource works on tasks in order of
priority devoting 100% of their available effort on top-priority tasks until
completed, and are shared equally among tasks with the same priority.
You can combine multiple assignments by separating them with commas:
JoeSmith, JackRiley[45%]
Copyright © 2005-2008 Effexis Software, LLC - www.effexis.com 142
..
..
.
Achieve Planner
Task assignments are combined with the project level assignments, if any.
For example if a task assignment for Task A is JSmith[50%] and resource
JSmith is already constrained to 50% availability at the project level, JSmith
is only 25% available for Task A.
If a task doesn’
t have an explicit resource assignment, the default resource
assignment for the task is determined as follows:
•
Use the resource assignment of the closest parent task with an explicit
assignment
•
Use the default resource for the project (if it has one)
•
Use the default resource for the project's result area (if it has one)
•
Use the default resource for the result area category (if there is one)
•
Use the standard default resource
By default, Achieve Planner uses the resources representing your own time
(“
Me(w)”and “
Me(p)”
) when there is no explicit assignment based on the
result area category (work vs. personal.)
Copyright © 2005-2008 Effexis Software, LLC - www.effexis.com 143