1
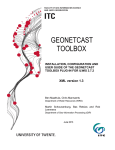
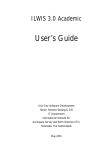
FACULTY OF GEO-INFORMATION SCIENCE AND EARTH OBSERVATION ITC ConversionTool for TimeSeriesData Processing UserManual By: Ben Maathuis and Martin Schouwenburg March 2013 1 Colofon: University of Twente Faculty of Geo-Information Science and Earth Observation Department of Water Resources Department of Geo-Information Processing Date last modified: 20 March 2013 E-mail corresponding author: [email protected] Postal address: P.O. Box 217 7500 AE Enschede The Netherlands Website: http://www.itc.nl and http://52North.org/communities/earth-observation Published by: University of Twente Faculty of Geo-Information Science and Earth Observation Departments of Water Resources and Geo-information Processing © This work is licensed under the Creative Commons Attribution-NonCommercial 3.0 Netherlands License. To view a copy of this license, visit http://creativecommons.org/licenses/by-nc/3.0/nl/ or send a letter to Creative Commons, 444 Castro Street, Suite 900, Mountain View, California, 94041, USA. 2 Releasenotes Following comments have to be taken into consideration with respect to the release of this Time Series Data Conversion Utility: 1. This is the first release of the Time Series Data Conversion tool and utmost care was taken to ensure appropriate operation of the routines developed but at this stage some new functionality might still result in defects and these should be reported to the corresponding author to be addressed in a new release; 2. No liability can be accepted for use of the Time Series Data Conversion tool by the developers; the software tool has been coded by Martin Schouwenburg (email: [email protected]). For any remarks with respect to this utility you can contact him using the email address provided. Some more attention has to be given to the various data types, scaling and offset values which are used for the original VGT products or manipulated products from ILWIS. For this description a byte format is used without scaling and offset applied. Mostly, when using ILWIS output a scaling of 1 and offset of 0 can be applied to use the same values in SPIRITS. This is not applicable when using HANTS or TIMESAT 3. When using this tool you agree and comply with the conditions of the software utilities used as well as the terms and conditions stipulated by other software and data providers for the use or references to the source of the data. 3 Contents 1. Overview to the time series data conversion tool developed .................................................... 5 2. Download and Installation of the tools and exercise data ......................................................... 6 3. Time series data processing and data transformation from ILWIS to SPIRITS ........................... 7 4. 5. 3.1 Introduction ........................................................................................................................ 7 3.2 VGTExtract .......................................................................................................................... 7 3.3 ILWIS for time series data visual inspection ....................................................................... 9 3.4 Map List rename and export to SPIRITS ............................................................................ 10 3.5 Create a Quick look in SPIRITS and export a Quick Look time series ................................ 11 3.6 Creating of animation and using it in a Power Point Presentation ................................... 12 3.7 Data transformation from SPIRITS to ILWIS ...................................................................... 13 Time series data processing and data transformation from ILWIS to TIMESAT ....................... 15 4.1 Introduction ...................................................................................................................... 15 4.2 NDV Data transform from ILWIS to TIMESAT ................................................................... 15 4.3 TIMESAT filtering ............................................................................................................... 16 4.4 Data transformation from TIMESAT to ILWIS ................................................................... 18 Time series data processing and data transformation from ILWIS to HANTS .......................... 21 5.1 Introduction ...................................................................................................................... 21 5.2 Export of time series data from ILWIS to HANTS .............................................................. 21 Appendix 1 Internet Sources of Open Source Software Tools used and time series data ............... 24 Appendix 2 Date stamp renaming formats supported ..................................................................... 25 Appendix 3 Sample Header file listing .............................................................................................. 26 Appendix 4 TimeSat Input Settings Tool, settings for Burkina Faso ................................................. 27 Appendix 5 HANTS settings for IHS processing ................................................................................. 28 4 1. Overviewtothetimeseriesdataconversiontooldeveloped It was noted over and over again that a lot of time is actually spend on preparation of time series data. Once the time series is constructed multiple freeware tools are available to allow further processing of the data. Conversion between the packages is again a tedious process and consuming a lot of time. In order to efficiently transformation the data from one application to another, and make full use of the capabilities offered by various packages, this tool has been developed. Figure 1.1 is showing a screenshot of the transformation utility. The tool is based on the data translation library offered by GDAL. It facilitates renaming of a map list which has been constructed in ILWIS, by adding temporal information to the name of the layers within a time series. After completion of this process the data can be exported to other free time series data analysis tools, like HANTS, SPIRITS and TIMESAT. The URL’s of these tools are provided in appendix 1. The output ‐ result of the analysis in these packages can then be transformed back into an ILWIS format for ingestion into other processing or visualization routines. Figure 1.1: Time Series Data Conversion tool This document is describing how time series data (for access to free and online time series data see also appendix 1) can be imported into ILWIS, how additional pre‐processing can be performed using time series data, the time series can be renamed and exported to other applications and transformed back to ILWIS. For this description use is made of ILWIS version 372. 5 2. DownloadandInstallationofthetoolsandexercisedata The time series data conversion software tool can be downloaded from the Earth Observation Community Web page; see appendix 1 for the URL. For the purpose of the exercises described here additional vector data and templates (contained in the file Ancillary.zip) has to be retrieved and can be downloaded from ftp://ftp.itc.nl/pub/52n/TSdata_conversion/. The exercise description is using the following assumptions with respect to your working directory: Create on the root of your ‘C:\ drive’ a directory “DataConversion” Create within this main directory the following sub‐directories: o Ancillary used to store the content of the Zip file “Ancillary” o Burkina_S10NDV used to store the content of the SPOT‐Vegetation data o TSConvert used to store the time series conversion software tool o NDV_ILWIS used to store the ILWIS NDV time series o NDV_SPIRITS used to store the SPIRITS NDV time series o NDV_Quicklook used to store the SPIRITS NDV quicklook time series o NDV_HANTS used to store the HANTS NDV time series o NDV_TIMESAT used to store the TIMESAT NDV time series o Back2ILWIS used to store the data transformed back into ILWIS format After this (sub) directory structure has been created on your local system, download the file “Ancillary.zip” from the ftp address indicated above and store the unzipped content in the sub‐directory “\Ancillary”. From this sub‐directory “\Ancillary” copy the content of the folder “\2NDV_ILWIS” into the sub‐directory “NDV_ILWIS” and copy the content of the folder “\2NDV_Quicklook” to the sub‐directory “NDV_Quicklook”. Retrieve the time series data conversion tool from the EO Community Web page and extract it into the sub‐ directory “\TSConvert”. Eventually create a shortcut from the file “TimeseriesConversion.exe” to your desktop. Retrieve the SPOT VGT NDVI files from VGT4Africa for Burkina Faso from http://free.vgt.vito.be/ (from 20100101 – 20121011) and store the zip files in the sub‐directory “\Burkina_S10NDV”. You can also download the VGTExtract utility (with JAVA Virtual Machine) from this location and install it. Download and install the other software utilities, like FWTools – GDAL, HANTS, ILWIS372, IrfanView, SPIRITS and TIMESAT. For download locations and additional installation instructions see URL’s given in appendix 1. Disk space required when going through this set of exercises (apart from the software) is at least 1.75 GB. Ensure that you have 2 GB at your disposal before you start! 6 3. TimeseriesdataprocessinganddatatransformationfromILWISto SPIRITS 3.1 Introduction This exercise example will focus on the use of an NDVI time series data set, derived from the SPOT Vegetation Instrument, for the Burkina Faso region from 01‐01‐2010 up to 11‐10‐2012. The (freely available) data was obtained from: http://www.vgt4africa.org. The temporal resolution is 10 days (resulting in 101 temporal events), spatial resolution is approximately 1 km and the data has geographic coordinates. Here attention is mainly on data import, eventual pre‐processing in ILWIS and subsequent data transformation into SPIRITS. Further temporal analysis in SPIRITS is not described here but use can be made of relevant documents from the internet location provided (see appendix 1). In order to process the data use is made of various utilities (see also Appendix 1): VGTExtract: import of the data and transformation of the data into an ILWIS format; ILWIS: inspection of the imported data using animations and eventual additional processing; Time Series Data Conversion Tool: file renaming and export to SPIRITS; SPIRITS: generation of Quick Looks; IRFANVIEW: create animation of (processed) time series Quick Looks; Microsoft Power Point: use template to visualize time series created. All software utilities used can be downloaded from the internet (see also Appendix 1) and various documents are available from these sources describing how to install the software tools. It is assumed that Microsoft Office is at your disposal. Templates are available to visualize Quick Looks in SPIRITS and export the Quick Looks. Before you start, check the content of the directory “C:\DataConversion” and verify if all sub‐directories are created as specified in the previous chapter. Please adhere to these ‘conventions’ as some SPIRITS templates are going to be used which expect these settings. The exercise will follow the same sequence as the listing of tools used provided above. Before you start the exercise, first inspect the directory “C:\DataConversion”. The sub‐directory “Burkina_s10NDVI” should provide the SPOT‐Vegetation data of Burkina Faso, the sub‐directory “Ancillary” is providing SPIRITS templates and a shape file with country boundaries, the sub‐directory “TSConvert” is providing the software used to rename and convert data processed in ILWIS to be used in SPIRITS, the sub‐directories “NDV_SPIRITS”, “NDV_ILWIS” and “Quicklooks” are used to store the processed data. The sub‐directory “NDV_SPIRITS” is currently empty, the sub‐directory “Quicklooks” should contain a sample power point presentation (“Sample_presentation.pptx”) having one slide and the sub‐directory “NDV_ILWIS” contains a country – boundary file (“Al1_country”). Ensure that all files are available and that you have sufficient storage capacity on your ‘C:\ drive’ as you are going to process time series data! 3.2 VGTExtract Start VGTExtract and define your input and output directory as specified in figure 3.1. Under Processing settings, press “New”, as Name enter “Burkina_Faso”, as Output Filename specify “%p_%y%m%d” (only product name, followed by year_month_day), as preset ROI, select “Burkina Faso”. As output directory specify “C:\DataConversion\ndv_ilwis” (see figure 3.2 ‐ left). Open the Tab “Output” and as Output Format select “ILWIS” and as Data Type “Unsigned Byte” (see figure 3.2 ‐ right). Now activate the option “Use Product Specific settings”, at the lower left hand corner. Open the Tab “Product Specific”, unselect the option “Included” for the “Vegetation” layer (see figure 2.3 ‐ top), and open the layer by pressing the ‘Layer Expand Option’ in front of Vegetation and only activate the layer “Basic 10day Normalized Difference Vegetation Index” (see figure 3.3 ‐ bottom). Press “OK” to store the 7 settings and you will return the start screen of VGTExtract (as of figure 3.1). Press the “Start” button to transform the data into ILWIS format. Ensure that the input data directory is activated (blue, as of figure3.1). Figure 3.1: Opening screen of VGTExtract showing directory settings Figure 3.2: Import setting for Region of Interest and Data Output format Figure 3.3: Product Specific Settings to extract NDVI layer only 8 Note the progress bar during import and the various layers are now added under the Output Directory specified and if the import is correct the indicator in front of the filename will blink ‘green’ for each layer (time event) imported. Inspect using ‘Windows Explorer’ the output directory storing the newly imported data! 3.3 ILWISfortimeseriesdatavisualinspection Open ILWIS and use the Navigator to move to your working directory, here “C:\DataConversion\ndv_ilwis” is assumed! From the main ILWIS menu select the option “File” > “Create” > “Map List”. As Map List name, specify “ndv”, select all layers (101 in total) from the left hand window and by pressing the “>” button the layers are added to the ‘Create MapList’ right hand window (see figure 3.4) and press “OK”. Figure 3.4: Creating a new map list in ILWIS Double click with the mouse on the newly created map list “ndv”, subsequently in the MapList window select as display option “Open as SlideShow”, as Representation select “Pseudo” and press “OK” twice, add the file “Al1_country” (no Info, boundaries only) and using the mouse with the left button pressed, inspect the map values. Note that higher values are red, green depicts the intermediate values and blue is marking the lower values. The ‘values’ are represented in a ‘byte’ range, from 0‐255. Check the value of the water bodies! Close the animation window when finished. To conduct computations in ILWIS on a map list select from the main ILWIS menu the option “Operations” > “Raster Operations” > “Map List Calculation”. Now as an example you are going to create a mask for the ‘open water bodies’, which in your imported data have a value of 1 and are going to be reassigned to a value 254. This is just a reclassification example to demonstrate what is happening in ILWIS when these type of map list calculation operations are applied; note that other computations can be performed in an identical manner! Enter the following formula in the expression window: iff(@1=1,254,@1) (see also figure 3.5) Note that ‘@1’ stand for the input map list, enter other parameters as specified in figure 3.5 below and press “Show” to execute the computation. A new map list is created for all layers. Display this new map list and note the occurrence of the value 254. Figure 3.5: Map List Calculation window 9 More important, note the naming convention of your map layers, these are now numbered from ndv_mask_1 up to ndv_mask_101, due to the operation you have lost the relation with the initial filenames and the date stamp! 3.4 MapListrenameandexporttoSPIRITS As SPIRITS requires appropriate accounting of the temporal resolution the obtained map list cannot be exported to SPIRITS at this moment. Open the application “TimeSeriesConversion.exe” which is contained in the sub‐directory “C:\DataConversion\TSConvert”, by double clicking it with the mouse. This stand‐alone application is developed to easily transform data from ILWIS to / from SPIRITS and is performing a number of operations: Rename ILWIS Maplist, using various date formats, check the “?” button for the date formats supported. See also Appendix 2 for the date format template. Transform from ILWIS format to SPIRITS for data types in byte, int16, int32 and float32, data scaling and offset can be included and flags can be specified. Note that float 64 formatted data is exported as float 32! During export the new header files are adapted and also the essential “days” and “date” field are included based on selected date format settings. Export from SPIRITS to ILWIS (Back 2 ILWIS), e.g. for quick visualization (animation) and inspection of the data values. The utility is using GDAL for data transformation. As both ILWIS and SPIRITS use these data translation libraries, under the Tab “lConfiguration” the “gdal_translate.exe” has to be selected as well as the location of the GDAL “Data” library”. Also your ILWIS.exe has to be specified. If not already installed, download and install GDAL ‐ FWTools, select “FWTools247.exe” and conduct the installation. As output directory specify “c:\fwtools247”, all other settings can be kept default. In the Time Series DataConversion application open the Tab “Configuration” and specify the settings as given in figure 3.6 – left for ‘your’ Gdal and ILWIS locations. After this has been done, open the Tab “Rename ILWIS Maplist”, use as input map list “ndv_mask” and specify the settings as given in figure 3.6 – right, subsequently press “Start Renaming”. Please wait a minute or so for the operation to complete. Open ILWIS and refresh the catalog (from the menu select “Window” > “Refresh”) and display the renamed map list, now called “ndvi” as an animated sequence. Note also the names of the individual layers and the new date format assigned. Figure 3.6: Using Ilwis2Spirits to set GDAL configuration and conduct map list renaming 10 After you have validated the results of the renaming operation, open the Tab “ILWIS 2 SPIRITS” to export your map list to ENVI format so it can be used by SPIRITS. Specify as input map list “ndvi.mpl” and select as output directory “C:\DataConversion\ndv_spirits”. Note the other settings from figure 3.7 below. After all parameters are specified press the option “Export to ENVI” and wait until the process has been completed. Figure 3.7: Export ILWIS map list to ENVI format for use in SPIRITS Use your ‘Windows Explorer’ and navigate to the sub‐directory “C:\DataConversion\ndv_spirits”. Now open with ‘Notepad’ the file “ndvi_20100101_out.hdr” and inspect the content (see also Appendix 3). Note that additional lines have been added to the original ENVI header file, like date, days, flags, program and comment. The data format is 1, meaning ‘byte’. SPIRITS supports data types 1 to 4, representing byte, int16, int32 and float32 respectively! Eventually open another header file and inspect the content. 3.5 CreateaQuicklookinSPIRITSandexportaQuickLooktimeseries Open SPIRITS (here version 1.1.1 from Febr. 2013 is used) and select from the main menu the option “Analysis” > “Maps” > “Create Template”. From the Image Tab, select as Image “C:\DataConversion\ndv_spirits\ndvi_20100101_out.img”. From the QuickLook menu, select “File” > “Open” and from the sub‐directory “C:\DataConversion\Ancillary” and select the file “ndv_template.qnq”. Your results should resemble those as presented in figure 3.8. Select also the Tab “View HDR” and inspect the content. Figure 3.8: Quicklook of ndvi_20100101_out.img using the ndv_template.qnq template 11 After inspection of this quick look open from the SPIRITS main menu the option “Analysis” > “Map” > “Map series” > “Time series” > “Create Quick Looks”. From the menu, select the option “File” > “Open” and select from the sub‐directory “C:\DataConversion\Ancillary” the file “create_ql.tnt”. The settings are automatically incorporated; if this is not the case specify them according to the settings given in figure 3.9. Figure 3.9: Quick Look template settings Check if your settings correspond to figure 3.9 and if this is the case press “Execute” to generate a time series of Quick Look images (in png format!). Wait until the process has finished and check using your Windows Explorer the sub‐directory “C:\DataConversion\ndv_quicklooks”. You should have obtained 101 new quick look images. 3.6 CreatingofanimationandusingitinaPowerPointPresentation After you have validated that 101 new “*.png” files have been created in the output directory “C:\DataConversion\ndv_quicklooks” open IrfanView. If not available on your system, download IrfanView and install it using the default settings. From the IrfanView menu select the option “SlideShow”. Select under ‘Look in:’ your quicklook sub‐directory “C:\DataConversion\ndv_quicklooks”. Press the “Add All” button and set the other parameters as given in figure 3.10. Figure 3.10: IrfanView animation setup After having provided the settings, press the option “Play Slideshow” and evaluate if the animation is according to your requirements. Press the <Escape> button on your keyboard to stop the animation and select 12 from the main IrfanView menu the option “SlideShow” again. If not satisfied you can modify some of the settings and repeat the procedure again. If satisfied press the option “Save slideshow as EXE/SCR”, specify the settings as given in figure 3.11 and press “Create”. Figure 3.11: Create animation settings Check in our output directory if the “ndv_burkina.exe” is created using ‘Windows Explorer’, eventually double click on the executable. Open the sample power point presentation “Sample_Presentation.pptx” and ‘Show’ the presentation. Click on the image and select “OK” to view the animation in Power Point. 3.7 DatatransformationfromSPIRITStoILWIS Data processed by SPIRITS can be transformed back into ILWIS format, this option is not described here but is considered straight forward. Browse to the relevant directory (here the sub‐directory “NDV_SPIRITS”, select all header labeled ENVI format files (enter *.hdr as ‘file name’, keep the shift key pressed and select the first and last map of the time series to select all layers!) and select “Open”. Specify an output directory (here the sub‐ directory “Back2ILWIS”) and press the button “Export 2 Ilwis” and wait till the export process has completed, see also figure 3.12. Figure 3.12: Export time series back into ILWIS format After the time series has been transformed into ILWIS format, a new map list has to be created and the time series can be visualized as an animated sequence. The procedure how to create a new map list is described in this document (see chapter 3.3). Navigate in ILWIS to the sub‐directory “Back2ILWIS”, from the main menu, 13 select the option “File” > “Create” and create a new maplist, as name specify “from_spirits” and add all map to the new maplist. Display this maplist as an animated sequence, using as Representation “Pseudo”. Having an efficient data transformation tool best of both applications are now at your disposal and can be effectively used so you are able to spend most of your time on data analysis and ‘not’ on data pre‐processing, which can be quite cumbersome for larger time series. 14 4. Time series data processing and data transformation from ILWIS to TIMESAT 4.1 Introduction This exercise will focus on the use of the same NDVI time series data set, derived from the SPOT Vegetation Instrument, for the Burkina Faso region but now only from 01‐01‐2010 up to 21‐12‐2011 (2 years). The temporal resolution is 10 days (resulting in 101 temporal events), spatial resolution is approximately 1 km and the data has geographic coordinates. The number of rows / lines is 785 and the number of columns / pixels is 1009. Here attention is mainly on data transformation, eventual processing in TIMESAT and subsequent data transformation of the filtered data back into ILWIS. Details of the temporal filtering in TIMESAT are not described here but further information can be obtained from the online documentation. In order to process the data use is made of various utilities: ILWIS: inspection of the imported data using animations and eventual additional processing; ILWIS2TIMESAT: file renaming and export to TIMESAT; TIMESAT: Temporal filtering and generation of new filtered output time series data; ILWIS: create graphs of original and processed ‐ filtered time series; All software utilities used are at your disposal (downloaded from the URL’s provided in appendix 1) and various documents are describing how to install the software tools. It is assumed that all tools are at your disposal and that you have created the (sub‐) directory structure as indicated in chapter 2. 4.2 NDVDatatransformfromILWIStoTIMESAT Open ILWIS and navigate to the directory “c:\DataConversion\NDV_ILWIS. Once more display the time series “ndv” which was created in chapter 3.3, see also figure 3.4. This is the original data imported from the SPOT Vegetation instrument using VGTExtract. If you start the exercise from here conduct the import as described in the previous chapter (see chapter 3.2 and 3.3). Once more note the import settings as specified in figure 3.2 and 3.3 (unsigned byte). Open the application “TimeSeriesConversion.exe” which is contained in the sub‐directory “C:\DataConversion\TSConvert”, by double clicking it with the mouse. Open the Tab “Configuration” and first check if your GDAL and ILWIS configuration settings are correct, if this is not the case consult chapter 3.4. Open the Tab “Ilwis 2 Timesat” and specify the appropriate input maplist (here “ndv” is used) and select the output directory (here “C:\DataConversion\NDV_TIMESAT” is used), see also figure 4.1. Note that here the “Force data type” option is used. This is done as the data format ‘byte’ is known. To export the data press the button “Export to TimeSat”. After the export processes has completed, use the Windows Explorer and navigate to the output directory. Check the content of this directory. A total of 101 *.img files and a text file “NDV.txt” should have been created. For a listing of the ndv.txt file see also figure 4.1. Use “Notepad” to open the file “NDV.txt”. Modify the first line, change “101” (being the number of original layers) into “72” as we are going to process only 2 * 36 dekades (for the years 2010 and 2011 only). Delete the content from line 74 onwards (the link to the files for 2012!) and use from the Notepad menu the option “File” > “Save As” and specify as new output file “NDV_2years.txt” and press “Save”. 15 Figure 4.1: Export time series from ILWIS in TIMESAT format Close Notepad and delete from your working directory also the imported *.img files from 20120101 up to 20121011. Open TimeSat, specify your TimeSat Installation Folder and press “OK”. From the TimeSat Menu System, select the option: Display Binary Images “TSM_ImageView”. In the TSM_imageview, select from the menu the options “File” > “Open file list”, press the button “Open file list” and navigate to your TimeSat working directory “C:\DataConversion\NDV_Timesat” and select as file list “ndv_2years.txt” and press “Open”. Select from the file list an image and in the “TSM_imageview” specify for ‘no of rows in’ “785” and for ‘No of columns per’ “1009”, subsequently press “Draw”, see also figure 4.2. Figure 4.2: File list and image visualization in TimeSat Eventually select some other images from the file list and press “Draw”. You can modify the “Image display scaling” by adjusting the slide bars, for further details consult the online TimeSat manual. 4.3 TIMESATfiltering Activate the TimeSat Menu System and select “File” > “Preferences”, press “Browse” and select your working directory, here “C:\DataConversion\NDV_TimeSat” and press “OK” twice. Then select the option Analyse time series data to find best fit “TSM_GUI”. In the TimeSat Graphical User Interface, select from the menu the “File” > “Open list of image files”, as Input file list specify options 16 “C:\DataConversion\NDV_TimeSat\ndv_2years.txt”, as ‘No. of years’ specify “2” (note that the 36 dekades are automatically assigned under ‘No. of images / year’, as ‘No of rows in image’ specify “785” and as ‘No of columns per row’ specify “1009”. Press the button “Show image”. From the new ‘Figure window’ activate the lower left button “Processing window” and select the following window: Col 264 – 306 and Row 310 – 354 and press the option “Return”. Note that these values are now added to the ‘image_files_input’ window, eventually change the indicated values to the values provided above manually and press the option “Load data”. The NDVI curve for row/column: 310/264 is now given in the GUI. Select from the options available under ‘Data Plotting’ the “Savitsky‐Golay” option (see also figure 4.3), check if all other parameters are set identical to figure 3.4 as well. Take specific note of the effect of “No. of envelope iterations”, here a value of “2” is applied; note the change of the peak of the NDVI if other envelope settings are used! Use also the option “Plot next series” to see the effect of the curve fitting over the next pixel. Figure 4.3: TSM_GUI showing NDVI over Burkina Faso for 2010 and 2011, for row/column 310/264 From the User Interface menu select the option “Settings” > “Save to Settings file” and under ‘Common settings’ now change the ‘Rows to process’ from “1” to “785” and Columns to process from “1” to “1009”, as ‘Job name’ specify “tsm_filter_settings” (see also Appendix 4). Subsequently from the menu, select the option “File” and “Save settings file as” and specify in your working directory (here C:\DataConversion\NDV_TimeSat\) as file name “tsm_filter_final” and press “Save”. You can close the ‘TSM_GUI’ and the ‘TSM_imageview’ windows as well as the file list window. Note the two open TimeSat windows: the TimeSat Menu System and the TimeSat DOS window! From the ‘TimeSat menu system’ select the option ‘Create and edit settings file’ “TSM_settings”, from the menu select “File” and “Open settings File”, specify the file “tsm_filter_final.set”, now available from your working directory and check if the settings are identical to Appendix 4. If this is the case then close the TimeSat input settings tool else modify them accordingly and save the file. Take special note of the setting for the ‘Output data’, especially the option “1=fitted data”! Continue with the next option from the TimeSat Menu System, select the option ‘Process images or ASCII data’ “TSF_process”, specify the file “tsm_filter_final.set”. Now 72 new image files are being created and the filter 17 function selected is applied for each row (in this case 785 rows!) to create the new filter definitions. Note that this process can take quite some time, use this time to read the documentation to assess what is done by the TimeSat application. Note that the progress can be followed by the row number displayed within the DOS box, see also figure 4.4. When the application has finished 2 new files have been created; these files are ‘tsm_filter_settings_fit.ndx’ and ‘tsm_filter_settings_fit.tts’. Figure 4.4: DOS progress window for TimeSat Continue with the option ‘Create images from function file (*.tts file)’ and press the button “TSF_fit2img” from the main TimeSat Menu System. Select as input file “tsm_filter_settings_fit.tts” and press the “Open” button. Specify the following options: ‘Code to missing pixels’ as “255”, ‘Name of output files (no extension)’ as “ndv_filtered”, ‘Specify the file type for the output image files (1, 2 or 3)’ as “1” and for ‘Number of years’ “‐1” to select both years. Wait until the routine has completed writing the output images. Use Windows Explorer, navigate to your working directory and check the new images created (ndv_filtered_0001 – ndv_filtered_0072). Through this routine the new images are being written and these can subsequently be transformed back into ILWIS. Close all open TimeSat windows. Copy now all “ndv_filtered_00*” files (from 0001‐0072) and paste these into the directory “C:/DataConversion/Back2ILWIS”. 4.4 DatatransformationfromTIMESATtoILWIS Open once more the Time Series Conversion tools and select the Tab “Back 2 ILWIS” as input envi files navigate to your working directory (here C:\DataConversion\Back2ILWIS) and first type a ”ndv_*” in the file name selection box, press <enter> then select all the ndv_filtered files (from 0001‐0072) created by TimeSat and press “Open”. As output specify “C:/DataConversion/Back2ILWIS”. To convert the TimeSat data also an ILWIS georeference is needed (for number of rows, columns, projection info, etc) which is also expected in the output directory. First use Windows Explorer and copy from the directory “C:\DataConversion\NDV_ILWIS” the files “NDV_20100101.grf” and “NDV_20100101.csy” and paste them in the current working directory “C:/DataConversion/Back2ILWIS”. Specify your settings as indicated in figure 4.5 and press the option “Export 2 ILWIS”. Wait some time for the conversion operation to complete. Open ILWIS and navigate to your active working directory (here C:\DataConversion\NDV_ Back2ILWIS) and create a new maplist of the filtered files. From the main ILWIS menu select the option “File” > “Create” > “Map List”. As Map List name, specify “ndv_filtered”, select all layers (72 in total) from the left hand window and by pressing the “>” button the layers are added to the 18 ‘Create MapList’ right hand window and press “OK”. Right click with the mouse on the newly created maplist icon, select the option “Properties”, if the georeference is “NDV_20100101” and press”OK”. Figure 4.5: Transform from TimeSat back to ILWIS Double click with the mouse on the newly created map list “ndv_filtered”, subsequently in the MapList window select as display option “Open as SlideShow”, as Representation select “Pseudo” and press “OK” twice, add the file “Al1_country” (no Info, boundaries only, available from the sub‐directory ‘ndv_ilwis’) and using the mouse with the left button pressed, inspect the map values. Note that higher values are red, green depicts the intermediate values and blue is marking the lower values. The ‘values’ are represented in a ‘byte’ range, from 0‐255 and ‘255’ has been assigned a ‘missing pixel’ value by TimeSat. Close the animation window when finished. To complete the process once more use the option “Rename ILWIS Maplist”. Specify the settings as given in figure 4.6 and press “Start renaming”. Refresh your ILWIS catalog and check the content of the maplist. Figure 4.6: Maplist rename 19 Once more open the first layer of the MapList “ndv_filtered” the map layer “ndv_filtered_20100101”, use as Representation “Pseudo”. From the main ILWIS menu, select the options “Operations” > “Statistics” > “MapList” > “MapList Graph”. Select as MapList “ndv_filtered”, use a fixed stretch from “0” to “255”, activate the option “Always On Top”. Now click with the mouse on a location in the map “ndv_filtered_20100101”. In the graph window you will see the filtered NDVI for that specific location, use “Clipboard Copy” and paste the data into a new Excel Spread Sheet. Now change the MapList to “ndv” which is available in the sub‐directory NDV_ILWIS. Now you see the original ndvi profile for that location, again use “Clipboard Copy” and paste the data as another column in the open Excel Spread Sheet. Note that the data is of a different time range, only the first 72 records are common! See also the figures below. Figure 4.5: MapList graphs for original (left) and filtered (right) NDVI and combination of both time series for row / column number 334 / 368 200 180 160 140 120 100 Org_NDV 80 Filt_NDV 60 40 20 1 5 9 13 17 21 25 29 33 37 41 45 49 53 57 61 65 69 73 77 81 85 89 93 97 101 0 The combination of both data ranges (original and filtered) clearly chows the impact of the TimeSat processing routine. The filtered NDV time series can subsequently be used as input into other time series analysis routines. Close all open windows and applications. 20 5. Time series data processing and data transformation from ILWIS to HANTS 5.1 Introduction This exercise will focus on the use of an NDVI time series data set, derived from the SPOT Vegetation Instrument, for the Burkina Faso region from 01‐01‐2010 up to 11‐10‐2012. The temporal resolution is 10 days (resulting in 101 temporal events). The data has already been imported in ILWIS. If this is not the case start importing the data as described in chapter 3.2. Once more note that the data is having a byte format. Install HANTS and double click with the mouse within the HANTS directory the file “Hants.chm”, showing the help. Have a look at the various chapters within the help menu 5.2 ExportoftimeseriesdatafromILWIStoHANTS Open the application “TimeSeriesConversion.exe” which is contained in the sub‐directory “C:\DataConversion\TSConvert”, by double clicking it with the mouse. Open the Tab “Configuration” and first check if your GDAL and ILWIS configuration settings are correct, if this is not the case consult chapter 3.4. Open the Tab “Ilwis 2 HANTS” and specify the appropriate input maplist (here “ndv” is used) and select the output directory (here “C:\DataConversion\NDV_HANTS” is used), see also figure 5.1. Note that here the “Force data type” option is used. This is done as the data format ‘byte’ is known. To export the data press the button “Export to Hants”. Figure 5.1: Export of NDVI time series to HANTS and ascii file list created After the export processes has completed, use the Windows Explorer and navigate to the output directory. Check the content of this directory. A total of 101 *.img files and a text file “NDV.txt” should have been created. For a listing of the ndv.txt file see also figure 5.1. Use “Notepad” to open the file “NDV.txt”. Open HANTS if not done already and specify the settings according to those provided in Appendix 5 for the Project, Analysis, Synthesis and IHS Tabs. Note that for the IHS Tab these are the expected input files, which still need to be created! The Bat‐File settings are provided in figure 5.2. Activate the options as provided here and press the option “Create”. Use the “Edit” option to view the content of the batch file created and subsequently press “Run” to execute the process. A new MS‐DOS window is opened showing the progress of the transformation procedure. At the end the user has to accept the ‘pause’ command by pressing <enter> twice from the keyboard. Check the content of your working directory. A file “ndv_process_ihs” should have been created. If this is not the case during the first run, double click with the mouse on the batch file 21 “ndv_process.bat” to execute the operation once more and make sure you have activated the “Create ..using IHS transform” option as indicated in the figure below! Figure 5.2: Create a HANTS batch file The output IHS image is a single Band Sequential (BSQ) 8‐bit per pixel output image file, containing 3 bands in the order red, green, blue. To import the image in ILWIS, navigate with ILWIS to your working directory, here “C:\DataConversion\NDV_HANTS” is used, and type the following expression in the ILWIS command line: hants_ihs:=maplist(ndv_process_ihs,genras,Convert,1009,3,0,BSQ,Byte,1,NoSwap,CreateMpr) and press <enter> to execute the command. Right click with the mouse on the newly created maplist icon “hants_ihs” and select from the context sensitive menu the option “Properties” and as Georeference select from the sub‐directory \NDV_ILWIS “NDV_20100101” and accept the changes by pressing “OK”. Now display the composite, double click on the maplist “hants_ihs” and select the option “Open as Color Composite” and for the red channel select “hants_ihs1”, green as “hants_ihs2” and blue as “hants_ihs3” and press OK to see the resulting image. Add the country boundary from the sub‐directory \NDV_ILWIS, unselect the option “Info” and only display the boundaries using as colour “White”. Your results should resemble those presented in figure 5.3. For display of phase information the IHS (Intensity, Hue, Saturation) transform is particularly useful, as phase can be connected to colour hue, which is a much more natural choice that connecting it to a scale of grey levels from black to white. Besides the coupling of phase to colour hue, it is possible to couple the amplitude of the same frequency to colour saturation and the mean signal to the intensity. For this the following set of formulas is applied as given by the set of equations below (source: from HANTS help). 22 Here r, g and b are the colour signals in red, green and blue, P is the phase in degrees, A the amplitude and M is the mean signal. The mean is scaled by means of a cut‐off (minimum) C and a saturation value (maximum) S. The amplitude is scaled between zero and a maximum value Amax. When the phase passes through the complete range from zero to 360 degrees, the colours go through the sequence blue‐cyan‐green‐yellow‐red‐ magenta‐blue, similar to a rainbow. When the amplitude is small, the colour components are almost equal, so the result will be a black and white image that is mainly controlled by the mean signal. Figure 5.3: Time series transformed into IHS components This resulting image can be used for further classification purposes to derive an appropriate crop mask, note that you have compressed your time series data from 101 temporal intervals to three components! 23 Appendix1InternetSourcesofOpenSourceSoftwareToolsusedandtime seriesdata From following internet addresses the tools used and additional documentation can be retrieved: Time Series Conversion Tool: http://52north.org/communities/earth‐observation/ ILWIS: http://52north.org/communities/ilwis/ VGTExtract: https://rs.vito.be/africa/en/software/Pages/vgtextract.aspx SPIRITS: https://rs.vito.be/africa/en/software/Pages/Spirits.aspx HANTS: http://gdsc.nlr.nl/gdsc/en/tools/hants TIMESAT: http://www.nateko.lu.se/timesat/timesat.asp IRFANVIEW: http://www.irfanview.com/ FWTools ‐ GDAL: http://fwtools.maptools.org/ Exercise templates and vector data used can be retrieved from: ftp://ftp.itc.nl/pub/52n/TSdata_conversion/ Online access to (free ‐ online) time series data: Time series data, based on SPOT‐VEGETATION, METOP‐AVHRR, MSG‐SEVERI and ENVISAT‐MERIS, can be retrieved from: https://rs.vito.be/africa/en/data/Pages/data.aspx For access to a multitude of other free time series data have a look at: http://52north.org/communities/earth‐observation/about‐isod‐toolbox 24 Appendix2Datestamprenamingformatssupported The figure below shows the types of Date Format supported for file renaming 25 Appendix3SampleHeaderfilelisting Header file listing of the file “ndvi_20100101_out.hdr” is show in the figure below 26 Appendix4TimeSatInputSettingsTool,settingsforBurkinaFaso 27 Appendix5HANTSsettingsforIHSprocessing The following screen dumps show the settings applied to transform the NDVI time series into Intensity – Hue – Saturation composite. For the purpose of the exercise configure the Project, Analysis, Synthesis and IHS Tabs as indicated. 28