1
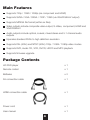
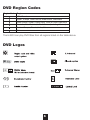
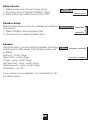
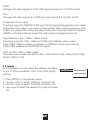
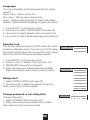
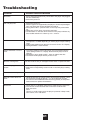
HANTZ + PARTNER The Upgrade Company! www.hantz.com HELIOS H4000 HD Upscaling DVD Player Users Manual Digital Revolution. Your Way. General Introduction Thank you for purchasing your new Helios H4000 HD Upscaling DVD player. The H4000 is integrated with the latest cutting edge video technology. The main feature of the player is to upscale standard DVD titles and MPEG4 files to high definition resolution. In addition, the H4000 offers a large selection of High Definition video modes and connection options. The player supports the following video modes and connection outputs: Component Video output: 480i / 480p / 576i / 720p / 1080i / 1080p HDMI video output 480i / 480p / 576i / 720p / 1080i / 1080p VGA/RGB-HV Output: VGA (640 X 480) / SVGA (800 X 600) / XGA (1024 X 768) / SXGA (1280 X 1024) / 720P / 1080i How will I benefit from the H4000s high definition video output? If you own a HDTV (or any other high definition display device), you will only be able to play standard DVD titles to as high as 480p (NTSC progressive scan) or 576p (PAL progressive scan) resolution video input. However, your HDTV actually has the capacity to show images much greater than 480p or 576p. Therefore, you are not getting the most out of your HDTVs resolution. The H4000 upscaling DVD player allows you to upscale standard DVD titles as well as MPEG4 files to as high as 1080p resolution. With its range of resolution options, you are able to select from a large number of resolutions in order to that right match with your HDTVs native resolution. The result is a noticeably sharper and clearer image on the screen. Table of Contents General: Safety Precautions 2 Player Features 4 Package Contents 4 Supported Disc Formats 5 Regional Code Distribution 6 DVD Disc Logos 6 Disc Usage and Maintenance 7 Using the Player: Display Panel 8 Remote Control 9 Front Panel Overview 10 Rear Panel Overview 10 System Connections 11 Playing Discs 17 Using OSD Guide Menu 18 Player Menu System 24 Getting Help: Troubleshooting 31 Product Specifications 32 1 Safety Precautions 1)Symbols An exclamation point within a triangle is an alert for important instructions on the use of the player. To avoid the risk of electric shock, DO NOT open the cover of the player. A lighting flash and arrowhead within a triangle is a warning sign alerting you of dangerous voltage inside the player. CAUTION: To reduce the risk of fire, electrical shock or damage to the player, do not expose this device to moisture and do not place water filled objects close to or on top of it. 2)Usage Notice a. Before plugging in this device, make sure your power supply voltage matches the product. The working voltage of this player is marked on the rear panel. b. To avoid damage to the audio system, switch the volume of connected devices such as speakers or amplifiers to minimum before turning the player on/off. c. Unplug the player when unused for long periods. d. Do not unplug by pulling on the power cable. e. Do not place heavy objects on top of the player. f. Do not put fingers or other objects into the player. 2 3)Maintenance Notice a. Do not expose the player to excessive heat, direct sunlight, dust, moisture, vibration, shock, moisture, liquids, speakers or magnetic objects. b. Trouble with getting the player to work may arise due to condensation on the lens when moved from a warm to cold environment. To resolve this, turn on the player to warm it up, and then play a disc 1-2 hours after. (Do not leave a disc inside the player while it is warming up) c. Clean the surface of the player with neutral detergent instead of organic substances such as alcohol or gasoline. Do not burnish with sand paper. 4)Caution a. To avoid the possibility of fire, electric shock or damage to player, do not expose this device to liquids or moisture. b. This player employs a laser system. To prevent direct exposure to laser beam, do not open the cover. Visible laser beams when uncovered. DO NOT stare into beam. 5)Reminders a. To ensure proper use of this player, please read the user manual carefully and store for future reference. b. Should this player require maintenance, contact the dealer, an authorized service center or an experienced radio/TV technician. c. All pictures in the instructions are for reference only. Specific contents are subject to actual display version 3 Main Features Supports 720p / 1080i / 1080p (via component and HDMI) Supports SVGA / XGA / SXGA / 720P / 1080i (via VGA/RGB-HV output) Supports MPEG4 file format (within avi files) Video outputs include composite video output, S-Video, component, HDMI and VGA/RGB-HV Audio outputs include optical, coaxial, mixed stereo and 5.1 channel audio outputs Upscales standard DVDs to high definition resolution Supports PAL (50hz) and NTSC (60hz) 720p / 1080i / 1080p video modes Supports DVD, Audio CD, VCD, SVCD, HDCD and MP3 playback Supports firmware upgrade Package Contents HD DVD player x1 Remote control x1 Batteries x2 AV connection cable x1 HDMI connection cable x1 Power cord x1 User manual x1 4 Supported Disc Formats Remarks Includes Includes 5 DVD Region Codes Region Code Region USA, Canada Japan, Europe, South Africa, Middle East, Greenland South Korea, Taiwan, Hong Kong, Parts of South East Asia Australia, New Zealand, Latin America (including Mexico) Eastern Europe, Russia, India, Africa China The H4000 can play DVD titles from all regions listed on the table above. DVD Logos 6 Proper Use and Handling of Discs Do not touch the signal (reflective) surfaces. Hold discs by the edges, or by one edge and the center hole. Do not affix labels or adhesive tapes to the disc surface this will unbalance the disc. Do not scratch or damage the label this will make the disc unreadable. Discs run at high speeds inside the player. Do not use damaged (scratched or warped) discs. Dirty discs can cause player malfunctions. Always keep discs clean by gently wiping the surface with a soft clean cloth (moving from the inner to the outer perimeter) If a disc is dirty, wet a soft cloth in water, wring out the cloth thoroughly, wipe the dirt away gently, and then remove any water drops from the disc with a soft dry cloth. Do not use record-cleaning sprays or anesthetic agents on discs. Never clean discs using benzene, thinner or other volatile solvents which may cause damage to disc surfaces. To avoid warping discs, store discs in their original cases. Do not leave discs under high temperature and humidity. 7 Display Panel 1 4 1. 2. 3. 4. 5. 5 2 6 3 13 14 7 Disc type(DVD) Play mode Pause mode Disc type(VCD) Disc type(MP3) 8 9 6. 7. 8. 9. 10. 10 PBC (VCD PBC) Disc running display Chapter/Track number Hours Minutes 8 11 11. 12. 13. 14. Seconds Dolby Digital DTS logo Repeat all 12 Remote Control Overview DISPLAY 1 2 A-B 9 MUTE 3 REPEAT PROGRAM EJECT 4 ANGLE 5 6 7 8 VGA HD 50/60hz PAL/NTSC 10 TITLE MENU 13 11 12 DVD MENU 14 15 ENTER 17 16 18 19 20 23 21 22 24 25 26 27 VOL 28 29 32 30 SUBTITLE 35 39 1 SETUP 2 6 40 CLEAR 43 STEP 9 44 31 AUDIO 33 36 5 ZOOM 34 3 37 7 41 0 45 4 38 8 42 BOOK MARK 46 SEARCH 47 H4000 HD UPSCALING DVD PLAYER 1. Power on/off 2. Display: show or hide OSD menu 3. Mute: press once to mute, twice to undo mute 4. Eject: open or close disc tray 5. AB Repeat 6. Repeat: repeat chapters or titles 7. Program: Open the programmable play list 8. Angle: switch play angles 9. VGA mode: switch between VGA / SVGA / XGA / SXGA 10. HD video mode: switch between 480p / 576p / 720p / 1080i / 1080p 11. 50/60hz.: press to switch between 50hz and 60hz. Only applicable for 720p / 1080i / 1080p HD modes 12. PAL/NTSC: switch between normal PAL/NTSC video modes 13. Title: jump to main title page of DVD title 14. Menu: jump to menu of DVD title 15. Up cursor 16. Left cursor 17. Enter / OK 18. Right cursor 19. Down cursor 20. Fast backward 21. Play 22. Fast forward 23. Previous: skip backward 24. Pause 25. Next: skip forward 26. Stop 27. Slow: slow motion playback 28. Volume increase (0 32) 29. Volume decrease (0 32) 30. Zoom 31. Step: plays video frame by frame 32. Subtitle: switch between subtitle options 33. Setup: displays system setup menu 34. Audio: switch audio tracks 35. to 42, 44, 45: Numeric buttons 43. Clear: erase the number or data you just entered 46. Bookmark: press to make a bookmark 47. Search Note: 1. Do not mix different types of batteries 2. Replace batteries when the remote controls functions and range are weak 3. Do not expose remote control to excessive heat or moisture 4. Do not leave the remote control under direct sunlight to avoid signal interference 5. Use remote control within 7 meters and 30 degrees of the player 9 Front Panel Overview H4000 HD UPSCALING DVD PLAYER 1 2 3 4 5 67 8 9 1. Disc Tray (Note: load discs label-side up) 2. Sensor: point remote control towards sensor to operate the player 3. LED screen: displays system information 4. [Stop] Stop playback 5. Power on/off 6. [Previous] Previous: skips to previous track or page 7. [Eject] Open/Close: inserts or ejects disc tray 8. [Play Pause]Play/Pause: plays or pauses disc 9. [Next] Next: skips to next track or page Rear Panel Overview ¡« 110V- 240V 50/ 60HZ 1. 5.1 channel surround sound audio outputs 2. MIXED audio outputs 3. Component video outputs 4. Coaxial audio output 5. Optical audio output 6. S-Video output 7. VGA output 8. Power on/off 9. Composite video output 10.HDMI output 11.Power IN (90V-240V 50/60hz) 10 How to connect the player to your AV system Connecting via composite video Using the AV cables supplied, insert the yellow cable into the video socket of your TV. Insert the white cable into the left channel socket and the red cable into the right channel socket , and then connect the other ends of the white (left) and red (right) cables to the corresponding inputs on your TV. Connecting via S-video If there is an S-video input socket in your TV set you can connect the TV and the player using the S-video cable. Use the supplied audio cable to connect the player to your TV. Or you can use the digital audio connection (coaxial/optical) or 5.1 channel connection to your AV receiver. 11 Connecting via component video connection Insert one end of the component video (Y / Cb / Cr) cable into the red/blue/green socket of the component video output located on the rear of the player. Insert the other end of the cable into the component video input socket located on your TV. Use the supplied audio cable to connect the player to your TV. Or you can use digital audio connection (coaxial/optical) or 5.1 channel connection to your AV receiver. Connecting via HDMI/DVI video Use the HDMI cable to connect the player to HDMI input of your TV. You need an HDMI to DVI cable to connect the player to DVI input. HDMI will output both video and audio (you need to turn off the digital output in the players setup in order to get audio from HDMI) 12 Connecting to VGA/RGB-HV Use the VGA cable to connect the VGA/RGB -HV output of the player to the VGA or RGB-HV input of your TV. Connecting to a 2 channel audio amplifier Connect the video output of the DVD player to the video input of your TV using the corresponding cables (video cable / S-video cable / component cable). Connect the audio cables FL and FR to the sound input L/R socket on the amplifier. 13 Connecting to AV receiver for digital audio connection Connect the video output of the DVD player to the video input of your TV using the corresponding cables (video cable / S-video cable / component cable). Use a fiber optic cable or coaxial cable to connect the optical or coaxial socket located on the rear panel of the player to the AV receiver. To setup the Digital Audio options you can go to the system setup. Please see Digital Sound Output 14 Connecting to a 5.1 channel amplifier Connect the video output of the DVD player to the video input of your TV using the corresponding cables (video cable / S-video cable / component cable). Connect the 5.1 audio output terminals of the player to the amplifier using the respective connection cables (L and R of MIXED/FRONT, L and R of SURROUND, CENTER and SUBWOOFER). Ensure that the 6 speakers are connected to the corresponding outputs of the amplifier. 15 Recommended Speaker Layout for 5.1 Channel System 16 Playing Discs 1. This player can play all kinds of discs including DVD, VCD, Audio CD, CVD, SVCD, MP3 and JPEG 2. Play discs: i. Connect TV set to the player ii. Turn on the player iii. Eject the tray by pressing the Open/Close button iv. Place the disc on the tray and press Open/Close v. The disc will be played automatically (some discs may require you to press the Play button to play) 3. Zoom: Press the ZOOM button to enlarge the image. Each time you press the button, the image will be enlarged 2-3-4-5 times bigger, and then it will return to its normal size. While zoomed, you can move the viewing area using the cursor buttons. 4. Mute: Press the MUTE BUTTON once to turn on mute and press again to turn off mute. 5. Title: Some discs will include a Title option. This is often a short introduction to the video before going to the DVD menu. Press the TITLE button to play the DVD from the Title 6. Menu: This is the DVD menu. Common options for a DVD menu are Language options, special features and episode selection. Press the MENU button to open the DVD menu. To return to normal play, press the MENU button again. 17 Using On Screen Display Menu The OSD (On Screen Display) menu lets you select from playback options while playing a disc. Press DISPLAY to see playback options. Use cursor keys to select a playback function. Note: you can only select a playback function that is supported by the disc you are playing. If a function is not supported by the disc, the icon will be highlighted grey. DVD screen display: Title | Chapter | Subtitle | Channel | Repeat | Bookmark | Multi-angle | Time Video display: File | Subtitle | Channel | Repeat | Time Audio CD display: Track | Play mode | Time 18 Time Display This function is used to display the time elapsed on the disc or to seek to a specific time on the disc. 1. Press DISPLAY on the remote control to open the OSD menu. 2. Use the numeric buttons to input the desired time in HH:MM:SS format. Select Title This function is used to select different titles when playing a disc with more than one title (for example, a TV series). 1. While playing a disc Press DISPLAY. 2. Use the cursor keys to highlight the Title option 3. Enter the desired title number using the numeric buttons or press [up] [down] to skip to the next or pervious titles. Note: Some discs have only one title. Select Chapter This function is used to select different chapters when playing a title with more than one title. 1. While playing a disc Press DISPLAY 2. Use the cursor keys to highlight the Chapter option 3. Enter the desired chapter number using the numeric buttons or press [up] [down] to skip to the next or pervious chapter Select Subtitle The Default setting for subtitles is Off (No subtitles). To select subtitles; 1. While playing a disc, press DISPLAY. 2. Use the cursor keys to highlight the subtitle options 3. Use the [Up] [down] buttons to select the desired subtitle language from those available on the disc 4. Press ENTER to display the selected subtitles OR Press the SUBTITLE button repeatedly to select the desired subtitle set and press ENTER to display the selected subtitles 19 Select Audio Language This function is used to select different audio tracks (Languages) when playing a disc with more than one Audio language track. 1. While playing a disc, press DISPLAY. 2. Use the cursor keys to highlight the Audio options 3. Use the [Up] [down] buttons to select the desired subtitle set from those available on the disc 4. Press ENTER to start playing the selected Audio language OR Press the AUDIO button repeatedly to select the desired language and press ENTER to start playing the selected Audio language Repeat Mode (Title / Chapter / A-B) This function is used to continuously replay a specific Title or Chapter or a user specified section (A to B). The default Repeat setting is OFF. 1. While playing a disc, press DISPLAY 2. Use the cursor keys to highlight the PLAY MODE / REPEAT MODE 3.Select the desired repeat mode OR Press REPEAT to switch between Title Repeat, Chapter Repeat, A-B Repeat and back to OFF. Bookmark Feature The bookmark function is used to create a book mark (time stamp) in the content that you are playing. You can return to a book mark at any stage by using the call bookmark menu. A maximum of six bookmarks can be created. To play the book mark, select the [>] play icon and press enter. To delete a bookmark, Select the Trashcan icon and press enter. Pen icons indicate unused book marks. 20 Bookmark Setup Press DISPLAY on the remote control and use cursor keys to highlight the bookmark options. Press ENTER to display the menu 1. Select a bookmark that is not yet used. The current play time (play time elapsed) will be displayed beside the bookmark. 2. When you reach the desired point for the bookmark, press ENTER. The bookmark is now created. Clear Bookmark Bookmarks are automatically cleared when the disc is ejected or the player is switched off. To clear a disc while still playing: 1. While playing a disc, press DISPLAY. 2. Use the cursor keys to highlight the Bookmark menu and press ENTER to open the sub menu. 3. Use the cursor keys to highlight the Trashcan icon to the left of the book mark and press ENTER. This clears the bookmark and makes it available for reuse Multi-angle playing Some DVD discs have multi-angle view options. You can select different viewing angles using the Multi-Angle play function. If the disc does not support multi angle, this feature will not be available. 1. If the disc does support multi angle, Press ANGLE and the multi-angle icon will be displayed as well as the current angle. E.g. 1/4 means the current viewing angle is 1 out of 4 available. 2. Press ANGLE again to switch to other angles or use [up] [down] to select angle. 21 Play Mode When playing a disc, using the OSD menu you can choose from the following Playing Modes - Normal, Random or Program. Normal: Play the disc according to the recording sequence from start to Finish. Random: Randomly play disc content. While playing a disc press DISPLAY Use the cursor keys to highlight the playing options. Press [Up] [Down] to select Random play and press ENTER. To switch back to normal play mode, repeat steps 1-3 and select Normal play instead of Random. Program: Edit the play list and play the disc content in the order you specify. You can only use this option when you have edited the play list. VCD play control VCD play control can be used on a VCD2.0 or higher disc. (PBC) 1. While playing a disc press DISPLAY 2. Use the cursor keys to highlight the Playing Mode options. 3. [Up] [Down] to select to select PCB and press ENTER 22 Playing mpeg4 When you insert a disc with Mp4DivX files, the first file automatically begins to play*. You can also manually select which file to play from STOP mode by pressing play to see a list of the files. To see file / folder information, select the file and press ENTER. To play a file, select it and press Play. To play all the files in a folder / disc start playing the first file and then press display to open the OSD. Then select the desired playback / repeat option. *The first file is played automatically if Auto / Easy play is enabled. Playing Audio CD When you load an audio CD, the CD begins to play. If it does not begin automatically, press PLAY. To select a different track, press the DISPLAY button to bring up the OSD control menu. Or press NEXT Playing Mp3 When you insert an MP3 disc or a disc with a folder containing music files the list of files appears. Select a file and press PLAY to begin playback. The MP3 menu automatically appears on the screen when playback starts. To select a different track, press DISPLAY to open the OSD control menu. Use the cursor keys to highlight the desired file and press ENTER to begin playing the file. Playing a JPEG file Open JPEG files using the same procedure for MP3 files (See above). While viewing a JPEG image, press ZOOM and a red Zoom frame appears. Use the direction keys to adjust the frame position. To rotate a JPEG image press ANGLE. Each time you press ANGLE the image is rotated 90 degrees. Slide Show Mode Slide Show mode is used to play a series of JPEG images on a disc according to sequence. 1. Insert a disc containing the images and use the cursor keys to highlight the disc and press ENTER 2. To select playing speed use [Up][Down] 3. While the slide show is playing, use [Left][Right] to skip the current image. 4. Press [STOP] to stop the slide show. You can press Root Menu to display disc menu. 5. You can also open the OSD by pressing DISPLAY 23 Player Setup Menu The Player setup menu is different from the disc menu and OSD. It is used to alter the players Audio, Video and user options as well as set default settings. The menu can be used under STOP mode by pressing SETUP on the remote control. Within the Setup menu, if an option has a sub menu there will be an arrowhead on the right hand side of the option. Press ENTER to open the sub menu or press the [Right] button. Use the direction buttons to choose the option you want to setup and press ENTER. Press [back] to exit the sub-menu or Setup Menu. Sound Setup SETUP SOUND DISPLAY LANGUAGE LOCK DEFAULT SOUND DIGITAL OUTPUT STEREO SOUND SETUP allows you to set the sound according to the playback and connection conditions. SPEAKER SETUP LPCM OUTPUT PROLOGIC II TEST TONE Digital output 1. Select Dolby Digital / DTS for original digital output. 2. Use cursor to select DIGITAL OUTPUT option and press OK. 3. Use cursor to select desired audio type, press OK to confirm 4. Use cursor to return to digital output option 24 DIGITAL OUTPUT DOLBY DTS Stereo Sound 1. Select sound menu to open player setup 2. Use cursor keys to highlight STEREO option 3. Press [OK] to turn stereo sound ON or OFF Speaker Setup Speaker setup allows you to set up speaker size, distance and volume 1. Select SOUND menu and press [OK] 2. Use the cursor to select speaker setup Speaker Using this option, you can setup the speaker according to the volume of the player. The following options are available: Left front - small / large Right front - small / large Center - none / small / large Left Surround - none / small / large Right surround - none / small / large Subwoofer - on / off If you need to set up speakers, you must first turn off the Stereo option. 25 STEREO ON OFF SPEAKER SETUP SPEAKERS DISTANCE VOLUME SPEAKERS LEFT FRONT SMALL / LARGE RIGHT FRONT SMALL / LARGE CENTER NONE/SMALL/LARGE LEFT SURROUND NONE/SMALL/LARGE RIGHT SURROUND NONE/SMALL/LARGE SUBWOOFER ON/OFF Distance Using this option you can setup the distance between audience and speakers, in order to get the best performance. The Default setting is 3.3 meters. You can adjust the distance for front, middle and surround speakers. 1. Select a speaker (L Front / R Front / Center / L Surround / R Surround) 2. Use the cursor keys to adjust distance from 1m to 6.6m Volume 1. Select SOUND menu 2. Use cursor to select SPEAKER SETUP and press OK 3. Select VOLUMR option and press OK 4. Select the desired speaker 5. Use the cursor to adjust volume within 0 to -10db LPCM Output 1. Press SETUP on the remote control, select SETUP and press OK 2. Use cursor to select SOUND and press OK 3. Select LPCM output 4. Press OK repeatedly to select the desired frequency Pro Logic II 1. Press [SETUP] on remote control and select the SETUP option. Press OK 2. Use cursor to select SOUND and press [OK] 3. Use cursor to select PRO LOGIC II and press OK 4. Use cursor to select desired option and press OK to confirm 26 DISTANCE VOLUME LEFT FRONT 3.3m. RIGHT FRONT 3.3m. CENTER 3.3m. LEFT SURROUND 3.3m. RIGHT SURROUND 3.3m. LEFT FRONT 0dB RIGHT FRONT 0dB CENTER 0dB LEFT SURROUND 0dB RIGHT SURROUND 0dB SUBWOOFER 0dB LPCM OUTPUT 96 K 48 K PROLOGIC II DSP MODE OFF IMULATION MUSIC MOVIE MATRIX Smart Play If Smart Play is enabled (On) discs are automatically played when they are loaded into the player. 1. Press [SETUP] on remote control and select the SETUP option. Press OK 2. Use cursor to select SOUND and press [OK] 3. Use cursor to select SMART PLAY and press [OK] to turn easy play On / Off Display Setup In the display menu you can adjust the TV System, TV Image, S-Video, HD Scan frequency, Video options, HDMI mode and HDMI Select options. DISPLAY TV IMAGE HD SCAN FREQ BRIGHTNESS 1. Press SETUP on the remote control 2. Use cursor to select DISPLAY and press OK. 3. Use cursor to move to the desired option and press OK NOTE: HD SCAN FREQ and Video options are available only in High Definition mode (720p, 1080i, 1080p) TV System 1. Press SETUP on the remote control 2. Use Cursor to select display and press OK 3. Use cursor to select TV system and press OK 4. Use cursor to select desired output and press OK TV SYSTEM HDMI MODE TV SYSTEM PAL NTSC PROGRESSIVE 480P PROGRESSIVE 576P HDTV 720p OUTPUT HDTV 1080i OUTPUT VGA OUTPUT SVGA OUTPUT XGA OUTPUT SXGA OUTPUT HDTV 1080P OUTPUT VGA 720p VGA 1080i 27 NTSC Changes the video signals of a PAL DVD disc and outputs it in NTSC format PAL Changes the video signals of a NTSC disc and outputs it in the PAL format Progressive Scan output The player supports 480NTSC (USA) and 576 PAL (Europe) progressive scan output. Progressive scan output can improve image quality. When using progressive scan output, it is required to connect the player using the component video out jacks or HDMI to a TV that is able to accept the video signal in progressive format. High Definition 720p / 1080i / 1080p output The player supports 720p, 1080i and 1080p high definition video output. 720p/1080i/1080p resolution is available via HDMI and component outputs, 720p/1080i available via VGA/RGB-HV output. VGA / S-VGA / XGA / SXGA output The player can provide VGA (640 X 480) / SVGA (800 X 600) / XGA (1024 X 768) / SXGA (1280 X 1024) TV Image With this option you can select the settings according to the TV to be connected. The TV has three display options. 1. Press SETUP on the remote control 2. Use the cursor to select DISPLAY and press OK 3. Use the cursor to select TV IMAGE and press OK 4. Use cursor to select the desired TV image and press OK 28 TV IMAGE 4:3 LETTER BOX 4:3 STANDARD 16:9 WIDE SCREEN Video Options Use the video options to set the levels of the various video properties: Color, Contrast, Brightness, Tint, Black level 1. Press SETUP on the remote control 2. Use cursor to select DISPLAY and press OK 3. Use cursor to select VIDEO OPTIONS 4. Use cursor to select the desired property and press OK 5.Use the cursor UP / Down to change the selected value. HDMI Mode Use this option to manually select one of three available HDMI modes ¨C YcbCr422 / YcbCr444 / RGB 1. Press SETUP on the remote control 2. Use cursor to select DISPLAY and press OK 3. Use cursor to select HDMI MODE 4. Press OK repeatedly to select the desired setting HDMI Select This option is used to select the type of TV the player is connected to from the HDMI output. You can connect to a HDMI display or a DVI display using a HDMI-DVI cable. There are three options for HDMI Select ¨C HDMI, DVI, AUTO 1. Press SETUP on the remote control 2. Use cursor to select DISPLAY and press OK 3. Use cursor to select HDMI SELECT 4. Press OK repeatedly to select the desired setting 29 HDMI MODE RGB YCBCR422 YCBCR444 Languages You can individually set the language that the player uses for: Player menu - Setup menus etc.... Disc menu - Menus when playing discs Audio - Default audio language to select with videos Subtitle - Default Subtitle language to select with videos 1. Press SETUP on the remote control 2. Use cursor to select LANGUAGES and press OK 3. Use cursor to select desired option and press OK 4. Use cursor to select desired language and press OK Parental Lock This function restricts playback of DVD video disc which contains undesired ratings. The user can set the rating level and the DVD player will not play DVD with a rating above this without the password being entered. 1. Press SETUP on the remote control. 2. Use the cursor to select LOCK and press OK. 3. PASSWORD menu will be displayed 4. Enter the password. Default password is 8888 Select the desired option that you wish to adjust LOCK CHANGE PWD RATING LIMITS RATING LIMITS LV8 LV7 NC-17 LV6 PG-R LV5 Rating Limit 1. Select RATING LIMITS and press OK 2. Use the cursor to select the desired rating level Note, Level 8 may not be available Change password or set rating limit. Change Password: 1. Select CHANGE PWD and press OK 2. Enter new password and press OK to confirm New password will now be activated 30 LV4 PG-13 LV3 PG LV2 LV1G CHANGE PWD ENTER NEW PASSWORD OK Troubleshooting Problem Possible Cause and Solution No Power 1. Ensure the power lead is firmly connected to the player and plugged into the socket fully. 2. Switch the power on Can not play Disc 1. Switch the power on. 2. The Disc type is not supported by the player or is seriously damaged. Only use discs that can be played by this player 3. Wrong side of disc place the disc on the tray with printed side up. 4. Restriction of Disc level. Cancel the restriction. 5. Condensation on the laser lense. Switch on the player without any disc loaded and allow to Warm up for 1-2 hours. No Picture 1.The TV Video Input state is incorrect. Adjust the TV to AV/S-Video /Component or HDMI depending on which player output is being used. 2. Video output settings from player are incorrect for the TV / Display. 3. Damaged Media clean the disc Picture distorted or loss of color 1. The output settings of the DVD player are not matched with the input settings of the TV / Display. Recheck both player and TV settings 2. Damaged or poor quality media clean or replace the disc 3. Connect the DVD player directly to the TV set. No Disc / Wrong Disc The disc could be dirty or damaged. Please clean or replace the disc Can not display picture as full screen 1. Reset the display mode of the TV 2. Select the corresponding screen mode on the DVD player setting menu Can not select a chapter Some discs are disabled from selecting an individual chapter Remote Control does not work 1. Obstacle between the remote control and receiving window - point the remote to the player directly i.e. get a clear line of sight. 2. The remote control batteries have the wrong polarity or low power. Please reload or replace the batteries No Sound 1. Check the TV or Amplifier equipment to make sure it is turned on. 2. The volume control has been set to minimum or MUTE has been turned on. Note: There is no audio output when the player is paused, in Step mode, slow motion, FF or FR status. 31 Product Specification Disc types Formats DVD/SVCD/VCD/CD/HDCD/MP3/MP3/WMA MPEG4(DivX, Xvid, MPEG1, MPEG2 and MPEG4) video file playback. Video output Composite video, S-Video, Y, Pb/Cb, Pr/Cr Component video, VGA/RGB-HV video, * HDMI (Video & Audio) * DVI available by using a HDMI to DVI cable. Audio output 2 channel mixed audio out 5.1 channel audio, Coaxial Digital audio, Optical Digital audio Video performance Audio performance Power supply AC 110V-240V 50/60hz Power consumption 20W Support Information: If you have any questions or queries about this product, you can submit a support ticket at www.neodigits.com/esupport or you can email us at [email protected] All questions will be answered within 48 hours (excluding Saturday, Sunday and public holidays) There is also a product FAQ available at www.neodigits.com If you have any suggestions about this product, please feel free to email us at [email protected] HANTZ + PARTNER The Upgrade Company! www.hantz.com Deutschland: Tel.: 0761 / 59 21 00 Fax: 0761 / 58 52 28 32 Schweiz: Tel.: 061 / 27 311 - 31 Fax: 061 / 27 311 - 39 Österreich: Tel.: 01 / 58 55 430 Fax: 01 / 58 55 460