1
WINTOTAL USER’S GUIDE ........................................................................5
USING THIS GUIDE ........................................................................................................ 5
CONVENTIONS IN THIS GUIDE .......................................................................................... 5
END USER LICENSE AGREEMENTS .................................................................................... 6
WinTOTAL – Aurora Software License ("License") by a la mode, inc. ................... 7
Adobe Systems Incorporated .............................................................................. 11
Flood Data .......................................................................................................... 12
Apex License Agreement..................................................................................... 13
Appraisal Institute .............................................................................................. 13
SYSTEM REQUIREMENTS .............................................................................................. 14
INSTALL WINTOTAL ................................................................................................... 15
CONFIGURE YOUR FIREWALL ......................................................................................... 16
CONFIGURE WINTOTAL ........................................................................... 16
GENERAL SETTINGS ..................................................................................................... 17
Manage User Accounts ....................................................................................... 18
Create User Accounts .................................................................................................... 19
Set Up Your Signature ................................................................................................... 19
Set the Current User ..................................................................................................... 20
Change Database Locations ............................................................................... 20
File Cabinet Settings ........................................................................................... 20
FORMFILLING PREFERENCES .......................................................................................... 21
Data Entry Options ............................................................................................. 22
Fonts & Form Colors ........................................................................................... 24
Spell Check Options............................................................................................. 26
IMAGE SETTINGS ........................................................................................................ 26
Image Quality Settings ....................................................................................... 26
Create Photo Labels ............................................................................................ 27
Comp Photo Import Settings............................................................................... 27
POCKET TOTAL SETUP ................................................................................................ 28
SYNCHRONIZATION OPTIONS......................................................................................... 28
SET UP YOUR CONNECTION .......................................................................................... 28
Set Up High Speed Connections .......................................................................... 29
Set Up Dial-up Connections ................................................................................ 30
Schedule Automatic Updates.............................................................................. 31
SET UP YOUR SKETCHER .............................................................................................. 31
Register Apex ...................................................................................................... 32
UnRegister Apex ................................................................................................. 33
Sketch Options .................................................................................................... 34
ENABLE FLOOD MAPS.................................................................................................. 34
GEOCODE COMPS ....................................................................................................... 34
INTEGRATE WITH XSITES .............................................................................................. 35
HOVERLINKS .............................................................................................................. 37
WinTOTAL HoverLinks......................................................................................... 37
HoverLinks to Websites....................................................................................... 38
HoverLinks to Programs ...................................................................................... 38
CUSTOMIZE YOUR TOOLBARS ........................................................................................ 39
Toggle Custom Toolbars ..................................................................................... 39
Appraisal Desktop Toolbars ................................................................................ 39
WinTOTAL Toolbars ............................................................................................ 40
REGISTER WINTOTAL ................................................................................................. 40
SET UP YOUR OFFICE .................................................................................................. 41
AUTOMATE WINTOTAL .............................................................................................. 42
Schedule Vault & Exact Backups ......................................................................... 42
Schedule XSite Synchronization .......................................................................... 42
Schedule DirectFax Synchronization ................................................................... 43
Schedule File Cleanup ......................................................................................... 43
APPRAISAL DESKTOP ............................................................................... 44
REPORT MANAGEMENT ............................................................................................... 45
Login Manager.................................................................................................... 45
Organize Reports ................................................................................................ 46
Create Folders ............................................................................................................... 47
Edit Your Column Layout ............................................................................................... 47
Attach External Folders ................................................................................................. 48
Tracking Folders ............................................................................................................ 49
Set Up Tracking Rules .................................................................................................... 49
Rebuild Your Reports List .............................................................................................. 50
Work with Reports .............................................................................................. 51
Search for Reports ......................................................................................................... 52
Clone Reports ................................................................................................................ 54
Print Reports ................................................................................................................. 54
Set Report Status ........................................................................................................... 55
Send Reports to Vault ................................................................................................... 56
Report Views ....................................................................................................... 56
Detailed View ................................................................................................................ 56
Order Form View ........................................................................................................... 57
Workfile View ................................................................................................................ 58
DirectFax View............................................................................................................... 59
E&O View ...................................................................................................................... 60
History View .................................................................................................................. 60
SYNCHRONIZE WINTOTAL ........................................................................................... 61
Wintotal User's Guide
CONTACTS ................................................................................................................. 63
Find Contacts ...................................................................................................... 64
Create Individual Contacts .................................................................................. 65
Create Company Contacts .................................................................................. 66
Manage Existing Contacts .................................................................................. 67
Merge Duplicate Contacts .................................................................................. 67
Create Client Login Accounts .............................................................................. 68
Ad-hoc Contacts .................................................................................................. 69
Synchronize Contacts .......................................................................................... 70
Import Athena Contacts...................................................................................... 70
POCKET TOTAL ......................................................................................................... 71
SNAPSHOT ................................................................................................................ 71
WINTOTAL DASHBOARD ............................................................................................ 72
GET HELP .................................................................................................................. 72
MARKET TO PAST CLIENTS ............................................................................................ 73
ORDER POWERVIEW ................................................................................. 74
SET UP ORDER PREFERENCES ........................................................................................ 75
Change Start Points for Directions ...................................................................... 76
Automate Order Numbering ............................................................................... 76
Complete the Order Form ................................................................................... 77
Get Flood & Census Data .................................................................................... 78
SET INTERNAL STATUS ................................................................................................. 79
MERGE IN REPORT DATA ............................................................................................. 80
ADD FORMS TO REPORTS ............................................................................................. 81
FORMS POWERVIEW ................................................................................. 82
NAVIGATE FORMS....................................................................................................... 83
CONTROL YOUR VIEW ................................................................................................. 83
FORMFILLING SHORTCUTS ............................................................................................ 84
QUICKLISTS ............................................................................................................... 85
Create Line Item QuickLists ................................................................................. 85
Create Multi-field QuickLists ............................................................................... 85
Use QuickLists ..................................................................................................... 86
Organize QuickLists............................................................................................. 87
Share QuickLists .................................................................................................. 88
QuickLists Options .............................................................................................. 89
RECENT RESPONSES .................................................................................................... 89
WinTOTAL User's Guide
Edit Recent Responses ........................................................................................ 90
Use Recent Responses ........................................................................................ 90
Swap Recent Responses & QuickLists ................................................................. 91
QUICKNOTES ............................................................................................................. 91
DEFAULT DATA & FORMATTING .................................................................................... 92
Set Default Fonts ................................................................................................ 92
Save Custom Formatting .................................................................................... 92
Set Default Data ................................................................................................. 93
FIELD-SPECIFIC FORMATTING ........................................................................................ 93
ADD DOCUMENTS TO REPORTS ..................................................................................... 94
WRITE ADDENDA........................................................................................................ 97
Create Addenda .................................................................................................. 97
Create Tables & Columns .................................................................................... 97
Cell Attributes ............................................................................................................... 98
Table Attributes............................................................................................................. 99
Insert Images ...................................................................................................... 99
Link to Form Fields ............................................................................................ 100
Navigate Addenda ............................................................................................ 101
Save Addenda ................................................................................................... 101
Use Existing Addenda ....................................................................................... 102
Text Overflow Options ...................................................................................... 102
WORKSHEET CALCULATIONS ....................................................................................... 104
Create Worksheets ........................................................................................... 104
Link Fields ......................................................................................................... 104
Enter Formulas.................................................................................................. 105
Format Worksheets .......................................................................................... 106
Save Worksheets............................................................................................... 106
Use Existing Worksheets ................................................................................... 106
CHECK E&O ............................................................................................................ 107
OTHER FORMFILLING TOOLS ....................................................................................... 107
SIGN REPORTS ......................................................................................................... 108
COMPS POWERVIEW ............................................................................... 109
ADD COMPS ............................................................................................................ 109
REMOVE COMPS ...................................................................................................... 110
ARRANGE COMPS ..................................................................................................... 110
MAP COMPS ........................................................................................................... 111
COMPS DETAILED VIEW ............................................................................................. 111
FILL OUT COMP COLUMNS ......................................................................................... 112
AUTOMATICALLY ADJUST ........................................................................................... 112
Copyright 2015, a la mode, inc.
Page ii
Wintotal User's Guide
COMPS DATABASE .................................................................................................... 114
Import Comps ................................................................................................... 115
Enter Comps Manually ................................................................................................ 115
Import Comps from Old Reports ................................................................................. 116
Import Comps from Open Reports.............................................................................. 116
Import Comps from Data Sources ............................................................................... 117
Search for Comps .............................................................................................. 120
Map Comps ....................................................................................................... 121
View Database Comps ...................................................................................... 122
Insert Database Comps ..................................................................................... 123
IMAGES POWERVIEW ............................................................................. 123
WORK WITH IMAGE PAGES ......................................................................................... 123
DOWNLOAD PHOTOS ................................................................................................ 124
Auto Retrieval Wizard ....................................................................................... 124
QuickPix ............................................................................................................ 126
QuickPix Configuration ................................................................................................ 127
Use QuickPix................................................................................................................ 127
Customize QuickPix ..................................................................................................... 128
IMAGES DATABASE.................................................................................................... 130
Search for Images ............................................................................................. 130
Unused Database Images ................................................................................. 131
My Albums ........................................................................................................ 131
Photo Pop-up Window ...................................................................................... 132
SCAN IMAGES .......................................................................................................... 132
IMAGES ON DISK....................................................................................................... 133
EDIT IMAGE FORMS .................................................................................................. 133
PLACE PHOTOS......................................................................................................... 134
EDIT IMAGES............................................................................................................ 134
Optimize Images ............................................................................................... 135
Enhance Images ................................................................................................ 136
Annotate Images .............................................................................................. 137
SKETCH POWERVIEW ............................................................................. 138
CHOOSE YOUR SKETCHER ........................................................................................... 139
SKETCH AREAS ......................................................................................................... 139
IMPORT OLD SKETCHES .............................................................................................. 139
CREATE SKETCHES ..................................................................................................... 140
WinTOTAL User's Guide
MAPS POWERVIEW .................................................................................. 141
SET UP MAP PREFERENCES......................................................................................... 141
GET MAPS .............................................................................................................. 142
VERIFY ADDRESS/GPS DATA ...................................................................................... 143
RETRIEVE A LOCATION MAP ........................................................................................ 144
RETRIEVE FLOOD & CENSUS DATA ............................................................................... 145
RETRIEVE A FLOOD MAP ............................................................................................ 146
EDIT MAPS .............................................................................................................. 146
Balloons ............................................................................................................ 147
Lines .................................................................................................................. 147
Highlight ........................................................................................................... 148
Icons.................................................................................................................. 148
REPORT TRANSFER OPTIONS ....................................................................................... 149
WORK WITH MAPS ................................................................................................... 150
ADD MAPS MANUALLY .............................................................................................. 151
WORKFILE POWERVIEW ....................................................................... 151
ADD FILES ............................................................................................................... 152
MANAGE FILES ......................................................................................................... 152
DIRECTFAX .............................................................................................................. 153
SEND REPORTS TO VAULT........................................................................................... 154
TOOLS............................................................................................................. 155
SPELL CHECK............................................................................................................ 155
CHANGE CASE .......................................................................................................... 156
CALENDAR............................................................................................................... 156
FILE LABELS ............................................................................................................. 156
COPYRIGHT REPORTS ................................................................................................. 158
AREA CALCULATOR ................................................................................................... 159
AREA ESTIMATOR ..................................................................................................... 159
SQUARE FOOTAGE ADJUSTER ...................................................................................... 160
MATH CALCULATOR .................................................................................................. 160
MARSHALL & SWIFT COST ESTIMATES .......................................................................... 161
PROPERTY PRESENTATIONS ......................................................................................... 163
CREATING THE PRESENTATION..................................................................................... 164
PUBLISHING THE PRESENTATION .................................................................................. 165
CONVERT COMPETITOR FILES ...................................................................................... 165
Copyright 2015, a la mode, inc.
Page iii
Wintotal User's Guide
COLLABORATION ...................................................................................................... 166
ASSOCIATE XSITE ORDERS .......................................................................................... 167
ROLL BACK TO ATHENA .............................................................................................. 167
PRINTING ..................................................................................................... 168
PRINT REPORTS ........................................................................................................ 168
PRINT OPTIONS ........................................................................................................ 169
Print Net & Gross Adjustments ......................................................................... 171
Print Summary Phrases ..................................................................................... 171
Remove Pages from the TOC ............................................................................ 172
PDF OPTIONS & SECURITY ......................................................................................... 172
Edit PDF Adjustments ....................................................................................... 173
Edit PDF Security Settings ................................................................................. 173
Edit Advanced PDF Settings .............................................................................. 174
REPORT DELIVERY ................................................................................... 175
DEFAULT DELIVERY METHODS..................................................................................... 175
MESSAGE TEMPLATES................................................................................................ 175
SELECT E-MAIL RECIPIENTS ......................................................................................... 176
TOTAL CONNECT PRO PRE-DELIVERY CHECK ................................................................ 177
VSS Pre–Delivery Check..................................................................................... 178
E-MAIL DELIVERY ...................................................................................................... 181
Share WinTOTAL PDF Reports .......................................................................... 181
Share WinTOTAL Reports .................................................................................. 182
Review Sent Reports ......................................................................................... 183
Receive WinTOTAL Reports ............................................................................... 183
DELIVER WITH TOTAL CONNECT ................................................................................. 184
BILLING & BUSINESS MANAGEMENT ............................................. 184
CONFIGURE XSITES BILLING ........................................................................................ 185
Defining User Roles ........................................................................................... 186
Setting Up Your Product List ............................................................................. 186
Creating Client Specific Fee Lists ....................................................................... 187
Assigning Client Fee Lists .................................................................................. 188
Setting Up Your Coverage Area ........................................................................ 189
Setting Up Your Fee Splits ................................................................................. 189
WinTOTAL User's Guide
Assigning Your Fee Splits .................................................................................. 190
Setting Up Billing Preferences........................................................................... 191
CONFIGURE WINTOTAL BILLING ................................................................................ 192
USE XSITES BILLING .................................................................................................. 192
Dashboard ........................................................................................................ 192
Work with XSite Orders..................................................................................... 194
Create XSite Orders ..................................................................................................... 195
Edit XSite Orders ......................................................................................................... 195
Create Client Accounts ................................................................................................ 196
Change XSite Order Status .......................................................................................... 197
Invoicing............................................................................................................ 198
Creating Order Invoices ............................................................................................... 198
Creating Miscellaneous Invoices ................................................................................. 200
Deliver XSite Invoices .................................................................................................. 200
Canceling Invoices ....................................................................................................... 200
Customizing the Invoice Grid ...................................................................................... 200
Payments .......................................................................................................... 201
Recording Full Payments ............................................................................................. 201
Recording Partial Payments ........................................................................................ 202
Recording Balloon Payments ....................................................................................... 202
Charging Credit Cards for Orders ................................................................................ 203
Paying Employees........................................................................................................ 203
Accounting ........................................................................................................ 204
Reporting .......................................................................................................... 204
USE WINTOTAL BILLING ........................................................................................... 207
Work with Orders ............................................................................................. 207
Create Orders .............................................................................................................. 208
Create Client Login Accounts....................................................................................... 209
Update Internal Order Status ...................................................................................... 209
Payments & Invoicing ....................................................................................... 210
Create Invoices ............................................................................................................ 210
Delivering Invoices ...................................................................................................... 211
Mark Reports as Paid .................................................................................................. 212
Record Partial Client Payments ................................................................................... 212
QUICKBOOKS INTEGRATION ........................................................................................ 213
Set Up QuickBooks Integration ......................................................................... 213
Export Reports to QuickBooks .......................................................................... 214
Track Exported Reports..................................................................................... 215
Copyright 2015, a la mode, inc.
Page iv
Wintotal User's Guide
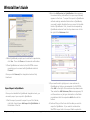
you make the most use of this tool and how to navigate
through it.
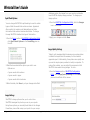
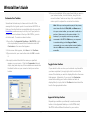
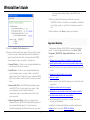
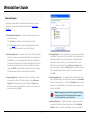
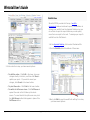
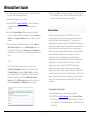
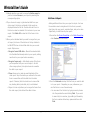
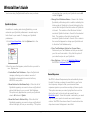
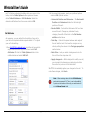
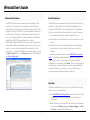
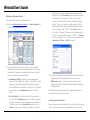
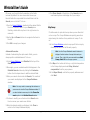
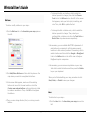
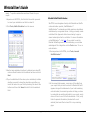
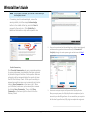
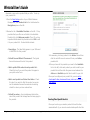
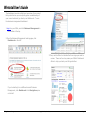
Contents
WinTOTAL User’s Guide
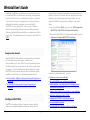
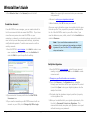
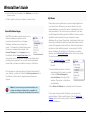
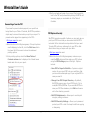
The Table of Contents allows you to navigate through the
chapters of the manual. Each blue arrow ( ) represents
one chapter. By clicking a blue arrow icon ( ) , you can
see the topics within that chapter. Just click a topic or
chapter name to view it in the right-hand pane.
This fully-searchable help file is provided to give you a clear
overview of working with WinTOTAL. Use the links on the left
to explore the various functions of WinTOTAL. Click Search
to find information on a particular topic or feature.
In addition to this user’s guide, you might also want to
consult the additional resources in the Help PowerView of the
Appraisal Desktop. The additional help includes the following
WinTOTAL resources:
•
QuickStart Guide: A brief tour through WinTOTAL.
•
Networking Guide: A guide to installing WinTOTAL on a
network.
•
Video Library: A complete series of online tutorials.
•
Webinars: An exhaustive list of web-based training.
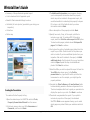
Many pages contain both text and photos. In addition, some
of the text will be blue Error! Hyperlink reference not valid.. This
"blue" text is called a hyperlink. When you click on it, you’ll
be taken to another webpage or another section of the
manual which further explains or illustrates a topic.
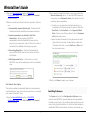
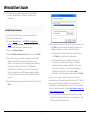
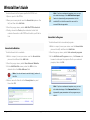
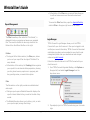
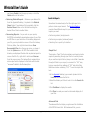
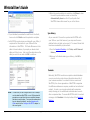
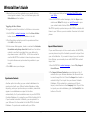
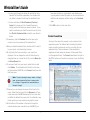
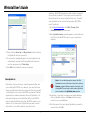
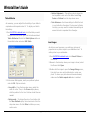
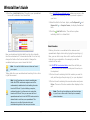
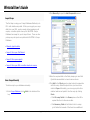
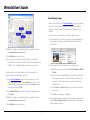
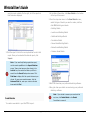
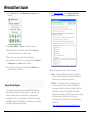
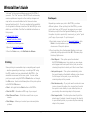
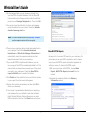
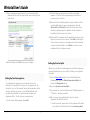
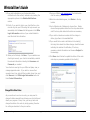
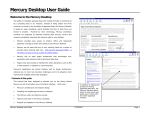
Search
The Search feature provides full-text search capabilities for
this guide. From here, just enter the words you want to find
within topics and click Go to view a list of all pages
containing your search criteria. Again, to view the desired
pages, simply click on them and they'll appear in the pane
on the right.
Search is particularly useful when you want to find a section
of the help file that is unique, but you're not sure where it is
in the Table of Contents, or when you want to find all
instances of a word within the help file.
• And more…
Visit www.alamode.com/Appraiser/Support for access to our
full list of help resources.
Conventions in this Guide
Using this Guide
We hope this on-screen help file provides a good reference
as you begin using WinTOTAL. Here’s a short guide to help
WinTOTAL User’s Guide
Before we get started, let’s cover a few of the conventions
used in throughout this guide to describe the processes you’ll
use as you work in WinTOTAL Aurora.
Copyright 2015, a la mode, inc.
Page 5
Wintotal User's Guide
• Click, double-click and right-click - Most items are
activated with a single click. If a double-click is
necessary, this guide will tell you. To right-click, use the
button on the right side of your mouse.
• Menus - Menus are at the top of the window throughout
WinTOTAL. They are labeled “File,” “Tools,” etc. to
provide a general indication of what each menu contains.
• PowerView - Functions in WinTOTAL are arranged in
screens called “PowerViews.” When a report is open,
you’ll notice buttons at the top labeled “Order,” “Form,”
“Comps,” etc. to indicate which functions each of these
PowerViews contain. Simply click any of these buttons to
switch PowerViews and address the corresponding
sections of your report.
• PowerPanes - In every PowerView, you’ll find a sub-menu
of options located on the lower-left side of the screen.
This PowerPane takes you quickly to the sub-functions
applicable to the current PowerView. For example, in the
Comps PowerView is a Comps PowerPane, allowing you to
switch between your Comps database and the Side-bySide view of your comps grid.
• Select - When this guide tells you to select something, it
means to click it once. Often, an item that has been
selected appears to be highlighted to indicate that you
have selected it.
• Window/Dialog - Throughout this guide, we’ll use the
terms “window” and “dialog” when referring to the active
screen.
• Tabs - Some windows within WinTOTAL have “tabs” to help
you navigate through the content in the window. Tabs
are effectively the same in WinTOTAL as tabs you may
find on manila folders you’d use to file physical copies of
WinTOTAL User’s Guide
important documents. You’ll notice these throughout
WinTOTAL, particularly as you fill out your forms.
• Links, URLs, web addresses, and hyperlinks - Each of
these items refer to nearly the same thing. Links and
hyperlinks are actually just words that you can click to
“link” to another program, website, or other content.
Typically, these “links” are indicated by their appearance
as they are often blue and underlined. “Web addresses”
and “URLs” refer to the address connected to the
hyperlink. For instance, a link to our Video Library, would
take you to the “web address” or “URL” of
http://www.alamode.com/wintotal/videos.
• Fields - Fields are any places in WinTOTAL – whether in a
form or in a dialog box - where you can type information.
• Drop-down lists - Often, fields in a WinTOTAL form or
dialog box will have an arrow displayed on the right side
of them. By clicking the arrow, you can access a picklist of
items. You can also use the Alt+Down Arrow keyboard
shortcut to open these lists.
• Pop-up Lists - Similar to Drop-down lists, only they will
appear either above or below the link you click, depending
upon where they appear on your screen.
End User License Agreements
WinTOTAL is a collection of products that work together to
help you produce quality appraisals. As such, the product is
covered by several license agreements created by the
owners of each product, and agreed to by each user during
the installation process. For your review, these agreements
are included here.
Copyright 2015, a la mode, inc.
Page 6
Wintotal User's Guide
WinTOTAL – Aurora Software License ("License") by a la mode,
inc.
IMPORTANT: READ BEFORE CONTINUING
IMPORTANT: READ THE FOLLOWING TERMS AND
CONDITIONS CAREFULLY BEFORE CONTINUING. BY
CONTINUING, YOU INDICATE YOUR ACCEPTANCE OF
THESE TERMS AND CONDITIONS. IF YOU DO NOT
AGREE WITH THE TERMS OF THIS LICENSE, DO NOT
CONTINUE. PROMPTLY RETURN THE PACKAGE TO THE
PLACE OF PURCHASE AND IF ALL APPLICABLE
CONDITIONS OF RETURN AS SET FORTH HEREIN ARE
COMPLIED WITH, YOUR LICENSE FEE WILL BE
REFUNDED.
By continuing, you acknowledge that you read, understand,
and agree with the terms of this License, and you agree to
abide by such terms. YOU ALSO AGREE THAT ALL OF THE
TERMS AND CONDITIONS OF THIS LICENSE APPLY TO YOUR
USE OF THE SOFTWARE, SHOULD YOU CHOOSE TO
PROCEED WITH THE USE AND IMPLEMENTATION OF THE
SOFTWARE
The License in Plain English
This software is protected by copyright. You must treat this
Software like you treat a book. Just as one book cannot be
read by different people in two different places at the same
time, neither can this Software be used on two different
computers at the same time. It may be moved from one
WinTOTAL User’s Guide
computer to another, so long as there is no possibility of it
being used on two computers simultaneously. The Software
and the manuals are for use on a single computer only. If
two computers run the program at the same time, it's a
violation of this License.
Note: In the case of a properly licensed "network version" of
this Software, substitute "server" for "computer(s)" in the
explanation above. Using a single-user version of this
Software on a network is expressly forbidden.
1. LICENSE TERMS: a la mode technologies, inc. hereby
grants you (the original user) a nonexclusive,
nontransferable, restrictive and conditional right to use the
enclosed Software subject to the terms and conditions
contained in this License on a single computer. You assume
full responsibility for the selection of this program to achieve
your intended results, and for the installation, use, and
results obtained from this program.
2. USE OF THE SOFTWARE: In consideration of this License,
you agree that the enclosed Software and its documentation
are for your use only, on a single machine. You agree not to
sublicense this Software, nor make copies of the Software or
its documentation to sell or to distribute free of charge. You
may copy the program into any machine-readable or printed
form for backup or modification purposes in support of your
own use of the Software on a single machine. Certain
programs, however, may contain devices to limit or inhibit
copying. You agree to take all reasonable and necessary
steps to ensure that all employees and other persons under
your control do not use this Software in contravention of the
terms of this License and are aware of and abide by the
Copyright 2015, a la mode, inc.
Page 7
Wintotal User's Guide
terms of this License. The Software shall be used only by
you, only for your own use and not for the benefit of any
other person or entity.
3. THIRD PARTY SOFTWARE: ALM is not responsible for third
party software. You accept responsibility for all third party
applications that you choose to integrate with ALM products.
4. OWNERSHIP: You have no ownership rights in the
Software. Rather, you have a license to use the Software as
long as this License Agreement remains in full force and
effect. Ownership of the Software, Documentation and all
intellectual property rights therein shall remain at all times
with a la mode technologies, inc. Any other use of the
Software by any person, business, corporation, government
organization or any other entity is strictly forbidden and is a
violation of this License Agreement.
5. COPYRIGHT: The Software and Documentation contain
material that is protected by United States Copyright Law
and trade secret law, and by international treaty provisions.
All rights not granted to you herein are expressly reserved
by a la mode technologies, inc. You shall not remove any
proprietary notice of a la mode technologies, inc. from any
copy of the Software or Documentation.
6. RESTRICTIONS: You may not publish, display, disclose,
rent, lease, sublease, modify, loan, distribute, or create
derivative works based on the Software or any part thereof.
You may not reverse engineer, decompile, translate, adapt,
or disassemble the Software, nor shall you attempt to create
the source code from the object code for the Software. You
shall not transmit the Software over any network or between
WinTOTAL User’s Guide
any devices, although you may use the Software to make
such transmissions of other materials.
7. USER COMMUNICATION: a la mode technologies, inc.
reserves the right to send service e-mails notifying User of
operational or other changes that may affect or change the
Services offered by a la mode technologies, inc. Please note
that you cannot opt out of such service e-mails because
these service e-mails provide information critical for the
operation of the Software.
USER HEREBY GRANTS a la mode technologies, inc.
EXPRESS WRITTEN PERMISSION TO SEND FAX AND OR
EMAIL SOLICITATIONS OR ADVERTISEMENTS, THUS
SATISFYING ANY EXPRESS WRITTEN PERMISSION
REQUIREMENT.
8. CONFIDENTIALITY: You acknowledge that the Software
contains proprietary trade secrets of a la mode technologies,
inc. and you hereby agree to maintain the confidentiality of
the Software using at least as great a degree of care as you
use to maintain the confidentiality of your own most
confidential information.
9. ASSIGNMENT: You may not assign, transfer or lend the
Software without a la mode technologies, inc.'s express
written consent. UNAUTHORIZED DUPLICATION, TRANSFER
OR SALE OF THIS SOFTWARE SHALL CONSTITUTE A
VIOLATION OF COPYRIGHT LAWS AND ENTITLES a la mode
technologies, inc. TO ALL REMEDIES AVAILABLE UNDER
APPLICABLE LAWS.
Copyright 2015, a la mode, inc.
Page 8
Wintotal User's Guide
10. VIOLATIONS OF LICENSE: Should a la mode
technologies, inc. become aware of any violations of this
License, the party responsible for such violations agrees to
be obligated to a la mode technologies, inc. for all costs
incurred to enforce this License, including reasonable
attorney's fees and court costs.
11. DURATION OF LICENSE: This license is effective until
terminated. You may terminate the License any time by
destroying the program together with all copies,
modifications and merged portions. In addition, this License
will automatically terminate if you fail to comply with any of
the terms of this License. You agree upon such termination
to return to a la mode technologies, inc. all copies,
modifications and merged portions upon.
12. LIMITED WARRANTY: a la mode technologies, inc.
warrants for a period of 100 days from your receipt of the
Software delivered with this package, that if operated as
directed, this program will operate substantially in
accordance with the Documentation. However, a la mode
technologies, inc. does not warrant that the functions
contained in the Software will meet your requirements or
that the operation of this program will be uninterrupted or
error free. Any use by you of the Software is at your own
risk. This Limited Warranty is the only warranty provided by
a la mode technologies, inc. regarding the Software. To
make a warranty claim, you must return this program to the
location where you obtained it along with proof of purchase
within such 100 day period. If this program does not perform
substantially in accordance with the Documentation, a la
mode technologies, inc.'s entire liability and your exclusive
remedy shall be limited to, at a la mode, inc's sole and
exclusive discretion, either:
WinTOTAL User’s Guide
a. The replacement of any software not meeting a la mode
technologies, inc.'s "Limited Warranty" which is returned to a
la mode technologies, inc., or
b. If a la mode technologies, inc. is unable to deliver
replacement software which is free of defects in materials or
workmanship, you may terminate this Agreement by
returning the program and your purchase price will be
refunded to you within a reasonable period of time.
13. DISCLAIMER OF WARRANTIES: THIS SOFTWARE IS
PROVIDED "AS IS" WITHOUT WARRANTY OF ANY KIND,
EITHER EXPRESSED OR IMPLIED, INCLUDING, BUT NOT
LIMITED TO THE IMPLIED WARRANTIES OF
MERCHANTABILITY AND FITNESS FOR A PARTICULAR
PURPOSE, UNLESS SPECIFICALLY PROVIDED HEREIN. THE
ENTIRE RISK AS TO THE QUALITY AND PERFORMANCE OF
THE SOFTWARE IS WITH YOU. SHOULD THE SOFTWARE
PROVE DEFECTIVE, YOU (AND NOT a la mode technologies,
inc.) ASSUME THE ENTIRE COST OF ALL NECESSARY
SERVICING, REPAIR OR CORRECTION.
SOME STATES DO NOT ALLOW THE EXCLUSION OF IMPLIED
WARRANTIES, SO THE ABOVE EXCLUSION MAY NOT APPLY
TO YOU. THIS WARRANTY GIVES YOU SPECIFIC LEGAL
RIGHTS AND YOU MAY ALSO HAVE OTHER RIGHTS WHICH
VARY FROM STATE TO STATE.
14. LIMITATION OF LIABILITY: IN NO EVENT SHALL a la
mode technologies, inc. BE LIABLE TO YOU OR ANY THIRD
PARTY FOR ANY LOSS, LIABILITY, PENALTY OR DAMAGE
ARISING IN ANY WAY, EITHER DIRECTLY OR INDIRECTLY
OUT OF THE USE OF THIS SOFTWARE OR ITS
DOCUMENTATION. YOU AGREE THAT IN NO EVENT SHALL a
la mode technologies, inc. BE LIABLE FOR ANY SPECIAL,
Copyright 2015, a la mode, inc.
Page 9
Wintotal User's Guide
INDIRECT OR CONSEQUENTIAL DAMAGES, INCLUDING BUT
NOT LIMITED TO ANY LOST PROFITS, LOST BUSINESS
OPPORTUNITY OR LOST SAVINGS, THAT IN ANY WAY
RELATE TO THE USE OF a la mode technologies, inc.'s
PRODUCTS. a la mode technologies, inc.'s LIABILITY SHALL
IN NO WAY EXCEED THE TOTAL AMOUNT OF YOUR LICENSE
FEE THAT YOU ACTUALLY PAY FOR THE USE OF a la mode
technologies, inc.'s SOFTWARE.
SOME STATES DO NOT ALLOW THE LIMITATION OR
EXCLUSION OF LIABILITY FOR INCIDENTAL OR
CONSEQUENTIAL DAMAGES SO THE ABOVE LIMITATION OR
EXCLUSION MAY NOT APPLY TO YOU.
15. EXPORT RESTRICTIONS: This License Agreement is
expressly made subject to any laws, regulations, orders, or
other restrictions on the export from the United States of
America of the Software or information about such Software
which may be imposed from time to time by the Government
of the United States of America. You shall not export the
Software, Documentation, or information about the Software
and Documentation without consent of a la mode
technologies, inc. and compliance with such laws,
regulations, orders, or other restrictions.
16. SEVERABILITY: If any provision of this License is
determined to be invalid, it will be deemed deleted and all
remaining provisions will remain in full force and effect.
17. UPDATES: At a la mode technologies, inc.'s sole
discretion, a la mode technologies, inc. may provide you with
an update. a la mode technologies, inc. reserves the right to
provide the update in exchange for payment of a fee. This
License will govern all updates, copies, and merged or
WinTOTAL User’s Guide
modified versions of the Software unless a new License is
provided to you.
18. CHOICE OF LAW AND VENUE: You agree that this
License shall be governed by the internal substantive laws of
the State of Florida, U.S.A. The Collier County, State of
Florida, U.S.A. District Court and the United States District
Court for the Middle District of Florida shall have sole and
exclusive jurisdiction and venue over any dispute, conflict or
claim arising from this License or your use of the Software.
Whether you are a United States citizen or a citizen or
resident of Canada or any other country, you agree to
submit to the terms of this License and to the laws,
jurisdiction and venue as provided by this License. By
continuing with the use and implementation of the Software
and related programs, you agree to submit to such laws,
jurisdiction and venue as set forth herein.
19. SURVIVAL: The provisions of Sections 8, 9, 10, and 12
shall survive termination of this License.
ERC RESTRICTIONS: Certain material contained in this
License may be licensed from the Employee Relocation
Council ("ERC") and is subject to the terms of that license.
The use of all ERC forms generated by this Software is
limited to the preparation of completed forms by the enduser for its business use. The production of blank forms is
strictly prohibited. ERC reserves the right to change,
modify, or discontinue the use or endorsement of any of its
forms at any time, without notice to the end-user. ERC
makes no claims or representations concerning its forms
whatsoever, including their fitness for any specific purpose.
Copyright 2015, a la mode, inc.
Page 10
Wintotal User's Guide
ERC is not connected in any way with any software vendor
and licenses its forms widely.
APPRAISAL INSTITUTE: User may have the option of using
or including Appraisal Institute AI Reports® data in
conjunction with User's use of the software. In such case,
User agrees that the Appraisal Institute is not responsible for
the data, analysis or work product User provides to User's
client as part of such use. User will only use AI Reports® for
User's own internal business purposes, and User may not resell or sublicense AI Reports®. User further agrees to
indemnify, defend and hold harmless the Appraisal Institute
from and against any and all third party claims or liabilities
for any third party claim brought against the Appraisal
Institute arising from or related to User's use and or any
misuse of AI Reports®.
FLOOD DATA: Certain third parties have granted ALM the
right to offer flood maps and other related flood
information. ALM is nothing more than a conduit for any
flood information provided to you by these third parties and
ALM is in no way involved in the location or determination of
the data. Therefore, ALM makes no warranties, express or
implied, including but not limited to warranties of
merchantability and fitness for a particular purpose. This
information is provided to you on an "AS IS" and "WITH ALL
FAULTS" basis and you agree to use it at your own risk. In
no event shall ALM be liable to you or any third party for any
loss, liability, penalty or damage arising in any way, either
directly or indirectly, from your use or reliance upon the
flood information provided to you and through your
acceptance of this provision you release all such claims.
You may not use any of this data to complete in whole or in
part a flood hazard determination and/or insurance quote.
WinTOTAL User’s Guide
You agree to use this information for solely immediate or
near immediate personal purposes, and not for service
bureau, time-sharing or other similar purposes. Accordingly,
you may copy this information only as necessary for your
personal use to (i) view it on your screen, (ii) save a single
copy on your hard drive or disk, (iii) print it, and (iv) transfer
it to a portable computer device, provided that you do not
remove any copyright notices that appear and do not modify
the information in any way. You may not otherwise
reproduce, copy, modify, decompile, disassemble or reverse
engineer any portion of this information, and may not
transfer or distribute it in any form, for any purpose.
MICROSOFT BING MAPS PLATFORM APIs' TERMS OF USE:
Our obligation to Microsoft requires that we provide you with
a link to their terms of use. The following Microsoft Terms of
Use may or may not apply to your use of the Microsoft Bing
Maps:
http://www.microsoft.com/maps/assets/docs/terms.aspx
Adobe Systems Incorporated
ELECTRONIC END USER LICENSE AGREEMENT
FOR ADOBE ACROBAT READER NOTICE TO USER:
THIS IS A CONTRACT. BY INSTALLING THIS
SOFTWARE YOU ACCEPT ALL THE TERMS AND
CONDITIONS OF THIS AGREEMENT.
This Adobe Systems Incorporated ("Adobe") End User
License Agreement accompanies the Adobe ® Acrobat ®
Reader product and related explanatory materials ("Adobe
Copyright 2015, a la mode, inc.
Page 11
Wintotal User's Guide
Software"). The term "Adobe Software" also shall include
any upgrades, modified versions or updates of the Adobe
Software licensed to you by Adobe. Please read this
Agreement carefully. At the end, you will be asked to accept
this agreement and continue to install or, if you do not wish
to accept this Agreement, to decline this agreement, in
which case you will not be able to use the Adobe Software.
Upon your acceptance of this Agreement, Adobe grants to
you a nonexclusive license to use the Adobe Software,
provided that you agree to the following:
identify printed output produced by the Adobe Software, in
accordance with accepted trademark practice, including
identification of trademark owner’s name. Such use of any
trademark does not give you any rights of ownership in that
trademark. Except as stated above, this Agreement does not
grant you any intellectual property rights in the Adobe
Software.
Flood Data
1. Use of the Software.
You may install the Adobe Software on a hard disk or other
storage device; install and use the Adobe Software on a file
server for use on a network for the purposes of (i)
permanent installation onto hard disks or other storage
devices or (ii) use of the Software over such network; and
make backup copies of the Adobe Software.
You may make and distribute unlimited copies of the Adobe
Software, including copies for commercial distribution, as
long as each copy that you make and distribute contains this
Agreement, the Acrobat Reader installer, and the same
copyright and other proprietary notices pertaining to this
Adobe Software that appear in the Adobe Software. If you
download the Adobe Software from the Internet or similar
on-line source, you must include the Adobe copyright notice
for the Adobe Software with any on-line distribution and on
any media you distribute that includes the Adobe Software.
Certain third parties have granted a la mode, inc. the right to
offer flood maps and other related flood information. a la
mode, inc. is nothing more than a conduit for any flood
information provided to you by these third parties and a la
mode, inc. is in no way involved in the location or
determination of the data. Therefore, a la mode, inc. makes
no warranties, express or implied, including but not limited
to warranties of merchantability and fitness for a particular
purpose. This information is provided to you on an “AS IS”
and “WITH ALL FAULTS” basis and you agree to use it at
your own risk. In no event shall a la mode, inc. be liable to
you or any third party for any loss, liability, penalty or
damage arising in any way, either directly or indirectly, from
your use or reliance upon the flood information provided to
you and through your acceptance of this provision you
release all such claims.
2. Copyright and Trademark Rights. The Adobe Software
is owned by Adobe and its suppliers, and its structure,
organization and code are the valuable trade secrets of
Adobe and its suppliers. The Adobe Software also is
protected by United States Copyright Law and International
Treaty provisions. You may use trademarks only insofar as
required to comply with Section 1 of this Agreement and to
You may not use any of this data to complete in whole or in
part a flood hazard determination and/or insurance quote.
You agree to use this information for solely immediate or
near immediate personal purposes, and not for service
bureau, time-sharing or other similar purposes. Accordingly,
you may copy this information only as necessary for your
WinTOTAL User’s Guide
Copyright 2015, a la mode, inc.
Page 12
Wintotal User's Guide
personal use to (i) view it on your screen, (ii) save a single
copy on your hard drive or disk, (iii) print it, and (iv) transfer
it to a portable computer device, provided that you do not
remove any copyright notices that appear and do not modify
the information in any way. You may not otherwise
reproduce, copy, modify, decompile, disassemble or reverse
engineer any portion of this information, and may not
transfer or distribute it in any form, for any purpose.
This license remains effective until terminated. You may
terminate this license at any time by returning to Apex
Software, or your authorized dealer, at your expense, the
program and related documentation together with all copies
and merged portions in any form. This license will also
terminate immediately upon conditions set forth elsewhere in
the Agreement or if you fail to comply with any term or
condition contained herein.
LIMITED WARRANTY
Apex License Agreement
Apex Software hereby grants the purchaser of this software
a personal, non-transferable and non-exclusive right and
license to use the program under the terms stated in this
agreement. Title, ownership and/or rights in and to the
program and the related documentation remain with Apex
Software.
Installation and use of this program is limited to the original
purchaser in accordance with the terms of sale. You and your
employees and agents are required to protect the
confidentiality of the program. You may not transfer,
distribute or otherwise make the program or documentation
available to any third party, by any time-sharing or
otherwise, without the prior written consent of Apex
Software.
You may not alter or modify the program. You may not copy
or reproduce the program or documentation for any purpose
except with the written permission of Apex Software.
You acknowledge that you are receiving only a LIMITED
LICENSE TO USE the program and related documentation
and that Apex Software retains all rights to the program and
documentation.
WinTOTAL User’s Guide
Apex Software makes no representation or warranties, either
expressed or implied, by or with respect to the program and
related documentation, including but not limited to, implied
warranties of merchantability or fitness for any particular
purpose(s). In no event will Apex Software be liable for any
damages, whether direct or indirect, special, consequential
or incidental, arising from the use of this program.
RETURN Policy
Please contact Apex Software or your authorized dealer to
obtain a Return Merchandise Authorization (RMA) number in
order to expedite handling. Programs returned without an
RMA will not be processed.
©1988, 2002 APEX Software. All Rights Reserved.
Appraisal Institute
The Appraisal Institute is not responsible for the data,
analysis or any work product the User provides (and/or that
provided by the appraiser(s) signing the report) in this AI
Reports Form. User further agrees to indemnify, defend and
hold harmless the Appraisal Institute from and against any
third party claims or liabilities brought against the
User arising from or related to User's acts or
Copyright 2015, a la mode, inc.
Page 13
Wintotal User's Guide
omissions (and/or those of the appraiser(s) signing the
report) with respect to this AI Report Form.
storage space (like all computer specs), more is always
better.
YOU ACKNOWLEDGE THAT YOU HAVE READ THIS
LICENSE, THAT YOU UNDERSTAND IT AND AGREE TO
BE BOUND BY ITS TERMS AND CONDITIONS. YOU
FURTHER ACKNOWLEDGE THAT THIS LICENSE
CONSTITUTES THE ENTIRE AGREEMENT BETWEEN YOU
AND a la mode, inc. AND SUPERSEDES ANY PROPOSAL
OR PRIOR AGREEMENT, ORAL, OR WRITTEN, AND ANY
OTHER COMMUNICATIONS BETWEEN US RELATING TO
THE SUBJECT MATTER OF THIS LICENSE. YOU ALSO
AGREE THAT ALL OF THE TERMS AND CONDITIONS OF
THIS LICENSE APPLY TO YOUR USE OF THE
SOFTWARE, SHOULD YOU CHOOSE TO PROCEED WITH
THE USE AND IMPLEMENTATION OF THE SOFTWARE.
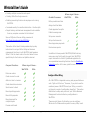
System Requirements
a la mode’s products are designed to run on Windows (either
32-bit or 64-bit versions). As such, your PC needs to meet
the requirements laid out by Microsoft for the version of
Windows that you’re using. However, as with any software,
the more it exceeds the minimum requirements, the better
your experience will be.
Beyond the official requirements to run Windows, one thing
to keep in mind when purchasing a new PC or upgrading
your existing hardware is hard drive space. You’ll need to
make sure you have enough to install the programs you
need to work and store your reports, too. When it comes to
WinTOTAL User’s Guide
Here are some details about our products that will help you
choose a PC with an appropriate amount of storage:
Program size on disk:
• WinTOTAL Aurora: 1GB (server and standalone)
• TOTAL Sketch: 200MB
• TOTAL Connect: 220MB
• 1024 MB = 1 GB || 1024 GB = 1 TB
The above sizes don't include the size of the install file,
which can be around the same size as the program itself.
Keep this in mind if you're downloading the install files on a
slow or limited Internet connection.
Report file sizes:
Since appraisal files continue to grow, we recommend that
you have at least 10MB of storage space available per
report that you complete.
Use this to estimate the amount of storage you need by
multiplying this value with the number of reports you
complete in a year, then multiple that value by two
(WinTOTAL and TOTAL keep a local backup of every file on
disk) to determine your annual ongoing storage needs.
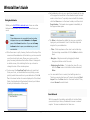
Choose a supported version of Windows below to view
Microsoft's official minimum system requirements. If you're
unsure which version of Windows you use, click here for a
Microsoft support page that will tell you.
Copyright 2015, a la mode, inc.
Windows Vista
Windows 7
Windows 8/8.1
Page 14
Wintotal User's Guide
4.Along the way, you�ll need to agree to our End User
License Agreement and you may need to supply
WinTOTAL with your preferred installation directory.
Install WinTOTAL
The first step, of course, is to install WinTOTAL. Here's how:
Note: As with most Windows software, administrative rights
are required to install WinTOTAL. If you don't have
administrative rights, contact your system
administrator.
Install WinTOTAL on a Network
When you�ve got multiple computers in your office, using
WinTOTAL on a network benefits you by centralizing your
data as well as program updates and administration while
also allowing each user to have custom preferences and
permissions to crucial data.
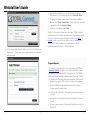
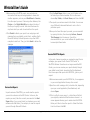
Install from the Internet
1.First, you need to download the latest WinTOTAL
installation file from our website. To do so, visit the My
Downloads section of your account at
http://www.alamode.com/myaccount. Just log in with
your a la mode username and password.
2.Once the file download is complete, run the installation
file, provide a preferred temporary directory for
WinTOTAL to place its installation files and then click
Install.
Note: Unless you have a specific reason to change the
temporary directory, we recommend that you
leave the temporary directory as the default value.
3.An installer will appear and prompt you about what you
want to do, click Install WinTOTAL. Then, follow
through the installation wizard. If the wizard prompts
you about whether you want to install Microsoft's SQL
Database engine, click Yes.
5.When the installation is finished, start WinTOTAL via your
Start menu.
The latest version of WinTOTAL, Aurora, goes even further
for network users by implementing Microsoft SQL databases
for faster and more reliable searches and file listings.
Instead of requiring workstations to open large database
files across the network - as was necessary with the older
Access-based system - SQL enables the server to search
through comps, images, the file cabinet, and more on its
own hard drive and simply return the results to the
workstation.
If you want to install WinTOTAL on an office network so that
you can share your WinTOTAL setup with everyone in the
office, see our WinTOTAL Networking Guide for specific steps
on this process.
Note: Aurora is not designed nor tested for use with Microsoft's
Remote Desktop (Terminal Services). As a result, we
don't support installing Aurora in a Remote Desktop
environment, and our Support Technicians are unable to
troubleshoot any potential problems.
Install WinTOTAL on a Laptop
WinTOTAL User’s Guide
Copyright 2015, a la mode, inc.
Page 15
Wintotal User's Guide
Installing WinTOTAL on a laptop can be a great way for you
to make WinTOTAL for Mobile but also bring your data back
into the office to work on a dedicated computer or network.
If you intend to use your laptop while on the go, but use a
dedicated workstation otherwise, you should install
WinTOTAL on your laptop first. Then, you�ll need to
perform some additional setup to ensure that your laptop
and your dedicated office workstation or network can talk to
each other. For detailed steps on this process, see Tech Doc
5080.
great lengths to make the application as widely useful as
possible, right out of the box. But we recognize that every
appraiser has unique requirements and habits. You can
access WinTOTAL’s configuration settings in one of two
ways:
1.From the Windows Start menu, choose [All] Programs,
WinTOTAL, WinTOTAL Configuration Utility.
2.From within WinTOTAL or the Appraisal Desktop, choose
Options, Configure WinTOTAL settings.
Configure Your Firewall
Since WinTOTAL relies heavily on the Internet as a resource
for flood and census data, maps, updates, and
communication with your XSite, it’s very important that any
firewall programs you may have do not interfere with those
processes. If you’re experiencing regular problems inside
WinTOTAL and you know that you have a firewall program
installed, consult one of our firewall documents below.
• Tech Doc 4016 - Effects of Antivirus & Firewall Programs on
WinTOTAL
• Tech Doc for Configuring ALL Firewall Programs for
WinTOTAL
Inside the configuration tool, you can:
• Change your auto-save settings
• Set up WinTOTAL user profiles and signatures
• Decide whether your drop-down lists contain Recent
Responses or QuickLists
• Create custom labels for the photos in your database
• Install and configure Pocket TOTAL
Configure WinTOTAL
WinTOTAL provides an array of options you can define to
design your optimal appraisal experience. We’ve gone to
Configure WinTOTAL
• Configure WinTOTAL’s Internet connection
• Set up automatic updates
• Integrate with your favorite sketching software
Copyright 2015, a la mode, inc.
Page 16
Wintotal User's Guide
• Integrate with InterFlood or your XSite
• And more…
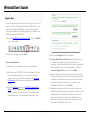
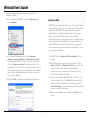
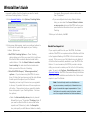
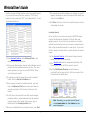
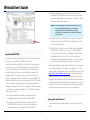
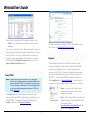
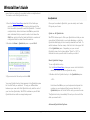
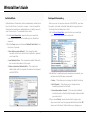
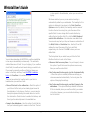
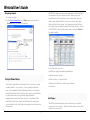
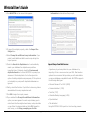
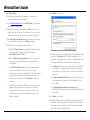
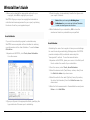
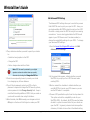
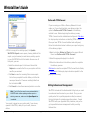
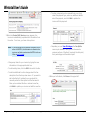
General Settings
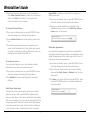
Configuration Options
The configuration utility is divided into several sections,
indicated by the icons in the toolbar. Then, inside each
section, look to the pane on the left for additional relevant
functions. Here’s a brief description of the options contained
in each section.
General – Various settings controlling how the
application appears, plus settings for individual users
Forms – Settings that allow you to control how
WinTOTAL functions during formfilling
Images – Settings for image size, quality, and labeling
Pocket - Pocket TOTAL installation and configuration
tools
Internet - Internet connection and update settings
Sketch – Settings for your preferred sketching
software
Flood – Flood map integration and colorization settings
Comps – Automatic latitude and longitude retrieval
settings for comps
net.X – Integration and synchronization settings for
your XSite
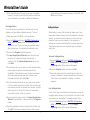
Click an icon to access the various settings in WinTOTAL,
make changes to your WinTOTAL configuration, and click
Save to apply these changes.
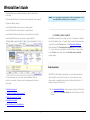
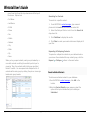
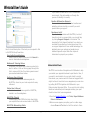
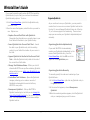
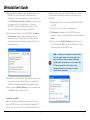
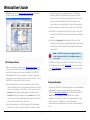
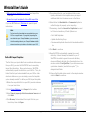
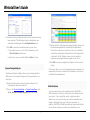
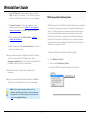
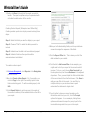
Configure WinTOTAL
To get the most out of WinTOTAL, you should customize
some of the configuration options to suit the way you work.
To access WinTOTAL’s general program settings…
1.From the WinTOTAL Configuration Utility, click the
General icon in the toolbar.
2.Apply your preferred settings and click Save. The available
settings include:
o Ask before saving changes – Whenever you close a
report, or exit WinTOTAL, the program checks to see if
you have made any changes to the file. By enabling
this option, WinTOTAL prompts you before saving
changes you’ve made to your reports. If you disable
this feature, WinTOTAL saves your changes
automatically.
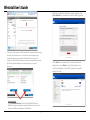
o Open Appraisal Desktop when WinTOTAL starts –
Check this option to ensure that WinTOTAL opens the
Appraisal Desktop whenever you open it.
o Close Appraisal Desktop when opening a report –
Check this option to close down the Appraisal Desktop
whenever WinTOTAL starts to that you can reclaim
any resources used by the Appraisal Desktop. If you
need both WinTOTAL and the Appraisal Desktop open
at the same time, leave this option unchecked.
o Always default to the printer that was last
selected – If you regularly switch back and forth
between several printers in your office, you can select
Copyright 2015, a la mode, inc.
Page 17
Wintotal User's Guide
you’d prefer, mark the Right option to move them to
the other side.
this option if you want WinTOTAL to remember the
last printer you used. If you’d prefer to always use
your default printer, turn this option off.
o Create transfer locks when converting old reports
– WinTOTAL attempts to save you time by pushing
relevant data forward into related fields in your report.
To ensure that you have full control over those fields,
WinTOTAL also provides a way to disable this behavior
so you can enter the exact data you want into those
fields. Since older versions of WinTOTAL didn’t have
this feature, you can enable this option to ensure that
your old report data remains intact when you merge it
into your new reports.
o Automatically save report every XX minutes – If
you enable this option and specify a number of
minutes in the provided box, you can set WinTOTAL to
automatically save your report every so often. This is
a great way to make sure that system crashes don’t
cause you to lose work as well.
o Enable the scroll wheel on my mouse – If you use a
mouse equipped with a scroll wheel, you may need to
enable this setting for it to work properly within
WinTOTAL.
o Hide data lookup panel inside of SwiftEstimator –
If you’re using WinTOTAL’s integration with
SwiftEstimator to produce your cost estimates, you
can toggle the data lookup panel that shows you key
information from your report on the left side of that
feature. Check the box to hide the data lookup panel
or leave it unchecked to continue showing the data
lookup panel.
o Display side items in WinTOTAL – By default, your
QuickLists and the panes containing other relevant
features appear on the left side of your screen. If
Configure WinTOTAL
o Initial Window Size – These options specify how the
WinTOTAL and Appraisal Desktop screens appear
when you launch the application. Options are:
Maximized – With this setting, WinTOTAL opens to
its maximum capacity so that it encompasses your
entire screen.
Use Last Position – With this setting, WinTOTAL
remembers the size and location of the window
when you last closed it and then it uses that same
combination when you next open WinTOTAL.
Use Standard Position – With this setting,
WinTOTAL and the Appraisal Desktop open in the
center of your screen.
Manage User Accounts
WinTOTAL tailors certain program settings to the needs of
the various users in your WinTOTAL installation allowing
multi-appraiser offices to use the same WinTOTAL
installation while still enjoying a personalized user
environment. If you tie WinTOTAL with your XSite, this can
also ensure that the proper file permissions are set in
WinTOTAL so that only the assigned appraiser and
supervisor can work with a given report file. To access
WinTOTAL’s user management tools…
1.From the WinTOTAL Configuration Utility, click the
General icon in the toolbar.
Copyright 2015, a la mode, inc.
Page 18
Wintotal User's Guide
2.Click Select a User in the General pane to the left.
Info in the upper right corner and enter your username
and password.
4.Be sure to set up your signature and seal.
5.When finished, click OK to save your account.
Create User Accounts
From WinTOTAL’s user manager, you can create and edit a
list of user accounts that can access WinTOTAL. If you have
more than one person who uses WinTOTAL on your
computer or network, you should create an account for each
user so that you can keep everyone’s settings, signatures,
and QuickLists separate. To add a user account or edit an
existing account…
Once your user information screen is complete, click to save
this user profile. Then, repeat this process to create profiles
for all of the WinTOTAL users in your office. Later, if you
need to delete any user profile, select it in the Available box
and click Remove.
Note: If you need further assistance with this
process or if you need some help creating your digital
signature file, see Tech Doc 5056 on digital signature
1.From WinTOTAL’s user manager, click Add to create a new
user or select an existing user from the Available list
and click Edit to open the profile for editing.
setup and creation.
Set Up Your Signature
1.From WinTOTAL’s user manager, select the user account
needing a signature and click Edit or click Add to create
a new account.
2.Change any profile information as necessary.
3.Then, click Browse in the Signature box, navigate
through your hard drive to find your signature file, select
it, and click Open to drop your digital signature into the
sample form block.
4.Click and drag the signature image to position it properly
on the signature line.
2.Type a name for the user profile into the WinTOTAL
Username box.
3.If you need to associate your WinTOTAL account with an
account on your XSite, click Change My XSite Login
Configure WinTOTAL
5.When you’re satisfied with your signature placement, click
the link to Password Protect my Signature. This
ensures that nobody can place your signature on a report
without knowing your password.
Copyright 2015, a la mode, inc.
Page 19
Wintotal User's Guide
6.Type a password into the field and click OK.
7.Repeat steps 3 and 4 using the links in the Seal box if you
would like to add your digital seal to your reports.
8.Finally, if you want to associate this WinTOTAL account
with the same user’s profile on your XSite, click Change
my XSite Login Info, type in the user’s a la mode
Username and Password, and click OK.
Set the Current User
While WinTOTAL prompts you about which user profile you
want to use when you log into WinTOTAL, you can switch the
active user profile at any time by accessing the WinTOTAL’s
user manager. To do so…
computer. If you choose to change these settings, keep in
mind that configuring them incorrectly could interfere with
WinTOTAL’s ability to create, load, and save certain types of
files that it uses. For this reason, we recommend that you
only change these settings at the direction of an a la mode
technical support representative. In the event that you
choose to do so on your own…
1.From the General Settings section of WinTOTAL
Configuration Utility, click Edit my Database Paths in
the General pane to the left.
2.If you’re storing your report files, images, or image
thumbnail files on your computer in a non-standard
location, just type in or Browse to the folder where
you’re storing each type of file.
1.From WinTOTAL’s user manager, select the name for the
profile you wish to activate in the list of users and then
click Set User.
2.If this is the primary or only user of this system, check the
box to Automatically Login Using this Name in the
Future.
Hint: If this option is not selected, and there are
3.Click Save when finished to accept your changes.
multiple user profiles configured on your system,
WinTOTAL prompts you to select a user each time you
load it.
File Cabinet Settings
Change Database Locations
WinTOTAL allows you to configure the location or “path” of
your report files, images, and image thumbnails on your
Configure WinTOTAL
WinTOTAL’s File Cabinet settings allows you to enable or
disable the Detailed View in the Appraisal Desktop, change
the alternate report color WinTOTAL uses in the File Cabinet
or configure the “stop lights” you see there. To access and
change WinTOTAL’s File Cabinet settings…
Copyright 2015, a la mode, inc.
Page 20
Wintotal User's Guide
1.From the General Settings section of WinTOTAL
Configuration Utility, click File Cabinet in the General
pane to the left.
2.Mark your preferred options from those provided. Options
are:
o Automatically expand details grid - Enables the File
Cabinet’s automatic detailed view expansion feature.
o Animate expanded row details in the Files
PowerView – When checked, WinTOTAL
automatically slides the detailed file view onto the
screen as you access each report. When this option is
unchecked, the detailed view simply pops open.
o Alternating Row Color - Controls the background
color that WinTOTAL uses for every other row in the
File Cabinet.
2.If you want to manage file status on your own, select the
Manual state only option. To have WinTOTAL manage
the process, click Automatic state, then select from the
reporting options presented.
o Currently you can base the stop-light reporting on a
comparison of the date you sign a report to either the
Due Date, the Order Date or the Appraisal Start
Date. Choose one of these options from the Compare
with drop-down menu.
o Adjust the date thresholds for the yellow and red alert
levels. Enter the number of days before or after the
“Compare with” date, choosing Before or After from
the drop-down menu.
o Grid Background Color – Controls the color that
WinTOTAL uses as the background color for the details
view.
3.Finally, click Save to apply your changes.
File Cabinet Stop Lights
This setting enables the Appraisal Desktop to automatically
track the status of your reports and present them in a simple
color-coded “stop-light” view.
1.From the General Settings section of WinTOTAL
Configuration Utility, click File Cabinet in the General
pane on the left.
Configure WinTOTAL
Formfilling Preferences
The Forms section of the Configuration Options screen
controls how WinTOTAL operates displays and manipulates
the data in your forms. By modifying these settings you can
control how QuickLists function in multi-line fields, enable or
disable WinTOTAL’s data transfer functions, and tweak your
Copyright 2015, a la mode, inc.
Page 21
Wintotal User's Guide
spellchecking preferences. These settings also include the
ability to change the look and feel of the program and
options for spell checking your reports. To access
WinTOTAL’s Forms settings…
o Always display dynamic field expansions when
entering a UAD field - Select this item if you'd like
to all the assistance available when you first enter a
field that's affected by UAD.
1.From the WinTOTAL Configuration Utility, click the Forms
icon in the toolbar.
o Only display dynamic field expansions when
entering a UAD field if the field is blank, in error,
or specifically selected - This still lets you see the
UAD assistance via expanded fields, but only does so
in cases where the field is blank, in error, or
specifically selected
2.Apply your changes and click Save.
o Never display dynamic field expansions when
entering a UAD field - This option is also known as
Freeform UAD mode. The dynamic field expansions will
not be displayed unless you press CTRL+ ENTER. You
can type the UAD formatted text or use the available
shorthand to make formfilling faster.
Data Entry Options
WinTOTAL’s Data Entry Options control how your cursor,
QuickLists, and drop-down menus function when you are
moving through the forms. To access your Data Entry
Options…
1.From the Forms section of WinTOTAL Configuration Utility,
click Data Entry Options in the Formfilling pane on
the left.
2.Mark your preferences in the screen that appears. Options
are…
Configure WinTOTAL
o Select all text when jumping into a field – When
you select this option, each time you enter a field in a
form, any existing text in that field is automatically
selected. That way, you can begin typing and the old
data is completely replaced with the new. If this option
is turned off, your cursor is placed at the beginning of
the field and you can use the arrow keys or mouse to
re-position the cursor and enter data.
o Show drop-down lists for fields – One of the
innovations found in our previous version of WinTOTAL
was the “Recent Response” list. Each field in your
forms would automatically remember the last several
items you typed in. The next time you entered that
field, you could reapply that text simply by choosing it
from a drop-down menu. To use the “Recent
Responses” feature in WinTOTAL, check the box beside
this option and then mark the Recent Responses
option.
Copyright 2015, a la mode, inc.
Page 22
Wintotal User's Guide
Unfortunately, the “Recent Responses” feature led to
some confusion with our QuickLists text databases.
So, in Aurora, you have the option of displaying your
QuickList items each field’s drop-down menu instead
of the recent responses. To do so, check the box
beside this option and then mark the QuickLists
option. Whichever option you choose for your dropdown lists, you have two additional options:
inserts the QuickList item wherever in the field
you have your cursor.
Replace any existing data – If you do choose to
create fewer, but longer, QuickList and Text
Database items, select this option. When it’s
turned on, the program overwrites any existing
field data with the new data from your list.
Append to existing data – If you’ve created
QuickList or Text Database items that build on
each other, the this option may help. When it’s
turned on, the program inserts your items at the
end of the current field, regardless of where your
cursor is.
Enable Auto-Complete – When this option is
turned on, you can begin typing information into
any field that has Recent Responses or
QuickLists enabled. WinTOTAL watches what you
type and displays items from your lists that match.
Once the correct list item is displayed, just press
Enter to accept that item. This function is very
similar to the way the address bar works in
Microsoft Internet Explorer.
Move to the next available field – This option
controls what your cursor does after you’ve
inserted a QuickList or Text Database item.
When it’s turned on, after you insert an item, the
cursor immediately moves to the next field in the
form. This can really speed up data entry as you
don’t have to press Enter to accept the text
item.
Automatically show drop-down lists – If you’re
using the auto-complete function, chances are you
may not want to see the drop-down menus at all.
The data is still available, but you won’t be
bothered by the menu icons. Turn this option on if
you always want the option of picking items from
the drop-down menus as well.
Keyboard navigation – Holding down the Ctrl key
on your keyboard and pressing the left or right
arrow keys allows you to move through your text in
a more word-processor like manner. Mark the
option for the behavior you want to use. Options
are:
Options for Inserting QuickLists items in multiline fields – As you build QuickList entries for
multi-line fields, you need to decide if you prefer to
have a few, very-long comments, or several smaller
comments that you chain together. Depending upon
how you build your lists, you need to adjust these
settings.
Insert into existing data – Use this option if you
want to insert QuickList items into the middle of
existing text. When it is turned on, the program
Configure WinTOTAL
Next Field – Causes the cursor to move to the
next field in your form.
Next Word – Causes the cursor to move to the
beginning of the next word in your field.
3.When finished, click Save to put your settings into effect.
Copyright 2015, a la mode, inc.
Page 23
Wintotal User's Guide
Fonts & Form Colors
If you don’t like how the programmers at a la mode designed
the look of the program, you can change the look in this
section of WinTOTAL’s Configuration Options to reflect
your sense of style. To access and change WinTOTAL’s look
and feel…
If you don’t like the standard black text on a white
background, this is the place for you to exercise your
creativity. You can change just about any aspect of the
screen coloring, as well as the colors of your output, if you
print on a color printer.
1.From the Forms section of WinTOTAL Configuration Utility,
click Fonts and Form Colors in the Formfilling pane
on the left.
2.Apply your changes and click Save.
Hint: While it is tempting to infuse your working
environment with a little pizzazz, remember that you
Fonts
have to stare at these screen colors, often for hours
WinTOTAL stores a separate default font for your forms and
your addenda. To change the typeface used when you print
your forms…
on end. Studies have shown that eye fatigue can be
compounded by poor screen contrasts or vivid
background colors. So, use caution before adjusting
1.If you have not already done so, open WinTOTAL’s forms
and fonts manager by following the steps above.
2.Then, click the Data Font button in the Fonts section at
the top.
3.Choose the font, style and size from the Font screen.
Then, click OK.
4.Click Addenda Font and repeat the process, choosing the
same or a different font, as you desire.
It is recommended that you modify this setting instead of
continually “selecting all” and changing the fonts manually in
each document.
Colors
Configure WinTOTAL
these settings to the extreme.
To set your Screen Colors…
1.If you have not already done so, open WinTOTAL’s forms
and fonts manager by following the steps above.
2.Choose Screen Colors from the drop-down menu at the
top.
3.Select one of the specific field options from the drop-down
menu on the right. A sample of the current settings is
displayed.
4.Click either Text Color or Background Color to change
either aspect of that field.
Copyright 2015, a la mode, inc.
Page 24
Wintotal User's Guide
5.Select one of the pre-defined colors from the palette, or
click Define Custom Colors to create your own favorite
shade. Click OK when finished. The sample screen
shows the results of your changes.
To set your Printer Colors…
1.If you have not already done so, open WinTOTAL’s forms
and fonts manager by following the steps above.
Page Width is probably your best bet. To change your
default zoom level…
1.If you have not already done so, open WinTOTAL’s forms
and fonts manager by following the steps above.
2.Choose your preferred default zoom level from the
available drop-down menu in the Initial Form Zoom
Level section of this screen.
2.Choose Printer Colors from the drop-down menu at the
top.
3.Then follow the same steps above to change how your
report prints. Remember that if you deliver your reports
via e-mail or through your XSite in PDF format, the color
settings will be included in that PDF file.
To reset your colors…
Check Box Appearance
Even though the appearance of most forms is dictated by
third-party entities like Fannie-Mae, many appraisers like to
adjust the appearance of the check boxes on the forms. To
change your check box appearance…
1.If you have not already done so, open WinTOTAL’s forms
and fonts manager by following the steps above.
If you do make changes to your color settings and later
decide that you’ve done more harm than good…
1.If you have not already done so, open WinTOTAL’s forms
and fonts manager by following the steps above.
2.Click Defaults to reset everything back to its original
settings.
2.If you’d like your check boxes to print out a bit darker,
choose either Dark, Darker or Darkest from the dropdown menu.
3.Click Save in the upper-left, then close WinTOTAL. When
you start WinTOTAL again, your checkbox preferences
will go into effect.
Initial Form Zoom Level
The Initial Form Zoom Level section allows you to set the
default zoom level with which WinTOTAL displays reports
when you open them. If you have a particularly large display
unit on your computer, you may need to experiment with the
various zoom levels to find the one that is the right balance
of text size versus the amount of the form that is displayed.
If you’re using a single, standard-sized monitor, choosing
Configure WinTOTAL
Copyright 2015, a la mode, inc.
Page 25
Wintotal User's Guide
database contain the images from your reports, and decide
how WinTOTAL displays image previews. To change your
image options…
Spell Check Options
You can change WinTOTAL’s spellchecking to react to certain
types of data like words that contain numbers. Appraisals
often contain lot numbers, plat designations and other
information that combine numbers and letters. To change
the way WinTOTAL handles this type of information…
1.From the Forms section of WinTOTAL Configuration Utility,
click Spell Check Options in the Formfilling pane on
the left.
1.From the WinTOTAL Configuration Utility, click the Images
icon in the toolbar.
2.Apply your changes and click Save.
Image Quality Settings
Today’s multi-megapixel digital cameras can produce photos
in details far beyond what is necessary for the standard
appraisal report. Unfortunately, these photos can rapidly use
up even the ample space provided on today’s computers. To
reduce this problem, you can adjust the compression that
WinTOTAL uses when storing images. To do so…
2.Mark the boxes beside the options you wish to use.
Options are:
1.From the Images section of WinTOTAL Configuration
Utility, click Image Quality Settings in the Photos
pane on the left side of the screen.
o Ignore words with numbers
o Ignore words in upper
o Ignore words with mixed case
3.When finished, click Save to put your changes into effect.
Image Settings
WinTOTAL’s image options allow you to control how
WinTOTAL manages the photos you use in your reports.
Using these options you can add photo labels to the Images
PowerView, ensure that comps you import into your comps
Configure WinTOTAL
Copyright 2015, a la mode, inc.
Page 26
Wintotal User's Guide
2.Use the slider to change the quality percentage you want
to use. You may need to experiment with this setting to
find the balance that’s right for your reports.
3.The Photo Capture Settings option allows you to specify
the file format that WinTOTAL uses by default. This
option is only used in rare instances and should most
often be left to its default setting: JPG.
o To add a label, type the label you want to add into the
text field and click Add.
o If you no longer need a particular description, select it
in the list and click Remove, or click Defaults to
remove all of the types you may have added and
revert to the original list.
2.Click Save to put your configuration changes into effect.
4.Click Save when finished to put your configuration
changes into effect.
Comp Photo Import Settings
Create Photo Labels
When you add photos to the WinTOTAL image database, you
have the option of labeling them as to their purpose. Of
course, the most common appraisal descriptions (Front,
Rear, Street, Interior) are already included. However, if
you’d like to add your own description or manage your
existing descriptions…
If you are going to import comparables from another source
that includes photos, such as old appraisal reports you can
change how WinTOTAL handles those photos by changing
your comp photo import settings. To do so…
1.From the Images section of WinTOTAL Configuration
Utility, click Create Photo Labels in the Photos pane
on the left side of the WinTOTAL Configuration
Options screen.
1.From the Images section of WinTOTAL Configuration
Utility, click Create Photo Labels in the Photos pane
on the left side of the screen.
2.Check the box to Import photos along with new comps
if you want WinTOTAL to ensure that you always have
both the data for the comp and the images associated
with them.
3.From the drop-down menu, choose the size of comp photo
you prefer to use in your reports to ensure that
WinTOTAL provides the right size.
4.Click Save to put your changes into effect.
Configure WinTOTAL
Copyright 2015, a la mode, inc.
Page 27
Wintotal User's Guide
o Automatically synchronize WinTOTAL and Pocket TOTAL
when you connect your Pocket PC
Pocket TOTAL Setup
Note: These instructions are for Pocket TOTAL, the legacy
version of our field data-gathering software. While we no
longer sell Pocket TOTAL, you are able to continue using
it if you still have a valid license. If you were looking for
our current mobile data-gathering software, TOTAL for
Mobile, click here.
Pocket TOTAL was a la mode's field data gathering tool prior
to TOTAL for Mobile. If you still have the legacy Pocket PC
hardware and a Pocket TOTAL license, you're able to
continue using Pocket TOTAL as you have been.
o Manually synchronize WinTOTAL and Pocket TOTAL by
clicking Pocket Sync in the Appraisal Desktop.
o In addition, WinTOTAL can help you maximize the
storage space on your Pocket PC by deleting files from
Pocket TOTAL whenever you delete the corresponding
file in the Appraisal Desktop’s Synchronize folder. To
enable this handy feature, click the Always delete…
check box on this screen.
If you need help installing Pocket TOTAL, click here for the
Pocket TOTAL User's Guide.
3.Click Save when finished to put your configuration
changes into effect.
Synchronization Options
Once Pocket TOTAL has been installed and registered, the
program is designed to automatically merge data from your
hand-held device with reports on your desktop. This function
happens whenever you connect your Pocket PC to your
desktop system. In the Configuration Options settings,
you have the choice of synchronizing automatically whenever
you connect, or to only synchronize when you tell it to. To
change your synchronization settings…
1.From the Pocket section of WinTOTAL Configuration Utility,
click Synchronization Options in the Pocket pane on
the left side of the screen.
2.Mark the option you’d prefer to use with Pocket TOTAL.
Options are:
Configure WinTOTAL
Set Up Your Connection
WinTOTAL relies on access to the Internet to provide several
features. Net.X maps and XSite integration being two, not to
mention access to an e-mail account for report delivery. For
you to get the most from WinTOTAL, you should ensure that
your computer is properly connected to the Internet.
A high-speed Internet connection such as that provided by
DSL or cable is highly recommended. However, WinTOTAL
can work through a dial-up connection, if that is all that is
available to you. To access WinTOTAL’s Internet
configuration options…
Copyright 2015, a la mode, inc.
Page 28
Wintotal User's Guide
1.From the WinTOTAL Configuration Utility, click the
Internet icon in the toolbar.
2.Apply your changes and click Save.
Depending on your needs, there are two different ways to
configure your Internet connection: for dial-up and for high
speed.
4.Select the option to “test drive” your connection, then click
Next. The setup wizard attempts to make a connection
with the Internet.
Set Up High Speed Connections
To configure your system to allow WinTOTAL to access the
Internet…
o If all goes well, the wizard informs you that it has, so
click Finish to complete the configuration.
1.From the Internet section of WinTOTAL Configuration
Utility, click Trusted Sites to ensure that WinTOTAL can
connect to all pertinent a la mode servers.
o If the wizard encounters a problem connecting, it
notifies you and gives you the option of making
another attempt or exiting the wizard. If you think
there was a mistake, try the connection again by
selecting the first option, then clicking Next.
Otherwise, choose the second option and click Finish.
2.Then, click Internet Setup.
3.In the screen that appears, the first option is to select
whether you have a modem-based connection, or an
“always on” Internet connection. Click the option for An
“always on” or LAN connection then click Next.
At this point if you’re unable to connect, you need to
troubleshoot your Internet connection from your PC. The first
thing you should check is whether you can access the
Internet from another application. Launch your web browser
and try to access a popular site like www.google.com or
www.yahoo.com.
• If you’re not able to access either of these sites, chances
are there’s a problem either with your connection or with
traffic through the Internet itself.
Configure WinTOTAL
Copyright 2015, a la mode, inc.
Page 29
Wintotal User's Guide
• If you’ve confirmed your connection to the Internet is
working, repeat steps 1-3 above to configure your
connection.
Set Up Dial-up Connections
If you are still using a dial-up connection to reach the
Internet, follow these steps…
1.From the Internet section of WinTOTAL Configuration
Utility, click Trusted Sites to ensure that WinTOTAL can
connect to all pertinent a la mode servers.
2.Then, click Internet Setup.
3.Select the Modem and phone line option and click Next.
4.The wizard scans your system and displays any Dial-Up
Network connections you have configured on your
system. If none are found, a message appears notifying
you that you need to setup your Dial-Up Network
connection(s). In this case, you must first configure a
dial-up connection in your Windows operating system.
Consult the Windows user guide for assistance with this
process.
5.Select the desired dial-up connection from the list and click
Next.
6.Now, select the option to “test drive” your connection and
click Next. The setup wizard attempts to activate your
modem and make a connection with the Internet.
o If all goes well, the wizard informs you that it has, so
click Finish to complete the configuration.
o If the wizard encounters a problem connecting, it
notifies you and gives you the option of making
another attempt or exiting the wizard. If you think
there was a mistake, try the connection again by
selecting the first option, then clicking Next.
Otherwise, choose the second option and click Finish.
At this point, if you are unable to connect you need to
troubleshoot your Internet connection from your PC. The first
thing you should check is whether you can access the
Internet from another application. Launch your web browser
and try to access a popular site like http://www.google.com/
or http://www.yahoo.com/.
• If you’re not able to access either of these sites, chances
are there’s a problem either with your connection or with
traffic through the Internet itself.
Configure WinTOTAL
Copyright 2015, a la mode, inc.
Page 30
Wintotal User's Guide
• If you’ve confirmed your connection to the Internet is
working, repeat steps 1-5 above to configure your
connection.
Set Up Your Sketcher
Schedule Automatic Updates
You can schedule WinTOTAL to keep itself up to date
automatically. Particularly if you have a high speed Internet
connection, it’s a good idea to configure WinTOTAL to
download updates so that you don’t have to manually
download the latest features, fixes, and forms yourself. To
configure automatic updating in WinTOTAL:
1.From the Internet section of WinTOTAL Configuration
Utility, check Enable Scheduling.
2.Pick either a Daily, Monthly, or Weekly frequency and
schedule a time and/or date for WinTOTAL to
automatically download and install the latest updates.
WinTOTAL and a TOTAL Sketch Pro license make it possible
to integrate WinTOTAL with any participating sketch
program. While WinTOTAL is fully capable of integrating with
the sketch program of your choice, each available sketching
program with which you can integrate is produced by a thirdparty vendor. As a result, you must maintain a separate
license for your Apex, RapidSketch, or AreaSketch software,
along with WinTOTAL. If you need more information about
the sketch programs with which WinTOTAL can integrate or
are interested in purchasing a sketch license from any of the
available vendors, visit WinTOTAL’s Store by clicking the
Dashboard icon on the upper right of the appraisal desktop
or a report. To access WinTOTAL’s sketch configuration
options and select your default sketching software:
1.From the WinTOTAL Configuration Utility, click the Sketch
icon in the toolbar.
3.When you’re finished, click Save.
2.Select your sketching software from the Choose your
sketcher drop-down menu.
3.Apply your changes and click Save.
Configure WinTOTAL
Copyright 2015, a la mode, inc.
Page 31
Wintotal User's Guide
Register Apex
If you’ve been using the custom version of Apex 3 or the old
version of Apex 2 originally distributed with WinTOTAL, you
need not purchase an additional license. Everything will
continue to operate as if nothing changed. To integrate your
sketch program with WinTOTAL…
1.From the WinTOTAL Configuration Utility, click the Sketch
icon in the toolbar.
2.Apply your changes and click Save.
3.Then click the Register link that appears.
Internet Registration
To register one of your Apex licenses on a workstation…
1.Install and launch WinTOTAL on the workstation. This can
be a stand-alone computer, or a node in a local area
network. Also, ensure that the computer has access to
the Internet, either through an always-on connection or
dial-up.
2.From the Sketching settings in WinTOTAL Configuration
Utility, select the Apex option corresponding to the
version you own. If you only have one available legacy
Apex license type, it’s automatically selected for you.
Configure WinTOTAL
4.The Apex Registration Wizard appears and gives you
the option of registering through the Internet, or
manually. We recommend using the Internet registration,
as this speeds up the process significantly. Click the
Internet Registration option and click Next.
5.Now, the wizard prompts you to enter your first and last
names, and prompts you with the name assigned to this
workstation. These items are used to help you manage
which users and systems have your licenses in use.
Complete the fields, then click Finish.
6.The wizard accesses the a la mode servers through the
Internet and confirms that your customer account has an
available license to assign to this machine. If so, the
license is assigned, your account is updated and you
should see a screen telling you how many licenses you
have left. Click OK and you’re done.
Copyright 2015, a la mode, inc.
Page 32
Wintotal User's Guide
7.If the wizard discovers that you do not have an available
license, it prompts you with that information and directs
you to contact the a la mode for additional assistance.
Fax Registration
screen telling you how many licenses you have left. Click
OK and you’re done.
UnRegister Apex
If you do not have a connection to the Internet, you can
register your Apex sketch software manually. To do so…
1.Install and launch WinTOTAL on the workstation.
2.From the Sketching settings in WinTOTAL Configuration
Utility, select the Apex option corresponding to the
version you own. If you only have one available legacy
Apex license type, it’s automatically selected for you.
Occasionally, you may find the need to release one of your
legacy Apex licenses, freeing it up to be assigned to another
system. You need to use this process if you’re removing a
computer from your environment or if an employee is
leaving your company and taking their computer with them.
There are two ways you can unregister Apex: by Internet
and by fax.
3.Then click the Register link that appears.
4.The Apex Registration Wizard appears and gives you
the option of registering through the Internet, or
manually. Click the Manual Registration option and
click Next.
Internet UnRegistration
5.The wizard prompts you to enter your first and last names,
and prompts you with the name assigned to this
workstation. These items are used to help you manage
which users and systems have your licenses in use.
Complete the fields, then click Print.
6.Print the resulting document on your local printer and fax
it to the number printed on the page. Service technicians
then receive your fax and process your request, normally
within a few hours. They then send you a registration
code, either via fax, e-mail or by phone.
7.Once you have the code, return to the Apex Registration
Wizard following steps 1-4 above and click the Register
button.
8.Type the registration code you received into the field and
click OK. The license is assigned and you should see a
Configure WinTOTAL
1.From the Sketching settings in WinTOTAL Configuration
Utility, click the UnRegister link in the Legacy
Sketching section of the screen that appears.
2.Select the Internet option, and then click OK.
3.The wizard accesses the a la mode servers through the
Internet, releases the license and updates your account.
This license is now available to reassign on another
computer.
Fax UnRegistration
If you do not have a connection to the Internet, you can still
unregister Apex. However, you must notify a la mode so that
your account can be updated. To unregister Apex by fax…
1.From the Sketching settings in WinTOTAL Configuration
Utility, click the UnRegister link in the Legacy
Sketching section of the screen that appears.
Copyright 2015, a la mode, inc.
Page 33
Wintotal User's Guide
2.Select the Manual option, and then click OK.
3.Now, click Print, and fax the resulting document to a la
mode. Once your fax is received, a technician will update
your account.
Sketch Options
Enable Flood Maps
If you use a la mode’s InterFlood product, you can configure
WinTOTAL to automatically access your account and retrieve
flood maps whenever you use the net.X features. You can
also set certain defaults for how you’d like your flood maps
to appear.
WinTOTAL’s Apex configuration options allow you to set how
WinTOTAL and Apex interact. You can set WinTOTAL to save
an extra copy of your sketch to a folder outside of your
report. To save a copy of your sketch outside of your
report…
1.From the WinTOTAL Configuration Utility, click Flood in
the toolbar at the top.
1.From the Sketching settings in WinTOTAL Configuration
Utility, click Apex File Options in the Sketch pane on
the left.
2.Type your InterFlood Account Number or your a la mode
Username and Password in the fields at the top of the
screen.
2.Check the box to enable this feature and then click
Browse.
3.Designate whether you want WinTOTAL to automatically
download only flood maps that fall in a flood zone or
those geocoded with high confidence by marking the
corresponding boxes.
3.Locate the directory on your computer or network in which
you’d like your sketches saved and click OK.
o Optional: You can also choose what type of map you
want to download, and select what color you want the
flood zones to be by using the drop down menus
above the sample map.
4.Click Save when finished to put your configuration
changes into effect.
4.Click Save to put your changes into effect.
Geocode Comps
Your comparables database is a valuable resource for your
appraisal practice. Aurora has improved on the standard
Configure WinTOTAL
Copyright 2015, a la mode, inc.
Page 34
Wintotal User's Guide
comps databases of the past by providing features that let
you search for comparable properties based on physical
location. Of course, this only works if the program knows
where in the world the comps in your database are located.
“Geocoding” is the process WinTOTAL uses to translate an
address into a specific latitude and longitude. Once this
information is obtained, the program can easily do proximity
searches. To set up WinTOTAL’s comps geocoding feature…
1.From the WinTOTAL Configuration Utility, click Comps in
the toolbar at the top.
2.Mark the options you want to use for your geocoding
preferences. Options are:
o Enable Scheduling – Check this box to ensure that the
geocoding information in your comps database is
always up to date. Then, set the time and frequency
that you’d like the WinTOTAL Assistant to scan your
files.
o Geocode # Records at Each Run - If you have a huge
comps database, and you’re concerned that the
geocoding process might slow down your system,
check this box to set a limit on the number of comps
that get updated on each run. Then, enter a number
of comps to geocode per run in the provided text box.
Bear in mind, however, that when this process runs,
only those comps that have not already been
geocoded are processed. So once your system is up to
date, subsequent runs complete much faster.
3.Click Save when finished to put your changes into effect.
Configure WinTOTAL
Integrate with XSites
For files you need to keep in sync with your online products
like Vault or your XSite, WinTOTAL includes a
synchronization tool called “net.X Connect” that harnesses
the power of our net.X technology to give you the fullest
control over what is sync’d and what isn’t. Whenever you
update a report with new order information, change the
internal status of a report, mark a report to send to the
Vault, or make any other changes that require WinTOTAL to
update information on your online accounts, WinTOTAL adds
those changes to a queue that you can preview before the
changes are posted to your online accounts.
Before you can harness the full power of net.X Connect,
you’ll need to configure it with your Username, Password,
and preferred options. To access the net.X Configuration
options:
1.From the WinTOTAL Configuration Utility, click net.X in the
toolbar at the top.
2.Apply your changes and click Save.
Setting Up Your Username & Password
The first step to enabling the net.X Connect’s powerful XSite
integration tools is to supply WinTOTAL with your a la mode
Username and Password. To do so:
1.Open the net.X configuration screen per the steps above if
you have not already done so.
Copyright 2015, a la mode, inc.
Page 35
Wintotal User's Guide
2.Then, click the Edit link to the right of the XSite field to
enter your XSite Username and Password.
In the future if you need to change or remove XSite
integration from WinTOTAL:
• Click Clear to remove WinTOTAL’s XSite integration.
• Click the Edit link to the right of Current XSite User to tie
your current user profile to a different profile on your
XSite.
Configuring Sync Preferences
WinTOTAL allows you to specify how and when it
synchronizes new and changed orders from your XSite. To
change your net.X Connect configuration options.
1.Open the net.X configuration screen per the steps above if
you have not already done so.
o Your XSite information is specific to your WinTOTAL user
profile. The net effect is that network users can plug
in their individual XSite logins so they only work with
orders assigned to them.
o If you’re a single user, mark the option to save your
password. However, appraisers in a multi-user office
may wish to leave that disabled, requiring password
entry when WinTOTAL needs to talk to your XSite.
(For convenience, WinTOTAL remembers until you
close it.)
o If you’re not the admin user for the XSite, the
Accounting and Order Management option under
XSite User Management must be enabled.
3.Click OK to save your information and then click Save to
accept your new configuration.
Once you’ve correctly entered XSite information into
WinTOTAL, WinTOTAL sends a signal to your XSite and
enables the new “Business Management” features which
replace the “Orders” interface we previously had.
Configure WinTOTAL
2.If you want WinTOTAL to automatically run net.X Connect
so you can keep it up to date as you use it, you can mark
the Prompt to run net.X Connect on program close
option. This initiates the net.X Connect process any time
you close WinTOTAL so you can keep WinTOTAL and your
XSite up to date without having to remember to manually
sync the two.
3.In the event that you synchronize an order that has
different information in your XSite than in WinTOTAL,
you’re prompted to decide which data you want to use.
Whenever this occurs you can merge in the data from the
XSite order in one of three ways. Options are:
o Always prompt me to choose the direction of sync
o Always use the information from WinTOTAL
Copyright 2015, a la mode, inc.
Page 36
Wintotal User's Guide
o Always use the information from my XSite
4.Mark the option for the method you want to use.
5.Click Save to update your changes.
Once you’ve configured net.X Connect, see the Synchronize
WinTOTAL section in the Appraisal Desktop chapter of this
user’s guide to learn more about how to use it.
The HoverLinks pane appears in the lower left corner of all
WinTOTAL PowerViews. Simply move your mouse pointer
over the pane and a series of links pops up to the right. Click
the desired icon to launch that applications or quickly jump
to that section of WinTOTAL.
WinTOTAL HoverLinks
WinTOTAL allows you to create HoverLinks that link to two
different portions of the program: PowerViews and tools.
HoverLinks
Many are the times when you’re working in a report in
WinTOTAL and discover that you need to launch another
application to retrieve data or check information. Perhaps it’s
an MLS service tool. Or a statistical analysis tool. Or even
one of our supporting applications, like QuickPix.
While it’s usually not too difficult to reach for the mouse,
click the Windows Start menu, scroll up through the program
options, wade through the sub-menus to find the desired
application, and launch it, but we’ve got a better idea called
“HoverLinks.”
Linking to a PowerView
To create a HoverLink to an entire WinTOTAL PowerView…
1.While in a report, move your cursor over the HoverLinks
pane on the left and click Add Link in the menu that
appears.
2.From the pop-up menu, select Add WinTOTAL shortcut.
3.Next, choose the PowerView option and select a
PowerView that contains the section in WinTOTAL with
which you’d like to link.
4.Finally, choose the section from the list that appears in the
menu for that PowerView.
Linking to a WinTOTAL Tool
Configure WinTOTAL
Copyright 2015, a la mode, inc.
Page 37
Wintotal User's Guide
To add a HoverLink that opens specific WinTOTAL tool…
Hint: If you’re an advanced computer user, you can
1.Open a report in WinTOTAL.
also take advantage of the Add field from report
feature to dynamically pass parameters into the
2.Move your mouse pointer over the HoverLink pane on the
left, and then click Add Link.
website URL so that the same link can work for
several different appraisals.
3.From the pop-up menu, select Add WinTOTAL shortcut.
4.Finally, choose the Tools option and select a tool that
contains the section in WinTOTAL with which you’d like to
link.
HoverLinks to Programs
To add a HoverLink to an external program…
1.While in a report, move your cursor over the HoverLinks
pane on the left, and then click Add Link.
HoverLinks to Websites
To add a HoverLink to a website…
2.From the pop-up menu, select Link external program.
1.While in a report, move your cursor over the HoverLinks
pane on the left and click Add Link.
3.In the Add External Program screen, click Browse and
browse to and open the program file for your external
program, then click OK.
2.From the pop-up menu, select New Internet Website.
3.In the Add Web Site screen, enter the URL for the
desired site in the Web Address field.
Note: You do not have to use the http:// portion of
the URL.
4.Enter a name for this site in the Description box, and
then click OK.
Hint: If you’re an advanced computer user, you can
also take advantage of the Command line field to
dynamically pass parameters to the program as you
start it.
Configure WinTOTAL
Copyright 2015, a la mode, inc.
Page 38
Wintotal User's Guide
Customize Your Toolbars
Sometimes the best way to shave work time off of the
average life of a typical report is to customize WinTOTAL so
that your favorite functions are available with only one click.
HoverLinks provide one way to do this, but if you prefer to
update the main toolbars at the top of WinTOTAL, you can
do that as well. To create a custom toolbar…
5.Once you’ve added all of the menu items that you want in
your custom toolbar, click its title bar, drag it to the
current toolbars’ location and drop it at a comfortable
anchor point to replace the current active toolbar.
Hint: While you can drag and drop any of the primary
menu items like the full File, Edit, and View menus
into your custom toolbar, you may want to add only a
portion of that menu into the custom toolbar. For
instance, if you regularly use the copy and paste
commands in WinTOTAL’s Edit menu, you may want
1.From either the Appraisal Desktop or WinTOTAL, rightclick any toolbar you would like to customize and click
Customize in the menu that appears.
to consider adding just the Copy and Paste
commands into your custom toolbar instead of adding
the entire Edit menu to make them more easily
2.In the screen that appears, click New in the Toolbars.
accessible.
3.Type a name for your new toolbar and click OK to create
it.
4.An empty toolbar titled with the name you specified
appears on your screen. Click the Commands tab and
simply drag and drop any of the available commands into
the blank toolbar on your screen to build your custom
toolbar.
Toggle Custom Toolbars
If you decide to hide or show your toolbar at any time after
you have completed it, simply right-click it and click the
name of the toolbar you want to display/hide from the menu
that appears. Alternately, if you are in the Customize
screen while editing your custom toolbar and wish to
display/hide it, simply click the Toolbars tab and check the
box for the appropriate toolbar.
Appraisal Desktop Toolbars
Depending on whether you attempt to create a custom
toolbar in the Appraisal Desktop or in WinTOTAL itself,
WinTOTAL offers different functions for your custom
Configure WinTOTAL
Copyright 2015, a la mode, inc.
Page 39
Wintotal User's Guide
toolbars. For instance, in the Appraisal Desktop, you can
add buttons such as New, Clone, Delete, and Print Report
to help you manage your reports. In the Appraisal Desktop,
you can add items from any of the following categories to
your custom toolbar:
• File – Contains commands to open any of your recently
used appraisal files.
creation as opposed to report management. To improve and
simplify your workflow as you create and manage your
appraisal files WinTOTAL provides items from each of the
following categories for use in your custom toolbars:
• Menus – Provides each of the full menus normally found in
WinTOTAL for individual use in your custom toolbar.
Note: The Menus group actually contains the
• Workflow – Contains the following items to improve your
workflow:
• New – Creates a new report file in your File Cabinet
complete menus you normally find at the top of the
screen.
• For separate commands within each menu or PowerView,
simply click the appropriate category as listed below.
• Clone – Creates a new report file in your File Cabinet by
cloning the report you currently have selected
• File – Individual File menu commands
• Delete – Deletes the report file you currently have selected
in the File Cabinet
• Print Report – Allows you to print all or part of the
currently selected report file in the File Cabinet to either a
PDF file or to a hard copy
• Mark Complete – Mark an order as complete in WinTOTAL
• Synchronize – Synchronizes WinTOTAL with your XSite.
• Edit – Individual Edit menu commands
• Form – Individual Form menu commands
• View – Individual View menu commands
• Workfile – Individual Workfile PowerView specific
commands
• Photos – Individual Images PowerView commands
• PowerViews – Individual commands to switch PowerViews
• Rules - Brings up the Rules screen that allows you to
control your filter in the Appraisal Desktop’s Tracking
folders.
• SendReport – Individual report delivery commands
WinTOTAL Toolbars
Register WinTOTAL
• ShowQN – QuickNotes display commands
While you may occasionally want to create new files, delete
old report files or otherwise manage the reports in your File
Cabinet from within the WinTOTAL window, the options
available for your custom toolbar in the WinTOTAL window
pertain more directly to those functions that facilitate report
Configure WinTOTAL
When you first install WinTOTAL, you’re prompted to enter
the registration information to unlock WinTOTAL’s full feature
set. If you’re working on a Demo version of WinTOTAL that
you’d like to unlock, or if you need to change your
Copyright 2015, a la mode, inc.
Page 40
Wintotal User's Guide
registration information you can do so at any time. To
register WinTOTAL…
1.From anywhere in WinTOTAL, click the Help menu and
select Register.
Set Up Your Office
WinTOTAL uses information about your office and its location
to do a variety of things for you. Using your office’s address
information, WinTOTAL can retrieve directions to each
property from your office and place those into the order.
When invoicing, WinTOTAL uses your office contact
information to help you fill out your invoice. Between these
and other functions in WinTOTAL, it’s imperative that you
give WinTOTAL accurate information about your office to
ensure a smooth experience throughout each report. To set
up your office information…
2.In the screen that appears, enter your Customer
Number, Company Name and Authorization code in
the designated fields. If you don’t have this information,
click the Forgot your code? link at the bottom of the
registration screen. Enter your a la mode customer in the
box and click the button. Your information is immediately
sent to the e-mail address and fax number we have on
file for your company.
3.Finally, click OK to accept your registration information.
1.In WinTOTAL, click Options, Office Settings from the
menus.
2.Edit the information in any or all of the fields. For the
Federal Tax ID and Employee ID fields, you have the
option of having that information automatically
transferred to your invoice forms. Check the box for
either item to enable this feature.
3.If you want to integrate WinTOTAL with your XSite, you
can do so here as well. Click Edit at the bottom of the
screen, fill out your XSite login information, check the
Save Password box for convenience, and then click OK
to save your XSite information.
4.When you’ve completed your changes, click OK to save
them.
Configure WinTOTAL
Copyright 2015, a la mode, inc.
Page 41
Wintotal User's Guide
Schedule Vault & Exact Backups
If you’ve installed Vault & Exact side by side with WinTOTAL,
you can schedule them to back up your reports and
WinTOTAL settings on a regular basis through the Assistant.
To do so…
1.Right-click the Assistant icon and click Show.
2.When the Assistant appears, double-click either the a la
mode Exact or a la mode Vault entry to launch the
configuration tools for those products. Then, just follow
through the wizards that appear. For exact details on
these processes, see the Vault user guide.
Automate WinTOTAL
WinTOTAL comes complete with your own customizable task
scheduler to help you automate those regular tasks like
downloading updates, synchronizing WinTOTAL, sending data
to the Vault, or managing photos on your computer. All of
WinTOTAL’s scheduling options are accessible through the
Assistant that WinTOTAL installs into your Windows taskbar.
Just double-click the Assistant icon or right-click it and
choose Show from the menu to call up your scheduling
options.
Schedule XSite Synchronization
If you’re actively using your XSite to take and manage
orders electronically or if you’re regularly using your XSite’s
business management tools, it’s often useful to automate the
synchronization process so that your XSite and WinTOTAL
Configure WinTOTAL
Copyright 2015, a la mode, inc.
Page 42
Wintotal User's Guide
are always in tune with each other. To schedule the XSite
synchronization process…
1.Right-click the Assistant icon and click Show.
2.When the Assistant appears, click to select Aurora to
XSite Sync. Then, click Configure.
3.Check the Enable Scheduling box and indicate how often
you want WinTOTAL to synchronize your DirectFax items
by typing a number (in minutes) into the provided box.
3.Check the box to Enable Scheduling for your
synchronization and then indicate whether you want to
synchronize on a daily or weekly basis by marking the
corresponding option.
4.Select a time and day for your synchronization as
necessary.
4.When finished, click Save to apply your changes.
Schedule File Cleanup
As you continue to use WinTOTAL to build your appraisal
reports, you may accumulate a number of backup reports
called “BZ1” files along with a host of old images. To help
you maintain as much free hard drive space as possible,
WinTOTAL provides a simple tool, the File Collector, you can
configure to automatically flush the old backup reports and
images from your system. To set it up…
5.When finished, click Save to apply your changes.
Schedule DirectFax Synchronization
If you regularly use DirectFax to archive items into your
digital workfile or if your clients use it to send you pertinent
information for your appraisal work, you can automate the
synchronization process so that WinTOTAL always has the
latest DirectFax items. To do so…
1.Right-click the Assistant icon and click Show.
2.When the Assistant appears, click to select WinTOTAL
File Collector. Then, click Configure.
1.Right-click the Assistant icon and click Show.
2.When the Assistant appears, click to select DirectFax
Synchronization. Then, click Configure.
Configure WinTOTAL
Copyright 2015, a la mode, inc.
Page 43
Wintotal User's Guide
not keep these backup copies, called “BZU” files,
around.
5.Finally, indicate the frequency with which you want
WinTOTAL to flush out old files. As necessary, schedule a
time of day, week, or month for the cleanup process to
run.
6.When finished, click Save to apply your changes.
Appraisal Desktop
3.Check the Enable File Collection box.
4.Check the boxes beside each type of file you wish to clean
out of your system automatically and then indicate the
age (in days) that each item must be before WinTOTAL
should clean it from your system. Options are:
o Unused Photos – Photos in your images database that
you have not yet used in a report
o Used Photos – Photos in your images database that
you’ve already used in a report. Bear in mind that
wiping these “used” images from your computer DOES
NOT remove them from the reports in which you used
them.
o Recoverable Files – WinTOTAL keeps backup copies,
called “BZ1” files, of every report you create. Once
you complete a report, these files become
unnecessary and you can safely remove them from
your computer.
o Athena Upgraded Files – When you upgrade from
Athena to Aurora, WinTOTAL creates backup copies of
your original Athena reports. If you’ve seen no
problems upgrading from Athena to Aurora, you need
Appraisal Desktop
The Appraisal Desktop is WinTOTAL’s central management
point. To open the Appraisal Desktop, click Start, [All]
Programs, WinTOTAL, Appraisal Desktop. From here
you can:
• Organize your report files into folders for easy retrieval
• Quickly locate existing reports using powerful search tools
• Identify the state of the reports using the handy “stop light”
icons
• Update the internal status of any report
• Print your report
• Send a report to the Vault for backup or to share with other
appraisers
• Update the order form for any report
• Add electronic documents to the report’s digital workfile
• Fax documents directly into your workfile
• Record payments for any order, or export information
directly to QuickBooks
In addition, the Appraisal Desktop is used to update your
contacts and to work with TOTAL for Mobile.
Copyright 2015, a la mode, inc.
Page 44
Wintotal User's Guide
• At the bottom of the Files view, a series of tabs allows you
to edit and review even more information about each
report.
To access the Files PowerView, open the Appraisal Desktop
and click Files in the upper right corner of the screen.
Report Management
The Files PowerView, often called the “File Cabinet,” is
designed to help you organize and access your appraisal
files. The screen is divided into two major sections: the
folders list on the left and the files on the right.
Login Manager
Folders
• The top part of the folders section, the Files pane, allows
you to sort your report files into logical “file folders” for
easy retrieval.
• At the bottom of this section, the Tracking folders organize
your reports from an internal status perspective, showing
you at a glance how any reports are in progress, past
due, pending review, or several other options.
TOTAL Connect's Login Manager allows you to link TOTAL
Connect with your client's account. Once you've logged in and
verified your account information, TOTAL Connect will download
and display any orders you've accepted via your client's order
management portal when you download new and changed
orders using net.X connect.
Follow the instruction below to link TOTAL Connect with your
client's account:
1. From TOTAL Connect's Appraisal Desktop, click Options on
the upper left, and select Login Manager from the
drop-down menu.
Files
The files section on the right provides more details about
each report.
• Clicking a report opens a Detailed View which displays the
report’s internal status history, as well as the date of key
events.
• The Detailed View also allows you to deliver, print, or mark
your report as paid, among other things.
Appraisal Desktop
2. If prompted, sign in to TOTAL Connect using your a la mode
login.
Copyright 2015, a la mode, inc.
Page 45
Wintotal User's Guide
4. Once you've selected your client and entered the login
information for your client's portal, click Verify & Save.
5. To remove an existing user and/or log in with a different
account, click Clear Credentials. Then, enter the new login
information and click Verify & Save.
6. When you're finished, click Close.
That's it! Once you've linked your accounts, TOTAL Connect
downloads any new orders you accept from your client's portal
when you download new and changed orders using net.X
connect. Keep in mind that an order must be accepted from
your client's order management portal before it will be
downloaded and displayed in TOTAL Connect.
3. In the screen that appears, select your client from the dropdown menu. Then, enter your e-mail address (or username)
and password.
Organize Reports
To help you reach your optimum performance, WinTOTAL’s
Appraisal Desktop includes a host of file organization tools.
In addition to the standard file folder approach, WinTOTAL
also includes self-managing folders called “Tracking” folders,
full control over the data columns that appear, and tracking
rules that allow you to filter the list of reports that appear.
• Top-level folders are displayed along the left, with subfolders nested beneath them.
• If a folder has sub-folders, they are shown with a plus next
to them.
• Clicking the plus expands the folder and displays any subfolders.
• You can create as many of the manila folders as you like in
WinTOTAL
Appraisal Desktop
Copyright 2015, a la mode, inc.
Page 46
Wintotal User's Guide
Your new folder now appears in the folder list. From here
you can:
• Delete a folder by right-clicking it and choosing Delete or
clicking the Customize link in the Files pane and clicking
Delete in the menu that appears.
• Rename a folder by right-clicking it and choosing Rename
or clicking the Customize link in the Files pane, clicking
Rename in the menu that appears, typing a new name
into the box, and clicking OK.
Edit Your Column Layout
Create Folders
WinTOTAL allows you to create as many manila folders as
you need to effectively organize your files. Since the
“tracking” folders come with WinTOTAL and are designed to
manage themselves, you need not create any additional
tracking folders or try to manually place your files into those
folders. They take care of themselves. To create a new
manila folder…
1.In the Appraisal Desktop, click the folder in the Files pane
into which you want to add your new folder or, if you’re
creating a new top-level folder, click the Reports folder.
The Appraisal Desktop provides an easy way for you to
customize the columns you see in the Files view. By
customizing the column layout in the Files view, you can
reduce the number of times you have to open a report just
to look up some information about it, like the amount due on
the report. To change the items displayed in the file list…
1.From the Appraisal Desktop, right-click anywhere in the
file list and choose Edit column layout.
2.Select the desired information from the Available Fields
pane on the left. Double-click the item to add it to the
Displayed Fields list, or just click Add.
2.Right-click the folder and click New in the pop-up menu
that appears. Or, click the Customize link located in the
Files pane, followed by New.
3.In the available box, type the name for your new folder
and click OK.
Appraisal Desktop
Copyright 2015, a la mode, inc.
Page 47
Wintotal User's Guide
Attach External Folders
You can also create a folder that opens an external storage
drive or mapped directory. This allows you to access
WinTOTAL reports on shared storage devices like networks
or CDs. To map an external directory:
1.From the Appraisal Desktop, choose Folder, Attach
Directory from the menus.
3.To remove a field, double-click it in the Displayed Fields
list, or select it and click Remove.
4.Use the Up and Down buttons to re-position the fields in
the list.
5.If desired, select an item in the Displayed Fields list and
enter a new title for the column in the Title box.
6.Set the initial width of the column by adjusting the number
in the Width field.
7.Click Sort by this field if this is the field by which you’d
like to initially sort your reports.
8.Set the initial sort direction to Ascending or Descending
by selecting the appropriate option in the Options box.
9.If you’d prefer not to see the column headings, un-check
the Show column titles box.
10. Click OK to save your settings.
Once your column layout is set, you can modify the column
order and width by clicking and dragging the title header of
the column. Likewise, you can resort the list by clicking the
title header of any column.
Appraisal Desktop
2.Decide if you’d like this external directory to appear to all
WinTOTAL users or just yourself.
o Mark This computer only to limit access to the new
directory to yourself.
o Mark Entire Network to allow any user who accesses
your copy of WinTOTAL — either over a local area
network or by logging into the same machine — to see
the directory.
3.Click Browse, select the desired directory from the
directory list and click OK. You can choose either a
directory on your local computer, a mapped drive on your
network or an external storage device attached to your
system.
4.When prompted, type a name for your attached directory
and click OK.
Copyright 2015, a la mode, inc.
Page 48
Wintotal User's Guide
The new directory is now displayed in your folder list.
each Tracking folder and displays the total to the left of
each Tracking folder.
Note: If you’ve linked to a network drive, make sure
you’ve logged into the network before you click on the
To use your Tracking folders:
attached directory in your folder list to avoid an error
1.First, set up your Tracking Rules to filter out unwanted
reports.
message. Likewise, if you’ve attached to an external
storage device, ensure that a disc, CD or storage card
is properly inserted.
• To remove an attached directory, right-click it and choose
Disconnect from the pop-up menu.
Tracking Folders
In the Appraisal Desktop, the lower portion of the Folders
section displays the “Tracking” folders, which automatically
sort and display your reports based on their internal status.
By comparison with regular folders, Tracking folders operate
quite a bit differently. Some of the differences include:
• Report Organization – The reports in the Tracking folders
are the exact same reports you have in your regular
folders. They’ve simply been reorganized to provide a
window into the current internal status of your office.
• Report Management – Unlike regular folders, you can’t
move reports into a Tracking folder. Tracking folders are
self-managing so the reports move themselves to the
appropriate folder as you continue working with them.
While there are several different criteria that the Tracking
folders use, one common way you can move a file from
one folder to the next is by changing its internal status.
• Overall Report Data – To help you get an accurate picture
of your office, WinTOTAL totals the number of reports in
Appraisal Desktop
2.Then, in the Appraisal Desktop, click any Tracking folder in
the lower left corner of the screen.
3.Click a Tracking folder to display reports with the related
internal status. If you need to limit this list to a subset
of files you have three options:
•
To limit the list of files to
those that also exist as
orders on your XSite,
mark the XSite option.
•
To limit the list of files to
those that only exist in
WinTOTAL, mark the
WinTOTAL option.
•
To show all the files in
your File Cabinet
regardless of whether
they are XSite or
WinTOTAL files, mark All.
Set Up Tracking Rules
If you plan to actively use WinTOTAL’s Tracking folders to
help you keep track of your files, you must first take a few
Copyright 2015, a la mode, inc.
Page 49
Wintotal User's Guide
moments to define the list of reports you want to handle
with those Tracking folders. To do so:
the newest Athena reports under a status other
than “Completed.”
1.In the Appraisal Desktop, click Options, Tracking Rules.
If you were diligent about using Athena’s status
tools, you can select the I used Athena’s status
on my reports option and WinTOTAL will use your
previous status information to sort your reports in
Tracking.
3.When you're finished, click OK.
2.In the screen that appears, mark your preferred options to
limit the list of reports that appear in your Tracking
folders. Options are:
o WinTOTAL Tracking Options – These Tracking
options allow you to filter your report list to just those
files that fall after a certain date and reside within
certain folders. Click the Select folders to exclude
from tracking link and check the box beside each
folder you want to filter out of tracking.
o Older WinTOTAL Report, "Athena generation",
options – If you’ve been using WinTOTAL for some
time, it’s likely that you have some of the older Athena
format reports throughout your File Cabinet.
Depending on how long it’s been since you upgraded
to Aurora, it’s possible that some of those reports are
still active. These options help you gracefully handle
those old reports in your Tracking folders. You have
two options:
Rebuild Your Reports List
If you regularly add files into your WinTOTAL file folders
outside of WinTOTAL or experience other difficulties with files
in the Appraisal Desktop, WinTOTAL’s file list could become
corrupt. If this occurs, your File Cabinet may not reflect all
of the files that are actually available in your WinTOTAL file
folders. For such occasions, WinTOTAL provides a simple
utility you can use to restore your file list to its full inventory
again. To use it, click Options, Rebuild Reports List in the
Appraisal Desktop. WinTOTAL then scans through the folders
in your WinTOTAL installation and builds a list of all current
reports in your File Cabinet.
Note: You should only need to use this feature on
very rare occasions, normally only if directed to do so
by an a la mode tech support representative. If you
find that you’re regularly using this function, contact
one of our support technicians for further assistance.
Check the Automatically show option to place all
Athena files in your “Completed” Tracking folder. If
you need to refine the filter to ensure that active
reports aren’t filtered out, check the Except for
box, and specify a cutoff date and status to classify
Appraisal Desktop
Copyright 2015, a la mode, inc.
Page 50
Wintotal User's Guide
Work with Reports
Appraisal reports found in the File Cabinet can be moved,
copied or renamed as needed from within the Appraisal
Desktop.
• Creating New Reports – You can create a new report in
one of two ways.
1.Click New to create a new report from scratch.
2.Click Clone to create a new report based off an exact
copy of another report in your File Cabinet.
• Selecting Reports – To select a file in the files list, simply
click it. You can also select multiple files by holding down
the Ctrl key on your keyboard and clicking multiple files.
Or, select a whole range of files by clicking the first file in
the range, scrolling down to the end of the list, holding
down the Shift key and clicking the last file in the range.
All files between the two ends are then selected.
• Moving Reports – The simplest way to move a report from
one folder to another is to simply click a file and drag it to
the desired folder. You can also select multiple files and
drag them all at once. Or, you can select one or more
files, then right-click and choose Move or Copy to from
the pop-up menu. Mark the Move option and then choose
the new folder you’d like to contain the new report and
click OK.
• Copying Reports – Select the report or reports you wish
to copy in the files list. Right-click and choose Move or
Copy to from the pop-up menu. Mark the Copy option
and then choose the new folder you’d like to contain the
new report and click OK.
• Renaming Reports – To rename a file, select the file (you
can only select one), then right-click and choose Rename
from the pop-up menu, or click the Rename button in the
toolbar. In the available box, type the new name for your
file and click OK.
Note: Renaming a report from the Appraisal Desktop
changes both the file’s description and the name of
the .ZAP report file on your hard drive.
• Deleting Reports – Select the report or reports you wish
to delete in the files list and drag them to the Deleted
Items folder on the left. Alternately, you can right-click
Appraisal Desktop
Copyright 2015, a la mode, inc.
Page 51
Wintotal User's Guide
and choose Delete from the pop-up menu, or click the
Delete button in the toolbar.
• Restoring Deleted Reports – Whenever you delete a file
from the Appraisal Desktop, it is placed in the Deleted
Items folder. If you delete a file by accident, click the
Deleted Items folder on the left and then drag the
desired file or files to another folder.
• Recovering Reports – As you work on your reports,
WinTOTAL automatically saves backup copies of your files
as .BZ1 files on your hard drive. If something happens to
your file, you may be able to recover it from this backup.
Click any folder, then right-click and choose View
Recoverable Files from the pop-up menu, or choose it
from the Options menu. All .BZ1 files located in that
directory are displayed. Double-click any desired report to
recover that file. Or, right-click it and choose Recover
from the pop-up menu. The backup file is renamed to an
active report and is displayed in the folder with the text
“recovered” added to the file description.
Search for Reports
Sometimes the easiest way to find the right report is to
perform a basic report search. The Appraisal Desktop
provides three different ways for you to search for the
reports you need:
• Performing a basic (simple) search
• Performing a complex (advanced) search
• Searching for a report by its location.
Simple Find
The simple or “basic” find tool provides a quick way to locate
reports by searching through your files for a certain phrase.
As you use the simple find tool, keep in mind that it searches
through all fields in your report, so a search for “123” may
bring up reports with an address of “123” and with a Map
Reference number containing “123.” To use the simple find
tool…
1.In the Appraisal Desktop, type a search phrase into the
Look for field above the file list.
2.Select the folders you’d like to look in from the Search In
list.
3.Click Find Now to display the results.
4.Click Clear to reset your search criteria and display all of
your files.
Advanced Find
The advanced find tool helps you get around the limitations
of WinTOTAL’s basic find. With advanced find, you can
Appraisal Desktop
Copyright 2015, a la mode, inc.
Page 52
Wintotal User's Guide
combine a series of fields together into a very specific search
or you can just ensure that your search for “123” limits
results to those containing “123” in the address field. To use
the advanced find tool…
7.If no reports are found that match your criteria, no reports
appear, otherwise you see all the reports that match your
criteria in the Files list.
8.Click Clear at the top of the list to reset the search criteria
and display all reports.
Location Search
As you continue to work up new reports, WinTOTAL keeps
track of the latitude and longitude it finds for each new
subject property. Over time, this can assist you in finding
suitable reports that you can use to merge in relevant report
data or flag as potential comps for a new report. If you want
to find a series of reports within a certain distance of another
report…
1.In the Appraisal Desktop, click to select a report around
which you’d like to find properties.
1.In the Appraisal Desktop, click Advanced Find in the
upper left corner of the screen.
2.In the screen that appears, type as many individual search
phrases into the provided boxes as you like. The more
search phrases you type, the more WinTOTAL refines
your final search results.
3.To expand your search beyond the currently selected
folder, click the Search all folders box.
2.If the detailed view does not expand automatically, click
the + symbol to the left of the report to open it.
3.Click the Find Nearby Reports link and choose a
proximity from the pop-up list to limit your reports list to
those within the desired area.
4.If you’re going to perform multiple searches, you may
keep the Advanced Find screen open even after you
execute one search. Click the box at the top of the
screen.
5.To limit the list of reports to those that involve subject
properties within a certain distance from the selected
property noted in the header of the screen, type a
distance into the Proximity within field.
Hint: Alternately, you can right-click the file and
choose Search within ½, 1, or 5 miles from the
6.Once you’re satisfied with your search criteria, click Find.
Appraisal Desktop
Copyright 2015, a la mode, inc.
menu that appears.
Page 53
Wintotal User's Guide
All reports within your specified radius then appear in the
reports list on the right. Click Clear at the top of the list to
reset the search criteria and display all reports.
Clone Reports
If you’d like to start a new report, based on the contents or
structure of an existing report, you can use WinTOTAL’s
Clone tool to help you do so. To clone a report…
1.In the Appraisal Desktop, locate the report you wish to
clone and click to select it.
2.Click Clone in the toolbar, and choose whether to clone
the report With data (copies the entire report, along
with all the information, maps, photos, sketches, comps
and other items in place) or Without data (copies the
structure of the report, including all forms and addenda,
but without any information, maps, photos, sketches,
comps or other items).
Print Reports
While you can always print a report while it’s open in
WinTOTAL, you can also print a report directly from the
Appraisal Desktop without having to open the report first.
But unlike WinTOTAL’s usual print options, by printing
through the Appraisal Desktop, you can print a full reports
list in your File Cabinet or quickly move from report to report
printing out entire copies or just a series of invoices. To use
the Appraisal Desktop’s print feature…
1.In the Appraisal Desktop, find and click to select a report
you wish to print.
2.Click Print in the toolbar and mark your desired print
option in the screen that appears. Options are:
o Print Report – Choosing this option opens the standard
WinTOTAL Print screen, from which you can choose
which pages and forms you’d like to print, as well as
choosing the printer to which you’d like them sent.
o Auto print report – This option automatically prints
the report based on the default settings you’ve chosen
for that report in the past.
o Print invoice only – If you just need to send out a new
invoice, choose this option. Any invoice form found in
the report is sent to your default printer.
3.Your new report is opened in the Order PowerView of
WinTOTAL. Give this new report a description and click
Save. You’re now ready to complete the report.
Appraisal Desktop
o Print reports list – The final option doesn’t print the
actual report. Instead, it prints a list of all reports in
the current folder.
3.Click OK to accept you print option.
WinTOTAL immediately prints the items you specified. For
further details on WinTOTAL’s advanced printing features,
see the Printing chapter of this user’s guide.
Copyright 2015, a la mode, inc.
Page 54
Wintotal User's Guide
more options may appear. For instance, if you choose
Inspection Scheduled, additional fields appear where you
can enter the date and time of the scheduled inspection.
Set Report Status
WinTOTAL’s status management tools can be a great way to
track your office turnaround times, generate a snapshot of
your current workload, and even organize your files. But
when you couple WinTOTAL’s internal status management
tools with your XSite, they become a proactive status
message tool you can use to keep your clients up to date
about the status of their orders without also tying up your
time in lengthy phone calls. To use WinTOTAL’s status tools:
4.Type any comments you want to include with the status
change in the Notes box.
1.In the Appraisal Desktop, click to select the report you
wish to update.
2.Depending on your preferred workflow, you then have two
options.
Note: If you’re using WinTOTAL’s status tools in
conjunction with your XSite so that you can benefit
from proactive status messages, the Notes field
becomes the body of the status notice e-mail.
o Click the Add Internal Status button in the top
toolbar.
o Click the plus sign beside your selected report to open
the Detailed View and then click the Add New link at
the top of the internal status list.
3.When the Add Internal Status window appears, choose
the desired internal status from the drop-down list in the
upper, right corner. Depending on the status you select,
Appraisal Desktop
5.If this is an XSite order and you've integrated with your
XSite, check the Send Client Notification box to send a
notification of this status change to your client. Then,
use the drop-down menus to select a recipient and
subject for your message or just type that information
yourself.
6.When you’re finished, click Save to update your internal
status.
Copyright 2015, a la mode, inc.
Page 55
Wintotal User's Guide
Report Views
Send Reports to Vault
The Vault is a utility that allows you to store your files in a
secure online repository for backup purposes, or to share
files with your colleagues. While this tool can monitor your
system and automatically upload any modified files on a
regular basis, you can also send files to the Vault manually
from the Appraisal Desktop.
As you continue using the Appraisal Desktop, you may find it
useful to see or edit information in your report without
taking the time to open it, search for it, unsign it, save it,
and so on. WinTOTAL’s Files PowerView provides an
alternate method of viewing and updating your data on-thefly to help you save time. These powerful tools, called
“views,” are controlled by the tabs appearing across the
bottom of the screen. Available tabs include:
• All Files
• Order Form
• Workfile
• DirectFax
• E&O
• History
1.From the Appraisal Desktop, select any file (or multiple
files) in the file list and click the Send to Vault button in
the toolbar.
In addition, WinTOTAL provides a detailed view you can use
to look up detailed information about the report, print it,
send it to QuickBooks, deliver it, or label it.
2.Confirm the list of files to be sent and click:
Detailed View
o Remove – to delete these files from your Vault.
o Send Now – to immediately connect to the Internet
and send the selected files.
o Send Later – to queue up these files in the net.X
Connect queue to be sent the next time your system
connects to the Vault.
o Cancel – to cancel this operation.
Appraisal Desktop
WinTOTAL’s detailed view can give you insight into the
current status of each report in your File Cabinet and can
help you perform a number of basic report management
functions without even opening the report. To open the
detailed view of any report, simply click the plus sign beside
any report in the Appraisal Desktop.
Copyright 2015, a la mode, inc.
Page 56
Wintotal User's Guide
The detailed view provides extensive report information
including:
• Front Subject Photo (if one has been assigned in the report)
Note: The "Add Report to QuickBooks" option only appears if you
have QuickBooks installed on your computer.
• Internal Status History
• Last Signed Date and by whom it was signed
• Last Printed Date and by whom it was printed
• Last Vaulted Date and by whom it was sent to the Vault
• Last Modified Date and by whom it was modified
i) Disabling Auto-Expand
By default, whenever you click on a file, it expands to display
the file’s detailed view. If you’d rather control this expansion
yourself, click the Tools menu in the Appraisal Desktop,
then de-select the Enable auto-expand option to disable
it. If you chose to re-enable it at a later time, simply return
to the Tools menu and check the Enable auto-expand
option again.
Order Form View
For convenience, you can also use the detailed view to
perform a number of basic report management functions
including:
• Deliver the report
• Create a file label for the report
• Mark the report as "Paid."
WinTOTAL’s File Cabinet provides you with direct access to
each report’s order form so that you do not have to open
each report to update basic order or billing information. To
access a report’s order form…
1.In the Appraisal Desktop, click to select a report in the files
list. Then, click the Order Form tab at the bottom of the
screen.
• Rename the report
• Add the Report to QuickBooks
Appraisal Desktop
Copyright 2015, a la mode, inc.
Page 57
Wintotal User's Guide
Workfile View
While WinTOTAL provides a full array of workfile
management features inside each report, it’s often faster to
manage your workfile from the Appraisal Desktop since you
do not have to open the report and since you can quickly
move from one report to the next. To manage your report’s
workfile from the File Cabinet…
1.In the Appraisal Desktop, click to select the desired file.
2.Click the Workfile tab at the bottom of the screen.
2.In the order form view, you have several options:
o To edit the order - Click Edit in the lower, type your
changes directly in the form, and then click Save to
update your report. If you wish to cancel your
changes, click Cancel in the lower toolbar.
o To print the order – Click Print in the lower toolbar.
o To switch to full screen view – Click Full Screen to
expand the order so that it takes up the whole
screen. To revert back to the split screen view, click
the Split Screen button that appears in place of the
Full Screen button.
Appraisal Desktop
3.Next, click Edit to open the workfile for editing. From here,
you have several options:
Copyright 2015, a la mode, inc.
Page 58
Wintotal User's Guide
2.Click the DirectFax tab at the bottom of the screen.
o To view any item in your workfile – Double-click it
to open it in its native application.
o To add new items into your workfile – Simple
select, drag, and drop files from any other window or
click Browse and navigate out to the desired files to
add them into your workfile.
o To scan new items into your workfile – Click Scan
and use your scanning software to generate a new
scan. When your scanning software is finished
scanning your documents, WinTOTAL adds them into
your workfile automatically.
For information about additional workfile functions or details
on using the workfile inside your report, see the Workfile
PowerView section of this user’s guide.
DirectFax View
Our electronic fax system, called “DirectFax,” provides an
easy way for you to quickly add a stack of documents into
your workfile without individually scanning each item. Of
course, since DirectFax is a faxed-based technology, you can
give DirectFax coversheets to your clients so that they can
electronically send you important documents for any given
appraisal. To use the DirectFax view…
1.In the Appraisal Desktop, click to select the any file in your
File Cabinet.
Appraisal Desktop
3.WinTOTAL shows you a full list of items that have been
sent through DirectFax into your report’s workfile. From
here you can:
o Create a new DirectFax coversheet – Using the
DirectFax coversheet, you can fax a stack of
documents in to the number specified on the cover
sheet to convert them into a PDF and attach them to
your report’s workfile. Since this coversheet is specific
to this report, you can also give it to your clients so
they can fax you important documents related to the
selected report.
o Download pending DirectFax items – If you’ve sent
anything in to DirectFax, it takes a few moments to
convert those items into PDF files. When the PDF files
are ready, you can download them by clicking Sync or
Sync All. Sync simply downloads DirectFax PDF’s
related to the selected report. Sync All retrieves any
pending DirectFax PDF’s and attaches those PDF’s to
the appropriate report workfiles.
Copyright 2015, a la mode, inc.
Page 59
Wintotal User's Guide
For more information about DirectFax, see the DirectFax
section of this user’s guide.
run an E&O check inside WinTOTAL. For details on running
E&O Checks in WinTOTAL, see the Check E&O section of this
user’s guide.
E&O View
If you’ve used the Errors and Omissions tool in WinTOTAL,
you can view the results with the E&O view in the File
Cabinet. While you still need to run your E&O checks inside
a report, this view provides a quick look into your most
recent E&O results so you can verify that they report is
ready to be sent. To use WinTOTAL’s E&O view….
1.In the Appraisal Desktop, click to select the desired report
in the files list.
History View
Whether you’re the only appraiser working on a report, or
several colleagues have assisted you, it can be a great
benefit to track when each change was made, and by whom.
With WinTOTAL’s report history view, you can quickly track
what was added or deleted from a report or verify that you
did, in fact, send the report to your client. To look over a
report’s history…
1.In the Appraisal Desktop, click to select the desired report
in the files list using any of the search features listed
above.
2.Click the Check E&O tab at the bottom of the screen.
2.Click the History tab at the bottom of the screen.
3.Another pane opens showing each of the changes made to
this report, when it was made and by which WinTOTAL
user. Click any of the headers to resort the list of
changes according to that column. For example, click the
top of the User column to quickly see all of the users
who have changed the report grouped together.
Another pane opens to display the results of the last E&O
check performed on that document. Keep in mind that this
is an E&O viewer, so no results appear if you have not yet
Appraisal Desktop
Copyright 2015, a la mode, inc.
Page 60
Wintotal User's Guide
3.A status message queue that holds all of the status
messages for XSite orders that could not be sent when
the status was updated (for example, if you were offline
when you updated the status).
NOTE: Status messages and client notifications can only
be synchronized and sent for orders placed
through your XSite. Statuses for any other
orders are for internal use only and won't be sent
to your client.
4.A contact queue that holds all of the contact information
that has changed in WinTOTAL since the last time you
sync'd with your XSite.
Synchronize WinTOTAL
For files you need to keep in sync with your online products
like Vault or your XSite, WinTOTAL includes a
synchronization tool called “net.X Connect” that harnesses
the power of our net.X technology to give you the fullest
control over what is sync’d and what isn’t. Whenever you
update a report with new order information, change the
internal status of a report, mark a report to send to the
Vault, or make any other changes that require WinTOTAL to
update information on your online accounts, WinTOTAL adds
those changes to a queue that you can preview before the
changes are posted to your online accounts. These changes
are broken down and separated into the 5 different queues
that you can control:
1.An order download queue that downloads new and
changed orders from your XSite into WinTOTAL.
2.An order upload queue that compares your orders in
WinTOTAL with your orders in your XSite and then
uploads the new or changed orders that it finds.
Appraisal Desktop
5.The last queue is actually no more than direct integration
with the Vault system. If you opt to use this feature,
net.X Connect forces Vault to upload any pending files
immediately but Vault will still run at the regularly
scheduled time regardless of whether or not you choose
to upload pending Vault files through net.X Connect.
Since each of these queues is self managing, all you need to
do to add something to the queue is to update it. In other
words, create or change an order in WinTOTAL or your XSite,
update the internal status of an order, or flag some files to
send to the Vault. Keep in mind that if you’re using Vault’s
watched folders feature, new and updated files are added to
the Vault’s upload queue automatically and you need not do
anything. Then, when you’re ready to send those changes to
the web, you can approve them at your convenience.
Syncing with net.X Connect
To preview and send updates that are queued to go to the
web:
Copyright 2015, a la mode, inc.
Page 61
Wintotal User's Guide
1.From the Appraisal Desktop, click net.X Connect in the
toolbar at the top of the screen.
2.If you’re running net.X Connect for the first time, be sure
to configure it per the steps in the Integrate with XSites
section in the Configure WinTOTAL chapter of this user’s
guide.
5.For statuses, if you want to edit the message that
accompanies a status notice, click the Edit link beside it.
Then, change the status, notes, or client contact
information as necessary and click Update when you’re
finished.
3.In the screen that appears, check the boxes to indicate
what you want to sync to the web. Options are:
o Download New & Changed Orders from XSite
When downloading new and changed orders, you can
limit the downloaded orders to those modified since
a date of your choice.
o Upload New & Changed Orders to XSite
When uploading new and changed orders, you can
limit the uploaded orders to those modified since a
date of your choice.
o Send Status and/or Client Notifications (XSite orders
only)
o Synchronize your contacts on the XSite and in
WinTOTAL
o Upload Vault Files
4.If you mark the Upload New & Changed Orders to
XSite or Send Status and/or Client Notifications
options, mark or unmark the orders listed in the
respective boxes to indicate whether net.X Connect
should send the information for that order.
6.When finished, click Connect to apply the synchronization.
NOTE: The only orders that appear in this list are those for
which you’ve enabled XSite Integration. To learn more
about how to enable XSite Integration on an order, see
the Set Up Order Preferences section of the Order
PowerView chapter in the manual.
Appraisal Desktop
7.Then, WinTOTAL’s net.X synchronization screen appears
showing you a live indicator of what it’s syncing to the
Internet.
Copyright 2015, a la mode, inc.
Page 62
Wintotal User's Guide
8.When the synchronization is complete, click Close to close
the net.X synchronization screen or check the
Automatically close box first if you’d prefer that
WinTOTAL closes this screen for you in the future.
o If you indicated you wanted to send files to the Vault,
be sure to click Finish once the upload is complete.
o As WinTOTAL synchronizes your data with your XSite, it
compares the information in your XSite with the
information in WinTOTAL. If it finds differences in the
data in those locations, it prompts you about which
data you’d like to use. Just mark the option above the
data you want to use and click OK to continue.
Sync History
As you use net.X Connect to synchronize WinTOTAL with
your XSite or your Vault account, you may want to see a
detailed history of what you’ve sync’d. To view all items that
have been successfully synchronized…
1.From the Appraisal Desktop, click Tools, net.X Connect
History.
2.When you’re finished viewing your history, click OK to
close it.
Contacts
HINT: To save time you can configure WinTOTAL to always
use the data from WinTOTAL or your XSite instead of
prompting you each time there are conflicts between
the data in each location. For more information about
how to change this default, see the Integrate with
XSites section of the Configure WinTOTAL chapter in
this user’s guide.
Appraisal Desktop
Naturally, WinTOTAL contains a complete contact database
you can use to store and retrieve information about all of
your business contacts. In contrast to former versions of
WinTOTAL, the Aurora generation of WinTOTAL recognizes
the difference between a company contact and an individual
contact. As such, you can pair contacts with companies
easily allowing you to redistribute individuals who move to
other companies later. To access WinTOTAL’s built-in contact
manager, click Contacts in the top toolbar of the Appraisal
Desktop.
Copyright 2015, a la mode, inc.
Page 63
Wintotal User's Guide
o Company – Shows only company contacts in your
database
2.If you want to filter the list further, select another filter
from the View menu at the top of the screen. Options
are:
3.View menu and select the appropriate filter. Options are:
o Contacts for all users – If you work in an office with
multiple appraisers, you can display the contacts from
your colleagues’ databases as well as your own. Click
the arrow beside the View button in the toolbar and
select Contacts for All Users.
o Contacts for this user only – To limit your display to
only those contacts you entered, click the arrow
beside the View button in the toolbar and select
Contact for this user only.
Find Contacts
With WinTOTAL’s built-in contact manager, you can manage
a full list of contacts and keep that list in sync with your
XSite. As the list continues to grow, you may need to
rearrange your contacts view to filter out unnecessary
contacts, sort your contacts based-off a specific piece of
contact information, or perform a basic search for contacts.
Filtering & Grouping Contacts
To filter and group contacts…
1.From WinTOTAL’s contact manager, click the item in the
View pane on the left to show the types of contacts you
wish to find. Options are:
o All – Shows all contacts, grouped by company
o Contacts – Shows the individuals in your contacts
database
Appraisal Desktop
o Appraiser, Client, Lender, Agent, Owner, Other –
Limits the displayed list of contacts to just those that
qualify as the types you specify. Click to check each
type of individual you wish to see.
4.If you’re looking for a very specific contact, you can limit
the list of contacts to just those that begin with a certain
letter. Just click the appropriate beginning letter across
the top of the screen to limit your contacts to those that
begin with that letter. To revert to a full list of contacts,
click All.
5.If you want to organize your contacts in ascending or
descending order by a specific column in your contacts
database, click the column header for the column by
which you want to sort. Click that column header again
to reverse the sort.
6.Then, to group your contacts by a piece of related
information, select an appropriate category by which to
Copyright 2015, a la mode, inc.
Page 64
Wintotal User's Guide
group from the Group By drop-down menu at the top of
the screen. Options are:
o Full Name
Searching for Contacts
To search for a specific contact…
o Last Name
1. From WinTOTAL’s contact manager, type a search
phrase into the Look for field above the contact list.
o E-Mail
2. Select the field you’d like to look in from the Search In
drop-down list.
o Phone
o Fax
3.
o Mobile
Click Find Now to display the results.
4. Click Clear to reset your search criteria and display all of
your files.
o Address
o City
o State
Expanding & Collapsing Contacts
o Zip
o None
When you’ve grouped contacts, each group is headed by a
non-white colored row listing the contact by which you’re
grouping. Then, the contacts within that group are listed
below it in white. You can expand and collapse the list of
contacts within each group by clicking the plus or minus sign
beside each group header.
To expand or collapse the contacts in your address book so
you can see the contacts within any contact group, click the
Expand or Collapse buttons in the main toolbar.
Create Individual Contacts
To add a new individual contact to your database…
1.From WinTOTAL’s contact manager, click Add in the
toolbar.
2.When the Contact Details screen appears, select the
option at the top to indicate that you’re adding an
Individual.
Appraisal Desktop
Copyright 2015, a la mode, inc.
Page 65
Wintotal User's Guide
• Fill out the appraiser’s license and certification in the fields
provided.
For Client and Lender Contacts
• Create a Username and Password for your clients to use
when they log into your XSite to place orders and check
order statuses.
• Resend a password to clients who have lost their
usernames and passwords for your XSite.
Note: These options require that you have integrated
WinTOTAL with your XSite. For more information on
this process, see the Create Client Accounts section of
3.Next, select at least one option from the Type of contact
check boxes. You can choose as many as you like.
4.If you’d like to limit access to this contact to yourself, uncheck the Public Contact box. If this is checked, all of
the users on your system can view this contact.
this user guide.
• Finally, type any notes about this contact in the available
Notes box.
• When the contact information is complete, click OK to save
this contact to your database.
5.Complete the remaining text boxes for this individual and
be sure to select the appropriate company from the
Assign to Co. menu.
Note: Keep in mind that the drop-down company list
only contains company contacts that you’ve created
thus far. If you need to add a company to the list,
Create Company Contacts
To add a new company contact to your database…
1.From WinTOTAL’s contact manager, click Add in the
toolbar.
add it first and then assign this contact to the
company later.
2.When the Contact Details screen appears, select the
option at the top to indicate that you’re adding a
Company.
6.Depending on the contact Type you indicated you have
different options available:
For Appraiser Contacts
• Choose an XSite User profile that corresponds with this
appraiser if you’ve integrated WinTOTAL with your XSite.
Appraisal Desktop
Copyright 2015, a la mode, inc.
Page 66
Wintotal User's Guide
Manage Existing Contacts
Once you’ve created a list of contacts, you can easily return
to edit or delete them later. To do so…
1.From WinTOTAL’s contact manager, click to select the
contact you wish to manage.
2.Then, modify it as necessary:
o To edit a contact, double-click it.
o To delete a contact, click Delete in the top toolbar.
3.Next, select at least one option from the Type of contact
check boxes. You can choose as many as you like.
4.If you’d like to limit access to this contact to yourself, uncheck the Public Contact box. If this is checked, all of
the users on your system can view this contact.
5.Complete the remaining text boxes for this individual or
company.
o To assign a contact to a different company, double-click
it and select a new company from the Assign to Co
drop-down.
Merge Duplicate Contacts
6.You can add individuals who work for that firm using the
Contacts in Company box at the bottom of the screen.
Click Add in the Contacts in Company box.
7.Complete the individual’s information and click OK. Use
the Edit and Delete links to modify existing contacts for
that company. Continue adding as many individual
contacts as necessary for this company.
8.Type any relevant notes about your contact in the
available Notes box.
9.When the contact information is complete, click OK to save
this contact to your database.
If you regularly type contacts into your reports instead of
selecting them from WinTOTAL's provided drop-downs or if
you regularly receive orders through your Appraiser XSite,
you may accrue a number of duplicate contacts in your
address book just in the natural course of doing business. To
help you keep your address book organized, WinTOTAL
provides a simple Contacts Cleanup Wizard and some basic
contact merging functions you can use to combine related
contacts. To use the Contacts Cleanup Wizard...
1.From WinTOTAL’s contact manager, click Sync, Contacts
Cleanup.
Note: If you've never run the Contacts Cleanup
before, this feature will appear in the main toolbar as
a Contacts Cleanup button.
Appraisal Desktop
Copyright 2015, a la mode, inc.
Page 67
Wintotal User's Guide
Merge Duplicate Contacts
2.In the screen that appears, review the notes about the
contact cleanup process and click Begin.
3.Once your contacts have been downloaded, you're taken to
the Company Cleanup step. Click View, Duplicates to
see your duplicate company contacts.
4.Click the + symbols beside each contact to view potential
duplicates, select the specific duplicate contacts you wish
to merge. Contacts denoted with a yellow flag are ad-hoc
contacts. Contacts denoted with a red flag are contacts
that have previously been deleted, but that are still tied
to orders in WinTOTAL.
Hint: To select multiple contacts at once, hold down
the Ctrl key on your keyboard and click each contact
you wish to select.
5.Click Merge Selected to merge the selected contacts.
6.In the screen that appears, verify that the contact
information for the merged contact is correct. Then, click
Save to apply your changes and click Yes to merge the
selected companies.
7.Repeat this process for any other duplicate company
contacts and then click Next.
Once you've run through the Contact Cleanup Wizard for the
first time, you may never need to run it again. It's always
available in case you need to merge a bunch of duplicates,
but often you can avoid that by just merging contacts as you
notice them. To do so...
1.From WinTOTAL’s contact manager, click to select the
contacts you wish to merge.
2.Click Merge Selected in the main toolbar.
3.In the screen that appears, verify that the contact
information for the merged contact is correct and make
any necessary changes.
4.When finished, click Save and then Yes to save your
merged contact.
Create Client Login Accounts
Whenever you create new contacts in WinTOTAL, you can
easily create client login accounts on your XSite at the same
time. In addition to consolidating and simplifying the
ordering process for both you and your clients, client login
accounts provide a variety of other benefits, such as:
8.In the Individual Contact Cleanup step, repeat steps 3-6
above to merge your duplicate individual contacts.
• You can automatically send your clients an updated status
message when you change the status of their orders.
9.Finally, in the last step, click Finish and then Yes to apply
your changes to your current reports and upload the
changes to your XSite. When the process is finished, click
OK.
• Your clients can view the order details for existing orders or
place new orders from your XSite.
Appraisal Desktop
• You can deliver the finished report back to your XSite so
that your clients can pick it up at their convenience.
Copyright 2015, a la mode, inc.
Page 68
Wintotal User's Guide
• Your clients don’t have to sign up on your XSite in order to
use your XSite’s ordering features.
To create client logins for your clients…
1.From WinTOTAL’s contact manager, choose a contact or
company from your list and click Edit to open the
contact.
2.When the Contact Details screen appears, check the
box(es) to indicate that the contact is either a Lender or
Client in the Type of Contact section at the top of the
screen.
3.If you’re editing an individual contact, check the Allow
this client to login box in the XSite Login section on
the right and then type the Username and Password
you want your client to use, in the available boxes on the
right.
- OR –
If you’re editing a company contact, scroll to the
Contacts in Company section at the bottom of the
Contact Details screen and Add or Edit a contact in
your client company. Then, just fill out any necessary
contact information, check the Allow this client to
login box in the XSite Login section on the right, and
enter a Username and Password for your client.
4.Finally, click OK to save your changes. The client login is
then created for your client and notifications are sent to
inform your client of their login credentials.
Ad-hoc Contacts
As with all great billing tools, in WinTOTAL, it’s vital to
provide an accurate list of your contacts and customers to
accurately track your billing activities. To assist you in
maintaining an accurate contact list, WinTOTAL introduces a
new type of contact: the ad-hoc contact. Ad-hoc contacts are
those contacts with whom you work on a one-time basis.
Over time, as you create contacts, these one-time contacts
can accumulate, cluttering your contacts list. Ad-hoc
contacts can help you eliminate the contact clutter by
providing a way to designate those one-time customers as
exactly that – one time customers. When you mark a
contact as an ad-hoc contact, WinTOTAL hides these
contacts from your contact drop-down menus and from
regular view in the contact manager since it’s unlikely that
you will need to access their information again. Over time if
those contacts become regular customers, you can promote
them to full-time customers through WinTOTAL’s contact
manager.
Viewing Ad-Hoc Contacts
To view and manage your list of ad-hoc contacts…
1.In WinTOTAL’s contact manager, click the View Ad-hoc
button to show your ad-hoc contacts in the list. The adhoc contacts in your database appear, each denoted by a
yellow flag.
Appraisal Desktop
Copyright 2015, a la mode, inc.
Page 69
Wintotal User's Guide
2.Work with your ad-hoc contacts as you would with any
other type of contacts. Then, to hide them again, click
Hide Ad-hoc in the toolbar.
1.First, make sure that you’ve associated WinTOTAL with
your XSite.
2.From WinTOTAL’s contact manager, click the Sync menu
and choose XSite OR simply run net.X Connect to sync
your contacts and all other XSite-related data.
Toggling Ad-Hoc Status
To toggle a contact from ad-hoc to full-time or vice-versa…
1.In WinTOTAL’s contact manager, click the View Ad-hoc
button to show your ad-hoc contacts in the list.
WinTOTAL quickly synchronizes your WinTOTAL contacts with
those in your XSite so you can maintain the same list in both
places.
2.Click the ad-hoc contact you wish to promote and then
click Edit in the toolbar.
3.In the screen that appears, check or uncheck the Exclude
from data entry drop-down list check box. An ad-hoc
contact is one that is excluded from your data entry
drop-down menus in WinTOTAL. A full-time contact is
one that WinTOTAL includes in those drop-down menus
for quick reference as you’re selecting contacts in your
report.
4.Click OK to save your changes.
Synchronize Contacts
Another option for setting up your contacts database is to
synchronize it with your XSites Contacts Database. Unlike
importing, when you synchronize your contacts, names that
appear in one database are copied to the other
automatically. So if you’ve added a name in your WinTOTAL
Contacts Database, it is copied to your XSite Contacts list. Or
if you’ve added a contact in Outlook, you can upload it to
your XSite and it is then added to the WinTOTAL Contacts
Database. To synchronize contacts with your XSite…
Appraisal Desktop
Import Athena Contacts
If you used Athena prior to the current version of WinTOTAL,
you may have a long list of contacts you want to import from
your old installation. If you want to import your old contacts
from Athena, you can easily do so with WinTOTAL’s contact
import tool.
1.From WinTOTAL’s contact manager, choose File, Import
from Athena.
2.The Import Athena Contacts screen displays a list of
contacts from your Athena database. Use the scroll bars
to scan through this list. Check the Import box beside a
contact to flag it for import into your Aurora Contacts
Database. If this contact is a company you’d like to
import, check the box in the Company field. If you’d like
to import your entire database, just click Mark All at the
bottom of the list.
Copyright 2015, a la mode, inc.
Page 70
Wintotal User's Guide
3.Once you’ve selected all of the desired contacts, click
Finish. Your contacts are imported into your current
database.
For more information on Pocket TOTAL, its installation and
use, consult the Pocket TOTAL user’s guide.
If you do not import all of your Athena contacts at once, you
can go back and repeat these steps. Each time you run the
Import function, only those contacts which you have not
already imported are displayed. If you want to see other
contacts, click the Show all contacts check box in the
Import Athena Contacts screen.
Pocket TOTAL
Note: These instructions are for Pocket TOTAL, the legacy
version of our field data-gathering software. While we no
longer sell Pocket TOTAL, you are able to continue using
it if you still have a valid license. If you were looking for
our current mobile data-gathering software, TOTAL for
Mobile, click here.
SnapShot
The SnapShot PowerView in WinTOTAL contains a wide
variety of helpful tools and content. While the SnapShot
view may seem familiar to you if you’ve used previous
versions of WinTOTAL, it has been upgraded to encompass
more useful information to help you become familiar with
WinTOTAL. To access WinTOTAL’s SnapShot PowerView,
click SnapShot in the Appraisal Desktop. From there, you
can expect to see a variety of useful information, including:
The Pocket section of the Appraisal Desktop lets you
configure the Pocket TOTAL data-gathering system for use
with WinTOTAL. To access the Pocket PowerView, click
Pocket at the top of the Appraisal Desktop.
Appraisal Desktop
Copyright 2015, a la mode, inc.
•
News – Here you can find the latest
appraisal news and the most recent
appraisal newsletter.
•
Tips – The Tips and Tricks to simplify the
appraisal process inside WinTOTAL that
you usually find at
www.alamode.com/wintotal/tips can be
found in this Tips view.
Page 71
Wintotal User's Guide
• Useful links – Contains just that. Here you can find useful
links to a variety of resources from government websites
to online appraiser forums.
• Specials – This view lists all the latest a la mode product
specials so you can find the products you need for the
best price.
WinTOTAL Dashboard
TOTAL for Mobile Sync
The WinTOTAL Dashboard gives you access to instant
upgrades, data integration, and support contract
information. It also gives you a central point to view or
launch any of the tools within WinTOTAL, as well as tools
purchased from the WinTOTAL Store.
Get Help
To start the WinTOTAL Dashboard, click the Dashboard icon
(
) on the upper right of the Appraisal Desktop or from
within a report.
Appraisal Desktop
WinTOTAL includes a wide variety of resources you can use
to familiarize yourself with the forms, features, and functions
it provides. Whether you learn by reading, seeing, hearing,
or doing, WinTOTAL has a solutions that can assist you in
maximizing the efficiency of your business. To access a full
list of help tools, including a fully searchable knowledgebase,
click Help in the Appraisal Desktop.
Copyright 2015, a la mode, inc.
Page 72
Wintotal User's Guide
If you intend to install WinTOTAL in a networked
environment, this guide walks you through the
process of installing it correctly.
Reseller & Education Network
Our searchable network of authorized resellers and
education partners is what you need if you want
special training or support.
Need more help?
If you’re having problems with WinTOTAL, but don’t
have time to call our support desk, you can get help
by clicking Support Request in the toolbar. This
launches the Tech Support Assistant, from which you
can detail the problem you’re having and send it to
our support department. As an added advantage, the
assistant scans your system and sends along a
detailed diagnostic report that often helps our
technicians to pinpoint your problem.
Here’s a brief description of the tools you can expect to find
in WinTOTAL’s Help PowerView
Searchable Knowledgebase
Simply type in a search phrase and click Search to
use our searchable knowledgebase.
Webinars & Training Videos
Sometimes, the easiest way to learn a product is to
see it in action. Visit our training page through this
link to review a full list of live training sessions and
pre-recorded educational videos.
On-Screen User's Manual
The complete searchable reference guide for
WinTOTAL, stored on your local computer for easy
reference.
Online User's Manual
An easier to read reference guide for WinTOTAL,
located in our Knowledgebase.
WinTOTAL Tutorial
A walkthrough of WinTOTAL that help should help
you complete the most common tasks in WinTOTAL.
WinTOTAL Networking Guide
Appraisal Desktop
Market to Past Clients
WinTOTAL now has direct integration with XSellerate to help
you market your appraisal business to past clients. Now, if
you want to send a mailer to your past clients to remind
them about your previous work for them and suggest that it
might be time to have their home reappraised you can do so
by putting WinTOTAL together with XSellerate in your
Enterprise level Appraiser XSite. If you want to print mailing
labels and customized print messages advising your past
clients to have their home reappraised…
1.From the Appraisal Desktop, click Tools, Export Address
Data to XSellerate.
2.When a screen appears prompting you for a date range,
choose From and To dates to limit the mailer to those
Copyright 2015, a la mode, inc.
Page 73
Wintotal User's Guide
8.In the Print Labels window that appears, choose your
Avery® label type and preferred printing options from
the available choices. Options are:
clients whose last appraisal falls within the dates you
specify.
3.Click OK to continue.
4.When your XSite’s login page appears, type in your XSite
Username and Password. Then, click Login.
5.In the screen that appears, you’re presented with 3 ad
options. Preview each option by clicking the respective
links. When you find an ad that you’re satisfied with,
click the disk icon to save a copy of the ad to your
computer.
o Require that the contact contains a full mailing address
to print a label for it so that you don’t print labels you
can’t use for mailings.
o Print a custom label instead of labels from contacts by
typing in the preferred label.
o Force the label printer to print a full sheet of your
custom labels.
o Choose the starting label on your label sheet by clicking
the corresponding cell in the preview page on the left.
9.When you’re ready to print your labels, just click the Print
icon in the Label Preview pane to send them to the
printer.
6.The provided ads are intentionally generic so that you can
simply print an ad and send it out as a part of your
mailer without a need to edit it, but it is possible to edit
these ads to customize them before mailing them out. In
order to edit this ad prior to sending out your mailing,
you can simply copy and paste the ad’s contents into a
word processor, edit it to your needs, and save it for your
printer from there.
7.To print mailing labels for your XSellerate mailer, click the
Preview and Print Labels button.
Order PowerView
Now, just combine the ads you’ve created with the mailing
labels you’ve printed and send your mailer to start bringing
in more appraisal business.
Order PowerView
Since time efficiency is key to running a successful appraisal
business, the Requester has been replaced with a more
powerful Order PowerView to help you manage and begin
Copyright 2015, a la mode, inc.
Page 74
Wintotal User's Guide
your appraisal orders. Since the Order PowerView uses a
form instead of an application like the Requester, you can
now enter even more information on the fly. While you
could use the Requester to help you fill out all the fields in
your forms, the new Order PowerView allows you to
geocode your property, add a map, and get driving
directions before you even begin your form work. There are
two ways to access the Order PowerView:
1.Open an existing report and click Order.
2.Click New in the upper left corner of WinTOTAL or the
Appraisal Desktop to create a new report. WinTOTAL
takes you to the Order PowerView automatically to assist
you in starting your reports.
office to the subject property to your order form as well.
• Extended Contacts – Adds new
sections to your order form
permitting you to add detailed
information about all of your
contacts to it.
• Extended Billing – Adds a Billing
section to your order form to help
you track billing and payment for
your report. This section replaces
the Billing PowerView in Athena.
• Extended Info – Adds another section to your order form
allowing you to add notes and a wealth of other
information about the subject property.
Set Up Order Preferences
As you fill out the order form in the Order PowerView, you
have the option of allowing WinTOTAL to complete several
tasks for you on the fly. These items are controlled from the
Options menu located on the left side of the Order
PowerView. To automate some of the initial order setup
processes in your report, check each of the options you wish
to apply using the Options pane to the left of the Order
PowerView. Options include:
• Default Settings - Allows you to determine how WinTOTAL
names your new report files and whether you
automatically or manually push your WinTOTAL orders to
your XSite.
• Order Map – Automatically adds a map to your order form
when you fill in the full subject address for your order.
• Auto Internal Order – WinTOTAL automatically generates
an order number for each new report when this option is
selected. To specify the format of the numbering, click on
the link and set your preferences in the screen that
appears. See the Automate Order Numbering section of
this user guide for more details.
• FEMA/Census Data – Automatically adds IDC data to the
appropriate fields in your report as you fill out your order
form.
• XSite Integration – If you have an Appraiser XSite and
want to keep your XSite order list in sync with WinTOTAL,
just mark this option. If it’s your first time using XSite
Integration, click the XSite Integration link next and
enter your XSite Username and Password.
• With Directions – If you opted to include a map in your
order form, checking this option adds directions from your
Order PowerView
Copyright 2015, a la mode, inc.
Note: Whenever a new order from your XSite is
downloaded into WinTOTAL or a new order is pushed
from WinTOTAL to your XSite, an XSite symbol
Page 75
Wintotal User's Guide
After a few moments, WinTOTAL automatically changes the
driving directions in your order form to start from the new
location.
appears in the XSite column to indicate that the
synchronization is complete.
Change Start Points for Directions
Automate Order Numbering
If you use WinTOTAL to retrieve directions to your property
inspections, you may need to change the starting location for
those directions from time to time. In WinTOTAL’s Order
PowerView, you can specify an alternate starting point for
your driving directions. To do so:
1.In WinTOTAL’s Order PowerView, check the Order Map
and With Directions boxes in the Options pane on the
left side of the screen.
2.Click the With Directions link in the Options pane.
If you’ve defined your own custom order numbering scheme
to help you keep track of each new order that comes into
your office, you may be able to use WinTOTAL’s autonumbering tools to automate the order numbering process
so that you don’t have to manage it. To enable automatic
internal order numbering…
1.In WinTOTAL’s Order PowerView, check the Auto Internal
Order box in the Options pane to the left of the Order
PowerView of the Appraisal Desktop.
2.Next, click the Auto Internal Order link.
3.In the screen that appears, indicate whether you want to
start from your local office address or from an alternate
starting point by checking or unchecking the Use Local
Office Address box at the bottom.
3.When the Configure Internal Order Number window
appears, determine whether you want to make your
order numbering system available to all users on your
network or just on your machine and then mark either
Just for me or Office-wide (All WinTOTAL users)
option to indicate your choice. If you’re not using a
network installation of WinTOTAL, mark the Just for me
option.
4.If you’re using a start point other than your local office,
type in the address you wish to use as the starting point
for your driving directions into the available boxes.
5.Finally, click OK to apply your changes.
Note: If you’re using a network setup of WinTOTAL
and you select to use this as an Office-wide setting,
it applies to all users in your network and can be
changed by all users in your network. If the other
users in your network wish to use a different internal
ordering scheme, they must repeat this process and
use the Just for me option.
Order PowerView
Copyright 2015, a la mode, inc.
Page 76
Wintotal User's Guide
4.
6.Depending on which option you chose, you must either
configure the starting number for your internal order
number or the prefix, day, month, year, and order of
appearance in your internal order numbering scheme.
7.When you’re finished, click OK to implement your internal
order numbering scheme on all your future appraisals.
Complete the Order Form
In order to take advantage of all WinTOTAL’s time saving
features, you should take the time to fill out as much
information as possible. Where applicable, WinTOTAL uses
this order information to fill out related fields throughout
your report.
5.Next, configure the auto-numbering scheme you’d like to
use for your internal order numbers by choosing from the
following options
o Auto number sequentially – Increments the internal
order number each time you generate a new report.
When you choose this option, you need to designate
the starting number for your internal ordering scheme.
o Auto number based on my settings below –
Provides a customizable format for your automatic
internal order number. Using this option you can
include a prefix, year, month, or day in your internal
order and control the order of their appearance.
1.Through the Order PowerView, fill out a Report
Description, Property Address, City, State, and Zip
at a minimum.
2.For best results, be sure to select contacts from your
contacts database using the drop-down menus provided
beside each contact field.
3.Finally, fill out any additional information in your order
form as are necessary. As you’re filling out the order
form, keep these things in mind to assist you in filling it
out quickly.
o QuickLists are available in the pane to the left of the
screen to help you fill out your order form quickly.
Hint: If you’re using the Auto number based on
my settings below option, you can preview the
internal order number format by viewing the
form is to create QuickList entries for the different
products you offer or the different areas you regularly
appraise. With a strong set of product or area based
QuickLists, you could easily fill out the entire order
Example field at the bottom of the window.
Order PowerView
Hint: One of the fastest ways to fill out the order
form and invoice with only a few clicks.
Copyright 2015, a la mode, inc.
Page 77
Wintotal User's Guide
o Notice that the field color changes to gray to indicate
you’ve been to this portion of the form as you move
through the fields in the order form. Fields you have
not updated remain blue.
o In any field that contains the or icon, you can select
data from or add entries to your Contacts Database.
o In any field that contains the icon, you can select a
date from a pop-up calendar that appears when you
click the icon.
o In the field that contains the icon, you can
automatically insert a location map, flood, and census
data into your report when you click the icon.
o In the appointment field that contains the icon, you
can add your appointments to your Outlook or XSites
calendar to help you maintain your schedule.
o When the icon appears in a field, click it to designate
that the content of that field is the same as either the
Internal Order, Lender Case, Client File or FHA/VA
case numbers entered in the Tracking section of the
order form.
o Additional fields have a drop-down menu from which
you can choose additional “Same as..” data. The items
displayed in these menus change depending upon the
type of information each field might contain. For
example, the Client field can be the “Same as” the
Lender, the Bill to or the Ship to fields.
o When the icon appears in a field, this indicates the
presence of a “recent response” entry. Use your
mouse and click the icon to display the list of your
most recent entries in that field. Or, press Alt +
Down Arrow on your keyboard.
Order PowerView
Get Flood & Census Data
If you want to have a bit more control over what data
WinTOTAL automatically inserts into your report when it
gathers flood, census, and other data from the Internet, you
can define your preferred format for that data in WinTOTAL’s
Order PowerView. To do so…
1.In WinTOTAL’s Order PowerView, check the FEMA/Census
Data box and then click the FEMA/Census Data link in
the Options pane on the left.
2.Mark your preferred data using the provided settings.
Options include:
o Make all addresses and other inserted data in uppercase
o Append the FIPS # to the beginning of the Census Tract
o Control which information (Census Tract, FEMA Zone,
Subject Address/Zip, etc) is automatically retrieved for
you by having WinTOTAL prompt you each time,
download all data, insert only data that it finds when it
connects to our servers, or choose the data you want
WinTOTAL to add to your report automatically by
checking the each option.
Copyright 2015, a la mode, inc.
Page 78
Wintotal User's Guide
3.When finished, click OK to apply your changes.
status change occurred in addition to any notes you may
have included at the time you changed the order status.
2.Use the Previous and Next buttons to see the detailed
information for each previous status change.
3.Click Back at the top of the Status pane to return to the
order history overview.
HINT: To quickly review an entire status history or update
the status of numerous reports in a hurry, you can
use the detailed file view provided in WinTOTAL’s
Appraisal Desktop.
Updating Order Status
To update the status of your current report:
Set Internal Status
1.In the Order PowerView, click Set Status in the Status
pane to the left.
In addition to the internal status tools provided
in WinTOTAL’s Appraisal Desktop, you can also
view and update your internal status history
through WinTOTAL’s Order PowerView.
2.When the Add Internal Status window appears, choose
the desired internal status from the drop-down list in the
upper, right corner. Depending on the status you select,
more options may appear. For instance, if you choose
Inspection Scheduled, additional fields appear where you
can enter the date and time of the scheduled inspection.
3.Type any comments you want to include with the status
change in the Notes box.
Viewing Status Details
To view the full details for any internal status update in your
order’s status history:
1.In the Order PowerView, click the status name’s link in the
Status pane on the left. WinTOTAL replaces the order
history with a detailed explanation behind the change in
order status. You can view the time and date that the
Order PowerView
Copyright 2015, a la mode, inc.
Page 79
Wintotal User's Guide
Merge in Report Data
Note: If you’re using WinTOTAL’s status tools in conjunction
with your XSite so that you can benefit from proactive
status messages, the Notes field becomes the body of
the status notice e-mail.
4.If this is an XSite order and you've integrated with your
XSite, check the Send Client Notification box to send a
notification of this status change to your client. Then,
use the drop-down menus to select a recipient and
subject for your message or just type that information
yourself.
5.When you’re finished, click Save to update your internal
status.
Order PowerView
WinTOTAL’s SmartMerge function takes the place of the
clone function provided in older versions of WinTOTAL,
placing far more data merging power into your hands as you
begin your reports. WinTOTAL now allows you to merge data
from individual sections of forms, as well as the whole form
or the whole report at any time during the life or your report.
You can even merge multiple different reports with different
sections of each report you merge to help speed up your
formfilling process without any concern about any data being
overwritten. Merge simply blends the data you select with
the data you’ve already placed into your report. To merge in
data from another report or template…
1.In WinTOTAL’s Order PowerView, click Merge in the
toolbar at the top of the Order PowerView.
2.Find and click to select a report from which you wish to
merge data. If necessary, use the Look for field to
locate the desired report or “template” file.
Copyright 2015, a la mode, inc.
Page 80
Wintotal User's Guide
3.Indicate whether you want to merge the Entire report or
just the Selected forms in your report by marking the
corresponding option.
4.If you choose to merge in just selected data from your
other report, the forms contained in that report are
displayed below the file list. Double-click each form in
this box to select or deselect it for inclusion in your new
report. Click Mark All to select all of the forms in the
report.
5.Once you’ve indicated what you want to merge from your
old report, click one of the buttons in the top toolbar to
tell WinTOTAL how to blend that data into your current
report. Options are:
Add Forms to Reports
Adding additional forms into your report is simple. Just use
the contents view to navigate out to the forms you want,
drop them into your report, organize them, and you’re done.
Specifically, to add forms to your report…
1.From either the Forms PowerView or the Order PowerView,
click Contents in the toolbar.
o Merge in forms AND data – Blends the selected data
into the data that already exists in your report, adding
new forms to your report when necessary.
o Merge in forms only – Adds blank copies of the forms
you’ve specified into your current report. As with
other merge options, this option does not overwrite
the data in your report.
o Clone allows you to make an exact duplicate of the
older report. Any information you entered in the order
form is overwritten with the data from the older
report. If desired, click the check box to ensure that
any tracking data (order date, etc) is not deleted.
o Merge in forms only allows you to merge the forms from
the older report, but without the data in them.
Order PowerView
2.From the Contents window, find the form you want to add
in to your report. Depending on your preferences, you
can find forms in one of several ways.
o You can search for the form by typing a search phrase
into the provided box and clicking Find. If you want
to search by form number, type a # sign followed by
the form number without any spaces and then click
Find.
Copyright 2015, a la mode, inc.
Page 81
Wintotal User's Guide
o You can scroll through the forms list and find the form
based off of the folder organization. Just double-click
any folder to expand it and show the available forms.
o You can customize the Most Common (Custom)
forms list to show your list of needed forms and
simply jump to that when you access contents. If you
want to customize your Most Common Forms list, click
the Click to Customize link and add in your favorite
forms.
3.If necessary, click the Preview link to the lower right
corner to see a live preview of the selected form.
4.When you locate the desired form, double-click it to add it
to your report, or click and drag it across.
5.On right side, the forms currently in your report are
displayed. You can change the order of these forms by
dragging them up or down the list. Or, use the Move Up
and Move Down links.
have dual monitors or a particularly large display area,
you may want to select this option so you can continue to
add forms as necessary without calling up the Contents
again.
9.Click OK to return to the order form.
Forms PowerView
Arriving at the value of a property is only one step in the
appraisal process. The tedious task of creating the actual
report can often consume as much or more time from an
appraiser’s day. There are dozens of tools available to
appraisers to help reduce the amount of time spent filling
out the appraisal forms. The Forms PowerView is the spot in
WinTOTAL where you’ll perform a majority of your formfilling
tasks.
6.To remove a form from your report, select the form and
click Delete. Do not double-click the form in this case,
as that switches WinTOTAL to the Forms PowerView with
that form open.
Note: If you're removing a comps, rentals, or listings
page, you must remove the forms in reverse order
(i.e. a listings 1-3 page can't be removed before a
listings 4-6 page).
7.If desired, you can change the name of this form for this
report. Select the form and click the Rename link. Type
a new name and click OK. Renaming the form here does
not affect the default form name, but it is reflected in any
future reports you may create by merging this report.
8.At the bottom of the window is the option to keep the
contents window open even after you click OK. If you
Forms PowerView
Copyright 2015, a la mode, inc.
Page 82
Wintotal User's Guide
Navigate Forms
Control Your View
WinTOTAL’s Forms PowerView provides a number of ways to
help you easily navigate through your forms to the right
fields in your report. Ways to jump around in your report
include:
• Collapsing/Expanding Forms – You can collapse all of
your forms into nothing more than headers, by clicking
Collapse All Forms , expand all the forms in your
report by clicking Expand All Forms or
expand/collapse each form individually by clicking the
icon beside the header of each form you want to toggle.
• Jump Directly to a Form – If you know exactly which
form you need, click the Jump to Forms menu in the top
toolbar and pick a form to jump directly to it.
• Jump Directly to a Section – If you need to quickly
access a specific section of your major form, click the tab
at the bottom of the screen that corresponds to the
section you want to access.
• Moving from Field to Field – Just as you can move about
your forms in several ways, there are several ways you
can move from field to field. Pressing Enter moves your
cursor from field to field in the “logical” order in which you
might fill out the form. Pressing Shift + Enter moves you
backward in that order. Pressing Tab moves you across
the form horizontally, where possible, or to the next
“logical” field if you’re at the right edge of the form.
Pressing Shift + Tab moves you backward, horizontally.
WinTOTAL provides a number of ways to help you maximize
the viewable area of your report on screen while providing
each access to the same tools you need throughout your
report. To arrange WinTOTAL for best use of screen real
estate, click the View menu in the Forms PowerView and
select the appropriate option for your needs. Options
include:
• Zoom to full width – Zooms in on the form until the entire
form fits within the viewable area in the WinTOTAL
window. As you resize your window, the form changes
size to accommodate your new window size.
• 100% - Zooms in on the form until it’s displayed at its full
width and height defaults.
• Zoom – Calls up the Zoom window so you can choose the
exact zoom setting for your needs.
• Show Left Pane – Toggles the left pane on and off. You
can also toggle this setting by pressing F9 on your
keyboard.
• Show form icons –Controls the field specific icons that
appear while you’re filling out your forms and that assist
you in doing various things like picking a date from a
calendar, managing your contacts, getting a map, etc.
You have three options you can apply to these icons:
Always show, Current field, and Never show.
• Hide all QuickNotes – Hides all your QuickNotes from
view.
• Show QuickNotes – Allows you to specify which
QuickNotes you want to see on screen.
Forms PowerView
Copyright 2015, a la mode, inc.
Page 83
Wintotal User's Guide
• Open all QuickNotes – Displays all of your QuickNotes for
this report and opens the “sticky notes” so that you can
edit them.
Hint: With a bit of forethought, QuickLists can be a
• Close all QuickNotes – Closes all “sticky notes” beside
your QuickNotes, but leaves their respective balloon icons
visible.
great way to quickly fill out subject data that relates
to a specific neighborhood. In other words, if the
neighborhood characteristics in your area are similar
enough, you may want to create and use QuickLists
that fill out the related fields with specific
neighborhood information about each neighborhood in
your area, depending on which neighborhood
QuickList you use.
• SmartMerge is available to help you merge in data from
previous reports. Unlike cloning, you can do this as many
times as you want without overwriting data that you’ve
already entered in your report.
• As you fill out fields in your major form, WinTOTAL takes
the relevant information from that field and applies it
throughout other forms in your report to help you save
time.
Formfilling Shortcuts
WinTOTAL’s Forms PowerView contains a series of icons and
tools within many of your forms that can help you to fill
them out with the appropriate data more quickly. By
default, these icons are nested next to each field that
pertains to the data they help retrieve, but if you want to
disable these icons, you can do so by clicking View, Show
form icons, Never show from the menus at the top. Keep
these features in mind as you fill out your forms.
• QuickLists are available to help you fill out entire sections of
a form at any given time.
Forms PowerView
• In any field that contains the or icon, you can select
data from or add entries to your Contacts Database.
• In the field that contains the icon, you can automatically
insert a location map, flood, and census data into your
report when you click the icon.
• When the icon appears in a field, click it to designate that
the content of that field is the same as either the Internal
Order, Lender Case, Client File or FHA/VA case numbers.
• When the icon appears in a field, this indicates the
presence of a “recent response” entry. Use your mouse
and click the icon to display the list of your most recent
entries in that field. Or, press Alt + Down Arrow on your
keyboard.
Copyright 2015, a la mode, inc.
Page 84
Wintotal User's Guide
• If you've enabled FreeForm UAD mode in WinTOTAL's Data
Entry Options, you'll be able to use shorthand entries to
speed up formfilling. Click here for a complete reference
on using the FreeForm UAD shorthand.
in your report, organize them for easier access, or share
them with others in your office.
Create Line Item QuickLists
QuickLists
To create a QuickList entry…
WinTOTAL’s QuickLists system is both
one of WinTOTAL’s most powerful
features and also one of its least
understood features. Using QuickLists
you can eliminate the need for repetitive
typing for good and, with the proper
setup, you can complete entire fields or
even entire sections with a single
keystroke. And since QuickLists are fieldspecific, you don’t have to scroll through
long lists to find the appropriate
comments.
There are two different types of QuickList
entries you can create in WinTOTAL: single-field entries and
multi-field entries. Single entries provide a simple tool for
stocking your common line item responses. Multi-field
entries, on the other hand, provide you with a way to stock
entire sections of a form into a single QuickList. Generally,
you can achieve the best results through a blend of line item
QuickLists and multi-field QuickLists.
1.In the Forms PowerView, place your cursor in the field you
wish to create a QuickList for and type the comment.
2.Double-click New in the QuickList pane or press Alt-0.
3.Type a name for this entry and click OK.
Your comment is added to the QuickList for this field. Now,
whenever you enter this field, the comment you saved
appears in the QuickLists pane on the left.
Create Multi-field QuickLists
When using QuickLists, the first step is to create your
custom list of “canned” responses. Then, you can use them
Forms PowerView
While line item QuickLists can help you quickly get through a
section in your report, you can often speed that process
further by creating multi-field QuickList entries that detail
Copyright 2015, a la mode, inc.
Page 85
Wintotal User's Guide
every field in a section for a certain builder or neighborhood.
To create a multi-field QuickList entry…
1.From the Forms PowerView, select all of the fields you
want to add into your QuickList entry starting with the
field into which you want to add this QuickList. To select
multiple fields, either hold down the Ctrl key and click
each individual field you want to add or hold down the
Shift key and click the first and last fields in a section of
contiguous fields to select the entire section.
2.Double-click New in QuickList pane or press Alt-0.
Use QuickLists
Once you’ve created a QuickList, you can easily use it when
filling out your forms.
Quick vs. All QuickLists
WinTOTAL allows you to filter your QuickLists so that you can
view either All QuickLists in your text database, or just the
QuickLists that apply to the currently selected form field. To
switch between the two views, click the link in the upper left
of the QuickLists pane. Depending on your current
QuickLists view, the link says either “Quick” or “All” to
indicate the view you will switch to when you click it.
Basic QuickList Usage
To use a QuickList entry...
1.In the Forms PowerView, place your cursor into the field in
which you intend to use the QuickList entry.
2.Double-click the QuickList entry in the QuickLists pane.
3.Type a name for this entry and click OK.
--OR-Your new QuickList entry then appears in the QuickLists pane
for the first field you selected. To help you differentiate
between your new multi-field QuickList entry and the rest of
your line item QuickLists, WinTOTAL notates any multi-field
QuickList entries with an orange background.
Hold down the Alt key on your keyboard and press the
number on your keyboard that you see listed in the
QuickLists pane to the left of the entry you want to use.
The QuickList entry immediately fills out your form with the
data you saved into it.
Advanced QuickLists Options
Forms PowerView
Copyright 2015, a la mode, inc.
Page 86
Wintotal User's Guide
If you need to specify exactly where WinTOTAL inserts the
QuickList entry in your field, you must use the advanced
QuickLists entry options. To do so…
1.In the Forms PowerView, right-click the QuickList entry
you want to use.
2.From the menu that appears, select the item you want to
use. Options are…
o Replace Current Field Text with QuickList –
Overwrites the information you currently have in your
form field with the data in your QuickList entry.
o Insert QuickList into Current Field Text – Inserts
the data in your QuickList entry into the existing
content in your field at the location of your cursor in
the field.
o Append QuickList at the End of the Current Field
Text – Adds the QuickList entry’s data to the end of
the current form field’s data.
Organize QuickLists
As you continue to use your QuickLists, you may need to
reorder them to move more common QuickList entries into
the top 10, move infrequent QuickList items out of the top
10, or to remove gaps in the numbering. There are two
ways you can reorder your QuickLists: alphabetically and
manually.
Organizing QuickLists Alphabetically
If you want WinTOTAL to automatically
reorder your QuickLists alphabetically by the
name of each QuickList entry, from the
Forms PowerView, click the A-Z icon to the
upper left of the QuickLists pane.
o Change Text Database Name – Offers you a list of
alternate WinTOTAL user profiles containing QuickList
entries so that you can switch your QuickLists to use
another user’s.
Organizing QuickLists Manually
o Create New Text Database – Opens the QuickLists
manager, allowing you to create a new set of
QuickLists and associate the new list with any
WinTOTAL user profile.
1.In the Forms PowerView, right-click any QuickList entry in
the QuickLists pane.
o Resequence QuickList – Calls up WinTOTAL’s
QuickList reordering tool so that you can change the
order of the QuickList entries for the currently selected
field. This only applies for fields that have multiple
QuickList entries.
Forms PowerView
To manually specify the order and numbering of your
QuickList items…
2.In the menu that appears, choose Resequence
QuickList.
3.When the reordering window appears, click the QuickList
entry or unassigned gap you wish to move.
Copyright 2015, a la mode, inc.
Page 87
Wintotal User's Guide
anything. WinTOTAL shares them with the other members
of your office by default. They simply need to swap their
QuickLists set to use yours instead of their own. To switch
your QuickLists set so you’re sharing another WinTOTAL
user’s QuickLists…
1.In the Forms PowerView, click Edit, Change Text
Database name from the menus.
2.When QuickList name window appears, you should see a
list of the other WinTOTAL users on your computer or
network.
4.Then, click the Move Up and Move Down links to position
the QuickList entry as you see fit.
5.To remove the unassigned gaps from your QuickLists and
automatically reorder the following QuickList entries to
use the new space, click Trim Gaps.
6.Click OK when finished to save your changes.
Share QuickLists
Note: You can also change the name of the Text
Particularly if you’re working in a multi-appraiser office and
you’re sharing WinTOTAL on a network, you may find times
when your QuickList entries do not have all the info you want
- particularly if you’re new to WinTOTAL and haven’t had the
opportunity to create an extensive library of QuickLists. For
just such occasions, we’ve added the ability for WinTOTAL
users to share QuickLists with other WinTOTAL users in your
network. If you have a set of QuickLists you want to share
with others in your office network, you need not do
Forms PowerView
Database for some of the users in the list by clicking
Rename, typing a different name for that entry, and
clicking OK This can help to clarify whose QuickLists
you’re viewing in the QuickList name window.
3.In addition, if you want to create a new blank database
with no QuickList entries, click New and then type a
name for your new database.
4.Click the name of the user whose QuickLists you want to
use and then click OK.
Copyright 2015, a la mode, inc.
Page 88
Wintotal User's Guide
only applies when you set your QuickLists view to All
instead of Quick.
You’re now using the QuickLists from the user you chose.
o Change Text Database Name – Shows a list of other
QuickLists profiles along with a notation indicating the
total number of QuickLists in the set that apply to the
current field along with the total number of QuickLists
in the set. The number on the left shows the total
number of QuickList entries in the set for the selected
field. The number on the right shows the total
number of QuickList entries in the set. Click a name in
the menu that appears to change your QuickLists set
to the other Text Database entry.
QuickLists Options
In addition to creating and sharing QuickLists, you can
customize your QuickList preferences in several ways to
tailor them to your needs. To change your QuickLists
preferences…
1.In the Forms PowerView, click the Options link in the
QuickLists pane.
o Clear Text Database Entries for Current User –
Flushes out your Text Database so that you can start
your list over from scratch. Only click this option if
you intend to wipe out your QuickLists.
o More Options – Calls up the Data Entry Options in
WinTOTAL’s Configure WinTOTAL utility.
2.From the menu that appears, select the item you wish to
use. Options are:
o Create New Text Database – Opens the QuickLists
manager, allowing you to create a new set of
QuickLists and associate the new list with any
WinTOTAL user profile.
Recent Responses
o Show Entries for this Name Only – Filters the list of
QuickLists appearing on screen to show only QuickList
entries that belong to your current Text Database.
This option only applies when you set your QuickLists
view to All instead of Quick.
o Show this Form’s Entries Only - Filters the list of
QuickLists appearing on screen to show only QuickList
entries that apply to form you are editing. This option
Forms PowerView
WinTOTAL’s Recent Responses system automatically stores
the last 10 entries you place into each field on your forms
into temporary storage so that you can access those
responses again as you continue working up future reports.
This system can save you some typing time from one line
item to the next, but is not quite as powerful as our
QuickLists system. Since this system is automatic, you need
only fill out your reports to create new recent response
entries. WinTOTAL then stores those 10 recent entries into
drop-down menus that appear in each field.
Copyright 2015, a la mode, inc.
Page 89
Wintotal User's Guide
o Remove from Recent Responses – Click this to
remove the item from your drop-down list.
If you prefer to use our QuickLists system for data entry but
you’d prefer to use the drop-down menus to select your
desired QuickList response instead of the QuickLists pane or
shortcuts, you can actually swap out the recent Reponses in
the drop-down menus for QuickLists. For details on this
process, see the Swap Recent Responses & QuickLists
section of this user’s guide.
o Add to QuickList – Click this, type a QuickList name,
and click OK to transfer the recent response item
directly to your QuickLists for this field.
o Use – Click this to apply the recent response entry to
the current field.
Note: Even though you edit a recent response item,
if you continue to type new items into that field, your
edited text may eventually by forced off the list by
new entries. Remember that recent responses only
remember the last 10 entries.
Edit Recent Responses
While the Recent Responses are saved for you automatically
as you type, you can also edit the entries.
1.In a report, place your cursor in any field containing recent
responses and click the icon to display the list.
2.Right-click any of the responses in the list.
3.In the menu that appears, choose an option to apply your
changes. Options include:
Use Recent Responses
Once you’ve entered text into a field in a report, the next
time you visit that field, you see an icon indicating that
recent responses are available. Click the icon to display the
list or simply press Alt + Down Arrow on your keyboard.
Select the desired entry from the list to insert it into the
field, overwriting any text that already exists.
o Edit Recent Response – Click this option, type a
correction into the screen that appears, and click OK
to save your changes back into the Recent Responses
list.
Hint: While selecting an item from the recent
response gives you a visual clue as to the items
available, you don’t actually have to use the dropdown menu. Just start typing into a text field. If there
is a recent response entry that begins with that letter,
it automatically appears. Then, press Down Arrow
and Enter to select that item.
Forms PowerView
Copyright 2015, a la mode, inc.
Page 90
Wintotal User's Guide
QuickNotes are available in three levels
• Standard (Yellow)
• Needs Review (Red)
Swap Recent Responses & QuickLists
• Reviewed (Green)
To create a QuickNote…
If you like the functionality of the recent responses, but
would rather use your QuickLists instead, you can turn off
the recent responses feature and replace the drop-down
menu with QuickLists.
1.In the Forms PowerView, click the note icon of choice
(Yellow, Red, Green) in the toolbar above your form.
1.From the Forms options of WinTOTAL’s configuration
utility, verify that the Show drop-down lists for fields
item is checked, then below that, mark the option for
QuickLists.
2.If you’d like, check the box to Automatically show dropdown lists when entering a field. With this enabled,
whenever you enter a field with a recent response or
QuickList associated with it, the drop-down menu
appears immediately.
3.Click Save to complete the change.
2.Click the area of the form where you want note to appear.
3.Type your comments in the box that appears.
QuickNotes
In the past, one of the advantages to a printed form was
that you could attach a note to it if you wanted to convey
some information about the report for another appraiser. In
extreme cases, review appraisers could often attach enough
of these messages that it was hard to see the report behind
the notes. Now, WinTOTAL lets you leave electronic “sticky
notes” anywhere on any form. These notes display on
screen, but do not show up on the printed copies. They
make a great teaching tool, as mentors and reviewers can
point out minor items, as well as critical errors.
Forms PowerView
4.Click the X in upper right corner to close and save your
note.
The note is placed in your document shown as a semitransparent balloon.
• If you need to reposition the note, just click and drag the
balloon to another location.
• To read a note, double-click the balloon.
• To change the type of note, right-click the balloon, then
choose QuickNote Type and select the desired note
type.
Copyright 2015, a la mode, inc.
Page 91
Wintotal User's Guide
• To remove a note from your report, right-click the balloon
and choose Delete.
• To choose how QuickNotes are displayed in the report, click
the Show QuickNotes icon
and select whether to hide
all notes, display only those of one kind, expand all notes
in the document, or collapse them all.
Default Data & Formatting
o Set default addenda data font - This allows you to
specify the font that is used to fill out the addendums
in your report.
Save Custom Formatting
Aurora, like Athena, allows you to customize the data, fonts,
and formats you use in WinTOTAL to comply with the
common formats, fonts, and data you prefer to use as you
fill out your reports. Using WinTOTAL’s data and formatting
tools, you can adjust the font or field format that WinTOTAL
uses by default and you can even add default data to specific
forms so that you can avoid retyping data unnecessarily.
WinTOTAL can store custom formatting such as text
alignment, rounding, commas, etc… This can come in handy
if you continually have to use the F6 key to override our
default settings or are always customizing the formulas. To
use custom formatting…
1.In the Forms PowerView, open the form you need and
make adjustments to the formatting in any fields that
require it.
2.Click the Form menu and choose Default field formats.
You then have 3 options:
Set Default Fonts
WinTOTAL can store custom font formatting such as italics
and font size to use throughout your forms. This can come in
handy if you need to keep the font styles consistent
throughout your report. To use custom formatting:
1.In the Forms PowerView, open the form you need and
make adjustments to the formatting in any fields that
require it.
2.Click the Form menu and choose Default data fonts. You
then have 2 options:
Forms PowerView
o Set default form data font – This allows you to
specify the font that is used to fill out all the forms in
your report.
o Save formats as new default – This saves the
formats currently in the form as that form’s default to
preload on all new files.
o Load default formats - This merges the default
formats with the current information in the report and
does away with your custom formatting.
o Restore standard default formats – This resets the
default formats with the original information that
shipped with WinTOTAL.
Copyright 2015, a la mode, inc.
Page 92
Wintotal User's Guide
Set Default Data
Field-specific Formatting
Default data is information that is automatically loaded into a
form the first time it is used in a report. It can be useful for
changing the headings on addenda forms or adding terms to
your invoice forms. To use default form data:
1.In the Forms PowerView, open the form you need and
make adjustments to the formatting in any fields that
require it.
Just as you can in previous versions of WinTOTAL, you have
the option to format individual fields within any given form.
To change the formatting for a field…
1.In the Forms PowerView, open the form you need and
right-click a field you’d like to reformat.
2.Click the Form menu and choose Default field data. You
then have 3 options:
o Save data as new default – This saves the data
currently in the form as that form’s default to preload
on all new files.
o Load default data - This merges the default data with
the current information in the report.
o Restore standard default data – This resets the
default data with the original information that shipped
with WinTOTAL.
2.In addition to traditional word processing commands, you
can also use the following commands:
o Fonts – This allows you to change the field’s font style
o Field format – This allows you to change various
formatting options for the field.
o Override number format – This overrides a default
number format so that the field accepts whatever data
you enter into it.
3.If you chose Fonts, simply choose the font type, size,
style, and colors from the appropriate fields and click OK
when you’re finished. Notice that as you change your
Forms PowerView
Copyright 2015, a la mode, inc.
Page 93
Wintotal User's Guide
font effects you can preview them in the preview pane to
the bottom right of the window.
o Alignment – Allows you to set your field alignment.
The default option is No Align.
4.Alternately, if you chose Field format, you have the
following options:
o Read Only – Only allows you to read a field and does
not permit manual changes to a field.
o Invisible – Hides the field and its data from view.
Note: This option only applies for some fields.
o Non-Printing – Designates that a field should not print
with the rest of your form data when you choose to
print your report.
o Skipped by Enter – Causes WinTOTAL to skip this field
when you travel consecutively through the fields in
your report using the Enter key.
o No Calc – Prevents WinTOTAL from calculating this
field. This can be particularly handy when you enter
data into a field that would normally resolve the data
to some calculation, but you do not want that to
happen.
o Numbers Only – Prevents you from typing letters and
other non-numeric characters into the field.
o 2 Decimal Places – Limits the number of decimal
places in a number field to 2.
o Show Commas – Toggles commas in numeric fields on
and off.
o Leading + or - - Requires a leading + or – in the field
such as in the comps grid.
Add Documents to Reports
In previous versions of WinTOTAL, adding files to your report
could be a complicated process. Now, WinTOTAL’s new “Add
Documents” feature allows you to add anything from a PDF
to a scanned document to your report in a few simple steps.
To add a file to your report…
1.In the Forms PowerView, click the down arrow next to the
Add button. Files can be added to your report using one
of four methods:
o Document from clipboard – Copies the image
currently in the Windows clipboard into your report
file. This allows you to use Windows’ copy and paste
features to import image files into your report.
o No Transfer In – Toggles field locking on and off.
o Document from image – Allows you to browse your
computer for the file that you want to add.
o Rounding – Allows you to set rounding for numeric
fields. The default option is No Rounding.
o Document from scanner – Allows you to scan a hard
copy of a document directly into your report.
Forms PowerView
Copyright 2015, a la mode, inc.
Page 94
Wintotal User's Guide
o Document from PDF – Allows you to import PDF files
directly into your report.
2.Click the option that corresponds with the source of the file
you want to import. Then, WinTOTAL prompts you about
the type of form you’d like to use to import this data.
Document from Image
When you use this option to add a document to your report,
WinTOTAL prompts you to browse for the file you wish to
add. In addition to the options outlined above, you need to
click Browse and Open the file that you wish to add before
clicking OK.
3.Choose a form type that suits your preference and then
type a title that reflects the file you’re importing.
4.Finally, choose an appropriate image quality using the
Quality settings options and then click OK to import
your file.
Document from Clipboard
When you use this option to add a document to your report,
WinTOTAL automatically pulls the latest image you’ve added
to the Windows clipboard into your report. In addition to the
general steps outlined above, you need to specify whether or
not you’d like to send the image to the image optimizer
before adding it to your report. To do so, simply mark the
option that corresponds to your choice.
Note: If you have not copied an image to the
Document from Scanner
By using this option to add a document to your report,
WinTOTAL automatically starts your scanning software.
Windows clipboard, this option generates an error
Note: You must have your scanning software
when you choose it.
installed to use this option. Furthermore, since your
scanning software is unique to your scanner, if you
have difficulties using this option, you should contact
your scanner manufacturer.
Forms PowerView
Copyright 2015, a la mode, inc.
Page 95
Wintotal User's Guide
1.Once the scanning software loads, it takes control from
WinTOTAL, so you must use it as directed by the
manufacturer to scan or acquire the image. Usually, you
click OK, Close, Save, Scan or Send to in order to send
the image to the “host” application – in this case,
WinTOTAL. If you’re scanning software has no such
option, it should send the image to WinTOTAL.
image file that can be used in a WinTOTAL form or even
optimized and annotated as with any other image file in
WinTOTAL.
2.Once the image has been sent to WinTOTAL, an Import
from scanner screen appears prompting you with
specific options. Choose a type of form to insert the
scanned document into and type a title for the form in
the available box.
3.Click Browse to navigate out to the PDF file on your
computer. When you find the PDF file, click it and choose
Open.
1.Choose a type of form into which WinTOTAL should insert
your PDF.
2.Type a title for the form into the available box.
4.Finally, choose the Quality Setting you wish to use on
your PDF and click OK to convert the PDF into an image
that can be used in a WinTOTAL form.
Note: In addition to the standard fax, black & white,
and color quality settings in the other options, this
option includes an option to maintain the highest
possible quality during the process of converting the
PDF into an image file. Use this option only as
necessary because it can increase your report’s
overall file size significantly.
3.Remember to choose either to automatically optimize your
image using your pre-defined settings or to manually
optimize the image by marking the appropriate option.
4.Finally, choose a Quality Setting for your document and
click OK to import it into your form.
Document from PDF
When you choose this option to add a document to your
report, WinTOTAL allows you to browse for and add a PDF
document to your report. It then converts the PDF into an
Forms PowerView
Copyright 2015, a la mode, inc.
Page 96
Wintotal User's Guide
Write Addenda
WinTOTAL’s addenda feature gives you unparalleled power in
creating narrative supplements to your appraisal reports.
Based on proven word processing technology, the Addenda
feature gives you access to most of the advanced tools found
in products like Microsoft Word, including tables. In fact, you
can load documents created in your word processor directly
into an addendum. But WinTOTAL’s addenda tools give you
one capability you won’t find in MS Word: you can link any
field from any form – or multiple forms – directly into your
addendum. As your report changes, your addendum is
automatically updated. To access WinTOTAL’s addenda tools,
click the Addenda button in the Report pane to the left of
the Forms PowerView.
• Text Overflow – As you’re typing in any multi-line text
field in a form, WinTOTAL knows how much text can fit in
that field. Once you’ve reached that capacity, the program
automatically prompts you to create an addendum. See
the Text Overflow Options section of this user’s guide for
exact detail on generating addenda with this tool.
• Select an Addendum Form – If there’s a particular
addendum form you wish to use, you can simply add the
form to the report using the Contents feature. Just add
an addendum form from WinTOTAL’s Other Forms &
Addenda folder inside the Contents tool.
• Split-screen addenda – The quickest way to create an
addendum. This method allows you to view the contents
of your forms while you’re editing your addendum. To use
it, click Addenda in the Report pane.
Create Tables & Columns
Using WinTOTAL’s addenda tools you can create tables to
help you display structured lists or create columns in your
document. To create a table in an addendum…
1.From WinTOTAL’s addenda tools, click the Table Options
button, and choose Insert Table.
2.Specify the number of rows and columns you would like to
see.
Note: There is no way to change the number of rows
and columns for the table once it has been inserted
Create Addenda
In WinTOTAL’s addenda tools, you can create addenda in
three different ways.
Forms PowerView
into the addendum.
3.Click OK.
Once a table is inserted, you can begin typing text into each
cell. Click and drag the borders of the table to resize each
Copyright 2015, a la mode, inc.
Page 97
Wintotal User's Guide
cell. To further customize the table, with your cursor in the
table, click the Table Options button again and choose
either Table Attributes or Cell Attributes. Select the
desired modifications from the screen and click OK.
Cell Attributes
As necessary, you can adjust the formatting of any cell in
your table to emphasize certain aspects about it. To adjust
your cell’s formatting…
1.From WinTOTAL’s addenda tools, click the cell you wish to
adjust and then either right-click it and select Cell
Attributes OR click the Table Options button in the
middle toolbar and select Edit Cell.
2.In the screen that appears, mark your preferred options
and click OK. Options include:
o Horizontal Position and Extension – The Horizontal
Position and Extension dictate the left and right
position of the cell.
o Border Width - Controls the thickness of all four lines
around the cell. Change any individual line by
changing the width of that side in the Cell border
widths section below.
o Text Gap – Controls the space between each edge of
the cell and the text. Fine tune the margins on any
side by editing the values in the Text gap properties
section below.
o Back Color – Lets you select a background color for
this cell from the drop-down list.
o Apply changes to – While designed to modify one cell,
you can apply the changes you make here to either
the entire row, column or the table itself.
WinTOTAL immediately applies your changes to the cell. To
undo these changes, click Undo.
Note: When entering values for the Cell Attributes,
each point size equals 20. Thus, to put a line width of
2 points on the bottom of the cell, you would enter 40
in the Bottom Border field.
Forms PowerView
Copyright 2015, a la mode, inc.
Page 98
Wintotal User's Guide
o Vertical alignment – This setting controls where the
text is placed in each cell of the table. Select Top,
Center or Bottom from the drop-down menu.
Table Attributes
As necessary, you can adjust the formatting of your table to
emphasize certain aspects about it. To adjust your table’s
formatting…
1.From WinTOTAL’s addenda tools, click the table you wish
to adjust and then either right-click the table and select
Table Attributes OR click the Table Options button in
the middle toolbar and select Edit Table.
o Text distances – Use these settings to offset the text
in your table from the edges. If you’ve used a thicker
line style, you may need to increase these settings to
ensure the text is separated from the edge.
Insert Images
As with any word processor, you add logos, pictures of
properties or any other image to your addendum text. To
add a picture to your addendum…
1.From WinTOTAL’s addenda tools, click Insert Picture in
the toolbar.
2.Browse to the directory where your image is stored, select
the file and click Open.
3.Double-click the image to open the Image Sizing screen,
from which you can use the slide bars to re-size your
photo. To ensure you photo does not become skewed,
make sure the Retain aspect ratio box is selected.
2.In the screen that appears, mark your preferred options
and click OK. Options include:
o Line width – From the drop-down menu, select the
width for a line. Then, in the Frame display above,
click the position for the line. Continue to add lines as
needed.
o Background – To change the color of your table, click
the User Defined option, then choose color from the
drop-down menu. Or click Other to define your own,
custom color.
Forms PowerView
Copyright 2015, a la mode, inc.
Page 99
Wintotal User's Guide
use Collapse all
forms.
and Expand all
, or Jump to
3.Once your cursor is in the proper field, click the Link
Field button to insert the contents of the selected form
field into your addendum.
The field data from the form transfers into the addenda. To
demonstrate that it is a live link, change the field on the
form and watch it change the addenda when your cursor
leaves the field!
Hint: You can link fields from more than one form in
your report. So you might link data from the main
4.To delete a photo, simply click on it and press Delete.
form, but also from an additional comps page, for
example.
If you don't like scrolling around your forms in the split
screen view, there is another way to insert fields from your
report's major form:
Link to Form Fields
A key feature in WinTOTAL’s addenda tools is the ability to
place hot links to fields from your appraisal forms. These
hotlinks pull information from the forms in your report to
help you fill out your addenda. For example, instead of
typing the address of “123 Main Street” you could link the
address field in your report down into the addendum. The
addendum would pull the address from the address field into
your addenda, marking it in blue. Then, if you save the
addendum and load it into another report, the address
refreshes with the data from the new report. To create
these hotlinks in your addendum…
1.In WinTOTAL’s addenda tools, place your cursor in the
addendum where you want to insert data from a report
field.
2.In the form window, select the field whose data you want
to include in the addenda. To find the right field, you can
Forms PowerView
1.From WinTOTAL’s addenda tools, click the Insert Field
button.
2.A menu appears showing the form's major sections. Click
the section you would like to use.
3.Fields from that section are listed alphabetically. If an
arrow is shown at the bottom of a list, use it to scroll
down and see more fields. Click the desired field in the
list and it should be inserted into your addendum.
Copyright 2015, a la mode, inc.
Page 100
Wintotal User's Guide
• Each addendum form in your report has a header at the top
of the page that conforms to the standard report formats
used in other forms. To quickly view and edit this header,
click the View menu in the lower toolbar, and then click
Page Header. The header box appears immediately in
the upper window pane.
Navigate Addenda
While you’re WinTOTAL’s addenda tools, there are a few
features that you can use to move around and view your
work.
Note:
These features are only accessible from the toolbar
• The Ruler is displayed by default to give you a guide for
laying out your document. Use it to set tab stops and
margins for your addendum.
displayed when you select Addenda in the Report
pane of the Forms PowerView. If you use the Jump
to forms button to open your addendum, you won’t
see that link.
• While the screen is split, showing the form at the top of the
screen and the addendum at the bottom, you have control
over the size of each area. Move your cursor over the
grey line seen just above the toolbar. When it changes to
a double-arrow, click and drag the line up or down to
change the size of the window panes.
• If you’ve used the Overflow Text feature to insert text
from your form, or linked data from any fields, you can
quickly locate these sections in your addendum. Click Go
To in the lower toolbar. A screen displays all of the linked
fields. Just double-click the desired link and you’re taken
directly to that section of the report.
o Tabs - Click anywhere on the ruler to set a tab stop.
Click and drag unused tabs off of the Ruler to delete
them.
o Margins - Margins are set by dragging the black
triangles at either end of the ruler.
o Displaying the Ruler – To toggle the ruler off or on,
click the View menu in the lower toolbar and select
Ruler.
• • You can switch from a normal, text editing view to a
“what-you-see-is-what-you-get” view by choosing Print
Layout from the View menu in the lower toolbar. Then,
choose Normal to switch back.
Save Addenda
With the powerful formatting and ability to link live fields,
you can build up a library of addenda to reuse in various
reports. To save an addendum for later use...
Forms PowerView
Copyright 2015, a la mode, inc.
Page 101
Wintotal User's Guide
1.From WinTOTAL’s addenda tools, click File in the toolbar
just above the addendum.
Note: Do not click File in the toolbar at the top of
the screen.
2.Click Save, type a name for your addendum in the
Addenda Name box and click Save.
Note: When you load a new addendum, it overwrites
the existing addendum in your report.
Hint: The Load Addenda screen lists only the
addenda files you created and saved in WinTOTAL.
However, you can also load any MS Word or Text file
into your addendum. From the screen that appears,
click More files. Browse your system to find the
desired file and click Open.
Use Existing Addenda
Once you’ve built your library of custom addenda, using
them in your reports is a matter of a few clicks. To load a
previously saved addendum…
1.From WinTOTAL’s addenda tools, click File in the lower
toolbar and choose Load.
2.Select the addendum you wish to use and then click Load.
Your custom addendum should now appear in your report
– replacing whatever addendum you had before. And any
linked field in the addendum is updated with information
from the current report.
Forms PowerView
Text Overflow Options
As you’re typing data into any multi-line text field, only a
certain amount of text can fit when the report prints. Based
on the field size and your default font, WinTOTAL knows how
much information this is. When you exceed the limit, you’re
presented with a screen allowing you to move the excess
text into an addendum.
Copyright 2015, a la mode, inc.
Page 102
Wintotal User's Guide
is also copied to the addendum, where you can continue
typing.
Whichever method you use, a new section heading is
automatically added to your addendum. The heading for this
section is displayed in two boxes in the Text Overflow
Options screen. By default, the heading uses the name of
the form the text is coming from, plus the name of the
specific field. You can change this for each situation by
editing the text in either field. Or, click the Edit Standard
section title definition… link and enter new default text.
You can enter any text you like, and choose a combination of
the Bold, Italic and Underline links. Use the $F and $D
wildcard to insert the name of the form and field,
respectively, into the text. Click OK to store your new
default text.
You can take advantage of WinTOTAL’s overflow capabilities
in two ways: automatically and manually. The automatic
method takes care of itself. As you’re typing, if you overflow
a text field, the overflow tools launch asking you what to do.
If you need to manually overflow a field, just place your
cursor in the field, and then, from WinTOTAL’s addenda
tools, click Overflow in the addenda toolbar
There are two options for how the text in your form is
treated when you overflow a field:
• Move all the text to the addendum – Mark this option if
you’d like all of the text you’ve already typed moved to
the addendum. In its place on the form, you can insert a
descriptive phrase directing the reader where to look for
the information. Check the box to enable this feature, and
then type the desired phrase in the available box.
The final options let you select how you’d like the Text
Overflow function to work in the future.
• Show me this box every time – As you’d expect, choose
this option if you’d like to see the options screen every
time you overflow a text field.
• Don’t show me this box again, just do it automatically
– When this option is selected, whichever settings you
chose are executed automatically. You’re not given the
option of changing the settings.
• Don’t show me this box again, and don’t jump to the
addendum – This option effectively disables the feature.
If this is selected, when you overflow a field, you remain
in the form. However, you are not able to add any more
text to the field.
• Jump to the addendum – Use this option if you’d like the
text you’ve already typed to remain on the form. The text
Forms PowerView
Copyright 2015, a la mode, inc.
Page 103
Wintotal User's Guide
Worksheet Calculations
Create Worksheets
WinTOTAL includes numerous automatic calculations. And
yet, there’s no way that our programmers can anticipate
everything you might want to calculate in the course of your
appraisal. Luckily, WinTOTAL’s worksheet feature allows you
to take control and create sophisticated models using data
from your reports. Based on industry-standard spreadsheet
capabilities, WinTOTAL’s worksheets can include
mathematical and statistical formulas, as well as handle text
manipulation. While worksheets do not print as part of your
report, you can utilize calculated data by inserting it into
your forms. To access WinTOTAL’s worksheet features, click
the Worksheet button in the Report pane to the left side of
the Forms PowerView.
Worksheets can be created from scratch within WinTOTAL, or
created in a Microsoft Excel-compatible application, then
loaded into WinTOTAL. Some considerations to remember:
• Only one worksheet can be attached to a report. However,
any worksheet can have multiple calculations in it.
• Worksheets can pull data from more than one form in your
report.
• While primarily used to manipulate data, worksheets can
also be used to simply transfer data from one field to
another.
To create a worksheet, just load up WinTOTAL’s worksheet
tools. A worksheet automatically appears at the bottom of
your screen for use. If you need to create a new blank
worksheet for any reason, click New. Keep in mind, though,
that creating a new worksheet erases the worksheet that’s
currently loaded in your report, so you should save your
current worksheet before creating a new one.
Link Fields
Once your worksheet is open, you can link data from a form
into any cell in the worksheet.
1.From WinTOTAL’s worksheet tools, place your cursor in the
worksheet cell where you want to insert data from a
report field.
2.Select the field in the form that you want in the worksheet.
You can use Collapse all and Expand all , or Jump
to forms, to display the desired form.
Forms PowerView
Copyright 2015, a la mode, inc.
Page 104
Wintotal User's Guide
3.Click the Link Field button. The cell in your spreadsheet
turns red to indicate it is a linked field.
1.From WinTOTAL’s worksheet tools, place your cursor in the
worksheet cell containing the data you want to place in
your form.
2.Select the field in the form. Again, use Collapse all and
Expand all , or Jump to forms, to display the desired
form.
3.Click the Link Cell button. The cell turns yellow
indicating that it is a linked field.
Enter Formulas
Now you should see the field data from the form transfer
into the worksheet cell. To demonstrate that it is a live link,
change the field on the form and watch it change the
worksheet when your cursor leaves the field!
Hint: You can link fields from more than one form in
your report.
Taking data from your worksheet and inserting it into a form
is just the reverse…
Hint: Not all formulas are as simple as adding two
fields. WinTOTAL worksheets support most of the
mathematical, statistical and text handling formulas
found in MS Excel. If you’re building a complex,
Entering formulas in a worksheet is the same as most
spreadsheets. Begin a formula by typing the equal sign (=).
Now, you can click in any other cell to use the contents of
that cell in your calculation. For example, to add the
contents of two cells…
1.In WinTOTAL’s worksheet tools, select the cell that you
want to contain the calculation and press the = key on
the keyboard.
2.Click on the cell containing the first number you want to
add, and then type the plus sign (+) on your keyboard.
3.Click on the cell containing the second number and press
Enter. The sum of the two numbers then displays in the
cell.
multipart formula, it is often easier to create that
Note: The cells you’re adding may be linked to data
formula in MS Excel. Then you can save the Excel
in your form or other cells in which you’ve manually
spreadsheet and load it into WinTOTAL and create the
entered numbers.
desired links to and from your spreadsheet. This
allows you to use Excel’s formula help and
troubleshooting tools to fine tune your formula.
Forms PowerView
Copyright 2015, a la mode, inc.
Page 105
Wintotal User's Guide
3.Click OK to save your formatting changes.
Format Worksheets
Hint: Worksheets are not intended for print. Instead,
To add formatting to the cells in your worksheet…
these formatting options can be applied to make your
1.In WinTOTAL’s worksheet tool, select the appropriate cells,
then click the Format Cells button. Or, right-click and
choose Format Cells from the pop-up menu.
worksheets easier to use. For example, since linked
2.From the Format Cells screen, you can change several
options. Click the desired tab at the top of the screen to
change the Number formatting, cell Alignment, Font,
cell Borders, fill Patterns or Protection. In addition,
you can restrict the data entered in a cell by using the
Validation tab.
being accidentally overwritten or deleted, use the
fields are colored red and yellow, you might color data
entry cells blue. Also, to preserve your formulas from
protection formatting. Finally, remember that
formatting applied in the worksheet does not transfer
up to the form.
Save Worksheets
WinTOTAL allows you to save copies of your worksheets so
that you can load them into any future report. To save a
worksheet…
1.From WinTOTAL’s worksheet tools, click Save in the
Worksheet toolbar.
2.Give the spreadsheet a name so you can identify it later,
and click Save.
Use Existing Worksheets
Note: The cell formatting options are similar to the
options found in MS Excel and most other
spreadsheets. For specific help in using any of these
options, consult your spreadsheet software manual.
Forms PowerView
If you’ve already created a spreadsheet in an application like
MS Excel, or have one from a previous version of WinTOTAL,
you can quickly load that into your current report. To do so…
1.First, in your spreadsheet application, save your work in an
MS Excel 5.0 format.
Copyright 2015, a la mode, inc.
Page 106
Wintotal User's Guide
2.In WinTOTAL’s worksheet tools, click Open from the
Worksheet toolbar.
Results form in the Jump to Forms drop-down menu to
display and annotate this report.
3.Browse your system and select the spreadsheet you wish
to use, and then click Open. Your custom spreadsheet
should now appear in the WinTOTAL worksheet –
replacing whatever spreadsheet you had before.
Note: You can use copy and paste to get your
spreadsheet from Excel into WinTOTAL, but when you
• Click Options to set the threshold values for the E&O
checker to use.
• Once you’ve made changes to your report, click Run Again
to update your E & O report the E & O rules and check
your changes.
• Select the E&O warnings option to display the specific
warnings grouped by report section. Double-click any
warning to quickly display the problem field in the form
window.
paste, only the text labels are pasted in, so you have
to copy your formulas individually.
• Click the Client instructions option to display any specific
instructions the client may have sent along with the order.
Check E&O
Once your report is complete, click E & O Check in the
Report pane of the Forms PowerView. This executes the
built-in Errors & Omissions tool and displays the results in a
window below your forms. Scroll through this list to review
the results.
Other Formfilling Tools
In addition to the variety of formfilling tools such as on-thefly contact management and pop-up calculation forms that
you have within each forms, WinTOTAL comes equipped with
a number of additional formfilling tools including:
• A Spell Checker
• A Change Case tool
• Calendar
• Math Calculator
• An Area Estimator
• Copyrighting tools
• A File Label tool
• Check the Add to Addendum box to include this report as
part of your addendum. Choose the Error & Omissions
Forms PowerView
• And more…
Copyright 2015, a la mode, inc.
Page 107
Wintotal User's Guide
2.Mark either the Appraiser or Supervisor option.
For a more detailed list of available tools and their
descriptions, see the Tools chapter of this user guide.
3.Choose a color. You can have your signature print in blue
or red (on a color printer) even if it was scanned in black.
4.Check the box to insert the current date automatically into
the Signed Date field of your report.
Sign Reports
When your report is complete and ready to deliver, it’s first
time to sign the report. This is an important step in the
electronic world, as applying your digital signature also
“locks” the report so it can no longer be changed.
Signing Reports
To sign a report:
1.From the Forms PowerView, click Sign in the toolbar, or
choose Tools, Sign/Unsign from the menus.
5.At the bottom of the screen, a handful of other options
appear and can assist you in completing various tasks
with your report. Options are:
o Export report comps into Comparables Database –
This option automatically adds the comps and subject
information from your current report to your comps
database so you can retrieve them easily later. If the
comp is already in your database, you may be
prompted about whether you want to update the comp
with the latest information in your report.
o Set report status to complete... – If you’re using
WinTOTAL’s internal status tools in conjunction with
your XSite, you can indicate that the report is
complete automatically when you sign a report by
marking this option.
o Deliver report using XSite Delivery Wizard – If you
are using WinTOTAL in conjunction with your XSite,
this feature automatically starts the XSite Delivery
Wizard to deliver your report when it’s checked. For
more information on the XSite Delivery Wizard, see
the Report Delivery section of this user guide.
6.Click OK.
7.If you configured your system to protect your signature,
type the password you assigned, and click OK.
Now, all pages of the report have been "signed."
Forms PowerView
Copyright 2015, a la mode, inc.
Page 108
Wintotal User's Guide
Unsigning Reports
WinTOTAL’s side-by-side comps view gives you the flexibility
to manage all of your comps at once. Since you’re not
constrained to form layouts for your comp work, you can
easily make adjustments to all of your comps, copy data
back and forth from comps, and rearrange comps without
the usual copy and paste process that forms require. To get
to WinTOTAL’s side-by-side comps view, just click Comps in
the main toolbar.
To unsign a report:
• In the Forms PowerView, click Sign again and choose to
Remove your signature(s) instead.
From this view, you can:
• Define and apply automatic adjustments
• Rearrange your comps
• Add, remove, or import comps
Comps PowerView
The Comps PowerView is designed to turn one of your most
valuable assets – your comps – into a powerful business
tool. The expanded Comps Database allows you to quickly
find and place the best comps for your report, while the sideby-side view allows you to quickly apply standard
adjustments across all of them at once. Coupled with the
new MLS import tools, these new features can easily save
you countless hours, and help you generate more business in
the process.
Comps PowerView
• Reuse comp data from other comp columns
• And more…
Add Comps
WinTOTAL provides several ways to assist you in adding
comps into your reports. There are three ways you can add
comps into you report.
Copyright 2015, a la mode, inc.
Page 109
Wintotal User's Guide
• Manual Data Entry – In the side-by-side comps view, just
click the Add a Comparable link at the top of the
Subject column to insert another comp column.
click Yes to save the comp to your workfile or click No to
simply flush it out of your report.
Hint: If you choose to add the removed comp to
• Old Reports – To import a comp from an old report, click
Old Reports in the toolbar of the side-by-side comps
view. Then, browse to a folder in your File Cabinet, click
a report and double-click mark each of the comps you
want to import from a previous report. Finally, click
Import to pull in all the data about the marked comps.
• The Comps Database – Your Comps Database is your
desktop resource for electronic comp data. When used
appropriately, you can virtually eliminate the need for
MLS printouts. Just click Comps Database in the Comps
pane on the left, mark the comps you want to use in your
report, and click Place to add them.
your workfile, you can find it in your workfile later,
click it, and click Restore to add it back into your
report.
Arrange Comps
Whether you need to add a comp, clear one out, or just
rearrange them, WinTOTAL provides all the tools you need to
manage your comps from the side-by-side comps view.
Moving Comps
Remove Comps
If you need to remove a comp from your report, you can do
so in the side-by-side comps view in two different ways
depending on your needs.
• Clearing the Column – If the comp data in a column does
not apply to your current report, just click Clear at the
top of the comp’s column and verify that you want to
clear the column. WinTOTAL flushes out all of the data
from that column, including the comp photo.
• Removing the Comp – If you originally placed the comp
in the report with the intention of using it in the current
report, but have since decided that the comp won’t suit
your needs, click Remove instead of Clear. When you
click Remove, WinTOTAL prompts you to add the comp to
your workfile as a means of complying with USPAP. Just
Comps PowerView
As you continue to work on your report, you may decide that
you need to rearrange the order of comps in your report,
hide a few comps from view so that you can make that comp
flush with the subject, or pull hidden comps back into view.
There are several ways you can reorganize your comps:
• Swapping Comps – If you need to swap the order of two
comps in your report, click the Move link in the top of
either comp column. Then, choose Swap With and select
the comp column where you want to move the current
comp.
• Manually Reordering Comps – If you need to fully
reorder your comps, click the Move link at the top of any
comp column and then choose Reorder Comps. In the
screen that appears, use the up and down arrows to
reorder the comps list to fit your needs. Then, click OK to
apply your changes.
Copyright 2015, a la mode, inc.
Page 110
Wintotal User's Guide
• Automatically Reordering Comps – If you need to order
your comps by their similarity to the subject property,
click Move Best Comps Closest at the top of the
Subject column. WinTOTAL evaluates the adjustments
you’ve made to your comps and reorders them so that
those with the smallest adjustment percentage are closest
to the subject.
• Hiding Comps – If you’re comfortable with the order of
comps in your report, but you want to hide some of the
comps from the side-by-side view so that you can place
certain comps flush with each, click Hide at the top of
each comp you want to hide from view. The comps
disappear from view but remain in your report. This can
help you organize your comps so that they’re flush with
the subject to make adjustments easier but without
reordering the comps in your report.
• Restoring Hidden Comps – If you’ve hidden some of your
comps from view so that you can align other comps to
ease the adjustment process, you may need to restore
them to view at some point. To do so, just click Show
Desired Comps in the Subject column and either click
Show All OR click Show Specific, mark the comps you
want to see, and click OK.
2.In the Maps Wizard, confirm the property addresses and
click Next.
3.Modify your map as desired using the Annotate tools in
the Location Map Options pane.
4.Click Finish when you’re done referencing the map.
5.Finally, you’re prompted to add the reference map to your
report’s digital workfile for safekeeping. Click Yes to add
it to your workfile or click No to simply close the Map
Wizard.
Comps Detailed View
Map Comps
If you want to evaluate your comps based off their proximity
to the subject property, you can place the comps in your
report onto a location map for reference. To do so…
1.From the side-by-side comps view, click Map in the
toolbar.
Comps PowerView
On top of the standard comparable information, you can now
store additional data about every comp. This data, such as
separate fields for garage and carport, or porch, patio and
deck, is included with the comp and can be used to make
automatic adjustments. However, the data is aggregated
and inserted into the proper field on the form’s grid. To use
the comps detailed view, click Detailed View at top of
Copyright 2015, a la mode, inc.
Page 111
Wintotal User's Guide
Subject column in the side-by-side comps view to expand
the grid in the report and enter additional data.
from another comp or subject column. For instance,
pressing =0 from the address field copies the entire
subject column into the current comp column. This can
help you shave formfilling time off of the life of your
report when you’re dealing with a very similar property.
• Press the equal key twice (==) to clear the current field.
• Press F2 in the description field of any comp to copy the
contents of that field forward across all higher numbered
comps.
• Clicking the Suggested value listed at the top of the
subject column inserts a weighted average of your comps
into the field for the indicated value based off the sales
comparison.
Note: WinTOTAL determines its suggested value for
sales comparison based off of a weighted average of
your comps.
Fill Out Comp Columns
When you’re editing comps in the side-by-side comps view,
you may often need to pull data from another comp column
into the field where you’re currently working. WinTOTAL
acknowledges this fact by providing a number of shortcuts
you can use to copy data to and from other columns. To use
WinTOTAL’s comp-specific formfilling tools…
• Press the equals key (=) at the beginning of any field to
copy information from the corresponding field in any other
comp, or the subject. For instance, if your cursor is in the
Location field, pressing =0 copies the contents of the
Location field in the subject to the Location field in the
current comp. Pressing =1 copies the contents of the first
comp, =2 the second comp, and so on.
• Press the equals key (=) at the beginning of the address
field for any comp to copy the data for the entire column
Comps PowerView
In addition to these comp-specific formfilling tools, keep in
mind that you can use both QuickLists and comp data from
your Comps Database to save even more time when filling
out the grid.
Automatically Adjust
In the past, WinTOTAL included the ability to make standard
adjustments across all comps based on square footage.
While the Square Foot Adjuster is still alive and well in the
Tools menu, the newest version allows you to make
adjustments across ALL comps in the report based on just
about any field. In addition, you can build sets of
assumptions and adjustments, then save and load them at
will.
Copyright 2015, a la mode, inc.
Page 112
Wintotal User's Guide
apply to any comp that differs from the subject. For
example, if in the Condition field you would normally
use “Excellent,” “Average” or “Poor,” enter these
values in the left column (leave the additional fields
blank). Then, if you would normally make a $1,000
adjustment if the subject was rated excellent and the
comp “Average,” put “1000” in the Value column to
the right of “Average.” Likewise, if the adjustment for
a “Poor” house was $1000, enter “-1000” in the Value
field to the right of “Poor.” Once you’ve completed the
Adjustment Table, click OK to save it.
Defining Adjustment Rules
To create a set of automatic adjustments…
1.From the side-by-side comps view, click Auto Adjuster at
the top of the Subject column.
2.In the Auto Adjustment fly-out column, you can define
adjustments for either text-based responses OR numeric
responses. Depending on whether the column’s data is
text or numbers, the process differs.
o For Numeric Fields – Enter a per-unit adjustment
value into the Adjustment column. For instance, if you
wanted to make a flat adjustment of $15 per square
foot of difference for the GLA, you’d type “15” (without
the quotes) into the Adjustment column for that
field.
o For Text Fields – Click the button with three dots to
the right of the Difference column. In the screen that
appears, enter each of the descriptions you might use
for each comp into the Description column. In the
Value column, enter a dollar value that you’d like to
Comps PowerView
3.To apply an adjustment threshold that prevents automatic
adjustments below a specified dollar value, use the
Difference column to enter a minimum dollar value
adjustment that WinTOTAL must exceed before applying
the adjustment.
WinTOTAL automatically applies your adjustment rules to
your report as you leave each field.
Saving Adjustment Rules
Since the same set of adjustment rules do not apply to every
report, you should save your adjustment rules so that you
Copyright 2015, a la mode, inc.
Page 113
Wintotal User's Guide
can retrieve them when you work a report for which they
apply. To save your adjustment rules…
1.In the side-by-side comps view, use the auto-adjuster to
define your adjustment rules.
2.After creating the adjustments you need (as you might do
for a neighborhood, for example), click Save As at the
top of the Auto Adjustments column.
3.Enter a name for this set of assumptions and then choose
whether it should be available to only you or to everyone
using this copy of WinTOTAL.
4.Click OK to save the assumptions.
Loading Adjustment Rules
As you continue working new reports, you will need to load
the proper set of saved adjustment rules in order to have
WinTOTAL automatically apply the right adjustments to your
comps. To load a set of adjustment rules…
Comps Database
The Comps Database is your central location for getting the
most out of one of your most precious resources. When
adequately stocked with an ample supply of comp data, your
WinTOTAL Comps Database can virtually replace your MLS
as a source of reliable comp information. Moreover, if you
add comps from your old reports into your database, you can
even place comps in the grid with data in your own
shorthand! Regardless of where you acquire your data, the
Comps Database is a fast, improved, appraiser-centric
replacement solution for your MLS print outs and county
records. To access your Comps Database…
1.In WinTOTAL, click Comps in the toolbar at the top.
2.Then, click Comps Database in the Comps pane on the
left to open the comps database.
1.In the side-by-side comps view, open the auto-adjuster by
clicking the auto-adjuster button at the top of the subject
column.
2.Click Load and choose the desired assumptions set from
the list
3.Click OK to accept your choice and apply your automatic
adjustment rules across all comps in the report.
Hint: For a faster way to access your Comps
Database, you can create a HoverLink directly to it.
Hint: Your auto-adjustment assumptions are saved
This is great for those avid Comps Database users.
as part of the report. When you clone an old report,
or use the SmartMerge feature, the auto-adjustments
are brought along.
Comps PowerView
Copyright 2015, a la mode, inc.
Page 114
Wintotal User's Guide
2.Click Manually to open the Add Comparable screen.
Import Comps
The first step in using your Comps Database effectively is to
fill it with reliable comp data. While you may get your comp
data from your MLS, county records, other appraisers, old
reports, or another public source, the WinTOTAL Comps
Database has a way for you to import them. There are four
primary ways to import comp data into WinTOTAL’s Comps
Database:
• Manually type the data
• Import it from your File Cabinet
• Import it from open reports
• Import it from your MLS or another electronic source
3.Enter the required data in the fields, keeping in mind that
QuickLists are available to insert common terms.
Enter Comps Manually
To add a comp to your database manually…
1.In the Comps Database, click
top.
Add in the toolbar at the
4.Click Add in the Photo pane to select a photo to associate
with this comp. Select the photo from your hard drive
and click Open. Alternately, you can copy a photo from
another location and paste it into the comp by clicking
Paste.
o Click All comp fields in the Views pane on the left to
expand the form to allow more data.
o Click Summary fields to limit data to info in comps
grid. Notice that several of the items have additional
Comps PowerView
Copyright 2015, a la mode, inc.
Page 115
Wintotal User's Guide
fields in which you can enter specific data that may or
may not appear on certain forms. This data can be
used to make automatic adjustments, but won’t print
on the report. See the Comps Detailed View section of
this user guide for more information about this
feature.
5.When completed, click OK and your new comp is added to
the database.
3.Choose a cutoff date to insure that you do not pull in comp
data older than your cutoff date, and then indicate how
you want WinTOTAL to deal with duplicate comps by
checking the Search for duplicate comps box and
marking your choice. When finished, click Next.
4.Select the desired folder from list. Individual reports stored
in that folder appear in the window to the right for
reference.
Import Comps from Old Reports
If you’ve been using WinTOTAL to write up your reports for a
while, you’ve accumulated a wealth of information you can
add into your comps database for quick access later. To
capture the power of that information in your comps
database, you simply need to import it. Before you begin,
you may want to collect all of the reports from which you
wish to import comp data and place them in a single folder in
your Appraisal Desktop File Cabinet. If you have a huge
number of files (over 500), you may need to divide them
among two or more folders to process them in batches. Once
you’re ready to begin, to import comps from your old
appraisal reports…
1.From the Comps Database, click Import.
2.Select the Import from reports in your File Cabinet
option, and then click Next.
Comps PowerView
5.Click Finish to begin the import.
Import Comps from Open Reports
To import the comps from your current report in your
database…
1.In the Comps Database, click
Copyright 2015, a la mode, inc.
Add in the toolbar.
Page 116
Wintotal User's Guide
2.Click WinTOTAL in the screen that appears.
information to discontinue the prompts.
3.To import the subject property, check the Import the
Subject box.
4.Select Prompt for additional comp information if you
prefer to add additional data to each comp during the
import process.
5.Check the Search for Duplicates box to automatically
search your database for duplicate comps before
importing them. If desired, check the Preview each
duplicate found box to force WinTOTAL to prompt you
whenever it finds a duplicate. You’re then given the
option of adding duplicate comps anyway. If this option is
not selected, any comps with duplicate addresses are
ignored.
6.Finally, check the final box if you’d like to have any photos
associated with a comp imported as well.
7.Click OK to begin the import process.
8.If you selected the Prompt for additional information
option, a screen appears for each comp allowing you to
enter items like the neighborhood name, notes, sale date
or age. Enter the desired data and click OK. Repeat for
each comp, or click Stop prompting me for this
Comps PowerView
Import Comps from Data Sources
A great way to get comp data into your database is by
importing it from a source such as your MLS. Most modern
systems have a service that provides you with sales data in
a common database-compatible format. WinTOTAL supports
the following data types:
• Microsoft Access 97 or 2000 (.MDB)
• Comma delimited (.CSV)
• Text file (.TXT)
• Xtensible Markup Language (.XML)
• Pipe delimited
• Tab delimited
Using WinTOTAL’s MLS import tool is a two-step process:
Copyright 2015, a la mode, inc.
Page 117
Wintotal User's Guide
1.Define an import template for your MLS and import the
first time
2.Re-use the import template for future MLS export files
5.Type a description for your template so that you can
quickly refer back to this template when you import
additional data from the same source in the future.
If you use NDCData.com, Click Here for special import
instructions.
6.Select either the Residential or Commercial option to
reflect the type of property you’re importing.
7.If necessary, check the Search for Duplicates box and
tell it how to handle any it finds. Options are:
Hint:
For best results, download new comp data from your
MLS on a regular basis. By regularly importing the
o Don’t Add Duplicates
new data into your Comps Database, you can ensure
o Update the Existing Comp
that the existing data in your Comps Database is both
o Preview each duplicate found and let me decide what to
do
extensive and as up-to-date as the data in your MLS.
8.Click Next to continue.
Define MLS Import Templates
The first time you import data from an electronic data source
like your MLS, you must tell WinTOTAL how to accurately
import the information. Once you’ve done so, WinTOTAL
automatically imports the data from your first file. Then, for
future files that you’ve downloaded from your MLS or other
electronic data source, you can simply re-use the template
you’ve already created. To define your MLS import template:
9.Since WinTOTAL automatically guesses the correct
delimiter, it should already be selected for you. If
WinTOTAL is unable to guess the correct delimiter,
choose a different delimiter from the selection box. You
can also select a Text Qualifier if your data source uses
a particular character (most often a quote “”) to
designate text fields.
10. Ensure that the data looks correct in the sample window
and click Next to continue.
1.Obtain the comp data file from your MLS provider and save
it on your hard drive.
2.In the Comps Database, click Import in the toolbar.
3.Select Import property data from external source and
click Next.
4.Click Browse, find and select the import file from your
hard drive, then click Open.
Comps PowerView
Copyright 2015, a la mode, inc.
Page 118
Wintotal User's Guide
11. Now you need to choose the data fields that you want to
import from the source file, and tell WinTOTAL into which
WinTOTAL fields you want to insert each MLS field.
WinTOTAL always makes an educated guess about what
data belongs in which fields. When it knows, it
automatically maps those fields for you. In the event
that WinTOTAL is unsure about where to place the data
from your MLS, it makes those data fields available in a
drop-down list so that you can choose which WinTOTAL
field maps to your MLS field.
Note: You can select as many fields as necessary and
you can insert the same field more than once. This is
useful if your data source has information in one field
that you would like to divide up and place in multiple
fields.
12.
15. When you’ve found a field on the WinTOTAL sample form
that correlates with a field from your MLS file, just click it
and choose the appropriate field from the drop-down
menu.
16. Repeat this process until you’ve mapped all the
remaining fields from your MLS file and then click Next.
17. The spreadsheet-like tool that appears next is useful for
manipulating data from your source file before it is
imported into your Comps Database. For example, you
might need to consolidate data from several fields into
one item. Or, you could find a “code” in a source field
that indicates a feature of the property. You can use the
power of the spreadsheet’s text handling formulas to find
this information and put it into a format that is more
useful to you in your appraisal practice.
18. Enter the desired formula in the cells and click Finish.
19. If you chose to preview duplicates, use Add New,
Update Existing or Skip options.
20. When the Import Complete message appears, click
Close to complete the process.
Use MLS Import Templates
After you’ve defined an MLS import template for your local
MLS, you can use the same template to quickly import data
from download files you generate from your MLS later. The
next time, you need to import data from the same source,
copy the new data file to your hard drive, then:
13. To map the remaining fields, click Pop-up unused
fields at the top and review the list of fields you still
need to map.
14. Find a field in the sample form that WinTOTAL provides
to map any of the remaining fields from your MLS file.
Comps PowerView
1.From the Comps Database screen, click Import.
2.Mark the Use a previously defined template option and
click Next.
Copyright 2015, a la mode, inc.
Page 119
Wintotal User's Guide
3.From the drop-down menu, select the import template you
wish to use.
4.If necessary, select Edit this template and click Next to
repeat the above steps.
5.Otherwise, mark Proceed to Finish Page (import now)
and click Next.
6.If any errors occur during the import process, an error log
appears, allowing you to correct the error and re-import
the data or enter it manually.
Search for Comps
Of course, the real power of any database is the ability to
search for information quickly. The Comps Database has
several search options.
2.In the Proximity Within field, enter the distance — in
miles — from the subject property within which you want
to limit the search. Enter whole numbers or decimals
Quick Searches
Note: For the proximity searches to function
The Search pane on the left contains several common
search fields.
properly, WinTOTAL must pinpoint each property
through “geocoding” the addresses. This process can
1.From the Comps Database, enter search criteria in any or
all of the fields listed in the Search pane on the left. Use
complete information or partial text. For example, in the
address field, either enter the full address, or just the
street name.
be scheduled to run on a regular basis, ensuring that
your database is ready for any search. See Geocode
Comps in the Configure WinTOTAL chapter of this user
guide for more information about setting up this
feature.
3.Click Find Now to display comps that match your criteria.
4.Click Clear Search to reset your list to show all comps.
Custom Quick Searches
Comps PowerView
Copyright 2015, a la mode, inc.
Page 120
Wintotal User's Guide
6.Click Clear Search at the bottom of the Search pane to
reset search options and display all of your comps.
Of course, you’re not limited to searching in the fields
included by default. You can choose also choose your
favorite fields from a provided list and add them into the
Search pane on the left. To do so…
1.From the Comps Database, double-click the desired field in
the list on the left to add it to your Search pane.
Similarly, double-click any item in the right column to
remove it.
2.Use the Up and Down buttons to reorganize the items in
the list.
3.Click OK to accept your changes.
Map Comps
It’s often easier to spot valid comps when you see them laid
out on a map. The Comps Database can quickly generate a
map showing the location of any selection of comps. To do
so…
1.In the Comps Database, select comps you’d like to map by
checking the box to the left of each property.
Advanced Searches
Hint: Use the Comps Database’s search features to
Instead of customizing the quick search fields, you can
always perform a detailed search. To do so…
display a limited number of comps that meet your
criteria. Then, right-click any comp and choose Mark
1.In the Comps Database, click Detailed at the top of the
Search pane.
2.Once again, you can customize which fields appear in the
Detailed Search window by clicking the Customize
button. Use the steps above to add the desired fields.
3.Enter your search criteria and click Search. The results of
your search are displayed in the Comps Database
window.
Comps, Mark All from the pop-up menu.
2.Click Map in the toolbar at the top, or right-click anywhere
in the Comps display and select Map, Selected
comparables from the pop-up menu.
3.In the Maps Wizard, confirm the property addresses and
click Next.
Note: You may need to re-arrange the windows on
your screen to view the Comps Database window. If
you have limited screen area, click the Close after
search option in the Detailed Search window.
4.Continue to modify your criteria and click Search each
time to narrow your search even further.
5.When the desired results are displayed, click Close to
return to the Comps Database display.
Comps PowerView
Copyright 2015, a la mode, inc.
Page 121
Wintotal User's Guide
View Database Comps
When you first enter the Comps Database, you’re presented
with a list of comps with limited information in columns.
However, there’s a wealth of information just under the
surface.
• Quickly sort the comps list by clicking header name
• Click the plus sign (+) for any comp to view the details for
that property. Note the new MLS-oriented view of the
information.
4.Modify your map as desired using the annotation tools in
the Annotate your map pane.
5.Click Finish when you’re done.
6.Next, you’re prompted to add the map to your digital
workfile for this report to better maintain compliance with
USPAP. Just click Yes or No to indicate your choice.
1.Right-click any comp and choose Edit, Property Detail
Fields.
Another option is to use a map to find all comp within a
certain radius of the subject. To do so…
1.In the Comps Database, right-click any comp in the list.
From the pop-up menu, choose Map, then 1, 2, 5 or 10
miles. To enter a different distance, click Custom, type
the amount and click OK.
2.In the Maps Wizard, confirm the property addresses and
click Next.
3.Modify your map as desired using the annotation tools in
the Annotate your map pane.
4.Click Finish when you’re done.
Comps PowerView
• To select which fields are shown in the detail view:
2.From the list of available fields on the left, double-click
the ones you want to include. Similarly, double-click
any item in the right column to remove it from the
detailed view.
3.Use the Up and Down buttons to reorganize the items
in the list.
4.Click OK to accept your changes.
• To edit which columns appear, right-click any heading and
select Edit, Column Layout. Use the steps 1-4 above to
add or delete columns.
Copyright 2015, a la mode, inc.
Page 122
Wintotal User's Guide
from that photo. To access the Images PowerView, just click
the Images button to the upper left of WinTOTAL.
Insert Database Comps
Once you’ve found the comps that you want to use in your
report, it’s easy to place them in your report. To do so:
1.In the Comps Database, check the boxes next to the
desired comps.
Hint: Use the Comps Database’s search features to
display a limited number of comps that meet your
criteria. Then, right-click any comp and choose Mark
Comps, Mark All from the pop-up menu.
2.Click Place in the toolbar at the top.
Work with Image Pages
3.When you’re prompted to confirm your comp placement,
just click Yes to place your comps in the grid.
The Image pages list on the left side of the Images
PowerView shows all of the photo pages currently in your
document.
To add additional photos pages…
1. In the Images PowerView, click Add at
the top of the Image pages pane to
bring up the Contents page.
Images PowerView
The photo capabilities of WinTOTAL are accessed by opening
a report, then clicking Images from the toolbar at the top.
In each of the different views, thumbnail images are
displayed. You can view a larger image by simply hovering
your mouse pointer over any thumbnail. The image then
expands and remains there until you move your mouse away
Images PowerView
2. The list on the left shows the available
photo pages in WinTOTAL. From this
list, double-click a form you wish to
add to your report.
3. The list on the right displays the forms
you’ve added to your report. Click
Copyright 2015, a la mode, inc.
Page 123
Wintotal User's Guide
and drag the new form to the desired position in the
report.
eliminate some of the data entry that QuickPix requires
from your workflow.
4. Continue to add photo forms and click OK when you’re
done.
• The same QuickPix application found in previous versions of
WinTOTAL.
Note: If you choose to add one of the Comparable
To tell WinTOTAL which method you prefer to use…
Photos pages, you should be prompted to indicate
1.From the Images PowerView, click the small arrow to the
right of Get Photos in the toolbar at the top.
which comp or comps the page should be linked with.
Enter the desired comp number and click OK. Any
relevant information is automatically copied from the
comp(s) to the photo page.
Some additional options are available in the Image pages
pane as well:
• To delete an unwanted photo page, select it and click
Delete.
2.From the pop-up menu, choose Options.
• To view any of the photo pages, simply click it.
3.Mark the option for the photo retrieval method you’d like
the system to use as a default and click OK.
Note: You can always override the default setting by
choosing either retrieval method from the pop-up
Download Photos
menu accessed by clicking the small arrow to the
If your camera is configured to work with your Windows
operating system, Windows should prompt you about how
you’d like to handle the images on your removable device or
camera. To simplify this process, we’ve added an option to
this list so that you can choose to run the WinTOTAL photo
retrieval process whenever you connect the device to your
computer or place it in its docking station. You have two
options for retrieving photos:
• The new Auto-Retrieval Wizard which can import your
photos based on the same criteria each time and can
Images PowerView
right of Get Photos in the toolbar.
Auto Retrieval Wizard
The first time you run the Auto-Retrieval Wizard, you need
to set the options you’d like it to use each time it is run.
Once you’ve configured WinTOTAL to import photos from
your digital camera or card reader, you can forego the setup
and skip straight to importing the photos.
Copyright 2015, a la mode, inc.
Page 124
Wintotal User's Guide
First Time Setup
6.Click Next to continue.
1.Connect your camera to your system, or insert your
storage device into a card reader.
2.In the Images PowerView, click Get Photos in the toolbar
at the top of the screen.
3.If asked to use previous settings, click No to set up the
import process. Once you’ve configured it, you can click
Yes to automatically perform the import in the future.
4.The Auto-Retrieval Wizard appears to walk you through
the configuration process. Click Next to begin.
5.The first step is to configure your camera.
o Select the Photo Source from the drop-down menu if
you use an older camera. Otherwise choose
Disk/Directory/PC Card.
o Mark the Retain image quality option if you prefer to
have your photos imported without any additional
compression.
o In the Path to Photos field, type the directory name
where your photos are stored. If you’re using a
storage device like a Compact Flash or SD card reader,
just enter the drive letter Windows has assigned to
that device. If necessary, click Browse to find your
directory.
o The final option forces WinTOTAL to prompt you about
deleting the images from the directory or storage
device after they are imported. This is useful if you
wish to keep your memory card clean for your next
batch of photos.
7.This step allows you to designate the information you want
to place in the Notes field for each image after it is
imported. This can be very useful in finding images using
the image database’s search features. Options are:
o The Notes field allows you to enter any other data that
is not likely to change each time you import images.
For example, you might wish to include your initials or
office ID.
o The Append dates to Notes option puts the date that
the images were imported into the database in the
notes field.
o The Append photo number to Notes adds a
sequential number to each image and adds that to the
notes field.
8.Click Next to continue.
9.Automatic filenames are generated for each image as it’s
imported. These can replace the often cryptic file names
that most cameras apply to photos. The name is made
up of any of these optional items:
Images PowerView
Copyright 2015, a la mode, inc.
Page 125
Wintotal User's Guide
o Any text filename prefix you’d like to assign. Once
again, this might be the appraiser’s initials or some
other individual designator.
12. If you marked the option about deleting the original
files, answer Yes or No in the screen that appears to
indicate your choice and complete the import process.
o A two-digit Year, a numeric or text Month, and the Day.
These items are taken from the date that the images
are imported.
Once you’ve imported your photos and they appear in your
Images Database, you can simply place them in your report
as usual and WinTOTAL automatically assigns the property
information to your photo for you. If you have photos
remaining that do not apply your current appraisal and you
need to assign property information to them, type it directly
into the available fields in the database.
o As you make your selections, note the Sample
Filename at the bottom of the screen.
Future Photo Imports
1.In the Images PowerView, click Get Photos in the toolbar
at the top of the Images PowerView.
2.Click Yes to reuse your previous settings and begin the
import immediately. Or, click No to change your import
options.
QuickPix
10. Click Finished when you’re done.
11. You’re prompted to enter a name for a new album
containing these photos. The default album name is set
to the current date, and a “Set” number. Edit this album
name and choose OK. Or, choose Skip if you do not wish
to use albums. If you prefer not to ever use albums,
check the I do not wish to use Albums box as well.
Note: See the My Albums section of this user guide
to learn more about albums.
Images PowerView
If you’re more comfortable using the QuickPix application
found in previous versions of WinTOTAL it’s still available in
Aurora. While this utility can often require you to enter more
property information about your photos than the AutoRetrieval Wizard requires, an advantage outside of familiarity
is that you can always run this tool entirely outside of
WinTOTAL. As with the Auto-Retrieval Wizard, the first time
you run QuickPix, you must configure it to work with your
digital camera or card reader. From then on, WinTOTAL
remembers your configuration so you can skip to the import
process. To start QuickPix…
Copyright 2015, a la mode, inc.
Page 126
Wintotal User's Guide
• In the Images PowerView, click the small arrow to the
right of Get Photos in the toolbar at the top of the
Images PowerView and choose QuickPix. Or, if you’ve
configured your default retrieval options to always use
QuickPix, just click Get Photos in the toolbar.
- OR • Click the Windows Start menu, and then choose All
Programs, WinTOTAL, QuickPix.
Use QuickPix
One of the advantages of this utility is the ability to preview
the photos on your camera or storage device before you load
them into your database. The process of downloading
images from your digital camera into your Images
Database is summarized as follows:
1.Load previews of your photos into QuickPix.
2.Mark the photos you wish to import.
3.Label the previews with address, descriptions and other
notes.
QuickPix Configuration
1.With QuickPix open, click Camera/Card/Disk, Setup
from the menus.
4.Download the selected images into your database.
2.Type the path to your photos on your camera or disk or
use the Browse link to browse out to them. Alternately,
if you have an older camera that does not comply with
most common Windows integration methods, you can
check the box indicating that and search the drop-down
list for your camera.
3.Once you have either indicated the camera type or path to
your photos, just click OK.
You should now be able to load your photos into QuickPix.
Images PowerView
QuickPix allows you to first see previews or “thumbnails” of
the images in the camera before taking the time to acquire
Copyright 2015, a la mode, inc.
Page 127
Wintotal User's Guide
the whole picture. It automatically assigns a filename to the
pictures it downloads and inserts them into the WinTOTAL
Images Database. Here’s how to do it.
set of previews, creating separate albums for separate
photo sets. For reference, the file names of those photos
you’ve already retrieved appear in the upper-left corner
of the preview image.
1.From QuickPix, click Previews.
2.Once the previews are loaded, use the scroll bar on the
right to move through the photos. Mark the check box to
the right of those images you wish to retrieve or click
Mark All to quickly select all of the photos you’ve
loaded.
3.For each photo you mark, complete the Address,
Description and Notes fields, as desired. If you loaded
QuickPix from within the Images PowerView, and have a
report loaded in WinTOTAL, you can select the address of
the subject property and any comps from the drop-down
menu. Likewise, the Description field drop-down menu
is populated with your common photo descriptions like
Front, Rear and Street. (For instructions on adding
additional photo descriptions, see the Create Photo
Labels section of this user guide.
7.When you are through downloading images, exit QuickPix
by selecting Exit from the File menu.
Customize QuickPix
There are several options you can configure in QuickPix.
1.In QuickPix, click File, Configure QuickPix from the
menus at the top to start the configuration process. You
are presented with four tabs representing the different
areas of the program which you may configure.
4.Once the desired images have been marked, click
Retrieve in the toolbar to import your photos.
5.If you’ve decided to use the albums feature in Aurora,
you’re prompted to give this photo set a name. Type a
name in available box and click OK. Or, if you don’t want
to place these in an album, click Skip and check the box
to stop using albums in the future.
Note: See the My Albums section of this user guide
to learn more about albums.
6.After the photos are downloaded, you return to QuickPix. If
necessary, you can retrieve additional photos from this
Images PowerView
Copyright 2015, a la mode, inc.
Page 128
Wintotal User's Guide
o Photo Retrieval - When importing images into the
database through QuickPix, you first must display and
label the previews as described above. To automate
the task of labeling photos, you can set defaults for
the database entries. For example, if all of the images
you are going to download are for the same address,
you can enter a default Address before displaying the
previews - then perhaps change the default Address
back before downloading other images. Likewise, you
can choose a default Description or enter text into
the Notes field (such as the appraisers’ initials).
Below these defaults is the option to use albums.
Check the box to turn on this feature and have
QuickPix prompt you for an Album name
whenever you import images.
Finally, you can customize what information is
displayed for images that have already been
downloaded during the current QuickPix session.
Mark an option to select it.
o Automatic Filenames - Digital images are simply data
files stored on your computer. When QuickPix imports
them from your digital camera, it assigns them a
name and stores them in the default image directory
(normally, that is C:\A LA MODE\WINTOTAL\IMAGES).
As a default, QuickPix assigns the images a file name
based on the date of the download and the picture
number. However, you can customize this aspect of
QuickPix to meet your needs. QuickPix automatically
assigns a file extension based on the format of the
image.
Images PowerView
o File Output Directory - Depending on your
circumstances, you may need to change the directory
in which QuickPix saves its images. We strongly
discourage doing this since it could cause an
inexperienced user difficulty in tracking images. But, if
you’re fairly comfortable with your system and desire
a different location for images, you can certainly do
so.
o File Format - Depending on your circumstances, you
may need to change the format in which QuickPix
saves its images. You can choose one of several
formats in this screen. As you click each particular
type of file, a brief description appears at the bottom
of the screen.
o For the JPEG format, you also have the option to change
the compression level that QuickPix uses to make your
image files smaller. Move the slider to the left to
reduce file size. Of course, this also reduces the
quality of the photo. But given the high detail most
modern digital cameras produce, you can often move
this down to the 40% range without compromising
quality.
Hint: JPEG is by far the most common file format for
images. Unless you have a compelling reason to
select one of the other formats, it is strongly
recommended that you stick with JPEG.
2.Once you’ve configured QuickPix, click OK to save your
changes. You can exit QuickPix by selecting Exit from the
File menu.
Copyright 2015, a la mode, inc.
Page 129
Wintotal User's Guide
Searching for Images
Images Database
To search for an image in your Images Database…
The Images Database allows you to quickly find images that
you’ve imported from your camera, scanner, or card reader
and use them in WinTOTAL. This can be great when you
need to find additional photos for later reports as you can
search for the photo by its address instead of visually
scouring your old images to find the one that looks correct.
As with many other sections of WinTOTAL, the Images
Database contains a variety of views to help you reorganize
your images in more intelligible ways. There are three
primary views in the Images Database:
1.In the Images Database, type an address, street name or
other information in the Find field. If you’re not sure of
the complete address or street name, just type a portion
of the name. For example, just entering “elm” finds
anything on Elm Street, Elm Avenue, Elmhurst Blvd or
Shady Elms Court.
2.From the Search In menu, select the field you would like
to search.
3.Click Find to begin the search and display the results in
the window.
• Images Database – This option shows you all of the
images in your database, regardless of whether they’ve
been used or not.
4.To reset the database view to show all photos, click Show
All in the toolbar at the top.
• Unused Images – Shows you images that you’ve added to
your database at some point, but have not yet used in a
report
If you’d like to narrow your search criteria even further, click
the Advanced link. The Advanced Photo Search screen
appears, offering additional search fields. Enter as many
search criteria as needed to pinpoint your property. You can
use any combination of the fields.
• My Albums – Shows a list of images, grouped by the time
you imported them from your digital camera or storage
device.
To access an alternate view, simply click Images Database
in the Images pane on the left.
As with the “quick find” method described above, if you type
partial information in the Address, Description, Filename
or Notes fields, the program finds any photos that contain
that information in their fields. If you’d like to limit your
search to exact matches, check the Exact match box at the
end of each field. Click OK to view the results of your search.
Search for Images
You can often shorten the time it takes to find a photo you
wish to use in your report by searching or sorting the images
in your database.
Images PowerView
Sorting Images
To sort the images in your Images Database…
Copyright 2015, a la mode, inc.
Page 130
Wintotal User's Guide
• Just click the column header, like Address, to sort by a
given column.
My Albums
• Click it again to sort your images in reverse order.
Photo albums are a great way to group images together as
you import them. Whenever you import photos into your
image database, you have the option of placing them into a
new photo album. This can be very convenient if you have
multiple appraisers taking photos of different homes, and an
assistant importing them into your company’s image
database. As you import the photos, simply place them in an
album that includes the date the photos were taken and the
name of the appraiser that took them. When that appraiser
sits down to start building reports, he can quickly find the
album containing his photos. For information on creating
albums, see the Download Photos section of this user guide.
To view the contents of an album:
Unused Database Images
WinTOTAL provides a simple way for you to
find and manage the photos you’ve
previously imported into your Images
Database, but have not yet used in a
report. To access the Unused Images view
to help you manage these images, click
Unused Images in the Images pane on
the left side of the Images PowerView. This
view allows you to quickly sort through your photos when
handling new properties. You can also locate and delete
photos that you have no intention of using in the future.
1.In the Images PowerView, click My
Albums in the Images pane on
the left.
On this page you have the option of viewing thumbnails of
your photos, or a text list. Check the View previews box at
the bottom of the screen to toggle between these two
options.
Note: If you have the pop-up window enabled, your
2.Locate the desired album in the list
and double-click its name, or select
it and click Show Images in
current album at the top of the
window. The photos in that album
are displayed.
3.Click Show all Albums to re-display the list of albums.
photos are displayed in that window, regardless of
whether you’re viewing the thumbnails or the text list.
Images PowerView
If you have a large number of albums, you can use the
search feature to find a specific album. See the Search for
Images section of this user guide for information about using
the search features.
Copyright 2015, a la mode, inc.
Page 131
Wintotal User's Guide
• Click and drag any edge or corner of the window to resize
it. The image resizes automatically to fill the new box.
Hint: If you find that albums are a great way to sort
• Click the title bar of the window to drag it anywhere on
your screen. If you’re working with dual monitors, you can
tuck it out of the way on your second display.
your photos, you can make sure that an album is
always created when you import photos. Just check
the Always use albums when retrieving images
box at the top of the My Albums page.
• As you change views by clicking any of the items in the
Images pane on the left, the pop-up window remains in
place.
• If you click a view that does not support the pop-up viewer
– or you leave the Images PowerView – the window
closes automatically.
Photo Pop-up Window
The Images PowerView gives you several ways to view both
the images in your database and those stored on your
computer. In each view listed in the Images pane on the
left, the images are displayed as thumbnails. Using
thumbnails instead of the actual photos greatly speeds up
WinTOTAL. However, thumbnails may be a bit hard to view,
depending upon your screen resolution. To give you a better
view of your images, each of the image views has an option
to Show selected photo in pop-up window. Check the
box to enable this feature and a separate window appears
containing whichever image is currently selected. Each time
you click a different image, the window displays the new
photo.
•
To close the window, click Close in the upper right of the
window, or un-check the option on your image view screen.
Scan Images
WinTOTAL provides a simple way for you to scan images into
your report. Images can be photos, maps or any other
paper-based documents. To scan an image…
1.From the Images PowerView, click Scan
Images in the Images pane.
2.Click Source at the top of the screen to
select the scanner device you wish to
use. A list of scanner devices
configured for your system appears.
Select your scanner from this list and
click Select.
3.Click Acquire Image to scan a picture or Acquire
Document to scan a document. Depending upon how
your system is configured, your scanner software should
launch and lead you through the steps to bring in your
image.
Images PowerView
Copyright 2015, a la mode, inc.
Page 132
Wintotal User's Guide
4.When the scanning process is complete, the image appears
in the available box at the bottom of this view. From
here, you can add a new image page and drag the
scanned image to the page. See the Work with Image
Pages section of this user guide for instructions on adding
an appropriate page to hold your scanned image.
Images on Disk
If you have images on your hard drive or another disc that
you need to insert into your report, you can easily browse
out to those photos in WinTOTAL and add them into your
report. To view the photos on your hard disk or other
media…
1.From the Images PowerView, click Images on disk in the
Images pane on the left.
2.Type the directory name into the Path field at the top of
the screen, or click Browse to select a directory from a
local or networked drive or select an attached storage
device. The photos in that directory or device are
automatically displayed in the window.
Images PowerView
3.Check the View Previews box at the bottom of the screen
to toggle between viewing thumbnails of your photos and
a simple list view. In the list view, click the heading of
each column to sort your photos based on that column.
If you have a large number of photos, you can use the search
feature to find a specific image. See the Search for Images
section of this user guide for more information about finding
your images.
Edit Image Forms
As you’re working in the Images PowerView, you may need
to directly edit your photo forms. While some of your photo
information is automatically transferred from your report into
the appropriate fields you can edit the information or type
additional data in the comments fields through the Edit
Forms view in the Images PowerView. To edit an image
page…
1.From the Images PowerView, click Edit Forms in the
Images pane.
Copyright 2015, a la mode, inc.
Page 133
Wintotal User's Guide
2.Now, select the desired form from the Image pages pane
at the top of the page. You can also use the Next and
Back links at the bottom of the forms to cycle through
the image pages in your report.
3.Click in any of the fields on the displayed page to edit or
enter data.
Note: If you make changes to any of the fields that
already have data in them, you need to lock that field
so your data is not overwritten the next time your
Edit Images
In an ideal world, every photo you take is perfect. But in the
real world, images are often over- or under-exposed or must
be cropped to eliminate unwanted obstructions. WinTOTAL’s
Image Optimizer is designed to help with just such tasks.
To edit any photo….
1.From the Images PowerView, double-click any thumbnail
or full image to open the Image Optimizer. Or, select
the image and click Optimize in the toolbar.
report is saved. Place your cursor in the field you
changed, then click the Forms menu, and select Lock
field from transfers.
2.Then, in the Image Optimizer, just edit your images with
any of the provided options. Options include:
o Light adjustment
Place Photos
o Size changes
To place a photo into a report:
1.In the Images PowerView, click the image page you want
to edit in the Images Page pane on the left.
2.Find the desired photo using any of the methods described
in the Images Database section of this user guide.
3.Click and drag the desired photo over to one of the photo
positions on the selected form.
Alternatively, you can also right-click a photo slot and select
Load photo from file… to manually locate and place a
photo.
o Color scale
o Cropping
o Sharpness
o Annotation
o File size
3.As necessary, click the Show All Report Images button
to the bottom left of the Image Optimizer to see all the
images in your current report, drag a corner of the image
optimizer to expand it, or click Restore Image to revert
your changes back to the original photo.
Note: If you switch to Windows 8, Windows prevents access to
the drag and drop feature in WinTOTAL, even with UAC
disabled. Because the Windows 8 security features
prevent this function from working properly in WinTOTAL,
we are not be able to support the drag and drop
feature. However, future versions of our TOTAL software
will support this feature.
Images PowerView
Copyright 2015, a la mode, inc.
Page 134
Wintotal User's Guide
5.Set colors: This setting will have the smallest effect on
file size. You'll probably find that you rarely need to
change the colors of the image, but you're welcome use
the drop-down to try different settings.
6.Choose Make the current Resolution and Quality
settings my default if you'd like to use your current
settings as the default for future optimization.
7.Choose Run the Image Optimizer when images are
added to a page if you always intend to optimize
images in your report.
8.When you’re finished, click OK to apply your changes.
Hint: While you’re optimizing your image, keep an
eye on the lower portion of the screen. You can
Optimize Images
quickly see the effect that your changes are having on
the file size as the current image size is displayed,
The options in the Optimize tab of the Image Optimizer
allow you to minimize the size of your images, while
maintaining photo quality. To “optimize” your image…
along with its original size.
Automatic Optimization
1.On an image page, double-click
any image to open it in the
Image Optimizer.
The Image Optimizer provides a simple way to apply your
preferred optimization settings automatically as you place
images into your report. To set up automatic optimization
so that you don’t have to manually optimize your images…
2.In the Image Optimizer, click the
Optimize tab.
1.In WinTOTAL, click Options, Configure WinTOTAL
settings...
3.Set pixels per inch: This setting
will change the resolution (the
number of "dots" per inch) of the
image. A lower number will
decrease both the dimensions
and the file size of the image.
2.Click Image Quality Settings in the lower left of the
Configuration Options window.
4.Set image detail: This setting
changes the quality of the image, sometimes known as
compression. A lower quality will reduce the file size
while reducing the visibility of image details.
Images PowerView
Copyright 2015, a la mode, inc.
Page 135
Wintotal User's Guide
o Photo Capture Settings: This determines the type
of file that will be used when you capture photos
within WinTOTAL.
4.Click Save in the upper-left to commit your changes and
close the window.
Enhance Images
3.On the right, mark your preferred optimization settings.
Options include:
Skip automatic image optimization for images
smaller than 500 KB: This will keep the Image
Optimizer from making changes if an image is smaller
than 500 kilobytes (KB), since images of this size may
not need to be much smaller than they already are.
The options in the Enhance tab of the Image Optimizer
help you adjust for lighting, color or rotation problems. In
addition, you can use the Crop tool to eliminate unwanted
features from pictures. To “enhance” an image in your
report…
1.In the Image Optimizer, click the Enhance tab.
o Show the Image Optimizaer whenver an images is
added to a page: Automatically brings up the Image
Optimizer for each image - perfect if you already know
that you'll be optimizing every image.
o Pixels per inch (Resolution): Choose the resolution
to which you'd like to automatically optimize your
report images.
o Detail (Compression Quality): Choose the detail to
which you'd like to automatically optimize your report
images.
Images PowerView
Copyright 2015, a la mode, inc.
Page 136
Wintotal User's Guide
2.Apply your preferences to your image as necessary.
Options include:
o Slide the Brightness, Contrast, Saturation and
Sharpness controls to the left or right to adjust the
appearance.
o Click the rotated “A” buttons to spin your image to the
proper orientation.
o Equalize Brightness attempts to balance your photo
automatically.
o To eliminate unwanted items from your image, click
Crop. Then, click and drag a rectangle around the
portion of the image you want to keep. When you
release the mouse button, the image crops
automatically. If you want your cropped image to have
the same height and width ratio as the original, check
the Maintain aspect ratio when cropping box
before you crop it.
2.Apply your preferred annotations using the options
provided. Options include:
o Icons - In the Icon area, you can choose Color, B&W
or Legacy icons.
1.Select the desired icon. Then, click anywhere in the
image to place that icon.
2.Click and drag the icon to move it around.
3.When you’re finished, click OK to apply your changes.
o Highlight Area – You can highlight a portion of your
image to draw attention to certain aspects of the
property.
Annotate Images
1.To highlight an area, first choose the size of the line
around the highlighted area from the Width dropdown menu.
The annotation tools in the Annotate tab of the Image
Optimizer allow you to add icons, balloon text and other
items to your images. To annotate your images:
2.Then, click the Fill Color and Line Color links to
select the color for your highlighted area.
3.Click the image to anchor the first corner of your
area.
1.In the Image Optimizer, click the Annotate tab.
Images PowerView
Copyright 2015, a la mode, inc.
Page 137
Wintotal User's Guide
4.Continue clicking to surround the area desired.
Instead of drawing the last line, just double-click
or press A to complete the area.
Note: You can also use the Highlight Area tool to
obscure or "black-out" photo elements such
as family photos, religious artifacts, people,
yard signs, and other portions of your photo.
o Lines – As with highlighting your image, drawing lines
on the image can be a good way to draw attention to
certain aspects of the property.
1.To draw a line on your image, choose the desired
size for your line from the thickness from the Line
Width drop-down menu.
2.Click Line Color to choose the color.
3.When finished, click OK to apply your changes.
Sketch PowerView
WinTOTAL’s new VIP integration system now allows any
sketch vendor to integrate directly with WinTOTAL. If you’ve
been using the custom integrated version of Apex 3 inside
WinTOTAL, that will continue to function normally, but if you
want to use a different sketch vendor like AreaSketch or
RapidSketch, those alternatives are also available and can
integrate directly with WinTOTAL.
Note: If you have any questions about licensing or
3.Click and draw the desired line across the image.
usage for these sketch programs, you should contact
o Balloons – Balloons often pair well with lines and
highlighted areas as a way of designating and
explaining key aspects about the property.
your sketch manufacturer directly.
1.To add a balloon, choose a background color, text
color and font for the balloon from the drop-down
menus.
This user’s guide, discusses key integration points for these
applications, as well as certain key options that are available
in WinTOTAL to facilitate your sketching and sketch
management. To access WinTOTAL’s Sketch PowerView,
click Sketch in the upper right corner of WinTOTAL.
2.Click the image to place the balloon.
3.Type the text for your balloon in the box available
and then click OK.
4.Once a balloon is placed, click and drag the balloon
or its square "handles" to reposition or resize the
balloon.
Note: When you click another tab to leave the annotations
section, all annotations become one item and you
cannot go back and reselect or edit individual
modifications.
Sketch PowerView
Copyright 2015, a la mode, inc.
Page 138
Wintotal User's Guide
Sketch Areas
Choose Your Sketcher
While the sketch configuration utility inside WinTOTAL allows
you to set your preferred sketching software and authorize it
all in one location, you can still select a sketcher you’d like to
use in WinTOTAL from the Sketch PowerView. To select a
preferred sketcher from…
1.From the Sketch PowerView, click the Sketch With button
in the toolbar.
2.In the list of sketch vendors that appears, select your
preferred sketching software.
3.When you try to draw a new sketch WinTOTAL prompts
you to authorize your sketcher. If you’d simply like to
demo it, choose Demo Mode and click Next. Otherwise,
choose an authorization method to authorize the sketcher
immediately.
Thanks to the power of WinTOTAL’s VIP
integration, your sketching software can
insert key calculations from your sketch into
the appropriate slots on your forms
automatically. For example, by default, the
Gross Living Area is calculated from the
sketch and transferred to the comps grid of
the URAR. You can also enable additional
transfers. To enable additional transfers,
check the box(es) beside the calculations
you’d like to transfer into your report from
the Sketch Areas pane of the Sketch
PowerView.
Note: TOTAL Sketch is a la mode's free sketching
solution provided with WinTOTAL. If you prefer to use
TOTAL Sketch as your sketching program, no
registration or authorization is required. Click here to
Import Old Sketches
learn how to use TOTAL Sketch.
TOTAL Sketch Pro
License Manager
To help save you time, WinTOTAL can import sketches from
your old reports. If you need to import an old sketch…
1.In the Sketch PowerView, click Import Sketch in the
toolbar at the top of the screen.
2.Use the Folders list on the left to locate and select the
WinTOTAL folder containing the report from which you
Sketch PowerView
Copyright 2015, a la mode, inc.
Page 139
Wintotal User's Guide
want to import a sketch. On the right, all of the reports in
that folder are displayed.
1.In the Sketch PowerView, click New Sketch in the toolbar
at the top of the screen.
2.From the drop-down menu in the New Sketch screen,
select the type of sketch you want to create, and then
click OK. Sketch types include:
o Building Sketch
o Location and Building Sketch
o Additional Buildings Sketch
o Foundation Sketch
o Above-Grade Building Sketch
o Below-Grade Building Sketch
3.Click the report in the list to see any sketches found in that
report. Once you’ve selected the desired report, click
Import.
o Common Areas Sketch
Note: If you need help finding a particular report,
use the search capabilities in the Import Sketches
screen. Type a street name or other criteria in the
Look for box, then select the folders you’d like to
search from the Search In drop-down menu. Click
Find Now to display all of the reports that meet your
criteria. For even more searching power, click the
Advanced Find link, enter your criteria in the text
boxes and click Find.
3.WinTOTAL launches your preferred sketching software.
4.Now, just draw your sketch as usual using your preferred
sketching software.
Note: If you decide to remove your new sketch at
any time, click Delete Sketch in the Sketch
Create Sketches
PowerView to remove it.
To create a new sketch in your WinTOTAL report…
Maps PowerView
Copyright 2015, a la mode, inc.
Page 140
Wintotal User's Guide
2.Mark your preferred options. Options include:
o Get location map - Mark this option if you want the
Map Wizard to retrieve a location map.
Maps PowerView
Mapping is a critical component of the appraisal process.
Today’s technology not only allows you to quickly generate
simple maps, but also choose between classic street maps
and true aerial photographs that you can annotate and
enhance to display information critical to the property value.
Plus, you can gather additional data — FEMA map numbers,
Census tract information and proper postal coding — about
properties based on their location. Flood maps also play an
important role in your reports. WinTOTAL's built-in tools can
help you retrieve all of these types of maps and data without
leaving your report to hunt for the data on the Internet or in
public records. Of course, if you need a map that WinTOTAL
can't provide you, you can always locate a wealth of other
maps — plat, topography, demographic — through the
Internet and use WinTOTAL's tools to insert them into your
report. To access all of WinTOTAL’s mapping tools, click
Maps in the upper right corner to open the Maps
PowerView.
o Get flood, census, and USPS data - Mark this option
if you want the Map Wizard to retrieve flood, census,
and USPS data for your report.
o Get FEMA flood map from InterFlood - If you want
the Map Wizard to download flood maps from your
InterFlood account, mark this option and then indicate
whether you always want to retrieve a flood map or
just want a flood map whenever the subject property
falls in a flood zone.
o Use high resolution (1200 x 1800) maps - Retrieves
a higher quality map so that the map is better defined
in print and PDF. Keep in mind that this option may
make your map appear fuzzy while it's on your screen,
but actually improves the print and PDF quality/clarity
of your map.
o Display property details so that I can verify
address or enter their GPS coordinates before
getting maps - If you use a GPS device to retrieve
the latitude and longitude of the properties in your
report or if you want to always verify the property
addresses before generating a map, mark this option.
Set Up Map Preferences
The Maps PowerView provides several different options you
can define to tell WinTOTAL how it should retrieve a map and
what it should display in the balloons. To edit your map
options…
1.In the Maps PowerView, click the Options link in the Map
pages pane on the left side of the screen.
Maps PowerView
o Center on subject - Centers the location map on the
subject property.
o Place Comps, Place Rentals, and Place Listings Check the boxes for each type of property you want to
display on your maps. If you may need any one of
these options in your future reports, check them all.
WinTOTAL only places balloons on your maps for
properties that are in your current report so if you
Copyright 2015, a la mode, inc.
Page 141
Wintotal User's Guide
don't have any rentals, for instance, no rental balloons
would appear on your map.
preferences each time you retrieve a map, mark this
option. Otherwise, leave the box unchecked if you
prefer to manually alter your settings for each map
you retrieve.
o Display proximity from subject - Mark this option if
you want to show the distance from the subject to
each comp, rental, or listing in your
comp/rental/listing balloons.
o Show in city blocks instead of miles - If you've set
WinTOTAL to show the distance from the subject on
each balloon in your map, you can also set it to use
city blocks as the distance unit within a certain
distance from the subject. Just mark this option and
then specify the number of blocks that correspond to a
mile and the number of blocks at which WinTOTAL
should switch to miles as the unity of measurement.
o Display direction from subject - Mark this option to
include the direction from the subject in your comp,
rental, and listings balloons.
o Map Style - Choose a map style to change the color
and look of your maps. As you select a style, a live
preview appears below so you can verify that you
want to use that style.
o Mapping System - Depending on your needs, you can
set WinTOTAL to retrieve basic street maps from
Microsoft's MapPoint (Legacy) or have WinTOTAL use
Microsoft's Virtual Earth to retrieve street maps, aerial
photographs, or hybrid street maps/aerial
photographs. Since Virtual Earth is capable of
retrieving basic street maps, unless you prefer a
different map style than what is available with Virtual
Earth, we recommend leaving this option set to
Virtual Earth.
o Re-use these settings and don't show this screen If you'd prefer not to be prompted about your map
Maps PowerView
3.When finished, click OK to apply your changes.
Get Maps
WinTOTAL’s Maps Wizard help you quickly and easily retrieve
an electronic map you can insert into your report. To insert a
location map and retrieve additional data about your subject
property…
1.In the Maps PowerView, click New Map in the toolbar.
2.If you're retrieving a map in WinTOTAL for the first time or
if you've set WinTOTAL to prompt you each time, a
window of options appears. Set your map preferences
and click OK.
Copyright 2015, a la mode, inc.
Page 142
Wintotal User's Guide
3.There are four total steps in WinTOTAL's Map Wizard to
help you retrieve a location map, flood map, or flood and
census data. Depending on your map preferences, not all
steps will appear for every map that you insert into your
report. Steps include:
o Confirming your address/GPS information
o Retrieving and annotating a location map
o Retrieving flood and census data
2.Verify the address/GPS data displayed in the grid. If the
information is incorrect or you need to adjust it, click a
field you wish to edit and then type in your changes.
o Retrieving and annotating a flood map
3.If you own a supported GPS and would like to import the
coordinates from your GPS device, you can do so.
Verify Address/GPS Data
If your map preferences are set to prompt you about
address/GPS data before retrieving each map in your report,
you're asked to verify and update this information as you
start the Map Wizard.
1.In the first step of the Map Wizard, indicate whether you
want to retrieve a map by looking up the addresses of
the properties in your report or by using exact GPS
coordinates.
o To configure your GPS - Plug your USB GPS device
into your computer, click Import from GPS Device,
and then click Configure. Select your type of GPS
from the list provided and click OK.
o To import coordinates from your GPS - Plug your
USB GPS device into your computer, click Import
from GPS Device, check the boxes beside each
coordinate you want to import and select the
appropriate property address for each coordinate from
the menus on the right. Then, click OK to import the
coordinates for your map.
4.When finished, click Next to continue through the Map
Wizard.
Maps PowerView
Copyright 2015, a la mode, inc.
Page 143
Wintotal User's Guide
Note: If you retrieve an aerial or hybrid map it may
contain a range map dates in the bottom right
corner. Unlike traditional street maps, aerial and
hybrid maps are built from a series of
photograph panels taken at different times. This
date range just means that your map area is
built out of multiple panel photographs taken at
different times.
Retrieve a Location Map
WinTOTAL's Map Wizard can retrieve several different types
of map depending on your needs and you have full control to
adjust the map for your current report.
1.In the second step of the Map Wizard, specify a map type
in the Type drop-down menu. Types include:
o Road Map - A typical street map like those that have
always been available in WinTOTAL
o Aerial Map - A satellite photograph of the area
containing your properties
o Hybrid Map - A satellite photograph of the area
containing your properties with street names and
details overlaid
o
2.WinTOTAL can also display bird's eye view maps depicting
an oblique overhead view of your subject property for
reference purposes. To view a bird's eye map of the
property, click the eye icon to the right of the type dropdown menu. Bear in mind, bird's eye view maps cannot
be printed, annotated, or placed in a report. You must
select a different map type before proceeding.
3.Once WinTOTAL finishes retrieving the map you request,
you can adjust the map's zoom and centering.
Hint: If your Internet connection stalls or the map does not load
for any other reason, just click the Refresh button above
the map area to force WinTOTAL to retrieve the map
again.
Maps PowerView
o To re-center the map, click anywhere on the map, hold
down the click, and move your mouse in the opposite
direction you wish to move the map.
Copyright 2015, a la mode, inc.
Page 144
Wintotal User's Guide
o To change the map zoom, click on of the zoom levels
across the top of the map or use the scroll wheel on
your mouse to zoom in and out.
4.Next, select a pre-named title or type in a title for your
map using the Title field to the upper right corner of the
map.
5.As necessary, you can edit and annotate your map using
the tools provided. To simply move or verify the
placement of a balloon, you have several options:
o To move the balloon's head, click and drag the head of
the balloon to the desired location
o To move the tail of the balloon, click the white square at
the end of the tail and drag it to the desired location
o To move the balloon based on a property's GPS
coordinates, click the property address in the Address
Information pane and type in the correct GPS
coordinates
o To manually move an entire balloon, click to select the
balloon, then click Add/Move Balloon in the Balloon
tab on the left. Then, click the desired location for the
tail of the map to move the entire balloon to the new
location
Retrieve Flood & Census Data
If your map preferences are set to retrieve flood and census
data, in the third step of the Map Wizard, WinTOTAL
retrieves the flood and census data for your subject property
along with the USPS formatted address for your subject.
1.Review the flood and census data items that WinTOTAL
retrieves. WinTOTAL's confidence in the data is indicated
by a red, yellow, or green stoplight. If you're satisfied
with the data, check the Insert box beside it to include it
in your report.
2.Next, review the USPS formatted address of the subject
property. As with flood and census data, WinTOTAL ranks
its confidence in the retrieved data by a red, yellow, or
green stoplight. If you're satisfied with the format of the
USPS address and zip code of your subject property,
check the Insert boxes beside each address item to use
them in your report instead of your hand typed address.
o If you believe the balloon's placement is incorrect, you
can verify it against Google's Maps and MapQuest. Just
click the questionable balloon to select it and then
click the Google or MapQuest links to call up the
same maps in Google or MapQuest so you can
compare maps.
6.When finished customizing your map, click Next to
continue through the Map Wizard or click Finish if you're
not retrieving any other map information.
Maps PowerView
3.For your convenience, WinTOTAL also retrieves directions
from your office to each property included in your map.
Copyright 2015, a la mode, inc.
Page 145
Wintotal User's Guide
Review those directions in the bottom half of the screen
and click Print Route if you want to print off a copy.
4.When finished, click Next to continue through the Map
Wizard or click Finish if you're not retrieving any other
map information.
Retrieve a Flood Map
If your map preferences are set to retrieve a flood map, in
the fourth step of the Map Wizard, WinTOTAL retrieves the
flood map for your subject property.
1.In some cases, WinTOTAL may find several flood maps
that apply to your subject property. Click the drop-down
menu above the map area to preview the other maps
that WinTOTAL finds (if any).
2.As necessary, you can edit and annotate your map using
the tools provided. To simply place the subject balloon,
click the Add/Move Subject button in the Balloon tab
on the left. Then, click the location on the map where
you wish to place the subject balloon to insert it into the
map.
3.When finished, click Finish to complete the Map Wizard
and insert your maps and data into your report.
Edit Maps
In the second and fourth steps of the Map Wizard, you can
annotate your maps to meet the requirements of each
report. Annotation tools include:
• Call out balloons
• Lines
• Highlighting
• Icons
Maps PowerView
Copyright 2015, a la mode, inc.
Page 146
Wintotal User's Guide
o To change the font on a balloon, click to select the
balloon you wish to change, then click the Choose
Font link in the Balloon tab on the left. In the screen
that appears, mark your font style, formatting, and
size. Then, click OK to update the font.
Balloons
To add or modify a balloon in your map...
1.Click the Balloon tab in the Annotate your map pane on
the left.
o To change the font or balloon color, click to select the
balloon you wish to change. Then, select your
preferred font or balloon color from the Text Color or
Back Color drop-down menus respectively.
5.As necessary, you can validate WinTOTAL's placement of
each balloon by comparing it with the same property
locations in other service providers. If necessary, click to
select a balloon and then click the Google or MapQuest
links in the Balloon tab on the left to view a Google or
MapQuest map for comparison.
2.Click Add/Move Balloon and then click the place on the
map where you wish to move/place the balloon.
3.In the screen that appears, mark one of the existing
balloons to move it to the new location or click the
Create new custom balloon option and type in a label
to create a new balloon. Then, click OK to move/place
the balloon.
4.Then, you can change the text, font, or coloring on each
balloon.
Maps PowerView
6.As necessary, you can remove any balloon on your map.
Just click to select the balloon and then press the Delete
key on your keyboard.
When you're finished editing your map, remember to click
Next, Back, or Finish to save your changes.
Lines
To add a line to your map...
1.Click the Line tab in the Annotate your map pane on the
left.
Copyright 2015, a la mode, inc.
Page 147
Wintotal User's Guide
2.Click Add Line and then click and hold the mouse button.
With the mouse button clicked, move your mouse to
draw a line on your map.
3.As necessary, click to select a line on your map and use
the Line Color and Line Thickness drop-down menus
to change the color and width of the line.
4.As necessary, click to select any line in your map and
press the Delete key on your keyboard to delete it.
When you're finished editing your map, remember to click
Next, Back, or Finish to save your changes.
2.Click Add Highlight and then click your map to place a
starting point for your highlighted area.
3.Drag your mouse to create a border around your
highlighted area. When you're satisfied with your line,
click to place the line and set a new starting point.
4.Repeat this process until you've created a border around
the area you wish to highlight. Then, right-click your
mouse to set the highlighted area.
5.As necessary, click the highlighted area and use the Fill
Color, Line Color, and Line Thickness drop-down
menus to alter the styles on your highlighted area.
6.As necessary, click to select any highlighted area and press
the Delete key on your keyboard to delete it.
Highlight
To highlight an area on your map...
1.Click the Highlight tab in the Annotate your map pane
on the left.
Maps PowerView
Icons
There are a variety of icons you can place on your map to
indicate landmarks, directionality, and a variety of other
items. To place icons on your map...
Copyright 2015, a la mode, inc.
Page 148
Wintotal User's Guide
1.Click the Icons tab in the Annotate your map pane on
the left.
1.In the Maps PowerView, click the Report transfer
options link at the top of the Information pane.
2.Mark Color, B&W, or Classic to select an icon set.
3.Scroll through the icons at the bottom of the Icons tab
and click to select one you wish to place.
4.Then, click your map to place the selected icon.
5.As necessary, click any icon on your map and click Rotate
90 degrees in the Icons tab to rotate it.
6.As necessary, click any icon and press the Delete key on
your keyboard to delete it.
2.Mark your preferred options. Options include:
o Caps - Check the first option to have your FEMA,
Census and USPS data converted to all uppercase
before they’re inserted in your reports.
Report Transfer Options
If you need to customize the way that WinTOTAL retrieves
map related information so that it does so in all caps, only
retrieves specific pieces of information, or gets property
proximities as well, you can apply your preferences through
WinTOTAL’s Report Transfer Options. To apply your mapping
and FEMA/Census data preferences…
Maps PowerView
o FIPS # - The National Institute of Standards and
Technology issues a set of codes that identifies
geographic entities in the United States. Check the
second box to insert these Federal Information
Processing Standards (or FIPS) into your report along
with the census tract information. For more
information about FIPS codes, visit the US Census
website at
http://www.census.gov/geo/www/fips/fips.html.
Copyright 2015, a la mode, inc.
Page 149
Wintotal User's Guide
o Property Proximities - If you’d like the distance from
your subject property to each comp transferred
directly into the comps grid, mark the Transfer
proximities option.
o FEMA/Census Data Retrieval Options – The final set
of options allows you to indicate how WinTOTAL should
decide what information it needs to retrieve and
embed into your report when it downloads a map.
The options included in this set are:
Work with Maps
Once maps have been added to your report, you have
several options for working with those maps. To edit maps
that are already in your report…
1.From the Maps PowerView, click a map page you want to
edit in the Map Pages pane on the left.
o Never check boxes - If you rarely use the FEMA,
Census or USPS information, mark this option so that
you can manually select each item you want to insert
into your report as you retrieve your maps.
o Insert if data is present – Only inserts the data into
your report if it is available, allowing you to manually
enter it whenever it isn’t available.
o Always check each box – Always inserts the data
retrieved from our net.X servers and inserts blanks
whenever the data is not present.
o Editing the Map Form – Just edit the text in the map
form by typing directly into the form.
o Remember the last fields I checked - Remembers
which items you selected the last time, and re-selects
those by default. By using this option, you can also
mark the boxes beside any of the data you want
WinTOTAL to transfer into your report automatically,
leaving the data you don’t want unchecked.
3.When finished, click OK to apply your changes.
2.Then, you can edit several aspects about the map using
the options provided. Options include:
o Collapsing/Expanding Map Pages - Click Collapse
All to reduce the forms to headers. Then, click the
header of the form you want to edit to expand it. Click
the header again to collapse it. Or, click Expand All
to expand all of the forms at once.
o Replacing the Current Map - To replace an existing
map, select the map in the Map pages pane and then
click Replace in the toolbar. Depending upon the type
of map you select, the wizard launches with those
options selected.
o Editing the Existing Map - Selecting a map and
clicking Edit reopens the map in the Map Wizard
where you can further enhance it.
Maps PowerView
Copyright 2015, a la mode, inc.
Page 150
Wintotal User's Guide
o Deleting the Map - To delete a map, select it and click
Delete.
3.At the top of the Image Optimizer window, select a form
type from the Page type: drop-down menu.
4.In the Form title text box, type the name you’d like to
have appear at the top of the form.
5.Click OK to place the map into your report.
Add Maps Manually
If you have a map, such as a plat map, that you wish to add
into your report from another source like a print out or
website, you can easily add it into your report. To add a
map into you report manually…
1.From the Maps PowerView, click the down arrow beside
Add Manual Map and choose the source for your map
from the menu that appears.
o Import from Clipboard – Use this to copy an image or
map from another page or from the Internet. First,
select the image at its source and copy it to the
clipboard.
o Import from File - Select this option, then browse
your system to find any image or map file. Click Open
to retrieve that image.
o Import from Scanner – If you have a hard copy of a
document you wish to include, select this option to
launch your scanner software and retrieve the image.
Workfile PowerView
One of the most useful tools in WinTOTAL, the digital
workfile not only helps you retain all of the supporting
documentation used to create the report in an easy-to-find
electronic format, but it also allows you to comply with
USPAP guidelines for storage of your appraisals. On top of
that, archiving your reports electronically can save you
money and free up space in your office for actual work!
The documents that make up your workfile are the same as
those that once took up space in your paper files: MLS
sheets, plat maps, title info, site sketches, field notes. These
documents can be other electronic files, like MS Word or
Excel documents, extra electronic photos, or even PDF
“printouts” of web search results. But your workfile can also
contain digitized copies of your paper documents – easily
converted using a scanner or our innovative DirectFax
service.
You can add and view workfile attachments directly in the
Appraisal Desktop or through the Workfile PowerView in
WinTOTAL. See the Workfile View section in the Appraisal
Desktop chapter of this user guide for more details.
2.Whichever option you choose, your map is loaded in the
Image Optimizer, where you can further enhance or
modify it.
Workfile PowerView
Copyright 2015, a la mode, inc.
Page 151
Wintotal User's Guide
Add Files
To add a file to the workfile from the Workfile PowerView…
1.From the Workfile PowerView, add the files you need to
store for USPAP compliance directly into the workfile.
There are several ways you can add files into your
workfile.
Manage Files
Browse – Click Browse in the toolbar and use
the standard Windows Open screen to navigate
your system, select a file and click Open.
To select multiple files at once, simply hold
down Ctrl on your keyboard and click the files
you wish to add to your workfile.
Scan – This option uses your attached scanner
to scan any document directly into the digital
Workfile. When you click Scan in the toolbar,
WinTOTAL presents you a list of the installed
scanners. Select the desired device from the list
and click Select. Your scanner software
launches and guides you through the scanning
process. At the end, the resulting document is
inserted directly into your report’s workfile. For
help with your scanner software, please consult
the documentation that came with your device.
DirectFax – A powerful new service offered by
a la mode. Click Create in the toolbar to print a
custom fax cover sheet for this report. Any
documents faxed to a la mode using this special
cover sheet are automatically attached to your
report’s digital workfile. See the DirectFax
section of this user guide for more information.
Workfile PowerView
2.Once you’ve added all the files you need into your
workfile, remember to click Save to save your
workfile.
Once your files are added to the workfile, they appear in the
file list. As with all WinTOTAL file lists, clicking any of the
headers sorts it by that item, allowing you to quickly find any
document in your workfile. To manage the documents in
your workfile, visit the workfile and use one of the following
options.
• Opening and viewing documents - To view any of your
workfile documents, double-click it, or select it and click
the Click here to open document link in the File
Details pane on the left. WinTOTAL attempts to open
whatever application created the original file. Thus, if it is
a MS Excel file, WinTOTAL loads Excel and opens the
document. Likewise, if it is a PDF file, WinTOTAL opens
Adobe’s Acrobat Reader.
• Handling unknown document types - If WinTOTAL
cannot automatically find the application that created your
workfile document, it notifies you and gives you the
opportunity to select an application from your system.
Copyright 2015, a la mode, inc.
Page 152
Wintotal User's Guide
Note: If you restore a copy of your report with an
old form, the new form is removed, along with any
changes you may have made. At the same time, this
form is also stored in your workfile.
DirectFax
• Adding comments - Since file names can often be brief
and difficult to decipher, you can also add comments to
each of your documents. Click any file and then type your
notes into the Comments field in the File Details pane
on the left side of the screen. These comments are then
stored with your workfile and displayed whenever you
click the file in the list.
• Restoring files – Certain file types stored in your workfile
are actually items from your report. For example,
whenever you change major forms in your report, a copy
of the old form is automatically placed in the workfile. If
you decide you need to return to the original form, you
can quickly restore the old report. Likewise, if you delete
a comparable from your report, you’re given the
opportunity to store that comp in the workfile. If you need
to add additional comps to your report following a review,
you can quickly re-add these deleted comps to the report.
To do so, just select the item in the list and then click
Restore in the toolbar.
Workfile PowerView
The DirectFax system works in tandem with your Enterprise
Appraiser XSite to convert all your paper workfile documents
into one electronic file. Anybody can fax a document to
special toll-free number using a custom cover sheet. You can
fax supporting documents to yourself, or have your clients
fax important supporting documents to you. These
documents are converted to electronic files, and then
attached directly to your report. To use DirectFax…
1.Gather up all of the supporting documents related to the
current report.
2.Then, in the Workfile PowerView, click Fax a document in
the DirectFax pane on the left.
3.Click DirectFax in toolbar to create and print a customized
cover sheet for this report.
Copyright 2015, a la mode, inc.
Page 153
Wintotal User's Guide
Note: All documents that are faxed at one time are
converted into one PDF file. Even though you may
have different kinds of documents, they’re all stored
in one file. If you’d like to have them stored
separately, use the same cover sheet, but fax them a
few minutes apart.
Send Reports to Vault
Once your workfile is complete, you can send the entire
report directly to your online Vault storage account. To do
so…
1.In the Workfile PowerView, click Vault in the toolbar to
upload the file.
Hint: You can use a tool like Adobe Acrobat to create
an electronic version of the cover sheet, which you
can then e-mail to your clients.
4.Fax all of your documents, with the cover sheet on top, to
the toll-free number provided on the cover sheet.
5.Once the fax has been sent, click Sync in the toolbar to
retrieve any faxed docs and add them to the list of
workfile documents.
2.Click Send Now to immediately send the file to the Vault
or click Send Later to add it the net.X queue to go out
to the Vault the next time you synchronize WinTOTAL
with your Internet products.
Note: Whenever you send a file to the Vault, it is
6.Double-click any DirectFax document to open it in the
Acrobat Reader application.
marked with a Vault icon in the Vault column of the
File Cabinet to keep you informed about which files
you’ve sent to the Vault and which remain to be sent.
Workfile PowerView
Copyright 2015, a la mode, inc.
Page 154
Wintotal User's Guide
Tools
The Tools menu is WinTOTAL’s centralized location for all of
its time saving tools. In addition to the tools introduced in
Athena, Aurora has a number of brand new tools like the
Change Case tool to help you complete your appraisals
quickly and easily.
Spell Check
WinTOTAL’s spell checker lets you spell check your entire
report either all at once or piece by piece. You can also add
words to the spell checker’s dictionary. To use WinTOTAL’s
spell checker…
4.To add or remove words in the dictionary, click Tools,
Spell Check, View/edit user dictionary from the
menus in the toolbar.
1.In the Forms PowerView, click Spell in the toolbar at the
top of the screen to spell check the entire report or click
the Tools, SpellCheck, Check whole report from
anywhere in WinTOTAL.
2.If you need to limit your spell check to certain portions of
your report, additional options in the spell checking
options in the Tools menu are:
o Check current field
o Check selected fields
o Check current form
3.As you run the spell check, you are prompted to add
unknown words to the dictionary associated with your
WinTOTAL Username.
Tools
Copyright 2015, a la mode, inc.
Page 155
Wintotal User's Guide
Change Case
Calendar
Consistency is a key way to maintain a professional face to
your business. Until now, if you’ve been working on your
report, there hasn’t been a quick way to give your report a
face lift before sending it out the door. Now the Change
Case tools, new in Aurora, help you ensure that your
appraisals go out the door with the same capitalization
scheme throughout the report. To change the case of any or
all text in your report…
WinTOTAL provides a basic calendar tool through the tools
menu to help you quickly find exact dates and insert them
into the fields of your report. To insert a date into a
WinTOTAL field with the calendar…
1.Anywhere in WinTOTAL, place your cursor in a date field
and click Tools, Calendar from the menus.
1.In the Forms PowerView, click Tools, Change Case,
Change whole report from the menus. Alternately,
you can limit the case change to:
o The current field
o All selected fields
o The current form
2.Once you’ve selected the option that suits your needs,
you’re prompted with a choice of case format. Pick the
option that suits you best and click OK to apply the
changes.
2.Navigate through the calendar to find the date you want to
insert.
3.When you find the desired date, click to select it and then
click Insert to place it into your report field.
File Labels
The ideal of the “paperless office” continues to elude most
appraisers. While some functions — such as the digital
workfile — are now handled electronically, many appraisers
are still more comfortable with the old manila folder. If you
Tools
Copyright 2015, a la mode, inc.
Page 156
Wintotal User's Guide
prefer the paper-based approach, you can print labels for
your work folders from within WinTOTAL. Using WinTOTAL’s
File Labels tool is a two-step process…
o Click the Contact data option to display the fields
related to your office. Double-click any field to place it
on your label.
1.Create a label template to use.
o With your cursor in the Label Template box, begin
typing to insert text or spacing. Do not type anything
between the brackets { } surrounding the codes you
inserted from the lists. Depending upon the type of
label you selected, you may have anywhere from two
to five lines available.
2.Print the label using your template.
Creating Label Templates
To create a file label…
1.Click the Tools menu, and then select Create File Labels.
2.From the Print Labels screen, click New at the end of the
Template drop-down menu.
3.Type a name for your labels in the Template Name box.
4.From the Avery® Label drop-down menu, choose one of
the pre-defined label types. If you’re using a non-Avery
label, pay attention to the label sizes listed.
5.Begin building your label using any combination of three
data types. Click the Label Template box to place your
cursor in the desired spot and then:
6.When your label template is complete, click Save.
Printing File Labels
To print a file label for a report…
1.With the desired report open in WinTOTAL, click the Tools
menu, then select Create File Label.
o Click the Report option to display a list the fields from
your report. Scroll through the list to find the field
whose information you’d like included on your label.
Double-click the field name and a code is inserted in
the Label Template. When you print the label, this
code is replaced with information from the report.
Tools
Copyright 2015, a la mode, inc.
- OR From the Appraisal Desktop, select a report in the Files
list, then right-click and choose Create File Labels from
the pop-up menu.
Page 157
Wintotal User's Guide
1.Open a report you wish to copyright.
2.Once it’s open, click Copyright Report in the Tools
menu.
2.From the Template drop-down menu, select your desired
label format.
3.Depending upon the type of label your template uses, the
label grid changes, showing you a sheet of labels. Click
the label location on the sheet to the left to indicate the
label you want to print. This is useful if you have a sheet
of labels that is only partially used.
4.If you are curious how your label looks, click Zoom at the
bottom of the screen to get a closer look.
5.If you need to tweak the label format, click Edit. Make
your changes as necessary and click Save when finished.
When you label is ready, click OK. The Windows Print
screen appears, from which you can select the printer that
holds your labels. Click OK to send the label to your printer.
o Insert copyright license – Inserts a copyright license
into your report to provide a clear understanding of
the copyright’s implications.
o Place copyright text on all forms – Labels each form
in your report as copyrighted.
o Place copyright text on photos selected below –
When you mark this option, you can choose to include
the word “Copyright” on any or all of your appraisal
photos by marking the photos you’d like to copyright.
Copyright Reports
New to the Aurora release of WinTOTAL is the ability to
copyright your appraisal reports to ensure that their content
is legally protected for legitimate use only. To copyright a
report…
Tools
3.When the Copyright Report screen appears, mark each
of the options you wish to use in your copyright
protection. Options include:
o Tell me how I can register my appraisal with the
U.S. Copyright Office – This link takes you directly
to the page of the government’s copyright website
that outlines how you can copyright your report.
Copyright 2015, a la mode, inc.
Page 158
Wintotal User's Guide
4.Once you’ve selected the appropriate options for your
copyright, click OK to copyright your report.
3.Check the option to automatically transfer the figures into
your report if desired.
WinTOTAL flags your report as copyrighted and adds an
unlimited use license agreement to your report, explaining
the terms of use for your appraisal report.
Note: When you’re using the Building Area
Addendum form, you must use the Area Calculator
in order to enter figures onto the form.
4.When finished with your calculation, OK to close the
window and insert any calculations you specified.
Area Calculator
If you don’t use a sketch program to calculate areas,
WinTOTAL comes complete with an interface for entering
room dimensions in the Area Calculator. To use the Area
Calculator…
Area Estimator
Calculating the area of an irregular lot can prove a challenge
for even the most geometrically-gifted appraiser. WinTOTAL
provides a simple utility to estimate areas using the
“average side” method. To use the area estimator…
1.Anywhere in WinTOTAL, click Tools, Area Calculator
from the menus.
1.Anywhere in WinTOTAL, place your cursor in the field you’d
like to contain the results of your calculation.
2.From the menus, select Tools, Area Estimator.
3.Select the desired units (Feet/inches, meters, miles) from
the Units for sides drop-down menu.
4.Select the units for the result (Sq feet, Acres, Sq meters,
Sq miles, Sq kilometers) from the Units for area dropdown menu.
5.Enter the first measurement in the available box and press
Enter or click Add Side.
2.Type your figures in the appropriate fields, specifying the
type and level of the area you’re calculating.
Tools
Copyright 2015, a la mode, inc.
Page 159
Wintotal User's Guide
6.Continue entering additional sides until all dimensions have
been entered. The Estimated Area is calculated as you
add sides and displayed in the Estimated Area box.
7.Click OK to place the calculated area into your form.
o If you make an error in one of the dimensions, click
Clear all sides to start over.
o At any time, you can select different Units for area.
3.The first section of the Square Footage Adjuster shows you
the methods available for calculating the adjustment.
Choose the method you want to use for your calculation
and set the parameters that determine if the adjustment
is relevant, the SF Adjuster shows you the resultant
net/gross percentages as they appear on the form.
4.Click OK to merge the adjustment figures into the current
report.
Square Footage Adjuster
The Square Footage Adjuster allows you to easily adjust for
differences in the square footage of all comparables in one
easy step.
1.Ensure that the sales price and square footage for all
comparables have been entered.
Math Calculator
2.Then, in the Forms PowerView or Comps PowerView, click
Tools, Square Footage Adjuster from the menus.
Tools
If for some reason, you must change the square footage of a
comparable, be sure to reload the SF Adjuster so that it can
recalculate the adjustments.
You can now do basic math operations using WinTOTAL’s
Math Calculator so that you can drop those calculations into
your report. By running this option, a basic calculator
appears on your screen to help you quickly calculate most
common calculations as your build your appraisal. In
addition, WinTOTAL’s Math Calculator can accept basic Excellike formulas to help you make your calculations more
Copyright 2015, a la mode, inc.
Page 160
Wintotal User's Guide
easily. To perform calculations and insert them into your
report…
1.Anywhere in WinTOTAL, find the field into which you want
to insert your calculation and click to select it.
2.Click Tools, Math Calculator from the menus.
Marshall & Swift Cost Estimates
WinTOTAL now integrates directly with Marshall and Swift's
online estimation product, SwiftEstimator™.
SwiftEstimator™ automates cost data searches, calculations
and data entry on appraisal forms - letting you easily create
a detailed Cost Approach without even having to pay an
annual subscription fee for cost data. For more information
on SwiftEstimator™, click here. If you prefer to use the
Marshall & Swift approach to cost estimates, you can take
advantage of this integration via the Tools menu. To run a
cost estimate…
1.From anywhere in WinTOTAL, click Tools, Launch
SwiftEstimator™.
3.Use the basic calculator functions to determine a value OR
enter an Excel formula into the bottom text box and click
Eval.
4.If you’re satisfied with the value you’ve calculated, indicate
whether you want to keep the calculator open after you
insert the value into your field by checking the box at the
bottom and then click Insert to add it into the selected
field.
Tools
2.In the screen that appears, a summary of the data from
your report that you wish to submit to Marshall & Swift
appears along with a statement of your total remaining
cost estimates, the remaining number of days you have
to recalculate an existing estimate for your report, and a
choice of form to use for the final estimate. First, verify
that all required information (denoted with a red
asterisk) has been filled out and fill in any remaining
gaps.
Copyright 2015, a la mode, inc.
Page 161
Wintotal User's Guide
Note: Due to limitations in SwiftEstimator™’s
integration tools, the square footage, client, and
appraiser fields cannot be transferred into your
Marshall & Swift Cost Estimate at this time.
3.Next, choose a type of estimate you wish to use. Options
are:
4.Finally, click Launch SwiftEstimator™ to begin
your cost estimate through Marshall & Swift’s
online tool.
Note: You must have available cost estimates in your
o Cost Approach w/ Addenda – Runs a standard report
and transfers the data to both the Cost Approach
section of your major form and into a special cost
approach addendum created by WinTOTAL.
o Cost Approach Only – Runs a standard report and
transfers the data into the Cost Approach section of
your major form only.
o Marshall & Swift 1007 LGL – Runs your cost estimate
and inserts the resulting 1007 into your report as a
legal sized form. Keep in mind that when you select
this option, the cost estimate is NOT transferred into
the cost approach section of your major form.
o Marshall & Swift 1007 LTR – Runs your cost estimate
and inserts the resulting 1007 into your report as a
letter sized form. Keep in mind that when you select
this option, the cost estimate is NOT transferred into
the cost approach section of your major form.
Note: Each of these options adds a copy of the cost
estimate to the workfile automatically so that you can
keep an original copy around as required by USPAP.
If a revision to your estimate is required later, the
SwiftEstimator™ integration again copies the update
to your workfile with a time and date stamp so you
can track and verify the history of the report.
Tools
a la mode account in order to launch the
SwiftEstimator™. If this screen indicates that you
have no available cost estimates, click Purchase
More to buy the necessary number of cost estimates
before proceeding.
5.When the SwiftEstimator™ appears, fill out the required
property details for your cost estimate. For additional
information or assistance using the SwiftEstimator™,
click the Help link in the upper right corner of the
screen.
6.Since Marshall & Swift currently limits the automatic
upload of data from your report to basic subject address
information, a Data Lookup sidebar appears on the left
with information from your report. To copy this
information into our Windows clipboard so you can paste
it into SwiftEstimator™, click the Copy link beside the
desired information. Then, just paste it in as you would
anything else.
7.When the details of your Cost Estimate are complete, you
arrive at the Reports/Calc section of the
SwiftEstimator™. A brief overview of your data is
supplied. Review the data you see and make any
adjustments to the data before proceeding.
8.When you’re satisfied with your data, click Calculate to
determine your cost estimate.
Copyright 2015, a la mode, inc.
Page 162
Wintotal User's Guide
Note: One cost estimate is deducted from your
account when you click Calculate. If you determine
that adjustments must be made to your cost
estimate, you have 7 full days after your first cost
estimate is generated (when you first click Calculate)
to recalculate your cost estimate free of charge. As
you continue to work with the cost estimate,
WinTOTAL displays the number of days you have left
to recalculate. After 7 days, another cost estimate is
deducted from your account when you attempt to
12. When you return to WinTOTAL, you may be prompted
about adding the new data to your report. If you receive
a prompt, click Yes to confirm that you want to add the
new cost estimate to your report.
recalculate.
9.When the calculation is complete, the results appear in
the same window, but you can always see the entire
report (whether Standard or a 1007) by clicking
Preview.
Your cost estimate is immediately added to your report.
10. If you need to make any adjustments to your cost
estimate, you can do so now or you can return at a later
time (before the end of your 7 day grace period). To
recalculate your cost estimate, simply launch the
SwiftEstimator™ tool in WinTOTAL, make any necessary
changes, return to the Reports/Calc step of the
SwiftEstimator™, and click Calculate again.
11. When you are satisfied with your cost estimate, click
Transfer to WinTOTAL to move the estimate into
WinTOTAL.
Tools
Property Presentations
As the appraisal industry evolves, the savvy appraiser is
always on the lookout for new ways to market appraisal
services to different audiences. One often overlooked
segment of the real estate market is the “For Sale By Owner”
or FSBO home seller. These individuals are often marketing
their homes without the benefit of a real estate agent to help
them establish the value of their homes. Enter the appraiser.
XSites include a feature which allows you to help FSBOs
market their homes and justify their asking prices.
Specifically, once you’ve completed an appraisal for a FSBO
customer, you can upload that appraisal to your XSite. A
custom URL is created on your XSite, which home sellers can
pass along to perspective buyers. When a buyer views the
site, they see the following:
Copyright 2015, a la mode, inc.
Page 163
Wintotal User's Guide
• Unlimited, full-color photos (provided by you during your
inspection)
3.The Additional Information screen appears, allowing
you to enter specific information about the property
which may not be included in the appraisal report, but
would be beneficial in marketing this property to buyers.
Fill out any or all of the fields for which you have
information and click Next.
• Virtual tour
4.Give a description of the property and click Next.
• Online map
5.Specify how much, if any, of the report you’d like to
include on your site. To include a PDF of the entire
report, mark the Print the entire report to PDF option.
To select certain pages, instead choose Print specific
pages. Click Next to continue.
• Summary of the professional appraisal report
• Link to download the full appraisal report
• Beautiful Flash-animated listings brochure
6.You’re given the option of uploading any photos from the
report to your XSite. Check the box for the photos you
wish to include. If you have additional photos from your
inspection that aren’t included in the report, click Add
additional photo. Find the photo file on your hard drive
and click Open. Repeat this step to add additional
photos. Click Next to continue.
7.Select the XSite you wish to upload this report to from the
Your XSite drop-down menu. In the Path to
presentation box, type the URL which you’d like the
homeowner to use. For example, you might type the
property address.
Creating the Presentation
To create an Online Property Listing…
1.Open the desired report in WinTOTAL and click Tools,
Property Presentation Wizard from the menus.
2.In the login screen, enter your XSite Username and
Password, and then click Next.
Tools
8.Complete the Client’s Name and E-mail address fields
to automatically generate a Disclosure Agreement form.
The client completes this form to grant you permission to
display the report on your site. Click Next to continue.
9.The wizard now generates the report. If you opted to
include only a portion of the report, the standard
WinTOTAL Print screen appears allowing you to select
which pages are printed. Make your selections and click
OK.
Copyright 2015, a la mode, inc.
Page 164
Wintotal User's Guide
10. Once the report is generated, you’re prompted to
preview the site. Click the link to open a window and
ensure that the information is correct. Click Next to
continue and then click Finish to complete the process.
Your customer’s property is now available online to assist in
marketing their home. Note that it is not viewable from your
XSite, unless you choose to add the link to either a menu
item or to a custom page.
Convert Competitor Files
Publishing the Presentation
Once the report is complete, you must return to your XSite
to enable it. Before doing so, you should contact your
customer and ensure that they received the electronic End
User Agreement and are willing to accept the terms. They’re
prompted to visit the site online and complete an acceptance
form. Once this is done, you’re ready to launch the property
report on your XSite.
If you’ve come to WinTOTAL from a 3rd party formfilling
application, chances are you’ve got a wealth of data locked
up your old appraisals files. Luckily, WinTOTAL has the key
to unlock that data. To convert your old appraisal files…
1.Anywhere in WinTOTAL, click Tools Convert Competitor
Files from the menus to launch the WinTOTAL
Conversion Wizard.
1.Log into your XSite and click the XSite in the toolbar at
the top.
2.Click Online Properties in the Extra Tools pane on the
left.
3.The reports you’ve uploaded from WinTOTAL are displayed
in the Online Properties window. Click Preview to look
at the site. If your site’s “File Not Found” message is
displayed, the home owner has not yet completed their
acceptance form. Once they do so, the site should display
properly.
4.As necessary you can manipulate this online property:
o Check the box to the left of the property name to enable
this page.
o Click Delete to remove it from your site.
o If you need to adjust the URL address you entered
earlier, click Edit URL.
Tools
2.From the drop-down menu, select the format for the files
you’d like to convert.
3.Depending upon the format you choose, one or more
options may appear at the bottom of the screen. These
show the resources that WinTOTAL is able to convert in
addition to report files. For example, in some formats,
Copyright 2015, a la mode, inc.
Page 165
Wintotal User's Guide
WinTOTAL can import comparables, photos and text
databases (canned comments). Check each box for the
items you wish to convert, and then click Next.
4.If you did not select options other than just appraisal
reports in the previous step, skip to the next step.
Otherwise, you may see up to four settings here
depending on the items you indicated you wanted to
convert. For each setting, click Browse, navigate out to
the appropriate file from your old software and click
Open to accept the file.
5.Now, click Browse to navigate out to the folder containing
the reports from your old software. Navigate out to that
folder, click it, and click OK to select it.
6.Select a WinTOTAL folder in which to store the converted
files. You can either click the drop-down menu to select
an existing folder or create a new folder for your
converted files by clicking New, typing a name, and
clicking OK.
7.Click Next to continue.
10. Click Finish to launch the conversion process.
11. When the conversion is complete, WinTOTAL notifies you
with a summary of the results. Just click OK and launch
WinTOTAL to find your newly converted content.
Note: Be aware that file conversion may take some
time. If you have hundreds of reports, it is strongly
recommended that you convert them in smaller
batches.
When you next return to the File Cabinet, your converted
files should be displayed in the appropriate folders. Likewise,
if you converted any other items, they also appear when you
next access the Files PowerView
8.The wizard presents a warning about the imperfect nature
of file conversion in general. Read the warning and click
Next to continue.
Collaboration
9.WinTOTAL then scans the selected directory on your
system and displays any reports found in a list. Select
the report(s) you’d like to convert from the list on the left
and click Add. Or, click Add All to select all the reports
displayed.
Tools
For security purposes and to prevent pirating of your data,
WinTOTAL limits its report delivery to files that were created
with your same customer number. The message that
appears when you try to deliver a report not created with
your customer number:
Copyright 2015, a la mode, inc.
Page 166
Wintotal User's Guide
1.From inside the report you wish to associate with an XSite
order, click Tools, Associate XSite Order in the menus.
If you want to deliver a file created on another appraiser's
computer, simply deliver from inside of TOTAL Connect.
Before beginning the delivery process, TOTAL Connect must
be installed and configured. Click here for step-by-step
instructions on installing TOTAL Connect.
2.In the list of orders that appears, find the order you wish
to associate with this report and click to select it. If you
can’t find the order in the list, you may need to mark the
Show all orders option to find it.
Once you have TOTAL Connect installed and configured,
follow the instructions below to deliver your report using any
of the TOTAL Connect plugins:
1.Begin by opening TOTAL Connect.
2.Select the appropriate order from the list and click
Deliver.
3.Click OK to continue.
3.Follow the instructions in the delivery wizard to complete
the delivery process.
4.A window appears prompting you to delete the original
order file so that you do not confuse the two in the
future. For best results, we recommend that you delete
the original order. Click Yes to delete it or click No if
you wish to keep it.
Associate XSite Orders
While WinTOTAL’s XSite synchronization tools are designed
to notify you any time you attempt to download a new order
that you’ve already started in WinTOTAL, you may find times
where you need to associate the two so you can deliver the
report to the appropriate client. If you need to associate
your existing report with an order from your XSite…
Tools
Roll Back to Athena
While the Aurora version of WinTOTAL contains all the latest
features, updates and upgrades to help you stay productive
in your appraisal business, we provide the option for you to
Copyright 2015, a la mode, inc.
Page 167
Wintotal User's Guide
“roll back” to the previous Athena version of WinTOTAL if
you wish. This “lite” version of WinTOTAL will continuously
receive updates and support as the industry changes and
may be the more comfortable tool for those who have
become familiar with it. If you’re considering the possibility
of rolling back to Athena, consult our Roll back FAQ for more
details or our Rollback Tech Doc for detailed instructions on
this process.
• Rollback FAQ (4997)
• Rollback Tech Doc (4999)
1.Open the Appraisal Desktop.
2.If you’re printing from the Appraisal Desktop, mark your
preferred printing option and click OK. Otherwise, skip
this step. Options are:
2.From the Tools menu, click Rollback to Athena.
Printing
Since printing is an essential step in completing each report
– whether generating a hard copy or creating a PDF using
the PDF creation tool now included with WinTOTAL - the
essentials are covered in this user guide. You can either
print your report using WinTOTAL’s Print button or through
the File menu. Here’s a brief description of the print options
in WinTOTAL’s File menu:
• Print to PDF – Generates a PDF copy of your report.
• Print Current Form – Prints the current form on your
screen.
• Print Setup – Allows you to select your main and photo
printers.
Printing
Depending on where you print in WinTOTAL, you have
different options. When printing from WinTOTAL, you can
print a hard copy or PDF copy of any pages in your report.
But when you print from the Appraisal Desktop, you have
the option to print a reports list, invoice only, or just a “quick
print” copy of your report. To print a report…
1.From inside a report or from the Appraisal Desktop, click
Print in the top toolbars or go to the File menu and
choose one of the print options.
To initiate the rollback process…
• Print – Acts just like the Print button in WinTOTAL.
Print Reports
o Print Report – This option opens the standard
WinTOTAL Print screen, from which you can choose
which pages and forms you’d like to print, as well as
choosing the printer to which you’d like to send them.
o Auto print report – This option automatically prints
the report based on the default settings you’ve chosen
for that report in the past, so you can skip the
remaining steps in this process.
o Print invoice only – If you just need to send out a new
invoice, choose this option. Any invoice form found in
the report is sent directly to your default printer, so
you can skip the remaining steps in this process.
o Print reports list – The final option doesn’t print the
actual report. Instead, it sends the report list directly
to your default printer, so you can skip the remaining
steps in this process.
Copyright 2015, a la mode, inc.
Page 168
Wintotal User's Guide
screen under your Online Tutorial link to tell WinTOTAL
which printers you use.
Note: You can also change the printer settings by
using Edit Printer Settings in the additional print
options.
3.When the Aurora Print Engine appears, you should see a
list of the forms in your report and other options. Mark
the option for the format you want for your print job:
Print, WinTOTAL PDF or Fax.
6.If you see the column titled TOC you can mark whether or
not a form is listed on WinTOTAL’s dynamic Table of
Contents form. When this box is cleared for a form, it is
skipped when printing as well as page number. This
feature is handy for comps pages included for analysis,
but not necessary for the final report, invoice forms, and
other photo pages.
Note: By default this column does not appear in the
print window. To enable it, click the Click here for
more printing options link in the lower left corner of
the screen, check the Show Table of Contents
column option, and ensure that you’ve added a
Table of Contents form to your report.
7.Once you’ve selected your options, click OK to begin the
print job.
4.Double-click each form you want to print or click Mark All
to print everything. An icon appears next to forms you’ve
marked. To “unmark” a form and omit it from printing,
double-click it again.
5.You can also select the target printer on a form by form
basis. If you have just one printer hooked up to your PC,
you can leave this at the default. If you have separate
printers for color printing or photos and B&W printing,
click Printer Settings in the upper left corner of the
Printing
Print Options
When you’re printing, there’s a link at the lower right of the
forms list for additional options. These options change
depending on whether you are printing to hard copy printers
or creating a PDF. To apply special print options while you’re
printing:
1.Print your report in the typical way.
2.In the Aurora Print Engine, click the link at the bottom to
open the additional printing options.
Copyright 2015, a la mode, inc.
Page 169
Wintotal User's Guide
3.Set your preferred options using the check boxes and links
in the pane on the right. Options include.
Available options (in the drop-down box) include:
Main File number
Other file number
Internal Order number
Lender Case number
Client File number
FHA/VA Case number
o Print a box around photos - Select whether or not
you want a border around photos.
o Show Table of Contents column – Toggles whether
the TOC column is hidden in the print window. When
enabled, you can remove forms from the printed TOC
by unchecking them.
o Include # copies of highlighted page – Allows you
to specify a different number of copies on a page by
page basis.
o Print page number on each form - Prints the page
number on each form. Or course, a page number
gives your report a more professional appearance and
keeps pages from being misplaced.
Show numbering as X of XX - When page
numbering is enabled along this option, page
numbers are formatted as 1 of 10 (for example).
Otherwise, WinTOTAL just prints the page number
at the bottom of each page of your report.
o Print # on each form - Overlays the selected number
at the top right of each form. This is handy for forms
that don’t have a place for a file number or for
including a specific identifying number on every form
to meet your client's requirements.
Printing
o Print net and gross % - Controls whether or not the
net and gross adjustments print on the major form.
Click the Edit link to the right to change formatting
options.
o Print a summary phrase – Allows you to print a
summary phrase about each form in the top left
corner of the page
Click the Edit link to the right to set form-specific
options, including the phrase to display and
positioning of the phrase on the form.
o Select main printer for all forms – Prints all form
pages using your designated main printer allowing you
to print photo pages and form pages on separate
printers.
o Select photo printer for all photo pages – Prints all
photo pages using your designated photo printer
Copyright 2015, a la mode, inc.
Page 170
Wintotal User's Guide
the right. The Edit link beside this option then enables
you to specify how they are labeled.
allowing you to print photo pages and form pages on
separate printers.
o Send all pages to printer as one job – Sends the
entire print job to the printer as one job rather than
breaking up the print job into a batch of individual
print jobs. This option is handy when you’re having
difficulty printing certain sections of your report.
o Use printer profiles – Using this option you can create
and use separate combinations of photo and main
printers. This option can be particularly handy when
you have both a set of network printers and local
printers and would like to alternate between them.
o Edit Printer Settings – This option is equivalent to the
Printer Settings option that appears in the upper left
hand corner of the Print window. It allows you to
select your main and photo printers and make
adjustments to the arrangement of the print job on
the page.
4.When finished, click OK to apply your changes and print
your report.
3.When finished, click OK to accept your changes and print
your report.
Print Summary Phrases
To identify the appraisal and report type, many appraisers
prefer to overlay the words “Summary Appraisal Report” at
the top of the form. If you want to overlay a phrase on your
appraisal report…
1.Print your report in the usual way.
Print Net & Gross Adjustments
Most forms themselves don’t have specific fields for net and
gross adjustments; however, many appraisers prefer to have
them overlaid in the sales comparison approach. If you wish
to have the net and gross percentages printed, you can set
WinTOTAL to print them on your forms. To do so…
2.When the Aurora Print Engine appears, check the Print a
Summary Phrase box in the Report Options pane on
the right. The Edit link beside this option then enables
you to specify the phrase you want to overlay on your
report.
3.When finished, click OK to apply your changes and print
your report.
Note: Instead of overlaying a summary phrase, you
1.Print your report in the usual way.
2.When the Aurora Print Engine appears, check the Print
Net and Gross % box in the Report Options pane on
Printing
Copyright 2015, a la mode, inc.
may wish to use our USPAP identification form. It
provides more detail on the appraisal and report as
well as room for comments and other disclaimers.
Page 171
Wintotal User's Guide
4.Finally, uncheck each page of your report that you wish to
hide in the TOC and proceed with printing. WinTOTAL will
leave any pages you unchecked out of the Table of
Contents.
Remove Pages from the TOC
If you need to prevent certain pages of your report from
being listed in your Table of Contents, WinTOTAL provides a
simple way to remove them when you print your report. To
prevent certain pages from appearing in the TOC...
1.Print your report as usual.
2.When the Aurora Print Engine appears, if the print options
aren't displaying to the left, click the Click here link to
the lower left of the screen to show the advanced
printing options.
3.In the printing options, check the Show Table of
Contents column box to display a list of check boxes
beside each form in your report.
PDF Options & Security
WinTOTAL provides a wealth of options you can apply as you
print your PDF files so that you can ensure that the PDF’s
include all of the information and protection that you need.
To apply PDF options or add security to your PDF so that
others cannot copy or tamper with your data…
1.Print your report as usual.
2.When the Aurora Print Engine appears, make sure you
mark the PDF option and then apply your PDF options
using the PDF Settings pane on the right. Options
include:
o Save PDF to Report’s Workfile – Copies an original
version of your report PDF into your workfile so that
you have a time-stamped copy of your original PDF in
case you need it.
o Change Your PDF Output Directory – By default,
WinTOTAL saves a copy of your PDF files to C:\a la
mode\WinTOTAL\PDFFiles. If you want WinTOTAL to
save your PDF files elsewhere, click Edit and browse
out to the directory you want.
o Edit PDF Adjustments – Allows you to control print
margins, scaling, and more.
o Edit PDF Security Settings – Allows you to password
protect your PDF or lock it to keep it safe from copying
or tampering.
Printing
Copyright 2015, a la mode, inc.
Page 172
Wintotal User's Guide
o Edit Advanced PDF Settings – Helps you control the
format of PDF to ensure that the maximum number of
clients can open the PDF files you produce.
Note: If you don’t see these settings to the right, you
may need to click the link at the bottom of the Aurora
Print Engine to see the additional printing options.
3.Once you’ve applied your PDF options, click OK in the
Aurora Print Engine to accept your preferences and
create your PDF.
2.Determine whether you would like to scale your PDF or
adjust the PDF margins and use the corresponding fields
to make your adjustments.
3.You should also notice another setting that pertains to
sketch printing with HP DeskJets. If you are experiencing
difficulties printing hard copies of your sketch pages
using your HP DeskJet, check this option.
Edit PDF Adjustments
WinTOTAL’s PDF options help you control the print scaling,
margins, and optimization settings for the PDF’s you create.
To change your PDF adjustments…
1.From the Aurora Print Engine PDF options, click the Edit
PDF Adjustments link.
4.Finally, click OK when you’re finished making your
adjustments.
Edit PDF Security Settings
WinTOTAL’s built-in PDF creation tool can assist you in
securing your PDF’s so that no one can tamper with your
PDF or copy data out of it for any reason. To apply security
settings to your PDF’s…
1.From the Aurora Print Engine PDF options, click Edit PDF
Security Settings.
Printing
Copyright 2015, a la mode, inc.
Page 173
Wintotal User's Guide
Edit Advanced PDF Settings
The Advanced PDF settings allow you to control the process
that WinTOTAL uses to print your report to PDF. Here, you
can toggle whether WinTOTAL should prompt you for a PDF
file name or simply name the PDF file using its own naming
conventions. You can also toggle whether the PDF should
appear in your PDF Viewer once it has been created, or
change the compatibility settings for your PDF’s. To change
your advanced PDF settings…
2.Then, determine whether you want to permit your clients
to:
1.From the Aurora Print Engine PDF options, click Edit
Advanced PDF Settings.
o Select text and graphics in the PDF
o Change the PDF
o Add or change notes and form fields
Note: PDF files aren’t protected by your digital
signature and can be edited unless you specify
otherwise by checking the Change the PDF box.
2.In the screen that appears, indicate whether you want
WinTOTAL to prompt you for a PDF file name when
creating PDF’s.
3.Check the corresponding boxes to prevent your clients
from changing any of these features.
4.If you’d like to password protect your PDF so that a
password is required to change the PDF security options,
enter a password in the Change Security field. Keep in
mind that this settings affects all PDF’s that you create so
you should be careful when using this feature.
5.When finished, click OK to accept your changes and click
OK again in the Aurora Print Engine to create your PDF.
Printing
3.Mark or unmark the checkbox to indicate whether you
want WinTOTAL to launch your PDF viewer so you can
see the PDF when it is complete.
4.Choose a PDF specification option from the drop-down list.
This option controls the compatibility mode for your
WinTOTAL PDF’s. By default, WinTOTAL uses the Adobe
Acrobat 4.x option to ensure that all of your clients can
open the PDF. In general, unless a technician specifies
otherwise, it’s better to leave this at the default setting.
Copyright 2015, a la mode, inc.
Page 174
Wintotal User's Guide
5.When finished, click OK to save your options and click OK
again in the Aurora Print Engine to create your PDF file.
Report Delivery
In the past, delivering your appraisal often meant plowing
through reams of paper, juggling two or more printers,
fiddling with little plastic binders, and then jumping in your
car to run it over to your client’s office.
Today, the vast majority of appraisals are being delivered
electronically. Typically, this involves printing the report to a
PDF file, then attaching it to an e-mail message. WinTOTAL
Athena pioneered a new, streamlined method of report
delivery through its EDI center. Now, Aurora is poised to
again revolutionize how appraisers interact with their clients
through a combination of innovative report delivery options:
• Share reports via e-mail – Appraisers who want to
deliver reports directly to their customers in a PDF format,
or share WinTOTAL files with other appraisers, can use
this option. Using the industry standard Messaging
Application Programming Interface (MAPI), WinTOTAL can
interact with your default e-mail application much as it
once did with the EDI Center. Report delivery is still
integrated with the PDF-creation process and information
from the report is still added to your accompanying e-mail
message – just as you were familiar with in Athena.
• TOTAL Connect – If you’re using your XSite, Mercury
Network, or one of the XSite/Mercury network partners,
like RealEC or Rels — then this delivery method is the one
to use. Reports are uploaded and the status is
immediately reflected in your online order management
system.
Report Delivery
To begin the delivery process, click the Share Report or
Deliver to Client button, or select a specific delivery
method using the drop-down arrows next to the buttons.
Default Delivery Methods
Before you use the report delivery tools in WinTOTAL, you
should set the default method you’d like to use to help you
save time in future deliveries. To set your default delivery
method:
1.Click the drop-down arrow next to Share Report or
Deliver to Client and select Set Default.
2.Mark the option in the list beside the report delivery
method you plan to use most often. If you’d like the
system to default to whatever method you used last,
mark the Remember what I did last time option.
3.Click OK to save your default.
Hint: Even though you've set a default, you can always choose
any of the delivery methods by choosing it from the
Deliver Report menu, or by clicking the down arrow to
the right of the Send button in WinTOTAL or the Appraisal
Desktop.
Message Templates
Using standard message text in reports you deliver via email can be a great way to consistently send a standardized
message to your clients while still including report specific
information in each message. To set up your standard
message text:
Copyright 2015, a la mode, inc.
Page 175
Wintotal User's Guide
1.Begin delivering your report using any of the e-mail
methods described in this chapter and click Edit
standard message text in the Delivery Information
screen.
Select E-mail Recipients
When sending reports and files using WinTOTAL’s report
delivery tools, you can access your contacts database so you
can quickly find and select recipients. This ensures that you
don’t have to look up their contact information in other
databases. In addition, since the Contacts Database can
synchronize with your XSite’s Contacts Database you can
ensure that you always have the most up-to-date address
information available in all locations. To use the Contacts
Database to address your e-mails…
1.From any of the Delivery Information screens that
appear throughout the various delivery wizards, click any
of the To or CC links your WinTOTAL address book.
2.Type the standard message you’d like to include in the email message whenever you send a report in the first
text box.
3.Check any of the report items you’d like to insert into the
message.
4.Finally, type your “signature block” in the last text box and
click Save.
Now, each time you send a report, this standard text is
automatically inserted into the message and you can easily
edit this text in the future if necessary.
2.If you know the name of your recipient, begin typing it in
the first text field. As you type, the list below sorts and
displays any records that match the letters you’re
typing. Or, use one of the following methods to find,
add, or remove contacts from your address book.
o Select a filter from the drop-down list to filter your
contact list to those that just fit a certain type.
Report Delivery
Copyright 2015, a la mode, inc.
Page 176
Wintotal User's Guide
o Click Find Contact, type a search phrase, and click
Find to search for contacts. If you find one you like,
click it and click Insert to include it in your message.
o Click New Contact to add a new contact to your
address book. Once you’ve filled out the necessary
contact information, click OK to save the contact.
o Click a contact and click Edit Contact to edit the
contact’s information.
o Click a contact and click Remove Contact to remove it
from your address book.
TOTAL Connect Pro Pre-Delivery Check
TOTAL Connect Pro's Pre-Delivery Check allows you to complete
your client's review process prior to singing and delivering the
report. This streamlines your delivery process and allows you
to make adjustments and provide commentary in the report
during your final review, as opposed to canceling the delivery,
returning to the report, and unsigning it to correct any issues.
The commentary you provide during the Pre-Delivery Check is
added to your report as a PDF.
To begin a TOTAL Connect Pro Pre-Delivery Check:
3.Once the desired contact is displayed in the list, doubleclick the name to add it to the To section of the
Message recipients field. Or, select the name and click
the Cc:-> button to add it to that section.
1. Click Deliver to Client.
2. Hover over Pre-Delivery Check.
3. Select the TOTAL Connect Pro partner from the list.
4.Repeat these steps to add as many recipients as
necessary.
5.When you’ve found all the desired contacts, click OK to
add their e-mail addresses to your e-mail message.
Hint: If you create any new contacts as you’re
selecting recipients, don’t forget to synchronize those
changes with your XSite by using the synchronization
tools in the Appraisal Desktop.
Report Delivery
Copyright 2015, a la mode, inc.
Page 177
Wintotal User's Guide
4. When you're finished entering the VSS Order Info, click
Submit to ProQuality to begin the ProQuality Review.
VSS Pre–Delivery Check
To begin the Valuation Support Services Pre–Delivery Check:
5. Once the review has finished, the final status is displayed.
Click the panel below that corresponds to the ProQuality
Review Final Status for your report to continue with the
instructions:
b)
1. Click Deliver to Client.
2. Hover over Pre-Delivery Check and select Valuation
Support Services from the list.
Click here if your report passed the VSS
ProQuality Review.
If your report passes with zero rules needing to be reviewed and zero
questions pending, you're finished! Simply click Save & Close to complete
the VSS PreCheck and return to your report. Then, sign the report and deliver
it as you normally would.
3. Enter your VSS Vendor ID, your Username and
Password, and the Order # in the fields provided. Then,
indicate whether or not any undue influence was placed on
you during the completion of the order. If you select Yes,
provide an explanation in the text box that appears.
c)
6.
Report Delivery
Click here if your report did not pass the VSS
ProQuality Review.
If your report doesn't pass, click Review Results on the lower right to
view a breakdown of the rules that were triggered, review the ProQuality
Review results, and provide additional commentary on your report, if
necessary.
Copyright 2015, a la mode, inc.
Page 178
Wintotal User's Guide
7.
In the screen that appears, click Review Results to open and work through
the ProQuality Review results. You're able to make changes to your
report while working through the ProQuality Review as long as it's
unsigned. Click Provide Commentary to answer any questions returned
by VSS and provide additional information about your report, if
necessary:
o
When the ProQuality Welcome screen appears, click
View Details to review each rule that was triggered.
o
Click Next to increment to the next rule that was
triggered, or click Back to view the previous rule.
Use the navigation on the left to jump to a specific
section of rules.
Review Results
Click Review Results below the ProQuality Review
Results to open a separate window where you can view
each rule that was triggered individually.
Report Delivery
Copyright 2015, a la mode, inc.
Page 179
Wintotal User's Guide
Note: If your report is unsigned, you can edit it while working in
the ProQuality Review.
o
If a warning must be acknowledged, review the
warning details, click the orange Acknowledge
button in the middle at the top, and click Next to
proceed to the next rule. Click Guide Me for
additional information or help with a specific rule.
Provide Commentary
Click Provide Commentary to open a separate window
to review and answer any questions that were returned
by Valuation Support Services. Each question that was
returned must be answered before the report will pass
the VSS Pre–Delivery Check. While you're working on
answering questions, save your progress at any time by
clicking Save Comments on the lower right. When
you're finished, make sure you've saved your answers
by clicking Save Comments. Then, click Close
Comments on the lower right to return to the Pre–
Delivery Check.
Report Delivery
8.
Once you have reviewed and acknowledged any rules that were triggered,
and answered any questions that were returned, click Resubmit to
ProQuality to begin the review process again and start over with Step 5.
9.
Continue to revise your report until it passes the ProQuality Review.
When your report passes, the ProQuality Review is complete and you’re
returned to your formfilling software. You can now deliver your report via
the Valuation Support Services (VSS) plugin to complete the assignment.
Copyright 2015, a la mode, inc.
Page 180
Wintotal User's Guide
Note: Unprotected PDF’s are still subject to tampering after
you’ve delivered them. To ensure that no one tampers
with the PDF copy of the report you send, see the PDF
Options & Security section of this user guide.
E-mail Delivery
Athena’s EDI Center was a ground-breaking tool for its time.
When this version was released, most appraisers did not
have their own e-mail tools. Or if they did, they often came
with severe limitations on the size of attachments. So the
EDI Center and our Proj2000 e-mail services made a lot of
sense.
Prior to the release of Aurora, though, the landscape shifted.
Now, an overwhelming majority of appraisers utilize tools
like Microsoft Outlook to handle all of their e-mail. Even now,
WinTOTAL can automate report delivery through Outlook or
your other default e-mail program in much the same way
that Athena did with the EDI Center. There are two primary
methods of delivering e-mail through e-mail:
• Sharing PDF reports
• Sharing WinTOTAL reports
To share a WinTOTAL PDF via e-mail:
1.Once you’ve completed and signed your report in
WinTOTAL, from the toolbar, choose Share Report,
WinTOTAL PDF via e-mail. Or, if you’ve configured this
as your default delivery method, just click Share Report
in the toolbar.
Note: See the Default Delivery Methods section of this user
guide for more information about configuring your
delivery default.
2.
3.Complete the necessary fields in the Delivery
Information screen. To save time, you can
automatically fill in most of these items based on the
customer information from your report. Click the dropdown menus to see the automated information available
for each field.
The method you choose depends entirely on the intended
recipient of your report.
Share WinTOTAL PDF Reports
PDF’s are files that anyone can view. As such they are best
suited when delivering your reports to your clients. If you’re
delivering your report to someone you want to update the
report, sharing a WinTOTAL report should better suit your
needs.
Report Delivery
Copyright 2015, a la mode, inc.
Page 181
Wintotal User's Guide
4.For the address fields, you can choose a recipient from
your WinTOTAL Contacts Database. Click the To or CC
link and double-click the appropriate contact to add that
person to your Message Recipients list. Then, click OK.
5.You can also insert text directly into the e-mail message
using information from your report. Check the Include
standard message text box.
Note: For more information about using Message Templates,
see the respective section of this user guide.
6.There are two remaining options to add automated text to
your message. Check either Acrobat download
instructions or XSite Order Manager Information to
automatically insert the respective instructions that
explain these useful tools to your customer.
7.If you use WinTOTAL’s digital workfile feature, you can
have a copy of the PDF file automatically added to it. This
ensures that you always have an exact copy of the report
you send to your customers. Check the Save PDF to
report’s Workfile box to enable this feature.
8.Click Finish and then select the forms you’d like to include
in your report from the screen that appears.
Share WinTOTAL Reports
As easy as it is to send a PDF report to your customers, it’s
just as easy to use your MAPI-compliant e-mail to share a
copy of your WinTOTAL report with another appraiser for
editing or review. To share a WinTOTAL report:
1.With your report open in WinTOTAL, choose Share
Report, WinTOTAL Report via e-mail from the
toolbar.
2.Complete the necessary fields in the Delivery
Information screen.
9.Set any other options as necessary and then click OK to
deliver your message.
10. Your report is generated and attached to an outgoing email message from your default e-mail client, whether
that’s Microsoft Outlook, Outlook Express or any other
MAPI-compliant e-mail tool. Click Send and you’re done.
Report Delivery
Copyright 2015, a la mode, inc.
Page 182
Wintotal User's Guide
3.When sending a WinTOTAL report, can exclude some
information that may not be appropriate to share with
another appraiser, such as your WorkSheet or Invoice,
from the report you send. Removing other features, like
Photos or the Digital Workfile can reduce the size of
the file you’re going to send. Just check the boxes for
any items which you wish to exclude from the report.
4.Click Finish to attach your report to an outgoing e-mail
message from your default e-mail client - whether that’s
Microsoft Outlook, Outlook Express or any other MAPIcompliant e-mail tool. Then, just click Send to deliver the
message.
1.Click the Sent Items folder in your list of folders on the
left side of your Outlook window. Or from the menu
choose Go, Folder, click Sent Items, and then click OK.
2.The reports you sent are saved in this folder. You can use
any of Outlook’s advanced features to sort or find a
particular report.
3.Once you’ve found the report you want, you can resend it
by opening the item, then choosing Actions, Resend
This Message from the menus. Consult the
documentation for your e-mail software for specific steps
to accomplish these tasks.
Receive WinTOTAL Reports
In the past, chances are when you received a report from a
colleague, you opened it with the old “EDI Center” in
WinTOTAL Athena. Since Aurora no longer needs the EDI
Center, you can now receive your reports directly through
your default e-mail client. Launching the file attachment
from there opens that report with WinTOTAL, just as you’d
expect.
1.When someone sends you a WinTOTAL file, it now appears
in your e-mail application like any other e-mail.
Review Sent Reports
In past versions of WinTOTAL, you could view the reports
you sent to customers in the EDI Center. In Aurora, the
reports you send, like other e-mails, are saved in the Sent
Items folder of your e-mail client (or whatever your e-mail
software calls that folder). For example, to view the reports
you sent through Microsoft Outlook…
Report Delivery
2.Open the e-mail message, click (or double-click, depending
upon your e-mail application) the attachment, and
choose Open.
3.If this is a file for a new report — rather than a file that
you originally created and that has been returned — a
screen appears allowing you to select which WinTOTAL
folder you’d like to store the report in. Select the folder
from the list and click OK.
Copyright 2015, a la mode, inc.
Page 183
Wintotal User's Guide
Deliver with TOTAL Connect
If you are using your XSite or Mercury Network to track
orders, or if your client has their own delivery plugin, the
option to Deliver with TOTAL Connect is the delivery
method to use. Before beginning the delivery process,
TOTAL Connect must be installed and configured. Click here
for step-by-step instructions on installing TOTAL Connect.
4.If this is a copy of an existing report, the Update
WinTOTAL Report screen opens, showing details of the
report you just received, as well as any existing reports
in your WinTOTAL files list that match the new one. At
this point, you can:
o Select the desired report in the lower list and click
Replace to overwrite the file on your system with the
new file you received.
o Click New to save the incoming file as a new report.
You’re then prompted for which folder you’d like the
new report saved in. Choose an existing folder from
the list and click OK.
o Click Cancel to close the screen and perform no action.
Hint: If you’d like the report to open automatically in
WinTOTAL after either replacing another report or
starting a new one, make sure the Open Report box
is selected.
Your report is saved on your system and, if you choose,
opened in WinTOTAL, ready for you to edit, review or
deliver.
Billing & Business Management
Once you have TOTAL Connect installed and configured,
follow the instructions below to deliver your report using any
of the delivery plugins:
1.Begin by clicking Deliver to Client on the upper left and
hover over Deliver with TOTAL Connect.
2.Select the appropriate plugin from the list.
3.Follow the instructions in the delivery wizard to complete
the delivery process.
Click here to view the complete TOTAL Connect User's Guide,
or click here to find step-by-step instructions specific to the
plugin you are using.
Billing & Business Management
WinTOTAL includes all the fundamental billing tools you need
to create and send invoices to your clients. Plus, you can
quickly enter full or partial payments as they’re received,
forming the basis for a simple accounting system. Couple
WinTOTAL with your Appraisal XSite, however, and you’ve
got a powerful business management toolkit providing
features like:
Copyright 2015, a la mode, inc.
Page 184
Wintotal User's Guide
• Creating multiple invoices for each report
Where to get it done…
• Creating XSite Client Login accounts
Periodic Processes
• Enabling accounting functions to employees not running
WinTOTAL
Define products and fees
• Increased security for sensitive information – like fee splits
• Report tracking and business management tools available
from any computer connected to the Internet
See our FAQ about the new billing processes at
http://help.alamode.com/docs/5003.htm.
This section of the User’s Guide provides step-by-step
instructions for using all of the billing and business
management functions in both WinTOTAL and Appraiser
XSites. Click the check mark in the chart below to view
specific help for the function and platform desired.
Frequent Functions
Where to get it done…
WinTOTAL
WinTOTAL
XSite
Assign client fee tables
Create appraiser fee splits
Publish coverage area
Set up user accounts
Set up client accounts
Record appraiser payments
Run business reports
In addition to these powerful WinTOTAL/XSite functions,
some users may find it useful to export their WinTOTAL
report information to Intuit’s QuickBooks application for
more specialized accounting functions. See the QuickBooks
Integration section of this user guide for more information.
XSite
Enter new orders
Create invoice for order
Add misc. fees to invoices
Create stand alone invoices
Send invoice to client
Record partial payments
Record full payments
Record payment for
multiple reports
Process credit cards
Billing & Business Management
Configure XSites Billing
All of WinTOTAL’s integrated invoicing and payment features
work “right out of the box.” However, if you plan to use the
combined power of WinTOTAL and your XSite, you need to
go through a couple of configuration steps first. This section
details how to setup each portion of your XSite’s Business
Management tools and a few key configurations in
WinTOTAL.
There are eight types of information you can configure.
While not all of these sections pertain to every office, here’s
Copyright 2015, a la mode, inc.
Page 185
Wintotal User's Guide
the definitive list of items you should take the time to
configure in your XSite as they pertain to you.
hands of the right people. To create user accounts and apply
the appropriate roles and privileges:
1.Hover your cursor over My Office in the main toolbar and
click User Management in the toolbar that drops down.
• User Profiles
• Coverage Area
2.Click Add User to create a new user account, or click any
existing user's name in the list to open it for editing.
• Default Jobs & Fees
• Client Specific Fees
3.In the User Information section, choose the appropriate
role for this user from the Type: drop-down menu.
• Matching Fee Tables with Clients
• Appraiser Fee Splits
4.Scroll down to the User Privileges section and add or
delete any of the privileges.
• Matching Fee Splits with Appraisers
5.Make any other changes to the user account you feel are
necessary and remember to click Save when you're
finished.
• General Billing Options
Most of this configuration is done through the Business
Management area of your XSite. To access it…
1.Log into your XSite.
2.Click Business Management at the top of the window.
3.Select the item you would like to configure from the
Navigation menu on the left.
For more information about your XSite's User Permissions,
see the User Privileges section of the Appraiser XSites User's
Guide.
Defining User Roles
If you have multiple staff members (appraisers, apprentices,
office admins) that will be using the WinTOTAL and XSite
Business Management functions, then your first step is to
build User accounts for each member of your staff, and
assign a role to each. Once their user accounts are
established, then each appraiser can link their copy of
WinTOTAL or TOTAL Connect to the corporate XSite. Now,
each staff member will only see order tracking information in
XSites that relates to them. This helps keep such sensitive
data as accounting data or appraiser fee split data in the
Billing & Business Management
Note: The user account flagged as the "Admin" does not have a
User Privileges section. By definition, the Admin has
access to all facets of your XSite.
Setting Up Your Product List
Before your clients can begin placing orders on your website,
you first need to set up the list of products you offer through
your appraisal business. Your Appraiser XSite frees you to
use any of the industry standard products like a URAR/Full
Copyright 2015, a la mode, inc.
Page 186
Wintotal User's Guide
Appraisal or any custom product that you offer. To set up
your product list:
1.From the Fees Setup section of your XSite's Business
Management, click Product List in the links below the
Navigation pane on the left.
2.Review the list of Available Products on the left. If any
products that you offer are not listed in the Available
Products list, click Add new product. Then, fill out any
important details about the product and click OK to add
it to your product list. Product details include:
o Description - The label that appears in your XSite and
in WinTOTAL for this product
o Default Fee and Default Turnaround - The typical
fee and turnaround time for this product
3.As necessary, click any product in the Active list and then
click the red left arrow to remove it from your Active
products list.
o Add to public XSite order form's product list Check this box if you want the product to appear in
your public order form.
4.Once you have all the products you need in the Available
list on the left, click each product you wish to add to your
product list and then click the green arrow between the
Active and Available product lists to add it to your list.
Once you've configured your product list, you can set up
client-specific fees, turnaround times, and more to cater to
good clients.
o Add to and update in all client fee tables - Check
this box if you want to offer this product or service
and its associate fees and turnarounds to existing
clients for whom you have custom fees.
o Default fee notes - Any miscellaneous information
about this product like mileage fees that may apply to
the product.
Creating Client Specific Fee Lists
Once you've set up your master product list and the fees
associated with it, you can also create client-specific fee lists
Billing & Business Management
Copyright 2015, a la mode, inc.
Page 187
Wintotal User's Guide
so you can cater to your clients. When you set up and
assign these client specific fee lists, your XSite automatically
distributes those fees to the clients you select. The next
time clients with a custom fee list place an order, your XSite
automatically shows them the custom fee you provided for
them instead of the default fee associate with their order.
To create a custom fee list…
1.From the Fees Setup section of your XSite's Business
Management, click the Define Client Specific Fees link
below the Navigation pane.
2.Click Create new fee table to create a new fee list or
click an existing fee list and then Edit selected to open
an existing list for editing.
fee, turnaround, and other details for the product. Then,
click OK.
5.For any products that you need to remove from this client
specific fee list, just click the Delete icon beside it and
then click OK to confirm that you wish to remove it from
your fee list.
6.Then, for each product in the fee list, click the pencil to the
right of the product, change the fee, turnaround, notes,
or other details for the product, and click OK to save it
back to your client specific fee list.
7.When finished, click Save.
Once you've created all of the client specific fee lists you
need, you must assign them out to your clients.
Assigning Client Fee Lists
To associate a client with a custom fee table:
1.From the Fees Setup section of your XSite's Business
Management, click the Assign Client Fee Tables link
below the Navigation pane.
2.All of the people in your contacts database that you've
designated as a "Client" or "Lender" are displayed. Add
or update any clients as necessary.
3.In the screen that appears, type a name that identifies this
fee list (like ABC Mortgage's Fees, for instance).
o To add a new client to the list, click Add new client, fill
out the contact details, and then click Save.
4.For any products that you need to add to this client specific
fee list , click Add new product, select the product from
the list of active products that you offer and fill out the
o To edit an existing client, click to select the client, click
Edit client contact record, make any necessary
changes, and then click Save.
Billing & Business Management
Copyright 2015, a la mode, inc.
Page 188
Wintotal User's Guide
3.Then, to assign a custom fee list to a client, select the
desired fee list from the drop-down menu to the right of
that client.
2.A list of states and provinces in the US and Canada
appears. Click the link corresponding to the state or
province of your choice.
3.When the list of counties appears, simply check all of the
counties that apply to your coverage area. Use the
Select All and Clear All buttons at the bottom of the
window to quickly select or deselect all the counties in
the state of province of your choice.
4.When you’ve selected all the applicable counties in the
state or province of your choice, click Add at the bottom
of the screen to save your changes and continue adding
counties in other states or click Done to return to your
completed list of counties covered.
4.When finished, click OK to save your changes.
Setting Up Your Fee Splits
Before you can take full advantage of your XSite's employee
payment tracking tools, you must first setup your appraiser
fee splits.
Setting Up Your Coverage Area
To maximize the exposure your business has on the
Internet, it's important to set up your coverage area. By
doing this, you will list yourself as an active appraiser in the
various counties you cover on our XSites Network and
increase the potential for new business through your
Appraiser XSite. To set up your coverage area:
1.In the screen that appears, click Add.
1.From the Fees Setup section of your XSite's Business
Management, click the Define Appraiser Splits link
below the Navigation pane.
2.Now, click Create new fee table.
3.Type a name for your fee table such as "Staff Appraiser" or
"Trainee" in the box provided.
4.Add or remove any products with which you have
appraiser fee splits to the list.
o To add a product, select each of the products with which
you intend to split the fees from the Active product
Billing & Business Management
Copyright 2015, a la mode, inc.
Page 189
Wintotal User's Guide
list drop-down menu and click Add selected product
to fee table.
o To remove a product later, just click the Delete link
beside it in the grid below.
Hint: If your split amount or percentage is consistent across
multiple appraisal products, you can simply fill out the
varying splits for the products to which they apply and
then choose All Other Products for the consistent split
to save time.
Assigning Your Fee Splits
Once you've created your appraiser fee split tables, it's
necessary to assign them to the appraisers in your office.
1.From the Fees Setup section of your XSite's Business
Management, click the Assign Fee Splits link below the
Navigation pane.
2.All of the people in your contacts database that you've
designated as a "Appraiser" are displayed. Add or
update any appraisers as necessary.
o To add a new appraiser to the list, click Add new
contact , fill out the contact details, and then click
Save.
o To edit an existing appraiser, click to select the
appraiser, click Edit selected contact, make any
necessary changes, and then click Save.
3.Finally, choose the appropriate fee split list from the dropdown menu beside each appraiser to assign your split
lists.
5.Once you've added all necessary products, for each
product choose a Split Type (percentage/dollar amount)
and enter the split percentages/amounts into the
Appraiser, Supervisor and Other fields.
6.When finished click Save and indicate whether you want to
backdate your changes to any existing orders.
Billing & Business Management
Copyright 2015, a la mode, inc.
Page 190
Wintotal User's Guide
Note: For your XSite's Client Accounting tools to function
properly, you must use your XSite (whether via WinTOTAL
synchronization or directly from your XSite) to manage
your invoices and payments.
Setting Up Billing Preferences
When creating invoices on your XSite, you can have the
payment method already filled in with a specific entry for
each client. This is particularly useful for requiring credit
card payments from certain clients.
1.From the Fees Setup section of your XSite's Business
Management, click the Payment Options link below the
Navigation pane.
3.If you want to require clients to pay by credit card, check
the boxes to require all new clients, all clients, or both.
When the clients you specify order from your XSite while
these options are enabled, they are required to supply a
credit card number with the order. Remember that you
must first enable your XSite's credit card processing tools
for this to work.
4.Mark the payment methods you accept. These appear in a
drop-down on your XSite order form and invoice forms
for your clients to see.
5.If you want to require that your clients pay you before
they can pick up their reports, find and select those
clients in the Available Clients list of the Require
Payment Before Delivery section. Then, click the right
arrow to add them to the Require Payment list. If you
decide to remove these clients later, return to this
section, select the clients in the Require Payment list
and click the left arrow to remove them.
2.If you want to enable your XSite's client accounting
features so that your clients can view their payment and
invoice histories, check the Enable Client Accounting
box.
6.If you want to require credit card payment for specific
clients instead of globally requiring it for all clients, find
and select the clients you wish to pay by credit card from
the Available Clients list in the Require Client to Pay
by Credit Card section. Then, click the right arrow to
add the clients to the list of those required to pay by
credit card. If you decide to remove these clients later,
return to this section, select the clients in the Require
Credit Card list and click the left arrow to remove them.
7.When finished, click Save to save your changes.
Billing & Business Management
Copyright 2015, a la mode, inc.
Page 191
Wintotal User's Guide
o If you’re not the admin user for the XSite, the
Accounting and Order Management option under
XSite User Management must be enabled.
Configure WinTOTAL Billing
Before integrating with your XSite, you need to make sure
you’ve told WinTOTAL your XSite domain and login
information.
1.In WinTOTAL, click Options and then Configure
WinTOTAL Settings.
4.Click OK to save your information and then click Save to
accept your new configuration.
5.Once you’ve correctly entered XSite information into
WinTOTAL, WinTOTAL sends a signal to your XSite and
enables the new “Business Management” features which
replace the “Orders” interface we previously had.
Use XSites Billing
Once you’ve setup your XSite with all the necessary
information about your office, you’re ready to begin using
the advanced features inside your Appraiser XSite. While
the workflow that best suits your office may vary, this
section follows the general workflow during the life of an
appraisal. To access all of your XSite’s Business Management
tools, log into your XSite and click Business Management
in the top toolbar.
2.Click the net.X icon in the toolbar at the top to access the
net.X configuration options.
3.From there, use the Edit link to the right to enter your
XSite Username and Password.
o Your XSite information is specific to your WinTOTAL user
profile. The net effect is that network users can plug
in their individual XSite logins so they only work with
orders assigned to them.
o If you’re a single user, mark the option to save your
password. However, appraisers in a multi-user office
may wish to leave that disabled, requiring password
entry when WinTOTAL needs to talk to your XSite.
Billing & Business Management
Dashboard
As you use XSites business management to manage your
billing and invoicing needs, your XSite tracks your billing
activities so that you can easily monitor them from right
within Business Management.
Copyright 2015, a la mode, inc.
Page 192
Wintotal User's Guide
The dashboard provides a high level overview of your recent
billing activities so you can quickly get an understanding of
your recent workload, top clients, and billed work. To use
the business management dashboard…
1.Log in to your XSite, and click Business Management in
the toolbar at the top.
2.From the Business Management landing page, click
Dashboard on the left.
3.Then, use the filters to indicate the time range you want to
review. There are four key areas your XSite's Dashboard
offers to help you track your billing activities:
If you're starting from a different area of Business
Management, click Dashboard in the Navigation pane
on the left.
Billing & Business Management
Copyright 2015, a la mode, inc.
Page 193
Wintotal User's Guide
Performance:
Allows you to track the progress of your business
against prior days, weeks, quarters, or years. The
default time ranges for comparison are This Year
and Last Year to help you compare this year’s
performance against last year’s. You can monitor
the quantity of your new and completed orders or
monitor your volume by dollar figure. To change the
time ranges, simply click the link in the Period
column.
Top 5 Clients by Volume:
You can control the time range for this “report” by
clicking the Today, Week, Month, Qtr, and Year links.
Office Workload:
This is a breakdown of all orders that are still in
progress based on the internal status logged in your
XSite.
Invoice Analysis:
Click between Today, Week, Month, Qtr, Year,
and All to view a snapshot of your invoicing,
including Total Billed and Total Due, the Current
due and Late invoices in the "Total Due" Analysis,
and you can also monitor the frequency of overdue
payments via the Late Payments Analysis at the
bottom.
• Your web-based order management system first shows you
a list of all your open orders with their present, or most
recent, status and some high-level statistics about orders
on your XSite.
• While viewing this list, you can sort it by clicking a column
heading.
• You can view orders based on their status by clicking a
status item from the left side of the screen.
Work with XSite Orders
XSites provide a number of power order management
functions you can use to keep track of your appraisal work,
keep your clients up to date, and generate invoices with just
a few clicks. To access the order manager on your XSite,
click Orders in the left pane inside Business Management.
Billing & Business Management
Once you’ve entered your XSite’s order manager, you have a
lot of options to find the orders you need:
• To limit the orders to just those received from a particular
client, pick that client from the drop-down list.
• Similarly, to limit the orders to just those assigned to a
particular appraiser, pick that appraiser from the dropdown list.
• If you have too many orders to fit them all in one screen
(as designated by the page numbers in the upper right
Copyright 2015, a la mode, inc.
Page 194
Wintotal User's Guide
3.Click OK when you’re finished.
corner of the screen), just click one of the available
arrows or enter a page number.
• To view the details of an order or take action on it, doubleclick it.
The next time you synchronize WinTOTAL, this new order
appears in your Appraisal Desktop’s New Requests folder.
Edit XSite Orders
Create XSite Orders
At any time, from any computer connected to the Internet,
you can log into your XSite and place an order. To create a
new order on your XSite…
1.From your XSite’s order manager, click Create a New
Order below the Navigation pane on the left.
Using the same tool your XSite provides to help you create
new orders, you can easily edit any existing order in your
site. To edit an existing order in your XSite…
1.From your XSite’s order manager, double-click any order in
the list to access details and make changes to it.
2.At the top of the Order Details pane there are a number
of options for working with your orders. Click the option
to perform the desired action on the selected order.
Options include:
o Status - Depending on the current status of the order,
you have different options when you click this button.
For example, if an inspection hasn’t been scheduled, it
defaults to that status item.
o Edit – Use this button to edit the original order form.
o Message - This option sends the client an e-mail and
logs the communication permanently with the order.
o Attach – Use this tool to upload documents or use the
DirectFax feature that digitizes things you fax to your
website
2.Fill out the order form. Notice there are drop-downs for
Clients, Lender, Appraiser and other contacts, which are
pulled from your Contacts Database. Likewise, your
default job types are pulled from our Fee Tables.
Billing & Business Management
o Print – This button generates a hard copy of the order
details.
o Billing - This allows you to generate invoices from the
information contained in your XSite order. In addition,
Copyright 2015, a la mode, inc.
Page 195
Wintotal User's Guide
you can also use this to quickly take credit card
payments for the active order.
o Delete - This naturally takes an order out of your active
list. You may want to use Delete on test and sample
orders so they don’t affect your statistics and
reporting.
5.If you’re creating a new client login account, type a
Username and Password for your client, ensuring that
you type the same password in the Confirm field as
well. Then skip to step 8.
6.If you want to attach an existing client login or XSites
Network account to your contact, click the here link
below the Username and Password information.
7.A list of potentially related accounts should appear.
Search through the list and find the account you want to
associate with your contact.
Create Client Accounts
Your XSite's contact manager allows you to create login
accounts for your clients to use on your XSite. These
accounts allow your clients to place orders online, check
status on the orders, and pick up orders online. If you want
to create a client login account for one of your clients.
1.In your XSite, click Contacts in the top toolbar to open
your contact manager.
2.Fill in any of the necessary Contact Information for this
client.
3.Mark the Type of Contact as either a Lender or Client
by checking the appropriate Type box and then click
Save.
4.Once the contact is finished saving, an XSite Ordering
Options section appears. Check the Allow this client to
login box.
Billing & Business Management
8.When you find it, click the link at the bottom of the contact
information for that client and confirm the change.
Copyright 2015, a la mode, inc.
Page 196
Wintotal User's Guide
9.If you wish to disable any or all automatic status
notifications for this contact, indicate so by marking the
appropriate options in the Disable Notifications
section.
1.From your XSite's order management, find and doubleclick the order you wish to edit.
10. Finally, if you want to inform your client that he or she
can now log into your XSite using the login account you
associated, click the here link that appears in the XSite
Login Information section of your contact details to
send the client the information.
3.You’re offered a set of statuses to choose from. Simply
choose the appropriate status from the drop-down menu
and fill out any date related information as necessary.
2.When the order details appear, click Status in the top
toolbar.
4.If you wish to include some notes with the change in
status, type them in the available field.
5.If you would like to send a notification to the client(s)
informing them about the status change, check the boxes
indicating the method of notification, fill out any
necessary contact information and choose a Subject for
the message.
11. When you’re finished, click Save. If you created a new
client login account, your client is immediately e-mailed
the relevant information including the Username and
Password you created.
6.Click Save when finished to update the status of the order
and relay any necessary updates to the client(s).
Your client can now log into your XSite and place, view, or
manage appraisal orders. If you wish to remove their
account at any time, just edit their contact at any time, and
click Remove in the XSite Login Information section of
their Contact Information.
Change XSite Order Status
As you continue to work on an order, you may need to
change its status several times to keep your client informed
about your progress. At any time, you can go back and
change the status of an order by simply opening the order
for editing as described in the prior section.
Billing & Business Management
Copyright 2015, a la mode, inc.
Page 197
Wintotal User's Guide
Invoicing
Your XSite’s invoice manager provides a number of ways you
can invoice your clients depending on the needs of the
order. With your XSite’s invoice manager, you can:
Note: If you use WinTOTAL Aurora as your formfilling software,
you can manage your invoices from within WinTOTAL
without ever accessing your XSite. All you need to do is
to enable WinTOTAL's XSite Integration features. For
more information about this process, see your WinTOTAL
user's guide.
• Invoice an appraisal order
• Generate an invoice for miscellaneous work
• Manage and deliver your invoices
• Track your recent invoice activity
To open your XSite’s invoice manager, click the Invoices
button in the Navigation pane to the left of Business
Management.
In the invoice manager, the left side of the screen shows a
snapshot and totals for all your invoices. You can quickly
filter this list for a particular client using the drop-down list.
Likewise, to see the list of invoices in a subtotal, just click
the description such as “30 days”, “60 days”, etc.
Creating Order Invoices
If you already have an order for a particular appraisal, you
need not create a new invoice for that order from scratch.
Your XSite can build the invoice from the existing order and
the fee information you provided when setting up Business
Management. To create or edit an invoice for an order:
1.From your XSite's order management, find and doubleclick the order you want to invoice.
2.In the Order Details screen, click Billing in the top
toolbar and select Invoice from the menu that appears.
Billing & Business Management
Copyright 2015, a la mode, inc.
Page 198
Wintotal User's Guide
o To enter a payment you've received from your client,
select the payment type, enter any additional details
about the payment, and click Add to update the
invoice with the payment.
3.When the Create/Edit Invoice screen appears, the
invoice is automatically populated with information from
the order. From here, you have a few options:
Note: If you entered any fee or payment information for this
order in WinTOTAL, this information is reflected in the
invoice as well after synchronizing WinTOTAL with your
XSite via net.X connect.
o Depending on your User Privileges, the Fee Splits
area may be enabled. Here, you can choose who
receives portions of the fee(s) received, the date paid,
their percentage, and the amount paid.
o Change any items for your invoice by typing the new
information in the appropriate text box.
o To edit existing fees, click the Edit link next to the fee.
o To add an additional line item charge, select the fee
description from the drop-down menu. If you want to
add a fee that isn't included in your products list,
manually enter the Description and the fee amount.
Once you've selected the fee or entered a new fee,
click Add to update your invoice and add the new fee.
Billing & Business Management
4.When you're finished, click Save on the upper left.
Copyright 2015, a la mode, inc.
Page 199
Wintotal User's Guide
o Send - To send a PDF copy of your invoice straight from
your XSite. An on-screen form then lets you compose
an e-mail message to accompany the PDF.
Creating Miscellaneous Invoices
In addition to invoices attached to orders, your XSite can
help you create and deliver invoices for additional services.
1.From your XSite's Invoice Manager, click Create a New
Invoice below the Navigation pane on the left.
o PDF - To have your XSite create and open a PDF copy
of the invoice. From there, you can work with it like
any other PDF, perhaps saving a local copy or
attaching it an e-mail.
2.Complete the invoice form, using the Lookup drop-down
menu in the Bill To section to select a client from your
Contacts database. Or, just fill in the blanks.
3.Now complete the Fees section and deliver the invoice as
described in the Delivering Invoices section of this user's
guide or click Save to save the invoice until later.
Canceling Invoices
Cancelled invoices are neither due nor paid and show up in
your Cancelled filter.
1.In your XSite's invoice manager, locate the invoice you
wish to cancel using any of the links on the left side of
the window. Or, use the Find text box to search for an
invoice.
Deliver XSite Invoices
Once you’ve completed your invoice, you can easily send it
out to your client independently from your report. To do so…
2.Select the invoice from the list on the right, and then click
Cancel.
1.From your XSite’s invoicing tools, find and double-click an
invoice you wish to send.
2.When the invoice opens, use one of the buttons across the
top to preview your invoice, deliver it directly, or create a
PDF you can send manually. Options include:
o Save - To save any changes you made to the invoice.
o Preview - To see how the printed invoice looks. (Click
Close when in the preview to return to the invoice.)
Customizing the Invoice Grid
If you prefer to see different information in your XSite's
Invoice Manager grid than what you see by default, you can
customize it to show the information that works best for
you. To do so:
1.From your XSite's invoice manager, click Customize.
Billing & Business Management
Copyright 2015, a la mode, inc.
Page 200
Wintotal User's Guide
2.In the screen that appears, add, remove, and sort the
columns you want to appear in the invoice list using the
tools provided.
o Choose a column from the list on the left and click Add
to add it to your invoice grid.
o Choose a column from the list on the right and click
Remove to remove it from your invoice grid.
o Click a column in the list on the right and then click the
Up and Down buttons to rearrange the columns in
your invoice grid.
3.Click OK (at the bottom of the window) when you're done.
Note that when viewing your list of invoices, you can click a
column heading to sort on that column. Click the column
again to toggle between an ascending and a descending sort.
Payments
Your XSite’s billing tools include an array of payment tools
that have never been available in WinTOTAL or XSites
before. Just as there are several different types of payments
you have to track as you manage your business from day to
day, XSites provide simple tools to help you easily log partial
payments, full payments, balloon payments, and employee
payments.
All of your XSite’s payment tools are located inside business
management. To access them, visit either your XSite’s
invoice manager OR through the accounting view that helps
you review your recent payment activities.
Recording Full Payments
When looking at your list of invoices, you can quickly mark
an invoice as paid in full on the current date.
1.In your XSite's invoice manager, locate the invoice you
wish to edit using any of the links on the left side of the
window. Or, use the Find text box to search for an
invoice.
2.Select the invoice from the list on the right and click Mark
as Paid.
Billing & Business Management
Copyright 2015, a la mode, inc.
Page 201
Wintotal User's Guide
If you need to log more details with your payment, such as a
note or check number, you should use the Edit feature.
them as paid. Instead, use the Enter Client Payments tool
to distribute the payment over several invoices.
1.From your XSite's invoice manager, click Enter Client
Payments just below the Navigation pane on the left.
2.Select the desired client from the drop-down list. All open
invoices for that client are quickly displayed.
Recording Partial Payments
3.Enter the check number, the date, and the amount.
If you need to record a partial payment for an individual
order via your XSite:
4.Mark the invoices that are being paid and the amount paid
on each.
1. From your XSite's invoice manager, find the invoice
you wish to update and double-click it to edit it.
2. Scroll down to the Payments add the payment type,
date, amount, and description to the available fields
and click Add to record it.
3. When finished, click Save in the toolbar to update
your invoice.
Note: To properly record a balloon payment that covers
numerous appraisals, see the Paying multiple invoices
section of this manual.
Hint: Each time you mark an invoice, the amount paid is filled
out automatically as long as the amount of the check
exceeds the total of the marked invoices.
Recording Balloon Payments
5.Click Apply Payments.
When a client writes you one check for multiple invoices, you
don't have to go into each invoice individually and mark
Billing & Business Management
Copyright 2015, a la mode, inc.
Page 202
Wintotal User's Guide
1.From your XSite's invoice manager, click Pay Employees
just below the Navigation pane on the left.
Charging Credit Cards for Orders
If you want to charge a credit card for an appraisal order
you've completed on your XSite you need to enable the
credit card processing tools on your XSite first. Then, to
charge a credit card for an order on your XSite:
1.From your XSite's order management, find and doubleclick the desired order in the list.
2.Above the Order Details pane, click the Billing menu and
select Charge Card.
Note: This same option is available in the Accounting
section as well.
3.Now, simply fill out the client contact and credit card
information and click Charge Credit Card to process the
charge.
2.Enter the check number and date.
3.Select the employee from the drop-down list. Only
employees you have included at the bottom of an invoice
form with an amount due will show in this list.
4.Enter a date range for the orders you want to see.
5.Click Display Orders and a list of orders for that appraiser
should display.
Paying Employees
Using the tools built into your XSite you can easily record
payments you've made to employees for the appraisal work
they've completed.
6.Mark the orders for which you want to log the appraiser as
paid and the amount they were paid for each one.
7.Finally, click Pay Items to mark them as paid.
Note: This tool only records the payment to your employees
and does not actually transmit any money to their bank
accounts.
Billing & Business Management
Copyright 2015, a la mode, inc.
Page 203
Wintotal User's Guide
Accounting
An alternative view into your finances is available through
the Accounting area of Business Management. To use it:
1.Click Accounting in the Navigation pane on the left side
of Business Management. Here, in one list, you can see
cash flow — both debits and credits — for a given date
range and/or for a client specific filter.
o To filter the list to just debits or credits, mark the
Debits Only or Credits Only boxes on the left.
Reporting
o To filter the list of activities to just credits from specific
clients, choose the client from the Bill To/Client
menu on the left.
The reports in your XSite’s Business Management tools offer
unlimited customization and like all XSite features can be run
from anywhere.
o To limit the list of debits and credits to a certain range
of dates, choose the beginning and ending date using
the calendars on the left and then click Submit.
Running Reports
2.Now, review the list of debits and credits for the account
history you need.
To run a report that’s already been created:
1.In Business Management, click Reports in the Navigation
pane.
o Click a column header to sort the list of payment
activities by that column.
o Select any item in the accounting list and click View
Invoice or just double-click the line item to view the
invoice behind the line item.
o Click the links within the listing for any item for further
information about the debits or credits.
o To view or edit the invoice for any accounting item, click
the Description link for any listing.
o To record new payments from clients or to employees
click the Enter Client Payments or Pay Employees
buttons in the toolbar respectively.
Billing & Business Management
2.Click any of the links beneath the Navigation pane to
filter the list of reports that appear.
Copyright 2015, a la mode, inc.
Page 204
Wintotal User's Guide
3.Finally, click Run to the right of the report you wish to
launch. The report compiles and you’re presented with
an Adobe Acrobat version of the results.
Creating Custom Reports (Enterprise Level XSites Only)
Creating custom reports is a simple process involving three
steps:
Step 1: Select the fields you want to display in your report
Step 2: Choose a “filter” to select the data you want to
include
Step 3: Indicate how the data is to be sorted and grouped
4.When you’re finished adding fields, use the up and down
arrows to arrange the sequence of the fields.
Step 4: Indicate if and how the report should be
summarized and sub-totaled.
5.Click the Report Filter tab. This is where you limit the
data included in your results.
To create a custom report:
6.Click the link to Add a new filter. As an example, you
might want to limit your report to the current month’s
invoices. To do so, you’d choose Date Invoiced from
the drop-down box, and choose Between in the adjacent
drop-down. Then, you would pick the first and last dates
of the current month from the final boxes. Click Save to
add your new filter to the report. You can filter by
multiple criteria, so you can even have a report
customized for dates and a single client.
1.In Business Management, click Reports in the Navigation
pane on the left.
2.Now, click Create a New Report. Or, if you prefer, you
can click Copy to the right of an existing report to use
that as a starting point. To edit an existing report, click
Edit.
3.In the Report Data tab, use the arrows in the center of
the screen to add any of the available fields on the left to
your report.
Billing & Business Management
7.If you’d prefer to have your report prompt you for
information each time you run it, click the Prompt
options that appear. In our example, clicking these
options would cause the report to prompt you for the
invoice date range each time you run the report.
Copyright 2015, a la mode, inc.
Page 205
Wintotal User's Guide
10. If you wish to count the report’s invoices by group or
print each group to a separate page, indicate so by
marking the corresponding boxes.
8.Click the Report Sorting tab to continue building your
report. Here, you can sort the output by choosing the
items from the primary and secondary sort columns. For
example, you might want to use the client’s company
name as the primary sort item and then the client’s name
as the secondary item so you can group together orders
from different loan officers at the same company.
11. Finally, click the Report Summary tab and choose how
you want to summarize the data by clicking Add a new
summary. Generally, you’d choose a field and choose
Subtotal, but there might be times when you want to
average values or get a count. In the Summary types
field, choose the type of summary you’d like to use and
remember to select a field you want used in the
summary from the Reporting fields drop-down.
12. Click Add to save your report summary and then check
the box in the Report Summary tab to include it in your
report.
13. Finally click Save to save your report.
9.Choose the field by which you wish to group the output.
Using the above example, you’d group by the company
name.
Billing & Business Management
The report you created is now listed with your other reports.
Copyright 2015, a la mode, inc.
Page 206
Wintotal User's Guide
• Update the order by changing the information in the order
form.
Use WinTOTAL Billing
WinTOTAL’s Aurora generation includes all the tools you
need to create orders, invoice clients and record payments.
If you have an Appraiser XSite, those same billing tools have
been extended to keep your XSite up to date without
requiring you to even log in! The workflow that best suits
your office may include various pieces from the full spectrum
of features available. This section of the user guide follows
the general workflow during the life of an appraisal from
order to payment with specific steps to help you perform
each step.
• Check the Extended Billing option on the left to manage
your invoice information through the order form.
• Update the internal status of the order using the Status
pane on the left.
• Check the XSite Integration box if it hasn’t already been
checked to ensure that this order syncs with your XSite.
Appraisal Desktop
Using the Appraisal Desktop’s order management tools, you
can:
Work with Orders
WinTOTAL’s Order Management tools exist in two places to
help meet your workflow.
• If you prefer to do your order management as you work on
your appraisal report, you can update your order with the
Order PowerView.
• If you prefer to do your order management across groups
of orders without having to open each order, you can do
so in the Appraisal Desktop.
• Sort the order list by clicking a column heading.
• View your orders based on their status by clicking a status
item from the Tracking pane on the left side of the
screen.
• Update the internal status of the order by clicking Add
Internal Status at the top of the screen and selecting a
status from the list that appears.
• View or edit the order form by clicking the Order Form tab
at the bottom of the screen.
Order PowerView
Using the Order PowerView’s order management tools, you
can:
Billing & Business Management
Copyright 2015, a la mode, inc.
Page 207
Wintotal User's Guide
to WinTOTAL’s automatic invoice forms and to your
XSite.
Create Orders
Hint: With XSite billing, you may find that you don’t
even need an invoice in your report. You can send an
To create a new order in WinTOTAL…
invoice straight from your XSite.
1.Click New in the Appraisal Desktop or choose File, New
from the menus at the top. You’re immediately taken to
the Order PowerView which replaces the “Requester”
found in previous versions of WinTOTAL. It ties directly
into both your WinTOTAL invoice form and your XSite’s
accounting data. Of course, if your client places orders
on your XSite, the Order PowerView’s options and the
data within the form are already filled out for you. On
the other hand, if your clients still prefer to fax you an
order, you can simply create an order for them on your
XSite by starting a new report in WinTOTAL as usual.
For a quick example of the integration in action, create a
new order in WinTOTAL and mark the option to integrate it
with your XSite. All you need to enter is a client contact, a
valid address and an invoice amount. Then, after closing the
order, log into your XSite and you should see that the order
has indeed transferred.
2.Mark the following options in the Options pane along the
left side of the screen.
o XSite Integration – If you have an XSite, mark this
option to tell WinTOTAL to keep the order and its
contacts synchronized between WinTOTAL and your
XSite. You can manually synchronize at any time by
clicking Sync with XSite from the Order PowerView
or using the Appraisal Desktop’s Sync tool. For more
on setting up XSite integration, see the Integrate with
XSites section of this user guide.
o Extended Billing - This enables extra fields at the
bottom of your order page for line item fees,
payments and a due date. This information transfers
Billing & Business Management
Of course, you’re not required to have an XSite to use
WinTOTAL’s invoicing features. You can still manually insert
your invoice from WinTOTAL’s Contents view – or using the
SmartMerge or Clone tools. Plus, you can always register
any necessary payments by editing the invoice inside
WinTOTAL or editing the report’s order form. The XSite
Integration tools in WinTOTAL simply improve upon the
synchronization between the two products. Moreover, since
Copyright 2015, a la mode, inc.
Page 208
Wintotal User's Guide
an XSite comes equipped with more advanced billing and
reporting tools, if you need to do anything beyond the
minimum of invoicing and recording of payments, an XSite is
the best solution.
4.Check the Allow this client to login box and then type a
Username and Password for your client to use on your
XSite in the boxes provided.
Create Client Login Accounts
If you intend to use your XSite to provide customers with
status information and report delivery, then each client
needs an account on your system. Of course you can go to
your XSite and create accounts for them there, or customers
can create their own accounts while visiting your site. But if
you receive an order from a new customer, you can also
create an account for them on-the-fly while you fill out
order. To do so…
WinTOTAL immediately connects to the Internet and
synchronizes your contact changes with the contacts on your
XSite to ensure that you have the same list in both locations.
Update Internal Order Status
1.In the Order PowerView, fill out any necessary contact
information in the Lender and/or Client fields of the
Order PowerView and then click the yellow book icon
beside either the Lender or Client field.
2.From the short menu that appears, choose Add to create a
new contact or choose Edit if you’re simply updating an
existing contact.
3.When the Contact Details screen appears, scroll down to
the XSite Login Information section if you’re editing an
individual contact. If you’re editing a company contact,
simply double-click the individual contact you wish to
create a login account for using the list at the bottom and
then scroll down to the XSite Login Information
section.
Billing & Business Management
5.When finished, click OK to accept your changes and create
the client login account.
Regardless of whether you received an order through your
XSite or if you created the order in WinTOTAL and uploaded
it to your XSite, you can easily update your order’s internal
status from directly within WinTOTAL. To do so, you have
two options:
• Update the internal status through the Order PowerView
• Update the internal status through the Appraisal Desktop
Ultimately, the option you use to set the internal status on
your order simply depends on your preferred workflow. If
you intend to update the internal status of an order while
you’re working on it inside of WinTOTAL, it’s probably easier
for you to update the order’s internal status through the
Order PowerView. If you prefer to update the internal status
of many separate orders at once without opening each order
to update its internal status, it is probably most beneficial for
Copyright 2015, a la mode, inc.
Page 209
Wintotal User's Guide
Manual Invoices allow you to complete all aspects of the
invoice yourself. To add an invoice to your report:
you to update the internal status through the Appraisal
Desktop.
1.From either the Forms or Order PowerView, click
Contents in the toolbar.
2.In the list of available forms on the left, scroll down to the
Invoices and double-click the invoice(s) you wish to add
to your report.
Payments & Invoicing
The Aurora generation of WinTOTAL comes complete with
the same Payment and Invoicing tools found in previous
versions of WinTOTAL. In WinTOTAL you can:
• Create Invoices
• Deliver Invoices
• Log Full Client Payments
• Log Partial Client Payments
Hint: Since you can log all of this information inside
of WinTOTAL, you can easily edit the layout of your
File Cabinet to show you all of this information at a
glance. By doing this, you can see who owes you
money, how much, and for what orders without
actually opening the report. For more information
3.When finished, double-click the invoice you added to your
report in the column on the right.
about how to do this visit our WinTOTAL Tips archive
at www.alamode.com/wintotal/tips.
4.Any fees you entered into the Order PowerView should
automatically propagate into the invoice if you chose one
of the Automatic forms. From there, you can add any
additional fees that you need in the fields provided. If
necessary, you can also add any pre-payments
Create Invoices
WinTOTAL includes both automatic and manual invoices to
help you bill your clients. Automatic Invoices pull
information directly from the Order PowerView, while
Billing & Business Management
Copyright 2015, a la mode, inc.
Hint: If you’re using the Extended Billing option
from the Order PowerView on your report, you can
also add fees or payments through the order form.
Page 210
Wintotal User's Guide
Delivering Invoices
In your XSite's invoice manager, you can save and send an
invoice in a few different ways. Just double-click to open
any invoice. Then in the invoice editor, choose the
appropriate option for your needs. Options include:
• Click Save to save any changes you made to the invoice.
• Click Close to close the invoice editor and return to your
order.
• Click PDF to generate and open a PDF copy of the invoice.
From there, you can save it to your computer or send it to
your client in an e-mail as you would with any other PDF.
• Click Preview to see how a printed invoice looks. (Click
Close when in the preview to get back to the invoice.)
• Click Send to send a PDF copy of your invoice from your
XSite to your client. Then, an on-screen form appears to
help you compose an e-mail message to accompany the
PDF.
Billing & Business Management
• Click Add to create and add a new invoice to this order.
When an order has more than one invoice, you can switch
between the invoices using the blue arrows on the upper
right of the invoice.
Copyright 2015, a la mode, inc.
Page 211
Wintotal User's Guide
Mark Reports as Paid
Whenever you receive payment for either a single order or a
series of orders and wish to log your payments in WinTOTAL
you can do so in a variety of different ways. If you’ve
received payment in full, it’s typically fastest to simply mark
the reports as paid.
1.Open the Appraisal Desktop and select the report(s) you
wish to mark as paid in full.
Hint: If you wish to select a series of unrelated
orders, just press and hold the Ctrl key as you click
each of the orders you wish to mark as paid.
2.When finished, right-click your order(s) and choose Mark
as Paid in the menu that appears.
3.When the Mark Report(s) as Paid screen appears, enter
the check number and date corresponding with the check
you received for your order(s) and then click Mark as
Paid.
Billing & Business Management
WinTOTAL marks each report in the list as paid in full and
connects with your XSite to update the payment information
there as well.
Record Partial Client Payments
If you need to log partial payments instead of full payments
for an appraisal, you can either do so through the Order
Form view in the Appraisal Desktop or directly within the
order form or invoice of your report. To log a partial
payment through the Order Form view in the Appraisal
Desktop, you must have enabled Extended Billing in that
order. Otherwise, you must open each order to update the
payments.
Note: If the report is signed, the Billing and Status
information fields are the only ones you can edit using
this method.
To log a payment through the Report’s Order form view:
Copyright 2015, a la mode, inc.
Page 212
Wintotal User's Guide
1.Click the Order Form tab at the bottom of the Appraisal
Desktop.
2.Click the order in your File Cabinet that you wish to update
and then click the Edit button that appears in the toolbar
in the middle of the screen.
3.Scroll down to the Billing section of the order form and
enter any partial payments in the fields provided.
WinTOTAL’s new QuickBooks integrations tools use Intuit’s
own proprietary integration backend for programs like
WinTOTAL. To use their tools, Intuit requires the Pro version
(or better) of QuickBooks 2002 or newer and therefore,
WinTOTAL’s QuickBooks integration tools have the same
requirements.
Note: Intuit does not support QuickBooks versions
prior to 2007 on Windows Vista. If you intend to run
Note: This section does not appear in the order form
Windows Vista as your operating system, you must
unless you have selected the Extended Billing
upgrade to QuickBooks 2007 or later to leverage
option in the report’s Order PowerView.
WinTOTAL’s integration with QuickBooks. For more
4.When finished, click Save.
information on this issue, visit Intuit’s Vista support
Even if the report is signed, the payment is added to your
invoice and WinTOTAL synchronizes with your XSite to
ensure that the payment is logged there as well.
Alternatively, you can always open the report and manually
type in the payments from the invoice or from the Order
PowerView inside the report, but it’s typically faster to
update the payments through the Appraisal Desktop.
QuickBooks Integration
While WinTOTAL and XSites provide a robust set of business
management and accounting tools, some appraisers may
find that their businesses are better served by using a
professional accounting package, such as Intuit’s QuickBooks
application. Fortunately, WinTOTAL includes direct
integration with QuickBooks to share billing and payment
information.
QuickBooks System Requirements
Billing & Business Management
page
Set Up QuickBooks Integration
To take advantage of our improved QuickBooks integration,
you first need to install the proper integration software on
your computer.
1.Right-click any report in the File Cabinet and choose the
Add report to QuickBooks option in the menu that
appears. Once the progress bar disappears, the
necessary software in installed.
2.When a window appears prompting you to permit
WinTOTAL to access QuickBooks, open QuickBooks and
then open your company file.
3.Once your company file is open, QuickBooks should
immediately prompt you about allowing WinTOTAL to
access its information. Mark the option to always allow
this connection even if QuickBooks is not running and
click Continue.
Copyright 2015, a la mode, inc.
Page 213
Wintotal User's Guide
2.When the Add Invoice to QuickBooks window appears,
the relevant billing information from your report already
appears in the form. To export this report to QuickBooks
without creating redundant information in QuickBooks,
you need to match the data from your report to the data
inside of QuickBooks. First, choose the corresponding
QuickBooks customer from the drop-down menu to the
far right of the Customer field.
4.When QuickBooks prompts you to confirm this permission,
click Yes. Then click Done on the second confirmation.
5.Close QuickBooks and return to the WinTOTAL screen
prompting you to connect with QuickBooks and click
Connect.
Once you click Connect, the integration tools are fully
functional.
Export Reports to QuickBooks
Once you’ve installed the QuickBooks integration tools, you
can easily export your reports to QuickBooks.
1.Find the report you want to export in your File Cabinet,
right-click it and choose Add report to QuickBooks at
the bottom of the list.
Billing & Business Management
3.If you need to add a job type or a new customer to
QuickBooks so that you can associate it in WinTOTAL,
click Add to the right of the customer drop-down menu.
Then when the Add Customer/Job screen appears, fill
out the customer or job type information in the fields
provided and click the respective Add button at the
bottom.
4.Continue filling out the form with the data you want to
export to QuickBooks. If you want to include other
WinTOTAL report info in the report that’s exported to
Copyright 2015, a la mode, inc.
Page 214
Wintotal User's Guide
QuickBooks, check the Add WinTOTAL report info box
and then click Edit client data to select the report info
you want to export. Once you’ve selected the data you
want, remember to click OK.
5.Next, you need to associate the WinTOTAL invoice items
with the invoice items you have in QuickBooks. Doubleclick each item to match it with the associated
QuickBooks Item.
automatically in the future.
8.Finally, once you’ve returned to the main Add Invoice to
QuickBooks screen, fill out the remaining info, check
the Export Pre-Payments box if you want prepayments you’ve recorded in WinTOTAL Exported to
QuickBooks as well, and then click Export to finish.
You can now find your report’s invoice information in
QuickBooks.
Track Exported Reports
6.When the Match Job with QuickBooks Item screen
appears, choose the Items Category that fits your
needs and then either:
o Choose the corresponding QuickBooks Item from the
available drop-down menu.
- OR -
If you’re a regular QuickBooks user, you may need an
indication about which reports you’ve exported to
QuickBooks and which reports you have not. To simplify this
process, the QuickBooks or QB column in the File Cabinet
depicts a circular money icon if the report has been exported
to QuickBooks. If the column is empty, you have not
exported it to QuickBooks.
o Add a QuickBooks Item by clicking Add and filling out
the necessary QuickBooks Item information.
7.Click Match to associate the WinTOTAL job with a specific
QuickBooks invoice item this one time or click the disk
icon and then click Match, to match the two items
Billing & Business Management
Copyright 2015, a la mode, inc.
Page 215