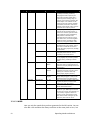
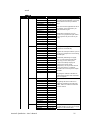
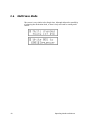
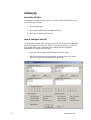
1
USER’S MANUAL
revision 6 | 06.2004
soundskin version 1.23
www.soundart-hot.com
Copyright © 2001-2004 Soundart
www.soundart-hot.com
Soundart makes no warranty of any kind, expressed or implied, with respect to the contents or use of the
material in this document or in the software and hardware it describes, and specifically disclaims any
responsibility for any damages derived from its use. Hardware and Software may contain design defects or
errors known as errata which may cause the product to deviate from published specifications. Soundart
reserves the right to revise and modify the topics covered in this document periodically, which are subject
to change without notice. This document may be reproduced and distributed freely, provided no alterations
of any kind are made. Soundart software is subject to the terms of the Soundart Tools Software license.
Third party software is subject to the terms of their respective owners license. Third party trademarks and
registered trademarks are property of their respective owners.
ii
Preface
This manual was written to help you to become familiar with Australis, the
Polyphonic Virtual Analog Synthesizer for Chameleon. It will also aid
experienced users with routine tasks.
To avoid confusion, the terminology used in this manual is based on the
Australis´s parameter names.
Acknowledgements
The Soundart team: Jesus Villena, Vicente Solsona, Jose Manuel Torrelo, JosepOriol Tomas, Simon Smith, Sergi Cerni.
We wish to thank also BiTeR mc, Jordi Trujillo, Andreu Jacob, Raul Jordan, Paul
Maddox, Eddy Robinson, Wolfgang Merkle & Thomas Merkle a.k.a. Bitplant,
Are Leistad, Spin Audio and everybody else who has helped in making the
Chameleon, its soundskins and all related items (manual, factory sounds,
demo songs, etc.), and beta testing the long list of intermediate versions.
Australis Synthesizer – User’s Manual
iii
Table of Contents
1
Overview.............................................................................................. 1
1.1 Main Features ............................................................................. 1
1.2 Sound Architecture...................................................................... 3
1.2.1
1.2.2
1.2.3
1.3
1.4
Memory Structure ....................................................................... 6
Setup and Connections ............................................................... 7
1.4.1
1.4.2
1.5
NAVIGATION AROUND THE SOUNDSKIN ...........................................................10
Operating Modes and Menus ............................................................. 12
2.1 Single Preset Mode ................................................................... 14
2.1.1
2.2
2.3
2.4
THE DISPLAY.......................................................................................................35
Multi Edit Mode......................................................................... 38
2.5.1
2.6
2.7
2.8
2.9
AUDIO.................................................................................................................17
MODULATION.....................................................................................................21
INPUT .................................................................................................................26
EFFECTS...............................................................................................................26
ARPEGGIATOR ....................................................................................................29
COMMON ...........................................................................................................30
ASSIGNING THE REALTIME CONTROLLERS .........................................................31
EXITING SINGLE EDIT MODE AND PREPARING TO SAVE....................................32
Single Save Mode...................................................................... 33
Multi Preset Mode..................................................................... 35
2.4.1
2.5
THE DISPLAY.......................................................................................................14
Single Edit Mode ....................................................................... 16
2.2.1
2.2.2
2.2.3
2.2.4
2.2.5
2.2.6
2.2.7
2.2.8
iv
MAKING THE CONNECTIONS ................................................................................7
LOADING THE SOUNDSKIN...................................................................................7
Quick Tour of the Controls and the Front Panel .......................... 9
1.5.1
2
AUDIO...................................................................................................................3
MODULATION COMPONENTS ...............................................................................4
EFFECTS.................................................................................................................5
SAVE AND EXIT...................................................................................................39
Multi Save Mode ....................................................................... 40
Assigns Info Mode..................................................................... 41
System Mode ............................................................................ 42
Demo Mode............................................................................... 45
A
Loading Soundskins ........................................................................... 46
B
Midi Implementation......................................................................... 48
C
Quick Navigation Tables .................................................................... 53
D
Factory Presets................................................................................... 62
E
Chameleon GUI .................................................................................. 69
Chapter
11
Overview
Australis is a polyphonic analog synthesizer emulator for Chameleon capable
of producing an enormous range of high quality synthesized sounds, from
warm pads to distorted, punchy basses. The sound is generated using modern
digital signal processing algorithms running on the Chameleon’s DSP chip to
emulate classic analog circuitry, while adding the benefit of digital control
and stability.
The sound textures obtained with these techniques recreates the character
found in classic vintage analog synthesizers of the 70’s and 80’s.
1.1
Main Features
•
16 dynamic allocated voices
•
8 multitimbral parts
•
4 single sound banks with 128 available presets each.
•
1 multi sound bank with 128 available presets (each multi sound is
composed of 8 individual addressable single sounds)
•
Factory sound banks and demo songs
•
Tempo Sync (external, internal, auto) for time based parameters
(Speed in LFOs, Chorus and Phaser, DelayTime in Delay, and note
length in arpeggiator)
•
2 multi-wave oscillators (sine, triangle, sawtooth, square and a list of
over 35 complex waveforms), suboscillator, coloured noise and ring
modulation per voice; square wave with variable pulse width;
synchronisation and frequency modulation (FM) between the
oscillators allow the generation of metallic or percussive timbres;
different phase initialisation options per oscillator
•
Unison mode, with configurable detune and pan spread amount, to
make the sound fatter
•
2 resonant analogue-like multimode filters (lowpass, highpass,
bandpass, bandstop) per voice, with 12dB/oct slope and selectable
Australis Synthesizer – User’s Manual
1
routing between serial-parallel configuration (the serial configuration
gives you an equivalent 24dB/oct slope filter)
2
•
2 ADSR Envelopes (filter, amplifier) per voice
•
2 multiwave LFOs (sine, tri, saw, square, sample&hold) per voice. LFO
functionality includes adjustable fade in, phase initialization and
square waveform with variable pulsewidth
•
Huge modulation matrix
•
Individual chorus FX available per part
•
Individual phaser FX available per part (with 3 and 6 peaks mode)
•
Individual distortion FX available per part (with several distortion
curves)
•
Global delay FX with individual send level assignable per part
•
External audio input support allowing to send it to the effects section
of a part
•
Individual programmable arpeggiator per part, with 128 pattern
presets available (which can be redefined) and adjustable gate time,
velocity, direction and note sort order
•
Comprehensive MIDI automation and bulk Dumps
•
Front-panel real-time controllers assignable to most internal
parameters, with several operating modes: absolute, relative and pick
up
•
Parameters assignable to external controllers, including support for
aftertouch and sustain and expression pedals
•
Downloadable arpeggiator patterns via MIDI SysEx
Overview
1.2
Sound Architecture
Australis is a digital emulation of musical instruments developed in the
analog electronics world. It is based around the concept of ‘subtractive
synthesis’ that is one of the classic methods for generating complex sounds
using analog circuitry.
The diagrams and short explanation below should provide all you need to
know to understand the architecture of Australis.
1.2.1
AUDIO
These elements generate and manipulate the audio signals.
Figure 1-1
Simple signal types are generated by the oscillators (Osc1, Osc2, SubOsc) and
noise generator (Noise).
The Mixer combines these signals together and sends the result to the Filters
(Filter1, Filter2) for cutting out certain frequencies.
The Routing configuration establishes the signal flow between both filters,
and the output is then passed to the amplification section, for setting the
volume of the sound.
The sound or “part” can be polyphonic, meaning more than one note
playable at a time (multiple voices). The output of all voices triggered by one
part are mixed together automatically.
An additional source of audio can be mixed with the generated sound before
going to effects: the signal present at any of the external input connectors of
the Chameleon.
Australis Synthesizer – User’s Manual
3
1.2.2
MODULATION COMPONENTS
These elements can be used for adding shape and movement to the sound.
Figure 1-2
The modulation components control the synths parameters over time to add
dynamic movement and are assigned to parameters through the Modulation
Matrix. The diagram above shows the modulation components alongside the
audio components. The possibilities for adding movement and dynamics to
the sound are huge, and you can see all the modulation routings in Table 2-7
on page 25.
4
Overview
1.2.3
EFFECTS
This last stage takes the synth output and adds internal effects.
Figure 1-3
Each synth part can have its own PHASER, CHORUS and DISTORTION. At the
very end, there is a global DELAY effect that can be put across all the sounds
Australis makes, that is then mixed in before going to the output. You can
learn more about the effects possibilities in section “EFFECTS” on page 26.
Australis Synthesizer – User’s Manual
5
1.3
Memory Structure
The memory of Australis can store all your presets, and combinations of
presets. It is made up of three main sections, as shown in the following
picture.
Internal Memory
multis
001
.
.
.
.
.
.
.
.
128
singles
Bank D
Bank001
C
.
.
.
Bank001
A
128
.
.
001 128
.
.
128
.
Bank001
B
128
patterns
001
.
.
.
.
.
.
.
.
128
Global Configuration Data
Figure 1-4
•
512 single sounds (singles) split into 4 banks of 128.
Think of a single like one complete synthesizer. You can store the
exact configuration of the synth in a single.
•
128 multi sounds combinations (multis)
In Multi Preset Mode you can have up to 8 single sounds running side
by side. You can mix them, pan them, detune them, activate or
deactivate arpeggiators and select what MIDI channel they each
respond to.
In memory you can also store:
6
•
128 arpeggiator patterns (patterns)
The arpeggiator patterns are used by singles to play different rhythm
and note variations when the arpeggiator is activated. Arpeggiator
patterns can be changed using MIDI SysEx dump. See section
“ARPEGGIATOR” on page 29.
•
Global data
This stores the global soundskin parameters which affects all sounds
in all parts, regardless of what single or multi you have loaded. This
includes screensaver times, general MIDI configurations, master
tuning, synchronisation options and so on.
Overview
1.4
Setup and Connections
This section explains how to load and get started with Australis for the first
time.
1.4.1
MAKING THE CONNECTIONS
In order to start using Australis, you need first to have the Chameleon unit
properly connected if you haven’t already done so. Make sure that you have
the Chameleon power supply (9V DC/1.2A) plugged to the device and
connected to the AC mains. The following figure shows the Chameleon rear
panel connections.
Figure 1-5
Before connecting the Chameleon to other units in your system, for safety
ensure that the power to all units is off. There are no real surprises here: To
hear sounds from the Chameleon, connect audio cables from the left and
right Chameleon outputs to a suitable amplifier or mixing desk (line level
inputs), or plug your headphones using the front panel jack.
You also need to connect your MIDI sequencer to the Chameleon so that it
can send and receive MIDI data.
The MIDI OUT of your sequencer should be connected to the MIDI IN of the
Chameleon.
The MIDI OUT of the Chameleon should be connected to the MIDI IN of your
sequencer.
Once all connections are made, turn on the power of the Chameleon and all
the other devices in your system.
1.4.2
LOADING THE SOUNDSKIN
The Australis soundskin is contained into a MIDI file called ‘Australis_vX.X.mid’
(where ‘X.X’ is the current version number of the soundskin). Like any other
Chameleon soundskin, when you load Australis you will wipe the memory of
the Chameleon and use it for this new soundskin instead. So you have to first
make sure you have saved your personal settings and user data stored in the
Australis Synthesizer – User’s Manual
7
soundskin you are about to replace with Australis. You can save it by making
a quick MIDI SYSEX Total dump.
Remember if you have an older version of Australis or a different soundskin
installed in your Chameleon you will lose your user data if you don’t make a
backup of it before updating the software version. Please read the important
notice in the Appendix A to check how to save your and load new soundskins
into the Chameleon.
When you have loaded the latest Australis, you can still reload again your old
Australis presets previously backed up by MIDI. The new software version will
update the preset formatting of your presets if necessary.
Once the soundskin is loaded, it is ready to use and you can treat the
Chameleon as if it was a regular synth. By default, the soundskin comes
loaded with the Factory presets banks, which provide a wide range of readyto-use singles and multis to choose from. These are useful starting points for
editing your own presets. Play around with these to take a quick overview of
Australis. Remember you can tweak many parameters straight away with the
Realtime controllers on the front panel.
NOTE: Factory presets can be edited, modified and overwritten like any other
preset, so all 512 available presets are considered as “user” presets and there
are not the so called “ROM presets”. So be careful how and where you save.
However, don’t worry about overwriting the Factory presets permanently. If
you think you have made a mess of a single, individual sounds from the
factory bank can be reloaded at any time.
Once the soundskin has been successfully downloaded into the Chameleon,
You will need to make sure you have a MIDI keyboard or sequencer able to
send MIDI to Australis in order to trigger sounds and control parameters.
8
Overview
1.5
Quick Tour of the Controls and the Front Panel
The following diagram highlights the main buttons and knobs used for
controlling Australis. These are referred to throughout this manual. The only
controller not magnified here is the BIG DIAL on the left of the Realtime
controllers, in the centre.
Figure 1-6
The first thing you see when powering up the Chameleon with Australis
loaded is the default mode - Single Preset Mode:
In this mode you can listen and navigate across the full 512 single presets
stored in internal memory: VALUE UP/DOWN and the BIG DIAL change the
current single preset (1 to 128). Note that the menus wrap around from 128
to 1 for quicker selection. PARAM UP/DOWN change the current bank (A,B,C
or D).
If you want to listen inmediately how Australis sounds, you can enter the
Demo Mode by pressing SHIFT+EDIT keys.
Australis Synthesizer – User’s Manual
9
In all operating modes, the LED located next to the SHIFT key will flash at the
selected tempo speed (quarter notes).
The Realtime Controllers on the right of the front panel are used to change
the value of internal parameters that you assign to them for instant access.
See page 31 for more details. The LED above each Realtime controller will
light if its controller is assigned to any parameter. When you use a Realtime
Controller, a screen will appear for a few milliseconds, telling you about the
parameter changed and the new value assigned.
When browsing around the different presets for the first time, do have a play
with these controllers to see how the sound can be manipulated.
The volume knob located in the left side of the front panel controls the
global level of the audio outputs, including the headphone connection.
Stuck notes: By pressing together the SHIFT and PART UP keys, Australis
performs a Panic function. The Panic function sends and executes an "All
Notes Off" command to terminate stuck notes. Panic also immediately sets all
envelopes to their release phases, while stopping the arpeggiator playing.
Australis includes a screensaver function which will fire after a number of
minutes specified in the System menus. When the screensaver is activated,
the display shows an animated message informing about the soundskin
version. Any external event as pressing a key or MIDI activity will exit from
the screensaver state.
When MIDI SysEx data is received, the current screen is temporary disabled
and a blinking information message is shown instead.
1.5.1
NAVIGATION AROUND THE SOUNDSKIN
Once you enter the Edit modes or System mode outlined below, you will find
a lot of parameters to control. However navigating them is quite easy, with
parameters grouped together into logical menus, which you can browse
through to access and modify parameters.
The menus always have the following structure:
•
10
GROUP (GROUP UP and GROUP DOWN keys)
The group buttons move you between the main sections within a
Mode. The name of the current group is shown in the upper left line
of the Display.
Overview
•
PAGE (PAGE UP and PAGE DOWN keys)
Within each group outlined above there are usually several “pages” to
navigate through that contain subsets of parameters for dealing with
one particular aspect of the mode. The page name is shown on the
right of the upper line.
•
PARAMETER (PARAM UP and PARAM DOWN keys)
Once you have chosen a group and gone inside a particular page, you
can then select from a list of parameters for adjusting. The name of
the current parameter is shown in the lower line of the Display,
aligned to the left.
•
VALUE (VALUE UP and VALUE DOWN keys and/or BIG DIAL)
All the other buttons described above are for navigating around the
soundskin. With VALUE UP/DOWN and/or the BIG DIAL you actually
change the value of a parameter. The current value of the parameter
you have navigated to is shown between animated brackets on the
lower line of the Display.
The LCD display always tells you where you are as you navigate - the upper
line shows the Group name and the current page (separated with “:”). The
lower line shows the current parameter name and their value between
animated brackets.
In the following chapters we have laid out all the groups, pages, parameters
and their possible values in tables, which show this hierarchical menu
structure clearly.
Australis Synthesizer – User’s Manual
11
Chapter
22
Operating Modes and Menus
Australis has several different operating modes. Here is a brief description of
what they do and how to move between them:
•
Single Preset Mode:
This is the default start up mode as shown above, and it is where you
can browse through the various single sounds available. (the
soundskin uses the MIDI Channel set in the Global system controls).
From here you can:
•
•
Enter Single Edit Mode by pressing EDIT (for editing a sound).
•
Enter Multi Preset Mode by pressing PART UP (for grouping
sounds together).
•
Enter System Mode by pressing and holding down EDIT (for
adjusting global parameters).
•
Enter Demo Mode by pressing SHIFT+EDIT (for playing the
demo songs included).
Single Edit Mode:
Here you ‘go inside’ the single, to adjust all the parameters for that
sound. You can make your changes, and then exit by pressing EDIT. If
necessary, it will ask you if you want to save your changes (see page
32).
•
Single Save Mode:
This mode is used to store the single preset edited in the Single Edit
Mode in any of the available memory locations.
•
Multi Preset Mode:
In this mode, up to 8 singles can be selected to be played, mixed and
modified together. Each one is called a “Part”. You can switch
between the 8 parts, choosing a single sound for each one. (The
current part is indicated by a small number on the lower right of the
screen). From here you can:
•
12
Enter Single Edit Mode by pressing EDIT. This will edit the
current single Part as outlined above.
Operating Modes and Menus
•
•
Enter the Multi Edit Mode by pressing SHIFT+EDIT (see below).
•
Enter System Mode by pressing and holding down EDIT (for
adjusting global parameters).
•
Return to Single Preset Mode by pressing PART DOWN,
counting down through the Multi Preset Mode parts until you
enter Single Preset Mode again at the bottom.
Multi Edit Mode:
In this mode you set up the multi. You can adjust the relative mix, pan
and so on between the 8 parts and set their MIDI channels. You also
set up the global DELAY effect here. You exit by pressing EDIT, and if
necessary it will ask you if you want to save your changes (see page
39).
•
Multi Save Mode:
This mode is used to store the multi preset edited in the Multi Edit
Mode in any of the available memory locations.
•
Assigns Info Mode:
It is useful to see the current parameter assignations for the front
panel realtime controllers (Knob1, Knob2 and Knob3) and the external
MIDI controllers (Modulation Wheel, Expresssion Pedal, Sustain Pedal
and Aftertouch).
•
System Mode:
For adjusting global parameters and functions that remain the same
regardless of what preset you have loaded, e.g. screensaver times,
MIDI SYSEX dump requests, etc.
•
Demo Mode:
The Demo Mode will playback a number of factory songs for your
pleasure...
Each of these Modes is described in detail in their own section, below.
Australis Synthesizer – User’s Manual
13
2.1
Single Preset Mode
Single Preset Mode is for selecting from the 4 banks of 128 presets. An
Australis preset is a combination of synth settings, modulation routings and
other such parameter values stored in memory. When you switch on the
Chameleon with Australis loaded, it automatically defaults to this Single
Preset Mode. From here you can enter the other modes easily.
2.1.1
THE DISPLAY
In Preset Mode, the LCD display will show information about the currently
loaded single preset, as showed in the following picture.
Here’s a detailed list of what you see.
The upper line:
•
A little “s” in reverse colour will appear in the upper-left corner of the
display to indicate Single Preset Mode. This small “s” will blink if the
preset is “dirtied” in any way - that is, the preset is somehow
changed in relation to what is stored in the memory and it has not yet
been saved. This can happen via MIDI, by moving an assigned front
panel Realtime controller, or by editing something while in Edit Mode.
So if you change preset without first saving what you have edited,
you will lose all the changes you may have made. Equally, if you have
ended up with a sound you don’t like and want to return to the saved
preset, simply use VALUE UP/DOWN to change to another a preset and
back again to reload the original preset from memory again.
•
Next, there is the name and memory location of the currently loaded
preset. The four banks are indicated by their letter (A, B, C, D) and the
3 digits show the preset number (001-128) within the bank.
•
Between the “s” symbol and the number of the selected sound, the
round MIDI data reception symbol will be shown when Australis
receives any incoming MIDI data. Use this to check your MIDI
connections are active.
The lower line:
•
14
This simply shows the three Realtime controllers potentiometer’s
current position.
Operating Modes and Menus
To choose from the different presets available, simply scroll with the BIG DIAL
or use the VALUE UP and VALUE DOWN keys.
To change to a different Bank (A,B,C or D) use PARAM UP and PARAM DOWN.
By pressing and holding about a second the SHIFT key, the screen will display
temporary the same information shown in the screensaver (soundskin info).
Australis Synthesizer – User’s Manual
15
2.2
Single Edit Mode
This is where you customise the synth sound by browsing through the
sections adjusting its parameters.
A little symbol in the top left hand corner will remind you what you are
doing. Either:
•
A little “s” symbol is shown in the corner if you have entered the
mode from Single Preset Mode.
•
A little part number will show if you have entered from Multi Preset
Mode, to remind you what part you are editing.
•
Both these symbols will blink if any parameter’s value is changed, to
remind you to save as you exit.
As stated in the section above on “Sound Architecture”, the synthesis process
is split into several sets of components and their controls. In Single Edit Mode
there are also the controls for the arpeggiator patterns and some common
controls:
1. AUDIO
This section deals with generating and manipulating audio signals.
2. MODULATION
For adding movement to the audio generation parameters over time.
3. FX
For adding sound FX to the synthesized sound.
4. ARPEGGIATOR
For automatically generating patterns of notes from the notes you
hold down on the keyboard.
5. COMMON
For adjusting some common parameters like external controller setups
and the internal tempo for the synth’s clock.
16
Operating Modes and Menus
2.2.1
AUDIO
2.2.1.1 OSCILLATOR
The Oscillator is the basic building block of an analog synthesizer, the raw
audio material to be used as a starting point for a sound.. An Oscillator
generates a sound continuously. It actually generates a periodic waveform or
a shape that will be fed into the other processes for manipulation. The shape
determines the "timbre" characteristic of a sound. The rate at which it
generates each cycle of the waveform is what we hear as pitch.
Here you can set up the waveforms of the two oscillators plus the noise
generator, as well as determine general characteristics of the OSC in relation
to your MIDI keyboard.
Table 2-1
Group
Page
Parameter
Value
OSC
Wave
PulseWidth
Sine,
Triangle,
Sawtooth,
Square,
Wave01..36
0..127
Pitch
-64..0..+63
KeyTrack
OFF/ON
Phase
Free
0..360 Deg.
Wave
Sine, Triangle,
Sawtooth,
Square,
Wave01..36
0..127
-64..0..+63
OFF/ON
Osc1
Osc2
PulseWidth
Pitch
Detune
KeyTrack
Phase
Sync
Australis Synthesizer – User’s Manual
OFF/ON
Free
0..360 Deg.
OFF/ON
Comments
You have the four classic basic waves,
plus a range of more complex
waveforms.
If the selected wave is Square, this
controls the period when the wave is
“up”, changing the harmonic content
of the waveform.
Here you can tune the pitch of the
OSCILLATOR in semitones.
This turns on or off the option of using
the keyboard to modify the pitch of
the oscillator. For instance, with a
bassdrum sound you might not want
to alter the fundamental pitch as you
play along the keyboard.
You can set at exactly what point in
the wave cycle the sound starts when
triggering a new note. Free stands for
an arbitrary value.
See OSC 1
You can set the pitch of Osc 2 to be
detuned in relation to Osc 1.
See OSC 1
This feature allows to use the phase
of the Osc1 to synchronize or “reset”
the phase of the Osc2. This results in a
new static wave whose frequency is
that of the Osc1, but whose shape is a
portion of the Osc2. Note that the
choice of wave for the Osc1 is
irrelevant and only it's frequency
matters.
17
Group
Page
Parameter
Value
Comments
FmAmount
0..127
Noise
Color
-64..+63
Unison
Active
OFF/ON
Detune
0..127
PanSpread
0..127
KeyMode
Poly
Mono
Trigger
Always
Staccat
Glide
Always
Legato
Portamento
0…127
Transpose
-64..0..+63
BendRange
-64..0..+63
FM synthesis is a way of generating
musically interesting sounds by
changing the basic frequency of a
sound using another signal with a
frequency in the hearing range. In
practice it just means connecting the
audio output of an oscillator to the
frequency input of another oscillator.
In Australis, FmAmount controls the
amount of the output of Osc1 used to
modulate the frequency of Osc2.
Here you adjust the frequency
contents of the generated noise. A
value of 0 is used to generate white
noise (uniform energy distribution).
With positive values the noise
contains less low frequency energy
than white noise, and with negative
values the noise contains less high
frequency energy than white noise.
This parameter activates or
deactivates the unison mode, where
two voices of Australis are used to
render the same played note, making
a sound fatter.
It is used when Unison Mode is active
to slightly detune the two voices,
providing a chorus-like effect.
It is used when Unison Mode is active
to vary slightly the panorma position
of both voices, providing an stereo
effect.
You can either have a synth that only
plays one note at a time (mono) or a
synth that can play multiple notes and
chords (poly).
It specifies if the envelopes are
restarted every time you play a note
(always) or at the first note only
when playing legato (staccato).
when the portamento is active, it
either always triggers or only on the
separated notes of a legato phrase.
Here you set the amount of time used
to glide the pitch from the current
note to the next note played.
This raises or lowers the pitch of the
whole OSCILLATOR section
This determines how much the pitch
bender on your MIDI keyboard bends
the note up or down in semitones (12
is an octave). Negative values are
used to reverse the meaning of the
pitch bend control: moving it up will
lower the pitch and vice versa.
Keyboard
Common
2.2.1.2 MIXER
Here you mix the sounds that you have generated in the OSC section. You can
also add a Sub-oscillator that always oscillates at the same pitch as Osc1, but
18
Operating Modes and Menus
an octave lower, using a triangle waveform. Furthermore, you can ring
modulate (multiply) the two oscillators together, for creating new overtones
giving the sound a metallic and percussive character.
Table 2-2
Group
Page
MIXER
Parameter
Value
Comments
Osc1Level
Osc2Level
SubOscLevel
NoiseLevel
RingModLev
0..127
0..127
0..127
0..127
0..127
Sets the mixing level for each of these
sound sources.
Sets the amount of signal sent to the
mixer from the Ring Modulator.
2.2.1.3 FILTER
The range of sounds generated in the oscillator section can be greatly
enhanced by selectively removing or 'subtracting' frequency components. This
is what filters are for. By using different filter types you can carve away parts
of the frequency spectrum from the mix of waveforms, changing drastically
the timbre of the sound.
In Australis there are available two identical resonant multimode filters with
two poles each (slope of 12dB/octave). A flexible routing mechanism allow
you to get for example a LowPass filter of 24dB/octave by putting the two
filters in series each with a LowPass configuration.
Table 2-3
Group
Page
Parameter
Value
FILTER
Type
LowPass
HighPass
BandPass
BandStop
Filter1
Comments
Filters operate around a determined
frequency called the cut-off point.
In a lowpass filter all frequencies
below the cut-off point are allowed to
pass.
In a highpass filter all frequencies
above the cut-off point are allowed to
pass.
A bandpass filter lets frequencies in a
“mid-range” band (defined by the
cut-off point and resonance) pass
through, while lower and higher
frequencies are cut out.
Frequency
(cut-off point)
Resonance
0..127
0..127
The bandstop filter type can be seen
as the opposite of a bandpass filter. It
cuts off frequencies in a “mid-range”
band, letting the frequencies below
and above through.
This sets the cut off point of the
chosen filter.
This is used to further adjust the
characteristics of the filter.
With lowpass and highpass filters, it
Australis Synthesizer – User’s Manual
19
Group
Page
Parameter
Value
Comments
feeds-back the frequency around the
cut-off point into itself, which at low
amounts creates a ‘sharpening’ of the
sound and at high amounts creates a
piercing tone.
EnvAmount
0..127
EnvInvert
OFF/ON
KeyTrack
-64..0..+63
Filter2
Type
Common
Frequency
Resonance
EnvAmount
EnvInvert
KeyTrack
Routing
LowPass
HighPass
BandPass
BandStop
0..127
0..127
0..127
OFF/ON
-64..0..+63
Serial
Parallel
In bandpass and bandstop filters the
resonance affects the width of the
passband and the rejected band
respectively.
In the modulation sections below, you
can set up a filter envelope to
manipulate the cut-off frequency over
time. This parameter determines how
much the filter cut-off is controlled by
the filter envelope.
With this parameter you can ‘invert’
the above envelope so that it acts in
reverse upon the cut off frequency
value. As the envelope raises the
value, the filter lowers it
correspondingly.
This allows the filter to modify the
cutoff point depending of the note
played in the keyboard. For instance,
if you left this off while using a
heavily LowPass filtered sound, you
would hear nothing at the very top of
the keyboard.
See Filter 1
You can route the sound through the
filters in different ways.
Serial configuration means that one
filter processes the sound before
passing it to the other.
20
Balance
-64..+63
Frequency
Resonance
0..127
0..127
Parallel configuration means that they
both take the signal at the same time,
process it and then the results are
mixed back together again.
When the Routing parameter has
been set to parallel, this specifies the
mix ratio of each filter. Negative
values affect the Filter1 output and
positive values affect the Filter2
output.
These parameters modify two related
values at a time (i.e.
Operating Modes and Menus
Group
Page
Parameter
Value
EnvAmount
0..127
Comments
FILTER:Common:Resonance will
change at the same time
FILTER:Filter1:Resonance and
FILTER:Filter2:Resonance, overriding
the old value of them).
This is for controlling them
simultaneously.
2.2.1.4 AMPLIFIER
In this section, an amplitude envelope (see below) is applied to the signal
from the previous stages and the resulting sound is finally sent to the stereo
part bus with the level and stereo pan specified.
Table 2-4
Group
Page
AMPLIFIER
2.2.2
Parameter
Value
Volume
Panorama
0..127
-64..0..+63
Comments
General level
Left to right stereo positioning
MODULATION
Next we have the sets of components that deal with controlling many of the
above parameters over time, to add movement and dynamics to the sound.
2.2.2.1 ENVELOPES
Envelopes are used to generate a control signal which value changes over
time. The envelope starts when it is triggered whenever you press a key on
the keyboard. The four parameters (the classic ADSR) give you control over
the start, the middle and the end of the sound.
Figure 2-1
You have control over certain time-dependant parameters and levels. The
output signal from an envelope is usually unipolar (only positive values) and
it can be inverted (only negative values).
Australis Synthesizer – User’s Manual
21
The ATTACK phase is entered just after the envelope is triggered. In this
phase, the control signal rises up to the maximum value at a rate specified in
the Attack parameter.
The DECAY and SUSTAIN stages are for adjusting how the envelope behaves
once the attack phase has finished but you still have your notes held down.
The RELEASE phase is entered one the key pressed is released. In this phase,
the control signal drops to zero from the Sustain level at a rate specified in
the Release parameter.
For instance, with a long “attack” (high value) the sound will fade in slowly,
and with a long “release” it will fade out slowly after you take your fingers
off the keyboard. This is typical for soft string pads and so on. Whereas: even
with the same OSCILLATOR waves, a short, instant attack and release (low
value) would sound much more like an organ.
There are two independent envelopes in Australis, one for controlling the
AMPLIFIER and one for the FILTER cut-off.
Table 2-5
Group
Page
ENV
Amp
Filter
Parameter
Value
Comments
Attack
Decay
0..127
0..127
Sustain
0..127
Release
0..127
Attack
Decay
Sustain
Release
0..127
0..127
0..127
0..127
How quickly the sound fades in.
How quickly the volume then fades
down to the SUSTAIN level.
The level that the volume finally
holds at if you keep the keys held
down.
How quickly or slowly the sound
fades away once you let go of the
keys.
These controls are exactly the same
as the Amp envelope above, but
control the filter cut-off point
instead of the overall volume of the
AMPLIFIER section.
2.2.2.2 LFOS
LFO stands for Low Frequency Oscillator. It creates a periodic slowly moving
control signal that can be used to automate another parameter in cycles. Here
you set up the pattern, and you can then assign the LFOs to control various
parameters by different amounts using the Modulation Matrix.
For instance, a triangle shaped LFO control attached to the panning control of
a synth, would shift the sound repeatedly left and right at the same speed as
the LFO. Here are two exampes of the LFO waves available:
22
Operating Modes and Menus
Figure 2-2
Figure 2-3
This is quite different from the ENVELOPES above, which are designed to
create a control movement only once, on every key trigger. The LFO normally
just keeps going, regardless of whether you are playing or not (however,
sophisticated LFOs like the ones here can be coordinated with the keyboard
for even more control).
Table 2-6
Group
Page
Parameter
Value
LFO
Wave
Sine
Triangle
Sawtooth
Square
S&H
Lfo1
Sync
(ON)
Clock
(OFF)
Speed
FadeIn
Australis Synthesizer – User’s Manual
OFF/ON
32T
…
1/4 notes
…
8 Bars
101 Hz
…
281 seconds
Static
0..127
Comments
You can choose the waveform shape
that you want the control signal to
take.
Sample & Hold is a random value
generator.
The LFO can be synchronised to the
MIDI clock or set at a certain speed in
Hertz (cycles per second) or
milliseconds. When the SYNC is OFF,
you can set the speed directly. When
SYNC is ON, you have a range of
tempo based options for
synchronising the speed to your MIDI
tempo e.g. 1/4 notes, 1/8 note
Triplets, etc.
You can set it so that the LFO takes
time to kick in when you press a key.
For instance, the panning control
outlined above could slowly become
more and more extreme using a fade
in.
23
Group
Page
Lfo2
Parameter
Value
Mode
Poly
Mono
Poly1Shot
Mono1Shot
KeyTrack
0..127
Phase
Free
0…360deg
PulseWidth
0..127
Wave
Sine
Triangle
Sawtooth
Square
S&H
OFF/ON
32T
…
1/4 notes
…
8bars
101Hz
…
281seconds
Static
0..127
Poly
Mono
Poly1Shot
Mono1Shot
0..127
Free
0…360 deg.
0..127
Sync
(ON)
(OFF)
Clock
Speed
Fade In
Mode
KeyTrack
Phase
PulseWidth
Comments
Poly means each note played has its
own LFO starting point.
Mono means all notes share a
common LFO.
1Shot means that when you trigger a
note, the LFO cycles once only. This
makes the LFO similar to an Envelope
in function.
This allows the LFO to increase its
speed as you rise up the keyboard.
You can choose where in the
waveform cycle the LFO begins. For
instance, with a sine wave, you might
choose to start it at the top of the
peak or at the bottom of the trough.
When the Wave selected for this LFO
is the Square wave, this parameter
sets the pulsewidth of the Square
signal generated.
See LFO 1
2.2.2.3 MODULATION MATRIX
This is where you assign the many modulation controllers to parameters that
have already been discussed in the previous sections. The list of options is
extensive, and these controls can twist the sound in all sorts of directions.
You can apply positive or negative amounts of control to the paramters, so
that as one parameter value is being being raised by a controller, another can
be simultaneously lowered. Several modulation controls can also be sent to
the same parameter, and they can interact to create a very expressive synth
24
Operating Modes and Menus
sound.
Table 2-7
Group
Page
MOD
Velocity
Lfo1
Lfo2
FilterEnv
Parameter
Value
Volume
Panorama
PulseWidth (*)
PulseWidth1
PulseWidth2
Osc2Detune
OscFm
FilterEnv (*)
Filter1Env
Filter2Env
FilterFreq (*)
Filter1Freq
Filter2Freq
FilterReso (*)
Filter1Reso
Filter2Reso
Volume
Panorama
OscPitch (*)
Osc1Pitch
Osc2Pitch
PulseWidth (*)
PulseWidth1
PulseWidth2
OscFm
FilterFreq (*)
Filter1Freq
Filter2Freq
FilterReso (*)
Filter1Reso
Filter2Reso
LFO2 speed
-64..0..+63
-64..0..+63
-64..0..+63
-64..0..+63
-64..0..+63
-64..0..+63
-64..0..+63
-64..0..+63
-64..0..+63
-64..0..+63
-64..0..+63
-64..0..+63
-64..0..+63
-64..0..+63
-64..0..+63
-64..0..+63
-64..0..+63
-64..0..+63
-64..0..+63
-64..0..+63
-64..0..+63
-64..0..+63
-64..0..+63
-64..0..+63
-64..0..+63
-64..0..+63
-64..0..+63
-64..0..+63
-64..0..+63
-64..0..+63
-64..0..+63
-64..0..+63
Volume
Panorama
OscPitch (*)
Osc1Pitch
Osc2Pitch
PulseWidth (*)
PulseWidth1
PulseWidth2
OscFm
FilterFreq (*)
Filter1Freq
Filter2Freq
FilterReso (*)
Filter1Reso
Filter2Reso
OscPitch (*)
Osc1Pitch
Osc2Pitch
-64..0..+63
-64..0..+63
-64..0..+63
-64..0..+63
-64..0..+63
-64..0..+63
-64..0..+63
-64..0..+63
-64..0..+63
-64..0..+63
-64..0..+63
-64..0..+63
-64..0..+63
-64..0..+63
-64..0..+63
-64..0..+63
-64..0..+63
-64..0..+63
Australis Synthesizer – User’s Manual
Comments
Velocity refers to MIDI signals that are
sent from most keyboards as you play
that indicate how hard you hit the
keys.
The most obvious application of this is
to Volume, so that the harder you
play the louder it gets.
Using these parameters you can
create a very expressive synth sound
that responses to your touch as you
play.
Here you can assign LFO 1 to control
parameters automatically.
Applied to several parameters you can
create very complex and rich evolving
soundscapes.
Particularly interesting is to apply
LFO1 to control the speed of LFO2.
This way you can create quasi random and wildly varying LFO
patterns that rarely repeat
themselves, and as you mix the LFO
wave types there is a wealth of
sounds to be created by these simple
controls.
By using the realtime controllers to
adjust the LFO speeds and waveforms
you can explore…
This is the same as LFO 1.
By getting the LFOs to interact on
different parameters and with each
other, there are endless sounds that
can be created.
Not only does the Filter Envelope
control the filter cut-off, you can apply
it here to control these other
25
Group
Page
AmpEnv
Random
Parameter
Value
Osc2Detune
OscFm
OscPitch (*)
Osc1Pitch
Osc2Pitch
Osc2Detune
OscFm
Panorama
PulseWidth (*)
PulseWidth1
PulseWidth2
Osc2Detune
OscFm
FilterEnv (*)
Filter1Env
Filter2Env
FilterFreq (*)
Filter1Freq
Filter2Freq
FilterReso (*)
Filter1Reso
Filter2Reso
-64..0..+63
-64..0..+63
-64..0..+63
-64..0..+63
-64..0..+63
-64..0..+63
-64..0..+63
-64..0..+63
-64..0..+63
-64..0..+63
-64..0..+63
-64..0..+63
-64..0..+63
-64..0..+63
-64..0..+63
-64..0..+63
-64..0..+63
-64..0..+63
-64..0..+63
-64..0..+63
-64..0..+63
-64..0..+63
Comments
parameters at the same time.
Not only does the Amplifier Envelope
control the AMPLIFIER section volume,
you can apply it here to control these
other parameters at the same time.
Every time you hit a key, this random
generator can adjust these
parameters.
Use just a little for a touch of
liveliness and a ‘human’ factor, or
loads to create really random
movement and changes into the
sound.
(*) These adjustments change simultaneously the value of the two next parameters.
2.2.3
INPUT
This section is used to feed any external signal to the synthesis structure of
Australis just before the effects section of a part.
2.2.4
Table 2-8
Group
Page
Parameter
Value
Comments
INPUT
Select
Here you can select the external
input channels to be used with the
internal effects. L+R stands for
stereo input.
Level
OFF
L+R
L
R
0…127
Balance
-64..+63
The level applied to the input
signal before being mixed with the
part voices.
This parameter adjusts the stereo
positioning of the input signal.
EFFECTS
After all the synthesis building blocks that create and manipulate the audio,
next are the internal effects you can add to the final sound you are working
on. There are two types of effects:
26
•
Individual effects that can be applied to each synth preset uniquely,
Distortion, Phasing and Chorus.
•
The global Delay FX that operates across all sounds.
Operating Modes and Menus
2.2.4.1 DISTORTION
This effect allows you to heavily transform the signal, by clipping and
overdriven it and adding a lot of new overtones.
Table 2-9
Group
Page
Parameter
Value
Comments
FX
Curve
OFF
1…10
Gain
0…127
Volume
0…127
There are 10 different distortion
curve types, ranging roughly from
mild to highly overdriven types
For boosting the sound with the
distortion curve.
Use this to turn back down the
volume level of the signal after
boosting it with the gain.
Distortion
2.2.4.2 THE CHORUS/PHASER
This effect is really composed of two different ones, but only one of them can
be activated at a time.
The Chorus effect is delay-based and it simulates the effect of multiple stereo
voices. It ‘thickens’ the signal by reproducing the same sound on top of itself
several times with a very slight delay and pitch change. Controls are added to
make these extra voices move about in pitch over time.
The Phaser effect is a set of 3 or 6 allpass filters which displace the phase 180
degrees each, giving 3 or 6 peak resonance frequencies. A phaser reproduces
the same signal on top of itself, but this time modulates the frequency phase
difference between the two (thus causing a frequency-dependant delay
between both signals). The result is that certain frequency components are
eliminated and others are enhanced as the phase relationship changes over
time. It is usually controlled by its own internal sine wave LFO.
An internal LFO is used to modulate the delay time in the Chorus and the
Frequency in the Phaser, giving the sound movement.
The menus for this particular effect are dynamic, that is, they change
depending which effect type you have selected. So if you choose Phaser, as
you scroll upwards you will see the Phaser effects parameters. The same is
true for Chorus.
Group
FX
Table 2-10
Page
Chor/Phas
Parameter
Value
Comments
Type
Select the effect type you want.
Delay
Chorus
Phaser
Off
1-127
0-127
Feedback
Depth
0-127
0-127
Mix
(Chorus)
Australis Synthesizer – User’s Manual
MIX sets the balance between
the FX and the original sound.
DELAY sets the time difference
between the original and the
processed signal. Feedback adds
a portion of the output signal to
the input, and depth controls
how deeply the LFO affects the
delay.
27
Group
Page
Parameter
Value
Sync
(ON)
Clock
(OFF)
Speed
Mix
(Phaser)
Peaks
Frequency
Feedback
Depth
Sync
(ON)
Clock
(OFF)
Speed
OFF/ON
32T
…
1/4 notes
…
8 Bars
101 Hz
…
281 seconds
Static
Off
1-127
3-6
0-127
0-127
0-127
OFF/ON
32T
…
1/4 notes
…
8 Bars
101 Hz
…
281seconds
Static
Comments
The internal LFO can be
synchronised to the MIDI clock
or set at a certain speed
directly. When the SYNC is OFF,
you can set the speed in
milliseconds or in Hertz (cycles
per second). When SYNC is ON,
you have a range of tempo
based options for synchronising
the speed to your MIDI tempo
e.g. 1/4 notes, 1/8 note
Triplets, etc.
MIX sets the balance between
the FX and the original sound.
Peaks defines the number of
allpass filters to use. Frequency
sets the base pitch area that is
effected. Feedback adds a
portion of the output signal to
the input, and depth controls
how deeply the LFO affects the
frequency.
The effect can be synchronised
to the MIDI clock or set at a
certain speed in directly. When
the SYNC is OFF, you can set the
speed in milliseconds or Hertz
(cycles per second). When SYNC
is ON, you have a range of
tempo based options for
synchronising the speed to your
MIDI tempo e.g. 1/4 notes, 1/8
note Triplets, etc.
2.2.4.3 GLOBAL DELAY
This effect operates across all the Parts. Here in Single Preset Mode this is
effectively the same as the individual effects, but in Multi Preset Mode you
have one delay setting for all the different Parts. There, you set the delay
effect parameters in Multi Edit Mode instead. The send levels can still set
within each preset, or changed in the multi parameters. See page 38 for
more details.
28
Table 2-11
Group
Page
Parameter
Value
FX
Send
Dry
1…125
Wet
OFF/ON
32T
…
1/4 notes
…
1 Bar
0…1354ms
Delay
Sync
(ON)
Clock
(OFF)
Speed
Comments
This turns on the effect and
determines how much of the
sound is sent to the global delay.
The effect can be synchronised to
the MIDI clock or set at a certain
speed directly. When the SYNC
is OFF, you can set the speed in
milliseconds. When SYNC is ON,
you have a range of tempo based
options for synchronising the
speed to your MIDI tempo
e.g. 1/4 notes, 1/8 note Triplets,
etc
Operating Modes and Menus
Group
2.2.5
Page
Parameter
Value
Comments
Feedback
0…127
Filter
-64…+63
PingPong
-64…+63
Without feedback the effect
creates only a single echo. This
feeds a portion of the output back
into the effect for creating more
echoes that die away. At high
levels you can get a recurring
feedback that grows and grows in
a similar way to guitar feedback.
This uses a frequency filter to
either make the output “darker or
lighter” in relation to the original
For creating stereo movement in
the delay lines.
ARPEGGIATOR
The arpeggiator splits the incoming MIDI chord into its single notes and
repeats them rhythmically. Different sequence modes can be defined to cover
a wide range of applications. In addition to the synthesis features, Australis
offers a deeply programmable arpeggiator for every preset sound.
The arpeggiator uses a so-called note list that can store up to 16 notes. This
list is set up depending on the arpeggiator parameter settings. For example,
when Sort is set to ByVel, the list is rearranged so the note with the lowest
velocity is placed in the first position, the second with the lowest velocity at
the next, and so on.
This function can automatically generate patterns and rhythms from the notes
you hold down. Use it to create sweeping harp like chords or stuttering
basslines, hi-hat patterns and more.
It will follow the internal clock unless you set the synchronization options in
System Mode to Auto or Ext (see page 42 for more details).
Table 2-12
Group
Page
ARPEGGIATOR
Parameter
Value
Mode
Off
On
OneShot
Hold
32T
…
1/4 notes
…
8 Bars
001…128
Clock
Pattern
Dir
Australis Synthesizer – User’s Manual
Up
Down
Up&Down
Down&Up
Chord
Comments
This, Like the LFOs, means that
the pattern can play continuously
(ON), once through (OneShot) or
forever (Hold).
You have a range of tempo
based options for synchronising
the speed to your MIDI tempo
e.g. 1/4 notes, 1/8 note Triplets,
etc.
There are 128 different rhythm
patterns to choose from.
When you hold down a chord,
the pattern will trigger the active
sorted notes in this order. UP or
DOWN only go in one direction.
UP&DOWN / DOWN&UP will do
just that
CHORD will play them all at a
time.
29
Group
2.2.6
Page
Parameter
Value
Sort
AsPlayed
ByNote
ByVel
Random
Comments
Octaves
1…6
Velo
Played
Pattern
First
Last
Full
Half
Note
Off
Pattern
GateTime
-64…+63
PatternLen
1…16
Quantize
OFF/ON
KeyRestart
OFF/ON
PatReset
OFF/ON
This determines the order used
by Dir. AsPlayed follows the
temporal order as they were
pressed. ByNote and ByVel uses
the Note and Velocity values
respectively as a key to be sort.
Random is auto explanatory.
It will span the notes over more
octaves than you play using this
parameter.
This specifies what velocity
pattern it uses. PLAYED is what
you play, PATTERN is what is in
the pattern, FIRST is from the first
note pressed. LAST is from the
last note pressed. And FULL and
HALF are used to specify a
velocity value of 127 and 64
respectively.
You can have automatically
generated note offset sequences
within the patterns as well. If
Pattern is selected, the active
note will be added with the
stored offset, creating complex
melodic phrases.
You can shorten and lengthen
the length (gate time) of the
pattern notes.
The pattern can be any length up
to 16. Trying unusual numbers
like 13 and 11 can make some
very interesting patterns that
cycle well over the top of
standard 4/4 beats.
This allows you to start the
pattern synchronously in the next
quarter note.
It specifies if a new key will
restart or not the selected
rhythm pattern.
It is used to restart the note list
from the beginning when the
rhythm pattern is reset.
COMMON
Lastly in Common you can adjust a number of common parameters that are
global to the sound, including the set up of your external MIDI controllers (see
page 32 for more details).
30
Table 2-13
Group
Page
Parameter
Value
COMMON
Tempo
BPM
65…192
Wheel
MinValue
MaxValue
0…127
0…127
Comments
To set the internal tempo clock that
is used when no external MIDI clock
is used.
For adusting the range of these
external MIDI controllers that are
Operating Modes and Menus
Group
Page
Parameter
Value
Comments
Exprs
MinValue
MaxValue
MinValue
MaxValue
MinValue
MaxValue
0…127
0…127
0…127
0…127
0…127
0…127
assignable to parameters –
Modulation wheel (CC 1, found on
most keyboards), Expression pedal
(CC 11), Sustain pedal (CC 64), and
Aftertouch (pressure sensitive touch
on keyboards that still reads pressure
while you are holding a chord).
Pedal
Aftch
2.2.7
ASSIGNING THE REALTIME CONTROLLERS
The Realtime controllers allow you hands on control of almost any parameter.
Every preset can have its own unique Realtime controller set up.
As well as for live performance they can be used for intuitive editing.
For instance, while editing a preset, you could then assign three of the FX
parameters, say Delaytime, DelaySend and Feedback to the three controllers.
Then you could tweak the parameters simultaneously, focusing on the sound
while finding the ‘sweet spot’ - without thinking in numbers or staring at the
screen.
The Realtime controllers also send out MIDI controller data, so you record any
parameter edits into you sequencer effortlessly in the same manner.
This is all really easy, as assigning parameters is a very quick process. In Edit
Mode:
1. Find the parameter you want to assign.
2. Press SHIFT while turning one of the pots.
2.2.7.1 WHAT HAPPENS AS YOU ASSIGN
The value of the parameter won’t change but a message “Knob x assigned”
will be shown in the Display for a few seconds. “Knob X” refers to which knob
you are assigning - 1, 2 or 3. It will also show the assigned parameter name.
When a potentiometer is assigned, the LED above it will lit. If you want to
assign the same pot to different parameter, simply repeat the process.
You can also un-assign a pot by pressing the SHIFT key and turning the pot all
the way to the left. The Display will show this message: “Knob x unassigned”
and its LED will turn off to show that this potentiometer is free.
Australis Synthesizer – User’s Manual
31
Once a parameter is assigned to a controller, its value can be modified
outside of Edit Mode as well. When you move it, the screen will always
briefly show you details of what you are doing.
Note that there are some specific parameters that cannot be assigned. If you
try to assign them, the display will show the following message:
2.2.7.2 EXTERNAL MIDI CONTROLLERS
You can assign a number of MIDI controllers to any parameter just like the
Realtime controllers. This includes MIDI expression pedal (CC 11), Modulation
Wheel (CC 1), Sustain Pedal (CC 64) and Aftertouch.
When assigning, the whole mechanism behaves in exactly the same way as
the Realtime controllers. Simply hold down the SHIFT key and move the
controller to send a MIDI signal to the Chameleon when you are looking at a
parameter you want to assign.
In the common menu of each single there are the parameters for adjusting
the ranges of each controller. See page 30 above for more details.
2.2.8
EXITING SINGLE EDIT MODE AND PREPARING TO SAVE
You exit Single Edit Mode by pressing the EDIT key. If any of the parameters
have been modified, the soundskin will show the Single Save screen, so that
you can save your work. If you have made no changes, you will simply return
to the Mode you entered single edit from – either Multi Preset Mode or Single
Preset Mode.
If you have not made changes but you DO want to save it (for instance to
save the sound to a different slot as it is) it’s possible to force the saving of
the current single sound by holding down the EDIT key in Single Edit Mode.
32
Operating Modes and Menus
2.3
Single Save Mode
To exit the Edit Mode and return to the Preset Mode (single or multi), press
and release quickly the EDIT key again. If at this point any of the parameters
of the current preset have been modified, you will be asked if you want to
store the modified preset to memory. You can choose whether you want to
overwrite the old preset or save it with a new name / new location.
So it will ask you if you want to store the altered single preset like this:
By pressing VALUE UP and VALUE DOWN selects between yes (Y) or no (N).
Once selected, press EDIT to proceed or SHIFT to abort and return to the Preset
Mode without storing. If you abort, your preset will still be modified, the
number will blink to remind you of this, and you will still be able to store it
later.
If you want to start over with the original preset from memory, from Preset
Mode simply use VALUE UP/DOWN to change to another preset, and then
change back to load the original sound from memory.
If you are sure you want to save your preset, just press and hold the EDIT key
down. This is also useful if you haven’t changed anything but want to save it
to a new location (otherwise the Edit button wouldn’t normally ask you if you
want to save it as you have made no changes, and would simply take you
back to Preset Mode.)
2.3.1.1 NAMING AND NUMBERING
So once you have chosen to save the preset, the next screen will allow you to
set the name and number of the preset you are saving. By default the current
preset number and name will be shown.
First you can change the number and bank, then the name. Use the BIG DIAL
or the VALUE UP and VALUE DOWN keys to alter the value, PARAM UP anmd
DOWN to select the bank, and the EDIT key to move to the Name field to edit
that. (The active field is enclosed between two animated brackets).
When the Name field is selected, you edit the name like this: the VALUE UP
and VALUE DOWN keys choose from the different characters available (from
Australis Synthesizer – User’s Manual
33
numbers to capital letters and symbols), and the PARAM UP and PARAM
DOWN keys move you around left or right within the name.
You can always jump back to the preset number field from the preset name
field and back using the keys PAGE UP&DOWN.
If you are saving to another location, by default the name and number of that
location will be shown. However, if you wish to use the original name of the
source preset you are copying to the new location, you can do so. While you
are editing the name, simply press PART UP or DOWN and it will give you the
option of using the source name. The VALUE UP and VALUE DOWN keys choose
between “Y” or “N”, and the EDIT key will execute.
Once finished, press the EDIT key to store the settings, or press the SHIFT key
to cancel the operation.
34
Operating Modes and Menus
2.4
Multi Preset Mode
Multi Preset Mode is for playing several synth sounds at once, selected from
your banks of Single presets. You can play up to 8 synths together, and each
one is called a Part.
You have lots of control over how the 8 Parts work together: you can set it up
so that they all play on a single MIDI channel, or just within a certain range
on the keyboard, and even within a certain velocity range. So you can place
different instruments in each hand, while also layering sounds on top of each
other that only trigger when you play quietly or loudly. These options are
great for creating lush pads and expressive, multi-layered instruments for
performance work.
Alternatively, you can set it so that each of the 8 Parts can be controlled
independently on its own MIDI channel from a MIDI sequencer, for studio
work.
Of course these layering and MIDI options can be combined any way you
please.
You can also do things like mix the relative volume levels, stereo pan
positions and individual delay sends, as well as transpose individual Parts up
and down in pitch. Another exclusive feature available is the possibility of
overriding the preset’s parameter arp mode, allowing to determine the
presets arp behaviour in Multi Preset Mode too.
2.4.1
THE DISPLAY
In Multi Preset Mode, the LCD display will show information about the
currently loaded multi preset and the details about the different Parts that
make up the multi (you can view and edit the parts one at a time), as
showed in the following picture:
Heres a detailed list of what you see.
The upper line:
•
A little “m” in reverse colour appears in this screen at the top left
corner of the display to denote MultiMode. Like the “s” of Single
Preset Mode, it blinks when any parameter is modified in the selected
multi.
Australis Synthesizer – User’s Manual
35
•
Beside this symbol, 3 digits indicate the number of the current
selected Multi. There are 128 Multis slots to save to, in one bank.
There are some factory multis to show you what’s possible.
•
On the right of the number appears the name of the Multi.
The lower line:
•
The number of the current selected Part (in reverse colour, which
again blinks if any parameter is modified in the selected Single
preset).
•
The bank, number and name of the selected Single preset in this Part.
2.4.1.1 CHOOSING OTHER MULTIS
To change to another Multi set up, you press SHIFT while turning the BIG DIAL
or while pressing VALUE UP/DOWN. This will take you through the other
Multis available.
In older versions of Australis you could just browse the Multis without having
the press SHIFT, but this has been changed. The reason we have done this is
because we want to preserve the use of the BIG DIAL without SHIFT for
selecting sounds for the Parts, where you often have one hand on the
keyboard as you cycle through looking for a sound you like (see below).
2.4.1.2 SELECTING THE SOUNDS FOR THE 8 PARTS
To select a sound for the current Multi Part, you can now simply browse with
the BIG DIAL or VALUE UP/DOWN buttons just as in Single Preset Mode. As
soon as you have changed the Multi’s configuration like this the “m” will
blink.
If you want to edit a different Part, use PART UP/DOWN to move between
them. (Note that PART DOWN at the bottom of the list takes you back to
Single Preset Mode).
2.4.1.3 EDITING THE SOUND OF A PART
If you want to edit a Single sound’s internal parameters, you can still press
EDIT to go to Single Edit Mode, make the changes, save and exit in just the
same way as in Single Preset Mode. Only this time you will return to Multi
Preset Mode.
Remember that while editing a single that is being used in Multi Preset
Mode, the internal TEMPO and the DELAY related parameters are disabled in
the Single Sound. The reason is because in Multi Preset Mode the DELAY
adjustments are stored in the Multi preset as the Delay effect is a global
resource.
36
Operating Modes and Menus
2.4.1.4 TO EDIT THE SET UP OF THE MULTI
To set up the mix and so on for a particular Multi, you go into Multi Edit Mode
by pressing SHIFT+EDIT. (Again, the key presses have been reversed from
previous versions of Australis).
The following section deals with the Multi Edit Mode options that you find.
Australis Synthesizer – User’s Manual
37
2.5
Multi Edit Mode
Here you can set up the mix, pan, transpose, Delay FX, tempo and Part
layering options for your Multi.
In the Multi Edit screen the little “m” symbol and the number of the current
edited part are shown in the upper left corner of the display.
Just as in Single Edit mode, the Multi adjustments are ordered using the same
“Group – Page - Parameter” menu structures. The tables below outline the
available options:
The first Group houses all the parameters for each Part. Here you can set up
the layering, mix and so on.
Table 2-14
Group
Page
PART
38
Parameter
Value
Comments
Enable
MidiChannel
OFF/ON
1…16
NoteLow
C-2…G8
NoteHigh
C-2…G8
VelLow
0…127
VelHigh
0…127
Volume
-64…+63
Pan
-64…+63
Transpose
-64…+63
Detune
-64…+63
This turns on the Part.
Sets the MIDI channel that the Part
responds to.
You can choose to only put the sound
in a portion of the keyboard. These
parameters set the range. For
instance, a drum kit could be made up
of different drum sounds that are set
to one key only, or a pad sound could
be placed in the left hand and a lead
in the right.
With these parameters you can set a
Part to only respond within these
velocity values. This means if you put
several sounds on the same MIDI
channel with different velocity layers,
you can create a really expressive
performance instrument that changes
sound as you play loud or soft..
To set the Part’s relative volume
level.
To place the Part in the stereo field,
relative to the preset adjustment.
You can change the pitch of the part
in relation to the others. This is also
useful if you have put two Parts side
my side on the keyboard. You can readjust the octave so that the sound
on the low part of the keyboard
doesn’t need to sound low. (12 = one
octave).
For fine-tuning the pitch of the Part.
Operating Modes and Menus
Group
Page
Parameter
Value
Comments
DelaySend
Preset
Dry
1..125
Wet
ArpMode
Preset
Off
On
OneShot
Hold
It allows you to use the same value
set in the single preset (Preset). Or
reassign it to a new value for using it
in the new Global Delay context of
the multi.
It allows you to use the same value
set in the single preset (Preset), or
reassign it to a new mode for using it
together with the rest of presets in
the multi.
The second group in Multi Edit Mode is for setting up the global tempo and
Delay effect settings. Remember that a single that is being used in Multi
Preset Mode has its internal TEMPO and the DELAY related parameters
disabled.
Table 2-15
Group
Page
MULTI
FxDelay
Tempo
2.5.1
Parameter
Value
Sync
(ON)
Clock
(OFF)
Speed
OFF/ON
32T
…
1/4 notes
…
1 Bar
0…1354 ms
Feedback
0…127
Filter
-64…+63
PingPong
-64…+63
BPM
65…192
Comments
The effect can be synchronised to the
MIDI clock or set at a certain speed
directly. When the SYNC is OFF, you
can set the speed in milliseconds.
When SYNC is ON, you have a range
of tempo based options for
synchronising the speed to your MIDI
tempo e.g. 1/4 notes, 1/8 note
Triplets, etc.
Without feedback the effect creates
only a single echo. This feeds a
portion of the output back into the
effect for creating repeating echoes
that die away. At high levels you can
get a recurring feedback that grows
and grows in a similar way to guitar
feedback.
This uses a frequency filter to either
make the output “darker or lighter” in
relation to the original.
For creating stereo movement in the
delay lines.
Sets the internal clock tempo for the
multi.
SAVE AND EXIT
To exit Multi Edit mode once you are done, press EDIT. If any value has been
changed, the soundskin will automatically ask you if you want to save by
taking you to Multi Save Mode (below). If there have been no changes, you
return straight away to Multi Preset Mode.
Again, as in Single Edit Mode it’s possible to force the saving of the current
multi preset even if it hasn’t been altered, by holding down the EDIT key
instead. This is useful if you want to save it to another location without any
changes.
Australis Synthesizer – User’s Manual
39
2.6
Multi Save Mode
This screen is very similar to the Single Save, although without the possibility
of selecting the destination Bank, as there’s only one bank for storing multi
sounds.
40
Operating Modes and Menus
2.7
Assigns Info Mode
In this mode the display shows the parameter assignments for each available
controller source, that is:
•
Realtime Controllers (Knob1, Knob2 and Knob3)
•
Standard MIDI Modulation Wheel (Wheel) with a controller code of 1.
•
Standard MIDI Expression Pedal (Exprs) with a controller code of 11.
•
Standard MIDI Sustain Pedal (Pedal) with a controller code of 64.
•
Standard MIDI Channel Pressure/Aftertouch (Aftch) with a status value
of 0xDn (where n is the MIDI channel).
The parameter assigned is shown in the lower line.
The keys PAGE UP and DOWN are used to change the current controller
selected showing the parameter assigned.
If a controller hasn’t a parameter assigned, the lower line will show the <NOT
ASSIGNED> message.
Pressing the EDIT key will leave the Assigns Info Mode.
Australis Synthesizer – User’s Manual
41
2.8
System Mode
You enter this mode by pressing and holding down the EDIT key when in
Single Preset Mode or Multi Preset Mode. In System Mode you can modify
several global parameters and access different utility functions. These
parameters are independent of whatever Single or Multi you might have
loaded.
This section also includes the pages where you perform the all-important
MIDI System Exclusive (SYSEX) dumps that safeguard your presets before you
might load a new soundskin instead of Australis.
You can simply select from the different SysEx dump types (using PARAM UP
and DOWN) and then press VALUE UP/DOWN to execute when you are ready.
If your MIDI sequencer has been put into record first, you can record the data
as it streams out from the Chameleon and save it as a MIDI file, just like the
other Chameleon files from us that you use to load soundskins and presets.
To reload these back into Australis later you simply play them to the
Chameleon on any MIDI channel and the Chameleon will do the rest.
Be careful to start your sequencer before you execute a system exclusive
MIDI dump, and not to stop your sequencer before it has finished.
This table shows all the available system parameters.
42
Table 2-16
Group
Page
Parameter
Value
Comments
Dump
Snapshot
Do it…
SysEx dumps are MIDI code that the
Chameleon will send to your MIDI sequencer
to save the internal settings of a SoundSkin
for safekeeping. Place your sequencer in
record and then use the VALUE UP key to
execute.
Performance
Do it…
Single
Multi
Arp Pattern
Do it…
Do it…
Do it…
Single Bank A
Single Bank B
Do it…
Do it…
Snapshot sends the current part parameters
as standard MIDI control codes (see table in
Appendix B).
This sends the current state of all parts as
SysEx in order of being repeated exactly as is,
without modify any stored preset.
Sends the current single state as SysEx.
Sends the current multi state as SysEx.
Sends the current arpeggiator pattern as
SysEx.
This sends a whole bank of presets as SysEx.
Operating Modes and Menus
Group
Parameter
Value
Single Bank C
Single Bank D
Multi Bank
ArpPat. Bank
Do it…
Do it…
Do it…
Do it…
Global Data
Do it…
Total
Do it…
Input
InputThru
0…127
Sync
Syncmode
Int.
Auto
Ext.
MIDI
MIDI Thru
OFF/ON
Global Chan
1…16
Sysex ID
0…126
Any
ArpSend
OFF/ON
Rx CtlChg
OFF/ON
Tx CtlChg
OFF/ON
Rx PrgChg
OFF/ON
Tx PrgChg
OFF/ON
Mastertune
KnobMode
-64…+63
Abs
Rel
Pick
Set Up
Page
Comments
Sends the full bank of multi presets as SysEx.
Sends the full bank of arpeggiator patterns as
SysEx.
This sends the global parameters not stored
with any single or multi preset, as SysEx.
Sends a dump of everything. This is the safest
to use to make sure you never lose all your
finely tuned presets.
This parameter defines the portion of the
input signal that will be fed to the output
directly (bypass).
SyncMode defines the source of the MIDI
clock to synchronize the delays and LFOs.
When set to internal, the MIDI clock is
generated internally using the Tempo
specified in the next parameter. If set to
external, the clock is extracted from the
incoming MIDI stream and the Tempo is
calculated from it. The Auto Mode is used to
automatically change between external and
internal tempo: if the system receives
incoming MIDI clock, then it will follow the
external tempo. If there is not incoming MIDI
clock, then the system will use the internal
tempo.
When on, the Chameleon will echo out
instantly of the MIDI OUT port all information
that it receives at the MIDI IN port.
It is used as the listening MIDI channel when
in Single Preset Mode.
If you have more than one Chameleon, and
you want to send SysEx information to them
independently on the same MIDI chain, you
can uniquely identify them using this setting
When this parameter is ON, Australis will
send out through the MIDI OUT port the
stream of notes generated by the internal
arpeggiator.
Australis will respond to MIDI controller
change messages.
When this is “ON”, whenever you adjust a
parameter, Australis will transmit the
corresponding MIDI controller change
message. Useful if you want to record a
performance with the real time controllers.
Will respond to program change messages
(for changing preset).
Australis will transmit a program change
messages whenever you change preset from
the front panel.
Determine the overall pitch of Australis.
Provides a selection of several knob
operating modes depending on personal
preference or suitability to the tasks you are
dealing with.
In absoulute mode (Abs) the assigned
parameter value will jump directly to the
value determined by the current position of
Australis Synthesizer – User’s Manual
43
Group
Page
Parameter
Value
Comments
the knob.
In Relative mode (Rel) the parameter value
will change in the same proportion as the
knob changes from the current position.
Utility
Info
44
TempoLED
Alt
Typ
LockEnc
OFF/ON
ScrnSaver
Init Single
OFF
1m
3m
5m
15m
Do it…
Init Multi
Do it…
Reset All
Do it…
Reset Bank A
Reset Bank B
Reset Bank C
Reset Bank D
Reset Multis
Reset ArpPat.
Do it…
Do it…
Do it…
Do it…
Do it…
Do it…
Version
Serial number
In Pick Up mode (Pick) the parameter value
will remain at the original setting until the
movement of the knob passes beyond this
position.
You can choose between two types of flash
patterns for the tempo LED. Straight flashes
or a slightly longer flash on the first beat of
the bar.
When playing with the real-time controllers,
it is possible to knock the BIG DIAL by
accident, which could mean changing preset.
This option switches off the big dial so that
during a gig you don’t accidentally change
preset and sound stupid. Aren’t we nice?
You can set the time before the screensaver
kicks in.
You can initialise a preset’s parameters (but
without losing it’s name) to their default
value so you can start again. Note: you still
have to save the changes for it to be
permanent.
This will initialise the current multi to default
settings. The same applies as the Init Single.
This will wipe your user presets and initialise
ALL presets back to the factory banks. Unlike
Init Preset this will happen straight away.
Careful…
These commands are for recalling the factory
bank sounds or patterns one at a time. You
don’t need to recall them all if you don’t
want to lose other things you have made
that you like.
For your information…
For your information…
Operating Modes and Menus
2.9
Demo Mode
You enter this mode by pressing SHIFT+EDIT when in Single Preset Mode. In
Demo Mode, Australis will play back demo songs written specially for this
soundskin and stored internally.
The user can select one from the available demos using the keys VALUE
UP&DOWN. Any other key will exit this operating mode and will return to the
Single Preset Mode.
While the demo song is playing, the SHIFT led blinks at the song tempo, and
the LEDs above the knobs will sequence to keep you amused…
Australis Synthesizer – User’s Manual
45
Appendix
AA
Loading Soundskins
To load a new application or version update into the Chameleon, follow the
instructions below:
MIDI OUT
MIDI IN
Chameleon
SHIFT
MIDI Sequencer/ Player
Figure 2-4
•
Power up the Chameleon with the Shift Key held down, to put it in
ready mode to accept the new application. It will show this message:
•
Connect the MIDI OUT of your MIDI Sequencer/Player machine (for
example, a computer with a MIDI interface) to the MIDI IN of the
Chameleon and Play the Application MIDI File containing the new
application or version update. It’s recommended to disable the MIDI
clock in the MIDI Sequencer/Player. If everything is connected
properly, the following screen will be displayed showing an increasing
block counter.
•
When the counter arrives at the last block the Chameleon will ask you
to store the application in the internal Flash memory: this must be
confirmed by pressing the SHIFT key within 20 seconds in order to
accept the received data. If you don’t press SHIFT the Chameleon will
simply return to the “Waiting” state. If you do press the SHIFT key to
accept, the application will be burned in the internal FLASH memory.
If any problem happens during the downloading process, the display
46
Loading Soundskins
will show “**BAD DATA**” or “**TIME OUT**”. To solve this,
try setting a lower tempo in the sequencer (e.g. 90 BPM).
•
After the process has been successfully completed, the Chameleon
will power-up automatically, loading the new application, which will
need a few seconds to be fully operative after reconfiguring all the
internal resources to it’s needs. It is at this stage that all the old
presets of the previous application are wiped out.
It is therefore vital that you save all your precious work by doing a MIDI dump
BEFORE you load a new application, even if it is just a version update.
NOTE: There’s no risk of damaging the Chameleon with wrong or corrupted
data, as the Chameleon just won’t accept it. In case of error, the old
application will remain unharmed.
Australis Synthesizer – User’s Manual
47
Appendix
BB
Midi Implementation
The next table shows the parameters mapped to MIDI Controllers, whose
value can be changed using standard MIDI control change messages (0xBn,
ctrl, value).
MIDI Ctrl
0
1
3
5
7
9
10
11
12
13
14
15
16
17
18
19
20
21
22
23
24
25
26
27
28
29
30
31
32
33
34
35
36
37
48
Australis Parameter
MidiBankSelect
MidiModulationWheel
Osc1Pitch
OscPortamento
MidiVolume
Osc2Pitch
MidiPanorama
MidiExpressionPedal
Osc1PulseWidth
Osc1KeyTrack
Osc2PulseWidth
Osc2KeyTrack
Osc2Detune
Osc2FmAmount
NoiseColor
MixerOsc1Volume
MixerOsc2Volume
MixerSubOscVolume
MixerNoiseVolume
MixerRingModVolume
Filter1Frequency
Filter1Resonance
Filter1EnvAmount
Filter1KeyTrack
Filter2Frequency
Filter2Resonance
Filter2EnvAmount
Filter2KeyTrack
MidiBankSelect
EnvFilterAttack
EnvFilterDecay
EnvFilterSustain
EnvFilterRelease
EnvAmpAttack
Midi Implementation
MIDI Ctrl
38
39
40
41
42
43
44
45
46
47
48
49
50
51
52
53
54
55
56
57
58
59
60
61
62
63
64
67
68
69
70
71
72
73
74
75
76
77
78
79
80
81
82
83
84
85
86
Australis Synthesizer – User’s Manual
Australis Parameter
EnvAmpDecay
EnvAmpSustain
EnvAmpRelease
Lfo1Speed
Lfo1KeyTrack
Lfo2Speed
Lfo2KeyTrack
ModVelocityAmpVolumeAmount
ModVelocityAmpPanoramaAmount
ModVelocityOscPulseWidthAmount
ModVelocityFmAmount
ModVelocityEnvFilter1Amount
ModVelocityEnvFilter2Amount
ModVelocityFilter1ResoAmount
ModVelocityFilter2ResoAmount
ModLfo1VolumeAmount
ModLfo1PanoramaAmount
ModLfo1FmAmount
ModLfo1Filter1FreqAmount
ModLfo1Filter2FreqAmount
ModLfo2Osc1PitchAmount
ModLfo2Osc2PitchAmount
ModLfo2OscPulseWidthAmount
ModLfo2Filter1ResoAmount
ModLfo2Filter2ResoAmount
FilterBalance
MidiSustainPedal
AmpVolume
AmpPanorama
ModRandomFmAmount
ModEnvFilterOsc1PitchAmount
ModEnvFilterOsc2PitchAmount
ModEnvFilterFmAmount
ModEnvAmpOsc2DetuneAmount
ModEnvAmpFmAmount
ModRandomPanoramaAmount
ModRandomFilter1FreqAmount
ModRandomFilter2FreqAmount
ModVelocityOsc1PulseWidthAmount
ModVelocityOsc2PulseWidthAmount
ModVelocityOsc2DetuneAmount
ModVelocityFilter1FreqAmount
ModVelocityFilter2FreqAmount
ModLfo1Osc1PitchAmount
ModLfo1Osc2PitchAmount
ModLfo1Osc1PulseWidthAmount
ModLfo2Osc2PulseWidthAmount
49
MIDI Ctrl
87
88
89
90
91
92
93
94
95
96
97
100
101
102
103
104
105
106
107
108
109
110
111
112
113
114
115
116
117
118
120
123
Australis Parameter
ModLfo1Filter1ResoAmount
ModLfo1Filter2ResoAmount
ModLfo2VolumeAmount
ModLfo2PanoramaAmount
ModLfo2Osc1PulseWidthAmount
ModLfo2Osc2PulseWidthAmount
ModLfo2FmAmount
ModLfo2Filter1FreqAmount
ModLfo2Filter2FreqAmount
ModEnvFilterOsc2DetuneAmount
ModEnvAmpOsc1PitchAmount
ModEnvAmpOsc2PitchAmount
ModRandomOsc1PulseWidthAmount
FilterFrequency
FilterResonance
FilterEnvAmount
ModVelocityEnvFilterAmount
ModVelocityFilterResoAmount
ModLfo1FilterFreqAmount
ModLfo2OscPitchAmount
ModLfo2FilterResoAmount
ModEnvFilterOscPitchAmount
ModRandomFilterFreqAmount
ModRandomOsc2PulseWidthAmount
ModRandomOsc2DetuneAmount
ModRandomEnvFilter1Amount
ModRandomEnvFilter2Amount
ModRandomFilter1ResoAmount
ModRandomFilter2ResoAmount
ModLfo1Lfo2SpeedAmount
MidiAllSoundOff
MidiAllNotesOff
BLUE = Standard Midi controllers supported
BOLD = Australis v0.9 parameters
The two standard BankSelect MIDI controllers (ctrls 0 and 32) are equally used
to select the Preset Bank which will be used in the next Program Change
message. The next table summarizes the possible values of value and their
meaning.
value
0
1
2
3
16
50
Bank
Single Preset Bank A
Single Preset Bank B
Single Preset Bank C
Single Preset Bank D
Multi Preset Bank
Midi Implementation
When selecting a Multi Preset (Bank Change=16, Program Change=multi
preset number), Australis will change to Multi Preset Mode if it is in Single
Preset Mode.
The next table shows the parameters mapped to MIDI Polyphonic Pressure
(parameters less used to continuously control), whose value can be changed
using standard MIDI polyphonic pressure messages (0xAn, ctrl, value).
MIDI Ctrl
0
1
2
3
4
5
6
7
8
9
10
11
12
13
14
15
16
17
18
19
20
21
22
23
24
25
26
27
28
29
30
31
32
33
34
35
36
37
38
39
40
41
42
43
Australis Synthesizer – User’s Manual
Australis Parameter
SingleTempo
Osc1Waveform
Osc2Waveform
Osc2Sync
OscKeyMode
OscTranspose
OscBendRange
Filter1Type
Filter1EnvInvert
Filter2Type
Filter2EnvInvert
FilterRouting
Lfo1Waveform
Lfo1Mode
Lfo2Waveform
Lfo2Mode
FxChorusMix
FxChorusDelay
FxChorusFeedback
FxChorusLfoDepth
FxChorusLfoSpeed
FxDelaySend
SingleFxDelayTime
SingleFxDelayFeedback
SingleFxDelayFilter
SingleFxDelayPingPong
ArpMode
ArpClock
ArpPatternSelect
ArpDirection
ArpSortOrder
ArpOctaveRange
ArpVelocity
ArpGateTime
ArpPatternLen
ArpQuantize
ArpKeyRestart
ArpPatternReset
OscKeyTrigger
OscKeyGlide
Osc1PhaseInit
Osc2PhaseInit
Lfo1Sync
Lfo1Clock
51
MIDI Ctrl
44
45
46
47
48
49
50
51
52
53
54
55
56
57
58
59
60
61
62
63
64
65
66
67
68
69
70
71
72
73
74
75
76
77
78
79
80
81
82
83
Australis Parameter
Lfo1FadeIn
Lfo1PhaseInit
Lfo1PulseWidth
Lfo2Sync
Lfo2Clock
Lfo2FadeIn
Lfo2PhaseInit
Lfo2PulseWidth
FxDistortionCurve
FxDistortionGain
FxDistortionVolume
FxChorusPhaserType
FxChorusLfoSync
FxChorusLfoClock
FxPhaserMix
FxPhaserOrder
FxPhaserFreq
FxPhaserFeedback
FxPhaserLfoDepth
FxPhaserLfoSync
FxPhaserLfoClock
FxPhaserLfoSpeed
SingleFxDelaySync
SingleFxDelayClock
UnisonActive
UnisonDetune
UnisonPanSpread
ModVelocityFilterFreqAmount
ModLfo1OscPulseWidth
ModLfo1OscPitchAmount
ModLfo1FilterResoAmount
ModLfo2FilterFreqAmount
ModEnvAmpOscPitchAmount
ModRandomOscPulseWidthAmount
ModRandomFilterEnvAmount
ModRandomFilterResoAmount
ArpNoteOffset
InputSelect
InputLevel
InputBalance
BOLD = Australis v0.9 parameters
52
Midi Implementation
Appendix
C
C
Quick Navigation Tables
These tables summarize the menu entries shown in the different operating
modes of Australis. Some entries can be disabled depending of the value of
other parameters. For example, the entry OSC:Osc1:Pulsewidth will be
disabled if OSC:Osc1:Wave has a value different of “Square”.
Single Edit Mode
Group
Page
Parameter
OSC
Osc1
Wave
PulseWidth
Pitch
KeyTrack
Phase
Wave
PulseWidth
Pitch
Detune
KeyTrack
Phase
Sync
FmAmount
Color
Active
Detune
PanSpread
KeyMode
Trigger
Glide
Portamento
Transpose
BendRange
Osc2
Noise
Unison
Keyboard
Common
Group
MIXER
Australis Synthesizer – User’s Manual
Page
Parameter
Osc1Level
Osc2Level
SubOscLevel
NoiseLevel
RingModLev
53
Group
Page
Parameter
FILTER
Filter1
Type
Frequency
Resonance
EnvAmount
EnvInvert
KeyTrack
Type
Frequency
Resonance
EnvAmount
EnvInvert
KeyTrack
Routing
Balance
Frequency
Resonance
EnvAmount
Filter2
Common
Group
Page
AMPLIFIER
Volume
Panorama
Group
Page
Parameter
ENV
Amp
Attack
Decay
Sustain
Release
Attack
Decay
Sustain
Release
Filter
54
Parameter
Quick Navigation Tables
Group
Page
Parameter
LFO
Lfo1
Wave
Sync
Clock
Speed
FadeIn
Mode
KeyTrack
Phase
PulseWidth
Wave
Sync
Clock
Speed
FadeIn
Mode
KeyTrack
Phase
PulseWidth
Lfo2
Australis Synthesizer – User’s Manual
55
Group
Page
Parameter
MOD
Velocity
Volume
Panorama
PulseWidth
PulseWidth1
PulseWidth2
Osc2Detune
OscFm
FilterEnv
Filter1Env
Filter2Env
FilterFreq
Filter1Freq
Filter2Freq
FilterReso
Filter1Reso
Filter2Reso
Volume
Panorama
OscPitch
Osc1Pitch
Osc2Pitch
PulseWidth
PulseWidth1
PulseWidth2
OscFm
FilterFreq
Filter1Freq
Filter2Freq
FilterReso
Filter1Reso
Filter2Reso
Volume
Panorama
OscPitch
Osc1Pitch
Osc2Pitch
PulseWidth
PulseWidth1
PulseWidth2
OscFm
FilterFreq
Filter1Freq
Filter2Freq
FilterReso
Filter1Reso
Filter2Reso
Lfo1
Lfo2
56
Quick Navigation Tables
Group
Page
MOD (continued) FilterEnv
AmpEnv
Random
Group
INPUT
Australis Synthesizer – User’s Manual
Page
Parameter
OscPitch
Osc1Pitch
Osc2Pitch
Osc2Detune
OscFm
OscPitch
Osc1Pitch
Osc2Pitch
Osc2Detune
OscFm
Panorama
PulseWidth
PulseWidth1
PulseWidth2
Osc2Detune
OscFm
FilterEnv
Filter1Env
Filter2Env
FilterFreq
Filter1Freq
Filter2Freq
FilterReso
Filter1Reso
Filter2Reso
Parameter
Select
Level
Balance
57
Group
Page
FX
Distortion Curve
Gain
Volume
Chor/Phas Type
Chorus
Mix
Delay
Feedback
Depth
Sync
Clock
Speed
Phaser
Mix
Peaks
Frequency
Feedback
Depth
Sync
Clock
Speed
Delay
Send
Sync
Clock
Time
Feedback
Filter
PingPong
Group
Page
ARPEGGIATOR
58
Parameter
Parameter
Mode
Clock
Pattern
Dir
Sort
Octaves
Velo
Note
GateTime
PatternLen
Quantize
KeyRestart
PatReset
Quick Navigation Tables
Group
Page
Parameter
COMMON
Tempo
Wheel
BPM
MinValue
MaxValue
MinValue
MaxValue
MinValue
MaxValue
MinValue
MaxValue
Exprs
Pedal
Aftch
Australis Synthesizer – User’s Manual
59
Multi Edit Mode
Group
Page
PART
MULTI
FxDelay
Tempo
60
Parameter
Enable
MidiChannel
NoteLow
NoteHigh
VelLow
VelHigh
Volume
Pan
Transpose
Detune
DlySend
ArpMode
Sync
Clock
Time
Feedback
Filter
PingPong
BPM
Quick Navigation Tables
System Mode
Group
Page
Parameter
SYSTEM
Dump
Snapshot
Performance
Single
Multi
Arp Pattern
Single Bank A
Single Bank B
Single Bank C
Single Bank D
Multi Bank
ArpPat. Bank
Global Data
Total
InputThru
SyncMode
MidiThru
GlobalChan
SysEx ID
ArpSend
Rx CtlChg
Tx CtlChg
Rx PrgChg
Tx PrgChg
MasterTune
KnobMode
TempoLED
LockEnc
ScrnSaver
Init Single
Init Multi
Reset All
Reset Bank A
Reset Bank B
Reset Bank C
Reset Bank D
Reset Multis
Reset ArpPat.
Australis vX.X
Input
Sync
MIDI
Setup
Utility
Info
Australis Synthesizer – User’s Manual
61
Appendix
D
D
Factory Presets
The following tables contain the name of the factory presets supplied with
this version of Australis. They fill completely the Single Banks A, B and C, and
a portion of the Multi Bank.
Single Bank A
Number
001
002
003
004
005
006
007
008
009
010
011
012
013
014
015
016
017
018
019
020
021
022
023
024
025
026
027
028
029
030
031
032
033
034
035
62
Name
ChamyPad
FilmPad
DarkPad
HiStrings
Ensemble
DarkStr
LargeStrn
FmStrings
HiSweep
Mistery
ResSweep
HiPassPad
GrowPad
Milkyway
OpenSweep
Spiky
SpecPad
Tremolous
Galaxy
WonderPad
SoftSquar
SynChoir
MaleChoir
MelloPad
VoxPad
Aurora
BellStr
ForceOne
SynthEp
HarpyHarm
Flux
Silicone
Evenly
Party
Bathos
Number
036
037
038
039
040
041
042
043
044
045
046
047
048
049
050
051
052
053
054
055
056
057
058
059
060
061
062
063
064
065
066
067
068
069
070
Name
Beaming
PolySynth
Interact
Password
Transgen
Loathing
Sacrilege
Syntax
Debacle
Syncope
Flipper
Umbrella
Spot
Finely
Inflamed
Hoarse
Rope
Venice
Allusion
Oomph
Smudgy
Pouding
ByGone
Disto303
Declaim
SynBass
SubBass
LowBass
Oizo
ObyBrass
SynBrass
Brassiere
Brash
Concoct
Shortfall
Factory Presets
Number
071
072
073
074
075
076
077
078
079
080
081
082
083
084
085
086
087
088
089
090
091
092
093
094
095
096
097
098
099
Name
GreenLead
Philately
Bindweed
Graffiti
Syphilis
Untrained
Transcend
Loopy
Distend
Zodiac
Zipper
DistGuit
Tsarina
GuitaJam
BassJam
Gummed
Surrender
ClaviSyn
BellyEp
Surreal
Bellows
Epilogue
Nana
Dropy
MyJeans
Chorale
Blower
Church
Feria
Australis Synthesizer – User’s Manual
Number
100
101
102
103
104
105
106
107
108
109
110
111
112
113
114
115
116
117
118
119
120
121
122
123
124
125
126
127
128
Name
Orgasm
HouseOrg
Viper
FarEast
BassDrum
MoreBeats
DistoBD
HardBD
DeepBD
SynSnare
AnaSnare
SynTom
CloseHH
Brush
OpenHH
Sticks
Snip
TecnoZip
Clave
Tribal
Borax
Playful
Barrel
Noiseness
AmbWind
Ghostly
NoSinger
NoisChoir
Input
63
Single Bank B
Number
001
002
003
004
005
006
007
008
009
010
011
012
013
014
015
016
017
018
019
020
021
022
023
024
025
026
027
028
029
030
031
032
033
034
035
036
037
038
039
040
041
042
043
044
045
64
Name
Big Poly
VS-Bell
ChurchBel
FM Bells
Crystal
Glass Pad
PPG Vox
PPG Choir
EntryPad
OuterLimt
WahPad
TrancePad
RainPad
Sticker
Iceberg
ResoPad
FlangerPa
Warm Pad
Under G
SynNymph
Synthi
FM Freak
SawThing
Orbiter
VelRaptor
Modulate
HardSynth
HappyHour
SubTrakt
Madness
Evolution
Da Force
ClearArp
Floating
AKLsynbas
Antenna
Organic
Picker
DreamOn
Progressy
SoftieArp
Lonely
Receiver
Mastermin
Cheesy
Number
046
047
048
049
050
051
052
053
054
055
056
057
058
059
060
061
062
063
064
065
066
067
068
069
070
071
072
073
074
075
076
077
078
079
080
081
082
083
084
085
086
087
088
089
090
Name
Transfer
LowMutes
LeadPick
Psychotic
SyncCity
SynBass2
ChorBass
Bastard
TBxfer
ResoTB
DanceBass
BootBass
MeloBass
Raver
MiniNoisy
MoogMan
Acidify
PillBass
FilterAtk
WarBass
B Bass
Dee`Troit
VerySub
Netwerk
TypBass
AccBass
PickBass
SiloBass
LowBrass
SoftBrass
Brassy
Brasster
Anattack
MeloBrass
TerraNova
Brassic
Darkness
LeadBrass
Leading
SineLead
Leader
SawLead
ShortLead
SyncLead
CrazyLead
Factory Presets
Number
091
092
093
094
095
096
097
098
099
100
101
102
103
104
105
106
107
108
109
Name
OldSkool
MagicOrg
OrganPad
ChorusOrg
Epiano
HighEP
PercEP
SoftEP
RingPiano
FazOrgan
Metalkey
Vibes
Vibes Vib
Woodkey
Marimbaaa
Kaleemba
Congas
Bongo
DanceKick
Australis Synthesizer – User’s Manual
Number
110
111
112
113
114
115
116
117
118
119
120
121
122
123
124
125
126
127
128
Name
DeepSubBD
Bum BD
RingRide
Brass SN
DrySnare
HipSnare
NoiseSnr
AnaSnare2
BigHat
Maracas
ClosedHH2
Shaker
TickSnare
NoiSnare
BigSnare
Snap
WhitePing
AnalogTom
XowToms
65
Single Bank C
Number
001
002
003
004
005
006
007
008
009
010
011
012
013
014
015
016
017
018
019
020
021
022
023
024
025
026
027
028
029
030
031
032
033
034
035
036
037
038
039
040
041
042
043
044
045
66
Name
Desert
Sulphuric
Styptic
Terror
Volcano
Universe
Bottling
Abandon
AlmostDef
B Runner
Clock
Poe
NoiseAge
NoiseWah
WundrPad2
Carintian
Screech
Insane
Surface
Atmozfear
Aquaria
Resine
Mars
Voodoo
Doorknob
Engine
Fretsaw
SomaPad
Phaedra
ModuLead
SeaScape
RingView
Ganymed
VenuStorm
Emptyness
SilkPad
Raezohr
Mistrust
MadDrivin
Reverse
Syntha
HiSweep
Asteroid
PPG keys
Return to
Number
046
047
048
049
050
051
052
053
054
055
056
057
058
059
060
061
062
063
064
065
066
067
068
069
070
071
072
073
074
075
076
077
078
079
080
081
082
083
084
085
086
087
088
089
090
Name
Play me
Phase syn
Tek hed
SpiritArp
Arp bass
BrightArp
Dance2me
JitterArp
RippleArp
TeeBee?
Jilted G
Heavy sbs
Wow morph
Stefs gig
KaoS Bass
SubGarage
Corpuscle
Visitant
Sweepa
PodLead
HeavyBass
Hyper PPG
RM Dream
MagicTree
Muted
Go Synth
RojoBass
ClockLife
Organik
On Wood
AtackOrgn
PearlOrgn
Future le
Perc Org
Organo
ChiFlute
eClarinet
Elektric
E Piano2
E Piano3
E piano4
Tine EP
Harpsichd
Clavinet
DubKeys
Factory Presets
Number
091
092
093
094
095
096
097
098
099
100
101
102
103
104
105
106
107
108
109
Name
Electro
D Whistle
DanceArp
Metallix
SpringArp
T Bass
Hard step
Monobeast
Monoblast
Syncing
Speak 2me
Speak 4me
Stomach
Undergrnd
AC/DC
Lunatic
Science
Computer
Kit BD
Australis Synthesizer – User’s Manual
Number
110
111
112
113
114
115
116
117
118
119
120
121
122
123
124
125
126
127
128
Name
Bill`s BD
Tight BD
Temple BD
Ana BD
Rascal BD
Kicker
AnaSnare
SnareHit
Light SN
MoSnare
Sandy SN
PingSnare
Loose Hat
ClHiHat
Spline
Tik hat
FlagerHat
PhaseHat
Tss Hat
67
Multi Bank
Number
001
002
003
004
005
006
007
008
68
Name
Sequencer
Technoid
Transient
Acme
Thinness
TecboyKit
Fatty Kit
Dark Kit
Number
009
010
011
012
013
014
015
016
Name
DeeperKit
Mini Kit
Earth Pad
MonstaLD
SputnikLD
OddesaARP
WaveKEYS
Vibe KEYS
Factory Presets
Appendix
E
E
Chameleon GUI
This appendix describes how to use the Soundart Chameleon Graphical User
Interface (GUI) in conjunction with the Australis Polyphonic synth skin. Each
skin runs it’s own module within the cross-platform GUI framework that
allows you to use your PC or Mac for on-screen editing, saving of Patches and
managing your banks of Presets. The GUI can also handle the loading of
soundskins directly, as you will need to load the latest version (supplied) to
work with the GUI.
Here we discuss the Australis GUI module and how to use it.
Australis Synthesizer – User’s Manual
69
Setting Up
About the GUI Files
The Windows and Mac versions give you a folder with everything you need.
In the folder you will find:
1. The GUI application.
2. The Australis Multi editor as a dynamic library
3. The Australis factory sound banks
How to Configure the GUI
To configure the GUI to work, you simply need to set up the correct MIDI ports
inside the program, and that is it. There is no audio to configure, as the GUI
only changes the synth’s parameters by sending and receiving MIDI
commands (CC, CPRESS and SYSEX etc).
1. Open the midi settings window under the system menu
2. Then select and insert the appropriate in and out ports. (E.g. input
from your keyboard, output to your Chameleon)
70
Chameleon GUI
Loading the Skin
Firstly, you should load the latest Australis soundskin onto the Chameleon
directly from the GUI.
1. Press Soundskin in the save menu on the right. You will then see this
box:
2. Once you hit yes it will lead you through the steps like this:
3. Once you hit next, a progress bar will show you haw long it will take
to transmit the skin:
Your presets stored in the Chameleon will be overwritten, so you should save
them before updating the soundskin.
Australis Synthesizer – User’s Manual
71
Using the Australis GUI
Firstly, a working knowledge of the Australis synth and its parameters is
assumed in the following descriptions. If you need more detailed
explanations on the workings of the Australis synth and how to program it,
see the relevant sections in this Australis manual.
Version 1.0 of the GUI is for editing the Multi sets and all their parts only.
Single mode is not supported. Full implementation of a separate Single editor
with all the relevant parameters covered (notably the Single delay FX) will be
added in the next version of the Australis GUI. However, remember that you
can, of course, already edit nearly every aspect of the Singles using this
version of the GUI.
For understanding how it works, we can split the GUI into two parts:
•
THE UPPER SECTION: this is permanently visible, and shows the main
readout window and all the main saving, storing and resetting
functions. You can also switch between the three main editing areas
that are displayed in the lower section – the Preset libraries (LIBRARY),
all the different pages of editable parameters (EDIT) and the global
settings (GLOBAL).
•
THE LOWER SECTION: what you see in this section will change,
according to what options you have selected in the upper section.
Different sets of parameters will show in the lower section, ranging
from the libraries of Preset banks to all the synth’s parameters for
each part.
The UPPER Section in Detail
The buttons on the right hand side are used for storing, loading and resetting
patches, as well as co-ordinating the GUI with the Chameleon's own internal
settings (or vice versa).
Saving your work with the GUI is more complex than a standard soft synth, as
you can save records of your Patches locally on your computer as well as to
the memory of the Chameleon itself. So there are a variety of options found
here.
72
Chameleon GUI
Dialog boxes will appear to help you, or to warn you if you are about to do
something major like initialise everything. Progress bars will also let you
know how any large data transfers are getting on.
Lets look at it a line at a time:
The top two lines are for storing to the Chameleon memory and resetting
patches:
•
STORE: This saves the current part that you are editing to the
Chameleon's memory, overwriting the previous stored Preset at the
same location. This is equivalent to saving the Preset over itself on
the Chameleon.
•
RESET: This initialises (i.e. wipes blank) the current Preset to default
values - a basic sine wave Patch. In the case of resetting a Multi it will
initialise ALL the parts in that Multi. Use these resetting options to
start a Patch from a clean slate.
Note that even if you reset a preset, on the Chameleon nothing is saved until
you explicitly commit it to memory using STORE. Until then the changes reside
in the volatile buffer memory. If you turn the Chameleon off and on again, or
even just switch to another Preset and back, your temporary changes are lost.
This is just like when editing directly on the Chameleon itself.
•
STORE ALL: This saves to the Chameleon's memory all the changes
made to all parts. Again, it saves to their current positions.
•
RESET ALL: This initialises ALL PRESETS AND MULTIS THROUGHOUT THE
CHAMELEON. Watch out!
The middle line of buttons is for co-ordinating the GUI with the Chameleon’s
data or vice versa.
•
REQUEST ALL: This asks the Chameleon to send all settings for all
banks (Multi and Single), as well as all global settings. This is for
making sure all GUI parameters are the same as those in the
Chameleon. When you start this option, it can take some time for the
Chameleon to send everything. However, You will not see a progress
bar on your computer screen, as the GUI and the Chameleon are not
linked together in a way that makes this possible. You are simply
sending a request for a SYSEX dump that the Chameleon will then
carry out.
•
DUMP ALL: This is the opposite of request all - this sends all
parameters from the GUI and sets the Chameleon so it is exactly the
same as the current GUI set up. In this case you will see a progress
bar.
The second from the bottom line of buttons are for loading and saving your
set-ups to your computer for back-up purposes and archiving of all your work.
Every time you switch skin you should save your Australis patches to your
computer so that you can return to them when you load it onto the
Chameleon again.
Australis Synthesizer – User’s Manual
73
•
LOAD: This is for loading into the GUI editor a .syx file previously saved
on your computer. You can then dump the info over to the
Chameleon.
•
SAVE: This is for saving a .syx file to your computer for backup, which
contains the complete state of the GUI editor. Using request all and
then saving a .syx like this, you can quickly save all your patches to
your computer before you switch to a new skin.
The last lines of buttons are:
•
SOUNDSKIN: for loading the latest version of the Australis soundskin
onto the Chameleon, as outlined above.
•
MIDI CC: This option allows you to use SYSEX to send all parameter
controls from the GUI. This is to get around some limitations inherent
in the MIDI standard. Normally Australis uses CC and P-press MIDI
messages to control many of its parameters, as this allows for a wide
variety of easy data manipulation techniques in modern sequencers.
But it also means that in certain situations there is a conflict. For
example - if you create a Multi with all Singles responding to the
same MIDI channel, all Singles will respond to the same filter control
CC message at the same time. Examples of this type of Multi are the
variety of 'kits' that come with the Australis Multi library such as ‘tek
boy kit’ and so on. If you deselect MIDI CC then SYSEX control will be
used, and this will no longer be a problem.
SOLO, COMPARE and PANIC
74
•
SOLO allows you to mute all other Single Parts and just listen to
individual Parts.
•
COMPARE allows you to toggle between the Preset saved in the
memory and the edits you have been making for comparison. This is
possible because your edits are being temporarily saved in a volatile
buffer memory.
•
PANIC will send an ‘all notes off’ MIDI message to clear any stuck
notes.
Chameleon GUI
The Main Window
This window allows you to see the currently selected Multi and all its parts.
You can see the MIDI channels being used, the Single Part names, and so on.
You will also see that any MIDI activity will flash the appropriate MIDI channel
numbers, to help you keep track of what is happening. This is useful in
trouble-shooting situations.
You can step up and down through the lists of Multi or Single Presets in your
library using the PRESET UP and DOWN buttons on the left of the screen.
In the main window, if you double click a Preset or Multi name you can
rename it.
LIBRARY, EDIT and LOCAL
Use these three buttons to the right of the main window to switch between
the different areas of the GUI that are shown in the lower section of the GUI.
•
LIBRARY: is for managing all your saved Presets.
•
EDIT: is for adjusting individual parameters within the different
sections of the synth (OSC, FILTERS, FX etc).
•
GLOBAL: is for setting up the main system parameters for the synth
(such as master tune, screen saver and so on).
Remember that what you will see in the lower section as you switch
between the LIBRARY and EDIT sections will also depend on what you have
selected in the main window – the Multi name or one of the individual
Presets.
Australis Synthesizer – User’s Manual
75
The LOWER Section in Detail
LIBRARY MODE
The buttons on the right hand side are used for storing, loading and resetting
patches, as well as co-ordinating the GUI with the Chameleon's own internal
settings (or vice versa).
These libraries are for getting an overview of all your different Patches. Here,
you can rapidly select a Preset you want. You are also able to swap Presets
around within the library, move them and reset them.
Remember that:
•
If you have selected the Multi name in the main window you will
enter the Multi library.
•
If you have selected a Preset name in the main window, you will edit
your Preset libraries instead.
For example, here is a Single bank library.
The buttons on the top right are for storing and saving.
The first three are for moving and saving your Presets and bank info:
•
STORE TO: This allows you to move presets around. By selecting a
preset, then pressing ‘STORE TO’ and then selecting a destination slot,
you can copy the Preset to other slots in the library.
- Remember that by default bank D is empty for user slots.
- Note that the STORE TO button will flash until you select a
destination.
76
Chameleon GUI
•
SWAP WITH: This allows you to swap presets around. By selecting a
preset, then pressing ‘SWAP WITH’ and then selecting a destination
slot, you can swap the preset with other slots in the library.
- Note that the SWAP WITH button will flash until you select a
destination.
•
SAVE BANK: press this to save the bank to your computer hard disk for
back-up.
The next two buttons help to synchronise the banks of GUI and those of the
Chameleon:
•
REQUEST BANK: this will ask the Chameleon to send a particular
bank’s data so as to co-ordinate the GUI with the Chameleon’s
memory.
•
DUMP BANK: this will send all bank data from the GUI to the
Chameleon, to co-ordinate the Chameleon memory with the onscreen GUI.
EDIT MODE
The buttons on the right hand side are used for storing, loading and resetting
patches, as well as co-ordinating the GUI with the Chameleon's own internal
settings (or vice versa).
Editing all the many parameters in the lower section of the GUI is
straightforward to use if you know your way around the synth already. We
advise exploring the Skin directly from the Chameleon first, to get to the
menus.
Drop-down menus are hierarchical, where relevant, and any parameter that
should not be accessible is deactivated automatically - e.g. the chorus
parameters are deactivated while the phaser is chosen.
Many of the parameters you find inside the Chameleon menus are
represented with knob and numbers that represent the knob’s position and
value, and you can edit them in two ways:
1. Use the mouse to turn the knobs by clicking and dragging up or down.
(double-click to reset a knob) or
2. Double-click the numerical value to enter it directly from your keypad.
For more details on what each parameter means, see the relevant chapter of
this manual.
Australis Synthesizer – User’s Manual
77
MULTI EDITING
If you have selected the Multi name in the top section’s main window you
will be able to edit all the Multi’s parameters such as balancing the level and
panning of all the parts, adjusting the MIDI channels and the global delay FX
and so on.
SINGLE EDITING
If you select one of the Single parts on the top section’s main screen, you can
edit all that single’s parameters such as the filters, oscillators and so on. You
can choose what group of parameters you wish to edit by picking the
parameter group (LFO, MIXER etc) using the middle row of buttons.
Note that there is a Quick Access group that also groups together many of the
most commonly used parameters for ease of use.
Here, for example, is the Quickedit window a single part.
78
Chameleon GUI
GLOBAL MODE
The global settings are the main system configuration parameters for the
Australis synth. Generally you will set these up and then leave them as they
are.
See the relevant chapter for more details.
Australis Synthesizer – User’s Manual
79