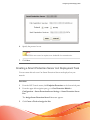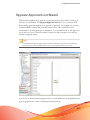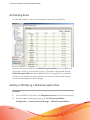
1
Trend Micro Incorporated reserves the right to make changes to this document and to
the products described herein without notice. Before installing and using the software,
please review the readme files, release notes, and the latest version of the applicable user
documentation.
Trend Micro, the Trend Micro t-ball logo, OfficeScan, Damage Cleanup Services,
ScanMail, and TrendLabs are service marks, trademarks or registered trademarks of
Trend Micro, Incorporated.
BigFix®, Fixlet® and "Fix it before it fails"® are registered trademarks of BigFix, Inc.
iprevention, Powered by BigFix, Relevance Engine, and related BigFix logos are
trademarks of BigFix, Inc.
All other product or company names may be trademarks or registered trademarks of
their respective owners.
Protected by U.S. Patent No. 5,623,600; 5,889,943; 5,951,698; 6.119,165
Copyright © 2013 Trend Micro Incorporated. All rights reserved.
Document Part No. APEM105438_120604
Release Date: January 2013
Related Documents
Use this Administrator’s Guide to upgrade, install and/or configure Trend Micro Core
Protection Module (CPM) on an existing ESP Server. This Administrator’s Guide also
covers ESP client deployment, Web Reputation updates and configuration, the Trend
Micro Common Firewall, and client console information.
For related information, see:
•
ESP 8.0 Administrator’s Guide: Contains deployment strategies, installation
instructions, and common configuration tasks.
•
ESP 8.0 Console Operator’s Guide: Contains information for using the ESP Console
to administer protected endpoints.
Feedback
Trend Micro always seeks to improve its documentation. If you have questions,
comments, or suggestions about this or any Trend Micro document, please contact us at
[email protected].
Please evaluate this documentation on the following site:
http://www.trendmicro.com/download/documentation/rating.asp
IMPORTANT NOTICE AND LIMITATION
Your use of the Trend Micro Core Protection Module is limited to supporting the Trend
Micro Core Protection Module and other BigFix Products purchased from Trend Micro
only as expressly described in and permitted by this user guide.
You are only authorized and licensed to use the software distribution capabilities of the
Trend Micro Core Protection Module to distribute the Trend Micro Core Protection
Module and other BigFix Products purchased from Trend Micro, but you are not
authorized or licensed to use the Trend Micro Core Protection Module to distribute any
other Trend Micro, BigFix, or any third party software
You are authorized and licensed to use the Trend Micro Core Protection Module only to
customize the Fixlets that are provided with the Trend Micro Core Protection Module
and other BigFix Products purchased from Trend Micro, but you are not authorized to
create completely new Fixlets unrelated to such software purchased from Trend Micro.
However, you may at any time purchase an upgrade from Trend Micro that permits you
to use the full and complete software distribution capabilities of the Trend Micro Core
Protection Module with any software application (any Trend Micro, BigFix, or third
party software) and to create new Fixlets that are unrelated to the software purchased
from Trend Micro.
Table of Contents
Chapter 1: Introducing Core Protection Module
Overview .......................................................................................................... 1-2
New in this Release ........................................................................................ 1-2
Platform and Browser Support ............................................................ 1-2
Detection and Performance Enhancement ........................................ 1-3
Data Loss Prevention Enhancements ................................................. 1-3
VDI Enhancement ................................................................................. 1-4
New in Version 10.6 SP1 ...................................................................... 1-4
New in Version 10.6 .............................................................................. 1-6
How CPM Works ........................................................................................... 1-8
ESP and CPM Components ......................................................................... 1-8
Features and Benefits ................................................................................... 1-11
Ease of Management ........................................................................... 1-11
Extended Platform Support ............................................................... 1-12
Superior Malware Protection .............................................................. 1-12
Web Reputation Technology .............................................................. 1-13
Client-Side Firewall (Optional) ........................................................... 1-13
Traffic Filtering ..................................................................................... 1-13
Customizable Profiles and Policies .................................................... 1-14
Stateful Inspection ............................................................................... 1-14
Damage Cleanup Services ................................................................... 1-14
Data Loss Prevention .......................................................................... 1-15
Device Control ..................................................................................... 1-15
The Trend Micro Pattern Files and Scan Engine .................................... 1-15
Incremental Virus Pattern File Updates ........................................... 1-16
Virus Patterns ........................................................................................ 1-16
The Trend Micro Scan Engine and Detection Technologies ........ 1-17
Trend Micro Damage Cleanup Services ................................................... 1-17
GeneriClean ................................................................................................... 1-18
i
Core Protection Module 10.6 SP2 Administrator’s Guide
Rootkit Detection ......................................................................................... 1-18
IntelliTrap ...................................................................................................... 1-18
About Windows 8 and Windows Server 2012 ......................................... 1-19
CPM in Windows UI Mode ................................................................ 1-19
CPM Feature Support in Internet Explorer 10 ............................... 1-20
Chapter 2: ESP Server: Installing and Upgrading
Opening the ESP Console ............................................................................ 2-2
Installing CPM on the ESP Server ............................................................... 2-2
Scan Methods .......................................................................................... 2-3
Fresh Installation Procedure ......................................................................... 2-4
Upgrading from Previous Versions ............................................................. 2-6
Smart Protection Server and Relay Sizing Recommendations ................ 2-7
Adding CPM to the ESP Server ................................................................... 2-7
Installing CPM Components on the ESP Server .................................... 2-10
Updating Pattern Files on the Server ........................................................ 2-11
Update Sources ............................................................................................. 2-11
Choosing an Update Source ............................................................... 2-13
Preparing the ESP Server and Updating the Pattern Files ..................... 2-14
Step 1: Run the CPM Automatic Update Setup Script ................... 2-14
Step 2: Issue a "Set ActiveUpdate Server Pattern Update Interval"
Task ........................................................................................................ 2-15
Step 3: Issue a "Apply Automatic Updates" Task ........................... 2-16
Connecting ESP to SPS ............................................................................... 2-16
Installing the ESPAgent using the ESP Deployment Tool ........... 2-17
Installing ESPAgent Manually ............................................................ 2-17
Activating CPM Analyses ............................................................................ 2-18
Shortcut: Activate All CPM Analyses ............................................... 2-18
Removing CPM Server Components ........................................................ 2-19
Removing the Core Protection Module Site .................................... 2-20
ii
Table of Contents
Chapter 3: Getting Started with Relays
Smart Protection Relays ................................................................................. 3-2
Best Practices for Smart Protection Relays ................................................ 3-2
Deployment ............................................................................................. 3-2
Switching Scan Methods ....................................................................... 3-3
Enabling Web Reputation on Endpoints ........................................... 3-4
Deploying SPRs in Low Bandwidth Networks ................................. 3-6
Deploying SPR ................................................................................................ 3-7
Configuring the Smart Protection Relay Proxy Settings Wizard ............. 3-7
Protecting Virtual Environments ................................................................. 3-8
VDI Components ................................................................................... 3-8
Connecting to Virtual Management Servers ...................................... 3-9
VDI Pre-Scan Template Generation Tool ....................................... 3-10
Chapter 4: CPM Clients: Installing and Updating
About CPM Client Deployment ..................................................................
CPM Console and Client System Requirements ...............................
Compatibility with Trend Micro OfficeScan .....................................
Incompatible or Conflicting Programs ...............................................
Overview of the Deployment Steps ....................................................
4-2
4-2
4-2
4-3
4-3
Pattern File and Engine Updates ................................................................. 4-7
Pattern Rollbacks .................................................................................... 4-7
Incremental Updates .............................................................................. 4-8
Updates from the "Cloud" .................................................................... 4-8
Updating Pattern Files on CPM Clients ............................................. 4-9
Displaying the CPM Icon on Endpoints .................................................. 4-14
Removing CPM Clients ............................................................................... 4-15
System Requirements ................................................................................... 4-16
Conflicting or Incompatible Programs ..................................................... 4-16
Chapter 5: Configuring and Managing CPM
Using the CPM Dashboard and Menu ........................................................ 5-2
Tips for Navigating the CPM Console ............................................... 5-2
iii
Core Protection Module 10.6 SP2 Administrator’s Guide
How CPM Task Flows Work ............................................................... 5-5
Configuring and Deploying Global Settings ..............................................
Configuring Global Settings .................................................................
Deploying the Global Settings .............................................................
Enabling the Global Settings Analysis ................................................
5-5
5-6
5-7
5-7
Configuring and Running Malware Scans ................................................... 5-9
Configuring the Default Scan Settings .............................................. 5-11
Configuring an On-Demand Scan ..................................................... 5-13
Running an On-Demand Scan ........................................................... 5-14
Scheduling an On-Demand Scan (Automatic Scanning) ............... 5-14
Client Updates from “the Cloud” .............................................................. 5-16
Configuring Clients to Update from the Cloud ............................... 5-17
Previous Pattern File Version Rollback .................................................... 5-18
Performing a Pattern File Rollback ................................................... 5-19
Re-enabling Updates Following a Rollback ..................................... 5-21
Deploying Selected Pattern Files ................................................................ 5-22
Exempting Programs from Spyware Detection ....................................... 5-24
Restoring Programs Incorrectly Detected as Spyware ................... 5-26
Smart Protection Server Configuration ..................................................... 5-27
Configuring the Smart Protection Server List ................................. 5-27
Creating a Smart Protection Server List Deployment Task .......... 5-29
Deploying the Smart Protection Server List .................................... 5-30
Protecting Endpoints Using Smart Scan .................................................. 5-32
Switching from Smart Scan to Conventional Scan ......................... 5-33
Behavior Monitoring .................................................................................... 5-34
Configure Behavior Monitoring Settings .......................................... 5-35
Event Monitoring ................................................................................. 5-37
Behavior Monitoring Exceptions ...................................................... 5-39
Client Self-Protection Settings ........................................................... 5-41
Unauthorized Change Prevention Service ........................................ 5-41
Enabling Certified Safe Software Service ......................................... 5-42
Chapter 6: Configuration Wizards Reference
Available Wizards ........................................................................................... 6-2
iv
Table of Contents
Global Settings Wizard ..................................................................................
Configuring Scan Settings .....................................................................
Configuring Virus/Malware Scan Settings Only ...............................
Configuring Spyware/Grayware Scan Settings Only ........................
Configuring Reserved Disk Space Settings ........................................
Configuring Client Console Settings ...................................................
6-3
6-3
6-4
6-5
6-6
6-6
ActiveUpdate Server Settings Wizard .......................................................... 6-6
Source ....................................................................................................... 6-6
Proxy ......................................................................................................... 6-8
Others ....................................................................................................... 6-8
On-Demand and Real-Time Scan Settings Wizards ................................. 6-9
Configuring the Scan Target Tab ....................................................... 6-10
Configuring the Scan Exclusions Tab ............................................... 6-13
Configuring the Scan Action Tab ...................................................... 6-13
Spyware Approved List Wizard ................................................................. 6-17
Chapter 7: Using Web Reputation
About Web Reputation .................................................................................. 7-2
Web Reputation Security Levels ................................................................... 7-2
How Web Reputation Works ............................................................... 7-2
Migrating WPM Standalone Settings ........................................................... 7-4
Procedures Overview ............................................................................. 7-5
Migrating Blocked/Approved Lists from WPM to CPM ................ 7-5
Unsubscribing from the WPM Site ..................................................... 7-6
Uninstalling the Standalone WPM ....................................................... 7-7
Installing or Upgrading the CPM Endpoints ..................................... 7-8
Enabling HTTP Web Reputation (port 80) on CPM Clients .......... 7-8
Redeploying WPM Policies to CPM Clients ...................................... 7-9
Configuring a Default WR Security Level ........................................ 7-10
Using Web Reputation in CPM .................................................................. 7-11
Blocked and Approved List Templates ............................................ 7-11
Enabling HTTP Web Reputation (all ports other than 80) on CPM
Clients ..................................................................................................... 7-14
Enabling HTTPS Web Reputation on CPM Clients ...................... 7-15
Web Reputation Proxy Settings ......................................................... 7-16
v
Core Protection Module 10.6 SP2 Administrator’s Guide
Importing Lists of Websites ....................................................................... 7-18
Viewing an Existing Template ........................................................... 7-20
Copying and Editing a Template ....................................................... 7-21
Editing Custom Actions ...................................................................... 7-22
Deleting a Blocked or Approved List ............................................... 7-22
Deleting a WR Custom Task .............................................................. 7-23
About Web Reputation Analyses ............................................................... 7-24
Viewing the Client Information Analysis ......................................... 7-25
Viewing the Site Statistics Analysis .................................................... 7-26
Chapter 8: Install and Manage the Client Firewall
About the CPM Firewall and Policies ......................................................... 8-2
Add the Firewall Masthead to the ESP Server ........................................... 8-3
Removing Conflicting Firewalls ................................................................... 8-5
Creating Firewall Policies .............................................................................. 8-6
Governing Logic ..................................................................................... 8-6
Policy Verification .................................................................................. 8-8
Global Exceptions .................................................................................. 8-9
Creating a Firewall Policy .................................................................... 8-10
Deploying a Firewall Policy ................................................................ 8-12
Creating and Deploying Smart Policies: Example ................................... 8-13
Creating a Policy for Each Case ......................................................... 8-14
Creating Tasks for Different Locations ............................................ 8-15
Global Exception Rules ............................................................................... 8-17
All Existing Rules ................................................................................. 8-18
Adding or Modifying a Global Exception Rule .............................. 8-18
Deleting a Global Exception Rule ..................................................... 8-19
Firewall Policy Settings Wizard .................................................................. 8-19
Firewall Policy Configuration ............................................................. 8-21
Exception Rules Configuration .......................................................... 8-23
Uninstalling the Common Firewall ............................................................ 8-24
Removing the Firewall Site ................................................................. 8-25
vi
Table of Contents
Chapter 9: Setting Up and Using Locations
Locations Overview ....................................................................................... 9-2
Creating Locations .......................................................................................... 9-2
Creating Location-Specific Tasks ................................................................. 9-5
How Location Properties Work ...................................................................
Creating the First Configuration and Task .........................................
Creating the Second Configuration and Task ....................................
Making the Configurations Location-Specific ...................................
9-6
9-7
9-8
9-8
Chapter 10: Monitoring CPM
CPM Overview ............................................................................................. 10-2
Protection Status ........................................................................................... 10-3
Protection Status for Endpoints ........................................................ 10-3
Protection Status for Relays ................................................................ 10-8
Pattern Version ........................................................................................... 10-12
Port Violations ............................................................................................ 10-13
Threat Detection ........................................................................................ 10-13
Web Reputation .......................................................................................... 10-17
Chapter 11: Using the Client Console
Overview ........................................................................................................ 11-2
CPM Client Dashboard vs. CPM Client Console ........................... 11-3
Accessing the Client Console ..................................................................... 11-4
Client Connection with CPM Server ......................................................... 11-4
Manual Scans ................................................................................................. 11-6
Initiating a Manual Scan from the System Tray Icon ..................... 11-6
Initiating a Manual Scan from Windows Explorer ......................... 11-7
Manual Scan Results ............................................................................ 11-8
Testing the CPM Client Console ............................................................. 11-11
Running Update Now ................................................................................ 11-11
vii
Core Protection Module 10.6 SP2 Administrator’s Guide
Chapter 12: Troubleshooting
Installation ..................................................................................................... 12-2
Install Status .......................................................................................... 12-2
Error Codes ........................................................................................... 12-2
Virus, Malware, and Spyware Scanning ..................................................... 12-4
Enabling Debug Logging .................................................................... 12-4
Virus/Spyware Logs on the CPM Client .......................................... 12-4
Debug Logs ................................................................................................... 12-5
Components Installation Debug Logs (CPM Server) .................... 12-6
Components Installation Debug Logs (CPM Client) ..................... 12-6
CPM Clients .................................................................................................. 12-7
Enabling Debugging on the CPM Client ......................................... 12-7
Collecting Information by CDT ........................................................ 12-7
Pattern Updates ............................................................................................ 12-8
General ................................................................................................... 12-8
Automatic Pattern Updates .............................................................. 12-10
Proxy Servers ...................................................................................... 12-11
Client-Side Logging: ActiveUpdate ................................................. 12-12
Additional Files ................................................................................... 12-12
Firewall Troubleshooting .......................................................................... 12-13
General ................................................................................................. 12-13
Client Is not Connecting to the ESP Server or Relays ................. 12-14
Chapter 13: Contacting Trend Micro
Contacting Technical Support .................................................................... 13-2
Speeding Up Your Support Call ........................................................ 13-2
Documentation Feedback ........................................................................... 13-3
Knowledge Base ........................................................................................... 13-3
TrendLabs ...................................................................................................... 13-3
Security Information Center ....................................................................... 13-4
Security Risks ................................................................................................ 13-4
Understanding the Terms ................................................................... 13-5
About Internet Security Risks ............................................................ 13-5
viii
Table of Contents
Viruses/Malware .................................................................................. 13-6
About Spyware/Grayware .................................................................. 13-8
Appendix A: Routine CPM Tasks (Quick Lists)
Scan Management .......................................................................................... A-2
General Scan Configurations ............................................................... A-2
Real-time and On-Demand Scans ...................................................... A-3
Malware Handling and Correction .............................................................. A-6
Exempting Files from Detection ........................................................ A-6
Recovering “Spyware” Files ................................................................. A-6
Using the Anti-Threat Toolkit (ATTK) ............................................. A-7
CPM Server Management ............................................................................. A-7
Activating Analyses ............................................................................... A-7
Removing CPM Server Components ................................................. A-8
Upgrading CPM Server Components ................................................ A-8
Removing the CPM Site ....................................................................... A-8
CPM Client Management ............................................................................. A-9
Displaying the ESP Icon on Endpoints ............................................. A-9
Viewing ESP Hidden Client Statistics for a Given Account .......... A-9
Decrypting Quarantined Files ........................................................... A-10
Deploying CPM Clients ...................................................................... A-11
Removing CPM Clients ...................................................................... A-11
Enabling the Client Console .............................................................. A-11
Enabling Notifications on the Client ............................................... A-12
Pattern File Management ........................................................................... A-13
Configuring Updates from the Cloud .............................................. A-13
Deploying Selected Pattern Files ...................................................... A-14
Reverting to a Previous Pattern File Version .................................. A-14
Re-enabling Updates Following a Rollback .................................... A-14
Updating Pattern Files on the CPM Server ..................................... A-15
Updating Pattern Files on the CPM Clients .................................... A-16
Web Reputation ........................................................................................... A-16
Enabling HTTP Web Reputation (port 80) .................................... A-17
Enabling HTTP Web Reputation (all ports other than 80) .......... A-17
Enabling HTTPS Web Reputation ................................................... A-17
ix
Core Protection Module 10.6 SP2 Administrator’s Guide
Configuring Web Reputation ............................................................ A-18
CPM Firewall ................................................................................................ A-18
Creating a Firewall Policy ................................................................... A-18
Deploying a Firewall Policy ............................................................... A-19
Disabling the Firewall on All or Selected Endpoints .................... A-19
Appendix B: Reference Tables
Default ActiveAction Behaviors .................................................................. B-2
Available Virus/Malware Scan Actions ...................................................... B-2
Pattern and Scan Engine Files ..................................................................... B-4
Scan Action Results for Compressed Files ................................................ B-6
Default Firewall Global Exceptions ............................................................ B-7
Client IPv6 Requirements ............................................................................. B-9
Pure IPv6 Client Limitations ............................................................... B-9
Appendix C: Task Reference
Smart Protection Relay Tasks ...................................................................... C-2
Smart Protection Relay Deployment Tasks ....................................... C-2
Smart Protection Relay Common Tasks ............................................ C-3
Smart Protection Relay Analyses ......................................................... C-5
Smart Protection Relay Troubleshooting ........................................... C-5
VDI Tasks - Quick Start ............................................................................... C-6
VDI Tasks - Common .......................................................................... C-7
VDI Tasks - Deployment ..................................................................... C-8
VDI Tasks - Analyses ........................................................................... C-9
VDI Tasks - Troubleshooting ............................................................. C-9
Index
Index .............................................................................................................. IN-1
x
Chapter 1
Introducing Core Protection Module
This chapter introduces Trend Micro Core Protection Module (CPM) and provides
information on the following topics:
•
Overview on page 1-2
•
New in this Release on page 1-2
•
How CPM Works on page 1-8
•
ESP and CPM Components on page 1-8
•
Features and Benefits on page 1-11
•
The Trend Micro Pattern Files and Scan Engine on page 1-15
1-1
Core Protection Module 10.6 SP2 Administrator’s Guide
Overview
Trend Micro™ Core Protection Module (CPM) is an anti-malware application for Trend
Micro Endpoint Security Platform (ESP). It works with ESP to protect the desktop and
notebook computers on your network from security risks, including spyware, viruses,
Trojans, worms, malicious Java applets, and ActiveX controls.
ESP is built on the BigFix® Enterprise Suite (BES) to provide extended management
capabilities to the CPM server and clients. The CPM client provides real-time, ondemand, and scheduled malware protection. In addition, you can protect your users
against visiting malicious websites by enabling CPM’s Web Reputation. CPM also
provides a policy-based firewall that you can deploy on your endpoints to control port
access.
Using a single agent and management console, Trend Micro ESP can support over
250,000 endpoints. From the management console, you can track the progress of each
computer as updates or configuration policies are applied.
New in this Release
Trend Micro Core Protection Module includes the following new features and
enhancements.
Platform and Browser Support
This version of CPM provides support for client installations on Windows Server™
2012/Server Core 2012.
This version of CPM also provides support for client installations on Windows 8™.
Note
1-2
•
CPM provides real-time toast notifications while operating in Windows UI mode.
•
Clients operating using the Windows UI mode receive limited support. For details, see
About Windows 8 and Windows Server 2012 on page 1-19.
Introducing Core Protection Module
This version of CPM provides support for Internet Explorer™ 10.
Detection and Performance Enhancement
This version of CPM provides the following detection and performance enhancement.
TABLE 1-1. Detection and Performance Enhancements
ENHANCEMENT
DESCRIPTION
MSI installation
Real-time scanning now verifies the file signature of an MSI
installation package before proceeding with an installation. Once
CPM receives verification that the file signature is trusted, real-time
scan allows the installation to proceed without further file scanning.
Popup notification
for compressed file
scanning
Administrators can now configure CPM to display a client
notification whenever CPM does not scan a large file within a
compressed file. End users can click the notification link to view a
log detailing the file that CPM did not scan.
For details, see Configuring Scan Settings on page 6-3 for the
Global Scan Settings Wizard.
Real-Time storage
device scanning
Administrators can configure CPM to automatically scan external
storage devices (for example, USB flash drives) when a user plugs
the device into the computer.
For details, see Scan Settings on page 6-11 for the Real-Time
Scan Settings Wizard.
Anti-Threat Toolkit
(ATTK)
Administrators can deploy the Trend Micro Anti-Threat Toolkit to
quickly identify and fix a wide range of threats including viruses,
worms, Trojans, and spyware on client computers.
After executing the toolkit on client computers, administrators can
upload all the detection logs generated by ATTK to the server for
further analysis.
For details, see Using the Anti-Threat Toolkit (ATTK) on page
A-7.
Data Loss Prevention Enhancements
This version of CPM enhances the Data Loss Prevention feature to provide:
1-3
Core Protection Module 10.6 SP2 Administrator’s Guide
•
Windows 8, Windows Server 2012, Windows Server Core 2012 support
•
Windows Store App support on the Windows UI and desktop application
support
•
HTTPS support using Internet Explorer 10
•
HTTPS support using Chrome™ versions 19, 20, 21, and 22
•
Updated Gmail support
•
Microsoft Office™ 2013 support
VDI Enhancement
This version of CPM enhances the smart scan update feature for virtual environments.
When a large number of smart scan clients request a pattern update, the server now
places the client requests in a queue until the server can send a response. As each client
completes the update, the server prompts the next client in the queue to begin updating.
New in Version 10.6 SP1
Data Protection Enhancements
The Data Protection enhancements in Core Protection Module 10.6 SP1 include the
following support and upgrades:
•
Over 100 new pre-configured Data Loss Prevention templates and data identifiers
•
Data Loss Prevention and Device Control support for 64-bit versions of Windows
platforms
For a complete listing of supported 64-bit Windows platforms, refer to the Systems
Requirements at:
http://docs.trendmicro.com/en-us/enterprise/core-protection-module.aspx
1-4
Introducing Core Protection Module
Virtual Desktop Infrastructure Enhancements
This version of Core Protection Module enhances Virtual Desktop Infrastructure (VDI)
support and capabilities.
•
Microsoft Hyper-V™ Support: Administrators can now manage virtual clients
using the Microsoft Hyper-V™ Server in addition to VMware vCenter™ server
and the Citrix XenServer™.
IPv6 Support
This version of Core Protection Module provides full support for IPv6 environments.
Administrators can now use IPv6 addresses when configuring:
•
ActiveUpdate Server Settings Wizard
•
Firewall Policy Settings Wizard
•
Smart Protection Server List
•
Smart Protection Relay Proxy Settings Wizard
•
Virtual Desktop Settings Wizard
Proxy Wizards
This version of Core Protection Module provides new proxy setting wizards to simplify
the setup of connections to Web Reputation proxy servers and Smart Protection Relay
proxy servers.
Features with Windows 64-bit Support
The following features in Core Protection Module now provide support for most
Windows 64-bit platforms:
•
Behavior Monitoring
•
Client Self-protection
•
Data Loss Prevention
1-5
Core Protection Module 10.6 SP2 Administrator’s Guide
•
Device Control (during Unauthorized Change Prevention monitoring)
For a complete listing of supported 64-bit Windows platforms, refer to the Systems
Requirements at:
http://docs.trendmicro.com/en-us/enterprise/core-protection-module.aspx
New in Version 10.6
CPM 10.6 provides the following enhancements over previous versions:
Data Protection
The Data Protection module provides Data Loss Prevention and expands the range of
devices monitored by Device Control.
TABLE 1-2. Data Protection Features
DATA PROTECTION
FEATURES
Data Loss
Prevention
DETAILS
Data Loss Prevention safeguards an organization’s sensitive
information against accidental or deliberate leakage. Data Loss
Prevention allows you to:
•
Identify the sensitive information (data identifiers) to protect
•
Create policies that limit or prevent the transmission of data
identifiers through common transmission channels, such as
email and external devices
•
Enforce compliance to established privacy standards
For more information, see the “Data Protection for CPM
Administrator’s Guide”.
1-6
Introducing Core Protection Module
DATA PROTECTION
FEATURES
Device Control
DETAILS
The Device Control feature regulates access to the following
devices:
•
CD/DVDs
•
Floppy disks
•
Network drives
•
USB storage devices
•
Ports (COM and LPT)
•
IEEE 1394 interface
•
Imaging devices
•
Infrared devices
•
Modems
•
PCMCIA cards
•
Print screen key
For more information, see the “Data Protection for CPM
Administrator’s Guide”.
Cache Files for Scans
The CPM client now builds cache files, which contain information about safe files that
have been scanned previously and files that Trend Micro deems trustworthy. Cache files
provide a quick reference during on-demand scans, thus reducing the usage of system
resources. On-Demand scans are now more efficient, providing up to 40%
improvement to speed performance.
For more information, see Scan Cache Settings (On-Demand Scans Only) on page 6-12.
Damage Cleanup Services
Damage Cleanup Services can now run in advanced cleanup mode to stop activities by
rogue security software, also known as FakeAV. The client also uses advanced cleanup
rules to proactively detect and stop applications that exhibit FakeAV behavior.
1-7
Core Protection Module 10.6 SP2 Administrator’s Guide
You can choose the cleanup mode when you configure virus/malware scan actions for
Manual Scan and On-Demand Scan.
For more information, see Damage Cleanup Services on page 6-15.
Web Reputation HTTPS Support
Clients can now scan HTTPS traffic for web threats. You can configure this feature
when you create a web reputation policy.
For more information, see Enabling HTTPS Web Reputation on CPM Clients on page 7-15.
How CPM Works
Trend Micro ESP uses the patented Fixlet® technology from BigFix to identify agents
with outdated antivirus and malware protection. You can trigger 50,000 computers to
update their 10MB pattern file and have confirmation of the completed action in as little
as 15 minutes.
Once CPM is installed, you will find it easy to protect your networked computers and
keep them secure, all from the ESP Console. Deploying CPM to ESP-managed
endpoints can be accomplished in minutes. After completing this process, you will be
able to track the progress of each computer as you apply CPM component updates. This
tracking makes it easy to gauge the level of protection across your entire enterprise.
Additionally, the ESP Web Reporting module makes it simple to chart the status of your
overall protection with web-based reports.
ESP and CPM Components
CPM, as a module in the Trend Micro Endpoint Security Platform (ESP), provides a
powerful, scalable, and easy-to-manage security solution for very large enterprises.
This integrated system consists of the following components:
1-8
Introducing Core Protection Module
TABLE 1-3. ESP Components
COMPONENT
ESP Console
DESCRIPTION
ESP consoles tie all components together to provide a
system-wide view of all the computers on your network. The
system-wide view of vulnerabilities and threats on the
computers on your network can quickly be addressed. The
console helps administrators quickly and easily distribute fixes
to computers that need them, without impacting other
computers on your network.
For large deployments, ESP consoles are often hosted from
Terminal Servers.
ESP Server
ESP servers offer a collection of interacting services, including
application services, a web server and a database server,
forming the heart of the ESP system. It coordinates the flow of
information to and from individual computers and stores the
results in the ESP database. ESP server components operate
in the background, without any direct intervention from the
administrator. ESP Servers also include a built-in web
reporting module to allow authorized users to connect through
a web browser to view information about endpoints,
vulnerabilities, actions, and more. ESP supports multiple
servers, adding a robust redundancy to the system.
ESP Agent
ESP Agents are installed on every computer ESP manages.
ESP agents access a collection of Fixlets that detect improper
configuration settings and vulnerabilities. The ESP Agent is
then capable of implementing corrective actions received from
the ESP Console through the ESP Server. The ESP Agent is
designed to run undetected by end users using a minimum of
system resources. However, ESP also allows the
administrator to provide screen prompts for those actions that
require user input. ESP Agents are capable of encrypting
communications thereby protecting sensitive information.
1-9
Core Protection Module 10.6 SP2 Administrator’s Guide
COMPONENT
DESCRIPTION
ESP Relays
ESP Relays increase the efficiency of the system. Instead of
forcing each networked computer to directly access the ESP
Server, relays spread the load. Hundreds to thousands of ESP
Agents can point to a single ESP Relay for downloads. The
relay then makes only a single request of the server. ESP
Relays can connect to other relays, further increasing
efficiency. An ESP Relay does not need to be a dedicated
computer. A relay can be any computer with the ESP Agent
installed . As soon as you install an ESP Relay, the ESP
Agents on your network have the ability to automatically
discover and connect to them.
CPM Client
Components
CPM Client Components are responsible for managing pattern
files, conducting scans, and with the help of Trend Micro
Damage Cleanup services, removing any malware that they
detect. These components run undetected by end users and
use minimal system resources. You need to install a CPM
client on each endpoint that you want to protect. These
endpoints should already have the ESP Agent installed.
Smart Protection
Network
Trend Micro™ Smart Protection Network™ is a nextgeneration, in-the-cloud based, advanced protection solution.
At the core of this solution is an advanced scanning
architecture that leverages malware prevention signatures that
are stored in-the-cloud.
This solution leverages file, email, and web reputation
technology to detect security risks. The technology works by
offloading a large number of malware prevention signatures
and lists that were previously stored on endpoints to Trend
Micro Smart Protection Servers or Trend Micro Smart
Protection Network. Using this approach, the system and
network impact of the ever-increasing volume of signature
updates to endpoints is significantly reduced.
1-10
Introducing Core Protection Module
COMPONENT
DESCRIPTION
Smart Protection Server
Trend Micro Smart Protection Servers enable corporate
customers to tailor Smart Protection Network utilization within
their corporate IT infrastructure for the best privacy, response
time and customized File and Web Reputation Services.
The Smart Protection Server can be monitored using a
customized dashboard along with email and SNMP alert
notifications. These features facilitate a seamless integration
with a customer’s IT operation infrastructure.
Smart Protection Relay
(SPR)
Based on an elegant and efficient architecture, Trend Micro
Smart Protection Relay is a light-weight connection between
Smart Protection Server and the Smart Protection clients.
Trend Micro Smart Protection Relay takes the flexibility of
deployment with Smart Protection Network to the next level.
For corporations and organizations which usually have slow
and expensive links across their organizations, Smart
Protection Relay concentrates, throttles, and significantly
reduces the bandwidth required between the smart protection
clients and Smart Protection Servers. With its small footprint,
flexibility of deployment, and minimized administrator
managing requirements, Smart Protection Relay proves to be
the best fit for most subsidiary or remote branch offices that
have lower cross-site bandwidth and limited on-site IT
resources.
Features and Benefits
CPM reduces business risks by preventing infection, identity theft, data loss, network
downtime, lost productivity, and compliance violations. Additionally, it provides your
large enterprise with a host of features and benefits.
Ease of Management
•
Uses small, state-of-the-art pattern files and enhanced log aggregation for faster,
more efficient updates and reduced network utilization
•
Supports native 64-bit and 32-bit processing for optimized performance
1-11
Core Protection Module 10.6 SP2 Administrator’s Guide
•
Integrates with the Trend Micro ESP Console to provide centralized security,
including the centralized deployment of security policies, pattern files, and software
updates on all protected clients and servers
Extended Platform Support
Works with most versions of Microsoft® Windows® including:
•
Microsoft Windows XP® 32/64-bit Service Pack 3
•
Microsoft Windows Vista® 32/64 bit
•
Microsoft Windows Server 2003® 32/64-bit (including R2)
•
Microsoft Windows Server 2008® 32/64-bit (including R2)
•
Microsoft Windows 7®
•
Microsoft Windows Embedded POSReady 2009® 32/64-bit
•
Microsoft Windows 8®
•
Microsoft Windows Server 2012®
Superior Malware Protection
•
Delivers powerful protection against viruses, Trojans, worms, and new variants as
they emerge
•
Protects against a wide variety of spyware/grayware, including adware, dialers, joke
programs, remote-access tools, key loggers, and password-cracking applications
•
Detects and removes active and hidden rootkits
•
Cleans endpoints of malware, including processes and registry entries that are
hidden or locked
1-12
Introducing Core Protection Module
Web Reputation Technology
The CPM Web Reputation technology pro-actively protects client computers within or
outside the corporate network from malicious and potentially dangerous websites. Web
Reputation breaks the infection chain and prevents downloading of malicious code.
In addition to file-based scanning, CPM now includes the capability to detect and block
web-based security risks, including phishing attacks. Using the ESP location awareness
features, you can have CPM enforce different web reputation policies according to the
client computer's location. The client's connection status with the ESP Server or any
Relay Server can be used to determine the location of the client.
•
Web Reputation opens a blocking page whenever access to a malicious site is
detected. This page includes links to the Trend Micro Web Reputation Query
system, where end users can find details about the blocked URL or send feedback
to Trend Micro.
•
Proxy server authentication for Web Reputation is also supported. You can specify
a set of proxy authentication credentials on the web console. HTTP proxy servers
are supported.
Client-Side Firewall (Optional)
The CPM firewall protects clients and servers on the network using stateful inspection.
You can create rules to filter connections by IP address, port number, or protocol, and
then apply the rules to different users and groups.
Contact your Trend Micro sales representative if you do not have the firewall masthead
for CPM 10.6 but are interested in using it.
Traffic Filtering
The CPM firewall can filter all incoming and outgoing traffic, providing the ability to
block certain types of traffic based on the following criteria:
•
Direction (inbound/outbound)
•
Protocol (TCP/UDP)
1-13
Core Protection Module 10.6 SP2 Administrator’s Guide
•
Destination ports
•
Source and destination computers
Customizable Profiles and Policies
The CPM firewall gives you the ability to configure policies to block or allow specified
types of network traffic. This provides a highly customizable means of organizing and
configuring client firewall settings.
Stateful Inspection
The CPM firewall is a stateful inspection firewall; it monitors all connections to the
client and records all connection states. It can identify specific conditions in any
connection, predict what actions should follow, and detect disruptions in normal
connections. Filtering decisions, therefore, are based not only on profiles and policies,
but also on the context established by analyzing connections and filtering packets that
pass through the firewall.
Damage Cleanup Services
Damage Cleanup Services™ cleans computers of file-based and network viruses, and
virus and worm remnants (Trojans, registry entries, viral files) through a fully-automated
process. To address the threats and nuisances posed by Trojans, Damage Cleanup
Services does the following:
•
Detects and removes live Trojans
•
Kills processes that Trojans create
•
Repairs system files that Trojans modify
•
Deletes files and applications that Trojans drop
Because Damage Cleanup Services runs automatically in the background, you do not
need to configure it. Users are not even aware when it runs. However, CPM may
1-14
Introducing Core Protection Module
sometimes notify the user to restart their computer to complete the process of removing
a Trojan.
Data Loss Prevention
Data Loss Prevention (DLP) safeguards an organization’s sensitive information against
accidental or deliberate leakage. Data Loss Prevention allows you to:
•
Identify the data identifiers to protect
•
Create policies that limit or prevent the transmission of data identifiers through
common transmission channels, such as email and external devices
•
Enforce compliance to established privacy standards
Device Control
Device Control regulates access to external storage devices and network resources
connected to computers. Device Control helps prevent data loss and leakage and,
combined with file scanning, helps guard against security risks.
The Trend Micro Pattern Files and Scan Engine
All Trend Micro products, including CPM, can be configured to automatically check the
Trend Micro ActiveUpdate (TMAU) server, then download and install updates when
found. This process is typically configured to occur in the background, although you can
manually update some or all of the pattern files at any time. In addition, pre-release
patterns are available for manual download (at your own risk) in the event that a
situation such as a virus outbreak occurs. Pre-release patterns have not undergone full
testing but are available to stop burgeoning threats.
You can manually download the virus pattern and other files from the URL provided
below. At the same location, you can also check the current release version, date, and
review all the new virus definitions included in the files.
http://www.trendmicro.com/download/pattern.asp
1-15
Core Protection Module 10.6 SP2 Administrator’s Guide
Incremental Virus Pattern File Updates
CPM, in conjunction with Trend Micro ActiveUpdate, supports incremental updates of
the virus pattern file. Rather than download the entire pattern file each time (full pattern
files can be more than 20MB), ActiveUpdate can download only the portion of the file
that is new, and append it to the existing pattern file.
Virus Patterns
The virus pattern available on a client computer depends on the scan method the client
is using.
TABLE 1-4. Virus Patterns
SCAN METHOD
Conventional
Scan
PATTERN IN USE
The Virus Pattern contains information that helps Core Protection
Module identify the latest virus/malware and mixed threat attacks.
Trend Micro creates and releases new versions of the Virus Pattern
several times a week, and any time after the discovery of a particularly
damaging virus/malware.
Trend Micro recommends scheduling automatic updates at least hourly,
which is the default setting for all shipped products.
Smart Scan
When in smart scan mode, clients use two lightweight patterns that
work together to provide the same protection provided by conventional
anti-malware and anti-spyware patterns.
A smart protection source hosts the Smart Scan Pattern. This pattern
is updated hourly and contains majority of the pattern definitions. Smart
scan clients do not download this pattern. Clients verify potential
threats against the pattern by sending scan queries to the smart
protection source.
The client update source (the Core Protection Module server or a
custom update source) hosts the Smart Scan Agent Pattern. This
pattern is updated daily and contains all the other pattern definitions not
found on the Smart Scan Pattern. Clients download this pattern from
the update source using the same methods for downloading other Core
Protection Module components.
1-16
Introducing Core Protection Module
The Trend Micro Scan Engine and Detection Technologies
At the heart of all Trend Micro products lies a scan engine. Originally developed in
response to early file-based computer viruses, the scan engine now detects Internet
worms, mass-mailers, Trojan horse threats, phish sites, spyware, and network exploits as
well as viruses. The scan engine checks for threats "in the wild," or actively circulating,
and those that are "in the zoo," or known, theoretical threat types typically created as a
proof of concept.
Rather than scanning every byte of every file, the engine and pattern file work together
to identify tell-tale "virus" characteristics and the exact location within a file where the
malicious code inserts itself. CPM can usually remove this virus or malware upon
detection and restore the integrity of the file (that is, "clean" the file).
International computer security organizations, including ICSA (International Computer
Security Association), certify the Trend Micro scan engine annually.
Scan Engine Updates
By storing the most time-sensitive virus and malware information in the pattern files,
Trend Micro minimizes the number of scan engine updates required while at the same
time keeping protection up-to-date. Nevertheless, Trend Micro periodically makes new
scan engine versions available. Trend Micro releases new engines under the following
circumstances:
•
Incorporation of new scanning and detection technologies into the software
•
Discovery of new, potentially harmful malware unhandled by the current engine
•
Enhancement of the scanning performance
•
Addition of file formats, scripting languages, encoding, and compression formats
Trend Micro Damage Cleanup Services
CPM uses Trend Micro™ Damage Cleanup Services (DCS) to clean computers of filebased and network viruses plus viruses and worm remnants (Trojans, registry entries,
and viral files) through a fully-automated process. DCS:
1-17
Core Protection Module 10.6 SP2 Administrator’s Guide
•
Detects and removes live Trojans
•
Kills processes that Trojans create
•
Repairs system files that Trojans modify
•
Deletes files and applications that Trojans drop
Because DCS runs automatically in the background, you do not need to configure it.
Users are not even aware when it runs.
GeneriClean
Also known as referential cleaning, GeneriClean is a new way of removing viruses and
malware without the availability of virus cleanup components. Using a detected file as its
basis, GeneriClean determines if the detected file has a corresponding process or service
in memory and a registry entry, and then removes them altogether.
Rootkit Detection
CPM also detects and removes rootkits. Currently on the rise, rootkits corrupt regular
operating system functions that the application programs assume are still valid to gain
various levels of control over a user's computer. Without adequate protection, rootkits
are extremely hard to remove without reformatting the infected computer’s hard drive.
IntelliTrap
Virus writers often attempt to circumvent virus filtering by using real-time compression
algorithms. IntelliTrap helps reduce the risk of a virus or malware entering your network
by blocking files with real-time compressed executable files.
1-18
Introducing Core Protection Module
About Windows 8 and Windows Server 2012
Windows 8 and Windows Server 2012 provide users with two types of operating modes:
desktop mode and Windows UI mode. The desktop mode is similar to the classic
Windows Start screen.
The Windows UI provides users with a new user interface experience similar to that
used on Windows phones. New features include a scrolling touch screen interface, tiles,
and toast notifications.
TABLE 1-5. Tiles and Toast Notifications
CONTROL
Tiles
DESCRIPTION
Tiles are similar to the desktop icons used in previous
Windows releases. Users click or tap on a tile to launch the
application associated with the tile.
Live tiles provide users application-specific information that
dynamically updates. Applications can post information to tiles
even when the application is not running
Toast notifications
Toast notifications are similar to a popup message. These
notifications provide time-sensitive information about events
that occur while an application is running. Toast notifications
appear in the foreground whether Windows is currently in
desktop mode, displaying the lock screen, or running another
application.
Note
Depending on the application, toast notifications may
not appear on all screens or in each mode.
CPM in Windows UI Mode
The following table describes how CPM supports the tiles and toast notifications in
Windows UI mode.
1-19
Core Protection Module 10.6 SP2 Administrator’s Guide
TABLE 1-6. CPM Support for Tiles and Toast Notifications
CONTROL
Tiles
OFFICESCAN SUPPORT
CPM provides users with a tile that links to the client program.
When users click the tile, Windows switches to desktop mode
and the client program displays.
Note
CPM does not support live tiles.
Toast notifications
CPM provides the following toast notification:
•
Threat Resolved
Note
CPM only displays toast notifications in Windows UI
mode.
CPM Feature Support in Internet Explorer 10
The mode in which users operate Windows 8 or Windows Server 2012 affects the
Internet Explorer 10 version used and hence the level of support that different CPM
features provide. The following table lists the support level for different CPM features in
desktop mode and Windows UI mode.
Note
Features not listed provide full support in both Windows operating modes.
TABLE 1-7. CPM Feature Support by UI Mode
FEATURE
Web reputation
DESKTOP MODE
Full support
WINDOWS UI
Limited support
•
1-20
HTTPS scanning
disabled
Chapter 2
ESP Server: Installing and Upgrading
Before beginning these procedures, you should have Trend Micro Endpoint Security
Platform (ESP) installed, including the ESP Server, ESP Console, and ESP Agents.
This chapter covers installing the Trend Micro Core Protection Module (CPM) server
components on the ESP Server, updating the related files, and preparing endpoints to
receive the ESP client. Topics include:
•
Opening the ESP Console on page 2-2
•
Fresh Installation Procedure on page 2-4
•
Upgrading from Previous Versions on page 2-6
•
Adding CPM to the ESP Server on page 2-7
•
Installing CPM Components on the ESP Server on page 2-10
•
Updating Pattern Files on the Server on page 2-11
•
Connecting ESP to SPS on page 2-16
•
Activating CPM Analyses on page 2-18
2-1
Core Protection Module 10.6 SP2 Administrator’s Guide
Opening the ESP Console
If you are logging into the ESP Server using an administrator account, you can use NT
Authentication instead of entering a password. If you are running the ESP Console
remotely, you will need a user name and password.
Procedure
1.
To open the ESP console:
•
For Windows XP, Server 2003, Vista, Server 2008, Windows 7, POSReady
2009, and POSReady 7:
On the Windows desktop, click the Windows Start button, then Programs >
Trend Micro Endpoint Security Platform > ESP Console.
•
For Windows 8 and Server 2012:
On the Windows desktop, click the Windows Start button, then click the ESP
Console shortcut.
Note
Switch to desktop mode to view the console.
2.
Connect to the ESP Server database by entering the user name you created when
installing the ESP Server (if you installed the evaluation version, type
EvaluationUser for the user name) and then click OK.
3.
The ESP Console opens.
Installing CPM on the ESP Server
The installation process you need to follow, when installing CPM on the ESP server,
depends on the scan method your endpoints will use.
2-2
ESP Server: Installing and Upgrading
Note
If ESP 7.x is currently installed on your network, you need to upgrade any installed ESP
Agents to version 8.0 or above, before installing CPM 10.6 clients.
Scan Methods
CPM clients can use conventional scan or smart scan when scanning for security risks.
Note
The default scan method in this release is conventional scan. Change scan method settings
using the Core Protection Module - Enable Smart Scan or Core Protection Module Disable Smart Scan tasks.
•
Conventional Scan
Conventional scan is the scan method used in all earlier CPM versions. A
conventional scan client stores all CPM components on the client computer and
scans all files locally.
Note
Conventional scan is the default scan method for clients.
•
Smart Scan
Smart scan is a next-generation, in-the-cloud based endpoint protection solution.
At the core of this solution is an advanced scanning architecture that leverages
threat signatures that are stored in-the-cloud.
2-3
Core Protection Module 10.6 SP2 Administrator’s Guide
Fresh Installation Procedure
TABLE 2-1. Fresh Installation of CPM on the ESP Server
STEPS
Step 1
Step 2
Step 3
ALL SMART SCAN/MIXED
Add CPM to ESP.
Add CPM to ESP.
Adding CPM to the ESP Server on
page 2-7
Adding CPM to the ESP Server on
page 2-7
Install Smart Protection Servers
Activate necessary analyses.
See the “Smart Protection Server
Installation Guide.”
Activating CPM Analyses on page
2-18
Install ESP Agent on Smart
Protection Servers.
Install server components.
Connecting ESP to SPS on page
2-16
Step 4
ALL CONVENTIONAL
Activate necessary analyses.
Activating CPM Analyses on page
2-18
Installing CPM Components on the
ESP Server on page 2-10
Download latest Engine and Pattern
versions from the ActiveUpdate
server.
Updating Pattern Files on the
Server on page 2-11
Step 5
Step 6
Install server components.
Deploy and update CPM clients.
Installing CPM Components on the
ESP Server on page 2-10
CPM Clients: Installing and
Updating on page 4-1
Download latest Engine and Pattern
versions from the ActiveUpdate
server.
Setup automatic updates.
Updating Pattern Files on the
Server on page 2-11
Step 7
Set up the Smart Protection Server
list.
Configuring the Smart Protection
Server List on page 5-27
2-4
Preparing the ESP Server and
Updating the Pattern Files on page
2-14
ESP Server: Installing and Upgrading
STEPS
Step 8
ALL SMART SCAN/MIXED
ALL CONVENTIONAL
Create Smart Protection Servers
list's Task.
Creating a Smart Protection Server
List Deployment Task on page
5-29
Step 9
Deploy Smart Protection Relays.
Getting Started with Relays on page
3-1
Step 10
Deploy the Smart Protection Server
list to endpoints and relays.
Deploying the Smart Protection
Server List on page 5-30
Step 11
Deploy and update CPM clients.
CPM Clients: Installing and
Updating on page 4-1
Step 12
Setup automatic updates.
Preparing the ESP Server and
Updating the Pattern Files on page
2-14
Step 13
Smart scan environments:
•
Switch all clients to smart scan
mode
Mixed environments:
•
Switch some clients to smart
scan mode
2-5
Core Protection Module 10.6 SP2 Administrator’s Guide
Upgrading from Previous Versions
TABLE 2-2. Upgrade Installation of CPM on the ESP Server
STEPS
ALL SMART SCAN/MIXED
Step 1
Upgrade server components.
Upgrade server components.
Step 2
Download latest Engine and Pattern
versions from the ActiveUpdate
server.
Download latest Engine and Pattern
versions from the ActiveUpdate
server.
Updating Pattern Files on the Server
on page 2-11
Updating Pattern Files on the Server
on page 2-11
Upgrade CPM Clients.
Upgrade CPM Clients.
CPM Clients: Installing and Updating
on page 4-1
CPM Clients: Installing and Updating
on page 4-1
Install Smart Protection Servers.
Activate necessary analyses.
See the “Smart Protection Server
Installation Guide.”
Activating CPM Analyses on page
2-18
Step 3
Step 4
Step 5
Install ESP Agents on Smart
Protection Servers.
Step 6
Activate necessary analyses.
Activating CPM Analyses on page
2-18
Step 7
Set up the Smart Protection Server
list.
Configuring the Smart Protection
Server List on page 5-27
Step 8
Create Smart Protection Servers
list's Task.
Creating a Smart Protection Server
List Deployment Task on page 5-29
2-6
ALL CONVENTIONAL
ESP Server: Installing and Upgrading
STEPS
Step 9
ALL SMART SCAN/MIXED
ALL CONVENTIONAL
Deploy Smart Protection Relays.
Getting Started with Relays on page
3-1
Step 10
Deploy the Smart Protection Server
list to endpoints and relays.
Deploying the Smart Protection
Server List on page 5-30
Step 11
Smart scan environments:
•
Switch all clients to smart scan
mode
Mixed environments:
•
Switch some clients to smart
scan mode
Smart Protection Server and Relay Sizing
Recommendations
If you use smart scan to protect your endpoints, use the information from the following
location as a guide to the number of Smart Protection Servers and Smart Protection
Relays your network needs:
http://esupport.trendmicro.com/solution/en-us/1058696.aspx
Adding CPM to the ESP Server
Install the Trend Micro Core Protection Module by adding its site masthead to the list of
managed sites in the ESP Console. If you do not have the Core Protection Module and
Reporting mastheads, contact your Trend Micro sales representative to obtain them.
The Trend Micro Common Firewall is also available for CPM. The firewall provides
client-level access control for your ESP endpoints.
2-7
Core Protection Module 10.6 SP2 Administrator’s Guide
CPM includes a Web Reputation component that replaces the stand-alone version. CPM
allows for the migration of any pre-existing WPM Blocked and Approved Lists.
The Data Protection module provides proactive data breach prevention features. CPM
safeguards sensitive data before leakage can occur due to employee error or intentional
theft.
Note
If you are a current Web Protection Module (WPM) customer, you will need to remove any
installed clients and then the WPM site prior to installing CPM.
Before adding the CPM site, ensure that the ESP Server has an active Internet
connection in order to connect to the source of the masthead files. If the ESP Server
cannot connect to the Internet, the request will remain pending until a connection
becomes available.
Procedure
2-8
1.
From any computer with the ESP Console installed, locate and double-click the
masthead file to automatically add its site.
2.
Alternatively, in the ESP Console menu, click Tools > Add External Site
Masthead.
3.
In the window that opens, select the masthead file(s) you received from the Trend
Micro sales representative.
4.
Click Open.
ESP Server: Installing and Upgrading
5.
Click Yes to verify you want to subscribe to the site.
6.
At the prompt, type your private key password and click OK.
The ESP Server will begin gathering the associated files and content associated
with the masthead(s) you added and install them on the server.
7.
Register endpoints by navigating to Endpoint Protection > All Endpoint
Protection > Sites > External Sites. Select the desired Task from the top right
pane.
8.
Click the Computer Subscriptions tab.
9.
Select All computers or select the specific computers you want CPM to manage.
10. Click Save Changes.
11. At the prompt, type your private key password and click OK.
12. Repeat steps 7 to 9 to perform all the desired Tasks on endpoints.
2-9
Core Protection Module 10.6 SP2 Administrator’s Guide
Installing CPM Components on the ESP Server
After adding the mastheads to the ESP Server, the next step is to open the ESP Console
and update the CPM Server with the required components. You will need at least one
relevant computer. In this case, the ESP Server to which you just added the CPM
masthead should be relevant. If it is not, resolve this issue before you begin. For
example, check that the server has an ESP Agent installed or that the CPM components
have not already been updated on the server.
Procedure
1.
From the ESP Console menu, click Endpoint Protection on the bottom left pane.
2.
From the upper left navigation pane, go to Core Protection Module >
Deployment > Install.
3.
From the list in the upper right pane, select Core Protection Module - Install
Server Components from the task list.
A screen displaying the Task Description tab appears.
2-10
ESP Server: Installing and Upgrading
4.
Below Actions, click the hyperlink to open the Take Action window.
5.
Select Specify computers selected in the list below.
In the Applicable Computers list, the ESP Server that is updating the CPM
components will appear as the only relevant computer.
6.
Click OK.
7.
At the prompt, type your private key password and click OK.
A status summary page appears when the Task is finished.
8.
To verify components have been deployed from the ESP Console menu, click
Endpoint Protection on the bottom left pane.
9.
From the upper left navigation pane, go to Core Protection Module >
Warnings.
10. Apply any Fixlets related to server components.
Updating Pattern Files on the Server
It is critically important to keep the ESP Server, Relays, and all CPM clients up-to-date
with the current pattern and engine files from Trend Micro. CPM uses as many as 22
different pattern files to identify viruses, spyware, and other malware threats (see Security
Risks on page 13-4 for the complete list). Not all patterns are updated every day. There
are days, however, such as when a new threat is released and hackers are writing
hundreds of variations to try and avoid detection, that one or all the patterns are
updated often over the course of a day or week.
Trend Micro recommends that you update the virus pattern file on the ESP Server
immediately after installing CPM, and then set the task to repeat hourly. The same holds
true for CPM clients.
Update Sources
By default, CPM is configured to use the Trend Micro ActiveUpdate (AU) server for
pattern updates. Although you can use an intranet source (for example by manually
2-11
Core Protection Module 10.6 SP2 Administrator’s Guide
downloading the pattern files to an internal computer and then pointing the ESP Server
to that source), Trend Micro recommends that you use the AU server. This is the only
official source for pattern updates, and in conjunction with CPM, AU provides several
layers of authentication and security to prevent the use of forged or unsupported
patterns.
FIGURE 2-1. Server Settings Wizard for identifying update sources
Configure the CPM server to frequently contact the AU server to check for and
download pattern and component updates. If there is a proxy server between the ESP
Server and the Internet, you need to identify it and provide any required log on
credentials. The proxy server you identify here is not "inherited" for use by other CPM
components, including the client settings for Web Reputation. That is a separate
configuration. Likewise, if you have configured a proxy to enable BESGather service
(typically identified during install), those settings will not be inherited for pattern
updates, even if the same proxy is being used.
2-12
ESP Server: Installing and Upgrading
Choosing an Update Source
Procedure
1.
From the ESP Console menu, click Endpoint Protection on the bottom left pane.
2.
From the ESP Console menu, click Endpoint Protection on the bottom left pane.
3.
From the upper left navigation pane, go to Core Protection Module >
Configuration > ActiveUpdate Server Settings > ActiveUpdate Server
Settings Wizard.
The Server Settings Wizard opens.
4.
Under Source, choose Trend Micro’s ActiveUpdate Server.
See ActiveUpdate Server Settings Wizard on page 6-6 for information about all the
configuration choices available on this page.
5.
6.
Under Proxy, click Use a proxy server for pattern and engine updates and
provide the following (there is no validation checking; be sure of the settings you
configure here):
•
Proxy Protocol: Choose the option that reflects your proxy server.
•
Server Name or IP: Use an IP address if you have not configured ESP
Server to recognize host names.
•
Port: Typically, this is port 80 or 8080.
•
User Name: Type a name with access rights to the proxy.
•
Password: The password is encrypted when stored and transmitted.
Click the Create Server Configuration Action... button.
The Take Action screen appears.
7.
Select the ESP server and click OK.
8.
At the prompt, type your private key password and click OK.
2-13
Core Protection Module 10.6 SP2 Administrator’s Guide
9.
In the Action | Summary window that opens, monitor the "Status" and "Count"
of the Action to confirm that it is "Running" and then "Completed".
Preparing the ESP Server and Updating the
Pattern Files
This procedure requires running a script to prepare the ESP Server for recurring
automatic pattern updates, which are then used for CPM client updates. Automatic
Updates allow you to automatically deliver and apply pattern file updates to your
endpoints whenever new patterns are made available by Trend Micro.
Note
An endpoint’s automatic update flag is set after CPM deploys. When the flag is set, the
Apply Automatic Updates policy action (configured in Step 3) will become relevant
whenever new pattern files are made available by the policy action configured in Step 2.
Only endpoints with the flag set will automatically apply pattern file updates.
Step 1: Run the CPM Automatic Update Setup Script
Download and run the CPM automatic update setup script on your server. You need the
deployment site administrator credentials and password. You cannot create a new
console operator account without these credentials. Use the operator account to send a
manifest of the latest available pattern file versions to your endpoints whenever new
patterns are downloaded from Trend Micro.
Note
The following items require a pre-installation of the CPM Automatic Update Setup Script
on the server that hosts ESP and CPM. Download and install the latest script, using an
administrator account from Endpoint Protection > Core Protection Module >
Updates and select Core Protection Module - Download CPMAutoUpdateSetup
Script in the top right pane. Or, download the script from the following location:
http://esp-download.trendmicro.com/download/cpm/
CPMAutoUpdateSetup2_1.0.8.0.exe
2-14
ESP Server: Installing and Upgrading
Take note of the following recommendations for the Automatic Update Setup Script:
•
The operator account should not be given administrative rights on any endpoints.
•
Do not change the default values supplied by the script.
•
Enable automatic updates on the server to make the latest pattern versions
available to endpoints.
•
Be sure to run the script before proceeding to the following steps. The script
automatically sets a flag on the server. After the flag is set, the Set ActiveUpdate
Server Pattern Update Interval policy action configured in Step 2 will send a
manifest of the latest available pattern updates to CPM endpoints.
•
If you want to prevent endpoints from updating pattern files, use the Disable
Automatic Updates - Server Task.
Step 2: Issue a "Set ActiveUpdate Server Pattern Update
Interval" Task
You have most likely already configured a policy action from this task. If you have not,
please see the instructions in the Core Protection User’s Guide:
http://publib.boulder.ibm.com/infocenter/tivihelp/v26r1/topic/com.ibm.tem.doc/
CPM_Users_Guide.pdf
Or, reference the Installation Guide and User’s Guide at:
http://publib.boulder.ibm.com/infocenter/tivihelp/v26r1/index.jsp?topic=/
com.ibm.tem.doc/welcome.htm
Note
The setup process of automatic updates will not download a new pattern-set. That action is
still managed by the Set ActiveUpdate Server Pattern Update Interval task.
A policy action of that task may already exist and the most recent pattern-set may have
been downloaded prior to this automatic updates setup procedure. In that situation, a
new pattern-set will not be available for automatic updates until the next set is
downloaded from the Trend ActiveUpdate Server.
2-15
Core Protection Module 10.6 SP2 Administrator’s Guide
The caching behavior of the Trend CPM Server component only downloads new
content from the Trend ActiveUpdate Server. To induce an immediate download of the
latest pattern-set to use in automatic updates, perform the following:
Procedure
1.
Clear the CPM Server Component download cache - Delete the contents of the
folder C:\Program Files\Trend Micro\Core Protection Module
Server\download.
2.
Configure a periodic policy action and deploy the action from the task Core
Protection Module - Set ActiveUpdate Server Pattern Update Interval.
Step 3: Issue a "Apply Automatic Updates" Task
This policy action monitors the latest pattern file versions and applies them to endpoints
with automatic updates enabled. This action should be targeted at all computers and set
with the following parameters:
•
Reapply whenever relevant
•
Reapply an unlimited number of times
•
Set the action to never expire
•
Retry up to 99 times on failure
Connecting ESP to SPS
If you choose to use smart scan for CPM endpoints, Smart Protection Servers (SPS)
need to install ESP Agent. This needs to be done so the ESP server can connect with
the Smart Protection Servers. Once connected, the ESP server can monitor the status of
Smart Protection Servers.
2-16
ESP Server: Installing and Upgrading
Note
For sizing recommendations for SPS and SPR, see Smart Protection Server and Relay Sizing
Recommendations on page 2-7.
Installing the ESPAgent using the ESP Deployment Tool
Procedure
1.
Log on to SPS servers using the root account.
2.
Execute the script file /usr/tmcss/bin/patchcpm.sh on SPS servers.
3.
Download *NIX Client Deploy and follow the installation instructions in the
following link to deploy the ESPAgent in SPS servers:
http://support.bigfix.com/labs/Unix_Client_Deploy_Tool.html
Note
After executing patchcpm.sh, the Summary screen only displays the Real-time
Status widget data. None of the other widgets display any data. Disabling the widgets
improves SPS performance.
Installing ESPAgent Manually
Procedure
1.
Log on to SPS servers using the root account.
2.
Execute the script file /usr/tmcss/bin/patchcpm.sh on Smart Protection
Servers.
3.
Download RPM for CentOS 5 to Smart Protection Servers:
http://support.bigfix.com/install/besclients-nonwindows.html
4.
Use RPM to install ESPAgent (root privilege is required).
2-17
Core Protection Module 10.6 SP2 Administrator’s Guide
5.
Put the ESP server masthead file in the folder /etc/opt/BESClient.
The masthead file can be found in the link of ESP server:
http://<ESP Server IP>:52311/masthead/masthead.afxm
6.
Rename masthead.afxm as actionsite.afxm.
7.
Restart ESPAgent using the following command:
Command: /etc/init.d/besclient restart
Activating CPM Analyses
The Core Protection Module includes a number of analyses that are used to collect
statistics from target computers. Analyses data are used to display information, typically
in Reports, about endpoint scan and configuration settings, server settings, spyware, and
virus events. Analyses must be activated before they can be used.
Procedure
1.
From the ESP Console menu, click Endpoint Protection on the bottom left pane.
2.
From the upper left navigation pane, go to Core Protection Module > Analyses
> Core Protection Module > [analysis name].
The Analysis Description tab opens.
3.
Below the Description, click the hyperlink to activate the analysis.
4.
At the prompt, type your private key password and click OK.
Shortcut: Activate All CPM Analyses
You can activate all CPM analyses at once, thus avoiding the need to repeatedly type
your private key password and click OK. You can activate the CPM client analyses
anytime; before or after the CPM clients have been deployed.
2-18
ESP Server: Installing and Upgrading
Procedure
1.
From the ESP Console menu, click Endpoint Protection on the bottom left pane.
2.
From the upper left navigation pane, go to Core Protection Module > Analyses.
3.
Click the Name column header to sort the analyses in alphabetical order, then
scroll down the list and select all the Core Protection Module analyses.
4.
Right-click the list you have selected. In the pop-up menu that appears, click
Activate.
5.
At the prompt, type your private key password and click OK.
CPM activates all the Analyses.
Removing CPM Server Components
Use the Remove Server Components Task to uninstall CPM server components from
the ESP Server (seldom used).
Procedure
1.
From the ESP Console menu, click Endpoint Protection on the bottom left pane.
2.
From the upper left navigation pane, go to Core Protection Module >
Deployment > Uninstall.
3.
From the list in the upper right pane, select Core Protection Module - Remove
Server Components.
A screen displaying the Task Description tab appears.
4.
Below Actions, click the hyperlink to open the Take Action window.
5.
Select the CPM server and click OK.
6.
At the prompt, type your private key password and click OK.
2-19
Core Protection Module 10.6 SP2 Administrator’s Guide
The ESP server initiates the removal.
Removing the Core Protection Module Site
Remove the Core Protection Module and/or Trend Reporting site from the ESP
Console by deleting the mastheads from the list of managed sites.
Procedure
1.
From the ESP Console menu, click Endpoint Protection on the bottom left pane.
2.
From the upper left navigation pane, go to All Endpoint Protection > Sites >
External Sites.
3.
Select the Trend Micro Core Protection Module site to be removed.
4.
In the right pane, click X Remove and then OK.
5.
At the prompt, type your private key password and click OK.
ESP removes the CPM masthead.
2-20
Chapter 3
Getting Started with Relays
This chapter covers installing Smart Protection Relay and VDI Components.
Topics include:
•
Smart Protection Relays on page 3-2
•
Best Practices for Smart Protection Relays on page 3-2
•
Deploying SPR on page 3-7
•
Protecting Virtual Environments on page 3-8
3-1
Core Protection Module 10.6 SP2 Administrator’s Guide
Smart Protection Relays
If smart scan is used by endpoints on your network, CPM clients make reputation
queries to Smart Protection Servers or the Smart Protection Network. Updates and
reputation queries can impact your network bandwidth. Smart Protection Relays (SPR)
are used to keep bandwidth usage for endpoints using smart scan to a minimum, when
updating or performing reputation queries. SPRs act as super nodes to deploy updates to
smart scan endpoints and to funnel reputation queries to Smart Protection Servers.
Note
For details on sizing recommendations for SPS and SPR, see Best Practices for Smart Protection
Relays on page 3-2.
Best Practices for Smart Protection Relays
The following sections detail Trend Micro best practices when using Smart Protection
Relays with CPM.
Deployment
The following steps outline Trend Micro recommended best practices when deploying
SPRs to your network:
1.
Identify Relays with higher-end hardware specifications from the ESP console.
Refer to the following website:
http://esupport.trendmicro.com/solution/en-us/1058696.aspx
2.
3-2
Check the number of endpoints under each Relay.
Getting Started with Relays
TABLE 3-1. SPR Hardware Specifications
RELAY HARDWARE
SPECIFICATION
3.
RECOMMENDATION
Standard/High-end
Up to 4000 endpoints can be switched to use smart scan on
a single Relay.
Low-end
Relays with low-end hardware can support up to 1000
endpoints that use smart scan.
•
If Relays with low-end hardware need to support more
than 1000 endpoints that use smart scan, increase the
Relays’ hardware resources, before deploying an SPR.
•
You could also add one more Relay to the site, and
move some endpoints to the new Relay, before
deploying SPR.
Install a Smart Protection Relay on all Relays.
Switching Scan Methods
The following table outlines Trend Micro recommended best practices when switching
the endpoint’s scan method to smart scan.
See Protecting Endpoints Using Smart Scan on page 5-32 for information on how to switch
an endpoint’s scan method
3-3
Core Protection Module 10.6 SP2 Administrator’s Guide
TABLE 3-2. SPR Hardware Specifications
RELAY HARDWARE
SPECIFICATION
Standard/High-end
RECOMMENDATION
•
Use an AD group or Subnet Address to switch scan methods.
•
Before switching to smart scan, deploy the Smart Protection
Server List to SPRs:
•
•
Low-end
After switching the scan method to smart scan, leave the
endpoints running for 1 day, so the smart scan cache
builds up to at least 50%.
Up to 4000 endpoints can be switched to use smart scan on a
single Relay.
Relays with low-end hardware can support up to 1000 endpoints
that use smart scan.
•
If Relays with low-end hardware need to support more than
1000 endpoints that use smart scan, increase the Relays’
hardware resources, before deploying SPR.
•
You could also add one more Relay to the site, and move
some endpoints to the new Relay, before deploying SPR.
Enabling Web Reputation on Endpoints
Trend Micro recommends the following guidelines when enabling Web Reputation on
Smart Protection Relays.
TABLE 3-3. SPR Hardware Specifications
RELAY HARDWARE
SPECIFICATION
Standard/High-end
3-4
RECOMMENDATION
Up to 4000 endpoints can be enabled to to use Web Reputation at
the same time on a single Relay.
Getting Started with Relays
RELAY HARDWARE
SPECIFICATION
Low-end
RECOMMENDATION
Relays with low-end hardware can support up to 1000 endpoints
that enable Web Reputation.
•
If Relays with low-end hardware need to support more than
1000 endpoints that use Web Reputation, increase the Relays’
hardware resources before deploying an SPR.
•
You could also add one more Relay to the site, and move
some endpoints to the new Relay before deploying SPR.
Enabling Web Reputation
Procedure
1.
Use AD groups or Subnet Addresses to select endpoints that will enable Web
Reputation.
2.
Configure the Security Level for Web Reputation.
a.
Click Endpoint Protection > Core Protection Module > Common Tasks
> Web Reputation.
b.
Select Web Reputation - Configure Web Reputation Security Level.
Trend Micro recommends using the default setting Low.
3.
4.
Enable Blocking Untested URLs. This step is optional.
a.
Click Endpoint Protection > Core Protection Module > Common Tasks
> Web Reputation.
b.
Select Web Reputation - Block web pages that are untested by Trend
Micro.
Enable the Web Reputation Fixlet.
a.
Click Endpoint Protection > Core Protection Module > Common Tasks
> Web Reputation.
3-5
Core Protection Module 10.6 SP2 Administrator’s Guide
b.
5.
Select Web Reputation – Enable HTTP Web Reputation Scanning (port
80).
Direct endpoints to query the Smart Protection Server or Smart Protection Relays,
instead of the Smart Protection Network.
a.
Click Endpoint Protection > Core Protection Module > Common Tasks
> Web Reputation.
b.
Select Web Reputation - Enable Smart Protection Server Web
Reputation Service.
Deploying SPRs in Low Bandwidth Networks
The following steps outline Trend Micro recommended best practices when deploying
SPRs in low bandwidth environments.
Tip
Trend Micro recommends deploying at least one SPR for each low bandwidth site.
Procedure
1.
2.
3-6
Use the Network Bandwidth Throttling Fixlet to customize SPR network
throttle settings to fit different outbound bandwidths and topologies.
•
For remote sites with less than 20 Mbps outbound bandwidth, use the
Network Bandwidth Throttling Fixlet to customize network throttle
settings.
•
According to real-world testing results, networks with an outbound
bandwidth below 256 Kbps should not use smart scan or Web Reputation.
Use the following table as a guide, when using the Network Bandwidth
Throttling Fixlet.
Getting Started with Relays
TABLE 3-4. Recommended Smart Scan Endpoints
OUTBOUND BANDWIDTH
3.
RECOMMENDED NUMBER OF SMART SCAN
ENDPOINTS
256 Kbps
8
512 Kbps
20
2 Mbps
80
6 Mbps
610
10 Mbps
1000
For more information on the Network Bandwidth Throttling Fixlet, see Smart
Protection Relay - Network Bandwidth Throttling on page C-4.
Deploying SPR
Deploy SPR to ESP Relays using the Deployment > Install > Smart Protection
Relay - Deploy task.
Smart Protection Servers must be installed and connected to ESP before SPRs can be
deployed.
Note
When deploying Smart Protection Relays, port 5274 must remain open.
Configuring the Smart Protection Relay Proxy
Settings Wizard
Note
You will be prompted to provide a password for the proxy server.
3-7
Core Protection Module 10.6 SP2 Administrator’s Guide
Procedure
1.
From the ESP Console menu, click Endpoint Protection on the bottom left pane.
2.
From the upper left navigation pane, go to Core Protection Module >
Configuration > Smart Protection Relay Proxy Settings > Smart Protection
Relay Proxy Settings Wizard.
The Smart Protection Relay Proxy Settings Wizard window opens.
3.
Click Use the following proxy settings.
4.
Either provide the necessary proxy settings information or click Use to reload
previously configured settings.
5.
Click Create Configuration Task and deploy the proxy settings to the necessary
Smart Protection Relays.
Protecting Virtual Environments
Before deploying CPM agents to virtual machines, there are a number of tasks that you
need to perform:
•
Step 1: Deploy VDI Components to ESP relays
•
Step 2: Connect VDI Components to your virtual management servers
•
Step 3: Deploy CPM agents to virtual endpoints (see CPM Clients: Installing and
Updating on page 4-1)
•
Step 4: Use the Pre-Scan Template Generation Tool
VDI Components
The resources of physical machines that host VM environments must be allocated
carefully. Resource intensive processes like performing component updates can be
handled as long as the process is not performed by all virtual machines on the physical
server at the same time. Virtual Deployment Infrastructure (VDI) Components prevent
3-8
Getting Started with Relays
all virtual machines on a physical server from performing resource intensive tasks at the
same time. VDI Components monitor the CPM Agents installed on virtual machines
and sequentially initialize resource intensive tasks.
Deploying VDI Components
Deploy VDI components to ESP Relays using the Deployment > Install > Core
Protection Module - Install VDI Components task.
Note
When deploying VDI components, port 5273 must be open.
Connecting to Virtual Management Servers
After deploying VDI Components, the components must first connect to the virtual
management servers on your network.
The Virtual Desktop Settings Wizard is used to connect to the VDI servers on your
network. CPM supports connecting to VMware vCenter™ Servers, Citrix
XenServers™, or Microsoft Hyper-V™ platforms.
Procedure
1.
Go to Configuration > Virtual Desktop Settings.
2.
Click Add New Connection Settings and select the virtual management server
for your environment.
3-9
Core Protection Module 10.6 SP2 Administrator’s Guide
The New VDI Connection Settings screen appears.
3.
Provide the required settings and click Save.
4.
Click Create Configuration Task and deploy the settings to the necessary
endpoints.
VDI Pre-Scan Template Generation Tool
Use the Core Protection Module VDI Pre-Scan Template Generation Tool to optimize
on-demand scan or remove GUIDs from base or golden images. This tool scans the
base or golden image and certifies the image. When scanning duplicates of this image,
Core Protection Module only checks parts that have changed. This ensures shorter
scanning time.
Tip
Trend Micro recommends generating the pre-scan template after applying a Windows
update or installing a new application.
3-10
Getting Started with Relays
Configuring the VDI Pre-Scan Template Generation Tool
Procedure
1.
Click Endpoint Protection > Core Protection Module > Deployment >
Install and select the Core Protection Module - Download VDI Pre-scan
Generation Tool fixlet.
2.
Copy the tool to the <CPM_Installation_Path>\OfficeScan Client
folder of the base image.
3.
Execute TCachGen_x86.exe or TCachGen_x64.exe.
4.
Click Generate Pre-Scan Template.
3-11
Chapter 4
CPM Clients: Installing and Updating
There are a number of ways to handle the deployment of CPM clients to your
endpoints, and you will need to decide on the one that works best for you and your
organization. However, Trend Micro does recommend that you start off incrementally,
deploying and then configuring a small number of clients and then, either gradually or in
batches, proceed until you have installed CPM clients on all your endpoints.
Topics in this chapter include:
•
About CPM Client Deployment on page 4-2
•
Pattern File and Engine Updates on page 4-7
•
Displaying the CPM Icon on Endpoints on page 4-14
•
Removing CPM Clients on page 4-15
•
System Requirements on page 4-16
•
Conflicting or Incompatible Programs on page 4-16
4-1
Core Protection Module 10.6 SP2 Administrator’s Guide
About CPM Client Deployment
The Tasks created in the procedures described below can only be deployed to relevant
computers (the number of which is indicated after the Task name). In the ESP
environment, relevance is determined by a "relevance statement" which defines certain
conditions that the computer must meet. Any computers running an ESP Agent can
receive relevance statements, and when they do, they perform a self-evaluation to
determine whether they are included in the criteria. Relevant computers will complete
whatever Action has been specified.
When targeting more than a few computers, Trend Micro suggests that you target
endpoints by property rather than by list. Targeting by property does not require a
relevant computer status and allows for the use of logic such as:
"Install on all XP computers, in California, that are part of the User group."
Note
Conventional scan is the default scan method for clients.
CPM Console and Client System Requirements
A complete list of system requirements can be found in System Requirements on page 4-16.
For information on ESP Server and ESP Console requirements, refer to the Trend Micro
Endpoint Security Platform Administrator’s Guide.
Compatibility with Trend Micro OfficeScan™
Trend Micro CPM is intended to replace OfficeScan clients with CPM clients, which can
be managed using the scalability and flexibility of the ESP Console.
Before deploying CPM clients, you should use the native OfficeScan uninstall program
to remove all installed OfficeScan clients and then restart them.
4-2
CPM Clients: Installing and Updating
Incompatible or Conflicting Programs
For a complete list of incompatible or conflicting programs, see Conflicting or Incompatible
Programs on page 4-16. The following is a short list of software that you should remove
from the endpoints before deploying the CPM client:
•
Trend Micro OfficeScan™ and Trend Micro PC-cillin™
•
Antivirus software, including Symantec™ AntiVirus™, McAfee™ VirusScan™,
Sophos™ Antivirus™, and eTrust™ Antivirus™
Overview of the Deployment Steps
To successfully deploy the CPM client, perform the following procedures:
1.
Identify ineligible endpoints.
2.
Identify conflicting products.
3.
Remove conflicting products.
4.
Deploy CPM clients.
Identifying Ineligible Endpoints
The CPM client supports most operating systems and typically does not require system
resources exceeding those required by the host operating system. However, there are
some factors that can preclude otherwise eligible endpoints from receiving the CPM
client. Perform the procedures that follow to identify which of your endpoints, if any,
require modification before installing the client. Do this before removing any existing
security products to ensure a continuation of your endpoint security.
Procedure
1.
From the ESP Console menu, click Endpoint Protection on the bottom left pane.
2.
From the upper left navigation pane, go to Core Protection Module >
Troubleshooting.
4-3
Core Protection Module 10.6 SP2 Administrator’s Guide
3.
From the list on the right pane, select Core Protection Module - Ineligible for
Install -Insufficient Hardware Resources.
The Fixlet Description opens.
4.
Click the Applicable Computers tab.
A list appears with the endpoints with insufficient hardware resources.
5.
Below Actions, click the hyperlink if you want to connect to the Support web page
for more information.
6.
Repeat steps 1-3 for any Tasks that pertain to endpoint readiness (for example,
Troubleshooting > Core Protection Module - Ineligible for Install Insufficient Software Resources).
Identifying Conflicting Products
Before deploying the CPM client to your endpoints, you need to uninstall any programs
that will conflict with the CPM functions. See Conflicting or Incompatible Programs on page
4-16 for more information.
Procedure
1.
From the ESP Console menu, click Endpoint Protection on the bottom left pane.
2.
From the upper left navigation pane, go to Core Protection Module >
Troubleshooting.
3.
From the list on the right pane, select Core Protection Module - Ineligible for
Install - Removal of Conflicting Products Required.
The Fixlet Description opens.
4.
Click the Applicable Computers tab.
A list of endpoints running conflicting software appears.
5.
4-4
Below Actions, click the hyperlink if you want to connect to the Support web page
for more information.
CPM Clients: Installing and Updating
Removing Conflicting Products
Procedure
1.
From the ESP Console menu, click Endpoint Protection on the bottom left pane.
2.
From the upper left navigation pane, go to Core Protection Module >
Deployment > Uninstall > [product name].
The Fixlet Description tab opens, showing a list of the endpoints currently
running the program.
•
Alternatively, you can click All Content and then navigate to Fixlets and
Tasks > All > By Site > Trend Micro Core Protection Module. In the list
of Fixlets that appears in the right window pane, select Core Protection
Module - Uninstall [product name] by double-clicking it.
3.
Below Actions, click the hyperlink to open the Take Action window.
4.
In the Target tab, a list of the endpoints that are running the selected program
appears. Click Applicable Computers to choose all relevant computers. In
addition, you may also want to configure other options, as described below:
•
Execution: Set the deployment time and retry behavior.
•
Users: This option works in combination with Target, linked by the AND
operand (both conditions must be present for the install to occur).
•
Messages: Configure these options to passively notify the user that the
uninstall is going to occur, to obtain consent, or to ask users to stop using
their computer while the install occurs.
•
Offer: Configure these options if you want the user to be able to choose
whether the program is removed. A pop-up message displays on the target
endpoints (requires that the client is enabled for offers).
5.
Click OK.
6.
At the prompt, type your private key password and click OK.
4-5
Core Protection Module 10.6 SP2 Administrator’s Guide
7.
In the Action | Summary window that opens, monitor the "Status" and "Count"
of the Action to confirm that it is "Running" and then "Completed".
Deploying CPM Clients to the Endpoints
Use the Core Protection Module Endpoint Deploy Task to deploy CPM to all
computers you want to secure against viruses and spyware. The CPM client package is
about 100MB, and each endpoint will be directed to download the file from the ESP
Server or Relay.
If you target your endpoints using properties rather than by computer (which is the
recommended behavior) any endpoint that subsequently joins the network will
automatically receive the CPM client.
Installation takes about ten minutes, and the CPM client can be installed with or without
the target user’s consent. Installation does not typically require a restart; however, a
DOS-style command console may open on the client as the install scripts run. In
addition, the client will be briefly disconnected from the network.
Note
Prior to deploying the CPM client, be sure your targeted endpoints are not running a
conflicting product (see Conflicting or Incompatible Programs on page 4-16) and that they meet
the hardware and software requirements as explained in Identifying Ineligible Endpoints on page
4-3.
Procedure
1.
From the ESP Console menu, click Endpoint Protection on the bottom left pane.
2.
From the upper left navigation pane, go to Core Protection Module >
Deployment > Install.
3.
Note the number of eligible clients in the parenthesis after Install.
4.
From the list on the right pane, select Core Protection Module - Endpoint
Deploy.
A screen displaying the Task Description tab appears.
4-6
CPM Clients: Installing and Updating
5.
Below Actions, click the hyperlink to open the Take Action window.
In the Target tab that opens, a list of eligible endpoints appears. The default
behavior is to install the CPM client on every relevant endpoint, regardless of who
is logged on to the computer and whether the user is present or not.
6.
Use the following deployment options if you want to change the target:
•
Target: Click All computers with the property values selected in the tree
list below and then choose a property that will include all the computers you
want to deploy this Action to.
•
Execution: Set the deployment time and retry behavior, if any.
•
Users: This option works in combination with Target, linked by the AND
operand (both conditions must be present for the install to occur).
•
Messages: Configure these options to passively notify the user that the install
is going to occur, or to ask users to stop using their computer while the install
occurs.
•
Offer: Configure these options if you want the user to be able to choose
whether the client is installed. A pop-up message will be displayed on the
target endpoints (requires that the client is enabled for offers).
7.
At the prompt, type your private key password and click OK.
8.
In the Action | Summary window that opens, monitor the "Status" and "Count"
of the Action to confirm that it is "Running" and then "Completed".
Pattern File and Engine Updates
It is important to keep your CPM clients current with the latest pattern and engine files
from Trend Micro. The update process can be scheduled to occur automatically and is
transparent; there is no need to remove the old pattern or install the new one.
Pattern Rollbacks
CPM supports pattern "rollbacks", that is, swapping out the current pattern to a
different one. Although seldom used, it is useful in case there is a problem with the
4-7
Core Protection Module 10.6 SP2 Administrator’s Guide
pattern file, for example to address an issue of false positives. The default is to keep 15
patterns on the server for clients to roll back to if necessary, but you can set this number
as high as 100 (in the CPM Dashboard, click Configuration > ActiveUpdate Server
Settings > ActiveUpdate Server Settings Wizard and scroll to the bottom of the
screen).
Incremental Updates
To reduce network traffic generated when downloading the latest pattern, the Trend
Micro ActiveUpdate server includes incremental pattern updates along with the full
pattern file. Updates represent the difference between the previous pattern file and the
current one. Like the full pattern file, incremental updates download and apply
automatically. Incremental updates are available to both the ESP Server (which typically
downloads pattern updates from the ActiveUpdate server) and to CPM clients that are
configured to get their updates from the ESP Server.
Updates from the "Cloud"
Clients typically receive their updates from the ESP Server or Relays, but CPM 10.6 also
supports client-updates from the "cloud", that is, directly from the Trend Micro
ActiveUpdate server.
Tip
Note that Trend Micro does not recommend updating clients from the cloud as the default
behavior.
Pattern files may exceed 20MB/client, so frequent, direct client downloads from the
ActiveUpdate server are usually not preferred. Instead, you can use the cloud as a
fallback for clients to use whenever they are not able to connect to the ESP Server.
Updates from the cloud support incremental pattern updates, however, it does not allow
you to update only certain pattern types.
4-8
CPM Clients: Installing and Updating
Updating Pattern Files on CPM Clients
Before performing the client update procedures below, be sure that you have updated
the pattern files on the CPM Server and that you have enabled that server to perform
automatic updates. See Updating Pattern Files on the CPM Server on page A-15 for details.
Trend Micro recommends that you perform the first full pattern-file update on a small
number of CPM clients and then repeat the procedure on an expanded scope as you
become more familiar with the procedures.
Note
Automatic updates are enabled by default.
Procedure Overview
1.
Enable automatic pattern file updates for CPM clients.
2.
Schedule and apply automatic pattern file updates.
3.
Manually update CPM clients with the latest pattern files.
Enabling Automatic Updates for CPM Clients
Procedure
1.
From the ESP Console menu, click Endpoint Protection on the bottom left pane.
2.
From the upper left navigation pane, go to Core Protection Module > Updates
> Automatic Update Tasks.
3.
Select Core Protection Module - Enable Automatic Updates - Endpoint from
the list on the right.
The Fixlet Description tab opens.
4.
Below Actions, click the hyperlink to open the Take Action window.
4-9
Core Protection Module 10.6 SP2 Administrator’s Guide
5.
On the Target tab, choose All computers with the property values selected in
the tree list below.
6.
Choose a property that will include all the computers you want to deploy this
Action to and click OK.
7.
At the prompt, type your private key password and click OK.
8.
In the Action | Summary window that opens, monitor the "Status" and confirm
that it "Fixed".
Scheduling and Applying Automatic Pattern File Updates
Procedure
1.
From the ESP Console menu, click Endpoint Protection on the bottom left pane.
2.
From the upper left navigation pane, go to Core Protection Module > Updates
> Automatic Update Tasks.
4-10
CPM Clients: Installing and Updating
3.
From the list on the right, select Core Protection Module - Apply Automatic
Updates.
A screen displaying the Task Description tab appears.
4.
Below Actions, click the hyperlink to open the Take Action window.
5.
Click the Execution tab to display scheduling options as shown below:
a.
Change Preset as shown by the letter a in the figure above.
b.
Enable Starts on and choose the current date and time (do not set Ends on).
c.
Enable On failure, retry 99 times (default setting).
d.
Choose to Wait 15 minutes between attempts (default setting).
e.
Enable Reapply this action... whenever it becomes relevant again
(default setting).
4-11
Core Protection Module 10.6 SP2 Administrator’s Guide
6.
On the Target tab, choose All computers with the property values selected in
the tree list below and then select All Computers.
Note
It is important to target All Computers for this action; only endpoints with the CPM
client installed and that have automatic updates enabled will be relevant.
7.
Click OK.
8.
At the prompt, type your private key password and click OK.
9.
In the Action | Summary window that opens, monitor the "Status" and "Count"
of the Action to confirm that it is "Running" and then "Completed".
Manually Updating CPM Clients with the Latest Patterns
Procedure
1.
From the ESP Console menu, click Endpoint Protection on the bottom left pane.
2.
From the upper left navigation pane, go to Core Protection Module > Updates
> Updates/Rollback Patterns > Create Pattern Update/Rollback Task.
The Pattern Updates Wizard opens.
3.
In the list of folders that appears, click the ">" icon next to most recent folder to
expand and display individual patterns as shown in the following figure.
Note
If you recently updated the pattern file for the first time, there will be only one folder
available.
4-12
CPM Clients: Installing and Updating
4.
5.
Click the Deploy button across from the folder. In the pop-up window that
appears, choose:
•
Deploy a one time action: Opens the Take Action window and allows you
to select the computers you want to apply this one-time Action to. Any
computers included in the Target that are not relevant for the Action at the
time of deployment will respond with a "not relevant" statement. Click OK.
•
Create an update Fixlet: Opens the Edit Fixlet Message window and
allows you to configure a Fixlet that will deploy the Action whenever the
selected clients become relevant. When finished, click OK and in the window
that opens, click the hyperlink that appears below Actions to open the Take
Action window.
In the Target tab that opens, click All computers with the property values
selected in the tree list below. Choose a property that will include all the
computers you want to deploy this Action to.
•
Execution: Set the time and retry behavior for the update (if any).
•
Users: This option works in combination with Target, linked by the AND
operand (both conditions must be present for the installation to occur).
4-13
Core Protection Module 10.6 SP2 Administrator’s Guide
6.
After selecting the computers to update, click OK.
7.
At the prompt, type your private key password and click OK.
8.
In the Action | Summary window that opens, monitor the "Status" and "Count"
of the Action to confirm that it is "Running" and then "Completed".
Displaying the CPM Icon on Endpoints
By default, the CPM agent running on your endpoints is in "stealth" mode: it is not
visible to the end users, and they do not have any control over the settings. If you want
users to know that CPM is running on their computer, you can display a CPM icon in
the Windows taskbar. Users can right-click the icon to view basic information about the
client in the Client Dashboard, including recent detections and the CPM client version.
client in the Client Dashboard, including recent detections and the CPM client
version.When displayed, the CPM icon also includes a hidden "Technical" mode that
Support or the CPM administrator can use to see a variety of information, including a
list of Fixlets that are relevant on that computer. This is useful to help understand and
troubleshoot client-side issues. After deploying the Task as described in the procedure
below, simultaneously press the following keys on the client’s keyboard to display the
Technical mode screen:
CTRL ALT SHIFT T
Procedure
1.
From the ESP Console menu, click Endpoint Protection on the bottom left pane.
2.
From the upper left navigation pane, go to Core Protection Module > Common
Tasks > Core Protection Module - Enable Client Dashboard.
A screen displaying the Task Description tab appears.
3.
Below Actions, click the hyperlink to open the Take Action window.
4.
In the Target tab that opens, click All computers with the property values
selected in the tree list below. Choose a property that will include all the
computers that you want to deploy this Action to.
4-14
CPM Clients: Installing and Updating
5.
•
Execution: Do not select a retry behavior.
•
Users: This option works in combination with Target, linked by the AND
operand (both conditions must be present for the install to occur).
In the Action | Summary window that opens, monitor the "Status" and "Count"
of the Action to confirm that it is "Running" and then "Completed".
Removing CPM Clients
To uninstall CPM from the ESP Server, you first remove all the CPM clients deployed
to the endpoints, then remove the CPM server components from the server, including
any mastheads. You can do the former by running the Endpoint Uninstall Task.
Procedure
1.
From the ESP Console menu, click Endpoint Protection on the bottom left pane.
2.
From the upper left navigation pane, go to Core Protection Module >
Deployment > Uninstall.
3.
From the list on the right, select Core Protection Module - Endpoint Uninstall.
A screen displaying the Task Description tab appears.
4.
Below Actions, click the hyperlink to open the Take Action window.
5.
Select the computers you want to target and click OK.
6.
At the prompt, type your private key password and click OK.
The uninstall sequence begins.
7.
In screen that appears, click the Reported Computers tab to follow the status of
the scan.
It usually takes a few minutes for targeted computers to report back their Action
status.
4-15
Core Protection Module 10.6 SP2 Administrator’s Guide
System Requirements
For a complete list of the system requirements for client installations, refer to the Core
Protection Module 10.6 SP2 - System Requirements document.
Conflicting or Incompatible Programs
Remove the following programs before deploying CPM to the endpoints.
TABLE 4-1. Conflicting or Incompatible Programs
PROGRAM TYPE
Spyware,
Virus, and
Malware
Programs
4-16
CONFLICTING/INCOMPATIBLE PROGRAMS
•
Symantec Software Virtualization Solution
•
Symantec AntiVirus
•
McAfee VirusScan
•
Sophos Antivirus
•
eTrust Antivirus
•
Bit9 Parity Agent
•
Computer Associates ARCserve Backup
•
HSM (Hierarchical Storage Management) Backup Software
•
BigFix Antivirus
CPM Clients: Installing and Updating
PROGRAM TYPE
Trend Micro
Software
Programs
Incompatible
with CPM on
the ESP
Server
CONFLICTING/INCOMPATIBLE PROGRAMS
These software programs should be removed from the endpoints
before deploying CPM clients to those computers. Use the program’s
native uninstaller to remove them.
•
OfficeScan versions 8 and 10
•
Internet Security 2008
•
Pc-cillin 2007
•
Pc-cillin 2006
•
Pc-cillin 2005
•
Pc-cillin 2004 (AV)
•
Pc-cillin 2004 (TIS)
•
Pc-cillin 2003
•
Pc-cillin 2002
•
Pc-cillin 2000 (WinNT)
•
Pc-cillin 2000 7.61 (WinNT)
•
Pc-cillin 98 Plus (WinNT)
•
Pc-cillin NT 6
•
Pc-cillin NT
•
HouseCall Pro
•
Virus Buster 2000 for NT ver.1.20-
•
Virus Buster 98 for NT
•
Virus Buster NT
•
Trend Micro ServerProtect
•
ServerProtect for Windows NT
4-17
Chapter 5
Configuring and Managing CPM
Before using this chapter, you should already have the ESP Server, ESP Console, and at
least one ESP Agent installed. In addition, you should have already installed the CPM
server and deployed CPM clients (and updated their pattern files). If you have not, see
Chapters 2 and 3 for the procedures.
Topics in this chapter include:
•
Using the CPM Dashboard and Menu on page 5-2
•
Configuring and Deploying Global Settings on page 5-5
•
Configuring and Running Malware Scans on page 5-9
•
Client Updates from “the Cloud” on page 5-16
•
Previous Pattern File Version Rollback on page 5-18
•
Deploying Selected Pattern Files on page 5-22
•
Exempting Programs from Spyware Detection on page 5-24
•
Smart Protection Server Configuration on page 5-27
•
Protecting Endpoints Using Smart Scan on page 5-32
•
Behavior Monitoring on page 5-34
5-1
Core Protection Module 10.6 SP2 Administrator’s Guide
Using the CPM Dashboard and Menu
Open the CPM Console by clicking the Windows Start button, then All Programs >
Trend Micro Endpoint Security Platform > ESP Console. When prompted, log in
as a Master Console Operator.
Tips for Navigating the CPM Console
When you open the ESP Console, you will notice that there are two systems of
navigation: the All Content or Endpoint Protection menus that access different folder
trees. Both are shown in the following figure.
Procedure
1.
Use one of the following paths to access the CPM console:
a.
Select the All Contents menu item at the bottom left of the ESP console
window.
In the navigation tree, go to Fixlets and Tasks > All > By Site > Trend
Micro Core Protection Module. Select tasks by clicking one of the following
folders: By Source Severity, By Category, By Source, By Source Release
Date.
b.
Select the Endpoint Protection menu item at the bottom left of the ESP
console window.
In the navigation tree, select Core Protection Module and click one of the
following categories: Overview, Protection Status, Quick Start Reports
Common Tasks Deployments Updates, Configuration Analyses
Troubleshooting.
Note
This manual mainly uses method b.
5-2
Configuring and Managing CPM
5-3
Core Protection Module 10.6 SP2 Administrator’s Guide
2.
Display the CPM Console Dashboard by clicking the Endpoint Protection menu
item, the Core Protection Module folder in the tree and the Overview
subcategory.
3.
Click a category, such as Updates.
4.
Find any task, including custom tasks, in the right upper pane. Tasks can be sorted
alphabetically by clicking the Name column heading. Click a Task to open it and
view the description.
5.
Navigate back, forward, refresh the console data, or control how much data
displays from the button above the navigation tree.
6.
When working on a specific task, you can use the buttons above the Description
window to Take Action, Edit, Copy, Export, Hide Locally or Globally, and
(sometimes) Remove
7.
Target certain computers when the Task is open by clicking one of the sub-tabs
that appears: Description (default), Details, Applicable Computers, and Action
History.
8.
Run the Task by clicking the link that appears below the Action window.
9.
Add or remove display columns by right-clicking any column header and then
selecting or de-selecting from the pop-up menu that appears.
10. Bundle configuration settings into a Task, attach it to selected endpoints, and
schedule it to run automatically.
11. To configure components:
a.
Use the Endpoint Protection > Core Protection Module > Configuration
> [component to be configured] to make your security and firewall
configurations.
For example, you can access the tasks for setting up the behavior of client
scans.
b.
5-4
Select the task in the list on the right or click the Create [task name] button.
Configuring and Managing CPM
Note
Windows by clicking the create-a-task button can be closed by clicking the X in the
upper right corner.
How CPM Task Flows Work
In general, you start by using the CPM Dashboard to make configuration settings. Then
you bundle the settings into a Task, which delivers an Action to targeted computers.
Tasks also include a Relevance, which provides an additional layer of logic that can
further define eligible targets. All ESP Agents (on which the CPM client runs) receive
Tasks, but then each agent makes its own determination as to whether its host endpoint
meets the conditions of the Task, that is, whether the Action is Relevant or not.
•
Relevance is determined by checking whether a given set of conditions is true for
a particular endpoint. If all the conditions are true, the endpoint is designated as
eligible for whatever Task, Fixlet, or Action did the checking.
•
Fixlets are a way of polling endpoints to see if they are Relevant for an Action. In
other words, Fixlets make Actions in a Task possible when conditions are right.
•
Fixlets can be grouped into Baselines to create a sequence of Fixlet Actions.
•
Offers are a way of obtaining end users consent before taking an action.
Configuring and Deploying Global Settings
Global settings apply to all On-Demand and Real-Time scans. You can think of them as
a superset, or background, against which all scan policies and associated Tasks are
applied. Global settings also apply to both virus/malware and spyware/grayware.
Set your global configurations before creating any on-demand or real-time scans, then
create and deploy a Task. You can also create multiple Global Settings Tasks, which are
saved in the Dashboard. For example if you want to apply different scan policies to
different endpoints according to location. In this case, you need to be mindful about
keeping each global setting aligned with its corresponding scan policy and its location.
5-5
Core Protection Module 10.6 SP2 Administrator’s Guide
Configuring Global Settings
Procedure
1.
From the ESP Console menu, click Endpoint Protection on the bottom left pane.
2.
From the upper left navigation pane, go to Core Protection Module >
Configuration > Global Settings > Global Settings Wizard.
The Global Scan Settings Wizard appears.
3.
Make your configurations choices (options are detailed in Configuring and Running
Malware Scans on page 5-9).
Note
Avoid overlapping two Global Scans on the same client when deploying. If you do,
only the last deployed settings will apply, or the overlapped endpoints may constantly
cycle between different applicable settings.
4.
5-6
Click the Create Global Scan Settings Configuration Task... button.
Configuring and Managing CPM
The Edit Task window opens.
5.
Above the Description tab, name the Task and then click OK to accept the
default Actions and Relevance.
By default, the Task will be relevant to any CPM clients that do not already have
the Global Setting parameters set in their registry.
6.
Click OK to save the Task.
Deploying the Global Settings
Procedure
1.
From the ESP Console menu, click Endpoint Protection on the bottom left pane.
2.
From the upper left navigation pane, go to Core Protection Module >
Configuration > Global Settings.
3.
Deploy the Global Settings by clicking the [task name] in the task list in the right
pane.
4.
Below Actions, click the hyperlink to open the Take Action window.
5.
In the Take Action window that opens, select the relevant computers to which to
deploy this Task. Click OK to deploy the configuration.
6.
Check the Action History tab to see which CPM clients received the update or, if
using multiple Tasks to deploy different sets of Global Settings, which settings are
in effect for a given endpoint.
Enabling the Global Settings Analysis
When the CPM client is installed, it includes a default configuration for Global Settings.
If you have changed any of these settings and updated your clients, you will need to
explicitly deploy these updates to any new computers as they are added to the network;
unless you select the Target by property (recommended) rather than by computer. You
can check which configuration is in place using the Global Settings Analysis.
5-7
Core Protection Module 10.6 SP2 Administrator’s Guide
Procedure
1.
From the ESP Console menu, click Endpoint Protection on the bottom left pane.
2.
From the upper left navigation pane, go to Core Protection Module > Analyses
> Core Protection Module.
3.
Select Core Protection Module - Endpoint Protection: Global Client Settings
from the list in the right pane.
The Analysis window opens.
5-8
4.
Below Actions, click the hyperlink to open the Take Action window.
5.
At the prompt, type your private key password and click OK.
6.
In the Take Action window that opens, select the relevant computers to which to
deploy this Task. Click OK to deploy the configuration.
Configuring and Managing CPM
Configuring and Running Malware Scans
CPM provides two types of malware scans, On-Demand and Real-Time. In addition,
you can schedule On-Demand scans to automatically reoccur. You can apply the same
scan to all endpoints, or create different scan configurations and apply them to different
sets of endpoints based on whatever criteria you choose. Users can be notified before a
scheduled or on-demand scan runs, but do not explicitly receive notifications whenever
a detection occurs on their computer.
Note
See Displaying the CPM Icon on Endpoints on page 4-14 for information on making some
detection information visible to your end users.
Detections are logged and available for review in CPM Reports.
Note
On-Demand scans can be CPU intensive on the client. Although you can moderate the
affect by configuring the CPU Usage option (sets a pause between each file scanned), you
may also want to configure an Offer as part of the Task. The Offer will allow users to
initiate the scan themselves.
As with most Tasks in the ESP Console, you can associate any of these scans with
selected computers, users, or other conditions. As a result, you can define multiple scan
5-9
Core Protection Module 10.6 SP2 Administrator’s Guide
settings and then attach a particular scan configuration to a given set of computers. Scan
settings are saved in the CPM Dashboard.
The configuration settings you define for these scans apply in conjunction with
whatever Global Settings you have configured.
•
5-10
On-Demand scans: Use On-Demand scans to run a one-time scan of client hard
drives and/or the boot sector. Launch the default scan with the Scan Now Task.
On-Demand scans can take from a few minutes to a few hours to complete,
depending on how many files are scanned and client hardware.
Configuring and Managing CPM
Note
When an end user initiates a Manual Scan from the CPM client console, the scan
settings reflect the latest settings configured by the administrator for an On-Demand
Scan.
For example, an administrator might schedule an On-Demand Scan on every
Thursday 12:00 PM that scans all file types. Then the administrator might run an OnDemand scan with different scan settings, maybe scanning only for .EXE files, at
14:00 PM. If an end user runs a Manual Scan at 15:00 PM, and the administrator has
not changed the settings, the end user’s Manual Scan will only scan for .EXE files,
not all file types.
•
Scheduled scans: You can schedule an On-Demand scan to trigger at a given
time, day, or date. You can also have the scan automatically reoccur according to
the schedule you set.
•
Real-Time scans: This scan checks files for malicious code and activity as they are
opened, saved, copied or otherwise being accessed. These scans are typically
imperceptible to the end user. Real-time scans are especially effective in protecting
against Internet-borne threats and harmful files being copied to the client. Trend
Micro recommends that you enable real-time scanning for all endpoints.
Configuring the Default Scan Settings
Whenever you run the default on-demand scan, the settings applied are those that you
configured for the default On-Demand Scan Settings. The relationship between these is
shown in the following figure.
Procedure
1.
From the ESP Console menu, click Endpoint Protection on the bottom left pane.
2.
From the upper left navigation pane, go to Core Protection Module >
Configuration > On-Demand Scan Settings > On-Demand Scan Settings
Wizard.
5-11
Core Protection Module 10.6 SP2 Administrator’s Guide
The On-Demand Scan Settings Wizard appears
3.
Make your configurations choices. Options are detailed in Exempting Programs from
Spyware Detection on page 5-24.
4.
Click the Create Configuration Task... button.
The Create Task window opens.
5.
Since this is the default Start Scan Now Task, keep the existing name and click OK
to also accept the default Actions and Relevance.
The Task is set to be relevant to all CPM clients.
6.
Click OK.
7.
At the prompt, type your private key password and click OK.
8.
Wait a few minutes and the Applicable Computers tab displays.
9.
Below Actions, click the hyperlink to open the Take Action window.
5-12
Configuring and Managing CPM
10. In the Take Action window | Target tab, select the applicable computers and
click OK.
11. Click OK.
12. At the prompt, type your private key password and click OK.
13. In the Action | Summary window that opens, monitor the "Status" and "Count"
of the Action to confirm that it is "Running" and then "Completed".
Starting a Scan of Relevant Endpoints
From the Endpoint Protection > Core Protection Module tree, go to Common
Tasks > Core Protection Module > Core Protection Module - Start Scan Now.
Configuring an On-Demand Scan
This scan configuration will be saved apart from the default scan now settings. You can
run it from the CPM Dashboard anytime to initiate an On-Demand scan that uses the
saved settings and applies to the selected computers.
Procedure
1.
From the ESP Console menu, click Endpoint Protection on the bottom left pane.
2.
From the upper left navigation pane, go to Core Protection Module >
Configuration > On-Demand Scan Settings > On-Demand Scan Settings
Wizard.
The On-Demand Scan Settings Wizard appears.
3.
Make your configurations choices (options are detailed in Exempting Programs from
Spyware Detection on page 5-24).
4.
Click the Create Scan Now Task... button.
The Create Task window opens.
5-13
Core Protection Module 10.6 SP2 Administrator’s Guide
5.
Edit the Name field and use the Description tab to edit it, so it clearly identifies
the scan parameters you have selected and the computers you will target in this
task.
6.
Select all the relevant computers from the Relevance tab and click OK.
7.
At the prompt, type your private key password and click OK.
8.
In the Action | Summary window that opens, monitor the "Status" and "Count"
of the Action to confirm that it is "Running" and then "Completed".
Running an On-Demand Scan
Procedure
1.
Go to Endpoint Protection > Core Protection Module > Configuration >
On-Demand Scan Settings.
2.
Double-click the previously defined [scan name] in the top right pane to initiate
the Task.
3.
Below Actions, click the hyperlink to open the Take Action window.
4.
In the Take Action window, select the computers you want to target (typically, by
Properties) and then click OK.
5.
At the prompt, type your private key password and click OK.
6.
In the Action | Summary window that opens, monitor the "Status" and "Count"
of the Action to confirm that it is "Running" and then "Completed".
Scheduling an On-Demand Scan (Automatic Scanning)
A scheduled scan will run automatically according to the schedule you set. Although it
will appear in the CPM Dashboard along with any other On-Demand scans, you do not
need to trigger it.
5-14
Configuring and Managing CPM
Procedure
1.
Go to Endpoint Protection > Core Protection Module > Configuration >
On-Demand Scan Settings.
2.
Double-click the previously defined [scan name] in the top right pane to open the
scan configuration.
3.
Below Actions, click the hyperlink to open the Take Action window.
4.
In the Take Action window, click the Execution tab (see the following figure).
•
Choose a Start date, and optionally, configure the days you want the scan to
run in the Run only on field.
•
Select Reapply this action while relevant, waiting 2 days between
reapplications (choosing whatever time period suits you).
WARNING! Do not select “whenever it becomes relevant again” or the scan
may run continuously.
•
If you want to let users initiate the scan, click the Offer tab and select Make
this action an offer.
5-15
Core Protection Module 10.6 SP2 Administrator’s Guide
•
Click any of the other Tabs to modify the trigger time and applicable users.
5.
Select all the relevant computers and click OK.
6.
At the prompt, type your private key password and click OK.
7.
In the Action | Summary window that opens, monitor the "Status" and "Count"
of the Action to confirm that it is "Running" and then "Completed".
Client Updates from “the Cloud”
Receiving pattern updates from the "cloud" is not recommended as the default behavior.
However, there are some cases, such as when an endpoint is not connected to the ESP
Server or Relay, you may want the endpoint to fail-over to updates from the cloud. The
most typical use case is to support roaming clients, for example those being taken offsite for travel.
5-16
Configuring and Managing CPM
Note
Perhaps the best method for updating roaming endpoints is to place an ESP Relay in your
DMZ. This way, endpoints are able to maintain continuous connectivity with the ESP
architecture and can receive their updates through this Relay just as they would if located
inside the corporate network.
There are several reasons updating from the cloud is not recommended for daily use by
all endpoints:
•
The Update from the cloud Task is not restricted only to roaming clients. You will
need to target your endpoints carefully to avoid triggering a bandwidth spike.
•
Full pattern and engine file updates can be 15MB or more.
•
Updates from the cloud will always include all patterns (you cannot update selected
patterns as you can from the ESP server).
•
Updates from the cloud are typically slower than updates from the ESP server.
Three additional points are relevant to cloud updates:
•
The endpoint will need an Internet connection. If the endpoint has a proxy
configured for Internet Explorer, those settings will be automatically used.
•
As with any pattern update, following a pattern rollback, further updates will be
prohibited until the rollback condition has been lifted by running the Task, Core
Protection Module - Clear Rollback Flag.
•
The CPM client will verify the authenticity of the pattern from the cloud.
Configuring Clients to Update from the Cloud
Procedure
1.
From the ESP Console menu, click Endpoint Protection on the bottom left pane.
2.
From the upper left navigation pane, go to Core Protection Module > Updates
> Other Update Tasks.
5-17
Core Protection Module 10.6 SP2 Administrator’s Guide
3.
From the list in the right pane, click Core Protection Module - Update From
Cloud.
A screen displaying the Task Description tab appears.
4.
Below Actions, click the hyperlink to open the Take Action window.
5.
In the Target tab, choose All computers with the property values selected in
the tree list below and then select the property that you want to apply (for
example, one that distinguishes between corporate and non-corporate Internet
connections).
a.
Execution: Schedule the time and duration of the cloud updates, as well as
the retry behavior. This setting can be very useful for cloud updates.
b.
Users: Select the computers you want to convert to cloud-updates by User.
This option works in combination with Target, linked by the AND operand
(both conditions must be present for the install to occur).
6.
Click OK when finished.
7.
At the prompt, type your private key password and click OK.
8.
In the Action | Summary window that opens, monitor the "Status" and "Count"
of the Action to confirm that it is "Running" and then "Completed".
Previous Pattern File Version Rollback
Problems with the scan engine and/or pattern files are very uncommon. However if a
problem does occur, it is likely to be due either to file corruption or false positives
(incorrect detection of malware in non-problematic files).
(incorrect detection of malware in non-problematic files). If a problem does arise, you
can deploy an Action to affected endpoints that will delete the file(s) in question and
replace them with a different version. This action is called a pattern rollback, and you
can rollback all or selected pattern files. By default, the CPM server keeps 15 previous
versions of the pattern and engine file for rollbacks (set this at the bottom of the Server
Settings Wizard: Core Protection Module > Configuration > ActiveUpdate Server
Settings > ActiveUpdate Server Settings Wizard > "Others" section.).
5-18
Configuring and Managing CPM
There are several things to bear in mind with regards to rolling back a pattern update:
•
Part of the rollback process is to lock-down endpoints to prevent any further
pattern updates until the lock has been cleared. The lock serves as a safeguard
against re-introducing whatever issue it was that triggered the need for a rollback.
Once the issue has been resolved, either by changing something on the endpoints
or by acquiring a different version of the pattern file, you will need to run the Core
Protection Module - Clear Rollback Flag Task to re-enable updates.
•
If your clients are not all running the same version of the pattern file, that is, some
have the current pattern and some have a much older version, and you perform a
rollback to the previous version, those with the current version will be reverted to
the previous version, while those with the older version will be updated to the
version.
•
You can rollback all or selected pattern files. However, even if you only rollback
one pattern file, you will still need to reset the rollback flag for all pattern files.
Performing a Pattern File Rollback
Procedure
1.
From the ESP Console menu, click Endpoint Protection on the bottom left pane.
2.
From the upper left navigation pane, go to Core Protection Module > Updates
> Update/Rollback Patterns > Create Pattern Update/Rollback Task.
5-19
Core Protection Module 10.6 SP2 Administrator’s Guide
The Pattern Update and Rollback Wizard opens.
3.
In the list of folders that appears, click the ">" icon to expand and display the
pattern file version you want to rollback to.
4.
Click the Rollback To button across from the folder. In the pop-up window that
appears, choose:
5-20
•
Deploy a one time action to open the Take Action window and the
computers you want to apply this one-time Action to. Any computers
included in the Target that are not relevant for the Action at the time of
deployment will respond with a "not relevant" statement. Click OK.
•
Create an update Fixlet to open Edit Fixlet Message window and
configure a Fixlet that will deploy the Action whenever the selected clients
become relevant. When finished, click OK and in the window that opens,
click the hyperlink that appears below Actions to open the Take Action
window.
Configuring and Managing CPM
Note
In CPM 10.6, you can only perform a rollback on Virus Patterns and Engines.
5.
In the Target tab that opens, click All computers with the property values
selected in the tree list below and then choose a property that will include all the
computers you want to deploy this Action to.
•
Execution: Set the time and retry behavior for the update, (if any).
•
Users: This option works in combination with Target, linked by the AND
operand (both conditions must be present for the install to occur).
6.
After selecting the computers you want to update, click OK.
7.
At the prompt, type your private key password and click OK.
8.
In the Action | Summary window that opens, monitor the "Status" and "Count"
of the Action to confirm that it is "Running" and then "Completed".
Re-enabling Updates Following a Rollback
After a rollback, you must clear the rollback flag setting attached to patterns on your
CPM clients to re-enable manual, cloud, and/or automatic pattern updates. The same
holds true even for pattern files that were not included in the rollback: all pattern files
updates will be on hold after a rollback until their individual flags have been lifted. You
can lift the flag on all pattern files at once or on selected files.
Procedure
1.
From the ESP Console menu, click Endpoint Protection on the bottom left pane.
2.
From the upper left navigation pane, go to Core Protection Module > Updates
> Other Update Tasks > Core Protection Module - Clear Rollback Flag.
A screen displaying the Task Description tab appears.
3.
Below Actions, click the hyperlink to open the Take Action window.
5-21
Core Protection Module 10.6 SP2 Administrator’s Guide
4.
In the Target tab, click All computers with the property values selected in the
tree list below and then choose a property that will include all the computers you
want to deploy this Action to.
5.
Click OK.
6.
At the prompt, type your private key password and click OK.
7.
In the Action | Summary window that opens, monitor the "Status" and "Count"
of the Action to confirm that it is "Running" and then "Completed".
Deploying Selected Pattern Files
By default, all pattern files are included when the pattern is deployed from the ESP
Server to CPM clients. You can, however, select and deploy a subset of patterns.
Note
This Task is typically only used to address special cases, and as a result is seldom used.
When used, this Task tends to be targeted narrowly.
Procedure
1.
From the ESP Console menu, click Endpoint Protection on the bottom left pane.
2.
From the upper left navigation pane, go to Core Protection Module > Updates
> Pattern Update Settings > Create Pattern Update Settings Task.
5-22
Configuring and Managing CPM
The Update Settings Wizard screen opens.
3.
In the list of components that appears, select the pattern types that you want to
allow updates for whenever pattern updates are applied. By default, all pattern files
are selected.
4.
Click the Create Update Settings Task... button in the upper right corner.
The Edit Task window opens.
5.
Modify the default name in the Name field and use the Description tab to edit it,
so it clearly identifies the purpose of this custom Task.
6.
Edit the Description and the Relevance tabs if necessary, to reflect your goals.
Click OK.
7.
At the prompt, type your private key password and click OK.
A screen displaying the Task Description tab appears.
The Task is added below Pattern Update Settings on the CPM Dashboard.
8.
Below Actions, click the hyperlink to open the Take Action window.
5-23
Core Protection Module 10.6 SP2 Administrator’s Guide
9.
In the Target tab, click All computers with the property values selected in the
tree list below and then choose a property that will include all the computers you
want to deploy this Action to.
•
Execution: Set the deployment time and retry behavior (if any).
•
Users: This option works in combination with Target, linked by the AND
operand (both conditions must be present for the install to occur).
•
Messages: Configure these options to passively notify the user that the install
is going to occur, to obtain consent, or to ask users to stop using their
computer while the install occurs.
10. When finished identifying the computers you want to receive the selected patterns,
click OK.
11. At the prompt, type your private key password and click OK.
12. In the Action | Summary window that opens, monitor the "Status" and "Count"
of the Action to confirm that it is "Running" and then "Completed".
Exempting Programs from Spyware Detection
You can add programs that you do not want CPM to detect as spyware to the Spyware
Approved List (the Approved List is analogous to exceptions in the CPM Firewall). In
addition, you can create different sets of Approved Lists and target them to different
computers. This is especially useful, for example, if you want your Help Desk people to
be able to use certain diagnostic tools, but also want those same tools to be removed
from any non-authorized computers.
Procedure
1.
From the ESP Console menu, click Endpoint Protection on the bottom left pane.
2.
From the upper left navigation pane, go to Core Protection Module >
Configuration > Spyware Approved List > Spyware Approved List Wizard.
The Spyware Approved List Wizard opens.
5-24
Configuring and Managing CPM
3.
Select spyware from the reference list on the left list and click Add to include it in
the spyware list on the right (those programs on the right will be exempted from
future detection).
Choose multiple names by holding the CTRL key while selecting.
4.
Click the button, Create Spyware Approved List Configuration Task... when
you are finished selecting programs for exclusion.
The Edit Task window opens.
5.
Edit the Name field and use the Description tab to edit it, so it clearly identifies
the purpose of this custom Task.
6.
Edit the Description and the Relevance tabs if necessary, to reflect your goals.
Click OK.
7.
At the prompt, type your private key password and click OK.
A screen displaying the Task Description tab appears.
The Task is added below New Spyware Approved List Task... on the CPM
Dashboard.
8.
Below Actions, click the hyperlink to open the Take Action window.
9.
In the Target tab, click All computers with the property values selected in the
tree below and then choose a property that will include all the computers you want
to deploy this Action to.
•
Execution: Set the deployment time and retry behavior (if any).
•
Users: This option works in combination with Target, linked by the AND
operand (both conditions must be present for the install to occur).
•
Messages: Configure these options to passively notify the user that the install
is going to occur, to obtain consent, or to ask users to stop using their
computer while the install occurs.
10. When finished identifying the computers you want to include in the exception,
click OK.
11. At the prompt, type your private key password and click OK.
5-25
Core Protection Module 10.6 SP2 Administrator’s Guide
12. In the Action | Summary window that opens, monitor the "Status" and "Count"
of the Action to confirm that it is "Running" and then "Completed".
Restoring Programs Incorrectly Detected as Spyware
CPM will keep up to 15 copies per client of the files it detects as spyware. If CPM
incorrectly classified a program running on the endpoints as spyware, you can undo the
action (that is, replace the file on the endpoint) by running the Restore Spyware/
Grayware... task. Before running the restore, be sure to add the program(s) in question
to the Spyware Approved List so the mis-detection will not occur again.
Note
If the same program was detected on many different endpoints, or if you choose to restore
many different programs at the same time, it may take a while for the restoration to finish
on the targeted computers.
Procedure
1.
From the ESP Console menu, click Endpoint Protection on the bottom left pane.
2.
From the upper left navigation pane, go to Core Protection Module > Common
Tasks > Core Protection Module > Restore Spyware/Grayware.
The Spyware/Grayware Restore Wizard opens.
3.
Select the snapshot(s) from the Spyware/Grayware Snapshots Detected list that
contain the software you want to restore to the computers from which it was
removed.
4.
Click the button, Restore Selected Snapshots....
The Edit Task window opens.
5.
Edit the Name field and use the Description tab to edit it, so it clearly identifies
the purpose of this custom Task.
6.
Edit the Description and the Relevance tabs if necessary, to reflect your goals.
Click OK.
5-26
Configuring and Managing CPM
7.
At the prompt, type your private key password and click OK.
A screen displaying the Task Description tab appears.
8.
Below Actions, click the hyperlink to open the Take Action window.
9.
In the Target tab, click All computers with the property values selected in the
tree list below and then choose a property that will include all the computers you
want to deploy this Action to.
10. Click OK.
11. At the prompt, type your private key password and click OK.
12. In the Action | Summary window that opens, monitor the "Status" and "Count"
of the Action to confirm that it is "Running" and then "Completed".
Smart Protection Server Configuration
Smart Protection Server Settings only need to be configured and deployed if there are
Smart Protection Servers deployed on your network.
CPM automatically detects Smart Protection Servers on your network if an ESP Agent is
installed on the server hosting a Smart Protection Server. For more information on
installing an ESP Agent on a Smart Protection Server, see Connecting ESP to SPS on page
2-16.
This Smart Protection Server hosts File Reputation Services, Web Reputation Services,
or both. File Reputation Services supports HTTP or HTTPS, while Web Reputation
Services supports only HTTP connection.
Endpoints can connect to the Smart Protection Servers using HTTP and HTTPS
protocols. HTTPS allows for a more secure connection while HTTP uses less
bandwidth.
Configuring the Smart Protection Server List
Smart Protection Servers must be ordered and the communication configured.
5-27
Core Protection Module 10.6 SP2 Administrator’s Guide
Procedure
1.
From the ESP Console menu, click Endpoint Protection on the bottom left pane.
2.
From the upper left navigation pane, go to Core Protection Module >
Configuration > Smart Protection Server Settings > Smart Protection Server
List.
If there are no Smart Protection Servers on your network (with ESP Agent
installed), no servers appear in the Available Smart Protection Server List.
The Smart Protection Server List screen appears.
3.
If a newer version of a Smart Protection Server is available, click the Update
available link under the Version column to obtain the latest updates from the
Trend Micro download center.
4.
Click the arrow icons, in the Order column, to move servers in to the priority that
you need. Servers at the top of the list are the first server Smart Protection Relays
and endpoints try to connect to when performing updates and reputation queries.
5.
Click a server name to modify the protocol used when communicating with Smart
Protection Relays and endpoints.
5-28
Configuring and Managing CPM
6.
Specify the protocol to use.
Note
HTTPS is more secure but requires more bandwidth for communication.
7.
Click Save.
Creating a Smart Protection Server List Deployment Task
You can create this task even if no Smart Protection Servers are deployed on your
network.
Procedure
1.
From the ESP Console menu, click Endpoint Protection on the bottom left pane.
2.
From the upper left navigation pane, go to Core Protection Module >
Configuration > Smart Protection Server Settings > Smart Protection Server
List.
The Assign Smart Protection Server List screen appears.
3.
Click Create a Task to Assign the List.
5-29
Core Protection Module 10.6 SP2 Administrator’s Guide
A Create Task dialog box appears.
4.
Click OK.
5.
At the prompt, type your private key password and click OK.
Deploying the Smart Protection Server List
Procedure
1.
From the ESP Console menu, click Endpoint Protection on the bottom left pane.
2.
From the upper left navigation pane, go to Core Protection Module >
Configuration > Smart Protection Server Settings > Custom Tasks.
5-30
Configuring and Managing CPM
Note
Click the Smart Protection Server deployment task. Settings for the task appear.
The Custom Tasks screen appears.
3.
Click Take Action.
5-31
Core Protection Module 10.6 SP2 Administrator’s Guide
The Take Action screen appears.
4.
Specify which endpoints and relays the task deploys to.
5.
Click OK.
6.
At the prompt, type your private key password and click OK.
Protecting Endpoints Using Smart Scan
Smart Protection Servers must be deployed and connected to ESP servers before
enabling Smart Scan. See Installing CPM on the ESP Server on page 2-2 for more
information.
5-32
Configuring and Managing CPM
Use the Common Tasks > Core Protection Module - Enable Smart Scan task to
enable smart scan on your network.
See Switching Scan Methods on page 3-3 for best practice information.
Switching from Smart Scan to Conventional Scan
When you switch clients to conventional scan, consider the following:
1.
Number of clients to switch
Switching a relatively small number of clients at a time allows efficient use of Core
Protection Module server and Smart Protection Server resources. These servers can
perform other critical tasks while clients change their scan methods.
2.
Timing
When switching back to conventional scan, clients will likely download the full
version of the Virus Pattern and Spyware-active Monitoring Pattern from the Core
Protection Module server. These pattern files are only used by conventional scan
clients.
Consider switching during off-peak hours to ensure the download process finishes
within a short amount of time. Also consider switching when no client is scheduled
to update from the server. Also temporarily disable "Update Now" on clients and
re-enable it after the clients have switched to conventional scan.
3.
Client tree settings
Scan method is a granular setting that can be set on the root, domain, or individual
client level. When switching to conventional scan, you can:
•
Create a new client group and add clients and use the following task on the
client group: Core Protection Module > Common Tasks > Core
Protection Module > Client | Core Protection Module - Disable Smart
Scan.
•
Select a client group and use the following task Core Protection Module >
Common Tasks > Core Protection Module > Client | Core Protection
Module - Disable Smart Scan.
5-33
Core Protection Module 10.6 SP2 Administrator’s Guide
•
Select one or several smart scan clients from a group and use the following
task Core Protection Module > Common Tasks > Core Protection
Module > Client | Core Protection Module- Disable Smart Scan.
Note
Before switching endpoints back to Smart Scan, the following must be done:
•
Smart Protection Relays are deployed in the environment
•
Smart Protection Server list has been deployed to Core Protection Module
clients
Behavior Monitoring
Behavior monitoring constantly monitors endpoints for unusual modifications to the
operating system or on installed software.
Administrators (or users) can create exception lists that allow certain programs to start
despite violating a monitored change, or completely block certain programs.
In addition, programs with a valid digital signature or have been certified are always
allowed to start (Core Protection Module - Enable Certified Safe Software Service).
The Behavior Monitoring capabilities of Core Protection Module now support 64-bit
versions of the following platforms:
•
Windows Server 2012™
•
Windows 8™
•
Windows Server 2008™
•
Windows 7™
•
Windows Vista™ with SP1 (or later)
5-34
Configuring and Managing CPM
Note
To ensure that this feature does not interfere with critical applications, CPM leaves this
feature disabled on server platforms. To enable this feature on a server computer, enable
Core Protection Module - Enable Unauthorized Change Prevention Service.
Configure Behavior Monitoring Settings
Refer to the table in Event Monitoring on page 5-37 for more information on the available
policies.
Procedure
1.
Navigate to the Configuration > Behavior Monitoring Settings > Behavior
Monitoring Wizard screen.
5-35
Core Protection Module 10.6 SP2 Administrator’s Guide
2.
Configure the settings as your network requires:
Note
CPM automatically enables Malware Behavior Blocking and disables Event
Monitoring.
•
5-36
Enable Malware Behavior Blocking: Select this option to enable program
behavior monitoring for proactive detection of malware and similar threats.
Configuring and Managing CPM
•
Enable Event Monitoring: Select this option to monitor system events that
may introduce threats/security risks into the computer and then select an
action for each system event:
Note
Trend Micro recommends enabling Core Protection Module - Enable
Certified Safe Software Service to reduce the likelihood of false positive
detections. See Enabling Certified Safe Software Service on page 5-42.
•
Assess: Always allow processes associated with an event but record this
action in the logs for assessment
•
Allow: Always allow processes associated with an event
•
Ask When Necessary: Prompts users to allow or deny processes that may
have violated Behavior Monitoring policies
Note
A prompt asking users to allow or deny the process and add to the Allowed
Programs or Blocked Programs appears. If the user does not respond within
the time period specified in the Behavior Monitoring Wizard screen, CPM
automatically allows the process to continue.
•
Deny: Always block processes associated with an event and record this action
in the logs
Event Monitoring
TABLE 5-1. Monitored System Events
EVENTS
Duplicated System
File
DESCRIPTION
Many malicious programs create copies of themselves or other
malicious programs using file names used by Windows system
files. This is typically done to override or replace system files,
avoid detection, or discourage users from deleting the malicious
files.
5-37
Core Protection Module 10.6 SP2 Administrator’s Guide
EVENTS
5-38
DESCRIPTION
Hosts File
Modification
The Hosts file matches domain names with IP addresses. Many
malicious programs modify the Hosts file so that the web browser
is redirected to infected, non-existent, or fake websites.
Suspicious Behavior
Suspicious behavior can be a specific action or a series of actions
that is rarely carried out by legitimate programs. Programs
exhibiting suspicious behavior should be used with caution.
New Internet
Explorer Plugin
Spyware/grayware programs often install unwanted Internet
Explorer plugins, including toolbars and Browser Helper Objects.
Internet Explorer
Setting Modification
Many virus/malware change Internet Explorer settings, including
the home page, trusted websites, proxy server settings, and menu
extensions.
Security Policy
Modification
Modifications in Windows Security Policy can allow unwanted
applications to run and change system settings.
Program Library
Injection
Many malicious programs configure Windows so that all
applications automatically load a program library (DLL). This
allows the malicious routines in the DLL to run every time an
application starts.
Shell Modification
Many malicious programs modify Windows shell settings to
associate themselves to certain file types. This routine allows
malicious programs to launch automatically if users open the
associated files in Windows Explorer. Changes to Windows shell
settings can also allow malicious programs to track the programs
used and start alongside legitimate applications.
New Service
Windows services are processes that have special functions and
typically run continuously in the background with full
administrative access. Malicious programs sometimes install
themselves as services to stay hidden.
System File
Modification
Certain Windows system files determine system behavior,
including startup programs and screen saver settings. Many
malicious programs modify system files to launch automatically at
startup and control system behavior.
Configuring and Managing CPM
EVENTS
DESCRIPTION
Firewall Policy
Modification
The Windows Firewall policy determines the applications that
have access to the network, the ports that are open for
communication, and the IP addresses that can communicate with
the computer. Many malicious programs modify the policy to allow
themselves to access to the network and the Internet.
System Process
Modification
Many malicious programs perform various actions on built-in
Windows processes. These actions can include terminating or
modifying running processes.
New Startup
Program
Many malicious programs configure Windows so that all
applications automatically load a program library (DLL). This
allows the malicious routines in the DLL to run every time an
application starts.
Behavior Monitoring Exceptions
Exceptions include Approved Programs and Blocked Programs. A program in the
Approved Programs list can be started even if it violates behavior monitoring policies,
while programs in the Blocked Programs list can never be started.
Procedure
1.
Go to the Configuration > Behavior Monitoring Settings > Behavior
Monitoring Wizard | Exceptions screen.
5-39
Core Protection Module 10.6 SP2 Administrator’s Guide
2.
Type the full path of the program in the Enter Program Full Path field. Separate
multiple entries with semicolons (;).
3.
Click Approved Programs or Blocked Programs.
5-40
•
Approved Programs: Programs (maximum of 100 including Blocked List
entries) in this list can be started. Click the corresponding icon to delete an
entry.
•
Blocked Programs: Programs (maximum of 100 including Approved List
entries) in this list can never be started. Click the corresponding icon to delete
an entry.
Configuring and Managing CPM
Client Self-Protection Settings
Client self-protection prevents attempts by programs or actual users to disable antimalware protection. Core Protection Module automatically disables this feature when
installed and deployed on server platforms.
Procedure
1.
Go to Configuration > Client Self-Protection Settings.
2.
Select the CPM client components to protect.
Note
By default, all CPM client folders, processes, registry keys, and services are protected.
Unauthorized Change Prevention Service
Unauthorized Change Prevention Service regulates application behavior and verifies
program trustworthiness. Behavior Monitoring, Certified Safe Software Service, and
Client Self-Protection all require this service.
5-41
Core Protection Module 10.6 SP2 Administrator’s Guide
Note
By default, Core Protection Module automatically disables this feature on Windows Server
platforms.
Enabling Certified Safe Software Service
Certified Safe Software Service allows Behavior Monitoring to reduce the likelihood of
false positive detections. It queries Trend Micro cloud servers to verify whether a
program detected by either Malware Behavior Blocking or Event Monitoring is a known
safe application before permitting user access.
Procedure
1.
Go to Common Tasks > Core Protection Module > Core Protection Module
- Enable Certified Safe Software Service option.
Note
With Certified Safe Software Service enabled, an intermittent Internet connection or
the wrong proxy setting can cause programs to appear unresponsive. This occurs
when Behavior Monitoring crosschecks a detection using Certified Safe Software
Service but is unable to receive an immediate response from Trend Micro servers.
Ensure that clients have the correct client proxy settings before enabling Certified
Safe Software Service.
5-42
Chapter 6
Configuration Wizards Reference
The CPM Dashboard includes Wizards to help you understand and organize scanrelated configuration choices.
Use the On-Demand Scan Settings Wizard, for example, to define which files to scan,
how to manage scan engine CPM usage, and designate the action to take whenever a
threat is discovered. Individual scan configurations can also be saved as a Task, which is
then available in the main Task List.
Topics in this chapter include:
•
Available Wizards on page 6-2
•
Global Settings Wizard on page 6-3
•
On-Demand and Real-Time Scan Settings Wizards on page 6-9
•
Spyware Approved List Wizard on page 6-17
•
ActiveUpdate Server Settings Wizard on page 6-6
6-1
Core Protection Module 10.6 SP2 Administrator’s Guide
Available Wizards
CPM provides the following configuration wizards.
TABLE 6-1. Configuration Wizards
WIZARD
6-2
REFERENCE
Global Settings Wizard
Global Settings Wizard on page 6-3
ActiveUpdate Server Settings Wizard
ActiveUpdate Server Settings Wizard on
page 6-6
Common Firewall Settings
•
Global Exception Rules on page 8-17
•
Firewall Policy Settings Wizard on
page 8-19
On-Demand Scan Settings Wizard
On-Demand and Real-Time Scan Settings
Wizards on page 6-9
Real-Time Scan Settings Wizard
On-Demand and Real-Time Scan Settings
Wizards on page 6-9
Spyware Approved List Wizard
Spyware Approved List Wizard on page
6-17
Web Reputation Blocked-Approved List
Wizard
Blocked and Approved List Templates on
page 7-11
Web Reputation Proxy Settings Wizard
Configuring the Web Reputation Proxy
Settings Wizard on page 7-16
Behavior Monitoring Wizard
Behavior Monitoring on page 5-34
Smart Protection Server Settings
Smart Protection Server Configuration on
page 5-27
Smart Protection Relay Proxy Settings
Wizard
Configuring the Smart Protection Relay
Proxy Settings Wizard on page 3-7
Client Self-protection Settings
Client Self-Protection Settings on page
5-41
Configuration Wizards Reference
WIZARD
REFERENCE
Virtual Desktop Settings Wizard
Connecting to Virtual Management Servers
on page 3-9
DLP Settings Wizard
Data Protection for CPM Administrator’s
Guide
Device Control Settings
Data Protection for CPM Administrator’s
Guide
Client Notification Settings
Data Protection for CPM Administrator’s
Guide
Global Settings Wizard
The Global Settings Wizard page contains sections for setting the following
parameters:
•
Configuring Scan Settings on page 6-3
•
Configuring Virus/Malware Scan Settings Only on page 6-4
•
Configuring Spyware/Grayware Scan Settings Only on page 6-5
•
Configuring Reserved Disk Space Settings on page 6-6
•
Configuring Client Console Settings on page 6-6
Configuring Scan Settings
Procedure
•
Configure scan settings for large compressed files: CPM checks the file size
and security risk count limit to determine whether to scan individual files contained
in a compressed file.
•
Do not scan files (in a compressed file) if the size exceeds X MB: Some
compressed files can expand to 100 or even 10,000 times their compressed
6-3
Core Protection Module 10.6 SP2 Administrator’s Guide
size (innocently, or maliciously, in what is known as the "zip of death").
Scanning these files can be dangerous and inefficient.
•
•
Display a client notification when CPM does not scan a large file: This
option displays a client-side popup notification when CPM does not scan a
file found within a compressed file based on the Do not scan files (in a
compressed file) if the size exceeds X MB setting. The notification
provides a link to a log file which indicates the date, source compression file,
and name of the file that CPM did not scan.
•
Stop scanning after CPM detects X viruses/malware in the compressed
file: This option provides a reduced scan time, which can be intensive for
compressed files. If a file is found to contain a lot of threats, it can be
summarily deleted.
Scan OLE objects. Maximum layers <drop-down list>: Object Linking and
Embedding (OLE) allows users to create objects with one application and then link
or embed them in a second application, creating "layers".
For example, a Microsoft Word document that contains an Excel spreadsheet,
which, in turn, contains another embedded object.
•
Exclude Microsoft Exchange server folders from scanning: Select this option
to prevent CPM from scanning Microsoft Exchange 2000/2003 server folders on
the client.
Use this option, for example, if you already use Trend Micro ScanMail for
Exchange to protect email. For Microsoft Exchange 2007 folders, you need to
manually add the folders to the scan exclusion list. For scan exclusion details, see:
http://technet.microsoft.com/en-us/library/bb332342.aspx
Configuring Virus/Malware Scan Settings Only
Procedure
•
6-4
Clean/Delete infected files within compressed files: Selecting this option can
slow scan processing time
Configuration Wizards Reference
For a list of secondary actions (if clean or delete fails,) see Security Risks on page
13-4.
Configuring Spyware/Grayware Scan Settings Only
Procedure
•
Enable assessment mode: CPM audits spyware/grayware detections.
This can be especially useful for identifying and observing suspect programs for
individual handling. It also prevents any service interruption that may otherwise
occur during the cleaning, as well as the unexpected termination of any running
processes or deleted registry keys. Assessment also allows you to recognize and
exonerate files that were incorrectly detected as spyware/grayware by adding them
to the Spyware Approved List (as described in Spyware Approved List Wizard on page
6-17). If enabled, set the Valid until 11:59:59 pm of <select date> field.
Note
Assessment mode overrides the user-configured scan action. If you have a scan
action set to Clean, but have also enabled the Assessment mode, On-Demand Scans
will use the Pass action and Real-Time Scans will use the Deny Action.
During assessment mode, CPM performs the following scan actions:
•
Pass (On-Demand Scans)
•
Deny Action (Real-Time Scans)
Tip
•
•
Avoid running the Assessment Mode for long periods because spyware/
grayware will not be removed. Instead, use it for periodic evaluations.
•
If you are unsure of the risk posed by a detected file, send it Trend Micro for
analysis.
Scan for cookies: Select this option to have CPM scan and evaluate cookies.
6-5
Core Protection Module 10.6 SP2 Administrator’s Guide
•
Count cookies into spyware log: Disable this option to reduce the number
of spyware logs that are generated.
Configuring Reserved Disk Space Settings
Procedure
•
Reserve X MB of disk space for updates: Sets the amount of client disk space
that will be saved for CPM pattern files, scan engines, and program updates
Configuring Client Console Settings
Procedure
•
Enable system tray icon: Displays the icon used to access the client console on
the relevant endpoints
•
Enable manual scan shortcut in Windows Explorer context menu: Allows
initiating a manual scan from Windows Explorer
ActiveUpdate Server Settings Wizard
Use this Wizard to select the location from where you want to download component
updates. You can choose to download from the Trend Micro ActiveUpdate (AU) server,
a specific update source, or a location on your company intranet.
Source
Procedure
•
6-6
Trend Micro’s ActiveUpdate Server: This location contains the latest available
patterns and is typically the best source.
Configuration Wizards Reference
•
Other Update Source: (seldom used)
The default location is:
http://esp-p.activeupdate.trendmicro.com/activeupdate
•
Intranet location containing a copy of the current file: If you want to use an
intranet source for obtaining the latest pattern file update, specify that location
here.
This is typically used on a temporary basis for one-time updates unless the intranet
source is configured to poll and receive updates from the Trend Micro
ActiveUpdate server on a regular basis.
6-7
Core Protection Module 10.6 SP2 Administrator’s Guide
Proxy
Procedure
•
Use a proxy server for pattern and engine updates: If there is a proxy server
between the ESP Server and the pattern update source you selected above, enable
this option and provide the location and proxy access credentials.
Others
Procedure
•
Log Rolling Frequency (1-90): To keep the cumulative size of log files from
occupying too much space on the server, you can specify how many days to retain
logs.
The newest logs will replace oldest after this number of days. The default is 10
days. Logs are stored in the following directory:
\TrendMirrorScript\log
•
Number of Updates to Keep on Server (1-100): You can store previous pattern
file sets on the server in case you ever need to revert, or roll back to an older file.
By default, CPM keeps the current pattern and 15 "snapshots" of the pattern set.
6-8
Configuration Wizards Reference
On-Demand and Real-Time Scan Settings
Wizards
Note
When an end user initiates a Manual Scan from the CPM client console, the scan settings
reflect the latest settings configured by the administrator for an On-Demand Scan. For
example, an administrator might schedule an On-Demand Scan on every Thursday 12:00
PM that scans all file types. Then the administrator might run an On-Demand scan with
different scan settings, maybe scanning only for .EXE files, at 14:00 PM. If an end user
runs a Manual Scan at 15:00 PM, and the administrator has not changed the settings, the
end user’s Manual Scan will only scan for .EXE files, not all file types.
•
Enable virus/malware scan: The different types of viruses and malware threats
are described in Security Risks on page 13-4 (recommended).
•
Enable spyware/grayware scan: The different types of spyware and grayware are
described in About Spyware/Grayware on page 13-8, which also contains information
6-9
Core Protection Module 10.6 SP2 Administrator’s Guide
about excluding programs you know to be safe from spyware detection
(recommended).
Configuring the Scan Target Tab
User Activity on Files (Real-Time Scans Only)
Procedure
•
Scan files being...
•
Created: Scans new files and files as they are copied to the client
•
Modified: Scans files that are opened as they are saved to the client
•
Received: Scans files as they are moved or downloaded to the client
Files to Scan
Procedure
•
All scannable files: This option is the safest, but will also have the greatest effect
on client performance. All files are scanned (On-Demand) or monitored (RealTime), even file types that cannot be infected.
•
File types scanned by IntelliScan: IntelliScan scans only files known to
potentially harbor malicious code, even those disguised by an innocuous-looking
extension name. IntelliScan examines the file meta data to determine file type.
•
Files with the following extensions: This option scans files based on their
extensions. If selected, only file types listed in this field will be scanned.
For example, you can specify certain file types as a shortcut to excluding all those
file types not on the list.
6-10
Configuration Wizards Reference
Scan Settings
Procedure
•
Scan floppy disk during system shutdown: (Real-Time scans only)
•
Scan all files in storage devices after plugging in: After plugging in a storage
device, CPM scans the entire device before allowing access to the data (Real-Time
scans only).
•
Scan network drive: Includes client file activity as it extends to mapped network
drives (Real-Time scans only)
•
Scan compressed files. Maximum layers <drop-down list>: CPM will scan up
to a specified number of compression layers and skip scanning any excess layers.
For example, if the maximum is two layers and a compressed file to be scanned has
six layers, CPM scans two layers and skips the remaining four.
Note
Choose this option to enable scanning of the following file type: Microsoft Office
2007 files in Office Open XML format. These are considered compressed because
Office Open XML includes ZIP compression technologies for Office 2007
applications such as Excel, PowerPoint, and Word.
•
Scan boot area: Scans the boot sector of the client computer hard disk (OnDemand scans only)
•
Enable IntelliTrap: Blocks real-time compressed executable files and pairs them
with other malware characteristics
Tip
Trend Micro recommends quarantining (not deleting or cleaning) files when you
enable IntelliTrap. Do not use IntelliTrap if your users frequently exchange real-time
compressed executable files.
6-11
Core Protection Module 10.6 SP2 Administrator’s Guide
Scan Cache Settings (On-Demand Scans Only)
The CPM client can build the digital signature and on-demand scan cache files to
improve its scan performance. When an on-demand scan runs, the client first checks the
digital signature cache file and then the on-demand scan cache file for files to exclude
from the scan. Scanning time is reduced if a large number of files are excluded from the
scan.
Procedure
•
Enable the digital signature: The CPM client uses the same Digital Signature
Pattern used for Behavior Monitoring to build the digital signature cache file. The
Digital Signature Pattern contains a list of files that Trend Micro considers
trustworthy and therefore can be excluded from scans.
•
Enable the On-Demand Scan cache: Each time scanning runs, the client checks
the properties of previously scanned threat-free files. If a threat-free file has not
been modified, the client adds the cache of the file to the on-demand scan cache
file. When the next scan occurs, the file will not be scanned if its cache has not
expired.
CPU Usage (On-Demand Scans Only)
On-Demand scans can be CPU intensive and clients may notice a performance decrease
when the scan is running. You can moderate this affect by introducing a pause after each
file is scanned, which will allow the CPU to handle other tasks. Consider factors such as
the type of applications run on the computer, CPU, RAM, and what time the scan is
run.
Procedure
•
High: No pausing between scans
•
Medium: Pause slightly between scans
•
Low: Pause longer between scans
6-12
Configuration Wizards Reference
Configuring the Scan Exclusions Tab
To increase scanning performance and reduce false alarms, you can exclude certain files,
file extensions, and directories from scanning. There are different exclusion lists for
different scans. These exclusions do not apply to spyware. See Spyware Approved List
Wizard on page 6-17 to understand how to prevent false positives by excluding certain
program files from spyware detection.
Configuring the Scan Action Tab
Virus/Malware Action
The default scan action CPM performs depends on the virus/malware type and the scan
type that detected the virus/malware. For example, because Trojan horse programs
cannot be cleaned (there is no virus code to remove from an infected file), the default
action is to quarantine them. The default action for viruses, however, is to clean them. If
that fails, the backup action is to quarantine them.
Note
Quarantining files: You can have CPM quarantine any harmful files that it detects. These
files will be encrypted and moved to a directory on the endpoint that prevents users from
opening them and spreading the virus/malware to other computers in the network. Trend
Micro provides a tool for decrypting quarantined files called VSEncode.exe. See Default
ActiveAction Behaviors on page B-2 for more information.
Procedure
•
Use ActiveAction: ActiveAction is a set of pre-configured scan actions for specific
types of viruses/malware.
6-13
Core Protection Module 10.6 SP2 Administrator’s Guide
Trend Micro recommends using ActiveAction if you are not sure which scan action
is suitable for each type of virus/malware. See Default ActiveAction Behaviors on page
B-2 for a list threat types and their associated ActiveAction.
•
Use the same action for all virus/malware types: If the first action fails, CPM
will automatically take the second action.
For example, say the first action is Clean and the second is Quarantine. If CPM
detects a virus but the code cannot be removed, (that is, the file cannot be
"cleaned"), the file will be quarantined. See Available Virus/Malware Scan Actions on
page B-2 for more information.
•
Use a specific action for each virus/malware type: Choose this option and
specify a 1st action and 2nd action for each threat type.
See Available Virus/Malware Scan Actions on page B-2 for more information.
•
Back up files before cleaning: CPM will encrypt the original file and make an
encrypted copy on the client computer before it attempts to clean the file.
For instructions on decrypting backup copies, see CPM Server Management on page
A-7.
6-14
Configuration Wizards Reference
•
Display a notification message on the client computer when virus/malware
is detected: Enabling this option allows CPM to display a notification message for
end users to see when virus or malware has been detected on their client machine.
Damage Cleanup Services
Damage Cleanup Services cleans computers of file-based and network viruses, and virus
and worm remnants (Trojans, registry entries, and viral files).
The client triggers Damage Cleanup Services before or after virus/malware scanning,
depending on the scan type.
•
When On-Demand Scan runs, the client triggers Damage Cleanup Services first
and then proceeds with virus/malware scanning. During virus/malware scanning,
the client may trigger Damage Cleanup Services again if cleanup is required.
•
During Real-time Scan, the client first performs virus/malware scanning and then
triggers Damage Cleanup Services if cleanup is required.
During On-Demand Scan, you can select the type of cleanup that Damage Cleanup
Services runs:
•
•
Standard cleanup: The client performs any of the following actions during
standard cleanup:
•
Detects and removes live Trojans
•
Kills processes that Trojans create
•
Repairs system files that Trojans modify
•
Deletes files and applications that Trojans drop
Advanced cleanup: In addition to the standard cleanup actions, the client stops
activities by rogue security software, also known as FakeAV. The client also uses
advanced cleanup rules to proactively detect and stop applications that exhibit
FakeAV behavior.
6-15
Core Protection Module 10.6 SP2 Administrator’s Guide
Note
While providing proactive protection, advanced cleanup also results in a high number of
false-positives.
Damage Cleanup Services does not run cleanup on probable virus/malware unless you
select the option Run cleanup when probable virus/malware is detected. You can
only select this option if the action on probable virus/malware is not Pass or Deny
Access. For example, if the client detects probable virus/malware during Real-time Scan
and the action is quarantine, the client first quarantines the infected file and then runs
cleanup if necessary. The cleanup type (standard or advanced) depends on your
selection.
Spyware/Grayware Action
CPM performs the specified action for all types of spyware/grayware. Because spyware/
grayware does not "infect" files, there are only three possible actions:
Procedure
•
Clean: CPM terminates processes or deletes registries, files, cookies, and shortcuts
(recommended).
•
Pass: CPM takes no action on the detected spyware/grayware, but records the
detection in the logs (On-Demand scans only).
•
Deny access: CPM leaves the file in its original location but prevents nonAdministrator users from opening, deleting, copying, or moving the file (Real-Time
scans only).
•
Display a notification message on the client computer when spyware/
grayware is detected: Enabling this option allows CPM to display a notification
message for end users to see when spyware or grayware has been detected on their
client machine.
6-16
Configuration Wizards Reference
Spyware Approved List Wizard
CPM classifies applications as spyware or grayware based on their function and/or on
the basis of code analysis. The Spyware Approved List allows you to prevent CPM
from treating approved applications as spyware or grayware. For example, say you have
a utility installed on clients that performs behavior that, under a different set of
circumstances, would be malicious or dangerous. You can add that file to the Approved
List to allow it to run. CPM will continue to detect the file as spyware, but it will not
take the configured action.
Note
The Spyware/Grayware Approved list will only be populated (as seen in the following
screen) after you have downloaded at least one set of pattern files to the server.
A good way to identify which programs (innocuous and malicious) are being detected as
spyware/grayware is to check your Spyware/Grayware Logs.
6-17
Core Protection Module 10.6 SP2 Administrator’s Guide
CPM can accommodate a maximum of 1024 spyware/grayware in the white or black
lists.
6-18
Chapter 7
Using Web Reputation
This chapter will help you optimize the features of Web Reputation (WR) for your
environment by detailing how to manage Blocked and Approved List templates,
Analyses, and the Dashboard.
Topics in this chapter include:
•
About Web Reputation on page 7-2
•
Migrating WPM Standalone Settings on page 7-4
•
Web Reputation Security Levels on page 7-2
•
Using Web Reputation in CPM on page 7-11
•
Importing Lists of Websites on page 7-18
•
Viewing an Existing Template on page 7-20
•
About Web Reputation Analyses on page 7-24
•
Viewing the Client Information Analysis on page 7-25
•
Viewing the Site Statistics Analysis on page 7-26
7-1
Core Protection Module 10.6 SP2 Administrator’s Guide
About Web Reputation
The Trend Micro Web Reputation (WR) technology joins its real-time visibility and
control capabilities with CPM to prevent web-based malware from infecting your users’
computers. WR intercepts malware "in-the-cloud" before it reaches your users’ systems,
reducing the need for resource-intensive threat scanning and clean-up. Specifically, WR
monitors outbound web requests, stops web-based malware before it is delivered, and
blocks users’ access to potentially malicious websites in real time.
Web Reputation requires no pattern updates. It checks for web threats when a user
accesses the Internet by performing a lookup on an "in-the-cloud" database. Web
Reputation uses the site’s "reputation" score and a security level set by the Console
Operator to block access to suspicious sites. The Web Reputation database lookups are
optimized to use very little bandwidth (similar in size to a DNS lookup) and have a
negligible impact on network performance.
Note
Users who are logged on to their computer with Administrator rights can disable Web
Reputation.
Web Reputation Security Levels
After enabling WR on your endpoints, you can raise the security level to Medium or
High (the default is Low) to increase the degree of sensitivity that WR uses when
evaluating URLs.
How Web Reputation Works
Whenever an end user tries to open an Internet site, the requested URL is scored at the
proxy, in real-time, and that score is then evaluated against the security level. URLs with
a score that exceeds the level you select will be prevented from opening. Note that this
scoring is relative to security, not whether a site may contain objectionable content.
7-2
Using Web Reputation
Note
As you set the security level higher, the web threat detection rate improves but the
likelihood of false positives also increases.
You can override incorrect blocking by adding the URL to the Approved List. Likewise,
you can force blocking of a site by adding it to the Blocked List
FIGURE 7-1. URL Blocked Message
URLs are scored on a security scale that runs from 0 to 100.
•
Safe: Scores range from 81 to 100. Static and normal ratings. URLs are confirmed
as secure, however content may be anything (including objectionable content.)
•
Unknown: Score equals 71. Unknown ratings. These URLs are not included in the
rating database.
•
Suspicious: Scores range from 51 to 80. URLs that have been implicated in
Phishing or Pharming attacks.
•
Dangerous: Scores range from 0 to 49. Static and malicious ratings. URLs are
confirmed as malicious, for example a known vector for spyware or viruses.
Security Levels range from high to low and have the following default actions:
•
High: Blocks unknown, suspicious, and dangerous sites
•
Medium: Blocks dangerous and suspicious sites.
7-3
Core Protection Module 10.6 SP2 Administrator’s Guide
•
Low: Blocks only dangerous sites.
For example, if you set the Security Level to Low, Web Reputation will only block
URLs that are known to contain malicious software or security threats.
FIGURE 7-2. Web Reputation Security Level Configurations
Migrating WPM Standalone Settings
Some customers start with an evaluation copy of Web Reputation, called the Web
Protection Module (WPM), before moving to CPM. You can migrate Blocked and
Approved Lists created in WPM standalone version to Web Reputation (WR) on CPM.
The alternative is to create new lists in the WR wizard. In the wizard, you can also
import lists from a text file.
7-4
Using Web Reputation
Note
Perform the migration before you unsubscribe from the WPM site. However, Trend Micro
recommends that you do not stay subscribed to both sites, and that you do not run both
WPM and WR at the same time (either on the same endpoints or by having a mix of
endpoints).
Procedures Overview
Procedure
1.
Migrate Blocked and/or Approved Lists from WPM standalone to CPM 10.6 SP1.
For details, see Migrating Blocked/Approved Lists from WPM to CPM on page 7-5.
2.
Unsubscribe from the WPM site. For details, see Unsubscribing from the WPM Site on
page 7-6.
3.
Uninstall WPM standalone. For details, see Uninstalling the Standalone WPM on page
7-7.
4.
Install or upgrade to CPM 10.6 SP1 clients on your endpoints. For details, see
Installing or Upgrading the CPM Endpoints on page 7-8.
5.
Enable HTTP Web Reputation (port 80). For details, see Enabling HTTP Web
Reputation (port 80) on CPM Clients on page 7-8.
6.
Redeploy your WPM policies to CPM clients. For details, see Redeploying WPM
Policies to CPM Clients on page 7-9.
7.
Configure a default security level for new WR templates. For details, see Configuring
a Default WR Security Level on page 7-10.
Migrating Blocked/Approved Lists from WPM to CPM
Procedure
1.
From the ESP Console menu, click Endpoint Protection on the bottom left pane.
7-5
Core Protection Module 10.6 SP2 Administrator’s Guide
2.
From the upper left navigation pane, go to Core Protection Module >
Configuration > Web Reputation Blocked-Approved List > Web Reputation
Blocked-Approved List Task....
The Web Reputation Blocked-Approved List Wizard screen opens.
3.
Click the link, Import Templates from WPM... that will only appear in the screen
if you have any existing Blocked/Approved Lists that were created with, and
currently exist on, the standalone WPM site.
Unsubscribing from the WPM Site
Remove the standalone Web Protection Module site from the ESP Console by deleting
the mastheads from the list of managed sites.
7-6
Using Web Reputation
Procedure
1.
In the ESP Console menu, click All Content > Sites > External > Web
Protection Module.
2.
In the right pane, click the Remove button, and then OK.
3.
At the prompt, type your private key password and click OK.
The ESP Server removes the WPM masthead.
Uninstalling the Standalone WPM
Before you can install or upgrade CPM 10.6 endpoints, you must uninstall any existing
WPM standalone clients.
Procedure
1.
From the ESP Console menu, click Endpoint Protection on the bottom left pane.
2.
From the upper left navigation pane, go to Core Protection Module >
Deployment > Uninstall.
3.
From the upper right hand pane, select Core Protection Module - Web
Protection Module.
4.
Click the Take Actions button to open the Take Action window.
5.
Select the applicable computers and then click OK.
6.
At the prompt, type your private key password and click OK.
7.
In the Action | Summary window that opens, monitor the "Status" and confirm
that it "Fixed".
7-7
Core Protection Module 10.6 SP2 Administrator’s Guide
Installing or Upgrading the CPM Endpoints
Procedure
1.
Install or upgrade CPM 10.6 endpoints from the Endpoint Protection > Core
Protection Module, select one of the following:
•
Install: Go to Deployment > Install > Core Protection Module Endpoint Deploy.
•
Upgrade: Go to Deployment > Upgrade > Core Protection Module Upgrade Endpoint.
2.
Below Actions, click the hyperlink to initiate the deployment process and open the
Take Action window.
3.
Choose all Applicable Computers and then click OK.
4.
At the prompt, type your private key password and click OK.
5.
In the Action | Summary window that opens, monitor the "Status" and confirm
that it "Fixed".
Enabling HTTP Web Reputation (port 80) on CPM Clients
Procedure
1.
From the ESP Console menu, click Endpoint Protection on the bottom left pane.
2.
From the upper left navigation pane, go to Core Protection Module > Common
Tasks > Web Reputation > Web Reputation - Enable HTTP Web
Reputation Scanning (port 80).
A screen displaying the Task Description tab appears.
7-8
3.
Click the hyperlink to open the Take Action window.
4.
In the Target tab, a list shows the CPM clients without Web Reputation installed.
5.
Select all the Applicable Computers and click OK.
Using Web Reputation
6.
At the prompt, type your private key password and click OK.
7.
In the Action | Summary window that opens, monitor the "Status" and "Count"
of the Action to confirm that it is "Running" and then "Completed".
Redeploying WPM Policies to CPM Clients
Procedure
1.
From the ESP Console menu, click Endpoint Protection on the bottom left pane.
2.
From the upper left navigation pane, go to Core Protection Module >
Configuration > Web Reputation Blocked-Approved List > Web Reputation
Blocked-Approved List Wizard....
The Web Reputation Blocked-Approved List Wizard screen opens.
3.
Select the template(s) you want to deploy and then click the Create Task From
Template button.
The Edit Task window opens.
4.
Modify the default name in the Name field so that it clearly defines the purpose of
this custom Task.
5.
Edit the Description tab to reflect your goals (if necessary). Click OK.
6.
At the prompt, type your private key password and click OK.
A screen displaying the Task Description tab appears.
The new Task is added below Web Reputation Blocked-Approved List in the
Endpoint Protection Domain screen.
7.
Below Actions, click the hyperlink to open the Take Action window.
8.
In the Target tab, click All computers with the property values selected in the
tree list below and then choose a property that will include all the computers you
want to deploy this Action to.
•
Execution: Set the deployment time and retry the behavior (optional).
7-9
Core Protection Module 10.6 SP2 Administrator’s Guide
9.
•
Users: This option works in combination with the Target, linked by the AND
operand (both conditions must be present for the install to occur).
•
Messages: Configure these options to passively notify the user that the install
is going to occur, to obtain consent, or to ask users to stop using their
computer while the install occurs.
When finished identifying the computers you want to receive the lists, click OK.
10. At the prompt, type your private key password and click OK.
11. In the Action | Summary window that opens, monitor the "Status" and "Count"
of the Action to confirm that it is "Running" and then "Completed".
Configuring a Default WR Security Level
Procedure
1.
From the ESP Console menu, click Endpoint Protection on the bottom left pane.
2.
From the upper left navigation pane, go to Core Protection Module > Common
Tasks > Web Reputation.
3.
Click Web Reputation - Configure Web Reputation Security Level.
A screen displaying the Task Description tab appears.
4.
Below Actions, choose a Security Level by clicking the hyperlink.
The Take Action window opens.
5.
In the Target tab, select all Applicable Computers to apply the WR security level
to all your endpoints. Click OK.
6.
At the prompt, type your private key password and click OK.
7.
In the Action | Summary window that opens, monitor the "Status" and "Count"
of the Action to confirm that it is "Running" and then "Completed".
7-10
Using Web Reputation
Using Web Reputation in CPM
The following rules apply when creating Approved Lists and/or Blocked Lists:
•
Secure URLs, those starting with https://, are supported after enabling HTTPS
Web Reputation.
•
Include all subdirectories by using the * wildcard:
"http://www.example.com/*"
•
Include all sub-domains by using the * wildcard:
“http://*.example.com”
Not valid: https://www.example.??
•
To import a URL that uses a non-standard port, use the following format:
“http://www.example.com:8080”
•
URLs can be up to 2083 characters long.
•
List each URL on a new line.
•
You can add or import up to 500 URLs in a given list.
Blocked and Approved List Templates
The Web Reputation Blocked-Approved List Wizard enables you to create and
maintain global lists of websites in the form of templates that you can use to control
your users’ web access. Once you have defined these templates, you use them to create
Custom Tasks, which you can then apply to your endpoints.
There are two types of URL lists you can create and group into templates using the
Wizard:
•
Blocked Lists: These are lists of blocked websites. If the endpoint tries to access a
site in one of these lists, they receive a message in their web browser indicating that
access to the site is blocked.
7-11
Core Protection Module 10.6 SP2 Administrator’s Guide
•
Approved Lists: These are lists of websites you allow your endpoints to access
without restriction.
Note
Use care when selecting sites for Approved Lists. Once a site is added to an Approved List,
it will no longer be checked. Therefore, endpoints connecting to that site would no longer
be protected by WR, should that site become a host for malware at some point in the
future.
By creating multiple tasks, you can apply different sets of Blocked and Approved List
templates to different users or groups of users. You can perform the following tasks:
•
Create and deploy a New Blocked / Approved List Template
•
Create and deploy a New Blocked / Approved List Template by importing an
existing list
•
View an existing Blocked / Approved List Template
•
Copy a Blocked / Approved List Template
•
Copy and edit a Blocked / Approved List Template
•
Delete a Blocked / Approved List Template
Creating and Deploying a New Template
Procedure
1.
From the ESP Console menu, click Endpoint Protection on the bottom left pane.
2.
From the upper left navigation pane, go to Core Protection Module >
Configuration > Web Reputation Blocked-Approved List > Web Reputation
Blocked-Approved List Wizard.
The Web Reputation Blocked-Approved List Wizard window opens, showing a
list of your currently available templates.
3.
7-12
Click Add Template.
Using Web Reputation
The Blocked-Approved List Template–Add Template page opens.
4.
Enter a name for your template in the Template Name field.
5.
In the Blocked List pane, enter or copy/paste the URLs you want to block.
You may enter up to 500 URLs. You also must have "http://" or “https://”
before each URL entry. To block all the pages for a site, enter the name of the
domain followed by /*. Example:
http://www.badURL.com/*
Note
You can include up to 500 URLs in a single template, and can create multiple
templates for use. However, only one template can be active on an endpoint at the
same time.
6.
To enter an Approved List, in the Approved List pane, enter or copy/paste the
URLs you want your users to be able to access without restriction.
You may enter up to 499 URLs per template. You also must have "http://" or
“https://” before each URL entry. To grant access to all the pages on a site,
enter the name of the domain followed by /* . Example:
http://www.goodURL.com/*
7.
When you are finished creating your template, click Save.
The Blocked-Approved List Templates window returns.
8.
Click the Create Task From Template... button.
The Edit Task window opens.
9.
Click OK.
10. At the prompt, type your private key password and click OK.
11. Click the hyperlink in the Actions window.
The Take Action window opens.
7-13
Core Protection Module 10.6 SP2 Administrator’s Guide
12. Select the computer or computers in the window to which you want to deploy your
Blocked / Approved List template and set any desired options.
Note
For more information about setting options using tabs in the Take Action window,
see the ESP Console Operator’s Guide.
13. When you have finished selecting options, click OK.
14. At the prompt, type your private key password and click OK.
15. In the Action | Summary window that opens, monitor the "Status" and "Count"
of the Action to confirm that it is "Running" and then "Completed".
Enabling HTTP Web Reputation (all ports other than 80)
on CPM Clients
Note
You must enable HTTP Web Reputation Scanning (port 80) before enabling HTTP Web
Reputation Scanning (all ports other than 80).
Procedure
1.
From the ESP Console menu, click Endpoint Protection on the bottom left pane.
2.
From the upper left navigation pane, go to Core Protection Module > Common
Tasks > Web Reputation > Web Reputation - Enable HTTP Web
Reputation Scanning (all ports other than 80).
A screen displaying the Task Description tab appears.
3.
Click the hyperlink to open the Take Action window.
4.
In the Target tab, a list shows the CPM clients without Web Reputation installed.
5.
Select all the Applicable Computers and click OK.
6.
At the prompt, type your private key password and click OK.
7-14
Using Web Reputation
7.
In the Action | Summary window that opens, monitor the "Status" and "Count"
of the Action to confirm that it is "Running" and then "Completed".
Enabling HTTPS Web Reputation on CPM Clients
Note
You must enable HTTP Web Reputation Scanning (port 80) before enabling HTTPS Web
Reputation Scanning.
Procedure
1.
From the ESP Console menu, click Endpoint Protection on the bottom left pane.
2.
From the upper left navigation pane, go to Core Protection Module > Common
Tasks > Web Reputation > Web Reputation - Enable HTTPS Web
Reputation Scanning.
A screen displaying the Task Description tab appears.
3.
Click the hyperlink to open the Take Action window.
4.
In the Target tab, a list shows the CPM clients without Web Reputation installed.
5.
Select all the Applicable Computers and click OK.
6.
At the prompt, type your private key password and click OK.
7.
In the Action | Summary window that opens, monitor the "Status" and "Count"
of the Action to confirm that it is "Running" and then "Completed".
•
HTTPS Web Reputation is only supported on Internet Explorer and Mozilla
FireFox browsers.
•
Enable the TmIEPlugInBHO Class add-on in your browser for proper
functionality of the Web Reputation scanning.
7-15
Core Protection Module 10.6 SP2 Administrator’s Guide
Web Reputation Proxy Settings
If your endpoints connect to the Internet through a proxy server, you will need to
identify that proxy and provide log on credentials. The credentials will be used by those
CPM clients you target with this Action to connect to the Internet.
Configure the Web Reputation proxy settings using either the Web Reputation Proxy
Settings Wizard or the Web Reputation - Enable/Configure Proxy Settings fixlet.
Note
For clients with CPM version 10.5 or later, CPM automatically detects the Web Reputation
proxy settings through Internet Explorer.
Configuring the Web Reputation Proxy Settings Wizard
Note
You will be prompted to provide a password for the proxy server.
Procedure
1.
From the ESP Console menu, click Endpoint Protection on the bottom left pane.
2.
From the upper left navigation pane, go to Core Protection Module >
Configuration > Web Reputation Proxy Settings > Web Reputation Proxy
Settings Wizard.
The Web Reputation Proxy Settings Wizard window opens.
3.
Click Use the following proxy settings.
4.
Either provide the necessary proxy settings information or click Use to reload
previously configured settings.
5.
Click Create Configuration Task and deploy the proxy settings to the necessary
clients.
7-16
Using Web Reputation
Configuring WR Proxy Settings Using the Fixlet
Note
You will be prompted to provide a password for the proxy server. Be sure to encrypt the
password using the utility provided in the Task before deploying the Task (user name and
password will be visible in the Action’s Summary Details).
Procedure
1.
From the ESP Console menu, click Endpoint Protection on the bottom left pane.
2.
From the upper left navigation pane, go to Core Protection Module > Common
Tasks > Web Reputation.
3.
From the right pane, select Web Reputation - Enable/Configure Proxy
Settings.
A screen displaying the Task Description tab appears.
4.
5.
Download and extract the encryption program, which will have a name such as the
following: TMCPMEncrypt.exe utility tool.
a.
Run the program. At the prompt, type your password in the field.
b.
Copy the encrypted results (you will be prompted to paste them later).
Back in the Task Description window, below Actions, click the hyperlink. At the
prompt, provide the following:
•
Proxy IP address or host name
•
Proxy port
•
User name for proxy authentication
•
Encrypted password (paste the password you encrypted)
7-17
Core Protection Module 10.6 SP2 Administrator’s Guide
The Take Action screen appears.
6.
In the Target tab, a list of endpoints that are running the CPM client appears.
7.
Select all applicable computers (those that are running WR) and then click OK.
8.
At the prompt, type your private key password and click OK.
9.
In the Action | Summary window that opens, monitor the "Status" and "Count"
of the Action to confirm that it is "Running" and then "Completed".
Importing Lists of Websites
Web Reputation allows you to import URLs for new Blocked and Approved List
templates from new line-delimited files.
7-18
Using Web Reputation
Procedure
1.
Create two text files - one for the websites you want this template to block and
another for the websites to which you want to give your users unrestricted access.
Note
If you do not want to include an Approved List in the template, you can skip this part
of the process. Web Reputation allows you to create Blocked / Approved List
Templates with both list types (a blocked and an approved list), only a Blocked List,
or only an Approved List.
2.
Press ENTER or place a "newline" code at the end of each line to separate each
entry.
You must have "http://" before each URL entry. To block all the pages for a
site, enter the domain name followed by "/*", for example:
http://www.badURL.com/*
3.
From the ESP Console menu, click Endpoint Protection on the bottom left pane.
4.
From the upper left navigation pane, go to Core Protection Module >
Configuration > Web Reputation Blocked-Approved List > Web Reputation
Blocked-Approved List to open the Web Reputation Blocked-Approved List
Wizard.
5.
Click the Add Template button or Edit.
The Blocked-Approved List Templates – Add Template window opens.
6.
Click Bulk Import Sites from external file....
The Import Sites from External File window appears.
7.
Select the text file you wish to import by clicking Browse next to the Select
Import File field.
The Open window appears.
8.
Use the Open window to navigate to the location where you have stored the text
file.
7-19
Core Protection Module 10.6 SP2 Administrator’s Guide
9.
Select the file and click Open.
The path to the selected file appears in the Select Import File field.
10. Choose Blocked List or Approved List from the List Type.
11. Click the Add Sites from File button.
12. Click Yes to import the file.
If you click No, to import the list you must re-launch the Wizard and perform the
import process again.
13. After you click Yes, the Blocked / Approved List Wizard displays the contents
of the tab associated with the file.
14. Click Finish to end the import process and start generating the relevant Custom
Action.
Note
To see the process required to finish generating your Custom Action and deploying
the template, start at Step8 in the Creating and Deploying a New Template on page 7-12
section.
Viewing an Existing Template
Procedure
1.
From the ESP Console menu, click Endpoint Protection on the bottom left pane.
2.
From the upper left navigation pane, go to Core Protection Module >
Configuration > Web Reputation Blocked-Approved List > Web Reputation
Blocked-Approved List to open the Web Reputation Blocked-Approved List
Wizard.
3.
Click the name of the Blocked / Approved List template you want to examine.
The Blocked-Approved List Templates – Add Template window appears.
7-20
Using Web Reputation
Copying and Editing a Template
Web Reputation enables you to create copies of existing Blocked / Approved List
templates. Use this feature to create copies of existing templates or to create slightly
modified versions of existing templates.
Procedure
1.
From the ESP Console menu, click Endpoint Protection on the bottom left pane.
2.
From the upper left navigation pane, go to Core Protection Module >
Configuration > Web Reputation Blocked-Approved List > Web Reputation
Blocked-Approved List to open the Web Reputation Blocked-Approved List
Wizard.
3.
Select the name of the Blocked / Approved List template you want to duplicate
and click Copy.
The name of the template appears in the form of "Copy of…" followed by the
template name you chose to copy. Web Reputation automatically copies the
contents of the Blocked and Approved List fields into the new template.
4.
Change the name in the Template Name field to a descriptive template name.
5.
Make other necessary changes to the template. For example, in copied templates,
you can:
6.
•
Add new URLs to the copied Blocked or Approved List.
•
Remove URLs from the Blocked or Approved List.
•
Import and append either an external blocked or an external approved list to
your Blocked and Approved List entries.
When you have modified the template, click Finish to end the process and to start
generating the relevant Custom Action.
7-21
Core Protection Module 10.6 SP2 Administrator’s Guide
Editing Custom Actions
The Blocked / Approved List Wizard allows you to edit existing Blocked or
Approved List templates.
You may edit these Custom Actions in two different ways:
•
By making modifications using the Edit Task window immediately after you click
Finish to create the Custom Task
•
By accessing the Edit Task window AFTER you have completely generated the
Custom Task.
Note
To make modifications using the Edit Task window, either access it as part of Custom
Task generation process or select it by right-clicking on the name of an existing Custom
Task and selecting Edit.
The Edit Task window consists of four tabs:
•
Description: Use the Description tab to make modifications to the task name,
title, and description.
•
Actions: Use the Actions tab to view or change the Action this Custom Task
performs. For example, use this window to add or remove blocked or approved
URLs from the presented Action Script.
•
Relevance: Use the Relevance tab to view and make modifications to the
relevance for a Custom Task. By default, the relevance for the Blocked or
Approved List is static. Its purpose is to detect endpoints for Web Reputation.
•
Properties: Use the Properties tab to view and modify the properties for this
custom task.
Deleting a Blocked or Approved List
Follow the steps below to delete an existing Blocked or Approved List template from
the Wizard’s Template list:
7-22
Using Web Reputation
Procedure
1.
From the ESP Console menu, click Endpoint Protection on the bottom left pane.
2.
From the upper left navigation pane, go to Core Protection Module >
Configuration > Web Reputation Blocked-Approved List > Web Reputation
Blocked-Approved List to open the Web Reputation Blocked-Approved List
Wizard.
3.
Select the name of the Blocked or Approved List template you want to delete and
click Remove.
The Delete window appears.
4.
Click Yes.
Web Reputation removes the template from the Blocked-Approved List Wizard
Template Management window.
Note
The Blocked-Approved List Wizard Delete feature only deletes the template from the
Management list. It does not delete the Custom Task you created with the template.
To completely remove the Blocked-Approved List template from your endpoints,
follow the steps below.
Deleting a WR Custom Task
Procedure
1.
Select the name of the template you wish to delete in the My Custom Tasks list
and right-click.
The right-click menu appears.
2.
Select Remove from the right-click menu.
3.
At the prompt, type your private key password and click OK.
7-23
Core Protection Module 10.6 SP2 Administrator’s Guide
A series of messages displays when the Custom Task is removed from the affected
CPM clients and the List Panel.
About Web Reputation Analyses
Web Reputation allows you to view detailed information about an endpoint or group of
endpoints protected by Web Reputation. Use the Client Information analysis to view
information about each endpoint protected by a CPM client.
•
From the ESP Console menu, click Endpoint Protection on the bottom left pane.
From the upper left navigation pane, go to Core Protection Module > Analyses
> Web Reputation.
The following properties are available for each endpoint:
•
Web Reputation Version: The installed version of Web Reputation
•
WR Installation Date: The date Web Reputation was installed.
•
Number of Web Threats Found: The number of web threats encountered and
recorded in the endpoint’s storage file
•
Web Reputation Enabled/Disabled: The status of the agent’s Web Reputation
feature (Enabled/Disabled)
•
Web Reputation Security Level: The security level for the Web Reputation
feature (High, Medium, or Low)
•
Proxy Server Enabled/Disabled: If a proxy server is enabled/disabled
•
Proxy Server Address: The address of the proxy server
•
Proxy Server Port: The port being used by the proxy server
•
Proxy Server User Name: The user name used by the client to connect to the
proxy server
•
Blocked-Approved List Template: The name of all Blocked and Approved List
templates deployed to the Agent
7-24
Using Web Reputation
•
Number of Days since Last Log Maintenance: The number of days that have
elapsed since you last performed Log Maintenance
•
Log Age Deletion Threshold: The number of days that logs will be kept on the
endpoint before they are deleted (the log age deletion threshold)
The Site Statistics analysis displays statistical information about the number of websites
accessed by an endpoint. You can use this analysis to view the following:
•
Blocked Sites: Shows the time a block occurred and the URL that was blocked.
•
Visited Sites: Shows each domain visited and the number of visits
Note
Enable or disable the collection of visited sites in the task pane by selecting either Web
Reputation - Enable Collection of Visited Sites or Web Reputation - Disable
Collection of Visited Sites and applying it to the appropriate endpoint(s).
Viewing the Client Information Analysis
Procedure
1.
From the ESP Console menu, click Endpoint Protection on the bottom left pane.
2.
From the upper left navigation pane, go to Core Protection Module > Analyses
> Web Reputation.
The List Panel changes to show all available analyses.
3.
•
Web Reputation - Client Information
•
Web Reputation - Site Statistics
Click the Web Reputation - Client Information analyses link.
The Web Reputation - Client Information window appears.
4.
You can view the analysis property results in either List or Summary format. To
select a perspective, choose the desired format from the drop-down box in the
upper-right corner of the analysis in the Results tab.
7-25
Core Protection Module 10.6 SP2 Administrator’s Guide
5.
To deactivate the analysis, return to the click here link in the Action window.
Viewing the Site Statistics Analysis
Procedure
1.
From the ESP Console menu, click Endpoint Protection on the bottom left pane.
2.
From the upper left navigation pane, go to Core Protection Module > Analyses
> Web Reputation.
The List Panel changes to show all available analyses.
3.
•
Web Reputation - Client Information
•
Web Reputation - Site Statistics
Click the Web Reputation - Site Statistics analyses link.
The Web Reputation - Site Statistics window appears. The window displays
information on the two Web Reputation properties you can view with the analysis:
•
Blocked websites
•
Visited websites
4.
You can view the analysis property results in a list or in summary form. To select a
perspective, choose the desired format from the drop-down box in the upper-right
corner of the analysis in the Results tab.
5.
To deactivate the analysis, return to the click here link in the Action window.
7-26
Chapter 8
Install and Manage the Client Firewall
Trend Micro Core Protection Module provides an optional, policy-based CPM firewall
that allows you to enable client-level firewall protection.
Topics in this chapter include:
•
About the CPM Firewall and Policies on page 8-2
•
Add the Firewall Masthead to the ESP Server on page 8-3
•
Removing Conflicting Firewalls on page 8-5
•
Creating a Firewall Policy on page 8-10
•
Creating and Deploying Smart Policies: Example on page 8-13
•
Global Exception Rules on page 8-17
•
Firewall Policy Settings Wizard on page 8-19
•
Firewall Policy Configuration on page 8-21
8-1
Core Protection Module 10.6 SP2 Administrator’s Guide
About the CPM Firewall and Policies
The CPM firewall is optionally available with the Trend Micro Core Protection Module
and allows you to enable client-level firewall protection. It is policy-based, and provides
bi-directional port-control to all or selected endpoints. You can also apply policies
selectively and automatically in real-time, according the user’s current IP address. For
example, you can have one policy for in-office network connections and another for
unsecured connections such as in an airport. The appropriate policy will automatically
be applied as the end user changes location.
The firewall configuration is not available from the ESP Console by default; you need to
add the firewall site before the Wizard will appear in the Core Protection Module site
folder. Firewall policies are automatically enabled and active when you deploy them to
the endpoints. There are no installation steps required.
Several examples of the firewall versatility are worth pointing out. Procedures for each
appear later in this chapter:
8-2
•
Uniform security: You can create a policy, apply it to all your endpoints, enable
one or more of the global exceptions, and then deploy the policy to all your
endpoints in just a few minutes.
•
Targeted security: You can create multiple policies, each with a different set of
ports enabled, and then use different Tasks to selectively target the different
policies to different endpoints.
•
Smart (flexible) security: You can create two policies, each with different rules,
and create two Tasks, each of which deploys one of the policies to the same
endpoints. By attaching a different Location Property to each Task prior to
deployment, the targeted endpoints will receive both policies. Whenever conditions
on an endpoint change to those set for one of the Locations, the policy in affect
for that endpoint will also change. In this way, you can create different policies for
the same computer, and they will automatically adapt to different conditions.
Install and Manage the Client Firewall
Add the Firewall Masthead to the ESP Server
Install the Trend Micro Common Firewall by adding its site masthead to the list of
managed sites in the ESP Console. If you do not have the Common Firewall masthead,
contact your Trend Micro sales representative to obtain it.
Before adding the site, make sure that the ESP Server can connect to the source of the
masthead files (that is, can connect to the Internet). If it cannot, the request will remain
pending until the connection is made.
Procedure
1.
From the ESP Console menu, click Tools > Add External Site Masthead....
The browse window opens.
2.
Locate and select the Common Firewall masthead file you received from Trend
Micro: Trend Micro Common Firewall.efxm. Click OK.
8-3
Core Protection Module 10.6 SP2 Administrator’s Guide
The selected masthead appears in the Manage Site window
3.
At the prompt, type your private key password and click OK.
The ESP Server will begin gathering the files and content associated with the
masthead you added and install them on the server.
8-4
4.
From the ESP Console menu, click Endpoint Protection on the bottom left pane.
5.
Click All Endpoint Protection > Sites > External Sites > Trend Micro
Common Firewall.
6.
Click the Computer Subscriptions tab in right hand pane.
7.
Select the subscribed computers and click the Save Changes button.
8.
At the prompt, type your private key password and click OK.
Install and Manage the Client Firewall
Removing Conflicting Firewalls
You should only deploy the CPM firewall on endpoints that do not have another
firewall installed, regardless of whether that firewall is active (for example, the driver and
services may continue to load, although no firewall policies are in place).
If the endpoints to be protected already have a firewall such as Windows Firewall
installed, you need to open port 52311 to allow the ESP server to communicate with the
endpoint.
CPM provides a Fixlet for disabling the Windows Firewall. For other firewalls, you can
use the same program that was used to install it to uninstall it, or create a custom Fixlet.
Procedure
1.
From the ESP Console menu, click Endpoint Protection on the bottom left pane.
2.
From the upper left navigation pane, go to Core Protection Module >
Troubleshooting.
3.
From the task list in the right pane, select Common Firewall - Disable Windows
Firewall.
A screen displaying the Task Description tab appears.
4.
Below Actions, click the hyperlink to open the Take Action window.
A list of the endpoints that are running the Windows Firewall appears under the
Target tab.
5.
Select all Applicable Computers and click OK.
6.
At the prompt, type your private key password and click OK.
7.
In the Action | Summary window that opens, monitor the "Status" and confirm
that it "Fixed".
8-5
Core Protection Module 10.6 SP2 Administrator’s Guide
Creating Firewall Policies
Configure firewall settings for your endpoints by creating one or more firewall policies
in the Firewall Policy Settings Wizard. Next, create a Task to deploy the action.
Structure the policy to Allow or Deny all inbound and outbound network connections
by setting the Security Level. A security level of High creates a default behavior of
Deny for all ports, while Low does the opposite. From there, you can add individual
port exceptions and/or use any of the 30 pre-set exceptions for common ports (such as
HTTP, FTP, SMTP) that are available as Global Exception Rules. Completed policies
are available in the Policy List. You can select one or more policies from the list to
include in a Task for deployment to the endpoints you specify.
Governing Logic
There are several sets of logic that affect policy targeting. When creating and deploying a
firewall policy, the chronological order is:
•
Create a policy.
•
Add it to a task.
•
Deploy it
The endpoint, which makes the final determination of relevance, is more-or-less
autonomous.
Irrespective of this chronology, however, is the determination of applicability. Whether
or not a given policy is in fact applied to a given endpoint is determined by the
population of endpoints that remains after configuring the Task and Action. This is
important because it means that simply including an IP address in a firewall policy does
not mean that the IP address will receive the policy.
The list below shows the order of inheritance. The Task defines the population within
which the Action can occur, and the Action defines the population within which IP
addresses defined in the policy can occur. The Policy sets the population of IP addresses
available for the Task. Knowing exactly which endpoints will ultimately receive your
policy can be complex.
To determine which endpoints receive a policy depends on:
8-6
Install and Manage the Client Firewall
1.
All Existing Firewall Policies list: Only one policy will ever be in effect for a
given client at a given time. The policy in effect is the first policy on the policy list
that contains the IP address of a targeted endpoint. This condition makes the order
of policies in the policy list significant. Evaluation occurs from the top down and
stops once a policy has been found that applies to an endpoint IP addresses.
Always put policies that specify fewer than "All Possible IPs" above those that
specify all IP addresses (which is, typically, most if not all policies). If you do not,
the policy that includes specific IP addresses will never be applied.
FIGURE 8-1. Firewall Policy Settings Wizard Screen
2.
The Policy: Within a firewall policy, include all possible IP addresses or a range of
IP addresses. Policy IP addresses will always be limited to the population of IP
addresses defined in the Task that deploys it.
3.
The Task: You can make the Task relevant to all or certain computers. By default,
tasks created for a firewall policy will use a relevance statement that is made up of
conditions from the firewall policy.
4.
The Action: When you deploy a Task, you select your targets from the population
of endpoints made available in the Task. You can reduce the population of
8-7
Core Protection Module 10.6 SP2 Administrator’s Guide
endpoints to those that you want the policy to target, and the conditions under
which you want the policy to apply. For example, you can filter the possible
endpoints by selecting a different target, by defining user eligibility, or by setting
execution or offer conditions.
5.
The Endpoint: The ESP Agent installed on the endpoint keeps a detailed list of
computer-specific parameters against which it continuously evaluates the relevance
statements of all Tasks deployed to it. If the endpoint finds that it is not relevant, it
will not incorporate the policy. This is significant when you deploy multiple firewall
policies to co-exist on the same endpoint (as opposed to one policy replacing
another). The endpoint selects which policy to apply based on its current status, for
example, the IP address it is currently using to connect to the network.
Policy Verification
It is possible to create a condition wherein no policies are applied to a given IP address,
or the wrong policy is inadvertently applied to a given IP address. Trend Micro
recommends that following deployment, you confirm your policy coverage by using a
port scanning program such as Nmap (http://nmap.org) to verify that the policy has
been applied to the computers and ports and is functioning as you expect.
8-8
Install and Manage the Client Firewall
Global Exceptions
You can add rules from the Global Exception Rules list to individual firewall policies.
These rules are available when you create a new policy, however, only those rules that
you have actually enabled in that policy will remain after you save it.
FIGURE 8-2. Exception Rule Configuration Screen
Global Exception Rules are not altered by editing a rule from within a policy. Add or
edit rules in the Global Exception Rules list to have the change available for all new
policies (global exception rules already attached to a policy will not change, even if they
are edited in the rule list).
One other point to keep in mind is that global exception rules have a predefined action,
either Allow or Deny. Be sure this action agrees with the fundamental construct of your
policy. For example, if you set the policy Security Level = Low, that is, allow traffic to
and from all ports, you need to change any exception rules imported from the global list
to Deny traffic for your exception ports. See Global Exception Rules on page 8-17 for
configuration details.
8-9
Core Protection Module 10.6 SP2 Administrator’s Guide
Creating a Firewall Policy
The procedure below is for creating a single firewall policy that will be applied to all
endpoints. You can use these same instructions to create multiple policies and target
them to different endpoints. The difference occurs according on the policies you enable
in the Policy List when creating a Task, and the computers you target with that Task. See
Firewall Policy Configuration on page 8-21 for details.
Procedure
1.
From the ESP Console menu, click Endpoint Protection on the bottom left pane.
2.
From the upper left navigation pane, go to Core Protection Module >
Configuration > Common Firewall Settings > New Policy Task....
The Firewall Policy Settings Wizard appears.
3.
Click the Add button, and in the window that appears, give the policy a name that
will make its function clear when it appears in the Policy List.
4.
Configure the following:
8-10
•
Firewall Enabled: This option must be selected for the policy to be "on." In
addition, the policy must be selected in the Policy List. Both conditions must
apply for the policy to be used.
•
Security Level - High: Choose to block all traffic to all ports, and then use
Exceptions to enable specific ports (inbound, outbound, or both.)
Install and Manage the Client Firewall
•
Security Level - Medium: Choose to block all inbound traffic to all ports,
but allow all outbound traffic to all ports; use Exceptions to alter specific
ports. To achieve the opposite, choose High and create a single exception rule
to Allow all inbound traffic for all ports (and enable this rule in the
Exception Rules list).
•
Security Level - Low: Choose to allow all traffic to all ports, and then use
Exceptions to block specific ports (inbound, outbound, or both).
•
Apply to All Possible IP Addresses: Choose this option for most cases. An
IP address is "possible" only if it is also included in the Task.
•
Apply to A Range of IP Addresses: Only use this option if you are creating
a policy to bind to one of several possible IP addresses that an endpoint may
use (due to Dual NICs, variable locations, etc., as described in Creating and
Deploying Smart Policies: Example on page 8-13).
•
Exception Rules: Only enabled rules will be included in the policy. Select an
existing rule from the list of Global Exception Rules that appears, or add a
8-11
Core Protection Module 10.6 SP2 Administrator’s Guide
new one. In either case, be sure your exceptions are in fact the opposite of the
Security Level you have set for the policy. For example, the default action
for most rules in the Global Exception Rules list is Allow. Enabling this rule
for a policy where Security Level = Low would produce no effect.
Rule Name: Click an existing rule to modify it. Any modifications made to a
global rule from within the policy will apply only to that policy (the global rule
itself will not change).
Add: Click this button to create and enable a new exception rule.
Import Global Rules: Click this button to repopulate the Exception Rules
list with exceptions from the Global Exception Rules list.
5.
Click Save.
Deploying a Firewall Policy
Procedure
1.
Enable the policy you just created in the Policy List by selecting it.
All enabled policies will be bundled into the Task when you create it. Disable any
policies in the list that you do not want in the Task.
WARNING!
Deleting a policy will make it unavailable for other Tasks.
2.
Move your policy to the top of the list and click the Save Order button.
3.
Click the Create Firewall Policy Task... button at the top of the screen.
A screen displaying the Task Description tab appears.
4.
Accept the default values and click OK.
5.
At the prompt, type your private key password and click OK.
A screen displaying the Task Description tab appears.
8-12
Install and Manage the Client Firewall
6.
Below Actions, click the hyperlink to open the Take Action window.
7.
Click Applicable Computers or whichever option will include all endpoints with
the firewall installed.
8.
Click OK.
9.
At the prompt, type your private key password and click OK.
10. In the Action | Summary window that opens, monitor the "Status" and "Count"
of the Action to confirm that it is "Running" and then "Completed".
Creating and Deploying Smart Policies:
Example
In this procedure, you will create four firewall policies, one for each of the policy goals
listed below.
Usage scenario:
Endpoints are comprised of desktop computers and laptops. All are running the CPM
Firewall.
•
Desktops have a single, wired, LAN.
•
The laptops have both a LAN and W-LAN.
Note
The laptops, being mobile, often travel to different corporate offices (London and
New York). In addition, they are used outside the corporate network (Airport).
Create one firewall policy for each of the following cases:
CASE
DESCRIPTION
Policy 1
Prevents wireless FTP connections in London
Policy 2
Allows wired and wireless FTP connections in New York
8-13
Core Protection Module 10.6 SP2 Administrator’s Guide
CASE
DESCRIPTION
Policy 3
Allows wired FTP connections in London and New York
Policy 4
Prevents all but HTTPS connections in unknown locations
(wireless)
When targeting specific IP addresses in a firewall policy, be sure that the IP address
ranges specified are mutually exclusive; that the same IP address is not included in
related policies.
•
London = 10.10.0.0–10.10.255.255
•
New York = 192.168.0.0–192.168.255.255
•
Unknown = Not London or New York
Creating a Policy for Each Case
The steps for creating the first policy are provided below. Repeat steps 3 and 4,
modifying as needed, to create the remaining three policies.
Procedure
1.
From the ESP Console menu, click Endpoint Protection on the bottom left pane.
2.
From the upper left navigation pane, go to Core Protection Module >
Configuration > Common Firewall Settings > New Policy Task....
The Firewall Policy Settings Wizard appears.
3.
Click the Add button, and in the window that appears, give the policy a name that
will make its function clear when it appears in the Policy List, for example, No FTP
over W-LAN in London.
The Firewall Policy Configuration screen opens.
4.
Configure the following (see Firewall Policy Configuration on page 8-21 for
configuration details):
a.
8-14
Select Firewall Enabled.
Install and Manage the Client Firewall
b.
Select Security Level = High to block all traffic to all ports.
c.
Select Apply to a Range of IP Addresses and enter the IP address range for
London, From: 10.10.0.0 To: 10.10.255.255.
d.
From the Exception Rules, enable FTP-Data and FTP.
•
If, in fact, you have a location that includes multiple ranges, create a parallel
firewall policy for each range (differentiate the name by adding a number).
•
If you are using a subnet to represent the location, enter the subnet IP in both
the From and To fields.
Note
Subnet notations such as 172.16.0.0/16 and 172.16 are not supported.
5.
Click Save.
Creating Tasks for Different Locations
In this procedure, you will create different Tasks and include in them different
combinations of the policies created above. The combinations you select for a Task are
important, as they determine the policies a given endpoint will have available to use.
Procedure
1.
On the Firewall Policy Settings Wizard screen, do the following:
a.
Be sure the policies are ordered correctly, that is, put the policy with an IP
address range above the one for all IP addresses.
b.
Select both London policies (Policies 1 and 3).
c.
For New York, use Policies 2 and 3
d.
For Unknown, use Policies 1, 2, and 4
2.
Click the Create Firewall Policy Task... button at the top of the screen.
3.
At the prompt, type your private key password and click OK.
8-15
Core Protection Module 10.6 SP2 Administrator’s Guide
The Create Task screen appears.
4.
In the Name field, give the Task descriptive name, such as Firewall policy
to prevent FTP over WLAN at London office.
5.
Below Description, edit the text to provide, for example, the rationale for the
policy to other console operators.
6.
Use the default settings in the Actions section. Click OK.
A screen displaying the Task Description tab appears.
7.
Below Actions, click the hyperlink to open the Take Action window.
8.
Click Applicable Computers or whichever option will include all endpoints with
the firewall installed.
9.
Click the Execution tab to make it active. Remove any Constraints that you do not
want to apply (such as a Start and End date), and in the Behavior section, make
sure only the following option is enabled: Reapply this action... whenever it
becomes relevant again.
8-16
Install and Manage the Client Firewall
10. Click OK.
11. At the prompt, type your private key password and click OK.
12. In the Action | Summary window that opens, monitor the "Status" and "Count"
of the Action to confirm that it is "Running" and then "Completed".
Global Exception Rules
The list of 30 or so default global exception rules appears whenever you create a new
firewall policy. You can use the rules to quickly add commonly used UDP and TCP
ports to your policy, for example, those used for SMTP, FTP, and HTTP traffic.
8-17
Core Protection Module 10.6 SP2 Administrator’s Guide
All Existing Rules
You can add, modify, or remove unused exception rules from the global list.
New rules and those modified in the Global Exceptions Rules list are available to all
new policies. However, if from within a policy, you modify a rule imported from the
Global Exception Rules list, that modification will not be applied to the global rule.
Likewise, if you modify a rule in the global list, any version of that rule that has been
saved in an individual policy will not change.
Adding or Modifying a Global Exception Rule
Procedure
1.
From the ESP Console menu, click Endpoint Protection on the bottom left pane.
2.
From the upper left navigation pane, go to Core Protection Module >
Configuration > Common Firewall Settings > Global Exception Rules....
8-18
Install and Manage the Client Firewall
3.
a.
Click a Rule Name in the list to open that rule for editing.
b.
Click the Add Rule button to create a new rule.
When finished, click the Save Rule button.
Deleting a Global Exception Rule
Procedure
1.
From the ESP Console menu, click Endpoint Protection on the bottom left pane.
2.
From the upper left navigation pane, go to Core Protection Module >
Configuration > Common Firewall Settings > Global Exception Rules....
3.
Select the check box(es) of the unused rules.
4.
Click the Delete Rule(s) button to remove selected rule(s).
5.
Click OK.
The selected rule is removed.
Firewall Policy Settings Wizard
Use the Firewall Policy Settings Wizard to create one or more firewall policies. You
can structure the policy to Allow or Deny all inbound and outbound network
connections by setting the Security Level, and then individual port exceptions.
Completed policies appear in the Policy List, as shown in the figure below. Select
policies from the list to include in a Task and deploy to your endpoints.
The following buttons and functions are available in the Firewall Policy Settings
Wizard:
•
Create Firewall Policy Task: Only policies that have been bundled into a Task
can be deployed to endpoints. You can apply different policies to different
endpoints by creating multiple Tasks.
8-19
Core Protection Module 10.6 SP2 Administrator’s Guide
•
Save Order: Because the firewall evaluates applicability by starting at the top of the
list and working down, put policies with a smaller Applied IP Range above those
that apply to All IPs. Save the order often to avoid losing your changes.
•
Add: Use this button to create a new policy. You must also select the policy before
using it in a Task.
•
Delete: Select one or more policies from the list and then use this button to
remove them. Only use Delete to remove the policy from any further use; disable
any policies that you do not want to include in a given Task.
•
Open an existing policy: Click the Policy Name to open an existing policy for
viewing or modification. Changes will not be applied to endpoints until you redeploy the policy.
FIGURE 8-3. Firewall Policy Settings Wizard Screen
8-20
Install and Manage the Client Firewall
Firewall Policy Configuration
Create or modify a firewall policy by clicking the Add button or a Policy Name in the
policy list. The options are explained below.
FIGURE 8-4. Firewall Policy Configuration Screen
The following options are available in the Firewall Policy Configuration screen:
8-21
Core Protection Module 10.6 SP2 Administrator’s Guide
SECTION
General
IP
8-22
OPTIONS
•
Policy Name: The name you type here will appear in the
firewall policy list. Once saved, it cannot be changed. Use a
name that will make the purpose of the policy clear.
•
Firewall Enabled: Selected by default, only disable this option
in a policy to uninstall the firewall from your endpoints (the
Task must be deployed).
•
Security Level: This option sets the predisposition of the
policy, that is, whether it Allows or Denies all traffic to all ports.
You can then fine-tune the policy by adding port exceptions
(these exceptions should, of course, be the inverse of the
action set through the Security Level).
•
Apply to All Possible IP Addresses: This is the correct
choice for most firewall policies. Possible IP addresses
refers to the limits inherited through the creation of the Task,
Policy Action, and the endpoint’s own relevance evaluation.
•
Apply to A Range of IP Addresses: This option is available
for creating location-aware policies. Be sure to move these
policies to the top of the Policy List to prevent the policy from
being missed.
Install and Manage the Client Firewall
SECTION
Exception Rules
OPTIONS
•
Note
All
exceptions
rules are
policyspecific.
Exceptions
created
within a
policy are
not be
available
globally. Add
them in the
Global
Exceptions
screen.
Add button: Opens a screen for creating a new exception rule
that will be unique to the policy. Exceptions that you add will
automatically be selected, that is, enabled in the policy.
Note
If you disable the exception and save the policy, the
exception will be removed from the policy. See more
information in Exception Rules Configuration on page
8-23.
•
Import Global Rules button: Repopulates the Exception
Rules list with all exceptions from the Global Exception
Rules list (including the defaults and any that you have
added). This can be especially useful if you later re-open the
policy and want to add additional exceptions (those not
included the first time will no longer appear in the list).
•
Editing existing rules: Modifications made to rules within a
policy apply only to that policy, even if the rule is one of the
Global Exception Rules.
•
Selecting exception rules: Select exceptions to include them
in a policy.
Exception Rules Configuration
Add a custom exception rule to the firewall policy by clicking the Add button. Click an
existing exception rule to open the rule for editing. The options are explained below.
•
Name: The name you type here will appear in the Exception Rules list. Once
saved, it cannot be changed. Use a name that will make the purpose of the policy
clear.
•
Actions: Deny/Allow. Choose an action that contradicts the prevailing disposition
of the policy as set by the Security Level.
•
Protocol: Select TCP/UDP to affect all traffic on the port, the typical assumption.
Otherwise, to block or allow a specific application, match the protocol and port.
8-23
Core Protection Module 10.6 SP2 Administrator’s Guide
•
Direction: Inbound/Outbound or both. Blocking inbound traffic, for example,
can prevent unauthorized access on the endpoint, while blocking outbound traffic
can be used thwart malicious spyware or programs such as file sharing.
FIGURE 8-5. Exception Rule Configuration Screen
•
Ports: (ports 0-1023 are "well-known," 1024-49151 are registered ports, and those
above 49151 are dynamic or private ports.)
•
All ports: Includes ports 1 through 65535
•
Range: Create multiple, parallel exception rules to include a number of
different ranges.
•
Specified port(s): Do not use zero or invalid input such as non-whole
numbers.
Uninstalling the Common Firewall
If you decide not to use the firewall, there is no application that you need to remove, or
anything that gets uninstalled. Instead, you simply create a policy with the firewall
8-24
Install and Manage the Client Firewall
disabled and deploy it in a Task. In addition, you can remove the CPM firewall site from
the ESP Console. Both procedures are provide in the sections that follow.
Removing the Firewall Site
Remove the Common Firewall site from the ESP Console by deleting the masthead
from the list of managed sites.
Procedure
1.
From the ESP Console menu, click Endpoint Protection on the bottom left pane.
2.
From the upper left navigation pane, go to All Endpoint Protection > Sites >
External Sites.
3.
Select the Trend Micro Common Firewall site.
4.
In the right pane, click Remove.
5.
At the prompt, type your private key password and click OK.
ESP removes the firewall components.
8-25
Chapter 9
Setting Up and Using Locations
This chapter has information about creating locations, tasks related to the locations, and
how to use locations.
Topics in this chapter include:
•
Locations Overview on page 9-2
•
Creating Locations on page 9-2
•
Creating Location-Specific Tasks on page 9-5
•
How Location Properties Work on page 9-6
9-1
Core Protection Module 10.6 SP2 Administrator’s Guide
Locations Overview
You can have ESP apply different CPM security configuration on the basis of the
client’s current geographical location. For example, say an organization has offices in
California, New York, and Germany, and that travel between offices is not uncommon.
In California and New York, the corporate security policy requires that suspicious files
be quarantined. In Germany such files must be deleted. In locations other than
California or Germany, incidents should be logged but no action taken. You can
accommodate all these regulations by creating Location Properties. In short, a client can
disconnect from the corporate network in the California one day and reconnect in
Germany the next, and his computer will automatically pick up the correct security
policy for the new location.
This same idea also applies to firewall configurations, and other CPM security features.
So, for example, in addition to location-specific configurations, you can create NICspecific security policies. If you want to have one set of malware and firewall settings to
that govern wireless connections and another set for wired connections. Your LAN and
W-LAN settings can be the same for all geographic locations, or they too can vary to
reflect a local security policy.
For example, wireless connections in New York could have one set of rules and wired
connections mighty have a different set of rules. In Germany, there may be completely
different rules for both wired and wireless connections - two locations, but four sets of
rules that may apply.
Creating Locations
Use the ESP Location Property wizard to create one or more named properties that
allow ESP Agents to identify themselves according to their current network location or
status. As soon as the property is created, it will be propagated to all clients and
applicable computers will pick up the setting (that is, their configuration status may
change according to the choices you have in place.)
Before you begin, you should know or have a list of the subnets used in your
organization and their respective geographic locations. Alternatively, you can create a
custom relevance expression to dynamically map retrieved client properties using a key/
value set. See the ESP Administrator’s Guide for more information.
9-2
Setting Up and Using Locations
Note
The purpose of the procedure below is to create a property that will define the geographic
location of an endpoint according to its subnet. Using the same principles, you could also
create a property based on connection type, relay, operating system, or any other
characteristics and use it in conjunction with the CPM firewall, CPM malware protection,
and CPM Web Reputation.
Procedure
1.
Log on to the ESP Console as Master Console Operator.
2.
From the ESP Console menu, click All Content on the bottom left pane.
3.
From the upper left navigation pane, go to Wizards > All Wizards > Location
Property Wizard.
The Location Property Wizard screen opens.
4.
Choose one of the following and then click Next.
•
Create a retrieved property that maps subnet to location: For each
location you want to identify, type the subnet IP address. If a single location
includes more than one subnet, type each subnet IP address (followed by the
same location name) on a new line. Clients will self-determine their relevance
to a given location by comparing their current IP address with the value(s)
specified here. Note that clients with multiple NICs may self-identify using
their W-LAN or LAN IP address, so you may need to include both subnets.
•
Create a retrieved property that maps subnet to location using only the
first two octets: Use this option to support a larger block of IP addresses. As
above, clients will self-identify their relevance to this IP address block. Clients
not included in the block will either inherit the default configuration that is
not location-specific, or not be covered by any location property.
•
Create a retrieved property that maps IP address range to location: Only
one range per line is supported (do not delimit multiple ranges).
•
Create a retrieved property that uses a custom relevance expression and
maps the result using a key/value set: See the ESP Administrator’s Guide for
more information.
9-3
Core Protection Module 10.6 SP2 Administrator’s Guide
5.
Give the property a name that will clearly identify its purpose and click Next.
6.
For each location, type the subnet address(es). Click the Insert Tab button, and
then type a name.
Use only one IP/location pair per line as shown in the following screen. Create
multiple lines for the same location if it uses multiple subnets.
Note
Be careful not to "overlap" any IP addresses when specifying ranges. Computers
included in multiple locations will constantly be updated as they re-evaluate and
recognize their relevance to one location and then another.
9-4
7.
Click Next, and if no valid IP/location pairs are displayed, click Next again.
8.
Accept the defaults that are selected in the Additional Options window and click
Finish.
Setting Up and Using Locations
The Import Content window opens.
9.
Click OK.
10. At the prompt, type your private key password and click OK.
11. In the Action | Summary window that opens, monitor the "Status" and "Count"
of the Action to confirm that it is "Running" and then "Completed".
Now that locations have been defined, the next step is to create a couple of
different configuration settings and bundle them into a Task. You can then
associate these Tasks with the Locations you just created.
Creating Location-Specific Tasks
In the procedures below, the goal is to create two different configurations and tasks, and
then attach them to different locations. The result will be that Configuration 1 will
automatically be picked up by users in Location 1, and Configuration 2 will be picked up
9-5
Core Protection Module 10.6 SP2 Administrator’s Guide
by users in Location 2. If a user from Location 2 travels to Location 1, he will
automatically pick up Configuration 1 when connecting to the network.
See Install and Manage the Client Firewall on page 8-1 for instructions on creating locationspecific firewall policies, and NIC-specific and connection-specific policies, such
connecting through the corporate LAN or a coffee shop.
How Location Properties Work
Each ESP Agent, on which the CPM client resides, receives a complete list of all the
Actions deployed from the ESP Server through the various Tasks. The individual
Agents check themselves against the list and create a short-list of only those Actions that
apply to them. In the current example, relevance is determined by IP address.
Configuration 1 is going to be deployed to all Agents, but only those Agents running on
an endpoint with an IP address in the subnet defined for San Francisco will pick up the
configuration. You will be able to see this self-selection at work when you create the
second configuration and apply it to a different Location. One Action will be picked up
by San Francisco endpoints and the other by German endpoints.
ESP Agents remain in sync with new relevance expressions by frequently checking the
ESP server for updates. Agents also maintain a detailed description of themselves that
may include hundreds of values describing their hardware, the network, and software.
In short:
•
First, define some locations.
•
Second, configure your scan, firewall, or URL filtering settings.
•
Next, save the settings to a Task and create an Action to target some given
endpoints.
When you deploy the Task, the ESP Server converts the Action details into a relevance
expression, which is sent to all Agents at the endpoints. Each Agent checks itself against
the relevance expression and takes the Action required for every match found.
9-6
Setting Up and Using Locations
Creating the First Configuration and Task
Procedure
1.
From the ESP Console menu, click Endpoint Protection on the bottom left pane.
2.
From the upper left navigation pane, go to Core Protection Module >
Configuration > Global Settings > Global Settings Wizard.
The Global Settings Wizard screen opens.
3.
4.
Enable Configure scan settings for large compressed files and type the limits
shown here:
•
Do not scan files in the compressed file if the size exceeds 2 MB
•
Stop scanning after CPM detects 2 virus/malware in the compressed
file.
Click the Create Global Scan Settings Configure Task button.
The Edit Task window opens.
9-7
Core Protection Module 10.6 SP2 Administrator’s Guide
5.
Type a descriptive (or memorable) name for the Task such as, Skip 2MB-2.
6.
Click OK.
7.
At the prompt, type your private key password and click OK.
The new policy now appears in the Configuration > Global Settings > Custom
Tasks.
Creating the Second Configuration and Task
Procedure
1.
From the ESP Console menu, click Endpoint Protection on the bottom left pane.
2.
From the upper left navigation pane, go to Core Protection Module >
Configuration > Global Settings > Global Settings Wizard.
The Global Settings Wizard screen opens.
3.
Remove the check from Configure scan settings for large compressed files.
4.
Click the Create Global Settings Configuration Task button.
The Create Task screen appears.
5.
Type a descriptive (or memorable) name for the Task such as, Scan BIG.
6.
Click OK.
7.
At the prompt, type your private key password and click OK.
The new policy now appears in the Configuration > Global Settings screen.
Making the Configurations Location-Specific
Procedure
1.
9-8
From the ESP Console menu, click Endpoint Protection on the bottom left pane.
Setting Up and Using Locations
2.
From the upper left navigation pane, go to Core Protection Module >
Configuration > Global Settings > Custom Task > Skip 2MB-2 (the task you
just created).
A screen displaying the Task Description tab appears.
3.
Below Actions, click the hyperlink to open the Take Action window.
4.
Select All computers with the property values selected in the tree below.
5.
Next, click the All Computers tree and then By Retrieved Properties > By
Subnet Address to open that branch.
6.
Choose the Location name you created for the San Francisco subnet in How
Location Properties Work on page 9-6.
7.
With your location still selected, click the Execution tab.
9-9
Core Protection Module 10.6 SP2 Administrator’s Guide
8.
Remove any Constraints that you do not want to apply (such as a Start and End
date), and in the Behavior section, make sure only the following option is enabled:
Reapply this action... whenever it becomes relevant again.
9.
Click OK.
10. At the prompt, type your private key password and click OK.
11. Repeat this procedure for the second configuration and Task (choose Scan BIG
from the Global Settings screen), and use the Location name you used for the
Germany subnet.
9-10
Chapter 10
Monitoring CPM
This chapter has information about monitoring the CPM network.
Topics in this chapter include:
•
CPM Overview on page 10-2
•
Protection Status on page 10-3
•
Pattern Version on page 10-12
•
Port Violations on page 10-13
•
Threat Detection on page 10-13
•
Web Reputation on page 10-17
10-1
Core Protection Module 10.6 SP2 Administrator’s Guide
CPM Overview
The CPM Console provides rich reporting features, including graphical representations
and drill-down granularity. The CPM Overview provides a quick summary showing you
the overall condition of CPM clients on the network.
FIGURE 10-1. The Overview Report - Threat Detections Screen
Available status:
•
Healthy: Endpoints pass all Protection Status criteria.
•
At Risk: Endpoints fail one or more Protection Status criteria.
•
Unmanaged endpoints: Endpoints that do not have CPM or MPM clients.
For further information, see Threat Detection on page 10-13.
10-2
Monitoring CPM
Protection Status
Use the Protection Status report for an at-a-glance look at the CPM network’s
endpoints and relays. All items on the checklists can be configured.
For example, if you know there are some endpoints on your network with out-of-date
components, but you prefer those endpoints to remain with the components they have,
you can configure the Endpoint components updated recently checklist item to
exclude those endpoints.
The Protection Status tabs, Endpoints and Relays, provide advice in the following
sections:
•
Endpoints at Risk
•
Unmanaged Endpoints
•
Relays at Risk
In each section links direct you to the Fixlet that resolves an issue.
Protection Status for Endpoints
Each item in the check list can be configured for your network’s needs. Each item in the
checklist also provides results (whether an item passes or fails and why) and resolutions
for issues.
The following table provides a list of all checklist items for endpoints.
TABLE 10-1. Protection Status for Endpoints
ITEM
DESCRIPTION
Network is free of virus
outbreaks
Specify the number of virus detections over the time period
to quantify a "virus outbreak".
Endpoints free of active
malware
Specify the percentage of endpoints with active malware
that you deem acceptable.
Real-Time Scan ON
Specify the percentage of endpoints with Real-Time Scan
OFF that you deem acceptable.
10-3
Core Protection Module 10.6 SP2 Administrator’s Guide
ITEM
DESCRIPTION
Restarts currently not
required
Specify the percentage of endpoints that require a restart
that you deem acceptable.
All endpoints connected to
Smart Protection Server
Specify the percentage of endpoints using smart scan that
are reconnecting to Smart Protection Servers that you
deem acceptable.
Required services ON
Specify the percentage of endpoints with their required
services OFF that you deem acceptable.
Automatic Update enabled
Specify the percentage of endpoints with Automatic
Update disabled that you deem acceptable.
Endpoint components
updated recently
Specify the percentage of endpoints with out-of-date
components that you deem acceptable.
On demand scan
performed recently
Specify the percentage of endpoints that have not
performed an on demand scan "recently" that you deem
acceptable.
Required Data Protection
Specify the percentage of endpoints with the required Data
Protection services OFF that you deem acceptable.
services ON
Configuring the Protection Status for Endpoints
Procedure
1.
10-4
Navigate to Core Protection Module > Protection Status.
Monitoring CPM
The Protection Status screen appears with the Endpoints tab displaying.
2.
Move the cursor over one of the items in the checklist.
An icon (
3.
) appears next to the item in the checklist.
Click the icon.
10-5
Core Protection Module 10.6 SP2 Administrator’s Guide
A configuration screen for the setting appears.
4.
Modify the settings for the checklist item.
5.
Click Save.
6.
Modify other items in the checklist as required.
Checking the Results and Resolutions for an Endpoint
Checklist Item
Procedure
1.
10-6
Navigate to Core Protection Module > Protection Status.
Monitoring CPM
The Protection Status screen appears with the Endpoints tab displaying.
2.
3.
Expand one of the checklist items.
•
Result: Displays the statistics for a checklist item
•
Resolution: Displays what the user can do to resolve the checklist item issues
Click the link under Resolution to fix the checklist item issues.
10-7
Core Protection Module 10.6 SP2 Administrator’s Guide
Protection Status for Relays
Each item in the check list can be configured for your network’s needs.
The following table provides a list of all checklist items for endpoints.
TABLE 10-2. Protection Status for Relays
ITEM
DESCRIPTION
File Reputation available
Specify the percentage of Smart Protection Relays that do
not have File Reputation service working correctly that you
deem acceptable.
Web Reputation available
Specify the percentage of Smart Protection Relays that do
not have Web Reputation Services working correctly that
you deem acceptable.
Smart Protection Relays
installed on all relays
Specify the percentage of required Smart Protection
Relays that are not installed that you deem acceptable.
Smart Protection Relay
status is "protected"
Specify the percentage of Smart Protection Relays that are
not working correctly that you deem acceptable.
All Smart Protection Relays
registered to Smart
Protection Servers
Specify the percentage of Smart Protection Relays that are
not registered to Smart Protection Servers that you deem
acceptable.
Relay VDI Components
Specify the percentage of required VDI Components that
are not installed that you deem acceptable.
All VDI Components
connected to VDI servers
Specify the percentage of required VDI Components that
are not connected to VDI servers that you deem
acceptable.
VDI Components status is
normal
Specify the percentage of VDI Components that are not
working correctly that you deem acceptable.
Configuring the Protection Status for Relays
Procedure
1.
10-8
Navigate to Core Protection Module > Protection Status | Relays
Monitoring CPM
. The Protection Status screen appears with the Relays tab displaying.
2.
Move the cursor over one of the items in the checklist.
An icon (
3.
) appears next to the item in the checklist.
Click the icon.
10-9
Core Protection Module 10.6 SP2 Administrator’s Guide
A configuration screen for the setting appears.
4.
Modify the settings for the checklist item.
5.
Click Save.
6.
Modify other items in the checklist as required.
Checking the Results and Resolutions for a Relay Checklist
Procedure
1.
10-10
Navigate to Core Protection Module > Protection Status | Relays.
Monitoring CPM
The Protection Status screen appears with the Relays tab displaying.
2.
3.
Expand one of the checklist items.
•
Result: Displays the statistics for a checklist item
•
Resolution: Displays what the user can do to resolve the checklist item issues
Click the link under Resolution to fix the checklist item issues.
10-11
Core Protection Module 10.6 SP2 Administrator’s Guide
Pattern Version
The Pattern Version report provides at-a-glance information about all CPM endpoint
components.
TAB
Anti-Virus
Anti-Spyware
AVAILABLE COMPONENTS
•
Antivirus Pattern Versions
•
Antivirus Engine Version (x32)
•
Antivirus Engine Version (x64)
•
Antivirus Engine Version (for Mac)
•
IntelliTrap Pattern Versions
•
IntelliTrap Exception Pattern Versions
•
Smart Scan Agent Pattern Version
•
Anti-Spyware Pattern Versions
•
Spyware Active-monitoring Pattern Version
•
Spyware Engine Version (x32)
•
Spyware Engine Version (x64)
Anti-Rootkit
Anti-Rootkit Driver Version
Damage Cleanup
Services
•
DCS Template Version
•
DCS Engine Version (x32)
•
DCS Engine Version (x64)
•
CPM Program Version
•
CPM for Mac Program Version
•
Firewall Driver Version
•
Firewall Pattern Version
CPM
Firewall
10-12
Monitoring CPM
TAB
Behavior Monitoring
AVAILABLE COMPONENTS
•
Behavior Monitoring Detection Pattern
•
Behavior Monitoring Driver Version
•
Behavior Monitoring Core Service Version
•
Behavior Monitoring Configuration Pattern Version
•
Policy Enforcement Pattern Version
•
Digital Signature Pattern Version
Port Violations
The Port Violations report provides at-a-glance information about inbound and
outbound endpoint port violations.
Threat Detection
The Threat Detection report provides at-a-glance information about all threats CPM
detects on your network.
GROUP
Top Detections
Infected Computers
DETECTIONS
•
Top virus detections
•
Top spyware detections
•
Top Mac malware detections
Displays the following over the specified period:
•
Computer
•
Virus detections
•
Spyware detections
•
Total number of malware detections
10-13
Core Protection Module 10.6 SP2 Administrator’s Guide
GROUP
Virus Detections
Spyware Detections
10-14
DETECTIONS
Displays the following over the specified period:
•
Date/Time
•
Virus/Malware: Click the virus/malware name to connect to
the Threat Encyclopedia for more information about the
detected threat
•
Computer
•
Detected File
•
Detected File Path
•
Infection Source
•
Scan Type
•
Result
Displays the following over the specified period:
•
Date/Time
•
Spyware/Grayware: Click the spyware/grayware name to
connect to the Threat Encyclopedia for more information
about the detected threat
•
Computer
•
Scan Type
•
Result
Monitoring CPM
GROUP
Mac Malware
Detections
Behavior Monitoring
Detections
DETECTIONS
Displays the following on Mac endpoints over the specified
period:
•
Date/Time
•
Virus/Malware
•
Computer
•
Detected File
•
Detected File Path
•
Scan Type
•
Result
Displays the following over the specified period:
•
Date/Time
•
Computer
•
Violation
•
Actions
•
Events
•
Risk
•
Program
•
Operation
•
Target
10-15
Core Protection Module 10.6 SP2 Administrator’s Guide
GROUP
DLP Detections
Device Control
Detections
10-16
DETECTIONS
Displays the following over the specified period:
•
Date/Time
•
Computer
•
Process
•
Policy
•
Channel
•
Action
•
Template
•
User Name
•
Description
Displays the following over the specified period:
•
Date/Time
•
Computer
•
Accessed By
•
Target
•
Device
•
Permission
Monitoring CPM
Web Reputation
TAB
Blocked Sites
Visited Sites
DESCRIPTION
Displays the following information about sites blocked by
CPM:
•
URL
•
Most Recent
•
Blocks
•
Blocked Devices
Displays the following information about sites that
endpoints in you network have visited:
•
Site
•
Number of visits
•
Number of endpoints
10-17
Chapter 11
Using the Client Console
This chapter includes information to help with using the Core Protection Module
(CPM) client console that runs on end users machines.
Topics in this chapter include:
•
Overview on page 11-2
•
Accessing the Client Console on page 11-4
•
Client Connection with CPM Server on page 11-4
•
Manual Scans on page 11-6
•
Testing the CPM Client Console on page 11-11
•
Running Update Now on page 11-11
11-1
Core Protection Module 10.6 SP2 Administrator’s Guide
Overview
The CPM client provides security risk protection and reports events to, and gets updates
from, the CPM server. A system tray icon for the client console informs the user of the
current scan service status of CPM and gives access to the client console. Also, if
enabled, the client console installation allows initiating a manual scan from Windows
Explorer.
You can perform the following tasks using the CPM client console:
•
Manually scan files and folders for virus/malware and spyware/grayware
•
View Manual Scan results and take see the action on infected files
•
Update to the latest version of protection components
11-2
Using the Client Console
The CPM client console, shown in the figure below, allows users to initiate scans at any
time on the files and folder selected, then view the scan results.
FIGURE 11-1. CPM Client Console - Manual Scan Tab
CPM Client Dashboard vs. CPM Client Console
The CPM Client Dashboard offers display-only information about the client machine to
the client machine user and the administrator. Before accessing it, it must be enabled
from the ESP console and deployed. For more information about enabling and disabling
the CPM Client Dashboard, see Displaying the ESP Icon on Endpoints on page A-9. Users
right-click the red icon (#1 in the figure below) to access it.
11-3
Core Protection Module 10.6 SP2 Administrator’s Guide
The CPM Client Console provides on-demand scan information about the client
machine to the client machine user. Before accessing it, it must be enabled from the
CPM Dashboard and deployed. See Enabling the Client Console on page A-11 for details.
Users right-click the blue icon (#2 in the figure below) to access it.
FIGURE 11-2. System Tray - 1= Client Dashboard, 2 = Client Console
Accessing the Client Console
Procedure
1.
Right-click the icon in the system tray.
The table in Client Connection with CPM Server on page 11-4 shows the icons.
2.
Mouse over the icon to display client connection information.
3.
Select Core Protection Module Console.
The CPM client console opens.
Client Connection with CPM Server
Icons on the client computer’s system tray indicate the client’s scan service status with
the CPM server.
11-4
Using the Client Console
TABLE 11-1. Conventional Scan Client Icons
ICON
STATUS
DESCRIPTION
Normal
All components are up-to-date and services work properly.
Scanning
Manual or On-Demand scan is in progress
No real-time
protection
The Real-time scan service is disabled.
Improper
service
Improper scan service status. User cannot perform scans.
Normal
Real-time Scan and Web Reputation service are enabled
No real-time
protection
Real-time Scan is disabled and Web Reputation service is
enabled
TABLE 11-2. Smart Scan Client Icons
ICON
STATUS
DESCRIPTION
Normal
The client can connect to a Smart protection Server and/or
the Smart Protection Network. All services work properly.
No real-time
protection
The client can connect to a Smart protection Server and/or
the Smart Protection Network. Real-time Scan is disabled.
Improper
service
The client can connect to a Smart protection Server and/or
the Smart Protection Network.
Improper scan service status.
Improper
service
The client cannot connect to a Smart protection Server
and/or the Smart Protection Network
11-5
Core Protection Module 10.6 SP2 Administrator’s Guide
ICON
STATUS
DESCRIPTION
Improper
service
The client cannot connect to a Smart protection Server
and/or the Smart Protection Network. Real-time Scan is
disabled.
Improper
service
The client cannot connect to a Smart protection Server
and/or the Smart Protection Network.
Improper scan service status.
Manual Scans
The Manual Scan tab displays a folder tree that shows your disk drives, folders, and
files as they appear in Windows Explorer®. Network resources such as Network
Neighborhood or My Network Places do not display.
Manual Scan is an on-demand scan that starts immediately after a user clicks the Scan
button the client console. The time needed to complete the scan depends on the
number of files scanned and the hardware resources of the client computer.
Note
When an end user initiates a Manual Scan from the CPM client console, the scan settings
reflect the latest settings configured by the administrator for an On-Demand Scan. For
example, an administrator might schedule an On-Demand Scan on every Thursday 12:00
PM that scans all file types. Then the administrator might run an On-Demand scan with
different scan settings, maybe scanning only for .EXE files, at 14:00 PM. If an end user
runs a Manual Scan at 15:00 PM, and the administrator has not changed the settings, the
end user’s Manual Scan will only scan for .EXE files, not all file types.
Initiating a Manual Scan from the System Tray Icon
Procedure
1.
Right-click the client console icon ( ) in the system tray.
2.
Select Core Protection Module Console.
11-6
Using the Client Console
3.
Click the Manual Scan tab.
4.
Select the drives, folders, and files you want to scan manually.
If a plus sign [+] appears next to a drive or folder, it means that the drive or folder
has at least one subfolder.
5.
Click Scan.
6.
See the Manual Scan Results tab immediately after completing the scan.
See Viewing Scan Results on page 11-10 for details.
Note
Scan results are only available during the scan session. If the console is closed, scan
results are no longer available.
Initiating a Manual Scan from Windows Explorer
This option must be enabled from the CPM dashboard before it is available to the
endpoint user.
Procedure
1.
Open Windows Explorer on the endpoint computer.
2.
Right-click on any folder or file to be scanned.
3.
Select Scan with Core Protection Module to initiate the scan.
Results will let you know if the scan was successful:
4.
•
If nothing was found, click OK in the confirmation dialog box.
•
If the scan found an issue, the action for handling malware (configured by the
system administrator) occurs.
See the Manual Scan Results tab immediately after completing the scan for
details.
11-7
Core Protection Module 10.6 SP2 Administrator’s Guide
See Viewing Scan Results on page 11-10 for more information.
Manual Scan Results
The Manual Scan Results tab displays the result of the most recent Manual Scan. You
can choose to view virus/malware or spyware/grayware scanning results.
Note
Closing the client console removes the information displayed on this screen.
11-8
Using the Client Console
The upper half of the screen contains the scan summary and the lower half contains a
table with detailed information about any security risk detected during scanning.
FIGURE 11-3. Client Console - Manual Scan Results Tab
The following table describes the buttons beside the scan results.
TABLE 11-3. Scan Results Buttons and Usage
BUTTON
USAGE
Clear List
Click this button to remove the information in the table.
Information
To learn more about the security risk, click the security
risk name and then click this button
11-9
Core Protection Module 10.6 SP2 Administrator’s Guide
BUTTON
Clear
USAGE
CPM may not be able to automatically clean some files
because the file may be encrypted, in a location that does
not allow it to be cleaned, or is a Trojan or worm.
See scan results for details.
Delete
Delete the virus or malware file.
Rename
Click to change the extension of the file to .VIR, (or
to .VI0, .VI1, and so on if there is more than one) to
prevent yourself or other users from opening it
accidentally.
Note
The Clear, Delete, and Rename buttons apply only to virus/malware scan results if the
scan action (configured by the CPM administrator) is Pass. Pass means that CPM detected
the file but did not take any action. CPM allows you to clean, delete or rename the file.
Viewing Scan Results
Procedure
1.
Perform a Manual Scan as described in Initiating a Manual Scan from the System Tray
Icon on page 11-6.
2.
Click the Manual Scan Results tab.
Summary details display at the top of the screen. See the figure in Manual Scan
Results on page 11-8.
3.
If CPM configured the scan action to Pass, select a detected virus or malware.
4.
Click Clean, Delete or Rename.
11-10
Using the Client Console
Testing the CPM Client Console
After enabling the CPM console, your administrator may test it to verify that antivirus
protection works. EICAR, the European Institute for Computer Antivirus Research,
developed a test script as a safe way to confirm proper installation and configuration of
antivirus software. Visit the EICAR website for more information at:
http://www.eicar.org
The EICAR test script is an inert text file with a .com extension. It is not a virus and
does not contain any fragments of viral code, but most antivirus software reacts to it as
if it were a virus.
Important
Never use real viruses to test your antivirus installation.
Contact your CPM administrator for information about how to use the EICAR test
script.
Running Update Now
Keeping client components current is essential to ensuring that your computer stays
protected. The Update Now feature allows updating at any time. The client connects to
an update source to check for updates to security components that detect the latest
viruses, spyware, and malware. If updates are available, the client automatically
downloads the components.
Note
Update Now always updates from the cloud and not the ESP Server, whether the endpoint
runs remotely or connects to the LAN.
Procedure
1.
Right-click on the CPM client console icon in the system tray.
11-11
Core Protection Module 10.6 SP2 Administrator’s Guide
2.
Click Update Now from the console menu.
3.
In the Update Status tab, click Update Now.
When complete, a message displays saying, "Component update is complete."
11-12
Chapter 12
Troubleshooting
This chapter includes information to help with basic troubleshooting and problem
solving.
Topics in this chapter include:
•
Installation on page 12-2
•
Virus, Malware, and Spyware Scanning on page 12-4
•
CPM Clients on page 12-7
•
Pattern Updates on page 12-8
•
Firewall Troubleshooting on page 12-13
12-1
Core Protection Module 10.6 SP2 Administrator’s Guide
Installation
The CPM installer writes install logs to the following file:
%WINDOWS%\CPMInstallResult.log
The log typically includes the install start and finish time, current status, and any error
codes encountered. If the status upon completion is not 5 or 6, an error occurred.
Install Status
TABLE 12-1. Installation Status Codes
NUMBER CODE
DEFINITION
0
Preparing Installation
1
Installing CPM Component
2
Upgrading CPM Component
3
Installing OSCE Component
4
Upgrading OSCE Component
5
Done
6
Done But Need Reboot
7
Installing BF-AU-Server Component
8
Upgrading BF-AU-Server Component
Error Codes
TABLE 12-2. Installation Error Codes
NUMBER CODE
0
12-2
DEFINITION
Installation was successful
Troubleshooting
NUMBER CODE
DEFINITION
1
Incorrect platform detected
2
Package extraction was unsuccessful
3
Insufficient disk space
4
Administrator privilege required
5
A newer version of Core Protection Module exists
6
Computer restart required before installation/migration
7
Unable to start Core Protection Module service(s)
8
Unable to stop Core Protection Module service(s)
9
Installation time out occurred
10
Another installer package is running
11
Command line time out argument is invalid
12
File copy process was unsuccessful
13
Unknown error
14
Missing configuration file
15
Invalid command line argument
16
OfficeScan detected on the target server
17
Unable to proceed with the migration due to a CPM corruption error
18
Unable to uninstall the conflicting product
12-3
Core Protection Module 10.6 SP2 Administrator’s Guide
Virus, Malware, and Spyware Scanning
Enabling Debug Logging
Procedure
1.
From the CPM client, open Microsoft Regedit.
2.
Locate the following entry:
•
3.
Double-click DebugLogFlags and type the following under Value Data:
•
4.
HKEY_LOCAL_MACHINE\System\CurrentControlSet\Services
\Tmfilter\Parameters\
0x3EFF
Save and close as necessary.
A log file will be created in the following location:
•
C:\Windows\TMfilter.log
•
C:\WinNT\TMfilter.log
Virus/Spyware Logs on the CPM Client
The virus/spyware log directory is located here:
%Program Files%\Trend Micro\OfficeScan Client\Misc
The following logs are significant:
•
Pccnt35.log
20090108<;>1131<;>JS_AMILALA.A<;>1<;>1<;>0<;>C:\Documents
and Settings\Administrator.QAL-22-13.001\Local Settings
\Temporary Internet Files\Content.IE5\WPIBG52Z
\trojan[1].htm<;>
12-4
Troubleshooting
•
Spyware.log
20090108<;>1140<;>JokePrograms_Test_File<;>2<;>1<;>0<;>0<;>
20090108114038075460_JokePrograms_Test_File<;>Administrator
<;>
•
Spyware_detail.log
[20090108114038075460_JokePrograms_Test_File]
Timestamp=1231443630 ScanType=1 ActionResult=2 ItemCount=1
ItemLocation#0=C:\Documents and Settings\Administrator
\Desktop\JOKE_Test_File.exe ItemScannerType#0=10
ItemThreatType#0=6 ItemRiskLevel#0=0 ItemActionResult#0=257
Debug Logs
1.
ESP Client Logs:
%ProgramFiles%\ BigFix Enterprise\BESClient\__BESData
\__Global\Logs
2.
TrendMirrorScript logs:
%ProgramFiles%\BigFix Enterprise\TrendMirrorScript\logs
3.
CPM Agent Logs:
%ProgramFiles%\Trend Micro\Core Protection Module\Bin
\AU_Data\AU_Log\TmuDump.txt
4.
CPM AU Server Logs:
%ProgramFiles%\Trend Micro\Core Protection Module Server
\bin\AU_Data\AU_Log\TmuDump.txt
5.
ESP Agent on SPS Logs:
var/opt/BESClient/__BESData/__Global/Logs
6.
Smart Protection Relay Logs:
12-5
Core Protection Module 10.6 SP2 Administrator’s Guide
%ProgramFiles%\Trend Micro\Smart Protection Relay
\apricot.log
%ProgramFiles%\Trend Micro\Smart Protection Relay
\access.log
Components Installation Debug Logs (CPM Server)
Get and use the following logs to help understand CPM server installation issues.
Directory = %WINDOWS%
•
CPMInstallResult.log
•
CPMsrvInstall.log
•
ClnExtor.log
•
CPMsrvISSetup.log
Components Installation Debug Logs (CPM Client)
Get and use the following logs to help understand CPM client installation issues.
Directory = %WINDOWS%
•
ClnExtor.log*
•
CPMInstall.log*
•
CPMInstallResult.log*
•
CPMISSetup.log*
•
ofcdebug.log
•
OFCNT.log
•
setupapi.log
•
OFCISSetup.log
12-6
Troubleshooting
Log file names followed by an asterisk (*) also serve as CPM Client upgrade debug logs.
All logs files can be collected by CDT.
CPM Clients
Enabling Debugging on the CPM Client
Procedure
1.
Create the following directory:
C:\logserver
2.
Change to this directory and then create a text file with name and content shown
below:
File name = ofcdebug.ini
[debug] Debuglog = C:\logserver\ofcdebug.log Debuglevel = 9
3.
Save and close the file.
4.
Run the following program from a command prompt:
%ProgramFiles%\Trend Micro\OfficeScan Client\Logserver.exe
Collecting Information by CDT
Procedure
1.
Run the following program on the endpoint in question:
%ProgramFiles%\Trend Micro\Core Protection Module\CDT
\CaseDiagnosticTool.exe
2.
Copy the output file from its location at C:\CDT_Data\. The file name will be
similar to: CDT-20091003-030750.zip
12-7
Core Protection Module 10.6 SP2 Administrator’s Guide
3.
Send the compressed file to Trend Micro Technical Support.
Pattern Updates
There are a number of moving parts and components involved with the routine task of
updating the pattern files:
•
•
•
CPM server components include:
•
Proxy Settings
•
TMCPMAuHelper.exe
•
TrendMirrorScript.exe
CPM console components include:
•
Pattern Update Wizard
•
Pattern-set Loading via Manifest.json
CPM client components include:
•
BESClient.exe (for dynamic download requests for pattern-sets)
•
TMCPMAuUpdater.exe (for request and application of pattern-sets)
General
•
The default ActiveUpdate server (for pattern updates) appears in the ESP Server
registry:
HKEY_LOCAL_MACHINE\SOFTWARE\TrendMicro\CPMsrv
\ServerUpdateSource\DefaultAUServer
•
The default ActiveUpdate server URL for CPM version 10.6:
http://esp-p.activeupdate.trendmicro.com/activeupdate
•
12-8
CPM server - Check that the server exists in the Windows Registry:
Troubleshooting
HKEY_LOCAL_MACHINE\SOFTWARE\BigFix\CPM\server
•
CPM server - If the automatic update Task is successful, the CPM site will exist in
the ‘bfsites’ directory:
<%Program Files%>\BigFix Enterprise\BES Server\wwwrootbes
\bfsites\CustomSite_FileOnlyCustomSite_CPMAutoUpdate_0_1
•
CPM client - After automatic updates have been enabled on the client, the CPM
site will exist in the ESP subscribed sites directory:
<%Program Files%>\BigFix Enterprise\BES Client\__BESData
\CustomSite_FileOnlyCustomSite_CPMAutoUpdate
•
Check for pattern updates on the CPM server.
From the CPM Dashboard, click Update/Rollback Patterns > Create Pattern
Update/Rollback Task to open Pattern Update and Rollback Wizard.
•
If there are no new updates, inspect the Task Core Protection Module - Set
ActiveUpdate Server Pattern Update Interval.
•
If the Task was run but the updates are not working properly, check the
Action or the ESP Agent logs on the ESP Server.
•
Check the ESP Server to confirm whether pattern update are being received
as expected:
<%Program Files%>\BigFix Enterprise\BES Server
\wwwrootbes\cpm\patterns
•
Check the TrendMirrorScript.exe logs from
<%Program Files%>\BigFix Enterprise\TrendMirrorScript\logs
•
Confirm that older pattern files are still located on the ESP Server (by default a
reserve of 15 patterns are retained).
12-9
Core Protection Module 10.6 SP2 Administrator’s Guide
Automatic Pattern Updates
Procedure
1.
Check the console to verify if any CPM servers require action for Core Protection
Module > Warnings.
2.
Check on the ESP Server that the Task, Core Protection Module - Set
ActiveUpdate Server Pattern Update Interval has been created and run.
This task should be set to automatically reapply at a frequent interval (often, this is
hourly), and it should not be restricted in any way that would conflict with the
action.
3.
Check on the ESP Server that the Task, Core Protection Module - Apply
Automatic Updates has been run and that the Action has successfully completed.
4.
On the CPM server, the user account must be in place for the propagation site.
The PropagateManifest registry key must be set to 1.
•
For 32-bit endpoints:
HKEY_LOCAL_MACHINE\SOFTWARE\BigFix\CPM\server
•
For 64-bit endpoints:
HKEY_LOCAL_MACHINE\SOFTWARE\Wow6432Node\BigFix\CPM
\server
5.
For CPM clients that have been enabled for automatic updates, the
EnableAutoUpdate registry key must be set to 1:
•
For 32-bit endpoints:
HKEY_LOCAL_MACHINE\SOFTWARE\BigFix\CPM\client
•
For 64-bit endpoints:
HKEY_LOCAL_MACHINE\SOFTWARE\Wow6432Node\BigFix\CPM
\client
12-10
Troubleshooting
6.
Check for endpoints that need to rollback components using Core Protection
Module - Clear Rollback Flag.
Proxy Servers
If there is a proxy server between the ESP Server and Internet, two separate
configurations are necessary:
•
The ESP Server proxy authentication settings: Used by BESGather service, and
typically set during the ESP Server install
See the following knowledge base article for more information:
http://support.bigfix.com/cgi-bin/kbdirect.pl?id=231
•
CPM server component proxy authentication settings: Used by the update
program, TMCPMAuHelper.exe
Set or check this from Endpoint Protection > Core Protection Module >
Configuration > ActiveUpdate Server Settings > ActiveUpdate Server
Settings Wizard.
Additional Information: Continue Testing
If the latest pattern file already exists on the CPM server, you will need to perform the
following manual steps to continue testing.
Procedure
1.
Locate and delete the following folder:
•
2.
%CPM_SERVER_INSTALL_FOLDER%\bin\AU_Data
Delete all files and any subfolders from this directory (but not the folder itself):
•
%CPM_SERVER_INSTALL_FOLDER%\download
12-11
Core Protection Module 10.6 SP2 Administrator’s Guide
3.
From Endpoint Protection > Core Protection Module > Updates >
Automatic Update Tasks, run the Core Protection Module - Set
ActiveUpdate Server Pattern Update Interval Task.
Client-Side Logging: ActiveUpdate
Procedure
1.
On the CPM client, create/locate and open the following text file:
•
2.
%CPM_INSTALL_FOLDER%\bin\aucfg.ini
Add or change the following parameter:
•
[debug] level=-1
3.
Save and close the file.
4.
Log output will be saved here:
•
%CPM_INSTALL_FOLDER%\Bin\AU_Data\AU_Log\TmuDump.txt
Additional Files
•
Create a manifest file and list of URLs by typing the following at a command
prompt:
TMCPMAuUpdater –pu –m Manifest –f urllist
•
Check the file, server.ini in the following location:
%CPM_INSTALL_FOLDER%\Web\officescan\download
12-12
Troubleshooting
Firewall Troubleshooting
The best tool for understanding and troubleshooting the Trend Micro Common
Firewall in CPM is a port scanner. Many are available. Use your favorite, or try Nmap,
from nmap.org.
General
Procedure
1.
Disable third-party firewalls or other conflicting products.
2.
Check that you are running CPM version 10.6.
3.
•
In the ESP Console, select the Analysis: Endpoint Protection > Core
Protection Module > Analyses > CPM Endpoints > Core Protection
Module – Endpoint Information.
•
Upgrade endpoints as necessary by running the Task, Endpoint Protection
> Core Protection Module > Deployment > Upgrade > Core Protection
Module - Upgrade Endpoint.
Confirm that the firewall is enabled.
•
4.
In the ESP Console, select Endpoint Protection > Core Protection
Module > Analyses > Common Firewall > Common Firewall Endpoint Firewall Settings.
Check the Action History for Tasks already run, especially if you are using a
location property (see Creating Location-Specific Tasks on page 9-5) with your firewall
Tasks. Be sure that conflicting policies have not been deployed to the same
endpoint(s).
•
From the ESP Console, Endpoint Protection > Core Protection Module
> Configuration > Common Firewall > <firewall task name> its Action
History.
•
If you see in the history that multiple firewall Tasks are overwriting one
another, chances are that multiple policies are claiming relevance and updating
12-13
Core Protection Module 10.6 SP2 Administrator’s Guide
the policy on the endpoint. In this case, delete all your Actions and re-apply
the Tasks.
5.
Confirm that the firewall services are running on the computers in question.
•
From the ESP console, click Endpoint Protection > Core Protection
Module > Troubleshooting > Core Protection Module - Improper
Service Status to run the Improper Service Status Fixlet.
•
At the endpoint(s) in question check that the following Windows Services are
running:
•
OfficeScan NT Listener
•
OfficeScan NT RealTime Scan
•
OfficeScan NT Firewall
Client Is not Connecting to the ESP Server or Relays
By default, ESP Server-Agent and CPM server-client communication occur using port
52311. This port is automatically allowed by the Trend Micro Common Firewall.
If you have installed ESP using a different port, the firewall will automatically recognize
that port. However, if you have re-installed the ESP Server and in that installation
designated a different port, the firewall will not pick up that change. Add an exception in
your firewall policies.
12-14
Chapter 13
Contacting Trend Micro
This appendix provides information to optimize the Trend Micro Core Protection
Module (CPM) performance and get further assistance with any technical support
questions you might have.
Topics in this chapter include:
•
Contacting Technical Support on page 13-2
•
Documentation Feedback on page 13-3
•
Knowledge Base on page 13-3
•
TrendLabs on page 13-3
•
Security Information Center on page 13-4
•
Security Risks on page 13-4
13-1
Core Protection Module 10.6 SP2 Administrator’s Guide
Contacting Technical Support
Trend Micro provides technical support, pattern downloads, and program updates for
one year to all registered users, after which you must purchase renewal maintenance. If
you need help or just have a question, please feel free to contact us. We also welcome
your comments.
•
Get a list of the worldwide support offices at http://esupport.trendmicro.com
•
Get the latest Trend Micro product documentation at http://docs.trendmicro.com
In the United States, you can reach the Trend Micro representatives through phone, fax,
or email:
Trend Micro, Inc.
10101 North De Anza Blvd.,
Cupertino, CA 95014
Toll free: +1 (800) 228-5651 (sales)
Voice: +1 (408) 257-1500 (main)
Fax: +1 (408) 257-2003
Web address: http://www.trendmicro.com
Email: [email protected]
Speeding Up Your Support Call
When you contact Trend Micro, to speed up your problem resolution, ensure that you
have the following details available:
•
Operating System and Service Pack version
•
Network type
•
Computer brand, model, and any additional hardware connected to your computer
•
Browser version
•
Amount of memory and free hard disk space on your computer
•
Detailed description of the install environment
13-2
Contacting Trend Micro
•
Exact text of any error message given
•
Steps to reproduce the problem
Documentation Feedback
Trend Micro always seeks to improve its documentation. If you have questions,
comments, or suggestions about this or any Trend Micro document, please go to the
following site:
http://www.trendmicro.com/download/documentation/rating.asp
Knowledge Base
The Trend Micro Knowledge Base is a 24x7 online resource that contains thousands of
do-it-yourself technical support procedures for Trend Micro products. Use the
Knowledge Base, for example, if you are getting an error message and want to find out
what to do. New solutions are added daily.
Also available in the Knowledge Base are product FAQs, important tips, preventive
antivirus advice, and regional contact information for support and sales.
The Knowledge Base can be accessed by all Trend Micro customers as well as anyone
using an evaluation version of a product. Visit:
http://esupport.trendmicro.com/
And, if you can't find an answer to a particular question, the Knowledge Base includes
an additional service that allows you to submit your question via an email message.
Response time is typically 24 hours or less.
TrendLabs
Trend Micro TrendLabs℠ is a global network of antivirus research and product support
centers providing continuous, 24 x 7 coverage to Trend Micro customers worldwide.
13-3
Core Protection Module 10.6 SP2 Administrator’s Guide
Staffed by a team of more than 250 engineers and skilled support personnel, the
TrendLabs dedicated service centers worldwide ensure rapid response to any virus
outbreak or urgent customer support issue, anywhere in the world.
The TrendLabs modern headquarters earned ISO 9002 certification for its quality
management procedures in 2000. TrendLabs is one of the first antivirus research and
support facilities to be so accredited. Trend Micro believes that TrendLabs is the leading
service and support team in the antivirus industry.
For more information about TrendLabs, please visit:
http://us.trendmicro.com/us/about/company/trendlabs/
Security Information Center
Comprehensive security information is available at the Trend Micro website:
•
List of viruses and malicious mobile code currently "in the wild," or active
•
Computer virus hoaxes
•
Internet threat advisories
•
Virus weekly report
•
Virus Encyclopedia, which includes a comprehensive list of names and symptoms
for known viruses and malicious mobile code
•
Glossary of terms
•
http://www.trendmicro.com/vinfo/
Security Risks
This section describes common security risks (viruses/malware, spyware/grayware, and
web threats). CPM protects computers from each of the security risks described below.
13-4
Contacting Trend Micro
Understanding the Terms
Computer security is a rapidly changing subject. Administrators and information security
professionals invent and adopt a variety of terms and phrases to describe potential risks
or uninvited incidents to computers and networks. The following is a list of these terms
and their meanings as used in this document.
Some of these terms refer to real security risks and some refer to annoying or unsolicited
incidents. Trojans, viruses/malware, and worms are examples of terms used to describe
real security risks. Joke programs, spyware/grayware are terms used to describe incidents
that might be harmful, but are sometimes simply annoying and unsolicited. CPM can
protect Exchange servers against all of the incidents described in this chapter.
About Internet Security Risks
Thousands of viruses/malware are known to exist, with more being created each day.
These include spyware/grayware, phish sites, network viruses/malware, Trojans, and
worms.
Collectively, these threats are known as security risks. Here is a summary of the major
security risk types:
TABLE 13-1. Internet Security Risks
THREAT TYPE
CHARACTERISTICS
Denial-of-Service (DoS)
attack
A DoS attack happens when a mail server’s resources are
overwhelmed by unnecessary tasks. Preventing CPM from
scanning files that decompress into very large files helps
prevent this problem from happening.
Phish
Unsolicited email requesting user verification of private
information, such as credit card or bank account numbers,
with the intent to commit fraud.
Spyware/Grayware
Technology that aids in gathering information about a
person or organization without their knowledge.
13-5
Core Protection Module 10.6 SP2 Administrator’s Guide
THREAT TYPE
CHARACTERISTICS
Trojan Horse program
Malware that performs unexpected or unauthorized, often
malicious, actions. Trojans cause damage, unexpected
system behavior, and compromise system security, but
unlike viruses/malware, they do not replicate.
Virus/Malware
A program that carries a destructive payload, and
replicates - spreading quickly to infect other systems. By
far, viruses/malware remain the most prevalent threat to
computing.
Worm
A self-contained program or set of programs that is able to
spread functional copies of itself or its segments to other
computer systems, typically through network connections
or email attachments.
Other malicious codes
CPM detects some malicious code that is difficult to
categorize, but pose a significant threat to Exchange. This
category is useful when you want CPM to perform an
action against a previously unknown threat type.
Packed files
Potentially malicious code in real-time compressed
executable files that arrive as email attachments.
IntelliTrap scans for packing algorithms to detected packed
files. Enabling IntelliTrap allows administrators to take
user-defined actions on infected attachments, and to send
notifications to senders, recipients, or administrators.
Viruses/Malware
A computer virus/malware is a segment of code that has the ability to replicate by
infecting files. When a virus/malware infects a file, it attaches a copy of itself to the file
in such a way that when the former executes, the virus/malware also runs. When this
happens, the infected file also becomes capable of infecting other files. Like biological
viruses, computer viruses/malware can spread quickly and are often difficult to
eradicate.
In addition to replication, some computer viruses/malware share another commonality:
a damage routine that delivers a payload. While payloads may only display messages or
images, they can also destroy files, reformat your hard drive, or cause other damage.
13-6
Contacting Trend Micro
Even if the virus does not contain a damage routine, it can cause trouble by consuming
storage space and memory, and degrading the overall performance of your computer.
Generally, there are three kinds of viruses/malware:
TABLE 13-2. Types of Virus/Malware
TYPE
DESCRIPTION
File
File viruses/malware may come in different types—there are DOS viruses/
malware, Windows viruses/malware, macro viruses/malware, and script
viruses/malware. All of these share the same characteristics of viruses/
malware except that they infect different types of host files or programs.
Boot
Boot viruses/malware infect the partition table of hard disks and boot sector
of hard disks and floppy disks.
Script
Script viruses/malware are viruses/malware written in script programming
languages, such as Visual Basic Script and JavaScript and are usually
embedded in HTML documents.
VBScript (Visual Basic Script) and Jscript (JavaScript) viruses/malware
make use of Microsoft's Windows Scripting Host to activate themselves and
infect other files. Since Windows Scripting Host is available on Windows 98,
Windows 2000 and other Windows operating systems, the viruses/malware
can be activated simply by double-clicking a *.vbs or *.js file from
Windows Explorer.
What is so special about script viruses/malware? Unlike programming
binary viruses/malware, which requires assembly-type programming
knowledge, virus/malware authors program script viruses/malware as text. A
script virus can achieve functionality without low-level programming and with
code as compact as possible. It can also use predefined objects in Windows
to make accessing many parts of the infected system easier (for example,
for file infection, for mass-mailing). Furthermore, since the code is text, it is
easy for others to read and imitate the coding paradigm. Because of this,
many script viruses/malware have several modified variants.
For example, shortly after the "I love you" virus appeared, antivirus vendors
found modified copies of the original code, which spread themselves with
different subject lines, or message bodies.
Whatever their type is, the basic mechanism remains the same. A virus contains code
that explicitly copies itself. In the case of file viruses/malware, this usually entails making
modifications to gain control when a user accidentally executes the infected program.
13-7
Core Protection Module 10.6 SP2 Administrator’s Guide
After the virus code has finished execution, in most cases, it passes back the control to
the original host program to give the user an impression that nothing is wrong with the
infected file.
Take note that there are also cross-platform viruses/malware. These types of viruses/
malware can infect files belonging to different platforms (for example, Windows and
Linux). However, such viruses/malware are very rare and seldom achieve 100%
functionality.
About Spyware/Grayware
Your clients are at risk from potential threats other than viruses/malware. Grayware can
negatively affect the performance of the computers on your network and introduce
significant security, confidentiality, and legal risks to your organization.
TABLE 13-3. Types of Grayware
TYPE
13-8
DESCRIPTION
Spyware
Gathers data, such as account user names and passwords, and
transmits them to third parties
Adware
Displays advertisements and gathers data, such as user web
surfing preferences, to target advertisements at the user
through a web browser
Dialers
Change computer Internet settings and can force a computer to
dial pre-configured phone numbers through a modem
Joke Programs
Cause abnormal computer behavior, such as closing and
opening the CD-ROM tray and displaying numerous message
boxes
Hacking Tools
Help hackers enter computers
Remote Access Tools
Help hackers remotely access and control computers
Password Cracking
Applications
Help hackers decipher account user names and passwords
Other
Other types not covered above
Contacting Trend Micro
Potential Risks and Threats
The existence of spyware/grayware on your network has the potential to introduce the
following:
TABLE 13-4. Types of Risks
TYPE
DESCRIPTION
Reduced computer
performance
To perform their tasks, spyware/grayware applications often
require significant CPU and system memory resources.
Increased web
browser-related
crashes
Certain types of grayware, such as adware, are often designed
to create pop-up windows or display information in a browser
frame or window. Depending on how the code in these
applications interacts with system processes, grayware can
sometimes cause browsers to crash or freeze and may even
require a system reboot.
Reduced user
efficiency
By needing to close frequently occurring pop-up advertisements
and deal with the negative effects of joke programs, users can
be unnecessarily distracted from their main tasks.
Degradation of
network bandwidth
Spyware/grayware applications often regularly transmit the data
they collect to other applications running on your network or to
locations outside of your network.
Loss of personal and
corporate information
Not all data that spyware/grayware applications collect is as
innocuous as a list of websites users visit. Spyware/grayware
can also collect the user names and passwords users type to
access their personal accounts, such as a bank account, and
corporate accounts that access resources on your network.
Higher risk of legal
liability
If hackers gain access to the computer resources on your
network, they may be able to utilize your client computers to
launch attacks or install spyware/grayware on computers
outside your network. Having your network resources unwillingly
participate in these types of activities could leave your
organization legally liable to damages incurred by other parties.
How Spyware/Grayware Gets into your Network
Spyware/grayware often gets into a corporate network when users download legitimate
software that has grayware applications included in the installation package.
13-9
Core Protection Module 10.6 SP2 Administrator’s Guide
Most software programs include an End User License Agreement (EULA), which the
user has to accept before downloading. Often the EULA does include information
about the application and its intended use to collect personal data; however, users often
overlook this information or do not understand the legal jargon.
Guarding Against Spyware/Grayware and Other Threats
There are many steps you can take to prevent the installation of spyware/grayware onto
your computer. Trend Micro suggests the following:
•
Configure On-Demand, Real-time, and Scheduled On-Demand Scans to find and
remove spyware/grayware files and applications.
•
Educate your client users to do the following:
•
Read the End User License Agreement (EULA) and included documentation
of applications they download and install on their computers.
•
Click No to any message asking for authorization to download and install
software unless client users are certain both the creator of the software and
the website they view are trustworthy.
•
Disregard unsolicited commercial email (spam), especially if the spam asks
users to click a button or hyperlink.
•
Configure web browser settings that ensure a strict level of security. Trend Micro
recommends requiring web browsers to prompt users before installing ActiveX
controls.
•
If using Microsoft Outlook, configure the security settings so that Outlook does
not automatically download HTML items, such as pictures sent in spam messages.
•
Do not allow the use of peer-to-peer file-sharing services. Spyware and other
grayware applications may be masked as other types of files your users may want to
download, such as MP3 music files.
•
Periodically examine the installed software on your agent computers and look for
applications that may be spyware or other grayware.
•
Keep your Windows operating systems updated with the latest patches from
Microsoft. See the Microsoft website for details.
13-10
Appendix A
Routine CPM Tasks (Quick Lists)
The Appendix includes a "quick list" of How To’s for the most common and routine
management tasks you are likely to encounter.
In addition, you will find several processes that are intended to reduce some procedures
to a simple reference. Refer to the complete procedure if you need configuration steps,
an explanation of choices, or other details.
Procedure sections in this appendix include:
•
Scan Management on page A-2
•
Malware Handling and Correction on page A-6
•
CPM Server Management on page A-7
•
CPM Client Management on page A-9
•
Pattern File Management on page A-13
•
Web Reputation on page A-16
•
CPM Firewall on page A-18
A-1
Core Protection Module 10.6 SP2 Administrator’s Guide
Scan Management
Scan management procedures included in this section include:
For General Scan Configurations:
•
Changing or Configuring General Scan Settings on page A-3
For Real-time and On-Demand Scans:
•
Configuring an On-Demand Scan on page A-3
•
Starting a Scan with Current Endpoint Settings on page A-3
•
Creating and Running a One-time On-Demand Scan on page A-4
•
Scheduling an On-Demand Scan on page A-4
•
Changing or Configuring Extra Scan Settings on page A-4
General Scan Configurations
The steps below are for experienced ESP administrators who just need a reminder list of
tasks involving the CPM scan configurations.
A-2
•
Embedded OLE objects (how to handle)
•
Microsoft Exchange folders (prevent scanning)
•
Compressed file scanning (how to handle)
•
Compressed file scanning (large)
•
Action to take on spyware and malware
•
Cookie scanning
•
Disk space available for pattern files and updates
•
Client console settings
Routine CPM Tasks (Quick Lists)
Changing or Configuring General Scan Settings
Procedure
1.
From the ESP Console menu, click Endpoint Protection > Core Protection
Module > Configuration > Global Settings > Global Settings Wizard.
Use the Global Scan settings Wizard.
2.
Deploy the Global Settings by clicking Endpoint Protection > Core Protection
Module > Configuration > Global Settings > [scan name].
Real-time and On-Demand Scans
Configuring an On-Demand Scan
Procedure
1.
Click Endpoint Protection > Core Protection Module > Configuration > OnDemand Settings.
Use the On-Demand Settings Wizard > Create Configuration Task....
2.
To deploy the new settings, click Endpoint Protection > Core Protection
Module > Configuration > On-Demand Settings > [scan name].
Starting a Scan with Current Endpoint Settings
Procedure
1.
Click Endpoint Protection > Core Protection Module > Common Tasks >
Core Protection Module > Core Protection Module - Start Scan Now.
A-3
Core Protection Module 10.6 SP2 Administrator’s Guide
Creating and Running a One-time On-Demand Scan
Procedure
1.
Click Endpoint Protection > Core Protection Module > Configuration > OnDemand Settings.
Use the On-Demand Settings Wizard > Create Scan Now Task....
2.
To deploy the new settings, click Endpoint Protection > Core Protection
Module > Configuration > On-Demand Settings > [scan name].
Scheduling an On-Demand Scan
Procedure
1.
Click Endpoint Protection > Core Protection Module > Configuration > OnDemand Settings > [scan name].
2.
Click the Take Action button and select Click here to configure these policy
settings option.
3.
In the Take Action window, click the Target tab and select the target computers.
4.
In the Take Action window, click the Execution tab.
5.
•
Choose a Start date, and optionally, configure the days you want the scan to
run in the Run only on field.
•
Select Reapply this action while relevant, waiting 2 days between
reapplications (choosing whatever time period suits you).
Click OK to deploy the task.
Changing or Configuring Extra Scan Settings
Configure the following scan settings by following the procedures below:
•
A-4
Client performance (CPU throttling)
Routine CPM Tasks (Quick Lists)
•
Virus and malware scanning
•
Spyware and grayware scanning
•
How threats are handled (delete, quarantine)
•
Real-time scanning (scan files as they are created, modified, or received)
•
Which files are scanned (performance, security)
•
Boot sector scanning
•
Floppy disk scanning (real-time)
•
Network drive scanning
•
Compressed files (performance, security)
On-Demand Scans
Procedure
1.
In the ESP console, click Endpoint Protection > Core Protection Module >
Configuration > On-Demand Settings.
Use the On-Demand Settings Wizard.
2.
Deploy the On-Demand settings by clicking Endpoint Protection > Core
Protection Module > Configuration > On-Demand Settings > [scan name].
Real-Time Scans
Procedure
1.
In the ESP console, click Endpoint Protection > Core Protection Module >
Configuration > Real-Time Settings.
Use the Real-Time Scan Settings Wizard.
A-5
Core Protection Module 10.6 SP2 Administrator’s Guide
2.
Deploy the Real-Time settings by clicking Endpoint Protection > Core
Protection Module > Configuration > Real-Time Settings > [scan name].
Malware Handling and Correction
The steps below are for experienced ESP administrators who just need a list for tasks
involving malware handling and correction. Procedures include:
•
Exempting Files from Detection on page A-6
•
Recovering “Spyware” Files on page A-6
•
Using the Anti-Threat Toolkit (ATTK) on page A-7
Exempting Files from Detection
Procedure
1.
Click Endpoint Protection > Core Protection Module > Configuration >
Spyware Approved List.
2.
Identify the file(s) you want to prevent from being detected as spyware.
3.
Click the Create Spyware Approved List Configuration Task... button.
4.
Deploy the settings by clicking Endpoint Protection > Core Protection Module
> Configuration > Spyware Approved List > [task name].
Recovering “Spyware” Files
Procedure
1.
A-6
In the ESP console, click Endpoint Protection > Core Protection Module >
Common Tasks > Core Protection Module > Restore Spyware/Grayware....
Routine CPM Tasks (Quick Lists)
The Spyware/Grayware Restore Wizard appears.
Using the Anti-Threat Toolkit (ATTK)
Procedure
•
To deploy ATTK to clients, click Endpoint Protection > Core Protection
Module > Common Tasks > Core Protection Module > Core Protection
Module - Execute Anti-Threat Toolkit (ATTK).
•
To upload ATTK logs to the server, click Endpoint Protection > Core
Protection Module > Common Tasks > Core Protection Module > Core
Protection Module - Upload Anti-Threat Toolkit (ATTK) Logs.
CPM Server Management
The steps below are for experienced ESP administrators who just need a list for tasks
involving the CPM server. Procedures include:
•
Activating Analyses on page A-7
•
Removing CPM Server Components on page A-8
•
Upgrading CPM Server Components on page A-8
•
Removing the CPM Site on page A-8
Activating Analyses
Procedure
1.
In the ESP Console navigation pane, click Endpoint Protection > Core
Protection Module > Analyses.
2.
In the upper right pane, sort the Name column in alphabetical order.
A-7
Core Protection Module 10.6 SP2 Administrator’s Guide
3.
Select all the Core Protection Module analyses.
4.
Right-click the list you have selected and click Activate.
Removing CPM Server Components
Procedure
1.
Click Endpoint Protection > Core Protection Module > Deployment >
Uninstall.
2.
Click Core Protection Module - Remove Server Components in the list of
Actions that appears.
Upgrading CPM Server Components
Procedure
1.
Click Endpoint Protection > Core Protection Module > Deployment >
Upgrade.
2.
Click Core Protection Module - Upgrade Server Components in the list of
Actions that appears.
Removing the CPM Site
Procedure
A-8
1.
In the ESP Console, click Endpoint Protection > All Endpoint Protection >
Sites > External and select the Trend Core Protection Module.
2.
Click the Remove button.
Routine CPM Tasks (Quick Lists)
3.
At the prompt, type your private key password and click OK.
CPM Client Management
The steps below are for experienced ESP administrators who just need a list for tasks
involving the CPM clients. Procedures include:
•
Displaying the ESP Icon on Endpoints on page A-9
•
Viewing ESP Hidden Client Statistics for a Given Account on page A-9
•
Decrypting Quarantined Files on page A-10
•
Deploying CPM Clients on page A-11
•
Removing CPM Clients on page A-11
•
Enabling the Client Console on page A-11
•
Enabling Notifications on the Client on page A-12
Displaying the ESP Icon on Endpoints
Procedure
1.
In the ESP console, click Endpoint Protection > Core Protection Module >
Common Tasks > Core Protection Module > Core Protection Module Enable Client Dashboard.
A screen displaying the Task Description tab appears.
Viewing ESP Hidden Client Statistics for a Given Account
Procedure
1.
From the endpoint you want to check, press the following keys:
A-9
Core Protection Module 10.6 SP2 Administrator’s Guide
CTRL ALT SHIFT T
Decrypting Quarantined Files
WARNING!
Decrypting an infected file may spread the virus/malware to other files. Trend Micro
recommends isolating the computer with infected files by unplugging it from the network.
Move important files to a backup location.
When you decrypt or encrypt a file, CPM creates the decrypted or encrypted file in the
same folder. For example: type VSEncode [-d] [-debug] to decrypt files in the
suspect folder and create a debug log.
Required the following files:
•
Main file: VSEncode.exe
•
Required DLL files: Vsapi32.dll
Run Restore Encrypted Virus using the following parameters:
•
no parameter {encrypt files in the Suspect folder}
•
-d (decrypt files in the Suspect folder)
•
-debug {create debug log and output in the client temp folder}
•
/o {overwrite encrypted or decrypted file if it already exists}
•
/f <filename> {encrypt or decrypt a single file}
•
/nr {do not restore original file name}
A-10
Routine CPM Tasks (Quick Lists)
Deploying CPM Clients
Procedure
1.
Click Endpoint Protection > Core Protection Module > Deployment >
Install.
2.
Click Core Protection Module - Endpoint Deploy.
Removing CPM Clients
Procedure
1.
In the ESP console, click Endpoint Protection > Core Protection Module >
Deployment > Uninstall.
2.
Click Core Protection Module - Endpoint Uninstall in the list of Actions that
appears.
Enabling the Client Console
Procedure
1.
In the ESP Console navigation pane, click Endpoint Protection > Core
Protection Module > Configuration > Global Settings > Global Settings
Wizard.
2.
In the Global Scan Settings Wizard, scroll down to the Client Console
Settings.
3.
Check the appropriate check boxes:
•
Click Enable system tray icon to display the icon used to access the client
console on the relevant endpoints
•
Click Enable the manual scan shortcut in Windows Explorer context
menu to allow initiating a manual scan from Windows Explorer.
A-11
Core Protection Module 10.6 SP2 Administrator’s Guide
4.
Click the Create Global Settings Configuration Task... button.
The Edit Task window opens.
5.
Type a descriptive (or memorable) name for the Task such as Enable Client
Console.
6.
Click OK.
7.
At the prompt, type your private key password and click OK.
The new settings now appear at Endpoint Protection > Core Protection
Module > Configuration > Global Settings list.
Enabling Notifications on the Client
Use the On-Demand or Real-Time Scan Settings Wizards to display notifications on the
client computer about virus/malware or spyware/grayware detections.
Procedure
1.
In the ESP navigation pane, click Endpoint Protection > Core Protection
Module > Configuration > On-Demand Scan Settings or Real-Time Scan
Settings.
2.
Click the Wizard link.
3.
Click the Scan Action tab.
4.
Select the appropriate check box(es):
5.
•
In the Virus/Malware pane, select Display a notification message on the
client computer when virus/malware is detected (Windows only).
•
In the Spyware/Grayware Action (Windows only) pane, select Display a
notification message on the client computer when spyware/grayware is
detected.
Click the Create Configuration Task... button.
The Edit Task window appears.
A-12
Routine CPM Tasks (Quick Lists)
6.
Type a descriptive (or memorable) name for the Task such as Enable endpoint
notification.
7.
Click OK.
8.
At the prompt, type your private key password and click OK.
The new settings now appear in the Endpoint Protection > Core Protection
Module > Configuration > On-Demand Scan Settings or Real-Time Scan
Settings list.
Pattern File Management
The steps below are for experienced ESP administrators who just need a list for tasks
involving the pattern files. Procedures include:
•
Configuring Updates from the Cloud on page A-13
•
Deploying Selected Pattern Files on page A-14
•
Reverting to a Previous Pattern File Version on page A-14
•
Re-enabling Updates Following a Rollback on page A-14
•
Updating Pattern Files on the CPM Server on page A-15
•
Updating Pattern Files on the CPM Clients on page A-16
Configuring Updates from the Cloud
Procedure
•
In the ESP Console navigation pane, click Endpoint Protection > Core
Protection Module > Updates > Other Update Tasks > Core Protection
Module - Update From Cloud.
A screen displaying the Task Description tab appears.
A-13
Core Protection Module 10.6 SP2 Administrator’s Guide
Deploying Selected Pattern Files
By default, all pattern files are included when the pattern is deployed from the ESP
Server to CPM clients. You can, however, select and deploy a subset of patterns.
Procedure
1.
In the ESP Console navigation pane, click Endpoint Protection > Core
Protection Module > Updates > Pattern Update Settings > Create Pattern
Update Settings Task.
2.
In the list of components that appears, select those that you want to include in the
pattern update.
By default, all patterns are selected.
3.
Click the Create Update Settings Task... button in the upper right corner.
4.
Deploy the setting by clicking Endpoint Protection > Core Protection Module
> Updates > Pattern Update Settings > [Task name].
Reverting to a Previous Pattern File Version
Procedure
•
In the ESP Console navigation pane, click Endpoint Protection > Core
Protection Module > Updates > Update/Rollback Patterns > Create Pattern
Update/Rollback Task.
Re-enabling Updates Following a Rollback
After a rollback, you must clear the rollback flag setting attached to patterns on your
CPM clients to re-enable manual, cloud, and/or automatic pattern updates. The same
holds true even for pattern files that were not included in the rollback.
A-14
Routine CPM Tasks (Quick Lists)
Procedure
1.
In the ESP Console navigation pane, click Endpoint Protection > Core
Protection Module > Updates > Other Update Tasks.
2.
Select Core Protection Module - Clear Rollback Flag.
A screen displaying the Task Description tab appears.
3.
Below Actions, click the hyperlink to open the Take Action window.
a.
In the Target tab, click All computers with the property values selected
in the tree list below and then choose a property that will include all the
computers you want to deploy this Action to.
b.
Click OK.
c.
At the prompt, type your private key password and click OK.
Updating Pattern Files on the CPM Server
Procedure
1.
Configure the ActiveUpdate server and proxy settings. In the ESP Console
navigation pane, click Endpoint Protection > Core Protection Module >
Configuration > ActiveUpdate Server Settings > ActiveUpdate Server
Settings Wizard.
2.
Download the Automatic Update script. In the ESP Console navigation pane, click
Endpoint Protection > Core Protection Module > Updates > Automatic
Update Tasks. Then select Core Protection Module - Download
CPMAutoUpdateSetup Script.
If this step completes successfully, Core Protection Module - Enable Automatic
Updates - Server is set by default.
3.
Update the pattern file on the CPM server. In the ESP Console navigation pane,
click Endpoint Protection > Core Protection Module > Updates > Automatic
A-15
Core Protection Module 10.6 SP2 Administrator’s Guide
Update Tasks. Select Core Protection Module - Set ActiveUpdate Server
Pattern Update Interval.
Updating Pattern Files on the CPM Clients
Procedure
1.
Enable CPM clients to receive automatic pattern updates (this is typically a onetime Task). In the ESP Console navigation pane, click Endpoint Protection >
Core Protection Module > Updates > Automatic Update Tasks.
2.
Schedule and apply automatic pattern file updates. In the ESP Console navigation
pane, click Endpoint Protection > Core Protection Module > Updates >
Automatic Update Tasks.
3.
Select Core Protection Module - Apply Automatic Updates.
The Task deploys the latest pattern set to the endpoints.
4.
Manually update CPM clients with the latest pattern files: In the ESP Console
navigation pane, click Endpoint Protection > Core Protection Module >
Updates > Update/Rollback Patterns > Create Pattern Update/Rollback
Task....
The Task deploys the specified pattern set to the endpoints.
Web Reputation
The steps below are for experienced ESP administrators who just need a list for tasks
involving the Web Reputation. Procedures include:
•
Enabling HTTP Web Reputation (port 80) on page A-17
•
Enabling HTTP Web Reputation (all ports other than 80) on page A-17
•
Enabling HTTPS Web Reputation on page A-17
A-16
Routine CPM Tasks (Quick Lists)
•
Configuring Web Reputation on page A-18
Enabling HTTP Web Reputation (port 80)
Procedure
•
In the ESP Console navigation pane, click Endpoint Protection > Core
Protection Module > Common Tasks > Web Reputation. Select Web
Reputation - Enable HTTP Web Reputation Scanning (port 80).
Enabling HTTP Web Reputation (all ports other than 80)
Procedure
•
In the ESP Console navigation pane, click Endpoint Protection > Core
Protection Module > Common Tasks > Web Reputation. Select Web
Reputation - Enable HTTP Web Reputation Scanning (all ports other than
80).
Enabling HTTPS Web Reputation
Procedure
•
In the ESP Console navigation pane, click Endpoint Protection > Core
Protection Module > Common Tasks > Web Reputation. Select Web
Reputation - Enable HTTPS Web Reputation Scanning.
A-17
Core Protection Module 10.6 SP2 Administrator’s Guide
Configuring Web Reputation
Procedure
•
In the ESP Console navigation pane, click Endpoint Protection > Core
Protection Module > Common Tasks > Web Reputation. Select Web
Reputation - Configure Web Reputation Security Level.
A screen displaying the Task Description tab appears.
CPM Firewall
The steps below are for experienced ESP administrators who just need a list for tasks
involving the CPM Common Firewall. Procedures include:
•
Creating a Firewall Policy on page A-18
•
Deploying a Firewall Policy on page A-19
•
Disabling the Firewall on All or Selected Endpoints on page A-19
Creating a Firewall Policy
Procedure
1.
In the ESP Console navigation pane, click Endpoint Protection > Core
Protection Module > Configuration > Common Firewall Settings > New
Policy Task....
2.
Click the Add button.
3.
Choose the following:
A-18
•
Firewall Enabled
•
Security Level
•
Apply to All Possible IP Addresses
Routine CPM Tasks (Quick Lists)
4.
Add any exceptions (relative to the Security Level) in the Exception Rules section
of the Firewall Policy Setting Wizard.
Deploying a Firewall Policy
Procedure
1.
In the ESP Console navigation pane, click Endpoint Protection > Core
Protection Module > Configuration > Common Firewall Settings > New
Policy Task....
2.
Select the policy you want from the Policy List.
3.
Move your policy to the top of the list and click the Save Order button.
4.
Click the Create Firewall Policy Task... button at the top of the screen.
5.
Deploy the policy by clicking Endpoint Protection > Core Protection Module
> Configuration > Common Firewall Settings > [Task name].
Disabling the Firewall on All or Selected Endpoints
Procedure
1.
In the ESP Console navigation pane, click Endpoint Protection > Core
Protection Module > Configuration > Common Firewall Settings > New
Policy Task....
2.
Click the Add button.
3.
Type a policy name and remove the check from Firewall Enabled.
4.
Click Save.
5.
Select the policy you just created in the Policy List and clear the check from any
other policies if necessary.
6.
Click the Create Firewall Policy Task... button at the top of the screen.
A-19
Core Protection Module 10.6 SP2 Administrator’s Guide
7.
A-20
Deploy the policy by clicking Endpoint Protection > Core Protection Module
> Configuration > Common Firewall Settings > [Task name].
Appendix B
Reference Tables
The reference tables in this appendix include:
•
Default ActiveAction Behaviors on page B-2
•
Available Virus/Malware Scan Actions on page B-2
•
Pattern and Scan Engine Files on page B-4
•
Scan Action Results for Compressed Files on page B-6
•
Default Firewall Global Exceptions on page B-7
•
Client IPv6 Requirements on page B-9
B-1
Core Protection Module 10.6 SP2 Administrator’s Guide
Default ActiveAction Behaviors
VIRUS/MALWARE TYPE
REAL-TIME
SCAN SECOND
ACTION
REAL-TIME
SCAN - FIRST
ACTION
ON-DEMAND
SCAN - FIRST
ACTION
ON-DEMAND
SCAN SECOND
ACTION
Joke program
*Quarantine
N/A
Quarantine
N/A
Trojan horse
Quarantine
N/A
Quarantine
N/A
Virus
Clean
Quarantine
Clean
Quarantine
Test virus
Deny Access
N/A
Pass
N/A
Packer
Quarantine
N/A
Quarantine
N/A
Others
Clean
Quarantine
Clean
Quarantine
Probable virus/malware
Pass
N/A
Pass
N/A
* CPM renames and then moves infected files to the following, non-configurable,
directory on the client’s computer:
C:\Program Files\Trend Micro\Core Protection Module\Quarantine
If you need to access any of the quarantined files, you can access the directory using
system administrator credentials and restore it using the VSEncrpyt tool.
Available Virus/Malware Scan Actions
SCAN ACTION
Delete
B-2
DESCRIPTION
CPM deletes the infected file.
Reference Tables
SCAN ACTION
Quarantine
DESCRIPTION
CPM renames and then moves infected files to the following, nonconfigurable, directory on the client’s computer:
C:\Program Files\Trend Micro\Core Protection Module
\Quarantine
If you need to access any of the quarantined files, you can access the
directory using system administrator credentials and restore it using the
VSEncrpyt tool (see Scan Action Results for Compressed Files on page
B-6).
Clean
CPM cleans the infected file before allowing full access to the file. If the
file is uncleanable, CPM performs a second action, which can be one of
the following actions: Quarantine (typical), Delete, Rename or Pass.
Rename
CPM changes the infected file's extension to "vir". Users cannot open
the renamed file initially, but can do so if they associate the file with a
certain application.
Important
Renaming the file will not prevent the virus/malware from
executing. Consider using Quarantine or Delete, instead.
Pass
CPM performs no action on the infected file but records the virus/
malware detection in the logs. The file stays where it is located.
CPM cannot use this scan action during Real-time Scan because
performing no action when an attempt to open or execute an infected file
is detected allows virus/malware to execute. All the other scan actions
can be used during Real-time Scan.
For the "probable virus/malware" type, CPM always performs no action
on detected files (regardless of the scan type) to mitigate false positives.
If further analysis confirms that the probable virus/malware is indeed a
security risk, a new pattern will be released to allow CPM to take the
appropriate scan action. If actually harmless, the probable virus/malware
will no longer be detected.
B-3
Core Protection Module 10.6 SP2 Administrator’s Guide
SCAN ACTION
Deny Access
DESCRIPTION
This scan action can only be performed during Real-time Scan. When
CPM detects an attempt to open or execute an infected file, it
immediately blocks the operation. Users receive no CPM-specific
notification of the action, only a message from the operating system.
Users can manually delete the infected file.
Pattern and Scan Engine Files
COMPONENT
DESCRIPTION
Antivirus
Smart Scan Agent
Pattern
A file that helps CPM’s smart scan clients identify virus signatures,
unique patterns of bits and bytes that signal the presence of a virus.
Virus Pattern
A file that helps CPM’s conventional scan clients identify virus
signatures, unique patterns of bits and bytes that signal the
presence of a virus.
IntelliTrap Pattern
The file for detecting real-time compression files packed as
executable files
IntelliTrap
Exception Pattern
The file containing a list of "approved" compression files
Virus Scan Engine
The engine that scans for and takes appropriate action on viruses/
malware; supports 32-bit and 64-bit platforms
Anti-spyware
Spyware Pattern
The file that identifies spyware/grayware in files and programs,
modules in memory, Windows registry and URL shortcuts
Spyware Activemonitoring Pattern
File used for real-time spyware/grayware scanning
Spyware Scan
Engine
The engine that scans for and takes appropriate action on spyware/
grayware; supports 32-bit and 64-bit platforms
Damage Cleanup Services
B-4
Reference Tables
COMPONENT
DESCRIPTION
Virus Cleanup
Template
Used by the Virus Cleanup Engine, this template helps identify
Trojan files and processes so the engine can eliminate them
Virus Cleanup
Engine
The engine Damage Cleanup Services uses to scan for and remove
Trojans and Trojan processes; supports 32-bit and 64-bit platforms
Firewall
Common Firewall
Pattern
Required for the optional CPM firewall; available in version CPM
10.6 (not found in CPM 1.0)
Behavior Monitoring Component
Behavior
Monitoring
Detection Pattern
This file contains the rules for detecting suspicious threat behavior;
supports 32-bit and 64-bit platforms
Behavior
Monitoring Driver
This kernel mode driver monitors system events and passes them
to the Behavior Monitoring Core Service for policy enforcement;
supports 32-bit and 64-bit platforms
Behavior
This service provides rootkit detection, regulates access to external
devices, and protects files, registry keys, and services; supports 32bit and 64-bit platforms
Monitoring Core
Service
Behavior
Monitoring
Configuration
Pattern
The Behavior Monitoring Driver uses this pattern to identify normal
system events and exclude them from policy enforcement.
Policy
Enforcement
Pattern
The Behavior Monitoring Core Service checks system events
against the policies in this pattern.
Digital Signature
Pattern
This pattern contains a list of valid digital signatures that are used
by the Behavior Monitoring Core Service to determine whether a
program responsible for a system event is safe.
Common Component
Anti-rootkit Driver
A kernel mode driver used by the Spyware Scan Engine that
provides functionality to bypass any potential redirection by rootkits;
supports 32-bit platforms
B-5
Core Protection Module 10.6 SP2 Administrator’s Guide
Scan Action Results for Compressed Files
STATUS OF CLEAN/
DELETE
CPM ACTION
INFECTED FILES IN
COMPRESSED
FILE FORMAT
RESULT
COMPRESSED FILES
Enabled
Clean or
Delete
Not
supported
Example:
CPM encrypts def.rar but does
not clean, delete, or perform any
other action on 123.doc.
def.rar
contains an
infected file
123.doc.
Disabled
Clean or
Delete
Supported/No
t supported
Example:
abc.zip
contains an
infected file
123.doc.
B-6
CPM does not clean, delete, or
perform any other action on both
abc.zip and 123.doc.
Reference Tables
STATUS OF CLEAN/
DELETE
CPM ACTION
INFECTED FILES IN
COMPRESSED
RESULT
FILE FORMAT
COMPRESSED FILES
Enabled/Disabled
Not Clean or
Delete (in
other words,
any of the
following:
Rename,
Quarantine,
Deny Access
or Pass)
Supported/No
t supported
Example:
abc.zip
contains an
infected file
123.doc.
CPM performs the configured
action (Rename, Quarantine, Deny
Access or Pass) on abc.zip, not
123.doc.
If the action is:
Rename: CPM renames abc.zip
to abc.vir, but does not rename
123.doc.
Quarantine: CPM quarantines
abc.zip (123.doc and all non-
infected files are quarantined).
Pass: CPM performs no action on
both abc.zip and 123.doc but
logs the virus detection.
Deny Access: CPM denies
access to abc.zip when it is
opened (123.doc and all noninfected files cannot be opened).
Default Firewall Global Exceptions
RULE NAME
ACTION
PROTOCOL
PORT
DIRECTION
FTP Data
Allow
TCP
20
Bidirectional
FTP
Allow
TCP
21
Bidirectional
SSH
Allow
TCP
22
Bidirectional
Telnet
Allow
TCP
23
Bidirectional
B-7
Core Protection Module 10.6 SP2 Administrator’s Guide
RULE NAME
B-8
ACTION
PROTOCOL
PORT
DIRECTION
SMTP
Allow
TCP
25
Bidirectional
DNS (TCP)
Allow
TCP
53
Bidirectional
DNS (UDP)
Allow
UDP
53
Bidirectional
TFTP
Allow
UDP
69
Bidirectional
HTTP
Allow
TCP
80
Bidirectional
Kerberos (TCP)
Allow
TCP
88
Bidirectional
Kerberos (UDP)
Allow
UDP
88
Bidirectional
POP3
Allow
TCP
110
Bidirectional
AUTH (TCP)
Allow
TCP
113
Bidirectional
AUTH (UDP)
Allow
UDP
113
Bidirectional
NTP (TCP)
Allow
TCP
123
Bidirectional
NTP (UDP)
Allow
UDP
123
Bidirectional
NETBIOS Name
Service (TCP)
Allow
TCP
137
Bidirectional
NETBIOS Name
Service (UDP)
Allow
UDP
137
Bidirectional
NETBIOS Datagram
Service (TCP)
Allow
TCP
138
Bidirectional
NETBIOS Datagram
Service (UDP)
Allow
UDP
138
Bidirectional
NETBIOS Sessions
Service (TCP)
Allow
TCP
139
Bidirectional
NETBIOS Sessions
Service (UDP)
Allow
UDP
139
Bidirectional
SNMP
Allow
UDP
161
Bidirectional
Reference Tables
RULE NAME
ACTION
PROTOCOL
PORT
DIRECTION
SNMP-TRAP
Allow
UDP
162
Bidirectional
HTTPS
Allow
TCP
443
Bidirectional
SMB (TCP)
Allow
TCP
445
Bidirectional
SMB (UDP)
Allow
UDP
445
Bidirectional
IPsec (TCP)
Allow
TCP
500
Bidirectional
IPsec (UDP)
Allow
UDP
500
Bidirectional
Client IPv6 Requirements
The client must be installed on:
•
Windows 8
•
Windows Server 2012
•
Windows 7
•
Windows Server 2008
•
Windows Vista
It cannot be installed on Windows Server 2003 and Windows XP because these
operating systems only support IPv6 addressing partially.
It is preferable for a client to have both IPv4 and IPv6 addresses as some of the entities
to which it connects only support IPv4 addressing.
Pure IPv6 Client Limitations
The following table lists the limitations when the client only has an IPv6 address.
B-9
Core Protection Module 10.6 SP2 Administrator’s Guide
TABLE B-1. Pure IPv6 client Limitations
ITEM
LIMITATION
Parent Core Protection
Module server
Pure IPv6 clients cannot be managed by a pure IPv4 Core
Protection Module server.
Updates
A pure IPv6 client cannot update from pure IPv4 update
sources, such as:
Scan queries, web
reputation queries, and
Smart Feedback
•
Trend Micro ActiveUpdate Server
•
Any pure IPv4 custom update source
A pure IPv6 client cannot send queries to smart protection
sources, such as:
•
Smart Protection Server 2.0 (integrated or standalone)
Note
IPv6 support for Smart Protection Server starts in
version 2.5.
•
Trend Micro Smart Protection Network (also for Smart
Feedback)
Software safety
Pure IPv6 clients cannot connect to the Trend Micro-hosted
Certified Safe Software Service.
Proxy connection
A pure IPv6 client cannot connect through a pure IPv4 proxy
server.
Most of these limitations can be overcome by setting up a dual-stack proxy server that
can convert between IPv4 and IPv6 addresses (such as DeleGate). Position the proxy
server between the clients and the entities to which they connect.
B-10
Appendix C
Task Reference
The reference sections in this appendix include:
•
•
Smart Protection Relay Tasks on page C-2
•
Smart Protection Relay Deployment Tasks on page C-2
•
Smart Protection Relay Common Tasks on page C-3
•
Smart Protection Relay Analyses on page C-5
•
Smart Protection Relay Troubleshooting on page C-5
VDI Tasks
•
VDI Tasks - Quick Start on page C-6
•
VDI Tasks - Common on page C-7
•
VDI Tasks - Deployment on page C-8
•
VDI Tasks - Analyses on page C-9
•
VDI Tasks - Troubleshooting on page C-9
C-1
Core Protection Module 10.6 SP2 Administrator’s Guide
Smart Protection Relay Tasks
If you use smart scan to protect your endpoints, use the information from the following
location as a guide to the number of Smart Protection Servers and Smart Protection
Relays your network needs:
http://esupport.trendmicro.com/solution/en-us/1058696.aspx
Smart Protection Relay Deployment Tasks
Smart Protection Relay - Deploy
Use this action to deploy Smart Protection Relay component to ESP Relays requiring
Smart Protection Relay components.
When using smart scan, Core Protection Module endpoints get updates and make
reputation queries to Smart Protection Servers or the Smart Protection Network. You
can minimize CPM endpoint bandwidth usage, for updates and reputation queries, by
directing the endpoint queries to Smart Protection Relays.
Note
Smart Protection Relays require endpoints, with a BES relay installed and with at least 1
GB of RAM and 250MB of hard drive space. Smart Protection Relays installed on
endpoints with lower-end hardware (Pentium 4) can support up to 500 endpoints. Smart
Protection Relays installed on endpoints with higher-end hardware (Core 2 Duo or above)
can support up to 1000 endpoints.
Navigation: Deployment > Install
Note
Smart Protection Servers must be installed and connected to ESP before SPRs can be
deployed.
C-2
Task Reference
Smart Protection Relay - Update
Use this task to upgrade Smart Protection Relay components.
Navigation: Deployment > Update
Smart Protection Relay - Uninstall
Use this task to uninstall Smart Protection Relay components from ESP Relays.
Navigation: Deployment > Uninstall
Smart Protection Relay Common Tasks
Smart Protection Relay - Disable Switching to Smart
Protection Servers When Uplink Fails
Use this action to disable Smart Protection Relays from switching to Smart Protection
Servers when the uplink to other Smart Protection Relays encounters issues.
Navigation: Core Protection Module > Common Tasks > Core Protection Module
> Relay
Smart Protection Relay - Enable Switching to Smart
Protection Servers When Uplink Fails
Use this action to enable Smart Protection Relays to switch to Smart Protection Servers
when the uplink to Smart Protection Relays encounters issues.
Navigation: Core Protection Module > Common Tasks > Core Protection Module
> Relay
C-3
Core Protection Module 10.6 SP2 Administrator’s Guide
Smart Protection Relay - Disable Switching to Smart
Protection Network When Uplink Fails
Use this action to disable Smart Protection Relays from switching to Smart Protection
Network when the uplink to Smart Protection Servers or Smart Protection Relays
encounter issues.
Navigation: Core Protection Module > Common Tasks > Core Protection Module
> Relay
Smart Protection Relay - Enable Switching to Smart
Protection Network When Uplink Fails
Use this action to enable Smart Protection Relays to switch to Smart Protection
Network when the uplink to Smart Protection Servers encounters issues.
Navigation: Core Protection Module > Common Tasks > Core Protection Module
> Relay
Smart Protection Relay - Network Bandwidth Throttling
Use this task to customize the bandwidth Smart Protection Relay uses, if the total
outbound bandwidth is less than 20 Mbps. Supported bandwidth settings are:
•
10Mbps
•
6Mbps
•
2Mbps
•
512Kbps
•
256Kbps
If the outbound bandwidth is more than 20 Mbps, the default network settings are used.
Smart Protection Relay uses up to 9 Mbps on 20Mbps networks.
Navigation: Core Protection Module > Common Tasks > Core Protection Module
> Relay
C-4
Task Reference
Note
The lower the bandwidth, the fewer endpoints Smart Protection Relay can support.
Smart Protection Relay Analyses
Smart Protection Relay - Information
Use this analysis to retrieve Smart Protection Relay component information. For
example: version, build, relay status
Navigation: Analyses > Core Protection Module
Smart Protection Relay Troubleshooting
Smart Protection Relay - Improper Service Status
Use this task to direct Smart Protection Relay to restart the services of the specified
computers.
Navigation: Troubleshooting
Smart Protection Relay - Reboot
Use this task to direct Smart Protection Relay to reboot the specified computers.
Navigation: Troubleshooting
Note
When running this action, pay careful attention to the action deployment options in order
to avoid restarting the computers at inappropriate times.
Smart Protection Relay - Restart Service
Use this task to restart Smart Protection Relay services.
C-5
Core Protection Module 10.6 SP2 Administrator’s Guide
Navigation: Troubleshooting
Smart Protection Relay - Purge Smart Protection Relay Error
Logs
Use this task to purge the Smart Protection Relay error logs, when the logs’ size exceeds
100MB.
Navigation: Troubleshooting
Note
This action can be configured to run as a policy with periodic behavior that reapplies the
policy. You can apply this Task with the following action parameters:
•
Reapply an unlimited number of times
•
Run after office hours
The Smart Protection Relay service stops when this task executes.
Smart Protection Relay - Windows Firewall is Blocking SPR
Traffic
Use this task to open port 5274 on Smart Protection Relays that use Windows Firewall
(Windows Firewall is enabled and blocking port 5274). Smart Protection Relay uses port
5274 for communication.
Navigation: Troubleshooting
VDI Tasks - Quick Start
Core Protection Module - Download VDI Pre-Scan Template Generation
Tool
The CPM VDI Pre-Scan Template Generation Tool scans the base or golden image and
verifies the image is a virtual desktop client. When scanning duplicates of this image,
C-6
Task Reference
CPM only checks the parts that have changed. This is done in order to optimize ondemand scanning.
Navigation: Core Protection Module > Quick Start > Virtual Desktop
Infrastructure
Note
Ensure CPM VDI Components are installed on the base or golden image's relay, before
running the VDI Pre-Scan Template Generation Tool on the base or golden image.
VDI Tasks - Common
Core Protection Module - Improper VDI Component Service
Status
The specified computers have one or more required VDI component services that are
not running or that are configured with an incorrect start mode.
Navigation: Core Protection Module > Common Tasks > Core Protection Module
Core Protection Module - Set Maximum Concurrent
Scanning Virtual Desktops
The listed computers have Core Protection Module VDI Components installed. Use this
task to set the maximum number of the virtual desktops to perform on-demand scan at
the same time.
The default maximum is 1.
Navigation: Core Protection Module > Common Tasks > Core Protection Module
Note
Valid values are 1 to 65536.
This action will set the maximum value to 1 if the specified value is invalid.
C-7
Core Protection Module 10.6 SP2 Administrator’s Guide
Core Protection Module - Set Maximum Concurrent
Updating Virtual Desktops
The listed computers have Core Protection Module VDI Components installed. Use this
task to set the maximum number of the virtual desktops to perform pattern updates at
the same time.
The default maximum is 3.
Navigation: Core Protection Module > Common Tasks > Core Protection Module
Note
Valid values are 1 to 65536.
This action will set the maximum value to 1 if the specified value is invalid.
VDI Tasks - Deployment
Core Protection Module - Install VDI Components
The specified computers are Servers or Relays which do not have Trend Micro Core
Protection Module VDI components installed. Core Protection Module VDI
components provide VDI support for CPM endpoints. Use this action to deploy Core
Protection Module VDI components on BES Servers or Relays that require Core
Protection Module VDI components.
Navigation: Core Protection Module > Deployment > Install
Core Protection Module - Remove VDI Components
The specified computers have Core Protection Module VDI components installed. Use
this task to remove Core Protection Module VDI components.
Navigation: Core Protection Module > Deployment > Uninstall
C-8
Task Reference
Core Protection Module - Upgrade VDI Components
The specified computers have Core Protection Module VDI components installed. Use
this task to upgrade the current components.
Navigation: Core Protection Module > Deployment > Upgrade
VDI Tasks - Analyses
Core Protection Module - VDI Component Information
This analysis contains information about the CPM VDI Components in your
deployment.
After activating this analysis, you will see the following properties:
•
Version
•
Build
•
Maximum concurrent scanning virtual desktops
•
Maximum concurrent updating virtual desktops
•
Number of enabled VDI Servers
•
List of enabled VDI Servers
•
Connections available between VDI Components and VDI Servers
•
VDI Component service status
Navigation: Core Protection Module > Analyses > Core Protection Module
VDI Tasks - Troubleshooting
Core Protection Module - Windows Firewall is Blocking VDI Traffic
Use this task to open port 5273 on relays with VDI components that use Windows
Firewall (Windows Firewall is enabled and blocking port 5273). Relays with VDI
components use port 5273 for communication.
C-9
Core Protection Module 10.6 SP2 Administrator’s Guide
Navigation: Core Protection Module > Troubleshooting
C-10
Index
A
ActiveUpdate, 1-16, 2-11, 2-13, 2-15, 6-6
incremental updates, 1-16
source, 6-6
wizard, 6-6
adware, 13-8
analyses, 2-18, 7-24
activating, 2-18
activating shortcut, 2-18
viewing, 7-25, 7-26
Web Reputation - Client Information,
7-24, 7-25
Web Reputation - Site Statistics, 7-25,
7-26
Apply Automatic Updates, 2-16
Approved programs, 5-40
assessment mode, 6-5
automatic update setup script, 2-14
B
Behavior Monitoring, 5-34, 5-35, 5-39
approved programs, 5-40
blocked programs, 5-40
configure settings, 5-35
event monitoring, 5-37
exceptions, 5-39
malware behavior blocking, 5-36
BigFix, 1-8
Block-Approved List Wizard, 7-11
Blocked programs, 5-40
C
cache, 6-12
cache files, 1-7
Certified Safe Software Service, 5-42
client console, 11-2–11-8, 11-10, 11-11
accessing, 11-4
connection status, 11-4–11-6
global scan settings, 6-6
icons, 11-4–11-6
manual scan, 11-6–11-8, 11-10
overview, 11-2
testing, 11-11
Update Now, 11-11
client dashboard, 11-3
clients, 4-2–4-6, 4-14, 4-15, 5-16, 5-17, 5-41, 7-8,
11-2–11-8, 11-10, 11-11, 12-4, 12-12, 12-14
configuring updates from the Cloud,
5-17
console, 11-2–11-8, 11-10, 11-11
deployment, 4-2
deployment steps, 4-3
deploying CPM, 4-6
indentifying conflicting products,
4-4
ineligible endpoints, 4-3
removing conflicting products, 4-5
displaying CPM icon, 4-14
installing, 7-8
logs, 12-4, 12-12
removing CPM, 4-15
self-protection, 5-41
troubleshooting, 12-14
uninstalling the firewall, 8-24
updates from the Cloud, 5-16
upgrading, 7-8
Client Self-Protection, 5-41
components, 2-19
compressed files, 6-3, 13-6
IN-1
Core Protection Module 10.6 SP2 Administrator’s Guide
configuration, 1-2
contacting, 13-3, 13-4
documentation feedback, 13-3
Trend Micro, 13-4
conventional scan, 2-3, 5-33, 11-5
icons, 11-5
switching to smart scan, 5-33
cookies, 6-5
Core Protection Module - Download VDI
Pre-Scan Template Generation Tool, C-6
Core Protection Module - Windows Firewall
is Blocking VDI Traffic, C-9
CPM, 2-2, 2-3, 2-7, 2-10, 2-19, 2-20, 5-5
adding to the ESP server, 2-7
components, 2-19
removing, 2-19
installing components on the ESP
server, 2-10
installing on the ESP server, 2-2
masthead, 2-7
scan methods, 2-3
site, 2-20
removing, 2-20
upgrading, 2-6, 2-7
CPM console, 5-2, 10-2–10-4, 10-6, 10-8, 10-10,
10-12, 10-13, 10-17
navigating, 5-2
overview, 10-2
pattern version, 10-12
port violations, 10-13
protection status, 10-3, 10-4, 10-6, 10-8,
10-10
threat detection, 10-13
web reputation, 10-17
CPM icon, 4-14
CPM task flow, 5-5
IN-2
CPU usage setting, 6-12
D
Damage Cleanup Services, 1-7, 1-14, 1-17
Trojan horse programs, 1-17
dashboard, 5-2
Data Loss Prevention, 1-6, 1-15
Data Protection, 1-6, 1-7, 1-15, 2-8
Data Loss Prevention, 1-6, 1-15
Device Control, 1-7, 1-15
debug logging, 12-4–12-7
Denial-of-Service, 13-5
Denial-of-Service attack, 13-5
Device Control, 1-7, 1-15
dialers, 13-8
documentation feedback, 13-3
E
encryption program, 7-17
ESP, 1-8
ESPAgent, 2-17
installing, 2-17
installing manually, 2-17
ESP agent, 1-9, 1-10
ESP console, 1-9, 2-2
NT Authentication, 2-2
opening, 2-2
ESP deployment tool, 2-17
ESP relay, 1-10
ESP server, 1-9, 1-10, 2-2, 2-10, 2-16, 2-19
connecting to Smart Protection
Servers, 2-16
installing CPM, 2-2
installing CPM components, 2-10
removing CPM components, 2-19
F
FakeAV, 6-15
Index
firewall, 1-13, 8-2, 8-3, 8-5, 8-6, 8-8–8-10, 8-12, 8-13,
8-17–8-19, 8-21, 8-23–8-25, 12-13
adding the masthead, 8-3
conflicts, 8-5
masthead, 8-3, 8-25
policies, 8-6, 8-8–8-10, 8-12, 8-13, 8-17–8-19,
8-21, 8-23
configuring, 8-21
creating, 8-10
deploying, 8-12
exceptions, 8-9, 8-17–8-19, 8-23
Global Exception Rules, 8-17
logic, 8-6
smart policy example, 8-13
verification, 8-8
wizard, 8-19
removing conflicting firewalls, 8-5
removing the site, 8-25
security versatility, 8-2
traffic filtering, 1-13
troubleshooting, 12-13
uninstalling from clients, 8-24
Fixlet, 1-8
fresh installation, 2-4, 2-5
G
GeneriClean, 1-18
global client settings, 5-8
Global Exception Rules, 8-17–8-19
global scan settings, 6-3–6-6
client console settings, 6-6
reserved disk space settings, 6-6
scan settings, 6-3
spyware/grayware settings, 6-5
virus/malware settings, 6-4
wizard, 6-3–6-6
Global Scan Settings Wizard, 6-3–6-6
global settings, 5-5–5-8
analysis, 5-8
configuring, 5-6
deploying, 5-7
grayware, 13-5
H
hacking tools, 13-8
HTTPS support, 1-8
HTTPS web reputation, 7-15
HTTP web reputation, 7-8, 7-14
I
ICSA certification, 1-17
incompatible programs, 4-2, 4-3, 4-16, 4-17
antivirus, 4-16
OfficeScan, 4-2
Trend Micro, 4-17
incremental pattern file updates, 1-16
installation, 1-10, 2-4–2-7, 12-2, 12-3
CPM components, 2-10
fresh install, 2-4, 2-5
fresh installation
steps, 2-4, 2-5
logs, 12-2, 12-3
steps
upgrading, 2-6, 2-7
upgrading, 2-6, 2-7
steps, 2-6, 2-7
IntelliScan, 6-10
IntelliTrap, 1-18, 6-11
IPv6 support
limitations, B-9
J
joke program, 13-8
IN-3
Core Protection Module 10.6 SP2 Administrator’s Guide
L
locations, 9-2, 9-5, 9-6
creating, 9-2, 9-5, 9-6
overview, 9-2
specific tasks, 9-5, 9-6
example, 9-6
wizard, 9-2, 9-5
logs, 12-2–12-8, 12-10–12-12
automatic pattern updates, 12-10
client-side, 12-12
debug logging, 12-4–12-7
client installation, 12-6
enabling, 12-4
enabling on client, 12-7
information on client, 12-7
location, 12-5
server installation, 12-6
installation, 12-2, 12-3
error codes, 12-2, 12-3
status, 12-2
pattern updates, 12-8
proxy servers, 12-11
viruses/malware, 12-4
M
Malware behavior blocking, 5-36
Manual Scan, 11-6–11-8, 11-10
initiating from system tray, 11-6
initiating from Windows Explorer, 11-7
results, 11-8
viewing results, 11-10
mastheads, 2-7
Common Firewall, 2-7, 8-3, 8-25
CPM, 2-7
Reporting, 2-7
Microsoft, 1-12
Windows support, 1-12
IN-4
N
new features, 1-2
O
OfficeScan, 4-2
On-demand scan, B-2–B-4
scan actions, B-2–B-4
On-Demand Scan, 5-13, 5-14, 6-9, 6-10, 6-12, 6-13
configuring, 5-13
CPU usage, 6-12
running, 5-14
scan action, 6-13
scan cache, 6-12
scan exclusions, 6-13
scan target, 6-10, 6-12
scheduling, 5-14
wizard, 6-9, 6-10, 6-12, 6-13
P
password cracking applications, 13-8
pattern files, 1-15, 2-11, 4-7–4-10, 4-12, 5-18, 5-19,
5-21, 5-22, 10-12
deploying, 5-22
incremental updates, 4-8
logs, 12-8, 12-10
manual updates, 4-12
rollbacks, 4-7, 5-18, 5-19, 5-21
scheduling updates, 4-10
updates, 2-11, 2-14, 4-7
updates from the Cloud, 4-8
updating clients, 4-9, 4-10, 4-12
updating on the ESP server, 2-11
version, 10-12
Pattern Version, 10-12
phish, 13-5
platforms, 1-12
Port Violations, 10-13
Index
Protection Status, 10-3, 10-4, 10-6, 10-8, 10-10
endpoints, 10-3, 10-4, 10-6
checking results, 10-6
configuring, 10-4
relays, 10-8, 10-10
checking results, 10-10
configuring, 10-8
proxy servers, 12-11
logs, 12-11
Q
quick start
VDI tasks, C-6
R
Real-time scan, B-2–B-4
scan actions, B-2–B-4
Real-Time Scan, 6-9, 6-10, 6-12, 6-13
wizard, 6-9, 6-10, 6-12, 6-13
remote access tools, 13-8
reserved disk space
global scan settings, 6-6
rollbacks, 4-7, 5-18
performing, 5-19
re-enabling updates, 5-21
rootkits, 1-18
detection, 1-18
S
scan actions, B-2–B-4
scan cache, 6-12
scan engine, 1-15, 1-17, 4-7
update events, 1-17
updates, 1-17, 4-7
virus/malware, 1-17
Scan Engine
ICSA certification, 1-17
scan methods, 2-3
conventional scan, 2-3
smart scan, 2-3
scans, 5-9, 5-11, 5-13, 5-14
configuring virus/malware scans, 5-9
default settings, 5-11, 5-13
On-Demand scan, 5-13, 5-14
starting, 5-13
virus/malware, 5-9
scan settings
compressed files, 6-3
OLE objects, 6-3
Security Information Center, 13-4
security risks, 13-4, 13-5, 13-10
compressed files, 13-6
Denial-of-Service, 13-5
Denial-of-Service attack, 13-5
grayware, 13-5
other malicious codes, 13-6
packed files, 13-6
phish, 13-5
spyware, 13-5
spyware/grayware, 13-5, 13-8, 13-10
Trojan Horse, 13-6
viruses/malware, 13-6
worms, 13-6
Set ActiveUpdate Server Pattern Update
Interval, 2-15
shortcut
Windows Explorer, 6-6
smart policy example, 8-13
Smart Protection Network, 1-10
Smart Protection Relay, 1-11
Smart Protection Relays, 2-7, 3-2–3-4, 3-6, 3-7
best practices, 3-2–3-4, 3-6
deployment, 3-2
IN-5
Core Protection Module 10.6 SP2 Administrator’s Guide
low bandwidth networks, 3-6
scan methods, 3-3
web reputation, 3-4
deploying, 3-7
sizing, 2-7
Smart Protection Server, 1-11, 2-7, 5-27–5-30
configuring, 5-27–5-30
list
configuring, 5-28
deploying, 5-29, 5-30
sizing, 2-7
Smart Protection Servers, 2-16
connecting to the ESP server, 2-16
smart scan, 1-16, 2-3, 5-32, 5-33, 11-5, 11-6
enabling, 5-32
icons, 11-5, 11-6
switching from conventional scan, 5-33
Smart Scan Agent Pattern, 1-16
Smart Scan Pattern, 1-16
SPR, 1-11
spyware, 13-5
spyware/grayware, 5-24, 5-26, 6-17, 12-4, 13-5,
13-8, 13-10
actions, 6-16
adware, 13-8
cookies, 6-5
detection, 5-24, 5-26
dialers, 13-8
entering the network, 13-9
global scan settings, 6-5
guarding against, 13-10
hacking tools, 13-8
joke program, 13-8
logs, 12-4
password cracking applications, 13-8
remote access tools, 13-8
IN-6
risks and threats, 13-9
rootkits, 1-18
wizard, 6-17
spyware/malware
exempting programs, 5-24
incorrect detections, 5-26
restoring programs, 5-26
standalone WPM
uninstalling, 7-7
system requirements, 4-16
system tray icon, 6-6
enable, 6-6
T
task flow, 5-5
Threat Detections, 10-13
TMCPMEncrypt.exe, 7-17
traffic filtering, 1-13
TrendLabs, 13-3
Trend Micro
Security Information Center, 13-4
Trojan Horse, 13-6
Trojan horse program, 1-17
Trojan horse programs, 1-17
troubleshooting, 12-13, 12-14
client connections, 12-14
firewall, 12-13
VDI tasks, C-9
U
Unauthorized Change Prevention Service,
5-41
updates, 2-11, 2-13, 2-14, 4-7, 4-8
applying, 4-10
automatic updates on clients, 4-9
from the Cloud, 4-8, 5-16, 5-17
incremental, 1-16, 4-8
Index
manual, 4-12
pattern files, 2-11, 2-14, 4-7
pattern files on clients, 4-9, 4-10, 4-12
preparing the ESP server, 2-14
scan engine, 1-17, 4-7
scheduling, 4-10
sources, 2-11, 2-13
choosing, 2-13
upgrading CPM, 2-6, 2-7
V
VDI components, 3-8, 3-9
deploying, 3-9
VDI Pre-scan Template Generation Tool,
3-10
VDI tasks, C-6–C-9
analyses, C-9
Core Protection Module - VDI
Component Information, C-9
common, C-7, C-8
Core Protection Module Improper VDI Component
Service Status, C-7
Core Protection Module - Set
Maximum Concurrent Scanning
Virtual Desktops, C-7
Core Protection Module - Set
Maximum Concurrent Updating
Virtual Desktops, C-8
deployment, C-8
Core Protection Module - Install
VDI Components, C-8
Core Protection Module Remove VDI Components, C-8
quick start, C-6
troubleshooting, C-9
VDI traffic, C-9
virtual management servers, 3-9
connecting, 3-9
virus/malware, 1-12, 1-17, B-2–B-4
"in the wild", 1-17
global scan settings, 6-4
protection, 1-12
scan actions, B-2–B-4
scans, 5-9
viruses/malware, 12-4, 13-6
actions, 6-13
boot, 13-7
file, 13-7
logs, 12-4
script, 13-7
Virus Pattern, 1-16
W
web protection module, 2-8, 7-4–7-7, 7-9
migrating lists to CPM, 7-5
pre-installation removal, 2-8
uninstalling the standalone, 7-7
web reputation, 1-8, 1-13, 2-7, 3-7, 7-2–7-4, 7-6,
7-8–7-12, 7-14–7-16, 7-18, 7-20–7-26, 10-17,
A-16–A-18
about, 7-2
analyses, 7-24–7-26
approved list, 2-7, 3-7, 7-11, 7-12, 7-16, 7-18,
7-20–7-22
copying, 7-21
creating, 3-7, 7-12, 7-16
deleting, 7-22
deploying, 3-7, 7-12, 7-16
editing, 7-21
importing, 7-18
rules, 7-11
viewing, 7-20
Blocked-Approved List Wizard, 7-11
IN-7
Core Protection Module 10.6 SP2 Administrator’s Guide
blocked list, 2-7, 3-7, 7-11, 7-12, 7-16, 7-18,
templates, 3-7, 7-11, 7-12, 7-16, 7-18, 7-21,
7-20–7-22
7-22
copying, 7-21
creating, 3-7, 7-12, 7-16
deleting, 7-22
deploying, 3-7, 7-12, 7-16
editing, 7-21
importing, 7-18
rules, 7-11
viewing, 7-20
blocked sites, 10-17
client information, 7-24, 7-25
configuring, A-18
custom approved list
editing, 7-22
custom blocked list
editing, 7-22
custom task, 7-23
deleting, 7-23
custom templates
editing, 7-22
enabling, A-17
HTTP, 7-8, 7-14
configuring, 7-8, 7-14
HTTPS, 1-8, 7-15
configuring, 7-15
in CPM, 7-11
proxy settings, 7-16, 7-18
configuring, 7-16, 7-18
quick steps, A-16–A-18
configuring, A-18
enabling, A-17
security level, 7-2, 7-3, 7-10
security scale, 7-3
site statistics, 7-25, 7-26
technology, 1-13
IN-8
copying, 7-21
creating, 3-7, 7-12, 7-16
deleting, 7-22
deploying, 3-7, 7-12, 7-16
editing, 7-21
importing, 7-18
web reputation
templates
viewing, 7-20
visited sites, 10-17
web protection module, 7-4, 7-6, 7-9
migrating to CPM
web protection module
migrating to CPM, 7-4
redeploying
web protection module
redeploying, 7-9
unsubscribing
web protection module
unsubscribing, 7-6
web reputation security level
configuring, 7-10
Windows Explorer
manual scan shortcut, 6-6
Windows Firewall, C-9
wizards, 6-6, 6-9, 6-10, 6-12, 6-13, 6-17
ActiveUpdate Server Settings, 6-6
Firewall Policy Settings, 8-19
global scan settings, 6-4–6-6
Global Scan Settings, 6-3
Location Property, 9-2, 9-5
On-Demand Scan Settings, 6-9, 6-10,
6-12, 6-13
Spyware Approved List, 6-17
Index
Web Reputation Blocked-Approved
List, 7-11
worms, 13-6
WPM
migrating to CPM
WPM, 7-4
redeploying
WPM, 7-9
unsubscribing
WPM, 7-6
IN-9