1
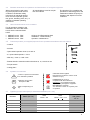
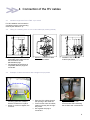
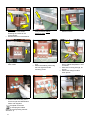
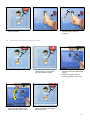
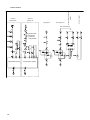
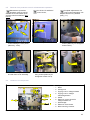
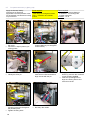
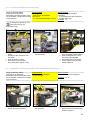
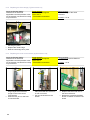
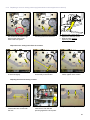
8.9
Replacing an under/overvoltage tripping coil (3 or 4) [See Section 8.6]
Apply the General Safety
Instructions for Electrical
Applications and the particular rules
for the network concerned for locking
out procedures.
Tools required:
- Cutting pliers
- Allen key for hexagonal
screw size 3
- 2 x open-ended spanners - size 7
Parts required:
- 1 coil with the same reference
- 2 pre-treated bolts and 2 washers
- 3 Rilsan cable ties
Duration: 1 h
Coil (4) may be either
on voltage
release/application.
For an undervoltage tripping coil,
first remove the coil board
(See Section 8.11).
F
F
Cut the fixing collars on the
wiring.
Disconnect the connector from
the coil.
F
F
Hold the coil in place.
Unscrew and remove the 2
fixing bolts (Allen key of 3 mm).
D1
F
F
Note which way round the coil
goes.
Remove this coil from the right
hand side.
F
Measure distance D1 on the
removed coil.
F
F
Measure the same distance D1
on the new coil.
Tighten the nuts.
Top view
3
4
D3
F
F
Positioning the new coil.
Insert and tighten the 2 new
mounting bolts supplied.
18
F
Make sure that the distance (D3)
between the centre of the coil
and the trip tab is equal to 3 mm
F
F
Reconnect the LV connector.
Fix the cables in place using
Rislan cable ties.