1
Wellspring Software
PrintBoss Installation Notes
www.wellspringsoftware.com
Last Revised: 16 April 2015
Sage 300
Formerly known as Sage Accpac ERP & Advantage Series
These are notes for a typical setup. For specific setup, please refer to the user manual. The user manual is available at
https://www.wellspringsoftware.com/Support/DynamicSupport/Directory.aspx . Select the Manuals folder in the left navigation pane.
The documents will display in the right pane. Choose ‘PrintBoss Standard-Enterprise Manual’ for this product.
Contents
1)
2)
3)
4)
General Information
Setup in Sage 300
PrintBoss Settings
Using PrintBoss with Sage 300
Section 1: General Information
PrintBoss is an application that adds flexibility and features to the task of printing multi-part accounting documents on Laser printers. In
spite of their superior print quality and speed, laser printers have introduced some new challenges with printing accounting documents.
PrintBoss solves these problems by offering the following features:
•
PrintBoss can print multiple copies of any document.
•
PrintBoss can enable unique printing for each copy, such as a legend.
•
Each copy can be printed in a different order, or to a different printer, or from different trays within the same printer.
•
PrintBoss can allow signatures to be printed on checks with security.
•
PrintBoss can print text or graphics based on conditions of the document (e.g. document amount).
•
Document design can be enhanced.
The PrintBoss application uses a special Windows Printer driver in order to interface with Sage 300. Once the appropriate settings are
made in PrintBoss and Sage 300, sending a document to PrintBoss requires no extra steps for the user.
Section 2: Setup in Sage 300
LOAD THE CRYSTAL REPORTS
During the installation of PrintBoss
•
Select Sage 300 as the Host Accounting Package.
•
Crystal reports for AP Checks, Payroll Checks, Purchase Orders and some AR & OE documents are installed into the
PrntBoss\Specs\Accpac\* directories, where the asterisk is the version number.
•
On the final "Setup Complete" screen, click on the "Start Install steps special for this host" to have PrintBoss copy these files
into the appropriate Sage 300 directories.
•
If the "Start Install steps special for this host" button is NOT selected, the modified crystal reports will need to be manually
copied into the appropriate Sage 300 directories.
•
Please note that the modified crystal reports are Sage 300 version specific.
•
Copying these modified crystal reports into the Sage 300 directories will not overwrite any of the standard Sage 300 reports. It
only makes these reports available for use by Sage 300.
While several of the report names are the same from one version to the next, PrintBoss has unique directories for each version of
SAGE 300 being used. In the PRNTBOSS\SPECS\ACCPAC directory, there are separate folders:
VER60 = reports for Sage 300 version 6.0
V ER61= reports for Sage 300 version 6.1
V ER62= reports for Sage 300 version 6.2
If you are using an older version of Sage 300, please contact Technical Support. If you upgrade to a newer version of Sage 300, you
will need to update PrintBoss to obtain the modified Crystal Reports that we distribute for that version.
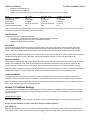
BANK SERVICES
Once a company is opened in Sage 300, select COMMON SERVICES / BANK SERVICES / BANKS.
1
Wellspring Software
•
•
•
PrintBoss Installation Notes
Select the correct bank account.
Select the CHECK STOCKS tab.
INSERT a new check stock code for the type of PrintBoss check form (one for AP, one for Payroll).
FIELD
CHECK STOCK CODE*
DESCRIPTION
STOCK TYPE
CHECK FORM
ADVICE LINES PER PAGE
A/P Checks
AP_PB
AP PrintBoss
Combined
AP-ck1.rpt /AP-ck2.rpt
999
US Payroll checks
UP_PB
UP PrintBoss
Combined
UP-ck3.rpt /UP-ck4.rpt
999
Canadian Payroll checks
CP_PB
CP PrintBoss
Combined
CP-ck3.rpt
999
* The code that appears first alphabetically in the list is the default code used at the point of printing checks. Give your code a name
that will make it appear first alphabetically in the list for this bank.
PRINTER SETUP
In Sage 300, select FILE / PRINT DESTINATION.
•
The options for "Report Paper Size" and "Report Orientation" should be checked.
•
The option for "A4 paper in place of letter" should NOT be checked.
•
"Letter" is usually the default paper size.
AP CHECKS
Print/Post checks in Sage 300 and stop at the Print Checks window. This is the screen with the Check Stock Code, Next Check
Number, and Check/Advice Form. All of the individual checks should be listed at the bottom of the window with a status of "Not
Printed". Select FILE / PRINT SETUP on this window. Select "Specific Printer" and choose the "PrintBoss 50" printer. Click OK.
Select the PrintBoss modified Crystal Report from the Check/Advice Form Browse window prior to printing. Checks will view PRIOR to
PrintBoss formatting when you print to PREVIEW. Reselect the "PrintBoss 50 printer to print from the PREVIEW screen.
PAYROLL CHECKS
Print/Post payroll checks in Sage 300 and stop at the Print Checks window. This is the screen with the Check Stock Code, Next Check
Number, and Check/Advice Form. All of the individual checks should be listed at the bottom of the window with a status of "Not
Printed". Select FILE / PRINT SETUP on this window. Select "Specific Printer" and choose the "PrintBoss 50" printer. Click OK.
Select the PrintBoss modified Crystal Report from the Check/Advice Form Browse window prior to printing. Checks will view PRIOR to
PrintBoss formatting when you print to PREVIEW. Reselect the "PrintBoss 50” printer to print from the PREVIEW screen.
OTHER DOCUMENTS
In Sage 300, get to the point of printing the document. This is the window where the Crystal Report is selected for printing the
documents. Select FILE / PRINT SETUP on this window. Select "Specific Printer" and choose the "PrintBoss 50" printer. Click OK.
Select the PrintBoss modified Crystal Report. Checks will view PRIOR to PrintBoss formatting when you print to PREVIEW. Reselect
the "PrintBoss 50 printer to print from the PREVIEW screen.
Section 3: PrintBoss Settings
The following items are suggested for the Sage 300 interface. This may serve as an installation checklist if problems are occurring.
This section is divided into 3 subsections: Required Settings (these MUST be done after the initial installation), Checklist, and Other
Common Settings.
REQUIRED SETTINGS
FILE / PRINTER SETUP
Select the driver matching the Laser Jet printer. The PCL5e is recommended when available. Do not use a Post Script (PS) driver.
DO NOT select the PrintBoss 50 printer as the printer from the PrintBoss application.
EDIT / BANK LIST
Beginning with PrintBoss version 5.71.1, PrintBoss includes bank Wizards to make the setup easier. Simply click on Wizards and
choose ‘Bank Creation’. Each screen has instructions and suggestions specific to Sage 300. You will be prompted to add a Logo or
2
Wellspring Software
PrintBoss Installation Notes
Signatures after the bank specific portion is completed.
PrintBoss comes with 10 bank accounts in the Standard edition. If more is needed, a Bank Key disk will need to be purchased. Call
Wellspring Software, Inc., for more information.
Primary Tab:
• Bank Code
•
•
•
•
•
Bank Prompt
Bank Name and Address
Company Name and Address
Next Check Number
Confirm Check Number
Enter the Sage 300 bank code for this account followed by a colon and the company
name. Ex: Bank:Company A
Enter any word or phrase for user recognition.
Fill in the bank information as it should appear on the checks.
Fill in the company information as it should appear on the checks.
DO NOT fill in. The check number comes from Sage 300.
"Auto..."
MICR Tab:
• Routing Number
• Account Number
• Check Number
Enter the bank account routing number.
Enter the bank account number. Use a period to designate a space.
{CchkNo} or CCCCCC
Miscellaneous Tab:
• 2nd Signature Line
• Canadian Style Date/Amount
Check this box if this account should always have a second LINE for signatures.
Check this box if the CPA06 standards should apply to this account.
Signature &_Logos Tab:
This tab is used if there is a signature or logo based on a PrintBoss Bank record. For these instructions, go to our website
www.wellspringsoftware.com and visit our Support Documents page.
CHECKLIST
OPTIONS / PRINTBOSS DRIVER SETTINGS
• Transfer Folder/File
• Append to Transfer File
• Load PB32.exe
• Configurations Settings Save Location
• Capture Mode
• PB 50 Driver Special Settings/Spool Dir
{ComAppData\...\Transfer}\{WinUserName}
Do Not Check
Checked
Local_User Registry (Standard)
Flag Trigger Required
{ComAppData\...\Spool}
Click on OK when finished.
OPTIONS / CONFIGURATION
Please visit our website www.wellspringsoftware.com for specific install steps if you are on a Citrix or Terminal Server environment.
Settings Tab:
• MICR offset adjustment
• Set Globally
• Work Files Private Folder Names
• Always Trigger/Capture Settings
o Form
o Bank
o PB#INFO flag overrides Above
o Allow fragmented PB#INFO line
Use if needing to adjust the MICR line placement. This field is workstation and
user specific. Default values are 0.
Checked
{WinUserName}
{ReqList}
(Grayed out)
Checked
Checked
Click on OK when finished.
OPTIONS / FORM/BANK REQUEST LIST
A Request List is NOT used for standard Sage 300 interfaces.
OTHER COMMON SETTINGS
3
Wellspring Software
PrintBoss Installation Notes
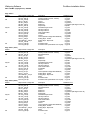
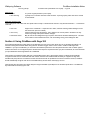
EDIT / FORMS / (highlight form) / EDITOR
Sage 300 6.0
Module
AP
AR
Payroll
OE
PO
Report Name in Sage 300
AP-CK1_v60.rpt
AP-CK2_v60.rpt
AR-CK1_v60.rpt
AR-IV1_v60.rpt
AR-ST1_v60.rpt
AR-ST2_v60.rpt
BK-DP1_v60.rpt
CP-CK3_v60.rpt
UP-CK3_v60.rpt
UP-CK4_v60.rpt
OE-CO1_v60.rpt
OE-CR1_v60.rpt
OE-IV2_v60.rpt
OE-IV5_v60.rpt
OE-Pi1 _v60.rpt
OE-PickShip1 _v60.rpt
OE-QT1_v60.rpt
PO-PO1_V60.rpt
PO-PO2_V60.rpt
Sage 300 6.1 (2012)
Module
Report Name in Sage 300
AP
AP-CK1_v61.rpt
AP-CK2_v61.rpt
AR
AR-CK1_v61.rpt
AR-IV1_v61.rpt
AR-ST1_v61.rpt
AR-ST2_v61.rpt
BK-DP1_v61.rpt
Payroll
CP-CK3_v70.rpt
UP-CK3_v70.rpt
UP-CK4_v70.rpt
OE
OE-CO1_v61.rpt
OE-CR1_v61.rpt
OE-IV2_v61.rpt
OE-IV5_v61.rpt
OE-Pi1 _v61.rpt
OE-PickShip1 _v61.rpt
OE-QT1_v61.rpt
PO
PO-PO1_V61.rpt
PO-PO2_V61.rpt
Sage 300 6.2 (2014)
Module
Report Name in Sage 300
AP
AP-CK1_v62.rpt
AP-CK2_v62.rpt
AR
AR-CK1_v62.rpt
AR-IV1_v62.rpt
AR-ST1_v62.rpt
AR-ST2_v62.rpt
BK-DP1_v62.rpt
Payroll
CP-CK3_v70.rpt
UP-CK3_v70.rpt
UP-CK4_v70.rpt
OE
OE-CO1_v62.rpt
OE-CR1_v62.rpt
OE-IV2_v62.rpt
OE-IV5_v62.rpt
OE-Pi1 _v62.rpt
OE-PickShip1 _v62.rpt
OE-QT1_v62.rpt
PO
PO-PO1_V62.rpt
Description
PrintBoss Form
Check
CA_AP1
Check (Includes Inv Desc. Column)
CA_AP2
AR Refund Check
CA_AR1
Invoice
CA_ARIV1
Statement
CA_ARST1
Statement
CA_ARST2 (left edge for tear off)
Deposit Slip
Deposit1
Canadian Payroll Check
CA_CP3
US Payroll Check
CA_UP3
US Payroll Check
CA_UP4
Order Confirmation
CA_CON1
Credit Note
CA_CRN1
Invoice
CA_INV2
Invoice (based on Sage 300 OEINVO5)
CA_INV5
Picking Slips - Orders
CA_PIK1
Picking Slips - Shipments
CA_PS1
Quote
CA_QU1
Purchase Order
CA_PO1
Purchase Order (Uses labels from Crystal) CA_PO2
Description
Check
Check (Includes Inv Desc. Column)
AR Refund Check
Invoice
Statement
Statement
Deposit Slip
Canadian Payroll Check
US Payroll Check
US Payroll Check
Order Confirmation
Credit Note
Invoice
Invoice (based on Sage 300 OEINVO5)
Picking Slips - Orders
Picking Slips - Shipments
Quote
Purchase Order
4
PrintBoss Form
CA_AP1
CA_AP2
CA_AR1
CA_ARIV1
CA_ARST1
CA_ARST2 (left edge for tear off)
Deposit1
CA_CP3
CA_UP3
CA_UP4
CA_CON1
CA_CRN1
CA_INV2
CA_INV5
CA_PIK1
CA_PS1
CA_QU1
CA_PO1
Wellspring Software
PrintBoss Installation Notes
PO-PO2_V62.rpt
Settings Tab:
• Copies
• Auto-Archiving
Purchase Order (Uses labels from Crystal)
CA_PO2
0 = just the original (increase to print copies).
Typically set to "Overwrite work files at start of batch". If printing copies, please refer to the manual
for more details.
Multi-Parts & Printers Tab:
These settings are work station and user specific when<Locally> is selected under "Printer & Tray Selections Saved InR” at the bottom
of this tab.
• Print Time
• Source Tray
• Destination Printer
Original set to "Immediate". If copies are set to batch, research archiving method settings to avoid
lost documents. (See user manual).
Pulls the paper from the selected tray. This is based on the current printer in PrintBoss. The tray
names may change if the printer selection changes.
May be used to send designated copy to a printer other than the PrintBoss default printer. This field
is also used for other PrintBoss functions, such as Emailing, Faxing, and creating PDF files.
Section 4: Using PrintBoss with Sage 300
If the PRINT DESTINATION in Sage 300 is set to PREVIEW, the view on the screen will be prior to any PrintBoss formatting. The
actual accounting data should be visible along with the "PrintBoss Trigger" which is a line of text in small font that begins with
"PB#INFO". If you print to PREVIEW, you must select the PrintBoss printer driver from the preview and then click on PRINT again to
send the documents on to the physical printer. Because these steps are required each time you print to PREVIEW, we recommend that
your print destination within Sage 300 be set to PRINTER.
When checks are printed from Sage 300, print to the PrintBoss printer driver. When printing checks, PrintBoss will automatically
recognize the bank account. If the bank code has not been entered in the PrintBoss bank list exactly as it appears in Sage 300,
PrintBoss will prompt the user to select the account the first time checks are printed from that account. After the first time, PrintBoss
should automatically recognize each account. No additional key strokes will be necessary by the user.
When printing other documents from Sage 300, print using the modified Crystal Report to the PrintBoss printer driver. No additional
key strokes will be necessary by the user.
5