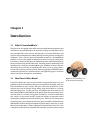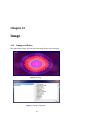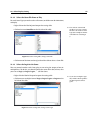
1
NeuroFeedBack User Manual
Science Beam Co.
November 15, 2014
A Tutorial on How to Work with NeuroFeedBack
Contents
1
.
.
.
.
.
.
.
.
.
.
.
.
.
.
.
.
.
.
.
.
.
.
.
.
.
.
.
.
.
.
.
.
.
.
.
.
.
.
.
.
.
.
.
.
1
1
1
2
2
Getting Started
2.1 eWave at a Glance . . . . . . . . . . . . . . . . . .
2.2 Setup eWave . . . . . . . . . . . . . . . . . . . . .
2.2.1 Add Bluetooth Device . . . . . . . . . . .
2.2.2 Detecting the Number of Serial Comport
2.3 Installing NeuroFeedBack . . . . . . . . . . . . .
2.3.1 Minimum Requirements . . . . . . . . .
2.3.2 Installation Folder . . . . . . . . . . . . .
2.3.3
Activate and Run NeuroFeedBack . . . .
.
.
.
.
.
.
.
.
.
.
.
.
.
.
.
.
.
.
.
.
.
.
.
.
.
.
.
.
.
.
.
.
.
.
.
.
.
.
.
.
.
.
.
.
.
.
.
.
.
.
.
.
.
.
.
.
.
.
.
.
.
.
.
.
.
.
.
.
.
.
.
.
.
.
.
.
.
.
.
.
5
5
6
6
8
9
9
9
10
3
Working with a Sample Protocol
3.1 Main Menu . . . . . . . . . . . . . . . . . . . . . . . . . . . . . . . .
3.2 A Sample Protocol Components . . . . . . . . . . . . . . . . . . .
15
15
16
4
Page
4.1 Page at a Glance . . . . . . . .
4.2 Page Setting Table . . . . . . .
4.3 Make a New Page . . . . . . .
4.4 Jump to a New Page . . . . . .
4.5 Change the Name of the Page
2
5
Introduction
1.1 What Is NeuroFeedBack? . . . .
1.2 How Does It Affect Brain? . . .
1.3 Who Can Benefit? . . . . . . . .
1.4 How Does It Work? . . . . . . .
.
.
.
.
.
.
.
.
.
.
.
.
.
.
.
.
.
.
.
.
.
.
.
.
.
.
.
.
.
.
.
.
.
.
.
.
.
.
.
.
.
.
.
.
.
.
.
.
.
.
.
.
.
.
.
.
.
.
.
.
.
.
.
.
.
.
.
.
.
.
.
.
.
.
.
.
.
.
.
.
.
.
.
.
.
.
.
.
.
.
.
.
.
.
.
.
.
.
.
.
.
.
.
.
.
.
.
.
.
.
.
.
.
.
.
.
.
.
.
.
.
.
.
.
.
.
19
19
20
20
21
22
PlayBox
5.1 PlayBox at a Glance . . . . . . . . . .
5.2 PlayBox Setting Table . . . . . . . . .
5.3 Make a New PlayBox Panel . . . . .
5.3.1
Changing Size and Position
5.4 Read Data through eWave Hardware
5.5 Read Previously Recorded Data . . .
5.6 Save Data . . . . . . . . . . . . . . . .
.
.
.
.
.
.
.
.
.
.
.
.
.
.
.
.
.
.
.
.
.
.
.
.
.
.
.
.
.
.
.
.
.
.
.
.
.
.
.
.
.
.
.
.
.
.
.
.
.
.
.
.
.
.
.
.
.
.
.
.
.
.
.
.
.
.
.
.
.
.
.
.
.
.
.
.
.
.
.
.
.
.
.
.
.
.
.
.
.
.
.
.
.
.
.
.
.
.
.
.
.
.
.
.
.
.
.
.
.
.
.
.
.
.
.
.
.
.
.
23
23
24
25
25
26
28
29
.
.
.
.
.
iii
.
.
.
.
.
.
.
.
.
.
iv
CONTENTS
5.7
6
7
8
Scope
6.1 Scope at a Glance . . . . . . . . . . .
6.2 Scope Setting Table . . . . . . . . . .
6.3 Make a New Scope Panel . . . . . . .
6.3.1
Changing Size and Position
6.4 Select Display Setting . . . . . . . . .
6.4.1 Select Channel to Display . .
6.4.2 Select Display Mode . . . . .
6.4.3 Select Horizontal Scale . . .
6.4.4 Select Vertical Scale . . . . .
6.4.5 Implement Filter to Data . .
.
.
.
.
.
.
.
.
.
.
.
.
.
.
.
.
.
.
.
.
.
.
.
.
.
.
.
.
.
.
.
.
.
.
.
.
.
.
.
.
.
.
.
.
.
.
.
.
.
.
FFT
7.1 FFT at a Glance . . . . . . . . . . . . . . . . .
7.2 FFT Setting Table . . . . . . . . . . . . . . . .
7.3 Make a New FFT Panel . . . . . . . . . . . . .
7.3.1
Changing Size and Position . . . . .
7.4 Select Display Setting . . . . . . . . . . . . . .
7.4.1 Select Channel to Display . . . . . . .
7.4.2 Select Frequency Band . . . . . . . . .
7.4.3 Select Vertical Scale . . . . . . . . . .
7.4.4
Select FFT Calculation Window Size
Val
8.1
8.2
8.3
8.4
9
Get information from the PlayBox Panel . . . . . . . . . . . . . . .
Bar
9.1
9.2
9.3
9.4
.
.
.
.
.
.
.
.
.
.
.
.
.
.
.
.
.
.
.
.
.
.
.
.
.
.
.
.
.
.
.
.
.
.
.
.
.
.
.
.
.
.
.
.
.
.
.
.
.
.
.
.
.
.
.
.
.
.
.
.
.
.
.
.
.
.
.
.
.
.
.
.
.
.
.
.
.
.
.
.
.
.
.
.
.
.
.
.
.
.
.
.
.
.
.
.
.
.
.
.
.
.
.
.
.
.
.
.
.
.
31
.
.
.
.
.
.
.
.
.
.
33
33
33
34
35
36
36
37
37
38
38
.
.
.
.
.
.
.
.
.
.
.
.
.
.
.
.
.
.
.
.
.
.
.
.
.
.
.
.
.
.
.
.
.
.
.
.
.
.
.
.
.
.
.
.
.
.
.
.
.
.
.
.
.
.
.
.
.
.
.
.
.
.
.
.
.
.
.
.
.
.
.
.
.
.
.
.
.
.
.
.
.
.
.
.
.
.
.
.
.
.
.
.
.
.
.
.
.
.
.
.
.
.
.
.
.
.
.
.
41
41
41
42
43
43
43
44
45
45
.
.
.
.
.
.
.
.
.
.
.
.
.
.
.
.
.
.
.
.
.
.
.
.
.
.
.
.
.
.
.
.
.
.
.
.
.
.
.
.
.
.
.
.
.
.
.
.
.
.
.
.
.
.
.
.
.
.
.
.
.
.
.
.
.
.
.
.
.
.
.
.
.
.
.
.
.
.
.
.
.
.
.
.
.
.
.
.
.
.
.
.
.
.
.
.
47
47
47
48
48
49
49
50
50
Bar at a Glance . . . . . . . . . . . . . . . . . . . . . . . . . . .
Bar Setting Table Properties . . . . . . . . . . . . . . . . . . .
Make a New Bar Panel . . . . . . . . . . . . . . . . . . . . . .
9.3.1
Changing Size and Position . . . . . . . . . . . . . .
Select Display Setting . . . . . . . . . . . . . . . . . . . . . . .
9.4.1 Select Channel to Calculate Bar . . . . . . . . . . . .
9.4.2 Select Frequency Band . . . . . . . . . . . . . . . . . .
9.4.3 Select Threshold Value . . . . . . . . . . . . . . . . . .
9.4.4
Select the Type of the Bar, Inverted or Non Inverted
.
.
.
.
.
.
.
.
.
.
.
.
.
.
.
.
.
.
.
.
.
.
.
.
.
.
.
53
53
53
54
55
56
56
56
57
58
Val at a Glance . . . . . . . . . . . . . . . . . .
Val Setting Table Properties . . . . . . . . . .
Make a New Val Panel . . . . . . . . . . . . .
8.3.1
Changing Size and Position . . . . .
Select Display Setting . . . . . . . . . . . . . .
8.4.1 Select Channel to Calculate Val . . . .
8.4.2 Select Frequency Band . . . . . . . . .
8.4.3
Select FFT Calculation Window Size
CONTENTS
9.4.5
9.4.6
v
Select Vertical Scale . . . . . . . . . . . . . . . . . . . . . .
Select FFT Calculation Window Size . . . . . . . . . . . .
10 Light
10.1 Light at a Glance . . . . . . . . . . . . . . . . .
10.2 Light Setting Table . . . . . . . . . . . . . . . .
10.3 Make a New Light Panel . . . . . . . . . . . .
10.3.1 Changing Size and Position . . . . .
10.4 Select Display Setting . . . . . . . . . . . . . .
10.4.1 Select Channel . . . . . . . . . . . . .
10.4.2 Select Frequency Band . . . . . . . . .
10.4.3 Select Thresholds Values . . . . . . .
10.4.4 Select FFT Calculation Window Size
11 Text
11.1 Text at a Glance . . . . . . . . . . . .
11.2 Text Setting Table . . . . . . . . . . .
11.3 Make a New Text Panel . . . . . . . .
11.3.1 Changing Size and Position
11.3.2 Change Text Properties . . .
.
.
.
.
.
.
.
.
.
.
.
.
.
.
.
.
.
.
.
.
.
.
.
.
.
12 Analyze
12.1 Analyze at a Glance . . . . . . . . . . . . . . .
12.2 Analyze Setting Table . . . . . . . . . . . . . .
12.3 Make a New Analyze Panel . . . . . . . . . . .
12.3.1 Changing Size and Position . . . . .
12.4 Select Display Setting . . . . . . . . . . . . . .
12.4.1 Select Data to Analyze . . . . . . . . .
12.4.2 Select a Text to Show the Result . . .
12.4.3 Change Text Properties . . . . . . . .
12.4.4 Select Channel to Display . . . . . . .
12.4.5 Select Horizontal Scale . . . . . . . .
12.4.6 Select Vertical Scale . . . . . . . . . .
12.4.7 Implement Filter to Data . . . . . . .
12.4.8 Select Frequency Band to Analyze . .
12.4.9 Select FFT Calculation Window Size
.
.
.
.
.
.
.
.
.
.
.
.
.
.
.
.
.
.
.
.
.
.
.
.
.
.
.
.
.
.
.
.
.
.
.
.
.
.
.
.
.
.
.
.
.
.
.
.
.
.
.
.
.
.
.
.
.
.
.
.
.
.
.
.
.
.
.
.
.
.
.
.
.
.
.
.
.
.
.
.
.
.
.
.
.
.
.
.
.
.
.
.
.
.
.
.
.
.
.
.
.
.
.
.
.
.
.
.
.
.
.
.
.
.
.
.
.
.
.
.
.
.
.
.
.
.
.
.
.
.
.
.
.
.
.
.
.
.
.
.
.
.
.
.
.
.
.
.
.
.
.
.
.
.
60
60
.
.
.
.
.
.
.
.
.
63
63
63
64
64
65
65
66
67
67
.
.
.
.
.
69
69
69
70
71
71
.
.
.
.
.
.
.
.
.
.
.
.
.
.
.
.
.
.
.
.
.
.
.
.
.
.
.
.
.
.
.
.
.
.
.
.
.
.
.
.
.
.
.
.
.
.
.
.
.
.
.
.
.
.
.
.
.
.
.
.
.
.
.
.
.
.
.
.
.
.
.
.
.
.
.
.
.
.
.
.
.
.
.
.
.
.
.
.
.
.
.
.
.
.
.
.
.
.
.
.
.
.
.
.
.
.
.
.
.
.
.
.
.
.
.
.
.
.
.
.
.
.
.
.
.
.
.
.
.
.
.
.
.
.
.
.
.
.
.
.
.
.
.
.
.
.
.
.
.
.
.
.
.
.
.
.
.
.
.
.
.
.
.
.
.
.
.
.
75
75
75
77
77
78
78
79
81
83
83
84
85
85
86
13 Image
13.1 Image at a Glance . . . . . . . . . . . . . . . . .
13.2 Image Setting Table . . . . . . . . . . . . . . . .
13.3 Make a New Image Panel . . . . . . . . . . . . .
13.3.1 Changing Size and Position . . . . . .
13.4 Select Display Setting . . . . . . . . . . . . . . .
13.4.1 Select the Image File Name to Display
.
.
.
.
.
.
.
.
.
.
.
.
.
.
.
.
.
.
.
.
.
.
.
.
.
.
.
.
.
.
.
.
.
.
.
.
.
.
.
.
.
.
.
.
.
.
.
.
.
.
.
.
.
.
.
.
.
.
.
.
.
.
.
.
.
.
87
87
88
88
88
89
89
vi
CONTENTS
14 Game
14.1 Game at a Glance . . . . . . . . . . . . . .
14.2 Game Setting Table Properties . . . . . .
14.3 Make a New Game Panel . . . . . . . . . .
14.3.1 Changing Size and Position . . .
14.4 Select Display Setting . . . . . . . . . . . .
14.4.1 Select the Type of the Game . . . .
14.4.2 Select the Game File Name to Play
14.4.3 Select the Logic for the Game . . .
14.4.4 Select the Full Screen Mode . . .
.
.
.
.
.
.
.
.
.
.
.
.
.
.
.
.
.
.
91
91
91
92
93
94
94
95
95
96
15 QEEG
15.1 QEEG at a Glance . . . . . . . . . . . . . . . . . . . . . . . . . . .
15.2 QEEG Setting Table Properties . . . . . . . . . . . . . . . . . . .
15.3 Make a New QEEG Panel . . . . . . . . . . . . . . . . . . . . . . .
15.3.1 Changing Size and Position . . . . . . . . . . . . . . . .
15.4 Select Display Setting . . . . . . . . . . . . . . . . . . . . . . . . .
15.4.1 Select the Calculation Method . . . . . . . . . . . . . . .
15.4.2 Select Channels and Corresponding Electrode Positions
15.4.3 Select the Frequency Band to Display . . . . . . . . . . .
15.4.4 Select FFT Calculation Window Size . . . . . . . . . . .
.
.
.
.
.
.
.
.
.
97
97
97
99
99
100
100
100
101
101
.
.
.
.
.
.
.
.
.
.
.
.
.
.
.
.
.
.
.
.
.
.
.
.
.
.
.
.
.
.
.
.
.
.
.
.
.
.
.
.
.
.
.
.
.
.
.
.
.
.
.
.
.
.
.
.
.
.
.
.
.
.
.
.
.
.
.
.
.
.
.
.
.
.
.
.
.
.
.
.
.
.
.
.
.
.
.
.
.
.
.
.
.
.
.
.
.
.
.
.
.
.
.
.
.
.
.
.
Chapter 1
Introduction
1.1 What Is NeuroFeedBack?
Have you ever seen people who suffer from unwanted behavioral patterns but
still refuse to see psychotherapists out of the fear of drugs and side effects? Have
you ever looked for a non invasive and drug free way to train the brain to self
regulate itself and improve your mood, behavior, learning patterns and physical
symptoms? This is exactly where NeuroFeedBack comes in. NeuroFeedBack
provides a safe way for people to improve their brain activity by training their
wave brains , decreasing the power or amplitude of some undesirable frequency
bands and increasing the desirable ones. Providing distinct protocol for each
individuals by a therapist, NeuroFeedBack gives feedback to clients that how
much they were successful in improving their brain waves by giving them a
reward such as playing a movie or Game. Receiving appropriate feedback about
its behavioral patterns, the automatic brain’s self-regulating organ is trained to
correct itself and to strengthen its functionality.
1.2 How Does It Affect Brain?
Is this like a fiction that a person can learn how to regulate his brain waves and
promote his brain functionality? But you have experienced it before when you
first learned how to ride a bicycle! That time, your brain learned how to selfregulate your state of balance during biking using the feedback it was being
received from gravity. Just like your eyes who helped your brain learn how to
bike, NeuroFeedBack send feedback to the person about his current brain status
and how much it is in order using games and movies. It needs no effort from
you, rather it is the central nervous system that decides to reorganize neural
connections to modify the function of those parts. While you are seeing movie
or playing games, your subconscious brain is going to modify itself based on the
information it received during interruption in game or movie. For clients, it seems
like a miracle when they saw how symptoms are diminished in their lives. This
is the power of their brain that beyond their conscious awareness process more
1
Figure 1.1 NeuroFeedBack can
promote brain functionality
2
Chapter 1 Introduction
information than what their mind can handle from a software and constantly
send commands to correct itself. Interestingly enough, this method has been both
scientifically and empirically proved to be effective and has been increasingly
practiced by specially trained psychotherapists.
1.3 Who Can Benefit?
Figure 1.2 Just like Gym that helps
your muscles get stronger, NeuroFeedBack helps your brain
strengthen itself to work in a more
efficient way.
Everyone can benefit from NeuroFeedBack therapy just like going to the gym that
can be useful for anyone. It is practical for any age from children who suffer from
learning problems to adults who like to be at their peak performance in their work
and for elders who want to keep their brain abilities as they age.
NeuroFeedBack can be used to improve attention, cognitive abilities, and
emotional regulations. It has been used in numerous disorders including depression, attention deficit disorder, anxiety, sleep disorders, headaches and migraines,
and other emotional issues. It can also be used for organic brain disorders, such
as autism, cerebral palsy, seizures, stroke, and traumatic brain injury. it can also
be helpful for people who struggle with drug and alcohol use and conditions like
mood swings and PMS.
1.4 How Does It Work?
Figure 1.3 NeuroFeedBack setup
It works in some steps:
• The therapist provides a unique protocol for you according to your type.
• He puts some sensors in specific location of your scalp to sense the electrical
activity (known as EEG) of those particular parts of your brain.
• You sit in front of a movie or game and very relax just see or play with your
brain.
1.4 How Does It Work?
• The software analyze your EEG signals to determine if your sate of the brain
is in order or not or how much it is deviated from the normal.
• The software gives you feedback about your brain status by stopping or
resizing the movie or game. For example, whenever your brain waves are in
order the movie is played with large screen giving your brain reward for its
positive performance. Whenever it is out of order, the movie is stopped or
its size is decreased.
• The reminding happens automatically and unconsciously! no need for you
to do anything else. Your brain do everything is needs to do! using this
feedback it realized that there is a problem in some parts of the brain and
instantly tries to alter that!
• Just wait and see how it creeps in your life and enhance your behaviors!
3
Chapter 2
Getting Started
2.1 eWave at a Glance
Figure 2.1 eWave
• Power: Press the Power button for 3 seconds to turn the device on or off.
• LED: The LED has different colored each of which has a special meaning :
Green color: when you turn the device on
Blinker Green Color: when the hardware connects and starts transferring
data.
• Charge Pin: Push the charger plug in this pin to charge the battery. You need
to charge it for 3 hours for every 10 hours work. Note that you can only use
or charge it at a time. when you are charging the battery, it automatically
stops working.
• HDMI port A: This port covers 8 channels from 1 to 8.
• HDMI port B: In eWave 16b, this port covers 4 channels from 5 to 8 that
is similar to the 5 to 8 channels in port A. In eWave 22b, this port covers 8
5
6
Chapter 2 Getting Started
channels from 9 to 16.
• HDMI port C: This port is for programming and connecting other devices.
2.2 Setup eWave
2.2.1 Add Bluetooth Device
• Press the power button for 3 second to turn on the device. The LED is
turned on with green color.
• Click Start in the windows and then Devices and Printers.
Figure 2.2 Add Device Window
• Click Add a Device on the right top of the window.
• Wait for your device to be detected.
• When your device is detected click on the device and then Next.
2.2 Setup eWave
7
Figure 2.3 Detecting Device
• On the verifying code click on Yes and then Next.
Figure 2.4 Detecting Code
• Click Close
8
Chapter 2 Getting Started
Figure 2.5 Adding device
2.2.2 Detecting the Number of Serial Comport
• Press the power button for 3 second to turn the device on. The LED is
turned on with yellow color.
• Click Start in the windows and then Devices and Printers.
• Click Add a Device on the right top of the window.
• Under the item Devices, right click on the name of your device form the
list.
• Click on Properties.
2.3 Installing NeuroFeedBack
Figure 2.6 Properties Table
• Click on Hardware.
• Under the Device Functions, under the Name, you can see the name of the
comport (Fig. 2.7).
2.3 Installing NeuroFeedBack
2.3.1 Minimum Requirements
To work with NeuroFeedBack software you should have a computer setup with
Requirements
• At least a dual core CPU
• At least 2G RAM
• Windows Seven ( other windows like windows eight or windows XP is not
supported.)
2.3.2 Installation Folder
You get this software with two folders: eProbe and Protocols.The eProbe consists of the installation program eProbe.exe, activation.txt and other files that is
internally used by software. The Protocols Folder consists of some folders and
text files that you need:
9
10
Chapter 2 Getting Started
Figure 2.7 finding Comport of the device
File and Folders You Need
• Protocols: some sample protocols that you can use for specific disorders.
You can later make your own protocols.
t You should put every new
• Anim: some folders and files for the Animation type of the Game panel.
protocol, file or folders that
you want to add in the right
folder.
• Image : some image files for theImage panel.
• Movie: some movie files for the Movie type of the Game panel.
• Video: some video files for the Movie type of the Game panel.
• Game: some game files for the Game type of the Game panel.
2.3.3
Activate and Run NeuroFeedBack
The first thing to do in using NeuroFeedBack is to activate the software:
• Double click on eProbe.exe in the eProbe Folder.
• Click on the item About eProbe and then click About eProbe button at the
top.
2.3 Installing NeuroFeedBack
11
Figure 2.8 Activate NeuroFeedBack
• Send the serial number in the opened window to [email protected]
and get product activation file.
Figure 2.9 Serial Number
• Copy the activation.txt in the eProbe Folder. You can also enter the activation number in the activation.txt and save it.
t For each computer setup
you need a specific activation number.
12
Chapter 2 Getting Started
Figure 2.10 Activatation Number
• Double click on eProbe.exe. The eProbe Demo is opened.
Figure 2.11 rProbe Demo
• Click on eWavePlus in the eProbe Demo. The main menu is now opened.
2.3 Installing NeuroFeedBack
Figure 2.12 Main Menu
• Click on File > Open Protocol to open a protocol. ( You can also make your
protocol using File > New Protocol. )
• A Sample protocol like this one is opened:
Figure 2.13 Sample Protocol
13
Chapter 3
Working with a Sample Protocol
In this Chapter, we show you how you can open a sample protocol and use
different panels. We introduce you different components, known as panels, that
you can later use in your own protocols to receive data, show signals and analyze
them, play game and so on.
3.1 Main Menu
The first time you run the eProbe.exe software a simple menu like Fig. 3.1 opens.
You can open an existed protocol or create a new one using File.
Figure 3.1 Main Menu
Click on File and then Open Protocol to open a .txt file name as protocol.
15
16
Chapter 3 Working with a Sample Protocol
Figure 3.2 Open Protocol
You can see the sample protocol in Fig. 3.3
Figure 3.3 Sample Protocol
3.2
A Sample Protocol Components
In this section, we introduce you different components of the protocol that you
can use during or after each session to play or analyze data. You can see the
sample protocol in Fig. 3.4
3.2 A Sample Protocol Components
Figure 3.4 Sample Protocol Components
Different Panels
• PlayBox: receives or opens recorded data and controls playing of different
panels.
• Scope: displays the signal both in time and frequency domain.
• Val: displays the square of the FFT power of a specific band. This value is the
summation over the frequency bins of the band.
• FFT: displays the square of the instantaneous FFT power of a specific band.
This value is displayed for each frequency bins of the band.
• Text: displays some pure information or the result of the analyze panel.
• Image: shows image.
• Game: plays video, movie or game.
• QEEG: shows the instantaneous Quantitative Electroencephalograph (QEEG)
or Brain map of a specific band.
• Bar: shows weather the square of the instantaneous FFT power of a specific
band is beyond or less than the threshold and considers it as a logic for the
Game panel. Here, the FFT power is the summation over the frequency bins
of the whole band.
• Light: compares the square of the instantaneous FFT power of a specific
band with two thresholds and shows it with green, orange or red color.
• Analyze: displays the whole signal and shows the FFT power of each of the
bands that you want in a text panel.
17
Chapter 4
Page
4.1
Page at a Glance
Every Page provides you with a context to add different panels. It consists of the
Back, Next and Page buttons.
Figure 4.1 Page
Page Components
• Page Button: shows the name or number of the page. Using this button you
see and change the name or number of the page and jump to other pages.
• Next Button: go to the next page.
• Back Button: go back to the previous page.
19
20
Chapter 4 Page
4.2
Page Setting Table
It provides you with some items to change the properties:
Figure 4.2 Page Setting table
• GoTo: If you want to jump to the specific page you can directly select the
name or number of the page using this item and pass over the next pages.
Extra Items
You can see some other options during EditMode ( When you have pressed the E
key on the keyboard and you can see Edit toolbar in the screen) including:
• Name: You can change the name of the Page and use the name instead of
the number of the page. This name appears in the Page button.
4.3
Make a New Page
• Run the eWave Probe to open the main menu.
• Click File > Open Protocol to open a protocol or File > New Protocol to
create a new protocol. An editable page opens.
• Press E key on the keyboard. The Edit Toolbar (Fig. 4.3) appears in the left
side of the page.
• On the Edit Toolbar, Click on Page.
• Click on the current the page.
Figure 4.3 Edit Toolbar
4.4 Jump to a New Page
21
• The new page is now made after the current page and the number of all
pages is automatically changed.
Figure 4.4 Making a new page
4.4 Jump to a New Page
• Right click the Page button to open the setting table.
• Click on Goto in the left pane.
• Select the name or number of the page you want in the right pane.
Figure 4.5 Page setting table, jump to another page
• Click on Ok.
• The selected page is opened.
22
Chapter 4 Page
4.5 Change the Name of the Page
• If the Edit Toolbar does not present in the page, press E key on the keyboard
to see it. Now, you are in Edit Mode and you can modify the name of the
page.
• Right click the Page button to open the setting table.
• Click on Name in the left pane.
• Type the name you want.
Figure 4.6 Page setting table, change the name of the page
• Click on Ok.
• The name of the page is now changed.
Chapter 5
PlayBox
5.1
PlayBox at a Glance
This panel helps you receive data through eWave hardware, open a previously
recorded data, start playing games, displaying signals and calculating FFT values.
You can get some information about the data such as the name of the data, the
type of data acquisition (online or offline) and the name of the recording file if it
is saving. You can also see the current time of the signal, the level of the battery
and the current comport in this panel.
Figure 5.1 PlayBox
PlayBox Components
• Play Button: starts playing games, displaying signal and FFT value on the
Scope, Bar, light and Val panels.
• Current Time: shows the current time of the data being displayed.
• Battery Level: Shows the percentage level of the battery charge.
• OpenMode:
Offline shows you are playing a previously recorded data.
eWave shows you are receiving data through eWave Hardware.
• Current Comport: shows the comport that linked your hardware to the
software. It is shown only when you are in eWave OpenMode. It should be
the corresponding comport of your device connection (see sec. 2.2.2).
• Saving Status:
Enable: shows that the data you are playing are currently recording with the
name specified in Recording File Name.
Disable: shows that the data is NOT recording.
23
24
Chapter 5 PlayBox
• Recording File Name: shows the name of the recording data that you can
later open in Offline OpenMode. It is shown only when the Saving Status is
Enable.
• Simulation File Name: shows the name of the previously recorded data that
you are currently playing in Offline OpenMode. It is shown only when you
are in Offline OpenMode.
5.2
PlayBox Setting Table
It provides you with some items to change the properties:
Figure 5.2 PlayBox Setting
• COM: You can select the serial comport of your device from the list.
• Open Data: You can select one of the items below:
Browse to open a recorded data.
eWave to receive data through eWave Hardware.
• Save Data: You can select one the items below:
Browse to save the recording data with the name and in the location you
want.
Disable to prevent data from saving.
• Saving Channels: You can select one or multiple channels that you want to
save.
Extra Items
You can see some other options during EditMode ( When you have pressed the E
key on the keyboard and you can see Edit toolbar in the screen) including:
• H: You can change the height of the panel.
5.3 Make a New PlayBox Panel
25
• W: You can change the height of the panel.
• X: You can change the position in x-axis.
• Y: You can change the position in y-axis.
5.3
Make a New PlayBox Panel
• Run the eWave Probe to open the main menu.
• Click File > Open Protocol to open a protocol or File > New Protocol to
create a new protocol. An editable page opens.
• Press E key on the keyboard. The Edit Toolbar (Fig. 5.3) appears in the left
side of the page.
• On the Edit Toolbar, Click on PlayBox.
• Click on the position of the page that you want to place the panel.
• The PlayBox panel is now made. You can change the size and position of
the panel to the values you want.
Figure 5.3 Edit Toolbar
Figure 5.4 Making a PlayBox Panel
5.3.1
Changing Size and Position
• If the Edit Toolbar does not present in the page, press E key on the keyboard
to see it. Now, you are in Edit Mode and you can modify the panel.
• Click on the borders of the panel and drag the mouse to resize it.
• Click on the center of the panel and drag the mouse to move it.
26
Chapter 5 PlayBox
An Alternative Way
If you want to specify the exact value of size and position do the following:
t You can edit panel only
• If the Edit Toolbar does not present in the page, press E key on the keyboard
to see it.
when you are in Edit Mode
.i.e. you have pressed the
E key on keyboard and you
can see Edit Toolbar in the
page.
• Right click on the panel to open the setting table.
• Click on the item H, to change height, and type the value you want.
t You can see these extra features in the setting table only
when you are in Edit Mode.
Figure 5.5 PlayBox setting table, change the size and position
• Click on W, to change width, and type the value you want.
• Click on X, to change the position in x-axis, and type the value you want.
• Click on Y, to change the position in y-axis, and type the value you want.
5.4
Read Data through eWave Hardware
• Right click on the panel to open the setting table.
t If you do not know which
• Click on COM in the left pane and select the corresponding comport in the
right.
comport to select see sec.
2.2.2.
Figure 5.6 PlayBox setting table, select comport
5.4 Read Data through eWave Hardware
• Click on Open Data in the left pane and select eWave in the right.
Figure 5.7 PlayBox setting table, read Data through eWave
• Click on Ok.
• Click on Play button on the PlayBox panel to receive data.
NOTE
You may receive an error message: "Device is not connected".
Check your eWave connection and try again.
Look at the Information
you can see the information about current status of play in the PlayBox.
Figure 5.8 PlayBox Panel
• Open Mode: eWave shows you are receiving data from eWave hardware.
• Current Comport shows the name of the file that you are playing. It is shown
only when open mode is eWave.
27
28
Chapter 5 PlayBox
5.5
Read Previously Recorded Data
• Right click the panel to open the setting table.
• Click on Open Data in the left pane and select Browse in the right.
Figure 5.9 PlayBox setting table, open a recorded file
• Browse on the data that you want to read and click OK.
Figure 5.10 Open dialog box, open a recorded file
• Click on Open.
• Click on Play button on the PlayBox panel to display data.
5.6 Save Data
29
Look at the Information
you can see the information about current status of play in the PlayBox.
Figure 5.11 PlayBox Panel
• Open Mode:offline shows you are playing a simulation data.
• Simulation File Name shows the name of the file that you are playing. It is
shown only when OpenMode is Offline.
5.6
Save Data
• Right click the panel to open the setting table.
• Click on Save Data in the left pane and select Browse item in the right.
t If you do not want to save
data, simply select Disable.
Or else, all of the data you
are playing in different times
are recorded. In this case,
you have many stored data
with the same prefix and
different suffixes according
to their time of recording.
Figure 5.12 PlayBox setting table, save data
• Click Saving Channels in the left pane and select number of each of the
channels that you want to save in the right.
30
Chapter 5 PlayBox
Figure 5.13 PlayBox setting table, select saving channel
• Enter the name that you want and click Save.
Figure 5.14 Save dialog box, save data
• Click on Open.
• Click on Play button on the PlayBox panel to show data.
NOTE
Saving your data, the software automatically adds date and
current time to the name you enter.
So, you can have multiple file with similar names and can
find your data based on the time you have recorded it.
5.7 Get information from the PlayBox Panel
Look at the Information
you can see the information about current saving status in the PlayBox.
Figure 5.15 PlayBox panel
• Save Status is Disable the data is not recording or Enable if it is recording.
• Recording File Name shows the name of the file that you want to save. It is
shown only when save status is enable.
5.7 Get information from the PlayBox Panel
You can see the current status of your recording in the play box pannel using the
following items:
• Play Button is Stop if you are playing and Play if not.
• Time shows the time of the data in second.
• Battery shows the percentage level of battery charge.
• Open Mode is offline when you are playing a simulation data or eWave
when you are receiving data from eWave hardware.
• Current Comport shows the name of the file that you are playing. It is
shown only when open mode is eWave.
• Simulation File Name shows the name of the file that you are playing. It is
shown only when OpenMode is Offline.
• Save Status is Disable the data is not recording or Enable if it is recording.
• Recording File Name shows the name of the file that you want to save. It is
shown only when save status is enable.
31
Chapter 6
Scope
6.1
Scope at a Glance
You can see the signal both in time and frequency domain in the Scope.
Figure 6.1 Scope
6.2
Scope Setting Table
In the scope setting table you can see some items to change:
Figure 6.2 Scope Setting
33
34
Chapter 6 Scope
• Channel: You can select the channel you want to see.
• V/D: The amplitude of the signal may be in different scales such as µv,
mv or v. The signal maybe too small or too large to be seen in the scope.
Therefore, you need to change the vertical scale (Volt/Division) using V/D.
Note that each value you select is equal to one of the grids in vertical axis.
• T/D: You may need to see the details of the signal in µs scale or see the
whole signal in s. So you can change how much the data is compact in
horizontal scale.
• HPF: You can implement a high pass filter to eliminate the high frequency
signals or noises. You can select the cut of frequency of the high pass filter
using item HPF.
• LPF: You can implement a low pass filter to eliminate the low frequency
signals or noises. You can select the cut of frequency of the low pass filter
using item LPF.
• Mode: You can see the raw signal in time or see the instantaneous FFT of
the signal by selecting the RAW or FFT mode respectively.
• Name: You can change the name of the panel using this item.
Extra Items
You can see some other options during EditMode ( When you have pressed the E
key on the keyboard and you can see Edit toolbar in the screen) including:
• H: You can change the height of the panel.
• W: You can change the height of the panel.
• X: You can change the position in x-axis.
• Y: You can change the position in y-axis.
6.3
Make a New Scope Panel
• Run the eWave Probe to open the main menu.
• Click on File > Open Protocol to open a protocol or on File > New Protocol to create a new protocol. An editable page is opened.
• If the Edit Toolbar does not present in the page, press E key on the keyboard
to see it. The Edit Toolbar (Fig. 6.3) is appeared in the left side of the page.
Figure 6.3 Edit Toolbar
• Click on the item Scope to select it.
6.3 Make a New Scope Panel
35
• Click on the position of the page that you want to place the panel.
• The scope is made in the page. You can then change the size and position
of the panel to the value you want.
Figure 6.4 A scope panel is made in the page.
6.3.1
Changing Size and Position
• If the Edit Toolbar does not present in the page, press E key on the keyboard
to see it. Now, you are in Edit Mode and you can modify the panel.
• Click on the borders of the panel and drag the mouse to resize it.
• Click on the center of the panel and drag the mouse to move it.
An Alternative Way
t You can edit panel only
when you are in Edit Mode
.i.e. you have pressed the
E key on keyboard and you
can see Edit Toolbar in the
page.
If you want to specify the exact value of size and position do the following:
• If the Edit Toolbar does not present in the page, press E key on the keyboard
to see it. Now, you are in Edit Mode and you can modify the panel.
• Right click on the panel to open the setting table.
• Click on H, to change height, and type the value you want.
t You can see these extra features in the setting table only
when you are in Edit Mode.
36
Chapter 6 Scope
Figure 6.5 Scope setting table, change the size and position
• Click on W, to change width, and type the value you want.
• Click on X, to change the position in x-axis, and type the value you want.
• Click on Y, to change the position in y-axis, and type the value you want.
6.4 Select Display Setting
6.4.1 Select Channel to Display
• Right click on the panel to open the setting table.
• Click on the item Channel on the left side of the table to change the channel.
Figure 6.6 Scope Setting table, select channel
• Click on one of the items on the right side of the table and select the channel
you want to display.
6.4 Select Display Setting
37
6.4.2 Select Display Mode
You can see data both in time and frequency domain in scope using Raw and FFT
mode respectively.
• Right click on the panel to open the setting table.
• Click on the item Mode on the left side of the table to change the display
mode.
Figure 6.7 Scope Setting table, select display mode
• Click on the RAW to see the raw data or FFT to see the instantaneous FFT
of the data or both FFT and RAW.
6.4.3 Select Horizontal Scale
• Right click on the panel to open the setting table.
• Click on the item T/D on the left side of the table to change the horizontal
scale.
Figure 6.8 Scope Setting Table, Select Time Division
t The values you see in horizontal scale of the scope
are not the current time of
the data, they are just Time
Divisions. If you want to
see the current time, look
at the Time button on the
PlayBox panel ( See sec.
5.7).
38
Chapter 6 Scope
• Click on one of the items on the right side of the table or type your own
value( You should enter a value on volt scale. e.g. .003 for 3mv.).
• The horizontal scale is changed. Each of the grid box in the scope is now
equal to the value you set as T/D.
6.4.4 Select Vertical Scale
• Right click on the panel to open the setting table.
• Click on the item V/D on the left side of the table to change the Vertical
scale.
• Click on one of the items on the right side of the table or type your own
value ( You should enter a value on volt scale. e.g. .003 for 3mv.)
Figure 6.9 Scope setting table, select Volt/Division
• The vertical scale is instantly changed. You can try different scales and
select the best. Each of the grid box in the scope is now equal to the value
you set as V/D.
• Click OK.
6.4.5 Implement Filter to Data
• Right click on the panel to open the setting table.
• Click on the item LPF on the left side of the table to implement low pass
filter or HPF for high pass filter.
• Click on one of the items on the right side of the table or type your own
value to determine cut of frequency of the filter.
6.4 Select Display Setting
Figure 6.10 Scope setting table, select cut of frequency of the filter
• The displayed data is filtered while the original data is the same.
39
Chapter 7
FFT
7.1
FFT at a Glance
In FFT panel, you can see the square of the instantaneous FFT power of your
desired band.
Figure 7.1 FFT
7.2
FFT Setting Table
In the FFT setting table, you can see some items to change:
• Channel: You can select the channel you want to see its frequency content.
• Band: You may want to see the FFT of specific EEG band or any other
frequency band that you want. You can choose one of the predefined EEG
bands on the setting table or enter a band in the forms of St ar t B and −
St opB and .
• V/D: The amplitude of the FFT signal may be in different scales such as
µv, mv or v. The signal maybe too small or too large to be seen in the FFT.
Therefore, you need to change the vertical scale (Volt/Division) using V/D.
41
42
Chapter 7 FFT
Figure 7.2 FFT Setting
• Time: You can change the window size of the FFT calculation window.
• Name: You can change the name of the panel.
Extra Items
You can see some other options during EditMode ( When you have pressed the E
key on the keyboard and you can see Edit toolbar in the screen) including:
• H: You can change the height of the panel.
• W: You can change the height of the panel.
• X: You can change the position in x-axis.
• Y: You can change the position in y-axis.
7.3
Make a New FFT Panel
• Run the eWave Probe to open the main menu.
• Click on File > Open Protocol to open a protocol or on File > New Protocol to create a new protocol. An editable page is opened.
• If the Edit Toolbar does not present in the page, press E key on the keyboard
to see it. The Edit Toolbar (Fig. 7.3) is appeared in the left side of the page.
• Click on the item named FFT. This item is highlighted.
Figure 7.3 Edit Toolbar
• Click on the position of the page that you want to place the panel. The FFT
panel is now made with default size. You can change the size and position
to the values you want.
7.4 Select Display Setting
7.3.1
43
Changing Size and Position
• If the Edit Toolbar does not present in the page, press E key on the keyboard
to see it. Now, you are in Edit Mode and you can modify the panel.
• Click on the borders of the panel and drag the mouse to resize it.
• Click on the center of the panel and drag the mouse to move it.
An Alternative Way
t You can edit panel only
when you are in Edit Mode
.i.e. you have pressed the
E key on keyboard and you
can see Edit Toolbar in the
page.
If you want to specify the exact value of size and position do the following:
• If the Edit Toolbar does not present in the page, press E key on the keyboard
to see it. Now, you are in Edit Mode and you can modify the panel.
• Right click on the panel to open the setting table.
• Click on H, to change height, and type the value you want.
Figure 7.4 FFT setting table, change size and position
• Click on W, to change width, and type the value you want.
• Click on X, to change the position in x-axis, and type the value you want.
• Click on Y, to change the position in y-axis, and type the value you want.
7.4 Select Display Setting
7.4.1 Select Channel to Display
• Right click on the panel to open the setting table.
• Click on the item Channel on the left side of the table to change the channel.
t You can see these extra features in the setting table only
when you are in Edit Mode.
44
Chapter 7 FFT
Figure 7.5 FFT setting table, change channel
• Click on one of the items on the right side of the table and select the channel
you want to display.
Delta: 1 − 4H z
Theta: 4 − 8H z
Thalpha: 6 − 10H z
7.4.2 Select Frequency Band
• Right click the panel to open the setting table.
Alpha: 8 − 12H z
LowAlpha: 8 − 10H z
HighAlpha: 10 − 12H z
• Click on the item Band on the left side of the table to change the frequency
bands that you want to see in horizontal scale. The frequency range of some
predefined Bands are shown in table . 7.1
Mu: 8 − 13H z
SMR: 12 − 15H z
Beta: 12 − 35H z
Beta1: 15 − 18H z
Beta2: 18 − 22H z
Beta3: 22 − 26H z
Beta4: 26 − 30H z
Beta5: 30 − 35H z
Gama: 35 − 100H z
LowArtifact: 43 − 59H z
HighArtifact: 1 − 2H z
Table 7.1 The Range of Frequency
Bands
Figure 7.6 FFT setting table, select band
• Click on one of the predefined bands on the right side of the table or type
your own frequency range( e.g. 1 − 50).
• The number of frequency bin is changed to cover the range that you set as
Bands.
7.4 Select Display Setting
7.4.3 Select Vertical Scale
• Right click on the panel to open the setting table.
• Click on the item V/D on the left side of the table to change the Vertical
scale.
• Click on one of the items on the right side of the table or type your own
value ( You should enter a value on volt scale. e.g. .003 for 3mv.)
Figure 7.7 FFT setting table, change vertical scale
• The vertical scale is instantly changed. You can try different scales and
select the best. Each of the grid box in the scope is now equal to the value
you set.
7.4.4
Select FFT Calculation Window Size
The FFT value is calculated online but it considers previous samples up to a
specific window length. Selecting FFT window size, you can determine if you
want to consider previous samples of one, two, four or eight seconds. If your data
has sharp changes and you want to track changes in every second, then choose
one second for FFT window size. If not, you can choose larger values.
• Right click on the panel to open the setting table.
• Click on the item Time on the left side of the table to change FFT window
size.
45
46
Chapter 7 FFT
Figure 7.8 FFT setting table, change FFT window size
• Click on one of the items on the right side of the table or enter a value to
select the window size.
Chapter 8
Val
8.1
Val at a Glance
This panel displays the square of the FFT power of the band that you have selected.
You can select the band and the channel that you want to see the corresponding
value.
Figure 8.1 Val
8.2
Val Setting Table Properties
In the Val panel, The square of the FFT power of the band that you have selected
is calculated. In the Val setting table, you can see some items to change:
• Channel: You can see the output Val of only one channel at a time in each
Val panel. Here, you can select the channel you want to see.
• Band: You may want to see the FFT of specific EEG band or any other
frequency band that you want. You can choose one or multiple predefined
EEG bands on the setting table or enter a band in the forms of St ar t B and −
St opB and .
• Time: You can change the window size of the FFT calculation method.
• Name: You can change the name of the panel using this item.
47
48
Chapter 8 Val
Extra Items
You can see some other options during EditMode ( When you have pressed the E
key on the keyboard and you can see Edit toolbar in the screen) including:
• H: You can change the height of the panel.
• W: You can change the height of the panel.
• X: You can change the position in x-axis.
• Y: You can change the position in y-axis.
8.3
Make a New Val Panel
• Run the eWave Probe to open the main menu.
• Click on File > Open Protocol to open a protocol or on File > New Protocol to create a new protocol. An editable page is opened.
• If the Edit Toolbar does not present in the page, press E key on the keyboard
to see it. The Edit Toolbar (Fig. 8.2) is appeared in the left side of the page.
• Click on the item named Val. This item is highlighted.
• Click on the position of the page that you want to place the panel. The Val
panel is now made with default size. You can change the size and position
to the values you want.
Figure 8.2 Edit Toolbar
t You can edit panel only
when you are in Edit Mode
.i.e. you have pressed the
E key on keyboard and you
can see Edit Toolbar in the
page.
8.3.1
Changing Size and Position
• If the Edit Toolbar does not present in the page, press E key on the keyboard
to see it. Now, you are in Edit Mode and you can modify the panel.
• Click on the borders of the panel and drag the mouse to resize it.
• Click on the center of the panel and drag the mouse to move it.
An Alternative Way
t You can see these extra features in the setting table only
when you are in Edit Mode.
If you want to specify the exact value of size and position do the following:
• If the Edit Toolbar does not present in the page, press E key on the keyboard
to see it. Now, you are in Edit Mode and you can modify the panel.
• Right click on the panel to open the setting table.
8.4 Select Display Setting
• Click on the item H, to change height, and type the value you want.
Figure 8.3 Val setting table, change size and position
• Click on the item W, to change Width, and type the value you want.
• Click on the item X, to change the position in x-axis, and type the value you
want.
• Click on the item Y, to change the position in y-axis, and type the value you
want.
8.4 Select Display Setting
8.4.1 Select Channel to Calculate Val
• Right click on the panel to open the setting table.
• Click on the item Channel on the left side of the table to change the channel.
Figure 8.4 Val setting table, select channel
• Click on one of the items on the right side of the table and select the channel
you want to display.
49
50
Chapter 8 Val
8.4.2 Select Frequency Band
Delta: 1 − 4H z
Theta: 4 − 8H z
Thalpha: 6 − 10H z
• Right click the panel to open the setting table.
• Click on the item Band on the left side of the table to change the frequency
bands that you want to see in horizontal scale. The frequency range of some
predefined are shown in table. 8.1
Alpha: 8 − 12H z
LowAlpha: 8 − 10H z
HighAlpha: 10 − 12H z
Mu: 8 − 13H z
SMR: 12 − 15H z
Beta: 12 − 35H z
Beta1: 15 − 18H z
Beta2: 18 − 22H z
Beta3: 22 − 26H z
Beta4: 26 − 30H z
Beta5: 30 − 35H z
Figure 8.5 Val setting table, select frequency band
Gama: 35 − 100H z
LowArtifact: 43 − 59H z
HighArtifact: 1 − 2H z
Table 8.1 The Range of Frequency
Bands
• Click on one of the predefined bands on the right side of the table or type
your own frequency range( e.g. 1 − 50).
• The number of frequency bins is changed to cover the range that you set as
Bands.
8.4.3
Select FFT Calculation Window Size
The FFT value is calculated online but it considers previous samples up to a
specific window length. Selecting FFT window size, you can determine if you
want to consider previous samples of one, two, four or eight seconds. If your data
has sharp changes and you want to track changes in every second, then choose
one second for FFT window size. If not, you can choose larger values.
• Right click on the panel to open the setting table.
• Click on the item Time on the left side of the table to change FFT window
size.
8.4 Select Display Setting
Figure 8.6 Val setting table, change FFT window size
• Click on one of the items on the right side of the table or enter a value to
select the window size.
51
Chapter 9
Bar
9.1
Bar at a Glance
This panel calculates the square of the FFT power of the band that you have
selected and displays it using a colored bar. It also shows weather this value is
beyond or less than your desired threshold and considers it as a logic for the Game
panel. This logic is used in Game panel as a command or rule that determines
how the game should play. You can see both the value of the FFT power and the
value of the logic in the Bar panel. The FFT power is displayed in lower part of
the bar and the logic is displayed in color form. It is green/red for upper than
threshold and red/green for lower than threshold in Non Inverted/Inverted mode.
Figure 9.1 Bar
9.2
Bar Setting Table Properties
In the Bar setting table you can see some items to change:
• Channel: You can see the output bar of only one channel at a time in each
Bar panel. Here, you can select the channel you want to see.
53
54
Chapter 9 Bar
• Band: You may want to see the FFT of specific EEG band or any other
frequency band that you want. You can choose one or multiple predefined
EEG bands on the setting table or enter a band in the forms of St ar t B and −
St opB and .
• Threshold: You need to select a threshold for each bar to determine whether
the FFT value of the selected band is less or more than the desired value.
This threshold play role in other panels such as Game. It determines
whether the video or game is played or not, which animation should be
displayed or with which size the movie should be played. You can select
this value using the item Threshold.
• Invert: You need to determine whether the objective of each bar is decreasing or increasing the frequency band. In other word, you need to specify
for the software that you want to give reward for increasing or decreasing
the FFT power of this band
• V/D: The amplitude of the signal may be in different scales such as µv, mv
or v. As a result, signal maybe too small or too large to be seen in the scope.
Therefore, you need to change the vertical scale (Volt/Division) using V/D.
Note that each value you select is equal to one of the grids in vertical axis.
• Time: You can change the window size of the FFT calculation method.
• Name: You can change the name of the panel using this item.
Extra Items
You can see some other options during EditMode ( When you have pressed the E
key on the keyboard and you can see Edit toolbar in the screen) including:
• H: You can change the height of the panel.
• W: You can change the height of the panel.
• X: You can change the position in x-axis.
• Y: You can change the position in y-axis.
9.3
Make a New Bar Panel
• Run the eWave Probe to open the main menu.
• Click on File > Open Protocol to open a protocol or on File > New Protocol to create a new protocol. An editable page is opened.
9.3 Make a New Bar Panel
55
• If the Edit Toolbar does not present in the page, press E key on the keyboard
to see it. The Edit Toolbar (Fig. 9.2) is appeared in the left side of the page.
• Click on the item named Bar. This item is highlighted.
• Click on the position of the page that you want to place the panel. The Bar
panel is now made with default size. You can change the size and position
to the values you want.
9.3.1
Changing Size and Position
• If the Edit Toolbar does not present in the page, press E key on the keyboard
to see it. Now, you are in Edit Mode and you can modify the panel.
• Click on the borders of the panel and drag the mouse to resize it.
• Click on the center of the panel and drag the mouse to move it.
Figure 9.2 Edit Toolbar
An Alternative Way
If you want to specify the exact value of size and position do the following:
• If the Edit Toolbar does not present in the page, press E key on the keyboard
to see it. Now, you are in Edit Mode and you can modify the panel.
• Right click on the panel to open the setting table.
• Click on the item H, to change height, and type the value you want.
t You can edit panel only when
you are in Edit Mode .i.e. you
have pressed the E key on
keyboard and you can see
Edit Toolbar in the page.
t You can see these extra features in the setting table only
when you are in Edit Mode.
Figure 9.3 Bar setting table, change size and position
• Click on the item W, to change Width, and type the value you want.
• Click on the item X, to change the position in x-axis, and type the value you
want.
• Click on the item Y, to change the position in y-axis, and type the value you
want.
56
Chapter 9 Bar
9.4 Select Display Setting
9.4.1 Select Channel to Calculate Bar
• Right click on the panel to open the setting table.
• Click on the item Channel on the left side of the table to change the channel.
Figure 9.4 Bar setting table, select channel
• Click on one of the items on the right side of the table and select the channel
you want to display.
Delta: 1 − 4H z
Theta: 4 − 8H z
Thalpha: 6 − 10H z
9.4.2 Select Frequency Band
• Right click the panel to open the setting table.
Alpha: 8 − 12H z
LowAlpha: 8 − 10H z
HighAlpha: 10 − 12H z
• Click on the item Band on the left side of the table to change the frequency
bands that you want to see in horizontal scale. The frequency range of some
predefined are shown in table. 9.1
Mu: 8 − 13H z
SMR: 12 − 15H z
Beta: 12 − 35H z
Beta1: 15 − 18H z
Beta2: 18 − 22H z
Beta3: 22 − 26H z
Beta4: 26 − 30H z
Beta5: 30 − 35H z
Gama: 35 − 100H z
LowArtifact: 43 − 59H z
HighArtifact: 1 − 2H z
Table 9.1 The Range of Frequency
Bands
Figure 9.5 Bar setting table, select frequency band
9.4 Select Display Setting
• Click on one of the predefined bands on the right side of the table or type
your own frequency range( e.g. 1 − 50).
• The number of frequency bins is changed to cover the range that you set as
Bands.
9.4.3 Select Threshold Value
You need to select a threshold for each bar to determine whether the FFT value of
the selected band is less or more than the desired value. This threshold play role
in other panels such as Game, it determines whether the video or game is played
or not, which animation should be displayed or with which size the movie should
be played. The value of the threshold is important in training a client’s brain
waves and should be specific to each individual. You have two ways to determine
a threshold : Manually or Automatically.
Manually
In this case, you yourself can select the threshold according to your instantaneous
observation of the client’s performance.
• Right click on the panel to open the setting table.
• Click on the item Threshold on the left side of the table.
Figure 9.6 Bar setting table, Select threshold value
• Click on the item manual on the right side of the table.
• From this time on you can change the value of threshold. Left click on the
position you want. A white line moves to the new position and shows the
value of the threshold.
57
58
Chapter 9 Bar
Automatically
The software can automatically select the threshold according to the percentage
that you determine. For example, selecting %60, the software should give reward
in 60 percent of the cases. In this case, the value of threshold is not constant . It
changes during the time so that in overall the client receives positive feedback in
60 percent of the time.
• Right click on the panel to open the setting table.
• Click on the item Threshold on the left side of the table.
Figure 9.7 Bar setting table, Select threshold value
• Click on one of the percentages on the right side of the table or enter you
own value.
• Click on Ok.
9.4.4
Select the Type of the Bar, Inverted or Non Inverted
In neurofeedback therapy, therapist may work on excessive fast or slow brainwaves to train them to behave in normal way. Hence, you may need to increase
some brainwaves while decreasing some other brainwaves. In this software, the
fact that the objective for each band in each bar is decreasing or increasing is
determined by Inverted or Non Inverted terms respectively.
Inverted and Non Inverted Terms
• The term Inverted means that you expect the client to decrease undesired
brainwaves hence the more he reduces that band the more he is eligible for
reward.
9.4 Select Display Setting
• The term Non Inverted means that you expect the client to increase desired
brainwaves hence the more he increases that band the more he is eligible
for reward.
Figure 9.8 Example of Inverted and Non Inverted Bars
To determine the type of the bar do the following:
• Right click on the panel to open the setting table.
• Click on the item Invert on the left side of the table.
Figure 9.9 Bar setting table, Select the type of the Bar, inverted or not
• Click on YES for Inverted or NO for Non Inverted type.
• Click on Ok.
59
60
Chapter 9 Bar
9.4.5 Select Vertical Scale
• Right click on the panel to open the setting table.
• Click on the item V/D on the left side of the table to change the Vertical
scale.
• Click on one of the items on the right side of the table or type your own
value ( You should enter a value on volt scale. e.g. .003 for 3mv.)
Figure 9.10 Bar setting table, change Volt/Division ( Vertical Scale)
• The vertical scale is instantly changed. You can see the data and select the
best you want. Each of the grid box in the scope is now equal to the value
you set as V/D.
9.4.6
Select FFT Calculation Window Size
The FFT value is calculated online but it considers previous samples up to a
specific window length. Selecting FFT window size, you can determine if you
want to consider previous samples of one, two, four or eight seconds. If your data
has sharp changes and you want to track changes in every second, then choose
one second for FFT window size. If not, you can choose larger values.
• Right click on the panel to open the setting table.
• Click on the item Time on the left side of the table to change FFT window
size.
9.4 Select Display Setting
Figure 9.11 Bar setting table, change FFT window size
• Click on one of the items on the right side of the table or enter a value to
select the window size.
61
Chapter 10
Light
10.1
Light at a Glance
This panel calculates the square of the FFT power of the band that you have
selected and compares it with two thresholds. If the value is more than both
thresholds the light shows green color. If it is less than both thresholds the color
is red and if it is in the middle, the color is orange.
Figure 10.1 Light
10.2 Light Setting Table
In the Light setting table you can see some items to change:
• Channel: You can see the output Light of only one channel at a time in
each Light panel. Here, you can select the channel you want to see.
• Time: You can change the window size of the FFT calculation method.
• ThresholdA: You can select the value of the first (lower) threshold using
ThresholdA.
• ThresholdB: You can select the value of the second (higher) threshold using
ThresholdB.
63
64
Chapter 10 Light
• Band: You can consider the FFT of specific EEG band or any other frequency
band that you want using the item Band. You can choose one or multiple
predefined EEG bands on the setting table or enter a band in the forms of
St ar t B and − St opB and .
• Name: You can change the name of the panel using this item.
Extra Items
You can see some other options during EditMode ( When you have pressed the E
key on the keyboard and you can see Edit toolbar in the screen) including:
• H: You can change the height of the panel.
• W: You can change the height of the panel.
• X: You can change the position in x-axis.
• Y: You can change the position in y-axis.
10.3
Make a New Light Panel
• Run the eWave Probe to open the main menu.
• Click on File > Open Protocol to open a protocol or on File > New Protocol to create a new protocol. An editable page is opened.
• If the Edit Toolbar does not present in the page, press E key on the keyboard
to see it. The Edit Toolbar (Fig. 10.2) is appeared in the left side of the
page.
• Click on the item named Light. This item is highlighted.
• Click on the position of the page that you want to place the panel. The Light
panel is now made with default size. You can change the size and position
to the values you want.
Figure 10.2 Edit Toolbar
t You can edit panel only
when you are in Edit Mode
.i.e. you have pressed the
E key on keyboard and you
can see Edit Toolbar in the
page.
10.3.1
Changing Size and Position
• If the Edit Toolbar does not present in the page, press E key on the keyboard
to see it. Now, you are in Edit Mode and you can modify the panel.
• Click on the borders of the panel and drag the mouse to resize it.
• Click on the center of the panel and drag the mouse to move it.
10.4 Select Display Setting
An Alternative Way
65
t You can see these extra features in the setting table only
when you are in Edit Mode.
If you want to specify the exact value of size and position do the following:
• If the Edit Toolbar does not present in the page, press E key on the keyboard
to see it. Now, you are in Edit Mode and you can modify the panel.
• Right click on the panel to open the setting table.
• Click on the item H, to change height, and type the value you want.
Figure 10.3 Light setting table, change size and position
• Click on the item W, to change Width, and type the value you want.
• Click on the item X, to change the position in x-axis, and type the value you
want.
• Click on the item Y, to change the position in y-axis, and type the value you
want.
10.4 Select Display Setting
10.4.1 Select Channel
• Right click on the panel to open the setting table.
• Click on the item Channel on the left side of the table to change the channel.
66
Chapter 10 Light
Figure 10.4 Light setting table, select channel
• Click on one of the items on the right side of the table and select the channel
you want to display.
10.4.2 Select Frequency Band
Delta: 1 − 4H z
Theta: 4 − 8H z
Thalpha: 6 − 10H z
• Right click the panel to open the setting table.
• Click on the item Band on the left side of the table to change the frequency
bands that you want to see in horizontal scale. The frequency range of some
predefined are shown in table. 10.1
Alpha: 8 − 12H z
LowAlpha: 8 − 10H z
HighAlpha: 10 − 12H z
Mu: 8 − 13H z
SMR: 12 − 15H z
Beta: 12 − 35H z
Beta1: 15 − 18H z
Beta2: 18 − 22H z
Beta3: 22 − 26H z
Beta4: 26 − 30H z
Beta5: 30 − 35H z
Figure 10.5 Light setting table, select frequency band
Gama: 35 − 100H z
LowArtifact: 43 − 59H z
HighArtifact: 1 − 2H z
• Click on one of the predefined bands on the right side of the table or type
your own frequency range( e.g. 1 − 50).
• The number of frequency bins is changed to cover the range that you set as
Bands.
Table 10.1 The Range of Frequency Bands
10.4 Select Display Setting
10.4.3 Select Thresholds Values
You need to select two thresholds for each Light panel to determine to compare the FFT value of the selected band with them. The value of the thresholds
is important in training a client’s brain waves and should be specific to each
individual.
• Right click on the panel to open the setting table.
• Click on the item ThresholdA/ThresholdB on the left side of the table.
Figure 10.6 Light setting table, Select threshold value
• Type the value you want. Note that the value of ThresholdA should be less
than ThresholdB.
10.4.4
Select FFT Calculation Window Size
The FFT value is calculated online but it considers previous samples up to a
specific window length. Selecting FFT window size, you can determine if you
want to consider previous samples of one, two, four or eight seconds. If your data
has sharp changes and you want to track changes in every second, then choose
one second for FFT window size. If not, you can choose larger values.
• Right click on the panel to open the setting table.
• Click on the item Time on the left side of the table to change FFT window
size.
67
68
Chapter 10 Light
Figure 10.7 Light setting table, change FFT window size
• Click on one of the items on the right side of the table or enter a value to
select the window size.
Chapter 11
Text
11.1
Text at a Glance
If you like to add some information as text to your protocol, you can use Text
panel. You can also use this panel to show the result of the analyze panel ( see Ch.
12).
Figure 11.1 Text
11.2 Text Setting Table
In the Text setting table, you can see some items to change:
• Content: Type what you like to write in your Text panel
• Font: You can select the font style and the size that you like from the font
table.
• Color: You can select the text color that you like from the color table.
69
70
Chapter 11 Text
Figure 11.2 Text Setting
• Alignment: You can select the text to be aligned in the Right, Left or Center
of the panel.
• Name: You can change the name of the panel.
Extra Items
You can see some other options during EditMode ( When you have pressed the E
key on the keyboard and you can see Edit toolbar in the screen) including:
• H: You can change the height of the panel.
• W: You can change the height of the panel.
• X: You can change the position in x-axis.
• Y: You can change the position in y-axis.
11.3
Make a New Text Panel
• Run the eWave Probe to open the main menu.
• Click on File > Open Protocol to open a protocol or on File > New Protocol to create a new protocol. An editable page is opened.
• If the Edit Toolbar does not present in the page, press E key on the keyboard
to see it. The Edit Toolbar (Fig. 11.3) is appeared in the left side of the
page.
• Click on the item named Text. This item is highlighted.
Figure 11.3 Edit Toolbar
• Click on the position of the page that you want to place the panel. The Text
panel is now made with default size. You can change the size and position
to the values you want.
11.3 Make a New Text Panel
11.3.1
71
Changing Size and Position
• If the Edit Toolbar does not present in the page, press E key on the keyboard
to see it. Now, you are in Edit Mode and you can modify the panel.
• Click on the borders of the panel and drag the mouse to resize it.
• Click on the center of the panel and drag the mouse to move it.
An Alternative Way
t You can edit panel only
when you are in Edit Mode
.i.e. you have pressed the
E key on keyboard and you
can see Edit Toolbar in the
page.
If you want to specify the exact value of size and position do the following:
• If the Edit Toolbar does not present in the page, press E key on the keyboard
to see it. Now, you are in Edit Mode and you can modify the panel.
• Right click on the panel to open the setting table.
• Click on the item H, to change height, and type the value you want.
Figure 11.4 Analyze setting table, change Size and Position
• Click on the item W, to change width, and type the value you want.
• Click on the item X, to change the position in x-axis, and type the value you
want.
• Click on the item Y, to change the position in y-axis, and type the value you
want.
11.3.2
Change Text Properties
• If the Edit Toolbar does not present in the page, press E key on the keyboard
to see it. Now, you are in Edit Mode and you can modify the panel.
• Right click on the text panel to open the setting table.
t You can see these extra features in the setting table only
when you are in Edit Mode.
72
Chapter 11 Text
• Click on the item Font on the left side of the table and then click on the
Font Table on the right side.
Figure 11.5 Analyze setting table, change the font
• Select the Font,Font Style and Size that you want and click on OK.
Figure 11.6 Font table
• Click on the item Color on the left side of the table and then click on the
Color Table on the right side.
11.3 Make a New Text Panel
73
Figure 11.8 colortable
Figure 11.7 Analyze setting table, change the color
• Select the color that you want and click on OK.
• Click on the item Alignment on the left side of the table and then click on
the Right or Left or Center to align the content in a way you like.
74
Chapter 11 Text
Figure 11.9 Analyze setting table, change the alignment
• Click on Ok. The content is displayed according to your desired properties.
Chapter 12
Analyze
After recording data you may need to see the whole data and analyze it. This
panel provides you with a scope and a text panel to shows the signal and the FFT
power of each of the bands that you want. You can select one or multiple bands
and see the corresponding values in the text panel. By default, this panel shows
the latest file that you have previously recorded. But you can change the analyze
file and some other properties in the setting table.
Note that the text panel is another panel that you should create and introduce
to the analyze panel
12.1
Analyze at a Glance
Figure 12.1 Analyze
12.2
Analyze Setting Table
In the Analyze setting table you can see some items to change:
75
76
Chapter 12 Analyze
Figure 12.2 Analyze Setting
• Channel: You can see only one channel at a time in each Analyze panel.
Here, you can select the channel you want to see.
• V/D: The amplitude of the signal may be in different scales such as µv, mv
or v. As a result, signal maybe too small or too large to be seen in the scope.
Therefore, you need to change the vertical scale (Volt/Division) using V/D.
Note that each value you select is equal to one of the grids in vertical axis.
• T/D: You may need to see the details of the signal in µs scale or see the
whole signal in s. So you can change the accuracy of the signal in time
domain or the horizontal scale using T/D.
• HPF: You can implement a high pass filter to eliminate the high frequency
signals or noises. You can select the cut of frequency of the high pass filter
using item HPF.
• LPF: You can implement a low pass filter to eliminate the low frequency
signals or noises. You can select the cut of frequency of the low pass filter
using item LPF.
• Time: You can change the window size of the FFT calculation method.
• Band: In the result of the analyze panel, you see the square of the FFT
power of the bands that you have selected using Band item. You may want
to see the FFT of specific EEG bands or any other frequency band that
you want. You have multi options here so you can choose one or multiple
predefined EEG bands on the setting table or enter a band in the forms of
St ar t B and − St opB and .
• Analyze File: By default, the analyze file is the latest signal that you have
recently recorded. If you like to analyze another recorded data you can
browse and select it using Analyze File.
• Name: You can change the name of the panel using this item.
12.3 Make a New Analyze Panel
77
Extra Items
You can see some other options during EditMode ( When you have pressed the E
key on the keyboard and you can see Edit toolbar in the screen) including:
• Slave: Using the item Slave, you can select a Text panel to the show the result
of Analyze. Click on the Slave and then on the Text panel to show the result.
• H: You can change the height of the panel.
• W: You can change the height of the panel.
• X: You can change the position in x-axis.
• Y: You can change the position in y-axis.
12.3
Make a New Analyze Panel
• Run the eWave Probe to open the main menu.
• Click on File > Open Protocol to open a protocol or on File > New Protocol to create a new protocol. An editable page is opened.
• If the Edit Toolbar does not present in the page, press E key on the keyboard
to see it. The Edit Toolbar (Fig. 12.3) is appeared in the left side of the
page.
• Click on the item named Analyze. This item is highlighted.
• Click on the position of the page that you want to place the panel. The
Analyze panel is now made with default size. You can change the size and
position to the values you want.
12.3.1
Figure 12.3 Edit Toolbar
Changing Size and Position
• If the Edit Toolbar does not present in the page, press E key on the keyboard
to see it. Now, you are in Edit Mode and you can modify the panel.
• Click on the borders of the panel and drag the mouse to resize it.
• Click on the center of the panel and drag the mouse to move it.
An Alternative Way
t You can edit panel only
when you are in Edit Mode
.i.e. you have pressed the
E key on keyboard and you
can see Edit Toolbar in the
page.
If you want to specify the exact value of size and position do the following:
• If the Edit Toolbar does not present in the page, press E key on the keyboard
to see it. Now, you are in Edit Mode and you can modify the panel.
t You can see these extra features in the setting table only
when you are in Edit Mode.
78
Chapter 12 Analyze
• Right click on the panel to open the setting table.
• Click on the item H, to change height, and type the value you want.
Figure 12.4 Analyze setting table, change Size and Position
• Click on the item W, to change width, and type the value you want.
• Click on the item X, to change the position in x-axis, and type the value you
want.
• Click on the item Y, to change the position in y-axis, and type the value you
want.
12.4 Select Display Setting
12.4.1 Select Data to Analyze
• Right click on the panel to open the setting table.
• Click on the item Analyze File on the left side of the table and select Browse
on the right side to open a file for analyze.
Figure 12.5 Analyze setting table, select file
12.4 Select Display Setting
• Browse on the file you want and click on Open.
Figure 12.6 Open dialog box for analyze file
• Click on Ok. The data is displayed on the Analyze panel.
• If you have attached a text panel to the analyze panel, the result is shown in
the text panel. If you have not, follow (Sec. 12.4.2) to show the result.
12.4.2
Select a Text to Show the Result
• Make a New Text Panel as discussed in section . 11.3 (or you may want to
select an existed text panel).
• If the Edit Toolbar does not present in the page, press E key on the keyboard
to see it. Now you are in Edit Mode.
• Right click on the panel to open the setting table.
• Click on the item Slave on the left side of the table and then click on the
text panel that you want to show the result.
79
80
Chapter 12 Analyze
Figure 12.7 Analyze setting table, select a text panel to show the result
• Click on Ok. The result is displayed on the text panel.
Figure 12.8 The result of the Analyze
Information to display on the text
In the text panel of the analyze you can see the following information:
• The FFT amplitude of each of the bands that you have selected.
• File Name: The name of the analyze file that you are working on.
• Recorded File: The recording time of the file.
• Sample Rate: The frequency sampling of the data.
• Resolution: The resolution is 24bi t .
+
• Voltage Range: The voltage range is − 2.5.
• Hardware Gain: The Gain of amplifier is 61.
12.4 Select Display Setting
12.4.3
81
Change Text Properties
• If the Edit Toolbar does not present in the page, press E key on the keyboard
to see it. Now, you are in Edit Mode and you can modify the panel.
• Right click on the text panel to open the setting table.
• Click on the item Font on the left side of the table and then click on the
Font Table on the right side.
Figure 12.9 Analyze setting table, change the font
• Select the Font,Font Style and Size that you want and click on OK.
Figure 12.10 Font table
82
Chapter 12 Analyze
Figure 12.12 colortable
• Click on the item Color on the left side of the table and then click on the
Color Table on the right side.
Figure 12.11 Analyze setting table, change the color
• Select the color that you want and click on OK.
• Click on the item Alignment on the left side of the table and then click on
the Right, Left or Center to align the content in a way you like.
12.4 Select Display Setting
Figure 12.13 Analyze setting table, change the alignment
• Click on Ok and the content is displayed according to your desired properties.
12.4.4 Select Channel to Display
• Right click on the panel to open the setting table.
• Click on the item Channel on the left side of the table to change the channel.
Figure 12.14 Analyze Setting table, select channel
• Click on one of the items on the right side of the table and select the channel
you want to display.
12.4.5 Select Horizontal Scale
• Right click on the panel to open the setting table.
• Click on the item T/D on the left side of the table to change the horizontal
scale.
83
84
Chapter 12 Analyze
Figure 12.15 Analyze setting table, change the Time/Division (Horizontal
Scale)
t The values you see in horizontal scale of the scope
are not the current time of
the data, they are just Time
Divisions. If you want to see
the current time, look at the
Time button on the PlayBox
panel ( See sec. 5.7).
• Click on one of the items on the right side of the table or type your own
value( You should enter a value on volt scale. e.g. .003 for 3mv.).
• The horizontal scale is changed. Each of the grid box in the scope is now
equal to the value you set as T/D.
12.4.6 Select Vertical Scale
• Right click on the panel to open the setting table.
• Click on the item V/D on the left side of the table to change the Vertical
scale.
• Click on one of the items on the right side of the table or type your own
value ( You should enter a value on volt scale. e.g. .003 for 3mv.)
Figure 12.16 Analyze setting table, change Volt/Division (Vertical Scale)
• The vertical scale is instantly changed. You can see the data and select the
best you want. Each of the grid box in the scope is now equal to the value
you set as V/D.
12.4 Select Display Setting
85
12.4.7 Implement Filter to Data
• Right click on the panel to open the setting table.
• Click on the item LPF on the left side of the table to implement low pass
filter or HPF for high pass filter.
• Click on one of the items on the right side of the table or type your own
value to determine cut of frequency of the filter.
Figure 12.17 Analyze setting table, change cut of frequency of the filter
• The displayed data is filtered while the original data is the same.
Delta: 1 − 4H z
Theta: 4 − 8H z
12.4.8 Select Frequency Band to Analyze
• Right click the panel to open the setting table.
• Click on the item Band on the left side of the table to change the frequency
bands that you want to see in horizontal scale. The frequency range of some
predefined Bands are shown in table. 12.1
Thalpha: 6 − 10H z
Alpha: 8 − 12H z
LowAlpha: 8 − 10H z
HighAlpha: 10 − 12H z
Mu: 8 − 13H z
SMR: 12 − 15H z
Beta: 12 − 35H z
Beta1: 15 − 18H z
Beta2: 18 − 22H z
Beta3: 22 − 26H z
Beta4: 26 − 30H z
Beta5: 30 − 35H z
Gama: 35 − 100H z
LowArtifact: 43 − 59H z
HighArtifact: 1 − 2H z
Figure 12.18 Analyze setting table, change the band
Table 12.1 The Range of Frequency Bands
86
Chapter 12 Analyze
• Click on one of the predefined bands on the right side of the table or type
your own frequency range( e.g. 1 − 50).
• The number of frequency bins is changed to cover the range that you set as
Bands.
12.4.9
Select FFT Calculation Window Size
The FFT value is calculated online but it considers previous samples up to a
specific window length. Selecting FFT window size, you can determine if you
want to consider previous samples of one, two, four or eight seconds. If your data
has sharp changes and you want to track changes in every second, then choose
one second for FFT window size. If not, you can choose larger values.
Figure 12.19 Analyze setting table, change FFT window size
• Right click on the panel to open the setting table.
• Click on the item Time on the left side of the table to change FFT window
size.
• Click on one of the items on the right side of the table or enter a value to
select the window size.
Chapter 13
Image
13.1
Image at a Glance
This panel shows image. You can select the image file you want to display.
Figure 13.1 Image
Figure 13.2 Image Setting Table
87
88
Chapter 13 Image
13.2
Image Setting Table
• ImageFile: You need to determine a file name of the image you want to
display using the item ImageFile. Note that the ImageFile you want to
select should be in the Image Folder in the protocol directory.
• Name: You can change the name of the panel using this item.
Extra Items
You can see some other options during EditMode ( When you have pressed the E
key on the keyboard and you can see Edit toolbar in the screen) including:
• H: You can change the height of the panel.
• W: You can change the height of the panel.
• X: You can change the position in x-axis.
• Y: You can change the position in y-axis.
13.3
Make a New Image Panel
• Run the eWave Probe to open the main menu.
• Click on File > Open Protocol to open a protocol or on File > New Protocol to create a new protocol. An editable page is opened.
• If the Edit Toolbar does not present in the page, press E key on the keyboard
to see it. The Edit Toolbar (Fig. 13.3) is appeared in the left side of the
page.
• Click on the item named Image. This item is highlighted.
• Click on the position of the page that you want to place the panel. The
Image panel is now made with default size. You can change the size and
position to the values you want.
Figure 13.3 Edit Toolbar
t You can edit panel only
when you are in Edit Mode
.i.e. you have pressed the
E key on keyboard and you
can see Edit Toolbar in the
page.
13.3.1
Changing Size and Position
• If the Edit Toolbar does not present in the page, press E key on the keyboard
to see it. Now, you are in Edit Mode and you can modify the panel.
• Click on the borders of the panel and drag the mouse to resize it.
• Click on the center of the panel and drag the mouse to move it.
13.4 Select Display Setting
89
An Alternative Way
If you want to specify the exact value of size and position do the following:
1. If the Edit Toolbar does not present in the page, press E key on the keyboard to
see it. Now, you are in Edit Mode and you can modify the panel.
t You can see these extra features in the setting table only
when you are in Edit Mode.
• Right click on the panel to open the setting table.
• Click on the item H, to change height, and type the value you want.
Figure 13.4 Image setting table
• Click on the item W, to change Width, and type the value you want.
• Click on the item X, to change the position in x-axis, and type the value you
want.
• Click on the item Y, to change the position in y-axis, and type the value you
want.
13.4 Select Display Setting
13.4.1 Select the Image File Name to Display
You need to select a file name of the image you want to display.
t You should put the image
• Right click the label of panel to open the setting table.
• Click on the item GameFiles on the left side of the table.
file in Image Folder in the
protocol directory or else
you can not see it in the
right side of the table
90
Chapter 13 Image
Figure 13.5 Image setting table, change Image File
• Click on one of the items on the right side of the table to select the image
file.
• Click on Ok. The image is displayed.
Chapter 14
Game
This panel is for clients to play video, movie or game. It plays based on the client’s
brain waves that is reflected on Bar panels and according to the features that you
specify. You can select the type of the game and the file that you want to display.
You can also change the logic or rule that it should follow.
14.1
Game at a Glance
Figure 14.1 Game
14.2
Game Setting Table Properties
• GameFiles: For each selected Game type, you need to determine a file
name ( or folder name for Animation) using the item GameFiles. Note that
the GameFiles you select should be relevant to the GameType you have
been selected (or going to select). If not it cannot show anything.
91
92
Chapter 14 Game
Figure 14.2 Game
• GameType: You have four options to choose the type of Game including:
Video, Movie, Flash and Animation. You can choose the type you want
using GameType item.
• Logic1, Logic2, Logic3, Logic4: You can control application of each Game
using the output of one or multiple Bars. To do this, you should specify
the name of the bar (or bars) that you want as Logic1 , Logic2, Logic3 or
Logic4 for the Game.
• FullScreen: You can use a separate monitor for the client using FullScreen
item. In this case, you can show only game ( not other panels) through full
screen monitor to the client.
• Name: You can change the name of the panel using this item.
Extra Items
You can see some other options during EditMode ( When you have pressed the E
key on the keyboard and you can see Edit toolbar in the screen) including:
• H: You can change the height of the panel.
• W: You can change the height of the panel.
• X: You can change the position in x-axis.
• Y: You can change the position in y-axis.
14.3
Make a New Game Panel
• Run the eWave Probe to open the main menu.
14.3 Make a New Game Panel
93
• Click on File > Open Protocol to open a protocol or on File > New Protocol to create a new protocol. An editable page is opened.
• If the Edit Toolbar does not present in the page, press E key on the keyboard
to see it. The Edit Toolbar (Fig. 14.3) is appeared in the left side of the
page.
• Click on the item named Game. This item is highlighted.
• Click on the position of the page that you want to place the panel. The
Game panel is now made with default size. You can change the size and
position to the values you want.
14.3.1
Changing Size and Position
• If the Edit Toolbar does not present in the page, press E key on the keyboard
to see it. Now, you are in Edit Mode and you can modify the panel.
• Click on the borders of the panel and drag the mouse to resize it.
• Click on the center of the panel and drag the mouse to move it.
Figure 14.3 Edit Toolbar
t You can edit panel only
when you are in Edit Mode
.i.e. you have pressed the
E key on keyboard and you
can see Edit Toolbar in the
page.
An Alternative Way
If you want to specify the exact value of size and position do the following:
• If the Edit Toolbar does not present in the page, press E key on the keyboard
to see it. Now, you are in Edit Mode and you can modify the panel.
• Right click on the panel to open the setting table.
• Click on the item H, to change height, and type the value you want.
Figure 14.4 Game setting table
• Click on the item W, to change Width, and type the value you want.
t You can see these extra features in the setting table only
when you are in Edit Mode.
94
Chapter 14 Game
• Click on the item X, to change the position in x-axis, and type the value you
want.
• Click on the item Y, to change the position in y-axis, and type the value you
want.
14.4 Select Display Setting
14.4.1 Select the Type of the Game
The panel Game covers four types of Game including: Video, Movie, Flash and
Animation.
Game Types
• Movie: It is a movie or cartoon that is always playing but its size is changed
based on the value of the bar.
• Video: It is a video with ordinary size that plays and stops based on the value
of the bar.
• Flash: It is a computer game that runs based on the value of the bar.
• Animation: It is a set of consecutive images that each time an image is
selected based on the value of the bar. The change in the value of the bar
leads to the change in the selected image and produces an animation.
• Right click the label of the panel to open the setting table.
• Click on the item Game Type on the left side of the table.
Figure 14.5 Game setting table, change Game Type
• Click on one of the items on the right side of the table to select a Game
Type.
14.4 Select Display Setting
95
14.4.2 Select the Game File Name to Play
For each Game Type you need to select a file name ( or folder name for Animation)
to display.
• Right click on the label of panel to open the setting table.
• Click on the item GameFiles on the left side of the table.
t The software cannot find
the file, if you select a Game
file that is for another Game
Type (For example an Animation folder for a Flash Type
)!
Figure 14.6 Game setting table, change Game File
• Click on one of the items on the right side of the table to select a Game File.
14.4.3 Select the Logic for the Game
You can control weather each Game plays or not using the output of one or
multiple Bars. To do this, you should specify the name of the bar (or bars) that
you want as Logic ( or Logic1, Logic2, · · · ) for the Game.
• Right click the label of the panel to open the setting table.
• Click on one or multiple items of Logic1, Logic2, Logic3 or Logic4 on the
left side of the table.
Figure 14.7 Game setting table, change Game Logic
t If you select multiple Logics
they will be ORed to produce
the final logic that affects
game.
96
Chapter 14 Game
• Click on one or multiple items ( name of the bars) that is appeared on the
right side of the table or enter a name to select bars as logic.
14.4.4
Select the Full Screen Mode
You may want to use a separate monitor for the client to show him only game (
not other panels) through full screen monitor. To do this, do the following and
select full screen mode.
Figure 14.8 FullScreen Mode: using second monitor for client
• Push the plug on the end of the second monitor cable into your computer’s
video port and turn on the second monitor.
• Right click the label of the panel to open the setting table.
• Click on the item FullScreen on the left side of the table.
Figure 14.9 Game setting table, change FullScreen Mode
• Click on ON to activate or OFF to deactivate this mode.
Chapter 15
QEEG
15.1
QEEG at a Glance
QEEG
Figure 15.1 QEEG
15.2
QEEG Setting Table Properties
In the QEEG setting table you can see some items to change:
97
98
Chapter 15 QEEG
Figure 15.2 Qeeg setting
• Method: You can select one of the Gaussian,Cubic Spline or Linear Spline
methods to calculate the QEEG.
• Band: You may want to see the FFT of specific EEG band or any other
frequency band that you want. You can choose one of the predefined EEG
bands on the setting table or enter a band in the forms of St ar t B and −
St opB and .
• Channel1,Channel2, · · · : You may use one or multiple channels and put
the their leads on specific locations of the brain using 10/20 system. You
can set the active channels and joint them with their corresponding lead
names using these items.
• Name: You can change the name of the panel using this item.
Extra Items
You can see some other options during EditMode ( When you have pressed the E
key on the keyboard and you can see Edit toolbar in the screen) including:
• H: You can change the height of the panel.
• W: You can change the height of the panel.
• X: You can change the position in x-axis.
• Y: You can change the position in y-axis.
15.3 Make a New QEEG Panel
15.3
99
Make a New QEEG Panel
• Run the eWave Probe to open the main menu.
• Click on File > Open Protocol to open a protocol or on File > New Protocol to create a new protocol. An editable page is opened.
• If the Edit Toolbar does not present in the page, press E key on the keyboard
to see it. The Edit Toolbar (Fig. 15.3) is appeared in the left side of the
page.
• Click on the item named QEEG. This item is highlighted.
• Click on the position of the page that you want to place the panel. The
QEEG panel is now made with default size. You can change the size and
position to the values you want.
15.3.1
Changing Size and Position
Figure 15.3 Edit Toolbar
• If the Edit Toolbar does not present in the page, press E key on the keyboard
to see it. Now, you are in Edit Mode and you can modify the panel.
• Click on the borders of the panel and drag the mouse to resize it.
• Click on the center of the panel and drag the mouse to move it.
An Alternative Way
t You can edit panel only
when you are in Edit Mode
.i.e. you have pressed the
E key on keyboard and you
can see Edit Toolbar in the
page.
If you want to specify the exact value of size and position do the following:
• If the Edit Toolbar does not present in the page, press E key on the keyboard
to see it. Now, you are in Edit Mode and you can modify the panel.
• Right click on the panel to open the setting table.
• Click on the item H, to change height, and type the value you want.
Figure 15.4 QEEG setting table, change size and position
t You can see these extra features in the setting table only
when you are in Edit Mode.
100
Chapter 15 QEEG
• Click on the item W, to change Width, and type the value you want.
• Click on the item X, to change the position in x-axis, and type the value you
want.
• Click on the item Y, to change the position in y-axis, and type the value you
want.
15.4 Select Display Setting
15.4.1 Select the Calculation Method
• Right click the panel to open the setting table.
• Click on the item Method on the left side of the table to select the QEEG
calculation method.
Figure 15.5 QEEG setting table, select QEEG calculation method
• Click on one of the items on the right side of the table or enter a value to
select the window size.
15.4.2 Select Channels and Corresponding Electrode Positions
• Right click on the panel to open the setting table.
• Click on Channel number that you want on the left side of the table and
click on the corresponding Lead name on the right side of the table.
15.4 Select Display Setting
101
Figure 15.6 QEEG channel selection
15.4.3 Select the Frequency Band to Display
• Right click the panel to open the setting table.
• Click on the item Band on the left side of the table to change the frequency
bands that you want to see in horizontal scale. The frequency range of some
predefined shown in table. 15.1
Delta: 1 − 4H z
Theta: 4 − 8H z
Thalpha: 6 − 10H z
Alpha: 8 − 12H z
LowAlpha: 8 − 10H z
HighAlpha: 10 − 12H z
Mu: 8 − 13H z
SMR: 12 − 15H z
Beta: 12 − 35H z
Beta1: 15 − 18H z
Beta2: 18 − 22H z
Beta3: 22 − 26H z
Beta4: 26 − 30H z
Figure 15.7 QEEG setting table, change band
Beta5: 30 − 35H z
Gama: 35 − 100H z
• Click on one of the predefined bands on the right side of the table or type
your own frequency range( e.g. 1 − 50).
LowArtifact: 43 − 59H z
HighArtifact: 1 − 2H z
• The number of frequency bins is changed to cover the range that you set as
Bands.
15.4.4
Select FFT Calculation Window Size
The FFT value is calculated online but it considers previous samples up to a
specific window length. Selecting FFT window size, you can determine if you
Table 15.1 The Range of Frequency Bands
102
Chapter 15 QEEG
want to consider previous samples of one, two, four or eight seconds. If your data
has sharp changes and you want to track changes in every second, then choose
one second for FFT window size. If not, you can choose larger values.
• Right click the panel to open the setting table.
• Click on the item Time on the left side of the table to change FFT window
size.
Figure 15.8 QEEG setting table, change FFT window size
• Click on one of the items on the right side of the table or enter a value to
select the window size.
âĂČ