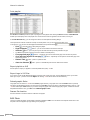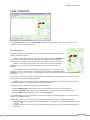
1
Channel in a Box Lite User Manual December 2 This guide explains in detail all functionalities of the Channel in a Box Lite modules. Version 1.2 Channel in a Box Lite Legal notice The information in this manual is furnished for informational use only. No part of this manual may be reproduced or transmitted in any form or by any means, electronic or mechanical, for any purpose, without the prior written permission of DMT Ltd. The software, described in this manual, is owned by DMT Ltd. It is protected by Bulgarian Copyright Law, as well as by international copyright treaties, and may be used or copied only in accordance with the license agreement. DMT Ltd. provides this manual “as is” without any warranty, either express, or implied. This publication may contain typographical errors or technical inaccuracies. While every precaution has been taken in the preparation of this document, DMT Ltd. assumes no responsibility for errors or omissions. Nor is any liability assumed for damages, resulting from the use of the information, contained herein. Changes are periodically made to the information herein. They will be incorporated in new versions of the manual. Please, check the PlayBox website regularly for User Manual updates. DMT Ltd. may introduce changes or improvements in the products, described in this manual at any time, without any special notice. Please, address your comments or questions to: Digital Media Technologies Ltd. 7 Iskarsko shose Blvd. th Building 15, 5 Floor 1528 Sofia, Bulgaria Tel.: +359 2 9703050 Fax: +359 2 9717700 [email protected] www.playbox.tv 2 Channel in a Box Lite Contents LEGAL NOTICE .................................................................................. 2 CONTENTS......................................................................................... 3 PREFACE ........................................................................................... 6 STYLE CONVENTIONS ...................................................................... 7 INTRODUCTION ................................................................................. 8 MODULES ............................................................................................. 8 AirBox ............................................................................................................................................... 8 ListBox .............................................................................................................................................. 8 CaptureBox ....................................................................................................................................... 8 TitleBox ............................................................................................................................................. 8 INSTALLATION ........................................................................................ 8 QUICK START ........................................................................................ 8 AIRBOX ............................................................................................ 10 GETTING STARTED ................................................................................ 10 USER INTERFACE............................................................................ 10 Title Bar ........................................................................................................................................... 10 Menu Bar......................................................................................................................................... 10 Multi-purpose zone .......................................................................................................................... 10 AirBox Playlist.................................................................................................................................. 11 Status Bar ....................................................................................................................................... 20 Playback Control and Counters........................................................................................................ 20 Playlist Control Buttons .................................................................................................................... 21 The Volume Slider ........................................................................................................................... 21 Trimmer Server................................................................................................................................ 21 MENU BAR........................................................................................ 22 File Menu ........................................................................................................................................ 22 Edit Menu ........................................................................................................................................ 23 View Menu....................................................................................................................................... 27 Settings Menu.................................................................................................................................. 32 Tools Menu...................................................................................................................................... 58 Commands Menu ............................................................................................................................ 59 Help Menu ....................................................................................................................................... 59 LISTBOX........................................................................................... 61 USER INTERFACE............................................................................ 61 Playlist Control Buttons .................................................................................................................... 61 Playback control and counters ......................................................................................................... 61 Playlist Grid ..................................................................................................................................... 62 Status Bar ....................................................................................................................................... 62 MENU BAR........................................................................................ 63 File Menu ........................................................................................................................................ 63 Edit Menu ........................................................................................................................................ 63 View menu....................................................................................................................................... 63 Settings menu.................................................................................................................................. 63 Tools menu...................................................................................................................................... 64 Commands menu ............................................................................................................................ 64 Help menu ....................................................................................................................................... 64 CAPTUREBOX ................................................................................. 65 CAPTURE SETTINGS ............................................................................. 65 3 Channel in a Box Lite MUSE.............................................................................................................................................. 65 USER INTERFACE............................................................................ 66 MENU BAR........................................................................................ 68 File Menu ........................................................................................................................................ 68 View Menu....................................................................................................................................... 70 Capture Menu .................................................................................................................................. 70 TITLEBOX......................................................................................... 71 GETTING STARTED ......................................................................... 71 USER INTERFACE............................................................................ 71 Work Area ....................................................................................................................................... 71 Toolbars .......................................................................................................................................... 72 Object Palette .................................................................................................................................. 75 System Bar ...................................................................................................................................... 75 Status Bar ....................................................................................................................................... 76 MENU BAR........................................................................................ 76 File Menu ........................................................................................................................................ 76 Edit Menu ........................................................................................................................................ 76 Network Menu ................................................................................................................................. 76 Object Menu .................................................................................................................................... 77 Project Menu ................................................................................................................................... 77 CREATING OBJECTS ....................................................................... 80 Step By Step ................................................................................................................................... 80 Editing Objects ................................................................................................................................ 80 Deleting Objects .............................................................................................................................. 80 Object List ....................................................................................................................................... 81 Object Properties ............................................................................................................................. 81 SLIDE MANAGER ............................................................................. 97 Slide control buttons ........................................................................................................................ 97 Project control buttons ..................................................................................................................... 97 Project Preview area........................................................................................................................ 99 Slide Controller .............................................................................................................................. 102 DATA SOURCE MANAGER ................................................................... 103 Weather Data Provider .................................................................................................................. 105 FileLink Data Provider.................................................................................................................... 105 ODBC Data Provider ..................................................................................................................... 107 XML Data Provider ........................................................................................................................ 108 RSS Data Providers....................................................................................................................... 109 HTML Table Data Provider ............................................................................................................ 110 EAS (Emergency Alert System) Data Provider ............................................................................... 110 TASK MANAGER ................................................................................. 112 Tasks ............................................................................................................................................ 112 Input Events .................................................................................................................................. 115 Assigning a task to an event .......................................................................................................... 116 CLIP TRIMMER............................................................................... 117 USER INTERFACE.......................................................................... 117 Preview Screen ............................................................................................................................. 117 Trimmer Control............................................................................................................................. 117 Volume Control .............................................................................................................................. 119 Status Bar ..................................................................................................................................... 119 TRIMMER PAGES ........................................................................... 119 Video Clip Info ............................................................................................................................... 119 Clip Zones ..................................................................................................................................... 120 Clip Shots ...................................................................................................................................... 120 Clip Streams .................................................................................................................................. 120 Extra.............................................................................................................................................. 121 4 Channel in a Box Lite Clip Filters ..................................................................................................................................... 121 External Output Configuration ........................................................................................................ 121 LIVE VIEWER ................................................................................. 122 GETTING STARTED ....................................................................... 122 Installation ..................................................................................................................................... 122 USER INTERFACE ............................................................................... 122 APPENDIX 1 – GRAPHIC RULES’ COMMANDS, USED FOR COMMUNICATION BETWEEN AIRBOX AND TITLEBOX ................................................................................. 124 APPENDIX 2 – INTEGRATION OF AIRBOX WITH TITLEBOX ....... 126 INDEX ............................................................................................. 127 5 Channel in a Box Lite Preface Dear PlayBox customer, Thank you for purchasing our product! We would like to assure you that you have chosen the most cost-effective and versatile TV automation system on the market. As always, we are trying to stay close to our customers’ needs, making sure they all receive adequate support and satisfaction. Your opinion about our product is an exceptionally valuable source of information for us. The ease of working with the PlayBox products results mainly from the suggestions and comments of our current respected customers. This manual is structured into several sequential chapters, each aiming to ease the installation, fine tuning, and use of our products. We hope that you will enjoy working with it, and we are anxiously looking forward to receiving your feedback. Please, send your questions, suggestions, and assistance requests to: [email protected] General feedback: [email protected] Helpdesk fax number: +359 2 9717700 6 Channel in a Box Lite Style Conventions File names, software, documents or terms are written in italics Direct quotations from the computer screen are presented as follows: Menu Items and commands Tab/Page names Column names (i.e. in a playlist or another grid) Field names, check boxes Buttons Screen readings are written in [square brackets] The keyboard keys are enclosed in < > signs Terms are described in the Glossary at the end of the manual The data is written in the settings.ini file. The file is located in C:\Program Files\DMT\AirBox For further information read Shortcuts reference book. The VTR is controlled via RS-422. The arrows, used in the setting procedures mean as follows: A menu item follows; A page(tab) name follows; A field name, a check box name, or a value name follows. Except for arrows, you can distinguish between the relevant menu categories also by the styles, listed above. 7 Channel in a Box Lite Introduction MODULES Channel in a Box Lite consists of the following major modules: AirBox The most important part of a transmission automation system. It performs on-air playback and control. The module is designed for uninterrupted 24 hours / 7 days-a-week content playout from online media storage. It can also be used as a production server with interactive capabilities, such as Next, Jump, Cue, etc. ListBox A standalone playlist editor, designed for arranging, previewing, and trimming the available content without any hardware decoder requirements. It contains useful playlist features, such as text searching, printing, etc. CaptureBox Sophisticated ingest round the clock. CaptureBox controls VTRs via RS-422 and automatically captures batches of scenes or programs. It also allows transferring a program to a tape precisely, by using frame-accurate timecode positioning. Needless to say, it also provides semi- or completely automated scheduled capturing, GPI interface, VU/peak audio meters, and a number of other unique tools. TitleBox TitleBox provides fully automated or interactive graphics overlay. It can also be synchronized to AirBox playout sequence. It allows insertion of text and dynamic graphic information in accordance to external data sources. Text information is received and rendered into high-quality graphics on-the-fly. INSTALLATION 1. Download Channel in a Box Lite from our website, www.playbox.tv. 2. Unzip the downloaded folder. 3. Run the Install.exe file. 4. Push the button Next in the installation wizard and accept the license agreement. 5. Push Next once again and select the folder, where you want Channel in a Box Lite to be installed via the Browse button. By default, Channel in a Box Lite is installed under folder C:\Program Files\PlayBox Technology Ltd\Channel in a Box Lite. 6. Push Next and press the Install button. 7. In the Setup Registry dialog that appears select the desired output settings for your channel from the drop-down list. 8. Press Finish and take a look at the Readme file. Congratulations! You can now start using Channel in a Box Lite. QUICK START Open CaptureBox and select the MUSE plug-in. Press OK. Connect the video source signal to CaptureBox video input. Select the media folder you wish to capture to. Fill in the Tape ID or Channel field and type the file name you want to capture the content to. 8 Channel in a Box Lite Click on the Manual Capture button. When required, stop the capturing by pressing the Abort button. Congratulations! You have just captured your first CaptureBox clip! Now you can use this clip in your PlayBox playlist. To create a PlayBox playlist open ListBox, select your desired output type and press OK. Right-click on the grid and select Add Media file. Browse for the files you want to insert in the playlist and click on the Open button. Go to File menu Save playlist as and browse for the location to save your playlist to. Type some name for the playlist and press Save. Congratulations! You have just created your first PlayBox playlist! To start a playout session verify all connections and launch AirBox. Select the MPO Mixed Playback module, press Set and then OK. Load your newly created playlist in ListBox. Add a logo to your video output via Settings Logo dialog. Press Load and open the image your logo. In the position field place the logo in the desired position. Press okay. Press Play to start the playlist. You should now see the currently playing video on your AirBox preview. Congratulations! You have just launched your first AirBox playout session! To connect AirBox and TitleBox create a folder, from which your TitleBox project templates will be accessed by AirBox. Copy the path of folder and go to the AirBox installation folder. Open Plnetinstal.exe. In the dialog that appears paste the path to the folder you just created. When completed successfully, you will be able to view a Network menu in TitleBox. Congratulations, now AirBox and TitleBox are connected! To add graphics to your video output open TitleBox. Select the Mapped Memory Driver from the Program Driver drop-down list. This driver allows AirBox and TitleBox to use the same preview. Press the Crawl button in the object palette to the left and draw a rectangle in the Preview Area. Type a text in the Properties dialog box and press OK. Press the two Play buttons – one in the bottom of the window and one in the third row of the taskbar. Congratulations! You have just created your first TitleBox crawl object! Notice that the TitleBox graphics object is directly overlaid on your AirBox preview. 9 Channel in a Box Lite AirBox GETTING STARTED AirBox is a universal SD/HD content playout and streaming software. Depending on the hardware platform and supported files in the playlist, there are different types of AirBox playout (playback modules). USER INTERFACE The main interface window is divided into several areas : Title Bar This is the topmost horizontal bar of the AirBox window. It contains abbreviations of all options, enabled on the dongle, the AirBox channel number, and the name of the currently executed playlist file. If the playlist has been changed, but not saved, there is an asterisk (*) after the playlist name. Menu Bar The MENU BAR is described in detail in the Menu Bar section. Multi-purpose zone The multi-purpose zone is situated to the left of the master counter. It consists of several tabs that allow quick navigation through the most frequently used functionalities in AirBox. Use the arrows in the upper right corner to scroll the tabs. TIP (!) To show/hide tabs in this zone, right-click on it and check/un-check the ones you need. 10 Channel in a Box Lite Preview This tab shows the currently playing video. The Video window can be moved outside the main window by checking External video window from the View menu. If you accidentally close the window, you can view it again by checking the Show external video window in the View menu. Some AirBox configurations do not provide such video overlay functionality. In some cases you might want to disable the window, since it consumes additional resources from the system. Then you will have to uncheck Show External Video Window in the View menu. Counters This tab contains all counters that can be found in the View menu. Their names are written in the lower left corner. Right-clicking in the Clip timer or in the Block timer will invoke a context menu to switch it to count-down mode. Please, check the View menu section below for a detailed description of the counters. Current Playlist This tab contains information and simple controls about the currently loaded playlist. Name – this is the title of the currently loaded playlist. It is different from its filename. You can change it in the dialog that appears after double-clicking in the string. Start time – by default, it is set to zero. You can set a different start time for the playlist by either entering the value, or using the arrow keys. TC – this is an offset that will be applied to the time code, which is broadcast over the network – see Settings menu General section. If the Lock playlist box is checked, it will prevent you from editing the currently loaded playlist, as well as from loading another playlist. Use it to prevent accidental changes of the playlist during playout. Playlist Loop – if checked, when the playback of the last clip in the playlist is complete, playback will continue from the beginning of the playlist again. Clip Loop – if checked, the currently playing clip will be repeated until unchecked. When AirBox is in stop mode, this check will loop the first clip to be played after resuming the playout (i.e. the last played before pushing the Stop button). Playlists In this tab you can view all playlists that are found in the currently selected playlist folder (displayed in the string). To change the folder, click on the Browse the string. button to the right of TIP (!) Double-click on a playlist line to load the relevant playlist in AirBox. Please, note that this will interrupt the playback! Log view This tab displays a list of all events that have occurred during AirBox operation. ShotBox This tab accommodates the live show clipboard. Here you can view and operate with the custom command buttons. It duplicates the live show clipboard window that opens from the View menu. Please, check the ShotBox section for details. AirBox Playlist 11 Channel in a Box Lite AirBox works with play playlists (play order). You can easily create a playlist manually, just by drag-n-dropping files into AirBox grid (or in ListBox). It is also possible to create a playlist with any third party application software. It is necessary that this application can create playlists in a format, compatible with AirBox. The AirBox playlist format is described in details in AirBox SDK. For obtaining AirBox SDK, please contact our PlayBox support team ([email protected]). AirBox also provides a possibility to import playlists from simple text files (tab delimited or comma separated text files). There are two workflows with AirBox playlists: ordinary playlist and daily playlist. The difference is that the daily playlist is loaded automatically at an assigned day and time, while the ordinary playlist should be loaded manually. Daily playlists require specific naming structure in order to be played on the desired date and time automatically. The structure is: YYYY_MM_DD_HH_MM_SS, where YYYY stands for year, MM-month, DD-date, HH-hour, MM-minutes and SS-seconds. th For example, if the name of the playlist is “2011_11_20_14_00_00.ply”, it will be loaded exactly on November 20 , 2011 at 14.00 h (2.00 pm). The AirBox playlist contains video clips and events (commands), which are described in details further in this chapter. Playlist Grid This is the main part of the AirBox interface, dedicated to the playlist (play order) visualization. When you launch AirBox, depending on your startup settings, you will see an empty window, and you will have to load (create) a playlist, or you will see the opened playlist. The Grid Columns If there is a playlist, loaded in AirBox, you will see information about the clips in different columns: Start Time This column contains each clip’s starting time. During Stop mode, it shows the current time for the clip that will be played first when the Play button is pressed. The time refreshes every 2 seconds. The following clips hold positive times calculated according to the current time and the duration of the preceding clips. During Play mode, this column shows the actual starting time for each clip. If there has been a Jump command or a clip has been trimmed during Play mode, the starting times of the following clips will be recalculated accordingly. If for any reason a file is removed or renamed after the playlist is loaded, it will be considered missing and hence - colored in red. AirBox will skip it and will jump to the next available clip. The Start Time column will be recalculated accordingly. Duration 12 Channel in a Box Lite Shows the actual duration of each clip. Naturally, if a clip has been trimmed, its actual duration will be reduced. The duration of the part to be shown will be displayed in the playlist and will be used for calculation of the starting times of all following clips. Type Shows the type (such as MPEG) of the clip – this is quite useful to determine the major type of compression, since many decoders do not allow different compression types to co-exist in the same playlist. Category Contains category information. This information could be entered manually from the user into the playlist or could be fed from some outstanding database (for example DataBox). NOTE: If category is taken from DataBox, you can define a field color for the clip, using DataBox (OptionsDefault valuesColor to AirBox). The Category and its color can also be defined manually in AirBox (or ListBox). You can fill-in the entire clip rows with their Category colors. In order to do this, go to AirBox Settings General Interface and select Color entire row by category. Title Shows the clip’s title or filename. Location Shows the file location (full path). Star Contains data, describing the artists in the clip. Notes Contains additional data. NOTE: If the Note is taken from DataBox, you have to specify in DataBox (Options General Fields to AirBox Notes) what exactly field to be transferred. (!) TIP You can change the columns’ order by drag-n-dropping them. (!) TIP A double-click in the first column that contains the items’ numbers will invoke the clip properties dialog. Double-clicking in any other column will open the Clip Trimmer (if it is enabled in Settings menu General (see the description further in this manual). Color coding The color-coding of the playlist’s rows provides additional information to the user: Pink row – outlines the currently playing clip. It is visible in PLAY and PAUSE modes only. Yellow row – it is visible only while switching between clips. It shows which clip will be played next. In that moment, the yellow clip is being actually fed into the decoder circuit. This happens during the last couple of seconds before the end of the previous clip. The clip cannot be moved, trimmed or deleted anymore. Just for comparison, competitive playout solutions tend to permanently lock the clip after the currently playing one, which reduces on-air flexibility and your lastminute decision freedom. Blue row indicates the currently selected clip – all actions, i.e. Jump, Move Up/Down will be applied to it. Red row highlights those files in the playlist that are missing/invalid (not supported from the currently installed hardware). The playback skips such files and plays the next available clip. If the file is missing, you can set the time interval for automatic check for missing files (SettingsGeneralMissing FilesCheck Missing files every […] sec). Light cyan row outlines the playlist events when selected. NOTE: You can change these colors to fit your personal preferences in SettingsColorsPlaylist tab. Drag-n-Drop! One of the main features of the grid is the drag-n-drop functionality. It allows dragging clips within the playlist and from one grid to another (from DataBox/ListBox to AirBox or from any folder to AirBox). If <Ctrl> is being held while dragging a clip in the playlist, the executed operation will be Copy. By default, each internal (in the grid) dragging means Move and dragging between two 13 Channel in a Box Lite windows (similar to Windows Explorer) is Copy. Clips that have already been played-back are grey and cannot be moved, but can be copied. Pointing with the mouse cursor at a playlist’s row displays a hint containing the clip’s file name and IN /OUT timecode values. Double-click over a clip invokes the Clip Trimmer (if it is enabled from Settings General General Use clip trimmer). If you trim a clip in the playlist, the change will not be permanent, but valid ONLY for this playlist. If you add the same clip to another playlist, it will appear un-trimmed there. A detailed description of Clip Trimmer can be found further in this user’s manual. If the use of Clip Trimmer is not enabled, the clip’s properties dialog will open. Right-click Right-mouse click over a row invokes a pop-up menu of playlist and events commands: Add – activates a drop-down list for appending various items to the end of the playlist. See their detailed description in the Edit menu section. Insert – opens a drop-down list for inserting various items before the currently selected item in the playlist. The Add and Insert drop-down lists are identical. Delete – deletes the selected playlist row(s); a dialog asks confirmation before the deletion. Jump – click it to interrupt the currently playing clip and jump to the currently selected (highlighted) item in the playlist. Loop – marks the selected clip for repeating until this option is cancelled. To remove the check, just right-click in the clip and choose Loop again. NOTE: This action differs from the Clip Loop button #, which loops the currently playing clip (not the currently selected one). 14 Channel in a Box Lite Auto update – use it to include the currently selected clip(s) in the automatic file duration checking. It will update the duration of your clips if the files associated with them have been, or will be, changed. NOTE: You have to enable this option first in Settings General General Auto update duration of marked files. The file checking interval should also be set there. Cut/Copy/Paste – these options are self-explanatory. Clip Trimmer – opens the Clip Trimmer application (if it is enabled in Settings General General Use Clip Trimmer. Otherwise, the Clip Properties dialog will open). Find detailed information about the Clip Trimmer in the section of the same name at the end of this manual. Properties – opens a window with clip’s properties. Clip Properties Most of the playlist consists of clips. All metadata, connected with any clip, could be found in the Clip Properties window. It is opened by right-mouse-clicking over the clip, or trough the Edit Menu. The Clip Properties window has five tabs: Source, General, Fixed-Time, Transition, and Metadata. All of these tabs allow you to save your settings, so that you do not have to define the settings for each file every time. In order to do that, once you have defined your desired settings, enter the Save current settings to new preset button in the Settings preset field, and enter a name for the selected preset. Once you have saved some settings for your input, you can load them via the Apply preset settings from selected preset button. You can also remove a preset via the Delete selected button. Source The Source tab contains a basic clip description information. The Type fields shows whether the input is from a File, a Live, or a UDP source. If the input is a File, the Parameters field shows the file Path. If it is a Live source, then the Address of the source is indicated in the field below. This Address corresponds to the Name of the live stream, as it is defined in the Settings Output Live Inputs tab. When the Type of the source is UDP, by default, and the user can enter the IP Address of the source machine and the number of the Port, which receives the input. There are also two additional options for this type of input: Program ID – if you check this box, you can to choose which program to be output by AirBox, if the stream has more than one channel. Source – check this box if the source broadcasts more than one stream, to be able to enter the Source Address of your desired stream. General The first line in the General tab contains the Title of the selected playlist item. The IN, OUT and Duration strings contain the IN point, OUT point, and clip duration data. You can change these values in order to make your clips shorter. The Duration is calculated automatically from the IN and OUT values. Furthermore, if you change the Duration, the OUT point will adjust accordingly. If there is information about the time-codes of the first and last frame in the clip, you can check the TC Value check-box and then into the IN and OUT strings you will see these time-codes. The TC field is necessary when there are subtitles to be displayed together with the clip, as the time code is the reference for displaying them. If you change the TC value, it will be saved in the playlist for future use. 15 Channel in a Box Lite When you use subtitles, you should also enter a TapeID value – read more about this value in the SubtitleBox section further in this manual. You can view and edit the HouseID, Star, and Category information in the relevant strings. The colored square next to the Category string represents the color, which will be displayed in the Category column of the playlist. You can change this color by double-clicking in the square. Use the Notes string to type your notes about the clip. NOTE: Content metadata fields, like Category, Star, Notes, could be filled directly into the AirBox playlist. In this case, the information is saved only for the current playlist. If you use the same file in the new playlist, you have to enter metadata again, unless you have saved it via the Settings preset field. It is also possible to keep all metadata in DataBox. Then, when you create a playlist by drag&drop files from DataBox, the metadata will be transferred too. You just need to define in DataBox options the fields for transfer. Another possibility is to use external user’s database (traffic, MAM, etc.) for preparing playlist. Then you can transfer metadata from this database to playlist. The exact metadata transfer depends on the term of integration of this third party database. Keep in mind, that if you change some metadata inside the playlist, the change will be valid only for the current playlist. The changes will NOT be transferred back to the original database. Program ID is checked when the stream is MPTS (it could be a live MPEG2 stream coming from the network or a file). Type the Program ID (for example, 12060), not the number of the program (i.e., not 1, 2 or 3). If you are going to playback a clip while it is being captured, check the Live (delayed) file check-box. If necessary, specify the Estimated duration of this live playback and then check the Set out point of live item box. Most of the properties in this window will be displayed in the playlist grid. If you save the playlist, these values will be saved as well. NOTE: Clicking Previous, OK or Next will apply all changes you have made to the current clip properties! If you want to discard them, please click Cancel. Fixed time The Fixed-time tab allows setting an exact start time for the particular clip. IMPORTANT: If you do not choose any of the Custom settings for the fixed-time event, the Default settings will apply. A detailed description of the default settings is available in the Fixed Time event Settings section further in the manual. WARNING! When using fixed time events, the playlist should start and end within the same calendar day (i.e. the playlist should not go beyond midnight). Otherwise, we cannot guarantee the proper operation of the fixed time logics. When using fixed start times, you always have to account for the other fixed times in the playlist. Therefore, the first two lines in this tab contain information about the preceding fixed time event and its duration; and the fourth line prompts the start time of the following fixed event (if any). If you try to set a start time, which is in conflict with the surrounding events, the time-picker background will become red. A warning message will appear upon clicking OK, and the allowable start time will be prompted until you set it. The two spin-boxes are situated between the Previous and Next fixed event rows describing the current fixed-time event. Check the Use fixed start time box and enter the time. In the Day offset spin-box, enter the number of days to go prior to executing the fixed time event. Day offset zero means the date of the AirBox startup! When using fixed start times, two types of time conflict might occur – overlapping of playlist items or gap in the playlist. In the first situation there is not enough time to playout all clips in the playlist before the fixed-time event starts. Therefore you can choose between two Custom overlap resolving options: Skip currently running event – when this option is selected, AirBox will skip all clips that cannot be played out as a whole. Let us assume that the time remaining till the fixed start is 2 minutes and all the clips before it are longer. AirBox will skip them and the 2-minutes gap will be filled with the Custom auto-fill category (see below). Truncate currently running event – AirBox will playout as many clips before the fixed time event as possible. The currently playing clip will be truncated when the fixed time comes. 16 Channel in a Box Lite In the second situation, when there is a gap in the playlist (either because the content is not enough or you have selected to skip the currently running events) you will need a Custom auto-fill category. This drop-down list contains all auto-fill categories, previously prepared by you, and a [Default Clip] entry. Check the Auto-fill settings section to learn how to create these categories. In case you can accept some deviation of the fixed time, check the relevant Custom tolerances box and describe it. In this way you can ease the complex operations when it comes to a few seconds differences. Everyday fixed time is needed in case you loop your playlists. If you leave this check-box empty, the fixed time will be executed only during the first loop. NOTE: Please, note that you cannot use simultaneously Day offsets and Everyday fixed time. WARNING! DO NOT use fixed time events within a bookmark’s time range! Transition The Transition tab accommodates settings, related to transitions between clips in the playlist. The transition settings are applied to the beginning of the currently selected clip. Check Set transition to enable the transition. Specify the transition Duration (in frames) in the spin-box below. The Type drop-down list contains all currently supported transitions. Choose the one you need from here. Trim the source clip with the transition duration – This checkbox is enabled only when you apply transition for the first time. Check this box to shorten the previous clip with the duration of the transition ensuring that enough video and audio content will be available for the transition. When this box is checked, the previous clip will be trimmed in accordance to the frames, set in the Duration spin-box when you press OK button. For example, assume that your AirBox is running in PAL mode (25 frames per second), and you have set a new transition with Duration of 50 frames, i.e., 2 seconds, to Clip 2. Assume further that the preceding item in the playlist is Clip 1, which is 10 seconds long. Once you press OK button Clip 1 will be automatically trimmed, so that its duration is reduced by 2 seconds, to 8 seconds. Thus, when Clip 2 starts, it will begin with a transition, displaying the last 2 seconds of Clip 1. NOTE: The clips that precede clips with applied transition in the playlist are trimmed immediately after OK button of dialig applying transition is pressed. Thus, if you want to change any transition duration during playout, you have to trim its preceding playlist item manually, by modifying the duration settings in the General tab of the Clip Properties dialog. NOTE: Even if you have set the Type of transition to None, the clip preceding the transition will still be trimmed if the source clip with the transition duration option is checked. If you want to keep these settings for other transitions in the playlist, press Set as default. NOTE: Transitions are supported only for the new mixed playout plug-ins!!! Metadata The Metadata tab provides room for additional information fields related to the currently selected clip. Upper part of the window: In the upper part of the window you can include additional metadata, related to the content of the clip. This information can be entered manually or by dragging from DataBox. In all cases you need to specify some metadata categories that will accommodate the relevant metadata values. 17 Channel in a Box Lite For example, the Name of a metadata category is [Producer] and the Value is [a person/ a company].Thus, if you have the producer’s name in DataBox [Person] and map it to AirBox [Producer], that information will be transferred automatically when you drag clips from DataBox to the playlist grid. You can use these fields in graphic rules, to present information that does not appear in the playlist columns. Click on the [Metadata name] cell to enter the name that will be used as reference in the Graphic Rules. In the [Metadata value] cell enter the additional information that should be presented in the graphics while this clip is on air. Please, refer to the Graphic rules section for detailed explanation about the metadata implementation. Except for showing information about the currently playing clip, metadata categories can be used for changing the links to picture and sound objects in TitleBox. Thus, you can change the image, shown in a picture object, or the sound that is played in a sound object. All you have to do here is: 1. Specify the Metadata name in the left column For example: [new picture] 2. Specify the file path to the new media to load in the column to the right. For example: [E:\Pictures\pic\A Dark Night.jpg] NOTE: The file path should be local for the TitleBox machine!!! Thus, you will have [new picture] [E:\Pictures\pic\A Fantastic Voyage.jpg] in one of the rows. Then, go to Settings Graphic rules and set the conditions and action offset time. Please, check the Graphic rules section for details. IMPORTANT: Make sure not to use tab characters in the metadata fields! Otherwise, the saved metadata will not be interpreted correctly. Lower part of the window The lower part of the Metadata window is used for entering specific metadata, related to video parameters of the current clip. The metadata is grouped in three main categories – [Video], [Mixing], and [Audio]. Video Metadata: Rescale Type – rescaling type for the video. Rescale value – if the rescale type is Custom, then you can add a specific rescale value in this field. Resample Type – resampling of the video bitrate. If the resample type is Custom, then you can add a specific resample value from the next field Resample value – if the resample type is Custom, then you can add a specific resample value in this field. ASCS (Aspect/Size conversion strategy) – this is a type of conversion of video files with a different aspect ratio than the one, set for the global playout. The values here are the same as those in the Output Video Setting dialog. Field order (input) – this is the field order of the input file. If there is no info about the field order in the file, or if it is wrong, you can enter it here. Item input Aspect – the aspect ratio of the current clip. If there is no info about the aspect ratio of the file, or if it is wrong, you can enter the value here. Mixing This metadata is used only if a Shift Transition is selected in the Transition property tab. Here you can define the Shift Type and the Shift Direction of the “Shift” transition. Audio metadata Language – the language of the sound Level – the audio level of the current clip in dB. (!) TIP: By using audio level metadata, you can specify a different audio level for each file in the playlist. For example, you can use it to decrease only the audio level of the commercials in the playlist. NOTE: On playout, the clip metadata (if there is such) settings have a higher priority than the output settings, created in the Output settings dialog. For example, if the aspect ratio in the main video output is set to 4x3, and the ASCS (Aspect/size conversion strategy) is set to “Balanced/Letterbox”. This means that if there are files with an aspect of 16x9 in the playlist, they will letterboxed at the output. 18 Channel in a Box Lite Let us assume that you have a particular file with aspect 16x9 in the playlist, which you do NOT want to be letterboxed, but rather you want it to be zoomed. Then, in the properties of this particular file, check the ASCS check-box and select “Fullscreen/Zoom” in the respective value field. NOTE: Values in Field order (input), as well as Item input Aspect metadata do not have any effect on the playout. These fields are connected to the file in the playlist and are used if the information for “Field order” and “Aspect ratio” of the file is not available in the file itself, or if it is wrong. Internal Events Stop event Inserting such an event in the playlist will stop the playback automatically at reaching this point of the playlist. This function is useful for news and other interactive sessions. StopCue event Automatically stops the playback upon reaching this point of the playlist and shows the first frame of the next clip. Wait event Temporarily stops the playback. A dialog box appears to specify the type of “waiting”: Wait means that playback will stop and standby for a certain period (hh:mm:ss). For example, 00:01:00 means that the playback will wait for 1 minute; Wait Until means that playback will stop and automatically resume at a defined time (hh:mm:ss). For example, 14:00:00 means that the playback will start at 14:00:00 o’clock. Wait TC event Automatically stops the playback and resumes it upon reaching the specified time code (e.g. coming from an external timecode generator). The message to the right will be displayed on the AirBox window and the Master counter will continue running. See the LTC reader description in the Settings menu Timecode section further in this chapter. The TimeCode format here is HH;MM;SS;FF, where H stands for hours, M for minutes, S for seconds, and F for frames per second. IMPORTANT: Depending on the standard you are using (PAL, NTSC, etc.), make sure to enter the corresponding number of frames in Settings General Interface Frame rate (25 for PAL and 29.97 for NTSC). NOTE: Be aware that when you are using PAL the timecode separators are ‘:’ and when you are using NTSC they are ‘;”. Logo event Logo On – Starts displaying the logo, set in the preceding Logo Preset event. If there is no preceding Logo Preset event, the first logo preset from the list (in SettingsLogo…Logo Presets) will be displayed. Logo Off – Stops displaying the logo. Logo preset - Sets a logo preset, which will be displayed after initiating the Logo On event. The preset number corresponds to its number in the preset list in SettingsLogo…Logo Presets. If you check the Activate now box in the event dialog box, the logo will appear immediately. You can also activate the logo before or after the beginning of the following clip by setting an offset to it. Return event This event will return the playback at the position before a previously executed Jump. For example, if you have a movie in your playlist, and at a certain time you decide to jump to a block of commercials somewhere in the playlist, and then go back to the same position in the movie, you can insert a Return event after the commercials you would like to play. Thus, the movie playback will resume after the end of the commercial break from the point before the jump. Fill event Opens the Fill event properties dialog. For more information, see section Settings menu Auto-fill… further in this chapter. 19 Channel in a Box Lite NOTE: The minimum fill time is 2 seconds. In case you have gaps that are less than 2 seconds long, you can use the Default Start Tolerance option in Settings menu Fixed time events. NOTE: The Fill event is in the format HH:MM:SS, i.e., it is secons-accurate. Complex Items Opens the Custom Complex Event dialog. A list of all previously defined complex events is displayed for the sake of convenience. For more information, see section Settings menu Complex items… further in this chapter. Status Bar The status bar is located at the lowest part of the AirBox window: The Total Duration field shows the total playlist duration. The End At field shows the time, when the playlist will end (if not looped, of course). If there is a question mark (?) after Total Duration and End At, this means that there are missing files in the playlist, and their duration is included in the total duration (i.e., the actual total length of the playlist is less than and the end-time is earlier than displayed). You can choose whether the duration of missing files should be included or excluded from the total length by checking the relevant box in Settings General Missing Files Show duration of missing files. IMPORTANT: In case there is a question mark in the Total Length and End At fields, the displayed total duration and end-time are NOT the real ones, since the missing files will be skipped during the playback. If there is an exclamation mark (!) after Total Duration and End At, this means that there are missing files in the playlist, and their duration is not calculated in the total duration (i.e., the duration of the missing files is considered to be zero in the playlist). TIP (!) You can set AirBox to notify for the existence of missing files in the playlist by blinking the Total Duration and End at cells in red. Besides, an audio alarm can be set off through the PC sound card. See Settings menu description General section for details on how to enable these notifications for Missing files. The Selection field displays the cumulated duration of the currently selected items in the playlist. The fourth field of the Status Bar shows the hardware module that is currently used for playout. If it displays [None], please, check whether the appropriate module is selected in Settings menu Modules Output tab. Playback Control and Counters The Master counter shows the elapsed time of the current playout session. Pressing the Stop button resets the counter. The title of the currently playing clip is displayed below the running time code. This is quite useful in case the row played is out of the visible grid range. (!) TIP: To view the currently playing clip in the beginning of the grid, just click on the Master counter. This will shift the playlist items by placing the currently playing clip at the top of the list. If you want to view the clips before it, use the arrow keys on your keyboard. The Clip counter is situated under the master counter. It can operate in two modes, count-up and count-down mode. Just double-click on it to switch between them! The playback control buttons are situated below the Clip counter: Play – starts the playback. Stop – terminates the playback. Pause/Resume – temporary interruption/resuming of the playback. The playback resumes from the same point on. Next – immediately stops the currently playing clip and switches to the next clip in the playlist. This happens with a smooth cut without any sound or visual artifacts. Return – this button is active only after a Jump has been executed. Use this button to return to the position before the last Jump. Jump – immediately terminates the currently playing clip and starts playing the one that is selected, regardless of its position in the grid. 20 Channel in a Box Lite Cue –interrupts the playback and pauses on the first frame of the selected clip. You can also activate it by holding down the <Ctrl> key and pressing the Jump button at the same time. Use this to prepare a playback clip while displaying its first frame on the output. Since this is a machine-and-decoder-dependent function, you may have to increase the Cue Delay time from the Settings dialog box (SettingsGeneralGeneral Cue delay). Reset hardware – resets the hardware driver. If, under any circumstances (bad MPEG media or bad system setup), playback is distorted so badly that normal PLAY and STOP commands cannot help, use this button to reset the hardware decoder. NOTE: This button is not visible by default! In order to show it, go to Settings menu General Interface tab and remove the tick Hide reset hardware button. WARNING! Pressing the Hardware reset button will interrupt the playback! Playlist Control Buttons Most of these buttons actually duplicate the commands, found in the File menu and Edit menu. All buttons provide hints. Here is a description of the playlist control commands: New playlist (open ListBox); Open existing playlist; Save playlist/Save playlist as… Save playlist as Daily. This button will be greyed-out if you have not specified a daily playlist folder in the Settings menu Start Up. Add clip at the end of the playlist/Insert a clip above the currently selected line. Delete the currently selected clip from the playlist. Clear playlist (remove all lines from the playlist). Use these buttons to Move the currently selected clip(s) up (before the previous clip) or down (after the next clip) the The link e d i… playlist even during playback. NOTE: You cannot move a clip above the currently playing one. Reset playlist position. If the current playlist has been started and then stopped, the clips that are already played are colored in grey and their order cannot be changed. Moreover, next time you hit the PLAY button, playback will start from the first black (not played yet) clip. If you hit #, the playlist will be reset, and the next time you hit PLAY, the playback will start from the very beginning of the playlist. Simply put, this is a kind of “playlist rewinding”. Randomize selection – press it to re-arrange the currently selected clips in a random manner. This button will display the Properties of the currently selected line. While a clip is selected in the playlist grid below, press this button to open the Clip Trimmer. Undo up to 6 latest actions. The Volume Slider Probably the less noticeable part of the user interface is the Volume slider. It is situated between the multi-purpose zone and the playback control buttons. It is used to compensate for different sound volume in separate clips. You can control it with the [+] and [–] numeric keys on your keyboard, or just by dragging the slider. Check the box under it to mute the output sound. This Volume Slider is connected to the slider, situated in the Volume control window. If you move the slider from here, it is moved in the Volume Control window too. Trimmer Server The trimmer server starts upon AirBox start-up. It was developed for two major purposes: 1. To enable working with the main AirBox interface while the Clip Trimmer is open. 2. To eliminate the possibility of interfering with the on-air playback process. The Trimmer is described in details in the Clip Trimmer chapter further down this manual. 21 Channel in a Box Lite NOTE: You can open only one Trimmer per instance! MENU BAR File Menu The File menu contains all playlist file-related commands: New Playlist This command evokes the ListBox module – it opens a new blank playlist for editing. Load playlist Loads an existing playlist file (*.ply). You can also open a Dalet Automation XML playlists (*.xml). WARNING! Loading a playlist on the currently playing AirBox window will stop the playback. A warning dialog box will appear each time you try to do so. Append playlist This item appends another playlist to the end of the currently loaded playlist. Insert playlist This menu item inserts another playlist in the currently loaded playlist, above the currently selected row. Save playlist This command saves the current playlist file. The saved file contains the names of all clips arranged by their running numbers in the grid, as well as some additional attributes, like playlist name, loop status, etc. Save as This command saves the current playlist to a file. Except for our generic playlist format (*.ply), now you can save your playlists to XML files as well. NOTE: The XML playlist has a generic PlayBox format. Therefore, you cannot load any XML file as a playlist! Save daily playlist This menu item saves the current playlist in compliance with the naming requirements for daily playlists. This saving option will not be active if you have not specified a Daily playlist folder (see Settings menu Start Up… Start Up playlist). WARNING! When using fixed time events in daily playlists, the playlist should start and end within the same calendar day (i.e., the daily playlist should not go beyond midnight). Otherwise, we cannot guarantee the proper operation of the fixed time logics and the daily playlist logics. WARNING! We strongly DO NOT recommend using stop events and live streams without duration in daily playlists. The reason is that in case of accidental shut down, there is no way to calculate the duration of these items and thus, to determine the insertion point. So, AirBox will not be able to catch up with the schedule. You can still use them in daily playlists, but at your own risk. 22 Channel in a Box Lite Print playlist Both AirBox and ListBox provide the option of printing the current playlist. After choosing the Print command, a Print-Preview window opens and displays the current playlist. The columns and their order of appearance are the same, as in the grid. In the Print Preview dialog, you can change the columns’ size and adjust the following settings: The drop-down list to the left contains all currently connected printers. Here you can select which printer to use. To the right of it, you can select the Font type and Font size of the printed document Print – press this button to start printing the playlist. Page Orientation buttons – you can choose between Portrait and Landscape. Selection button – push it to print only the rows that have been previously selected in the grid. The Name of the printer (it may be a local or a network-connected printer). First page/Last page buttons – respectively go to the first and the last page of the content to be printed Go to previous page/Go to next page buttons – respectively visit the previous and the next page of the content to be printed Refresh Table button – press it to update the view. Auto-size Columns button – press it to automatically fit the columns’ width to their content. Export playlist as XLS Use this option to export your playlists to comma-separated value (CSV) *.xls files. Export Logs in XLS files If you need to convert the tab-delimited log files to XLS format, click on this menu item. A browse dialog will open for you to select which log to export – just select it and click Open. The resulting *.xls file will be saved to the same directory. Reload graphic Rules The graphic rules are saved in a *.dat file in the AirBox program directory. The graphic rules of the first AirBox instance (channel) are saved in the GraphRules1.dat file. The rules for the second AirBox instance are saved in a GraphRules2.dat file, and so on. This *.dat file is loaded upon AirBox startup. If you want to change the graphic rules without stopping the program, overwrite the relevant Graphrules#.dat file first. Then, go to File menu Reload graphic rules. Rescan file duration Use this command to rescan the durations of all files in the playlist. Edit Menu This menu contains all playlist- and clip-editing commands, available in AirBox. You can find the most important of them also in the drop-down menu that appears upon right-clicking in the playlist grid. 23 Channel in a Box Lite Add/Insert Both commands provide the same action list. The difference is in the insertion point in the playlist. While an Add command will add the selected event at the end of the playlist, the Insert command will insert the selected event above the currently selected line. Media Files Adds/Inserts existing clip(s) in the playlist. Browse in the dialog opened to point which clip(s) you would like to append or insert. Dummy Clip The Dummy Clip invokes a special dialog box for adding or inserting “virtual” clips in the playlist. You can use this option when you want to build your playlist prior to receiving a clip, whose properties are already known. AirBox will mark it as Missing, but when it becomes available, it could be used right away. Use the Source tab to fill in the Location of the clip. You can read more about it in the Clip Properties dialog Source description. In the General tab, fill-in the Title of the clip. The IN and OUT points, the Duration, and the Timecode are also editable. If you want you can write the Category, Star, and Notes. You can make the module remember each last string entry by checking the box next to its row. If you want, you can select the File type, or leave it as Auto. Read more about it in the Clip Properties dialog General description. NOTE: If you do NOT know the Duration of the clip you would like to add as a Dummy Clip, you can put a random number in the Duration field. When the clip is present, AirBox will automatically update its duration, as long as the following conditions are satisfied: 1. 2. 3. The Auto update clip’s duration option is checked in Settings menu General General tab. The following phrase is added in [HKEY_CURRENT_USER\Software\Digital Media Technologies Ltd.\PlayBox\2.0\AirBox 1]: "OverwriteOutpointOnAutoUpdate"=dword:00000001 Steps 1 and 2 are done for each AirBox instance, for which you would like to use that option. If one or more of the above conditions are not fulfilled and the Duration, set for the Dummy Clip does not correspond to the actual duration of the clip, the clip will be trimmed accordingly. Use the Fixed-time tab if you would like the Dummy Clip to start at a specific point in time. Check the Clip Properties dialog Fixed-time description for details on fixed-time settings. Use the Transition tab to define transition settings for your dummy clip, if you wish. You can read more about it in the Clip Properties dialog Transition description. Add some more info about the file in the Metadata tab. You can use this info later, in the graphic rules functionality. Check the Clip Properties dialog Metadata description for details about Metadata description. Incomplete Clip Just as the Dummy Clip, this menu item opens the Clip Properties dialog. Usually, the incomplete clip is still being captured at the moment of playback. You need to create such an Incomplete clip entry in the playlist and check Live (delayed) file. At a given time you start capturing this clip to the specified location, and once there are a few seconds of it, available on the storage, AirBox marks it as a valid clip and it can be played immediately. Thus, capturing and playback proceed simultaneously. If you want to predefine the file length despite its real length, just check Set out point of live item. With this setting the file will be played exactly until the time you have specified, even if it is longer. NOTE: The TDIR option is hardware-dependent. See also Using the TDIR option in the Capture Mode section below. Live stream A live event could be either a UDP stream, or a Live video stream, as selected in the Type field of the Source tab. The live video stream comes from a video source, defined in Live Input from Settings menuOutputLive Inputs tab. 24 Channel in a Box Lite IMPORTANT: The name is case sensitive. If you are going to use some transition in the beginning of the event, select the Transition Type and Transition Duration in the relevant fields in the Transition tab. The URL field (the command for AirBox) is generated automatically as you type in the above fields (for UDP or for Live stream). You could also enter a command directly in the URL field. If you use streams (UDP or Live) that come from the same sources, you could create some presets via the Preset field at the bottom of the dialog window. Thus, the next time you need the stream, you can just insert the relevant preset instead of setting up the whole information again. Read more about the preset option in the Clip properties section above. You can also configure the Fixed-time, Transition, and Metadata settings of the above events. For detailed information about these options, please read the relevant sections above. Live Viewer is a tool, which shows a preview of the defined streams in AirBox.First you have to define streams in AirBox, then, after starting LiveViewer, you can select your desired streams. Bookmark This is a special virtual item that can be used as a target point for incoming triggers (GPI input or DTMF input) or by itself. It will cause AirBox to Jump to the following item in the playlist, according to several additional conditions as described below. The bookmark properties dialog contains a Name string and a Time zone area. When inserting bookmarks, you must enter a Name, and you can optionally enter a Time zone as well, depending on your needs. The time zone represents a validity period of the relevant bookmark. It can act as a target for GPI or DTMF input (when [Jump to bookmark in time range] is selected as a command in the relevant setup dialog). When Force jump on time is checked, the bookmark will act as a fixed time event and AirBox will jump to it when its time is through. This can happen in two cases,: if the expected trigger does not arrive until the time specified in the To string, or when you are using bookmarks alone in the playlist. For example, a jump operation will be executed to the bookmark in the screenshot at 16:36:32 o’clock, if the expected trigger has not arrived by that time. WARNING! Please, note that the To string will force AirBox to jump and execute the following items in the playlist. This might interrupt the playback order, so be careful when checking Force jump on time in bookmarks! There are several possible scenarios when using bookmarks and DTMF/GPI triggers combined: When the bookmark Name is used as a reference, i.e. the DTMF/GPI command is Jump to bookmark: If there is a Time range, specified in the bookmark’s properties and the trigger comes within this time range – AirBox will jump to this bookmark. If there is a Time range, specified in the bookmark’s properties and the trigger comes outside this time range – AirBox will ignore the command. If there is no Time range, specified in the bookmark’s properties, AirBox will jump to that bookmark unconditionally upon receiving the trigger tone/pulse. When the Time zone is used as a reference, i.e. the DTMF/GPI command is Jump to bookmark in time range: If the trigger comes within the time range – AirBox will jump to this bookmark If the trigger comes outside the time range – AirBox will jump to the nearest following bookmark, according to the system clock. WARNING! Please, make sure to set the Time zones correctly, since late arrival of the DTMF tone will cause AirBox to jump to the next bookmark, thus possibly skipping some of the items that are situated between the two bookmarks, as in the following example: If a bookmark’s Time zone is set From 15:36:32 To 16:36:32 and the DTMF tone does not arrive, AirBox could jump to the following item in the playlist at 16:36:32. If the DTMF tone arrives at 17:00:00, AirBox will jump to the next bookmark in the playlist that has a later Time zone, thus skipping some of the clips that are between the two bookmarks. WARNING! DO NOT use fixed time events within a bookmark’s time range! 25 Channel in a Box Lite Note Adds/Inserts a comment line in the playlist. Transition This feature Adds/Inserts a transition into the playlist. You can read a more detailed description of AirBox events in Clip Properties Transition. Event This feature Adds/Inserts events into the playlist. You can read more detailed descriptions of AirBox events in the section AirBox Events. Delete Commands Delete current from list This item removes the currently selected clip from the playlist. Delete unsupported clips This command will remove all unsupported clips from the current playlist. It is used mainly when you import online media library files in your playlist. The OML files might contain *.avi and *.wav files. Both types are inserted in the playlist (using the Import tab delimited functionality from the File menu). AirBox will consider the *.wav files as an unsupported format, so use the Delete unsupported clips command to cleanup your playlist. Clear List This command removes all clips from the playlist. Clip Trimmer Invokes the Clip Trimmer. It allows previewing, non-destructive trimming, and exporting parts of the currently selected clip to new files. Properties Clip’s properties are described in details in the Clip Properties section. Other Edit Commands Undo Use it to cancel up to five recent actions. Cut Removes the selected object(s) and keeps it(them) in the buffer-memory. Copy Saves a copy of the selected object(s). Paste Pastes the buffer content. Randomize This command randomizes the order of all selected clips (highlighted in the playlist). It is quite useful for music video channels. Apply Transition This command is used to apply a default transition to a select item (items). You can set a transition to be a default one from the Clip PropertiesTransition tab. Playlist loop This command duplicates the checkbox that loops the playlist for continuous playback. 26 Channel in a Box Lite Clip loop This button will loop the currently selected clip when AirBox reaches it. This functionality is not the same as the Loop checkbox in the main AirBox window (see the Playlist and Clip Buttons section above). Select all Selects the whole playlist. Deselect Deselects the whole playlist. Invert selection Inverts the selection in the playlist. Find/Replace This is a searching/replacing function of the playlist. View Menu System Timer This is a system time clock. It could be shown as a digital or analog clock. Right-click on it and select the desired appearance from the context menu. You can also set whether the date to be visible, or not. Clip Timer This is a clip-related timer. Its accuracy depends on the MPEG2 decoder used. Right-clicking over it invokes a context menu, in which you can choose the timer mode (time elapsed/remaining). If you check the [Count down] item, the timer will show exactly how much time remains until the end of the currently playing clip. The background is black and a blue progress bar indicates what portion of the clip has already passed. If you uncheck the [Count down] row, the Clip timer will start counting up, showing the elapsed time from the beginning of the clip. The colors of the progress bar and the digits will reverse. (!) TIP: The color of the progress bar and that of the digits can be changed in Settings ColorsTimers by clicking in the relevant fields there. Block Timer This is an event-related countdown timer. It shows how much time remains until the selected playlist event or until the [End of the playlist]. Choose the event type to display from the dropdown list: [Stop], [Stop Cue], [Wait], [Wait Until], etc. If there are several uniform events in the playlist, they are shown in a pop-up list, arranged by their playlist line numbers so you can choose one of them. If you do not select an event, by default, the timer will show the time remaining till the end of the playlist. A progress bar indicates how much of the time has already passed. The color of the progress bar and that of the numbers can be set from Settings ColorsTimers. Timecode Timer The timecode timer displays the timecode received from the LTC Reader plug-in, if available. The incoming LTC should be connected to the sound card of the playout server. Daily playlist viewer 27 Channel in a Box Lite The Daily Viewer is a tool that will help you manage your daily playlists. In the area above you can view all daily playlists. The number in the brackets in front of the start time represents the number of days remaining till the start. For example, if there is a two in the brackets and then 12:00:00, this means that the playlist will start in two days, twelve hours. When you click once on a daily playlist row, its items will be displayed in the grid below. Double-clicking on a daily playlist line will load it immediately. Please, note that this will interrupt the playback! ShotBox Selecting this View menu item will show/hide an additional window with buttons for fast switching/insertion of custom events. All clipboard buttons can operate in two modes: Execute mode – pressing a button while in this mode will execute the event, assigned to it immediately. In case a live stream is assigned to this button, a live stream row will be inserted in the playlist, and the playback will jump to it. NOTE: No offsets will be applied to the events while in this mode! NOTE: In execute mode, a complex item is treated as an events container. All events assigned to it will be executed immediately, with no offsets. NOTE: In AirBox Lite you can use up to 4 logo presets! Insert mode – pressing the relevant button will insert the event assigned to it in the playlist. You can specify the point of insertion by using the location toggle button: Insert as next – will insert the event after the currently playing clip. If AirBox is in Stop or Pause mode, the e will be inserted as the next line to be executed after resuming the playback. Append at playlist end vent line – will add the selected command to the end of the playlist. TIP (!) If you need to insert an event line in another position in the playlist, just drag-n-drop the relevant button to the line, in which you would like to insert it. TIP (!) Hold down the Alt key while clicking on a button to toggle the current mode of operation. Thus, you will switch between Execute/Insert modes for this particular command. The link ed image cannot be display ed. The file may hav e been mov ed, renamed, or deleted. Verify that the link points to the correct file and location. To change the buttons’ number and appearance, press the gear-wheel button . The buttons setup dialog will pop up. Define the dimensions at your will. NOTE: If the matrix settings cannot accommodate all the buttons, a warning dialog will appear, and you will not be able to apply the changes. NEW: For emergency execution of certain items in the playlist, you can assign a Jump shortcut to a button. The “jump to” target can be a playlist item number or a bookmark name. NOTE: You cannot drag these shortcuts to the playlist! They work only in execute mode! TIP (!) Instead of going to View menu, you can press <Ctrl> + <G> to open the Clipboard window. TIP (!) Instead of pushing a button, you can press the <Ctrl> + number key to execute the command, assigned to the relevant button. Right-clicking on a button in the ShotBox invokes a context menu, which allows you to do the following: Assign event: Logo event - view a detailed description of the Lovo event here. Media - view a detailed description of the insertion of media files here. 28 Channel in a Box Lite Complex event - view a detailed description of the insertion of Complex items here. Playlist - invokes a browser dialog, through which you can assign a playlist file to be loaded upon pressing the respective button. Jump shortcut - invokes a dialog, through which you can assign a jump command to a specified item, designated by its index number in the playlist, or a jump command to an existing bookmark in the playlist, designated by its name. Unassign - Use this command to disable an already assigned event to the respective button. Edit - Use this command to edit an already assigned event to the respective button. Set title - Use this command to set a title to appear on the respective button. Set hint - Use this command to set a hint to appear when the pointer is positioned on the respective button. Picture: Assign picture - this menu option opens a browser dialog, from which you can select a picture to be loaded as a logo upon pressing the respective button. Clear picture - this command will remove the picture, selected in the assign picture option above. Log Selecting this item in the View menu will open a Log View window. It is used to show the events that have occurred during the AirBox operation. (!) TIP: All windows can be freely resized and moved around the screen, staying on top of other windows. <Ctrl>+click on a Timer window will change its appearance. Check it out! Right-clicking on any timer window opens a drop-down menu. Select Can Snap in it to lock the timer position to the main window. 29 Channel in a Box Lite Plug-in windows Select this item to display the additional windows, available with the currently used output module. Volume control window VU&Peak Meter Momentary Loudness Loudness Meter Short-Term Loudness Volume Slider Front Left Front Right Front Left Front Right Front Center Back Left LFE Subwoofer Back Right This is an additional window, which appears close to the main AirBox window. You can resize it by stretching its edges. The image to the right shows the Volume control window of an AirBox that has two different audio configurations. The first one is for stereo, i.e., a left and a right audio channel – the [Default] section to the left. The second one is for 5.1 audio, i.e., 5 audio channels – the [Channel] section to the right. Notice that the [Default] section shows only two channels, as it represents a stereo output, while the [Channel] section shows six channels, as it is for 5.1 output. The colored fields in the window are volume & peak meters. The narrower band shows the peak levels in each separate channel, and the wider one to the right shows the overall peak levels. The blue scroll to the right shows is the [Master] volume slider. This Volume slider also is visible in the main AirBox interface (between the multi-purpose zone and the playback control buttons). If you move the slider from the Volume Control window, it is moved in the main interface too. Right mouse-clicking on the Volume Meter area opens a context menu, like the one shown below The Show Master and Show All Channels commands allow you to hide / unhide the master and the channel bars respectively. In the Stream and Channel Orientation menus you can select the direction of the stream and the peak bars respectively. The Reset command nullifies the peak values and the Skin option allows you to select a skin color for your peak bars. 30 Channel in a Box Lite The Edit – debug command invokes a dialog, which allows you to configure the overall appearance of your Volume Control window, named the Designer window. This window contains five tabs. The General tab allows you to Load and Save custom skins for your Volume Meter. Here you can also set your Background and Outline colors. Note that when you configure your desired settings, you need to press the Apply button in order to change the appearance of the Volume Meter window. Furthermore, you can dynamically view how the appearance of the Volume Meter changes if you place a check in the Auto Update box. In the Scales tab you can show / hide the scales via the Visible box and set the scales type to Momentary or Short Term. Use the Left / Top / Width / Height / Tick Size spin-boxes to edit the appearance of the bars. The Color Values field allows you to edit the bar colors, depending on the peak levels. Finally, use the Outline field to set borders in your desired positions and / or colors. The Numeric Scale tab allows you to configure the appearance of the numeric scales in the Volume Meter. You can show / hide it via the Visible check-box, set its Width, Distance, Position, and Color. Furthermore, you can choose the number of Ticks (values) shown in the scale via the respective spin-box. This tab also allows you to set the Color, Position, and Text of the number values. 31 Channel in a Box Lite Use the Title/Indicators tab to configure the position and appearance of the Titles and Indicators in the Volume Meter window. You can set the Alignment, Justification, Font, and Color of the Titles. For the indicators you can change their position in the dialog, Color, and Alignment. Finally, in the MaxPeak tab configure the Shape, position, and colors of the max peak indicator. External video window Check it to move the video window outside the main AirBox window. You can resize the video window by pulling its edges with the mouse pointer, or by right-clicking on it (a drop-down menu will suggest several zooming options). Show external video window If you have closed the external video window, you can view it again by checking this line. Pressing it once again will hide the window back. Arrange windows Clicking on this line will align all open timers around the main AirBox window. Settings Menu The Settings menu contains the most important settings for the AirBox. General This Settings dialog box is divided into several tabs. General General tab contains general functionality options: Use Clip Trimmer – if checked, AirBox will open the Clip Trimmer upon double clicking over a clip. If this flag is not checked, the Clip Properties dialog will open instead. Disable trimming while playing – restricts changes in the currently playing list. Transmit actual file timecode – AirBox transmits the actual file timecode, embedded in the clip file. This timecode can be used by external applications, such as SubTitle Plus. Remove old media items on append – removes the already played files from the old playlist when appending a new one Broadcast timecode over network – If this one is checked, AirBox will broadcast the playlist time code, the current clip timecode, and the relative timecode (from the beginning of the playout session) over the network (via UDP). Auto save playlist – saves the playlist automatically at predefined intervals. 32 Channel in a Box Lite Auto update duration of marked files – check it to enable automatic updating of clips’ duration in case of file change. If not checked, AirBox will “remember” the duration of the original file, and if you change this file with a longer one, it will be truncated. After you have checked this box, go to the playlist, and highlight the files you would like to update (you can use multi-selection). Right-click and choose Auto update. Thus, all “auto update” files will be checked in accordance to the set interval, and their durations will be updated accordingly. Restart playback after – resets the hardware counter, which is displayed at the Master (green) counter. This option is necessary due to various platform and format limitations. NOTE: Decoder restarting may cause a few black frames in playback. Cue delay – this option concerns the Cue function (freeze at a first clip frame). It defines the delay (in milliseconds) before pausing on the first frame, since different decoders behave differently in regards to the first clip frame. This function is both decoder- and computer-dependent. You will have to find the most suitable one for your setup via testing. NOTE: This affects only some old Playout plug-ins. Audio Streams –depending on the hardware platform used, AirBox can playout more than one audio stream. Default Offset – this is a general offset (measured in milliseconds) that will apply to all newly-inserted external events. The positive values mean later execution of the events and the negative values mean earlier execution. This offset will appear in the Notes column in the playlist upon inserting an external event. Pre-roll event time – The command reaction times for external events is different, depending on the devices. Still, if you find out an acceptable compromise value that will serve your needs, you can set a general offset value to be applied in run-time to each external event you add in the playlist. Thus, you will not have to enter the same values each time you create an event. This offset will not appear in the playlist! NOTE: Do not forget to account for the pre-roll event time when you set additional offsets in the events’ properties dialogs. The offsets and the pre-roll event time are summed up in runtime. The next field, Network Files Restrictions, is designed to specify the procedure upon insertion of files that are not saved locally in the AirBox machine. This is a precaution option: The playback could stop upon network failure if your whole content is remote, or the playlist could end earlier – if some of your files are stored locally and the network fails, AirBox will label all remote files as missing, skip them, and hence, the end time of the playlist will be reduced by the duration of all missing files. When Warn is selected, the rows of all network-stored files in the playlist will become dark-green. A note [Remote file] will appear in the Type column. When Allow is selected, you will not be notified whether your files are stored remotely or locally. Thus, you will take the chance to trust your network. If Reject is selected, the rows of all network-stored files in the playlist will become red (brown when selected). A note Rejected remote file [Remote file] will appear in the Type column. These files are considered missing and will be skipped during playback. If you have left the Show duration of missing files flag unchecked, the playlist time will be recalculated accordingly (see the Missing files section below). Channel ID – enter the ID of the output Channel here Default code page – select the default text encoding Interface The Interface tab provides the following user interface options: Auto popup LogView on error – displays the LogView window automatically, when an error occurs. Auto change items in Block Timer list – the block timer will follow the subsequent events in the playlist (as selected in the block timer dialog box). If not checked, the timer will remain fixed at the selected event in the list. After this event has passed, the block timer will read negative values, since the origin point will remain fixed in the past. Add original duration in notes after trimming – if checked, once you trim a clip, AirBox will automatically insert information about its original duration in the Notes column in the playlist. If you do not want to see this information, just leave this box unchecked. Copy HouseID to TapeID – a convenient way to automate assigning reference information, needed for subtitles insertion. 33 Channel in a Box Lite Show frame values in playlist – check it to view the number of frames at the end of the duration value in the Duration column. Color entire row by category – fills the entire row in the playlist with the Category-field color of the relevant clip. This option refers to categories in DataBox. You can change the category color in DataBox Options Default values Colors to AirBox NOTE: You will have to drag-n-drop entries from the DataBox grid into the AirBox grid to view their category color. Show external event’s thumbnails in the hint – by default, you will be able to view thumbnails of all TitleBox templates used in the TitleBox Net Control events in the playlist. If you do not need them, just go to this check-box and uncheck it. Disable misusable (critical) shortcuts – replaces regular shortcuts of “dangerous” playback commands with alternative ones, as in the table to the left. Large status bar – enlarges the status bar at the bottom of the AirBox window Use Extended MPEG info tip – enables showing detailed file information in the hint when sliding the mouse pointer over a clip in the playlist Hide hardware reset button – checked by default, uncheck this box to be able to see the Reset counters in the main AirBox interface hardware button under the Always show playing item on top of the grid – scrolls the playlist grid so that the currently playing item is on top of it Show progress bar in block timer … sec. – defines the time before a clip’s end for showing the progress bar inside the block timer (see ViewBlock Timer). For instance, if a 15-second value is set, the progress bar will be visible in the last 15 seconds of the clip playout. During the rest of the time, the progress bar will not be displayed, just the counter itself Overlay channel number, first channel is – a big figure showing the AirBox instance will be displayed in the grid background. You have to set the number of the first channel. The numbers of all subsequently open channels will be updated automatically. You just have to check the Overlay channel number box in the Settings of each AirBox if you want to view it in the grid. Video preview aspect ratio – select the aspect ratio for the Video preview window. This is necessary because some decoders cannot report the aspect ratio of the playing content, so this must be selected manually, in order to properly preview content. Frame rate – this entry is necessary for estimating all kinds of time values (i.e., end time, playlist duration, etc.), while there is no accessible frame rate of a currently played file (for example, AirBox is in Stop mode). Missing files Missing files is the third tab in the Settings dialog box. It refers to automatic handling of missing files in the playlist. Show duration of missing files – if there are any missing files in the playlist, their real duration or zero-duration can be displayed. This will affect the playlist’s Total duration and End time that are shown in the Status Bar at the bottom. If this option is checked, a question mark will appear after [Total Length] and [End at] in the Status Bar. If it is not checked but there are missing files, an exclamation mark will appear after [Total Length] and [End at] in the Status Bar. Blink status bar on missing file – in case there are missing files in the playlist, the Total Length and End at: cells in the status bar will become red and will start blinking. Log message if missing file exists – check it to include the list of missing files in the log window. Show warning window if there is a missing clip or stream – checking this box will ensure that a warning dialog will pop-up to prompt the operator that there is a missing clip/stream in the playlist. Check Missing Files every …sec. – When you prepare your playlist, you can add files to it that are not available in the online storage yet. They appear in AirBox as red-colored lines. Check this box to let AirBox auto-check whether the missing files are already available or not. Audio alarm if missing file exists, every …sec. - use this option to enable an audio alarm if there are missing files in the playlist. Thus, you will be alerted if there are missing files, or if you accidentally delete a clip, related to the current playlist. 34 Channel in a Box Lite NOTE: The alarm is output on the PC speaker! Try to resume on missing live stream every …min – automatically checks if a missing live stream has been reconnected to AirBox in a period of time defined by the user Auto-fill missing files and live streams – AirBox will look for the auto-fill category, according to your preferences: Use category of the clip – AirBox will use the auto-fill category, as specified in the missing file’s properties. In case there is no such category, the default auto-fill clip will be played out. Custom category – here you can select from your own categories, prepared in advance in Settings menu Auto-fill dialog. Automation This tab allows you to manage the Automation settings that you have defined in your playlist. Disable automation in following time zones – here you can list the time zones to disable the execution of commands, related to external triggers. First, you have to specify the Start and the End time of a zone and then press the Add button to add it to the list.To remove a zone from the list, select it and press the Delete button above. Disable automation for following categories – here you can define categories, for which to disable the execution of commands, related to external triggers. The category names correspond to the Categories, set in Clip Properties General tab for each playlist item. WARNING! The automation has a higher priority than the Automation graphic rules and the Automation event in the Edit menu! The latter will both not operate properly when using Automation, so please do not use them simultaneously! 35 Channel in a Box Lite Grid The Grid tab allows you to control the columns that appear in the playlist grid. You can add new columns by pressing the Plus button above the list. Generally, a new column will contain a Metadata name (as it appears in the first column of the clip properties). Thus, once you enter some metadata for a clip, its value will appear in the corresponding column in the grid. All columns are Visible by default. Double-click in the green tick-mark to turn them Invisible. To remove a column from the list, click on the Minus Click button. to restore the factory defaults. Change the Font and the Row Height settings through the respective fields. Access Restrictions This General Settings tab allows you to add restrictions for non-administrator users, i.e., users who do NOT have the admin password, defined in the Admin section of the settings menu. The following restrictions can be added from here: Change settings - if checked, this option restricts the user from changing any AirBox settings Change playlist - if checked, this option restricts the user from changing the playlist Change playback status - if checked, this option restricts the user from changing the playback status, i.e., selecting a play, stop, or a pause command Colors This option allows users to define the colors, used in the AirBox playlist for color- coding, as well as for timers. Playlist colors: Background – playlist background. Playing – currently played clip. Event – event rows. Cued – a clip prepared for playback. Missing – missing file rows. Note – note (comment) line. You can define colors for Normal and for Selected status of each playlist row. Timer colors: Clip timer – colors for the progress bar and the letters in the Clip Timer. Block timer – colors for the progress bar and the letters in the Block Timer. TC (timecode) timer – colors for the progress bar and letters in the TC Timer. Clicking on the desired color box enables a combo-box for selecting a color or defining a custom one. The Reset button resets the selected field to default colors. All the screenshots in this User’s Manual are made with default AirBox colors and all explanations are in accordance to them. 36 Channel in a Box Lite Modules AirBox Output Here you can select the active playback module, depending on the installed hardware platform. Check the latest list of platforms, supported in AirBox in http://www.playbox.tv, or write to [email protected]. Select the desired module from the list of available modules in the upper window, and assign it to the corresponding AirBox channel in the lower window by double-clicking on the module, or by pressing the Set button. This option allows you to start multiple AirBox applications on different hardware decoders at the same workstation. NOTE: Depending on the active module, AirBox may recognize some files as invalid, if these files are not supported by the respective hardware used. If there is no hardware platform installed, there are still several options: MPO Mixed Playback This plug-in allows for playout of different types of media (SD, HD, 25fps, 30 fps, etc.) and different outputs (SDI, Analogue, IP Streaming etc.) to run at the same time from a single AirBox playout server. Basically, with the Multi Parallel Outputs (MPO), AirBox allows broadcasters to provide parallel outputs in any combination needed to deliver content. For more detailed information on how to use the MPO Mixed Playback, please, check the relevant section below. If you still have any questions, related to the configuration of this AirBox module, contact our support team at [email protected]. Remote Control All of the available modules for remote control in AirBox are listed in the remote control tab, like GPI (General Purpose Interface), DTMF, video matrices, and video switchers, TitleBox NetControl, resizing, etc. These modules correspond to events in the AirBox playlist. First, you have to enable the module from AirBox MenuSettingsModulesRemote Control and configure it. Then, you can put it as an event in the AirBox playlist. Here is a list of available modules: TitleBox Net Control output This function allows managing the TitleBox objects from AirBox. This is done by inserting external events (TitleBox NetControl Output events) in the playlist. Press the Configure button to configure further the TitleBox control. You can set the connection port for this UDP communication (it is set to 8012 by default). If there is more than one TitleBox, controlled through AirBox in your network, set the TitleBox channel, to which AirBox commands should refer. If you check Broadcast, the commands will be sent throughout the entire network. If unchecked, the commands will be sent only to the specified TitleBox Server. For a detailed step-by-step guide on how to integrate TitleBox with AirBox, see APPENDIX 2 – Integration of AirBox with TitleBox . 37 Channel in a Box Lite Logo This option allows displaying a logo over the clips, played in AirBox. You may select a logo source from the list and assign it to the appropriate AirBox channel. By Payback Module This is an internal logo generator that keys the selected logo over the output video. This is the option to be used in most cases. Pressing the Configure button while the Logo tab is selected will open the Logo configuration dialog box, where you can define Logo Presets to be used later in AirBox (see the Logo section of the Settings menu description, further in this manual). Output This window contains information about the settings of the currently active plug-in and allows its fine-tuning. The Output Setup dialogs may vary depending on the decoders’ models. Usually, these settings are defined at the factory, so you do not have to adjust them, unless advised by our support team. As explained in the Preamble section above, there are two major playout modules, supported by Airbox. The AirBox playout is defined in the AirBox Settings Output menu, described below. Video tab Here you can define the parameters of the AirBox video output. The settings will affect ALL files in the playlist! Video Standard - specify PAL or NTSC video standard Field Order – corrects the order of the field. Flip Image – check this box to flip the video vertically. NOTE: Flip Image will affect ALL files in the playlist! -Aspect Ratio – the aspect ratio of the video output. -Aspect/Size Conversion Strategy – it is used to define how the output video will look like if the output aspect ratio is different from the aspect ratio of the files in the playlist. For example, if the output aspect is set to 4:3, but the clips in the playlist are with a ratio of 16:9. The following settings are available: Best fit – will keep the real size of the image. Two horizontal black bars will be added above and under the video to fill-up the remaining part of the screen. The horizontal size of the video is preserved. Balanced Letterbox – the horizontal black bars will be smaller. Small parts at the two sides of the video will be left out of the screen. Full screen/Zoom – the vertical size of the video will be preserved. Video will be cut equally to the left and to the right. Stretch – using this setting, there will be no black bars on the screen, but a little change in the form of the shapes. Custom – it is used for custom settings. When you select it, the drop-down box at the right side of the Aspect/Size will become active, as well as the Conversion Strategy box. The latter allows you to adjust what portion of the image and what portion of the black bars will be visible in percentage. For example, if you select 50 %, the result would be like the Best screen/Zoom, and at 0% – like Letterbox. Fit Aspect/Size ratio. At 100% the result will be like Full -Rescaling – In case the source file has a different resolution than the output resolution, there might be some Rescaling of the video. No Rescaling – if selected, there will not be any rescaling. Crop – if the source file has a higher resolution than the output resolution, only the middle part of the video will be visible. If the input video has a lower resolution, the remaining part of the output picture is filled with a black color. Standard – this setting corresponds to the Low one from the Custom list. 38 Channel in a Box Lite Custom – if pressed, the user has to choose the type of quality from the drop-down list near the relevant radio-button. NOTE: Working with higher video quality requires more CPU power. -Resampling – In case the source video has a different frame rate than the output one, the following Resampling options are provided: No Resampling – there will be no resampling. Repeat/Skip – for example, if the output video standard is set to NTSC, but you have to play a file, which belongs to the PAL standard, some frames will be repeated, in order to fill up the frame number to 30. By analogy, some frames could be skipped. Standard – corresponds to the 9-Very High quality from the Custom list. Custom – if selected, you have to select an item by your choice from the drop-down list near this radio-button Audio (General) Tab Here you can define some settings for the audio output. DTMF settings Here you can define an output DTMF signal to be generated by the AirBox application. Press the DTMF settings button to open the DTMF set-up window. Output settings: Here you can define the parameters of the DTMF tone – Frequency, Bits per sample, number of Mono Channels, and Channels Mask. Depending on the Channels Mask, the DTMF tone is sent to a specific audio channel. If Channels Mask is zero (0), the DTMF is not sent. If it is one (1), DTMF is sent to the 1st mono nd channel. If it is two (2), DTMF is sent to the 2 mono channel. Length of the standard Symbol in DTMF sequence – numbers from 0 to 9 and letters A, B, C, D Pause Length – length of the pause between symbols Specific Symbols Length – Specific symbols are all symbols in the DTMF strings, different from numbers from 0 to 9, and letters A,B,C,D Signal Level % – the signal level in percent Working Mode – here you can set the DTMF to either be Mixed with the output audio, or to Replace the output audio Audio (Channels) Tab In the AirBox Lite version you can only define one Audio stream with up to 2 mono channels. Streams (audio tracks) The currently defined stream is visible in the Streams window. When you select it you can see the details for this audio stream in the next Stream Details window. To define/remove/edit the stream, press the Add/Del/Prop button respectively at the right side of the window. To change the order of the streams in the stream list, use the Up and Down buttons. When you press the Add button, the set-up window will open. Enter the name of the new stream in the Name field. In the Preset field you can select a preset for a channel mapping from a drop-down list. Here you can see a list of the most popular channel mappings. 39 Channel in a Box Lite For example, if you select Stereo, the channel mapping will contain a [Front Left] and a [Front Right] channel. If you select 3 front LFE, there will be: [Front Left], [Front Right], [Front Center], and [LFE Subwoofer]. In Mono Channels Count enter the number of mono-channels, included in this stream. NOTE: If you have selected some preset from the Preset list, then the number of the mono channels appears automatically, and you cannot change it. If you select the Preset to be Unknown, you can enter the number of mono channels manually, and you can define your own channel mapping into the Channel Mapping area. Channel Mapping By default, when you select some number of mono channels, in the Channel Mapping field, you will see the most popular mapping types for them. NOTE: There is an option, in which the Channel Mapping could be disabled. If you would like to disable these settings, please, contact our support team at [email protected]. If you select 2 mono channels, the Mapping will contain a [Front Left] and a [Front Right] channel. If you select 4 mono-channels, the Mapping will be: [Front Left], [Front Right], [Front Center], and [LFE Subwoofer]. You can delete one or more of these mono-channels by pressing the Del button to the right of the Channel Mapping area. Then you can add a new channel for audio mapping, by pressing the Add button. To change the channels’ order, just select one of them and move it up or down in the list, by pressing the Up or Down button. NOTE: If you have selected some preset from Preset list, then you cannot edit the Channel Mapping IMPORTANT: In case the available in-file mono-channels are different in count than the ones, selected for the output (for example, you have 2 mono-channels in file, but define 4 mono-channels for the output), the re-mapping is made by the software up to the most-popular re-mapping rules. If you want to make your own re-mapping, please, ask our PlayBox support team ([email protected]) for assistance. Audio Level in dB – Enter a value here for changing the output audio level of the current stream. The default value is zero (0), which means that there is no change. If you enter one (1), the output audio level will increase by one (1) dB. If you enter minus one (-1), the output audio level will decrease by one (1) dB. In the Input Type field, you can select from a drop-down list a type for the sound in this audio stream, like “dialogue”, “music and effects”, “commentary”, “voice over”, etc. In the Output type field select the output encoding method – PCM or DolbyDigital. NOTE: Currently, DolbyDigital output is supported with a Deltacast card only. The language of a sound could be selected from the Language field. Meta Data – this is a list of additional audio metadata for user-defined audio streams. For example, default volume, copyrights, etc. You can Add, Delete, or Edit metadata by selecting it and pressing the Add/Del or Prop button respectively. When you are ready, press the OK button at the bottom of the Mixed Audio Channel Settings window. The newly defined audio stream will appear in the stream list. IMPORTANT: If you have defined more output audio streams than you have in your file, then, by default, the extra streams will be empty. It is possible to dublicate the first output audio stream into the extra streams. For further instructions and help, please, contact our PlayBox support team ([email protected]). Outputs This tab allows you to select the type of output, SD, HD, or streaming output, with which your AirBox is going work. NOTE: This version of AirBox allows you to select only one type of output at a time. 40 Channel in a Box Lite As shown in the image to the left, the Outputs tab allows you to view a list of already configured outputs. The Output Name column shows you the individual names you have given to each separate output. In the Output Type column you can see the type of that particular preset. The Clock column (third one from the left) allows you to select the clock of which hardware device to be used. Note that if you only have one hardware device configured, it will be used by default. If you set the clock clock of non-hardware output to be used, AirBox will simply use the system timer. Be aware that in this case an additional timebase correction may be necessary. In the example to the left the clock of the Decklink platform is selected. The Setup column allows you to invoke the setup dialog of each separate output. To do that, simply double click on the corresponding [Setup] row and a dialog will appear, depending on the type of output. The next column, fifth from the left, invokes a dialog like the one shown to the right. Here you can set the resolution of the output. The sixth column from the left is used for refreshing the output, and the last one – for removing it. To add a new output preset, simply press the Add button at the bottom. You can select from one of the following types of outputs: DeltaCastHD, MPEG Transport Streaming, Decklink, or a Preview. Depending on your selection, a different setup dialog will appear. If you select Decklink or DeltaCast HD, a dialog, as the one to the left will appear. Here you can simply enter the name of your output, and choose an existing Decklink platform from the list. Once you are done, press OK. If you add an MPEG transport streaming output, a dialog like the one to the right will appear. Enter the IP address, Port number, and Interface name of the respective AirBox, to which you wish to send the transport stream. 41 Channel in a Box Lite If you select a Preview output, a dialog as the one to the right will appear. Select the Video Renderer Type from the drop-down list and place a check next to the streams you wish to output (Video / Audio). NOTE: If there are Closed Captions in the content that is played, you will be able to see them in the preview window. Pressing the Plugin Setup for a predefined MPEG Transport Stream in the Outputs tab invokes a dialog, like the one to the right. - - In the IP settings field configure the following: Address – enter the IP address of the remote machine to receive the stream. If you check Multicast, i.e. streaming to multiple machines, you will have to enter a special multicast address in the Address field (the multicast addresses are in the range between 224.0.0.0 and 239.0.0.0). TTL stands for time-to-live for the Internet packets. This spinbox is active only if the Multicast box is checked. The higher the TTL value, the longer the packets will “live” and pass through more network routers. By default the TTL is set to “1,” which is enough for local networks. Buffer size – in this spin-box you can specify the size of the IP packets to be sent along the network. This size should be a multiple of 188 bytes, which is the size of an MPEG-2 TS packet. We recommend a 1316 bytes buffer size, which will comply with the standard network MTU. Port - define which communication port will be used for the streaming. By default it is 1234. Interface - if there is more than one network card in the PC, you need to specify which one should be used for the streaming in this string. If you leave it empty, AirBox will stream through all of the available interfaces. Multicast – check it to stream to all PCs in the network. Protocol – the network protocol. In the Output drop-down menu select whether the output to be sent over ASI or over IP In the MPEG settings field configure the following: If you click on Program stream, the protocol will be switched automatically to UDP. With Transport stream you can choose between a UDP and an RTP protocol. The MPEG stream settings are situated at the right side of the window. There are two options for the Multiplex Type: Program or Transport stream. When Transport stream is selected, the TS Mux Rate spin-box becomes active, so you could either select Automatic, or fix the Mux rate manually. The Audio Bit Rate is adjustable for both stream types. It is 192kbit/s. If you select Program With Transport stream, the network protocol will be switched automatically to UDP. stream you can choose between UDP and RTP. CPU time factor – similar to IP Pump, in IP Streamer we use the CPU clock to generate the PCRs of the Transport Stream. Enter the value from the stream analyzer in this spin box to compensate the inaccuracy of the CPU clock frequency. Pressing the Multiplexer Settings button will open the MainConcept Multiplexer© properties dialog. You can view the parameters of the output MPEG-2 TS stream in it. The Video Encoder Settings and the Audio Encoder Settings are described below. 42 Channel in a Box Lite Logo This tab contains two fields – General and Fade. The first one contains the following check-boxes: Use Logo – if not checked, the user will not be able to use logo. Use Subtitles – check it to enable the usage of subtitles. Logo on top – you can use it to avoid eventual overlapping of the logo and the subtitles. To adjust the duration of the Fade In and Fade Out effects when showing/hiding the logo, use the relevant spin-boxes, situated in the Fade field. AUX Source These are settings for using an additional video source. There are three possible AUX Sources: Previously prepared File – you need to enter its location here; UDP stream – enter the IP address and port; Live video – a video signal, coming from a Live Input, as it is defined in the Live Input settings window. Here you have to enter the name of the live source, exactly like it is entered in the Live input window. NOTE: Keep in mind that when creating the resize control event, you have to specify an offset of at least 1 second (1000ms). Check the Use Second Source Audio box if you want the output audio to be the one, coming from the AUX source. IMPORTANT: It is recommended for the live stream video standard and fields order to be similar to the playlist input video. NOTE: This plug-in supports the transition between clips in the playlist. Please, check the clip properties description for details. Logo The Logo settings dialog is used to configure logo images for displaying in AirBox (their position on the screen, transparency, etc.). The Logo Preset field contains a list of logo presets available for use. To load a new preset, press the Load button, and select a file. It will appear in the Preview area. If you approve it, press the Apply button to save the logo file in the preset list. NOTE: In AirBox Lite you can use up to 4 logo presets! Invert alpha – inverts the alpha key of the logo (if the original picture file has an alpha). Matte Color – this is the background color, which should be mixed with transparent colors, and thus, removed from the logo image. Position – illustrates the logo position on the screen. On Startup – these options are used to define the logo appearance upon pushing the Start button in AirBox: No Logo –no logo appears when AirBox is started. Last used – If there are no Logo preset events in the playlist, the last used logo will appear when AirBox is started. Logo 1 – If there are no Logo preset events in the playlist, Logo Preset #1 (from the list) will appear when AirBox is started. Auto show box – check it if you want to display the logo while you are editing it. NOTE: All changes will be shown on the screen immediately! Show button – starts displaying the logo. 43 Channel in a Box Lite Hide button – hides the logo from the screen. NOTE: The picture format depends on the decoder. The 32-bit RGBA files are most preferable, but TGA, JPG and PSD files are widely supported too. IMPORTANT: You will not have fade transition when displaying Logo and Subtitles simultaneously on the DeckLink platforms! Please, refer to the SubtitleBox section for more details on the subtitling options in AirBox. StartUp Here you can find useful options for setting the behavior of AirBox on module start-up: StartUp Playlist, various Playback recovery options, how playlists will be reloaded and two system options. AirBox startup At the top of the StartUp window, you can choose between two system options: Launch AirBox on Windows start, delay sec. – you might need some delay, as the system might take some time to initialize the installed decoder. If AirBox starts before that, it will not be able to perform normally, as the decoder will be “missing”. Increase the delay to ensure that AirBox will not start before hardware initialization. Start minimized – if you place a check in this box, the AirBox will be automatically minimized on startup. StartUp playlist In this section you can choose a playlist to be loaded upon AirBox startup. New loads a blank playlist; Select the Last used option and the next time you start AirBox it will load the last played list. In addition, you can check Auto start playback after loading the last used playlist. Open dialog invokes a query to choose a playlist from the last used playlist location. Daily playlist folder gives an opportunity for some simple scheduling of playlists. Select a folder, in which you will place the daily playlists by filling-in its path, or just browse for it with the browse button. There you will save the playlists you want to schedule. They require a specific naming structure in order to be played on the desired date and time. An example name is “2003_11_20_14_00_00.ply,” where 2003 stands for the year, 11_20 is for MM_DD (month_day), and 14_00_00 is HH_MM_SS (hour_minutes_seconds). Only files with such a naming structure will be played automatically when AirBox is running in this mode. Now you can use the Save daily playlist feature in the AirBox File menu to achieve this naming automatically. IMPORTANT: If you are using the Daily playlist folder is situated! playlist folder option make sure that you have defined a folder, where the daily Playback recovery options Here you can specify what AirBox should do in case of accidental restart /abnormal termination of the module. The following options are available if AirBox is not running in daily playlist mode: Last playback status (Play/Pause/Stop) – if checked, it resumes the last playback status of AirBox, depending on the status, in which it was before stopping. Last played item from the last playlist – if checked, it resumes the last item from the playlist that was played by AirBox before stopping. Last played position in the last played item – functions as the two previous options but it also remembers the position of the last item to resume status exactly at it is. The interval for saving the last position is changeable through the spin-box below. Catch up with schedule according to system clock – this option allows playlist recovery after a failure and synchronizes it with the system clock. When you set this option, you should bear in mind that the default start time for all playlists in AirBox is 00:00:00 hours. Therefore, if you have started your playlist manually, after a power failure, AirBox will resume playback from that point in the playlist, which corresponds to the initial time (00:00:00) plus the current system clock time. For example, you start your playlist manually at 9:00 44 Channel in a Box Lite o’clock; and at 9:30 a power failure that persists till 10:00 occurs. After the power supply is recovered at 10:00 o’clock, AirBox will resume playback from the point in the playlist that is 10:00 hours away from its beginning (considering 00:00:00 as an initial start time). In short, AirBox will “forward” the playlist to the point of power supply recovery, taking 00:00:00 as initial time. In order to overcome this, you should compile your playlists to start with wait events or fixed-time items. The wait events’ values should be set in hours from 00:00:00 to the desired start time of your playlist, i.e., for the above example, your playlist should start with a “wait for 9 hours” event, or with a fixed-start clip. Thus, in case of power failure, AirBox will account for the initial time, set by you, and will resume playback from the point that corresponds to the power recovery time. Let us consider the example above. With this setting, at 10:00 o’clock AirBox will start from the point, which corresponds to one hour after the beginning of the playlist (set to 9:00 o’clock through a wait event). NOTE: Playback recovery options will not be applied when AirBox is running in daily playlist mode! In daily playlist mode, AirBox will always try to catch-up with the schedule according to the playlist start time and the current system time. Reload playlist In this section you can adjust settings, related to the way AirBox handles playlist reloading. Reload playlist on file change – reloads the current playlist automatically, if in the meantime it has been changed and saved by another user. Reload daily playlist without playing it – in certain occasions playlists should not start playing when reloaded. WARNING! When this box is checked, AirBox will not calculate the insertion point when reloading playlist on file change, either! Fill gap between playlists – if there is a gap between the current playlist and the playlist after it, AirBox will use the auto-fill clip to compensate for this gap if this box is checked Pre-cache new playlist minutes before start – specify how many minutes before the playlist starts AirBox should cache it. NOTE: For long playlists, we recommend entering higher pre-cache time values. Daily Playlist loading tolerance second(s) – specify the daily playlist loading tolerance in seconds. Loading a playlist always takes a few moments, depending on its length. AirBox calculates the exact point to start playback after the playlist is loaded. Thus, if there is an event in the beginning of the playlist, it might be skipped (as the event’s duration is zero, its time could be considered to have passed after playlist loading). Therefore, you should set some loading tolerance to ensure the correct execution of the first event in the playlist (if any). Usually, one second should be enough, but it depends on the playlist length. If you work in Daily playlist mode, it is important to clarify what will happen in the case If there is no current daily playlist. AirBox offers the following possibilities: Try to load last daily playlist for same weekday – AirBox will search the daily playlist folder for old playlists for the same day of the week (i.e., Fridays), and will load the most recent one. Try to load past daily playlist from last days – AirBox will search the daily playlist folder for old playlists in accordance to your settings and will play the most recent one (i.e., yesterday’s, if available). NOTE: If there are three playlists from the previous day (i.e. 10:00, 12:00, and 18:00), AirBox will load the latest one (i.e., 18:00), regardless of the current time (i.e. even if now it is 9:00 o’clock). Reload last daily playlist on and of the current daily playlist – AirBox will load the currently playing daily playlist again, as soon as it ends. If you have checked Reload playlist on file change, it is important to define when the reloading will happen. When reloading playlist In the field below you can set two additional rules on playlist reloading – reload the playlist immediately, or reload the playlist after the end of the currently played clip. Reload playlist immediately: Depending on the playlist type – Regular or Daily, the behavior of AirBox is different: Regular (not Daily) playlist operation: There are two possible situations for reloading the playlist: 45 Channel in a Box Lite 1).If the currently playing clip (its List ID) is available in the newly edited playlist, AirBox will reload the new playlist and will start playing it from the next item (next List ID). Thus, AirBox will jump to the next item in the playlist. 2).If the currently playing clip (List ID) is removed from the newly edited playlist, then AirBox will reload the new playlist and will start playing it from the beginning. Daily playlist operation AirBox will remove all items from the current playlist after the currently played item. Instead of them, AirBox will load the items from the newly edited playlist. IMPORTANT: In daily playlist you can edit only those items, which come after the currently playing item! IMPORTANT: You can save the changed playlist and reload it only if there is no pre-cashed file or playlist. A pre-cashed file is a file, locked for playout. Wait for playing clip end NOTE: This option is available only for Regular (not for Daily) playlists. 1). If the currently playing clip (its List ID) is available in the newly edited playlist, AirBox will finish playing it. Then, it will load the new playlist, and will start playing the next clip accordingly. 2). If the currently playing clip (List ID) is removed from the newly edited playlist, AirBox will reload the new playlist and will start playing it from the beginning. When selecting this radio button, you have two additional options: Allow clip trimming – check it if you would like the currently playing clip to be trimmed upon playlist reloading Offset whole playlist – check it if you would like the whole playlist to be offset upon playlist reloading Auto-fill In the Auto-fill options dialog you can specify a default auto-fill clip, and create your own auto-fill categories, containing certain clips. These settings are necessary for the automatic filling of gaps that may appear in your playlist when using Fixed-time events. On the top of this window you can see the Default auto-fill clip string. Browse for it by pressing the folder button to the right. The Auto-fill categories field is situated below. The drop-down list contains all previously prepared categories (hence, it will be empty when you open it for the first time). To create a new category, press the white sheet button to the right, and enter the name of the new Category. Click OK. You can rename your categories later by pressing the gear-wheel button. The link ed image cannot be display ed. The file may hav e been mov ed, renamed, or deleted. Verify that the link points to the correct file and location. Now you have to add clips to your category. Press the tape button to open a browse dialog to locate the clip. Let us have a look at the clips’ description below. The first three columns need no explanation, but the last one is very important. The Truncate column contains info on whether the respective clip can be truncated, or not (you can change [YES]/[NO] by double-clicking in the relevant cell). This is important because if you have a 2 minutes gap for example, and all of the clips in the auto-fill category are longer than 2 minutes and cannot be truncated, there will be a conflict. As a result, none of the clips will be played out and the default auto-fill will be executed instead. NOTE: When playing auto-fill categories, AirBox will first look for clips that can be played out as a whole, then for clips that can be truncated. Thus, if you have a two-minute gap and the auto-fill category contains the following: Clip#1 with Duration 3:00, Truncate=[YES] Clip#2 with Duration 2:05, Truncate=[NO] Clip#3 with Duration 1:50, Truncate=[YES]/[NO], AirBox will playout Clip#3 first (since it can be played out to its end), and then Clip#1 (since it can be truncated). This comes to illustrate that the order of the clips in the category can be changed automatically, depending on the gap size. 46 Channel in a Box Lite To delete a clip from the current category, select it and press the delete selected clip category, press the delete category button. If you want to remove the entire button. NOTE: If the user does NOT define any auto-fill clip, AirBox will use its own default auto-fill clip, which is simply an empty video, showing a black screen. Fixed-time event When there is more than one fixed-time event in the playlist, it might conflict with other fixed starting times (this can happen if you insert/append a playlist containing fixed-time events to the current playlist, also containing fixed-time events in it). The first section in this dialog is designed for setting the rules for automated resolving of such conflicts between consecutive fixedtime events: Default start time conflicts resolving Let us assume that there are two fixed-time events already inserted in the playlist, but the one that is programmed for later playback (hereafter called the second) has an earlier start time than the preceding fixed-time item (hereafter called the first). In other words, the first has a later start time than the second. This dialog provides four possible actions if there is such a case in the playlist: Both start times are removed – if you check this option, the start times of the first and the second fixed-time events will be removed and they will be played-back as ordered in the playlist, without executing the defined start times. Both start times are swapped – check this and the items’ start times will be exchanged. As a result, the first item will be played-back first, at the start time, set for the second item. The second item will be played-back after that, starting at the time, set for the first item. The first conflicting event will have its start time removed – this will remove the fixed start time of the first item and it will be played-back in its turn, as an ordinary clip in the playlist. The second item will be played after the first one and will preserve its fixed start time. The second conflicting event will have its start time removed – this will remove the start time of the second item and it will be played back in its turn, as an ordinary clip in the playlist (after the first item). The first item will be played back as fixed. NOTE: The playlist is protected against engendering conflicting situations when inserting fixed-time events. You will not be allowed to set a fixed start time for an item, if there is an overlapping fixed-time already inserted in the playlist. If you try to enter a conflicting start time, the Use fixed start time field will become red, and pressing OK will invoke a warning dialog. Conflicting situations could also be caused by applying offset values to these items. Default behavior when overlapping preceding events When using fixed-time events in the playlist, one can always come across some conflicts with the “ordinary content” (i.e., without fixed start times). There can be two major conflict types: 1.) The content to be played until the fixed start time is more than the time allowed (for example, there are 15 minutes of clips and only 10 minutes until the fixed time) – so there is overlapping; 2.) There is not enough content to be shown until the fixed start time (say there are 5 more minutes of clips in the playlist before the fixed time row, and the fixed time itself will go on-air after 15 minutes) – a gap is formed. It is up to you to precise the rule for automatic settling of this conflict. The default behavior when overlapping preceding events could be one of the following: Skip playing event and do an auto-fill – all preceding clips that cannot be played as a whole (i.e., from the beginning until the end) before the beginning of the fixed-time clip will be skipped. A gap will appear in the playlist as a result of this skipping. This gap will be filled in accordance with the auto-fill rules, set by you (see the Default gap-filling category below). Let us assume that there are five minutes remaining until the fixed time and you have two clips to go (before the fixed time), both of which are 3 minutes long. In this case AirBox will not be able to play the whole second clip, so this clip will be skipped, and an auto-fill event (category or default clip) will be played-back instead. Truncate playing event – AirBox will playout as much of the preceding clip as possible, and when the time comes, it will cut to the fixed-time event (see also default start tolerance below). Default gap-filling category Default gap-filling category is the third section of the Fixed-time event options dialog and it contains several options for automatic filling of gaps in the playlist: 47 Channel in a Box Lite Default clip – The default auto-fill clip must be an MPEG2 (if you are using an MPEG2 plug-in) or DV (if you are using a DV plug-in) file. Most often it is a program logo, animation, etc. The default auto-fill clip will be played-back each time there is a gap in your playlist and you have not specified anything else to be done in order to fill it (you have not set any auto-fill category, the clips from this category are missing for some reason, etc.). In brief, the default auto-fill clip is always there in case something goes wrong with the other filling content. You can specify this file in the Settings menu Auto-fill dialog. Category from previous event – sets the auto-fill category of the last played fixed-time event in the playlist (if such an event exists). Category from fixed-time event – uses the category from the current fixed-time event (this corresponds to the auto-fill setting in the Clip Properties dialog of the fixed-time item). Custom category – a sequence of clips created by you in the Auto-fill options dialog, which will be played-back if a gap appears. Default start tolerance In case you could accept some later or earlier start of your fixed-time events, specify the exact parameters here. Thus, if the time until the end of the previous clip is within the allowable later start, it will be played out without being truncated. Again, if it finishes earlier, within the allowable earlier period, the fixed time clip will start playing without the need to fill-in a several seconds’ gap. This is NOT a fixed offset! Example: Let us assume that there are two items in the playlist – an “ordinary” clip, followed by a fixed-time clip. The first one finishes at 11.00.20, and the second one must start at 11.00.00. This is a time-conflict situation. However, if the fixed-time has set a later start tolerance of 30 seconds for example, AirBox will play the first item until its end and the fixed-time will start at 11.00.20. To recapitulate, later tolerances allow playback of the previous item to the end, and earlier tolerances allow avoiding short gaps (if possible). Start delay compensation It allows for setting offsets to a fixed-time event to compensate the time needed for reaction of the hardware. The offsets may be: During play or pause mode- tries to compensate for the time (in milliseconds), necessary for executing commands like Jump, Next, and Resume. During stop mode – tries to compensate for the time, necessary for executing the Play command. NOTE: These settings are hardware-specific, so their exact values have to be determined experimentally. WARNING! When using fixed-time events, the playlist should start and end within the same calendar day (i.e., the playlist should not go beyond midnight). Otherwise, we cannot guarantee the proper operation of the fixed-time logic and that of the daily playlist logic. Complex Items Two main ideas stand behind the complex events: 1.) Avoiding insertion of numerous rows in the playlist when there are several external events that have to be executed at the same time (or one after another): For example, when you need to run a program off-tape, you will have to insert a VTR event, plus two switcher events, one for cutting from AirBox video to VTR output, and the second one for performing the opposite. All of these can be part of a complex event, so basically, you have a single complex event, named "VTR1," for example, which would take care of sending signals to the matrix and to the VTR, when necessary; 2.) Enabling creation of such complex events’ presets, so the user will not have to insert the same external events one by one each time he needs them. Instead, he could pick up one of the available presets from the list he has created. For example, if you have a matrix switcher, which needs to route IN5 to OUT2 in order to get AirBox on-air, and it needs to route IN2 to OUT2 in order to get live feed pass-through, you could predefine 2 complex events with custom names, such as “To AirBox” and “To Live”. These complex events will contain the matrix switcher event with its IN/OUT configuration, as defined. Then you just need to insert the complex event by name. So basically, a complex event represents a set of external events with their adjustments and offsets. The Complex event presets editor window is divided in two sections: 48 Channel in a Box Lite The Complex items field to the left contains a list of available presets and several buttons for preset management. To create a new preset, press the Create new complex item button and enter its name in the New Complex Item dialog. You can edit this name later, by pressing the Edit button. To delete a Complex event from the list, press the Bin button. The Properties field in the right contains the “essence” of the complex event - a sequence of Beginning events and Ending events. You can add beginning or ending events by pressing the Add new external event button in the Beginning/Ending events section respectively. Pushing these buttons invokes a drop-down list of all enabled external events. NOTE: To have any external event available in the list, make sure it is enabled in AirBox Settings menu Modules Remote control tab. Each time an event is being added, its settings dialog opens for you to make the relevant adjustments (they can be edited further on) and specify its offset (if necessary). The events are executed in accordance with their offsets and regardless of their order in the Beginning/Ending events list. NOTE: The beginning events can have earlier and/or later offsets, while the ending events can have only earlier offsets. (!) TIP: If you need to make some fine-tuning of a certain external event when inserting a Complex item in the playlist, select it and press the Gear-wheel button above it. Thus, each time you insert this complex item in the playlist, the settings dialog of this event (i.e., a switcher configuration dialog) will open for you to make the final touches. These changes will not be saved in the original complex event; they will be valid only for the current insertion. (!) TIP: If you want to change the events’ order, select an event from the list and press the red Up/Down arrows to move it. NOTE: If you have set the Default duration of the complex event, its execution will result in holding the AirBox playback during the event (as in a wait event). Besides, the offsets of the included external events will be calculated in relation to the complex event’s start and stop points. Please, refer to the following example: Let us assume that we have created a complex event with duration of 15 seconds. It includes 2 beginning events: Event A with 3 seconds earlier offset, and Event B with 2 seconds later offset, As well as an Ending event (C) with 5 seconds earlier offset. The Complex event, described above, will be executed as follows: AirBox plays the clip, situated before the complex event in the playlist. 3 seconds before its end, Event A will be executed. 3 seconds later this clip will end, and a 15-seconds hold of the playback will start (the complex event duration has started). 2 seconds later, Event B will be executed. Event C will be executed after 8 seconds (5 seconds before the end of the complex event). The next clip in the playlist will start playing 5 seconds later (the 15-second duration of the complex event has expired). NOTE: When the complex event duration is zero, the included events’ offsets will be calculated in relation to the surrounding clips. The AirBox playlist and playback will not be paused. Please, refer to the following example: Let us assume that we have created the same complex event, but with zero duration: AirBox is playing the clip situated before the complex event in the playlist. 5 seconds before its end, Event C will be executed. Two seconds later (3 seconds before the clip’s end), Event A will be executed. Three seconds later the clip ends and the next clip in the playlists starts playing. Two seconds after its beginning, Event B will be executed. 49 Channel in a Box Lite Graphic Rules The information contained in the AirBox playlist can be displayed automatically over the video output through the TitleBox Net Control functionality. The main application of this feature is for music channels, to display the performers’ names and song titles. . First of all, you have to create a TitleBox template, with the objects that will display the information, contained in the playlist. In the example below we have created TB_Music.tmpl. It contains a background picture (we called this object Background); a text object for the performer’s name (called Star), and a text object for the song title (called Title). Once the template is created and available in the templates folder (see TitleBox NetControl description above), go to AirBox Settings menu Graphic rules. The rules for extracting playlist information and displaying it over the video are set here. The Graphic rules dialog contains three fields: Rules, Conditions, and Actions. The Rules field contains a list of all available rule presets. Rules are organized in Groups. You can create new groups by clicking on the Folder will see a [General] group with an [Example] Rule in it. icon in the Rules zone. By default, you The Conditions field contains the list of all necessary conditions that will enable executing the relevant actions below as per the currently selected Rule. In case you use Metadata (from the clip properties dialog) as a condition parameter, type its name in the cell to the right and then specify the operator. In the Actions field there are three lists and a couple of check-boxes. The list to the left contains all actions, related to the currently selected rule. The Action Script list represents the commands that will be sent to TitleBox during the currently selected Action. The Preset values list contains the variables that can be added to the script and are used most often. For better understanding of the Graphic rules, please, follow the example below. To create a new rule, select the group folder, to which it should belong, and press the New rule button in the Rules field. Enter the name of your template and press OK. Then, go to the Conditions field to the right and set the conditions for executing Actions (we will set them later). In the example above, we have set the Parameter to [Category], the Operator to [is], and the Value to [Music]. Thus, when the condition Category is Music is fulfilled, the Actions below will be executed. To add a new action, press the New Action button in the Actions tab, and enter its name ([Clip_Start_Show] in our example), then press OK. This action will show the selected information from the play upon clip start. In the Action time offset spin-box, specify the desired offset for execution. It can be in percentage from the clip duration or in milliseconds (select this in the spin-box to the right) Finally, carefully describe the action in the Action script field: [LOAD_TEMPLATE=TB_Music.tmpl] – This line describes which template will be used to show the text from the playlist. [Background.play] – a Play Command for the picture object Background. [Title.text=%clip_title%] – This line contains the name of the TitleBox object [Title] and a description of the text that it should contain (as you see, in this case we will extract information from the clip_title column of the relevant playlist entry). You can drag-n-drop the Preset Values from the list to the right. [Star.text=%clip_star% ] – similar to the above, here we have described which cell contains the information to be displayed in the [Star] text object. AirBox sends out this command to TitleBox through the net control option and the clip title and the performer name are displayed. 50 Channel in a Box Lite Now we have to send out another command to hide the graphics. We will call it Clip_Start_Hide: [LOAD_TEMPLATE=TB_Music.tmpl] – point out which template is addressed. [Background.stop] – A Stop command for the Background object. [Title.stop] – A Stop command for the Title text object. [Star.stop] – A Stop command for the Star text object WARNING! All entries in the Action script field are case-sensitive, so enter them exactly as they appear in the TitleBox template project, including the name of the template itself. In the example in the screenshot above, we have set four actions to be executed when the Category is Music: Clip_Start_Show – to show the clip title and performer when 5% of the clip duration has passed. Clip_Start_Hide – to hide the title and the performer when 20% of the clip have passed. Clip_End_Show – same commands as in Clip_Start_Show, but with 80% Action time offset to show the title and the performer at the end of the clip. Clip_End_Hide – same commands as in Clip_Start_Hide, but with 95% Action time offset, to hide the graphics when 95 percent of the clip has passed. You can add more variables from the Metadata tab in the clip’s properties dialog. The preset value format for the metadata is [%metadata_MetadataName%], where MetadataName is the same as in the Metadata tab of the clip properties dialog (in the first column).Thus, if the metadata name is Producer, the preset value script will be [%metadata_Producer%]. Now you can create an Action script that will send this information to TitleBox (for example, [Producer.txt=%metadata_Producer%]). Metadata categories can also be used for changing the file links in picture and sound objects in TitleBox. Thus, you could control which picture(s)/sound(s) should appear over each video clip. Let us assume that in one of the rows in the Metadata tab we have typed [new picture] [E:\Pictures\pic\A Fantastic Voyage.jpg]. With this example action script, AirBox will send a command to TitleBox to: 1. Load the project called [template.tmpl]; 2. Play the object called [picture] and replace the currently loaded picture file with the one, specified in the Metadata tab of the currently playing clip, under metadata category [new picture]: [LOAD_TEMPLATE=template.tmpl] [picture.MEDIA=%METADATA_new picture%] Where: [picture.] is the name of the object that we want to control [MEDIA] means that this command contains information about a new media file to be loaded in this object. [%METADATA_new picture%] – This is the place, from which AirBox should “read” the new file path for the media file to be loaded. Again, the format is %METADATA_MetadataName%, where MetadataName is the same as in the Metadata tab of the clip properties dialog (in the first column). The same action script applies to sound objects: [LOAD_TEMPLATE=template.tmpl] [sound.MEDIA=%METADATA_new sound%] Thus, TitleBox will load project [template.tmpl], play the object called [sound], and replace the currently loaded file with the one, specified in the Metadata tab of the currently playing clip, under metadata category [new sound]. NOTE: The Metadata name is case sensitive! You must type it exactly as it appears in the file properties dialog! You can display information about the title of an upcoming clip in the playlist. The preset value descriptor has the following format: %clip_title[+n]%. Afterwards, create a script to send this information to TitleBox: Next.text=%clip_title[+1]%. Where Next is the name of the text object in TitleBox and [+1] is the index off-setter (to show the title of the following clip). 51 Channel in a Box Lite Moreover, a bookmark can be used as a reference for presenting information about an item in the playlist. Let us assume that the Bookmark name is Test1 and you want to display information about the title of the following clip. Then the descriptor value should be %clip_title[BM_Test1]%. To display the start time of an upcoming clip, type %clip_start[+n]{HHMMSS}%. The command, sent to TitleBox could be Start.text=%clip_start[+3]{HHMM}%. NOTE: If you are using daily playlists, the number [+n] for the next file could correspond to some file in the next day’s playlist. For example, if you have: %clip_title[+100]%, and the current playlist ends after 90 lines, AirBox will continue to count the items from the next day’s playlist until it reaches 100 (i.e., 10 more items). The number of playlists ahead, in which AirBox will continue searching, is five (5), by default. If you want to change this number, please, consult with our PlayBox support team ([email protected]) for instructions. To show the start time and the title of an up-coming clip, create the following command: Next.text=%clip_start[+4]{HHMM}% - %clip_title[+4]%, where Next is the name of the text object in TitleBox, [+4] is the offsetter, {HHMM} is the time format. The time format can also be {HH} or {HHMMSS} or {HHMMSSFF}. As in NTSC mode, the start time appears as a drop-frame timecode in the playlist, it would be more convenient to display the start time according to the system time on the PC. There are two options for the system time script: {T} – for short system time (according to the Regional settings) and {TT} – for long system time (according to the Regional settings). Thus, instead of Next.text=%clip_start{HHMM}%, you should type Next.text=%clip_start{T}%. Now you can show information about upcoming clips that belong to a certain category. The script format is [CAT_Category Name[±index]]. Title.text=%clip_title[CAT_Movies]% – %clip_start[CAT_Movies]%. In the example above, the content to be displayed in TitleBox object Title is: the title of the next clip down the playlist that belongs to Category Movies, then a dash, and then the start time of this clip. Text1.text=%clip_title[CAT_Movies+1]% – %clip_start[CAT_Movies+1]% In the example above, the content to be displayed in TitleBox object Text1 is the title of the second clip down the playlist that belongs to Category Movies, then a dash, and then the start time of this clip. IMPORTANT: There should be no plus or minus signs in the category name! Instead of Category, you could use the Star as an index modifier to show information about upcoming clips in the playlist. Thus, the scrip will look like this: Text1.text=%clip_start[STAR_Madonna]% - %clip_title[STAR_Madonna]% - to show the stat time and title of the next clip in the playlist that has [Madonna] assigned as Star. OR Text1.text=%clip_start[STAR_Madonna+1]% - %clip_title[STAR_Madonna+1]% - to show the title of the second clip down the playlist that has [Madonna] assigned in the Star column. IMPORTANT: Again, there should be no plus or minus signs in the Star name! Besides Category and Star, you could use a clips’ Metadata as an index modifier to display information about upcoming events. In such cases, the script should look like this: Text1.text=%clip_start[METADATA_Show]% - %clip_title[METADATA_Show]%. Thus, AirBox will display information about the next clip in the playlist that has Metadata called Show in its properties (in the first column of the Metadata tab). OR Text1.text=%clip_start[METADATA_Show+1]% - %clip_title[METADATA_Show+1]%. Thus, you will display information about the second clip down the playlist that has Metadata Show in its properties. Replacing “+1” with “+2” will display information about the third clip down the playlist that has Metadata Show in its properties, and so on. NOTE: Even if there is no value for this metadata (in the second column of the Metadata tab), it will be considered valid and AirBox will display information about that clip. 52 Channel in a Box Lite IMPORTANT: There should be no plus or minus signs in the Metadata name! Special actions in the Graphic Rules can control events, different from graphics events. Thus, you can control the logo insertion for example. The commands can be assigned as separate actions, or as lines in other graphic rules actions. The beginning of such an Action script is marked with an exclamation mark {!}.The script must end with an exclamation mark too{!} Inside the script, there can be three types of commands: LOGO_OFF (to stop showing the logo), LOGO_ON (to show the last used logo), or SHOW_LOGO_PRESET_1…16 (to show one of the 16 logo presets as specified in Settings menu Logo). Here is an example of a command to stop the logo: {!LOGO_OFF!} IMPORTANT: The logo script is case-sensitive, i.e., it must be typed in capital locks! Another couple of actions can switch the incoming triggers ON and OFF. Thus, the received GPI In pulses, DTMF tones, or Time Code will be ignored, and the commands assigned to them will not be executed during a certain clip. These actions are called AUTOMATION actions. The possible commands are: {!AUTOMATION_OFF!} – to disable the incoming GPI/DTMF triggers. {!AUTOMATION_ON!} – to enable the incoming triggers. WARNING! Do not use automation rules simultaneously with skip zones (Settings menu General Skip zones) to avoid conflicting logics! TIP! If you need to switch the AUTOMATION ON/OFF manually, use the Automation button in the main AirBox window. If you need to switch OFF the Audio output of certain clips, you can use the following Action script: {!MUTE_ON!}. Type {!MUTE_OFF!} in the Action script to switch the audio back ON. (!) TIP: If you are using the Next command in AirBox, all graphic rules that would have been executed in normal playback, will be executed at once. This might cause an unpleasant flickering of your graphics. To avoid this, check Skip this action on Next. (!) TIP: If some of the information that should be displayed in the graphics object is missing from the playlist, you can skip sending the whole command by checking Skip this action if there is an empty field. (!) TIP: To enable/disable a Graphic rule or an entire Rules group, select it and press the Enable/disable button. If you want to disable the use of all graphic rules, just un-check Use graphic rules for current AirBox at the top of the Graphic rules window. (!) TIP: You can rename a group or a rule by clicking on it while it is selected. To move rules from one group to another, just drag-ndrop them. If you need to assign some events to be executed instead of the above actions, you can do that in the External events tab. Like in other set-up dialogs, you can choose the event type after pressing the New event button. The event settings dialog varies according to the event type you select. Please, check the events’ descriptions in the Edit menu section above. NOTE: the list of available events will contain only the plug-ins that have been enabled in Settings menu Modules Remote Control. Please, note that by default, all events will be executed simultaneously. If you want to execute some of them later, please, specify the required positive offsets. NOTE: Negative offsets will not be executed! IMPORTANT: Please, make sure not to overlap later offsets with other clips’ graphics rules! NOTE: In AirBox Lite you can have up to 3 rules and 3 properties at a time. NOTE: To view a list of the commands, used in Graphic Rules, please, refer to Appendix 1 below. 53 Channel in a Box Lite Filename Parser This module will allow AirBox to Parse names of files and get information from them. It provides an easy way to use information, included in the file name, without using a database. You can make the most of this feature if you have a standard naming structure for your clips. In this setting dialog box, you have to “tell” AirBox how you name files, so it will “know” what certain parts of your filenames mean. The dialog box is divided into three zones – the uppermost zone provides options to write/browse for a sample filename and to set general “parsing rules” – presets; in the middle zone you should “explain” the naming structure by including metadata fields; and in the lower zone you can specify the properties of each metadata field. For clarification, please, have a look at the following example: Let us pick a sample filename, like BGMusic-Lime_BiscuitThe_road_to_heaven-live.mpg. Enter the latter name in the Filename field. You could also browse for existing files or choose from the drop-down list of filenames after pushing the arrow button to the right of the Filename field. The drop-down list contains all filenames of the currently loaded playlist. This is a possible way to name music files – create a preset (let us call it Music): Push the Plus button, situated to the right of the Active file parser preset field The link ed image cannot be… . A dialog will prompt you to name the new preset. You can rename it later on by pushing the Recycle button, or delete it by pushing the Minus button. Once you have entered the preset name, you can start “explaining” the naming rules. Let us go back to the sample filename – you can see that its structure contains, in order of appearance, an abbreviation (BG), a category name (Music), a separator (-), a name of a performer/star (Lime_Biscuit), another separator (-), a title (The_road_to_heaven), one more separator (-), and a note (live), followed, of course, by the file format. This is what you have to “tell” AirBox. Here is how: In the Metadata options area, use the Plus and Minus buttons to add/remove parser fields. You can choose from the available types of fields. In our example, you have to enter one by one: Note (it will stand for the abbreviation BG), Category, SEPARATOR, Star, SEPARATOR, Title, SEPARATOR, and Note. If you want to skip some information in the filename, select NONE in the relevant position. Do not forget to set which symbols are regarded to as separators (check the relevant boxes in the lower left corner). Here, exclude the lower dash from the separators list, as it represents the space within the separate fields. To the right of the Metadata fields list you can see a number of checkboxes that provide some conversion options: Convert all underscores to spaces - in our case Lime_Biscuit will become Lime Biscuit. Convert all “%20” to spaces is not applicable in our case, but otherwise you can use it for downloaded files (their names often happen to contain “%20” instead of spaces) ALL CAPS will turn all letters in the filename to upper case. All first caps – capitalizes the first letter of each word in the relevant metadata field Capitalize first only – capitalizes only the first letter of the relevant metadata field Include letters and Include numbers are checked by default. If you uncheck some of them, the filename parser will ignore the relevant characters (i.e. will not include them in the field). You have to set your preferences for each metadata field separately (select it by clicking on it). Finally, you have to specify the length of each metadata field. This is not a problem if you choose to name your files with fixed length for each field – check the Fixed length flag and specify the number of characters using the arrows. The corresponding characters in the Filename field will be highlighted in blue, so that you can see your setting. However, setting variable lengths is a bit more complicated. Check the Variable length flag in the lower right field and then specify minimum and/or maximum characters to be included in the relevant metadata field. If you have set a Minimum value, but the relevant metadata field contains fewer characters, you will need some Pad symbol to fill-in the gab. If you have set a Maximum value, but the relevant metadata field contains more characters, you will have to insert a NONE field before the SEPARATOR field, thus, telling AirBox to ignore the remaining symbols to the separator. Back to our example, Lime_Biscuit contains 12 symbols. If we set a minimum value of15 symbols and a Pad symbol (*) for the [Star] field, the Filename Parser will display Lime Biscuit*** in the playlist grid. If we set a maximum of 9 symbols for the [Star] 54 Channel in a Box Lite field, the Metadata fields list should contain “… [Star], [NONE], [SEPARATOR]…,” instead of “… [Star], [SEPARATOR]…”. You can change the positions of the metadata fields by drag-n-dropping them. Append … at end field gives an opportunity to add characters to the end of a metadata field. Some fields, like [Title], [Category], etc., are displayed directly in the AirBox grid. Others, like [Tape ID] for example, may provide information to SubTitle Plus or SubtitleBox (see below) for proper display of the corresponding subtitles. When you use the filename parser to display subtitles, you have to create a preset with naming structure [Tape ID] and [SEPARATOR] and the fields’ length should be set to Variable. In the clip’s properties dialog fill in the same Tape ID as that in the subtitle file. NOTE: In order to use the features of the Filename parser module, you must set it first, and then add files to the playlist. THE MODULE CANNOT PARSE AN ALREADY LOADED PLAYLIST, since it already contains all the metadata for the relevant clips, included in it. WARNING! If, in the newly-loaded playlist, there is any information in the fields that is also used by the Filename Parser preset, this information will be overwritten! Access control This menu item aims at improving the security of AirBox. The idea for password protection of some settings that might be crucial to playback performance is already a fact. The first time you enter this menu item, you will have to go to the Change password row. Clicking on it will open a dialog box, containing three cells – Old password, New password, and Confirm password. As this is the first time you enter this menu item, leave the first cell empty, then write your password twice – in the second and in the third cells (your password can contain up to 256 symbols). Click OK. WARNING! Make sure not to forget the password! Now you are already logged on. In order to restrict the access of all other users to the Settings menu, you just have to log off. Almost all menu items will become inaccessible – at any attempt to enter, a password will be required. The only exceptions are Colors (as they will not affect the playback); Enable SubtitleBox (but not Configure); and Mirror mode (Full mode, Idle mode, Change dongles, also without configuration options access). If you decide not to use password protection any more, just go to Change password, and enter the old password in the relevant field. Leave the New password and Confirm password fields empty and click OK. Save/Load Settings If you need to configure several playout servers in the same way, you can use these two options to copy settings and apply them to other machines. Thus, you will avoid configuring all your machines one by one. You can export the settings of all AirBox channels on the machine, or you can only copy those of the currently open channel. To export the settings of the current AirBox instance, go to Settings menu Save config, and select the AirBox #... line. The resulting file has extension *.pb1, which means that it contains settings for only one AirBox channel. WARNING! Please, make sure to name the channel-setting file after the instance name, so that you know for sure which channel’s settings are contained in it. Later, when you try to load the *.pb1 file on another system, AirBox will not be able to distinguish which channel’s settings you load; therefore you need to recognize this from the filename. To export the settings of all AirBox channels, select All AirBox instances. The resulting file has extension *.pb0. Later, when you load it on another machine, it will affect all AirBox channels available there Live Inputs Opens the Live Inputs editor. When you are using AirBox with a live input device, you have different configurations in the Live Inputs tab. 55 Channel in a Box Lite The Live Inputs dialog allows you to add as many live inputs as you wish and edit their settings. The Live Inputs dialog contains a list of all available live inputs. They are designated by a Live name and an ID number. Clicking on the the Details field to the right contains information about each separate input. In order to see the specifications about a given input, just select it from the list. When you select a Live Input, the right area of the PlayBox Live Editor will show you its configuration properties. Two different types of inputs can be configured: CaptureDevice and UDP. Note that you can change the type of each separate input by selecting the desired option from the corresponding Type drop-down list. The CaptureDevice properties are shown to the right. Set its ID number and Name from the corresponding field and Enable / Disable the Auto Start option, which allows the input to be automatically initiated once it is set. NOTE: The AirBox Lite version does NOT support Closed Captions! Further down the dialog select the video Device, used for this input, its Format, Fields order, and Aspect ratio. The Audio field also allows you to select a Device and Format. In the AirBox Lite version you can define only one stereo stream with up to two mono channels. To define a stream, press the Add button Use the Edit button to change the settings of an already existing audio stream. The Remove button will delete the selected stream. 56 Channel in a Box Lite Pressing the Add / Edit button invokes the dialog to the right. Here you can select the number of Mono Channels, a maximum of 2 in this version, and enter the language of the input. If you select UDP for an input type, a dialog as one to the left will appear. Here you should set the UDP Address, Port, and Program ID. The live inputs, configured in AirBox, are visible in the Multi AirBox Manager and in the Live Viewer. 57 Channel in a Box Lite Tools Menu This menu was created to accommodate some useful tools in AirBox. Change file path… This module is intended for relocating file paths. If you have built a playlist and, for some reason, the file locations have been changed, here you can quickly relocate file paths. This can be done easily. Just fill in the Old folder field with the original location, and then fill in the New folder field with the new location. You may browse for path with the button. There are two view options: If you check Show only files that exist in new folder, only the files that are available in the New folder will be displayed in the list below; Show only missing files displays only the files from the playlist, which are Missing. The Selection modes are self-explanatory and give opportunity for fast selecting/deselecting of all items, inverse, and missing only selection. When the Change button is pressed, the file paths are relocated, and this is reflected in the playlist immediately. Playlist Checker This tool checks the playlist for inconsistencies. Enable the criteria you need by checking the box in front of them. Below you will find description of some of the checking criteria: Missing clips – checks for missing clips in the playlist Unsupported clips – checks for clips with an unsupported format in the playlist Overlapped clips – this check is related to fixed-start time clips that overlap previous clips in the playlist. Missing Logo Off events between Logo On events – checks if there is a Logo Off event between the Logo On events Missing Logo On events between Logo Off events – checks if there is a Logo On event between the Logo Off events Non-sequential bookmarks with time zones: Bookmarks with time zones should be situated in sequential order, i.e., following the normal time flow. This means that bookmarks with earlier time zones should be situated up in the playlist, while bookmarks with later time zones should be placed down the playlist. This will ensure their correct execution. Gaps larger than… – when using fixed-start times and there is not enough content to be played before them, gaps are formed in the playlist. Missing TapeID info for subtitling of clips in [Category name] – Subtitles are shown based on the TapeID of the clip and the currently running time code. If a Tape ID is missing frin a clip’s properties, no subtitles will be displayed over it. Therefore, it is important to make sure that all TapeIDs are in place. Just specify the category of clips that require subtitling and check if all of them have TapeIDs in their properties. Missing Metadata in Clips – this field contains settings for verifying the availability of all metadata, usually needed for Graphic rules. Metadata is described in the clip properties. Each metadata has a name and value, where the name represents a category, and the value represents the information about this category. Please, check the Metadata description above. The playlist checker uses the metadata names as reference and checks the presence of the corresponding metadata values. From category [Category name] – here you have to specify the category of the clips you want to check, like clips that belong to category [Music] The list of metadata fields to be checked is situated to the left below. You can pick them from the list of presets to the right: Just select the Metadata name you need and press the button to add it. 58 Channel in a Box Lite If the Metadata name is not available in the list of presets, create a custom name in the string above it, and press the add it to the left. To remove a metadata name from the check-list, select it from the list to the left, and press the To clear the whole check-list, press button to button. . If the Check playlist button finds an inconsistence, the relevant criterion turns red. The arrow to the right of it becomes active. Press it do view the list of inconsistencies, sorted by their position in the playlist. Media Folders This tool was developed to allow for specifying watch folders that might contain media files. Thus, if there are missing files in a playlist, these folders will be automatically searched upon playlist loading. NOTE: Media folders do not operate in run-time! You need to reload the playlist in order to check the watch directories. To add a new watch directory, click on the plus sign and browse for it. As soon as it is inserted in the list, you can adjust its settings: Double-click in the Active column to enable watching the folder, described in the line to the right. If you want AirBox to parse the sub-directories of a selected watch folder, double-click on the Subfolders column to turn the closed sign into a green tick-mark. Auto-replace – this function will update the file paths of the missing files upon saving the playlist. If not enabled, the new location of files will not be saved in the playlist. Commands Menu This menu contains commands, related to playback and logo presets. The available commands are: Playback commands This menu duplicates the playback control buttons, situated under the master counter (Play/Stop/Pause/Next/Jump/Return). The commands are executed just by clicking on the appropriate field. For the user’s convenience, a relevant shortcut is written to the right of each command. Logo presets Here you can trigger logo presets by clicking on them. The preset numbers correspond to those in the Settings menu Logo dialog. NOTE: In AirBox Lite you can use up to 4 logo presets! Jump to: This is just a shortcut – <Ctrl+Shift+#>. By using it, you can jump to a clip at your will. Just press and hold down <Ctrl+Shift>, enter the desired clip’s number, and then release the <Ctrl+Shift>. Help Menu This menu contains useful information about the AirBox module and the possibilities for getting technical support from us. PlayBox Help Opens the AirBox context-sensitive help. PlayBox Doctor This module gives the opportunity to generate easy-to-complete problem reports. It is integrated in each PlayBox module. It can gather almost all the information, needed for the PlayBox support team in order to provide you with the prompt answers, without too many questions about your system configuration. 59 Channel in a Box Lite The Basic User’s manual contains a detailed description of the PlayBox Doctor Report and other functionalities. If you do not have the Basic manual, you can download it from our website – www.playbox.tv Support Download PlayBox Literature. About… Displays the About box of the AirBox module. It contains useful information, such as: module version, WIBU Box number, mode, registration, etc. The name of the currently selected platform is displayed at the bottom. 60 Channel in a Box Lite ListBox USER INTERFACE The interface of ListBox is identical with the AirBox interface. It is designed like that for the user’s convenience. There are some differences, which are described in this section. Playlist Control Buttons These buttons provide access to the most commonly used playlist functions. All commands from the Toolbar can also be found in the Menu Bar. Some particular buttons on the Toolbar will appear enabled or disabled, depending on the selection made. The functions of each button are explained in detail in the corresponding section in AirBox. Playback control and counters The Master Counter shows the elapsed time of the current playout session. Pressing the Stop button resets the counter. The Clip counter is situated below the master counter. It can operate in two modes: count-up and count-down mode. Just doubleclick on it to switch between them! The playback control buttons are situated below the Clip counter: Play – starts the playback. Stop – terminates the playback. Pause/Resume – temporary interruption and resuming of the playback. The playback resumes from the same point on. Next – will stop the currently playing clip immediately and will switch to the next clip in playlist. This happens by a smooth cut without any sound or visual artifacts. Return Jump is active only after a Jump has been executed. Use this button to return to the position before the last Jump. – terminates the currently playing clip immediately and starts playing the selected one, regardless of its position in the grid. Cue – This button will interrupt the playback, and will pause at the first frame of the selected clip. You can also activate it by holding down the <Ctrl> key and pressing the Jump button at the same time. Use this to prepare a clip for playback, while showing its first frame on the output. Since this is a machine-and-decoder-dependent function, you might have to increase the Cue Delay time in the Settings dialog box (SettingsGeneralGeneral Cue delay). Fix overlapping – press it to fix the overlapping issues in the playlist. The fixed time flags will be removed and the duration of the overlapping files will be truncated. Fixed playlist start mode – press it to see the start time of the clips in the playlist in relation to the start time of the playlist, which is defined in the Current playlist tab. Press the button again to see the start times of the clips in the playlist in relation the current system time. 61 Channel in a Box Lite Playlist Grid This area is dedicated to playlist visualization. It looks the same as the AirBox Playlist Grid, but the grid headers are colored, so you can easily distinguish between AirBox and ListBox. The order of grid columns can be changed by drag-n-dropping them to the left or to the right. You can control the columns to appear and their order in the grid from Settings menu General Grid. Grid Features: - The Color Coding in the grid provides additional information for the users: Dark Blue bar shows the currently selected clip – all actions, i.e., Move Up/Down are applied to it. Red text rows contain events. You can insert the same events as in AirBox. Red-colored rows represent clips, which cannot be found at the specified file location. A red minus appears in front of the clip position number. - Drag-n-Drop – It allows dragging playlist items within the grid or from one grid to another (from DataBox or from/to AirBox). If you hold down the <Ctrl> key while dragging, the executed operation is Copy. If you just drag-n-drop, the operation is Move. - Multi-selection – allows simultaneous manipulation of many clips – move, randomize, etc. Clips can be added to the selection by holding the <Shift> or <Ctrl> key. The <Shift> key selects from-to, while the <Ctrl> adds a single clip to the selection. - Double-clicking over a clip invokes the Clip Trimmer. A detailed description of the Clip Trimmer can be found further in the manual in its corresponding chapter. Double-clicking over a missing clip invokes its properties dialog. If you want to view the properties of an existing clip, right-click in its row and select Clip properties… from the context menu. - Right-clicking in the grid opens a context menu. It contains commands from the Edit menu and the Playlist menu that are described further in the manual. Columns description: Start Time – shows the start time of each clip. Duration – shows the actual duration of each clip. If a clip has been trimmed, its new actual duration is displayed in this column. Type – shows the type of the clip (MPEG, or AVI DV). Category – contains category information, fed by DataBox. The background is colored with the predefined category color. File Name – contains information about the file-paths and names. If you need to change the path of a certain file in List Box, just press <F8> to open the Browse dialog. - If a file is missing after the playlist is loaded in AirBox, its line will be skipped and the playout will continue with the next available clip. - Title, ClipID, Star – contain data, fed by DataBox, describing the clip name, clip ID, and the performing artists. You can edit these fields manually in ListBox, in the clip properties dialog. - Notes – displays trimming notification and data from the fields, defined in DataBoxOptionsGeneralFields to AirBox notes. You can edit these notes in the clip properties dialog in ListBox. (!) TIP: You can choose the columns to be shown in the grid. Go to Settings menu General Grid and check the ones you would like to see. If you would like to change the columns’ order, rearrange them in this dialog, or simply drag their headers, while working in the playlist. Status Bar The Status bar is located in the lowest part of the ListBox window. 62 Channel in a Box Lite Its first cell – Total Length – shows the playlist duration. If it is longer than 24 hours, the number of days will be displayed in brackets in front. The figure in parenthesis in the end shows the number of rows in the list. The Second field – End at/Loop at – shows when the playlist will end. If the playlist is longer than 24 hours, the number of days will be displayed in brackets in front. The third cell – Selection Length – represents the duration of the currently highlighted lines in the grid. The fourth cell displays the currently active plug-in. NOTE: ListBox is always running on the Software Mixed plug-in. As this plug-in supports virtually all file formats, please go to Settings menu Modules Output, and select the plug-in you are planning to use in AirBox. This will allow for correct file verification in ListBox. MENU BAR The Menu Bar is situated in the upper left end of the window and contains the same menus as AirBox. However, some of the options are disabled, as they are not relevant in playlist preparation. The following paragraphs contain description of the differences that appear in ListBox. Please, check the AirBox File menu section above for detailed information about the common settings. File Menu Export Logs to XLS This File menu item appears in AirBox, but it is not visible in ListBox. Reload Graphic Rules This File menu item appears in AirBox, but it is not visible in ListBox. Edit Menu This menu contains commands, related to playlist editing. As it is identical to the AirBox Edit menu, please, check the relevant section above for details. View menu This menu is identical to the AirBox View menu. The only difference is that in ListBox you cannot view external preview window, while in AirBox you can. Settings menu As the Settings menu contains many playback-related options, here you will find most of the differences between the two modules. General In the General tab of this options dialog, there are several fields that are not accessible in ListBox: Restart playback after – this setting is always enabled. TC transmission options – as they are related to on-air subtitling, they are not needed in ListBox. All the other settings in this dialog are the same as in AirBox Settings menu General General. Interface In the Interface tab, there are two options that are always enabled and inaccessible: Modules AirBox Output tab – here you can find a list of presets that will be used for file verification while building your playlists in ListBox. All you have to do is select the platform and file format you intend to use for playout in AirBox, and double-click to assign it. 63 Channel in a Box Lite Tools menu The Tools menu is identical to the AirBox Tools menu. Please, check the relevant section above for details. Commands menu The commands menu contains some playback-related and logo-related commands. As they are identical to the AirBox commands, please, check the relevant section above for details. Help menu PlayBox Help This menu item opens the ListBox context-sensitive help. It is still under development. PlayBox Doctor… Open it to start a tool that automatically collects data about your system and current setting, in order to provide you with proper support. All you have to do is fill-in the mandatory fields and send the resulting PlayBox Doctor report to us. See detailed description of the PlayBox Doctor features in the Basic PlayBox manual. About… Clicking on this menu item displays the About box of the ListBox module. It contains useful information about the module version, WIBU Box number, license type, registration, etc. 64 Channel in a Box Lite CaptureBox CAPTURE SETTINGS MUSE The MUSE capture plugin stands for Media Universal Source Engine and it provides an additional layer between the capture and the video source, thus allowing the use of the same video source by many clients. For example, the same LIVE IN video source can be used simultaneously by CaptureBox and AirBox. The number of applications, which can use the same live input is limited by the machine resources. You can make the preferred capture settings for MUSE input in this dialog: The Input tab allows you to select an already preset Live input from the dropdown menu, or add a new input. Pressing the Edit button invokes the Live Inputs Editor, which is the same as the one in AirBox and is described in the relevant section above . In the Capture Format tab you can select your Video and Audio Encoders from the corresponding drop-down menus. Also, if you need additional frames, enter your desired number of frames in the Extra frames spin-box. You can also write a negative number here if you want to remove frames from the input. The Preview check-box allows you to turn preview on and off. If you check Flip fields the fields of the captured material will be flipped. You cannot configure the Video, Audio, and Multiplexer settings in CaptureBox Lite! Closed Captions are NOT supported in CaptureBox Lite! 65 Channel in a Box Lite USER INTERFACE In the CaptureBox Lite version only the Capture Page is available. This is the module’s “record” mode. In this mode, you can record every single scene manually from a VTR. Clip Data fields This field is designated for clip description. Here you can also enter the tape ID, the initial and the final timecode, as well as the clip name. Folder – this field describes the folder in which files will be captured. Pressing the browse button next to it opens a browse dialog box where you can specify a hard disk and a folder for storing the captured clip. Under the field you can see information about the free disk space at the selected disk. Tape ID – In this field you must type the ID of the source tape from which the footage will be captured. This is very important if you work with more than one tape or the tape timecode is not continuous. In and Out fields specify the initial and the final timecode respectively. If you choose to fill-in the information manually, you could use either of the following separators: colon ( : ), semi-colon (;), dot (.) or comma (,). Of course, you do not need to enter the leading zeros in any field. For example, if you enter 1.2.3 this will be translated to 00:01:02:03. If you do not enter any disjunctive symbols in the timecode, this will be interpreted as a number of frames. For example, if you enter "100", this will be interpreted as 4 seconds (00:00:04:00). Duration – Its value is automatically calculated by subtracting In from Out values. It is possible to type a value only in the In field and define Duration. The value of Out field will be calculated automatically. The following buttons are situated to the right of the In, Out, and Duration: - Pressing the black arrow, pointing left, will insert the current timecode from the VTR in the corresponding field - Pressing the red arrow, pointing down, will rewind the tape exactly to the timecode, written in the corresponding field - Pressing the Clear button clears all values in the In, Out and Duration fields. In the Comment field you can enter a description or a comment, concerning the particular scene sequence. Your comment will be displayed in the relevant Grid column. Title represents the name of the clip. If left empty, the field will be automatically filled-in with the corresponding File name. Lock button is used for locking the Title to the File name, i.e., any changes in the clip name will affect the file name and vice versa. File Name stands for the name under which the captured clip will be saved. If left empty, the field will be automatically filled-in with the Title. 66 Channel in a Box Lite For your convenience, the filename is automatically increased by pressing the Plus button or Add to List button. If the last clip name was [Capture001], the next filename would be [Capture002], and so on. If the filename does not end with a number, but with a letter, the letter will change in alphabetical order, i.e. if the last clip name was [Sofia], the new filename will be [Sofib], then [Sofic] and so on. Of course, there is an option to enter a new name manually. Plus button increases the File name. Clear Clip button - clears all clip data. Capturing In this version of CaptureBox you can only use one method of capturing, manual capture. This mode can be applied only if Tape ID, File Name and Folder fields are filled-in. If the timecode field In is empty, pressing this button will open a window for manual start of the capturing. If the In field contains a timecode, CaptureBox will start counting down for the same amount of time before commencing the capture. Press the Finish button to stop the capture. Using the Time Delay – Instant Replay option (TDIR) TDIR functionality is available only for *.mpg files, i.e. for plug-ins, where *.mpg files are supported. To use the TDIR option, launch AirBox and right-click over the grid. Choose Add/Insert Incomplete clip from the context menu. You can also Add/Insert Incomplete clips from the Edit menu. In the Clip Properties dialog, browse and point the location where the clip will be captured. Type the Filename and copy it (<Ctrl + C>), you will need it later in CaptureBox. Start the playback. Next, run CaptureBox and prepare for capturing - make the necessary settings and fill in the Clip Data fields. Use <Ctrl + V> to paste the filename you copied from AirBox. There should be at least 5 seconds between the capture start and the start of the incomplete file’s playback. Here is an example of setting this function. In it, a clip that is still being captured will be played back in AirBox for 20 seconds: 1. Open AirBox 2. In the Settings menu Settings dialog, set Check Missing every [3] seconds and click OK. 3. Load a playlist; right-click and select Insert/Incomplete clip. 4. In the Clip Properties dialog, type in the title and the filename. 5. Use <Ctrl + C> to copy the file name, you will need it later. 6. Browse for the location to which the clip will be captured. Then set the Duration to [20] seconds. In the bottom of the Clip Properties dialog, check Live (delayed) file and clip and set duration (). 7. Push Play. The incomplete file is marked Missing as it still does not exist. 8. Open CaptureBox and specify the Folder you will capture to, 9. the clip name and the filename (Use Ctrl + V to paste from AirBox) 10. Start manual capturing. 11. A few seconds later the incomplete clip will become available, but it will still be marked as missing as it was inserted before it was created. 12. It will be played for 20 seconds as specified in its properties. 13. When AirBox starts playing the next clip, you can go to CaptureBox and stop capturing (if needed). WARNING! You must have SCSI or very fast SATA storage for the TDIR option. Otherwise capturing will most likely fail. 67 Channel in a Box Lite RS-422 Controller Each VTR with RS-422 SONY protocol can be used in CaptureBox. Switching the active window between the main and this one is done by pressing the <Insert> key. It is possible to attach this window to the main one by moving it close to any of its edges. Thus, the VTR control panel will move together with the main window. Here is a short description of the VTR control panel: The VTR brand is displayed in the window’s caption. If there is no connection, the text [Not Connected] will appear. Display Indicators: - TCR has three possible states – TCR (normally read timecode), T*R (corrected timecode), TCG (generated timecode, red). - RecInh a record-protected tape is inserted in the VTR. - Local indicates that the VTR is in local control mode and the remote control is not possible. - Tape indicates that there is a tape in the VTR. - EOT (End-Of-Tape) alarms that the tape is about to end or that the tape end has actually been reached. - Indicator >> or << - shows the tape roll direction. - Preroll indicator informs that the VTR is executing a preroll command. - Servo indicator shows that playback is running stable. - CueUp indicator – shows that the timecode positioning command has been successfully completed. Tape/AutoEE and Full EE – depending on VTR’s model and its settings, a combination of these keys opens the E-E circuitry. Config button – opens a configuration dialog box, where you can define: Com port – the port to which the recorder is connected. Timecode type – the type of the timecode: LTC, VITC, etc. Play Delay – the delay (in frames) of the video recorder start towards the capturing start. This setting refers to the Capture mode. REC Delay – the delay (in frames) of the clip start towards the video recording start. This setting refers to the Print-to-tape mode. REC Latency – the frame offset of the records beginning toward the clips IN point. This setting refers to the Print-to-tape mode. NOTE: The REC Delay and REC Latency fields are accessible only when the Editing VCR box is checked. Always on top – check it, if you want to see the RS422 window always on top. Editing VCR – it should be checked, if you use an editing video recorder. If the box is checked, you can set the REC delay and REC latency fields and the Video recorder edit mode. Video recorder edit mode – you can choose between Insert and Assemble. RecInh box– allows or forbids the REC button in order to protect the tape from accidental mistakes. The Shuttle slider – allows shuttling within the particular VTR capabilities. If the VTR allows it, you could achieve variable speed by shifting this button left or right. The Jog slider allows frame-accurate positioning. IMPORTANT: The PlayBox modules DO NOT support the Deck Control connector supplied on the DeckLink breakout cable! MENU BAR File Menu New This command opens a new Capture list (*.cap). Preferences The preferences dialog box consists of three pages: In the General page you can check the current video standard which depends on the selected plug-in. 68 Channel in a Box Lite The video standard can be changed in the specific set up form of the plug-in (if the relevant plug-in supports this functionality). The current video standard is also displayed in the bottom of the main CaptureBox window. If you want CaptureBox to start minimized, check Start in system tray. NEW: TCI files are automatically generated during capturing. They contain information about the tape ID, In and Out time code on the tape, as well as clip duration and notes on the captured files. Most of this information can be imported in DataBox for automated creation of new records in the database. Please check the TCI Import section in DataBox Options description. The time codes in *.tci files can be read by the Clip trimmer for subtitling purposes. If you do not need them, uncheck Create TCI files, which is checked by default. NEW: Stop Capture on VTR ServoLock Lost – this option is designed to prevent bad video capturing. If for some reason, the VTR reports lost servo lock CaptureBox will stop capturing and will send a Stop command to the VTR. Thus, you will be able to see the exact position of the bad tape. NEW: Preroll time in seconds –if checked, this box allows you to set a custom preroll time via the spin-box below. NEW: Overwrite file if already exists – if you check this box, if a file with the same name as the currently captured file exists, it will be automatically overwritten In the Schedule page, you can define Naming Type for the captured files. They are AUTOMATICALLY formed using the original filename entered in the File Name field (while in Schedule mode) plus some kind of index to distinguish them from one another: Increment name (Zero Based) –the consequent file names will be formed by adding increasing numbers to the original file name. The number in the original file name is always zero; therefore, this naming type is called “Zero-based”. In the Zero Based Settings field, you can specify the number of digits to be displayed. Increment name (Calendar Based) – the names of consequent files will be formed by adding the subsequent calendar number of the capturing day to the original file name (this number may vary from 1 to 365/366 – in leap years). Insert date – inserts the capturing date in the filename. If you choose this, the Date position (choose position before or after the file nae) and Date format fields will become active. Same name (Overwrite) – Thus, each time CaptureBox starts schedule capturing, it will write the data to the same file. Below, you can specify the date format and position. NOTE: File name incrementing is valid only for Schedule mode, for more than one capturing session (daily or weekly repetition). The AutoSave page allows enabling automatic storing of capture lists. In it, you can also define the auto-save period in minutes by checking the Enable List AutoSave box and entering the period in minutes. The Cyclic Capture page allows the user to define a number of cyclic files, which will be used for capturing. Thus, if you check the Enable Cyclic FileName Capture box and enter, for example, [20] in the Cyclic Files Count spin-box, CaptureBox will only use 20 file to th store the captured video. When it reaches the 20 file, it will go back to the first and start overwriting data. RS-422 Config This command invokes the RS-422 Config dialog, which is described in detail in the RS-422 Controller section. Exit Click it to close CaptureBox. 69 Channel in a Box Lite View Menu Use this menu to open some additional windows to the main CaptureBox window: Preview Window You can use it to monitor the video currently present on the encoder input. Sony transport This command shows the RS422 controller window. The RS422 controller is described profoundly above, in the User Interface section. FireWire Transport This command shows the FireWire (IEEE – 1394) controller windows. Volume Meter Shows the volume & peak meter for the currently captured audio. The Volume & peak Meter is described in more details in the User Interface section above. Timer This command displays the system time window. CPU Monitor Capturing on some hardware platforms is quite CPU-intense. To prevent poor encoding and frame-dropping, CaptureBox has an automatic protection which will stop the capture if the CPU usage goes above 85%. This monitor will help you predict such possible situations and set your PC prior to starting the capture. A drop-down menu activates on right-clicking in this window. In it, you can select which CPU to view (if there is more than one). Besides, you can view all CPUs simultaneously, or an average value of the CPUs’ usage. (!) TIP: You can arrange all windows together by pressing <Shift+F12> Capture Menu Compensation It invokes a dialog box for adjusting the capturing delay compensation (in frames). The capturing delay is hardware specific, so the values in this dialog are determined after the method test and mistake. Setup It opens a capture setting dialog box. This command duplicates the SetUp button situated under the batch capture grid. The dialog box is different, according to the encoder used. See the Capture Settings section to view the description of some encoders’ setting dialogs. Capture It is active only when you work in Capture mode (the Capture tab is selected). It provides three options that duplicate the relevant buttons under the clip data fields: Manual Capture starts recording the currently available video source. A dialog box will appear prompting for your confirmation. 70 Channel in a Box Lite TitleBox GETTING STARTED The TitleBox module is an on-air graphics manager. You can create different static or dynamic objects in TitleBox, such as rolls, crawls, still pictures, clocks, etc., and save them in projects. The projects could be used directly for broadcasting or as customized templates. TitleBox works together with the AirBox playout. Separate objects in TitleBox can be started or stopped via AirBox, by inserting TitleBox Net control events in an AirBox playlist. For more information about a AirBox TBNetCTrl event, please see AirBox Settings->Modules->RemoteControl->TitleBox NetControl chapter. USER INTERFACE Work Area TitleBox interface is very user friendly and it can be used easily in a live environment. The main part of the user interface is the Work area. It shows the objects, their positions, types, and status. Objects can be moved and resized in this area. If an object is too complex and is not rendered yet, a yellow/black sign, saying [Rendering] will appear on the screen. This sign will automatically disappear when the rendering is complete. The little icons in the upper-left corners of the objects show their type, lock status, and transitions. You can enable/disable the icons from Project menu Options General Show Objects Icons. 71 Channel in a Box Lite The color bar at the bottom of the work area displays the current mode of operation. By default, the preview mode is outlined in blue. You can change this color in the Project menu Options General tab. Toolbars The Toolbar is designed to facilitate the project management, the individual object control, as well as the object ordering and alignment: The New, Open, and Save buttons correspond to the relevant commands in the File Menu. The Cut, Copy, Paste, and Delete buttons correspond to the relevant commands in the Edit Menu. Paste as Copy/ In Slide will create a new instance of the object that is copied in the clipboard. Unlike the simple Paste as Copy does not create objects. All changes applied to the originally copied object will be that creates a new object, Paste applied to all its instances. The Select Display device button opens the list of available hardware drivers, from which you can select the one to work with. See also the corresponding section in the Project Menu description. TIP (!) If you want to change the driver before its initialization, hold down <Ctrl + Shift> during TitleBox startup to open the Driver select dialog. The Zoom spin-box allows resizing the work area, so you could see the whole project at a glance. It is very useful for viewing HD projects. This button opens the Data Source Manager window. It contains all supported data providing plug-ins. You can use them to “translate” different types of data and display the information they contain in some of the TitleBox objects. Please, check the Data Source Manager section further below. This button opens the Task Manager window. Please, check the Task Manager description in the related section further below. When the Output aspect ratio is changed, TitleBox will automatically change the size of the objects according to the selected aspect. All of the aspect changes concerning one particular project are listed as presets in the Display resolutions dialog. To open it, press the display resolution button. The dialog to the right will appear. It provides possibilities for fast switching between the different presets. Pressing the button or double- clicking one of the rows will initiate an aspect change. To delete a preset, use the button. The External aspect control button is pressed by default. It is intended for automated switching of the aspect ratio according to an external source. Such a source can be WSS present in the incoming video, for example. The Objects list button The Properties object. shows a window with a list of all objects, available in the current TitleBox project. buttons are object-related. They allow for viewing or changing the properties of the currently selected There are two types of properties: Standard Properties, that provide the standard object options, and Property Tools, which provide an additional set of properties. The Property Tools are active only for texts, rolls, and crawls. IMPORTANT: The properties can be interactively changed at any moment, even when the object is running on-air. The Play, Pause Stop, and Toggle Play/Stop buttons correspond to the relevant commands in the Object Menu. The Group and Ungroup buttons control the play status of any particular object. They are intended for grouping and ungrouping a selection of objects. 72 Channel in a Box Lite The Lock and Visible buttons visible in the preview area or not. The Show Events Manager description. The Mix Draw be blended. List button Mode button define the object status. It could be locked for moving and resizing or not. It could also be will open a list of all events, assigned to the currently selected object. See also the Task defines the draw mode of the object. If the button is pushed, two or more overlapping objects will (!) TIP: When in Mix object mode, you can switch between the overlapping objects using the <Alt> + click combination. The name of the currently selected object will appear in the Name field and will be highlighted in the Object list window. You can activate this window from within the Object menu. The Name field contains the name of the object. The default names are [Type]_[#], i.e. [Crawl 1], [Roll 3], etc. You can change them at your will. The names are most important when you use the Objects list window, where only names and properties are displayed. In order to change the object name, just select the object, and then enter a new name into the Name field. In the Delay field you can specify a delay for each individual object. A three-second delay means that the object would start three seconds after you have pressed the Show object button. In the Duration field you can specify the duration for an object, if needed. The duration determines how long the object will be displayed after pressing the Show The Order buttons The Alignment buttons object is selected. The Lock buttons object button. allow defining the objects’ order in case they overlap. Overlapping dynamic objects is not desirable. - allow for aligning objects to each other. These buttons work when more than one are used for locking the horizontal or vertical (or both) sizes of the object. The X and Y numeric fields stand for X and Y positions of the selected object in the 2D space. The W and H numeric fields stand for Width and Height of the selected object. NOTE: You cannot change some objects’ size during their running on air. The Tag spin-box is used for additional object control. By default, an object’s tag is set to [0]. However, you can enter another value here. The idea of the tag is that you can simultaneously operate with many objects that share the same tag number. This could be done via the script task and the program script task. The 3D Offset spin-box allows you to set an offset to the selected object in terms of depth. If you set a positive number, the object will appear deeper in the screen and vice versa. The transitions toolbar will help you in setting your objects’ In and Out transition effects: First, select the transition effect from the In and Out drop-down list. The available types are [Cut (None)], [Cross Fade], [Fly] and [Wipe]. They are not active for Analog clock objects. In the spin-boxes next to the In / Out fields set the duration of this transition (by default it is 1.00 second). NOTE: Increasing the figures in these fields will decrease the speed of the transition. Finally, define the type of motion during the transition (ascending, descending, or constant). By default, the motion type is set to [0 Normal]. This means that the transition will proceed at constant speed. For example, if you have set a [Fly From Left] effect and duration of 2 seconds, your object will move at a constant speed from left to right till it reaches the desired position within two seconds. If you set the motion type to [(1 to 5) Ascending], the object will start in a slower motion and its speed will accelerate during the 2 seconds of transition. In descending mode, the speed of the transition will decelerate. 73 Channel in a Box Lite The Full screen transition buttons are situated next to the transition duration spin-boxes. You might need this functionality in case there are several grouped objects on the screen and these objects have the same transition effect and duration. If you trigger or stop such objects simultaneously, they will move in relation to each-other, because they have to cover different distances on the screen for the same period. Using this button will make objects move together, but not in relation to each-other, during the transitions. The transition of all grouped objects will look as if the entire screen is moving, not the separate objects. The lowest toolbar contains object-specific settings that change depending on the currently selected object. If no object is selected, this toolbar allows for changing the work area and the grid. Push the Token button if you need to be more precise while drawing the objects in the work area. You can change the colour of the drawing canvas from the Work Space drop-down palette. To change the colour of the surrounding area, use the Back palette. The View grid box is checked by default. If you do not want to view the grid dots, uncheck it. TIP (!) You can adjust the distance between the dots in the Project menu Options General tab. If the Snap To Grid box is checked, all objects in the project will be aligned to the nearest grid point. If you want to load a picture as a background in the work area, you can browse for it after pressing the button. NOTE: Currently, it is not possible to unload the background file, unless you close TitleBox. You can just change it. TIP (!) You can take a snapshot of the current output (fill and key) from TitleBox by pressing <Ctrl + F12> keys on your keyboard. Then, you can paste the shot into a picture editor and save it to a file. 74 Channel in a Box Lite Object Palette The Object palette contains buttons for all supported graphics objects. Click on the object you need and draw a rectangle in the work area to create it Press this button to select object(s) by dragging a rectangle around them. Create a Still picture object. Create a Text Template object (with background). Create a Roll object (vertically running text). Create a Crawl object (horizontally running text). Create an Analogue Clock object (with custom background and clock hands). Create an Animation File. Insert Direct Show Media Source. Insert a Banner object. Create a Digital Clock object (with custom background and font). Insert a flash object. Insert a Power Point presentation. Create a Primary shape – squares, ovals, triangles with outline offsets. Create a browser object. Create a Screen capture object. NOTE: In TitleBox Lite you have restrictions regarding the number of objects you use in your project. While you can have numerous objects in your project, you can only play up to 7 of them simultaneously. Furthermore, you cannot have more than 2 animation objects in your project, including animation sequences (*.tga files) and Direct Show objects. System Bar The system bar is situated at the bottom of the interface window. It contains buttons for hardware control: [ON AIR] – playout notification filed. It blinks red when TitleBox is on air (i.e., the Program driver is playing). Program – this is the button that controls the program output driver. Pressing it will start/stop the graphics frame buffer. If it is not running, no graphics will appear in the output. Pressing the arrow to the right of it opens a drop-down list that contains several items: Stop/Play – stop or play the program output driver. Clear will erase the graphics frame buffer, so there will be no remnants from any previously loaded projects. Program Driver SetUp – opens the settings options of the currently selected Program driver. Driver manager opens the list of available drivers, so you could choose the one to use for outputting the graphics or a driver to preview it. Preview – this is the button for controling the selected preview driver. While the preview driver is playing, the bar under the work area will turn blue. A text message in it will notify you that the Preview driver is running. The link ed image cannot be display ed. The file may hav e been mov ed, renamed, or deleted. Verify that the link points to the correct file and location. The preview mode allows you to make changes in your project, and view them in a preview window without actually applying them on the output. When the preview driver is stopped, all changes you make in the project will be applied in real time to the output. 75 Channel in a Box Lite Pressing the arrow to the right of the Preview button opens a drop-down menu. It contains the same items as the ones of the program driver. NOTE: In preview mode you cannot create a Flash object! You can just edit already existing objects! NOTE: Some objects might not appear properly in the simple preview window! Update - While in preview mode, press this button to apply the changes to the program output. Overlay – It is not in use for the current TitleBox version. Status Bar The status bar displays information about the currently selected driver and the X/Y position of the pointer in the work area: The link ed image cannot be display ed. The file may hav e been mov ed, ren amed, or deleted. Verify that the link points to the correct file and l MENU BAR File Menu This menu contains commands related to the project’s file: New – allows creating a new project. Open – opens an existing project (*.tbd). Reopen – shows a list of the ten recently open projects. NOTE: If you reopen a file while working on another project, the latter will be closed without preserving any unsaved changes. Merge – merges the current project with another one. NOTE: Global layer links might not operate properly because the Master container of the second project will appear as a simple slide in the merged project. You will have to drag its layers to the merged Master Container and set the layer links again. Save – saves the current project to the open file (*.tbd). Save as – saves the current project to a specified file (*.tbd). Edit Menu The Edit menu contains object-related commands: Undo – use it to undo Move, Size, and Create. Please, note that there is no undo for deleting objects. Cut – removes the selected object(s) and keeps them in the buffer-memory. Copy – saves a copy of the selected object in the buffer-memory. Paste – pastes the buffer content in the project. Delete – deletes the selected object. Select All – selects all objects in the Preview area. Network Menu This menu concerns the connection between AirBox and TitleBox. NOTE: This feature is available for the TitleBox full version only. It is not available in the TitleBox light version. For detailed step-by-step guide on how to integrate TitleBox with AirBox look up in APPENDIX 2 – Integration of AirBox with TitleBox Export Project as Template – exports the currently open project as a template. It will be saved in the specified Template folder. You have to specify this folder during TitleBox Net Control activation (see Appendix 4 for details). IMPORTANT: The project must be exported as a template, so that it could be controlled through AirBox. 76 Channel in a Box Lite Net control – shows the connection status between AirBox and TitleBox. IMPORTANT: In order to be able to control TitleBox through Net Control output events from AirBox, you have to switch TitleBox in Net Control mode (TitleBox Network menu Net Control). If you want to control a TitleBox project (and its separate objects) from AirBox, you have to export it as a template (TitleBox Network menu Export project as template). The template folder will open automatically, so you do not have to browse for it. Just type a name and press Save. Object Menu This menu contains object-related commands: Play- shows and runs the selected object on the graphics frame buffer. Pause- freezes the object but it remains displayed on the graphics frame buffer. Stop – hides the object from the graphics frame buffer. Order – This function is active when there are overlapped objects. You can move the selected object under or over the others. Alignments – This function is active when more than one object is selected. It allows for aligning the objects to each other. Assign Task - this function invokes the Task Manager for the selected object. More detailed information you can read in section Task Manager, further in that manual. View Events – select it to view all tasks, assigned for the currently selected object. This menu item corresponds to the View Events List button in the toolbar . Object list – shows a window with a list of all objects available in the current TitleBox project (see its description further in this chapter). Property – opens the Properties window of the currently selected object. Property Tools – opens additional properties windows for objects (text, rolls, and crawls). The commands from this menu (except for Assign Task) are also displayed in the second uppermost row of the toolbar. Project Menu This menu contains project-related commands. Some of them (Play, Pause, etc.) are also operated through buttons, situated along the bottom of the window. Project playout commands Play – starts the driver of the graphics frame buffer. If this button or command is not triggered, you will not be able to show any graphics on the screen. Stop – hides all objects from the screen but they remain loaded in the graphics frame buffer. Clear Buffer – clears the graphics frame buffer. This command helps avoiding accidental showing of remnants of an old project when loading a new one. Mix Objects – This command is a duplicate of the Mix Draw Mode button. It will blend the overlapping objects in the project. 77 Channel in a Box Lite Driver Select In TitleBox Lite only one driver is supported: [Mapped Memory Driver] – This driver is used, when AirBox and TitleBox are being used in the same playout system. It allows keying the graphics over the video played in AirBox. Driver Setup Press it to change the output settings. The available options depend on the currently used driver. Mapped Memory Driver settings Output Buffer Size – select the output resolution from the drop-down list. If you select a Custom resolution, then the next Width and Height fields will become available for enterenig your resolution values. Flip– if you check this box, the output graphics will be flipped at 90 degrees. Fields type – select the field order from the drop-down list. Press the OK button to save the changes. Plug-ins This item shows the list of available external plug-ins: File link Opens a list of all objects in the project and their links, if any, to external files. Any changes in those files are applied in real time. The file links apply to the text and picture objects only! Task Manager Select this menu item to create a list of tasks, related to objects in the current project. Check the detailed description in the Task Manager section. DataSource Manager This plug-in opens the Data Source Manager. It contains all supported data providing plug-ins. You can use them to “translate” different types of data and display the information that they contain in some of the TitleBox objects. Please, check the Data Source Manager description further below. 78 Channel in a Box Lite Options Press it to open the Project Options window. It contains three pages – General options, Network options, and Output options. General Options: These options allow for defining the colors, the safe area, and the grid of the Work area: Workspace – set a color for the area that surrounds the workspace. Back Color – set a background color for the workspace. Back image – you can select an image for background via the browser button. Work Area – set a color for the borderline of the work area. Preview Mode - set a background color for the workspace, when it is in preview mode. Safe Frame – check it to view the safe area in the workspace. You can adjust its size by using the [H] and [V] percentages to the right. Safe Frame color – choose the color for the safe area border. View Grid/ Grid color – check the box to see the grid and select its color. The grid is very useful when you resize your objects. Snap to Grid – check this box to align the objects in the project to the grid. Use the [X] and [Y] spin-boxes to define the distance between two neighboring points in the grid. Max Undo Count – specify the number of latest actions to be saved in the undo history. Please, note that the higher number here means higher memory usage. NOTE: You cannot undo removing objects! Show Objects Icons – check this box to enable showing the objects icons in the upper left corner of each object in the work area. Process Priority – this slider will affect all other programs running on the system. Please, do not change the default setting, unless advised so. Create backup on save project – check this box to if you want TitleBox to create a backup file of your project every time you save it. The backup file will be saved in the same folder, in which your current project is saved, and it will be with extention *.backup On Startup – here you can select the start mode of TitleBox. Network Options These options are used for interaction between TitleBox and AirBox. TitleBox Channel ID – TitleBox’s channel ID; it corresponds to AirBox->Settings>Modules-> Remote control [TitleBox Net Control] Configure [Channels]. NetControl Port – select a network port for receiving commands. This is the port, at which TitleBox receives commands from third-party applications (like AirBox NetControl commands) Alarm&Control Port – select a network port for communication with PlayBox applications (like AlarmBox or TitleBox Text Client). Output Options Here you can set the aspect ratio of the output. The default setting is [4:3]. The slider below determines the smoothness of the font characters. The greater the value, the smoother the font. Rectangle rendering is recommended for more powerful systems. It changes the algorithm of graphics rendering for optimizing the performance. Do not use it on single CPU machines, as it increases the CPU load! NOTE: Using of this option with animation objects and Direct Show Media objects is not recommended! Restart render on aspect change – check this box to restart the rendering when the aspect ratio is changed. External aspect control - it is intended for automated switching of the aspect ratio, according to an external source. Such a source can be WSS present in incoming video, for example. 79 Channel in a Box Lite NOTE: The External aspect control check-box is related to the External toolbar. aspect control button on the TitleBox Disable ScreenSaver – disables the screensaver on the machine, on which TitleBox is in use. WatchDog The WatchDog plug-in is used in TitleBox systems working on pass-through mode. Its purpose is to switch the by-pass relay card in case of TitleBox crash, in order to bypass a video signal. The WatchDog works with a dedicated PlayBox Bypass relay card. You can read more about this card on our website, playbox.tv. You need to have an installed PlayBox Bypass relay card in order to configure the WatchDog plugin. When you press the Configure WatchDog button, the following window opens. Activate the plug-in first by double-clicking on the entry under the Activated column next to the corresponding Plugin, so that the [No] text in it turns to [Yes]. Then press the Setup button to open the set-up window: In the Device Select field you will see the list of the installed ByPass Relay cards. Select the card you need and press OK. IMPORTANT: Even if there is only one ByPass Relay card installed, select it from the Device Select field and press the OK button, for the setting to take effect. CREATING OBJECTS Step By Step All objects are created in a similar way: 1. Select the appropriate object button from the Object Palette. 2. Draw a rectangle in the Preview Area, where you wish to place it. 3. A Properties dialog box, allowing fine-tuning of non-text objects (Still picture, Analog clock, Animation, Digital Clock, DirectShow media, Banner, etc.), will appear. 4. Pressing OK inserts the created object in the project. You can edit the properties of text-containing objects either by using the special toolbars that appear when double-clicking on the relevant object, or when clicking on the Properties buttons. The unique properties of all types of objects in TitleBox are described in detail in their relevant sections in the Object Properties below. Editing Objects You can edit objects either by invoking the object properties dialog box (for non-text objects), or by using the special toolbars (for text objects). Do this by double-clicking on the object, or by clicking on the Properties buttons. Animations and Clocks CANNOT be resized in TitleBox, whereas Pictures and Text templates with graphics background can. Crawls, Rolls and Text Templates without graphics background can be resized even on-air. You can resize all dimensions of Text objects, Crawl’s width and text size, and Roll’s height and text size. However, resizing a Crawl’s height and a Roll’s width should be done while the objects are stopped. Deleting Objects An object can be deleted by selecting it and clicking on the Delete button on the Main Toolbar. It can also be deleted by using the <Delete> key on your keyboard. 80 Channel in a Box Lite All objects can be deleted by clicking on the New want to save your changes. Project button and clicking on the No button in the dialog that asks you if you Object List The Object list is intended for fast switching and reviewing of objects and their properties, such as Left and Top side positions, Duration and Delay. Here you can easily Group/Ungroup objects, change their Order (z-order), and control their playout and visibility status by pressing the relevant buttons on the toolbar. Object Properties The Object Properties dialog boxes are different, depending on the object type. All buttons have specific pictures and provide hints when you slide the mouse pointer over them. Right-clicking on any object invokes a menu, like the one shown in the screenshot to the left. The upper half of the menu contains the most common status and editing commands. The Send Copy To command allows you to easily create copies of the currently selected object of all slides and layers in your project. Set File Link – select this item to invoke a browse dialog to locate the text file (*.txt or *.rtf), to which you would like to link your object. Thus, your object’s content will be updated every time the linked text file is saved. An additional window will open to display all objects and their file links (if any) in the current project. You can set/change the file links from within the Links dialog. Just press the browse button to the far right of the relevant row to open a new browse dialog. If you right-click on the selected row, the following dialog will open: If you do not want to have a link anymore, just uncheck the Active row. When you create a new link, Active is checked automatically. Pressing Set File Link will open a new browse dialog for selecting a text file for the link. AutoPlay On file Change is used for starting the object automatically, if there is a change in the linked text file. Change File Path allows for changing the file path to the linked file. It is used in case the linked file is moved to another location. (!) TIP: When a Roll, Crawl, or Text object is linked to a text file (*.txt or *.rtf), you can insert a still picture in the text – the image will be displayed among the characters, according to the position of its script in the text. Write the following command in the text file: <BITMAP>[file path of the image file]</BITMAP> Make sure that BITMAP is written in capital letters. Here is an example: 81 Channel in a Box Lite Example 1 – Inserting a Still Picture in a Text File 1) Save your image. Let us assume the file name is “logo.bmp” located on D:\ 2) Enter the text in a file, for example "Hello, this is a test project". 3) Continue writing the following: <BITMAP>D:\logo.jpg</BITMAP>. Thus, your text file will be: Hello, this is a test project <BITMAP>D:\logo.jpg</BITMAP> It could also be: Hello, this <BITMAP>D:\logo.jpg</BITMAP> is a test project or Hello, this is a <BITMAP>D:\logo.jpg</BITMAP> test project Every time you edit the text and save the changes, the text on the output will be refreshed. If you want to change the picture, change the file name and location part in the script (here: D:\logo.jpg). If you want to insert an animated GIF file in the text, write <MOVIE> instead of <BITMAP>. For example: Hello, this is a test project <MOVIE>D:\smilie.gif</MOVIE> NOTE: There is no spell-checker implemented in TitleBox text objects (roll, crawl and text template). You can use some external application for spell-checking and then just copy&paste the text into TitleBox object. Still Picture Properties The Picture Properties dialog box looks like the one to the left. The Toolbar allows you to Open and Save the image, Load and Invert the mask (the alpha channel), and Flip the image horizontally and/or vertically. If your picture does not have an alpha channel, you can import one separately, by using the Open mask button. The Draw Alpha Only button provides a new, interesting option. Push this button to create a Picture object over other objects in the project. Thus, you will overlay its alpha over all underlying objects. Try to make effects this way! At the right part of the window you can adjust the object’s Contrast, Brightness and change its Color Balance. You can choose to Blur the object and set the blur radius by using the slider below. The Anti-flicker option is designed for smoothing the high-contrast computer graphics when overlaying it over video. Change the Vertical Value to prevent flickering of the graphics’ edges. 82 Channel in a Box Lite Text Object Properties The Text objects have three groups of settings options: Text and Background Properties You can edit the common text attributes (such as font selection, size, color, blur, shadow, etc.) and background attributes from another object-specific toolbar: This toolbar appears in the last row of the TitleBox toolbar when you double-click on a Text template object. Another way to invoke it is by pressing the Property button (in the second row of the toolbar) while a Text object is selected (single click). Write the new texts directly in the object! Pressing invokes the FontDialogEx dialog, which allows you to manage the font of the selected text. Here you can find all the formatting options, as known from other windows-based editing applications: The Set Default at the bottom button restores the TitleBox native settings. NOTE: TitleBox supports all true type fonts. Pressing invokes the Paragraph-formatting dialog box, where you can set all paragraph-formatting options. The Script State and Script Control areas are related to the use of Arabic language and Arabic (Arabic-Indian) digits in the project. The Set Default button at the bottom restores the TitleBox native settings. The 83 button in the toolbar allows you to change the color of the background. Channel in a Box Lite Press to view a transparency background in the preview area while editing. The following fields in the toolbar provide general text-formatting options (font, font size, bold, italics, underlined, text alignment, font color). The button inserts a still picture. Press it to open a browser dialog for selecting a picture image to be inserted inside the text into the text object. The button inserts OLE compatible objects. When you press it, the following dialog will appear: If you choose Create New, the relevant application opens, and you will be able to create the desired object. Any changes in the relevant OLE object will be visible in TitleBox, when saved. If you choose Create from checking the relevant box. File, you will be prompted to browse for it. You can create a link, or display it as an icon through The drop-down list for vertical alignment is used to manage the position of the inserted OLE objects into the text object. Background properties If you click once on a text object, the following object-specific toolbar appears in the last line of the TitleBox toolbar: The button is related to the objects (OLE object or pictures), inserted into the text. Press this button to open the list of all objects that are already inserted into the text objects. The insertion of the objects is described in details in the previous section. You can set an auto refresh period for the object. Press the clock button in the upper left corner to activate this function and set the refreshing period in seconds by using the arrows. Thus, if you update the original file, it will be refreshed automatically in your TitleBox project. In addition, right-mouse-clicking on an object in the list will invoke a context menu, containing several useful options: Update – it is valid for OLE objects only; Size… – you can set a custom size to your inserted item; Full size – display the original size of the object; Invert Alpha – inverts an object’s alpha channel; Update from file – it is valid for picture objects only. If you want to open an image as a background, push the Open image button in the object (Normal, Stretch, Tile or Center). Delete the background image by pushing the . Use the drop-down list to the right to fix its layout button. 84 Channel in a Box Lite Text Object Property Tools The property dialog box for text objects allows for displaying different texts consequently, for specified periods in seconds. The different texts are shown as a list of texts (separate lines) in the Text Template window – press the mouse-click over the object and select Property Tools ). button to view it (or right- You can prepare texts in advance or create them online. Use the buttons in this dialog to do the following: New Open button – open a new text template. button – You can open a previously prepared text file, by using the Open button . Each paragraph in the text appears as a separate line in the Text Template window. Save button – saves the entered text as a file. Stop button - stops displaying the text lines in the preview/output window. Play button – starts displaying the text lines in the preview/output window. Global Time spin-box – defines the frequency of changing the text lines. This is actually a “duration,” applied for each new line added in the text template. If you need to specify a different duration for a particular line, use the spin-box in the text input dialog. Edit item button – opens a dialog box for editing the selected text line. (!) TIP: You can change the text by right-clicking on a text string as well. Add item button – adds a text line. A dialog box opens for typing the text in it. Insert item button – inserts a text line. A dialog box opens for typing the text in it. Delete item button – deletes the selected text line. Moving up – moves the selected text line up. Moving down - moves the selected text line down. Auto refresh box – automatically displays the changes made in the currently loaded text file, even during its play-out. Roll/ Crawl Properties There are three groups of properties for these objects, similar to the text template: common text attributes; continuity mode and queue options; and dynamic speed properties. The first two are controlled through object-specific toolbars, while the third one can be set in the specially designated dialog box. Continuity and Queue mode. When a toolbar: crawl/roll object is selected (single . click) the following string appears in the last row of the The link ed image cannot be display ed. The file may hav e been mov ed, renamed, or deleted. Verify that the link points to the correct file and location. The gear-wheel button opens the Embedded Objects list. This is the one already described for text objects. Please, check above in the Manual. Speed field - controls the speed of dynamic objects, such as animations, crawls, and rolls. Its value can be positive (right-to-left movement) or negative (left-to-right movement). If zero, the object is frozen. NOTE: You can change the speed interactively at any moment, even when the object is running on-air. If the value in the Loop field is [0], the object will be displayed endlessly. The link ed image can not be d isplay ed. The file may The next three buttons refer to the object’s background continuity mode. The first one means that the background will be displayed only while the text is running. The second one will “glue” the texts one after another, without any space in between. The third button will display the background continuously. The last two buttons in this toolbar concern the Queuing functionality. After pressing one of these buttons, TitleBox will “remember” the changes for background colors and text colors and it will play them one after another, i.e., you will be able to make a queue of color changes (loops). If none of the above buttons is pressed, TitleBox will show only the latest change. You can choose how to switch between changes (loops) while in play mode: The link ed 85 Channel in a Box Lite Use if you want to display the subsequent loops one by one, i.e., to leave some space between them (empty or with background color, depending on your settings – see the previous paragraph). In addition, use if you do NOT want any space between the successive loops in the object. TitleBox will generate one loop out of all loops in the queue. Text and Background Properties You can edit the common text attributes (such as font selection, size, color, blur, shadow, etc.) and background attributes from another object-specific toolbar: It appears in the last row of the TitleBox toolbar when you double-click a Roll/Crawl object. Another way to invoke it is by pressing the Property button (in the second row of the toolbar) while a Crawl/Roll object is selected. Write the new texts directly in the object! NOTE: There is no possibility to insert images as background but you can still insert images and OLE objects in the Roll/Crawl objects. Pressing invokes the FontDialogEx dialog, which allows you to manage the font of the selected text. Here you can find all the formatting options, as known from other windows-based editing applications: Use the Fill Effect button and its additional buttons to modify the colors for your text. You can select None for color, Gradient color, or Texture Fill. If you click on Gradient color from the drop-down list, you can select from 255 levels of graded transparency and a vast variety of colors. In the Gradient properties dialog, fix the desired settings: Choose a Style for the gradient from the drop-down list. In the square field to the left drag the cursor to change the gradient positioning. In the rectangle field below, define the gradient colors and their initial points. Place the plus-sign cursor in the desired position and click. A black triangle will appear in that position to mark the currently selected point. All other marks will become white. Double-click on the black triangle to invoke the Color setting dialog. Modify the color for this color-change point at your will and click OK. Back in the Gradient properties dialog, you can change the position of the point by dragging it. Also, you can add as many colorchange points to the gradient, as you like. Finally, click OK. Pressing invokes the Paragraph-formatting dialog box, where you can set all paragraph-formatting options. The two buttons to the right concern the background. Press to view a transparency background during editing in the preview area. Text-formatting buttons - font, font size, bold, italics, underlined, text alignment, font color. Object links buttons. Push the Push the button to insert OLE compatible objects. Use the drop-down list to fix their position withinin the Roll/Crawl object. The Text Template Properties section above contains a detailed description on how to import OLE-compatible. button to insert a still picture object link. (!) TIP: When a Roll, Crawl or Text object is linked to a text file (*.txt or *.rtf), you can insert a still picture in the text – the image will be displayed among the characters, according to the position of its script in the text. Write the following command in the text file: <BITMAP>[file path of the image file]</BITMAP> Make sure that BITMAP is written in capital letters. Please, check Example 1 above. 1) Save your image. Let us assume the file name is “logo.bmp” located on D:\ 2) Enter the text in a file, for example "Hello, this is a test project". 3) Continue writing the following: <BITMAP>D:\logo.jpg</BITMAP>. 86 Channel in a Box Lite Thus, your text file will be: Hello, this is a test project <BITMAP>D:\logo.jpg</BITMAP> It could also be: Hello, this <BITMAP>D:\logo.jpg</BITMAP> is a test project or Hello, this is a <BITMAP>D:\logo.jpg</BITMAP> test project Every time you edit the text and save the changes, the text on the output will be refreshed. If you want to change the picture, change the file name and location part in the script (here it is D:\logo.jpg). If you want to insert an animated *.gif file in the text, write <MOVIE> instead of <BITMAP>. For example: Hello, this is a test project <MOVIE>D:\smilie.gif</MOVIE> NOTE: There is no spell-checker implemented in the TitleBox text objects (roll, crawl, and text template). You can use some external application for spell-checking and then just copy and paste the text into the TitleBox object. 87 Channel in a Box Lite Dynamic Speed Properties Pushing the Property tools button while a Roll/Crawl object is selected will open the Dynamic properties dialog box: This property dialog box allows you to specify different speeds of the Roll’s and Crawl’s movement. The movement is represented graphically and you can define the speed of each point of the graphics. The horizontal axis of the graphics represents the position of the Crawl/Roll on the screen. The vertical axis represents the speed multiplier (0; 1; 2; etc.) of the default speed, which is set in the main screen (see the Toolbar section above). The zero value means 0 x default speed, i.e., the object does not move; one means 1 x default speed, i.e., the object moves with the default speed; two means 2 x default speed, i.e., the object moves twice as fast as the default speed, etc. On the top of the graphics, you can see the object’s (Roll/Crawl) text. By moving the mouse pointer over the grid (the blue lines) or by using the arrow keys, you can select the position in the text, where you would like to change the speed. The text section, which will be displayed at the selected “speed change” point, is enclosed in a frame. By default, the first point is situated at the beginning of the graphics. A new point is added by pressing the double-clicking in the yellow-squared area. Add button or by When you select a position to change its speed, a green point will appear in the grid and its properties (Speed and Position) will be displayed in the Point Properties area to the right. The position’s coordinates are also displayed in the status bar. If you set a speed of ‘0’ for any position, then you will have to define a delay period. This is the period (in seconds), during which the object will remain stopped. The wait-time appears in a red square under the zero-point. All points are shown in the Point list to the right of the graphics. Their names are [Point #], where the # stands for the sequential number of the point. The Align buttons allow for aligning the selected point toward the previous, the next or the first point in the graphics. The Default speed field shows the default speed, as it is defined in the main TitleBox window (see the Toolbar section above). In the Point Properties area, the following properties of the selected point are shown: Speed, Position, and Time (for zero-speed points only). The Point list shows the list of all “speed change” points in the object. The Add button The Delete button adds a new “speed change” point in the object graphics. deletes the selected “speed change” point in the object graphics. Analog Clock Properties The Analog Clock properties dialog box looks like the one to the right. The New button opens an empty clock property object. The Open button loads a previously created clock object (*.clc). The Save button saves the current clock image into a file (*.clc). There are different pages for each clock layer – background (clock plate), hours, minutes, and second hands, as well as a preview page of the overall clock layout. All pages have an identical structure: a settings area and a preview area. Settings: Load Image – loads the relevant image (for the background, hour, minute, or second hands). / Enable – enables/prohibits displaying the relevant element. / Key Color – key color for the image. If the image does not have a mask, you can select the key color. 88 Channel in a Box Lite / Lock position – locks the [X/Y] position of the image. Transparency – sets the image transparency Preview area – It is used for previewing the corresponding clock element. (!) TIP: To achieve a satisfactory result, use a picture-editing application to create four square images with equal dimensions. Save them in separate files – one for each element of the clock (background, hour hand, minute hand, and second hand). Be sure to place the hands’ ends on the exact centers of the relevant images. Keep in mind that the clock object will have the same size as the image in the file. It cannot be resized! Animation Properties The Sequence Property dialog has the following functions:: The New The Open button allows for creating a new sequence. button loads a file (*.seq) or a sequence of files (*.tga) for an animated logo: Besides, you can load animated *.gif files. If you use the Add button, TitleBox will load only the first picture of the file. If you use the The Open button, TitleBox will load the entire range of *.gif images. NOTE: We do NOT recommend using *.gif sequences for high quality applications, since they have only 256 indexed colors and do NOT have 8-bit transparency (just one color can be either entirely transparent, or entirely solid). If you want to load only а part of the files, uncheck the Load All box and enter either the number of the first or the last file of the sequence, or both, by checking the Load From and Load To boxes and filling the relevant spin-boxes. Use the blue arrows to the right to enter the number of the currently selected file in the relevant field. If you are loading an interlaced animation, specify the first field – A Field First or B Field First. Click Open. The sequence will be displayed in the animation property window. The currently selected file from the sequence will be shown in the preview area to the right. The Export The Add The Delete The Insert button saves the current sequence as a file (*.seq). button adds a new file to the sequence. button deletes a selected file from the sequence. button inserts a file into the sequence. The Invert alpha button inverts the alpha channel of the selected file. The Move Up/Down buttons move the selected file up/down the list. The Reverse button reverses the files’ order The View buttons are used for changing the sequence files’ view to list or thumbnail mode. If the animation files do NOT have an alpha channel, you can select a key color by using the Key color tool: The Range and the Loop-related spin-boxes are situated below the key-color setting kit. Select the Range of frames that will be used in the sequence – enter the values you wish in the From and To fields. The names of the frames that are out of this range will become red, and their background – grey. The background of the working range will remain white. If you want to loop between two frames in this 89 Channel in a Box Lite working range, place a check in the Loop box, and fill in the Start and End fields, as well as the number of loops. The frames, included in the loop will be highlighted in pale yellow. A blue arrow to the right of them will mark the final and the initial frame of the loop. After adding your animation to the preview area, an additional toolbar will become active. In order to see it, click on the animation object: Select the desired Speed and enter the number of times you want to Loop the animation. This taskbar duplicates the range and loop settings in the Properties dialog box. You can change those settings here as well. Just choose a Range of animation frames to be displayed, or check/uncheck the Loop option (it enables leader-loop-trailer functionality). When you check it, select the range of frames, within which you want to loop. If this option is selected, the animation will start from the beginning. Run to the End frame and loop between Start and End frames. If you want the animation to run regularly again, simply uncheck the Loop box. NOTE: The From and Start fields represent the first frame that will be shown, and the To and End fields represent the first frame that will NOT be shown. Thus, the difference between the To and the From (and between the End and Start) values will be equal to the number of frames that will be shown in your sequence. These numbers will be displayed in the status bar of the sequence’s properties dialog box. Count stands for the total number of frames in the list, Used stands for the number of frames in the working Range, and Loop stands for the number of frames that will be looped. IMPORTANT! You must have enough uninterrupted free RAM to load a TGA sequence in TitleBox. The minimum free RAM needed for loading a TGA animation is calculated with the following formula: (Animation_Width multiplied by Animation_Height, multiplied by 4) multiplied by the Animation_Frame_Count. Example 2 – Minimum Free RAM for Animation Sequence To save or open a project, which contains such an animation, you will have to multiply the needed RAM by 2. Thus, the minimum free uninterrupted RAM for saving/opening a 100-frame animation with 300x200 frame size will be: (300 * 200 * 4) * 100 * 2 = 48,000,000 bytes = ~45.77 MB. TIP (!) In order to reduce these requirements, you could export your longer animations to sequence files by using the Create Animation File object (see the section below). NOTE: Fielded animations are NOT supported! Use frame-based animations with each field in a separate file. Then, use speed 2 for proper speed and field interpretation. NOTE: The Animation/Sequence is limited to 32-bit TGA. Create Animation File . This object was created to avoid the real-time rendering of sequences, thus, reducing the system resources’ load during playout. We recommend using it for large-sized animations with numerous frames. The resulting file format is *.seq2. The properties of this object appear in the dialog to the right. It is similar to the Animation properties dialog and most of the options are the same. To load an already existing sequence file, click on the To create a new sequence file, click on the the images to load and click Open. Open sequence button. Add Images button and browse for them. In the Open sequence dialog, select You can use the arrows to change the image order. In the Range spin-boxes, specify which images should be included in the sequence. All of them are included by default. Once you have loaded all the frames you want to include in the sequence, press the file. Export Sequence button, and save the NOTE: Fielded animations are NOT supported! Use frame-based animations with each field in a separate file. Then, use speed of ‘2’ for proper speed and field interpretation. NOTE: The Animation/Sequence is limited to 32-bit TGA. 90 Channel in a Box Lite Direct Show Media Properties TitleBox allows for inserting all kinds of Direct-Show compatible media. First, you have to specify the source media: The File string contains the file path or URL to play in the object. Press the Load button to the right to browse for it. NOTE: In the dialog you should specify the URL of a live network stream, not a link to a file. The Capture Device drop-down list contains all direct-show compatible capture devices installed in the PC (like FireWire camera, DeckLink card, etc.). Select one of them. 91 Channel in a Box Lite Example 3 – Direct Show Media Capture Device If there is a separate DeckLink card installed, TitleBox could use it as a capture device. It will be visible as DeckLink Video Capture (2) in the capture list, as in the screenshot bellow: Custom (Support) – this is an advanced option. Click on it to select the filters to use in this object on your own. You can add filters to the graph by clicking on the Add button. A list of all available filters will open for you to select from. To view the properties of a filter in the graph, select its line in the list and press Properties. You can crop the image [Width] and [Height] by using the relevant spin-boxes under the preview window. When a direct show object is selected in the TitleBox preview area, an object-specific toolbar appears under the standard ones: The Properties button opens a list of all filters used in the current graph. Check Alpha to use the video’s alpha channel. You can adjust it by using the percentage spin-box to the right. In this toolbar, there are two drop-down lists: one for selecting the display Mode, [Stretch] or [Center], and another one for the scaling quality. If the [Pure (Fast)] quality is selected, the CPU usage is lower. Enter the Loop number to repeat the video as many times, as you want. Loop = [0] means that the video will be endlessly repeated; Loop = [1] means that the video will be played once; Loop = [2] means that the video will be played twice, and so on. Any loop number different from zero represents how many times the object will be looped. Keep Aspect – check this box to preserve the aspect ratio when resizing the object. The next two spin-boxes control the image’s [X] and [Y] offset in relation to the object’s center. Use them while in [Center] mode, to move the video vertically or horizontally within the object boundaries. When in [Center] mode, you can use alpha matte to fill-in the space between the edges of the video and the object’s borders. You can select its Color from the palette to the left of the Use Alpha check-box. The two sound controls are situated at the end of the toolbar. The Audio Delay spin-box allows for adjusting the A / V sync of the object. To the right of it you can find the Volume control. NOTE: The audio of your DirectShow objects will be output on the Default Audio device, set in Windows Control Panel Sound and Audio Devices Audio. WARNING! As the playout of direct show media objects is carried out by third-party filters, we cannot guarantee the A / V sync of these objects. 92 Channel in a Box Lite Banner Properties Pushing the Insert slideshow. Banner button invokes a dialog box for you to create a list of picture files. They will be displayed as a Use the respective buttons to add, insert, and delete pictures from the list; invert move them up and down, as well as reverse their order. their alpha, When you select a picture from the gallery to the right, it is displayed in the preview window to the left. The buttons above it are relevant for the currently selected picture. The button allows you to choose a background color for it. Specify how long it will be displayed (in seconds), the transition pattern and duration, as well as the picture’s layout (from the drop-down list in the upper right corner). If you would like to set the same parameters for all pictures, included in the banner, simply press the Set Thus, the settings you have already made will affect all newly inserted images in this object. As Default button . When you check the Watch Directory option, a browser dialog will open for you to specify a folder (watch folder) that contains picture files. Opening the folder will activate a kind of slideshow in the banner and the images from the watch folder will be shown in the banner object in a random order. NOTE: Keep in mind that all files, used in the banner objects are kept into the project. In this way, the size of the project is increased and it is possible to overload it. To avoid such overloading, we recommend using the Watch Directory option. Chat note objects Another object from the object palette is the Chat note object . This kind of object can be used together with some third-party applications, like SMS, chat, etc. It creates a text file. You can insert a file link (ProjectPluginsFile Link) in this text file. The chat note will be updated every time the relevant file is saved. The object’s properties are controlled in the same way as the other objects (see the Text object properties section). A Chat Note can be also treated as a Text object but when you enter a text in it, the text is always shown as a new line coming from the bottom, and the old text is rolling to the top. The information entered is not saved into the project. When you click on this object once, an additional object-specific toolbar will appear below the standard ones. Specify the desired speed for changing the text lines in the chat note in seconds via the Speed spin-box: When you double-click on the object, a window will appear. The properties are the same as for the Text object’s Text and Background properties. IMPORTANT: When the object is linked to *.txt file, then the font formatting is taken from TitleBox font properties. When the object is linked to an *.rtf file on the other hand, then the font formatting is taken from the *.rtf file itself. 93 Channel in a Box Lite Digital Clock Properties The default Digital Clock object looks like the one to the right: It displays the current system time. You can change it by using the Time Offset spin-box (see the bottom of this page). A text-formatting toolbar appears upon double-clicking on the digital clock object: Use this toolbar to edit the digital clock’s common text attributes (such as font, size, color, blur, shadow, etc.) and background attributes. This toolbar has already been described in the Text template properties section above. If you click once on your Digital The Digital clock Clock item, the toolbar below will appear below the standard TitleBox toolbars has four modes of operation. It can run as a [clock] or a [counter], or it can display [Long] or [Short Date]. While in [clock] mode, the object runs as an ordinary digital clock. You can choose its time format through the clock button 12/24 hours . The twelve-hour time format is active when the button is pressed, and the twenty-four hours format – when it is not pressed. The background color is changeable through the Palette button. Select a mask for the clock in the Mask drop-down menu. Update the mask by using the green arrows button have changed the mask, you will have to press this button to show it on the display. next to it. If you In [counter] mode some additional options are available. You can select the counter to be countdown by pressing the Countdown button. If you push this button, the counter will count from an Initial time to a Stop time or until the Stop box is checked. If not pushed, the counter will count up. After selecting the counter type and entering the Initial and Stop times, as well as a Mask, you are ready to run your Counter. Run your project and show your object by using the well-known Play Then, Prepare your counter and Start button. it. After pressing the Prepare button your counter sets to Initial time and waits for a Start command. Stop the counter with the button. Pushing the Intermediate button will “freeze” the counter. During freeze, the counter will be running in the background but you will see a still frame, displaying the time of the counter from the moment, when the Intermediate button has been pressed. When you push the Intermediate button once more, the counter will start showing the current time again. Two buttons are active for both the [clock] and [counter] modes – Properties and Visible . Pressing Properties opens the font formatting dialog. The Visible button determines if the Clock / Counter will be visible on the monitor, or not. It does not stop the clock/counter but it just hides/shows it. Time Offset – This spin-box allows for creating digital clocks for different time zones. In [Date] mode the object will display the system date instead of the system time. There are two date formats: [Long Date] and [Short Date]. Their appearance depends on the regional settings of your TitleBox server. You can change them in Windows Control Panel Regional and Language Options Regional Options. After pressing the Customize button, go to the Date tab. There you can check your current system date settings and change them at your will. Flash objects Flash objects, similar to sound objects, are actually links to flash files. To create a flash object, press the flash button in the Object palette and draw a rectangle. Two windows will open as soon as you release the mouse 94 Channel in a Box Lite button: a standard browse dialog to locate the flash file and an interactive properties window. The name of the Flash object is displayed in the caption of the properties window. When a flash object is selected in the work area, the following toolbar appears underneath the standard TitleBox toolbars: It provides the following options: Press the Pointer button Use the to show your mouse pointer on the output. Thus, the operator’s actions will be shown on the monitor. Invert button to change the color of the pointer that is displayed on the output. Select the mode, in which your flash should be displayed from the first drop-down list to the left. It contains all standard flash settings. Make your choice in accordance to the system capabilities of your PC. Use the second drop-down list to set the quality of your flash image. Practically, this is an anti-aliasing setting of the flash object. You could select a color from the last drop-down list to the right and make it transparent by checking the Use Key Color box. The last check-box to the right is related to aspect-ratio incompatibility. If your flash has a 4:3 aspect ratio and the output (in Project menu OptionsOutput) is set to some other aspect ratio (such as 16:9, for example), checking this box will ensure the correct displaying of your flashes in the working area. NOTE: You must have a Flash Player installed on your PC in order to play these objects. WARNING! Do NOT close the preview window of the flash object and do NOT minimize the TitleBox window. 95 Channel in a Box Lite Power Point Objects TitleBox allows you to insert Power Point presentations in your projects. Just press the PowerPoint Presentation button from the object palette and draw a rectangle in the work area. Then browse for the file location. You can change the file later by double-clicking in the Power Point object or by pushing the Properties If you right-click on a PowerPoint object or push the Properties interactive and allows you to control your slide shows. 2 button in the toolbar. button, the PowerPoint properties window will open. It is The name of the currently selected object is written in the window caption. WARNING! Do NOT minimize the TitleBox window while displaying a power point presentation – this will hide it from the output! Do NOT close the preview window of the object. IMPORTANT: You must have a full PowerPoint version installed on the TitleBox PC in order to run these objects. Only PowerPoint 2003 is supported. Primary Shapes You can create your own mattes for the text objects directly in the TitleBox work area. They are truecolor with 256-level transparency. Press the Create Shape button in the object palette and draw a rectangle in the work area. By default, an oval shape will appear in it, and the object-specific toolbar will appear under the standard ones: The toolbar provides a wide variety of editing options. The drop-down list of available shapes is situated to the far left. The color palette next to it is designated for the background color. You can select it from the available ones, or create it on your own. Further to the right there is another palette for the fill effects. You can choose between None, Gradient color, or Texture Fill. The fill and outline effects are the same as in text objects. Check the Roll/Crawl properties section above. NOTE: The background color serves as an alpha channel to the fill-effect. The background color (and transparency) will be mixed with the fill-color and its transparency. Use the Radius spin-box to enlarge your objects or to make them smaller. The next spin-box determines the Outline width. The color palettes next to it are for the background color of the outline and its fill effects respectively. Similar to the shape background and fill, these will be mixed as well. The Angle value is in degrees and it is valid for polygon and star shapes only. The Square button in the far right of this toolbar fixes the aspect ratio of the shape object. It will change your object to fit a square and will keep this shape when you resize it. WARNING! You will NOT be able to revert to your previous shape after checking the Square check box. Browser Properties The browser object uses Internet Explorer to display web pages as graphics on the screen. As soon as you release the mouse key after drawing the object’s rectangle, the Open page dialog will appear in the work area. Type in the URL you would like to browse, or paste it from the clipboard. Once you click OK, the object-specific toolbar will open under the standard toolbars: In it, you can type another URL to be loaded in the browser object. 96 Channel in a Box Lite The Properties 2 button will invoke the Browser Open Dialog. In it, you can see the currently loaded web page. If the object’s dimensions are smaller than the page itself, you can use the scrolls to select which part of the page to be shown on screen. IMPORTANT: If a link in the webpage is set to open in a new window, you will not be able to open it in the same browser object. There is no practical way to grasp such a window into the same object. WARNING! Do NOT minimize TitleBox while using browser objects! This will make the objects disappear off the screen! WARNING! Do NOT close the preview window, as it might freeze the source web site. Screen Capture object This object will allow you show some parts of your desktop on the screen. The window to the right will appear as soon as you create the screen capture object. Its size is the same as of the rectangle you drew in the work area. Drag it to the area you would like to show on the screen. In the upper right corner, there is a two-sided arrow button. Use it to minimize/maximize the main TitleBox window but leave the Screen Capture window ON. Please, note that if you use the minimize/maximize buttons in the main TitleBox window; the screen capture dialog will be affected as well. In the lower left corner, you can find two other buttons that control the mouse pointer. The first one is for showing/hiding it from the screen. The second button will invert the cursor color. Thus, if the background of your desktop is light, you can turn the cursor black, so it will be easier seen on the screen. When a screen capture object is selected in the work area, the object-specific tool bar will appear under the regular toolbars: The link ed image cannot be display ed. The file may hav e been … The first two buttons in it duplicate the ones for cursor control in the lower left corner of the Screen Capture window. To the right is the Antialiasing check box. Use it to make the sharp edges smoother, thus avoiding possible aliasing effects on the output. NOTE: It is NOT possible to capture overlay video in this object. SLIDE MANAGER In the past, you could create your TitleBox projects in a single layout only. If you had to open a new layout, you had to load a new project. It was like having a single sheet of paper per project. With the Slide Manager your project turns into a sketchpad, allowing you to organize your projects in a multi-slide layout. Each sheet of this pad is called a Slide. In each Slide you can have numerous groups of objects, called Layers. Finally, in each Layer you can have as many objects as your system can handle. You can now control your slides/layers/objects manually, or play the slides consecutively (or simultaneously) by using the Slide Controller. The Slide Manager is locked to the right of the work area. You can open and close it by using the Slide Manager button, situated in the lower right corner of the TitleBox interface. You can also drag the Slide Manager out of the main TitleBox window. NOTE: In TitleBox Lite you can have up to 4 slides per project! Slide control buttons These buttons are situated in the lower right corner of the TitleBox interface. They provide simple slide control options. The numbers in the middle represent information about the currently selected slide (i.e., slide 2 of 3 in the screenshot above). The main Slide Manager window consists of three logical parts – control buttons at the top, slides’ thumbnails and a project structure, situated in the predominant part in the middle (further divided into three tabs), and a properties area at the bottom, where you can find a detailed description of the currently selected element in the list above. Project control buttons 97 Channel in a Box Lite The first three buttons at the top of the Slide Manager window are used for controlling Slides. You can Add Delete , Insert , and slides by using them. NOTE: The difference between Adding slides and Inserting slides is that when you add a slide, it appears at the bottom of the slides list, while when you insert a slide, it appears above the currently selected slide. The following two buttons are used to control Layers. You can Add or Delete layers. While in the Details tab, you can show/hide slides’ thumbnails by pushing the Thumbnails button . In case you need to move a slide or an object, just drag-n-drop it to the new place where you would like it to be. If you want to show/hide/pause a slide, a layer, or an object manually, slide the mouse pointer to the end of its row. The Play/Stop/Pause buttons will appear. They are related only to the currently selected line. The elements’ hierarchy will be observed, i.e., when you push Play for a Slide, all Layers and objects that belong to it will be played (if not disabled). If you push Play for a Layer, only the objects in this layer will be played. Respectively, if you push Play for an object, TitleBox will show only this object. If a Slide is in Stop mode, it will not prevent you from playing its Layers and objects. Pressing the Shortcut mode button will enable the shortcuts functionality. Thus, if you have assigned some shortcuts to slides in your project, you will be able to control these slides using the relevant shortcuts. Please, check the Preview section below for details. 98 Channel in a Box Lite Project Preview area The project preview area consists of three tabs as described below. Details In this tab you can view the hierarchical structure of your project. It is divided in two parts – project tree and properties. Project tree The project tree part is further divided in two levels – Level 1 that contains the Project line and the Master container and Level 2 that contains all “regular” slides. Level 1 The Project line is situated on top. It displays the filename of the current project. The line control buttons here have a slightly different functionality as compared to the other lines below. These buttons control the Slide Controller that will play all slides in the project one after the other (see the Slide control section for details). Under the project line, you will find a list of all unassigned objects (if any). These objects are present in the object but do not belong to any of its slides. Click on the plus sign in the beginning of the project line to view them. You might need to show/hide such objects manually, without affecting the rest of the project. The Master Container line is situated right under the project line. In it, you can create layers to be assigned later to the “regular” slides below. By using these master layers, you will avoid inserting the same objects in numerous slides. For example, if you need a logo shown in Slides 1, 3, 7 below, just create a Layer in the Master container. Then, go to Slide1, click (left mouse button click) the Assign Layer button and select the logo-containing layer from the drop-down list. Repeat the procedure for Slides 3 and 7. Thus, each time TitleBox displays Slide 1, 3 or 7, it will also display the logo-containing layer from the Master Container. Another way to do this is just drag-n-drop the Layer from the Mater Container to the relevant slide. Level 2 All slides are listed in this part of the Slide Manager window. You can create as many Slides and Layers as your computer can handle. You MUST have at least one Layer per slide. Each element is displayed in a separate line. Each line starts with a plus sign. You can click in it to expand the relevant level. Next to the plus sign, you can see a play status notification. Further on there are several controls that vary within the different levels. You can find a detailed description of each level below. In a Slide line, you will see Enable/Disable (it is under development now) check box, Assign Layer button, Lock/Unlock button (it is under development now), and the Slide name (check the Slide Line Properties section below on how to change Slide names). If you have assigned some layer(s) from the Master Container to a slide, their number will be reflected in the Assign Layer button. Thus, if you have assigned one layer, a small dark-blue square will appear in the button. If you assign two layers to the slide, there will be two dark-blue squares in the Assign Layer button, and so on. In a Layer line there is no Assign Layer button as this contradicts the hierarchy. However, there is a Visible/Invisible button. This button will hide the currently selected layer from the work area, so its objects will not impede you while creating another layer in the same slide. After the Layer name, there is always a figure in brackets. It represents the number of objects contained in this layer. In an Object line, you can see the status of the object (play / pause / stop), its visibility status, an icon, distinguishing its type, and the name of the object. NOTE: The object visibility concerns only the status of the object within the project and it does NOT affect the output. In case you need to move a slide or an object, just drag-n-drop it to the new place, where you would like it to be. 99 Channel in a Box Lite Properties In the area under the project tree, you can see the property’s window for the currently selected line (project, slide, layer, or object). The properties of the Project Line contain some default settings that will affect all newly created slides: Default color – this color will be applied in the preview thumbnails of your slides. You might need it in case there are some white characters in a text object that would be impossible to see on a white background. Default slide duration – the time for showing the slides when playing them with the Slide Controller; Default Play mode – the way of showing the slide on the screen: Cross Play – if the previous slide has an out transition, the following slide will appear as soon as the out transition starts. Stop Previous – if the previous slide has an out transition, the following slide will “wait” for this transition to end and only then will appear on the screen. Add – the previous Slide will remain on the screen and the following will be overlaid on top of it. Currently, there is a known limitation, related to this type of play mode – once you pile up a slide on top of another one, the first slide will remain on the screen, even if the second one is stopped. Thus, if you want to stop the first slide, you will have to do this manually. Clear Previous – the previous slide will be removed immediately off the screen, its out transitions (if any) will not be executed. Loop – specifies how many times the Slide Controller should play all slides in the project. The default value [zero] means endless loop – the Slide Controller will play all slides one by one repeatedly. If a Slide Line is selected, you will see the following properties: Duration – this is the time (in seconds) for showing the selected slide with the Slide Controller. If you decrease this value to zero, the duration will be set to [Auto]. Auto duration is applicable when there are objects with different duration in the slide. In such a case, the Slide Controller will show the slide until the longest duration is through, then will go to the next slide in the list. TIP (!) Use it for objects like crawl/roll and animation when they are looped. Enabled – it is equal to the Enable check box in the slide’s row. Lock – reflects the padlock status in the slide’s row. Play mode – how TitleBox should treat the previous slide on starting the currently selected one. Please, check the project properties above for details. View Name – click in this line to change the slide name at your will. If a Layer Line is selected, you will see: Enabled – shows the status of the Enable check box of the currently selected layer. Lock – reflects the padlock status in the layer’s row Visible – shows the status of the Visible/Invisible button. When an object is selected, you will see below all its properties that can be adjusted in the main TitleBox interface. These properties are different for the different objects and have already been described in the Object Properties section. 100 Channel in a Box Lite Preview In this tab you can see thumbnails of all Slides in the current project. Double-clicking in a slide’s thumbnail will load it in the work area for editing. If you select an object in the work area, its properties will be displayed in the Details area below. Right-clicking in a slide will open a context menu. It contains basic slide controls. The Play Mode represents the way of showing the slide on the screen in relation to the previously played slide. Please, check the project properties section above for further details. Sliding the mouse over the Global Layer Links line will open a drop-down list of all Layers available in the Master container. The Slide Actions list contains four commands related to the Slide Controller. They will be executed when the duration of the current slide is over. None is the default slide action, no command will be sent to the Slide Controller when the slide duration is over. Stop Playing – when the duration of the currently selected slide is over, it will send a stop command to the Slide Controller. A small sign will appear in the lower right corner of the slide thumbnail to notify the operator about the assigned action. A Jump To… action will make the Slide Controller loop between the current slide and the specified Jump To… slide. Wait Key Press is a pause command sent to the Slide Controller. Playback of slides will resume at any key stroke. The following sign will appear in the thumbnail to notify the operator. Selecting Assign Shortcut will open a shortcut-defining dialog. To define a shortcut, click in the Shortcut string and press the keys you would like to assign. Below, select the command to be executed at pressing these keys: Toggle Play/Stop – to show/hide the slide off the screen; Play From Slide – to start displaying all following slides in a row (via the Slide Controller). To clear the shortcut, press the X button to the right of it. All assigned shortcuts will appear in the slide’s thumbnail: The blue background means the assigned command is Play From. The green background means the assigned command is Toggle Play/Stop. The red background means that there is an assigned shortcut to this slide but the Shortcut mode button is not pressed. The assigned shortcuts will be active only when the Shortcut mode button is pushed. NOTE: In shortcut mode, the newly-assigned shortcuts have higher priority than the default ones. Thus, while in shortcut mode, the default shortcuts in TitleBox will operate normally unless duplicated with newly assigned shortcuts. For example, the default command for <Ctrl + H> is Add to schedule, but if you assign <Ctrl> + <H> to be Toggle Play/Stop of a slide, the shortcut will act as Toggle Play/Stop. 101 Channel in a Box Lite Properties In this tab, you can see the detailed properties of the line that is currently selected in the Details tab. Slide Controller The slide controller will play your slides consecutively, with duration at your will. If you want to rearrange the order of showing the slides, you will have to drag-n-drop them in the Details tab. If you want to skip a slide, just disable it by un-checking the Enable checkbox in its row. . The Slide Controller window contains four rows and eight buttons. The Controller counter is situated in the top row. It counts the time since the slide controller was started. Below, you can see the name of the currently playing slide. Further down is the Slide counter. By default, it shows the elapsed time since the start of the current slide. If you want to see how much time remains to the end of the slide duration, click in the Time> cell. It will turn into <Time and will start counting down. The last row has three parts – play status, loop value and the number of the currently playing slide. In the bottom of the Slide Controller are situated the playout control buttons. They provide hints and hotkeys: Button Command Play Shortcut F5 Stop F6 Pause F7 Resume F7 Go to First Slide Ctrl + Home Go to Previous Ctrl + PageUp Go to Next Ctrl + PageDown Skip Next Slide Ctrl + Left arrow By default, the Slide Controller is a separate window that appears outside the Slide Manager. If you want to lock it to the Slide Manager window, right-click in the counter and select Dock in Manager. 102 Channel in a Box Lite DATA SOURCE MANAGER The Data Source Manager allows users connect to different data providers through the selected plug-ins. This engine allows connecting different properties of a TitleBox object to different data sources or providers, like RSS channels, *.html files, *.xml files or third party data bases. Besides, the same data source(s) can be related to different objects in TitleBox. The dialog below opens after pressing the Data Source Manager Button in the main TitleBox interface. The left part of this dialog contains a list of all objects in the current project and already assigned to them data source instances. To add a new data source instance, press the Add button. The list of currently available data provider plug-ins will open. In it, you can choose the data source to be used as a new instance. Select its line and press Config. The configuration dialogs vary according to the selected plug-in. You can read more detailed description of each plug-in definition further in that manual. When you configure the plug-in, and press OK button, into the main screen a new data provider appears in the list. Select the needed data provider and drag&drop it over the TitleBox object in the left. Then a DataDistributor Properties window will open. Here you have to define the way of data source appearing. Into the header line of the Property window is visible the name of the selected data provider. Into Update area you have to specify how often to update the source information. Select Automatically, to update the data automatically on source change. Automatically option is available only for EAS data provider and File link data provider. Select Every xx sec, to update the data periodically at every xx sec. By default, the update is at every 60 seconds. The term “cursor” further in that section, is used to define the cursor position into the data source. Into Cursor scroll area, you can specify how to move the cursor to the next row, if the data source has many rows: Manually, or at Every xx seconds. If select Manually, you can start the data provider manually from main data provider menu NOTE: The cursor continue cycling, even the connected object is not played on air. This means that when you start again the object, it will show data from current cursor position. 103 Channel in a Box Lite TIP (!) If you want at every object start to show the first line from the data source, leave Cursor scroll to be Manual and check Start cursor scroll on any Object Play. In Cursor control area, there are the following settings: Scroll by X rows, where X is a number of rows to scroll the cursor. If X =1, the cursor will scroll each row. If X =2, the cursor will scroll each second row (i.e. the cursor will skip one row), etc. Reset cursor on dataset change – check this, if you want to move the cursor to the initial position, when the data in Master column of data provider is changed. Reset cursor on field change - check this, if you want to move the cursor to the initial position, if any field into data provider changes. Start cursor scroll on any Object Play – check this, to start the cursor scrolling from the first position in data source, any time, when the object is started. In Objects control area there are the next settings: Stop Objects on bottom cursor – check it, if you want to stop the object(s) connected to the data provider, when the cursor is at the end of the data in data source. Stop/Next Slide on bottom cursor - check it, if you want to stop the object and go to the next Slide, when the cursor is at the end of the data in data source. Stop Objects on any Object stop – check this, to stop all objects connected to the same data provider, if any of these objects is stopped. It is useful, when the project is control remotely. Start Objects on any Object play check this, to start all objects connected to the same data provider, if any of them is started. Start Objects on automatic update - check this, to start all objects connected to the same data provider, on automatic update of the data source. It is relevant, if Automatic update is checked. Automatically is available only for EAS data provider and File link data provider Press OK button to save Source Link settings. After that, an Object Link Properties window will appear. Here you have to define how to link the data from the data source to the TitleBox object. In the header of the window, you can see the name of the TitleBox object to which data provider is assigned and the name of the data provider. Next is a Links area, where are three main columns: Link Name – this is the type of the selected object (Text, Sound, etc.). Field – here you can see the list of all available fields from the data-source. Select from drop-down list one of them, which you want to show into the TitleBox object. NOTE: You can assign a data-source field to a TitleBox object, only if they are from the same type – text, sound, etc. Master column – you can select one of the data provider’s columns to be a Master column. Enter YES in Master column field, if the selected field is from this master column. Set a column to be a Master, if you want to reset the cursor for all columns, on data change in this particular column, In Data control area you can set a Cursor offset – this is the offset upon the cursor for displaying the data into this particular TitleBox object. Example 9: Let us show the data from data source in a table 3x3 (3 rows and 3 column) in TitleBox. You have to draw 9 objects in TitleBox project, each connected to a separate field from data provider. Into DataSource Link Properties->Cursor control->Scroll by, enter 3(scroll should be equal to the numbers of table rows). Into Object Link Properties -> Cursor offset, cursor offset should be 0 for the first row; 1 for the second row and 2 for the third row. If you want to use in/out effects, you have to check the relative check-box. 104 Channel in a Box Lite Press the OK button to save the settings. NOTE: In TitleBox Lite you can only use one data provider at a time! Weather Data Provider . This data provider displays information coming from weather forecast sources. For now, the only available provider is weather. In this way online weather information will be shown in the objects. To adjust the Weather Data Provider, click the button in the main TitleBox interface. The Data Source Manager dialog will open. The left part of it contains a list of all objects in the current project. To add a new Weather Data Provider instance, press the ADD button. A list of all currently available data source plug-ins will open. Select the Weather Data Provider and after that press the ADD button. A dialog will appear for specifying a station. To find the Station code for your desired city, use one of the following links: http://edg3.co.uk/snippets/weather-location-codes/ http://www.mywebs.biz/Gadgets/Weather/Location-ID.php After pressing OK, a Weather Data provider instance will appear in the list to the right part of the Data Source Manager dialog. For displaying information, using this instance, select the object desired. line and drag it to the When you release the mouse button, a fine-tune dialog will open so you can select what kind of information will be shown in the object (as Temperature, Postal Code, Current city humidity, etc.). This plug-in will display the weather information according to the settings you have made. For example, if you intend to display information about Sofia town and you have chosen Temperature C from the Field drop-down list, the Weather Data Provider will show the current temperature within the object (have a look at the example to the right). NOTE: This plug-in is still BETA. Working with Yahoo and binding pictures to objects are still in development at this stage. FileLink Data Provider Select this plug-in if you intend to link certain objects in TitleBox to text documents. Earlier in this Manual it was described a simple file link. It is assigned to a text object and shows the whole text document, as it is. Unlike simple File Link, the FileLink Data Provider allows the user to modify how the text from the text document will be displayed on screen. Example 10: By using FileLink Data Provider, one text document could be interpreted as a table. It is applicable for texts, where the data is organized in columns and rows (like in the example Test4.txt file in the right screen-shot). The user can define in what kind of order to display the rows and columns. Select the FileLink Data Provider and press Config. Browse for the file you need, select it and press Open. The dialog to the right will appear, so you could define Formatting of the linked file. Check the Header row check box, if the first row of the linked document is a column header and should not be visible on the screen. 105 Channel in a Box Lite Check the Format rows check box if the file consists column delimiters (like coma, semicolon, etc.). Checking this check – box will activate Columns Delimiter radio-buttons. Check the Skip Blank rows check box, when there are empty rows in the linked file; they will be skipped on data scrolling in the text object. Check the Group up to blank row check box, if you want to show into the text object, a group of data separated by empty row. Check the Group by paragraph check box, if you want to show into the text object, a group of data separated by some Paragraph Delimiter. Checking this check – box will activate Paragraph Delimiter radio-buttons. Columns Delimiter is a symbol, which is used for separating the data by columns in the text file. You can choose between Tabulation (Tab), Comma (,) and Semicolon (;) as delimiter, or you can define your own delimiting symbol in field Other. In our example, the column separator is Tab. Paragraph Delimiter is a symbol, which is used for separating the data by paragraphs in the text file. You can select a certain number of rows as paragraph separation or you can define a symbol, which to be used as paragraph separator. Enter the symbol in Char field. If you want to separate the source data by paragraphs, but there are not delimiter symbols inside your file or the numbers of rows per each paragraph is different, then you can use the PlayBox Delimited Inserter. PlayBox Delimited Inserter (TextConvert.exe) is an additional application, which helps the users to separate the source data file at different paragraphs. It is installed through the main TitleBox installation. You can start the application from TitleBox main folder (by default: C:\Program Files\PlayBox Technology Ltd\TitleBox). Into the Source field, browse the location and name of the source file. Into Destination field browse the location and name of the resulting file. Select the type of the delimiter symbol in Delimiter field. It is possible to have alternating paragraphs with different length (number of rows). Then you can select the number of rows for the first paragraph in TitleRows field and the number of fields for the second paragraph in Descr. Rows. Example 11: Let the source file contains news data, organized into two paragraphs: in the first one there are the titles of the news and in the second one, there are the full texts of the news. Then the “Title Rows” number is different than the “Description”rows number. When you are ready, press the Save And Apply button. The new file will be created in destination folder. Depending on status of this proccess, the next three squares will flash: First square is Running status : Red=Stop; Green=Running; Second square is Error status: Red=Error; Green=OK; Third square is Converting status: Yellow=Converting; Green=Waiting for file change. If the source file is updated periodically, keep the Delimiter inserter opened. It will create a new file at each saving of the source file. Converting square will show the status. Back into the Data Source Manager window; drag the FileLink data source from the right to a text object in the left. When you release the mouse button, a link fine-tune dialog will open so you could select which column from the file should be linked to that text object. NOTE: Currently with File Link DataProvider, you can link your text object only to *txt files! 106 Channel in a Box Lite ODBC Data Provider This plug-in allows connecting to ODBC-compatible database formats and displaying the information they contain on the screen. Choose the ODBC Data Provider in the list of available plug-ins and press Config. The ODBC Connection Manager will open. Press to create a new connection. The following dialog will open for you to specify the Connection Alias and view the Connection String. Press Build to configure the connection. The window below will open: The ODBC configuration dialog contains four tabs: In the Provider tab, select the data base type you want to connect to. When you click Next, the Connection tab opens, so you could configure the connection to the selected database. The Connection tab looks differently depending on the Provider you have chosen. When you are done entering the connection details, presses Test Connection to check if it works correctly. After configuring the connection, you can open the Advanced tab for more configuration options, which differ depending on the selected Provider. Finally, you could view all settings for the current connection in the All tab. Click OK and Close in all open windows until you return to the Data Source Manager. In it, doubleclick on the newly-created ODBC Data Provider instance. A fine-tune dialog will open for you to configure the data Query. Press Execute Command to check if the connection is working correctly. Press Apply and Close. To assign the ODBC Data Provider instance to an object, drag it from the list in the right to the relevant object in the left. Close the Data Source Manager window. 107 Channel in a Box Lite XML Data Provider Choosing this plug-in allows you to insert data into TitleBox object from an *.xml file. Choose it from the list of available plug-ins and press Add button. The following window will open: Into XML field, enter the location of the *.xml file. Into XSL field enter the location of the related *.xsl (*.xslt) file. An XSL (eXtensible Stylesheet Language) file is needed for defining XML document transformation and presentation. Since the XML language does not use predefined tags, it is necessary to provide the application with information on how to interpret the XML document. In TitleBox, the XSL file is needed to transform the XML file to coma separated text table. NOTE: Currently, under Microsoft Windows 7 you can use only Msxml4.0 (with update msxml4-KB973685). There is no update from Microsoft Windows 7 for Msxml6.0. If you have a header line, check the check-box Treat first row as header. Press More button to see the source *.xml file, the related *.xls file and the result of the transformation. In order to see the Result, first press play button. NOTE: If *.xml files used with XML data provider are web based files, it is needed to download these files locally on your PC first. For downloading, you can use a dedicated application (Downloader.exe) included in TitleBox installation. You can find Downloader.exe in TitleBox folder. Start the application and the following window will open: To add a new source for downloading, right mouse click on the black area and the set-up dialog will appear. Here you have to enter the URL of the source and the location for saving the file. If access to the source needs some Username and Password, enter them in the relevant feelds. 108 Channel in a Box Lite RSS Data Providers Choosing this plug-in allows you to connect to RSS feeds from the Internet. RSS (Really Simple Syndication) is an XML-based format for sharing and distributing Web content, such as news headlines for example. Currently many web sites provide RSS feeds. There are 2 types of RSS dataproviders in TitleBox. The main difference between them is that Data Provider I shows RSS feed line by line into the linked object, while Data Provider II shows all lines of RSS source together into the linked object. RSS/Atom Data Provider I Choose it from the list of available plug-ins and press Add button. The following window will open. In RSS/Atom Feed field enter the URL of the needed RSS feed. To check the connection, press Test Feed button. You will receive a message if the connection is successful. There are two advanced options available for choosing the proper behavior if the RSS feed is not reachable or if there is no data. Check the first check-box, into Advanced area if the RSS feed is not reachable, but you want to see the old data in the relative TitleBox object; Check the second check-box, if there is no any data in RSS feed, but you want to have some text into related TitleBox object (like “No data available” or “please excuse us…”, etc.). Press Apply button to accept the settings. Press Close button to close the window without changes. RSS/Atom Data Provider II As mentioned before, Data Provider II shows all lines of RSS source together into the linked object. The different lines are separated by some delimiter. Choose Data Provider II from the list of available plug-ins and press Add button. The following window will open. In RSS/Atom Feed field enter the URL of the RSS feed. Check Limit check-box if you want to limit the number of displayed lines and enter the number of lines into the next field. By default, Limit check-box is checked and the number of lines is five. 109 Channel in a Box Lite Then enter the Delimiter sign. If the source channel provides the Channel image, you can select Use Channel Image checkbox. If it is checked, but there is no channel image, than the AirBox channel image will be shown by default. If you want to use your own picture as delimiter, you can use bitmap or movie tags into the field. Inserting of the bitmap or movie tags is the same like for text objects. See here for description. NOTE: RSS data providers works with Internet Explorer only. You need Internet Explorer v.8.0 or higher. NOTE: It is possible to see RSS data in TitleBox differently ordered than it is visible in the RSS source site. It is because some RSS sources (news channels for example) give opportunity to user to order the visible into browser data differently - by date or by title, etc., while TitleBox data-provider extracts the data from the original *.xml file of the RSS and there is no possibility to re-arrange their order. TIP (!) You can use downloader.exe, described in XML data provider section for downloading RSS feed first. It is useful in case the link to the RSS breaks. HTML Table Data Provider Choosing this plug-in allows you to insert data into TitleBox object from an *.html file. Choose it from the list of available plug-ins and press Add button. The following window will open. URL/File path – enter here the location of your *.html table Empty value string – enter here the string, which you want to be visible if there are no data into the table. Header format – this is the format of the table header. By default, it is “Column {0}” Into Tables found in HTML area, you will see the list of tables found into the source *.html file. In order to see a table, you have to select a line and press Get Table button in the bottom of the window. Press Apply button, to accept the settings. Press Close button, to close the window without saving the changes. EAS (Emergency Alert System) Data Provider The Emergency Alert System (EAS) is a national warning system in the United Stated of America put into place in 1997. The EAS requires broadcasters, cable television systems, wireless cable systems, satellite digital audio radio service (SDARS) providers, and direct broadcast satellite (DBS) providers to provide the communications capability to the President to address the American public during a national emergency. The system also may be used by state and local authorities to deliver important emergency information, such as AMBER alerts and weather information targeted to specific areas. Each State and several territories have their own EAS plan. The EAS regulations and standards are governed by the Public Safety and Homeland Security Bureau of the FCC (Federal Communications Commission). All EAS equipment must be FCC certified for use. 110 Channel in a Box Lite TitleBox is connected to EAS decoder unit via LAN connection. The messages coming from EAS unit are connected to TitleBox objects via EAS data provider. EAS data provider is started as service. It could be assigned to a text and to an audio object. When you select EAS data provider from a list of dataproviders, the following setup win window opens: Here, you have to enter the IP address of the EAS unit, as well as some advanced details of the connection. If there is connection username and password defined, you have to enter them also. When you are ready, press the Play button, in order to start the service. NOTE: It is very important to set the proper time zone to the system and the system clock to be accurate, in order the service to work correctly. IMPORTANT: TitleBox works with decoders, produced of Digital Alert Systems, LLC with FCC ID: R8VDASDEC-1EN. 111 Channel in a Box Lite TASK MANAGER Task Manager is an instrument for creating specific tasks in TitleBox. A task is an action, which is executed in TitleBox (like play object, stop object, etc.). The Task usually is performed, when happens a specific condition. The condition (trigger) on which Task is executed is defined by user. The condition (trigger), on which the task is performed, is called event. An event could be the object’s status (like play, stop, etc.) or a command. First you have to create a task, and then you can assign this task to an event. Suppose that the user wants to start Object1 when Object2 stops. Then the task, which have to be created is “Start Object1” and the condition, i.e. the event is “OnStop Object2”. Tasks For creating tasks, you can start the Task Manager from Project menu Plugins Task Manager. The window will open also if right mouse click over an object in TitleBox working area and select Task Manager from the list. All tasks are visible into the Task list. To create a new task, press the related icon from the menu bar. To delete a task, select it and press delete button from the menu bar. The tasks could be executed manually (for test purposes). Press task. play button to start a task and stop button to stop a The available tasks are: Object Control It provides options for creating object-related tasks: Play Object; Stop Object; Toggle Play/Stop; Pause object; Move Object. Select one of these options and then select an object from a drop-down list at the right of the window. In this drop-down list are listed all objects existing in the current project. Press OK and you will see your task in the task list. If you select the Move Object control, an additional window will open where to enter the moving options. Select Move and enter X and Y values, to move the object to a position with exactly these X and Y coordinates. Select Increment and enter X and Y values, to increase the existing coordinates of the object with these values. 112 Channel in a Box Lite Repeat the procedure till you have all necessary tasks related to objects. DataProvider Control Here you can create tasks related to data providers. At the first field in the window, you have to select a data provider from a list of all existing dataproviders. Then you can choose an activity for this data provider, like Stop, Start, Update data provider. If there are more than one row in the data provider source (like in RSS data provider or in ODBC data provider), than you can select also Cursor scroll –move cursor to next row; Cursor top – move cursor to the first row and Cursor bottom – move cursor to the last row. If Cursor scroll is selected, an additional field is visible. There you can enter the number of rows to scroll cursor. Command Script task This command is used, if you want to create a task based on TitleBox internal commands. You can refer to the TitleBox API to learn more about TitleBox internal commands. For example, you can create a Script for loading a new project in TitleBox: “PROJECT LOAD=template1.tmpl” Further you can assign this task to any of the existing events. 1. Enter the name of the task in the Script Name field. Be aware that if you save your script with a certain name, recognized by TitleBox, it will be executed automatically under given conditions. Check the Auto-executed Scripts function, described below. 2. Enter the TitleBox command into Script text field. 3. Press OK button to create the task. 4. If you want to save the script from created task in a file, press the Save Script button 5. If you want to use an existing script, press Load Script button and select the script file. IMPORTANT: In order to use the Script task properly, you need to be familiar with the TitleBox API commands, which are listed and explained in the TitleBox API User Manual. To obtain the latter, please, contact our support team at [email protected]. 113 Channel in a Box Lite Event sequencer Task This task is designed for generating a time sequence for executing another task. An example of such sequence is, if you want to start a Digital Clock, than to start a picture and move it horizontally on screen over a specific period of time and at finally to start another task. You will have the following sequence of tasks: 1. Task “Play Digital Clock 1”; 2. Task “Play Picture 1” (to be started 5 sec. after the beginning of the sequence); 3. Task “Move Picture1” (to be started 10 times at every 5 seconds); 4. Task “Start timer1” In this example, you have to fill the setup window like it is shown in the following screenshot. Into Task Name, enter the name of your time sequence (sequence 1). Into OnStart field, select the name of the first task in the sequence (Play Digital Clock 1). Select the name from the drop-down list. If you don’t want to have task on sequence start, uncheck relative Enable check-box. Into Delay before Loop field, enter the interval of delay in milliseconds (5000ms=5sec.). This is the delay after the sequence start and before the start of the loop task. Into OnEndDelay field enter the task which will be executed with this delay (PlayPicture1). Select the name of the task from the drop-down list with existing tasks. If you don’t want to have delayed task, uncheck relative Enable check-box. Into OnLoop field, enter the task which will be executed on every loop (Move Picture 1). Into Loop Interval field enter the interval for repeating the task (5sec.=5000ms). Into Loops Count field enter how many times the task will be repeated (10). If Loops Count is zero (0), the looping will be infinite, until task is running. Into OnStop field, enter the task which will be executed at the end of the sequence (Start timer1). This task will start when the looping is finished or when a Stop sequence command is send. When you are ready with definition of the sequence, press the OK button to save it. You will see two tasks in the task list, created automatically: Start sequence name and Stop sequence name. The command Stop sequence name usually is used to stop a sequence when the LoopInterval is zero (infinite). Play Sound It is designed for creating sound tasks. Pushing the icon will open the Play Sound dialog and all you have to do is to browse for the sound you need. You can open all Direct-Show compatible sound files (*.wav, *.mp3, etc.). You can preview all sound tasks in the Task Manager using the Play and Stop buttons. 114 Channel in a Box Lite Windows Named Event Task This task is related to Windows Named Event Objects. For more information about them, you can refer to Windows documentation. The Event Name task was developed to synchronize the external applications to TitleBox. Thus, if there is a third party application that can accept certain event names, TitleBox can trigger events in these applications. Each system event should have a Name. You can type it in the Event Name string. Below, you have to choose the Action and the type of Initialization. Create Windows Task This task is related to executing of the external applications. Into field File enter the executable file name (including the full file’s path). You can start *.exe *.bat or *.cmd files. Into Params field, you can enter some parameters for starting the application. For example, if in the File is entered AirBox, into Parameter you can enter the name of the playlist which you want to start or the AirBox instance number. If there is a file association existing, you can enter into the File field, only the file name of the document to start the associated application. For example, if you have a file association for Windows Media Player, into field File you can enter only the location and name of the *.mp3 file. Auto-executed Scripts TitleBox provides an additional way to assign scripts to certain events. If you want a certain script, created either via the Command Script Task, or by the Program Script Task to be executed when you load, unload, start, or stop your project, simply save the corresponding script with one of the following names: “OnProjectLoad” – this script will be executed right after a project is loaded; “OnProjectUnload” – this script will be executed right before unloading a project; “OnProjectStart” – this script will be executed right before starting a project; “OnProjectStop” – this script will be executed before stopping project. NOTE: If you have more than one script, bearing one of the abovelisted names, TitleBox will only execute the first one from the list, i.e., the oldest one. Input Events The events are triggers, on which the tasks are performed. The Input Event dialog opens when you select an object, right mouse click and select TaskManager from menu. The input events for the TitleBox Lite version are restricted to Keyboard events. 115 Channel in a Box Lite KeyBoard events Keyboard events are user definable keyboard shortcuts for some action. These events are connected to some task, so when the keyboard combination is pressed, the assigned task is executed. Press the List button to see all created keyboard shortcuts. Press the Clear button to delete all created keyboard shortcuts. Assigning a task to an event To assign a task to an event, you have to open the Assign Task dialog. It is available after right mouse clicking on an object in TitleBox project and selecting Assign Task from menu. You will see the list of already created tasks. If there are no tasks, first create them into Task area of the window. Select an event from the available events and then select a task from Task list. Press the Create Task button in the bottom of the Assign task window In the right side of the Assign Task window, you can see the list of all tasks related to the currently selected object. If you want to see the tasks related to another object, just select this object and press the TitleBox window. task list button from the main To see the tasks, which are not related to any object (keyboard shortcuts), unselect all objects in TitleBox and press the list button. task 116 Channel in a Box Lite CLIP TRIMMER The Clip Trimmer is used for previewing and trimming clips in ListBox, DataBox and AirBox modules. You can preview clips even during the on-air playback in AirBox. Trimmer allows marking IN and Out points for video playout. , and then the player (AirBox) plays the video exactly between these points. This way no real cutting of the file is performed. USER INTERFACE It combines a VGA preview screen and tools for editing the In and Out points of MPEG clips. . Clips are loaded into the Trim Window by double-clicking on them in ListBox, DataBox or AirBox modules. The trimmer window has a number of keyboard shortcuts that are listed in the shortcuts leaflet in the PlayBox customer’s package. Preview Screen The Preview screen occupies the largest part of the Trim Window. It shows the video clip which is being trimmed. Pressing the right mouse button over the Preview screen, invokes a context menu with the most frequently used commands in Trimmer (See the screenshot to the left). Trimmer Control Once a clip is loaded, you can navigate and edit it, using the Clip Trimmer controls. The following boxes are situated under the preview window: In box – displays the In point timecode Out box – displays the Out point timecode Duration box – displays the clip duration. It is equal to the difference between In and Out points. After entering the In and Out timecodes, the Duration value will be calculated automatically. Moreover, after entering the In and Duration values, the Out point timecode will be calculated automatically. It is possible to lock the In, Out or Duration value (but not all the three of them, of course) by clicking on the lock icon to the right of the box. Thus, you can protect their values from changing (by mistake, for example). To enter values in the In, Out or Duration box, you can use the arrows beside them or type numbers in the boxes. Position box contains the timecode of the currently selected point in the clip. If you type another timecode in this box and press <Enter>, the marker will move to the relevant position. Total Duration box – displays the original, untrimmed duration of the clip. Details box – it shows the part of the clip, enclosed in the zoom frame. The Trim bar visualizes the clip length and the clip markers. The Zoom frame is a yellow square in the trim bar. It defines what part of the clip is being shown in the Detail View. It is quite useful for long clips. You can move or resize the zoom frame, by mouse dragging. You can define a new Zoom area by drawing a rectangle through dragging the mouse while holding its right button. 117 Channel in a Box Lite SPLIT button - splits the clip and thus defines separate sections in the clip. After splitting the clip, each new clip section appears as a separate row in the play list. You can play them separately, change their order, insert other clips between them, etc. You can define In/Out points for each section of the split clip. The In, Out and Duration boxes display information about the selected section. Multiple In/Out definitions are used for skipping some parts of the clip during its playback. Thus, you can exclude existing commercials, titles, etc. from the original clip. You can create separate sections also by pressing repeatedly the In/Out buttons. Pressing the In button after an existing Out point, creates a new section after the existing one. Pressing the Out button before an existing In point, creates a new section before the existing one. IN button – marks the In point for start of playback in AirBox. The IN point marker is colored green and by default it is at the beginning of the clip. OUT button – marks the Out point for end of playback in AirBox. The OUT point marker is colored red and by default it is at the end of the clip. You can set an In/Out point, by dragging the IN/OUT marker on the trim bar or by entering timecode directly into the IN/OUT box. The IN/OUT markers show the frame before/after (i.e. if the marker is on the Out point, you actually see the next frame, but not the last frame of the trimmed part.). NOTE: For MPEG files, the trimming is GOP accurate! IN points can be positioned only on I-frames, while OUT points can be positioned on I- or P-frames. Depending on the stream’s GOP size, this may lead to a slight inaccuracy, limited to half a GOP for the IN points and a couple of frames for the OUT points. If the stream’s GOP size is one (I-frames only), then trimming will be frame accurate. NOTE: Even if you specify In and Out points in a particular timecode, some playout plug-ins (for ex. IPPUMP) will correct them to nearest I-frame for IN point or I- or P-frames for OUT point. Thus outputted duration could be shorter then specified. Play button starts playing the clip. Then it transforms to pause/resume. If you want to play only the trimmed part (i.e. between the IN and OUT points), press <Shift> + Play. Stop button stops the playback and “rewinds” the clip to its beginning. Pause /Resume button. It stops and resumes the clip playback from the same timecode position. Button - skips one frame forward Button - reverts to one frame backward Button - fast forward (if it is possible) Button - rewind (if possible) Button - moves to the next mark point (in/out/bookmark) Button - moves to the previous mark point (in/out/bookmark) Add Zone button - marks the beginning of a zone. A yellow point appears in the trim bar. Delete Zone button - deletes the selected zone point. Open button will load a clip in the Trimmer window. Export button - opens a dialog box for exporting the trimmed clip as a file. If you have divided the clip into several sections, they will appear in the Export list as different parts. Select which of them to export by checking the checkboxes in front the relevant section. Besides, you can change their order using the up and down arrows. If you choose to export several parts at a time, you have to specify the way they should be exported: as separate files (Export selection(s) as multiple files) or as a single file (Export selections as a single file). Pressing the Export button in this dialog opens another dialog box for you to specify the file name and store location and to begin the export. To delete a clip section, select it and press <Ctrl>+<D>. 118 Channel in a Box Lite To reset the original clip length, press <Ctrl>+<BkSp>. The Throttle has three levels – Low, Normal and High. Each of them “tells” the CPU what priority to give to the export process. The higher the priority, the slower the other simultaneously running processes on the machine, and the quicker the export made. IMPORTANT!: Export works only for MPEG2 files. NOTE: Export is not frame accurate. It is GOP accurate! IN points can be positioned only on I-frames, while OUT points can be positioned on I- or P-frames. Depending on the stream’s GOP size, this may lead to a slight inaccuracy, limited to half a GOP for the IN points and a couple of frames for the OUT points. If the stream’s GOP size is one (I-frames only), then trimming will be frame accurate. Volume Control You can change the audio volume and audio balance of the clip, using the relevant sliders in the Clip Trimmer. The new values will not take effect in AirBox playback. These sliders are used for convenience during the trimming process. Volume box – shows the volume level of the clip playback. There is a reset button beside the slider to restore the default value. Balance box – shows the clip playback L-R balance. There is a reset button beside the slider to restore the default value. Status Bar It is located along the lowest part of Trimmer window. - The first field [Position] – shows the current timecode, when dragging over the trim bar. - The second field [Zoom Frame] – shows the scale of the Zoom zone. - The third field [Version] – displays the current Trimmer version. - The last field shows the clip’s filename and location. TRIMMER PAGES There are six pages on the right side of the Trimmer Window: Info, Zones, Shots, Filters, Stream and Extra. Video Clip Info This page shows important system stream information, extracted from the file. It contains: Filename Video compression type Video stream information: number of streams; image width and height in pixels; video frame rate; video bitrate. Audio stream information: number of streams; audio compression type; audio sampling rate; audio channels; audio bitrate. Type of MPEG packages Type of PES (packetized elementary stream) Mux rate (the multiplexing rate in bps) Duration of the clip in HH:MM:SS.ms (hours:minutes:seconds.miliseconds) 119 Channel in a Box Lite Clip Zones This page is used for registering a set of timecodes (points) in the clip. Thus, you can mark an initial or final timecode of an important zone in the clip. For example, in each movie there are predefined commercial break points that might be used later for automated commercial slot insertion. Those breakpoints can be defined in Clip Trimmer as single split points or zones (blank/stills) that will be skipped, and a commercial slot will be inserted instead. To add a Zone, set the cursor at the appropriate point and press the Add Zone button in the page or in the main window. A yellow point appears in the trim bar, showing the beginning of the zone. You can define different zone types, pressing the black arrow of the Add Zone button. It opens a button menu: - Bookmark – creates a single split point at the current play head position. You can change the Zone name (Bookmark by default) and timecode manually. - Simple skip zone – creates a two-point zone. The first point is the current play head position; and the second is 5 seconds later, by default. You can change the Zone name and timecodes manually. - Advanced skip zone – creates a four-point zone. The first point is set at the current play-head position. By default the second point is 1 second later, the third point is 5 seconds later and the fourth point is 6 seconds later. You can change the Zone name (Advanced Zone by default) and timecodes manually. To add a next marker in the Zone, press the Add in that zone, by default. Zone marker To delete a marker from the Zone, select it and press the Delete first one, which can be deleted only by deleting the whole zone. To delete a Zone, select it and press the Delete Zone button. It will add a marker 10 seconds after the last marker Zone marker button. It will delete all markers, except the button from the page or from the main window. By pressing the Clock buttons, you can choose a display mode of the markers: - Time – shows exact timecodes in HH:MM:SS:FF format - Offset value – shows the interval between the current marker and the first one. - Duration – shows the time difference between two consecutive zone markers. Clip Shots Use this page to extract shots from the video clip. To create a shot, stop the play-head at the desired frame and press the Add button. The shot, as a thumbnail and its time-code are displayed in the tab. You can change the shot’s name (Scene No., by default) manually. To delete a shot, select it and press the Delete button. To extract a shot to a file, select it and press the Export file name, type (*.jpg or *.bmp) and location. button. A browse window appears to select the To set a shot as thumbnail of a file, press the Thumbnail button. Clip Streams This feature is applicable in case the file contains more than one video and/or audio stream. Here you can choose which of them to view/listen during playback. The check boxes in front the relevant streams show their playback status. The checked streams will be loaded in the playlist after clicking and will be played in their turn. The green ticks serve for previewing the desired streams – if you click on the single tick, you will preview only the selected stream. If you click on the double tick, you will preview all the streams simultaneously. If you preview several audio streams, they will be mixed-up. If the streams are video, the preview window will split according to the number of streams (up to 32). Use the blue arrows to move streams up and down the list. 120 Channel in a Box Lite Extra This “extra” will help you in managing multiple monitor video wall systems of up to 16 monitors. The files that are usually used for video walls end in *.c#.mpg or *.c#.avi (for example *.c1.mpg or *c3.avi). Just load the first file in the playlist. AirBox will detect the others automatically. The trim bar and the buttons above the list of files are designed for control of the entire bunch. The trim bar and the buttons under the preview window are used for control of the currently selected monitor (the one in the red dotted-line frame). This feature will help you in synchronizing the video wall and will allow you to control each monitor separately. You can also rearrange the display positions of files by drag-and-dropping the relevant squares in the preview window (i.e. file #1 can be displayed on monitor#3, etc.) or by using the blue arrows above the file list. The files in the preview window are arranged horizontally, in up to 4 rows of up to 4 files each. This means that if there are 16 files in the bunch (the most possible), the first row will contain files #1 to #4, the second one will contain files #5 to 8#, etc. The Create TC file check box is situated at the bottom of the file list. If you check this box, a TC file will be created automatically, saving you settings, such as In and Out points, file order, etc. Thus you will be able to use your settings again the next time you open the relevant file. Clip Filters This tab provides information about the filters that participate in playing the current clip and an opportunity for changing the filters’ settings. The Windows Registry contains a key [HKEY_CURRENT_USER\Software\Digital Media Technologies Ltd.\PlayBox\2.0\DXPresets] in which you could create your own string values, containing groups of preferred filters (presets). All filters of the currently selected preset are displayed in Filters page. There is a legend at the bottom of the page: The sign marks all filters from the preset. The sign marks filters that are included in the preset, but do not participate in executing the current particular file. There is a Property button right under the tab name. Pushing it will open the property page (if any) of the selected filter. You could change the filter’s setting there. External Output Configuration This tab allows you to select the externalvideo and audio renderers. Use the External Video Renderer drop-down list to select the desired video renderer from the list of available ones. Enable the Flip fields option if you want to flip the fields of the corresponding clip. Use the External Audio Renderer drop-down list to select the desired audio renderer from the list of available ones. 121 Channel in a Box Lite Live Viewer Live Viewer is an additional application which is installed together with AirBox. It allows the users to view the live events, set in AirBox. GETTING STARTED Installation Where to Install it Live Viewer is usually installed under folder C:\Program Files\PlayBox Technology Ltd\UDP Switcher The Live Viewer icon will appear in the Toolbar . USER INTERFACE The main purpose of the Live Viewer is to preview the video, which is defined as live event in AirBox. In order to see preview of the video source, first you have to set some video sources in AirBox from the AirBox menu Settings Live Inputs tab. IMPORTANT! You have to restart AirBox after setting up the video sources. Now you are ready to open Live Viewer. Go to the Streams menu Add / Remove stream and notice that a Preview List with already defined live video sources can be found there. It looks like the image to the right. In the Device Name field check the respective source names of the sources you would like to preview in the Live Viewer and press OK button. 122 Channel in a Box Lite To remove a video source from a list, just un-check the device name from the list. Into the left part of the main screen you will see small preview windows of all checked sources. By clicking on some of the small windows, you will see the preview of the respective source into the big screen to the right, as shown in the screenshot below. The position of the view-list of video streams could be changed by selecting the desired position from Streams menu View orientation. Enable / Disable audio streams via the Audio Enabled command in the Streams menu. Select the desired Video Renderer preset from the list of available renderers. Pressing Configurations menu Customize shortcuts invokes the dialog, shown to the right: Here you can set a list of user’s shortcuts for some main commands, like Add / Remove streams; Alignment, Audio Enabling, etc. To the left, you will see the list of Available commands, and to the right the relevant shortcut will appear in the Current keys field. If you want to change the key combination for a certain command, select it from the Available commands list, go to the Press new shortcut key field, press the desired keyboard combination, and notice that it appears in the respective field. When you are done with the configuration of your shortcut keys press the Add button.The new key combination will be assigned to the respective command. To exit the dialog, press OK 123 Channel in a Box Lite APPENDIX 1 – Graphic Rules’ Commands, Used for Communication between AirBox and TitleBox In the table below you can find a list of commands, used in the AirBox Graphic Rules option. IMPORTANT: All of the commands used in Graphic Rules are CASE SENSITIVE! Command LOAD_TEMPLATE=TB_ProjectName.tmpl ObjectName.play ObjectName.stop ObjectName.text ObjectName.media PlaylistColumn.text=%clip_PlaylistColumn% %clip_title% %clip_location% %clip_category% %clip_notes% %clip_star% %clip_start% %clip_duration% %clip_start_date% %metadata_MetadataName% %clip_title[+n]% %clip_title[BM_Test1]% %clip_start[+n]{HHMMSSFF}% Description Points out which template (created from a TitleBox project) is addressed. Sends a play command for the corresponding TitleBox object, designated by its name. Sends a stop command for the corresponding TitleBox object, designated by its name. Used for adding text to the corresponding TitleBox object, designated by its name. Used for adding media to the corresponding TitleBox object, designated by its name. This line contains the name of the AirBox playlist column [PlaylistColumn] object [Title] and a description of the text that it should contain. For example, the line [Title.text=%clip_title%] contains the name of the TitleBox object [Title] and a description of the text that it should contain. I.e., in this case, we will extract information from the Title column of the relevant playlist entry. Use this line to show the text from the corresponding title field in the AirBox playlist. Use this line to show the text from the corresponding location field in the AirBox playlist. Use this line to show the text from the corresponding categofy field in the AirBox playlist. Use this line to show the text from the corresponding notes field in the AirBox playlist. Use this line to show the text from the corresponding star field in the AirBox playlist. Use this line to show the text from the corresponding start time field in the AirBox playlist. Use this line to show the text from the corresponding duration field in the AirBox playlist. Use this line to show the text from the corresponding start date field in the AirBox playlist. Use this line to show the text from the corresponding metadata, designated by its name. Use this line to display information about the title of an upcoming clip in the playlist, where [+n] is the off-setter. Use this line if you want to use a bookmark for presenting information about an item in the playlist. Here Test1 is the Bookmark name and [+n] is the off-setter. Shows the start time and the title of an up-coming clip. Here Next is the name of the text object in TitleBox, [+n] is the off-setter, and {HHMMSSFF} is the time format to be used. Be aware that the time format can also be {HH} or {HHMMSS}. In case you are in NTSC mode, the start time is displayed in accordance to the PC system time. Thus, instead of {HHMMSSFF}, here you should use {T} or {TT}, where: 124 Channel in a Box Lite %clip_title[CAT_CategoryName+n]% %clip_start[CAT_CategoryName+n]% {!LOGO_ON!} / {!LOGO_OFF!} SHOW_LOGO_PRESET_n {!AUTOMATION_ON!} / {!AUTOMATION_OFF!} {!MUTE_ON!} / {!MUTE_OFF!} 125 {T} stands for short system time {TT} stands for long system time Use this line to display the title of the next clip (if n=0) down the playlist that belongs to the category, designated by its name. You can also use [+n] as an off-setter. Use this line to display the start time of the next clip (if n=0) down the playlist that belongs to the category, designated by its name. You can also use [+n] as an off-setter. Use this command to show / hide the logo from the screen. Use this command to display logo preset number [n], where [n] is between 1 and 16 and stands for the respective logo Preset, as configured in Settings Logo. Enables / disables the incoming GPI / DTMF triggers. Switches the audio on / off. Channel in a Box Lite APPENDIX 2 – Integration of AirBox with TitleBox TitleBox settings: 1) Run Programs > PlayBox Technology Ltd. >TitleBox >PLNetInst.exe and select a folder for your TitleBox templates. 2) Create your TitleBox projects. 3) Export them via Network >Export project as template, giving them respective names. 4) *.tmpl (template) files are exported in the templates folder. 5) Go to Project\Options, look at Network tab. Remember the TitleBox channel ID and Port values. Confirm any changes. 6) Go to Network>Net control. Run it. That's all for TitleBox. Now it stays in standby mode and executes the commands coming from AirBox. Please note that it is not possible to edit objects in TitleBox while in this mode. AirBox settings: 1) Go to Settings Modules, then to Remote control tab. Enable TitleBoxNetCtrl Output setting with Yes. Click Configure. Enter same Channel ID and Port values as in TitleBox settings. Confirm. 2) Go to Events Add/Insert event TitleBoxNetCtrl Output 3) There are two modes for event insertion - 'Wizard' or 'Advanced' (selectable through the Advanced button). You are recommended to choose the 'Wizard' mode for now. The functions are self-explanatory, but since this module is still under development, some of them are not functioning as desired... 4) In 'Wizard' mode you can choose between Template Control and Play Project - the first one is for global TitleBox control commands; the second one is for project/objects control commands. 5) If you have entered Play Project mode, further you can select your project by list - all exported template projects should appear in this list. Select a whole project or some objects from it. 6) Click Finish. That’s it! Run AirBox. When the time for a TitleBox event approaches, respective commands are being sent to TitleBox and it runs the appropriate objects. 126 Channel in a Box Lite Index AIRBOX Admin rights, 55 Auto Fill, 47 Automation, 35 Block Timer, 27 Bookmark, 25 Bookmark, 25 Clip Properties, 15 Clip Properties – Fixed time, 16 Clip Timer, 27 Clipboard, 28 Color settings, 36 Color Settings, 36 Commands menu, 59 Complex events, 48 Complex Items, 20 Counters, 11 Current Playlist, 11 Daily Playlist, 28 Dummy Clip, 24 dummy clips, 24 Edit Menu, 24 Event, 26 File Menu, 22 Filename parser, 54 Fill Event, 20 Fixed start, 47 Fixed Time Clip Properties, 16 General Clip Properties, 15 General Settings, 32 Graphic rules, 50 Graphic Rules, 23 Help menu, 59 Incomplete Clip, 24 incomplete clips, 25 Interface Settings, 33 Internal Events, 19 Live Input, 56 Live input stream, 25 Live Inputs, 25 Log, 29 Log view, 11 Logo, 38 Logo Event, 19 Logo options, 43 Media Files, 24 Media Folders, 58 Metadata, 17 Missing Files, 34 Modules, 37 MultiformatOutput – audio settings, 39 MultiformatOutput – AUX source, 43 MultiformatOutput – logo settings, 43 MultiformatOutput –video settings, 38 Note, 26 Playback Counters, 20 Playback modules, 37 127 Playlist, 12 Playlist and clip buttons, 21 Playlist Color Coding, 13 Playlist Control Buttons, 21 Playlist Drag-n-Drop, 13 Playlist Grid, 36 Playlist Grid, 12 Playlist Right-click, 14 Playlists, 11 Playout, 10 Print Playlist, 23 Remote control – TitleBox Net Control, 37 Return Event, 20 Save config, 55 Save Daily Playlist, 22 Settings, 32 ShotBox, 11, 28 Source Clip Properties, 15 Startup options, 44 Status Bar, 20 Stop Event, 19 StopCue Event, 19 System Timer, 27 Timecode Timer, 28 Timecode Timer, 28 Title Bar, 10 Transition, 17, 26 Trimmer Server, 22 User interface, 10 User Interface, 10 Menu Bar, 10 Video Overlay Window, 11 View Menu, 27 Volume Control, 30 Volume slider, 21 Wait Event, 19 Wait TC Event, 19 CAPTUREBOX Capture tab, 66 Capturing, 67 Menu bar, 68 MUSE, 65 RS-422, 68 TDIR, 67 VTR control, 68 CLIP TRIMMER Clip Shots, 120 Clip Zones, 120 External Output Configuration, 121 Extra, 121 Filters, 121 Pages, 119 Preview Screen, 117 Status Bar, 119 Trimmer Control, 117 User Interface, 117 Video Clip Info, 119 Channel in a Box Lite Volume Control, 119 LISTBOX Edit menu, 63 Playback control, 61 Playlist Control Buttons, 61 Playlist grid, 62 LIVE VIEWER, 122 Installation, 122 User Interface, 122 OVERVIEW PlayBox Modules AirBox, 8 CaptureBox, 8 ListBox, 8 TitleBox, 8 TITLEBOX Analogue clock, 88 Animation file, 90 Animation properties, 89 Banner, 93 Browser object, 97 Chat note, 93 Creating objects, 80 Dataproviders-EAS, 110 Dataproviders-FileLink, 105 Dataproviders-HTML, 110 Dataproviders-ODBC, 107 Dataproviders-RSS, 109 Dataproviders-Weather, 105 Dataproviders-XML, 108 DataSource Manager, 103 Deleting objects, 81 Digital clock, 94 Direct Show media, 91 Dynamic speed, 88 Editing objects, 80 Flash objects, 94 General options, 79 Menu bar, 76 Network control, 76 Object palette, 75 Objects List, 81 Power Point objects, 96 Primary Shapes, 96 Roll&crawl properties, 85 Screen capture, 97 Set File link, 81 Slide controller, 102 Slide Manager, 97 Still picture properties, 82 System bar, 75 Task Manager, 112 Task Manager-Events, 115 Task Manager-Tasks, 112 Text field properties, 83 Toolbar, 72 User interface, 71 128