1
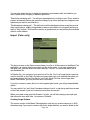
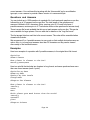
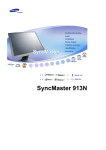
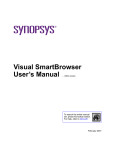
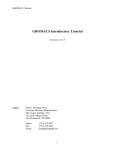
Quizzler User Guide
Table of Contents
About Quizzler
Installation & Registration
Quizzler Reader
Quizzler Maker
Quizzler Server
Section
Section
Section
Section
Section
1
2
3
4
5
Quizzler File Format
Version History
Appendix A
Appendix B
Quizzler was created in 2000 and is copyrighted by John Covele, President of Pocket
Mobility, Inc. Our web site features the latest version and news about Quizzler, as well as
other handheld software products.
Pocket Mobility, Inc.
323 Peakview Rd
Boulder, CO 80302
(303) 546-6200
www.QuizzlerPro.com
Updated 9/1/2007
About Quizzler
Quizzler runs on Palm and Pocket PC handheld platforms, and Windows and Macintosh
computers. Quizzes can even be exported to run on an iPod (some features not available
on iPod). Quizzler quiz database files are like electronic flashcards; they can be educational
or entertaining. Since you can create your own quizzes with Quizzler (even Mac users!),
there is no limit to what you can do with it: build a trivia game, a study guide, or an
assessment exam. Many security and assessment features are built into Quizzler
especially for teachers.
Once you have a quiz database file, you can use Quizzler to make learning fun. You can
choose from a variety of formats: multiple choice, true and false, flash card, or reverse
questions. You can answer the questions in order or randomly. There is even a Speed
Game option where you try to beat the clock. Quizzler keeps track of your score as you go,
and remembers your last score for each quiz.
Best of all, Quizzler Reader is free! All quizzes that you create using our authoring tools can
be read with free software (individual quizzes can be protected and commercialized if
desired).You can find many free quiz files in the quiz library at www.QuizzlerPro.com.
Quizzler Maker is product for Windows and Macintosh that lets you create quizzes using a
simple, easy to use interface. The quiz files you create can be read by Quizzler Reader on
Windows, Macintosh, Palm, and Pocket PC platforms. Quizzler Maker also lets you export
quizzes to the iPod and web (optimized for iPhone).
Quizzler Instructor runs on handhelds, and lets you collect score information from
students, via Infrared or Bluetooth connections. Once you gather scores, you can instantly
see the collective results from the classroom.
Quizzler Server runs on the desktop, and lets you collect score information from students
via a WiFi connection. You can also conduct quick “polls” to gather instant feedback from
your classroom.
Quizzler Reader - Free quiz reader for Windows, Macinotsh, Palm, and Pocket PC
Quizzler Maker - Authoring tool for Windows and Macintosh
Quizzler Instructor - Score analysis tool for Palm & Pocket PC; uses IR & Bluetooth
Quizzler Server - Score analysis tool for Windows & Macintosh; uses WiFi
Quizzler quiz files have the same file format on all platforms!
The Quizzler Classroom
The ultimate Quizzler experience takes advantage of the entire family of Quizzler products
in the classroom, providing a paperless, wireless, learning experience. Here's how you put
them all together:
Step 1 - Create Your Own Quizzes
Using Quizzler Maker is the easiest way to create quizzes using a desktop computer. Just
type in your questions and answers, and select the option to build the quiz (the same quiz
file will work on all platforms). You can even preview and print quizzes from your desktop.
This program is designed to be simple and easy to use, so some advanced Quizzler
Page 1-1
features are not available. The free demo lets you create quizzes with up to 10 questions.
Step 2 - Beam Quiz To Students with Handhelds
In a handheld environment, sync your quiz to your handheld, then "Beam" it to your
students. For testing situations, build the quiz in "exam mode" for special features to
prevent cheating (users cannot leave the quiz once it has begun), no score feedback until
the quiz is completed, the ability to change answers before the quiz is complete, etc.
Step 3 - Students Beam Results Back
After students are done with their quiz, they get to see the score immediately. No more
waiting and worrying for them. They enter their name and beam the quiz results back to the
teacher. Use Quizzler Pro Server to receive scores over WiFi on a computer; use
Quizzler Pro Instructor to receive scores over Infrared or Bluetooth on a handheld.
Step 4: Analyze Results Instantly
This is the most amazing part of the process for the teacher. Open a score collection to see
all the individual scores and the average score. You can see a list of questions, and the
percentage correct for each question, to quickly spot those topics that gave the students
trouble. Even better, you can tap on one of those tough questions and find out the
percentage for each individual answer. Then you can list the students who missed that
question.
Now, instead of spending hours grading the tests, you can determine in seconds how the
class did, what topics you need to review, and think about new, improved ways of teaching
the material based on the test results. OK, would you rather go back to the paper and
pencil method?!?
Quiz Databases
A quiz database file contains all the questions and answers, as well as author information
and optional features that quiz authors can embed in the quiz. This allows quiz authors to
freely distribute quizzes yet still receive due credit and protect their hard work. Quizzler
writes the last quiz score in the quiz database file as well, so this information goes along with
the database file.
F inished quiz database files always end with “.pdb”. Quizzler is required to open these
files.
The source text used to build and edit quizzes is stored in plain text files ending with “.txt”.
These files are not distributed to others as they can be easily opened with any word
processor.
Page 1-2
Installation & Registration
System Requirements
Palm:
•Palm OS 3.0 or higher (Palm III or later handheld model) for Quizzler version 4
•Palm OS 5 to run Quizzler version 5
•Approximately 750 KB of RAM, plus room for quizzes
Pocket PC:
•Any device running Pocket PC or Windows Mobile
•Approximately 750 KB of RAM, plus room for quizzes
Windows and Macintosh
• Windows 98 or later
• Macintosh running MacOS 9 or 10 (untested on earlier versions)
• Approx. 4 MB of disk space
Downloading
When downloading from our web site at www.quizzlerpro.com, you can “Run” the
download link directly from your web browser to start the installer; there is no need to
“Save” the installer to your computer first. The Palm installer will automatically launch the
Palm Quick Install tool as long as you have installed the Palm Desktop software. The
Windows Mobile installer will automatically copy files toy our handheld. The Windows and
Macintosh desktop installers will copy a folder to your computer’s desktop.
Files and Folders
After installing from web download or from CD-ROM, certain files and folders are created
for you. Do not change these names or locations, or Quizzler may not function properly.
Windows and Macintosh computer:
Run Quizzler (shortcut launches Quizzler Reader)
Quizzler Maker (application)
Quizzler Server (application)
SuperWaba (folder contains Quizzler Reader files and quiz registration file)
My Quizzes (folder containing all your quiz PDB and TXT files)
Other Scores (folder containing scores collected with Quizzler Server)
For iPod (folder containing quizzes exported for iPod, with Quizzler Maker)
Pocket PC/Windows Mobile handheld:
Quizzler shortcut created in Start Menu/Programs
/SuperWaba (folder containing all required program files, including registration info and score
history)
/My Documents (all quiz PDB files and Score Collection files must be stored here; you
may place them in subfolders if you like)
Palm OS handheld:
All files and quizzes must be stored in main memory
Page 2-1
Registration
You can upgrade the free trial versions just by entering a Key Code, which you receive
after making a purchase. Complete instructions are provided on our web site.
Page 2-2
Quizzler Reader
When you launch Quizzler Reader, you see the Quiz List screen. This screen shows you a
list of all quiz database files (PDB) on your handheld device. Select a quiz from the list by
tapping on it, then choose “Quiz Options” to start the quiz.
Quiz Options
The Quiz Options screen will show you how many questions in the selected quiz, the last
score, and a comment field that was written by the quiz author. Some quizzes may contain
extra information that you can see by tapping the “More Info” button.
Tap “Begin” to start answering questions, or “Quiz List” to return to the Quiz List screen. At
the bottom half of the screen there are options you can choose before taking the quiz.
Chapters - Some larger quizzes may make use of “chapters”. For a quiz with chapters, the
list of chapters can be seen by tapping a button to the right of the “Chapters” label. You
can choose to take questions for one chapter only, or all the questions in the quiz at once.
Sequence - You can answer the questions in random order, or sequential order, by making
your selection here.
Answers - You can choose your quiz format by making your selection here:
Multiple Choice - All answers will be displayed. The order of the answers is
random. See Multiple Choice Questions below for more information.
True and False - Only one answer is displayed. There is always a 50% chance that
the correct answer will be displayed, no matter how many other answers are
provided in the quiz database. See True and False Questions below for more
information.
Flash Card - No answers will be displayed at first. You make a guess, then reveal
the answer to see if you are correct. See Flash Card Questions below for more
information.
Reverse Questions - Like Flash Card, but you are shown the answer and must
guess the question.
Auto - This option will display the question in Multiple Choice mode if there is more
than one answer, or Flash Card mode if there is only one possible answer. This
allows you to have a “mixed mode” quiz with both types of questions.
Page 3-1
Repeat Wrong Answers - After answering all questions, any questions answered
incorrectly will be re-asked.
Exam Mode - There are two ways to get into Exam Mode. A quiz can be specially
designed so that it only functions in this mode (using the “#exam” tag), or you can choose
this as an option by checking the check box. There is just one difference: if a quiz has been
specially designed to only function in exam mode, then you may not press any hardware
button to leave Quizzler while taking the exam. The only way to leave the exam is by
pressing the Stop button or answering all the questions.
When in exam mode, the answer mode is automatically set to “Auto” mode, and you will
not get any feedback when you answer a question right or wrong. You may also change
your answers as many times as you like. When you are finished with the exam, you will see
your score then.
Speed Game - Check this option to play against the clock. In the Speed Game, each
question is worth 10 points. A point is subtracted for each second it takes before you get
the correct answer. For example, if it takes you 4 seconds to guess the correct answer, you
will receive 6 points for that question. you always get at least 1 point for a correct answer.
The Speed Game works best in Multiple Choice or True and False formats.
Register - Commercial quizzes will show a “Register” button on the Quiz Options screen
until you enter your registration code. Note that this button only registers a quiz, and does
not upgrade the application itself to Quizzler Pro.
Score Code - This menu item will display a special code that corresponds to your score.
Not all quizzes make use of this feature, but it provides a means to verify the score that you
received for certification purposes. The quiz author can verify that your score code
corresponds to the score you reported.
Last Score - Some quizzes include a feature that hides your last score, so it may not be
visible to you. Once you begin a new quiz, your last score is reset to 0 of 0.
Answering Quiz Questions
The questions screens will look slightly different, depending on which quiz format you have
selected. In all cases the top half of the screen is the same:
Page 3-2
question
number
correct
answers
answers
attempted
Done
The “question number” is shown in the top left. This can be useful if you want to return to a
specific question later using the “Goto Question” menu item. The current score is shown at
the top right as “1 of 2”, which indicates 1 correct answer so far, and 2 questions attempted
so far.
In Exam mode, the score is hidden, and you may change your answers as often as you like
without affecting your score.
If you skip a question and don’t make any attempt to answer, it does not affect your score.
If an answer will not fit on one line, a scroll bar appears on the right, allowing you to see the
rest of the question. You can also scroll by pressing the “up” and “down” buttons on your
handheld device. If you are already at the bottom of the scrolling question when you press
the “down” button, it will have the same effect as the “Right Arrow” button; i.e. you will go to
the next question.
The question is displayed under the question number and score, followed by the answers
(the answers area will be different for each quiz format). At the bottom of the screen there
are always three buttons:
Right Arrow - Skip to the next question. Your score is not affected if you didn’t make any
guesses. You may also press the “down” hardware button to go to the next question.
Some quizzes will hide this button.
Left Arrow - Go to the previous question. Your score is not affected if you didn’t make any
guesses. You may also press the “up” hardware button to go to the previous question.
Some quizzes will hide this button.
Done - Finish taking the quiz and return to Quiz Options. This is only necessary if you are
quitting the quiz prematurely.
Explain - If a quiz has been built with explanations, then you can click this button to get an
explanation of the answer. You should pick an answer before tapping the Explain button to
get full credit for a correct answer.
Page 3-3
And there are menu options for navigation:
“Goto Question” menu item - Go to any question number you enter. For example,
type “3” to jump directly to question #3 (not necessarily the third question if you are taking
the quiz in random order).
“Find” menu item - If you are using Quizzler Pro, or any registred commercial quiz, you
can use the “Find” option to look for words in the quiz, and go directly to that question.
Multiple Choice Questions
In a Multiple Choice format quiz, all answers (as many as 10) will be displayed. You tap on
the correct answer to move to the next question. If you tap the wrong answer, your score
will update in the top right corner, but you will stay on that question. Keep guessing and tap
the correct answer to move on. You are only scored on your first attempt.
Some quizzes allow more than one correct answer, or a variable amount of points for each
answer.
True and False Questions
In a true and false format quiz, one answer is displayed, and you must guess whether it is
correct or incorrect. Even if there are 3 or 4 possible answers in the quiz database file, there
will always be a 50% chance of the correct answer being displayed.
After you make your guess, the next question is displayed and the score updated.
Flash Card Questions
In a Flash Card format quiz, no answer is displayed at first. You must guess the correct
answer, then tap “Show Answer” to see if you were correct. After seeing the correct
answer, score yourself by tapping either “I was correct” or “I was incorrect”.
Reverse Questions
This is just like Flash Card, but you are shown the answer and must guess the question.
Page 3-4
My Scores
As you complete quizzes, Quizzler keeps track of your most recent scores. You can see
these scores by selecting the “My Scores” menu item. Actually, alot more information than
just the score is stored here. You can tap the “Details” button to see more details about the
quiz score. The Details window will show you what options were in effect for that quiz
(multiple choice, flash card, exam, etc.), and exactly which questions you got wrong.
You may also select any score and beam this information to another handheld which is
running Quizzler Pro Instructor Edition. That score will appear in the other user’s “Other
Scores” screen. This is a very handy feature if you are giving a quiz to several students, for
example, and want to collect all those scores for your grade book.
Quizzler 3.4 and later features an “Export” button on this screen. This is used to export the
scores to a file that Gradebook can analyze and do reports on. Just tap on a quiz score,
then tap “Export”. All the other scores associated with the selected quiz score will be
exported to a file. Then run Gradebook to look at these score files.
Preferences (Palm only)
Select the “Preferences” menu item to choose optional sound effects and font sizes.
Here you can select a sound to play after any correct answer and/or incorrect answers.
Page 3-5
You can also select the font to display the questions and answers with, and whether you
want a visual effect to display in between questions.
“Warn before finishing quiz” - You will get a warning before you finish a quiz. This is useful to
prevent accidentally leaving the quiz and locking in your score (perhaps you skipped some
questions you want to come back to).
“Disable buttons during quiz” - This will lock out all the hardware buttons except the up and
down scroll buttons, making it impossible to leave a quiz while it is in progress (unless you
tap the “Stop” button). This could be useful in a group where you are passing the handheld
around, or with children.
Import (Palm only)
The Import screen on the Palm version shows you a list of all the memos in the Memo Pad
application, as long as there is more than one line in the memo. If you have created your
own quiz here, you can select that memo and tap “Convert” to convert the memo into a
quiz database file.
In Quizzler Pro, you can import your quiz from a Doc file. “Doc” is a format that is commonly
used for text files on the Palm, and there are many third party tools available that allow you
to convert desktop files into Doc files for your Palm. Since Doc files can be larger than
Memo Pad memos, you may find this more convenient.
If you try to convert a memo that is not in the special quiz format, you will get unpredictable
results.
You can use the “up” and “down” hardware buttons to scroll, or tap the up and down arrows
on the Palm screen, if your list of memos is more than one screen.
When you create a new quiz with Quizzler 2 or later, you will be creating a new style quiz
that cannot be seen with older 1.x versions of Quizzler.
Creating Large Quizzes
The current version of the Memo Pad application only lets you create memos up to 4000
characters long. If you want to create a quiz that is larger than this, you need to break up the
Page 3-6
quiz into separate memos under 4000 characters each, with each memo having the
same title. When you try to import and convert a memo with the same title as an existing
quiz database, you will be warned and given the option to append the memo questions to
the bottom of the existing quiz database (the comment line of the subsequent memo will
be ignored). In this fashion you can create very large quiz database files that exceed the
4000 character limit.
The other alternative is to create one single large text file using your favorite word processor
on your desktop computer, then convert this to a “Doc” file using a third party program like
“pDocs” or “TealDoc”. You can install the Doc file on your Palm and import all the questions
at once. Quizzler Pro allows you to import from Doc files.
Quizzler Maker for desktop computers provides yet another way to create large quizzes
more conveniently.
Page 3-7
Quizzler Maker
Quizzler Maker for desktop computers is by far the easiest way to create quizzes; just type
in the new questions or import text files in the special Quizzler file format. You can use the
free unregistered demo version to create quizzes with upt o 10 questions each.
File Types
There are two types of files used by Quizzler Maker. When you create your own quiz, you
begin with a ".TXT" file, which is a plain text file. Each time you save your quiz file, a ".PDB"
file is automatically built to distribute to others. The .PDB file is encrypted for security, and
can be viewed with the free version of Quizzler for desktop and handheld computers. You
need the .TXT to edit a quiz and make changes to it.
File Locations
All quiz files need to be located within the My Quizzes folder so Quizzler Reader, Quizzler
Server, and Quizzler Maker can find them. The My Quizzes folder, and SuperWaba folder
that contains Quizzler Reader, are installed together, and they should stay together. If you
are upgrading, simply copy all your old quizzes into the new My Quizzes folder. It is OK to
create subfolders within My Quizzes.
Creating a New Quiz
To create a new quiz file, click the "New" button and give the file a name. Create flashcard
style questions (instead of multiple choice) by only providing one answer to a question.
When you are finished editing questions, close the window to return to Quiz List.
After you create and save your quiz, you will find both a PDB and TXT file. You can select
your PDB file and Preview it now. To do more editing, select the TXT file and click the Edit
button.
When you are ready to try out the quiz interactively using Quizzler, you will need the .PDB
Page 4-1
file, located in the same folder as your .TXT quiz file. Give this .PDB file to other Quizzler
users. To install on a handheld, select the PDB file and click the Install button.
Quiz Preview
Click the "Preview" button to view your quiz questions all at once with Quizzler Maker. You
can even print the questions on paper this way for "old fashioned" quiz taking.
Importing Questions
If you have lots of questions you want to import from other sources, there is an easier way
to create a Quizzler quiz, rather than editing the questions one by one. Go ahead and create
a quiz with just a couple questions using Quizzler Maker, save it, and then open the plain
text file with a word processor. Just copy/paste your new questions right into the text file
and reformat in the Quizzler style (use the existing questions as your model). When you're
done, go back to Quizzler Maker and open the TXT file; a new PDB file will be automatically
created.
Export Quiz
To export a quiz, select the text file in the Quiz List and click the Export button. You will then
be given the choice of exporting in classic iPod format, simple HTML, or a rich interactive
HTML web page (optimized for small browsers such as the iPhone and iPod Touch).
Read the online help for certain limitations that apply when exporting.
Commercial Quizzes
When opening a commercial quiz, some features are disabled in order to protect the
intellectual property of the quiz author. You can't edit the questions, but you can enter
Preview mode if you have the key code for the commercial quiz.
More Help
Hover the mouse over buttons to get online help.
Quiz Authors
Please send us a copy of your quiz database file (ending in “.pdb”) so we can post them
on our web site for all to share. This will help us to build a library of quizzes that will benefit
everyone (original authors will get credit because of the “comment” field inside every quiz).
If you have created a commercial quality quiz and would like to sell your work, contact us
about comarketing opportunities. We might be able to sell your quiz for you for a small
commission.
Quiz contents are stored in an encrypted manner, so it would not be easy for anyone to
copy your proprietary quiz electronically.
Email your new quiz database file to [email protected] or visit our web site at
http://www.quizzlerpro.com.
Page 4-2
Quizzler Pro Server
With Quizzler Server, you can collect scores from a classroom over a WiFi network. After
each student completes a quiz, they just click "Send" and the quiz results appear on your
computer screen. Not just the score, but how each question was answered. In an instant,
you can see how the entire classroom performed, which questions were missed the most,
and what the incorrect answers were. Instead of going home and grading papers the old
fashioned way, you can focus on teaching the areas that need it the most -- and take the
night off!
Don't you wish you could find out what your classroom knows, or how they feel about a
particular topic, in an instant? Don't you wish you could "poll the audience" like they do on
some game shows? With Quizzler Server, you can! From your computer, just type in a
question with up to 5 possible answers, and publish your poll. Each student can view the
question on their handheld or computer, and send you their answer over your WiFi network.
You see the results on your computer screen as they come in. Students give their
feedback instantly without announcing it to all the other classmates, so you get accurate and
honest information.
Quick Start - Wireless Polls
As the first step in getting Quizzler Pro Server up and running, launch the software on your
computer and select the “Quick Poll” tab. Check the “Broadcast Poll” button to activate this
feature; you will then see the “server IP address” displayed on the right. This number
needs to be entered on each student handheld or computer which talks to the Server
software.
All versions of Quizzler 5 have the ability to talk to Quizzler Pro Server, even unregistered
copies, so when setitng up Quizzler Pro Server you only need to purchase one license to
communicate with many students.
To configure Quizzler 5 to talk to Quizzler Pro Server, select the “Wireless Poll” menu
option. On this screen, enter the server IP address which you just obtained. Then click the
“Get Question” button to retreive the next poll question sent by Quizzler Pro Server.
Score Collections
Click the Score Collections tab to activate this powerful feature. Before checking the
“Receive new scores” checkbox, create a new score collection to place new scores (once
you have created a score collection, you can select the existing collection to add to it).
NOTE: Only scores from the same quiz can be stored within a score collection. Each time
you receive new scores from a new quiz, create a score collection for that quiz.
To send scores from a student device to the score collection, click the “My Scores” button
from Quizzler 5. Select a score from the list, then click the Send button. In the next screen,
select the “sending via WiFi” option, and make sure the server IP address is entered
correctly there. Finally, click the Send Now button to transmit the score to Quizzler Pro
Server.
Once you have a score collection with some scores in it, click the Analyze button to dig
down and analyze the contents.
Page 5-1
NOTE: Before clicking the Analyze button, make sure the matching quiz file is located in
your My Quizzes subfolder. That way the quiz scores can be correlated to the questions.
Page 5-2
Appendix A - Quizzler File Format
Quizzler version 5 introduces new quiz formatting features not described here
yet. For the latest documentation and examples, see our web site at
www.QuizzlerPro.com. Much of the information in this Appendix is not needed if
you use Quizzler Maker, but is provided here for reference.
All Quizzler quiz files begin as plain text files using this format. Quizzler for Palm allows you
to import these text files from either the Memo Pad or as Doc files, and creates quiz
database files in a proprietary format. Quizzler Maker is an editor that lets you create these
text files easily, and you can also import a text file if it is correctly formatted.
The first two lines of every quiz must begin with the #quizzler tag and the #name tag. You
follow these two lines with some number of question/answer lines and other optional
special tags that are described below. (The first answer provided is the correct
answer, except when using the long format) Using these tags you can create quizzes
that operate in a wide variety of ways for many different purposes.
Beginning with Quizzler 2.1, you can insert blank lines in your quiz and they will be ignored.
Here is a very simple quiz text file that does not use any optional tags:
#quizzler demo
#name demo
This is a demo. How do you like it?
very much;it’s OK;not at all
What is your favorite color?
blue;red;green;orange
Required Tags
#quizzler
Every quiz must begin with this tag on the first line. This is a marker that identifies this quiz as
a Quizzler quiz. You can actually put anything you want after the tag, and doing so makes it
easier to identify in a list of memos.
#name x
Every quiz must have this tag on the second line. “x” is the name of the quiz as seen by the
PalmOS system after importing the text file, and is limited to 32 characters. For PocketPC
systems, this tag is ignored (but must still be present).
Quizzler Long File Format
There is an alternative way to create your quizzes which works better for larger quizzes.
Rather than putting all the answers on one line, you can put each answer on its own line. A
blank line at the end marks the end of the answers. The correct answer is marked by a
line starting with an asterisk (“*”). In order to use this new file format, you need to use
the “#longformat” tag at the top of your quiz. For example:
#quizzler
Page A-1
#name Fruit Colors
#longformat
What color is an apple?
Purple
*Red
Blue
What color is a lemon?
Green
Black
*Yellow
Now that the correct answer is not always listed at the beginning, you also have the option
of specifying that the answers not be displayed in random order. The tag “ #norandom ”
tells Quizzler to not randomize the order of the answers when the quiz is taken.
Note for Quizzler before version 4 only: Even though each answer is displayed on its own
line, you still need to make sure each answer does not contain the delimiter character (used
when displaying the answers on the same line), since this is still used internally. Remember
that the default delimiter character is the semicolon (“;”), and if your answers contain this
character, you can specify some other character with the “#delimiter” tag.
Optional Tags
#author x
“x” is a string that will be displayed on screen with the other options when a quiz is selected.
Usually this will contain the author’s name and/or contact information. The string is limited to
63 characters.
#moreinfo
Use this tag to include more info about your quiz. In Quizzler 2.0, this extra info is available
by tapping the “More” button on the Quiz Options screen. You might use this to include an
explanation of your quiz, or a scoring table (like “5-10 correct = pretty smart”). The
information you provide is limited to 255 characters.
#chapter x
Use this tag in the middle of your questions to insert chapter markers. If you are going to
insert chapter markers, you should insert one right before the first question. A quiz with
chapter markers will allow the user to take portions of your quiz (one chapter at a time), or
the entire quiz. “x” is the name of the chapter and is limited to 23 characters.
#norandom
Use this tag to stop Quizzler from displaying answers in random order. Only makes sense
when used with then new “Long” Quizzler file format. (This tag now works as expected in
Quizzler 4 or later)
#longformat
Used to swtich to different quiz format that is ideal for larger quizzes with longer answers. In
fact, we recommend this format all the time starting with Quizzler 4. See Quizzler Long File
Format for details.
Page A-2
#newline
Sometimes you want to insert carriage returns (line feeds) into your questions or answers to
get them to look better on the screen. If you use this tag near the beginning of the quiz, then
you can insert a tilda (~) and when the question or answer is displayed on screen, a carriage
return will occur in place of the tilda. For example, "what is this~formula" will appear on two
lines .
#delimiter x
The normal delimiter that separates answers is a semicolon. If you want to include
semicolons within an answer, you need to choose a different character for your delimiter. “x”
must be a single character. (There is no need for this tag when using the long file format)
#oneguess
Only one guess is allowed for each question, so if the guess is wrong, it won’t be revealed
which answer is correct. This only applies to multiple choice style quizzes.
#scoreatend
Use this tag to keep a user’s score hidden until the quiz is over. Only one guess is allowed
for each question (just like the #oneguess tag), and there will be no indication if each guess
is right or wrong. This only applies to multiple choice style quizzes.
#nonavigate
Use this tag to disable all navigational functions while taking the quiz. This forces the user to
answer each question in turn. This could also be useful as a “demo mode” setup in which a
Palm is passed around a group and you want to keep things simple. This tag will disable
the Next and Previous buttons, and the Goto menu item.
#timer x
This tag imposes a time limit for students taking the quiz. When the time limit expires, the
quiz will end automatically. “x” is the number of seconds allowed for the quiz.
#useallanswers
This is a shortcut for creating a multiple choice quiz without coming up with all the possible
(wrong) answers. You simply include one possible (correct) answer for each question, and
while taking the quiz in multiple choice mode, the user will see 5 possible answers which
have been randomly selected from all the other questions. For example, you could create a
vocabulary quiz and provide only the correct answer for each question, but still take the quiz
in multiple choice mode.
#
Any tag that begins with “#” but doesn’t match a valid tag will be ignored. You can use the
symbol “#” followed by a space to insert comments into your quiz text file.
##points
This tag is actually inserted after a possible answer, just before the semicolon or end of line.
“x” is the number of points that should be awarded for that answer. When using “special
points” in this manner, only one guess per question is permitted (just like the #oneguess
tag).
For example, your question/answer might look like this:
Page A-3
How many times per day do you comb your hair?
zero##0
one to three##5
*more than three##10
If the second answer is selected, then 5 points are awarded. You can use this tag to set up
a multiple choice quiz with more than one “correct” answer.
Tags Supported by Quizzler Pro or Quizzler Maker Only
(Quizzler Pro & Quizzler Maker lets you create new quizzes with the following features.
Once created, the free Quizzler can be used to view the quizzes and use the special
features.)
##PICTURE:NUMBER
This tag is placed at the end of a question, and links that question to a picture that is stored in
a separate database file. You give the name of the database file, and the record number.
For example, if there was a picture file named "fruits", and an apple was the 3rd image in
that file, you would phrase the question like this:
What type of fruit is this?##fruits:2
an apple;a peach;a plum
(a "2" is used to indicate the 3rd picture, since counting begins with "0")
This is a new tag introduced with version 2.5. Currently, only Quizzler Pro can CREATE a
quiz with pictures. Quizzler Maker will be updated in the near future. The free Quizzler can
VIEW quizzes with pictures.
New with version 3.6, you can insert a JPEG image filename like this:
What type of fruit is this?##fruits.jpg
an apple;a peach;a plum
Using the JPEG file format this way is probably the easiest way to make use of pictures.
However, due to the way the PalmOS works, JPEG images (in native format, not within a
.PDB file) may only be stored on a memory card. See the section “Working with Pictures”
below.
#protect nnnn
nnnn is a number from 1000 to 32000. This is a code that must be entered before the quiz
can be taken. If you also include the #limituse tag in a quiz, it must come AFTER the protect
tag. In that case, you can take the quiz without entering a key code until the specified
number of uses is used up, after that the key code must be entered. After entering the key
code, the quiz is permanently unlocked for unlimited use (even if beamed to someone
else).
#exam
This simple tag enables several features that are useful for educators when conducting a real
"test", rather than just a study quiz. It is designed to simulate an actual exam environment
and prohibit cheating. This tag does all of the following:
--No scoring feedback is given until the end after the score is "locked in" . After the last
question the student will be warned that quitting the exam will lock in the score, and then the
Page A-4
aggregate score will be displayed.
--Students can go back and change answers any time they wish; the exam is not "graded"
until the end
--ALL hardware buttons are disabled, which prohibits a student from looking in another
application for help (Palm only); obviously, there is no way to pause a quiz and resume it
as you can normally.
--The mode is forced to "Auto", "Repeat wrong answers" is disabled, and "Speed Game"
is disabled. There is no way to have the actual correct answer displayed.
Note that this is similar in some ways to the "Exam Mode" option that a user can choose
before taking a quiz, but a quiz that is built with "#exam" can never function in any other way.
This is a very powerful tool combined with "#limituse" and/or "#timer".
? (explanations)
Starting with Quizzler version 4, you can add explanations with every question. The user,
when not in Exam mode, can click a button to get a detailed explanation of the correct
answer. This is inserted using the long file format, preceeded by a question mark, like this:
What is the closest planet to earth?
Mercury
*Venus
Mars
?Venus is closer, but covered with dense clouds
#scorecode x y
This tag provides a means of certifying the score. You can request that a user provide you
with the “Score Code” to verify what score they achieved when taking the quiz. The Score
Code can be obtained by selecting the appropriate menu item in the Quiz Options section
of Quizzler.
When using this tag, set “x” to a multiplier value that will be multiplied by the actual score,
and set “y” to an offset that will be added to the result. For example, if the actual score was
10 and you use this tag: “#scorecode 5 -20”, then the Score Code generated for this score
would be 10 X 5 -20, or 30.
#limituse x
This allows you to create a quiz that can only be taken a limited number of times before it is
disabled. This can be used as a form of copy protection so you can distribute a demo
version, or as a way to prevent a student from taking a quiz repeatedly to get a better
score. If you use this in conjunction with the “#nobackup” tag and beam your “fresh” quiz to a
student, there will be no easy way to reload a new quiz to get more uses.
#nobeam
Quiz authors creating a commercial quiz might want to disable beaming as a form of copy
protection. This tag will prevent the quiz from being beamed to another device.
#nobackup
This type of quiz will not be backed up on the desktop during a HotSync operation. This is
another form of copy protection that you might desire.
#noscore
Use this tag to completely hide the score so that there is no indication at all of incorrect or
Page A-5
correct answers. You could use this tag along with the “#scorecode” tag for a certification
type quiz, or as a means to provide a demo version of a commercial quiz.
Questions and Answers
You can include up to 1000 questions in a quizzler file. Just insert each question on one line,
followed by up to 10 answers on the next line. The total length of the questions and
answers is limited to 8191 characters [Note: versions prior to 2.3 could only have 4
possible answers; versions prior to 2.7 had shorter limits on the question and answer sizes]
There is a new file format available that lets you ut each answer on its own line. This can be
more readable for large quizzes. See our web site for details on the “long file format”.
The first answer listed on each line is the correct answer. The order will be scrambled when
viewed with Quizzler.
We recommend 3 or 4 possible answers in every quiz so that multiple choice becomes an
option. Also, try to keep most answers less than 32 characters so they can be viewed
more easily on the handheld screen.
Examples
Here is an example of a question with 3 possible answers, in the original short file format:
#quizzler
#name Planets
What planet is closest to the Sun?
mercury;venus;mars
Here is a quiz file that includes two chapters in long format, and some questions have more
than one correct answer (worth 1 point):
#quizzler my demo
#name my demo
#author By John Covele
#longformat
#chapter The Planets
What planet is closest to the Sun?
*mercury
venus
mars
Which planet gets much hotter than the earth?
*mercury
venus##1
pluto
#chapter Science
Page A-6
What is boiling point of water?
*212 degress
depends on altitude##1
200 degrees
150 degrees
Which weighs more: a ton of lead or a ton of feathers?
feathers
*they are the same
lead
Working With Pictures
Quizzler version 2.5 and later adds support for quizzes which contain pictures. If the
“picture” button appears when viewing a question, there is a picture that will be displayed
when you click the button. You tap anywhere on the picture to hide the picture and return to
the question.
show picture
tap anywhere to hide picture
Only devices with PalmOS 3.5 or later can display pictures. A quiz that contains pictures will
consist of two or more files: the quiz database file, plus one or more picture database files.
The quiz database file is linked to the picture database file(s), but you can still use a quiz
database file without the pictures.
You must own a copy of Quizzler Pro to create a quiz that contains pictures. Once created,
any version of Quizzler (free or Pro) can be used to take the quiz.
How to add pictures to your Quizzler quiz
When writing/creating the actual quiz, a special tag is required at the end of the question for
which you'd like to add a picture.
For example, here is a sample quiz question with a picture tag added:
According to the map, which direction is Metro?##QuizPictures:3000
north
Page A-7
*south
east
west
You'll notice on our example that directly after the question, a tag called “##QuizPictures:4”
was added. By adding this tag, you are telling your quiz to look for the picture database
named "QuizPictures" and display picture number 3000.
Now we need to create the other picture database file...
NEW: linking to JPEG images
New with version 3.6, you can link to a JPEG image in native file format (i.e. not contained
within a .PDB file). As long as the target device has a memory card to store the image, this
is by far the easiest method to include pictures and you can read no further past this
section!
Here is an example of linking to a JPEG image file (notice there is no number after the
filename; files may only contain one image):
What type of fruit is this?##fruits.jpg
an apple
a peach
*a plum
Due to the way the PalmOS works, JPEG images (in native format, not within a .PDB file)
may only be stored on a memory card, so that is where Quizzler will look to find the picture.
Specifically, you need to place JPEG images inside this directory on the external storage
card: /DCIM. If you use the Palm Install tool to place the image file on the card, that is where
it will be placed automatically. Perhaps a future version of Quizzler will support JPEG files in
main memory; check our web site for the latest info.
The JPEG file must be stored in native format (ending with .JPG or .JPEG) and fit within the
Palm screen. Larger files can be loaded but will be clipped to fit the screen.
Creating the Picture Resource Database
There are two general techniques you can use to create the picture database file:
option 1 - Create a resource database. This method is more simple and supports
more types of pictures. You need Quizzler version 3.23 or later. Instructions are below.
option 2 - Create a non-resource database . This is the original method required when
pictures were first introduced with Quizzler version 2.5. This is slightly more complicated,
requires third party software, and pictures are more limited. Instructions are given on this
other page for this technique .
There are a variety of third party tools that will convert pictures from common desktop
formats (like GIF, BMP, or JPEG) into a Palm bitmap format that can be read by Quizzler.
You can install these tools on your desktop computer, or even do the conversion online
which works with any platform. We will mention some of these third party tools here and tell
you how to use them.
Page A-8
When you create a resource database, you will add pictures to the file and give each picture
a number, or "ID". This is the number you use to refer to a particular image, like the "3000" in
the example above. You must begin numbering your pictures with resource ID's of
1000 and higher.
Quizzler will display your picture in a window that is 160 x 160 pixels, so your
images should be sized appropiately. Some third party tools will do the scaling for you if
your image is too large. Your images can be in full color or black and white, but keep in mind
that not all devices can display color and color images take up more space.
Third Party Image Creation Tools
There is a third party utility called "OpenLogoHack" that allows you to display images on
your Palm device at certain times. Conveniently, the same tools provided to create Open
Logo Hack image databases will work with Quizzler, too. Note: you don't need to install
OpenlogoHack, you will just use one of the tools for it.
Online image converter - This tool lets you upload images to a web site, and the image
database is created and downloaded to your desktop. Pretty simple! Here are instructions
for using this online tool:
1) Go to this web page: olh.sourceforge.net/convert/index.html
2) Enter the number of images you want in your image database, then press the "Start"
button.
3) For "Output", choose "Open Logo Hack Database"
4) Select the appropriate "Screensize", and enter anything you want for "DB Comment".
5) For each image, or "Slot", you need to select a file and enter some information. The
"Display Name" field is not used by Quizzler, so just make something up.
6) Press the "Convert Images" button, and a file called "logo.pdb" containing your images
will be downloaded to your computer. All the pictures you convert using this tool will begin
numbering at 3000. For example, the third picture will be number 3002.
7) Follow instructions below to set the picture database name to something more
appropriate.
Setting The Picture Database Name
You will need to set the picture database name to something unique for your own use.
Keep in mind that the filename that you see on your desktop is not necessarily
the same as the image database name as it appears on your Palm device .The
Palm name is stored internally. For example, when you use the OpenLogoHack tool
described above, the filename is called "logo.pdb" but when you install this on a Palm
device, the name is "OlHaLogos".
There is another third party tool called "Filez " that will allow you to examine the details of
any file, and change its name. You can download this tool from PalmGear.com or
Handango.com and run it on your Palm device. (There are many other similar tools
available which run on either your desktop or handheld.) Make sure the real Palm name
matched the name that you have in your quiz file, or Quizzler won't be able to display the
picture.
Page A-9
Appendix B - Version History
New in version 5.0:
Formatted text
Embedded pictures in questions and answers
Wireless polls
Bluetooth, WiFi support
Export to iPod
New in version 4.0:
Add explanations to each answer
Norandom works much better now
New internal file format
Compatible with Quizzler Maker 4 and Quizzler 4 for desktops
Quiz List is sorted, and you may enter a letter to scroll
New in version 3.6:
You may link to native JPEG pictures stored on a memory card
New in version 3.5:
Now you can store quizzes on a memory card
Find feature for Pro users
Tap on Score button for additional details during a quiz
New in version 3.4:
Export score files for analysis in Gradebook
New in version 3.0:
#exam tag
Exam mode user option
#newline tag
Put quizzes into categories
Save recent scores
Beam scores to others
New demo mode supported for commercial quizzes
New in version 2.7:
Max length of question/answers raised to 8K!
Fixed bug related to protected quizzes
Fixed bug related to scoring when using chapters
New in version 2.6:
#timer no longer requires Pro version
#useallanswers tag added
Page B-1
#protect tag added
New Preferences: lock buttons, and warn before finishing quiz
New in version 2.5:
Resume last quiz where you left off
Add pictures to quizzes
Questions may only be answered once for credit
Score indicates whether you left multiple choice mode (with asterisk)
Menu changes, modal About screen
Upgrade to Pro version by entering Key code in Register screen
New in version 2.3:
May now have up to 10 multiple choice answers
Cosmetic changes in menus, etc.
New in version 2.2:
Long questions/answers scroll
LargeBoldFont used instead of LargeFont
Fixed crashing bug if you tried to run without quizzes installed on some systems
New in version 2.1:
User interface enhancements
New in version 2.0:
New file format with lots of optional quiz features
Choose display font
Choose sound to play for correct/incorrect answers
Import from Doc files (Pro)
“Auto” question mode
PalmOS 3.0 required
“Previous” button added
New in version 1.2:
Added “categories” popup in Import
Fixed bug where private & recently deleted records don't show up in Import
Fixed misc bugs during Import
Put max questions limit back to 500
Longer answers possible (up to 128 chars)
Up/down buttons work in quiz list, memo list
Down button goes to "next question"
Percentage next to last score
Added "replace" option when importing quiz with same name
New in version 1.1:
You may append memos to the end of existing quizzes to surpass 4000 char limit.
Page B-2
More feedback after right and wrong answers in multiple choice format.
Fixed bug where some memos not listed during Import.
Memos don’t need to have a comment line to be imported.
Give warning if quiz only supports flash card and multiple choice is selected.
Option to repeat wrong answers
Page B-3