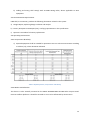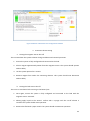
1
This page has been left blank intentionally 1. EXECUTIVE SUMMARY This report encompasses the key works undertaken whilst completing an electrical engineering internship with Carnegie Wave Energy Ltd (CWE). Before commencing, program specific and personal objectives were developed to address the needs of the company, provide the backbone of the major tasks to be completed, and identify opportunities for professional development. The two tasks detailed in this report are the deployment of the Acoustic Wave and Current (AWAC) meter, and the engineering and testing of Buoyant Actuator (BA)/Pods subsea power systems. Both tasks revolved around providing subsea power solutions to the data collection and analysis components of the Perth Wave Energy Project (PWEP) to assist in the verification of model accuracy against actual system performance. Deploying the AWAC meter will enable the system performance to be analyzed against real-time wave and current characteristics. To power the device, a rechargeable subsea battery system was engineered. The instrument and system performance were then tested, deployment and recovery procedures were developed, and the unit was deployed. Upon retrieval, the data was processed and maintenance procedures were conducted in preparation for future use. Completing this task provided CWE with valuable wave and current characteristics data, an engineered subsea rechargeable battery system to power the AWAC, and procedures and protocols to provide guidance for future deployments. A BA is a submerged semi-spherical shell which is moved up and down by ocean waves, driving a pump to pressurise seawater. The water is then sent to shore via a hydraulic management unit known as a Pod. In the PWEP, both the BA and Pods are connected to various sensors and monitoring equipment to gain greater understanding of system performance. This task required the design and testing of a suitable subsea power system to power the measuring devices. The engineering strategy was to identify the system requirements, obtain the relevant components, implement and test the system, and develop a factory acceptance test (FAT) document and instructors manual. The completed works have resulted in the development of a system prototype which will provide the foundation from which the remainder of the testing, configuration, and maintenance procedures will be conducted. Major challenges associated with achieving the tasks above included operating within the subsea environment, the unique nature of the wave energy industry, and long lead times of required equipment and materials. A combination of strategies were employed to overcome these challenges through utilising resourcing and research, innovation, adhering to stringent documentation process, and utilising technologies with a proven performance. The above tasks provided significant exposure to the engineering industry, facilitating the accomplishment of the project objectives. This internship provided the opportunity to contribute in a meaningful way to CWE’s PWEP objectives whilst simultaneously providing the opportunity to develop professional skillsets and employee attributes. i ACKNOWLEDGEMENTS Many people have contributed to the outcome of this program. I would like to thank my wife and family, and my colleagues at Carnegie Wave Energy Ltd for their ongoing support and assistance. Their backing has contributed greatly to my experience throughout the internship and in composing this report. I would also like to make special mention of the following people who were heavily involved with the program. Greg Crebbin, Academic Supervisor and Engineering Academic Chair at Murdoch University David Harrowfield, Industry Supervisor and Mechanical Engineer at CWE Thomas Theron, Electrical Engineer at CWE ii DECLARATION Except where otherwise indicated, this work in this report is my own and has not been submitted for assessment in another course. Signed: Date: iii ACADEMIC AND INDUSTRY SUPERVISOR ENDORSEMENT This report is an accurate reflection of the work undertaken. We are satisfied with the progress of this internship project. Signed: Dr Greg Crebbin Academic Supervisor Signed: David Harrowfield Industry Supervisor iv This page has been left blank intentionally v TABLE OF CONTENTS 1. Executive Summary ....................................................................................................................... i Acknowledgements .............................................................................................................................. ii Declaration ............................................................................................................................................ iii Academic and Industry Supervisor Endorsement ........................................................................... iv Table of Contents ................................................................................................................................. vi Abbreviations and Definitions ............................................................................................................. x 2. Introduction ................................................................................................................................... 1 3. Background ................................................................................................................................... 1 4. 3.1. The Company......................................................................................................................... 1 3.2. The Perth Wave Energy Project (PWEP) ............................................................................. 2 3.3. Program Overview ................................................................................................................ 4 3.4. Internship Objectives ............................................................................................................ 4 Acoustic Wave and Current Meter Deployment ......................................................................... 6 4.1. Introduction ........................................................................................................................... 6 4.2. AWAC meter: Operating Principles ..................................................................................... 6 4.3. Design Specification ............................................................................................................. 8 1. Scope ....................................................................................................................................... 8 2. Risk Management ................................................................................................................... 8 2.1 General ................................................................................................................................ 8 2.2 Workplace Safety ................................................................................................................ 9 3. Functional Requirements ...................................................................................................... 10 3.1 Power Requirements ........................................................................................................ 10 3.2 Batteries ............................................................................................................................ 10 3.3 Mechanical ........................................................................................................................ 10 3.4 Connectors ........................................................................................................................ 11 3.5 Charging ............................................................................................................................ 11 3.6 Deployment....................................................................................................................... 11 4. Engineering Requirements .................................................................................................... 11 4.1 Design Life ............................................................................................................................... 11 vi 4.2 Design Codes and Standards ............................................................................................. 11 4.3 Documentation Requirements.......................................................................................... 12 4.4 Operating Environment .................................................................................................... 12 4.4. Designing the System ......................................................................................................... 13 1. Battery Selection and Design ................................................................................................ 13 2. Switching Device ................................................................................................................... 14 3. Cables and Connectors.......................................................................................................... 16 5. 6. 4.5. RFQs, Cost Evaluations, & Procurement ......................................................................... 17 4.6. Test Plan .............................................................................................................................. 17 4.7. Deployment and Data Acquisition ..................................................................................... 25 4.8. The Next Steps… ................................................................................................................. 27 4.9. Summary .............................................................................................................................. 27 Bouyant Actuator & Pod Subsea Power System ..................................................................... 28 5.1. Introduction ......................................................................................................................... 28 5.2. Approach.............................................................................................................................. 29 5.3. Design Specification ........................................................................................................... 29 1. Introduction .......................................................................................................................... 29 2. Scope ..................................................................................................................................... 29 3. Functional Requirements ...................................................................................................... 29 5.4. Design Description ............................................................................................................. 32 1. Batteries ................................................................................................................................ 32 2. Battery Management System ............................................................................................... 33 3. DC-DC Converter ................................................................................................................... 35 4. Protection Devices ................................................................................................................ 35 5. Custom Designed Interface Board ........................................................................................ 36 6. Charging Strategy .................................................................................................................. 37 5.5. Battery Box Schematic ....................................................................................................... 38 5.6. Factory Acceptance Test .................................................................................................... 39 1. Purpose ................................................................................................................................. 39 2. Safe Operation Guidelines .................................................................................................... 39 3. Connecting the system.......................................................................................................... 40 4. System Testing ...................................................................................................................... 41 5.7. The Next Steps… ................................................................................................................. 43 5.8. Summary .............................................................................................................................. 43 Program Synopsis ...................................................................................................................... 44 6.1 Major Challenges ................................................................................................................ 44 6.2 Project Objectives Assessment......................................................................................... 46 1. Program Specific Objectives ................................................................................................. 46 2. Personal Objectives .............................................................................................................. 47 6.3 Development Opportunities .................................................................................................... 48 7 CONCLUSION .................................................................................................................................. 50 8 References ................................................................................................................................... 51 vii Table of Figures Figure 1 CETO Technology Electricity Generation Concept .................................................................... 1 Figure 2 Ariel photograph of PWEP location .......................................................................................... 2 Figure 3 Nortek AWAC Meter ................................................................................................................. 7 Figure 4 AWAC Transducer Beams.......................................................................................................... 7 Figure 5 Lithium-ion cells used ............................................................................................................. 13 Figure 6 Four Batteries were configured for each canister .................................................................. 14 Figure 7 Battery Canister ...................................................................................................................... 14 Figure 8 Activating magnet model shot ................................................................................................ 15 Figure 9 Entire battery system with cable ............................................................................................ 16 Figure 10 Ocean Science 'Barnacle' sea platform ................................................................................. 17 Figure 11 System on deck ready prior to installation ........................................................................... 25 Figure 12 Lowering the system to the seabed ...................................................................................... 26 Figure 13 Storm software – DPP site processed wave data ................................................................. 26 Figure 14 Storm software – DPP site processed current data .............................................................. 27 Figure 15 PWEP General Arrangement ................................................................................................. 28 Figure 16 Thunder Sky LiFePO4 Batteries ............................................................................................. 32 Figure 17 Calibrating the leak sensor.................................................................................................... 35 Figure 18 BA/Pod Battery box schematic ............................................................................................. 38 Figure 19 Connecting the Batteries and Cell boards............................................................................. 40 Figure 20 Elithion ‘Lithiumate Lite’ Configuration Software ................................................................ 42 Table of Tables Table 1 Program Objectives .................................................................................................................... 5 Table 2 AWAC Power Requirements..................................................................................................... 10 Table 3 Sepia Depression, Temperature and Salinity ........................................................................... 12 Table 4 Wave measurement characteristics ......................................................................................... 19 Table 5 Current measurement charcteristics ....................................................................................... 19 Table 6 Equipment Schedule ................................................................................................................ 21 Table 7 Deployment checklist ............................................................................................................... 24 Table 8 Thunder Sky Battery Characteristics ........................................................................................ 32 Table 9 Consequences of Li-Ion cell operation outside of SOA (15) ..................................................... 33 Table 10 Lithiumate Lite BMS Operating Characteristics (17) .............................................................. 34 Table 11 Evaluation summary of project specific objectives ................................................................ 47 Table 12 Evaluation summary of personal objectives .......................................................................... 48 Table 13 Summary of Developed Attributes ......................................................................................... 49 viii This page has been left blank intentionally ix ABBREVIATIONS AND DEFINITIONS AC Alternating Current AST Acoustic Surface Tracking AWAC Acoustic Wave And Current meter BA Buoyant Actuator BMS Battery Management System CETO Technology name for wave energy system developed by CWE CETO 3 Third Generation CETO Technology CETO 4 Fourth generation CETO Technology CWE Carnegie Wave Energy Ltd. DAS Data Acquisition System DC Direct Current DPP Desalination Pilot Plant EMI Electromagnetic Interference FAT Factory Acceptance Test HSE Health, Safety, and Environment IP68 Ingress Protection Rating, the degree of protection required against the intrusion, dust, accidental contact, and water in electrical enclosures LED Light Emitting Diode LiFePO4 Lithium Iron Phosphate Li-Ion Lithium Ion x May Verbal form used to indicate course of action permissible within the limits of the specification MLM Maximum Likelihood Measurement PCS Process Control System PLEM Pipeline End Manifold PWEP Perth Wave Energy Project RFQ Request For Quotation RS485 A physical layer standard for data communication over differential voltage twisted pair wiring RTU Remote Terminal Unit SCADA Supervisory Control and Data Acquisition SIT System Integration Test SAT Site Acceptance Test SELV Separated Extra Low Voltage Shall Indicates requirements strictly to be followed in order to conform to this specification or standard and from which no deviation is permitted. SOA Safe Operating Area SOC State Of Charge SOH State Of Health USB Universal Serial Bus xi 2. INTRODUCTION Murdoch University Bachelor of Engineering students are required to undertake a final year project in the form of an internship or thesis (1). This provides the student the opportunity to apply and build upon the knowledge attained throughout their studies, whilst gaining valuable exposure to their prospective industry. An internship with Carnegie Wave Energy (CWE) Ltd was completed to fulfil this requirement (2). This report encompasses the works conducted as part of the unit ENG450 Engineering Internship. The document will first place the project in context, by providing the reader background information about CWE, its operations, and the objectives of the program. The major tasks undertaken throughout the program will then be described in detail, paying particular attention to technical concepts, the challenges that each task presented, and the approach taken to overcome these. Finally, this report will reflect upon the overall experience and assesses the performance of achieving the set objectives. 3. BACKGROUND 3.1. The Company CWE is a publicly listed ASX company located in Perth, Western Australia. It is the inventor, owner and developer of CETO wave energy technology that converts ocean waves into electricity and desalinated water (3). Over the past decade CWE has tested and refined this technology with the aim of pioneering a global market and verifying wave energy as a genuine alternative to traditional and renewable energy resources (2). The CETO technology consists of totally submerged units comprised of a buoyant actuator (BA) tethered to a hydraulic pump mounted to the sea floor (4). Wave motion causes the BA to move up and down, causing the pressurisation of seawater that is transmitted onshore where it is utilized for electricity generation or water desalination. (2) Figure 1 CETO Technology Electricity Generation Concept 1 3.2. The Perth Wave Energy Project (PWEP) The PWEP, located at Garden Island, Western Australia, is the world’s first grid-connected wave energy project to utilise the CETO technology. The project involves the installation and operation of an array of three CETO units fixed to the ocean seabed. Two small diameter pipelines laid on the seafloor connect the units, and run back to a shore-based power generation facility located within a disused quarry. The electricity generated will be sold to the Australian Department of Defence to supply HMAS Stirling, Australia’s largest naval base (4) Figure 2 Ariel photograph of PWEP location The company aims to achieve the following objectives through delivering this project (3): • Demonstrate a larger capacity CETO unit • Confirm the feasibility of the than either the CETO 3 or CETO 4 units deployment, operation and recovery of the developed to date. Project's major elements including pipeline, • Produce utility-compliant electricity by CETO units and foundations. generating and exporting power to the grid • for a sustained period. the Project in order to demonstrate and verify • Verify the accuracy of Carnegie's Record the environmental interactions of that it has minimal impact. computational CETO system modelling against • Demonstrate Carnegie's ability to plan, the measured Project performance. resource and execute a commercial scale CETO project. 2 3.3. Program Overview This internship involved a number of responsibilities which contributed directly to the achievement of the objectives of the program and to satisfy the needs of company. The majority of these tasks revolved around providing subsea power solutions to the data collection and analysis components of the PWEP. These components are necessary for achieving the project objective of verifying computational model accuracy against actual performance (5). CWE has developed mathematical models which represent the system dynamics, intended for scoping future designs. In order to verify the model’s accuracy, data representing the true system behaviour must be available for comparison (5). The wave characteristic data will be obtained using of an Acoustic Wave and Current (AWAC) meter whilst the performance of the CETO units will be monitored and recorded through various sensors and measurement devices located inside the CETO Units and Pods (2). Therefore, the two key tasks detailed in this report are: 3.4. Engineering and deployment of the AWAC meter Engineering and testing of the BA/Pods Subsea Power System Internship Objectives This internship had a dual purpose: firstly, to contribute to the project outcomes as described above, and secondly, to develop professional skillsets and employee attributes. Therefore, in planning this project, a set of objectives were developed for each purpose as listed in Table 1 (2): Project Specific Objectives Personal Objectives Develop a technical specification, and then design, procure, test and deploy a rechargeable subsea battery Develop a greater understanding of company and industry procedures power system for the Nortek AWAC meter Improve time documentation AWAC meter skills and skills, research techniques Configure, monitor and evaluate the performance of the power system and management Gain greater requirements knowledge for subsea of the electrical 4 installations Assist in the design, part procurement, construction and testing of the rechargeable subsea battery systems required for the CETO Improve my understanding of power technologies, analysis, design techniques ‘Buoyant and implementation processes Actuators’ and ‘Pods’ Build networks and relationships with colleagues and within the renewable energy industry Table 1 Program Objectives (2) 5 4. ACOUSTIC WAVE AND CURRENT METER DEPLOYMENT 4.1. Introduction The Nortek Acoustic Wave and Current (AWAC) meter (see figure 3) measures wave orbital velocity, water pressure, and surface position, which enables the estimation of wave height and wave period. The Doppler shift along each beam is used to measure the orbital velocity, whilst a high resolution piezo-resistive element is used to measure the water pressure (6). Acoustic Surface Tracking (AST), during which the instrument acts as an inverted echo sounder, is used to measure the surface position. Combining orbital velocity measurements with AST in an array near the surface enables the estimation of wave direction. The Maximum Likelihood Method (MLM) is then used to generate an accurate directional wave spectrum (7). The deployment of the AWAC meter is set to play a crucial role in the data collection and analysis components of the PWEP (3). The collected wave and current data will enable comparison between the developed mathematical models which represent the system dynamics, and actual performance, thereby helping to fulfill one of the key objectives of the project (5). The key focus was to design and implement a subsea battery system to power the AWAC device throughout the designated deployment periods. This also involved the configuration of the instrument to achieve the desired measurements, testing of system performance, and the oversight of the deployment and recovery procedures. After each deployment, the collected data was to be retrieved and given to CWE modelling and data analysis personnel for processing (8). 4.2. AWAC meter: Operating Principles 1. Current Measurement The Nortek AWAC meter measures the velocity of water by employing a physical principle called the Doppler Effect (9). The Doppler Effect can be observed when a wave source moves with respect to an observer, or when the observer itself moves relative to the wave source. For example, when stationary, the sound waves of a train whistle will travel at uniform speed in every direction. However, if the train or an observer begins to move towards the other, the sound waves arrive with decreasing time intervals, and thus representing a frequency shift (10). 6 Acoustic Doppler instruments such as the AWAC meter transmit a brief pulse of sound at constant frequency, observe the echo and then determine the change in its pitch or frequency (6). The velocity of the water is then proportional to the difference in frequency between the transmitted and received pulses (10). The emitted sound pulse is reflected back to the transducer by small suspended particles floating passively in the water, such as zooplankton, sediment, or air bubbles. A key assumption of the Doppler approach is that these particles move with the same speed as the water they are floating in (9). The sound pulse is scattered in various directions when it strikes the particles. The majority of the Figure 3 Nortek AWAC Meter sound continues forward, however a small fraction is reflected back to the device. Only the velocity parallel to the beam is calculated as the velocity perpendicular to the beam has no effect on the Doppler shift. Therefore, the Doppler Shift is employed to determine the water velocity along the beam of the acoustic pulse (10). This is expressed in the following equation: Where: F (Doppler) is the change in received frequency, V is the current velocity known as the Doppler shift C is the speed of sound F (Source) is the frequency of transmitted sound The first term of the equation reveals that if the distance between the transducer and the scattering target increases (decreases), the frequency of the reflected pulse decreases (increases). The second term includes the speed of sound to ensure that the actual velocity is calculated (9). 7 Measurement Area, Blanking, Wave Measurement Area The sound generated by the AWAC transducers is concentrated into a narrow beam. The measured Doppler shift by each transducer is proportional to the particle velocity along its acoustic beam. Given that the relative orientation of the transducers is known, and by combining the measured transducer velocities, the three dimensional velocity can be determined (7). The velocity is assumed consistent at a given depth. Figure 4 shows the orientation of the transducer beams. Each beam is oriented at 25° off the vertical axis, and they are equally spaced at 120° azimuth angles (7). The AWAC attains the velocity at different depth cells by measuring the Doppler shift of the reflected signal at discrete times following the initial pulse. The region immediately in front of the transducer is called the blanking region. Velocity measurements are not made in this region to allow the device to recover from the transmit pulse. User defined depth cells extend after the blanking region, and the AWAC averages the return signal over a period of time corresponding to these cells (9). Figure 4 AWAC Transducer Beams Wave Measurement The AWAC collects raw wave data which must go through a processing step before it can be used to interpret the waves on the surface. The AWAC measures three independent quantities to attain these estimates: pressure, orbital velocities, and AST, which enable the calculation of traditional estimates for wave height, wave period, and direction (6). Directional Estimates The projections of the wave velocity cells create an equilateral triangle just below the surface. This “projected array” is designed to enable MLM processing to be used post data collection. In addition to the wave velocity cells, the AST measurement in the centre of the array is included to add a fourth 7 measurement point in the middle of the array. The AST is included in the MLM solution to improve the accuracy of the directional estimates. It is important to note that the directional estimates of short waves will be limited by the size of the projected array. The size of this array or the horizontal separation distance between cells depends upon the deployment depth. As the deployment depth increases, so does the cell separation. Increased cell separation distance for the array enables estimation of the direction of motion of longer minimum wavelengths. The rule of thumb is that for waves with a wavelength that is two times the separation distance or greater, the direction of motion can be estimated unambiguously (9). AST – Acoustic Surface Tracking The Acoustic Surface Tracking (AST) function of the AWAC operates like a typical acoustic range detector. Once again, the centre beam is used to transmit a very short pulse. The time taken for the sound wave to travel from the device to the surface and back enables the distance to the surface to be estimated. The strong impedance disparity between water and air results in a almost perfect reflection, and thus results in a strong return signal (6). 4.3. Design Specification A design specification was established to distinctly identify the requirements and guidelines for the design of the battery system. The specification document was reviewed and approved by CWE senior management to adhere to company protocol and ensure appropriate measures and safety concerns were addressed. Consolidating the requirements of this task into a document provided clarity and a constant point of reference throughout the design and implementation processes. The text of the document is as follows. 1. Scope The requirements stipulated here are particular to the battery system for the Nortek AWAC meter used in the PWEP. Situations other than those specified in this requirement may lead to nonconformance and must not be attempted without due consideration of the purpose of this equipment. CWE is responsible for procurement, installation and verification of the specified system. 2. Risk Management 2.1 General In general, CWE manages risk according to AS/NZS ISO 31000:2009. It is CWE’s objective to do so in a safe and efficient environment. 8 2.2 Workplace Safety a) CWE shall assess risks regarding workplace safety in accordance with current State and National Occupational Safety and Health Standards, removing and mitigating hazards that may be observed during the design, implementation and testing of the system. b) Care shall be taken in all areas of work and in particular: Lifting of heavy equipment. Protection against hazardous substances or situations by wearing protective clothing. Removal of hazardous gases like soldering fumes. Proper design of fixtures and fasteners on heavy equipment. Management of cabling/wiring that may lead to entanglement. No sharp edges and pinch points on enclosures. 2.3 Batteries a) All batteries shall be protected against over-charge and over-load conditions. b) All batteries shall be protected against over-temperature conditions. c) Battery terminals shall be protected from short circuiting in the case of battery dislodgement. 2.4 Corrosion a) All exposed components shall be corrosion resistant to survive the environment stated in Section 4.4 of this specification, for the project life span. b) Aluminium fixtures shall be electrically isolated from other metal surfaces to limit corrosive effects. 2.5 Electrical safety a) The system shall comply with safety regulations for secondary circuits (battery powered). See section 4.2 of this specification for applicable Standards. b) The system is not required to comply with regulations for EMC compliance. 9 c) Electro-Magnetic Interference (EMI) may be considered as part of due diligence during the design process, but no tests or requirements are enforced. 2.6 Labelling a) Cables shall be labelled according to wiring diagrams. b) Connectors or penetrators shall be labelled according to wiring diagrams. c) Labels shall be of a permanent nature, appropriate for the environment and life span of the project. 3. Functional Requirements 3.1 Power Requirements The designed battery must meet the following requirements of the AWAC meter Nortek AWAC Power Requirements DC Input 9-16V Absolute maximum DC input voltage 18.6V Peak current 3A Typical Power Consumption 1W Table 2 AWAC Power Requirements Note: It is clearly stipulated in the Nortek product manuals that any power supply should be designed to never drop below 9V or rise above the max voltage of 18V. 3.2 Batteries a) The battery configuration for this application is driven by the AWAC specifications as stated in section 3.1 and CWE requirements for a period of supply of 45 days. b) The system shall contain a switching device which is easily accessible from the outside of any enclosure, to enable a diver to isolate the power supply during any installation or maintenance procedures. 3.3 Mechanical a) CWE proposes to use Ikelite enclosures, as they have been tested and found appropriate during CETO3. See Section 4.4 for specific environmental requirements. 10 b) The system and enclosure must be a suitable size and weight for one diver to carry during deployment and charging procedures. 3.4 Connectors a) The battery assembly shall use a suitable underwater-pluggable connector from the SEACON Sea-Mate range between the battery and the AWAC. b) If a separate charging connector is provided, this connector can be from the Micro Wet-con series with a dummy plug, since in-situ charging is not required. 3.5 Charging a) The batteries will be collected and will be bench charged off site. b) The proposed batteries contain a charging current of 4 A each and a minimum charging time of 13 hours. The charger must be capable of charging all batteries simultaneously in parallel. I.e. a system of 8 batteries will require a charger able to supply a 32 A charging current. c) The charger must be suitable for the chemistry of the battery being used. 3.6 Deployment A procedure must be provided that clearly illustrates the correct installation method to a diver. 4. Engineering Requirements 4.1 Design Life a) The system shall be designed to power the AWAC meter until such time that the umbilical power cable has been installed and powered. Current schedule estimates indicate this will occur no later than May 2014. However, this date may be subject to change and shall be considered in the design process accordingly. b) Components requiring periodic service may be used, providing the service cycle is longer than the proposed deployment period. The proposed period of a single charge is 45 days and thus there will be an opportunity to inspect the battery after each period. 4.2 Design Codes and Standards a) Submersible enclosures and connections shall be rated IP68 or better, with a permanent submersion depth of 25 m or better. 11 b) Cabling and wiring shall comply with AS 3000 Wiring Rules, where applicable to SELV equipment 4.3 Documentation Requirements CWE shall, as a minimum, produce the following documents related to the system: a) Design Report, explaining design evolution and analysis b) Factory Acceptance Test Report (FAT), verifying requirements in this specification c) Operator’s Procedure for battery replacement 4.4 Operating Environment 4.4.1 Temperature & Salinity a) Exposed equipment shall be suitable for permanent use in a sub-sea environment according to Table 3 (11), unless otherwise indicated. Table 3 Sepia Depression, Temperature and Salinity 4.3.2 Motion and Vibration The device is to be statically mounted on the AWAC OCEANSCIENCE 553 Barnacle compact trawlresistant seafloor platform. It should be secured so as not to be influenced by wave motion. 12 4.4. Designing the System The key considerations when designing the system include: Satisfies power requirements of the AWAC meter for a maximum Selecting system components for subsea cabling and relatively simple deployment and recovery procedures deployment period of 45 days. Enabling to reduce costs and complexity. connectors Minimising expenses by selecting components and proven performance to eliminate strategies that failures. equipment already Carnegie Wave using design incorporate owned by Energy 1. Battery Selection and Design The initial stage in the design process was to determine the chemistry of the batteries to be used, during which Lithium-ion was identified to be the most appropriate. This decision was based on the characteristics of Lithium-ion batteries bearing significant advantages when measured against traditional technologies (12). These include: High cell voltage: This allows a reduction in the number of cells required (13). Specific energy (Wh/kg): Lithium batteries generally contain a specific energy range between 100-500 Wh/kg compared to 35-55 Wh/kg of lead acid batteries, and 50-70 Wh/kg of Nickel Cadium batteries, enabling systems to be more lightweight (14). High energy density (Wh/L): Lithium batteries occupy less space than conventional systems. An Figure 5 Lithium-ion cells used important characteristic for subsea applications where canister space is limited (14). Loadability: Specific lithium batteries are manufactured with a high resistance for low rate long time applications (14). This is deal for the proposed 45 day deployment cycle length. 13 Discharge characteristics: They contain a very flat and stable voltage discharge curve which supports electronic devices with minimal tolerance to input voltage variation, such as the AWAC (15). Shelf Life: They can be stored for long periods of time with negligible self-discharge and minimal effect on their nominal capacity (15). Environmental compatibility: Decreased toxicity to biological systems when compared to lead or nickel batteries (16). This is particularly important to CWE who takes great pride in ensuring minimal Figure 6 Four Batteries were configured for each canister environmental impact on the surrounding marine environment. From here the selection focused on obtaining the most appropriate battery combination for the application based on cell characteristics, cost, availability, and size of configuration to fit inside the CWE owned canisters. The battery pack selected contained eighteen (6x3) 2600mAh cells wrapped in heavy duty heat shrink resulting in a combined voltage of 11.1V and energy storage of 173Wh. Each pack is consists of its own short circuit, over current, and over voltage protection. Configuring eight batteries in parallel resulted in a capacity of 1384Wh. This buffer will allow for sub-optimal performance of the AWAC meter or unexpected losses (8). Figure 7 Battery Canister 2. Switching Device To ensure the safe operation of the system, a magnetic switch was incorporated into the design to enable the power supply to be isolated during installation, maintenance or retrieval procedures. The switch selected for this application was the ‘normally open’ Hamlin HD Stainless Steel Magnetic Sensor. It was mounted into the bottom of the lid of the battery canister with a magnet locking pin configuration on the top to enable activation/deactivation of the switch for operation as shown by the model shot in figure 8. 14 When the magnet is locked into place above the switch, the circuit is closed and the battery supplies power to the AWAC meter. When it is locked in the other latch outside the activating distance, the circuit is open and the battery is isolated. Although the 500mA rated current of the switch is suitable for the current passing through when powering the AWAC, it presented a challenge when considering the charging strategy of the battery, which is designed Figure 8 Activating magnet model shot to draw between 10-20A. Thus, the solution required incorporating an additional pin into the circuit to be used as a charging pin, bypassing the magnetic switch and connecting to the battery via a schottky diode. In the resulting circuit, the current passes through the switch when supplying power to the AWAC, and through the diode when charging. The inclusion of the diode enables the required higher charging currents to flow into the batteries when charging without damaging the magnetic switch, and prevents current leakage whilst the system is operating. Running the charging current through a diode in a small enclosed space with no ventilation can result in the diode experiencing excessive heat gain and eventually component failure (17). A heat sink was selected to help dissipate the heat to acceptable levels to ensure the diode did not operate outside its nominal operating temperature range. There are numerous options when selecting a heat sink/diode combination. The following procedure was used to ensure the components selected contained the appropriate operating characteristics (17). i. Obtain the forward voltage of the selected diode: 0.39V ii. Determine the maximum working temperature: 155°C iii. Determine the maximum current the diode will be conducting: 32A iv. Ambient temperature that the diode will be operating in: 25°C From here the required heat sink rating can be determined from the following steps: v. Max Power Dissipation = Forward Voltage x Max Current = 0.39V x 32A = 12.5W vi. Allowable Temp Gain = Max Working Temp – Ambient Temp = 155-25 = 130°C vii. Degree per Watt rating ≤ Allowable Temp Gain / Max Power Dissipation 15 ≤ 130°C / 12.5W Therefore, the degree per watt rating shall be less than 10.4 °C/W A relatively inexpensive and readily available heat sink with a rating of 4 °C/W was selected for the task. 3. Cables and Connectors Electrical connectors constitute a very significant component of all subsea electrical systems. These allow connection between cables and equipment and can be divided into two groups (18): Wet mateable: Designed to be submerged in sea water with the ability to be connected/disconnected in submerged condition. Dry mateable: Designed to be submerged in sea water but must connected/disconnected in a dry environment. Subsea connectors are widely considered the most troublesome in subsea electrical systems and have been the subject of intense investigation (19). The connectors CWE had used in previous projects were recently found to have experienced severe corrosion leading to component failure. This has led to a complete overhaul of the connectors to be used on the PWEP. For this application, the brand of connector to be used was primarily selected based on their proven performance over a long period. The Seacon micro range was deemed the most suitable for the task and satisfied cost and availability objectives. The battery system is connected to the AWAC meter via a subsea cable and connectors. The cable was designed to adequately account for the maximum demand of the profiler. The cable length was limited to 1m to minimise potential losses. The cable is terminated via micro Seacon two and three pin connector plugs MCIL-2-M and MCIL-3 respectively. These connectors mate with their paired bulkhead connectors located on both the canister lid and the AWC meter. Figure 9 Entire battery system with cable 16 4.5. RFQs, Cost Evaluations, & Procurement All materials for this task were purchased in accordance with the CWE procurement procedure. The process begins with providing a supplier with a RFQ (Request for Quotation). Once a quotation has been supplied and agreed upon, a purchase order request is then submitted to CWE management for approval. This is subsequently passed on to the supplier and the order is made. Several suppliers were used to supply the equipment for this task. Multiple quotations were requested for all major items (connectors, cable etc.) which were then evaluated to identify the most cost effective and timely option to meet the needs of the project. Figure 10 Ocean Science 'Barnacle' sea platform 4.6. Test Plan Introduction This piece was developed to devise a plan to test the device prior to its use. The testing has the following aims: Gain familiarity with the hardware and software. Check operation and data acquisition. Observe corrosion and bio-fouling. Practice deployment and recovery. Determine any undocumented maintenance requirements. It is proposed to deploy and test the AWAC in 2 different locations sequentially. The first location will be the proposed outfall location for the Desalination Pilot Plant (DPP) that will be integrated into PWEP. The second location will be the subsea lease area for PWEP, where the CETO Units are intended to operate. In both test locations, the AWAC shall operate autonomously under battery power. All data acquired will be recorded onto internal memory. In normal operation for PWEP, the AWAC will be hard-wired to the Onshore Plant, permitting external power and communications. 17 Background Nortek AWAC Meter Wave Measurement Maximum depth: 35 m (1 MHz) Data types: Pressure, one velocity along each acoustic beam, AST Sampling rate (output): 2 Hz velocity, 4 Hz AST (1 MHz) No. of samples per burst: 512, 1024, or 2048 Range: -15 to +15 m Accuracy/resolution (Hs): < 1 % of measured value/1 cm Accuracy/resolution (Dir): 2º / 0.1º Period range: 0.5-100 s (1 MHz) Table 4 Wave measurement characteristics (6) Current Measurement Maximum range: 30 m (1 MHz) Depth cell size: 0.25-4 m No. of cells: Typical 20-40, max 128 Maximum output rate: 1 Hz Table 5 Current measurement characteristics (6) PWEP DPP Outfall The DPP will include a pipe which transports processed highly saline water back into the ocean to an outfall location. In order to consider potential impacts of this process and ensure efficient design, it is imperative to observe environmental conditions at the site. The wave and current characteristic data at the DPP outfall location will be obtained through the use of the AWAC meter. The end goal is to verify mixing characteristics in the area predicted by MP Rogers and GHD (20). 19 Deployment and Recovery Test Plan DPP Outfall Test i) Deployment & Recovery Location The proposed location is the position of the outfall diffuser recommended by GHD (10). This is alongside the proposed PWEP pipeline route at “Kilometre Post 2.3”, defined in the pipeline route drawing (21). This is approximately 700 m offshore from the DPP onshore site and at a water depth of 10 m. It should be noted that there is more sunlight at this depth than the 24 m of PWEP, which will promote more bio-fouling on the equipment deployed (18). The location is also not protected by a lease or fenced with cardinal markers, so the AWAC will also be more vulnerable to theft and anchor damage. Timing The deployment shall be complete by early December 2013 and extend for at least 2 weeks (ideally 4 weeks). The exact timing of deployment and recovery will be dictated by the availability of equipment and environmental conditions. Operations shall take place on a day and time when weather conditions are deemed suitable to safely undertake the required transportation and diving. Methodology Total AMS will be undertaking the initial installation and recovery procedure. The AWAC shall be pre-fitted into the seafloor (OceanScience ‘Barnacle’ see figure 10) platform and pre-connected to the battery mounted inside the platform. Once on site, the entire assembly shall be lowered into position via an on-board hoist. A diver will then retrieve the cable, inspect the placing of the assembly to ensure a relatively level and stable orientation, and fix the platform into position using three steel star pickets and ratchet straps. The AWAC shall be turned on and off, as appropriate, on the deployment vessel. Equipment Schedule Below is the equipment schedule for the system. As per the key design consideration, materials owned by CWE have been reused wherever possible to minimise expenses. These components are marked CWE Stock. 20 Item Supplier EDA 1 Imbros 17/10/13 OceanScience 553 Barnacle compact trawl-resistant seafloor platform 1 Imbros 17/10/13 Ikelite Glass Enclosure 2 CWE Stock - BatterySpace 11.1 V 15.3 Ah Li-Ion Battery 8 CWE Stock - Internal Canister Supports (cable ties and accessories) 2 CWE Stock - 4 Degree Celsius / Watt 1 CWE Stock - Hamlin HD Stainless Steel Magnetic Sensor (Normally Open) 1 Digi-Key 9/10/13 Diode DIODE Schottky diode 45 V 30 A to 220 FPAC 1 Digi-Key 17/10/13 Connector Subconn Bulkhead Connector (Battery Connection) 2 CWE Stock 1 Imbros AWAC meter Description Nortek acoustic wave and current meter Barnacle Battery Canister Battery Battery Support Heat Sink Magnetic Switch Connector Quantity Seacon Micro Connector Wet-Con Bulkhead Cable Battery bridging cable with 2 x Subconn MCIL5M connectors with locking sleeves 1 CWE Stock Supply Cable Imbros Supplied AWAC Custom Cable with 1 x MC-IL-2-M and 1 x MC-IL-3-M Seacon connectors with locking sleeves 1 Imbros Pigtail wires, adapters, screws etc. - CWE Stock Miscellaneous - 12/11/13 - 12/11/13 - Table 6 Equipment Schedule ii) Measurement Requirements Parameters At this location, the AWAC shall be configured to measure and record: Wave height Wave period Current velocity Bin (Depth Cells) Width for Current Measurements The maximum bin width requested by the end user is 1 m. As previously stated, the meter will be placed in water approximately 10 m deep and when attached to the ‘Barnacle’, will be sitting 21 approximately 0.5 m above the ocean floor. Allowing for a ‘blanking’ distance of 0.5 m and keeping the projected beams 1 m (10 % of the water depth) away from the surface to prevent side-lobe interference, leads to a measurement distance of 8 m. It is therefore proposed to use a bin width of 0.5 m to produce a total of 16 bins (7). Wave Mode Sampling Rate All parameters shall be measured continuously throughout the deployment. The recommended sampling frequency for depths less than 20 m is 2 Hz (7). iii) Data Analysis The data acquired shall be analysed to verify the following: The data recorded is the data that was configured to be measured and acquired, meaning all measurement requirements are satisfied. There are no gaps in the data recorded due to instrument malfunction. The data is sensible and consistent with other measurement devices in the vicinity (e.g. Triaxys Wave Boy) and historical data. PWEP Test iv) Deployment & Recovery Location The deployment location shall be in the PWEP subsea lease area at a sufficient distance (at least 50 m horizontally) from floating obstacles such as cardinal markers so as to avoid acoustic beam interference. There is no preferred location within the lease area and so this may be determined at the discretion of the deployment personnel. Timing Installation is tentatively scheduled to begin in January 2014 and extend for 4 weeks. To avoid damage, the deployment shall take place after the installation of foundation piles and before the installation of pipelines in February/March 2014. The exact timing is still to be determined. Methodology As per DPP Outfall Test. v) Equipment Schedule As per DPP Outfall Test. 22 Measurement Requirements Parameters In addition to the parameters listed for the DPP Outfall test, a request has been made to measure orbital water particle velocity down to the level of the Attachment, at the PWEP site. This application is for modelling installation forces on the Pump. Bin (Depth Cells) Width for Current Measurements The meter will be placed in water approximately 24 m deep. Using the same methodology as per the DPP location, this leads to a measurement distance of 20.6 m. It is therefore proposed to use a bin width of 0.5 m to produce a total of 41 bins (6). Sampling Rate All parameters shall be measured continuously throughout the deployment. The recommended frequency for depths greater than 20 m is 1 Hz (6). Data Analysis As per DPP Outfall Test. 23 Deployment Checklist Sequence 1.1 Process Document Review 1.2 Activity Person Responsible Review and approve AWAC Battery specification DH Review and approve test plan DH/JF 2.1 Inspection of Equipment Inspect all materials received SK/DH 3.1 Battery System Test battery system performance SK 3.2 Test electric components operation (diode, switch) SK 3.3 Inspect electrical connections and terminations SK Configure profiler to desired settings SK 4.2 Calibrate sensors and compass SK 4.3 Apply the functionality test SK Review and approve installation strategy AM/LM Review and approve retrieval strategy AM/LM 4.1 5.1 AWAC Configuration Deployment 5.2 6.1 Maintenance Perform maintenance checks between deployments SK 7.1 Data Analysis Extract and analyse data and performance SK/DH Date Signature Comments Table 7 Deployment checklist 24 Inspections and Maintenance The following requirements are common to both proposed deployments. Preventative Maintenance vi) Cleaning Clean the meter prior to all deployments. Use a mild detergent to clean the AWAC. Pay special attention to the acoustic transducers. Check the pressure sensor and remove any dirt from the two front holes (7). Replacing Desiccant Keep water out of the open pressure case. Both fresh and salt water can corrode the circuitry. At least once a year, replace the desiccant located inside the AWAC housing. Refer to page 77 of the product manual for more information (7). vii) Inspections and Testing Visual inspections and functional tests of the AWAC meter are to be performed upon the retrieval from all deployments before reuse in accordance with procedures outlined in the product manual (7). 4.7. Deployment and Data Acquisition After all testing procedures had been completed the meter was installed by TAMS Pty Ltd at the DPP outfall location on Thursday the 5th of December. The installation was carried out usingof an onboard hoist which lowered the device to the ocean floor, where it was then secured via three steel star pickets and ratchet straps. The delay from the anticipated installation date was largely due to the longer than expected supply lead times of the subsea connectors and cable, and to a lesser extent on weather conditions and availability of personnel. Figure 11 System on deck ready prior to installation 25 The unit remained at the DPP outfall location for a period of 13 days. It was retrieved on the 18th of December to enable the CWE personnel responsible for data processing and environmental impact assessments to receive the data before the Christmas shutdown period. Upon receipt of the unit, data retrieval procedures were conducted to extract the relevant information and assess the performance of Figure 12 Lowering the system to the seabed the system and the reliability of the data in the Storm post deployment software. Figure 13 Storm software – DPP site processed wave data There were two peculiarities found in the system. Firstly, the processed wave data appeared to cease two days before the unit was retrieved. After consultation with the manufacturers, it was found that the unit was operating at the edge of the post processing software capabilities, and the data was able to be retrieved. This incident has been documented, however the unit configuration for the DPP outfall location was unique due to the current data requirements and therefore this is not anticipated to affect future deployments. 26 Figure 14 Storm software – DPP site processed current data Secondly, upon undergoing testing and maintenance procedures it was found that the magnetic switch had stopped activating. It was concluded this had occurred during the retrieval procedure, most likely caused by an impact or jolt whilst being mobilized back to CWE’s yard. The switch has subsequently been replaced by the same model and will be closely monitored during future deployments to ensure this is not a regular occurrence. 4.8. The Next Steps… As this report is being written (January 2014) preparations are underway to re-deploy the unit at the PWEP lease area location in the coming weeks subject to construction schedules and weather conditions. The length of this deployment will be approximately 30 days. 4.9. Summary The AWAC meter is set to play a crucial role in achieving the PWEP objectives. Completing this task has resulted in an engineered subsea rechargeable battery system capable of powering the AWAC unit for up to 45 days. During the design process, expenses were minimised by incorporating components which were already owned by CWE from previous works. Deploying the AWAC at the DPP outfall location provided valuable information on the location’s wave and current characteristics. Finally, the procedures and protocols which have been developed will provide guidance for future deployments. 27 5. BOUYANT ACTUATOR & POD SUBSEA POWER SYSTEM 5.1. Introduction The Buoyant Actuators (BAs) are submerged semi-spherical shells constructed as a bottom section enclosing (unsealed) a steel lattice work and a top section enclosing sealed buoyancy tanks. Their movement, caused by the ocean waves drives a hydraulic pump used to pressurize the sea water and send to shore via a ‘Pod’. The Pods act as hydraulic management modules for the CETO units. A Pod will be situated next to each Unit, and will consist of pipework, hydraulic components, instruments, control and monitoring equipment, cabling and support frame, designed to manage pressurised fluid and electrical & control signals to and from each unit & the Pipeline End Manifold (PLEM) (22). BA Onshore Plant Pod To Onshore Plant PLEM Figure 15 PWEP General Arrangement As shown in figure 15, the PWEP will consist of three BAs and three Pods. As part of the data collection and modelling analysis of PWEP, both the BAs and Pods are connected to various additional sensors to gain greater understanding of system performance (3). A suitable regenerative power source is not available to drive these sensors, consequently CWE has opted for a battery driven system. There will be two battery systems for each BA and one for each pod, along with two systems on standby to align with the charging strategy. Therefore, eleven subsea battery systems are required to be engineered and tested for this task (8). 28 5.2. Approach The duration of this task would exceed the length of the internship and thus the focus was to implement and test a prototype which will be used to procure and test the remaining 10 systems. The initial undertaking was to identify the system requirements of the system and to determine how to most efficiently satisfy these. This was documented through a design description that identified each component to be implemented, described its workings, and how it would contribute to the overall system and objectives. Once the design had been finalized, the equipment and materials for one system was procured to undergo extensive testing. A Factory Acceptance Test (FAT) outlining the testing procedure for the manufactured batteries was developed, this would ensure safe and efficient operation for future use. 5.3. Design Specification 1. Introduction A design specification was established to distinctly identify the requirements and guidelines for the design of the battery system. This report was reviewed and approved by CWE senior management to adhere to company protocol and ensure appropriate measures and safety concerns were addressed. Consolidating the requirements of this task into a document provided clarity and a constant point of reference throughout design and implementation processes. The report is as follows. 2. Scope The requirements stipulated here are particular to the battery system for the BA / Pods Instrumentation and Telemetry. Situations other than specified in this requirement may lead to nonconformance and must not be attempted without due consideration of the purpose of this equipment. CWE is responsible for procurement, installation and verification of the specified system. 3. Functional Requirements 3.1 Batteries All batteries shall be protected against over-charge and over-load conditions. All batteries shall be protected against over-temperature conditions. An alarm shall be raised if over-charge, over-load or over-temperature conditions occur for a dwell time of 30 seconds or longer. Battery terminals shall be protected from short circuiting in the case of battery dislodgement. 29 3.2 Electrical safety The system shall comply with safety regulations for secondary circuits (battery powered). See section 4.2 for applicable Australian Standards. 3.3 Labelling Cables shall be labelled according to wiring diagrams. Connectors or penetrators shall be labelled according to wiring diagrams. All detachable instrumentation on the BA shall be labelled with CWE ownership and contact details. Labels shall be of a permanent nature, preferably engraved and colour-impregnated. 3.4 Power System LiFePO4 batteries shall be used as a primary power source to the system. The battery stack shall be designed to provide a voltage output of between 3 V and 50 V. The optimum voltage shall be determined by packaging, interconnects and charging design requirements. Series-connected batteries shall be managed by a suitable balancing method. The battery storage shall be sized for a typical unattended run time of 15 or more days. The battery compartment shall be designed to keep battery temperatures below 85°C (13). The charging time shall be optimised according to the battery size and configuration. A faster charge is desirable, but not at the expense of system safety. Discharge current rates shall be monitored by the DAS to an accuracy of at least 1 % of the designed full scale charging rate. A method shall be provided to measure the amount of energy left in the battery (Fuel Gauge). Voltage shall be monitored to an accuracy of 1 % of the maximum battery stack voltage. The battery compartment temperature shall be monitored to an accuracy of at least 3 % over a range of -10 to 100 °C. The preferred interfaces for current, voltage and temperature monitoring are 4-20 mA. However, this is not mandatory. The interface specification for the DAS assumes 4-20 mA. If these interfaces differ, the DAS requirements should be adjusted accordingly. 30 The sensors shall be capable of sampling rates of at least 1 Hz. A relay circuit shall be deployed for isolation of battery system from all power consuming equipment. The power isolation shall isolate power under DAS control and re-connect power under charger control. A suitable charger shall be used to charge the batteries at a charging facility. 3.5 Fault Management The BA Instrumentation and Telemetry System shall isolate the system power when a low battery condition is detected, and only after a low battery alert has been sent to the onshore SCADA system (PCS). Power isolation due to battery condition shall be latching and can only be re-established by a signal from the battery charging system. 4 Engineering Requirements 4.1 Design Codes and Standards Submersible enclosures and connections shall be rated IP68 or higher, with an indication of continuous depth operation of 15 m or better. The electrical system shall comply with requirements for a SELV circuit (battery powered) as described in AS/NZS 60950. Code of Practice for Safe Use of Electricity Under Water (24) shall be used as guidance for the electrical installation. 5 Cabling and wiring shall comply with AS 3000 Wiring Rules. Documentation Requirements CWE shall produce the following documents related to the system: a) Design Report, explaining design evolution and analysis. b) Factory Acceptance Test (FAT) Report, verifying requirements in this specification. c) Site Acceptance Test (SAT) Report, verifying in-situ functionality. d) System Integration Test Report (SIT), verifying integration with onshore plant. e) BA Instrumentation & Telemetry Wiring Diagram. 31 5.4. Design Description The system consists of a battery, a DC/DC converter, a Battery Management System (BMS), an interface and several other components to meet these requirements. The components will be located inside an IP68 rated battery box custom designed for this system. A schematic of the overall system is located in section 5.5. 1. Batteries The batteries will consist of CWE owned lithium-Ion phosphate (LiFePO4) cells which were used during the company’s previous project, CETO 3. In addition to the advantages of lithium-ion batteries stated in section 4.4.1, LiFePO4 cells are an attractive option within the lithium-ion space due to their high specific capacity, inherently flat voltage discharge profile, non-toxicity, and good thermal stability (15). For this application, each battery pack will consist of 3 Thunder Sky LiFePO4 batteries connected in series (see figure 16) resulting in a 9.6V 400Ah system. The Thunder Sky battery cell characteristics are shown in table 8. Figure 16 Thunder Sky LiFePO4 Batteries Model: Thunder Sky WB-LYP400AHA Nominal Capacity 400Ah Cycle Life 70% DOD ≥ 7000 Operating Voltage 4V - 2.8V Operating Temperature -45°C ~ 85°C Typical 3.3V Max Charge Current ≤3CA Self-Discharge ≤3% Monthly Max Discharge Current ≤3CA Weight 13.5kg ± 200g Table 8 Thunder Sky Battery Characteristics (23) 32 2. Battery Management System It has been shown that implementing lithium-ion cells carries numerous advantages over other cell chemistries. However, they are also quite unforgiving if used outside their nominated safe operating area (SOA), with consequences that can prove both costly and dangerous. The most common fault occurrence is damage to the battery that leads to a reduced product life, however certain misuse can also cause significant damage and safety concerns. It is therefore important to understand what constitutes the SOA and how to remain within its boundaries. The SOA of Li-Ion cells is bounded by current, temperature, and voltage (25). Table 9 illustrates the resulting consequences of operating the cell outside this region. Action Overcharged above a certain Voltage Consequence Li-Ion cells will be damaged and may cause a potential fire hazard Discharged Below a certain voltage Damaged cells Operated outside temperature range The lifetime of the cells will be drastically reduced Discharged / charged at too high current Lifetime will be reduced Allowed to operate at high pulse currents Li-Ion cells may be damaged Table 9 Consequences of Li-Ion cell operation outside of SOA (25) A common design strategy to ensure the system remains with the SOA is to implement a battery management system (BMS). In essence, a BMS obtains and monitors battery operating conditions, maintains operation within nominated parameters, balances individual cells, and estimates battery states (26). Obtaining and monitoring information regarding the operating conditions of the battery, specifically, current, voltage, and temperature, is a vital function of a BMS. The BMS then uses this information to perform its most important function, which is maintaining a safe and reliable operation for the battery. If any SOA limit comes within reach, corrective action is taken in order to protect the battery. This typically involves disrupting or limiting the current, or reducing or shutting off the connection to the load or charger (26). For applications such as the BA/Pods battery system where multiple batteries are configured together, the BMS is also called upon to balance the individual cells. Manufacturing differences can 33 cause matching battery cells to contain different internal characteristics, leading to varying charge/discharge rates and hence non-uniform voltage across each individual cell. Therefore, if the voltage of a battery pack is only monitored across the whole pack, certain cells will not completely charge and others will be subject to overcharging. Using a BMS counteracts this issue through cell balancing. Balancing maintains uniform charge levels across all cells through either dissipating excess energy or shifting excess energy from one cell into another cell that is not fully charged. Finally, the BMS is required to estimate unmeasurable conditions such the battery’s state of health (SOH) and state of charge (SOC) (26). The Elithion “Lithiumate Lite’ BMS module has been selected for this application and will play a central role in achieving the system requirements and ensuring safe operation of the designed system. Usually implemented in electric vehicle applications (27), it was preferred due to its compatibility with the battery modules and configuration options. The operating characteristics are shown in table 10. Lithiumate Lite Battery Management System Measurement Management Measures and reports the battery pack current Measures and reports the cell voltages and temperatures Balances the pack o Top balance, voltage based o Dissipative (passive) balancing Evaluation Calculates and reports the SOC Protection Shuts down charger if the charging current is excessive, or if any cell voltage exceeds a maximum Reduces the load if the battery is low Shuts off the load if any cell voltage falls below a minimum, or experiences excessive discharging current Prohibits charging and/or discharging if cell temperature is outside the specified range Prohibits charging/ discharging if a cell board stops reporting Table 10 Lithiumate Lite BMS Operating Characteristics (27; 28) 34 3. DC-DC Converter A DC-DC converter converts a source of direct current from one voltage level to another (28). In this system the output battery voltage is approximately 9-10V for the majority of the discharge cycle which is reduced slightly due to losses in the BMS circuitry. Employing a DC-DC converter enables an increase of the system output voltage to 12V to provide the power requirements of the measuring devices and equipment used in the BAs, and to 24V in the case of the Pods, without increasing to number of cells required. The selected converter is a DC-DC Intelligent Buck-Boost converter with USB interface. The unit accepts an input range of 6-34V with a range of available outputs depending on the operating mode and jumper settings selected. Although there are various programming options, a relatively simple configuration was employed for this application which sees the converter act as a regular boost converter (producing an output voltage above the input voltage level), producing a fixed 12V/24V output for the duration of the discharge cycle (28). 4. Protection Devices Leak Sensor A capacitive liquid level sensor has been incorporated into the design to ensure the system does not operate if water enters the battery box. The components used are not conducive to operating in a wet environment and operating the system in such conditions may cause significant damage and pose a serious safety hazard (18). The selected device uses capacitive proximity sensing in which embedded electrodes detect changes in the capacitance as it comes into contact with fluid. Once the user defined threshold is reached, the sensor will prevent the current path from conducting (29). In this case, the sensor will prevent the system operating once it has come into contact with 0.2ml of water. A calibration procedure was developed to ensure uniformity across each of the systems deployed (see figure 17). Figure 17 Calibrating the leak sensor 35 Magnetic Switch The Hamlin magnetic sensor used in the AWAC meter deployment was also implemented to isolate the BA/Pods battery box during installation and maintenance procedures. The sensor located in the AWAC battery box will be closely monitored during the next deployment, to ensure it will withstand the rigors of this application. Using the same methodology, a normally open sensor is placed inside the battery box lid connecting the battery output to the BMS ignition via a custom interface board. To activate the switch and hence provide power to the BMS ignition, an activating magnet located outside the battery box must be locked into place within the nominated activating distance of 22mm. Without the presence of the magnet, the switch is left open and the system is unable to commence any charging or discharging procedures. Current Sensor A current sensor is located to measure the load current at the input of the DC-DC converter. The sensor’s nominal operating current of 300A far exceeds the systems operating value, however, this sensor was selected due to its compatibility to the Lithiumate Lite BMS. The sensor will report the measurement back to the BMS as per its operating requirements. Protective Relays and Fuses A protective relay has been implemented to safeguard against overcharging the battery cells in the case of an error with the BMS. The charge input passes into the BMS from the most positive battery terminal via a charge relay. This charge relay is driven from the ‘Charge OK’ output on the BMS which produces a 12V output signal only when the battery condition is suitable for charging to occur. If the BMS is not functioning or the conditions are not met, then no charging will occur. Two fuses are present in the system. A 60A fuse will be connected between the positive terminal of the battery and the BMS charge output terminal to limit the charging current, and a 10A fuse is located between the positive battery terminal and the DC-DC converter to limit the discharge current. 5. Custom Designed Interface Board The custom interface board was created to bring the individual components together into one coherent system. The board, consisting of its own DC-DC converter, will be used to drive ignition inputs, LED indicators, and a Modbus module. It will act as the junction point to the various safety and measuring devices used inside the battery box or BMS itself. This system collaboration can be seen with the interaction between magnetic switch, leak sensor, and BMS ignition input. The magnetic switch is connected directly to the battery pack and provides the input to the in-built interface DC-DC converter, where the voltage is raised to 12V to power the 36 BMS ignition. The ignition voltage for the in-built converter is provided by the batteries via the leak sensor. Therefore, when a leak is detected, power is switched off by de-activating the DC-DC, hence preventing power entering the BMS and thereby switching off all other components as a result. The Modbus remote terminal unit (RTU) will provide information on the battery state conditions and system faults. The module will transmit this information using the serial interface RS485 to the central data acquisition system (DAS). The LED indicators connected to the interface will be placed on the outside of the battery box lid. Driven from various input measurements, these will indicate to the diver or charge operator the current operating condition of the system (ON, Charging, or Fault) without the need to open the case. 6. Charging Strategy The system will operate at approximately 15 day discharge cycles. It is anticipated that each system will be rotated so that when the system voltage is approaching its low state, it will be replaced by one of the spare systems and taken onshore to be recharged in order to provide constant power to the measurement devices. Selecting the appropriate charger was quite an involved process. The Lithiumate Lite BMS is typically powered by 120 or 240 AC however, to enable charging to occur onsite if required to add operational flexibility, the charging strategy is based on utilising the available 24V DC supply. In addition to the charger being LiFePO4 chemistry compatible, the BMS also requires it to contain Constant Current/Constant Voltage (CC/CV) operating characteristics, with an output voltage the same as the pack voltage (10.8) and a max output current of 30A DC. These constraints significantly reduced the number of products available for this application. The original charger selected appeared to satisfy these requirements, however upon testing the device it became apparent it was unable to supply LiFePO4 cells at the required current levels, which would have led to excessive charge times and disrupted the battery replacement schedule. After much deliberation and research, the solution was to purchase a Stirling 24V DC/ 12V DC battery to battery charger with output current limiting capabilities. Current testing has confirmed that the devise characteristics satisfy the system requirements. 37 5.5. Battery Box Schematic Figure 18 BA/Pod Battery box schematic 38 5.6. Factory Acceptance Test 1. Purpose This procedure was developed to configure and test the designed system. This procedure is to be conducted on each battery box configuration before it is installed and is aimed to test the interactions within the entire system. Configuring, testing, and calibrating of the individual components is to be completed before commencing this procedure. 2. Safe Operation Guidelines Before commencing any works on the system it is essential that the user has assessed the potential risks involved. The following safe operation guidelines have been developed in accordance with AS/NZ 60950.1 to help prevent personal injury incidents occurring from electric shock and cell damage whilst working on the system. Short circuit prevention o Work in a quiet environment without minimal distractions. o Leave only the section being worked on exposed at any one time, covering the rest of the terminals with insulating cloth. o Place tools, bus bars, and other materials not being used away from the cell terminals. o Wrap tools with electrical tape, leaving the minimum possible amount of exposed metal o Remove watches, rings and accessories. Current Path prevention o Disconnect the battery from all other components. o The battery must be completely isolated from earth ground: that way, even after it is connected to the load, even if you touch one exposed terminal, you will not get shocked o If your right hand is doing the work, keep your left hand away from the terminals 39 3. Connecting the system Check the voltage levels of each individual cell before connecting them in a series configuration. If satisfied, connect the batteries. Follow the procedure outlined in the Elithion ‘Lithiumate Lite’ user manual (30) to connect the cell boards to the battery terminals. Carefully connect the individual components and terminate all wires and cables in accordance with CWE’s BA & Pods Battery box wiring diagrams. Figure 19 Connecting the Batteries and Cell boards Battery Cells Cell Boards Connection BMS Magnetic Sensor Current Sensor DC Converter 50W Halogen Globe Custom Interface Figure 19 BA/Pods Battery Testing Configuration 40 4. System Testing i. BMS Testing Connect the BMS module to a computer via the USB connection. The driver will install itself, once complete to launch the ‘Lithiumate Lite’ software to undertake the following testing sequence (30). a. Prove that the BMS master is able to shut down the charger 1. Open the "BMS test" tab of the software; select the "Test A" tab. 2. Connect the charger and switch on the DC power supply. 3. Enable the charging process by clicking the "Charge OK" button. 4. Observe that the charge current is present. 5. Re-click the "Charge OK" button to deactivate the charging process. 6. Note that the charger current goes to 0. The “Test A” should turn green. 7. Press the "Restore automatic control" button to provide control back to the BMS. b. Prove the BMS can shut off the load 1. Again in the "BMS test" tab of the software, select the "Test B" tab. With the ignition on. 2. Enable system discharge by clicking the "Discharge OK" button. 3. Observe that the discharge current is present. 4. Re-click the "Charge OK" button to deactivate the charging process. 5. Note that the load current goes to 0. “Test B” should turn green. 6. Press the "Restore automatic control" button to provide control back to the BMS. c. Check Cell Boards 1. Go to the "Configure" tab. The number of cell boards should be showing 3. 2. Go to the "Monitor" tab, and then the "Status" tab 3. Check that the range of cell voltages is normal – (3V-3.4V) 4. Check that the range in cell board temperatures is normal 41 Figure 20 Elithion ‘Lithiumate Lite’ Configuration Software ii. Protection device testing a. Testing the magnetic sensor shut off This test simulates the system isolation during installation and retrieval processes. 1. Ensure the system is fully configured and connected to the load. 2. Place a magnet approximately 20mm from the magnetic sensor. The system should operate without delay. 3. Let the system operate for 1 minute. 4. Remove magnet from within the activating distance. This system should now deactivate without delay. b. Testing the leak sensor shut off This test is to simulate a leak occurring in the battery box. 1. Once again, ensure the system is fully configured and connected to the load with the magnetic sensor activated. 2. Slowing apply liquid to the sensors’ surface with a syringe until the cut-off volume is reached. The system should cease operation. 3. Remove the fluid with a paper towel. The system should recommence operation. 42 5.7. The Next Steps… As previously stated, the works on this task are ongoing and will exceed the term of this internship. The key items to be addressed during the coming weeks include the following. Continue testing the charge and discharge cycles of the system. This will involve connecting the system to a load similar to that of the measuring devices in the PWEP and observing an entire discharge cycle to ensure it operates as intended. Once this system satisfies operational requirements, procure and test the remaining 10 systems. Investigate the potential of incorporating solar panels on the BA to increase the discharge cycle of the BA battery boxes. The key items to be investigated include the estimated power that could be harnessed, how to best to integrate the panels into the system, and whether their presence may affect the motion of the BA. 5.8. Summary All materials required for the testing of this system have been procured. A testing procedure has been developed with testing on the first system now in its final stages. The system works as a cohesive unit which will provide a reliable source of power to the monitoring devices located inside the BAs and Pods. The design has focused on maintaining the integrity of the batteries to prevent potentially dangerous and expensive damage occurring to the Li-Ion cells through the use of a BMS and other safety devices. The works completed will provide the foundation on which the remainder of the testing, configuration, and maintenance procedures will be conducted for the duration of the project. 43 6. PROGRAM SYNOPSIS 6.1 Major Challenges Several challenges were experienced during the program which directly affected the achievement of the tasks. Detailed below are three key challenges and the approach taken to overcome these. Operating within the subsea environment The subsea environment presented many challenges. Whether it was dealing with the issues of bio fouling and corrosion, overcoming technical limitations and product failures, or even coping with the logistical problems of accessing equipment for testing and troubleshooting system performance, this experience has certainly presented a unique set of obstacles. The strategy to overcome these challenges primarily focused on utilising technologies from suppliers whose performance had been proven in subsea conditions, together with adhering to a stringent documentation process. Whilst the wave energy industry is relatively new and still in its infancy, electrical subsea projects, such as marine vessels or oil and gas exploration etc., have been occurring with increasing regularity over recent decades. This has led to considerable investment into subsea technologies, subsequently making significant progress in overcoming specific challenges such as bio fouling, and the corrosion of electrical connectors etc (18). Opting to use technology suppliers who had a proven performance in the marine industry (such as switching to Subconn electrical connectors for the AWAC battery canister) ensured the equipment was suitable for the environment, and therefore helped to minimise the occurrence of component failure. Whilst a project is never immune to failure, this strategy reduced their frequency. The documentation process involved developing well-structured procedures and protocols, clearly identifying the works to be conducted at each stage and reviewing progress regularly. For example, before commencing each task or sub-task, literature on the topic would be thoroughly reviewed to ensure an up to date understanding was acquired. From here the common course of action was to develop a document such as a requirement specification, or test plan etc to ensure each step of the procedure has been duly considered. This was then reviewed by CWE colleagues and used as a continual point of reference once the task had been commenced. Finally, progress was regularly documented and any findings noted accordingly. Adhering to this regimented approach promoted transparency and allowed for any potential issues to be more easily identified. The combination of these strategies certainly had a positive impact in overcoming the unique challenges presented when working in a subsea environment, removed potential issues and enabled the objectives to be achieved. 44 The unique industry of wave energy A company developing and implementing its own technology such as CWE requires great innovation to provide solutions to the myriad of problems which arise, making it a very interesting and rewarding place to work. However, the fact that the wave energy industry is so unique, often complicates the problem solving process by making more difficult to find the appropriate piece of equipment or materials to fit specific needs. This is something which presented regular challenges throughout the program. A prime example dilemma occurred with the BA/Pods battery box. This application required a combination of components from varying industries to bring together the system as a whole. The strategy to overcome this challenge was to use a combination of research, innovation, and resourcing. More specifically, the focus was on researching equipment which has succeeded in specific conditions and adapting these to meet the project requirements. Often this research would involve liaising with fellow CWE staff, to utilise their experience and expertise across a wide range of industries, and applying this knowledge to the task at hand. This resulted in adapting components from the electric vehicle, marine, and electronics industries and combining these to achieve the desired outcome. Long lead times for material/equipment supplies Receiving required goods within the designated time frame often presents a challenge irrespective of the nature of project. A delay of one component can bring the entire operation to a halt, as was discovered with the AWAC supply cable. This issue was exacerbated due to the limited time (14 weeks in total) that was available to conduct all works in this internship. Some long lead times were unavoidable, such as the subsea connectors which are manufactured overseas and take approximately 5-6 weeks to arrive. These instances required an organised and sequential approach to the procurement of all equipment to prevent this from derailing the progress of the project. For example, during the design process, components which required these materials were identified and given priority in order to get the procurement procedure underway as soon as possible. To minimise the occurrence of unexpected delays, several previous quotations were obtained in order to get a realistic estimate of the likely time period for supply. Once decided upon, all purchase orders emphasised the importance of receiving the goods within the designated time frame. 45 6.2 Project Objectives Assessment 1. Program Specific Objectives The program specific objectives were derived to meet both company needs and the program requirements as stipulated in the Internship Guidelines. They involved a broad range of activities to present a holistic introduction into the electrical engineering profession. The accomplishment of these objectives played an important role in achieving more broad objectives of the PWEP. A summary of the actions taken to achieve each objective, and the outcome is presented in table 11. Objective Actions taken Successful? Reviewed relevant literature and company protocols. Design, procure, test and deploy a Developed, documented rechargeable subsea battery power system and implemented a design for the Nortek AWAC meter specification, test plan, and Yes installation and retrieval procedures. Researched operating principles for all equipment. Configure, monitor and evaluate the Programmed for deployment and retrieval of performance of the power system and AWAC data meter. Yes Undertook maintenance and post deployment testing. Built and configured battery box model. Assist in the design, part procurement, construction and testing of the rechargeable Tested battery / BMS / converter / charger subsea battery systems required for the Yes * performance. CETO ‘Buoyant Actuators’ and ‘Pods’ Developed design description, FAT test 46 procedure, and operators manual. Table 11 Evaluation summary of project specific objectives * Indicates works on this item are ongoing and will continue beyond the timeframe of this report. 2. Personal Objectives The personal objectives identified at the beginning of this program were selected to provide a platform for professional development, helping to build upon certain employee attributes for post graduate studies. Whilst achieving these goals did not necessarily directly affect the outcome of the major tasks, they were considered very important on a personal level and were repeatedly reflected upon to ensure appropriate progress was being made. Table 12 gives a summary of what steps were undertaken to achieve each of these objectives. Objective Actions taken Conducted extensive research and used internal documents and procedures. Develop a greater understanding of company and industry procedures Successful Yes Observed and sought advice from experienced colleagues. Developed a Gantt chart and where possible adhered to project timeframes. Improve time management skills, documentation skills and research Undertook repeated documentation and review procedures. techniques Yes Gathered and reviewed various forms of literature from a wide range of sources. Gain greater knowledge of the Reviewed relevant literature requirements for subsea electrical Utilized the expertise of colleagues and installations Yes resources available at CWE. 47 As above, reviewed literature and Improve understanding of power utilized the expertise of colleagues and technologies, resources available at CWE. techniques analysis, and design implementation processes Yes Applied attained knowledge to each step for both the AWAC and BA/Pods tasks. Build networks and relationships with colleagues and within the renewable energy industry Continual liaising and engaging with colleagues. Yes Attended to social occasions and functions. Table 12 Evaluation summary of personal objectives 6.3 Development Opportunities In addition to the stated objectives, this internship provided the opportunity to significantly develop professional skillsets and employee attributes which will be transferable to future engineering roles. Table 13 highlights these key attributes and the activities that were taken to promote their development. Developed Area Activities Constant and concise dialogue with colleagues, manufacturers, and suppliers was paramount to the success of each task. Communication Skills Company meetings to address task progress developed the ability to convey concepts to a group audience. The nature of the project required collaboration between several Team-work members of staff with diverse expertise to achieve the overall outcomes. Problem Solving The development of a thorough design and testing process provided Techniques innovative solutions and enabled the identification of potential issues. 48 Understanding Technical Standards Report Writing Ability HSE awareness Constant reference to electrical standard documents throughout the tasks provided a greater understanding of what is required and also where to find the relevant information for a given situation. Regular documentation of procedures, protocols, and findings. The reinforcement of health and safety issues at company workshops highlighted the importance of safe practice. Table 13 Summary of Developed Attributes CWE is a company where the culture is focussed on innovation and teamwork. The support provided by CWE staff was greatly appreciated and largely responsible for providing these development opportunities. Assisting the company in achieving its objectives of the PWEP proved to be a very rewarding and fulfilling experience. 49 7 CONCLUSION This internship provided the opportunity to apply and build upon the knowledge attained throughout the previous studies, whilst gaining valuable exposure to the electrical engineering and renewable energy industries. A set of program specific and personal objectives were identified to address the needs of the company, identify opportunities for professional development, and provide the backbone of the major tasks to be completed. The major tasks detailed in this report- the engineering and deployment of Acoustic Wave and Current (AWAC) meter, and the engineering and testing of Buoyant Actuator (BA)/Pods subsea power systems- revolved around providing subsea power solutions to the data collection and analysis components of the PWEP. Both tasks required the development of a well-documented engineering strategy that incorporated research and analysis, problem solving, design, implementation, and testing procedures. The result was significant exposure to the engineering profession, allowing both the program specific and personal objectives to be attained. The major challenges associated with these tasks were overcome through a combination of resourcing and research, innovation, adhering to a stringent documentation process, and utilising technologies with proven performance. Finally, the internship provided the opportunity to contribute in a meaningful way to CWE’s PWEP objectives whilst simultaneously providing the opportunity to develop professional skillsets and employee attributes. The support provided by both colleagues at CWE and academic staff at Murdoch University contributed greatly to the achievement of the objectives of the program and the overall professional engineering experience. 50 8 REFERENCES 1. Murdoch University. Bachelor of Engineering Program Structure. Murdoch Univeristy. [Online] 2014. [Cited: 14 August 2013.] http://www.murdoch.edu.au/Courses/Electrical-PowerEngineering/Course-structure/#. 2. Kenny, Steven. ENG450 Engineering Internship Project plan. Perth WA : Murdoch University, 2013. 3. Carnegie Wave Energy Ltd. Projects - PWEP Australia. Carnegie Wave Energy. [Online] Luminocity, 2013. [Cited: 14 October 2013.] http://www.carnegiewave.com/index.php?url=/projects/perthproject. 4. Cranegie Wave Energy Ltd. Summary of Environmental Impact Asessment and Approvals. Perth WA : Carnegie Wave Energy Limited, 2012. 5. Pichard, A. CP111-0054-A_PLN-CETO 5 MODELLING ACCURACY VERIFICATION. s.l. : Carnegie Wave Energy Ltd, 2011. 6. Nortek, AS. AWAC Acoustic Wave and Current Meter Product Brochure. Norway : s.n., 2005. 7. —. AWAC Acoustic Wave and Current Meter User Manual. Norway : s.n., 2005. N3000-126. 8. Kenny, Steven. ENG450 Engineering Internship Progress Report. Perth WA : Murdoch University, 2013. 9. Nortek, AS. AWAC Acoustic Wave and Current Meter Operating Principles. Norway : s.n., 2009. N3000-132. 10. Petrescu, F. A New Doppler Effect. Munich : Technical Services Academy, 2012. 11. Sawyer, T. CP103-0060-0 Environmental Design Conditions Garden Island Site. Perth WA : Carnegie Wave Energy Ltd Internal Document, 2012. 12. Jacobi, W. Lithium Batteries:. [book auth.] A.H., Kiehne. Battery Technology Handbook. s.l. : CRC Press, 2003. 13. Yuan, X., Jiu, H., & Zhang, J. Lithium-Ion Batteries: Advanvced Materials and Technologies. Boca Raton, FL, USA : CRC Press, Taylor & Francis Group, 2012. 14. Kiehne, H. A. Battery Technology Handbook. New York : Marcel Dekker INc, 2003. 15. Brodd, Ralph J. Batteries for Sustainability. New York : Springer Science and Media, 2013. 16. Dell, R.M. & Rand, D.A.J. Understanding Batteries. Cambridge, UK : The Royal Society of Chemistry, 2001. 17. Electus Distribution. Heat Sink Basics. Electus Distribution. [Online] 2012. [Cited: 26 August 2013.] http://www1.electusdistribution.com.au/images_uploaded/heatsink.pdf. 18. Bai, Yong, & Qiang Bai. Subsea Engineering Handbook. s.l. : Elsevier Inc, 2010. 51 19. Buchanan, G. & Whittington, H.W. Factors Affecting the Reliablity of Microelectronics in Sever Offshore Environments. U.S.A : Sage Publishing, 1984. 20. GHD. Desalination Pilot Plant Intake/Outfall Detailed Design, Final - Detailed Design Report. 2013. October 2013. 21. Sun, David. CP111-004182-A Preliminary Route Layout Drawing. 2013. A. 22. Theron, T. BA Instrumentation and Telemetry. Perth, WA : Carenegie Wave Energy Internal Document, 2013. 23. LiFePO Battery Datasheet. s.l. : Magellan Batteries. 24. IMCA. Code of Practice for the Safe Use of Electricity Underwater. s.l. : IMCA, 2010. 25. Andrea, D. Battery Management Systems for Large Lithium Ion Battery Packs. Norwood, MA : Artech House, 2010. 26. Development of an Experimental Testbed for Research in Lithium-Ion Battery Management Systems. Lotfi, N., et al., et al. s.l. : Energies 2013, , Vol. 6. 5231-5258. 27. Elithion Inc. Lithiumate Lite Overview. [Online] 14 October 2013. [Cited: 10 December 2013.] http://elithion.com/lithiumate_lite_overview.php. 28. Mohan, Undeland, & Robbins. Power Electronics: Converters, Applications, and Design. s.l. : Wiley, 2007. 29. Terzic, E., Terzic, J. and Nagarajah, R. Capacitive Sensing Technology. s.l. : Springer, 2012. 30. Elithion. Lithiumate Lite Installation Manual. Boulder, Colorado : s.n., 2011. 52 53