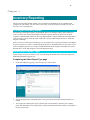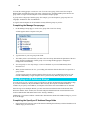
1
User’s Manual Sitekeeper® November 2004 This document describes the installation and operation of Executive Software International’s Sitekeeper system management software. It is intended primarily for Windows system administrators and managers. Revision/Update Information: This is a new manual Software Versions: Sitekeeper 3.5 Operating Systems: Windows Server™ 2003 Windows XP Professional Windows 2000 Server Windows 2000 Professional Windows NT® 4.0 Server (SP 6 or higher) Windows NT 4.0 Workstation (SP 6 or higher) Windows Millennium Edition (Me) Windows 98 Windows 95 (OSR 2 or higher) Executive Software International, Inc., Burbank, California, USA ________________________ November 2004 __________ © 2004 by Executive Software International, Inc. The Software described in this document is owned by Executive Software International, Inc. and is protected by United States copyright laws and international treaty provisions. Therefore, you must treat the Software like any other copyrighted material (e.g. a book or musical recording) except that you may either (a) make one copy of the Software solely for backup or archival purposes, or (b) transfer the Software to a single hard disk provided you keep the original solely for backup or archival purposes. You may not copy the user documentation provided with the Software, except for your own authorized use. RESTRICTED RIGHTS LEGEND The software and documentation are provided with RESTRICTED RIGHTS. Use, duplication, or disclosure by the Government is subject to restrictions as set forth in subparagraph (c)(1)(ii) of the Rights in Technical Data and Computer Software clause at DFARS 252.227-7013 or subparagraphs (c)(1) and (2) of the Commercial Computer Software-Restricted Rights at 48 CFR 52.227-19 as applicable. Manufacturer is Executive Software International, Inc., 7590 North Glenoaks Boulevard, Burbank, California 91504. Executive Software and Sitekeeper are either registered trademarks or trademarks of Executive Software International, Inc. in the United States and other countries. Microsoft, Active Directory, Windows, Windows NT and Windows Server 2003 are either registered trademarks or trademarks owned by Microsoft Corporation in the United States and/or other countries. All other trademarks are the property of their respective owners. iii Contents CONTENTS PREFACE WHAT THIS BOOK IS ABOUT STRUCTURE OF THIS BOOK III VII VII VII ABOUT SITEKEEPER 1 ABOUT INVENTORY REPORTING ABOUT LICENSE COMPLIANCE ABOUT SOFTWARE DEPLOYMENT GETTING STARTED NAVIGATING IN SITEKEEPER PRODUCT TOOLBAR TASK NAVIGATOR AND RELATED TASKS QUICK FILTERING ABOUT SHARED FOLDERS 2 2 2 3 3 3 3 4 5 CONFIGURATION 9 CONFIGURING THE SITEKEEPER DATABASE MANAGING SITEKEEPER LICENSES REMOVING LICENSED COMPUTERS MANAGING LICENSED COMPUTERS MANAGING HIDDEN ITEMS MANAGING RENAMED ITEMS CHECKING FOR UPDATES PATCHKEEPER CONFIGURATION 9 10 12 12 12 13 13 13 INVENTORY REPORTING 17 CREATING AN INVENTORY REPORT SELECTING A REPORT TYPE SELECTING COMPUTERS SPECIFYING PERMISSIONS MANAGING COMPUTER GROUPS SPECIFYING AN IP ADDRESS RANGE SELECTING THE DATA SOURCE VIEWING SCAN STATUS SET IT AND FORGET IT OPTIONS INVENTORY REPORTING JOB QUEUE 17 17 18 18 19 20 21 21 22 22 iv VIEWING REPORT STATUS SITEKEEPER INVENTORY REPORTS SOFTWARE INVENTORY REPORT BY TITLE SOFTWARE INVENTORY REPORT BY COMPUTER HARDWARE INVENTORY REPORT BY DEVICE HARDWARE INVENTORY REPORT BY COMPUTER SOFTWARE LOCATIONS REPORT DEVICE LOCATIONS REPORT DATA COLLECTION REPORT 22 22 23 23 23 23 23 23 24 LICENSE COMPLIANCE 25 DETERMINING LICENSE COMPLIANCE SELECTING COMPUTERS FOR LICENSE COMPLIANCE SPECIFYING THE DATA SOURCE FOR LICENSE COMPLIANCE MANAGING SOFTWARE LICENSES ADDING LICENSED SOFTWARE LICENSE COMPLIANCE REPORT 25 25 25 26 27 27 SOFTWARE DEPLOYMENT 29 INSTALLING AND UNINSTALLING SOFTWARE SELECTING SOFTWARE ADDING NEW SOFTWARE SPECIFYING A SHARE SELECTING COMPUTERS SPECIFYING PERMISSIONS MANAGING COMPUTER GROUPS SPECIFYING AN IP ADDRESS RANGE SET IT AND FORGET IT OPTIONS VIEWING THE DEPLOYMENT JOB SUMMARY SOFTWARE DEPLOYMENT JOB QUEUE COMMAND LINE PARAMETERS TESTING A DEPLOYMENT WITH THE AT COMMAND LINE SCHEDULER 29 29 29 30 32 33 33 34 35 35 35 36 36 PATCHKEEPER 39 PATCHKEEPER BEST PRACTICES ABOUT CERTIFIED UPDATES ABOUT STATUS / RATING INFORMATION SCAN AND UPDATE SCAN AND AUTOMATIC UPDATE SCAN AND SEMI-AUTO UPDATE MANUALLY SPECIFY UPDATES MANAGE UPDATES VIEW PATCH DETAILS LOCATE SELECTED UPDATES CERTIFY SELECTED UPDATES 40 40 41 41 42 46 46 47 47 50 51 v CLEAR CERTIFICATIONS PRINT / PRINT PREVIEW HIDE SELECTED UPDATES VIEW TYPE CLEAR ALL FILTERS BUILD AND VIEW REPORTS BUILD CUSTOM REPORT CREATE A REPORT BASED ON MISSING UPDATES CREATE A REPORT BASED ON UPDATES YOU SPECIFY OPEN A REPORT FROM THE JOB QUEUE OPEN SAVED REPORT VIEW REPORTS REPORT VIEW STATUS VIEW VIEW REPORTS RELATED TASKS VIEW JOB QUEUE 51 51 51 52 52 52 52 52 55 57 58 58 58 59 60 62 SITEKEEPER AGENT 63 ADDING AND REMOVING THE SITEKEEPER AGENT REMOTE COMPUTERS MANAGING REMOTE COMPUTERS IMPORTING INFORMATION FROM REMOTE COMPUTERS 63 64 64 65 USING HELP 67 TABLE OF CONTENTS SEARCH CHECKBOXES AND BUTTONS ON THE SEARCH TAB INDEX 67 67 67 67 TROUBLESHOOTING 69 GENERAL TROUBLESHOOTING SOFTWARE DEPLOYMENT TROUBLESHOOTING TROUBLESHOOTING DATA GATHERING SITEKEEPER REQUIRED NETWORK SERVICES SITEKEEPER REQUIRED TCP/IP OPEN PORTS NETWORK PATH NOT FOUND NETWORK FAILURE THE OPERATION RETURNED BECAUSE THE TIMEOUT PERIOD EXPIRED FORMAT OF THE COMPUTER NAME IS INVALID NOT STARTED ACCESS DENIED IP SECURITY ON THE SITEKEEPER HOST PATCHKEEPER SCAN ERROR TROUBLESHOOTING TROUBLESHOOTING PATCH INSTALLATION 69 71 72 73 73 74 79 79 79 80 80 84 84 87 vi GLOSSARY 91 SUPPORT SERVICES 95 INDEX 97 vii Preface What This Book is About Welcome to the Sitekeeper User’s Manual. This book describes the various Sitekeeper modules and how to use them. Structure of This Book Chapter 1 describes Sitekeeper and the different modules available. It also gives useful information about using the Sitekeeper interface. Chapter 2 explains how to configure Sitekeeper for use at your site. Chapter 3 describes using the Inventory Reporting module. Chapter 4 shows how to use the License Compliance module. Chapter 5 gives information about using the Software Deployment module. Chapter 6 describes the use of the Patchkeeper update deployment module. Chapter 7 explains the Sitekeeper Agent, a small application that enables Sitekeeper to perform functions on Windows 9x computers and other computers that are often disconnected from the network. Chapter 8 gives tips for using the Sitekeeper help system. Appendix A provides troubleshooting information and answers to common questions. Appendix B is a Glossary of terms used within Sitekeeper. Appendix C explains how to contact Executive Software for Support Services. viii This page intentionally left blank. 1 Chapter 1 About Sitekeeper Sitekeeper consists of three modules: Inventory Reporting and License Compliance, Software Deployment, and the Patchkeeper update deployment module. License Compliance enables you to easily and automatically keep your software programs and licensing completely current. Inventory Reporting automatically logs and monitors installed programs on networked computers across your entire site. Additionally, Inventory Reporting gives you the ability to inventory hardware devices installed on computers on your network. This module automatically tracks and keeps updated records on the types of software, and versions of that software, as well as the hardware devices installed on your licensed computers. The Software Deployment module enables you to install new programs or updates over your network. You can also uninstall programs on remote computers. Software Deployment enables administrators to easily install or uninstall programs, updates, upgrades and patches which are logo-compliant for Windows 2000 and XP, or Microsoft- Installer-compliant, on licensed computers. Patchkeeper manages the collection and deployment of a variety of software security updates, upgrades, patches, hotfixes and service packs (collectively called updates). Patchkeeper can automatically find, download and deploy software updates to anything from one to thousands of computers. It can also scan your network to see what computers are missing which updates, and automatically install them. Sitekeeper can be installed on computers running: • Windows NT 4.0 with Service Pack 6 or greater and Internet Explorer 5.5 SP2 or greater • Windows 2000 with SP2 or greater and IE5.5 SP2 or greater • Windows XP Professional • Windows Server 2003 In order to be included in Sitekeeper tasks, computers must be running: • Windows Server 2003 • Windows XP • Windows 2000 • Windows NT 4 • Windows Me (Sitekeeper agent must be installed) • Windows 98 (Sitekeeper agent must be installed) • Windows 95 (Sitekeeper agent must be installed) • Any Server Appliance running Windows Sitekeeper supports Active Directory so you can easily include all Active Directory computers in a Sitekeeper task. Additionally, you can include computers by domain or IP address range. Sitekeeper also enables you to create custom groups of computers. For example, you may want to create separate groups for your marketing and accounting computers. You can then easily include groups in Sitekeeper tasks. 2 Sitekeeper modules can be licensed separately or together. The modules are licensed per computers licensed by Sitekeeper. About Inventory Reporting The Inventory Reporting module maintains data on all the software and hardware devices installed on your licensed computers. When Inventory Reporting is set up, a Windows Service is launched. It compiles information when Sitekeeper scans licensed computers. The data is then stored in the Sitekeeper database. The data is obtained from each licensed computer’s Windows Registry - the same information used by the Add/Remove Programs feature in the Windows Control Panel. The data includes all information provided by each software publisher, such as software name, version (major and minor), build number or patch level, and name of publisher. The number of copies of each type of software installed is also totaled. Inventory Reporting uses little system resources. On an average network, Inventory Reporting scans and reports on five to ten computers a second. It compiles information every time you scan selected licensed computers, or during a scheduled scan of all your licensed computers. Once Sitekeeper has gathered the data, you can generate a Software Inventory Report by Software Title or by Computer. You can also generate Hardware Inventory Reports by Device or Computer. Sitekeeper’s “Set It and Forget It” feature enables you to schedule the report to run once at a later time, or on a recurring basis. As an additional benefit, Inventory Reporting catches incidents of users installing and running programs locally without your approval. About License Compliance The License Compliance portion of the Inventory Reporting and License Compliance module enables you to ensure that all your software is license compliant. This module includes tools and reports you can use to reconcile the number of software licenses you have with the actual number of installations of the software on your network. You can enter the number of licenses owned by your organization for each inventoried software item. Because different numbers of licenses may have been purchased at different times, Sitekeeper displays each software type and version so a complete total of each product is shown. After you enter information about your software licenses, License Compliance is implemented as a Windows Service, monitoring and reporting licensing compliance from that point on. Additionally, you can enter and maintain information on licenses for non-inventoried software (DOS or Unix software for example) for reference purposes. License Compliance gives you the necessary information to ensure license compliance. If Sitekeeper finds you are not in compliance, you can purchase the appropriate software licenses or, if need be, uninstall copies of software to ensure compliance. About Software Deployment The Software Deployment module enables administrators to easily install or uninstall software, updates, upgrades, and patches which are logo-compliant for Windows 2000 and XP or Microsoft-Installercompliant, on licensed computers throughout a site from a central location. You select the software or update to be installed or uninstalled. The software selected for installation must reside on a shared drive or drives accessible to all computers on which the software is to be installed. You can select to install or uninstall software immediately, or “Set It and Forget It” by specifying to install or uninstall it later in the day when everyone has gone home. 3 Getting Started To get up and running with Sitekeeper after installation, you must first configure the database in which Sitekeeper will store inventory, licensing, and software deployment information. You are then guided through the process of selecting a server for the Sitekeeper database, then building and configuring the database on that server. This process may involve installing the Microsoft Desktop Engine (MSDE), if you do not have it or Microsoft SQL Server 2000 installed. After you configure the Sitekeeper database, click a category in the task navigator on the left to begin using Sitekeeper. Navigating in Sitekeeper All navigation in Sitekeeper is performed through the “Unified User Interface” shell. The shell provides a convenient central location to perform all Sitekeeper tasks and run and view reports. Product Toolbar The shell includes a product toolbar. You can use this toolbar to toggle between Sitekeeper module functions and Configuration functions. Task Navigator and Related Tasks When you make a selection in the product toolbar, the shell features a task navigator on the left. The available selections in the task navigator depend on which module you select. You can select a module and perform individual tasks through the task navigator. Back and Next buttons are provided on task pages; however, when navigating using the task navigator, you can select any step in any order. Many individual task pages feature a Related Tasks pane on the right. 4 Selecting a related task opens the appropriate page for that task in the shell. Quick Filtering Grids in Sitekeeper feature “Quick Filtering.” Quick Filtering enables you to quickly and easily display only the information you want to see in the grid. You can click the down arrow at the top of any column and determine what displays in the entire grid. When you select an item, only that item appears in the grid. When you select “(none)” no filtering is applied and all items appear in the grid. When you select “(custom)” the Custom Row Filter screen appears so you can build a custom filter statement to determine the information that appears in the grid. 5 You can use the and or the or option to define a relationship between two statements in your filter. The asterisk can be used as a wildcard character for a character or series of characters. For example, in the Version column of the Manage Licenses grid (accessed by selecting License Compliance in the task navigator), you may want to see only a certain range of versions of a selected software item. About Shared Folders A shared folder on a computer enables other computers on the network to access files located in it. In order for Sitekeeper or any of its modules (such as Patchkeeper) to deploy an update, that update package must be located in a shared folder. You cannot share the Documents and Settings, Program Files, and Windows system folders. In addition, you cannot share folders in other user's profiles. Creating a Shared Folder Follow these steps to create a shared folder for use with Sitekeeper: 1. Open Windows Explorer, and locate the folder you want to share. For this example, we'll use a folder named Test Shared Folder. Right-click the folder and select Sharing and Security. 6 2. 3. Next, the Folder Properties dialog box is displayed. Do the following steps: a. Select the Sharing tab, then select the Share this folder option. The name of the option may vary slightly depending on your operating system and configuration. b. Optionally, change the name of your folder on the network by entering a new name in the Share name field. This will not change the name of the folder on your computer, only the name by which it appears for other users in Explorer. In the example below, we have accepted the default, which is the folder name. You can also enter a comment to remind you about the purpose of the shared folder. c. Next, set the number of users you want to allow simultaneous access to this folder. In the example below, the default of "Maximum allowed" has been accepted. d. Click Permissions to set permissions for users who access this share. Click Add in the Permissions dialog box displayed to grant permission for the user you specified in the Specify Permissions for UNC Path section of the Specify Share page. 7 4. Enter the name of the user account(s) you want to have access to this shared folder. For use with Sitekeeper, this must include the user you specified in the Specify Permissions for UNC Path section of the Specify Share page. In the example below, an account named SitekeeperAdmin has been added to the users who have access to the shared folder. 5. In order for Sitekeeper to perform its functions across a network, the account you specified in the previous step must be given Full Control over the contents of the shared folder. Highlight the appropriate account name, then select the check box to allow Full Control for the selected account. In this example, SitekeeperAdmin has been allowed Full Control over the folder named Test Shared Folder. 8 6. Click OK to save your changes and exit the Properties screen. 9 Chapter 2 Configuration When you first log into Sitekeeper, you are prompted to create the database in which Sitekeeper will store and track software and hardware inventory and licensing data for computers you select to be licensed. Additional Configuration options include, managing your Sitekeeper licenses, managing software items you want to hide so they do not appear on reports, managing items you have renamed so they appear as something other than the default name in reports, and checking for Sitekeeper updates. Configuring the Sitekeeper Database The Configure Database task enables you specify the server and configure the database Sitekeeper will use to store and track information for your licensed computers. Sitekeeper supports Microsoft SQL Server 2000. Sitekeeper also supports the Microsoft Desktop Engine (MSDE), which you can install from a link in this task. MSDE provides local data storage and is based on the Microsoft SQL engine. You must first select whether you want to specify an existing SQL Server 2000 or MSDE location, or whether you want to install MSDE. The steps in configuring the database vary according to which of these options you select. Previous versions of Sitekeeper used a different database format than that used in this version. If you had a previous version installed, you can migrate this data into the new database format as part of your database configuration. Completing the Configure Database screens If you are using a database on a remote server, you must create the directory in which the database will reside before you run the Configure Database task. You cannot create a directory on a remote server from this task. We recommend you create a “C:\Sitekeeper” directory on the remote server for the Sitekeeper database. 1. On the Specify Database Location page, select the type of database Sitekeeper will use to store information for your licensed computers. If you want Sitekeeper to store information on an existing database location, select the I want to use an existing SQL server or MSDE option, click Next and skip to step 3. If you want Sitekeeper to store information in a Microsoft Desktop Engine (MSDE) database, and you do not yet have MSDE installed, select the I want to install Microsoft Desktop Engine (MSDE) locally option and proceed to the next step. 2. If you purchased Sitekeeper on a CD, MSDE is included on your CD and you will have the option to Install MSDE Now. If you purchased Sitekeeper online, click Open MSDE Web page. Your browser opens to a site where you can download MSDE. After you click Install MSDE Now or Open MSDE Web page, you will be guided through the process in either instance. After you complete the MSDE installation, click Next to continue. In some instances, the MSDE installation may require a reboot. If you are instructed to reboot, close all open applications and reboot the computer. Then, restart Sitekeeper and begin the Configure Database task again. If you newly installed MSDE during the Sitekeeper installation, and a reboot was not required, click Next and proceed to the next step. 10 3. On the Specify Server Location screen, a list of your database servers found by Sitekeeper appears. Select the Server Name of the server on which the Sitekeeper database will reside. Enter the User name and Password needed to connect to the database. If you are using MSDE, enter a user name of “sa” and do not enter a password; leave the Password field blank. If a message appears asking for confirmation that no password is required, click OK. If you are using SQL Server, enter your SQL Server user name and password. Click Next to continue. 4. On the Specify New or Existing page, select whether you want to use an existing database or you want to create a new database. You must configure at least one Sitekeeper database. You can also configure more than one MSDE or SQL Server 2000 database. For example, you may want to store inventory information about computers in different divisions of your company in separate databases. Click Next to continue. 5. If you selected to create a new database, the Specify Database Information page displays the Server location you selected previously for verification. You will also see this page if you installed MSDE while installing Sitekeeper and a reboot was not required. Review the Server location to ensure this is where you want to build the Sitekeeper database. If you want to specify a different location, click Specify Server Location in the task navigator. Specify the directory location in which you want to build the database and the name you want to give the database. Remember, if you are creating the database on a remote server, the database directory must already exist. You cannot create a directory on a remote server from this page. If you selected to use an existing database, review the Server Location and Database Name. 6. If you selected to use an existing database from a previous version of Sitekeeper, this is considered a legacy database and it must be updated to work with the current version of Sitekeeper. If you select the option to update the specified database, you also have the option of saving a copy of the current database in the old format for archival purposes. If you do not want to update the specified legacy database, you must click the Specify Database Location task and select another database or create a new one. 7. Click Finish. The summary page appears letting you know whether the database was created successfully. Managing Sitekeeper Licenses A Sitekeeper license is needed for each computer you specify to include in Sitekeeper functions. When you select to include computers in a task, if Sitekeeper detects that the number of computers you select to manage exceeds the number of licenses you purchased or the number available in the trial version, you are informed that you need to purchase additional licenses and Sitekeeper goes into “Try and Buy” mode. You can purchase licenses immediately via the Web by clicking the Purchase Licenses related task link on the View Sitekeeper Licenses page. When using the trial version, you can fully manage selected computers for 30 days. If you have not yet purchased licenses by the last day of the trial period, a message informs you that the trial has expired and you cannot perform any Sitekeeper functions until licenses are purchased. Purchasing Sitekeeper Licenses 1. From the Configuration task navigator, click Manage Sitekeeper Licenses. The Manage Sitekeeper Licenses page appears containing the View by Licenses grid. 11 2. Click the down arrow on the left of the grid to view details including how many licenses you have for each Sitekeeper module and how many are currently being used. If you are using the trial licenses, the number of days left in the trial is displayed. To purchase licenses click the Purchase Licenses related task. If you are using trial licenses, popup messages will occasionally remind you how many days are left in the trial grace period. From a grace period reminder message, you can click Buy Now. 3. Your Web browser is activated and directed to a site where you can purchase Sitekeeper licenses. The actual site may vary according to where you initially purchased Sitekeeper or where you most recently purchased licenses. 4. After you complete your transaction for purchasing additional licenses on the Web site, you will receive an e-mail including the license files. You are instructed to copy the license files into the Sitekeeper installation directory. After you copy the license files, use the Add Licenses related task on the View Sitekeeper Licenses page to activate them. Adding and Removing Sitekeeper Licenses 1. From the Configuration task navigator, click Manage Sitekeeper Licenses. The Manage Sitekeeper Licenses page appears containing the View by Licenses grid. 2. Click the down arrow on the left of the grid to view details including how many licenses you have for each Sitekeeper module and how many are currently being used. If you are using the trial licenses, the number of days left in the trial is displayed. The grid displays detailed information on the licenses which are currently active. 12 3. To activate new license(s) you purchased, click Add Licenses in the Related Tasks pane. The Add Licenses File screen appears. If necessary, use the Look in field to browse to the directory where you saved the new licenses. 4. Licenses appear with the .skl (sitekeeper license file) extension. Select the new license(s) and click Open. The Sitekeeper Licensing screen appears. The Sitekeeper Licensing screen confirms the number of licenses you activated. 5. The View by Licenses grid shows the number of licenses you currently have, the number you have installed, and whether you have any more available or need more licenses according to the number of computers you selected for Sitekeeper to include in tasks. Removing Licensed Computers Once you select a computer to be included in a Sitekeeper task, it is considered a licensed computer and uses one of your licenses. If necessary, you can select Remove Licensed Computers in the Configuration task navigator to specify that a licensed computer no longer be licensed. The license that computer was using is then available so you can include another computer in a Sitekeeper task. Completing the Remove Licensed Computers page 1. In the Related Tasks pane, specify a view for your network. You can view by licensed computer, by other methods such as Active Directory, or by computers that are licensed for each Sitekeeper module (Inventory Reporting and Software Deployment). 2. If you have previously selected a computer to be included in a task, it is a licensed computer. If you no longer want a computer to be licensed, select the checkbox by that computer and click the Remove Licenses related task. A message appears verifying that you want to remove the selected computer. Click Yes, and the selected computer no longer appears in the Computer View pane (when you have the Licensing View set to Licensed Computers Only). The licenses that were assigned to the selected computers are now available to assign to other computers to be included in Sitekeeper tasks. Managing Licensed Computers On the Manage Licensed Computers page, you can control several aspects of your licensed computers. You can specify that licensed computers be classified as remote or local. Additionally, you can manage the Sitekeeper agent on licensed computers. Completing the Manage Licensed Computers page 1. In the Related Tasks pane, specify a view for your network. You can view by licensed computer, by computers with the agent installed, by remote computers, or by other methods such as Active Directory computers. 2. If you need to install or uninstall the agent for a selected computer, click the appropriate related task. You can select to view only computers that have the agent installed. 3. You can specify that licensed computers are local (always connected to the network), or remote (not always on the network). You must install the agent on computers you set as remote, and specify settings for how remote computers will send data to Sitekeeper. You can select to view only computers that you have specified as remote. Managing Hidden Items Sometimes you may not want specific software items to appear in your Sitekeeper reports. Sitekeeper enables you to hide software so that it does not appear in your software inventory reports. You can hide software in all software reports, or specify that hidden software appear in selected individual reports. 13 From any software inventory report, you can select the software that you do not want to appear in any of your Sitekeeper reports. You can also unhide hidden software through the Manage Hidden Items related task link on a report or the Manage Hidden Items task on the Configuration task navigator. Hiding software and managing hidden items 1. Click Configuration in the toolbar. 2. Click Manage Hidden Items in the task navigator. 3. To view all software you have selected to be hidden in reports, click the Show Hidden Software. The Hidden software appears in the grid. 4. To unhide a hidden software item in all reports, select it, and click the Restore Hidden related task. 5. To hide software from view in reports, highlight it, and click the Hide Selected related task. The selected software does not appear in any future reports. Managing Renamed Items You may want to use a name other than the default for software to appear in your Sitekeeper reports. Sitekeeper enables you to rename the software that appears in your inventory reports. From any one of these reports, you can select software that you want to rename in the Sitekeeper report. You can also manage software you have renamed - rename them again or restore the default name through the Manage Renamed Items link in the Configuration task navigator. Renaming items and managing renamed items 1. Click Configuration in the toolbar. 2. Click Manage Renamed Items in the task navigator. 3. All software items you have renamed appear with both the original name and the custom name you assigned. To change the custom name, click the Rename Software related task. 4. To reestablish the original name of an item you renamed, click Restore Software Name. Checking for Updates When you click Check for Updates in the Configuration task navigator, Sitekeeper checks the Web to see if an updated version of the program is available. If one is, you are asked whether you want to update at this time. Patchkeeper Configuration The Patchkeeper Configuration module includes these options: • General Preferences • Default UNC Settings • Default Alert Settings General Preferences This page of the Patchkeeper configuration module allows you to set general Patchkeeper preferences. These options are available on the General Preferences page: • Uncertified Update Warnings 14 When this option is enabled, Patchkeeper will display a warning any time you attempt to deploy updates you have not previously certified. Certified updates are those you have tested and determined to be safe and appropriate for deployment across all or a portion of your network. For more information, see About Certified Updates on page 40. • Patchkeeper Engine Updates The engine that Patchkeeper uses to stay up-to-date on Microsoft security fixes is updated periodically. Executive Software provides these engine updates to Patchkeeper users as they become available. Running the latest Patchkeeper update engine ensures Patchkeeper bases its recommendations on the most current information available . Use the automatic or manual options to specify whether the Patchkeeper engine updates are downloaded and installed automatically as they become available, or if you would prefer to manually check for and install the Patchkeeper engine updates yourself. Default UNC Settings On the Specify the UNC Path to the Shared Folder page, you must indicate the location to be used for downloaded Patchkeeper update packages and provide the administrator permission information needed to access the share. If you need more information about how to share the folder, see About Shared Folders on page 5. The path to the shared folder must be a Universal Naming Convention (UNC) path. The UNC path must begin with the computer name in the following syntax \\ComputerName\SharedFolderName\FileName. Note: To easily enter the UNC path, click Browse. On the Select Path screen, click the My Network icon then click Entire network and browse to the update file. This ensures the path begins with the computer name. You must also provide administrator permissions information Patchkeeper needs to access the shared folder on the network. Completing the Specify UNC Path page 1. Specify the UNC path to the shared folder in the Share path field. The Share Path must be a full network (UNC) path. When you click Browse, you must browse to your network, then to your share, and then to the .exe file for the selected update. 2. Click Browse. 3. The Open screen appears. 15 4. On your computer, the Open screen will start in a different drive and folder than shown above. However, no matter what folder this screen opens to, begin by clicking My Network. Then browse to the computer containing the shared folder, then to the shared folder itself, and finally to the .exe file for the update to be installed. The screen shot below shows an example of a full UNC path as displayed in Windows Explorer. 5. When you use the Browse button, you need to open each "level" of the path. In the example above, each level was browsed to in this order: • • • • • • • 6. My Network Places Entire Network Microsoft Windows Network Proddev (the name of the network) Testpc (the name of the computer where the shared folder resides) PatchDownload (the name of the shared folder) WindowsXP-KB828035-x86-ENU.exe (the executable file used to install the update) You must provide the administrator User name Patchkeeper will use to access the shared folder. If the computer on which the shared folder is located is part of a domain, the user name must be entered using the following syntax: DomainName\UserName. 16 If the computer on which the share resides is part of a workgroup, the user name must be entered using the following syntax: ComputerName\UserName. 7. Enter the administrator Password corresponding to the user name you entered above. Default Alert Settings You can specify the default settings for the way Patchkeeper will notify you when Patchkeeper tasks have been completed. You can choose to have a Windows popup message displayed or an e-mail message sent when the task is done. You can customize the text in the e-mail message, and say who will receive it. Completing the Default Alert Settings page 1. 2. 3. Set the default settings for e-mail messages sent by Patchkeeper: a. Specify the e-mail address of the people you want to receive the report by default. Use a semicolon (;) to separate multiple e-mail addresses. b. Enter an e-mail address in the "Sender" field. This becomes the default name displayed in the "From" field when the e-mail message is received. c. Specify a default subject line for the e-mail message. The initial default subject is "Patchkeeper Task Completed". d. Enter the text you would like as a default for the e-mail message to which the Patchkeeper e-mail message will be attached. The message tells the recipient(s) the Patchkeeper task has been completed and directs their attention to the attached report. Set the default e-mail server settings: a. Enter the SMTP name of your outgoing e-mail server. This is usually a name similar to smtp.YourEmailServer.com. b. If your e-mail server requires Secure Password Authentication (SPA), select the option and enter your SPA user name and password. c. Optionally, click Send Test E-mail to Sender to test the e-mail settings. Click OK after you have entered your alert preferences. 17 Chapter 3 Inventory Reporting The Inventory Reporting module enables you to track software and hardware devices installed on all computers on your network. You can create a wide variety of reports and specify that they run now, at a later time, or on a recurring basis. Creating an Inventory Report The Sitekeeper task navigator guides you through the process of creating inventory reports. When you create your first report, use the task navigator on the left to specify data for the report such as which computers it should include. Whenever the Create Report button is enabled, Sitekeeper has enough data to create the report. You can create the report at that time or specify additional options such as “Set It and Forget It” scheduling. After you create your first report in Sitekeeper, you can simply select a report type and click Create Report. A report of the type you select is created using the properties you established in the previous report. If you want to change the properties (for example, include different licensed computers or schedule it to run at a different time), use the task navigator to select the appropriate page. Selecting a Report Type Specify the type of report you want to create. You can change the default name of the report and specify additional information to appear on it. Completing the Select Report Type page 1. On the Select Report Type page, select the report you want to create. 2. Specify the Report name. The default name is the type of report followed by the date and time it is created. 3. You can provide a Description, specify who the report was Prepared by, and enter your Company name. This information is not required, but if you do enter information in these fields, it will appear at the top of your report. 18 Selecting Computers Select the computers you want to include in the report. You can view computers, manage custom groups, and change the computer view. When you select a computer for a task, you are specifying that it is licensed by Sitekeeper. The Licensed Computers Only view shows only those computers you have selected. You can select any combination of Computer Views for your network. If you want to create custom groups (for example, production or accounting) you can do so by selecting the Manage Groups related task. To be included in a Sitekeeper task, computers must be licensed by Sitekeeper. When you select a computer to be included in a task, you are specifying that it is licensed. Therefore, you can view only selected computers by selecting the Licensed Computers Only licensing view. Computers running Windows 9x, Windows Millennium Edition (ME), or Windows XP Home Edition, require an agent to be included in Sitekeeper task. Additionally, computers you specify as remote (such as laptops which may not always be connected to the network) require the agent to be installed. Completing the Select Computers page 1. On the Select Computers page, specify a Computer View in the Related Task pane by selecting any combination of the following: • Custom Groups • Domain • Active Directory • IP address Range If you select to display computers by IP address range, a page appears where you can provide the starting and ending IP addresses for the range you want to display. 2. You can also specify to view computers based on their Sitekeeper licensing status. When you select a computer to be included in a task, you are specifying that it is licensed. Therefore, if you select the Licensed Computers Only view, only computers selected for Sitekeeper tasks appear in the view. 3. Sitekeeper needs domain or workgroup permissions information to access licensed computers and include them in tasks. If you select computers for which Sitekeeper does not already have this information, you can enter it by selecting the Specify Permissions related task. If you do not enter the information now, you will be prompted by Sitekeeper to enter it later. 4. You can select the Manage Groups related task to create custom groupings of your computers. Specifying Permissions Sitekeeper needs network permissions information to access licensed computers and include them in tasks. You can enter user name and password information for your domains and workgroups directly into the fields on the Specify Permissions page. If licensed computers are located on a domain, you must enter the user name and password that grants administrative access to that domain. If licensed computers are part of a workgroup, you must ensure that the user name and password you enter enable administrative privileges on each individual machine in the workgroup. Different user names and passwords may be required for each domain or workgroup containing machines which you have selected to included in a Sitekeeper task. If your authentication information changes, you will be prompted to enter the new information the next time you run a task including any computers affected by the change. 19 Completing the Specify Permissions page 1. The Specify Permissions page appears automatically when you select a computer to be included in a Sitekeeper function and Sitekeeper does not have the network permission information it needs to access the computer. 2. The Permissions grid contains all the items Sitekeeper found on your network. 3. Enter the Name of the network item, specify its Type (such as a domain or workgroup). Enter the User name and Password Sitekeeper will use to access the item. 4. Using Related Tasks, you can Clear a selected row in the grid, or Clear All the information in the grid. Managing Computer Groups Computer groups enable you to run Sitekeeper tasks on specific computers in your network. For example, you may want to create separate groups for your development, accounting, and marketing computers. Or, you may want to create a group that includes all your remote computers. You can edit existing groups or create new ones. To create a new group, click Create New Group in Related Tasks, and name the group. Then select a Network View, and drag and drop items into the new group folder. A single licensed computer can be included in multiple groups. A group can be a subgroup of another group. For example, your “Development” group may have two subgroups “Production” and “Test Machines.” A single licensed computer can be included in as many different groups as you like. Completing the Manage Groups page 1. On the Manage Groups page, click Create New Group to create a new group. A folder appears in the Computer View pane. 20 2. Type the name of your new group in the folder. The folder you have selected when you click Create New Group determines the placement of the new group. Groups can subgroups of other groups. You can drag and drop groups to change their arrangement in the hierarchy. 3. You can specify to view only Groups, or select a related task so you can simultaneously show Network View. 4. When you have both items in view, you can drag selected items from the Network View pane into a group’s folder. A single custom group can contain computers from any part (or any combination of parts) of your network. Additionally, a single computer can be a part of as many different groups as you wish. Specifying an IP Address Range You can specify to view a specific group of computers by entering an Internet Protocol (IP) address range. If you enter an address in only the IP Address Start field, only the computer with that IP address is included. If you specify an end address, all computers between the start and end addresses are included. If the IP range covers multiple domains, you must enter the trusted domain name in the Domain field. When one domain “trusts” another, the user name and password defined in the “trusted” domain can be used for authentication and authorization in the “trusting” domain(s). Additionally, if you want to indicate a mask used to determine the subnet an IP address belongs to, you can do so on this page. Completing the Specify an IP Address Range fields 1. In the Domain field, enter the name of the domain containing the machine(s) with the IP address or IP address range you want to enter. 2. You can include a single computer by entering an address in the IP Address Start field only. 3. If you select the option to Specify End IP Address and enter an address, all computers with IP addresses falling within the range are included. 4. If you want to indicate the mask used to determine what subnet an IP address belongs to, select the Specify IP Mask option and enter the mask in the accompanying field. Turning Off the Windows XP Firewall To enable scanning Windows XP Pro or Home computers, the Windows Internet Connection Firewall must be turned off. By default, the firewall is turned off in Windows XP Professional. It is turned on by default in Windows XP Home. If you are running Windows XP Service Pack 2 (SP2), see www.executive.com/sp2 for the latest information about running Sitekeeper with this configuration. 21 Turning off the Firewall in Windows XP 1. Click Start, then select Control Panel. 2. From the Control Panel, click Network Connections. 3. Right-click on the network connection and select Properties. In Windows XP Professional: • Select the Advanced Tab • Verify that the Protect my computer and network by limiting and preventing access to this computer from the Internet checkbox is not selected. • Click OK. In Windows XP Home: 4. • Select the General tab. • Select the Off option. • Click OK. After you turn the firewall off, the computer can be scanned by Sitekeeper. Selecting the Data Source On the Select Data Source page, you can specify whether you want to use live or history data for a report. Using live data specifies that each selected computer will be scanned to gather information for the report when the report is generated. Sitekeeper must scan licensed computers to gather data about them. If you have many computers included in a report, using live data can take some time. If previous scans have included the same computers selected for the current report, you may want to select one of those instead. You can select the View Data Collection Report related task to see which computers were included in a scan and whether all computers were successfully scanned (some may have been offline for example).You can also select to use cumulative data from all previous saved scans by selecting “Current Data (System)” in the Data Name column. When using data gathered in previous scans, keep in mind that the data may have changed since that scan was performed. The only way to get the most up to date information about your computers is to select the Use live data checkbox. Completing the Select Data Source page On the Select Data Source page, select the Use live data checkbox if you want to scan each computer you included in the report when the report is generated. 1. If you want to use a previous scan, select the Use history data option, and select a scan from the grid. You can view details about the scan by selecting it and then selecting the View Data Collection Report related task.. 2. The top row in the grid contains cumulative information for all previous scans. If you select this option, each computer scanned in a previous scan is included in the current task. Viewing Scan Status The Data Collection Report shows detailed information about a selected scan or task, including whether or not it was successful and the date on which it was performed. The Status column indicates whether all computers selected for the task were successfully scanned (for example, some may have not have been scanned because they were offline). 22 If a selected computer was not included in a scan or task, more information is provided in the Description column. Set It and Forget It Options Sitekeeper enables you to run a report now or “Set It and Forget It” by indicating a time to run it later. For example, you may want to the report to run at night when there is less activity on your network. Additionally, you can specify to generate the report on a recurring basis. For example, you want to automatically create a software inventory report for your computers on a monthly basis. Completing the Set It and Forget It Options page 1. On the Select Set It and Forget It Options page, specify whether you want to Create report now or Create report later. 2. If you select to create it now, the report begins generating. If you select to create it later, additional options are enabled. 3. Specify whether the report should Run once or Run recurring. 4. If you specify to run the report once, specify the Date and Time it should run. If you specify to run it on a recurring basis, you can specify the pattern for when it should run. Inventory Reporting Job Queue The job queue lists all tasks, whether they are completed, pending, or currently running. From the related task pane, you can view and print a report. You can stop a current or pending job, and view the status of a job to see detailed information about whether it completed successfully for all selected computers. Using the Inventory Reporting Job Queue page 1. All reports you created appear on the View Job Queue page. When you select a report, several related tasks are available. You can View Report or View Status of the report. If a job is currently running, or scheduled to run at a later time, you can cancel it by clicking the Stop related task. 2. Click Refresh to ensure all current jobs appear in the grid. Viewing Report Status From the Job Queue, you can select the View Status related task while a report is selected. The Data Collection Report is generated and shows detailed information about the data gathered for the selected report. The Status column indicates whether all computers selected for the task were successfully scanned (for example, some may have not have been scanned because they were offline). If a selected computer was not successfully scanned for the report, more information is provided in the Description column. Sitekeeper Inventory Reports You can run a variety of Sitekeeper reports to determine inventory of software installed on your licensed computers, exact computers on which selected software is installed, and inventory of hardware devices installed on your licensed computers. From a report, you can select a related task to view all the locations where a specific software or hardware item is located, view details about the data collected for the report, print the report, or unpin the report so it appears in a separate window. 23 In Software Inventory by Title reports, you can rename items so they appear under a different name in the report and hide items so they do not appear in the report at all. For information about the other inventory reports, see the following sections. Software Inventory Report by Title The Software Inventory Report by Title displays a complete list of all software installed on your selected licensed computers. The report displays the Publisher, Software title, Version, and Usage Count for each software item installed on each selected licensed computer. Not all software manufacturers provide Publisher information. If the information does not appear in the registry for this or any other reason, “Unavailable” appears as the entry in the Publisher column. From the report, you can select a related task to print or preview it. You can hide software so it does not appear in reports, view all items you have specified to be hidden, rename software to customize how it appears in reports, and view all items you have renamed. Software Inventory Report by Computer The Software Inventory Report by Computer displays a complete list of all software installed on your selected licensed computers. The report is sorted by computer and displays the Publisher, Software name, and Version for each software item installed on each selected licensed computer. Not all software manufacturers provide Publisher information. If the information does not appear in the registry for this or any other reason, “Unavailable” appears as the entry in the Publisher column. From the report, you can select a related task to print or preview it. Hardware Inventory Report by Device The Hardware Inventory Report by Device displays a complete list of all hardware devices installed on selected licensed computers. The report is sorted by device and displays the name of each device Type, Manufacturer, “Friendly” Name, Description and Count of each hardware device installed on your selected licensed computers. From the report, you can select a related task to print or preview it. Hardware Inventory Report by Computer The Hardware Inventory Report by Computer displays a complete list of all hardware devices installed on selected licensed computers. The report is sorted by computer and displays the Domain to which the computer belongs, Computer name, Type of device, Manufacturer, Description, and “Friendly” Name of the hardware devices installed on each selected licensed computer. Additional information is provided where applicable; for example, disk drives include the total size. From the report, you can select a related task to print or preview it. Software Locations Report From a Software Inventory by Title Report, you can highlight a software item and select the View Software Locations related task to access the Software Locations page. The grid on this page displays each instance of where a selected software item is installed on your network by computer. Device Locations Report From a Hardware Inventory by Device Report, you can highlight a device and select the View Device Locations related task to access the Device Locations page. 24 The grid on the Device Locations page displays a complete list of each computer on which a selected device is installed. The grid displays the Domain or Workgroup to which the each computer belongs, and the Computer name. Data Collection Report When you select the View Data Collection Report related task from a report, you can view detailed information about the data gathered for the report. The Status column indicates whether all computers selected for the task were successfully scanned (for example, some may have not have been scanned because they were offline). If a selected computer was not successfully scanned for the report, more information is provided in the Description column. 25 Chapter 4 License Compliance The License Compliance section of the Inventory Reporting module enables you to ensure that all your software is license compliant. This module includes tools you can use to reconcile the number of software licenses you have with the actual number of installations of the software on your network. After you create a License Compliance report to specify which computers you want to monitor for compliance, you can click the License Compliance task link and enter the number of licenses owned by your organization for each software item. Because different numbers of licenses may have been purchased at different times, Sitekeeper displays each software type and version so a complete total of each product is shown. License Compliance gives you the necessary information to manage licensing. If Sitekeeper finds you are not in compliance, you can purchase the appropriate software licenses or, if need be, uninstall copies of software to ensure compliance. Determining License Compliance Determining your license compliance is performed by completing several tasks. First, in the Inventory Reporting module of Sitekeeper, select the option to create a License Compliance report. As with any other inventory report, you must then select the computers you want to include in your License Compliance report. Remember, any computer you select to include in a Sitekeeper task is considered a licensed computer and uses one of your Sitekeeper licenses. Then, again as with any other inventory report, you specify whether you want to compile software information from live data, or the historical data Sitekeeper has gathered from any previous scans of your licensed computers. The License Compliance report shows how many licenses are used for each software item on the selected computers. You can then select License Compliance in the task navigator to access the Manage Software Licenses page. This page shows the information gathered in the report. On this page you can also enter information about the software licenses owned by your organization. As you add licenses, the information is updated on the page to reconcile the number of installations of a software item with the number of licenses you hold for it. For example, if the License Compliance report showed you were using 50 licenses of Microsoft Office 2003 and you enter 50 licenses on the Manage Software Licenses page, the grid will update to show “0” in the Licenses Difference column. Selecting Computers for License Compliance Selecting the computers you want include in your license compliance reports is performed in the Inventory Reporting module. Select Inventory Reporting from the task navigator. On the select Report Type page, select License Compliance, then complete the report as you would any other inventory report. Specifying the Data Source for License Compliance As with selecting the computers you want include in your license compliance reports, specifying the data source is also performed in the Inventory Reporting module. When creating a License Compliance Report, on the Select Data Source page, you can specify whether you want to use live or history data for the report. 26 Managing Software Licenses The Manage Software Licenses page gives you the ability to maintain a wide variety of information about your software licenses. You can use it to ensure you maintain license compliance. The Manage Software Licenses page includes all software items installed on computers included in your License Compliance report. After you enter the number of licenses you hold for software, the License Difference column is automatically updated to show the licensing. To complete the Manage Software Licenses page, you will need a list of the programs licensed and the number of licenses purchased per program. Although not required, we recommend you also list the serial numbers or product keys applicable to each license. In addition to managing licenses for software inventoried by Sitekeeper, you can manually enter licensing information for software such as DOS or UNIX applications that Sitekeeper does not scan for. This enables you to keep track of these licenses for reference purposes in the Sitekeeper database. Completing the Manage Licenses page 1. In the task navigator, select License Compliance. The Manage Software Licenses page appears. The grid shows the inventoried software items on all your Sitekeeper licensed computers. 2. To add license information for a software item, click the down arrow beside it. The Add or Edit License screen appears. 27 3. Enter as much information about your licenses as you can so your data is as detailed as possible. We especially recommend that you enter the Serial Number for reference purposes. 4. Click OK. Your licensing information now appears in the grid and is reflected in the License Difference column. 5. Using the Hide Selected Item related task, you can hide software items so they do not appear on the Manage Licenses page. Adding Licensed Software In addition to managing licenses for software inventoried by Sitekeeper, you can manually enter information for software such as DOS or UNIX applications that Sitekeeper does not scan for. This enables you to keep track of these licenses for reference purposes in the Sitekeeper database. Completing the Add Licensed Software page 1. From the Manage Software Licenses page, select the Add New Software related task. The Add Licensed Software screen appears. 2. Specify a Publisher Name and Software Title. 3. Click OK. You return to the Manage Software Licenses page where the software now appears in the grid. 4. You can now enter licensing information for the newly entered software just as you would for software gathered by a Sitekeeper scan. Viewing Software Locations You can view all the locations where a particular software item is installed. From the Manage Software Licenses screen, select a software item, and select the View Software Locations related task. A page appears showing detailed information about each computer on which the software is installed. License Compliance Report The License Compliance Report shows licensing information for all programs installed on selected computers. To run a License Compliance Report, select Inventory Reporting in the task navigator. Select the Create a Report task and specify the License Compliance option. The report can use information you enter in the Manage Software Licenses grid to show detailed information on your license compliance. The report shows the number of licenses you hold and the number of licenses used. Any software for which you are not in license compliance appears in the report with a negative number in the License Difference column, so you can take corrective action, whether it be purchasing additional licenses or removing the software from workstations. 28 Using related tasks, you can hide software items so they do not appear in reports and manage hidden items from the report. 29 Chapter 5 Software Deployment The Software Deployment module enables you to easily install or uninstall software which is logocompliant for Windows 2000 and XP or Microsoft- Installer-compliant, on licensed computers throughout your network from a central location. Installing and Uninstalling Software When using Software Deployment, you must first select a task to specify whether you want to Push-Install Software or Uninstall Software. Then you select the software to be installed or uninstalled. Software selected for installation must reside on a shared drive or drives accessible to all computers on which the software is to be installed. You can select to install or uninstall software immediately, or “Set It and Forget It” by specifying to install or uninstall it later in the day when everyone has gone home. Selecting Software Sitekeeper comes with all the information you need to specify settings to install or uninstall many software packages. Before installing software, you must create a share on the directory on your computer in which the software to be installed is located. If you need to install or uninstall a software package which is not included in the Software Titles grid, you must specify command line parameters for it. Completing the Select Software page 1. On the Select Software page, the Software Titles grid appears. 2. Select the Software you want to deploy from the grid. 3. If you have not specified the shared location in which the software resides, you are prompted to specify a share. You can also select the Specify Share related task to enter this information. 4. If the software you want to deploy does not appear in the Software Titles grid, select the Add New Software Title related task. Adding New Software If software you want to deploy was not included in the Software Titles grid by default, you can manually specify the information Sitekeeper needs to deploy it. 30 Completing the Add New Software page 1. To access the Add New Software page, click the Enter New Software Title related task on the Select Software page. 2. On the Add New Software page, you must provide information about the software you want to deploy. Enter the Software Publisher, Software Title, and Software Version. This information will appear in the Software Titles grid on the Select Software page, and in Sitekeeper software reports. 3. You must specify Command Line Parameters for the software. The command line parameter runs the install or uninstall. If you edit an existing command line parameter, it will be associated with the software for any future installs or uninstalls. If you must edit these parameters, use extreme care to ensure the information you enter is correct. Specifying a Share Before you can complete this page, you must share the software’s folder on your network. When you specify this share, you must use a full Uniform Naming convention (UNC) path. To ensure a UNC path is entered, browse to the My Network Places level, then work your way down to the shared folder. The path will begin with \\ComputerName which is necessary for Sitekeeper to deploy the software. Completing the Specify Share page 1. On the Specify Share page, enter the Share Path. Specify the path to where the software is located. The Share Path must be a full Uniform Naming Convention (UNC) path. When you click Browse, you must browse to your network, then to your shared folder, and then to the setup.exe or .msi for the selected program. 2. Click Browse. 31 3. The Open screen appears 4. On your computer, the Open screen will start in a different drive and folder than shown above. However, no matter what folder this screen opens to, begin by clicking My Network. Then browse to the computer containing the shared folder, then to the shared folder itself, and finally to the setup.exe or .msi for the selected program to be installed. For example, the screenshot below shows an example a full UNC path as displayed in Windows Explorer. 32 5. 6. When you use the Browse button, you need to open each “level” of the path. In the example above, each level was browsed to in this order: • My Network Places • Entire Network • Microsoft Windows Network • Proddev (the name of the network) • Testpc (the name of the computer where the shared folder resides) • AdobeReader6Install (the name of the shared folder) • Adobe Reader 6.0.1.msi (the Microsoft Installer file that installs this software) Enter the User Name the Password Sitekeeper will use to access the share. The name must be preceded by the domain name (DomainName\Username) or, for a workgroup, by the computer name (ComputerName\Username). The permissions information you enter must be for an account that has sufficient permissions access the shared location. Selecting Computers Select the computers on which you want to install or uninstall software. You can view computers, manage custom groups, and change the computer view. When you select a computer for a task, you are specifying that it is licensed by Sitekeeper. The Licensed Computers Only view shows only those computers you have selected. You can select any combination of Computer Views for your network. If you want to create custom groups (for example, production or accounting) you can do so by selecting the Manage Groups related task. To be included in a Sitekeeper task, computers must be licensed by Sitekeeper. When you select a computer to be included in a task, you are specifying that it is licensed. Therefore, you can view only selected computers by selecting the Licensed Computers Only licensing view. Computers running Windows 9x, Windows Millennium Edition (ME), or Windows XP Home Edition, require an agent to be included in a Sitekeeper task. Additionally, computers you specify as remote (such as laptops which may not always be connected to the network) require the agent to be installed. 33 Completing the Select Computers page 1. On the Select Computers page, specify a Computer View in the Related Task pane by selecting any combination of the following: • Custom Groups • Domain • Active Directory • IP address Range If you select to display computers by IP address range, a page appears where you can provide the starting and ending IP addresses for the range you want to display. 2. You can also specify to view computers based on their Sitekeeper licensing status. When you select a computer to be included in a task, you are specifying that it is licensed. Therefore, if you select the Licensed Computers Only view, only computers selected for Sitekeeper tasks appear in the view. 3. Sitekeeper needs domain or workgroup permissions information to access licensed computers and include them in tasks. If you select computers for which Sitekeeper does not already have this information, you can enter it by selecting the Specify Permissions related task. If you don’t enter the information now, you will be prompted by Sitekeeper to enter it later. 4. You can select the Manage Groups related task to create custom groupings of your computers. Specifying Permissions Sitekeeper needs network permissions information to access licensed computers and include them in tasks. You can enter user name and password information for your domains and workgroups directly into the fields on the Specify Permissions page. If licensed computers are located on a domain, you must enter the user name and password that grants administrative access to that domain. If licensed computers are part of a workgroup, you must ensure that the user name and password you enter enable administrative privileges on each individual machine in the workgroup. Different user names and passwords may be required for each domain or workgroup containing machines which you have selected to included in a Sitekeeper task. If your authentication information changes, you will be prompted to enter the new information the next time you run a task including any computers affected by the change. Completing the Specify Permissions page 1. The Specify Permissions page appears automatically when you select a computer to be included in a Sitekeeper task and Sitekeeper does not have the network permission information it needs to access the computer. 2. The Permissions grid contains all the items Sitekeeper found on your network. 3. Enter the Name of the network item, specify its Type (such as a domain or workgroup). Enter the User name and Password Sitekeeper will use to access the item. 4. Using Related Tasks, you can Clear a selected row in the grid, or Clear All the information in the grid. Managing Computer Groups Computer groups enable you to run Sitekeeper tasks on specific computers in your network. For example, you may want to create separate groups for your development, accounting, and marketing computers. 34 You can edit existing groups or create new ones. To create a new group, click Create New Group in Related Tasks, and name the group. Then select a Network View, and drag and drop items into the new group folder. A single licensed computer can be included in multiple groups. A group can be a subgroup of another group. For example, your “Development” group may have two subgroups “Production” and “Test Machines.” A single licensed computer can be included in as many different groups as you like. Completing the Manage Groups page 1. On the Manage Groups page, to create a new group click Create New Group. A folder appears in the Computer View pane. 2. Type the name of your new group in the folder. 3. The folder you have selected when you click Create New Group determines the placement of the new group. Groups can subgroups of other groups. You can drag and drop groups to change their arrangement in the hierarchy. 4. You can specify to view only Groups, or select a related task so you can simultaneously Show Network View. 5. When you have both items in view, you can drag selected items from the Network View pane into a group’s folder A single custom group can contain computers from any part (or any combination of parts) of your network. Additionally, a single computer can be a part of as many different groups as you wish. Specifying an IP Address Range You can specify to view a specific group of computers by entering an Internet Protocol (IP) address range. If you enter an address in only the IP Address Start field, only the computer with that IP address is included. If you specify an end address, all computers between the start and end addresses are included. If the IP range covers multiple domains, you must enter the trusted domain name in the Domain field. When one domain “trusts” another, the user name and password defined in the “trusted” domain can be used for authentication and authorization in the “trusting” domain(s). Additionally, if you want to indicate a mask used to determine the subnet an IP address belongs to, you can do so on this page. Completing the Specify an IP Address Range fields 1. In the Domain field, enter the name of the domain containing the machine(s) with the IP address or IP address range you want to enter. 35 2. You can include a single computer by entering an address in the IP Address Start field only. 3. If you select the option to Specify End IP Address and enter an address, all computers with IP addresses falling within the range are included. 4. If you want to indicate the mask used to determine what subnet an IP address belongs to, select the Specify IP Mask option and enter the mask in the accompanying field. Set It and Forget It Options Sitekeeper enables you to deploy software now or to “Set It and Forget It” by indicating a time to run it later. For example, you may want to deploy software at night when most users have gone home. Completing the Software Deployment Set It and Forget It Options page 1. On the Select Set It and Forget It Options page, specify whether you want to Install/Uninstall software now or Install/Uninstall software later. 2. You can also specify whether you want the install or uninstall to end at a certain time. Specifying an end time does not mean the install or uninstall will go more slowly to fill the entire time frame you select. However, the install or uninstall will terminate at that time even if it has not completed for some reason. You can then view the Installation Report for details. Viewing the Deployment Job Summary Verify the details of the deployment on the Summary page. The page verifies information such as the software to be deployed, the selected licensed computers it will be deployed to, and other options you set on the previous pages. You can change the default Name and enter a Description of the job to further help you identify it in the queue. If you want to change any of these items, select the appropriate link in the task navigator on the left to do so. If you are ready to create the job, click the Install Software or Uninstall Software button. Software Deployment Job Queue The job queue lists all tasks, whether they are completed, pending, or currently running. From the related task pane, you can view and print a report. You can stop a current or pending job, and view the status of a job to see detailed information about it. Using the Software Deployment Job Queue 1. All deployment jobs you created appear in the grid on the View Job Queue page. 2. When you select a job, several related tasks are available. 3. If a job is currently running, or scheduled to run at a later time, you can cancel it by clicking the Stop related task. 4. Click Refresh to ensure all current jobs appear in the grid. Viewing Deployment Status From the Job Queue, you can select the View Status related task while a deployment is selected. The status grid shows detail information for the selected deployment. A Status of “Success” indicates that Sitekeeper was able to access a computer and begin the deployment on it. If Sitekeeper was not able to access a selected computer (it may have been offline for example), more information is provided in the Description column. You may want to filter on the Status column to show only computers which could not be accessed, then print a list for later reference. 36 If you have the Inventory Reporting module, you can ensure a deployment was successful by generating an inventory report for the computers included in the deployment. If you are not using one of the preconfigured installation packages that come with Sitekeeper for a deployment and the deployment fails, you may want to test to see if the software supports installation under the SYSTEM context. Sitekeeper uses the SYSTEM account to deploy software. Command Line Parameters A command line parameter is necessary to provide Sitekeeper with information it needs to install or uninstall software or updates using the Software Deployment module. Sitekeeper comes with default command line parameters for many software programs. Also, you may have custom command line parameters you have written for other software. If so, you can add your command line parameters and software on the Select Software page. If you have software you want to install or uninstall and it is not among the default items included on the Software Titles grid on the Select Software page, and you have not yet created a command line parameter for it, you must do so before you can install or uninstall it. On the Add New Software page, you can specify the name of the software and add the install or uninstall command line parameter for it. Each program may have different “switches” you must use to build a command line parameter — in other words “/s” may mean different things for different programs. For software that uses a Microsoft Installer (.msi) file, standard switches are available to customize an installation. For example, the “q” switch specifies the amount of user interface that appears during an installation: • q, qn - No user interface- “silent installation” • qb - Basic user interface - “unattended” installation, shows only progress bars on user interface • qr - Reduced user interface - may require some user input on target computer • qf - Full user interface requires user input on target computer. When adding other software packages that may not include an .msi file, information about available installation parameters is usually available from: • The User Guide for the software • The Help Files for the software • The vendor’s Web-based documentation (Knowledgebase or FAQs) • The vendor’s Technical Support department If you are unsure about how to build an installation or uninstallation command line parameter for a particular program, see the documentation for it, or contact the manufacturer. Testing a Deployment With the AT Command Line Scheduler If you are not using one of the preconfigured installation packages that come with Sitekeeper for a deployment and the deployment fails, we recommended you test your install parameters and verify that the software can be correctly installed under the context of SYSTEM. Please note that this is not the same as installing interactively at the command prompt. Sitekeeper uses the SYSTEM account to deploy software. If the software can be installed only from the USER context, Sitekeeper cannot deploy it. Because the AT Command Line Scheduler runs by default under the context of SYSTEM, you can use it as a debugging tool to determine if the problem is that the particular software does not support installation from the SYSTEM context. 37 Accessing the Microsoft AT Command Line Scheduler 1. To open a command prompt window, click Start on your Windows task bar, then select Run. The Run screen appears. 2. In the Run field, type “cmd” (without the quotes) and click OK. The command prompt appears. 3. At the cursor in the command prompt, type the letters “at” followed by a space, a forward slash, and question mark (“at /?”). A screen with details on how to use the at command appears. 4. Follow the onscreen prompts and enter your parameters where specified (see “command” in the prompts). The Windows Schedule Service must be running to launch jobs created in the Command Line Scheduler. For more information about the Schedule Service in your particular version of Windows, see the Windows help file. 5. If you are able to successfully install to a single computer with the Command Line Scheduler using your command line parameters, you are ready to use them in a Sitekeeper software deployment. 38 This page intentionally left blank. 39 Chapter 6 Patchkeeper The Patchkeeper module enables you to easily deploy a variety of software updates, upgrades, patches, hotfixes and service packs (collectively called updates) to your licensed computers. Patchkeeper manages the collection and deployment of these updates. Patchkeeper can automatically find, download and deploy software updates to anything from one to thousands of computers. It can also scan your network to see what computers are missing which updates, and automatically install them. Of course, you can also use Patchkeeper to manually download and deploy updates, giving you complete control over the entire operation. Utilizing the Shavlik Patch Management Technology, Patchkeeper scans your licensed computers, generates reports detailing the scans, locates the URL for any missing updates and prepares the update for deployment. Patchkeeper reports on Microsoft security updates and service packs for these applications: Operating systems: Windows NT 4.0 (all versions) Windows 2000 (all versions) Windows XP Home and Professional Windows Server 2003 (all versions) Internet Explorer (IE): IE 4.0, 5, 5.01, 5.5, 6.0 Sever applications: IIS 4.0, 5.0, 5.1, 6.0 SQL Server 7.0 and 2000 Exchange Server 5.5, 2000 and 2003 ISA Server 2000 Commercial applications: Windows Media Player 6.4, 7.0, 7.1, XP, 9.0 Office 2000, Office XP, Office 2003 (Office includes Word, Excel, PowerPoint, Access and Outlook.) 40 Windows components: MDAC 2.5, 2.6, 2.7, 2.8 .NET Framework 1.0, 1.1 Patchkeeper Best Practices It is broadly recognized the best practice in patch management is to test all patches before deploying them, in case they negatively affect applications your organization depends on for its production. Most system administrators have a few systems specifically used for testing. Here is how you can use Patchkeeper to automatically manage security patches on your network: 1. Create a group called “Test Systems” and schedule Patchkeeper to scan for and deploy missing patches to these systems every day and alert you via e-mail every time a missing patch is identified. Use the Manage Groups task shown in the Related Tasks pane on any of the Select Computer pages to create the "Test Systems" group. 2. Schedule your other systems to be automatically scanned and updated once or twice a week, but set a condition that only “Certified” patches can be deployed. 3. Monitor your test systems, and if the newly installed security patches cause no problems, flag them as “Certified” through the Patchkeeper Manage Updates feature. This way, newly certified updates are deployed automatically the next time a scan and deployment task is scheduled to occur. In this 1-2-3 fashion, you can automatically keep your entire network updated with the latest Microsoft security patches. Patchkeeper offers the ability to organize and create patch management tasks based upon the type of Microsoft software to be patched (operating system, Office, etc.) and the level of criticality assigned to a patch by Microsoft (Critical, Important, etc.). If missing patches are detected, alerts can be set to pop up on your desktop and/or be sent by e-mail to an unlimited number of mail boxes. Scan Reports can be scheduled to occur automatically, with the reports e-mailed to any number of recipients. Scans can be launched to search out the status of specific patches or with the Sitekeeper Quick Filtering feature, drilling down to the exact patch data needed takes just a few mouse clicks. Also note that it is highly advised that computers should be rebooted after installation of one or more updates. If you install updates and do not reboot, when you rescan the system, the true installation state may not be apparent, as the rescan may show the patch as installed (though the files have yet to be fully updated), or it may show as not installed (in cases where a reboot would copy the proper files into place). Executive Software strongly suggests that you perform a reboot at some point after you install the update— whether immediately after the installation, or at some later point . About Certified Updates Patchkeeper relies on the concept of “certified” and “uncertified” updates. Certified updates are those you have tested and determined to be safe and appropriate for deployment across all or a portion of your network. Although the vast majority of updates perform as designed, most system administrators test new updates thoroughly before deploying them to remote computers in a production environment. After you have tested an update, you “certify” it by selecting it and clicking Certify Selected Updates in the Related Tasks pane of the Manage Updates view. Uncertified updates are those you have not specifically tested and certified as described above. Patchkeeper allows you to deploy both certified and uncertified updates, but remember there is a certain risk in deploying untested updates. 41 Note: It is strongly recommend that you test any updates thoroughly before deploying them widely to production systems. About Status / Rating Information The various Patchkeeper report views provide information about the installed and/or missing updates on the selected computers. Two useful sources of information in the reports are the Status and Rating columns. Status Column This column shows at a glance which computers have been updated. Three possible types of update status are shown: Missing, Installed, or Effectively Installed. The Missing and Installed labels are selfexplanatory. When an update is shown as "Effectively Installed", it was not installed individually, but instead was installed as part of a bigger update package or service pack. Rating Column This column shows the severity rating of the update as defined in the Microsoft Security Response Center Security Bulletin Severity Rating System (Revised, November 2002). The severity rating applies to the vulnerabilities corrected by the update. The definitions of the ratings, as per the Microsoft article noted above, are: Rating Definition Critical A vulnerability whose exploitation could allow the propagation of an Internet worm without user action. Important A vulnerability whose exploitation could result in compromise of the confidentiality, integrity, or availability of users data, or of the integrity or availability of processing resources. Moderate Exploitability is mitigated to a significant degree by factors such as default configuration, auditing, or difficulty of exploitation. Low A vulnerability whose exploitation is extremely difficult, or whose impact is minimal. Unknown Patchkeeper determines the patch status of a computer by evaluating the presence of specific registry keys, file versions, and file checksums associated with a given update. There are some instances where Patchkeeper is not able to determine the patch installation status because detailed file and registry key information is not available for the specified update. If this occurs, “Unknown” is assigned as the severity status. “Unknown” does not indicate that the computer being scanned is insecure. It only indicates that Patchkeeper is not able to fully determine if the appropriate patch or workaround has been applied. Remediation of these issues usually involves a configuration change or workaround rather than a patch. You can disregard the “Unknown” status once you have applied the specific update or evaluated your system and made any needed configuration changes. Scan and Update Patchkeeper allows you to scan for missing updates and deploy them automatically or manually. You can also specify update packages on your system and schedule their deployment according to your needs. If you select an option that includes generating a report, you can choose updates from within the report and deploy them to the computers you specify. You can select from these scan and update options: 42 • Scan for missing updates and automatically update computers • Scan for missing updates and generate a report, with the option to deploy specific updates • Manually specify updates to scan for and generate a report, with the option to deploy specific updates Scan and Automatic Update Scan for missing updates and automatically update computers Select this option to have Patchkeeper scan the selected computers to determine what updates are missing, then automatically deploy any missing updates to the computers that need them. When you select this option, the Scan and Update wizard guides you through these steps: • • • • • • • Specify Criteria Specify UNC Path Select Computers Select Schedule Set Alerts and Notifications Set Deployment Options Summary Specify Criteria The Specify Criteria page of the Scan and Update wizard shows the applications, versions and categories of security updates or service packs, and allows you to select which of these criteria will be used in the scan for missing updates. You can customize the scan in many ways. For example, you can scan for all missing updates or service packs on all supported operating systems, regardless of the category assigned to them by Microsoft (Low, Moderate, Important, Critical or Unknown). As other examples, you can limit the scan to only look for DirectX updates that are "Important" or "Critical", or scan for only critical Windows NT service packs. The choices are very flexible. You can select or de-select any combination of criteria by holding the <Ctrl> key and clicking on your choices. Use the options in the Related Tasks pane to select or clear all of the criteria displayed. In order to have Scan and Update find updates in categories other than those explicitly listed, you must choose Clear All, which means “No criteria selection, so find anything available.” Specify UNC Path In order to deploy updates, you must specify the (UNC) path to the shared folder where the downloaded update packages have been stored. The UNC path begins with the computer name in this form: \\ComputerName\SharedFolderName. Click Browse to easily browse to the shared folder where the update packages are stored, or manually enter the UNC path in the Share path: field. Hint: To easily enter the full UNC path, click Browse. On the Select Path screen, click the My Network icon then click Entire Network and browse to the update package folder. This ensures the path begins with the computer name in the correct format. Also remember the folder must be shared and writable. For more information about shared folders, see About Shared Folders on page 5. Be aware that you must also specify login credentials (or permissions) for the UNC path you specify. Note that on a domain, the user name begins with the domain name in this form: DomainName\UserName. For a Workgroup, the user name will use this form: ComputerName\UserName. Each time a UNC path is required, Patchkeeper checks to see if a valid UNC path has been entered previously. If you have already specified a valid path, you are not prompted to enter a new path. However, you can change the path by clicking Specify UNC Path in the task navigator pane. 43 Completing the Specify UNC Path Page 1. On the Specify UNC Path page, enter the Share Path. Specify the path to where the software is located. To do this easily, click Browse. 2. The Open screen appears On your computer, the Open screen will start in a different drive and folder than shown above. However, no matter what folder this screen opens to, begin by clicking My Network. Then browse to the computer containing the shared folder, then to the shared folder itself, and finally to the setup.exe or .msi file for the selected program to be installed. The Share Path must be a full Uniform Naming Convention (UNC) path. When you click Browse, you must browse to your network, then to your shared folder. For example, the screen shot below shows an example a full UNC path as displayed in Windows Explorer. 44 When you use the Browse button, you must open each "level" of the path. In the example above, each level was browsed to in this order: • • • • • • • My Network Places Entire Network Microsoft Windows Network Proddev (the name of the network) Testpc (the name of the computer where the shared folder resides) AdobeReader6Install (the name of the shared folder) Adobe Reader 6.0.1.msi (the Microsoft Installer file that installs this software) 3. Enter the User Name and the Password Sitekeeper will use to access the share. The name must be preceded by the domain name (DomainName\Username) or, for a workgroup, by the computer name (ComputerName\Username). The permissions information you enter must be for an account that has sufficient permissions to access the shared location. 4. When done entering the necessary information, click Next to continue to the Select Computers page. Select Computers Selecting the computers you want include in your scans and reports is performed in the same manner as is done for most other Sitekeeper tasks. Navigate the tree view to select domains, workgroups, custom groups and individual computers you want to scan (and optionally deploy updates to). The Related Tasks pane offers useful options for specifying permissions, managing groups, and changing the items shown in the Computer View pane. You can also show all the computers on your network or only those with valid Patchkeeper licenses. After making your selection, click Next. Select Schedule Patchkeeper allows you to perform the scan for missing updates now or "Set It and Forget It" by specifying a time to run it later. For example, you may want to run the scan at night when there is less activity on your network. Additionally, you can specify to run the scan and update on a recurring basis. For example, you want to automatically run a scan for missing Critical updates for your computers on a weekly basis. Completing the Select Schedule Page 1. On the Select Schedule page, specify whether you want to Create report now or Create report later. 2. If you select to create it now, the scan begins. If you select to create it later, additional options are enabled. 45 3. Specify whether the update scan should Run once or Run recurring. 4. If you specify to run the report once, specify the Date and Time it should run. If you specify to run it on a recurring basis, you can specify the pattern for when it should run. Set Alerts and Notifications You can optionally specify how Patchkeeper will notify you when the scan and update task has been completed. You can choose to have a Windows popup message displayed or an e-mail message sent when the task is done. You can customize the text in the e-mail message, and say who will receive it. Completing the Set Alerts and Notifications page 1. Select the options to launch a Windows popup dialog and/or to distribute the report as an e-mail attachment. 2. If you select to send the report attached to an e-mail message, follow these additional steps: 3. a. Specify the e-mail address of the people you want to receive the report. Use a semi-colon (;) to separate multiple e-mail addresses. b. Enter an e-mail address in the "Sender" field. If you do not enter an address, an informational message is displayed and the default address is entered. The default is "[email protected]". This is the name displayed in the "From" field when the e-mail message is received. c. Specify a subject line for the e-mail message. If you do not enter a subject, an informational message is displayed and the default subject is entered. The default subject is "Patchkeeper Task Completed". d. Enter the text for the e-mail message to which the scan report will be attached. If you do not enter the message text, an informational message is displayed and a default message is created. The message tells the recipient(s) the Patchkeeper task has been completed and directs their attention to the attached report. e. Enter the SMTP name of your outgoing e-mail server. This is usually a name similar to smtp.YourEmailServer.com. Click Next after you have entered your alert preferences. Set Deployment Options This page of the Scan and Update wizard allows you to specify how you want updates deployed on your network. You can choose to have Patchkeeper retry a deployment for cases where some of the selected computers are unavailable—either turned off or not connected to the network—when the initial deployment task is done. Summary The Summary page of the Scan and Update wizard shows information about the pending scan. You can create or edit the name and description of the update scan task in the Name and Description fields. The Selected Computers area of the display lists the computers you have selected for the update scan task. If you need to make any changes to the scan and update task, click Back or select the desired step in the task menu on the left of the Patchkeeper display. Click Start when you are ready to begin the scan and update task. 46 Scan and Semi-Auto Update Scan for missing updates and generate a report Select this option to have Patchkeeper scan the selected computers to determine what updates are missing, then generate a report showing any missing updates and the computers that need them. From the report, you can select the computers to which you want to deploy the updates, and proceed with the deployment operation. When you select the option to scan and generate a report of missing updates, the Scan and Update wizard guides you through these steps: • • • • • Specify Criteria Select Computers Select Schedule Set Alerts and Notifications Summary You will note these steps mirror most of those shown in the Scan and Automatically Update wizard described on page 42. If you opt to deploy the missing updates directly from the report, you will be guided through the appropriate steps. Manually Specify Updates Select this option to manually specify the updates for which you want Patchkeeper to scan. After the scan is completed, Patchkeeper generates a report showing any missing updates and the computers that need them. From the report, you can select the computers to which you want to deploy the updates, and proceed with the deployment operation. When you select this option, the Scan and Update wizard guides you through these steps: • • • • • Specify Updates Select Computers Select Schedule Set Alerts and Notifications Summary With the exception of the Specify Updates step (described in the following section), these steps also mirror most of those shown in the Scan and Automatically Update wizard described on page 42. As with the SemiAuto Scan and Update, if you opt to deploy the missing updates directly from the report, you will be guided through the appropriate steps. Scan and Update - Specify Updates The Specify Updates page of the Scan and Update wizard allows you to manually enter the names of security updates or service packs you have previously downloaded, or click Add Updates to select from a list of the updates available to you. The Add Updates page gives a listing of the updates available to you. You can filter, sort and select one or more individual updates based on these criteria: Update Name — such as Q999999 or Windows XP Professional SP2 Rating — from Low to Critical Description — as described by Microsoft Product Name — such as Internet Explorer or SQL Server 2000 Missing Count — the number of computers missing that update Certified — updates you have tested and confirmed to be OK (see page 40 for more on Certified 47 Updates) Detected Time — the date and time the update was detected Downloaded — shows if Patchkeeper has downloaded the update You can select or de-select any combination of updates by holding the <Ctrl> key and clicking on your choices. After selecting the updates you want to scan for, click Next. The Scan and Update wizard then continues through the remaining steps. If you are manually entering update names, you can specify more than one update by separating the update names with a semi-colon (;). Manage Updates You can use Patchkeeper to manage the updates stored in the Sitekeeper database. Use the Manage Updates option in the Patchkeeper task menu to see a listing of all the updates available. Like many other Sitekeeper pages, this information is displayed in a table, and you can sort and filter the report columns for each of these column fields: Update Name — such as Q999999 or Windows XP Professional SP2 Rating — from Low to Critical Description — as described by Microsoft Product Name — such as Internet Explorer or SQL Server 2000 Missing Count — the number of computers missing that update Certified — updates you have tested and confirmed to be OK (see page 40 for more on Certified Updates) Detected Time — the date and time the update was detected Downloaded — shows if Patchkeeper has downloaded the update Use the options in the Related Tasks pane to perform these update management tasks: • • • • • • • View Patch Details Deploy Selected Updates Locate Selected Updates Certify Selected Updates Print / Print Preview Hide Selected Updates View Type View Patch Details Click View Patch Details in the Related Tasks pane to see a detailed description of the selected update. This description includes: • The Microsoft Bulletin ID, with a link to view the bulletin • The Microsoft Knowledge Base article number, with a link to view the article • A summary describing the issues addressed by the update 48 • Any comments entered about the update • The severity and criticality ratings of the update as determined by Microsoft • The approval status of the selected update • The downloaded status of the selected update, with a link to download it Deploy Selected Updates Click Deploy Selected Updates in the Related Tasks pane to start the Update Deployment wizard. You will be guided through these steps: • Patch Location • Specify UNC path • Select Schedule • Set Retry Options • Set Alerts and Notifications • Summary Patch Location The Patch Location page shows you if the selected update is missing or has not yet been downloaded. If the update has been installed, this view shows you the computers where it has been installed. Select the update(s) you want to deploy, then click Next. Specify UNC Path In order to deploy updates, you must specify the (UNC) path to the shared folder where the downloaded update packages have been stored. The UNC path begins with the computer name in this form: \\ComputerName\SharedFolderName. Click Browse to easily browse to the shared folder where the update packages are stored, or manually enter the UNC path in the Share path: field. Hint: To easily enter the full UNC path, click Browse. On the Select Path screen, click the My Network icon then click Entire Network and browse to the update package folder. This ensures the path begins with the computer name in the correct format. Also remember the folder must be shared and writable. For more information about shared folders, see page 5. Be aware that you must also specify login credentials (or permissions) for the UNC path you specify. Note that on a domain, the user name begins with the domain name in this form: DomainName\UserName. For a Workgroup, the user name will use this form: ComputerName\UserName. Each time a UNC path is required, Patchkeeper checks to see if a valid UNC path has been entered previously. If you have already specified a valid path, you are not prompted to enter a new path. However, you can change the path by clicking Specify UNC Path in the task navigator pane. Select Schedule Patchkeeper allows you to perform the update deployment now or "Set It and Forget It" by specifying a time to run it later. For example, you may want to run the deployment at night when there is less activity on your network. Additionally, you can specify an "ending time" at which the update installation will stop, if it 49 has not already finished. This is useful for cases where you want to ensure the update installation is not running, such as the beginning of a work day (following a nighttime update installation). Completing the Select Schedule page 1. On the Select Schedule page, specify whether you want to Install software now or Install software later. 2. If you select to install the update now, the installation begins immediately. 3. If you select to install the update later, additional options are enabled to allow you to specify a date and time when the installation will start, and optionally set a date and time for the installation to end (in the event it has not yet completed). 4. Select the scheduling options of your choice, and click Next to continue the update deployment. Set Retry Options The Set Retry Options page allows you to optionally specify whether Patchkeeper will be allowed to retry the deployment task in the event any of the selected computers were unavailable when the initial deployment task was run. This is useful for cases where a selected computer was either turned off or disconnected from the network. Select I want to enable deployment re-queues to enable this option. When it is enabled, you are given a broad range of scheduling choices, allowing Patchkeeper to retry the deployment daily or weekly on the schedule you specify. Select Reboot after the installation to allow the computer to be restarted after the update is installed. Note: If you install updates and do not reboot, when you rescan the system, the true installation state may not be apparent, as the rescan may show the patch as installed (though the files have yet to be fully updated), or it may show as not installed (in cases where a reboot would copy the proper files into place). For these reasons, Executive Software strongly suggests that you perform a reboot at some point after you install the update whether immediately after the installation, or at some later point. Set the retry options of your choice (if any) and click Next to continue with the deployment task. Set Alerts and Notifications You can optionally specify how Patchkeeper will notify you when the update deployment task has been completed. You can choose to have a Windows popup message displayed or an e-mail message sent when the task is done. You can customize the text in the e-mail message, and say who will receive it. Completing the Set Alerts and Notifications page 1. Select the options to launch a Windows popup dialog and/or to distribute the report as an e-mail attachment. 2. If you select to send the report attached to an e-mail message, follow these additional steps: a. Specify the e-mail address of the people you want to receive the report. Use a semi-colon (;) to separate multiple e-mail addresses. b. Enter an e-mail address in the "Sender" field. If you do not enter an address, an informational message is displayed and the default address (is entered. The default is "[email protected]". This is the name displayed in the "From" field when the e-mail message is received. c. Specify a subject line for the e-mail message. If you do not enter a subject, an informational message is displayed and the default subject is entered. The default subject is "Patchkeeper Task Completed". 50 3. d. Enter the text for the e-mail message to which the scan report will be attached. If you do not enter the message text, an informational message is displayed and a default message is created. The message tells the recipient(s) the Patchkeeper task has been completed and directs their attention to the attached report. e. Enter the SMTP name of your outgoing e-mail server. This is usually a name similar to smtp.YourEmailServer.com. Click Next after you have entered your alert preferences. Summary The Summary page of the Update Deployment wizard shows information about the pending deployment task. You can create or edit the name and description of the update deployment task in the Name and Description fields. If you need to make any changes to the update deployment task, click Back or select the desired step in the task menu on the left of the Patchkeeper display. Click Install Patch when you are ready to deploy the update. Also note that it is highly advised that computers should be rebooted after installation of one or more updates. If you install updates and do not reboot, when you rescan the system, the true installation state may not be apparent, as the rescan may show the patch as installed (though the files have yet to be fully updated), or it may show as not installed (in cases where a reboot would copy the proper files into place). Executive Software strongly suggests that you perform a reboot at some point after you install the update— whether immediately after the installation, or at some later point. Locate Selected Updates Click Locate Selected Updates in the Related Tasks pane to open the Patch Location page. This view shows you which computers have been patched with the selected update, and which have not. The Patch Location page shows the following: Domain Name The domain name for the specific computer. Machine Name The machine name for the specific computer. Product Name The product to which the update applies. Status The installation status of the specific update. See About Status/Rating Information on page 41 for more information about the Status column. Installed By The name of the person or process responsible for installing the update. Installed On The date and time the update was installed. 51 The Related Tasks pane offers these options when viewing the Patch Location page: Add Machines to a Group Click this option to add the selected computers to a custom group. See Managing Computer Groups on page 19 for more information about custom groups. Print Print the Patch Location page. Print Preview Display how the Patch Location page will look in printed form. Install Selected Patch Starts the Patch Installation wizard and guides you through the installation of the selected update(s). This option is only available if the selected patch has already been downloaded. Certify Selected Updates Click Certify Selected Updates in the Related Tasks pane to designate the selected updates as "Certified". Certified updates are those you have tested and determined to be safe and appropriate for deployment across all or a portion of your network. Although the vast majority of updates perform as designed, most system administrators test new updates thoroughly before deploying them to remote computers in a production environment. After you have tested an update, you “certify” it by selecting it and clicking Certify Selected Updates in the Related Tasks pane of the Manage Updates view. Not Certified updates are those you have not specifically tested and certified as described above. Patchkeeper allows you deploy both certified and uncertified updates, but remember there is a certain risk in deploying untested updates. Note: It is strongly recommend that you test any updates thoroughly before deploying them widely to production systems. Clear Certifications Click Clear Certifications in the Related Tasks pane to remove the certification from selected updates that were previously Certified. This option is only available when you have selected Certified updates in the Manage Updates page. See About Certified Updates above for more information about update certification. Patchkeeper allows you deploy both certified and uncertified updates, but remember there is a certain risk in deploying untested updates. Print / Print Preview Click Print in the Related Tasks pane to print the current view. Similarly, click Print Preview to see an on-screen sample of how the printed report will look. Hide Selected Updates Click Hide Selected Updates in the Related Tasks pane to remove any selected updates from the Normal view type. This option is useful for cases where you know you do not need to use or see one or more particular updates in the listing. 52 To "unhide" previously-hidden updates and make them visible in the Normal view type again, select the Hidden view type in the Related Tasks pane, select the updates you want to unhide, then click Unhide. View Type The View Type option in the Related Tasks pane offers these viewing options: Normal — This view shows all updates that you have not specifically hidden (with the Hide Selected Updates option) Hidden— This view shows all updates that you have specifically hidden using the Hide Selected Updates option. All — This view shows all updates, both Normal and Hidden Clear All Filters Click Clear All Filters in the Related Tasks pane to clear any Quick Filters you have set in the Manage Updates page. See Quick Filtering on page 4 for more information about filtering the information shown on various Patchkeeper pages. Build and View Reports Patchkeeper provides a quick way to create reports that show which computers on your network are missing updates. You can customize the reports to provide only the information you need. Of course, after a report is built, it can be viewed from within Sitekeeper, printed, saved or sent via e-mail to the recipients you specify. Reports can be based on real-time data or on data already gathered and stored in the Sitekeeper database. You can select from these reporting options: • Build a custom report • Open a report from the Patchkeeper Job Queue • Open a previously-saved report Build Custom Report You can build a custom Patchkeeper report based on missing updates, or select specific applications, versions or update categories (such as Critical or Moderate) on which to base the report. You can also create a report based on one or more individual updates you specify. Patchkeeper provides the flexibility to create reports that give you the information you need, without becoming overwhelmed with unnecessary data. You can choose to build a report based on missing updates (or other update criteria), or create a report based on updates you specify. Create a report based on missing updates Select this option to have Patchkeeper create the report based on missing updates or other update criteria. When you select this option, the Build and View Reports wizard guides you through these steps: • Specify Criteria • Select Computers • Select Data Source • Select Schedule 53 • Set Alerts and Notifications • Summary Specify Criteria If you choose to build a report based on missing updates, the Specify Criteria page is displayed. This page provides a table showing all of the different update criteria. By default, all the update criteria are selected. You can accept this default, or select specific criteria of your choice. The Patchkeeper report will show which selected computers are missing the updates you have specified. The Specify Criteria page of the Build and View Reports wizard shows the applications, versions and categories of security updates or service packs, and allows you to select which of these criteria will be used in the scan for missing updates. You can customize the scan in many ways. For example, you can scan for all missing updates or service packs on all supported operating systems, regardless of the category assigned to them by Microsoft (Low, Moderate, Important, or Critical). As other examples, you can limit the scan to only look for DirectX updates that are “Important” or “Critical”, or scan for only critical Windows NT service packs. The choices are very flexible. You can select or de-select any combination of criteria by holding the <Ctrl> key and clicking on your choices. Use the options in the Related Tasks pane to select or clear all of the criteria displayed, and to clear any Quick Filters you have set. See page 4 for more information about Quick Filters. After selecting the criteria of your choice, click Next. Select Computers Selecting the computers you want include in your scans and reports is performed in the same manner as is done for most other Sitekeeper tasks. Navigate the tree view to select domains, workgroups, custom groups individual computers you want to scan (and optionally deploy updates to). The Related Tasks pane offers useful options for specifying permissions, managing groups, and changing the items shown in the Computer View pane. You can also show all the computers on your network or only those with valid Patchkeeper licenses. After making your selection, click Next. Select Data Source Whether you are building a custom report from update criteria or specific updates, Patchkeeper reports can be based on a real-time scan of the selected computers (called live data), or update information already stored in the Sitekeeper database (called history data). The Select Data Source page allows you to select between live or history data, and it displays a list of scan jobs available from the Sitekeeper database. • A report based on a real-time scan provides the most current information, but it can also take time and network resources to gather the information. Of course, like many other Sitekeeper tasks, the scan can be scheduled for a time when network activity is low. After selecting this option. click Next to open the Select Schedule page or click Build to create the report now. • A report based on Sitekeeper database data is generated more quickly than a report using a real-time scan, but it may not reflect the most current information available. This method does not offer the opportunity to schedule the report generation for a later time. After selecting this option. click Build to create the report now. Select Schedule If you choose to build the report based on live real-time data, Patchkeeper allows you to perform the scan for missing updates now or "Set It and Forget It" by specifying a time to run it later. For example, you may want to run the scan at night when there is less activity on your network. Additionally, you can specify to 54 run the scan and update on a recurring basis. For example, you want to automatically run a scan for missing Critical updates for your computers on a weekly basis. Completing the Select Schedule page 1. On the Select Schedule page, specify whether you want to Create report now or Create report later. 2. If you select to create it now, the scan begins. If you select to create it later, additional options are enabled. 3. Specify whether the update scan should Run once or Run recurring. 4. If you specify to run the report once, specify the Date and Time it should run. If you specify to run it on a recurring basis, you can specify the pattern for when it should run. Set Alerts and Notifications If you select to use live real-time data for the report, you can specify how Patchkeeper will notify you when the scan and report generation task has been completed. You can choose to have a Windows popup message displayed or an e-mail message sent when the task is done. You can customize the text in the email message, and say who will receive it. Completing the Set Alerts and Notifications page 1. Select the options to launch a Windows popup dialog and/or to distribute the report as an e-mail attachment. 2. If you select to send the report attached to an e-mail message, follow these additional steps: 3. a. Specify the e-mail address of the people you want to receive the report. Use a semi-colon (;) to separate multiple e-mail addresses. b. Enter an e-mail address in the “Sender” field. If you do not enter an address, an informational message is displayed and the default address (is entered. The default is "[email protected]". This is the name displayed in the “From” field when the e-mail message is received. c. Specify a subject line for the e-mail message. If you do not enter a subject, an informational message is displayed and the default subject is entered. The default subject is “Patchkeeper Task Completed”. d. Enter the text for the e-mail message to which the scan report will be attached. If you do not enter the message text, an informational message is displayed and a default message is created. The message tells the recipient(s) the Patchkeeper task has been completed and directs their attention to the attached report. e. Enter the SMTP name of your outgoing e-mail server. This is usually a name similar to smtp.YourEmailServer.com. Click Next after you have entered your alert preferences. Summary The Summary page of the Build and View Reports wizard shows information about the pending scan. You can create or edit the name and description of the update scan task in the Name and Description fields. The Selected Computers area of the display lists the computers you have selected for the update scan task. 55 If you need to make any changes to the scan and update task, click Back or select the desired step in the task menu on the left of the Patchkeeper display. When you are satisfied with your choices, click Build. Create a Report Based on Updates You Specify If you choose to build a report based on specific updates, you can enter the update names manually, using a semi-colon (;) to separate the update names. Better yet, click Add Updates to open the Manage Updates page. From there, you can filter, sort and select one or more individual updates based on these criteria: Update Name — such as Q999999 or Windows XP Professional SP2 Rating — from Low to Critical Description — as described by Microsoft Product Name — such as Internet Explorer or SQL Server 2000 Missing Count — the number of computers missing that update Certified — updates you have tested and confirmed to be OK (see page 40 for more on Certified Updates) Detected Time — the date and time the update was detected Downloaded — shows if Patchkeeper has downloaded the update After selecting the updates on which you want to base the report, click Next. The Build and View Reports wizard then guides you through these steps: • Specify Updates • Select Computers • Select Schedule • Set Alerts and Notifications • Summary Specify Updates The Specify Updates page of the Build and View Reports wizard allows you to manually enter the names of security updates or service packs you have previously downloaded, or click Add Updates to select from a list of the updates available to you. If you are manually entering update names, you can specify more than one update by separating the update names with a semi-colon (;). Select Computers Selecting the computers you want include in your scans and reports is performed in the same manner as is done for most other Sitekeeper tasks. Navigate the tree view to select domains, workgroups, custom groups individual computers you want to scan (and optionally deploy updates to). 56 The Related Tasks pane offers useful options for specifying permissions, managing groups, and changing the items shown in the Computer View pane. You can also show all the computers on your network or only those with valid Patchkeeper licenses. After making your selection, click Next. Select Data Source Whether you are building a custom report from update criteria or specific updates, Patchkeeper reports can be based on a real-time scan of the selected computers (called live data), or update information already stored in the Sitekeeper database (called history data). The Select Data Source page allows you to select between live or history data, and it displays a list of scan jobs available from the Sitekeeper database. • A report based on a real-time scan provides the most current information, but it can also take time and network resources to gather the information. Of course, like many other Sitekeeper tasks, the scan can be scheduled for a time when network activity is low. After selecting this option. click Next to open the Select Schedule page or click Build to create the report now. • A report based on Sitekeeper database data is generated more quickly than a report using a real-time scan, but it may reflect the most current information available. This method does not offer the opportunity to schedule the report generation for a later time. After selecting this option, click Build to create the report now. Select Schedule If you choose to build the report based on live real-time data, Patchkeeper allows you to perform the scan for missing updates now or "Set It and Forget It" by specifying a time to run it later. For example, you may want to run the scan at night when there is less activity on your network. Additionally, you can specify to run the scan and update on a recurring basis. For example, you want to automatically run a scan for missing Critical updates for your computers on a weekly basis. Completing the Select Schedule page 1. On the Select Schedule page, specify whether you want to Create report now or Create report later. 2. If you select to create it now, the scan begins. If you select to create it later, additional options are enabled. 3. Specify whether the update scan should Run once or Run recurring. 4. If you specify to run the report once, specify the Date and Time it should run. If you specify to run it on a recurring basis, you can specify the pattern for when it should run. Set Alerts and Notifications You can specify how Patchkeeper will notify you when the scan and report generation task has been completed. You can choose to have a Windows popup message displayed or an e-mail message sent when the task is done. You can customize the text in the e-mail message, and say who will receive it. Completing the Set Alerts and Notifications page 1. Select the options to launch a Windows popup dialog and/or to distribute the report as an e-mail attachment. 2. If you select to send the report attached to an e-mail message, follow these additional steps: a. Specify the e-mail address of the people you want to receive the report. Use a semi-colon (;) to separate multiple e-mail addresses. b. Enter an e-mail address in the “Sender” field. If you do not enter an address, an informational message is displayed and the default address (is entered. The default is 57 “[email protected]”. This is the name displayed in the "From" field when the e-mail message is received. c. Specify a subject line for the e-mail message. If you do not enter a subject, an informational message is displayed and the default subject is entered. The default subject is “Patchkeeper Task Completed”. d. Enter the text for the e-mail message to which the scan report will be attached. If you do not enter the message text, an informational message is displayed and a default message is created. The message tells the recipient(s) the Patchkeeper task has been completed and directs their attention to the attached report. e. Enter the SMTP name of your outgoing e-mail server. This is usually a name similar to smtp.YourEmailServer.com. Click Next after you have entered your alert preferences. Summary The Summary page of the Build and View Reports wizard shows information about the pending scan. You can create or edit the name and description of the update scan task in the Name and Description fields. The Selected Computers area of the display lists the computers you have selected for the update scan task. If you need to make any changes to the scan and update task, click Back or select the desired step in the task menu on the left of the Patchkeeper display. When you are satisfied with your choices, click Build. Open a Report from the Job Queue Select this option in the opening Build and View Reports page and click OK to open a report from the Patchkeeper Job Queue. The Job Queue contains information from previous Patchkeeper data collection scans. This information is displayed in a table, and you can sort and filter the report columns for each of these column fields: Job Name — the name you specified when the data collection scan was run Schedule — shows the schedule option specified when the data collection scan was run Next Run Time — for scheduled data collection scans Last Run Time — the last time the data collection scan was run Status — shows if the data collection scan was successful or not Select any of the jobs displayed, and click the option of your choice in the Related Tasks pane: • Click View Report to open the View Reports page and display a detailed report, based on the data gathered in the selected collection scan job. From the View Reports page, you can choose different reports by clicking the tabbed controls at the top of the page. You can also select from a wide variety of options in the Related Tasks pane of the View Reports page. 58 • Click View Status to open the View Data Collection Report page and see the success or failure status of the selected collection scan job. From this page, you can click View Patch Install Status in the Related Tasks pane to see details about the installation status of the individual updates included in the selected collection scan job data. • The Print, Print Preview, Delete Selected Job and Refresh options in the Related Tasks pane are self-explanatory. Open Saved Report Select this option in the opening Build and View Reports page and click Browse... to open a previously saved report. This opens a typical Windows browse dialog box, from which you can navigate to the folder containing Patchkeeper scan reports you have previously saved. Using this option opens the saved report and displays it in the View Reports page. View Reports Use the View Reports option in the Patchkeeper Task menu to view reports you have created during the current Patchkeeper session, or previously-saved reports you have opened via the Build and View Reports option. This option is only available when there are reports to be viewed. After you have created or otherwise opened reports, this option becomes available, and the number of available reports is also shown. Select this option to open the View Reports page. The View Reports page displays all the available reports in a tabbed format. Click the tabs at the top of the page to switch between the available reports. The Related Tasks pane offers two primary options for viewing each report: • View Report • View Status Report View Click View Report in the Related Tasks pane to see the details of the report scan you selected with the tabbed controls at the top of the page. You can see a vast amount of information presented in a very flexible format. Report Type At the top of each report is the Report Type selection box. Each report can be viewed in "Update By Title" or "Update By Computer" formats. As their names imply, each report type emphasizes an important aspect of update management. As with other Sitekeeper screens, you can use the Quick Filtering capabilities described on page 4 to filter either report format in a wide variety of ways. The Update By Title format lists the installed updates (or missing updates, depending on the report scan criteria) by name. It also shows the following: Rating The severity rating for the update, as described in About Status/Rating Information on page 41. Description A brief description of the specific update. Product Name The product to which the update applies. Missing Count The number of selected computers that are missing the specific update. 59 Certified Shows whether the update has been certified by you. See About Certified Updates on page 40 for more information. Detected Time When the update was detected. Downloaded Shows whether the update has been downloaded. The Update By Computer format lists the installed updates (or missing updates, depending on the report scan criteria) by computer. This is a useful way to see which computers have which updates installed. This format shows the following: Domain Name The domain name for the specific computer. Machine Name The machine name for the specific computer. Product The product to which the update applies. Status The installation status of the specific update. See About Status/Rating Information on page 41 for more information about the Status column. Rating This column shows whether the update has been certified by you. See About Status/Rating Information on page 41 for more information about the Rating column. Name The name (or title) of the update, as given by Microsoft. Description A brief description of the specific update. Detected On When the update was detected. Installed By The name of the person or process responsible for installing the update. Installed On The date and time the update was installed. Status View Click View Status in the Related Tasks pane to see the status of the report scan you selected with the tabbed controls at the top of the page. You can see the scan status (Success or Failure) and whether the scan is Scheduled, In Progress, or Completed. This is a convenient way to confirm which selected computers were successfully scanned for updates. The Related Tasks pane in this view offers these options: View Report Click this option to switch from the Status View to the Report View. Refresh Click this option to refresh the status report (for cases where the scan is pending or in progress). Add Machines Click this option to add the selected computers to a custom group. See Managing Computer Groups on page 19 for more information about 60 to a Group custom groups. Print Print the status report. Print Preview Display how the report will look in printed form. View Reports Related Tasks The Related Tasks pane in the View Reports module provides different options, depending on the report format selected. Related Tasks — Update By Title When you select the Update By Title report format, these options are available in the Related Tasks pane: View Status Switches to Status Report view. Save this Report as Saves the report and specify a name for it. Close this Report Closes the report and removes it from the View Report tabbed display. Print Prints the report. Print Preview Displays how the report will look in printed form. Unpin Report Unpins the report so it displays in a separate window. View Patch Details Shows details about the selected update. View Machine Locations Shows the computers to which the selected update applies. Install Selected Patch Starts the Patch Installation wizard and guides you through the installation of the selected update(s). This option is only available if the selected patch has already been downloaded. Hide Selected Updates Removes the selected updates from the report view. Hidden updates can be seen by selecting Hidden under the View Type option described below. When viewing hidden updates, this option changes to Unhide Selected Updates. View Type Offers the options to view Normal, Hidden or All updates. Normal updates are those that have not been hidden with the Hide Selected Updates option described above. Hidden updates are as the name implies: hidden from normal view. The All option shows both Normal and Hidden updates. 61 Clear All Filters Clears any Quick Filtering settings you have set. Status/Rating Info Displays information about the Status and Rating columns in the report. Related Tasks — Update By Computer When you select the Update By Computer report format, these options are available in the Related Tasks pane: View Status Switches to Status Report view Save this Report as Saves the report and specify a name for it Close this Report Closes the report and removes it from the View Report tabbed display Print Prints the report Print Preview Displays how the report will look in printed form Unpin Report Unpins the report so it displays in a separate window View Patch Details Shows details about the selected update View Machine Locations Shows the computer to which the selected update applies Install Selected Patch Starts the Patch Installation wizard and guides you through the installation of the selected update(s). This option is only available if the selected patch has already been downloaded. Hide Selected Updates Removes the selected updates from the report view. Hidden updates can be seen by selecting Hidden under the View Type option described below. When viewing hidden updates, this option changes to Unhide Selected Updates. View Type Offers the options to view Normal, Hidden or All updates. Normal updates are those that have not been hidden with the Hide Selected Updates option described above. Hidden updates are as the name implies: hidden from normal view. The All option shows both Normal and Hidden updates. Clear All Filters Clears any Quick Filtering settings you have set. Status/Rating Info Displays information about the Status and Rating columns in the report. 62 View Job Queue Use the View Job Queue option in the Patchkeeper Task menu to see all tasks, whether they are completed, pending, or currently running. The Patchkeeper Job Queue shows the following information about each task: Job Name The name you specified when the task was first initiated (either run or scheduled to run). Schedule Shows how often the task is scheduled to run — Once, Daily, Weekly, or Monthly. Next Run Time Shows when the task is next scheduled to run. Last Run Shows when the task last ran. Status Shows if the task is running, completed or scheduled. The Related Tasks pane offers these options when viewing the Job Queue: View Report Click this option to switch from the Job Queue to the Report View, showing the complete report for the selected task. View Status Click this option to open the Data Collection Report and see detailed information about the selected task. This is useful for seeing the computers on which the task has completed. Stop Stops the selected task. This option is only available when you have selected a currently-running task. Add Machines to a Group Click this option to add the selected computers to a custom group. See Managing Computer Groups for more information about custom groups. Print Print the status report. Print Preview Display how the report will look in printed form. Deleted Selected Job Removes the selected task from the Job Queue. Refresh Click this option to refresh the Job Queue (for cases where tasks are pending or in progress). Clear All Filters Clears any Quick Filtering settings you have set. 63 Chapter 7 Sitekeeper Agent The Sitekeeper agent is a small application that enables Sitekeeper to perform functions on certain computers in two categories: • Computers running Windows 9x, Windows Millennium Edition (ME), or Windows XP Home Edition, require an agent to be included in inventory and license compliance reports or to deploy software. • To enable scanning of remote computers that are not always connected to your network (for example, laptops that are connected to the network when in the office, but are not connected when taken on business trips), the agent must be installed on them. This enables these computers to send inventory information directly to Sitekeeper when they are connected to the network, and to send inventory information via e-mail or media such as floppy disc when they are not. The agent does not need to be installed on licensed computers running Windows NT, 2000, or XP Pro that are always connected to your network. There are two ways you can install the agent: automatically and manually. The automatic installation uses the Software Deployment module to install the agent on selected computers. Because they require the agent to be installed before software can be deployed to them, you must manually install the agent on computers running Windows 9x, Windows Millennium Edition (ME), or Windows XP Home Edition. Agent installation can be performed using Software Deployment on computers you indicate are remote. The install agent pages will appear when you specify Sitekeeper functions for licensed computers that do not have the agent and require it to complete the function. At this time, you can specify to install the agent now, or wait until later. Adding and Removing the Sitekeeper Agent The Add or Remove Agents page automatically appears when you select computers running Windows 9x, Windows Millennium Edition (ME), or Windows XP Home Edition - or when you configure scanning for remote computers that are not always part of your network. You can use the Software Deployment module to install agents on some computers, but you must manually install the agent on computers running Windows 9x, Windows Millennium Edition (ME), or Windows XP Home Edition. Completing the Add or Remove Agent pages 1. When you select one or more computers that require the agent to complete a Sitekeeper task, a warning appears. Click Next to configure the agent installation. Additionally, you can install the agent on selected computers from the Manage Licensed Computers page of Configuration. 2. Specify whether you want to Automatically install the agent over the network, or Manually distribute the agent. Because you cannot automatically deploy to computers running Windows 9x, Windows Millennium Edition (ME), or Windows XP Home Edition, you are given the option of installing the agent on these computers now or later. 3. If you select to Automatically install the agent over the network, you can configure a deployment of the agent. 4. If you select to Manually distribute the agent, specify how you want to install the agent on selected computers. 64 Select the I want to copy the agent executable to media for distribution option if you want to save the installation package to another location or to a CD that you can distribute among your users. In the Copy to field, browse to the location where you want to save the agent installation executable. Click Copy to copy the file to the specified location. If you select to save the installation package to a remote shared location, you can run this task again if you want to e-mail the location, along with instructions for running the installation package, to your users. After saving the installation files to a remote shared location, when you select the I want to e-mail the agent option, enter the E-mail addresses of the users you want to install the agent. Separate addresses with a semi- colon. Click Send. Your e-mail program opens with a default message containing instructions on how to install the agent, and a link to the location where you saved the installation package. 5. Review the summary. It shows your selections on the previous pages. If you want to make any changes, select the appropriate item in the task navigator. Remote Computers Remote computers are computers that are not always connected to your network. These may include laptop computers that are sometimes taken home or on business trips by your users, or computers that are not always connected to the network for security reasons. Before you can gather inventory information and deploy software for remote computers, you must install the Sitekeeper agent on them. Managing Remote Computers To specify that a computer is a remote computer, use the Set as Remote related task on the Manage Licensed Computers page in Configuration. This related task, along with the Set as Local related task, enables you to specify whether computers are local (always connected to the network), or remote (not always connected). Completing the Manage Remote Computers pages 1. Click Manage Licensed Computers in the Configuration task navigator. Select the computers you want to indicate should be remote, and click the Set as Remote related task. 2. Specify how the agent on the remote computers will send inventory data to Sitekeeper during intermittent and extended periods of network connectivity. For Intermittent Network Connection Settings, the Send schedule option enables you to control when inventory data is sent to Sitekeeper during a period of discontinuous connections. Additionally, specify the Minimum amount of bandwidth on which the remote computer is connected that will enable the inventory information to be sent in an amount of time that is acceptable to you. 3. The Extended Network Connection Settings options enable you to specify how often (Frequency), and at what Time inventory data is sent to Sitekeeper when the remote computer is connected to the network for extended periods. Specify the target E-mail address of who should receive inventory information sent by remote computer users who select to update inventory data via e-mail. Remote users will send the information to the address you enter here. When users of remote computers send you inventory information via email or media such as floppy disk, you must import that data into Sitekeeper. For more information, see the following section, Importing Information from Remote Computers 4. Click Next to continue. 5. If you selected to make any licensed computers remote and the computers do not already have the Sitekeeper Agent installed on them, you will be prompted to do so. 65 The Sitekeeper agent must be installed on remote computers to enable Sitekeeper to gather data from them. You must specify settings for how the agent will be installed on selected computers. Importing Information from Remote Computers When users of remote computers send inventory data via e-mail or media such as floppy disk, you must import the inventory into Sitekeeper. If you received the .ski file as an e-mail attachment, first save it to a location you can access from the computer on which Sitekeeper is installed. To import the data, from the menu bar select File, Import Inventory. The Open screen appears. Browse to the location where the inventory information is saved, or to the drive containing the media (CD or floppy disk) on which it is located. Click the .ski file to import it into Sitekeeper. 66 This page intentionally left blank. 67 Chapter 8 Using Help The Sitekeeper help system is designed to give you quick access to information. To access the Sitekeeper help, click the Help button on a Sitekeeper page, or select the Help menu. The help contains several tabs to help you locate the information you need. Additionally, the help system features “breadcrumbs” at the top of most topics to help you orient yourself in the help by locating the position of a topic in the overall system. Previous and Next buttons are available in each topic. These buttons access the previous and next topics in the help table of contents. Clicking a standard hyperlink takes you to another topic. Additionally, many topics feature a hyperlink followed by a blue arrow. Click the arrow to reveal more content, frequently a numbered procedure. Table of Contents The Contents tab displays books and pages representing categories of information in the help system. When you click a closed book, it opens to display its contents (sub books and pages). When you click individual pages, you can select topics to view in the right-hand pane of the Microsoft HTML help window. Search The Search tab enables you to search for specific words in the help system and locate topics containing those words. Full-text searching looks through every word in the help to find matches for your search phrase. You can also search previous results, find similar words, and search only topic titles. When the search is completed, a list of topics displays so you can select a specific topic to view. Checkboxes and Buttons on the Search Tab You can select several checkboxes to help determine the results of a search: • Select Search titles only if you want to look for your search word or phrase only in topic titles. • Select Match similar words if you want the search to find words similar to your search term. • If you have already conducted a search and want to search from within the results of that search, select Search previous results and conduct another search. • If you want all instances of the search term found in a topic to be highlighted, from the menu bar, select Options, Search Highlight On. To sort search results alphabetically, click the Title column heading; to sort by the number of times your search phrase appears, click the Rank column heading. The location of all topics is the same, so clicking this heading does not resort the results. Index The index tab displays a multi-level list of keywords and keyword phrases. These terms are associated with topics in the help system. They are intended to direct you to specific topics according to your workflow. To open a topic associated with a keyword, select the keyword and click Display. If the keyword is used with more than one topic, a Topics Found screen appears, where you can select a specific topic to view. 68 This page intentionally left blank. 69 Appendix A Troubleshooting This section includes answers to a number of common questions and issues you may have when first using Sitekeeper. General Troubleshooting Sitekeeper fails to install on the first attempt This can be the result of several things. Here are some items to check: 1. When installing Sitekeeper, be sure that no unnecessary applications are running. Try removing and then reinstalling Sitekeeper. 2. If the repair installation option fails, use the Add or Remove Programs applet in Windows Control Panel to uninstall Sitekeeper. Then reinstall Sitekeeper. Sitekeeper fails to run Here a some things to check: 1. When installing Sitekeeper be sure that no unnecessary applications are running. Try removing and then reinstalling Sitekeeper. 2. Try running Sitekeeper with only the necessary applications running. Disable any Pop-Up Add Killers or Anti-Virus applications. Configuration of a new database fails Several possibilities can cause the configuration of a new database to fail. Here are a few things to check: 1. Verify that you used the correct user name and password for the database. The default is user “sa” with the password left blank. This can be used for MSDE or SQL Server database logins. Different user login names and passwords are also valid. 2. If you are creating a new database and the default “SKDatabase” name was used in a previous installation, or still exists, then enter a new unique database name. The creation of a new database will fail if the database name entered already exists in the database server specified. 3. If you are using a SQL server and the server has set a minimum database size greater than 10MB, the database creation will fail. In this situation, contact the Sitekeeper Tech Support team at: [email protected] We will send you a special version to accommodate the needs of your SQL server. Configuration of an existing database fails Here are some things to check if you are having difficulties configuring an existing database: 1. Verify that you used the correct username and password for the database. The default user name is “sa” with the password left blank. This can be used for MSDE or SQL Server database logins. Different user login names and passwords are also valid. 70 2. The Configure Database pages only display existing database names in the selection box of those databases that were previously created from Sitekeeper version 1.x or 2.0. If the name does not appear, then the database does not exist or it is corrupt. I need to install the Sitekeeper MSDE to another partition Follow these steps to install the Sitekeeper Microsoft Desktop Engine to a different disk partition: 1. Ensure you run the latest SitekeeperMDSE file. This file is available on the Sitekeeper CD-ROM, or from the Executive Software Web site during the Sitekeeper installation process. 2. In the Specify Installation Location screen of the Sitekeeper MSDE Installation Wizard, you can enter any valid partition and path. Be sure that the destination directory exists if you are entering this manually rather than using the Browse button to select a directory. How do I set up Sitekeeper to work with my current SQL database? Steps 1-13 are for creation of a SQL User Account capable of creating a Sitekeeper SQL database. If you already have an Administrative “SQL” account established you do not need to do this. 1. Open the SQL Enterprise Manager. 2. Navigate to the server on which you will be creating a Sitekeeper Database. 3. Expand the Security folder. 4. Select Login Accounts. 5. In the right-hand pane, right-click and select New Login. 6. In the New Login window enter a name. 7. Next, select SQL Server Authentication. You can select to enter an existing Windows NT/2000 account. 8. Enter a password. 9. Select the Server Roles tab from the current window. 10. Add the Database Creators privilege to your account. You can remove the Database Creators privilege from the SQL account after this installation has been completed. 11. Click OK. You will once again be prompted for the password for this new account. 12. Enter your password and click OK. 13. On the SQL Server system you must create two folders (the Sitekeeper installation does not automatically create these). • At the root level of a volume, create a folder named Sitekeeper. • Next, create a sub folder underneath the “Sitekeeper” folder named Database. 14. Return to the machine where Sitekeeper is installed and run the Configure Database task. 15. Select the ...existing SQL Server option. 16. Select your server from the list, click Next and finish the task. 17. In the Configure Database task, select the option to ...create a new database. 18. Enter the user name and password you supplied when installing MSDE (or your SQL login information). 71 19. Under the Directory text box, enter the path for the folders created in Step 13. (Do not add the machine name as this has already been specified). 20. Click Next, then Create New Database and you are done. Sitekeeper does not see my remote SQL Server database on my network For Sitekeeper to see a SQL Server database, certain components must exist on the machine on which Sitekeeper is installed. These components are the Microsoft Data Access Components (MDAC). Installing the MSDE or SQL Server installs these components by default. However, if this is not been done, you will need to install MDAC separately. You can download MDAC from Microsoft's web site at: http://www.microsoft.com/data/download_260rtm.htm I cannot use my Windows Authentication password with Sitekeeper even though I can with my SQL Server database While you can set up SQL Server to accept either SQL authentication or Windows Authentication, currently the connection from Sitekeeper to SQL Server accepts only SQL Authentication. The creation of a database on a SQL Server fails even though I have specified a valid database login account with Database Creators privilege. What is wrong? Here are some things to check: 1. Verify that on the SQL Server system you created two folders on the root of a volume. If not, create a folder called “Sitekeeper”, then create a sub folder underneath “Sitekeeper” called “Database”. 2. Verify with the SQL Administrator that at the global level SQL Authentication is enabled along with Windows Authentication. Even if a login account is setup for SQL Authentication, this feature must also be enabled at the global level. Where does Sitekeeper find hardware data? Sitekeeper looks for hardware data in many locations within the systems registry. Some of the primary locations are: • SYSTEM\\CurrentControlSet\\Enum\\ACPI • SYSTEM\\CurrentControlSet\\Enum\\DISPLAY • SYSTEM\\CurrentControlSet\\Enum\\FDC • SYSTEM\\CurrentControlSet\\Enum\\HID • SYSTEM\\CurrentControlSet\\Enum\\LPTENUM Sitekeeper does look in other locations, although the majority of the data it collects is found in these locations. Software Deployment Troubleshooting When deploying software with Sitekeeper, I do not see a listing for the software that I want to deploy. What do I do? Executive Software is working to supply install scripts for all of the most popular applications for Windows NT 4.0, 2000 and XP platforms. If you do not currently see the software you want listed, and do not know 72 the installation command line parameters (or qualifiers) needed for the deployment, we suggest you contact the technical support department of the manufacturer of the software. Request information about the full command line needed to perform a “silent installation” of the software from the Command Prompt. This is essentially what Sitekeeper does on the remote system. Many manufactures have this data available in the FAQs section of their web sites. I have created a deployment for a software package not included in Sitekeeper and the deployment fails. How can I debug the deployment? If you are not using one of the preconfigured installation packages that come with Sitekeeper for a deployment and the deployment fails, we recommended you test your install parameters and verify that the software can be correctly installed under the context of SYSTEM. Please note that this is not the same as installing interactively at the command prompt. Sitekeeper uses the SYSTEM account to deploy software. If the software can be installed only from the USER context, Sitekeeper cannot deploy it. Because the AT Command Line Scheduler runs by default under the context of SYSTEM, you can use it as a debugging tool to determine if the problem is that the particular software does not support installing from the SYSTEM context. For more information, see “Accessing the Microsoft AT Command Line Scheduler.” Troubleshooting Data Gathering Note: Windows XP Service Pack 2 (SP2) contains security enhancements that directly affect Sitekeeper. If you are using Windows XP SP2, be sure to see the information shown here for important information about running Sitekeeper with Windows XP SP2. This information also applies if you are running a third-party firewall on your systems. When Sitekeeper is unable to scan a computer to gather data from it, a message appears in the Description column of the Data Collection Status report. Possible errors and ways to correct them are listed below. Network path not found An error is generated if Sitekeeper cannot find the network path to a computer. See page 74 for more information. System not found, Scan not performed This message indicates the computer is offline, or one or more of the needed communication ports are disabled on the computer. For more information about these ports, see page 78. Network failure This message may appear if a computer is offline. See page 79 for more information. The operation returned because the timeout period expired A variety of factors can result in this error message. See page 79 for more information. Format of the computer name is invalid This message can be caused if File and Print sharing is not enabled on a target computer and other factors. See page 79 for more information. Not started This message can be caused by firewall or anti-virus software blocking scanning of selected computers and other factors. See page 80 for more information. 73 Access is denied This message can be caused by incorrect or inadequate permissions information and other factors. See page 80 for more information. Additional useful information to help you troubleshoot data gathering and scanning is in the following sections: • Sitekeeper Required Network Services (page 73) • Sitekeeper required TCP/IP Open Ports (page 73) • IP Security on the Sitekeeper Host (page 84) Sitekeeper Required Network Services Sitekeeper requires the following services enabled to perform an inventory scan on Windows NT4, Windows 2000, and Windows XP target machines: • TCP/IP Protocol Suite enabled. • File and Print Sharing enabled (on client computers without the Sitekeeper agent installed). • NetBIOS over TCP/IP (Required for Windows NT4 and for Workgroups and NOVELL). • Remote Registry Service enabled (Windows 2000 and above client computers without the agent installed). • RPC Service enabled (needed for hardware inventory which calls WMI via RPC on the client). • Workstation Service (Required for Workgroups and NOVELL) Sitekeeper requires the following service to be enabled to perform an inventory scan on Windows NT target machines: • Server service Enabling the Services Sitekeeper Needs to Scan Computers Service status can be verified by running: • Windows NT: Open Control Panel, select Services. • Windows 2000 and above: Open Control Panel, select Administrative Tools, then select Services. TCP/IP protocol, File and Print Sharing and NetBIOS over TCP/IP status can be verified by: • Windows NT: Open Control Panel, select Networks. • Windows 2000 and above: Open Control Panel, select Network Connections. View the property page(s) of the network card adapter(s) you have enabled. Sitekeeper Required TCP/IP Open Ports Sitekeeper requires the following TCP/IP ports to be available for Sitekeeper inventory scans. • TCP 445 (Direct host SMB over TPC/IP) (WIN2K+). • TCP 139 (NetBIOS Session) – must be open if port 445 is not available (NT). • TCP 135 (RPC Resolution). • TCP 1025 (RPC Listener used for WMI hardware inventory) (WIN2K+). 74 • ICMP Ping (used by low level RPC and NetBIOS calls). These ports can be controlled by: • On-host personal firewall or spy-ware • On-host Network Connection properties with Internet TCP/IP Advanced options • Network router or gateway firewall Sitekeeper requires the following TCP/IP service/ports to be accessible on client systems that do have the Sitekeeper Agent installed, for Sitekeeper inventory scans: • TCP 31042 Sitekeeper Scanning Port • ICMP “Ping” • UDP 5100 Sitekeeper Agent Discovery Port (recommended) Verifying that the Required TCP Ports are Open 1. Select Control Panel, Network Connections. 2. Right-click on the network card and select Properties. 3. Select TCP/IP Properties, Internet Protocol (TCP/IP). 4. Select Properties and then select Advanced. 5. On the Advanced TCP/IP Settings screen, select the Options tab 6. Select “TCP/IP filtering” and click the Options button. The TCP/IP Filtering screen appears so you can determine if any of the above ports are being blocked. Or: See the Microsoft Knowledge Base Article – 310099 at http://support.microsoft.com/?kbid=310099 This article provides a description of the PORTQRY.EXE command line utility for Windows 2000 or Windows 2003 computers to determine open and closed ports. Network Path Not Found Possible reasons for this scan error: • Computer is Offline or Connecting Path is Disabled (see page 75) • TCP/IP Protocol is Disabled (see page 75) • Computer Name to IP Address Translation Failed (see page 76) • NetBIOS over TCP/IP is Disabled (on Windows NT 4.0) (see page 76) • File and Print Sharing (Windows 2000 and above) or Server Service (Windows NT) is Disabled (see page 77) • The Computer is Running Windows 95, 98, ME, or XP Home and Needs an Agent Installed (see page 78) • The Computer is a Windows XP Computer and the Windows Firewall is Enabled (see page 78) 75 Computer is Offline or Connecting Path is Disabled Symptom: ping <computer-name> returns “Request timed out” Check to see if: • The computer is powered off or in hibernation mode. • A network cable is disconnected. • A network card is enabled. • A router, switch and or hub is disabled or cable is disconnected. • The gateway is disabled. TCP/IP Protocol is Disabled Symptom: Ping <computer-name> returns “Request timed out” Check: • On the target computer, verify that TCP/IP is enabled. Verifying that TCP/IP Protocol is Enabled 1. Select Control Panel, Network Connections. 2. Right-click on the network card and select Properties. 3. Ensure that the Internet Protocol (TCP/IP) checkbox is selected. 76 Reference: Microsoft TCP/IP Troubleshooting http://www.microsoft.com/technet/treeview/default.asp?url=/technet/prodtechnol/windows2000serv/re skit/tcpip/part1/tcpch03.asp Computer Name to IP Address Translation Failed or is Incorrect Symptom: Ping computer-name and ping ip-of-computer-name do not resolve to the same IP address. Manually entered HOST or LMHOST pairs of <computer-name ip-of-computer-name> yields a successful scan of the target machine. Check: This can be caused due to missing, stale or incorrect DNS and/or WINS entries. • Dynamic DHCP may not be updating and cleaning up DNS records. • Fully Qualified Domain Name (FQDN) may be required in a native Windows 2000 Active Directory network with NetBIOS disabled. HOSTS or LMHOSTS files are located under the directory: <system root>:\Windows\system32\drivers\etc\ The following registry key and values determines the order in which local and remote DNS and WINS name resolution records are checked. HKEY_LOCAL_MACHINE\SYSTEM\CurrentContorlSet\Services\ Tcpip\ServiceProvider The default values are: • LocalPriority (0x1F3) • HostsPriority (1F4) • DnsPriority (7D0) • NetbtPriority (7D1) Microsoft Domain Name System (DNS) Center http://www.microsoft.com/Windows2000/technologies/communications/dns/default.asp Microsoft Knowledge Base Article 142309 NetBIOS Name Resolution Using DNS and the HOSTS File http://support.microsoft.com/default.aspx?scid=kb;en-us;142309 Microsoft Windows Internet Naming Service (WINS) http://www.microsoft.com/ntserver/techresources/commnet/wins/winswp98/wins02-12.asp NetBIOS over TCP/IP is Disabled (on Windows NT4) Symptom: Net view \\computer-name command does not “complete successfully”; fails to list shared resources. 77 Check: Specify that NetBIOS be enabled on the client computer. Activating NetBIOS on the Client Computer 1. Select Control Panel, Network Connections. 2. Right-click on your network card and select Properties. 3. Select TCP/IP Properties, Internet Protocol (TCP/IP). 4. Select Properties and then select Advanced. 5. On the Advanced TCP/IP Settings screen, select the WINS tab 6. In the NETBIOS setting frame, select Default or Enable to activate NetBIOS on the client. Reference: Microsoft Knowledgebase Article 119493 NetBIOS over TCP/IP name resolution and WINS http://support.microsoft.com/default.aspx?scid=http://support.microsoft.com:80/support/kb/articles/Q1 19/4/93.asp&NoWebContent=1 File and Print Sharing (Windows 2000 and above) or Server Service (Windows NT) is Disabled Symptom: \\computer-name\admin$ command fails to connect to the system default share point. Check: 78 On the target computer, verify that File and Print Sharing is enabled. Verifying that File and Print Sharing is Enabled 1. Select Control Panel, Network Connections. 2. Right-click on your network card and select Properties. 3. Verify that the File and Printer Sharing for Microsoft Networks checkbox is selected. The Computer is Running Windows 95, 98, ME, or XP Home and Needs an Agent Installed In order to be included in Sitekeeper functions, computers running Windows 95, 98, Millennium Edition, and XP Home must have the Sitekeeper agent installed on them. For more information about the agent, see “Sitekeeper Agent” on page 67. Access may also be denied if a computer running Windows XP Home is specified as being part of a domain. On the Specify Permissions page select “Workgroup” as the Type or enter the user name as “ComputerName\UserName.” The Computer is a Windows XP Computer and the Windows Firewall is Enabled In order to access Windows XP Pro or Home computers, the Windows Internet Connection Firewall must be turned off. By default the firewall is turned off in Windows XP Pro. It is turned on by default in XP Home. System not found, Scan not performed This message indicates the computer is offline, or one or more of these communication ports are disabled on the computer: • TCP Port 135 (Remote Admin Service) 79 • TCP Port 139 (File and Print Sharing) • TCP Port 445 (File and Print Sharing) One or more of these ports are commonly disabled by the Windows Firewall under Windows XP SP2, as well as third-party firewall products. If the target system is running Windows XP SP2, then the remedy for this is to configure the Windows Firewall correctly to allow the communication needed by Sitekeeper. A batch file, SK_Config_XPSP2.bat, is provided with Sitekeeper (in the folder where Sitekeeper is installed) to automatically configure the Windows Firewall on Windows XP SP2 systems. Copy the batch file from the Sitekeeper installation folder to the folder of your choice, from where you can run it on the remote computer to open the specific ports used by Sitekeeper. If you have multiple systems to configure, these changes can easily be done through a remote login script or through Group Policy. For more information about Sitekeeper, this batch file and Windows XP SP2 systems, click this link: http://www.executive.com/products/tipsntricks.asp?PC=2&MajorVer=3&MinorVer=5&LCID=1033 Network Failure Possible reasons for this scan error: • The computer is offline. For solutions, see page 75. • TCP/IP is disabled. For solutions, see page 75. • Computer name to IP address translation failed or is incorrect. For solutions, see page 76. • NetBIOS over TCP/IP is disabled. For solutions, see page 76. The Operation Returned Because the Timeout Period Expired Possible reasons for this scan error: • The computer is offline. • TCP/IP is disabled. • Slow WAN connection. Symptom: ping <computer-name> returns “Request timed out”, “destination host unreachable” or return times are much longer than for local systems; some percentage of packets are lost • Router or Firewall is blocking network traffic. Format of the Computer Name is Invalid Possible reasons for this scan error: • Computer name to IP address translation failed or is incorrect. For solutions, see page 76. • File and Print Sharing (Windows 2000 and above) or Server Service (Windows NT) is disabled. For solutions, see page 77. • The computer is running Windows 95, 98, or ME and needs an agent installed. For solutions, see page 78. 80 Not Started This message indicates that the process which performs the scan of all machines on a unique domain or workgroup has stopped and was prevented from completing the scan of other machines in the group. Possible reasons for this condition are: Spyware, Port blocker, or Firewall Software Has Blocked the Scan Process, but Left It Waiting Symptom: Task Manager displays process EXEC.EXE as a running process, even though the scan is reported as completed. Check: Whether disabling resident spyware, port blocker or firewall software allows the scan process to complete. One of the Computers Scanned has a Corrupt or Missing WMI Component Symptom: Target computer application or system event log contains DCOM or WMI errors or warnings which match the time Sitekeeper scanned the system. Check: The Microsoft Web site for Service Pack, Hotfix, or other updates. Anti-Virus Software has Blocked the Scan Process EXEC.EXE from Starting Symptom: A pop-up message appears indicating that EXEC.EXE “could not initialize.” Check: Turn off the anti-virus software and retest Sitekeeper scanning. If the scan still fails, keep the antivirus software disabled and uninstall Sitekeeper. Then reinstall Sitekeeper and retest the scanning. You can turn on the anti-virus software after Sitekeeper has been reinstalled. Access Denied Possible reasons for this condition are: Incorrect Domain/Workgroup Administrator Name or Password Sitekeeper needs this information to access selected computers. Administrator Account Does not have FULL Domain Admin Privileges to the Computers in Question If the Administrator account does not have full domain admin privileges, Sitekeeper may not be able to access all computers on the domain or workgroup. 81 The Remote Registry Service is Disabled This service must be enabled for Sitekeeper to scan the computer. If the service is not started, attempting to access the remote registry via REGEDIT yields an error message similar to the following: Verifying that the Remote Registry Service is Started 1. Select Control Panel, Administrative Tools. 2. Select Services. 3. Verify that the Remote Registry service is started. Windows XP or Windows Server 2003 Local Security Policies “Network access: Sharing and security model for local accounts” is set to “Guest only - local users authenticate as guest” by default. This needs to be changed to “Classic - local users authenticate as themselves.” 82 Simple File Sharing is Enabled You can disable simple file sharing. Disabling Simple File Sharing 1. From the Windows Explorer menu bar, select Tools, Folder Options. 2. Select the View tab. 3. Clear the Use simple file sharing checkbox (last item in the Advanced settings frame. ACL For Registry Hives Deny Read Access Verify the read properties for the registry files: Windows 2000 and above: Run: cacls.exe\windows\system32\config\{software,system} Windows NT: Run: cacls.exe \winnt\{software.log,system.log} Both should allow full access for ‘Administrator’ and ‘System’. Sitekeeper needs to remotely access the registry of each target computer (not running an agent). One means of verifying authentication to an “access denied” target computer from the Sitekeeper host is by using the Connect Network Registry setting. Verifying Authentication Using Connect Network Registry 1. Click Start on the taskbar. 2. Click Run. The Run screen appears. 3. Enter “REGEDIT.EXE” in the Open field and click OK. The Registry Editor appears. 4. From the menu bar, select File, Connect Network Registry. The Select Computer screen appears. 5. Enter the target computer name. You will be prompted for a user name and login to access this registry. If you are not, then a pre-existing session trust relation exists between the host and client. Select another computer which does not have such a trust relationship. 83 6. On the Enter Network Password screen, specify the Administrator/Domain-Admin account User name and Password which was entered in the Sitekeeper permissions screen for the domain or workgroup in question. An incorrect user name and password will result in the following error message: Sitekeeper needs to remotely access the administrative share of each workstation computer (not running an agent) for a software inventory. Sitekeeper needs to access the same share for every Software Deployment (PushInstall) action on all computer (not running an agent). Verifying Access to the Share 1. Click Start on the taskbar. 2. Click Run. The Run screen appears. 3. Enter “\\<target-computer-name>\ADMIN$” in the Open field and click OK. 4. You should be asked for a user name and login to access this share. If you are not, then a preexisting session trust relation exists between the host and client. Select another computer which does not have such a trust relationship. Enter the Administrator/Domain-Admin account name and password which was entered on the Sitekeeper permissions screen for the domain (or workgroup) in question. If this is accepted then this is not the point of failure. 5. If the share is removed or an incorrect user name and password is entered then the following error message appears: 84 Reference: Microsoft knowledge Base Article 314984 HOW TO: Create and Delete Hidden or Administrative Shares on Client Computers IP Security on the Sitekeeper Host The IPSec service running on the Sitekeeper host or target machines can create difficulties connecting to a remote host if policies have been setup to filter traffic. Checking IP Security 1. Select Control Panel, Administrative Tools. 2. Select Local Security Policy. 3. Select IP Security Policies on Local Computer. Determine if any active IP filters are in place. If so, you can turn off IP Security and attempt to run Sitekeeper scans which are currently failing. 4. To disable the IP Security on only the Sitekeeper host computer and the target computers select Control Panel, Administrative Tools. 5. Select Services. 6. Select IPSec Policy Agent Service and STOP the service. Patchkeeper Scan Error Troubleshooting There are several situations that can cause Patchkeeper (or the underlying Shavlik update engine) to display error messages. This table shows the Patchkeeper error messages displayed, what can cause them, and how to resolve them. In the event of an error message or other failure, select the affected computer and click Show Error Details in the Related Tasks pane for assistance with the error. Error Message Description Solution Admin rights are required You are attempting to run Patchkeeper from a user account that is not a member of the Administrators group. Ensure you are logged into an account that is a member of the Administrators group. Also confirm that you have entered the correct login credentials on the Specify Permissions page. Access was denied This is typically the result of using incorrect login credentials to access the affected computer. It is also possible that the operating system on the target computer is Windows 95, 98 or Me. Patchkeeper currently can detect only Microsoft security patches from computers running English versions of Windows NT 4.0 and above. Note that the user account you specify must be a member of the Administrators group. Click Set Permissions to open the Specify Permissions page to review and change the login credentials you have entered. 85 System not found The remote computer could not be found by Patchkeeper. When this error occurs, a message is displayed indicating a port analysis is being done. You can click Cancel to stop this analysis process. This port analyzer checks the DNS table to determine if the computer is offline. If the computer is found in DNS table, ports 135, 139 and 445 are scanned. If the machine is offline and is confirmed by the port analyzer, a message box is displayed indicating that the machine is offline. Otherwise, a message is displayed explaining what port is blocked. Note that if the target system is running Windows XP SP2, then the remedy for this is to configure the Windows Firewall correctly to allow the communication needed by Patchkeeper. A batch file, SK_Config_XPSP2.bat, is provided with Sitekeeper to automatically configure the Windows Firewall on Windows XP SP2 systems. Click Copy to copy the batch file from the Sitekeeper installation folder to the folder of your choice, from where you can run it on the remote computer to open the specific ports used by Sitekeeper. SystemRoot share access required to scan Patchkeeper could not establish access to the SystemRoot share. Unable to connect to the system share on the remote computer. This can occur if the SystemRoot share (typically C$ or similar) has been “unshared” or the AutoShareServer (or AuroShareWks) registry key has been disabled. Use Regedit.exe to open the Registry Editor and set value of the following keys from 0 to 1. HKEY_LOCAL_MACHINE\SYSTEM\ CurrentControlSet\Services\lanmanserver\ parameters\AutoShareServer HKEY_LOCAL_MACHINE\SYSTEM\ CurrentControlSet\Services\lanmanserver\ Parameters\AutoShareWks Machine is not one of Windows (NT 4, 2000, XP or .NET). Scan not performed The target computer is not running a supported version of Windows. The system may be a non-Microsoft platform running SMB services or otherwise emulating a Microsoft product. Patchkeeper currently can detect only Microsoft security patches from computers with running English versions of Windows Confirm the target computer is running one of these versions of Windows supported by Patchkeeper: • Windows Server 2003 • Windows XP • Windows 2000 • Windows NT 4 86 NT 4.0 and above. Machine OS is not Recognized Patchkeeper was unable to determine the operating system running on the specified computer. This can occur when scanning beta or unreleased versions of Microsoft operating systems. Confirm the target computer is running one of these versions of Windows supported by Patchkeeper: • Windows Server 2003 • Windows XP • Windows 2000 • Windows NT 4 Machine Service pack is not Recognized Patchkeeper was unable to determine the service pack running on the specified computer. This can occur when scanning beta or unreleased versions of Microsoft service packs. Be aware that Patchkeeper does not support beta or unreleased versions of Microsoft service packs. 87 Troubleshooting Patch Installation There are several situations that can cause Patchkeeper (or the underlying Shavlik update engine) to display error messages. This table shows the Patchkeeper error messages displayed, what can cause them, and how to resolve them. Note: Patchkeeper always scans the target computer to verify that the selected patches are still missing before the installation. The installation will not proceed if the scan fails. If this scan fails, the installation status shown in the Status Report will be identical to the scan status. In the event of an error message or other failure, select the affected computer and click Show Error Details in the Related Tasks pane for assistance with the error. Error Message Description Solution Admin rights are required You are attempting to run Patchkeeper from a user account that is not a member of the Administrators group. Ensure you are logged into an account that is a member of the Administrators group. Also confirm that you have entered the correct login credentials on the Specify Permissions page. Access was denied This is typically the result of using incorrect login credentials to access the affected computer. It is also possible that the operating system on the target computer is Windows 95, 98 or Me. Patchkeeper currently can detect only Microsoft security patches from computers running English versions of Windows NT 4.0 and above. Note that the user account you specify must be a member of the Administrators group. Click Set Permissions to open the Specify Permissions page to review and change the login credentials you have entered. System not found The remote computer could not be found by Patchkeeper. Confirm the computer is actually connected to the network and is running. You can use the “ping <computer_name>” command from the Windows Command Prompt to verify the computer is available. If the ping request confirms the computer availability, confirm that ports 135, 139 and 445 are opened on that computer. Note that if the target system is running Windows XP SP2, then the remedy for this is to configure the Windows Firewall correctly to allow the communication needed by Patchkeeper. A batch file, SK_Config_XPSP2.bat, is provided with Sitekeeper to automatically configure the Windows Firewall on Windows XP SP2 systems. Copy the batch file from the Sitekeeper installation folder to the folder of your choice, from where you can run it on the remote computer to open the specific ports used by Sitekeeper. SystemRoot share access required to scan Patchkeeper could not establish access to the SystemRoot share. Unable to connect to the system share on the remote computer. This can occur if the SystemRoot share (typically C$ or similar) has been “unshared” or the AutoShareServer (or AuroShareWks) registry key has 88 been disabled. Use Regedit.exe to open the Registry Editor and set value of the following keys from 0 to 1. HKEY_LOCAL_MACHINE\SYSTEM\ CurrentControlSet\Services\lanmanserver\ parameters\AutoShareServer HKEY_LOCAL_MACHINE\SYSTEM\ CurrentControlSet\Services\lanmanserver\ Parameters\AutoShareWks Machine is not one of Windows (NT 4, 2000, XP or .NET). Scan not performed The target computer is not running a supported version of Windows. The system may be a non-Microsoft platform running SMB services or otherwise emulating a Microsoft product. Patchkeeper currently can detect only Microsoft security patches from computers with running English versions of Windows NT 4.0 and above. Confirm the target computer is running one of these versions of Windows supported by Patchkeeper: • Windows Server 2003 • Windows XP • Windows 2000 • Windows NT 4 Machine OS is not Recognized Patchkeeper was unable to determine the operating system running on the specified computer. This can occur when scanning beta or unreleased versions of Microsoft operating systems. Confirm the target computer is running one of these versions of Windows supported by Patchkeeper: • Windows Server 2003 • Windows XP • Windows 2000 • Windows NT 4 Machine Service pack is not Recognized Patchkeeper was unable to determine the service pack running on the specified computer. This can occur when scanning beta or unreleased versions of Microsoft service packs. Be aware that Patchkeeper does not support beta or unreleased versions of Microsoft service packs. 89 Accessing installation share failed, Installation not performed The Patchkeeper installation service was unable to access the specified shared folder from the target computer and execute the installation package from it. Confirm that you have a valid share and have entered the correct login credentials on the Specify Share page. Log on to the target computer by using these login credentials and open Windows Explorer to confirm you can access the file(s) in the shared folder. Sitekeeper installation port 31040 may be firewalled, Installation not performed Patchkeeper was able to set up a Remote Procedure Call (RPC) server on the target machine but can not communicate with it. The reason could be that the communication port 31040 is blocked by firewall. Enable port 31040 if there is a firewall installed on the target computer. Sitekeeper Agent is required, Installation not performed Patchkeeper received an Internet Control Message Protocol (ICMP) echo request but also found that File and Print Sharing is disabled. Update Sitekeeper Agent on the target computer to the latest version. Incompatible Sitekeeper Agent is installed, Installation not performed Patchkeeper detected that Sitekeeper agent with incompatible version is installed on the target computer. Update Sitekeeper Agent on the target computer to the latest version. Note that if the target system is running Windows XP SP2, then the remedy for this is to configure the Windows Firewall correctly to allow the communication needed by Patchkeeper. A batch file, SK_Config_XPSP2.bat, is provided with Sitekeeper to automatically configure the Windows Firewall on Windows XP SP2 systems. Copy the batch file from the Sitekeeper installation folder to the folder of your choice, from where you can run it on the remote computer to open the specific ports used by Sitekeeper. 91 Appendix B Glossary ABC Agent The Sitekeeper agent is an application that enables Sitekeeper functions to include certain computers in two categories: Computers running Windows 9x, Windows Millennium Edition (ME), or Windows XP Home Edition. Remote computers on which you want to enable Sitekeeper tasks, but that are not always connected to a network. Command Line Parameters A command line parameter is necessary to provide Sitekeeper with information it needs to install or uninstall a program or deploy an update using the Software Deployment module. Sitekeeper comes with default command line parameters for many programs. You can also build command line parameter for other programs. DEF Domain A domain refers to a collection of computers sharing a common database and security policy. Each domain has a unique name. Users can log into the domain to gain access to all its resources, even though the resources may be located on a number of different servers in the network. GHI Hotfix A hotfix is a single cumulative package composed of one or more files used to correct a problem in a product. Hotfixes address a specific customer situation and may not even be distributed outside a customer organization. The terms patch and update have been used in the past as synonyms for hotfix. Inventory Reporting The Inventory Reporting module maintains data on all the software and hardware devices installed on licensed computers. JKL Licensed Computer A licensed computer is one you specify to be included in a Sitekeeper function. For example, when you include a computer to be included in an inventory report, that computer becomes a licensed computer. 92 Local Computer A local computer is one that is always connected to the network. Local refers to the network connectivity rather than the actual physical location of the computer. A local computer does not need to be in the same physical location as the computer on which Sitekeeper is installed - it needs only be connected to the same network. MNO Manual Installation (agent) On computers running Windows NT, 2000, or XP, the Software Deployment module can be used to automatically install the agent. However, because computers running Windows 9.x, Millennium Edition, and XP Home require the agent to enable the Software Deployment module, the agent must be manually installed on them. PQR Patch The definition of patch can vary widely. Usually, a patch is considered a widely released fix for a productspecific security-related vulnerability. Microsoft rates security vulnerabilities based on their severity, critical, important, moderate, or low. PushInstaller The Software Deployment module uses the PushInstaller to install or uninstall programs, updates, upgrades and patches. Remote Computer Remote computers are computers that are not always connected to the network. These may include laptop computers that are sometimes taken off site, or computers that may not always be connected to the network for security reasons. ST Selected Licensed Computers Before performing Sitekeeper tasks, you must select the computers the task will affect. Any combination of computers can be selected, including all of them. Each selected computer is considered a licensed computer at that point, and requires a Sitekeeper license. Service Pack A service pack is a tested, cumulative set of all hotfixes, security updates, critical updates, and updates created and fixes for defects found internally since the release of a product. Service packs may also contain a limited number of customer-requested design changes or features. Silent Installation A silent installation updates a machine while a user is working on the machine without interrupting the user. All software and update deployments and are done silently unless a reboot is required by the software or update. 93 Software Update Microsoft refers to a software update as any update, update rollup, service pack, feature pack, critical update, security update, or hotfix that is used to improve or to fix a software product that is released by Microsoft. Target Console Multiple instances of Sitekeeper can be present on the same network. A target console refers to the console to which a specific remote machine reports its information. A remote machine is one that may not always be connected to a network. UV Update Microsoft refers to a software update as any update, update rollup, service pack, feature pack, critical update, security update, or hotfix that is used to improve or to fix a software product that is released by Microsoft. WXYZ Workgroup A workgroup is a group of users sharing files while working on a common project, often over a local area network. 94 This page intentionally left blank. 95 Appendix B Support Services U.S. Support Services Registered users are entitled to 90 days of free telephone support, as well as special upgrade pricing, from Executive Software. Our free U.S. technical support is available Monday through Friday during the first 90 days from 7:00 A.M. to 5:30 P.M. Pacific time. If you have not yet registered your Sitekeeper purchase, register online via our Web site at: www.executive.com Most technical support questions can be answered from the Technical Support section of our Web site at the address shown above. You can also contact our technical support team via the Internet at: [email protected] Or via FAX at: 818-252-5514 If you are within your 90-day free support period, or have purchased telephone support, you can call: 818-771-1600 When your 90-day free support period has expired, you can purchase the support plan which best suits your needs. Executive Software offers 24-hour, 7-day support plans. Contact Executive Software to find out which support options suit you best. Executive Software’s address is: Executive Software 7590 North Glenoaks Boulevard Burbank, California 91504, USA 96 European Support Services Registered users are entitled to 90 days of free telephone support, as well as special upgrade pricing, from Executive Software. Our free European technical support is available Monday through Friday during the first 90 days from 8:30 to 17:30 GMT. If you have not yet registered your Sitekeeper purchase, register online via our Web site at: www.executive-europe.com Most technical support questions can be answered from the Technical Support section of our Web site at the address shown above. You can also contact our technical support team via the Internet at: [email protected] Or via FAX at: +44 (0) 1342-327390 If you are within your 90-day free support period, or have purchased telephone support, you can call: +44 (0) 1342-327477 When your 90-day free support period has expired, you can purchase the support plan which best suits your needs. Executive Software offers 24-hour, 7-day support plans. Contact Executive Software to find out which support options suit you best. Executive Software’s address is: Executive Software UK Inc. Kings House, Cantelupe Road East Grinstead, West Sussex RH19 3BE England 97 Index A about shared folders ....................................................5 agent .........................................................................63 Sitekeeper .............................................................63 H using help ................................................................. 67 I B best practices Patchkeeper ..........................................................40 build and view reports...............................................52 build custom report ...................................................52 Inventory Reporting about .................................................................... 17 creating a report ................................................... 17 Set It and Forget It Inventory Reporting......................................... 22 reports, inventory reporting reports .................................................................. 22 C certifications clear ......................................................................51 certified updates........................................................40 certify selected updates .............................................51 clear certifications.....................................................51 command line parameters software deployment command line parameters.................................36 computers managing licensed ................................................12 remote...................................................................64 selecting for inventory reporting ..........................18 selecting for software installation.........................32 IP address range specifying an IP address range .............................34 configuration...............................................................9 Patchkeeper configuration ....................................................13 D database configuring .............................................................9 legacy .....................................................................9 J job queue inventory reporting job queue ......................................................... 22 opening a report from the..................................... 57 software deployment job queue ......................................................... 35 view ..................................................................... 62 L legacy databases ......................................................... 9 license compliance about .................................................................... 25 report.................................................................... 27 licenses adding Sitekeeper................................................. 11 managing Sitekeeper licenses .............................. 10 purchasing Sitekeeper .......................................... 10 Managing Sitekeeper licenses ............................................................ 10 managing software licenses ............................................................ 26 data source, Inventory Reporting ............................. 21 locate selected updates ............................................. 50 F folders about shared............................................................5 M managing remote computers .................................... 64 managing updates..................................................... 47 G glossary.....................................................................91 O open saved report ..................................................... 58 operating systems 98 supported by Sitekeeper..........................................1 P patch details ..............................................................47 Patchkeeper...............................................................39 default alert settings..............................................16 default UNC settings ............................................14 general preferences...............................................13 Patchkeeper best practices ........................................40 Patckeeper reports build and view ......................................................52 Preface ..................................................................... vii Q filtering, columns in grids ...........................................4 R remote computers......................................................64 managing ..............................................................64 report build custom .........................................................52 create based on missing updates ...........................52 create based on updates you specify .....................55 open saved ............................................................58 related tasks ..........................................................60 view ......................................................................58 view status ............................................................59 hidden .................................................................. 12 software renaming .............................................................. 13 software adding licensed .................................................... 27 software locations............................................................... 27 software deployment .......................................................... 29 software intstalling and uninstalling................................... 29 software adding new........................................................... 29 software specifying a shared folder .................................... 30 Software Deployment Set It and Forget It Software Deployment...................................... 35 permissions, specifying ............................................ 33 status / rating information......................................... 41 status view................................................................ 59 Support Services Europe.................................................................. 96 U.S. ...................................................................... 95 T task navigator ............................................................. 3 troubleshooting data gathering....................................................... 72 general ................................................................. 69 software deployment............................................ 71 S U scan and update automatic update...................................................42 manual update.......................................................46 overview ...............................................................41 semi-automatic update..........................................46 shared folders..............................................................5 Sitekeeper about.......................................................................1 navigating in...........................................................3 Sitekeeper agent........................................................63 adding and removing ............................................63 managing Sitekeeper licenses managing ..............................................................10 Sitekeeper licenses purchasing ............................................................10 Sitekeeper licenses adding and removing ............................................11 Sitekeeper licenses unassigning...........................................................12 hiding software Uniform Naming Convention path ........................... 30 updates about certified ...................................................... 40 certify selected ..................................................... 51 clear all filters ...................................................... 52 deployment .......................................................... 39 hide selected......................................................... 51 locate selected...................................................... 50 managing ............................................................. 47 checking for Sitekeeper updates updates............................................................. 13 view type.............................................................. 52 V view job queue ......................................................... 62 view patch details..................................................... 47 view reports.............................................................. 58