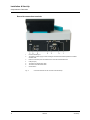
1
ScanDrop
Nano-volume Spectrophotometer
Analytik Jena AG
Kundendienst
Konrad-Zuse-Str. 1
07745 Jena
Phone:
e-mail:
Hotline:
+ 49 (3641) 77-7407
Fax:
+ 49 (3641) 77-7449
[email protected]
General information about Analytik Jena AG
on the internet: http://www.analytik-jena.de
Copyrights and Trademarks
Microsoft, Windows 2000, Windows XP, Windows NT, MS Excel are registered trademarks of Microsoft
Corp.
Publication No.: 211:802.23
Edition – June 2009
Technical documentation made by:
Analytik Jena AG
This documentation describes the state of this product at the time of publishing. It
need not necessarily agree with future versions of the product.
Subject to change!
© Copyright 2009 Analytik Jena AG
Content
Table of Contents
ScanDrop
1
General Advice ................................................................5
1.1
Working with the ScanDrop...................................................................5
1.2
Notes Regarding the Use of This Manual .............................................6
2
Safety Instructions ..........................................................7
2.1
General Safety Instructions...................................................................7
2.2
Standards & Directives..........................................................................9
3
Technical ScanDrop Data .............................................11
4
Transportation & Installation Requirements...............13
4.1
Transportation & Storage ....................................................................13
4.2
Installation Requirements....................................................................13
5
Installation & Start-Up...................................................15
5.1
Standard Delivery Scope ....................................................................15
5.2
Components & Terminals....................................................................16
5.3
Connecting the ScanDrop ...................................................................19
5.4
Starting Up & Turning On....................................................................19
5.5
Turning Off ..........................................................................................20
6
Inserting Samples .........................................................21
6.1
Working with a CHIPCUVETTE ..........................................................21
6.2
Working with a Standard Tube............................................................23
7
Operation Control with ASpect Nano ..........................25
7.1
General Settings for ASpect Nano......................................................26
7.1.1
User Identity Management & Current User Log Off ............................26
7.1.2
Language Settings ..............................................................................28
7.1.3
Setting Initial Screen After ScanDrop Power Becomes Available ......28
7.1.4
General System Settings ....................................................................29
7.1.5
System Settings for CHIPCUVETTE ..................................................30
7.2
Data Management on HID-Pro 320 ....................................................32
8
Measurement in CHIPCUVETTE...................................33
8.1
Defining Sample Assignments for CHIPCUVETTE in ASpect Nano ..33
8.2
Quantitative Analysis – Quantification Module....................................35
8.2.1
Parameter Settings for Concentration Analysis ..................................36
8.2.2
Triggering Concentration Measurement .............................................40
8.2.3
Display & Management of Measured Results.....................................40
06/2009
1
Content
2
8.2.4
Presettings in Quant Module...............................................................45
8.3
Bio Method Module .............................................................................46
8.3.1
Settings for & Management of Analytical Parameters ........................48
8.3.2
Triggering Measurement .....................................................................51
8.3.3
Display & Management of Analytical Results .....................................51
8.3.4
Presettings in Bio Module ...................................................................54
8.4
Expression Module..............................................................................55
8.4.1
Settings for & Management of Analytical Parameters ........................56
8.4.2
Triggering Measurment .......................................................................59
8.4.3
Displaying & Managing Analytical Results..........................................59
8.4.4
Analytical Parameter Presettings / Programming of
Analytical Formula...............................................................................62
8.5
User-Defined Measurement – UV VIS Module ...................................65
8.5.1
Setting & Managing Measurement Parameters ..................................65
8.5.2
Performing Sample Measurement ......................................................70
8.5.3
Display & Management of Measured Results.....................................70
9
Measurement in Standard Tube ...................................73
9.1
Quantitative Analysis – Quantification Module....................................73
9.1.1
Analytical Parameter Settings .............................................................74
9.1.2
Triggering Concentration Analysis ......................................................77
9.1.3
Display & Management of the Results of Concentration Analysis......77
9.1.4
Presettings in Quantification Module ..................................................80
9.2
Bio Method Module .............................................................................82
9.2.1
Selection of Bio Method & Triggering Analysis ...................................83
9.2.2
Management of Analytical Results in Bio Mehod Module...................84
9.2.3
Presettings in Bio Method Module ......................................................85
9.3
Expression Module..............................................................................86
9.3.1
Triggering Measurement & Displaying Analytical Results ..................87
9.3.2
Data Management...............................................................................88
9.3.3
Analytical Parameter Presettings / Programming of
Analytical Formula...............................................................................88
9.4
User-Defined Measurement – UV VIS Module ...................................90
9.4.1
Settings for & Management of Measurement Parameters..................91
9.4.2
Performing Sample Measurement ......................................................94
9.4.3
Display & Management of Measured Results.....................................94
10
Preventive Maintenance & Care ...................................97
10.1
Cleaning the ScanDrop .......................................................................97
06/2009
ScanDrop
Content
ScanDrop
10.2
Cleaning the Touchscreen ..................................................................98
10.3
Firmware & Software Updating ...........................................................98
11
Packaging for Transportation ......................................99
12
Disposal .......................................................................101
13
List of Illustrations ......................................................103
06/2009
3
Content
4
06/2009
ScanDrop
General Advice
1
General Advice
1.1
Working with the ScanDrop
The ScanDrop provides a UVVIS spectrophotometer that has been specifically
designed to perform analysis of micro-liter samples with a minimum sample
volume of 0.3 µL.
The ScanDrop is available in three product versions:
•
ScanDrop 100
•
ScanDrop 200
•
ScanDrop 250
Version 200 Scandrops are intended for measurement of micro-liter samples in
a patented CHIPCUVETTE®-type tube. ScanDrop 250 systems include an extra
tube chimney for insertion of standard tubes. They can be used to analyze
samples in a CHIPCUVETTE® or to measure samples in standard tubes with a
layer thickness of 10 mm. The ScanDrop 100 is for measurement of samples in
a standard tube.
The optical beam train of all ScanDrop versions integrates a xenon flash-lamp
serving as excitation light-source and a diode array with a holographic grid as
the receiver part. Because there are no mechanically moving parts inside the
polychromator, the ScanDrop performs with exceptional stability yet providing
high wavelength accuracy at the same time. Configured with a combination of a
xenon flash-lamp and a split-beam component for reference gauging, the
system will work in a stable state and be ready for measurement immediately
on turning power on. No run-in time is required to achieve consistent test
readings.
The ScanDrop is prepared for measurement within a spectral range from
190 nm to 720 nm.
Its integrated portable operation-control unit with HID-Pro 320 color touchscreen
makes the ScanDrop a footprint-saving stand-alone tool. The operation control
unit has implemented ASpect Nano software to facilitate:
•
Quantitative evaluation based on three calibration models
•
Biochemical analysis
•
Analysis following user-programmed formulas
•
Intensity measurement at discrete wavelengths and within discrete
spectral ranges plus output and display of readings in units of
transmittance, absorbance and energy
Optionally, the ScanDrop may be connected to a PC. Operation control and
®
data evaluation processes are accomplished by WinASPECT software for
UVVIS spectroscopy in this case.
ScanDrop
06/2009
5
General Advice
1.2
Notes Regarding the Use of This Manual
Warning and information symbols used throughout this Manual:
Danger!
Advice of this kind must be followed under all circumstances in order to prevent
physical harm to people.
Caution!
Advice of this kind must be followed in order to prevent damage to the product.
Note
Advisory notes should be followed in order to obtain correct results of
measurement.
For greater convenience in working with this Manual, the following systematic
rules have been incorporated herein:
•
Chapters and illustrations are numbered consucutively.
•
Each picture has its own caption.
•
Cross-references to other sections are marked with an arrow (e.g. →
section "Working with the ScanDrop" p. 5).
•
Work steps are numbered.
This Manual contains a description of ScanDrop 100, ScanDrop 200 and
ScanDrop 250 product models. A description part which equally applies to all
three product models will provide collective references to the ScanDrop as
such. Where a particular feature of a given product model is to be specifically
highlighted, the full product name will be quoted.
6
06/2009
ScanDrop
Safety Instructions
General Safety Instructions
2
Safety Instructions
2.1
General Safety Instructions
For your own safety and to assure failsafe operation, you should carefully read
this chapter, before you proceed with any kind of ScanDrop start-up action.
Comply with all safety requirements that are contained in this Manual and follow
all messages and prompts that are displayed on the monitor screen by control
software.
You are also advised to observe all safety requirements for integrated system
components from other manufacturers (e.g. operation control unit, printer).
Remember to comply with safety advice on labels and specifications regarding
the handling, storage and disposal of reagents, reaction tubes and accessory
pack slips of test sample sets.
Intended use!
The ScanDrop, including any original accessories, may not be used for
applications other than described in this User Manual. No manufacturer
warranty can be assumed in the event of any other type of use, including that of
individual assemblies or single parts. This will also apply in the event of service
or repair work which is not performed by authorized service personnel. All
claims for warranty/guarantee will be null and void in such cases.
Local requirements/practice!
Local safety provisions and rules which are applicable to product operation
should be followed (e.g. industrial labor protection practice, accident prevention
rules, industrial safety regulation).
A reference to potential hazards contained in the User Manual must not be
regarded as replacing compulsory workforce safety requirements.
Personnel!
The ScanDrop may not be operated by anyone other than duly trained and
qualified personnel.
Prior knowledge of this Manual is indispensable and assumed to have been
acquired before operation.
Shut-down in the event of emergency!
In the event of an emergency, the power plug must be detached from the line
socket in order to cut power supply to the ScanDrop and its components.
Caution! There is danger of loss of data and damage to the operating system!
Refrain from operation in rooms with an explosive atmosphere!
ScanDrop
06/2009
7
Safety Instructions
General Safety Instructions
Danger of finger injury working at the ScanDrop 250!
Keep your fingers clear of the standard tube chimney. As part of outward
motion, the CHIPCUVETTE® cover is raised to a position above the tube
chimney, which creates danger of physical injury!
Water
Take care to prevent penetration of liquid into the inner working space.
Do not place liquid-containing vessels onto the ScanDrop.
Otherwise, the system may suffer damage.
Danger of corrosion
Do not operate the ScanDrop in the direct vicinity of aggressive vapors, for
example, strongly etching acidic or alkali fumes! Such fumes might corrode
terminals, mechanical and optical parts.
Keep the sample compartment free from exposure to strongly etching
substances in order to prevent adverse influences! Use vapor-tight tubes with a
plug in such cases.
Touch screen scratching
Use only your finger tips or a suitably chamfered input aid of plastic material
(palm pen) to make entries at the touchscreen. Refrain from the use of sharpedged objects or pins.
8
06/2009
ScanDrop
Safety Instructions
Standards & Directives
2.2
Standards & Directives
Protection class and degree of internal protection
The system casing is designed to comply with internal protection standard IP
20.
Operating safety
The ScanDrop is designed and built to meet the following safety standards:
•
DIN EN 61010-1 (VDE 0411T.1; IEC 61010-1)
EMC compatibility
The ScanDrop has been tested for radio interference suppression and noise
immunity and found to fulfill the requirements according to:
•
DIN EN 61326-1
Environmental compatibility
The ScanDrop has been tested for environmental compatibility and found to
meet the requirements according to:
•
DIN ISO 9022-3:2000
•
DIN ISO 9022-32-03-0
•
DIN ISO 9022-2:2003/01
EG directives
The ScanDrop is built and tested to comply with the requirements of EC
directives 2006/95/EC and 2004/108/EC. It is factory-shipped in a faultless and
absolutely safe technical condition. To preserve this condition and ensure
reliable operation, the user must follow all safety notes and instructions that are
provided in this Manual. Integrated accessories or system components from
other manufacturers should be treated in accordance with the appropriate user
manuals.
ScanDrop
06/2009
9
Safety Instructions
Standards & Directives
10
06/2009
ScanDrop
Technical ScanDrop Data
3
Technical ScanDrop Data
Physical & optical ScanDrop data
Technical data
ScanDrop
Principle
Diode array for UV-VIS range with additional
reference channel
Optics
Polychromator with concave holographic grid
and photo diode line (256 pixels)
Reference channel: polychromator
(ScanDrop250) or photo diode
(ScanDrop200, ScanDrop 100)
Radiation sources
Xenon flash-lamp
Wavelength measurement
range
190 - 720 nm
Spectral slit width
7 nm
Photometric measurement
range
-3 - +3 A
Wavelength accuracy
±1 nm, achieved with holmium oxide filter*
Wavelength reproducibility
±0.05 nm
Stray light
0.5%T at 220 nm and 340 nm (NaNO2) *
Photometric accuracy for VIS
± 0.02 A (at 546 nm, with Hellma F4 neutral
glass filter)
Photometric accuracy for UV
± 0.04 A (with potassium dichromate after
Ph.Eur.)*
Longtime stability
± 0.003 A/h at 500 nm
Baseline noise
0.002 (RMS)
Shortest time to measure
12 ms for one spectrum
* taking into consideration tolerances prescribed by the selected standard
ScanDrop
06/2009
11
Technical ScanDrop Data
General technical ScanDrop data
Weight
5 kg
Footprint area (W x D)
about 500 mm x 450 mm
Phys. dimensions (W x H x
D)
286 mm x 235 mm x 250 mm
Input voltage
24 V DC / 2A
Power consumption
50 VA
External power pack
Inlet
Output voltage
100...240 V AC / 50…60 Hz
24 V DC / 2.7 A
Radio interference
suppression
EN 55011, class A
Noise immunity
DIN EN 50082-1
Degree of protection
IP 20
Data terminals
USB
Summary table 3-1 General technical ScanDrop data
Technical data of HID-Pro 320
12
Weight
600 g
Phys. dimensions (W x H x
D)
110 mm x 110 mm x 180 mm
Display
Touch screen,
5.7" diagonal
Operating system
Windows CE
Data terminals
USB, LAN
External memory
SD 1 GB
06/2009
ScanDrop
Transportation & Installation Requirements
4
Transportation & Installation Requirements
4.1
Transportation & Storage
For transportation and storage, the following ambient conditions must be
maintained:
Temperature range -40 C – +50 C
Rel. air humidity
up to 95%
Use dessicant!
4.2
Installation Requirements
Caution! The following compulsory rules must be observed at any time
during operation!
Do not place objects onto the ScanDrop!
Prevent operation in rooms with an explosive atmosphere!
There must be no aggressive vapors, for example, strongly etching acidic or
alkali fumes in the immediate surroundings of the system.
The designated site for installation must meet the following requirements:
•
Absence of draught effects, dust, etching vapors and mechanical vibration.
•
No electromagnetic fields (e.g. motors) located nearby.
•
No dripping, gushing or splashing water near the ScanDrop.
•
No exposure to incident solar radiation or radiation emitted by heaters.
Temperature range
+10 C - +40 C
Max. rel. air humidity
93% at +40°C
Footprint requirements
With physical dimensions as quoted above and approximately 100 mm of
clearance on all sides, the ScanDrop requires a minimum footprint area of
500 mm x 450 mm (W x D).
ScanDrop
06/2009
13
Transportation & Installation Requirements
14
06/2009
ScanDrop
Installation & Start-Up
Standard Delivery Scope
5
Installation & Start-Up
5.1
Standard Delivery Scope
ScanDrop delivery may include system versions and accessory items as
specified hereafter:
ScanDrop 100
•
ScanDrop 100 spectrophotometer for 10mm standard tubes
•
ASpect Nano software
•
1 standard glass tube, 10 mm layer thickness
•
1 standard quartz tube, 10 mm layer thickness
ScanDrop 200
•
ScanDrop 200 spectrophotometer for CHIPCUVETTE®
•
ASpect Nano software
•
2 CHIPCUVETTE® micro trubes
ScanDrop 250
•
ScanDrop 250 spectrophotometer for CHIPCUVETTE® and 10-mm
standard tubes
•
ASpect Nano software
•
2 CHIPCUVETTE® micro tubes
•
1 standard glass tube, 10 mm layer thickness
•
1 standard quartz tube, 10 mm layer thickness
Optional components
ScanDrop
•
HID-Pro 320 – portable control unit
•
Set of CHIPCUVETTE® - 5 tubes
•
Set of CHIPCUVETTE® - 25 tubes
•
Stirrer for ScanDrop 250 and ScanDrop 100
•
Water or Peltier temperature controller for ScanDrop 250 and
ScanDrop 100
06/2009
15
Installation & Start-Up
Components & Terminals
5.2
Components & Terminals
The ScanDrop is of modular setup. It consists of a basic system unit that can be
combined with a HID-Pro 320 operation control unit. Once mounted onto the
interface port at the top of the basic unit, the control unit will be operational.
1
Basic ScanDrop unit
3
Chimney for 10 mm layer thickness standard tubes (ScanDrop 250 and ScanDrop 100)
4
Receptacle for CHIPCUVETTE micro tubes (closed)
Fig. 1
16
HID-Pro 320 operation control unit
2
®
General view of ScanDrop
06/2009
ScanDrop
Installation & Start-Up
Components & Terminals
Connector terminals at HID-Pro 320 control unit
The HID-Pro 320 control unit provides a USB port for data transmission. It is
required for software updates and to export measurement and evaluation data.
1
USB port (2.0)
2
LAN port
Fig. 2
ScanDrop
Connector terminals at HID-Pro 320 control unit
06/2009
17
Installation & Start-Up
Components & Terminals
Rear-side connection terminals
1
RS 232 interface port
2
Terminals for water supply to heat exchanger and thermostat with temperature-controlled
standard tube
3
Electric connection points for Peltier thermo controller and standard tube
4
USB port (PC)
5
Terminal for external power pack
6
Terminal for standard tube stirrer
7
On/Off switch
Fig. 3
18
Connector terminals on the rear side of the ScanDrop
06/2009
ScanDrop
Installation & Start-Up
Connecting the ScanDrop
5.3
Connecting the ScanDrop
1. Remove the ScanDrop, power pack, operation control unit and user manual
from their transport packaging. Allow adequate time for the system to
thermally adjust to its ambient temperature.
2. Store transport packaging for future transportation if necessary.
3. Mount HID-Pro 320 operation control unit onto the mechanical interface at
the top of the ScanDrop. The operation control unit is held in position by
magnets.
Alternatively, you may connect a PC in order to perform operation control
and data evaluation of the ScanDrop at the PC.
4. Connect the ScanDrop with the power pack and connect power pack to line
power supply.
5.4
Starting Up & Turning On
Caution! Liquids!
Do not place objects, especially liquid-containing vessels, onto the ScanDrop.
Refrain from tilting!
The operation control unit just sits on the connector interface of the basic unit. It
may fall off if the system is tilted up.
1. Use the On/Off switch to turn the ScanDrop on.
The ScanDrop will automatically undergo an initialization routine.
The screen for password entry appears on the monitor.
2. Enter your user name with related password if there is an installed user
identity management system.
Otherwise, make these entries:
User name:
Administrator
Password:
admin
The main menu screen will show.
The ScanDrop is ready for measurement.
ScanDrop
06/2009
19
Installation & Start-Up
Turning Off
5.5
Turning Off
1. Remove samples.
Remove standard tube from tube chimney.
Trigger [CHIP] to move the CHIPCUVETTE® holder frame out of the
ScanDrop and remove the CHIPCUVETTE®.
2. Turn power off using the ScanDrop On/Off switch.
20
06/2009
ScanDrop
Inserting Samples
Working with a CHIPCUVETTE
6
Inserting Samples
6.1
Working with a CHIPCUVETTE
Only for ScanDrop 250 and ScanDrop 200
Structure of a CHIPCUVETTE®
A CHIPCUVETTE® can be loaded with as many as sixteen samples. All sample
channels are of through (single space) type so they can be filled without
formation of bubbles. Each channel has two test points, a shallow point with a
layer thickness of 0.1 mm and a deeper one with a layer thickness of 1 mm.
A channel has two openings for sample-filling from a pipette. The opening on
the shallow-channel side can be served with crystal pipettes of a maximum 20
µL capacity. The opening on the deeper channel side is intended to be filled,
using standard pipettes with tips up to 200 µL capacity.
Optionally or with very small sample quantities, a sample channel may only be
filled at its shallow or its deep test point end:
Channel depth
Fill quantity
Pipette tips
0.1 mm
0.3 µL
0.1 – 20 µL
1 mm
2 µL
up to 200 µL
both combined
max. 4 µL
1
Sample channel
4
Test point for 1 mm layer thickness
2
Fill opening on shallow channel side
5
Fill opening on deep channel side
3
Test point for 0.1 mm layer thickness
Fig. 4
ScanDrop
Structure of a CHIPCUVETTE
06/2009
®
21
Inserting Samples
Working with a CHIPCUVETTE
Inserting a CHIPCUVETTE®
Caution! Danger of finger injury working with the ScanDrop 250!
Keep your fingers clear of the tube chimney and take care that no tube or other
object are located in the standard tube chimney, if measurement is to be
performed with a CHIPCUVETTE®. During outward motion of the
CHIPCUVETTE® holder, the tube’s cover raises to a level above the tube
chimney’s top edge.
Note! Contamination of a CHIPCUVETTE® may falsify measured readings!
Prevent physical contact with optical surfaces (test point surface) of a
CHIPCUVETTE®! Contamination forming on an optical surface may falsify the
readings that will be measured. Hold the CHIPCUVETTE® only by its lateral
side!
1. Select CHIPCUVETTE option from the Select measurement list and select
a desired application under “Modules“, working in the main menu.
2. Press [CHIP] key to move the CHIPCUVETTE® out of the ScanDrop.
3. Place CHIPCUVETTE® onto the holder frame. Then slide the
CHIPCUVETTE® into the left holder groove and press it down.
Note: Make sure that the CHIPCUVETTE® is correctly positioned. Its fill
openings must be facing to the top and position 1 must be located on the
left-hand side. A check for correct placement can be made using system
setting procedures (→ section "System Settings for CHIPCUVETTE" p. 30).
The CHIPCUVETTE® will mechanically engage with a perceivable click.
4. Acknowledge "Please insert CHIPCUEVETTE" screen prompt with [OK].
The CHIPCUVETTE® holder moves into the ScanDrop.
5. Press [CHIP] again on completion of measurement, in order to trigger
another outward motion run of the holder frame with CHIPCUVETTE®.
Place your fingertip into the right-hand recess in the frame below the
CHIPCUVETTE®, push the tube somewhat to the left and take it off from the
top.
22
06/2009
ScanDrop
Inserting Samples
Working with a Standard Tube
Holder frame of CHIPCUVETTE
2
Shallow test point of sample channel 1
3
CHIPCUVETTE
Fig. 5
6.2
®
1
®
4
Recess in holder frame
5
Clamp
6
Groove
®
Holder frame with CHIPCUVETTE inserted
Working with a Standard Tube
Only for ScanDrop 250 and ScanDrop 100
Note regarding ScanDrop 250
The CHIPCUVETTE® holder must have been fully lowered into the ScanDrop.
Otherwise, its cover will obstruct access to the standard tube chimney.
1. For ScanDrop 250: Select Standard (10 mm) option from the Select
measurement list in the main menu.
2. Fill sample into the tube (minimum fill height: 17 mm (1.7 mL)).
3. Place tube into the tube chimney. The arrow beside the tube chimney
indicates the direction of beam passage. The tube’s optical (blank) surfaces
must be orthogonal in relation to the beam.
ScanDrop
06/2009
23
Inserting Samples
Working with a Standard Tube
Fig. 6
1
Standard tube
2
Arrow marker for
measuring beam direction
Standard tube installed in measuring chimney
Note regarding ScanDrop 250
Always remove the CHIPCUVETTE® from the ScanDrop before you begin
measurement with a standard tube!
During measurement of a standard tube, the measurement channel of
CHIPCUVETTE® is used as internal reference. A CHIPCUVETTE® present in
the beam path may falsify the measured result!
24
06/2009
ScanDrop
Operation Control with ASpect Nano
7
Operation Control with ASpect Nano
When you work with the HID-Pro 320 control unit, system operation is controlled
and data packages are evaluated by ASpect Nano software which has been
specifically developed for biochemical analysis. ASpect Nano software is of
modular setup. It consists of the following modules:
Quant
Evaluates samples analyzed for concentration
Bio method
Measures proteins, DNA and RNA with respective evaluation
Expression
Performs evaluation based on user-defined formulas
UV VIS
Measures sample intensities and outputs results for
transmittance, absorbance and energy
Actions for system operation control and evaluation of results are normally
triggered at the large touch-sensitive LCD monitor (touch screen) of HID-Pro
320.
Its input fields are adequately sized to allow operation control with one’s fingers.
A commercial palm pen can also be used as input aid.
A key (control button), option or control field can be activated by pressing it.
For inputs in an entry field, an alpha-numerical or numerical keypad will show
as soon as the input field is active. Inputs with the alpha-numerical keypad will
not become valid unless confirmed by pressing [OK]. Numerical values on the
].
numerical keypad can be acknowledged by pressing [
The main menu will be displayed when a ScanDrop session starts. It contains a
tool for selection of a tube, keys for triggering the various analytical modules
and one key to open the system settings window. The starting window of
ASpect Nano software can be modified. For example, required analytical
module windows can be directly opened or a menu for method selection be
chosen in addition to the main menu (refer to section "Setting Initial Screen
After ScanDrop Power Becomes Available" p. 28).
Fig. 7
Main menu of ASpect Nano software
Operator action for the analytical modules is different for working with a
CHIPCUVETTE® and with a standard tube. For this reason, measurement with
the two types of tube will be discussed separately in this User Manual. General
ScanDrop
06/2009
25
Operation Control with ASpect Nano
General Settings for ASpect Nano
system settings such as language, user identity management or starting options
for ASpect Nano are described in section "General Settings for ASpect Nano" p.
26.
Abbreviations for convenience
This ASpect Nano software description uses "Chip" for CHIPCUVETTE® and
"Std." for a standard tube.
7.1
General Settings for ASpect Nano
For access to general settings options, press the [Settings] key in the main
menu. The following system parameters and properties can then be configured:
•
User identity management
•
Language setting for software user screen
•
Settings for starting menu after power becomes available to the ScanDrop
•
General measurement parameter settings
•
Software updates
•
Alignment of CHIPCUVETTE®
The bigger part of setting options is only available to persons with administrator
rights.
7.1.1
User Identity Management & Current User Log Off
Note
In initial setting state, a user with administrator rights is logged on:
User name: Administrator
Password: admin
User identity management
The user identity management tool can be accessed via the Gneral tab of the
ScanDrop - Settings window.
Creating a new user profile
1. Press [Settings] key in main menu and change to the General tab in the
ScanDrop - Settings window.
2. Press [Edit user list] key to open a summary table of available user
profiles.
3. Press [Add] key to open the dialog window for entry of a new user profile.
4. Make data inputs as follows:
{
26
User name
06/2009
ScanDrop
Operation Control with ASpect Nano
General Settings for ASpect Nano
{
Password and repeated password
{
User level (refer to section "User levels & rights" below)
{
Deactivate User is blocked check box. If this check box is active, a
currently edited profile will be blocked so it cannot be used.
5. Press [OK] to exit the dialog window.
The new user profile is now contained in the list of profiles.
Editing a user profile
1. Select desired profile from the summary list of available user profiles.
2. Press [Edit] key to open the dialog window with user profile data.
3. Working in the dialog window, you may edit the password, user level and
the blocked state.
4. Press [OK] to acknowledge your changes in data settings.
Note
A user profile can be edited or blocked, but it cannot be deleted.
User levels
Working in the user identity management, you may assign rights on three
levels:
Administrator
Extended user
Restricted user
Load analytical
module
+
+
+
Start
measurement
+
+
+
Create analytical
method
+
+
-
Reregister user
+
+
+
Edit general
system settings
+
-
-
Reregistration of a user
During an ASpect Nano session, one may change a currently logged user. For
reregistration, the General tab on the ScanDrop – Settings window is
available.
1. Press [Settings] key in main menu and change to General tab in
ScanDrop - Settings window.
2. Press [Log Off] key to open the dialog window for user and password
entry.
3. Enter new user name with pertaining password and press [OK] for
acknowledgement.
The newly logged user will be displayed at the General tab.
ScanDrop
06/2009
27
Operation Control with ASpect Nano
General Settings for ASpect Nano
7.1.2
Language Settings
Language settings can be made on the General tab of the ScanDrop –
Settings window.
1. Press [Settings] key in the main menu and change to General tab in
ScanDrop - Settings window.
2. Select the Language list field.
3. Select desired language (German or English).
The software user screen will promptly convert to the selected language output
version.
7.1.3
Setting Initial Screen After ScanDrop Power Becomes Available
In default setting version, the main menu with keys that are assigned to the four
analytical modules will be displayed, once power is available to the ScanDrop.
This setting version can be edited so a particular analytical module with its presettings or a quick start menu will show immediately after power is turned on.
Triggering analytical module after ScanDrop is turned on
Initial screen settings can be made by selecting the Launch ASpect Nano
Software group on the General tab of the ScanDrop – Settings window.
Fig. 8
Settings window – General tab
1. Press [Settings] key in main menu and change to General tab in
ScanDrop - Settings window.
2. Select tube type for analysis in Measurement list field.
3. Select starting software in Start module list field as shown hereafter:
28
Mail
Basic setting with window for selection of an analytical
module
Quick start
Menu with up to six analytical methods available for
06/2009
ScanDrop
Operation Control with ASpect Nano
General Settings for ASpect Nano
measurement
Quant
Module for concentration analysis
Bio method
Module with prefabricated typically required methods of
bio analysis
Expression
Module for analysis based on user-programmed
formula(s)
UV VIS
Module for measurement of absorbance, transmittance
and energy at discrete wavelengths or for discrete
spectrums
Configuring quick-start menu
The quick start menu is provided to load methods or measurement parameters
directly from the various analytical modules for triggering. Configuration settings
for the quick start menu can be made on the Quick start tab of the ScanDrop –
Settings window.
1. Press [Settings] key in main menu and change to Quick start tab in
ScanDrop - Settings window.
2. Select desired quick-start position from Select button list field for editing
(Quick start button 1 – 6).
3. Set tube type in Measurement list field.
4. Select analytical module in Start module list field.
5. Load method.
Press key
to open the standard window for file opening. Select method
and press [OK] for acknowledgement.
Note: On loading, only such methods will be displayed which were
previously created for the selected tube type.
6. Enter a description in field Description of quick start menu.
If quick start is the active version for starting menu, a method list will appear as
soon as the ScanDrop is powered up. A method can be loaded and displayed
by pressing the pertaining [Start] key.
7.1.4
General System Settings
The Device tab in ScanDrop – Settings window contains basic settings for
determination and processing of measured values. It displays the current
software version and facilitates automatic firmware/software updates via USB
stick (→ section "Firmware & Software Updating" p.98.
Note! Basic settings solely intended to be modified by service personnel!
Basic settings have been made in such a way that optimal measuring results
will be obtained. They should not be changed, unless by prior consultation with
Analytik Jena AG.
ScanDrop
06/2009
29
Operation Control with ASpect Nano
General Settings for ASpect Nano
Accumulation
Defines the number of repetitions of a measurement cycle
required to obtain a measured value.
This parameter can be changed in pre-settings for the various
modules and in any method.
Preset value: 10
Flash number
Number of flashes to expose the receiver line
Preset value: 3
Flash frequency Sets the number of flashes (flash rate) per second
Preset value: 4
Dark corr.
Records dark signal prior to each measurement if active.
Dark signal correction should always be active.
Data correction Corrects flash-lamp intensity with the help of an internal
reference channel.
The ScanDrop 250 includes two receivers for measurement
in a CHIPCUVETTE® and in a standard tube. In the case of
CHIPCUVETTE® measurement, the receiver for standard
tube is used as reference channel and vice versa.
Wavelength indicates the midpoint value of a range that is
selected for measurement of the flash intensity. The size of
this correction range can be defined in the Range input
window. It specifies the number of pixels to the right and to
the left of Wavelength. With check box Data smooth in
active state, all values obtained within the correction range
will be subjected to smoothing.
In the case of ScanDrop 200 and ScanDrop 100, a photo
diode functions as receiver in the internal reference channel.
7.1.5
System Settings for CHIPCUVETTE
Alignment of CHIPCUVETTE®
Exact positioning of the CHIPCUVETTE® within ScanDrop beam train is an
indispensable prerequisite for obtaining correct measurement results. Alignment
is performed under software control using the CHIPCUVETTE tab in the
ScanDrop – Settings window.
We recommend that a positional adjustment routine be performed for each new
batch of tubes of this type. Insert an empty, non-filled CHIPCUVETTE® for this
purpose. Alignment is carried out, using the deep channels. Three different
modes are available for choice as necessary to meet the requirements on
accuracy:
Single-channel calibration (fast):
Monitors channel 3. As measurement is going on, the CHIPCUVETTE® moves
through the beam path thus recording the profile of this sample channel. From
30
06/2009
ScanDrop
Operation Control with ASpect Nano
General Settings for ASpect Nano
the recorded profile, the location of the mid-channel point is then determined
and resulting correction factors are calculated.
Two-channel calibration (recommended):
Monitors channels 1 and 16. The alignment process is identical with that in
Single-channel calibration mode.
All-channel calibration (advanced):
Monitors all channels. The alignment process is identical with that in Singlechannel calibration mode.
Correction of channel depth
A channel depth of 100 µm for shallow channel measurement cannot always be
guaranteed. To enable users to account for the precise value of a layer
thickness in analytical processes, system delivery includes a correction factor
for each lot of tubes. This factor normalizes the result of measurement or
analysis to a layer thickness of 100 µm in all cases.
It must be entered at the Correction factor of channels input field.
Position testing of CHIPCUVETTE®
A CHIPCUVETTE® must always be inserted in a correct position in relation to
the tube holder (see Fig. 5 S. 23). If the CHIPCUVETTE® is installed in a
rotationally twisted position, its samples will be mal-assigned.
If the Check position of inserted CHIPCUVETTE check box is active, the
CHIPCUVETTE® will automatically be checked for correct placement in its
holder frame.
Note
To check for correct ordinate location and correct wavelength with filter chip,
position testing must be turned off.
ScanDrop
06/2009
31
Operation Control with ASpect Nano
Data Management on HID-Pro 320
7.2
Data Management on HID-Pro 320
Files must always be saved on the memory card (Storage Card folder). The
HID-Pro 320 operation control unit does not provide enough memory space for
this purpose!
Analytical data are managed and maintained in individual analysis modules.
File summary table in Aspect Nano
File name
File content
Quantification modules
.cqu
Analytical parameters and results of concentration analysis
performed with a CHIPCUVETTE®
.squ
Analytical parameters and results of concentration analysis
performed with a standard tube
Bio method modules
.cbi
Analytical parameters and results of a bio-method performed
with a CHIPCUVETTE®
.sbi
Analytical parameters and results of a bio-method performed
with a standard tube
Expression modules
.cei
Analytical parameters and results based on user-programmed
formula with a CHIPCUVETTE®
.sei
Analytical parameters and results using a programmed
formula with a standard tube
UV VIS modules
32
.dac
Readings obtained measuring with a CHIPCUVETTE®
.das
Readings obtained measuring with a standard tube
.par
Measurement parameters in UVVIS module
06/2009
ScanDrop
Measurement in CHIPCUVETTE
Defining Sample Assignments for CHIPCUVETTE in ASpect Nano
8
Measurement in CHIPCUVETTE
8.1
Defining Sample Assignments for CHIPCUVETTE in ASpect
Nano
Sample assignments for a CHIPCUVETTE® must be specified before
measurement can begin. This will determine the order in which samples are
measured in an analytical process. This work step is similar in all program
modules.
A sample assignments chart is graphically displayed. For better convenience,
the various sample positions (sample channels on CHIPCUVETTE®) are
distributed onto the two tabs [1..8] and [9..16]. A sample channel on
CHIPCUVETTE® is represented through a bar with its assigned number. A slim
bar symbolizes the shallow test point end, the broad bar the deep test point
end. This tube setup is identical for all measuring modules.
1
Keys for selection of sample type
2
Number keys of sample channels
3
Keys for sample channels
Fig. 9
QUANT module window – sample assignment settings for CHIPCUVETTE
®
The keys (1 in Fig. 9)on the left of the actual tube setup area are intended for
assigning a required sample type (also refer to description of analysis modules).
An activated sample type will be assigned on marking of a test point.
Sample type
Depending on the selected analysis module, the appropriate
sample types will be enabled for definition (reference,
standard, concentration analysis sample, etc.).
[No]
Removes marker from a test point.
[All]
Assigns marked sample type to all test points.
Removes all markers if [No] is active.
•
To assign a sample type to a test point, activate its related key, for example
[Conc.]. Then touch a sample channel (2 in Fig. 9).
A sample channel is fully marked in color.
•
ScanDrop
To deactivate just one test point, activate key [No] at first. Then touch all
those test points you do not want to measure.
06/2009
33
Measurement in CHIPCUVETTE
Defining Sample Assignments for CHIPCUVETTE in ASpect Nano
The markers at these test points will be removed.
•
To assign the same sample type to all test points, activate the key
corresponding to that type. Then press key [All].
The same sample type will be assigned to all test points on the active tab.
Note regarding sample assignments
•
A sample assignments chart need not necessarily begin with position 1.
Unused channels of a tube may be assigned at a later point in time.
•
A sample measurement sequence begins with the smallest assigned
sample position.
•
A reference must be placed before its related sample, i.e. be defined with a
position number that is smaller than the actual sample.
Defining sample properties in Quantification, Bio method and Expression
module
The various samples in a given tube setup may be assigned to specific
properties such as sample name, sample type or correction factors.
34
•
To open this input window, press number key of the sample channel (2 in
Fig. 9).
•
Enter all required sample properties in this window and press [OK] to
restore the tube setup window screen.
06/2009
ScanDrop
Quantitative Analysis – Quantification Module
System Settings for CHIPCUVETTE
8.2
Quantitative Analysis – Quantification Module
The Quantification module is preferentially intended for express routine jobs of
concentration analysis. A concentration value is determined using the
absorbance value obtained for a given wavelength. Concentration analysis may
be performed with a factor or based on a linear or square regression model
alternatively. Routinely, a pre-defined sequence of reference samples, standard
samples and samples for concentration or absorbance measurement will be
processed. Working with the Quantification module, it is possible to prepare and
save required methods to such an extent that a given analytical process can be
triggered by pressing [Start], once a method and sample assignments setup
have been selected.
®
A sequence of samples for analysis with a CHIPCUVETTE is defined through
that tube’s sample assignments.
The Quantification module displays an initial parameter window for input of
required analytical settings when selected. It outputs the results for
concentration in a separate results window in graphical and numerical form.
Automatic determination of optimal measuring range
Where quantitative analysis performed with a CHIPCUVETTE® records a test
reading at both test points of a sample channel, the analytical process will use
that of the two test readings which is found to be within the linear measuring
range from 0.005 to 1.5 Abs. If both measured readings are found to be within
this range, the one which is closer to 0.75 Abs will be included for analysis. This
automated procedure for determination of an optimal measuring range allows
you to extend the available width in concentration without having to put up with
a dilution factor of 10.
The measured readings are tested for accuracy according to these criteria:
•
Abs(1mm) > Abs(0.1 mm)
•
Abs(1mm) > 0.005
•
Abs(0.1 mm) < 1.5
Abs(1 mm) -
Absorbance value for 1 mm layer thickness
Abs(0.1 mm) -
Absorbance value for 0.1 mm layer thickness
In the event of non-compliance with these requirements, affected test reading(s)
will be marked as faulty with a supporting reference to non-conforming sample
preparation.
To facilitate this analytical procedure also when performing concentration
analysis with calibration, one calibration graph is recorded for the deep and one
for the shallow test point to be included for analysis.
Triggering Quantification module
1. For ScanDrop 250: Select CHIPCUVETTE tube type in main window.
2. Press [Quantification] key.
ScanDrop
06/2009
35
Quantitative Analysis – Quantification Module
Parameter Settings for Concentration Analysis
The Quant module parameter window opens.
Function elements in Quant module parameter window
The Quant module parameter window has four tabs:
[1...8] and
[9…16]
Tube setup with CHIPCUVETTE® sample assignments
Sample prop.
Means sample table with details regarding sample sequence,
sample type, name and standard concentrations
Settings
Defines measurement and evaluation settings for
concentration analysis
The actual function keys are located at the bottom bar of the dialog window:
8.2.1
Function
Description
[New]
Deletes all previous entries and allows reentry of analytical
parameters.
[Load]
Loads previously saved measuring and evaluation
parameter settings for concentration analysis.
[Save]
Saves currently valid analytical parameters.
[Open]
Opens previously saved result file of prior concentration
analysis.
[Start]
Triggers measurement with analytical parameters as userset.
[Eject]
Moves holder frame of CHIPCUVETTE® out for insertion or
removal of a tube of this type.
[Default]
Defines presettings that are displayed prior to each new
concentration analysis.
[Close]
Closes the Quantification module.
Parameter Settings for Concentration Analysis
Entering a sample sequence
Action for sample assignment settings in CHIPCUVETTE® mode is described in
section "Defining Sample Assignments for CHIPCUVETTE in ASpect Nano" p.
33.
For measurement in Quantification module, the following sample types can be
defined via tabs [1...8] and [9...16]:
[Ref]
Reference
Note: Reference measurement must always precede a
standard or a sample measurement.
36
06/2009
ScanDrop
Quantitative Analysis – Quantification Module
Parameter Settings for Concentration Analysis
[Std]
Standard with known analyte concentration
[Conc]
Sample being measured for concentration.
[Abs]
Sample being measured for absorbance only.
[No]
Deletes individual sample position(s).
[All]
Assigns previously selected sample type to all sample
channels.
Fig. 10
Quant module (Chip) – for definition of sample sequence via analytical parameters
Note regarding assignment of reference and standard samples
Measurement readings for reference samples and standard samples are always
determined for both channels.
Defining sample properties
On selection of the Sample prop. tab, the various samples of a sample
assignments chart can be assigned a sample name, standard concentration,
weighed in quantities and dilution factors in a sample table.
Fig. 11
QUANT module (Chip) – editing sample table
1. To enter or edit sample properties, press corresponding sample line.
A window for defining the properties of a selected sample will open.
ScanDrop
06/2009
37
Quantitative Analysis – Quantification Module
Parameter Settings for Concentration Analysis
Alternatively, this window can also be opened from tabs [1..8] and [9..16]
by pressing number keys [1] to [16].
2. Available value entries:
Sample name Individual sample designation
Type (0.1mm) Sample type in shallow channel
Type (1 mm)
Sample type in deep channel
Note: For shallow channel and deep channel, the same
sample type or No property (for sample type) must be set.
References and standards are always measured in both
channels.
Target value
Known analyte concentration of standard samples.
Dilution
Dilution factor
Init weight
Concentration factor for correction of a weighed-in (initial)
portion
Alternatively, sample names can be imported from a file in "*.csv" format. This
CSV file must contain sample names in an order identical with that of the
sample table. The positions of reference and standard samples must be taken
into consideration.
Defining measurement parameters
For measurement parameter settings and definition of a desired type and mode
of concentration analysis, the Settings tab is provided.
Fig. 12
QUANT module (Chip) – measurement parameter settings
Title
Title of a measurement. This entry is optional.
Wavelength
Designates the wavelength being analyzed.
Multiple meas.
The number of repeat measurements of a sample.
Concentration is determined from the mean value of all
readings.
38
06/2009
ScanDrop
Quantitative Analysis – Quantification Module
Parameter Settings for Concentration Analysis
Unit
Unit of measure for concentration analysis
This input appears as part of results display. It is saved
together with the result of analysis.
Accumulation
Designates the number of repetitions of measurement you
want included in the formation of a measured value.
All single readings are averaged and output as the result of
measurement (Absorbance). Accumulation of single
measured readings may help improve the signal-to-noise
ratio.
The type of concentration analysis can be selected in the Calibration list field:
Concentration analysis using a factor
Factor
Enter required value, having opened the Factor input field.
Note: In the case of concentration measurement using a
factor, measured absorbance readings will be normalized to
a layer thickness of 1 cm for both test points of a sample
channel. For this reason, the extinction coefficient for 1
cm layer thickness must also be defined.
Current sample
table
Concentration analysis relies on a calibration graph that is
recorded as part of a current analytical job in accordance
with the sample table entries.
Select one of three regression calculation options in the
Regression input field:
Y= B + X
Y=A+B*X
Y = A + B * X + C + X2
Load calibration Loads a previously saved calibration graph (refer to section
further below).
file
Loading previously saved calibration graph
From a previously saved result file the settings for calibration can be loaded for
use in a current measurement task.
1. Select Load calibration file option in Calibration list field.
2. Click
symbol to open the standard dialog screen for file opening.
3. Mark a desired file and press [OK] for acknowledgement.
The default setting for saving the results files of concentration analysis is
"StorageCard/Scandrop/Quant". The file extension is "*.cqu".
Calibration data are loaded from the available file and will be available for
subsequent concentration analysis.
Note
When working with a previously saved calibration graph, you are not able to
measure with other standards nor include these for calibration.
ScanDrop
06/2009
39
Quantitative Analysis – Quantification Module
Display & Management of Measured Results
Saving and loading analytical parameters
Analytical parameter settings can be managed with the help of the two keys
[Load] and [Save] in the parameter window.
The default path for saving files in Quantification module is
"StorageCard/ScanDrop/Quant".
The file extension is ".cqu".
Saving an analytical parameter file
1. Set analytical parameters you want saved in the parameter window.
2. Press [Save] key.
The standard window for file saving opens.
3. Set path name and file and press [OK] for acknowledgement.
Loading analytical parameters
Analytical parameters and measured results are saved in the same manner. A
file always contains analytical parameter settings. A result file contains the
absorbance values for the measured samples in addition. Accordingly,
analytical parameters can be loaded from a parameter file or a result file.
1. Press [Load] key in parameter window.
2. Select ".cqu" file and press [OK] for acknowledgement.
The analytical parameters are displayed in the parameter window. They can be
edited or used for subsequent measurement.
8.2.2
Triggering Concentration Measurement
1. Pprepare parameters for concentration analysis.
2. Load CHIPCUVETTE® in accordance with the sample setup as made via
measurement parameter settings and place tube into holder frame.
3. Press [Start] to start measurement.
Measurement begins with predefined measurement parameter settings.
Samples are automatically evaluated in accordance with the selected sample
setup.
8.2.3
Display & Management of Measured Results
On completion of measurement, the results are displayed on the four tabs
Settings, Samples, Calibration and Coefficient of the results window. The
available function keys are intended for saving and exporting the results of
measurement and for returning to the parameter window.
40
06/2009
ScanDrop
Quantitative Analysis – Quantification Module
Display & Management of Measured Results
Tabs in results window
Settings tab
Fig. 13
QUANT module (Chip) – display of selected analytical parameter settings
The following values of analytical parameter settings are displayed and saved
together with the measured results:
Title
Title of measurement
Operator
Name of user
Wavelength
Analytical wavelength
Unit
Unit of measure of concentration value
Multiple meas. The number of repeat measurement cycles required to
determine a concentration value
Calibration model
Calibration
Samples tab
The Sample tab contains a table of samples with an overview of the results of
measurement.
Fig. 14
Quant module (Chip) – outputs table with results of analysis
The sample table survey area displays the following values:
ScanDrop
06/2009
41
Quantitative Analysis – Quantification Module
Display & Management of Measured Results
Pos
Position number of sample in CHIPCUVETTE®
Sample name
Sample name as defined in sample properties prior to
measurement.
Type
Sample type (reference, standard, concentration value or
absorbance value)
Conz
Calculated concentration value
On pressing of a sample line, a Single-sample result window with more
individual sample details will open:
Name
Sample name
Conzentration
Concentration value
Target value
Only for standards
Nominal concentration specified via analytical parameters
Type
Sample type (standard, concentration value or absorbance
value)
Dilution
Dilution factor
Init weight
Concentration factor
Active
Includes the entire sample into calculation procedures, e.g.
for determination of mean value or calibration parameters if
active.
Does not consider a given sample for calculation if inactive.
An inactive sample value is marked with a bracket in the
sample table.
Table
Values measured for absorbance
For CHIPCUVETTE® mode, both measured readings are
displayed, i.e. that from the 0.1 mm deep test point the other
from the 1 mm deep test point. With multiple measurement
sequences, all single sample readings are indicated. Related
mean values are output below the table.
Single sample values can be deactivated in the table. To do
this, touch the particular single sample value and
acknowledge the "Do you want to deactivate measured
value?" query with [OK]. A deactivated single sample will be
marked with a bracket in the table. The related mean value
will change correspondingly.
42
06/2009
ScanDrop
Quantitative Analysis – Quantification Module
Display & Management of Measured Results
Fig. 15
Quant module (Chip) – shows sample properties and single readings
Calibration tab
Only for concentration analysis with calibration
Fig. 16
Quant module (Chip) – shows calibration graph
Both calibration graphs are graphically represented on the Calibration tab. The
graph for the 1 mm layer thickness channel is marked with green color, the
graph for the 0.1 mm layer thickness channel in blue color. Single samples can
be selected from the samples list on the right-hand side. The absorbance and
concentration values of a selected sample will be indicated numerically and
marked with gray lines in the graphic field.
Coefficients tab
Only for concentration analysis with calibration
ScanDrop
06/2009
43
Quantitative Analysis – Quantification Module
Display & Management of Measured Results
Fig. 17
Quant module (Chip) – shows calibration coefficients
The Coefficients tab depicts the parameters for calibration. In addition to the
actual calibration coefficients, it outputs the coefficient of determination and the
values for maximum and minimum concentration.
Opening, saving and exporting measured results
Files with previously saved results of measurement are contained in a
parameter window that opens on selection of the Quantification module.
The default path for file saving in Quantification module is
"StorageCard/ScanDrop/Quant".
The file extension is ".cqu".
1. Press [Open] key in parameter window.
The standard window for file opening opens.
2. Select ".cqu" file with quantitative measuring results and press [OK] for
acknowledgement.
Measured results are saved in the results window.
1. Press [Save] key in results window.
The standard window for file saving opens.
2. Select path and file name and press [OK] for acknowledgement.
Files can be exported to a text file where they will be available for further
processing in other programs, for example, Excel. Files can be exported when
working in the results window.
1. Press [Export] key in results window.
The standard window for file saving opens.
2. Select path and file name and press [OK] for acknowledgement.
44
06/2009
ScanDrop
Quantitative Analysis – Quantification Module
Presettings in Quant Module
Closing results window
To exit the results window, you may select either [New] or [Close]. The
software will query if you want unsaved data to be saved, and restore the
Quant module parameter window.
8.2.4
[New]
The parameter window will show basic settings or
presettings.
[Close]
The parameter window preserves the parameter settings of
a previous measurement. These can be used or modified for
next measurement.
Presettings in Quant Module
Presettings can be made for analytical parameters. These will be displayed on
selection of the Quant module.
1. Press [Default] key in Quant module.
2. Available parameter settings:
Default sample
type
Type preset in CHIPCUVETTE® setup
Decimal places
(conc.)
Number of decimal digits for output of analytical results
Wavelength
Analytical wavelength
Multiple meas.
Number of repetitions when a sample is measured for
absorbance
Concentration is determined from the mean value of all
absorbance readings.
Unit (conc.)
Unit of measure for concentration analysis
Accumulations
The number of repetitions of measurement defined for
determination of an absorbance value
Concentration
Selects type of concentration analysis, allows entry of a
factor or a calibration file name where required
3. Use [OK] to exit the Quant module – Default settings window and confirm
query for saving of changes with another [OK].
All modified presettings will be saved and displayed when the Quantification
module is selected for the next time.
ScanDrop
06/2009
45
Bio Method Module
Presettings in Quant Module
8.3
Bio Method Module
The Bio method module is intended for analysis of proteins, DNA and RNA,
including related evaluation procedures according to these methods:
Name of method
Formula
DNA – purity A260/A280
x = A(260nm) / A(280nm)
Absorbance 260 nm
x = A (260nm)
Absorbance 260 nm, factor 33
x[μg/ml] = A(260nm) * 33
Absorbance 260 nm, factor 40
x[μg/ml] = A(260nm) * 40
Absorbance 260 nm, factor 50
x[μg/ml] = A(260nm) * 50
Absorbance 280 nm
x = A(280nm)
Absorbance 280 nm, factor
1.38
x(mg/ml) = A(280 nm) * 1.38
Kalb Bernlor
x[μg/ml] = (A(230nm)* 183
) - (A(280nm)*75.8)
Kalckar Shafran
x[mg/ml] = (A(280nm)* 1,45) (A(260nm)*0.74)
Warburg – Christian (DNA)
x[mg/ml] = (A(260nm)* 62.9) - (A(280nm)*36)
Warburg – Christian (Protein)
x[mg/ml] = (A(280nm)* 1.55) (A(260nm)*0.76)
Whitaker Granum
x[mg/ml] = (A(235nm) – A(280nm)) / 2.51
On selection of a method, the absorbance values which are required for a given
analytical process will be determined at the appropriate wavelengths and the
results be calculated and displayed.
Automatic determination of optimal measuring range
Similar to the procedure followed in Quantification module, a measurement
outputs two measured values that have been determined for both test points of
a sample channel. Of the two measured values that one will be included in
analysis which is within a linear measuring range of 0.005 to 1.5 Abs. If both
measured absorbance readings are within this range, the one which is closer to
0.75 Abs will be selected.
Measured values are checked for accurary according to these criteria:
46
•
Abs(1mm) > Abs(0.1 mm)
•
Abs(1mm) > 0.005
•
Abs(0.1 mm) < 1.5
Abs(1 mm) -
Absorbance value for 1 mm layer thickness
Abs(0.1 mm) -
Absorbance value for 0.1 mm layer thickness
06/2009
ScanDrop
Bio Method Module
Presettings in Quant Module
If these requirements are not fulfilled, the given measured value will be marked
as faulty with a supporting reference note to non-conforming sample
preparation.
Triggering Bio method module
1. For ScanDrop 250: Select CHIPCUVETTE tube type in main window.
2. Press Bio method key.
The Bio module parameter window opens.
Fig. 18
Bio module (Chip) – parameter window
Function elements in Bio module parameter window
The Bio module parameter window provides four tabs:
[1...8] and [9…16] Tube setup with CHIPCUVETTE® sample assignments
Sample prop.
Samples table with details regarding sample sequence,
sample type, name and standard concentrations
Settings
Allows input of measuring and evaluation parameters for Bio
method analysis
All function keys are located at the bottom bar of the dialog screen:
ScanDrop
Function
Description
[New]
Deletes all previous entries for definition of new analytical
settings.
[Load]
Loads previously saved analytical settings for subsequent
analysis.
[Save]
Saves current analytical parameter settings.
[Open]
Opens previously saved file of analysis performed with Bio
method.
[Start]
Triggers measurement with currently set analytical
parameters.
[Eject]
Moves holder frame of CHIPCUVETTE® out for insertion or
removal of a tube of this type.
06/2009
47
Bio Method Module
Settings for & Management of Analytical Parameters
8.3.1
[Default]
For definition of presettings. These are displayed in Bio
module before a new analytical process starts.
[Close]
Closes Bio module session.
Settings for & Management of Analytical Parameters
Automatically, on selection of a bio method, the appropriate measurement
parameter settings are loaded. Consequently, only a bio method needs to be
selected and a sample assignments chart be defined for working with a
CHIPCUVETTE®.
Entering sample sequence
Action for sample assignment settings of CHIPCUVETTE® is described in
section "Defining Sample Assignments for CHIPCUVETTE in ASpect Nano"
p. 33.
For measurement in Bio module, tabs [1...8] und [9...16] provide the following
sample options:
[Meth]
Sample which is analyzed according to the selected method.
[Ref]
Reference
Note: Reference measurement must always precede sample
measurement.
[No]
Deletes single sample channels.
[All]
Assigns all sample channels to the sample type that was selected
above.
Fig. 19
Bio module (Chip) – sample sequence settings
An analytical method can be selected via tabs [1...8] and [9..16] in the sample
setup area.
1. Define reference sample.
2. Activate [Meth] key.
3. Select analytical method in list field.
48
06/2009
ScanDrop
Bio Method Module
Settings for & Management of Analytical Parameters
4. Mark all sample positions you want analyzed according to the selected
method.
Selected samples will be marked in the color of the selected method to the
right of the list field.
Different sample channels of a CHIPCUVETTE® can be analyzed according to
different methods in one measurement process. However, for a given sample
channel, the same method must be defined for both test points or one test point
may be deactivated.
Entering sample sequence and methods in a table
The Sample table Tab displays a table with sample names and analytical
methods.
Fig. 20
Bio module (Chip) – for configuration or modification of sample table
1. To enter or change sample properties, press the particular sample line.
A window for definition of properties for a selected sample opens.
2. Available value entries:
Sample name
Defines sample name.
Type (0.1mm)
Defines sample type in shallow channel.
Typ e(1 mm)
Defines sample type in deep channel.
Method
Select other bio method if necessary.
Alternatively, required sample names can be imported from a file in "*.csv"
format. This CSV file must contain the sample names in question in the same
order as the sample table. Note that the positions of reference samples must be
taken into account.
ScanDrop
06/2009
49
Bio Method Module
Settings for & Management of Analytical Parameters
Defining general analytical parameter settings
Fig. 21
Bio module (Chip) – general analytical parameter settings
The wavelength is automatically set for a selected method. The following
parameter settings options on the Settings tab are valid to all methods:
Title
Title of a measurement. This entry is optional.
Unit
Unit of measure for analysis
The unit of measure appears in the results window. It is
saved together with the analytical results.
This entry is optional.
Accumulation
Defines number of repeat measurement runs for a single
reading.
From the total number of single readings, a mean value for
the selected wavelength is obtained and output as the result.
Accumulation of single readings helps improve the signal-tonoise ratio.
Saving and loading analytical parameters
Analytical parameter settings can be handled with the help of the two keys
[Load] and [Save] in the parameter window.
The default path for file saving in Bio method module is
"StorageCard/ScanDrop/Bio".
The file extension is ".cbi".
Saving a file of analytical parameter settings
1. Select analytical parameters you want saved in parameter window.
2. Press [Save] key.
The standard window for file saving opens.
3. Set path and file name and press [OK] for acknowledgement.
50
06/2009
ScanDrop
Bio Method Module
Display & Management of Analytical Results
Loading of analytical parameters
Analytical parameter settings are saved in the same manner as measured
results. A file always contains a set of analytical parameters. A result file
contains the absorbance readings for the measured samples in addition.
Accordingly, analytical parameter settings can equally be loaded from a
parameter file or a result file.
1. Press [Load] key in parameter window.
2. Select ".cbi" file and press [OK] for acknowledgement.
Analytical parameter settings are displayed in the parameter window. They can
be edited or used for subsequent measurement.
8.3.2
Triggering Measurement
1. Prepare analytical parameter settings.
2. Load CHIPCUVETTE® in accordance with sample setup defined in
analytical parameters and insert CHIPCUVETTE® into holder frame.
3. Click [Start] to trigger measurement.
Measurement begins with predefined parameter settings. The samples are
automatically analyzed, following your preselected sample setup.
8.3.3
Display & Management of Analytical Results
Representation of measured results
On completion of measurement, the results will be represented on the Results
and the Settings tab of the results window. Its function keys can be used to
save or export measured results or to return to the parameter window.
Tabs in results window
Results tab
The Results tab contains a sample table with a summary of analytical results.
ScanDrop
06/2009
51
Bio Method Module
Display & Management of Analytical Results
Fig. 22
Bio method (Chip) – display of results list
Values on display:
Pos.
Position number of sample on CHIPCUVETTE®
Sample name
Sample name defined via sample properties prior to
measurement.
Method
Analytical method
Result
Analytical result
Check box
Corr. (320 nm)
Performs background correction if active. The absorbance
value measured at the wavelength of 320 nm is subtracted
from the measured absorbances.
By pressing a sample line the Single-sample result window with more sample
details can be opened:
Position
Position on CHIPCUVETTE®
Sample name
Sample name
Type
Analytical method
Date/Time
Time of analysis
Result
Analytical result
Result
(Corr. 320 nm)
Analytical result after background correction
Table
Values measured for absorbance
For a CHIPCUVETTE®, both readings, i.e. one for 0.1 mm
and one for 1 mm deep test point are indicated.
52
06/2009
ScanDrop
Bio Method Module
Display & Management of Analytical Results
Fig. 23
Bio module (Chip) – displays result of a single sample
Settings tab
The Settings tab displays the Title, the Operator, the number of
Accmulations and the Unit of an analytical procedure. These values are saved
together with the measured results.
Opening, saving and exporting measured results
The default path for file saving in Bio method module is
"StorageCard/ScanDrop/Bio".
The file extension for CHIPCUVETTE® data is ".cbi".
Files with previously saved results of measurement can be accessed in the
parameter window that will open, once the Bio method module is chosen.
1. Press [Open] key in parameter window.
The standard window for file opening opens.
2. Select ".cbi" file with analytical results of a prior bio method and press [OK]
for acknowledgement.
Measured results can be saved in the results window.
1. Press [Save] key in results window.
The standard window for file saving opens.
2. Select path and file name and press [OK] for saving.
Data can be exported to a text file, where they will be available for further
processing in other programs, for example, Excel. For data exporting, the
results window is available.
1. Press [Export] key in results window.
The standard window for file saving opens.
2. Select path and file name and press [OK] for saving.
ScanDrop
06/2009
53
Bio Method Module
Presettings in Bio Module
Closing the results window
The results window can be exited by pressing the [New] or the [Close] control
button. After a query if unsaved data are to be saved, the Bio module
parameter window is restored.
8.3.4
[New]
Parameter window displays basic setings or presettings.
[Close]
Parameter window preserves the settings of a preceding
measurement. They can be used for next measurement or
be modified.
Presettings in Bio Module
Presetttings can be made for analytical parameters. These will be loaded when
the Bio method module starts.
1. Press [Default] key in Bio module window.
2. Available parameter setting options:
Sample type
Presets sample type in CHIPCUVETTE® sample
setup
Method
Selects a bio method
Accumulations
Defines the number of repeat measurements to
obtain an absorbance value
Decimals places
The number of decimal digits for display of results
Unit
The unit of measure in which analytical results will
be shown
Correction (320 nm)
Activates background correction at 320 nm
3. To exit the Bio Module – Default settings module, press [OK]. Then use
another [OK] to confirm that you want your changes saved.
Modified presettings will be saved and available on display when a bio module
session is selected for the next time.
54
06/2009
ScanDrop
Expression Module
Presettings in Bio Module
8.4
Expression Module
The Expression module allows you to link as many as six absorbance values
obtained at different wavelengths in a single mathematical formula.
Automatic determination of optimal measuring range
Similar to the procedure followed in Quantification module, a measurement job
involving both test points of a sample channel will consider only that measured
reading for analysis which is within a linear measuring range of 0.005 to 1.5
Abs. If both absorbance values are within this area, the one which is closer to
0.75 Abs will be included.
Measured values are checked for accuracy according to these criteria:
•
Abs(1mm) > Abs(0.1 mm)
•
Abs(1mm) > 0.005
•
Abs(0.1 mm) < 1.5
Abs(1 mm) -
Absorbance value for 1 mm layer thickness
Abs(0.1 mm) -
Absorbance value for 0.1 mm layer thickness
If these requirements are not fulfilled, the particular measured value will be
marked as faulty with a supporting reference note to non-conforming sample
preparation.
Triggering Expression module
1. For ScanDrop 250: Select CHIPCUVETTE tube type in main window.
2. Press Expression key.
The Expression module parameter window opens.
Fig. 24
ScanDrop
Expression module (Chip) – parameter window
06/2009
55
Expression Module
Settings for & Management of Analytical Parameters
Function elements in Expression module parameter window
The Expression module parameter window provides four tabs:
[1...8] and
[9…16]
Tube setup with sample assignments for CHIPCUVETTE®
Sample Prop.
Sample table with details regarding sampling sequence and
analytical formulas
Settings
Input of measurement parameters that are independent of the
analytical formula.
Its function keys are located at the bottom bar of the dialog screen:
8.4.1
Function
Description
[New]
Deletes all previous entries and allows new settings for analytical
parameters.
[Load]
Loads previously saved measuring and analytical parameters for
analysis.
[Save]
Saves current measurement and evaluation settings.
[Open]
Opens previously saved file with analytical results.
[Start]
Triggers measurement with selected settings for measurement
parameters.
[Eject]
Moves holder frame of CHIPCUVETTE® out for insertion or
removal of a tube of this type.
[Default]
Compiles formulas for use in analytical processes.
Defines presettings. These are displayed at the beginning of a
new analytical procedure.
[Close]
Closes the Expression module.
Settings for & Management of Analytical Parameters
On selection of a particular formula, the required relevant measurement
parameter settings will be loaded automatically. Accordingly, only a formula
needs to be selected and sample assignments be defined for CHIPCUVETTE®.
Defining sample sequence
Action to make settings for CHIPCUVETTE® sample assignments is described
in section "Defining Sample Assignments for CHIPCUVETTE in ASpect Nano"
p. 33.
56
06/2009
ScanDrop
Expression Module
Settings for & Management of Analytical Parameters
Fig. 25
Expression module (Chip) – sample sequence settings
For measurement in Expression module, the following sample types can be
defined via tabs [1...8] and [9...16]:
[Expr]
Sample being analyzed according to selected formula.
[Ref]
Reference
Note: Reference measurement must always precede sample
measurement.
[No]
Deletes single sample channels.
[All]
Assigns sample type selected above to all sample channels.
Analytical methods can be selected via tabs [1...8] and [9..16] of the sample
setup area.
1. Define reference sample.
2. Activate [Expr.] key.
3. Select analytical formula from list field. A selected formula can be edited
working in the Default settings dialog screen (refer to section "Analytical
Parameter Presettings / Programming of Analytical Formula " p.62).
4. Mark all those sample positions in the sample setup area which you want
analyzed according to the selected formula.
Different formulas can be applied for analysis of different sample locations of a
CHIPCUVETTE® as part of a measurement process. However, only an identical
formula can be set for the deep test point and the flat test point of a given
sample channel, or only one of the two test points can be activated.
Defining sample properties
The Sample Prop. tab displays sample names and analytical formulas in a
table.
ScanDrop
06/2009
57
Expression Module
Settings for & Management of Analytical Parameters
Fig. 26
Expression module (Chip) – definition or modification of sample table
1. To enter or change sample properties, press the corresponding sample line.
A window for defining properties for a selected sample opens.
2. Value entries:
Name
Enter sample name.
Type (0.1 mm)
Enter sample type for shallow channel.
Type (1 mm)
Set sample type for deep channel.
Expression
Select other formular if necessary.
Alternatively, sample names can be imported from a file in ".csv" format. This
CSV file must contain the sample names in the same order as in the sample
table. The position of reference samples must also be taken into account.
Defining general measurement parameters
A wavelength is automatically set for a given selected method. The following
parameters and entries which were made on the Settings tab will be valid for all
methods:
Title
Title of a measurement. This entry is optional.
Accumulation
The number of repeat measurements required to calculate
an absorbance value
Note
The unit of measure for a measured quantity can be saved in the related
analytical formula.
Saving and loading analytical parameters
Analytical parameters can be managed with the help of the two keys [Load]
and [Save] of the parameter window. The default path for file saving in
58
06/2009
ScanDrop
Expression Module
Displaying & Managing Analytical Results
Expression module is "StorageCard/ScanDrop/EXPRESSION".
The file extension is ".cei".
Saving a file of analytical parameters
1. Set analytical parameters you want saved in the parameter window.
2. Press [Save] key.
The standard window for file saving saving opens.
3. Set path and file name and press [OK] for acknowledgement.
Loading analytical parameters
Analytical parameters are saved in the same manner as measured results. A
file always contains analytical parameters. Result files contain the absorbance
values of tested samples in addition. For this reason, analytical parameters can
equally be loaded from a parameter file or a result file.
1. Press [Load] key in parameter window.
2. Select ".cei" file and press [OK] for acknowledgement.
Analytical parameters are shown in the parameter window. They can be edited
or used for subsequent measurement.
8.4.2
Triggering Measurment
1. Prepare analytical parameters.
2. Load CHIPCUVETTE® in accordance with sample setup defined via
analytical parameters and place CHIPCUVETTE® into holder frame.
3. Press [Start] to begin measurement.
Measurement starts with specified measurement parameter settings. Samples
are automatically evaluated according to sample assignment definitions.
8.4.3
Displaying & Managing Analytical Results
Representation of measured results
On completion of measurement, the results are displayed at the Results and
the Settings tab of the results window. The window provides function keys that
are intended for saving and exporting of measured results, as well as for
restoring the parameter window.
ScanDrop
06/2009
59
Expression Module
Displaying & Managing Analytical Results
Fig. 27
Expression module (Chip) – display of results list
Tabs in results window
Results tab
Results contains a sample table with a summary of the results of
measurement. It displays the following values:
Pos.
Position number of sample on CHIPCUVETTE®
Sample name
Sample name defined via sample properties prior to
measurement.
Expression
Analytical formula which is applied to the sample
Result
Result of analysis
A Sampe result window with more sample details will open when a given
sample line is clicked:
Name
Sample name
Type
Analytical formula which was applied to the sample
Position
Position of this sample on CHIPCUVETTE®
Date/Time
Time of analysise
Result
Result of analysis
Table
Values measured for absorbance
For CHIPCUVETTE®, both readings, one for 0.1 mm test
point and the other for 1 mm test point are indicated.
60
06/2009
ScanDrop
Expression Module
Displaying & Managing Analytical Results
Fig. 28
Expression module (Chip) – single result display for a sample
Settings tab
The Settings tab indicates the Title, the Operator and the number of
Accumulations of an analytical job. This data is saved together with the results
of measurement.
Opening, saving and exporting measured results
Files with previously saved results of measurement can be opened in the
parameter window that appears following selection of the Expression module.
The default path for file saving is "StorageCard/ScanDrop/EXPRESSION".
The file extension is ".cbi".
1. Press [Open] key in parameter window.
The standard window for file opening opens.
2. Select ".cei" file with analytical results from Expression module and press
[OK] for acknowledgement.
Measured results can be saved in the results window.
1. Press [Save] key in result window.
The standard window for file saving opens.
2. Select path and file name and press [OK] for saving.
Data can be exported to a text file where they will be available for further
processing in other programs, for example, Excel. Files can be exported
working in the result window.
1. Press [Export] key in results window.
The standard window for file saving opens.
2. Select path and file name and press [OK] for saving.
ScanDrop
06/2009
61
Expression Module
Analytical Parameter Presettings / Programming of Analytical Formula
Closing the results window
The results window can be exited by clicking the [New] or the [Close] control
button. Following a query if unsaved data are to be saved, the Expression
module parameter window is restored.
8.4.4
[New]
Parameter window displays basic settings or presettings.
[Close]
Parameter window preserves the parameter settings of a
preceding measurement. They can be selected or modified
for use in next measurement.
Analytical Parameter Presettings / Programming of Analytical Formula
Analytical parameter presettings
Working in the Default settings window, one can enter analytical parameter
settings that will be displayed on selection of the Expression module. In
addition, this window also provides options for programming of analytical
formulas.
1. Press [Default] key in parameter window.
2. Available value setting options are:
Expression
Analytical formula
Sample type
The sample type that is valid for all sample positions in
a sample setup.
Accumulations
Defines number of repeat cycles of a single
measurement.
From the total number of single measurements, mean
readings are determined for each selected wavelength
and output as results. Accumulation of single
measurement readings helps improve the signal-tonoise ratio.
Decimal places
Number of decimal digits contained in a result output.
[Edit Expressions] This key opens a formula list for programming new
formulas or deleting prior formulas.
3. Acknowledge your entries with [OK].
4. Following changes in parameter settings, you will be queried if your settings
are to be saved. Confirm this query with [Yes] in order to validate the
changes.
Programming a formula
Analysis performed via the Expression module relies on user-compiled formulas
for evaluation of samples. The absorbance values of a maximum of six
wavelengths may be included in programming.
A formula can be compiled starting from the Default settings window.
62
06/2009
ScanDrop
Expression Module
Analytical Parameter Presettings / Programming of Analytical Formula
1. Press [Default] key in parameter window of Expression module.
2. Press [Edit formula] key. This produces a formula list. Press [Add] in
formula list.
3. Set number and related values of analytical wavelengths in Set
wavelengths window:
Fig. 29
{
Use [+] or [-] key of Number field as necessary to set a required
number of wavelengths (x = 1..6).
Keys [A1] to [Ax] will turn active according to your settings. "Ax" will
designate the absorbance value for a specified wavelength in the
resulting formula.
{
Press [A1] key and enter first wavelength in numerical field that has
opened.
{
Proceed in the same manner, until all wavelengths have been
defined.
{
Specify a unit of measure for analysis at the Unit box. This entry is
optional.
{
Acknowledge your entries with [OK] and exit the Set wavelengths
window.
Expression module (Chip) – defining wavelengths for formula
4. Compile formula in Edit Expression window.
Available mathematical operations:
Designation of key
Operator/Constant
()
Round brackets
+
Addition
-
Subtraction
*
Multiplication
/
Division
1/x
Reciprocal value
2
Square
3
x
3rd power
sqrt
Square root
x
ScanDrop
06/2009
63
Expression Module
Analytical Parameter Presettings / Programming of Analytical Formula
ln
Natural logarithm
abs
Amount
The [A] keys stand for the absorbance values that were obtained at the
defined wavelengths. The numeral block is intended for numerical inputs.
By pressing [Clear] or [Back] you can delete an expression fully or delete
only its last entry. The [Test] can be used to check a formula for
mathematical correctness.
{
Enter formula, for example, (A1* 62,9) - (A2*36)
{
Press [OK] to acknowledge this formular and return to the formula list
screen.
Fig. 30
Expression module (Chip) – editing of formulas
The newly edited formula appears in the list, for example y[mg/ml] = (A[260]*
62,9) - (A[280]*36).
64
06/2009
ScanDrop
User-Defined Measurement – UV VIS Module
Setting & Managing Measurement Parameters
8.5
User-Defined Measurement – UV VIS Module
Working in UV VIS module, one may measure samples for transmittance,
absorbance or energy. Available result options are spectrums, values obtained
at discrete wavelengths or values for two wavelengths or the corresponding
differential amount.
Furthermore, multiple measurement sequences can be performed for kinetic
analysis.
However, no optimal measuring range can be determined, in contrast to, e.g.
operation in Quant module.
Triggering UV VIS module
1. For ScanDrop 250: Select CHIPCUVETTE tube type in main window.
2. Press UV VIS key.
The UV VIS module window opens.
Function elements in UV VIS module window
The three tabs Chart, Table and Settings are available options for presentation
of results. They are explained in more detail in section "Display & Management
of Measured Results" p. 70.
The module’s function keys are located at the bottom bar of the dialog window:
8.5.1
Function
Description
[Para]
Opens parameter window for measurement parameter settings.
[Open]
Opens a previously saved result file.
[Save]
Saves current measurement results.
[Export]
Exports measurement results.
[Start]
Triggers measurement with specified parameter settings.
[Eject]
Moves holder frame out for insertion or removal of a
CHIPCUVETTE®.
[Close]
Closes UVVIS module.
Setting & Managing Measurement Parameters
Measurement parameter settings can be made and managed working in UV
VIS module window.
1. Click [Para] to open the UV VIS module - Parameters measurement
parameter window in UVVIS module.
The measurement parameter window opens.
This window contains five tabs (General, Meas mode, Cycles, 1..8, 9..16).
They allow settings for measurement parameters. The function keys are located
ScanDrop
06/2009
65
User-Defined Measurement – UV VIS Module
Setting & Managing Measurement Parameters
in the window’s bottom bar. They are intended for management of
measurement parameters.
8.5.1.1 Measurement Parameter Settings
The measurement parameter window provides the following tools for user
selections:
General tab
Title
For assigning a name to a measurement.
The specified title will be saved together with the measured
results and displayed when this result file is loaded again.
A name entry at the Title input field is optional.
Operator
This entry is defined by the user identity management tool.
Display
Defines magnitude for ordinate of measured results display
during measurement:
Accumulations
•
Absorbance
•
Transmittance
•
Energy
Defines the number of repetitions of a single measurement.
The readings obtained for a total number of single
measurement cycles will be averaged for a selected spectral
range and output as the result. Accumulation of single
measurement readings helps improve the signal-to-noise
ratio.
Meas mode tab
The Meas mode tab provides facilities for selection of a spectral range or of the
wavelengths to be measured:
Spectrum
Measures spectral range.
Set starting wavelength and end wavelength of a spectral
range at the two input fields Wavelength 1 and
Wavelength 2.
Fixed
wavelengths
66
Measures at one or more wavelengths.
On selection of this option, the Wavelength input field will
appear with a great list field.
•
Having pressed the Wavelength input field, use the
numerical keypad (which is superimposed on the display
area) for entering a desired wavelength.
•
] to hide the keypad again when you have
Use [
completed the last wavelength entry.
•
Press [Add] to acknowledge a wavelength
06/2009
ScanDrop
User-Defined Measurement – UV VIS Module
Setting & Managing Measurement Parameters
The selected wavelengths will appear in the list field.
•
To delete a wavelength from the list field, mark this
wavelength and press [Del].
Two wavelengthsRecords measurement readings for two wavelengths and
determines their difference amount.
and difference
•
Fig. 31
On selection of this option, the two input fields
Wavelength 1 and Wavelegth 2 will show. Use the
numerical keypad (which is superimposed on the display
area) to define a wavelength at each input field.
UVVIS module (Chip) – parameter settings for wavelengths
Cycles tab
Select single measurement or cyclic multiple measurement.
The results of a cyclic multiple measurement process, e.g. a series of
spectrums are saved in a single cyclic file .
ScanDrop
Option
Description
No
Selects single measuremnt (normal) mode.
Automatic
Automatically repeats measurement of a sample.
Specifies a number of desired repeat measurement at the
Number input field.
Time controlled
Selects time-controlled repetition of a measurement for
kinetics.
Once active, this option opens a table for defining a
maximum of four subphases (intervals) with different interval
times.
Waiting time Defines the length of time by which the
actual start of measurement is delayed against
the starting command. This time specification
can be used as incubation time for kinetic jobs.
Time intervals (s)
Defines total length of a subphase.
Time (s)
Time interval between two successive
measurements within a given subphase.
Start request
Actual measurement will not start before the “Trigger
measurement?“ query has been acknowledged when this
06/2009
67
User-Defined Measurement – UV VIS Module
Setting & Managing Measurement Parameters
option is active.
Kinetic - slow
Fig. 32
Performs “kinetic -fast“ measurement if disabled.
Launches “kinetic - slow” measurement if enabled.
UVVIS module (Chip) – parameter settings for cyclic measurement
Kinetic - slow and Kinetic - fast
For measurement in a CHIPCUVETTE®, two different kinetic modes are
available: “Kinetic – slow” and “Kinetic – fast”.
In kinetic-fast mode, measurement is completely performed at a given single
test point before measurement of the next sample begins. In terms of
measurement kinetics this means that measurement for reaction kinetics will be
fully performed on a given sample before the next measurement of reaction
kinetics starts (activate Start request check box!).
As compared to this, with extended kinetic measurement jobs you may optimize
the total time to measure and perform measurement of samples in a cyclically
timed manner (Kinetic-slow): Within a given cycle one measurement is
performed on each sample. This is followed by measurement of the first sample
as part of the next cycle. Measurement continues in the same order until the
last cycle has been completed.
Tabs for sample assignments on CHIPCUVETTE®
Settings for CHIPCUVETTE® sample assignments are described in section
"Defining Sample Assignments for CHIPCUVETTE in ASpect Nano" p. 33.
For measurement in UVVIS module, the following sample options can be
defined:
68
[Ref]
Reference measurement
Refrence measurement must always precede actual sample
measurement.
[Meas]
Sample measurement
Results will be output in parameters as defined via General
tab and Meas. mode tab.
[No]
Deletes individual sample positions.
[All]
Assigns above selected sample type to all sample channels.
06/2009
ScanDrop
User-Defined Measurement – UV VIS Module
Setting & Managing Measurement Parameters
Fig. 33
UVVIS module (Chip) – parameter settings with sample sequence
8.5.1.2 Saving & Loading Measurement Parameters
For management of measurement parameters contained in the UVVIS module,
the two keys [Open] and [Save] are provided in the module’s parameter
window.
The default path for file saving is in UVVIS module is
"StorageCard/ScanDrop/UVVIS".
The file extension is ".par".
Files must always be saved on the storage card (Storage Card folder). The
memory space of the HID-Pro 320 operation control unit is not big enough for
this purpose!
Saving a measurement parameter file
1. Specify measurement parameter settings you want saved when working in
the parameter window.
2. Press [Save] key.
The standard window for file saving opens.
3. Select path and file name and press [OK] for acknowledgement.
Loading analytical parameters
Analytical parameters are saved in the same way as measured results. A
parameter file always contains analytical parameters. A result file contains the
absorbance readings for the measured samples in addition. Consequently,
analytical parameters can equally be loaded from a parameter file or a result
file.
1. Press [Open] key in results window.
2. Select ".par" file and press [OK] for acknowledgement.
Analytical parameters will be displayed in the parameter window. They can be
edited or used for subsequent measurement.
ScanDrop
06/2009
69
User-Defined Measurement – UV VIS Module
Display & Management of Measured Results
8.5.2
Performing Sample Measurement
1. Prepare analytical parameters.
2. Load CHIPCUVETTE® in accordance with sample setup specified via
analytical parameters and insert CHIPCUVETTE® into holder frame.
3. Press [Start] to trigger measurement.
Measurement starts with predefined settings and included samples are
automatically evaluated in accordance with the sample setup you have
configured.
8.5.3
Display & Management of Measured Results
Presentation of measured results
On completion of measurement, the results are displayed on the Chart, the
Table and the Settings tab of the UV VIS module window. The function keys
on this window are intended for saving or exporting measured results or
restoring the parameter window screen.
Chart tab
Only for measurement of spectrums and kinetic reaction processes
A measured spectrum can be graphically shown on the Chart tab. The list fields
above the spectrum graph area allow you to select a sample and sample
position for display.
Fig. 34
UVVIS module (Chip) – graphic representation of spectrum
Table tab
The Table tab contains a table of samples with an overview of measured
results.
70
06/2009
ScanDrop
User-Defined Measurement – UV VIS Module
Display & Management of Measured Results
Fig. 35
UVVIS module (Chip) – samples table
Settings tab
Displays the following measurement parameter data and saves them together
with the measured results:
Meas. mode
Spectral range or wavelengths being measured
Display
Shows magnitude of ordinate of results of measurement
while measurement is going on
Accumulation
Number of repetitions of a single measurement
Interval
Measurement-to-measurement interval in cyclic
measurement mode
Opening, saving and exporting measured results
The default path for file saving in UVVIS module is
"StorageCard/ScanDrop/UVVIS". The file extension is ".dac".
Files with previously saved results of measurement can be opened in the
UV VIS module window.
1. Press [Open] key in parameter window.
The standard window for file opening opens.
2. Select ".dac" file with analytical results from UV VIS module and click [OK]
to open.
Note
To save a big file, for example, the result of spectrum measurement at all test
points of a CHIPCUVETTE®, takes several seconds. The screen keys remain
disabled until saving is complete.
Measured results are saved in the UV VIS module window.
1. Press [Save] key in results window.
The standard window for file saving opens.
2. Select path and file name and click [OK] for saving.
ScanDrop
06/2009
71
User-Defined Measurement – UV VIS Module
Display & Management of Measured Results
Data can be exported into a text file where they will be available for further
processing in other programs, for example, Excel. Data exports can be
triggered in the UV VIS module window.
1. Press [Export] key in results window.
The standard window for file saving opens.
2. Select path and file name and press [OK] to save a fiven file.
72
06/2009
ScanDrop
Quantitative Analysis – Quantification Module
Display & Management of Measured Results
9
Measurement in Standard Tube
9.1
Quantitative Analysis – Quantification Module
The Quantification module is mainly intended for express jobs of routine
concentration analysis. A concentration value is determined working from the
absorbance at a given wavelength. Concentration analysis may rely on a factor
or a linear or square regression module alternatively. A routine procedure
processes predefined sequences of reference samples, standard samples and
samples for concentration or absorbance measurement. Working in the Quant
module allows users to prepare and save methods to such a degree that an
analytical process just neeed sto be triggered via [Start], once a method has
been selected and relevant sample assignment been made.
For routine analysis in standard tubes, it is necessary to prepare a sample table
that specifies a given sample sequence along with sample properties.
Triggering Quantification module
1. For Scandrop 250: Select Standard (10 mm) tube type in main window.
2. Press [Quantification] key.
The Quant module parameter window opens.
Function elements in Quant module parameter window
The Quant module window provides two tabs:
General
For input of measurement and evaluation parameters
required in concentration analysis
Sample table
Table of samples with details regarding the sample
sequence, sample type, name and standard concentrations
The relevant function keys are located in the bottom bar of this dialog window:
Function
Description
[New]
Deletes all previous input and allows new analytical
parameter settings.
[Save]
Saves currently valid analytical parameter settings.
[Open]
Opens a result file of concentration analysis.
Presents analytical results in the results window.
ScanDrop
[Load]
Loads previously saved analytical parameters for use in
other measurement jobs.
[Start]
Triggers measurement with measurement parameters
currently set.
[Default]
Defines those presettings which will be displayed at the
beginning of a new concentration analysis session.
[Close]
Closes the Quantification module.
06/2009
73
Quantitative Analysis – Quantification Module
Analytical Parameter Settings
9.1.1
Analytical Parameter Settings
Defining calibration parameters
Measurement parameters can be set and the type and mode of concentration
analysis be specified on the General tab.
Fig. 36
Quant module (Stand.) – calibration parameter settings
Title
For assigning a title to measurement. This entry is optional.
Wavelength
Sets wavelength to be used for analysis.
Multiple meas.
Defines repetition runs of a sample measurement.
Determines concentration from the mean value of all
measured readings.
Unit
Unit of measure applied to concentration analysis.
This entry appears in the results display area. It will be
saved together with the analytical result.
Accumulations
The number of repetitions of a single measurement run,
which are involved in calculation of a measured value.
From the single readings, a mean value is obtained which is
then output as the result of measurement (Absorbance).
Accumulation of a multiple of single measurement runs helps
improve the signal-to-noise ratio.
For concentration analysis, a desired type can be selected from the Calibration
list field:
Factor
Performs concentration analysis based on factor.
Enter desired value at Factor input box which opens.
Current sample
table
Performs concentration analysis following a calibration graph
that is recorded in a current analytical process as defined via
the sample table.
Select one of three regression calculation possibilities in
Regression input field:
74
06/2009
ScanDrop
Quantitative Analysis – Quantification Module
Analytical Parameter Settings
Y= B + X
Y=A+B*X
Y = A + B * X + C + X2
Load calibration Loads a previously saved calibration graph (refer to section
below).
file
Loading previously saved calibration graph
From a previously saved result file you may load the calibration data for use in a
current measurement job.
The default folder setting for file saving is "StorageCard/Scandrop/Quant". The
file extension is ".squ".
1. Set Load calibration file option in Calibration list field.
2. Click the
symbol in standard dialog field for opening files.
3. Mark a desired file and confirm your selection with [OK].
Calibration data are loaded from the previous file and will be available for
use in subsequent concentration analysis.
Note
No other standards can be measured or considered for calibration when you
work with a previously saved calibration graph.
Defining sample sequence and sample properties
A sample sequence and sample properties can be specified on the Sample
table tab. Each sample is assigned a sample name, a standard concentration,
weighed-in portion and dilution factor in a sample table.
Fig. 37
Quant module (Stand.) – definition of sample table
1. Define total number of samples including reference and standard sample in
the Number field, using arrow keys as necessary.
The sample table is built up. Through modification of the total sample
number you may extend or reduce the sample table as required. A change
is always made at the end of the sample table.
ScanDrop
06/2009
75
Quantitative Analysis – Quantification Module
Analytical Parameter Settings
2. Assign a type to the samples in the table.
Activate a required type switch on the window’s left-hand side, then tap on
that cell in the Type column of the table you want assigned to the selected
type.
The following sample types can be defined in Quant module:
[Ref]
Reference
Note: Reference measurement must precede measurement of
any other sample. For this reason, this type of measurement
must be defined as the first in a sample table.
[Std]
Standard with known analyte concentration
[Conc]
Sample for which a concentration is to be determined.
[Abs]
Sample for which only absorbance is measured.
3. Assign sample name.
Tap onto the Sample name input field of a desired sample line. Enter a
name at the alpha-numerical keypad and press [OK] for acknowledgement.
A table with sample names can also be imported from a CSV file. This CSV
file must contain sample names in the same order as your current sample
table. The position of reference and standard samples must be taken into
consideration.
4. Enter known analyte concentrations for standard samples.
Tap onto Target input field of a desired sample line. Enter a desired
concentration value at the numerical keypad and press [OK] for
acknowledgement.
5. Alternatively to making entries at the sample table, all inputs relating to a
given sample may equally be performed in Sample setup window.
Press required table cell in Pos. column and open sample settings window
for the sample in question. Besides the data described above, a factor for
weighed-in portion - Init weight - and for Dilution can be specified.
Saving and loading analytical parameters
Manipulation of analytical parameters is possible via the [Load] or the [Save]
key of the parameter window. The default path for file saving in Quant module is
"StorageCard/ScanDrop/Quant". The file extension is ".squ".
Saving an analytical parameter file
1. Set analytical parameters you want saved in the parameter window.
2. Press [Save] key.
The standard window for file saving opens.
3. Set path and file name and confirm your selections with [OK].
Loading of analytical parameters
Analytical parameters are saved in the same manner as the results of
measurement. Consequently, a result file also contains parameters for
76
06/2009
ScanDrop
Quantitative Analysis – Quantification Module
Display & Management of the Results of Concentration Analysis
determination of concentration. For this reason, analytical parameters can be
loaded from a parameter file or a result file.
1. Press [Load] key in parameter window.
2. Select ".squ" file and press [OK] for acknowledgement.
Analytical parameters are displayed in the parameter window. They can be
edited or used in a subsequent measurement session.
9.1.2
Triggering Concentration Analysis
1. Prepare analytical parameters.
2. Trigger measurement with [Start].
3. Place Sample 1 (reference) into tube chimney, following the screen prompt,
then press [OK].
4. Successively measure all other samples in the same order as defined via
the sample table.
The samples will be automatically evaluated in accordance with your sample
assignment settings.
9.1.3
Display & Management of the Results of Concentration Analysis
On completion of a measurement process, the results are available for viewing
on the Calibration, the Table and the Settings tab of the results window. Its
function keys are intended for saving and exporting of measured results, and for
returning to the parameter window.
Tabs in results window
Calibration tab
Only for concentration analysis with calibration
The purpose of the Calibration tab is to present a graphical view of the
calibration curve. Single samples can be selected from the sample list on the
right-hand side. The absorbance and concentration values of a selected sample
are displayed in numerical format and marked with red lines in the graphical
screen area. By pressing the [Detail] key, you can open the Sample result
window for a selected sample (see "Table tab" below).
ScanDrop
06/2009
77
Quantitative Analysis – Quantification Module
Display & Management of the Results of Concentration Analysis
Fig. 38
Quant module (Stand.) – display of calibration results
Table tab
Table contains a sample table with a summary of analytical results.
Pos.
Number of sample in sample table.
Sample name
Sample name defined via sample properties prior to
measurement.
Type
Sample type (reference, standard, concentration value or
absorbance value)
Conc.
Calculated concentration value
Fig. 39
QUANT module (Std.) – display of results list
On selection of a particular sample line, the Single-sample result window with
more sample-related details will open:
78
Name
Sample name
Concentration
Concentration value
Target value
Only for standards:
Nominal concentration as defined via analytical parameters
Type
Sample type (standard, concentration value or absorbance
value)
Dilution
Dilution factor
06/2009
ScanDrop
Quantitative Analysis – Quantification Module
Display & Management of the Results of Concentration Analysis
Init weight
Concentration factor
Active
Includes sample in procedures for averaging or calculation of
calibration parameters if active.
The given sample will not be considered for calculation is this
button is disabled. A disabled sample value will be marked
with parenthesis in the sample table.
Measured valuesThe reading obtained for absorbance or the individual
absorbance readings in the case of multiple measurement.
Mean values are output below the table.
Single sample values can be disabled in the table. To do this,
tap on a desired single sample value and cofirm "Do you
want measured value disabled?" query with [OK]. Once
disabled, the single sample in question will be marked with
parenthesis in the table. The related mean value will change
accordingly.
Settings tab
The following items of analytical parameter settings are displayed and saved
together with the results of measurement:
Title
Title of measurement
Operator
Name of user
Wavelength
Analytical wavelength
Unit
Unit of measure of concentration value
Multiple meas. The number of repeat measurements that is defined for
determination of a concentration value
Calibration
Fig. 40
ScanDrop
Calibration model
Coefficients calculated according to calibration model
Standard deviation with linear and square calibration models
Valid calibration range
QUANT module (Std.) – view of parameter settings for current analytical job
06/2009
79
Quantitative Analysis – Quantification Module
Presettings in Quantification Module
Opening, saving and exporting measured results
Files with previously saved results of measurement are displayed in a
parameter window that will appear, once the Quantification module has started.
The default path for file saving in Quantification module is
"StorageCard/ScanDrop/Quant".
The file extension is ".squ".
1. Press [Open] key in parameter window.
The standard window for file opening opens.
2. Select ".squ" file with quantitative results of measurement and press [OK]
for loading.
Measured results can be saved in the results window.
1. Press [Save] key in result window.
The standard window for file saving opens.
2. Select path and file name and press [OK] for saving.
Data can be exported to a text file where they will be available for further processing in other programs, for example, Excel. Data exports can be accomplished via the results window.
1. Press [Export] key in results window.
The standard window for file saving opens.
2. Select path and file name and press [OK] for saving.
9.1.4
Presettings in Quantification Module
Presettings can be made for analytical parameters. These will be shown on
triggering of the Quant module.
1. Press [Default] key in Quant module window.
2. Make parameter settings as follows:
Sample type
Type which is preset in the sample table
Wavelength
Analytical wavelength
Multiple meas.
Specifies number of repeat measurements for a given
sample.
Concentration is determined from the mean value of all
absorbance readings.
Unit
Unit of measure for concentration analysis
Sample number Number of samples in sample table
Display decimals Number of decimal digits in analytical result output
80
06/2009
ScanDrop
Quantitative Analysis – Quantification Module
Presettings in Quantification Module
Calibration
Selects type of concentration analysis, allows entry of
factor or name of calibration file where appropriate.
3. Use [OK] to exit the Quant module - Default Settings window. Use
another [OK] to confirm you want your changes saved.
All modified presettings will be saved and displayed with the next selection of
the Quantification module.
ScanDrop
06/2009
81
Bio Method Module
Presettings in Quantification Module
9.2
Bio Method Module
The Bio method module facilitates measurement of proteins, DNA and RNA
with related evaluation procedures according to the methods listed hereafter:
Name of method
Formula
DNA – Purity A260/A280
x = A(260nm) / A(280nm)
Absorbance 260 nm
x = A (260nm)
Absorbance 260 nm, factor 33
x[μg/ml] = A(260nm) * 33
Absorbance 260 nm, factor 40
x[μg/ml] = A(260nm) * 40
Absorbance 260 nm, factor 50
x[μg/ml] = A(260nm) * 50
Absorbance 280 nm
x = A(280nm)
Absorbance 280 nm, factor
1.38
x(mg/ml) = A(280 nm) * 1.38
Kalb Bernlor
x[μg/ml] = (A(230nm)* 183) (A(280nm)*75.8)
Kalckar Shafran
x[mg/ml] = (A(280nm)* 1.45) (A(260nm)*0.74)
Warburg – Christian (DNA)
x[mg/ml] = (A(260nm)* 62.9) - (A(280nm)*36)
Warburg – Christian (Protein)
x[mg/ml] = (A(280nm)* 1.55) (A(260nm)*0.76)
Whitaker Granum
x[mg/ml] = (A(235nm) – A(280nm)) / 2.51
Absorbance values will be determined at wavelengths as appropriate for one or
more selected methods and the results are calculated and output for display.
Working in standard tube mode, only single measurement is possible. For
further processing, the analytical value must be saved in a separate file after
each sample measurement.
Triggering Bio method module
1. For ScanDrop 250: Select Standard (10 mm) tube type in main window.
2. Press [Bio method] key.
The Bio module parameter window opens.
82
06/2009
ScanDrop
Bio Method Module
Selection of Bio Method & Triggering Analysis
Fig. 41
Bio module (Std.) – parameter and results window
Function elements in Bio module window
The Bio module window is intended for selection of a bio method and for
display of analytical results.
Its function keys are located at the bottom bar of this dialog window.
9.2.1
Function
Description
[New]
Deletes all previous entries and allows new entries for analytical
parameters.
[Open]
Opens a previously saved analytical file with bio methods.
[Save]
Saves analytical result.
[Export]
Exports the result of analysis.
[Ref]
Triggers reference measurement.
[Start]
Triggers measurement with presettings for analytical parameters
[Default]
Defines presettings that will be displayed in the Bio module
window at the beginning of a new analytical session.
[Close]
Closes the Bio module.
Selection of Bio Method & Triggering Analysis
A bio methiod can be selected and an analytical process be triggered in Bio
module window.
1. Prepare analytical parameters.
Make parameter settings as follows:
ScanDrop
Sample name
Individualized sample name
This entry is optional.
Method
Provides a selection list of available analytical methods.
Select a desired bio method.
06/2009
83
Bio Method Module
Management of Analytical Results in Bio Mehod Module
Accumulation
Specifies the number of single measurement repetitions
you want included in the formation of a measured value.
All single measurement readings will be averaged and
output and the result of measurement (absorbance).
Accumulation of the individual readings helps improve
the signal-to-noise ratio.
2. Place reference sample into sample chimney.
3. Trigger reference measurement by pressing [Ref] key.
4. Place tube with analytical sample into tube chimney.
5. Trigger measurement by pressing [Start] key.
Measurement starts with predefined parameter settings.
Fig. 42
Bio module (Std.) – display of results
The results of analysis are displayed in the lower half-area of the Bio module
window. In addition to the calculated results, it outputs the values for
absorbance.
Background correction is performed if the Corr. (320 nm) check box was set.
The absorbance value obtained at 320 nm is subtracted from the aborbance
values that have been measured for a given bio method.
9.2.2
Management of Analytical Results in Bio Mehod Module
Files with analytical results can be managed using the function keys in Bio
module window.
The default path for file saving in Bio method module has been assigned to:
"StorageCard/ScanDrop/Bio".
The selected file extension is ".sbi".
Opening analytical file
1. Press [Open] key.
The standard window for file opening opens.
84
06/2009
ScanDrop
Bio Method Module
Presettings in Bio Method Module
2. Select ".sbi" file with the analytical results of a bio method and press [OK]
to open this file.
Note
Once a result file has been loaded, its prior method selection can be used for
further measurement.
Saving measured results
1. Press [Save] key.
The standard window for file saving opens.
2. Select path and file name and press [OK] to save this file.
Exporting results of measurement
Data can be exported to a text file where they will be available for further
processing in other programs, for example, Excel.
1. Press [Export] key in result window.
The standard window for file saving opens.
2. Select path and file name and press [OK] for saving.
9.2.3
Presettings in Bio Method Module
For analytical parameters, it is possible to make presettings. These will be
loaded when a Bio method module session starts.
1. Press [Default] key in Bio module window.
2. Make parameter settings for:
Sample name
Individualized sample name
Method
Selects bio method
Accumulation
Defines the number of repetitions of single
measurement you want included in the calculation of
a mean value.
Decimal places
The number of decimal digits in a result output
Correction (320 nm)
For activation of background correction at 320 nm
3. To exit the Bio module – Default settings window, use [OK]. Then press
[OK] once again to confirm you want your changes saved.
Modified presettings will be saved and output for display when the Bio module is
selected the next time.
ScanDrop
06/2009
85
Expression Module
9.3
Expression Module
The Expression module allows linking a maximum of six absorbance values
obtained at different wavelengths in a mathematical formula.
Only single measurement is possible when working with standard tubes. Where
further processing is required, the given analytical value must be saved in a
separate file after each sample measurement.
Triggering Expression module
1. For ScanDrop 250: Select Standard (10 mm) tube type in main window.
2. Press [Expression] key.
The Expression module parameter window opens.
Fig. 43
Expression module (Std.) – parameter settings
Function elements in Expression module window
The Expression module window is intended for selection of measuring
parameters and an analytical formula, as well as display of analytical results.
Its function keys are located at the bottom bar of the dialog screen area:
86
Function
Description
[New]
Deletes all previous entries and allows new entries for
analytical parameters.
[Open]
Opens analytical file.
[Save]
Saves analytical results.
[Export]
Exports analytical results to a text file.
[Ref]
Performs reference measurement.
[Start]
Triggers measurement with specified analytical parameter
settings.
[Default]
Allows programming of analytical formula and definition of
presettings.
[Close]
Closes the Expression module.
06/2009
ScanDrop
Expression Module
Triggering Measurement & Displaying Analytical Results
9.3.1
Triggering Measurement & Displaying Analytical Results
1. Prepare analytical parameters.
Make settings for the following parameters:
Sample name
Individualized sample name
This entry is optional.
Accumulation
Specifies the number of repetitions of single
measurement you want performed for calculation of a
measured value.
All single measurement readings will be averaged and
output as the result of measurement (absorbance).
Accumulation of single readings helps improve the
signal-to-noise ratio.
Formula
Provides a list of choices to select from available
analytical formulas
Select desired formula.
2. Place reference sample into sample chimney.
3. Press [Ref] key to trigger reference measurement.
4. Place tube with analytical sample into tube chimney.
5. Press [Start] to launch measurement.
Measurement starts with predefined parameters.
Fig. 44
Expression module (Std.) – display of results
The results of analysis can be viewed in the lower half-area of the Expression
module window. In addition to the calculated result, it outputs the values that
have been obtained for absorbance.
ScanDrop
06/2009
87
Expression Module
Analytical Parameter Presettings / Programming of Analytical Formula
9.3.2
Data Management
Files with analytical results can be manipulated using the function keys in
Expression module window.
Saving analytical results:
1. Press [Save] key.
The standard window for file saving opens.
2. Select path and file name and press [OK] for saving.
The default path for file saving in Expression module is
"StorageCard/ScanDrop/Bio".
".sei" is used as file extension.
Viewing the results of analysis:
1. Press [Open] key.
The standard window for file opening opens.
2. Select required ".sei" file with analytical results and press [OK] for viewing.
Exporting the results of analysis:
1. Press [Export] key.
The standard window for file saving opens.
2. Select path and file name and press [OK] for saving.
9.3.3
Analytical Parameter Presettings / Programming of Analytical Formula
Analytical parameter presettings
Working in the Presettings window you can define those analytical parameters
which you want displayed on selection of the Expression module. Besides, this
window also provides options for programming analytical formulas.
1. Press [Default] key in Expression module window.
2. Settings can be made for the following parameters:
Sample name
Individualized sample name
Expression
Analytical formula
Accumulations
The number of repetitions of a single measurement cycle
required to obtain a measured value.
Decimal places The number of decimal digits which are comprised in a
result output.
[Edit
expressions]
88
This key opens a list of formulas for programming a new
formula or deleting one or more previous formulas.
06/2009
ScanDrop
Expression Module
Analytical Parameter Presettings / Programming of Analytical Formula
3. Confirm your entries with [OK].
4. Following changes in parameter settings, you will be queried if you want
your new settings saved. Acknowledge this query with [Yes] to validate
your changes.
Compiling/editing a formula
Operation in Expression module relies on user-programmed formulas for
sample analysis. The procedure for compilation or editing of formulas is similar
to that for CHIPCUVETTE® (→ section "Programming a formula" p. 62).
Once compiled or edited, a given formula can equally be used for measurement
in a CHIPCUVETTE® or a standard tube.
ScanDrop
06/2009
89
User-Defined Measurement – UV VIS Module
Analytical Parameter Presettings / Programming of Analytical Formula
9.4
User-Defined Measurement – UV VIS Module
Sample intensities can be measured with the help of the UV VIS module.
Results can be output in units of transmittance, absorbance or energy. Subject
to measurement can be spectrums, values at discrete wavelengths or values at
two wavelengths with the pertaining differential amount.
Furthermore, multiple measurement is possible for purposes of kinetic analysis.
However, PC software is required for evaluation in this case.
Where standard tubes are used, only single samples can be measured. For
further processing of a single reading, the particular analytical value must be
saved in a separate file after each sample measurement.
Triggering UV VIS module
1. For ScanDrop 250: Select Standard (10 mm) tube type in main window.
2. Press [UV VIS] key.
The UV VIS module window opens.
Fig. 45
UV VIS module (Std.) – starting screen
Function elements in UV VIS module window
Three tabs - Chart, Table and Settings – are available for presentation of
results. They are explained in section "Display & Management of Measured
Results" p. 94.
The module’s function keys are located at the bottom bar of the dialog window:
90
Function
Description
[Para]
Opens parameter window for measurement parameter
settings.
[Open]
Opens a previously saved result file.
[Save]
Saves the results of current measurement.
[Export]
Exports measured results.
[Ref]
Triggers reference measurement.
[Start]
Triggers measurement with selected measurement parameter
06/2009
ScanDrop
User-Defined Measurement – UV VIS Module
Settings for & Management of Measurement Parameters
settings.
[Close]
9.4.1
Closes UV VIS module.
Settings for & Management of Measurement Parameters
Options for measurement parameter settings and management are provided in
the UV VIS module – Parameters window.
1. Press [Para] key in UV VIS module window.
The UV VIS module – Parameters measurement parameter window
opens.
This window comprises three tabs (General, Meas. mode, Cycles) that allow
settings for measurement parameters. Related function keys at the bottom bar
of the window are intended for management of measurement parameters.
Fig. 46
UV VIS module (Std.) – parameter settings
9.4.1.1 Measurement Parameter Settings
The following setting options are provided in measurement parameters window:
General tab
ScanDrop
Title
For definition of a title to a measurement task.
The entry for title will be saved together with the actual
results of measurement and displayed when this measured
data file is loaded the next time.
Entries at the Title input field are optional.
Operator
User names are assigned through user identity managament.
Display
For input of a desired unit of measure for the ordinate of
measured results:
•
Transmittance
•
Absorbance
06/2009
91
User-Defined Measurement – UV VIS Module
Settings for & Management of Measurement Parameters
•
Accumulation
Energy
Specifies the number of repetitions of a single measurement
cycle you want included in calculation of a measured value.
This number of single readings will be averaged and output
as the result of measurement in your selected unit of
measure for ordinate. Accumulation of a number of single
readings helps improve the signal-to-noise ratio.
Measuring mode tab
The Meas. mode tab can be used for selection of a spectral range or of
wavelengths for measurement.
Spectrum
Measures spectral range.
Specify starting wavelength and end wavelength in input
fields Wavelength 1 and Wavelength 2 respectively.
Fixed
wavelengths
Measures at one or more wavelengths
On selection of this option, a Wavelength input field and a
big list field will appear.
•
Press Wavelength input field using the superimposed
numerical keypad, then define a wavelength.
•
Use [
] to hide the keypad when you have completed
the last wavelength definition.
•
Press [Add] to add a defined wavelength to the list.
Selected wavelengths are shown in the list field.
•
To delete a wavelength from the list field, mark this
wavelength and press [Del].
Two wavelengthsRecords the readings for two wavelengths and determines
with difference the difference amount between them.
On selection of this option, the two inputs fields
Wavelength 1 and Wavelength 2 come on display.
• Use superimposed keypad to specify a wavelength at
each field.
Cycle tab
Selects single measurement or cyclic multiple measurement.
The results of cyclic multiple measurement, for example, a series of spectrums
are saved in a single cyclic file.
92
Option
Description
No
Performs single measurement cycles (normal measuring
mode).
06/2009
ScanDrop
User-Defined Measurement – UV VIS Module
Settings for & Management of Measurement Parameters
Automatic
Sets automatic repetition of a sample measurement.
Define a desired number of repeat cycles at the Number
input field.
Time controlled
Sets time-controlled repetition of measurement for kinetic
purposes.
On activation of this button, a table will show. It allows you to
specify up to four different subphases (intervals) with
different interval settings:
Waiting time The amount of delay form a starting
command to the actual start of measurement.
This time length can be used as incubation time
for kinetic jobs.
Time interval (s) Defines the total length of a subphase.
Time (s)
The time between two successive
measurements within a given subphase.
Manual
Multiple sample measurement with manual triggering.
A single sample measurement is triggered “manually“. After
each measurement, a dialog window appears. You may
decide to trigger another measurement or terminate your
series of measurements in this window.
The number of samples in a cycle need not be defined in
advance.
Start request
Actual measurement will not start until the “Start
measurement?“ query has been confirmed if this box is
active.
9.4.1.2 Saving & Loading Measurement Parameters
Action for management of measurement parameters in UV VIS module can be
triggered by pressing [Open] and [Save] in the measurement parameter
window.
The default path for file saving in UV VIS module is
"StorageCard/ScanDrop/UVVIS".
The file extension is ".par".
Saving a measurement parameter file
1. Select measurement parameters you want saved in parameter window.
2. Press [Save] key.
The standard window for file saving opens.
3. Select path and file name and press [OK] for acknowledgement.
Loading analytical parameters
1. Press [Open] key in measurement parameter window.
2. Select desired ".par" file and press [OK] for acknowledgement.
ScanDrop
06/2009
93
User-Defined Measurement – UV VIS Module
Display & Management of Measured Results
The file’s analytical parameters are displayed in the parameter window. They
can be edited or used for subsequent measurement.
9.4.2
Performing Sample Measurement
1. Prepare analytical parameters.
2. Place reference sample into tube chimney.
3. Trigger reference measurement by pressing [Ref].
4. Place tube with sample being analyzed into tube chimney.
5. Press [Start] key to begin measurement.
Measurement starts with predefined measurement parameters. The various
samples are automatically evaluated in accordance with your sample
assignment presettings.
9.4.3
Display & Management of Measured Results
Presentation of measured results
On completion of measurement, the results can be viewed on the Chart, the
Table and the Settings tab of the UV VIS module window. Its function keys are
intended for saving or exportation of measured results and for returning to the
parameter window.
Chart tab
Only for measurement of spectrums and kinetic reaction graphs.
A measured spectrum is graphically shown on the Chart tab.
Fig. 47
UVVIS module (Std.) – display of spectrum
Table tab
Table contains a sample table with a survey of the measured results.
94
06/2009
ScanDrop
User-Defined Measurement – UV VIS Module
Display & Management of Measured Results
Settings tab
The following measurement parameter data can be viewed and saved together
with the measured results:
Meas. mode
Spectral range or wavelength being measured
Display
Displays unit of measure for ordinate of measured results
during measurement
Accumulations
The number of repetitions of a single measurement cycle
Interval
Settings for cyclic measurement
Opening, saving and exporting measured results
Files with previously saved results of measurement can be opened in the
UV VIS module window.
The default path for file saving in UV VIS module is
"StorageCard/ScanDrop/UVVIS".
The file extension is ".das".
1. Press [Open] key in UV VIS module window.
The standard window for file opening opens.
2. Select desired ".das" file with analytical results from UV VIS module and
press [OK] to open this file.
Measured results can be saved in the UV VIS module window.
1. Press [Save] key in result window.
The standard window for file saving opens.
2. Select path and file name and press [OK] to save this file.
Data can be exported to a text file where they will be available for further
processing in other programs, for example, Excel. For exportation of data, the
UV VIS module window is available.
1. Press [Export] key in result window.
The standard window for file saving opens.
2. Select path and file name and press [OK] to save the given file.
ScanDrop
06/2009
95
User-Defined Measurement – UV VIS Module
Display & Management of Measured Results
96
06/2009
ScanDrop
Preventive Maintenance & Care
10
Preventive Maintenance & Care
The ScanDrop is largely maintenance-free.
To maintain your laboratory certification and equipment validation state, we
offer a maintenance agreement with IQ/OQ (installation and operation
qualification).
Required action for preventive maintenance and care on your part is restricted
to cleaning of the system enclosure and its display screen.
In the event of maloperation of defects in the system, you are requested to
contact our Customer Service department. You can find its address details on
the inside of the title page.
10.1
Cleaning the ScanDrop
Sample material spillings in the sample compartment or on surfaces of accesory
items should be wiped off with blotting paper immediately.
Use a piece of soft clean cloth which can be moderately wetted with a
commercial neutral detergent to remove soiling or pockets of contamination
from system surfaces.
Cleaning in a medical laboratory
Special care should be used where the ScanDrop is required to perform
analysis of infectious material, because ScanDrop cannot be decontaminated
as a whole.
Perceivable contamination must be immediately removed with suitable aids.
Make sure that no solvent can penetrate into the inner system space as you do
this.
Recommended disinfectants:
Decosept AF Spray disinfectant
from Dr Schuhmacher GmbH
Meliseptol HBV cloth
from B.Braun
Use a non-shedding piece of cloth to wipe the system and adapter surfaces
down for decontamination. Make sure that affixed lettering is not wetted when
you work with spray disinfectant.
Prior to reshipment of a ScanDrop, which is used to process infectious material,
to Analytik Jena AG for necessary service work, it must be decontaminated and
performed action be documented.
ScanDrop
06/2009
97
Preventive Maintenance & Care
10.2
Cleaning the Touchscreen
Use typical domestic detergents to clean the touchscreen.
Do not allow the sensor to come into contact with acetone or solvents. This
might result in discoloring or haziness of the uppermost plastic layer.
10.3
Firmware & Software Updating
Firmware updates can be performed on the Device tab of the ScanDrop Settings window.
Software update packages will be sent via email. Please follow special
instructions for unpacking and renaming of files as may be necessary from case
to case.
Save files to a USB stick according to instructions. All files which are required
for a given update must be contained in the "Scandrop/Update" directory of this
USB stick. The two text files "appfile.txt" and "gsefile.txt" list all those files which
must be contained in the "Update" folder.
1. Turn ScanDrop on and enter your password once the software has started.
2. Wait until the main menu shows. Then plug your USB stick into the USB
stick port on the right-hand side of the HID Pro 320.
3. Select [Settings] menu item in the main menu.
4. Press [Firmware/Software Update] on the Device tab.
5. Respond [Yes] to "Do you want to update firmware and software now“
query.
The Scandrop – Update Tool window opens.
6. Press [Update Software] key or [Update Firmware] as appropriate for a
required update.
The progress of updating will be displayed. The process takes 2 to 3 s.
7. Press [Close] key on completion of an update process.
Following a firmware update, the ScanDrop must be restarted, i.e. power must
be turned off and on again. Software updates will be valid at once without a
restart.
98
06/2009
ScanDrop
Packaging for Transportation
11
Packaging for Transportation
The ScanDrop may only be transported or dispatched for shipment in its original
packing.
Caution! Transport damage!
You are advised to strictly follow all packaging instructions. This is necessary to
prevent transport damage!
ScanDrop
1. Prepare ScanDrop with
HID-Pro – 320 operation control
unit for transportation
2. Pack ScanDrop and HID-Pro –
320 into plastic bags to protect
from moisture and scratching
3. Place ScanDrop with HID-Pro –
320 s into lateral shape-moulded
padding part.
4. Place second shape-moulded
padding part to the system from
the top.
06/2009
99
Packaging for Transportation
5. Place ScanDrop into its packing
case. Make sure it is correctly
seated.
6. Put accessories (cardboard box
with CHIPCUVETTES, power
pack and power cable) into
separate packing unit.
7. Insert accessories box into the
lateral free space between the
system and the cardboard wall.
8. Place manual and brief
instructions on top of ScanDrop .
9. Close packing case and use
adhesive tape for sealing.
100
06/2009
ScanDrop
Disposal
12
Disposal
It is the ScanDrop owner/operator’s responsibility to dispose of waste matter
(sample material) resulting from measurement in accordance with statutory
rules and local practices.
Under currently bindung provisions of law, the system with electronic
components must be disposed as electronic waste on expiry of its specified
lifetime.
ScanDrop
06/2009
101
Disposal
102
06/2009
ScanDrop
List of Illustrations
13
ScanDrop
List of Illustrations
Fig. 1
General view of ScanDrop ............................................................. 16
Fig. 2
Connector terminals at HID-Pro 320 control unit ........................... 17
Fig. 3
Connector terminals on the rear side of the ScanDrop.................. 18
Fig. 4
Structure of a CHIPCUVETTE® ..................................................... 21
Fig. 5
Holder frame with CHIPCUVETTE® inserted................................. 23
Fig. 6
Standard tube installed in measuring chimney .............................. 24
Fig. 7
Main menu of ASpect Nano software ............................................ 25
Fig. 8
Settings window – General tab ...................................................... 28
Fig. 9
QUANT module window – sample assignment settings for
CHIPCUVETTE® ............................................................................ 33
Fig. 10
Quant module (Chip) – for definition of sample sequence via
analytical parameters..................................................................... 37
Fig. 11
QUANT module (Chip) – editing sample table............................... 37
Fig. 12
QUANT module (Chip) – measurement parameter settings.......... 38
Fig. 13
QUANT module (Chip) – display of selected analytical parameter
settings........................................................................................... 41
Fig. 14
Quant module (Chip) – outputs table with results of analysis........ 41
Fig. 15
Quant module (Chip) – shows sample properties and single
readings ......................................................................................... 43
Fig. 16
Quant module (Chip) – shows calibration graph............................ 43
Fig. 17
Quant module (Chip) – shows calibration coefficients................... 44
Fig. 18
Bio module (Chip) – parameter window......................................... 47
Fig. 19
Bio module (Chip) – sample sequence settings ............................ 48
Fig. 20
Bio module (Chip) – for configuration or modification of sample
table ............................................................................................... 49
Fig. 21
Bio module (Chip) – general analytical parameter settings ........... 50
Fig. 22
Bio method (Chip) – display of results list...................................... 52
Fig. 23
Bio module (Chip) – displays result of a single sample ................. 53
Fig. 24
Expression module (Chip) – parameter window ............................ 55
Fig. 25
Expression module (Chip) – sample sequence settings................ 57
Fig. 26
Expression module (Chip) – definition or modification of sample
table ............................................................................................... 58
Fig. 27
Expression module (Chip) – display of results list ......................... 60
Fig. 28
Expression module (Chip) – single result display for a sample ..... 61
Fig. 29
Expression module (Chip) – defining wavelengths for formula ..... 63
Fig. 30
Expression module (Chip) – editing of formulas ............................ 64
06/2009
103
List of Illustrations
104
Fig. 31
UVVIS module (Chip) – parameter settings for wavelengths ........ 67
Fig. 32
UVVIS module (Chip) – parameter settings for cyclic measurement
....................................................................................................... 68
Fig. 33
UVVIS module (Chip) – parameter settings with
sample sequence ........................................................................... 69
Fig. 34
UVVIS module (Chip) – graphic representation of spectrum......... 70
Fig. 35
UVVIS module (Chip) – samples table .......................................... 71
Fig. 36
Quant module (Stand.) – calibration parameter settings ............... 74
Fig. 37
Quant module (Stand.) – definition of sample table....................... 75
Fig. 38
Quant module (Stand.) – display of calibration results .................. 78
Fig. 39
QUANT module (Std.) – display of results list ............................... 78
Fig. 40
QUANT module (Std.) – view of parameter settings for current
analytical job .................................................................................. 79
Fig. 41
Bio module (Std.) – parameter and results window ....................... 83
Fig. 42
Bio module (Std.) – display of results ............................................ 84
Fig. 43
Expression module (Std.) – parameter settings............................. 86
Fig. 44
Expression module (Std.) – display of results................................ 87
Fig. 45
UV VIS module (Std.) – starting screen......................................... 90
Fig. 46
UV VIS module (Std.) – parameter settings................................... 91
Fig. 47
UVVIS module (Std.) – display of spectrum .................................. 94
06/2009
ScanDrop