1
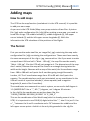
UTR VA Configuration User’s Manual http://www.utr-online.com/utrsdk ©2009, Jasper Bussemaker. All rights reserved. Applies to: V1.4.1 UTR VA Config (SDK) Manual 2009 Table of contents Table of contents ........................................................................................... 2 Copyrights ................................................................................................... 3 Terms of use................................................................................................ 3 Warranty..................................................................................................... 3 VA Configuration in steps ............................................................................... 4 The application ........................................................................................... 4 Setting up the UTR VA Config ...................................................................... 6 A Configuration setting ............................................................................... 6 Making the flights timetable ....................................................................... 7 At last ......................................................................................................... 8 Final note .................................................................................................... 8 Adding maps .................................................................................................. 9 How to add maps ........................................................................................ 9 The format .................................................................................................. 9 2 UTR VA Config (SDK) Manual 2009 Copyrights Copyrights held by Jasper Bussemaker. Freeware, limited distribution. All rights reserved. Icon is property of Jasper Bussemaker. Jasper Bussemaker holds copyrights on the layout of the application. No copying without an explicit written permission of Jasper Bussemaker ([email protected]). You are only as a virtual airline allowed using the UTR VA Config, so no using by the pilots of your VA. Terms of use I (with which I mean “Jasper Bussemaker”) am not responsible for ANY kind of damage to you or your computer or any other objects/people which was generated by the UTR VA Config (“Universal Timetable Reader VA Configuration”) or the installing/uninstalling or the UTR VA Config on your system or other people’s system. Warranty The service is provided “as is” and comes without ANY warranty that it will work on your system. Tested and works on Windows Vista and XP (although it was programmed in Visual Basic 6 and also should work in Windows 2000/98/95). 3 UTR VA Config (SDK) Manual 2009 VA Configuration in steps Ok, let’s start with the real manual after all this warranty and terms of use kind of things… This manual will show you how to create your own settings file with the UTR VA Config. But first let’s look at all the buttons and options of the UTR VA Config. The application 1 2 3 4 5 6 20 7 8 9 10 11 12 13 14 15 16 17 18 19 1. Use these small buttons to increase/decrease the flight number. 2. This box contains the flight number. The flight number must consist of four digits OR letters, so you can type “001A”. (E.G. Flight 50 becomes flight 0050). 3. This box contains the ICAO code of the airport of departure. This consists of four letters. Use the button below it to turn it into the VA’s main hub. See object 17 for more details. 4. This box contains the ICAO code of the destination airport. This also consists of four letters. And the button below it does the same thing as in object 3. 4 UTR VA Config (SDK) Manual 2009 5. Click this button to choose the hour of departure. 6. Click this button to choose the minute of departure. Object 5 and 6 together give the time of departure. 7. Click this button to choose the hour of arrival. 8. Click this button to choose the minute of arrival. Object 7 and 8 together give the time of arrival. 9. Use this drop-down box to choose with which aircraft the flight should be operated. This can be configured at object 17. 10. Use these check boxes to select on which day of the week the flight should be operated. So checking box 1 and 3 means the flight operates at day 1 and 3 (Monday and Wednesday). 11. Choose Passengers if this flight is a passengers flight, cargo if cargo and Connection if this flight is only used to ‘ship’ an airplane from the one hub to another to begin carrying passengers at the other hub. So this flight is non-passengers. 12. Click this button to add the just configured flight to the table. The flight time will be calculated. 13. Click this button to delete the selected line. 14. Click this button to clear the table and start all over again. 15. Click this button to get the VA Configuration box. See VA Settings. 16. Click this button to load a settings file. 17. Click this button to save a settings file. If you already loaded it, the file is automatically saved without showing a save pop-up box. 18. Click this button to configure the UTR VA Config. The things you can configure are the VA’s main hub (see object 3 and 4). This consists of one airport ICAO code. And the aircraft(s) used by the VA. Type this in the second box separated with commas (no space!!) and click OK to confirm. NOTE: These settings only affect the way the UTR VA Config is operating, not the VA Settings file itself. 19. Check this box to let the application be always on top of other applications. Helpful if you are switching between windows often (E.G. UTR VA Config and the VA’s timetable). 20. This is the table to which the created flights will be added. Double-click a flight to set all the settings above to the settings of the selected flight. 5 UTR VA Config (SDK) Manual 2009 Setting up the UTR VA Config First of all, start the application. After installing the application is by default found in the Universal Timetable Reader\VA Config folder in your start menu. Now click the Settings button (object 18). You now get a pop-up where you can choose the VA hub and the aircrafts. These settings only affect the way the UTR VA Config is operating and don’t affect the VA Settings file itself. See object 18 for what you can configure. Now we are pretty much ready to start operating with the UTR VA Config. A Configuration setting When we start making our own VA Settings file, the first thing we do is to click the VA Config button (object 14). Now we get this screen: 1 2 3 4 5 8 6 7 9 10 1. Insert the VA’s long airline name in here (limited to 24 characters). 2. Insert the VA’s short airline name in here (limited to 8 characters). 6 UTR VA Config (SDK) Manual 2009 3. 4. 5. 6. Insert the VA’s ICAO code here (three characters). Insert the VA’s IATA flights code here (two characters). Insert the VA’s website in here. Insert the VA’s hub(s) in here. These are separated by commas (no space!!) and the main hub comes first. 7. Click this button to pick the color which the font will have in the UTR. Choose a nice one! 8. This is a text field in which you can type a message for the pilots to view, it is not needed, but perhaps to explain which flights are commercial and which cargo… 9. Then in these two text fields, the validity period start dat and end date must be inserted. But be patient: The format is like: “yyyymmdd”, so 29 JUL 2008, becomes “20080729”. And off course the ending of the period must be higher than the start. 10. And finally click this button to confirm all the changes. Set all the settings and click OK. Now we are ready to start making the flights timetable. Making the flights timetable First of all we start with setting the flight number. Fill this in into object 2 (main application) or use the two small buttons next to it to choose the flight number. Now set the departure airport into object 3. If the flight departs from the main hub, just click the button (if configured right) below object 3. Now set the destination airport into object 4. If the flight arrives on the main hub, click the button below object 4. Use button 5 and 6 to set the departure time (in UTC!!). And use button 7 and 8 to set the time of arrival (also in UTC!!). Choose the aircraft which operates this flight with object 9. 7 UTR VA Config (SDK) Manual 2009 Then check in object 10 the weekday(s) on which this flight is operated. E.G. checking day 1 and 3 means the day is operated on Monday and Wednesday. Checking all of them makes the flight operate always. Before adding the flight to the table, check if the right Type of Flight (Object 11) is selected. Now click Add (object 12) to add the flight to the table. You are now ready to start the next flight. If you are not satisfied with the flight click Delete. If you are not satisfied with the whole table, click Clear (this deletes the whole table! NO UNDO!). At last When you finished creating the VA configuration and the complete timetable, click Save and save the file as <ICAO>.utr (E.G. “jas.utr”) and click OK. Make sure that the file is in the same directory as the UTR for testing. When making it available for your pilots (putting it online) include a readme or instructions on how to install: put the file in the same directory as the UTR. NOTE: The UTR will crash when you create more than 15,000 flights :-P Final note When creating the VA Settings file, make sure you have included the hubs (which you configured with the VA Config) in the timetable, else the application will crash. With this I mean, you have to have at least one or more flights from and to (all) the hub(s). And every airport has to have at least one flight TO it and one flight FROM it, but I think this is logical ;-). And the UTR only chooses the flights according to the departure/arrival time and departure/arrival airport. So it doesn’t matter when you have two times the same flight number, for example when the same flight is operated every day, but every day on a different time, or with a different aircraft. 8 UTR VA Config (SDK) Manual 2009 Adding maps How to add maps The UTR has the map function (read about it in the UTR manual). It is possible to add your own maps. As you see in the UTR Folder\Map, every map contains of two files. A picture file (.jpg) and a configuration file (.cfg). When making a new map, you need to know four things: The middle latitude (Y), middle longitude (X), left-upper corner latitude (Y) and the left-upper corner longitude (X). With this information the UTR calculates all the positions of the flights. The format First you need to make two files, an image file (.jpg) containing the map and a configuration file (.cfg) containing the configurations. These must have exactly the same name apart of the .cfg or .jpg, case sensitive. Like if you want to make a map of west USA and call it “West - USA.cfg”, the map file must be exactly “West - USA.jpg”. Else the UTR will not recognize it. The dimensions of the map don’t matter, because the map will be fitted in a rectangle having twice the width as the height. Because with a map of the world, the X coordinates range from -180 to 180 with as 0 point the 0 meridian going trough Greenwich, London, UK. The Y coordinates range from -90 to 90 with the 0 point the equator. The coordinated are north-east orientated, so any coordinated in the USA will result of a positive latitude (Y, above equator) and a negative longitude (X, west of the 0 meridian). The coordinates are measured in a metric system, so one-and-a-half degree is 1.5 (IMPORTANT! Use a “.”, NO “,”) degrees, not 1 degree 30 minutes. In the .cfg file the coordinates are written down like this: “0.0000_0.0000&-180.0000_90.0000” “X_Y&X_Y” This are the coordinates of the World map (which is already present in the UTR). It is important to use FOUR (4) digits behind the “.”, also if it is just 0. Use a “_” between the X and Y coordinate and a “&” between the middle and the left-upper-corner points. And this is the only thing needed in the .cfg file. 9