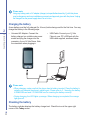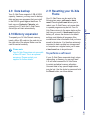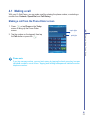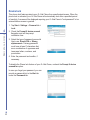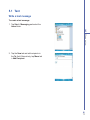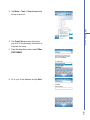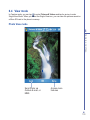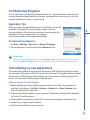
1
Contents
1. Before using your O2 Xda Flame
8
1.1
What’s in the box?
8
1.2
Familiarizing yourself with your O2 Xda Flame
9
1.3
Features
12
1.4
LED Status
13
1.5
Display information
14
2. Getting started
28
2.1
Inserting the battery & SIM/USIM card
28
2.2
SIM/USIM card
29
2.3
Battery
29
2.4
Switching your O2 Xda Flame on or off
31
2.5
Screen tapping and Calibration
31
2.6
Screen Orientation
32
2.7
Entering information
32
2.8
Recording a message
36
2.9
Data backup
37
2.10 Memory expansion
37
2.11 Resetting your O2 Xda Flame
37
1
3. Settings
3.1
Personal settings
41
3.2
System settings
47
3.3
Connection settings
50
4. Basic phone functions
52
4.1
Making a call
55
4.2
Ending a call
58
4.3
Receiving/Ignoring a call
59
4.4
International calls
59
4.5
Video Telephony
60
4.6
Emergency calls
61
4.7
In-call options
61
4.8
Contact information
64
4.9
Device security
67
5. Messaging
2
40
72
5.1
Text
73
5.2
Multimedia messages (MMS)
79
5.3
Voicemail
85
5.4
E-mail
86
5.5
Pocket MSN
96
6. Camera and Video
102
6.1
Using the Camera
102
6.2
Capture mode
104
6.3
Setup menu
106
6.4
View mode
109
6.5
Recording
111
7. O2 MediaPlus
114
7.1
My FM Radio
116
7.2
My Music
118
7.3
My Photos
120
7.4
My Videos
121
7.5
My Settings
122
8. SRS
128
3
9. Applications
4
130
9.1
Outlook
130
9.2
Word Mobile
137
9.3
Excel Mobile
138
9.4
PowerPoint Mobile
139
9.5
Pictures & Videos
141
9.6
Calculator
144
9.7
Games
144
9.8
File Explorer
145
9.9
Searching for Files
145
9.10 O2 Connect
146
9.11 O2 SMS Plus
148
9.12 Remote Control
151
9.13 Adobe Reader LE
155
9.14 JAVA Midlet
156
9.15 USB OTG Connection
158
10. Wireless Connectivity
160
10.1 About Wireless
160
10.2 Wireless Manager
160
10.3 WiFi Utility
169
10.4 Making a connection
172
10.5 Connecting to the Internet
174
11. Synchronization
176
11.1 About synchronization
176
11.2 Installing ActiveSync
177
11.3 Choosing your synchronization type
178
11.4 Using ActiveSync tools
179
11.5 ActiveSync Errors
181
12. Managing your O2 Xda Flame
184
12.1 Self Diagnostics
184
12.2 O2 AutoConfig
185
12.3 Memory Management
186
12.4 Power management
188
12.5 Removing Programs
189
12.6 Installing my own applications
189
12.7 O2 AutoInstall
191
5
13. TV Connection and Control
194
14. Troubleshooting
196
14.1 Glossary
196
14.2 Troubleshooting
198
15. Safety Information
15.1 Safety information
202
15.2 Phone Care
203
15.3 Driving Safety
206
15.4 Other Safety
206
15.5 Cautions
208
16. Technical Specifications
210
16.1 Technical Specifications
210
16.2 Declaration of Conformity
212
16.3 About this User Manual
214
16.4 Mandatory Statements
214
Index
6
202
215
Chapter 1
Before using your O2 Xda Flame
1.1
1.2
1.3
1.4
1.5
What’s in the box?
Familiarizing yourself with your O2 Xda Flame
Features
LED Status
Display information
1. Before using your O2 Xda Flame
1.1 What’s in the box?
Thank you for selecting the O2 Xda Flame. Please check if your package comes with the
following items. If any of them are missing, please contact your retailer.
Before using your O2 Xda Flame
1
• Stylus x 2
• Universal AC adapter with
four plugs for different
countries
• Battery
• High quality stereo
wired headset
• Limited Warranty
Statement
• TV-Out AV cable
• Quick Start Guide
• O2 Xda Flame – your
Windows Mobile-based
Pocket PC phone
• Mini USB cable
• User Manual
8
• Getting
Started CD
• USB Host cable
1.2 Familiarizing yourself with your O2 Xda Flame
5
9
10
14
15
1
2
6
Before using your O2 Xda Flame
11
4
No.
1
16
3
17
12
7
13
18
8
14
19
Item
Description
1
Record
Press and hold to record a voice note. Press and release
immediately to access Notes.
2
TV Out connector
To project image to a TV or projector, connect the plug and play TV
out cable here.
3
Infrared port
Enables you to exchange files or data with other devices without
cables or wires.
4
Wireless Manager
Key
Quick access to the Wireless Manager Menu.
The LED indicates the status of your phone by showing different
colors.
Static amber: The phone is being charged.
5
Notification LEDs
Green: Mobile network is detected.
Blue: Bluetooth is activated.
Orange: Wireless LAN is activated.
Blinking amber: For notifications.
6
Left Soft Key
Press to access menus on the left.
7
Call / Send Key
Press to make or receive a call, or press to launch the Phone
screen.
8
Windows Start menu
Press to bring up the Start menu.
9
No.
Before using your O2 Xda Flame
1
10
Item
Description
9
Camera for video
For making video telephone calls with another party who has a 3G
phone with this feature.
10
Touch screen
Use the stylus to select items on the screen.
11
Navigation pad
Press to navigate up/down and right/left through any of the drop
down menus or program instructions; confirm your selection by
pressing the center key.
12
Right Soft Key
Press to access menus on the right.
13
End Key
Press to end a call or exit an application.
14
Messaging Key
Quick access to Messaging application.
15
Volume
Press up/down to increase/decrease the volume.
16
External memory
expansion slot
Insert your Micro SD card into this slot for expansion of memory.
This is an optional accessory.
17
Camera & Video key
Press to launch the camera function and take a picture or record
high quality video.
18
Soft reset
Press here with the stylus to soft reset your O2 Xda Flame. For
information about hard reset, please see 2.11 Resetting your O2
Xda Flame.
19
Stylus & stylus
holder
Storage place for your stylus when it is not in use.
20
21
23
24
25
22
1
No.
Item
Description
20
Self-portrait mirror
The preview mirror for a self-portrait.
21
Flash light
White LED strobe flash.
22
Battery cover
To remove or replace the battery, push and slide out the battery
cover.
23
Camera lens
The CMOS camera supports 2 mega-pixel resolution with autofocus function for high quality color photos or high quality video
recording.
24
Mini-USB connector
Connect the USB data cable to a PC for synchronization of
information, data transmission and battery charging.
25
Earphone plug
Plug in the stereo headset and listen to audio files or use the
phone’s handsfree kit.
26
Power button
Before using your O2 Xda Flame
26
Short Press : Enter sleep mode.
Long Press : Turn on/off your phone.
11
1.3 Features
Your O2 Xda Flame not only supports basic dialing features but also supports video telephony.
It also integrates Personal Digital Assistant (PDA) capability and is equipped with Wireless
(802.11 b/g) to let you browse websites anywhere, any time. The following section provides
more information about the phone’s features:
Before using your O2 Xda Flame
1
12
•
Touch screen: 3.6” TFT LCD display with 65536 effective colors (Hardware supports 262K
colors).
•
UMTS (3G WCDMA FDD I) and GSM (tri-band 900/1800/1900).
•
5-way navigation key.
•
2GB User Memory NAND Flash.
•
Micro-SD card slot Expansion.
•
Windows Start menu key and O2 Messaging key.
•
Messages can be sent via SMS, Outlook E-mail, MMS, Hotmail, or MSN.
•
WOW HD provides improved audio for your O2 Xda Flame.
•
Mini-USB connector for connecting your phone with a PC for synchronization of
information, data transmission and also battery charging.
•
The TV out connector enables you to connect to a TV set or projector for viewing photos
and videos with others, making presentations, or enjoying a richer console gaming
experience on a larger screen.
•
2MP Camera Lens: Supports 2 Mega Pixels with Auto Focus function for high quality color
photos and high quality video recording.
•
VGA CMOS camera: Make yourself visible when making video calls.
•
Multiple photo types available: Simplex photo, MMS photo, Video, MMS video, Contact
Picture, Frame Photo and Multi shot (2, 4, or 6).
•
Supports various Video formats: MPEG4, 3GP, 3GP2, H.263, H.264, WMV.
•
Supports various Audio formats: AMR, MP3, AAC, WMA, Midi.
•
Connections: IrDA, Bluetooth, USB and Wireless LAN.
•
Microsoft Windows Mobile 5.0: Pocket MSN, Pocket Outlook, Pocket Internet Explorer,
Word Mobile, Excel Mobile and PowerPoint Mobile. Also features Windows Media Player
10, Terminal Service Client, Pictures & Videos, Calculator, 3D games, ActiveSync, and File
Explorer.
•
O2 programs: O2 Connect, O2 SMS Plus, O2 Themes, O2 Menu, O2 AutoInstall and
O2 AutoConfig.
•
Other programs: FM Radio, Java, Self Diagnostics, Adobe Reader LE, CodeWallet Pro 6,
Power Management, SRS Enhancer, O2 MediaPlus and Remote Control.
1.4 LED Status
The O2 Xda Flame has a LED light that varies in color depending on phone status. LED colors
vary depending upon whether or not the GSM network is available.
Missed calls, unread messages and low battery condition status are given priority over the
status of Wireless LAN and Bluetooth; for all of these conditions the LED blinks Amber (a
brighter amber for low battery).
Blinks Green
Wireless LAN On and Bluetooth Off
Alternates between Green and Orange
Wireless LAN Off and Bluetooth On
Alternates between Green and Blue
Wireless LAN On and Bluetooth On
Alternates between Orange and Blue
GSM Off
Wireless LAN Off and Bluetooth Off
No change
Wireless LAN On and Bluetooth Off
Blinks Orange
Wireless LAN Off and Bluetooth On
Blinks Blue
Wireless LAN On and Bluetooth On
Alternates between Orange and Blue
Before using your O2 Xda Flame
GSM On
Wireless LAN Off and Bluetooth Off
1
When charging the battery, the LED is Amber and notifications are indicated by flashing.
Please note
If you take a flight with your O2 Xda Flame, set the device to “All wireless Off” and be
sure that no LEDs are blinking or flashing.
13
1.5 Display information
Windows Start menu
The screen displays the following
information:
Tap on the Windows Start menu on the
top left of the screen to bring up a menu.
To return to the Today screen, tap Start >
Today.
Start menu Status & icon area
Status & icon area
Before using your O2 Xda Flame
1
Main
Display
This area shows your current mode, such
as Phone mode or MSN Sign In mode. The
rest of the area displays notification icons
such as time, signal strength, message
arrival, etc.
Main Display
Command
bar
Pop-up
menu
Depending on the current mode or program,
this area shows the major features of the
mode. On the Today screen, this area
contains shortcuts to certain programs. To
change the Today screen settings, tap Start
> Settings > Personal tab >Today.
Command bar
Depending on the mode, this area contains
different features such as input panel and
commands to create or edit a file.
Pop-up menu
This feature allows you to quickly access
an item. To access a pop-up menu, simply
tap the icon on the screen and tap again
to perform an action. To cancel it, tap
elsewhere on the screen.
14
Start menu area
Tap Start to bring up a list of menu options.
1
1
3
No.
Description
1
Selected programs will be displayed in this section of the Start menu.
2
Recently accessed programs.
3
Access the programs and settings folders and display the help information. Refer to the
following tables for a detailed list of Programs and Settings.
Before using your O2 Xda Flame
2
15
Programs
Your O2 Xda Flame contains a list of programs, allowing you to get the most out of your
phone.
Icons
Before using your O2 Xda Flame
1
16
Programs
Description
Games
Provides games such as Bubblebreaker and Solitaire.
ActiveSync
Synchronizes information between your O2 Xda Flame and a
PC.
O2 AutoConfig
Configures your network operator settings.
Calculator
Performs mathematical computations.
Camera
Takes photos and records video clips.
Adobe Reader LE
Supports viewing of PDF files.
CodeWallet Pro 6
Holds your secret financial numbers/passwords (Option to
install in O2 AutoInstall).
Download Agent
Manages your downloaded content for installation.
Excel Mobile
Creates, views and edits Excel files.
File Explorer
Views all files on your O2 Xda Flame.
FM Radio
Enables you to listen to FM radio.
Java
Manages your Java applications.
Modem Link
Links your O2 Xda Flame to a modem.
Icons
Description
Notes
Creates notes, drawings, and recordings.
O2 AutoInstall
Leads you to the installation of O2 selected applications.
O2 Connect
Connect to the O2 website and downloads the latest software
updates.
O2 MediaPlus
Integrates Windows MediaPlayer with Radio and Pictures &
Videos programs. An outstanding integrated interface for quick
access.
O2 SMS Plus
Besides SMS messaging services, it also provides chat and
vCard sending features.
Pictures & Videos
Views your images and videos.
Pocket MSN
Accesses MSN services.
PowerPoint
Mobile
Views PowerPoint files on your O2 Xda Flame.
Search
Searches for all data, programs and files.
Tasks
Keeps track of appointments and creates meeting requests.
Terminal Service
Client
Allows you to connect to a defined terminal server.
Word Mobile
Creates, views and edits Word files.
O2 Phone Plus
Features smart dialing and a block list (Option to install in O2
AutoInstall).
Internet Sharing
Connects your PC/Notebook, using your O2 Xda Flame as a
modem.
1
Before using your O2 Xda Flame
Programs
17
Programs
Description
Remote Control
Turns the device into a multifunctional remote control.
SIM Toolkit
Details very depending on your service provider.
1
Self Diagnostics
Diagnose and repair faults with your O2 Xda Flame.
Before using your O2 Xda Flame
Icons
O2 Menu
Displays a list of running applications.
MSN Messenger
Directly access all your MSN contacts.
18
Settings menu
The Settings menu lists a range of different applications.
Personal
Icons
Description
Buttons
You may assign an application program to a hardware button.
Input
Set your preferred input method.
Lock
You may set a personal password for your O2 Xda Flame to
prevent unauthorized use.
Menus
Select the programs to be displayed in the Start menu.
MSN Options
You may set your MSN password, account and other details.
Owner Information
You may input your personal information.
Phone
Settings for your phone functions.
Sounds &
Notifications
Settings for sounds and notifications.
Today
Settings for screen appearance and items displayed on the
Today screen.
O2 Themes
O2 Themes offers a simple way for users to personalize the
Today screen.
1
Before using your O2 Xda Flame
Settings
19
System
Icons
Before using your O2 Xda Flame
1
20
Settings
Description
About
Contains information about your O2 Xda Flame.
Backlight
Configures the backlight settings and adjusts brightness to
save power.
Certificates
Information about the certificate issuer and expiration date.
Clock & Alarms
Sets the time and alarm.
Device Information
Displays your system information.
Error Reporting
Reports your system errors to the Microsoft help center.
GPS
Settings for using the GPS function.
Headset Volume
Limitation
Adjust the maximum volume of your headset.
Memory
Displays the memory allocation status and the programs
currently running.
Power
Displays battery status and settings.
Regional Settings
Settings for region, number, currency, time and date.
Remove Programs
Removes programs from your O2 Xda Flame.
Screen
Settings for screen orientation, screen alignment, and text
size.
WOW HD Settings
An advanced audio solution for mobile phones and
accessories.
Connections
Icons
Description
Beam
Sets your O2 Xda Flame to receive or deny IrDA signals.
Bluetooth
Sets up Bluetooth connection.
Connections
Configures connection settings.
Network Cards
Configures Wireless Networks.
USB to PC
Enables advanced network functionality.
Wireless Manager
WiFi Utility
Activates phone, GPRS, Bluetooth and Wireless
LAN functions.
WiFi Utility settings.
1
Before using your O2 Xda Flame
Settings
21
Status and icons area
This area indicates the current application or menu:
Before using your O2 Xda Flame
1
When you go from the Today screen to the Calendar screen, the area changes from Start to
Calendar.
The icon display is on the top right of the Today screen. Please refer to the following table for
some of the more frequently encountered icons. Alternatively, tap the icon and its definition
will be displayed; this will also enable you to change settings.
Type
Icons
Description
Battery full
Battery
Battery alert
Battery charging
Battery empty
Call forward
Call on hold
Calls
Data call
Missed call
Voice call
Making a call
22
Type
Icons
Description
System volume
Phone volume
Volume
Ringer on
Ringer off
Vibrate on
1
Alarm
Message
New voice mail(s)
Push Messages
New instant message(s)
Strong signal
Signal Strength
No signal
Roaming
Before using your O2 Xda Flame
New SMS / MMS message(s)
23
Type
Icons
Description
GPRS in range
Building connecting to GPRS
GPRS Sync
Strong signal in GPRS
WiFi network in range
1
Before using your O2 Xda Flame
WiFi on
24
WiFi connected
Connection
3G in range
3G Sync
Building connecting to 3G
Sync
Sync error
Bluetooth
Data connected
Data disconnected
No SIM/USIM card
Please note
Your O2 Xda Flame is designed to notify in a number of ways, including an alert tone,
vibration, icon or flashing LED. To choose reminder types and sounds for your O2 Xda
Flame, tap Start > Settings > Personal tab > Sounds & Notifications.
Main Display
The main body of the Today screen displays the following items for quick access and
convenient viewing:
1
2
3
1
4
No.
Function
Description
1
Date and Time
Displays date and time. Tap to change the date and time and
to set alarms.
2
Wireless Manager
Shows the status of all current wireless connections.
3
Owner Information
Tap to change owner details.
4
E-Mail
Displays status of unread e-mails.
5
Device Lock
Device lock status.
Before using your O2 Xda Flame
5
Please note
If you want to change the Today display, tap Start > Settings > Personal tab > Today
> Items tab to increase or decrease the number of items to be displayed on the Today
screen.
25
To lock/unlock your O2 Xda Flame:
1. Tap Device unlocked to lock the phone;
the screen will now display Device
locked.
1
Before using your O2 Xda Flame
1
2. Tap Unlock on the command bar to
unlock the phone and tap the Unlock
button on the screen again to confirm.
Now the screen indicates Device
unlocked.
2
Please note
You can press the Power button to enter sleep and lock mode to avoid activating the
keypad / touch panel accidentally.
26
Chapter 2
Getting started
2.1
2.2
2.3
2.4
2.5
2.6
2.7
2.8
2.9
2.10
2.11
Inserting the battery & SIM/USIM card
SIM/USIM card
Battery
Switching your O2 Xda Flame on or off
Screen tapping and Calibration
Screen Orientation
Entering information
Recording a message
Data backup
Memory expansion
Resetting your O2 Xda Flame
2. Getting started
Before start using your O2 Xda Flame, you
need a fully charged battery and a valid SIM/
USIM (Subscriber Identity Module/Universal
Subscriber Identity Module) card.
Getting started
2
3. Insert the SIM/USIM card with the
metallic part facing down and the
clipped corner to the left.
Please note
USIM is for a 3G UMTS system. If you
want to use the video telephony, please
insert a USIM card. See Chapter 2.2
SIM/USIM card
2.1 Inserting the battery &
SIM/USIM card
Before inserting/removing a SIM/USIM
card, make sure that your O2 Xda Flame is
powered off and not connected to any power
supply via USB cable or AC adapter.
4. Gently press down the SIM/USIM card
holder and lock it by sliding it away
from you, as shown below. Make sure
the holder does not bounce back
upwards.
1. Remove the battery cover by gently
pulling the clip downwards and then
lift out the rear cover in the direction
shown below.
2. Unlock the SIM/USIM card holder by
pushing it towards you and lifting it up.
28
5. Slide the battery into place with the
metal connectors facing down and
away from you. Push down the back
edge until it clips into place.
6. Once the battery has been inserted, push
the side facing you down until it clips into
place (1). Slide the clip (2) on the right
of the battery compartment towards the
battery.
1
2
Copy SIM/USIM contacts to
phone memory
SIM/USIM contacts will be automatically
copied to your phone when you insert the
SIM/USIM card for the first time. To copy
SIM contacts to your O2 Xda Flame, tap
Contacts > [find the contact] > Menu >
Copy Contact.
2.3 Battery
2
Getting started
7. Slide the cover back into place and
push down until it clicks.
Please note
If the phone or the SIM/USIM card is
lost or stolen, contact your network
operator immediately to prevent
unauthorized use.
Your O2 Xda Flame contains a removable
and rechargeable Li-Polymer battery. Battery
life will depend on actual usage, network
coverage and whether the device is in
standby mode or not.
Battery life estimates:
•
Talk-time:
-
- GSM: Up to 6 hours
2.2 SIM/USIM card
•
- WCDMA voice calling: Up to 4 hours
Before using your O2 Xda Flame, you must
contact a network operator to get a personal
SIM/USIM (Subscriber Identity Module/
Universal Subscriber Identity Module) card.
•
- WCDMA video calling: Up to 2.5 hours
•
Standby:
-
- GSM: Up to 200 hours
-
- WCDMA: Up to 170 hours
The SIM/USIM card contains your O2 Xda
Flame number, the services included in your
subscription, and personal data such as your
phonebook and messages. The phone is
unusable (except for emergency calls) until
a valid SIM/USIM card is inserted. Your O2
Xda Flame will display a warning message if
the SIM/USIM card is not inserted properly.
The above timings are based on the
assumption that you only use one function at
a time. Battery life may also vary depending
on how frequently you switch between
functions. For battery safety, refer to Chapter
15 Safety Information.
29
Please note
Using any battery pack or AC adapter (charger) not specified/endorsed by O2 with this phone
may be dangerous and may invalidate any warranty and approval given with the phone. Unplug
the charger from the power supply when it is not in use.
Charging the battery
A new battery must be fully charged (for 4 hours) before being used for the first time. You may
charge the battery in the following ways:
Getting started
2
•
Universal AC Adapter: Connect the
battery charger to a suitable main power
socket and plug the charger into the
connector of your O2 Xda Flame. Note
the orientation when plugging in.
•
USB Cable: Connect your O2 Xda
Flame to your PC’s USB port with the
USB cable supplied, as shown below.
Please note
• When charging, make sure that the phone has its battery inserted. Place the battery’s
metallic end towards the phone’s metallic part. Please refer to 2.1 Inserting the battery
& SIM/USIM card and 2.2 SIM/USIM card for inserting the battery correctly.
• During charging, the LED lights up orange. When charging is completed, the orange
light goes off.
Checking the battery
The battery indicator displays the battery charge level. Check the icon at the upper right
corner of the Today screen.
30
•
Battery full
•
Battery alert
•
Battery empty
•
Battery charging
Low battery indication
2.4 Switching your O2 Xda Flame on or off
•
Press the Power button on the top of the phone to switch on your device. When you
switch on the device for the first time, it will power up and automatically begin the initiation/
calibration. See Chapter 2.5 Screen tapping & Calibration for further details.
•
Press the Power button in the following ways:
Short Press : To enter sleep mode.
Long Press : To turn on/off your O2 Xda Flame.
2
Getting started
When the battery voltage falls below the working level, a warning message appears on the
screen and a warning tone alerts you, if you have activated the warning sounds for system
events (See Chapter 3 Settings). Save the data you are working on at the moment, perform
synchronization with your PC, and turn off your O2 Xda Flame. (For more details about data
safety, see Chapter 2.9 Data backup).
Please note
Switching off your device will suspend the screen display and the device will enter sleep
mode to save battery power. When your device is in sleep mode, press the Power button to
wake up the device; the device will then display the Today screen. Press the Power button
to enter sleep and lock modes to avoid activating the keypad / touch panel accidentally.
2.5 Screen tapping and Calibration
When you first start up your O2 Xda Flame, you will be asked to calibrate the screen by
tapping the center of a cross with your stylus as it moves around the screen. This process
ensures that, when you tap the screen, the tapped item is activated.
To align the screen:
1. Tap Start > Settings > System tab > Screen.
2. Tap the Align Screen button on the General tab to recalibrate the screen as described above.
Please note
When aligning the touch screen, tap the target firmly and accurately.
31
2.6 Screen Orientation
To switch the orientation of your touch screen between Portrait and Landscape modes:
Getting started
2
Portrait mode
Landscape mode
1. Tap Start > Settings > System tab > Screen.
2. On the General tab, select the Orientation by tapping Portrait, Landscape (righthanded), or Landscape (left-handed).
The Portrait mode allows you to get a better view or better operation of certain programs on
your O2 Xda Flame, while Landscape may be optimal for viewing longer text files.
2.7 Entering information
You can enter information on your O2 Xda Flame in the following ways:
•
Synchronizing: Using ActiveSync, exchange information between your PC and device.
(For more information, see Chapter 11 Synchronization).
•
Typing: Using the input panel or the keyboard, enter text into the device. You can do
this by tapping keys on the on-screen keyboard, or by using the handwriting recognition
software
•
Writing: Using the stylus, write directly on the screen.
•
Drawing: Using the stylus, draw directly on the screen.
•
Recording: Create a standalone recording or embed a recording into a document or note.
Block Recognizer
With the Block Recognizer, you can input character strokes (using the stylus) in a way
similar to those used on other devices.
1. Tap the arrow next to the keyboard, and then Block Recognizer.
2. Write a letter in the box. When you write a letter, it is converted to onscreen text. For
instructions on using the Block Recognizer, tap the question mark next to the writing area.
32
Keyboard
To show or hide the input panel, tap the Input Panel button. To see your choices, tap the
arrow next to the Input Panel button. Tap the arrow next to the Input Panel button, and then
Keyboard.
1. To type lowercase letters, tap the keys with the stylus. To type a single capital letter or
symbol, tap the Shift key. To tap multiple capital letters or symbols, tap the CAP key. You
can also tap and hold the stylus on the key and drag up to type a single capital letter.
2. To add a space, tap the space bar, or tap and hold any key and drag the stylus to the right.
To backspace one character, tap the backspace key, or you can tap and hold any key and
drag the stylus to the left across at least two other characters.
3. To insert a carriage return, tap and hold the stylus anywhere on the keyboard and drag
down. When you use the input panel, your O2 Xda Flame anticipates the word you are
typing or writing and displays it above the input panel. When you tap the displayed word, it
is automatically inserted into your text at the insertion point. The more you use your O2 Xda
Flame, the more words it learns to anticipate.
2
Getting started
Please note
The CAP key is only available when the small key keyboard is selected. See the note
below on how to change the keyboard.
Please note
To change the keyboard size displayed on the screen, tap the arrow beside the
keyboard icon and select Options. Under Input Method, you may select either Large
keys or Small keys by tapping on its radio button.
4. To change word suggestion options, such as number of words suggested at one time, tap
Start > Settings > Personal tab > Input > Word Completion tab. Alternatively, tap the
arrow next to the input panel icon, then Options… > Word Completion tab.
33
Letter Recognizer
To punctuate in Transcriber:
With the Letter Recognizer, you can write
letters using the stylus, just as you would
on paper.
1. Tap the keyboard button on the tool bar.
1. Tap the arrow next to the input panel
button, and then Letter Recognizer.
2. Write a letter in the box.
Getting started
2
When you write a letter, it is converted to
text on the screen. For specific instructions
on using Letter Recognizer, with Letter
Recognizer open, tap the question mark
next to the writing area.
3. Tap the keyboard button again to hide it.
To learn writing in Transcriber:
1. Tap
Transcriber allows you to write anywhere
on the screen using the stylus, just as you
would on paper. Unlike Letter Recognizer
and Block Recognizer, you can write one or
more sentences. Pause and let Transcriber
change the written characters to text.
2. Write anywhere on the screen.
For specific instructions on using
Transcriber, with Transcriber open, tap
the question mark in the lower right-hand
corner of the screen.
on the tool bar.
2. A Letter Shapes Selector screen will
appear:
•
At the bottom of the screen, select the
character you wish to explore.
•
At the top of the screen, tap the picture
of this character. It will slowly redraw,
showing the writing sequence.
•
Select how often you write the character
using that method. When you finish
selecting all the letters, you can save
these as a profile by tapping File > Save,
and enter a name for the profile.
Transcriber
1. Tap the arrow next to the input panel
button and then Transcriber.
34
2. Tap the desired punctuation.
Using Profiles
Letter Shape Selector supports two
profiles: Master (by tapping File > Master)
and Guest (by tapping File > Guest):
•
Master is typically used by the primary
user. This profile is unaffected by any
Guest user settings.
•
Guest is for temporary device usage by
another person.
Writing on the screen
In any program that accepts writing, such as
Notes, and in the Notes tab in Calendar,
Contacts, and Tasks, you can use your
stylus to write directly on the screen. Write
as you would on paper. You can edit and
format what you have written and convert
information into typed text at a later time.
Tips for good recognition:
1. Write clearly.
2. Write on the lines and draw descanters
below the line. Write the cross of the “t”
and apostrophes below the top line so
that they are not confused with the word
above. Write periods and commas above
the bottom line.
3. For better recognition, use a zoom level
of 150% or higher by tapping Start >
Settings > Input > Options tab to
change the default zoom levels.
5. Hyphenated words, foreign words that
use special characters, such as accents,
and some punctuation, cannot be
converted. If you edit or add to a word
after attempting recognition, the new
writing will not be included if you attempt
recognition again.
Drawing on the screen
You can draw on it in the same way that
you write on the screen. The difference
between writing and drawing on the screen
is how you select items and how they can be
edited. For example, selected drawings can
be resized, while writing cannot.
2
Getting started
Tap the pen button to switch to writing mode.
This action displays lines on the screen to
help you write. Some programs that accept
writing may not have the pen button. See the
manual for each particular program to find
out how to switch to writing mode.
4. Write the letters of a word close together
and leave big gaps between words so
that the device can easily tell where
words begin and end.
To create a drawing:
Cross three ruled lines on your first stroke.
A drawing box appears. Subsequent strokes
in or touching the drawing box become part
of the drawing. Drawings that do not cross
three ruled lines will be treated as writing.
35
To select a drawing:
To create a recording:
If you want to edit or format a drawing, you
must select it first.
1. To add a recording to a note, open
the note before recording. Tap Start >
Programs > Notes.
1. Tap and hold the stylus on the drawing
until the selection handle appears. To
select multiple drawings, deselect the pen
button and drag to select the drawings
that you want.
Getting started
2
2. You can cut, copy, and paste selected
drawings by tapping and holding the
selected drawing and tapping an editing
command on the pop-up menu, or by
tapping the command on the Edit menu.
To resize a drawing, make sure the
Pen button is not selected, and drag a
selection handle. To change the zoom
level, tap Tools and select a zoom level.
2. If there is no Record/Playback toolbar,
tap Menu > View Recording Toolbar.
3. Hold your device’s microphone near your
mouth or another audio source.
4. To start recording, tap
.
5. To stop recording, tap . The new
recording appears in the note list or as an
embedded icon.
6. To play a recording, tap it in the open
note or tap the recording in the note list.
2.8 Recording a message
In any program where you can write or draw
on the screen, you can also quickly capture
thoughts, reminders, and phone numbers by
recording a message. In Calendar, Tasks,
and Contacts, you can include a recording
in the Notes tab.
In the Notes program, you can either
create a standalone recording, or include
a recording in a written note. If you want to
include the recording in a note, open the
note first.
In the Messaging program, you can also add
a recording to an E-mail.
You can also access the Record/Playback
toolbar by pressing the Record button, which
is the first button from the top on the left side
of your O2 Xda Flame.
To quickly create a recording, hold down the
Record button. When you hear the beep,
recording has begun. Release the button
when you are finished.
The new recording is stored in the open
note, or as a standalone recording, if no note
is opened.
36
2.9 Data backup
Your O2 Xda Flame supports 2 GB of ROM
capacity; however, you may need to backup
data and any new programs that you install
in the ROM to guard against data loss. To
back up your Contacts, Calendar, etc.,
connect your PC with the O2 Xda Flame;
ActiveSync will start automatically.
To expand your O2 Xda Flame’s memory,
insert a Micro SD card into the card slot on
the right side of the phone. Make sure the
card is inserted correctly.
Please note
Your O2 Xda Flame does not come with
a Micro SD card. This is an optional
accessory. Please contact your
supplier for further details.
Your O2 Xda Flame can be reset in the
following two ways: soft reset or hard
reset. Executing soft reset allows you to
reboot your O2 Xda Flame; only some data
in opened programs may be lost. Your O2
Xda Flame returns to the same status as the
last time you used it. A hard reset turns the
battery off, returns the device to its default
settings, and deletes all programs, files,
contacts and other information that you have
saved to the device. It is therefore extremely
important to back up data to a storage card
or computer on a regular basis, just in case
a hard reset has to be performed.
2
Getting started
2.10 Memory expansion
2.11 Resetting your O2 Xda
Flame
To perform a soft reset
If your O2 Xda Flame responds slowly, stops
responding, or freezes, you can soft reset
it. A soft reset causes the O2 Xda Flame
to restart and adjust memory allocation.
Unsaved data in any opened applications
may be lost. Use the stylus to press and hold
the Reset button, as shown below.
37
To perform a hard reset
A hard reset clears memory, deletes all data (such as owner information under Setup Wizard
and AutoConfig) and restores the O2 Xda Flame to its default settings. This action will erase
all data that you have created and programs you have installed, but will keep all preinstalled
programs from when your O2 Xda Flame was first delivered to you. Press and hold the
Wireless Manager key and the Camera & Video key at the same time, and then use the
stylus to press the soft reset button. Be sure you have backed up all your data in a Micro SD
card or PC before performing a hard reset.
Getting started
2
38
Chapter 3
Settings
3.1
3.2
3.3
Personal settings
System settings
Connection settings
3. Settings
The following is an overview of the Settings menu.
Personal
Settings
3
Buttons
Input
Menus
MSN Options
Owner Information
Lock
Phone
Sounds &
Notifications
Today
About
Backlight
Certificates
Clock & Alarms
Error Reporting
GPS
Memory
Power
Regional Settings
Remove Programs
Screen
Device Information
Headset Volume
Limitation
WOW HD Settings
O2 Themes
System
Connections
USB to PC
Beam
Bluetooth
Connections
Wireless Manager
Network Cards
WiFi Utility
40
3.1 Personal settings
Buttons
To customize the program hardware buttons to open your most frequently used programs:
1. Tap Start > Settings > Personal tab > Buttons > Program Buttons tab.
2. Under Select a Button, tap the button you want to assign to a program and then select a
program from Assign a Program.
In the Backlight tab, check the Light Sensor Enable box to set backlight time settings.
From the drop down lists, choose when to switch the backlight off when using AC Power and
Battery Power.
3
Settings
In the Up/Down Control tab, Delay before First Repeat changes the time elapsed before
scrolling begins. Repeat Rate changes the time it takes to scroll from one item to the next.
Press and hold the Up/Down control to scroll through the items in a list.
Input
1. Tap Start > Settings > Personal tab > Input.
2. On the Input Method tab, select a desired input method. On the Word Completion tab,
select the desired settings for word completion. On the Options tab, select the desired
options for writing and recording. These options apply to any program where you can
record or write.
You can also change input options by tapping the
arrow and Options.
Menus
Only 7 programs are allowed in the Start menu. To add frequently used programs to the Start
menu:
1. Tap Start > Settings > Personal tab > Menus.
2. Select the desired programs, then tap OK.
41
MSN Options
Under MSN Options, you can configure settings for MSN applications:
1. Tap Start > Settings > Personal tab > MSN Options.
2. Under MSN Options, you can configure settings for MSN applications.
Settings
3
Option
Description
General
To increase phone security, select Clear Saved Password.
Hotmail
Select E-mail delivery options, filtering level of junk mail, and choose whether to
activate Download new e-mail automatically.
Messenger
Enter your display name when you sign in to MSN Messenger.
SMS
Select to activate SMS for receiving MSN Messenger messages when data
connection is temporarily unavailable.
Switch User
Press the Switch User button to sign in with a new login name.
Owner Information
1. Tap Start > Settings > Personal tab > Owner Information.
2. On the Identification tab, enter your personal information.
3. On the Notes tab, enter any additional text you want to display when the device is turned
on, such as: “Welcome!’
4. On the Options tab, select which message will display when your O2 Xda Flame is turned
on.
Lock
For a more secure password, it must have at least 7 characters that are a combination of
uppercase and lowercase letters, numbers, and punctuation.
1. Tap Start > Settings > Personal tab > Lock.
2. To enable this function, select how long your mobile device must be turned off before the
password is required by tapping Prompt if device unused for.
3. Select the type of password you want: Simple 4-digit or alphanumeric combination.
4. Enter the password and:
• If your device is configured to connect to a network, use a strong password to help
protect network security.
• If you forget your password, you must hard reset before you can access your device.
This will erase all files and data created and programs installed.
• If you’ve used ActiveSync to create a backup file, all program data can be restored.
42
Phone
You can easily view and change phone settings, such as ring type, ring tone and keypad tone.
You can also protect your phone from unauthorized use. To change phone settings:
•
Tap Start > Settings > Personal tab > Phone.
Phone tab
Under the Phone tab, you can set up the following items:
3
Ring type
Settings
You can change the way you are notified of incoming calls. For example, you can choose to
be notified by a ring, vibration, or a combination. Tap the Ring type list and select the desired
option.
Ring tone
Tap the Ring tone list, then select the sound you want to use.
1. To set .mp3, .wma, .wav or .mid files as ring tones, use ActiveSync on your PC to copy the
file to the \Windows\Rings folder on your device. Select the sound from the Ring tone list.
2. To download ring tones, you can make a connection to the Internet and download ring
tones compatible with .mp3, .wma, .wav or .mid.
Keypad tone
You can change the tone you hear when entering a phone number on the keypad. If set to
Long tones, the tone is heard continuously for as long as the number is pressed. If set to
Short tones, the tone is heard only for one or two seconds.
1. Tap the Keypad list, then select the desired option.
2. To prevent tones from being heard when entering a phone number, select Off.
Security
You may check the Require PIN when phone is used option to enhance your phone
security. Tap Change PIN to change your SIM/USIM PIN number.
43
Services tab
The Services tab is primarily used to set options for incoming calls, such as Call
Forwarding, Call Waiting, Caller ID, and so on.
Settings
3
Option
Description
Call Barring
Blocks incoming and/or outgoing calls.
Caller ID
Displays your name and/or phone number for outgoing calls.
Call Forwarding
Forwards all or selected incoming calls to a different number.
Call Waiting
Notifies you of an incoming call while you are on the phone.
Voice Mail and Text
Messages
Sets up voice mail and SMS text messages service center number.
Network tab
With network settings, you can view available networks, determine the order in which your O2
Xda Flame accesses another network (if the current one is unavailable) and specify whether
you want to change networks manually or automatically. The current network will remain
active until you change it, lose your signal, or change your SIM/USIM card.
The network currently in use will be listed at the top of the screen. When your current network
is unavailable, tap Find Network to select an alternative.
More tab
The More tab allows you to select automatic answering. Any incoming calls will be
automatically answered.
1. Check the AutoAns(HandFree) box.
2. From the drop down list, choose the number of seconds (1-10) to wait before the call is
picked up.
Band selection tab
Depending on your situation, you may want to choose which band your phone uses. Tap
either 3G Only, 2.5G Only or Auto.
44
Sounds & Notifications
Turning off sounds and notifications helps conserve battery power. To change the ring type
and volume:
1. Tap Start > Settings > Personal tab > Sounds & Notifications.
2. On the Sounds tab, you can select when to play a sound.
3. On the Notifications tab, you can customize how you are notified about different events.
Select the event name and type of reminder. You can select a special sound, message,
flashing light or vibration.
Settings
Today
To change the theme of your Today screen:
3
1. Tap Start > Settings > Personal tab > Today.
2. On the Appearance tab, select the desired theme. To use your own background, select
Use this picture as the background, then tap Browse to locate the desired file.
3. Choose a folder, then tap the desired file you want and tap OK.
Please note
The recommended picture size for the background is 480 x 640 in JPEG format. To
beam a theme to a friend, select the desired theme and tap Beam on the Appearance
tab.
Customizing the displayed information:
1. Tap Start > Settings > Personal tab > Today > Items tab.
2. Select the information you want displayed on the Today screen.
3. To customize the information further, select an information type and tap Options (not
available for all information types).
O2 Themes
O2 Themes offers a simple way for users to personalize their devices in the Today screen. It
comes with 4 built-in profiles (Default, Simple, Business, Music) that cater to different types
of users. Users can add new profiles to customize their likings by rearranging the appearance
of Today plug-ins/Items, change text colours and menus to match wallpaper. More Today
Plug-ins/Items, such as Wireless Today plugin and Auto Device Lock, will be added to O2
Themes to make the Today application look more appealing; an integrated analog/digital
clock with operator name and wireless status will be included. In addition, a spacer Today
Plugin that allows other Today Plug-ins that follow it to appear at the bottom of the screen,
and a new music Today Plug-in, will be included.
45
To edit O2 Themes:
1. Tap Start > Settings > Personal tab > O2 Themes.
2. Tap to select one of the four profiles:
Default, Simple, Business, Music.
3. To change the background theme, tap the Color / Background tag and select the options
there. Tap OK to confirm and exit.
4. To edit the items in the profile, tap the Items tab and select and hold the Today Screen
Item profile to edit. Tap OK to confirm and exit.
Settings
3
46
3.2 System settings
About
The Version tab displays important device information, including amount of memory installed.
On the Device ID tab, you may need to change the device name if unable to connect to a
network because another device, with the same name, is already connected.
3
Backlight
•
Tap the Battery power tab to turn ON/OFF the backlight when using battery power.
•
Tap the External power tab to turn ON/OFF the backlight when using external power.
•
Tap the Brightness tab to adjust the brightness level.
Settings
Using the backlight, whilst on battery power, substantially reduces battery life. Tap Start >
Settings > System tab > Backlight.
Certificates
This item displays the name of the certificate issuer and the expiration date.
Clock & Alarms
Tap Start > Settings > System tab > Clock & Alarms.
•
If you visit a particular time zone often, select it as your Visiting time zone on the Time tab
so that you can quickly see the correct date and time.
•
You can use your device as a travel alarm clock, and set up to 3 seperate alarms in the
Alarms tab. Tap the Alarm icon to select the type of alarm.
•
Tap the More tab to display the clock in the title bar of all programs.
Please note
To change the way the date or time is displayed on your O2 Xda Flame, go to Regional
Settings by tapping Start > Settings > System tab > Regional Settings.
Device Information
This feature displays system information.
Error Reporting
This feature allows you to report system errors to the Microsoft Help Center. Tap Start >
Settings > System tab > Error Reporting and select Enable/Disable Error Reporting.
47
GPS
Under the Programs tab, you can choose the port your phone uses for GPS data.
Under the Hardware tab, you can specify the hardware port to which your GPS device is
connected. Settings include GPS hardware port and Baud rate.
Under the Access tab, you can activate Manage GPS automatically. You are strongly
advised to activate this feature; doing so will enable Windows Mobile to manage access to
your GPS device, and allows multiple programs to obtain GPS data simultaneously.
Settings
3
Headset Volume Limitation
Use the slide bar to limit the maximum volume of the headphones.
Memory
You may need to stop a program if it becomes unstable or the program memory is low. Tap
Start > Settings > System tab > Memory.
•
The Main tab displays the amount of memory the system has allocated to file and data
storage versus program storage. This tab also displays the amount of memory in use
versus the available memory.
•
The Storage Card tab displays how much memory is available on the storage card
inserted in your device.
•
The Running Programs tab displays the list of currently active programs. You can stop
a program by selecting it on the list and tapping Stop, or just tap Stop All to stop all
programs.
Power
Tap Start > Settings > System tab > Power.
48
•
The Battery tab displays the battery power remaining. Battery power depends on battery
type and usage.
•
On the Advanced tab, you can select options for turning off your device to conserve
battery power.
•
The CPU Optimize tab alows you to manually choose how much power is given to the
processor.
Regional Settings
This feature allows you to customize units and formats for your current region. To access this
feature, tap Start > Settings > System tab > Regional Settings.
Remove Programs
Remove Programs allows you to uninstall programs saved in your phone’s storage memory.
It also shows total available storage memory. Select a program that you want to remove from
the program box and tap Remove.
Settings
Screen
Under the General tab, you can adjust the screen orientation and alignment. For more
information, refer to Chapter 2 Getting started.
3
Under the Clear Type tab, you can select Enable Clear Type to smooth the edges of screen
fonts for many programs.
Under the Text Size tab, you can adjust the text size to see more content or increase the
readability in many programs.
WOW HD Settings
•
The WOW HD Settings tab allows you to choose sound system effects.
•
Use the slider bars in the TruBass tab to change the bass levels.
•
The About tab displays the version information of the SRS WOW HD.
WOW HD technology is incorporated under license from SRS Labs, Inc.
49
3.3 Connection settings
For detailed information, please refer to Chapter 10 Wireless Connectivity.
Settings
3
50
Chapter 4
Basic phone functions
4.1
4.2
4.3
4.4
4.5
4.6
4.7
4.8
4.9
Making a call
Ending a call
Receiving/Ignoring a call
International calls
Video Telephony
Emergency calls
In-call options
Contact information
Device security
4. Basic phone functions
Like a standard mobile phone, you can use your O2 Xda Flame to make/receive calls and
send SMS messages. You can also take notes while talking, dial directly from Contacts, and
easily transfer contacts between your SIM/USIM card and your O2 Xda Flame.
The Phone Dialer screen
To access the Phone Dialer screen, tap Start > Phone, or tap Phone on the Today screen.
From this screen, you can access Contacts, Call History, Speed Dial, and more options
under Menu. The Phone Dialer screen has the following features:
Basic phone functions
4
1. Signal strength
2. Clear numbers
3. Speed dial
4. Received, dialed and missed call history
5. Make / End a video call
6. Make / End Call
7. Access more options
8. Contact list
9. Touchscreen keypad
10.The number you entered
When a call is connected, the screen displays the following:
1. Call Mute
2. Call Hold
3. End Call
4. Access more options
5. Contact list
6. Return to the Phone Dialer screen
7. Note creation for the call
8. Received, dialed and missed call history
9. The name and number of the contact
you are calling
10.Call status
52
The navigation pad and dialing
11
6
2
5
4
3
Item
Description
1
Left Soft Key
Press the left key to access left menu items.
2
Call key
Press to activate the Phone Dialer screen, dial a phone number or
accept an incoming call. During a call, press and hold to turn the
speakerphone ON or OFF.
3
Navigation key
Press for 4-ways (Up/Down/Left/Right) navigation through a list.
4
Centre key
Press to select a menu item.
5
End call
Press to end a call, return to standby screen or end a GPRS
connection.
6
Right Soft Key
Press the right key to access right menu items.
Entering your PIN
Most SIM/USIM cards are preset with a PIN
(Personal Identification Number). This PIN is
provided by the Network Operator, which you
need to enter whenever you use your device.
1. Enter the preset PIN assigned by the
Network Operator.
2. Tap Enter.
If your PIN is entered incorrectly three times,
the SIM/USIM card will be blocked. If this
happens, you can unblock it with the PIN
Unblocking Key (PUK) from the Network
Operator.
Checking your connection
By default, your O2 Xda Flame will
Basic phone functions
No.
4
automatically connect to your registered
network once you have inserted a SIM/USIM
card and entered the required PIN code. An
icon indicates that you are connected to a
Network Operator’s network, or an affiliated
provider. A full strength signal is indicated
by . The stronger the signal strength, the
more bars the icon shows; no bars indicates
no signal.
Warning
In many countries you are required
by law to turn off your phone onboard
an aircraft. Turning off the power of
your O2 Xda Flame doesn’t turn off the
phone function. You must disconnect
the connection to the wireless network.
53
While Flying
You can turn off the wireless connections while still using the O2 Xda Flame for other
purposes.
1. Tap Settings in the Start menu.
2. Tap the Connections tab > Wireless
Manager.
Basic phone functions
4
3. Tap All Wireless Off; when all buttons/
icons are colorless, wireless functions
are off. Your O2 Xda Flame is now safe
to use on a flight.
Adjusting the phone volume
You may adjust phone volume in the following ways:
1. During a call, press the volume buttons
on the right side of your device.
2. Alternatively, tap to bring up a pop-up
menu. You can adjust:
•
Ring volume
•
Device volume
•
Vibrate mode: If this feature is activated,
appears in the status and icon area.
•
Mute/Unmute the phone by tapping
On/Off.
.
.
Adjusting the conversation phone volume should only be done during a call. Adjusting the
volume at another time will affect the ring, notification and MP3 sound levels.
54
4.1 Making a call
With your O2 Xda Flame, you can make a call by entering the phone number, or selecting a
number from Contacts, Speed Dial, and Call History.
Making a call from the Phone Dialer screen
Input digits
2. Tap the number on the keypad, then tap
.
the Talk button or press the
Erase the
input digits
4
Basic phone functions
1. Press
or tap Phone on the Today
screen to bring up the Phone Dialer
screen.
Please note
If you tap a wrong number, you can back space by tapping the back arrow key to erase
individual numbers, one at a time. Tapping and holding backspace will delete the entire
telephone number.
55
Making a call from Contacts
1. Tap Contacts on the Today screen or Phone Dialer screen.
2. Tap the entry, and then tap Call or Call Mobile.
To view/search the contact list:
When you access Contacts, you see a contact list. You may view contacts in the following
ways:
Basic phone functions
4
•
Tap Menu > View by and select Name
or Company.
•
Tap Menu > Filter and select All
contacts, Recently viewed or No
categories.
•
Tap Menu > Options. Set up the List
view settings by selecting Show
alphabetical index or Show contact
names only.
To search for a contact, tap the Enter a
name or number bar and enter the first
letter of the desired contact’s name. A list of
names with similar letters will be displayed.
Scroll up or down to the desired item.
56
Making a call from Call History:
1. In the Phone Dialer screen, tap Call History.
2. Find a number from different Call Histories by tapping Menu > Filter and selecting All
Calls, Missed, Outgoing, Incoming, and By Caller.
3. Alternatively, scroll to the number by using the up/down navigation keys and press the
center navigation key to select the number.
4. Scroll to Call Mobile and press the center navigation key to call the number.
4
Call History icons include:
Outgoing calls
Missed calls
Making a call from Speed Dial
The Speed Dial enables you to call frequently used numbers with a single tap. To create a
Speed Dial entry, you must have the number already stored in Contacts.
1. From the Phone Dialer screen, tap
Speed Dial > Menu tab > New.
Basic phone functions
Incoming calls
2. Tap the desired contact name and
number.
3. In the Location field, tap the ▲/▼
arrows to select an available location
to assign as the new Speed Dial
entry. (The first Speed Dial location is
reserved for your voice mail).
57
By memorizing a number’s position in the
Speed Dial list, you can dial the number by
pressing and holding its position number.
By default, the Location function will give
the next available position in the Speed Dial
setting screen. If you want to put a number
in a position already occupied, the new
number will replace the existing number.
Basic phone functions
4
Please note
To delete a Speed Dial entry, go to
the Speed Dial list, tap and hold the
contact name in the box to the right of
the assigned speed dial number and
tap Delete.
Checking your Voice Mail
By default, the first Speed Dial location
is your voice mailbox. When you insert
your SIM card into your O2 Xda Flame, it
will automatically detect and set the voice
mailbox number of your network operator.
On the Phone Dialer screen, tap Speed Dial
and select Voice Mail, and then press
or tap Call to call the voice mail center.
58
4.2 Ending a call
Once an incoming or outgoing call is in
progress, you can press the
, or tap
End on the Phone Dialer screen to hang up.
Please note
Alternatively, press the silver button on
the wired stereo headset to end a call.
4.3 Receiving/Ignoring a
call
When you receive a phone call, a notification
message will appear.
To answer the incoming call, tap Answer or
.
press
Please note
During an incoming call, you can short
press up or down volume button on
the side of your device to mute the
ring tone.
Alternatively, press the silver button
on the wired stereo headset to receive
a call. Please see Chapter 4.7 In-call
options.
When you make an international call from any
country, you need to insert a special international
access code. If you enter the “+” symbol as a
prefix before the number you are calling, then
you do not need to enter the access code for the
country you are calling from.
4
To make an international call:
1. Tap and hold the 0 key until the + sign
appears. The + replaces the international
prefix of the country you are calling from.
2. Enter the full phone number. It should
include the country code, area code
(without the leading zero) and phone
number.
3. Tap Talk or press the
.
Basic phone functions
To ignore or reject a call, tap Ignore or press
to mute the phone and reject the call.
This may divert the call to your voice mail,
depending on your network operator.
4.4 International calls
59
4.5 Video Telephony
Tapping the Video Call button allows you to make a VT (video telephony) call.
1
Basic phone functions
4
2
11
10
3
4
No.
5
6
7
8
9
Item
Description
1
Call Duration
Displays the length of the video call.
2
Caller Image
Displays the caller image.
3
Keypad
Tap to return to the keypad.
4
Brightness
Use + and - to increase or decrease the screen brightness.
5
Camera
Turn on or off the caller image.
6
Internal / External
Camera
Switch between using the camera facing you or the camera
pointing away from you.
7
Speaker
Turn the speaker on/off.
There are 4 view modes available, tap this button to switch
between them:
Only Receiver - Displays only the person you are calling.
8
View Mode
Only Sender - Only displays your image.
Standard Mode - Displays both the caller and the receiver.
The sender is small.
Sender is large - The sender image is large and the receiver
image is small.
60
You can use Hold, Mute, Turn Speakerphone On, Turn Handsfree On, Conference, Paste, Save to Contacts, Create Note, Call
History, Speed dial, Options, Video call options:
Hold - Places the current call on hold
Mute - Mutes the speaker
Turn Speakerphone On - Turn speakerphone on or off.
Turn Handsfree On - Turn handsfree on or off.
9
Menu
4
Conference
Basic phone functions
Paste
Save to contacts
Create note
Call history
Speed dial
Options
Video call options
10
End
End the call.
11
Reciever Image
See the person who receives your call.
4.6 Emergency calls
Enter the international emergency number 112, then tap Talk or press the
.
Additional emergency numbers may be included on your SIM/USIM card. Contact your
network operator for more information.
If your O2 Xda Flame has been put into Device Lock mode, you have to unlock the device
before placing an emergency call. (Refer to Chapter 1 Befor using your O2 Xda Flame)
1. Press the “Unlock” on Left soft key.
2. Press again and “Unlock” appears on the middle of screen.
4.7 In-call options
Adjusting the earpiece volume
During a call, you can adjust the earpiece volume on your wired stereo headset by turning the
volume button to the right/left to increase/decrease the volume (with the silver button facing
61
Putting a call on hold
towards you).
During a call, you may choose to put the call
on hold to receive or make a second call.
To put a call on hold, tap Hold or tap Menu >
Hold.
Volume
4
1. Tap Answer to take the 2nd call and hold
the 1st one.
Basic phone functions
To accept/end another incoming call:
2. To end the 2nd call and go back to the
.
1st, tap End or press the
On / Off
Button
Turning on the speakerphone
Your device has a speakerphone allowing
you to talk handsfree or let other people
listen to the conversation.
or
1. During the call, press and hold the
tap the Menu tab > Turn Speakerphone
On.
2. To turn the speakerphone off, tap the
feature again.
Warning
To avoid damaging your hearing, do
not hold your O2 Xda Flame against
your ear when in speakerphone mode.
Muting a call
When there is an incoming call, you may
mute your microphone by pressing the Mute
button on the Phone Dialer screen or tap
Menu tab > Mute.
62
To swap between two calls, tap Swap or tap
the Menu tab > Swap.
Setting up conference calls
In either of the following two situations, you
can set up a conference call:
•
When you put a call on hold, dial a 2nd
number and wait for it to be picked up.
•
When you accept a 2nd incoming call and
the first one still in progress.
To make a conference call:
1. In either of the above two situations, tap Conference.
2. If the conference connection is successful, the word Conference will appear at the top of
the Phone Dialer screen.
3. To add additional people to your conference call, tap Hold to enter the new number and
then tap Resume to return and continue.
Adding a note
Writing a note
1. During/After a call, tap Notes.
2. Use any of the input methods to record
your note and tap OK. You can finish
your note during or after the call.
4
Basic phone functions
Regardless of whether you call from the Phone Dialer screen, Contacts, Call History, or
Speed Dial, you can take notes during/after a call. The note can be saved as an attachment
to your call in one of the Call History folders.
Viewing a note
1. In the Call History list, tap and hold the desired number, then tap View Note in the pop-up
menu. The icon indicates a note.
2. Alternatively, go to Notes, and then tap the name of the file on the list.
63
4.8 Contact information
Contacts can be imported in the following ways:
From your SIM/USIM card: Use your SIM/USIM card in your O2 Xda Flame and another
device; while using the other device you create one or more new contacts on the SIM/
USIM card.
•
From your Call History: New contact numbers can be found in incoming or missed calls.
4
Why import contacts?
•
You can back up your SIM/USIM numbers to your O2 Xda Flame.
Basic phone functions
•
•
Creating contacts in Contacts creates more detailed records.
•
Only Contacts can have Photo Contacts for an individual contact entry.
64
SIM/USIM Contacts
To copy your SIM/USIM contacts to Contacts on your phone:
1. Select the contact with the SIM/USIM card icon next to it
.
2. Tap Menu > Save to Contacts to go to the Contacts screen to add further details.
3. Press OK to save the details.
Call History
To view the Call History, tap Phone on the Today screen and tap Call History on the Phone
Dialer screen.
To add a new contact when just ending a
call, tap Menu tab > Save to Contacts.
Enter the caller’s name and other
information and tap OK when finished
editing.
Please note
When the contact is created, the call details in the Call History will be amended and
displayed under the name, not the phone number.
4
Basic phone functions
Alternatively, go to Call History, tap and
hold the number to bring up the pop up
menu and select Save to Contacts.
Photo Contacts
Photo Contacts allows you to assign still or animated photos to entries in Contacts. When
a person (for whom you have previously assigned a photo in Photo Contacts) calls you, that
photo will appear on your O2 Xda Flame’s incoming call screen. Use the rich set of features
provided to have the photos displayed with the size, position and animated template you
want.
Creating a new photo contact
You can create a photo contact in the following ways:
1. Tap Contacts on the Today screen or tap Phone > Contacts > New tab.
2. Enter the Contact’s name and other information.
65
3. Scroll to the Picture field and tap Select
a picture....
Basic phone functions
4
4. Tap on a desired picture and it will be
assigned to the entry. (To delete the
picture from the Contacts screen tap
Menu tab > Remove Picture).
Alternatively, you can assign a picture to a contact.
1. Tap Start > Programs > Pictures &
Videos > My Pictures folder.
2. Tap the desired picture to view and tap
Menu > Save > Save to Contact....
66
4.9 Device security
You can guarantee your phone’s security by making use of the following security features:
Device lock
The keypad lock turns off keypad functionality. This is a helpful feature, especially when your
O2 Xda Flame is put in your pocket, and you don’t want it to be pressed accidentally.
4
2
3
Basic phone functions
1
1. Tap Device unlocked on the Today screen to lock the keypad.
2. Once you lock the phone, this area displays Device locked.
3. To unlock your keypad, tap Unlock on the bottom left of the Today screen and tap Unlock
again to confirm.
67
Device lock
This phone lock feature protects your O2 Xda Flame from unauthorized access. When the
phone lock is activated, your O2 Xda Flame will automatically lock after a specified period
of inactivity. A screen will be displayed requiring your O2 Xda Flame’s “lock password” to be
entered before access is granted.
1. Tap Start > Settings > Personal tab >
Lock.
Basic phone functions
4
2. Check the Prompt if device unused
for option and set the prompt
notification time.
3. Select the type of password you would
like to use: Simple PIN or Strong
alphanumeric. A strong password
must have at least 7 characters that
are a combination of uppercase and
lowercase letters, numbers, and
punctuation.
4. Enter the password and confirm, if
necessary.
To disable the Phone lock feature of your O2 Xda Flame, uncheck the Prompt if device
unused for option.
In case you forget your password, you can
provide a password hint in the Hint tab
under the Password tab.
68
Locking your SIM/USIM card
You can protect your O2 Xda Flame from unauthorized use by assigning a PIN (Personal
Identification Number). Your first PIN is assigned by the Network Operator.
1. Tap Start > Phone or alternatively tap the Phone button on the Today screen.
2. On the Phone Dialer screen, tap Menu tab > Options > Phone tab.
3. Check the Require PIN when phone is used option.
4. To change the PIN, at any time, tap Change PIN.
4
Basic phone functions
69
Basic phone functions
4
70
Chapter 5
Messaging
5.1
5.2
5.3
5.4
5.5
Text
Multimedia messages (MMS)
Voicemail
E-mail
Pocket MSN
5. Messaging
You can receive E-mails and text messages in Messaging. Text messages are sent and
received through your network operator by using a phone number as the message address.
Your phone supports the following messaging services:
Messaging
5
72
•
SMS (Short Messaging Service) allows you to send short messages. To send an SMS
message, your must register for SMS service with your network operator. For more
information, contact your network operator.
•
MMS (Multimedia Messaging Service) allows you to send multimedia messages. In
an MMS message, you can include text, pictures, photos, audio files or recorded voice.
To send an MMS message, your must register and configure the MMS service with your
network operator. For more information, contact your network operator.
•
Chat allows you to send messages back and forth with friends. This feature is network
dependent. This feature is supported by the O2 SMS Plus application.
•
Voice Mail: You can forward a call to your voice mail box when you are unable to receive a
call. The voice mail center will send you a notification.
•
E-mail: You can send or receive E-mails with your O2 Xda Flame by either synchronizing
your Outlook E-mails or connecting to the Internet.
•
IMS (Instant Messaging service): Your O2 Xda Flame is equipped with the Pocket MSN
application. To send instant messages, you need to connect to the Internet.
5.1 Text
Write a text message
To create a text message:
1. Tap Start > Messaging and select the
Inbox folder.
5
Messaging
2. Tap the New tab and add recipients in
the To: field. Alternatively, tap Menu tab
> Add Recipient.
73
3. Tap on the Edit screen to start editing.
For the entry method, refer to Chapter
2.7 Entering information.
4. To add predefined text, tap Menu > My
Text and select text.
5. When you finish editing text, start the
spell check by tapping Menu > Spell
Check.
Messaging
5
6. You can check the recipients of the text
message by tapping Menu > Check
Names.
7. To save a message to the draft box, tap
Menu > Save to Drafts.
8. Before you send a message, you can
choose to receive a delivery notification
by tapping Menu > Message Options
and checking the Request message
delivery notification box.
9. To send a message, tap Send.
74
Read messages
Text messages are automatically received when your phone is turned on. Otherwise,
messages are held by your network operator until your phone is connected to the operator
network.
To read text message(s):
1. Tap Start > Messaging.
5
Messaging
2. Select the Text Messages folder and
a sub-folder under Text Messages,
such as Inbox, Outbox, Sent Items, or
Deleted Items.
3. Select how to sort the messages.
•
Message Type - Sort by message type.
•
From - Sort by sender.
•
Received - Sort by the date messages
were received.
•
Subject - Sort by subject in alphabetical
order.
75
4. Tap Menu to access more options:
•
Tap Go To to switch your current
account to Text Messages, Outlook
E-Mail, MMS, etc.
•
Tap Tools to Sort By, Manage Folders,
Empty Deleted Items, Clear “Text
Messages”, create a New Account,
and view Options options...(change
settings for Accounts, Message,
Address, and Storage).
Messaging
5
76
Settings
Text Message settings allow you to customize Accounts, Message, Address and Storage.
To access available options tap Menu > Tools > Options.
•
5
Messaging
•
Accounts: Tap an account to change
settings. For example, tap Text
Messages to change Request delivery
notifications and Use Unicode when
necessary. Tap New Account to set up
a new account, or tap Signatures… to
use signatures to designate accounts.
Message: Set up the following
messaging features—When replying
to e-mail, include body, Keep copies
of sent items in Sent folder and the
display After deleting or moving a
message feature.
77
•
Address: Select whether to get E-mail
from all contacts with E-mail addresses;
alternatively, you can verify names by
defining their E-mail addresses.
•
Storage: Check the memory space
of your phone, storage card and
attachments, Store attachments on
storage card and specify how you want
to empty your deleted items.
Messaging
5
78
5.2 Multimedia messages (MMS)
Your O2 Xda Flame allows you to create and share your own MMS messages (with photos,
videos, text, and audio) with your friends and family. You can even use the O2 Xda Flame’s
built-in camera to snap photos and send them immediately by composing an MMS message.
Launching the MMS composer screen
You can access MMS directly by tapping Start > Messaging and selecting the MMS folder.
Your device also provides several ways to launch the MMS composer screen:
From Pictures & Videos: Select any picture in the My Pictures folder, tap Menu > Send
and select an account—MMS. At this point, you will be directed to the MMS composer
screen in Messaging.
•
From Camera (Optional): Capture a picture or a video clip. Select the file and send via
MMS.
5
Messaging
•
Please note
You must configure the profiles, connections and downloading settings before you can
send and receive MMS messages.
Create an MMS message
In the Inbox, you will see messages listed with the following parameters:
•
Message Type
• Time when the message was received
•
Receive from
• Subject of the message
Creating an MMS Message
MMS messages are created by combing various slides. Each slide can consist of a photo, an
audio or video clip, audio, or text.
1. Tap Start > Messaging > MMS folder.
In the MMS Inbox, tap New. You will
automatically be taken to a blank MMS
composition screen.
79
2. Enter the recipient’s address To: and
the Subject of the message.
Messaging
5
3. Tap Menu to view more options: tap
Menu > Insert > Picture to access the
image selection screen.
4. Select an image and insert it to your
message. You can also insert an audio
file or text.
80
Scroll up to view the
Bcc and Cc fields.
5. Tap Menu to get more editing options.
For details, refer to the following MMS
menu options.
5
Messaging
The MMS composition screen menu includes the following options:
Items
Description
Add Recipient
Add a new recipient from your Contacts list.
Check Names
This option helps you search for the names beginning with letters
entered in the To, Bcc, or Cc fields.
Template
The current MMS message can be saved as a template and used at a
later date.
Select the file type to insert into your message. If the message contains
an audio or image file, a video file cannot be inserted.
•
If you select to insert Sound Recorder, a record screen displays:
Recording time
in seconds
Insert (Picture,
Video, Audio, or
Sound Recorder)
Play
Tap Menu > Select and specify the file name & save it.
81
Items
Description
A list of pre-defined texts that can be inserted into your MMS message.
5
Messaging
My Text
Remove Recipient/
Subject, Picture/
Video/Audio/Text)
Depending on the cursor location, the Remove item varies. If the cursor
is on the Insert Audio field, this item shows Remove Audio.
You can create/delete slides in your message, navigate between the
next and previous slides, or specify the display duration of each slide.
Slides (Insert,
Delete, Next,
Previous, Duration)
More options include
Options
82
•
Background Color: Select a background color from a color palette
for your message.
•
Send options: Choose the priority of the message from the drop
down menu (Low, Normal or High). Check delivery report, read report
and hide sender to activate the options.
Preview
To view the composed message before sending, tap Replay.
Save to Drafts
Save the message to your drafts folder.
Cancel Message
To cancel the composed message and return to the Inbox. Before
canceling, you can save the message to the drafts folder.
MMS folder options:
In each message box, tap and hold an individual message to see various options.
Description
Delete
Delete the selected message. The deleted message will be stored in the
Deleted Items folder.
Reply
Reply only to the selected message’s sender. After selecting this
option, you are taken to the message composition page where you can
compose a message as a reply. You can change the subject and other
fields.
Reply All
Reply to all the senders and recipients in the Cc and Bcc fields. You can
change the subject and other fields.
Forward
Forward the selected message to other recipients. On selecting this
option, you are taken to the page where your original message is
retained and you can edit it before sending. You can change the subject
and other fields.
Move
Move the selected message to a different folder. The folder list is
displayed to select the folder where the message is to be moved to.
Mark as Read/
Unread
Mark the selected message as read or unread. This feature depends on
whether the message is read or not.
Download Message
Download the message from the server.
Send/Receive
Refresh and download pending messages.
Go To
Switch between different accounts (Text Messages, Outlook E-mail
and MMS).
5
Messaging
Items
83
Items
Description
This option helps you to Sort By, Manage Folders, Empty Deleted
Items, Clear “MMS”, create New Account, and access more features.
•
Sort by: Choose how to view MMS messages by Message Type,
From, Received, and Subject.
•
Manage Folders: On selecting this option, you get the MMS folder
list, where you can create new folders rename, delete and view folder
options.
Messaging
5
Please note
System folders (including Inbox, Deleted Items, Drafts, Outbox,
and Sent Items) cannot be deleted.
Tools
•
Empty Deleted Items: An alert message asks if you want to delete
all messages permanently, which cannot be recovered once deleted.
•
Clear MMS: Clear all the messages in your Inbox and Sent Items
folders. Tap Yes to confirm deletion.
•
New Account: To create a new E-mail account.
•
Options: You can edit account settings for your messages, address
book and storage. Please refer to Chapter 5.1 Text.
This option helps you to set the MMSC settings, Send settings,
Receive settings, General and About.
• MMSC settings: From this list, choose the profile that you want
to use to send the MMS. Tap Edit to see the profile name and the
MMSC, Data Connection, Gateway, IP Address and Port.
MMS Settings
• Send: From the drop down menus, choose Priority (Low, Normal
or High), Validity Period (Maximum, 1 week, 1 day, 12 hours),
Defered Delivery (Immediate, After 1 hour, After 1 day, After 1 week,
Custom), Message Type ( Personal, Advertisement, Informational,
Automatic), Message Size ( 30KB, 100KB, 300KB). Check Delivery
Report, Read report and Hide Sender to activate these options.
.• Receive: Choose the type of reception you receive when you are at
Home or Roaming; choose from Automatic, Manual or Restricted.
Check the boxes to choose which messages to allow: Personal,
Informational, Advertisement or Automatic. Check the box to
Reject Anonymous Messages.
• General: Choose the number of attempts it takes to send the
message from, 1 ~ 6.
•
84
About: Details about the product version.
Read MMS messages
You have several options when viewing a message:
1. Use playback controls (Play/Pause, Stop) to view a message. You can pause it anytime.
2. Tap Objects View to see a list of files. If you want to save a particular file, tap it and then
choose Save from the Tools menu.
3. To view slides manually, use the navigation buttons to scroll through the message.
5
5.3 Voicemail
•
if your phone is switched off or is not able to receive signals
•
if you do not answer the call
•
if you are currently on the phone
Messaging
Most mobile network operators offer this external voicemail service to subscribers. This
function enables you to divert received calls to a voicemail center where callers can leave
voice messages under the following circumstances:
You will be notified of a voicemail message by an icon on the Today screen. If the voice mail
service is not included in your mobile network operator’s package, you will have to subscribe
to the service separately and configure the settings manually. Contact your mobile network
operator for more details.
Please note
The voicemail service is SIM/USIM card and network dependent.
To call the voicemail center
Tap Phone > Speed Dial and call from Speed Dial 1. Alternatively, enter the voicemail center
number on the Phone Dialer screen and tap Talk or press the Call key.
Please note
For more details about the Speed Dial, refer to Chapter 4.1 Making a call.
85
5.4 E-mail
The Outlook E-mail account on your O2 Xda Flame is used to store messages that you send
and receive through synchronization with a PC. Account names appear when you open the
folder list, located on the left, under the navigation bar, in the message list view.
Messaging
5
You can receive E-mail and text messages in Messaging. E-mail messages are sent by using
an address received from your Internet network operator (ISP), an E-mail network operator
or your employer. You can also send and receive E-mails by synchronizing with your PC
or connecting to a Post Office Protocol 3 (POP3) or Internet Message Access Protocol 4
(IMAP4) mail server. Aside from the default Outlook E-mail account, you need to manually set
other E-mail accounts.
How you download copies of messages depends on how you receive messages:
•
If you receive E-mail messages through a remote E-mail server, follow the instructions as
described in the following Downloading messages from a server.
•
If you receive E-mail messages through ActiveSync, begin synchronization. For more
information, refer to Chapter 11 Synchronization.
With synchronization, messages are synchronized between your O2 Xda Flame and the
PC by using ActiveSync and Microsoft Exchange Server or Outlook E-mail. For more
information, see Chapter 11 Synchronization.
Setting up an account:
1. Open Messaging on your O2 Xda
Flame by tapping Start > Messaging.
2. Select the Outlook E-mail folder.
86
3. Tap Menu > Tools > New Account and
set up an account.
5
Messaging
4. The E-mail Setup screen will prompt
you to fill in the necessary information to
complete the setup.
5 From the drop down menu, select Other
(POP3/IMAP).
6. Fill in your E-mail address and tap Next.
87
7. E-mail Setup will attempt to connect
your O2 Xda Flame to your E-mail
server and automatically download the
necessary connection settings. If auto
configuration is unsuccessful, contact
your ISP or network administrator. If you
know your E-mail settings, press Next
to proceed.
Messaging
5
8. Enter Your name, User name and
Password, and tap Next. If you check
the Save password box, your device
will not ask for your password the next
time you log-in to an E-mail account.
However, other people can access your
account if you lose this device.
9. Select the appropriate Account type
that your E-mail provider supports
(POP3 or IMAP4). Enter a Name for
your E-mail account and tap Next.
88
10.Enter your E-mail provider’s server
name information for Incoming mail,
Outgoing mail and Domain, and tap
Finish.
5
Messaging
Please note
For security reasons, some fixed
line ISPs may restrict access to their
outgoing mail servers to their own ISP
network infrastructure. In this case,
you may need to use the Outgoing
mail server (if available) provided by
your mobile operator.
When finished, your new E-mail account will be displayed under this menu. You can start
connecting to your E-mail server at this point. You can set up several E-mail accounts,
including Outlook.
Please note
To delete an account, go to the account’s folder (Start > Messaging > Menu > Tools >
Options). Tap and hold the account’s name and tap Delete.
Downloading messages from a server
In Messaging, select Outlook E-mail or another account to open a connection to the Internet
or your corporate network, depending on the account.
1. Select an account and ensure that it is selected (marked by a bullet).
2. Tap Menu > Download Message. The messages on your device and E-mail server
are synchronized. New messages are downloaded to your O2 Xda Flame Inbox folder
messages in your O2 Xda Flame Outbox folder are sent, and messages deleted from the
server are removed from your O2 Xda Flame Inbox. Tap a message in the message list to
open it. For E-mail viewing menu options, please refer to the following section.
To cancel the downloading of a message, tap Menu > Do not download.
3. If you read a message, you can mark it as read or unread by tapping Menu > Mark as
Read or Mark as Unread.
4. When finished, tap Accounts > Disconnect.
89
E-mail viewing screen options:
Items
Description
Delete
Delete the selected message. The deleted message will be stored in the
Deleted Items folder.
5
Reply
Messaging
After selecting an E-mail from an account, tap Menu to access the following options:
Reply to only the selected message’s sender. After selecting this
option, you are taken to the message composition page where you can
compose a message as a reply. You can change the subject and other
fields.
Reply All
Reply to all senders and recipients present in the Cc and Bcc fields. You
can change the subject and other fields.
Forward
Forward the selected message to other recipients. On selecting this
option, you are taken to the page where your original message is
retained and you can edit it before sending. You can change the subject
and other fields.
Move
Move the selected message to a different folder. The folder list is
displayed so you can select the folder where the message is to be
moved.
Mark as Read/
Unread
Mark the selected message as read or unread. The read and unread
feature depends on whether the message is read or not.
Download Message
Download messages from the server.
Send/Receive
Refresh and download pending messages.
Go To
Go to other messaging accounts such as Text Messages, Outlook
E-Mail, MMS.
Tools
Use to Sort, Manage Folders, Empty deleted items, Clear Outlook
E-mail, setup a New Account and use Options to change account
details.
90
Receiving attachments
An attachment sent with an E-mail message or downloaded from a server appears as an icon
at the bottom of a message in its own window panel. Tapping the attachment icon opens the
attachment if it is fully downloaded. You can mark an attachment for downloading (IMAP4
account only) the next time you connect.
For Outlook E-mail attachments through synchronization:
1. Start ActiveSync on your PC.
5
2. Click File > Mobile Device and select your mobile device.
4. Select the message account > Settings > Include File Attachments.
Through a remote IMAP4 E-mail server:
1. From Messaging, tap Accounts > Accounts... > IMAP4.
Messaging
3. Click Tools > Options.
2. Tap Next until you reach Server Information > Options.
3. Tap Next twice > Get full copy of messages and When getting full copy get
attachments.
Embedded images and objects cannot be received as attachments. An embedded message
can be viewed as an attachment when using IMAP4 to receive E-mail. However, this feature
does not work if TNEF (Transport Neutral Encapsulated Format) is enabled so that you can
receive meeting requests.
91
Creating an E-mail
1. Tap Start > Messaging and select Outlook E-Mail or the desired E-mail account.
2. Tap New.
Messaging
5
3. Enter the E-mail address of one or
more recipients, separating them with
a semicolon. To access addresses and
phone numbers from Contacts, tap To
or tap Menu > Add Recipient….
4. Enter your message. To quickly add
common messages, tap My Text and
tap a desired message.
5. To check spelling, tap Menu > Spell
Check.
6. Tap Send. If you are working offline, the message is moved to the Outbox and will be sent
the next time you connect.
92
Account menu options:
When you select an account, tap Menu to access the following options:
Description
Delete
Delete the selected message. The deleted message will be stored in the
Deleted Items folder.
Reply
Reply to only the selected message’s sender. After selecting this
option, you are taken to the message composition page where you can
compose a message as a reply. You can change the subject and other
fields.
Reply All
Reply to all senders and recipients present in the Cc and Bcc fields. You
can change the subject and other fields.
Forward
Forward the selected message to other recipients. On selecting this
option, you are taken to the page where your original message is
retained and you can edit it before sending. You can change the subject
and other fields.
Move
Move the selected message to a different folder. The folder list is
displayed to select the folder where the message is to be moved.
Mark as Read/
Unread
Mark the selected message as read or unread. The read and unread
feature depends on whether the message is read or not.
Download Message
Download messages from the server.
Send/Receive
Refresh and download pending messages.
Go To
Go to other messaging accounts such as Text Messages, Outlook
E-mail, and MMS.
5
Messaging
Items
93
Items
Description
This option helps you to Sort By, Manage Folders, Empty Deleted
Items, Clear “Outlook E-mail”, create New Account, and access more
features.
Messaging
5
•
Sort By: Choose between Message Type, From, Received and
Subject
•
Manage Folders: On selecting this option, you get the list of Outlook
E-Mail folders where you can create new folders, rename folders,
delete folders and view folder options.
Please note
System folders (including Inbox, Deleted Items, Drafts, Outbox,
and Sent Items) cannot be deleted.
Tools
•
Empty Deleted Items: An alert message asks if you want to delete
all messages permanently, which cannot be recovered once deleted.
•
Clear Outlook E-mail: To clear all messages and subfolders under
Deleted Items. Tap Yes to confirm.
•
New Account: To create a new E-mail account.
•
Options: You can edit the account settings for your messages,
address book and storage.
E-mail composition menu options include the following:
94
Items
Description
Add Recipient
Add a new recipient from your Contacts list.
Insert (Picture, voice
note, and File)
Select the files to insert into your message. If the message contains an
audio or image file, video files cannot be inserted.
My Text
Select or edit a preset message.
Spell Check
To check the spelling of your message content.
Check Names
You can check the recipients of the E-Mail that you are sending.
Save to Drafts
Save a message to your Draft folder.
Cancel Message
Cancels sending of the composed message and returns to the Inbox.
Before canceling, you can save the message to the Drafts folder.
Message Options
Specify settings such as Priority, Security and Language.
Managing messages and folders
Each E-mail account and text message account has its own folder hierarchy with five default
folders: Inbox, Outbox, Deleted Items, Drafts, and Sent Items. The messages you receive
and send are stored in these folders. You can also create additional folders within each
hierarchy. The properties of the folders you create depends on whether you are using an
Outlook E-Mail, Text Messages, POP3, MMS, or IMAP4 account.
If you use an Outlook E-Mail account, E-mail messages will automatically be synchronized
with your device. You can synchronize additional folders by designating them for ActiveSync.
The folders you create and the messages you move will then be mirrored on the server.
Messaging
If you use a Text Messages account, messages are stored in the Inbox folder.
If you use a POP3 account and move E-mail messages to a folder you created, the link
between the messages on the device and their copies on the mail server will be broken. The
next time you connect, the mail server will see that the messages are missing from the device
Inbox folder and delete them from the server. This prevents you from having duplicate copies
of a message, but it also means that you will no longer have access to messages that you
move to folders created from anywhere except the device.
5
If you use an IMAP4 account, folders you create and E-mail messages you move are
mirrored on the server. Therefore, messages are available to you anytime you connect to
your mail server, whether from your device or a PC. This synchronization of folders occurs
whenever you connect to your mail server, create new folders, or rename/delete folders when
connected.
95
5.5 Pocket MSN
When starting Pocket MSN, the following
screen is displayed. Tapping Options
displays General, Hotmail, Messenger,
SMS and Switch User.
Messaging
5
MSN Messenger features include:
•
Seeing who is online.
•
Sending and receiving instant messages.
•
Having instant message conversations with groups of contacts.
•
Notifying contacts of your online status.
•
Blocking contacts from seeing your status or sending you messages.
To use MSN Messenger, you need a Microsoft Passport account or a Microsoft Exchange
E-mail account that your employer provides. Once you do, you will need to:
•
Set up an account on MSN Messenger.
•
Sign in to MSN Messenger.
Setting up an account
Before you can use MSN Messenger, you must set up the instant messaging account(s) to
use. For MSN Messenger service, you must have a Microsoft Passport or Hotmail account.
For Exchange Instant Messaging, you must have an Exchange account.
96
•
To set up a Microsoft Passport account, go to http://www.passport.com.
•
To set up a Hotmail account, go to http://www.hotmail.com.
•
To set up an Exchange account, check with your company network administrator.
MSN Messenger composition menu options include the following:
Description
Chats
Displays all current people being chatted to.
Sign In / Sign Out
Sign in or out of MSN messenger.
My Status
Display your status to your contacts (Online, Busy, Be Right Back, Away,
On The Phone, Out To Lunch, Appear Offline).
Add a Contact
Tap to add a new contact.
Edit My Text
Edit the predfined messages.
Under the options, select from the following tabs: General, Hotmail ,
Messenger, SMS, and Switch User.
Sy
Please note
System folders (including Inbox, Deleted Items, Drafts, Outbox,
and Sent Items) cannot be deleted.
•
General: Tap the box to clear the saved password.
•
Hotmail: Select E-mail delivery options (Off, Use filters and For
all new e-mail); Select the Junk mail filter (Default, Enhanced,
Exclusive); Tap the check box to “Download new e-mail
automatically”.
•
Messenger: Enter your display name; Tap “Update presence
information for all contacts automatically”.
•
SMS: Tap the check box to use SMS to keep my messages and
contacts up-to-date.
•
Switch User: Tap the Switch User box to change the current MSN
user.
Options
5
Messaging
Items
97
MSN Messenger
The Hotmail mail inbox behaves in the same way as all other E-mail in boxes.
Signing in
5
2. Tap Start > Program > Pocket MSN >
MSN Messenger > Tap here to sign in.
Messaging
1. To use MSN Messenger Service, set up a connection
to the Internet; to use Exchange Instant Messaging,
set up a connection to your corporate network.
3. Enter your sign-in name and password for the selected
account(s). Your sign-in name is usually in the form:
[email protected].
Please note
Signing in to an Exchange account may take several minutes, depending upon your
connection speed.
Using
1. Once signed in, the following screens will be
dsiplayed.
2. Enter your Hotmail username and password.
3. A list of your contacts and their status is displayed.
98
MSN Hotmail
MSN Mobile Home
The Hotmail mail inbox behaves in the same
way as all other e-mail in boxes (See Chapter
5.4 E-mail).
Loads Internet Explorer and displays the mobile.
msn.com/pocketpc website.
1. Tap the links for further infromation.
5
Messaging
Compose Hotmail
Pocket MSN Help
Composing Hotmail e-mails is done in the same
way as all other e-mail accounts (See Chapter
5.4 E-mail).
1. Tap the items on the list for further
information.
Displays the help file of Pocket MSN
99
Messaging
5
100
Chapter 6
Camera and Video
6.1
6.2
6.3
6.4
6.5
Using the Camera
Capture mode
Setup menu
View mode
Recording
6. Camera and Video
6.1 Using the Camera
Camera and Video
6
Your O2 Xda Flame features a digital camera that allows you to take photos (including selfportraits) or video clips with accompanying audio. They are stored in Pictures & Videos,
which provides many powerful features to manage, organize, and manipulate image, video,
and audio files.
Landscape mode
Pictures & Videos
The integrated camera features the following:
•
In Photo Capture mode, you can capture standard still images.
•
In MMS Photo mode, you can take a photo and then send it out via MMS.
•
In Video Capture mode, you can capture “live” video streams (with audio if desired), then
share them with others or play them on the O2 Xda Flame or desktop PC.
•
In MMS Video mode, you can capture “live” video and then send it out via MMS.
•
In Contact Picture Capture mode, you can capture images for contacts use.
•
In Frame Photo Capture mode, you can place captured images into attractive frames
(templates).
•
In Multishot function mode, you can take multiple pictures (2, 4, or 6) by pressing the
capture button.
You can even send captured files via E-mail or MMS. Just Snap and Send a newly captured
image or Select and Send an existing image. Of course, you can also get image, video,
and audio files from received E-mail, a Memory Card, Infrared beaming, Bluetooth or
synchronized from a PC via ActiveSync, and organize them into Pictures & Videos and
slideshows.
102
Camera Buttons
Quick access to Pictures
& Videos application
Shooting mode
Shoot
To “Today”
6
Brightness
Zoom Out
Switch Camera Mode
Camera and Video
Zoom In
Setting
Item
Description
Shooting Mode
Press to switch between shooting modes eg Photo, MMS Photo, Video, etc.
Shoot
Press to take pictures and record videos.
Quick access
to Pictures
& Videos
application
Press to go to the Pictures & Videos application.
To “Today”
Press to go to the Today screen.
Zoom In/Out
Press to zoom in and out of the framed picture.
Brightness
Press to adjust the brightness.
Setting
Press to access the camera settings.
Switch
Camera Mode
Press to switch between the Main (Back) camera and the Sub (Front) camera.
103
6.2 Capture mode
Your O2 Xda Flame has a number of capture modes. The following section shows how to use
photo capture mode and video capture mode. To switch capture modes, tap
.
Photo/Video mode
2
1
15
4
3
6
Camera and Video
5
6
14
No.
13
12
11
Item
10
9
8
Icons
16
7
Description
Photo
MMS Photo
1
Video
Capture mode
MMS Video
Contact Picture
Multi Shot
104
/
MicroSD™ (Memory card) / PDA; indicating the current
location of saved files.
2
Storage
3
Multishot
mode
Within the Multishot mode, you can select either 2, 4, or
6 multi shots. (This feature is disabled in video capture
mode).
4
Exit
Exit the screen.
5
Pictures &
Videos
Where your captured or recorded files are saved. You can
view or edit these files under Pictures & Videos.
6
Setup menu
A detailed setup menu.
7
Brightness
Brightness level: -3, -2, -1, +0, +1, +2, +3.
No.
Item
Icons
Description
Photo
resolution
9
Night Mode
A pre-programmed exposure and shooting mode. Enable
this feature when taking picture(s) in poor lighting condition
or when environment is dark.
10
Quick view
A quick view after you take a shot. Select to turn this
feature on/off.
11
Self Timer
Indicates whether Self Timer is on/off.
12
Flash light
Indicates whether Flash is on/off.
13
Self Portrait
Mode
Switch between Normal Mode and Self Portrait Mode.
14
Zoom In/Out
Zoom range: 1x,2x and 4x.
15
Video Record
mode
Indicates video recording status.
16
Video
resolution
6
Camera and Video
8
1600 x 1200 UXGA
1024 x 768 XGA
640 x 480 VGA (default)
320 x 240 QVGA
176 x 144 QCIF (also for video)
176x144 QCIF
352x288 CIF
Please note
Not all the icons described above will be displayed at the same time. Some will be
displayed only when certain functions are operating.
Shoot a picture
1. Press the Camera key on the right bottom corner of your O2 Xda Flame or tap Start >
Programs > Camera.
2. Tap
to select the desired capture mode: Photo, MMS Photo or select a Frame
Photo, etc. For more settings, please refer to Chapter 6.3 Setup menu.
3. Press the Camera key to take a snapshot.
4. After you take a photo, the image will be automatically saved to Pictures & Videos.
105
6.3 Setup menu
When you are in camera mode, you can tap on the
icon to access the setup menu. The
menu has three submenus: Basic, Advanced and About. You can press the navigation keys
(left and right) or use the stylus to tap on desired menu options.
Camera and Video
6
106
Product information
Basic Menu
Under the Basic menu, you can adjust the following items:
Item
Description
Select a capture mode from Photo, MMS Photo, Video, MMS Video,
Contact Picture, and Multishot.
Mode
Set image quality at Normal, Better and Best.
Resolution options vary according to the Capture Mode you select.
Resolution
•
Photo: 1600 x 1200 UXGA, 1024 x 768 XGA, 640 x 480 VGA, 320 x 240
QVGA, 176 x 144 QCIF
•
MMS Photo: 320 x 240 QVGA and 176 x 144 QCIF
•
Video: 352 x 288 CIF, 176 x 144 QCIF
•
MMS Video : 176 x 144 QCIF
•
Contact Picture: 320 x 240 QVGA and 176 x 144 QCIF
•
Multishot: 1600 x 1200 UXGA, 1024 x 768 XGA, 640 x 480 VGA, 320 x
240 QVGA, 176 x 144 QCIF
6
Camera and Video
Quality
Please note
The Capture Mode you select determines the resolution ranges. See
the following Resolution for details.
Please note
• When you select Multishot you will be asked to choose the number of
shots from 2, 4, or 6.
• When you select Video and MMS Video , the system will ask you to
specify the Format from 3GP or MP4.
• When you select MMS Video the system will ask you to specify the File
Size from 50K, 100K, 150K, 200K, 250K, or 300K.
• When you select Video or MMS Video , the system will ask you to
check if you want to mute the microphone.
Flash light
Select to activate/deactivate the Flash.
107
Advanced menu
Under the Advanced menu, you can adjust the following items:
Camera and Video
6
108
Item
Description
Brightness
The Brightness level ranges from -3 to +3. The default value is 0.
Contrast
The Contrast level ranges from -2 to +2. The default value is 0.
Storage
Storage locations: Main Memory and Memory Card.
Flicker
Select the Flicker Control value from 50Hz to 60Hz.
Shutter sound
Activate Shutter Sound to hear a clicking sound when you take a shot. The
default value is set to On.
Self timer
When the Timer is activated, the icon
appears on the screen. When you
press the Camera key,
starts to blink for ten seconds. The default setting
is Off.
Power saving
Check the box to enable power saving mode.
Night mode
Select to activate or deactivate Night Mode. The default setting is Off.
Quick view
after shutter
A quick view after you take a shot. Select to turn this feature on/off.
Default value
Tap Default Value to reset all setup menu options to default values.
6.4 View mode
In Capture mode, you can tap
to enter Pictures & Videos and tap the picture to enter
Single View Mode. When you select the Single View icon, you can view the pictures saved on
a Micro SD card or the phone’s memory.
Photo View mode
6
Camera and Video
Send Photo via
Outlook E-mail, or
MMS
Access more
features
109
The Menu includes the following features:
Camera and Video
6
Option
Description
Zoom
Zoom in/out of the image.
Play Slide Show
Play all the images in the folder in a slideshow.
Set as Today
background
Save an image as the background for Today.
Beam picture
Transmit photos or video clips to another device via infrared connection.
Save
Save a file to another location or save as a photo contact.
Edit
Rotate, Crop, Auto Correct, Undo, revert to saved and Save as images.
Properties
Displays the Name, File Type, Dimensions, File Size, Date Created and
Protected. It also allows you to change the File name.
There are 2 tabs
Options
General - Resize the picture (Original size, Large (640 x 480), Medium
(320 x 240) and Small (160 x 120)); Rotate the picture Left or Right by 90
degrees.
Slide Show - Optimize the slide show for viewing either Portrait or
Landscape pictures; Check the box to play the screensaver when connected
to a PC and idle for 2 minutes.
110
6.5 Recording
In addition to taking still images, the camera can be used to record video.
1. Press the Camera key on the right side of your O2 Xda Flame, or Tap Start > Programs >
Camera.
2. Tap the
icon to switch to Video or Video MMS mode.
3. When you see ●Ready shown in the screen, press the Camera key to start recording.
5. To stop recording, press the Center navigation key or Camera key. The recorded video clip
will be automatically saved to Pictures & Videos.
6
Camera and Video
4. During the recording process, the blinking ● 00:00:00 indicates that the video capturing is
working; this icon will be followed by recording time information.
111
Camera and Video
6
112
Chapter 7
O2 MediaPlus
7.1
7.2
7.3
7.4
7.5
My FM Radio
My Music
My Photos
My Videos
My Settings
7. O2 MediaPlus
•
A music library management system
•
A photo library management system
7
•
A video library management system
•
A powerful alarm program
O2 MediaPlus
This application provides a user-friendly way to manage media files and gives easy access to
different entertainment players like the FM Radio and Windows Media Player. This application
also includes the following features:
•
Personalization
Personalized
Graphics
Alarm indicator
Context graphics
Now playing
Volume
Tool bar
114
Item
Icon
Launch SRS settings.
Equalizer
Play / Stop
Description
/
Tap once to play and tap again to Stop.
Go to the previous track.
Next
Go to the next track.
Volume
To adjust the volume.
Windows Media
Player
Launch the Windows Media Player.
FM
Launch the FM radio.
Alarm indicator
Indicates that an alarm has been set.
7
O2 MediaPlus
Previous
115
7.1 My FM Radio
You can listen to FM Radio through your O2 Xda Flame. You can search channels by tapping
and holding on the
/
Key. This application also includes 100 user-defined favorites
groups (each favorite contains up to 18 preset channels), volume control, record button to
record audio files, and fine tune channels.
O2 MediaPlus
7
Please note
The FM Radio can be used only when the headset is plugged in (as an external
antenna).
Current channel
Mono / Stereo /
Record indicator
Group view
18 preset
channels
Volume Control
Switch to
RDS view
Access more
features
Tap to display the
next / previous 9
preset channels.
116
Item
Icon
Description
Decrease / Increase volume output.
Volume
Play / Pause /
Record
/
/
Tap once to play as audio file and tap again to pause. Tap
to start recording.
Tap to Stop recording or to stop playing an audio file.
Previous
Go to previous preset channel.
Next
Go to next preset channel.
Choose output
/
RDS
/
/
Toggle between the Headset, Bluetooth headset and Speakers.
Tap to switch between RDS and Preset Modes.
7
O2 MediaPlus
Stop
Tap Menu to access the following features:
•
Auto Search: Launch auto-scanning function
•
Set frequency: Enter the frequency manually.
•
Save Channel: Save the current frequency with a Channel Name and a Channel Number.
•
Edit Channel: Edit the selected Channel, such as edit the Channel Name and/or change
the Channel Frequency.
•
Group: Use a selected group, create a New Group, Rename and Delete a group .
•
Clear: Delete a channel.
•
FM record file: Open saved recordings.
•
Schedule recording: Choose a frequency, date, time and duration for schedule recording.
•
Sleeping mode: Check the Sleep Mode box and select the time to turn the radio off.
•
Setting: You can adjust recording options such as file name, output file format, country,
etc.
•
Help: Displays help for the application.
•
About: Version info of this program.
•
Exit: Exit FM Radio program.
FM Radio will be muted during a voice call. Hanging up the voice call will resume the FM Radio.
117
7.2 My Music
My Music is a powerful music library management system. It can manage music files by
Albums, Artists, Playlists, Songs and Genres. As a song or playlist is tapped, Windows Media
Player 10 is launched to play audio and video files stored on your O2 Xda Flame.
O2 MediaPlus
7
118
You can play files in either Windows Media or MP3 formats (this includes files with the
extensions .asf, .wma, .wmv, and .mp3.) To find contents in Windows Media Format for your
O2 Xda Flame, please go to http://www.windowsmedia.com.
When launched for the first time, My Music scans all folders for all supported music files,
and catalogs them into a music library for later use. For all subsequent launches, My Music
just reads the media libraries, instead of scanning again. The media library is updated only
if Menu > Update Library is tapped again. When a Micro SD card is inserted, as there is no
library for this card, a dialog box pops up asking for rescan confirmation.
Music category
7
Sort file
alphabetically
O2 MediaPlus
Thumbnail/Folder list
Displays current
page number
Go back to the main page
Access more
features
Tap Menu to access the following features:
Item
Description
Views
Choose how to view the details of the music files, either as Thumbnails
or as a List.
Library
Access All songs or songs saved in the Device or Memory Card.
Add To
Add the selected track to a playlist.
Update Library
Scan all folders to update the music library.
New PlayList
Create a new Playlist.
Edit PlayList
Edit a Playlist. The current highlighted Playlist will be edited.
119
7.3 My Photos
My Photos provides a simple thumbnail view of your photos. As a thumbnail picture is tapped,
the camera album will be launched to view the selected picture. My Photos supports JPEG
and BMP. Pictures are saved to \My Documents / My Pictures by default.
Picture display order
O2 MediaPlus
7
Photo thumbnail/
Folder list
Sort file
alphabetically
Display current
page number
Go back to the
previous page
Access more
features
Tap Menu to access the following features:
Item
120
Description
Views
See the photos either as Thumbnails or as a List.
Folder
See all the folders on the device.
7.4 My Videos
My Videos provides a simple video browser and easy access to the camera video viewer.
Use the navigation keys to navigate through thumbnails. As a thumbnail video is tapped, the
camera video viewer will be launched to view the selected video. My Video supports video
formats supported by Windows Media Player, and 3gp as well. Videos are saved to \My
Documents / My Videos by default.
Video display order
7
O2 MediaPlus
Video thumbnail/
Folder list
Sort file
alphabetically
Display current
page number
Go back to the
previous page
Access more
features
Tap Menu to access the following features:
Item
Description
Views
See the videos either as Thumbnails or as a List.
Folder
See all the folders on the device.
121
7.5 My Settings
Under My Settings, you may customize Alarm, Sleep Timer, and My Profile features.
Access more settings
O2 MediaPlus
7
Access more
features
Go back to the main page
122
Alarm
7
Description
Turn Alarm On
When this feature is selected, an input alarm time box is displayed.
Turn Alarm Off
Cancel the alarm.
Time
Tap the hours or minutes and use the up and down arrows to change
the time. Tap M, T, W, T, F, S or S to select the day of the week.
Details
•
Alarm type: settings include Buzzer, FM Radio, and Music. As
Music is selected, a file explorer pops up to ask for the location of
the alarm music.
•
Snooze for: Time, in minutes, to snooze when the alarm goes off.
•
Volume: Drag the slider left and right to decrease and increase the
alarm volume.
O2 MediaPlus
Item
123
Sleep Timer
This sleep timer is for both the FM radio and Windows Media Player. When the sleep timer
expires, the Media Center closes both FM radio and Windows Media Player.
O2 MediaPlus
7
124
Item
Description
Sleep Timer On
Starts counting down.
Sleep Timer Off
Turns off the Sleep timer.
Sleep Timer Off in
Tap the Up or Down key to set the expiration time, in minutes.
My Profile
This feature allows you to change the background image or add text.
7
O2 MediaPlus
Item
Description
My Current Profile
Picture
To change the profile image.
New Profile Line
When you select a Personal image, you can Add Text to go with it.
Tap Menu to access the following features:
Item
Description
Select Picture
Choose a picture to use for your profile.
125
O2 MediaPlus
7
126
Chapter 8
SRS
8. SRS
Your O2 Xda Flame has the latest digital compression technology providing the best quality of
audio sound. To access SRS go to Start > Settings > System tab> WOW HD Settings.
SRS
8
WOW HD Settings
Item
Description
Enable
Check to Enable SRS. From the drop down list, choose Internal (Mono),
Internal (Stereo) or Headphones.
Preset Levels
There are 22 preset levels to meet most of your audio requirements,
however if you want to customize the levels, see the settings below.
Levels
For SRS 3D Effect, SRS Center Effect, SRS Focus Level and SRS
Definition Level, use the slider bar to select the required level.
TruBass
Item
Description
SRS TruBass Level
Use the slider bar to select the required level.
SRS TruBass Speaker
Size
Use the slider bar to select the speaker size to be used from 40 Hz to
400 Hz.
About
Item
Description
About
Displays information about the application.
is a trademark of SRS Labs, Inc.
WOW HD technology is incorporated under license from SRS Labs, Inc.
128
Chapter 9
Applications
9.1
9.2
9.3
9.4
9.5
9.6
9.7
9.8
9.9
9.10
9.11
9.12
9.13
9.14
9.15
Outlook
Word Mobile
Excel Mobile
PowerPoint Mobile
Pictures & Videos
Calculator
Games
File Explorer
Searching for Files
O2 Connect
O2 SMS Plus
Remote Control
Adobe Reader LE
JAVA Midlet
USB OTG Connection
9. Applications
Your phone comes with a number of additional applications. These smart, powerful
applications allow you to manage your phone more conveniently. The applications include O2
Connect, O2 SMS Plus, Adobe Reader LE, and JAVA Midlet, and so on.
9.1 Outlook
Applications
9
The Outlook application allows you to synchronize Outlook data between your O2 Xda
Flame and PC. This data includes Outlook E-mail (for more information, see Chapter 5.
Messaging), Calendar, Contacts, Tasks, and Notes.
Calendar
Use Calendar to schedule appointments, including meetings and other events. You can check
your appointments in one of several view types (Day, Week, Month, Year, and Agenda) and
set Calendar to remind you of appointments with a sound or other method. Appointments for
the day can be displayed on the Today screen.
If you use Outlook on your PC, you can synchronize appointments between your O2 Xda
Flame and PC.
Tap to see
appointment details
Go to today’s
appointments
Scroll to
another date
Change the
calendar view type
130
Tap to access
more options
Create or change an appointment:
1. Select a view type from Day, Week,
Month, Year, and Agenda. Tap Menu >
New Appointment.
9
Applications
2. Enter the appointment details. When
finished, tap OK to return to the
calendar.
131
Send a meeting request
Use the Calendar to schedule meetings via e-mail with contacts who use Microsoft® Outlook
or Outlook Mobile.
1. Tap Start > Calendar.
2. Schedule a new appointment, or open an existing one, and tap Edit.
3. Tap Attendees.
Applications
9
4. Tap the name of the contact you want to invite.
5. To invite each additional attendee, tap Add and tap the name.
6. Tap OK. The meeting request will be sent to the attendees the next time you synchronize
your device with your PC.
Please note
When attendees accept your meeting request, the meeting is automatically added to
their schedules. When their response is sent back to you, your calendar is updated.
Set a reminder for an appointment:
1. In the Calendar, tap the Appointment >
tap Edit >Reminder > Remind me.
132
2. To change how many minutes, hours,
days and weeks before the appointment
you are to be reminded, tap the minutes
displayed.
To choose between minutes, hours,
days, and weeks, tap minutes select
from the drop down list.
9
Applications
3. To automatically set a reminder for all
new appointments, in the calendar, tap
the Menu > Options > Appointments
tab > check Set reminders for new
items.
Beam an appointment
To beam an appointment in the calendar list, tap and hold the appointment, then tap Beam
Appointment…. When using infrared (IR), align the IR ports between the devices so they are
unobstructed & near to each other.
133
Contacts
Applications
9
• If someone not on your list of contacts
calls you or sends you a message, you
can create a contact from Call History
or from the message by tapping Menu >
Save to Contacts.
Contacts is your address book and
information storage for the people and
businesses you communicate with. Store
phone numbers, E-mail addresses, home
addresses, and any other information that
relates to a contact, such as a birthday or an
anniversary date. You can also add a picture
or assign a ring tone to a contact.
• To include a nickname, title, and more,
while creating a contact, tap the arrow
to the right of Name field. For an
existing contact, tap the contact, tap
Menu > Edit, and tap the arrow to the
right of Name field.
From the contact list, you can quickly
communicate with people. Tap a contact in
the list for a summary of contact information.
From there, you can call or send a message.
There are several ways to organize your
contacts. View contacts by name or
company. Or, assign one or more category
to contacts, so you can quickly filter them.
Microsoft®
Outlook on your PC,
If you use
you can synchronize contacts between your
device and PC.
Create a contact
1. Tap Start > Contacts.
• If most of the contacts you create have
phone numbers that begin with the
same area code, in the contact list, tap
Menu > Options and enter that area
code in the Area code box.
Find a contact
1. Tap Start > Contacts.
2. If you are not in Name view, tap Menu >
View By > Name.
3. Do one of the following:
•
Begin entering a name or phone number
in the search field until the contact you
want is displayed. To show all contacts
again, tap the text box and clear the text,
or tap the arrow on the right of the search
field.
•
Use the alphabetical index displayed at
the top of the contact list.
•
Filter the list by categories. In the contact
list, tap Menu > Filter. Then, tap a
category you’ve assigned to a contact.
To show all contacts again, tap Menu >
Filter > All Contacts.
2. Tap New and enter contact information.
3. When finished, tap OK.
Please note
• If your contact list has been filtered by
a category when you create a contact,
that category is automatically assigned
to the new contact.
134
Please note
• To search for a contact by entering
a name or number, or by using the
alphabetical index, you must be in
Name view. To switch to Name view,
tap Menu > View By > Name.
Using the summary screen
When you tap a contact on the contact list, a
summary screen is displayed. To change the
contact information, tap Menu > Edit.
Tasks
Use Tasks to keep track of jobs. A variety
of task information can be displayed on
the Today screen. If you use Microsoft®
Outlook on your PC, you can synchronize
tasks between your device and PC.
• When working in Company view, you
can filter by categories you’ve assigned
to contacts. Then, only the companies
with contacts that have a category
assigned to them will appear on the
list.
Create a task:
1. Tap Start > Programs > Tasks.
2. Tap Menu > New Task, enter a subject
for the task and fill in information such as
start and due date.
9
Applications
• You can locate your contacts by the
name of the company they work for. In
the contact list, tap Menu > View By,
and tap Company. Tap the company to
see contacts who work there.
3. When finished, tap OK.
Beam a contact
To beam a contact on the contact list, tap
and hold the contact. On the pop-up menu,
tap Send Contact > Beam.
When using infrared (IR), align the IR
ports between the devices so that they are
unobstructed and within close range.
To change options:
1. On the contact list, tap Menu > Options.
2. To increase the available space for
displaying contacts on the list, uncheck
Show alphabetical index tabs.
Please note
An easy way to create a task is to
copy an existing one. In the task list,
select the task you want to copy. Tap
Menu > Edit > Copy, and then tap
Menu > Edit > Paste.
You can easily create a short, to-do type
task. Simply tap the Tap here to add a new
task box, enter a subject, and press Enter
or the Center Button. If the task entry box
is not available, tap Menu > Options and
select the Show Tasks entry bar check
box.
3. The area code for a new contact is
automatically entered based on the
information in Country/Region settings.
135
In the Calendar and Tasks programs, you
can set reminders to notify you in advance of
appointments and task due dates.
1. From the program, tap the item you want
to set a reminder for.
Applications
9
2. Tap Edit, and in the Reminder box, tap
Remind me.
In Calendar, the default reminder is set
15 minutes before an appointment.
In Tasks, the default reminder is set at
8:00AM of the day the task is due.
1. Tap Start > Programs > Notes > New.
2. Create your note by writing, drawing,
typing, and recording. see Chapter 2.7
Entering information about using the input
panel, writing and drawing on the screen,
and creating recordings.
3. To insert the date in a note, deselect and
make sure that no drawings are selected.
Next, tap and hold anywhere on the note
and tap Insert Date.
3. Tap OK.
To send a note by E-mail:
Please note
To set a reminder for a task, you
must first enable the sounds for
Notifications by tapping Start >
Settings > the Personal tab > Sounds
& Notifications.
Beam a task
To beam a task, in the task list, tap and hold
the task. On the pop-up menu, tap Beam
Task.
In the Notes, Word Mobile, Excel Mobile,
PowerPoint Mobile, and Pictures & Videos,
you can send files and information to other
devices via E-mail.
1. First you must set up Messaging to send
and receive messages.
2. From the program, select the item you
want to send.
3. Tap Menu > Tools > Send.
A new message is created with the item
attached.
Notes
4. Select the account to send from.
Notes help you to quickly capture ideas,
notes, and thoughts. You can create a note
using written and typed text, drawings, and
recordings. You can also share your notes
with others through E-mail, infrared, and PC
synchronization.
5. Enter the recipient name and subject and
tap Send.
The message will be sent the next time
you synchronize your device.
To create documents with advanced
formatting or templates, such as bulleted
lists and tabs, use word processing software
developed for your device, such as Word
Mobile.
136
To create a note:
Beam a note
To beam a note, on the note list, tap and
hold the note. On the Pop-up menu, tap
Beam File.
Change options:
1. In the note list, tap Menu > Options.
2. For the Default mode, select Writing, or
Typing as the input method.
3. For the Default template, you can select
a pre-designed template to use with all
new notes.
Document conversion
5. If you record a message for your Note, in
Record button action, choose whether
to Switch to Notes or Stay in current
program.
Word documents (.doc) and templates (.dot),
created in Word 6.0 or later on the PC, are
converted to Word Mobile documents (.psw)
and templates (.psw). The conversion takes
place during the following actions:
9.2 Word Mobile
•
During file synchronization.
•
When you copy a Word file from the PC
to your O2 Xda Flame.
•
When you open an E-mail message, with
an attached Word file, on your device.
You can create and edit documents and
templates in Word Mobile, just as you would
do in Word, on your PC. Word Mobile
documents can be saved as .psw, .doc,
.rtf, or .txt files. After you close a document
and name it, the document is automatically
placed on the Word Mobile document list.
Synchronizing Word Mobile
documents
Word Mobile documents can be
synchronized with Word documents on your
PC. To synchronize files, select the file type
for synchronization in ActiveSync Options
settings on your PC. When you select Files,
a \My Documents folder is created on your
PC’s desktop. Place all the files you want
to synchronize with the device in this folder.
Please note that password-protected files
cannot be synchronized.
9
Applications
4. If you store most of your notes and
recordings on a storage card, in Save
to, tap Storage card to have new items
automatically saved to the card.
All Word Mobile files stored in \My
Documents and its subfolders are
synchronized with the PC. ActiveSync
will convert the documents during
synchronization. When you delete a file
on your PC or your device, the file will be
deleted in the other location the next time
you synchronize. For more information on
synchronization, or file conversion, see
ActiveSync Help on the PC.
Word Mobile documents are converted
to Word documents when they are
synchronized or copied back to the PC.
During conversion from Word to Word
Mobile, most simple text and paragraph
formatting will be retained and displayed, but
some formatting attributes can be changed
or lost.
137
9.3 Excel Mobile
Not only can you edit Excel workbooks and
templates created on your PC, but also can
create and edit workbooks and templates on
your device with Excel Mobile.
•
View, edit, and create charts & graphs,
that can be embedded as objects in
a worksheet or placed on a separate
worksheet.
•
Enter formulas and functions and then
filter data to see the desired subset of
information.
•
Split panes to view different parts of a
worksheet at the same time.
•
Freeze the top and left-most panes in a
worksheet to keep row and column labels
or other data visible as you scroll.
Applications
9
When you close a newly created workbook,
it is automatically named and placed in the
Excel Mobile workbook list. You can easily
rename the workbook and move it to another
folder or a storage card.
Please note
Work in full-screen mode to see as
much of your workbook as possible.
Tap View > Zoom and select a
percentage so that you can easily read
the worksheet.
138
Synchronizing Excel Mobile
workbooks
Excel Mobile workbooks can be
synchronized with Excel workbooks on your
PC. To synchronize files, select the file type
for synchronization in ActiveSync Options
settings on your PC. When you select
Files, a My Documents folder is created
on your PC’s desktop. Place all the files you
want to synchronize with the device in this
folder. Password-protected files cannot be
synchronized.
All Excel Mobile files stored in My
Documents and its subfolders are
synchronized with the PC. ActiveSync
converts documents during synchronization.
When you delete a file on your PC or
device, the file will be deleted in the other
location the next time you synchronize. For
more information on synchronization or file
conversion, see ActiveSync Help on the
PC.
Workbook conversion
Excel files (.xls) and templates (.xlt), created
in Excel version 5.0/95, or later, on the PC,
are converted to Excel Mobile workbook
(.pxl) or template (.pxt) files. The conversion
takes place during the following actions:
•
File synchronization.
•
When you copy an Excel file to your
device from the PC.
•
When you open an E-mail message with
an Excel file attached.
Excel Mobile workbooks are converted
to Excel workbooks when they are
synchronized or copied back to the PC.
Starting a slide show
presentation
During conversion from Excel to Excel
Mobile, most simple text and paragraph
formatting will be retained and displayed, but
some formatting attributes can be changed
or lost.
2. In the presentation list, tap the slide show
you want to view.
With PowerPoint Mobile, you can open
and view slideshow presentations created
on your PC. Whether the presentation
is opened from an e-mail message,
downloaded from a file or the Internet,
copied to the device via a storage card, or
obtained by synchronizing with your PC,
slideshows created in *.ppt and *.pps format
with PowerPoint ‘97 and later can be viewed
on your device.
Many presentation elements built into the
slide shows, such as slide transitions and
animations, will play back on the device.
If the presentation is set up as a timed
slide show, one slide will advance to the
next automatically. Links to URLs are also
supported.
PowerPoint features not supported on
the device include:
•
Notes: Notes written for slides will not be
visible.
•
Rearranging or editing slides: PowerPoint
Mobile is a viewer only.
•
Files created in *.ppt format earlier than
PowerPoint ‘97 and HTML files in *.htm
and *.mht formats are not supported.
3. Tap the current slide to advance to the
next slide.
Please note
If the presentation is set up as a
timed slide show, slides will advance
automatically.
Changing the slide show
orientation
9
Applications
9.4 PowerPoint Mobile
1. Tap Start > Programs > PowerPoint
Mobile.
1. Tap Start > Programs > PowerPoint
Mobile.
2. Open the presentation you want to view,
tap ▲ arrow > Show options.
3. Tap the Orientation tab and select the
orientation you want.
Please note
Tap Default to view the presentation
in the orientation that best fits the size
and shape of the device screen.
139
Navigate between slides
If a presentation is set up as a timed
slideshow, slides will advance automatically.
However, if the presentation is not timed,
or you simply want to go to another slide
out of sequence, you can do that easily in a
PowerPoint Mobile presentation.
Applications
9
140
•
To turn off builds and other animations,
select the Show without animation
check box.
•
To prevent slide transitions, select the
Show without slide transition check
box.
•
To use the timings recorded with each
slide in a presentation, select the Use
slide, if present check box.
•
To automatically advance to the first slide
after the last in a presentation, select the
Loop continuously check box.
1. Tap Start > Programs > PowerPoint
Mobile.
2. Open the presentation you want to view,
tap ▲ arrow > Go to Slide.
3. Tap the slide you want to view.
4. Tap OK.
Please note
If you have zoomed in to see a slide
in more detail, you cannot navigate to
another slide until you zoom out.
Please note
To turn the presentation into a
continuously looping slideshow, select
both the Use timings, if present and
the Loop continuously check boxes.
Tapping Next or Previous may play an
animation on a slide rather than navigate to
another slide.
Stop a slide show presentation
Set slideshow playback options
In the PowerPoint presentation, tap ▲
arrow > End Show.
You can override some of the playback
options stored in a PowerPoint presentation.
Zoom in and out in a slide
1. Tap Start > Programs > PowerPoint
Mobile.
Zoom in to see a portion of a slide in more
detail and zoom out to see the entire slide.
2. Open the presentation you want to view,
tap ▲ arrow > Show Options.
1. In a PowerPoint Mobile presentation, tap
▲ arrow > Zoom In.
3. Tap the Playback tab, select the
Override playback options for all files
check box, and do any of the following:
2. Do one of the following:
•
To zoom in another level, tap
•
To zoom out, tap
•
To return to the slideshow, tap
.
.
.
Please note
• If the presentation is set up as a timed
slideshow, the presentation will pause
during zoom.
• To view content not visible on the
device screen during zoom in / zoom
out, simply tap the slide and drag it up,
down, or to either side, until the content
is visible.
Use the Pictures & Videos program to take,
view, and edit pictures as well as record and
launch video clips stored on your device or
storage card. You can also send pictures
and video clips to others, or set a picture
as the background on the Today screen.
You can see your pictures individually, as
thumbnails, or as part of a slideshow. You
can edit pictures by cropping, rotating, and
adjusting the brightness and contrast.
Transferring pictures
Pictures stored on your PC can be
synchronized with Pictures & Videos on
your device. Picture synchronization is
not automatically selected in ActiveSync;
you need to tap the sync option Files in
ActiveSync on your desktop PC.
1. Tap Start > Programs > Pictures &
Videos.
2. Tap My Pictures and select a folder from
the drop down menu.
View pictures and launch video clips:
1. Tap Start >Programs > Pictures &
Videos.
2. Tap the picture or video clip you want to
see.
3. To view pictures or launch video clips
stored on a storage card, tap the folder
list (labeled My Pictures by default) and
tap the appropriate storage card option.
9
Applications
9.5 Pictures & Videos
Finding and listing pictures:
4. To view pictures or launch video clips
stored in the My Pictures folder on your
device, tap My Pictures.
Please note
To quickly assign a picture to a contact
while viewing a picture, tap Menu >
Save >Save to contact, tap the name
of the contact and tap OK.
141
Photos and video clips that you take are stored in Pictures & Videos, where you can view
your image files and manage photos or video clips that you take, set them as Wallpaper or
Caller ID, and so on.
Select a folder
9
Applications
Sort By list
View the selected picture
142
Access more features
The following list out the options within the Menu
Description
Send
Send photos or video clips via E-mail or MMS message.
Beam
Transmit photos or video clips to another device.
Save to contact
Save an image as a Contact Photo.
Delete
Delete a file.
Edit
Cut, Copy, Paste and create a New Folder.
Properties
Displays the Name, File Type, Dimensions, File Size, Date Created and
Protected.
Play Slide Show
Play all the images in the folder in a slideshow.
Set as Today
Background
Save an image as the background for today.
9
Applications
Option
There are 2 tabs
Options
General - Resize the picture (Original size, Large (640 x 480), Medium
(320 x 240) and Small (160 x 120); Rotate the picture Left or Right by
90 degrees.
Slide Show - Optimize the slide show for viewing either Portrait or
Landscape pictures; Check the box to play the screensaver when
connected to a PC and idle for 2 minutes.
143
Applications
9
Sort pictures and video clips
Set pictures as background
If you store a large number of pictures or
video clips on your device, you may find it
helpful to sort them to quickly find a specific
picture or clip. You can sort by Name, Date,
and Size.
You can use your own picture as the
background on the Today screen, and
specify how you want it displayed on
the screen, such as by adjusting the
transparency level.
1. Tap Start > Programs > Pictures &
Videos.
1. Tap Start > Programs > Pictures &
Videos.
2. Tap the sort list (labeled Date by default)
and select the item you want to sort by.
2. Select the picture you want to set as the
background.
Deleting an image
Hold the stylus firmly on the file name of the
picture you want to delete. Select Delete
from the Pop-up menu.
3. Tap Menu > Set as Today Background.
4. In Transparency Level, select a higher
percentage for a more transparent picture
or a lower percentage for a more opaque
one.
Edit pictures
5. Tap OK.
You can rotate, crop, zoom and adjust
the brightness and color contrast of your
pictures.
Saving pictures
1. Tap Start > Programs > Pictures &
Videos.
1 Tap Start > Programs > Pictures &
Videos.
2. Tap the picture you want to edit.
2. Select the picture you want to save.
3. Tap Menu > Edit and do any of the
following:
3. Tap Menu > Save. Choose between
Save to contact or Save As.
Pictures can be either saved to contact or
saved as a new name.
•
To rotate a picture 90 degrees
counterclockwise, tap Rotate.
9.6 Calculator
•
To crop a picture, tap Menu > Crop.
Then, tap and drag to select the area
to crop. Tap outside the box to stop
cropping.
Your phone has a calculator application
that allows you to do basic calculations. To
use the calculator, tap Start > Programs >
Calculator.
•
To adjust the brightness and contrast
levels, tap Menu > AutoCorrect.
9.7 Games
Your phone is provided with some games for
your entertainment:
1 Tap Start > Programs > Games.
2. Tab Bubble Breaker or Solitaire to
launch the game.
144
9.8 File Explorer
This feature allows you to view and manage all files saved in your O2 Xda Flame or storage
card. To access File Explorer, tap Start > Programs > File Explorer. Select the source where
the files are saved.
To sort files by type, tap Sort By and select a method: Name, Date and Size. Tap Up to go up
a level in the file hierarchy.
Tap Menu to access more options:
Description
My Documents
Display files saved in My Documents.
Open Path
Create a new path to open a file.
Send
Send the selected document via E-mail, or MMS.
Beam File
Send the file via Infrared or Bluetooth.
Refresh
Refresh the document display screen.
Show All Files
Show all the stored files.
New Folder
Create a new folder.
Rename
Rename a file.
Delete
Delete a file.
Edit
Manage the file list by using Undo, Cut, Copy, Paste, Paste Shortcut,
and Select All.
9
Applications
Option
9.9 Searching for Files
This feature allows you to search for a file easily.
To find a file:
1. Tap Start > Programs > Search.
2. Enter the file name in the Search for field and select a file type in the Type field.
3. Tap Search to start searching and the results will be displayed in the Results field.
145
9.10 O2 Connect
O2 Connect gives you direct access to
everything about O2 by keeping you
updated on the latest products, promotions,
software upgrades, downloads, helpdesk
numbers, repair center locations, and tips &
tricks to enhance your mobile lifestyle.
Applications
9
Accessing O2 Connect
You can access O2 Connect via
ActiveSync, GPRS or Wireless LAN.
Once connected, you can synchronize
information to your device and read it
offline. If you find an item in O2 Connect
that you want to download, you can do so
and install it instantly, or choose to install
it later.
146
Options
Some content items require a user name
and password. You can save this user
name and password on your device so you
don’t have to enter them again; simply tap
Menu > Options and then enter your user
name and password when prompted.
9
Applications
You can program the device to receive O2
Connect updates at Never, Every 6 hrs.,
Every 12 hrs., and Everyday intervals
through an ActiveSync connection, or
choose Never, Every 6 hrs., Every 12 hrs.
and Everyday intervals through an active
Internet connection.
Enabling/Disabling O2 Connect
To disable O2 Connect, tap Menu >
Options and then select Stop O2 Connect
service.
To enable O2 Connect, tap Menu >
Options and then select Start O2 Connect
service.
By default, if your O2 Xda Flame is
connected to the Internet via ActiceSync,
O2 Connect will make a connection to the
O2 Server every 4 hours to refresh the
contents. You will always have access to
the latest information.
147
9.11 O2 SMS Plus
O2 SMS Plus is an alternative SMS application that lets you:
Applications
9
•
Send and receive SMS messages via a
chat-style user interface
•
View incoming and outgoing SMS
messages in the same list window
•
Write an SMS and schedule its delivery
•
Send SMS messages to multiple
recipients
•
Send and receive vCard contacts
via SMS from compatible devices
supporting SMS vCard transmission;
and
•
Search for SMS messages that contain
a search string.
Opening O2 SMS Plus
To access O2 SMS Plus, simply tap Start > Program > O2 SMS Plus.
When you open O2 SMS Plus, you will see a message list window on your screen. You can
control this list window to display
•
Received messages only
•
Sent messages only
•
Messages from Current Contact only
•
Both received and sent messages
•
Unread messages only
Please note
Unread messages will be displayed in bold.
To read a message, simply tap on the message or use the appropriate directional keys on the
navigation pad to highlight it and then press the action key. Alternatively, you can navigate to
the message in the list window and see the full message displayed as a “ticker tape”, scrolling
across the screen, without opening.
148
Chatting with Contacts
To chat with someone on your contact list, follow these simple steps:
1. Select Menu > Chat > Others.
2. In the “To” field, enter the destination phone number or select a name from the contact list
by tapping “To” or Menu > Select Contact.
3. Compose your message. To enter a preset text message, tap Insert My Text and select
the appropriate message. To enter emoticons, tap Menu > Insert Emoticon.
4. Tap Send.
To schedule SMS to be sent at a chosen date and time, follow these steps:
1. Select Menu > Set Schedule.
2. Scheduled SMS window displays. To create a schedule, select Menu > Add.
3. The message window displays.
Applications
Scheduling messages
9
4. In the “To” field, select a name from the contact list by tapping “To” or Menu > Select
Contact.
5. In the “Date” and “Time” fields, select the date and time to send.
6. Compose your message. To enter a preset text message, tap “My Text” and select the
appropriate message. To enter emoticons, tap Menu > Insert Emoticon.
7. Tap OK when done.
Sending group messages
To send SMS to a group of people, follow these steps:
1. Select Menu > Group SMS.
2. In the “To” field, select a name from the contact list by tapping “To” or Menu > Edit
Recipients to select groups. A group window is displayed. Check the groups you want to
include in the recipient list.
3. To select individual contact names, tap Menu > Insert Contact.
4. Tap Done to exit the select group window.
5. Compose your message. To enter a preset text message, tap Menu > Insert My Text and
select the appropriate message. To enter Emoticons, tap Menu > Insert Emoticon.
6. Tap Send.
149
Sending vCards
To send a vCard, follow these steps:
1. Select Menu > Send vCard.
2. In the “To” field, select a name from the contact list by tapping “To” or tap Menu > Select
Contact.
3. Tap the Contact Card field to select the name of the card to be sent.
Applications
9
4. Tap Send.
Note: You can choose whether to send the card in either vCard format or as text.
Editing / Adding Text
To edit the pre-set text, follow these steps:
1. Select Menu > Edit My Text.
2. Tap the text to be edited to highlight it.
3. Tap Menu > Edit and change the text.
4. Tap Done.
Note: To add new text tap Menu > Add New Text will appear, follow the above steps to
change the new text.
150
9.12 Remote Control
The O2 Xda Flame can be used as a remote control to control TV’s, Videos, DVD’s and
anything else.
1.) Tap Start > Programs > Remote Control to launch the remote control. When asked if you
want to switch the device to landscape (right handed) mode, tap Yes.
9
Applications
2.) Tap the required item or tap Menu.
Tap Menu to access the following options:
Item
Description
Add device
Add a device either by brand or manually.
Delete device
Tap to see a list of devices that have been setup. Select the device and tap
delete to remove it.
Show label
Select whether to see labels below the icons.
Reset
All devices will be removed from the program.
Help
Displays the help file.
About
Displays version information.
Exit
Closes the program.
151
Adding a Device - By Brand
Adding a Device - Manually
1) Tap Menu > Add device > By brand >
select TV, DVD, Audio or VCR.
1) Tap Menu > Add device > Manually.
Select a profile for the device and add a
name for the new device. Tap Done.
2) From the drop down list, choose the
model of your appliance and tap Done.
2) The example below shows an
unconfigured screen.
Applications
9
3) The buttons now have to be configured.
This can be done either through tapping
one of the existing buttons or by tapping
Menu > Learn button.
152
Tap Menu to access the following options:
Description
Add button
Tap to add a new button.
Delete button
Tap to delete a button.
Learn button
Use the existing remote control to train the O2 Xda Flame.
Move button
Tap to move a button.
Shortcut
Add shortcuts to the navigation pad.
Show label
Select whether to see labels below the icons.
Reset
Removes all devices.
Help
Displays the help file.
About
Displays version information.
Exit
Closes the program.
Learning buttons
Position the remote control as shown below
and follow the instructions on the screen.
9
Applications
Item
To learn a button, either tap the required
button, or tap Menu > Learn button to
display additional buttons.
153
Tap an empty button to select a button
image. Select a label image and enter a
name for the button. Tap Next.
Using the Remote Control
Having configured the remote control to work
with your device(s), it is ready for use.
Point the O2 Xda Flame at the device and
tap the appropriate buttons.
Applications
9
154
TV
Line up the devices and the remote control
and follow the on screen instructions.
9.13 Adobe Reader LE
Adobe Reader LE displays Portable Document Format files. These files usually have a .pdf
extension.
To open a PDF file
1. Launch Adobe Reader LE by tapping Start > Programs > Adobe Reader LE.
2. Tap File > Open to view a list of .pdf files on your O2 Xda Flame > Tap the file you want to
view.
When a document is larger than one screen, scroll bars enable you to move around. You can
navigate around a .PDF file in the following ways:
•
Tap the up/down and right/left arrows to move one line in the desired direction. You can
also use the navigation pad to move around the screen.
•
Click and hold the space between the arrow and the scroll bar to move one screen to the
desired position.
•
Use the left, right, up and down arrow keys on the soft keyboard to move to the desired
position.
•
You can also tap and hold and then drag the screen to move around the document to the
desired position.
9
Applications
Moving around in a document
The Zoom feature
The Zoom feature allows you to enlarge or reduce the document content on display. Zoom is
available from the Tools menu.
To get a different view of a document, select from the preset Zoom settings or choose To %
to set Custom Zoom.
155
9.14 JAVA Midlet
Your O2 Xda Flame supports Java 2 Edition, J2ME. The MIDlet Manager allows you to
download Java applications, such as games and tools specifically designed for mobile
devices. The Java MIDlet Manager gives you a high level of flexibility when installing and
managing additional J2ME applications from the Internet.
Installing from the Internet
Applications
9
You can install MIDlets/MIDlet suites directly from the Internet using Internet Explorer in
conjunction with the MIDlet Manager.
1. Connect to the Internet in the following ways:
• Tap Start > Programs > Java > Menu > Install > Browser.
• Alternatively, launch Internet Explorer.
2. Locate a MIDlets/MIDlet suite you wish to download (this is normally .jad or .jar).
3. Select the MIDlets/MIDlet suite and download it.
4. You will be asked to confirm before the download begins.
5. A progress screen is displayed while files are downloaded. You can cancel the download
at any time.
Once your download is completed, the MIDlet Manager will automatically start and prompt
you to install your new MIDlets/MIDlet suite. You must confirm that you want to proceed;
the installation of your MIDlets/MIDlet suite is then completed. Alternatively, you can cancel
installation at any time.
156
Installing MIDlets from a PC
You can install MIDlets/MIDlet suite onto
your O2 Xda Flame from your PC using the
USB cable, infrared or Bluetooth. MIDlets
transferred to your O2 Xda Flame using
infrared, Bluetooth, or as E-mail attachments
are, by default, saved in the My Documents
directory.
1. Tap Start > Programs > Java > Menu >
Install > Local Files.
2. The Install screen will open, presenting a
list of all available MIDlets/MIDlet suites.
3. Select one and choose Install from the
pop-up menu. You will be prompted to
confirm your choice.
Running MIDlets
1. Tap Start > Programs > Java.
2. Select a suite and press Launch to run
the MIDlet. The MIDlets/MIDlet suite
you selected will open within the MIDlet
Manager window.
9
Applications
To install MIDlets via a physical connection
(USB cable or cradle), use Windows
Explorer to copy your MIDlet file(s) from your
PC to My Documents on your device.
Once the file(s) have been copied to your O2
Xda Flame, you must install the MIDlet/
MIDlets suite:
Stopping MIDlets
Some MIDlets have an exit or stop command
within their menu structure to stop, or end
the program, depending on the MIDIet
software developer.
157
9.15 USB OTG Connection
The USB On-The-Go (OTG) Connection refers to the small connector at the bottom of the
phone. As previously mentioned, this connector allows you to synchronize and charge the
mobile phone via the USB port.
Applications
9
In addition to this functionality, you can also attach other USB devices such as USB Flash
Disk, etc.
1. Attach the USB Host cable to the base of the O2 Xda Flame.
2. Attach the USB Flash Disk.
3, Files on the USB Flash Disk can be viewed by going to Start > File Explorer > Menu >
Show All Files.
USB On-The-Go (OTG) is a new supplement to the USB 2.0 specification that augments the
capability of existing mobile devices and USB peripherals by adding host functionality for
connection to USB peripherals.
Warning: It can only at any one time, support reading of one USB device only. It does not
support a USB hub. The output current of the host cable is up to 500mA, hence if an external
storage device that requires power supply that exceed this rating, it will not be able to work.
158
Chapter 10
Wireless Connectivity
10
About Wireless
Wireless Manager
WiFi Utility
Making a connection
Connecting to the Internet
Wireless Connectivity
10.1
10.2
10.3
10.4
10.5
159
10.
Wireless Connectivity
10.1 About Wireless
10
You can set up connections to the Internet and incorporate a network at work to browse the
Internet, use E-mail, use instant messages, and synchronize with ActiveSync.
Wireless Connectivity
Your O2 Xda Flame has powerful networking functions that enable you to connect to the Internet
using a number of different methods, including GPRS network or Bluetooth modem. You can
also use an external modem with this device to access the Internet.
There are two types of connection settings: My ISP and My Work Network. My ISP settings
are used to connect to the Internet, and My Work Network settings can be used to connect
to any private network, such as a corporate network. Fill in the settings and you are ready to
connect to the Internet.
10.2 Wireless Manager
Wireless Manager is an integrated interface that combines Bluetooth, Wi-Fi, and Phone in one
function page. To manage these wireless connections, tap Start > Settings > Connections
tab > Wireless Manager. You may also access Wireless Manager from the Today screen.
Wireless
Manager
Tap All Wireless On/All Wireless Off to turn on/off all wireless connections. If you only want
to turn off Bluetooth, for example, tap Bluetooth and the button will become grey. Tap Menu
to set up these wireless connections.
160
GPRS
Before using GPRS to connect to the Internet, please contact your network operator
to confirm that the service is enabled and supported on your SIM card. Using GPRS is
convenient for you while traveling or working at home. You can use this device to browse
web pages, read or send E-mail, text or MMS messages, and sign in Pocket MSN through
wireless network.
GPRS connection settings
1. Select Start > Settings > Connections tab > Connections > Advanced tab.
3. Select a desired network name from the list, or tap New to add available networks to the
list. Tap Edit to modify existing network setup content.
4. Tap OK to save and exit.
Please Note: The simplest way to get your O2 Xda Flame connected to the network is to
activate O2 Auto Configurator (Please refer to Section 12.2 O2 AutoConfig).
Activating GPRS connection
10
Wireless Connectivity
2. Tap Select Networks to open Network Management screen.
1. Tap Start > Internet Explorer.
2. Input an URL address you desire to browse in address field and tap the arrow icon to go to
the URL.
3. After completing connection,
icon will become
icon.
4. Or you may select Start > Settings > Connections tab > Connections > Tasks tab >
Manage Existing Connections > tap and hold on a connection to open pop-up Menu >
Connect.
After completing connection, you may start Internet surfing or send and receive E-mail.
Please note: If this device is under flight mode, please turn off flight mode beforehand. Tap
icon on Today screen, then tap “Wireless Manager” on the pop-up window. Tap “Phone”
to turn the phone function on. The
range.
icon will appear on Today screen when GPRS is in
When using GPRS or connecting to the Internet, you will not be able to answer a call. If you
make a call, your device will automatically disconnect from the Internet and reconnect to the
Internet after the conversation ends.
161
Bluetooth
Bluetooth is a short-range wireless communications technology. With Bluetooth, you don’t
need to line up the devices to send/receive information. The two devices only need to be
within a range of about 10 meters. You may use Bluetooth in the following ways:
Wireless Connectivity
10
1. Exchange information, such as files, appointments, tasks, and contact cards, between
devices that have Bluetooth capabilities. For example, if you and a co-worker have a device
with Bluetooth, you can beam items between your devices; these items could include files,
contact cards, appointments, tasks, etc.
2. Create a dial-up modem connection between your device and a Bluetooth phone. You can
then use the Bluetooth phone as a modem.
Bluetooth settings
To access the Bluetooth settings screen, tap Start > Settings > Connections tab >
Bluetooth.
To activate Bluetooth function, tap the Turn on Bluetooth option if it is not check; uncheck
this option to deactivate Bluetooth. To ensure your phone can receive data from another
Bluetooth device; first you must make your device visible to other Bluetooth devices by
checking on Make this device visible to other devices option. If Bluetooth is turned off, you
cannot use Bluetooth to either send or receive information. In order to conserve the battery
power or where radio use is prohibited, it is recommended that the Bluetooth function is
deactivated.
By default, Bluetooth is turned off. If you turn it on, and then turn off your device, the Bluetooth
radio also turns off. When you turn on your device again, the Bluetooth radio automatically
turns on the radio.
If Bluetooth radio is turned on, then all of the other Bluetooth devices within range (about 10
meters) can detect your device and attempt to send/receive information to/from it, establish a
bond, or use a Bluetooth service. In this mode, other devices can detect your device whether
or not a bond has been created; however, in order to receive data from another device, you
must accept it on your device.
Other Bluetooth devices can now detect your device and attempt to send information to it,
establish a bond, or use a Bluetooth service. Note that, to receive information, you must
accept it on your device by selecting Make this device visible to other devices; this also
turns on your Bluetooth radio. If you no longer want your device to be visible, uncheck Turn
on Bluetooth option or uncheck Make this device visible to other devices option to leave
the radio on, but not allow detection by other devices.
162
Bonds
To exchange information in a secure manner, you may use a bond to create a relationship
between your O2 Xda Flame and another Bluetooth device. To create a bond, you need to
enter the same passcode on the two devices that you want to bond. You need only create a
bond once between two devices. Once a bond is created, the devices recognize the bond and
are able to exchange information without your needing to enter Passcode again.
To create a bond:
1. Tap Start > Settings > Connections tab
2. Tap Bluetooth > Devices tab > Add new device.... Your device searches for other
Bluetooth devices and displays them in the list.
3. Tap the name of the other device in the list, and then Next.
4. Enter a Passcode of between 1 and 16 characters and tap Next.
5. Enter the same passcode on the other device.
6. In Display Name, edit the name of the other device if you want.
10
Wireless Connectivity
You can create a bond between your device and another device that has Bluetooth. Once you
do this, Bluetooth doesn’t need to be in visible mode in order for you to exchange information
wirelessly between the two devices; you only need to have the Bluetooth radio turned on.
7. Tap Finish.
Please note: Make sure that the two devices are within 10 meters of one another and that
Bluetooth is in visible mode on both devices.
To accept a bond:
1. Please make sure that Bluetooth is activated and visible to other devices.
2. When prompted to bond with the other device, tap Yes.
3. Enter a passcode of between 1 and 16 characters , and tap Next. You must enter the same
passcode that was entered on the device requesting the bond.
4. In Display Name, edit the name of the device requesting the bond if you want.
5. Tap Finish.
The bond is created. You can now exchange information with the other device.
163
To rename a bond:
1. Tap Start > Settings > Connections tab.
2. Tap Bluetooth > Devices tab.
3. Tap the bond to rename.
4. In Display Name, enter a new name for the bond and then tap Save.
To delete a bond:
Wireless Connectivity
10
1. Tap Start > Settings > Connections tab.
2. Tap Bluetooth > Devices tab.
3. Tap and hold the bond and then tap Delete.
Sending Information via Bluetooth
1. Tap and hold an item to send, such as an appointment in Calendar, a task in Tasks, a
contact card in Contacts, or a file in File Explorer.
2. Tap Beam type of item.
3. Tap the device to which you want to send the data. The item is sent to the device you
selected. If the device that you want to send to does not appear in the list, ensure that it is
turned on first and in visible mode, and within 10 meters of your device. Also, make sure
that your Bluetooth is activated.
Receiving information via Bluetooth:
1. Make sure that your device is configured to receive incoming data and that Bluetooth is in
visible mode.
2. Ensure that your device is within 10 meters of the device sending the information.
3. When prompted to receive an incoming data, tap Yes. The information is now stored on
your device.
164
Using your device as a modem
This phone allows you to use it as a modem.
To do this, you create a Bluetooth modem connection on your device and then send
information to the phone by using Bluetooth. The phone relays the information wirelessly and
then sends back to your device any information that you had requested over the connection.
Once you create a modem connection to the Bluetooth phone, you can reuse it whenever you
want to use the phone as a modem.
1. Ensure that your phones’ Bluetooth radios are turned on, and that your device and the
other device are within 10 meters of one another.
3. Tap Start > Settings > Connections tab > Connections > Add a new modem
connection.
4. Enter a name for the connection.
5. In Select a modem list, tap Bluetooth > Next.
6. Make sure that the device is visible. Some phones may also need to be pairable in order
to accept a bonding request.
Wireless Connectivity
2. If you have not already done so, create a Bluetooth phone connection using the method
described below:
10
7. If the device appears in My Connections list, skip to step 14. If not, tap Add new device
and follow the remaining steps.
8. In the list, tap the device and then Next.
9. Enter a passcode of between 1 and 16 characters, and tap Next.
10. Enter the same passcode on the phone.
11. If you want, in Display Name, edit the name of the phone.
12. Tap Finish.
13. In My Connections list, tap the device, and then Next.
14. Enter the phone number to dial for this connection and tap Next.
15. In User name, Password, and Domain; enter the logon information for this connection
and tap Finish.
16. Start using the program that uses the Bluetooth phone connection; for example, Inbox to
send and receive E-mail, or Internet Explorer to browse the Web.
165
Bluetooth headset
To set up your O2 Xda Flame with a Bluetooth headset, you may refer to the user guide with
your Bluetooth headset and the following instructions:
1. Tap Start > Settings > Connections
tab > Bluetooth > Mode tab and check
Turn on Bluetooth and Make this
device visible to other devices.
Wireless Connectivity
10
2. Tap Start > Settings >
Connections tab > Bluetooth >
Devices tab and tap Add new device...
to scan for other Bluetooth devices.
3. Your O2 Xda Flame starts Searching
for Bluetooth Devices.
166
4. Enter the Passcode for the located
Bluetooth Device. For information,
please refer to documents coming with
your Bluetooth headset.
10
Wireless Connectivity
5. Define the Display Name and the type
of service your Bluetooth device offers.
6. When you finish setup, you will see the
Bluetooth device displayed in the menu.
167
7. Also, there will be a Bluetooth headset
icon indicating the active connection
status.
Wireless Connectivity
10
COM ports
For example, when you purchase Bluetooth GPS-supported navigation software; you can
register this device as an effective serial port by following the instructions on the manual of
that product and the steps below:
Tap Start > Settings > Connections tab > Bluetooth > COM Ports tab. To register a new
serial port:
1. Tap New Incoming Port to enter setup screen.
2. Select a port to be set.
3. Select Finish.
168
10.3 WiFi Utility
WiFi is a type of wireless local area network
that communicates between two devices via
high frequency radio waves. Your O2 Xda
Flame supports Wireless LAN, which is IEEE
802.11b/g compliant. It allows your device
to connect to the Internet with detected
wireless network.
10
To activate WiFi
2. Tap WirelessLAN to activate wireless
network.
3. Tap OK to exit.
To check your WiFi status
Tap Start > Settings > Connections tab>
WiFi Utility.
1. And you may see the details of your
phone’s wireless LAN connection,
including SSID, BSSID, Channel, Tx Rate,
IP Address, MAC address and Strength.
2. Periodically updated scanning results in
the Active SSIDs window that lists all the
access points and peer stations available
around the host.
To update IP info
Tap Start > Settings > Connections tab >
WiFi Utility > IP Info tab.
This tab shows all related IP address
information including DHCP, DNS, WINS
server and gateway, etc. for advance users.
Operation Buttons
Wireless Connectivity
1. Tap Start > Settings > Connections tab
> Wireless Manager.
• Renew – Renew IP address from DHCP
server for this Network card.
• Ping – Ping another IP/Host Name in the
network (refer to the picture below).
3. A configuration tool that enables you to
create and edit SSID profiles for your
station to associate or join with.
To configure WiFi settings
To Setup WLAN using WiFi Utility , Tap
Start > Settings > Connections tab > WiFi
Utility.
IP Address/Host Name: Enter an IP
address or host name to ping. When
a host name (eg. www.yahoo.com) is
entered, the Resolve target name box
needs to be checked.
169
Size (Bytes): Choose from the pull down menu from 32 to 8192, with 32 as the default.
Timeout (ms): Defaulted to 1000, can be increased or decreased from the drop down
menu.
Resolve target name: Check it if a host name is entered. This allows the software to
translate host name to IP address.
Infinite: check this box to keep pinging the target.
Wireless Connectivity
10
Ping: Click on this button to ping the IP address/Host Name entered in the input field.
Ping Statistics Field: Shows the pinging IP address and the pinging results.
• Trace – Trace all nodes in the route to a ping destination for their ping response. 3 pings are
made to each node.
IP Address/Host Name: Enter an IP address or host name to ping. When a host name
(eg. www.yahoo.com) is entered, the Resolve target name box needs to be checked.
Reply Timeout (ms): Default is 2000, can be increased or decreased from the drop
down menu.
Maximum Hops: Default is 10, can be increased or decreased from the drop down
menu.
Resolve target name: Check it if a host name is entered. This allows the software to
translate host name to IP address.
Trace: Click on this button to start trace.
Trace Statistics Field: Shows the trace IP addresses/domain names and the pinging
results. * means timeout for that ping.
Config – Configure static IP address.Use server-assigned IP address is the default setting.
If static IP is desired, this page should be used to configure it. Check Use static IP address
and enter related information.
To change Power Save Mode
Tap Start > Settings > Connections tab > WiFi-Utility > Advanced tab > Power Save
Mode
• Always Disable – Choosing this option will always disable the power save mode.
• Always Enable – Choosing this option will have the power save mode always enabled. This
is the default setting.
• Auto Enable – When internal battery is being used, it will be in Power Save mode; when
external power supply is being used, the Power Save mode will be disabled automatically.
170
• Best Performance/Best Battery Life Sliding Bar
• Apply Button
Apply the Power Save Mode setting.
Getting Connected
Please note: After activating WirelessLAN, a new window, New Network Detected, will
appear if any is detected. Select Connect and enter your password to the local network.
Tap Connect to connect this device with local network. You may use WirelessLAN for up to
2 hours. The actual usage time will depend on the power status of your battery. While this
feature is not in use, please disable it to save power.
10
Wireless Connectivity
Move the bar to balance between the performance of the WLAN card and length of the
battery life. Default is set to Best Performance. Not operable if the Power Save Mode is
Disable. The leftmost position on the sliding bar (Best Performance) indicates that the
WLAN station will listen to every beacon from the associated AP. The default beacon interval
is 100 ms for most APs. When the knob is dragged to the right-hand-side, the station will
listen to the beacon in multiple beacon intervals depending on the position on the slide bar.
The rightmost position (Best Battery Life) indicates the beacon interval is 10 times of AP’s
beacon interval, i.e. 1000 ms when the beacon interval is set to 100ms. For the Sliding bar
to take effect, the Power Save Mode needs to be either Always Enable or Auto Enable,
and you need to click on the Apply button.
171
10.4 Making a connection
The simplest way to get your O2 Xda Flame
connected to the network is to activate
AutoConfig (Please refer to Chapter 12.2
AutoConfig).
Wireless Connectivity
10
The CSD Line Type default setting on your
O2 Xda Flame:
Data Rate: 9600 bps(V.32)
Connection Element: Non-transparent
Network Card Settings
You can connect directly to an Ethernet
network by inserting a network (Ethernet) card.
Once connected, you can browse the Internet
or an intranet, or download E-mail. Make sure
that you purchase and configure a network
card compatible with your O2 Xda Flame.
To set up your network card:
1. Insert the network card into your O2 Xda
Flame.
2. The first time you insert the card, Network
Settings will appear automatically. To
change it later on, tap Start > Settings >
Connections tab > Network Cards.
3. Tap the Network Adapters tab and tap
the desired adapter to configure it’s
settings. Tap OK when done.
To change network card settings:
1. Tap Start > Settings > Connections
tab > Network Cards > Network
Adapters tab.
2. In the My network card connects to
drop-down list, tap either The Internet
or Work. If you are connecting to your
ISP at home, tap The Internet. If you are
connecting to a private network such as a
corporate network at work, tap Work.
172
3. Tap the appropriate adapter in the Tap
an adapter to modify settings box.
The IP address will now appear in the IP
Address box on the IP Address tab.
4. To change TCP/IP settings, if your ISP or
private network does not use dynamicallyassigned IP addresses, tap Use specific
IP address and enter the requested
information. Contact your ISP or network
administrator to get the IP address,
subnet mask, and/or default gateway
(if needed).
5. To change DNS and WINS settings if
your ISP or private network does not
use dynamically-assigned IP addresses,
tap the Name Servers tab and enter
the requested information. Servers that
require an assigned IP address may also
require a way to map computer names
to IP address. DNS and WINS are the
resolution options supported on your O2
Xda Flame.
Terminal Services Client
Using the Terminal Services Client,
you can log onto a PC running Terminal
Services or Remote Desktop and use all
of the programs available on that PC from
your mobile device. For example, instead of
running Pocket Word, you can run the PC
version of Word and access all of the .doc
files on that PC from your O2 Xda Flame.
Connecting to a Terminal Server
Start a remote connection to the server via a GPRS or Wireless LAN connection:
1. Tap Start > Programs > Terminal Services Client.
2. To connect to a server you have previously connected to, define a server in Recent
servers. To connect to a new server, enter the server’s name in the Server box. Select
the Limit size of server desktop to fit on this screen check box only when using
applications that have been specifically sized for use with the O2 Xda Flame.
3. Tap Connect.
Navigating within the Terminal Services Client
Once connected to the server, the PC’s screen may have much more information to feed
into your mobile device’s screen. If scroll bars are displayed on the server’s screen, you will
see more than one set of scroll bars on your O2 Xda Flame: one to scroll information on the
PC, and one to scroll the PC display through the Terminal Services window in the Terminal
Services Client.
Wireless Connectivity
Please note
If the network administrator has configured the Terminal Services Client to reconnect to
disconnected sessions, and you previously disconnected from a Terminal Server without
ending the session, the Terminal Services Client reconnects to that session.
10
To ensure that you are scrolling the PC display through the Terminal Services Client, use
the five directional buttons at the bottom of the Terminal Services Client screen.
To better fit information onto your mobile device’s screen, select Limit size of server
desktop to fit on this screen. For best effect, maximize programs on the desktop computer.
Disconnecting without ending a session:
The following commands must be accessed from the Start menu in the Terminal Services
window used to access the PC’s commands. Do not use the Start menu on your Xda Flame.
1. In the Terminal Services window on your PC, tap Start > Shutdown.
2. Tap Disconnect. If your administrator has configured the Terminal Services Client to
reconnect to disconnected sessions, you will be reconnected to this session the next time
you connect to this server.
173
10.5 Connecting to the Internet
Once connected, you can use Pocket Internet Explorer to surf the Internet. While surfing,
you can also download files and programs to be installed on your device from the Internet
or intranet. During synchronization with your PC, download your favorite links and mobile
favorites that are stored in the Favorites folder in Internet Explorer on the PC. To synchronize
and download your favorite links from your PC, in your PC’s ActiveSync, select Favorites in
the Tools menu > Options > Sync options.
Wireless Connectivity
10
Browsing the Internet
Open the Pocket Internet Explorer screen by tapping Start > Internet Explorer.
1. In the address bar that appears at
the top of the screen, enter the Web
address you want to connect to. Tap
to choose from previously entered
addresses.
2. Tap Back to go back to the previous
page.
3. Tap Menu > Refresh to refresh the web
page on the screen.
4. Tap Menu > Home to go back to the
Home page.
5. Tap Favorites and the favorite address
you want to view. To add a favorite link
while using your O2 Xda Flame, go to
the page you want to add, tap and hold
on the page, and tap Add to Favorites
on the pop-up menu.
174
Chapter 11
Synchronization
11.1
11.2
11.3
11.4
11.5
About synchronization
Installing ActiveSync
Choosing your synchronization type
Using ActiveSync tools
ActiveSync Errors
11.
Synchronization
11.1 About synchronization
Synchronization
11
You can synchronize information between
your PC or Microsoft® Exchange Server
and your O2 Xda Flame with ActiveSync on
both your O2 Xda Flame and PC. Before
synchronizing information, please install
ActiveSync 4.2 on the PC. Then you can:
● Synchronize information to get the latest
information in all locations.
● Add or remove programs on your device.
● Transfer files between your device and
a PC.
176
● Change synchronization settings and the
synchronization schedule.
Once you install ActiveSync on your PC, you
will be prompted to connect your device and
create a synchronization relationship with the
device by using a USB cable or Bluetooth
connection. While you are setting up this
relationship, you can choose the information
that you want to synchronize with either your
PC or with Microsoft® Exchange Server.
11.2 Installing ActiveSync
11
Synchronization
Please do not connect your device to the PC before installing ActiveSync 4.2 on the PC from
the Getting Started Disc included in your package. You may only connect the device to the PC
by USB cable or Bluetooth AFTER ActiveSync is installed.
Please note
Your O2 Xda Flame has built-in ActiveSync already. To install ActiveSync 4.2 on your
PC, please follow the instructions given when you run the Getting Started Disc. After
installing ActiveSync on your PC, you will be asked to build a partnership with your
device using one of the following connection methods:
● USB cable
● Bluetooth
177
11.3 Choosing your
synchronization type
USB cable
Synchronization
11
You can connect your device with other
devices via a mini-USB connector. You can
manually change the connection settings as
follows. The new settings will be used when
you connect your device to the PC next time.
1. Tap Start > Programs > ActiveSync.
2. Tap Menu tab > Connections.
3. Choose USB in the drop down menu and
check Synchronize all PCs using this
connection.
Bluetooth connection
You can also synchronize your information
by using Bluetooth wireless connectivity
technology, which allows your device to
connect to a Bluetooth-compatible device
within a range of up to 10 meters. For best
connection results, it is recommended that
you connect the device to the PC using USB
to establish a synchronization relationship
before connecting via Bluetooth.
To synchronize via Bluetooth connection:
1. Execute ActiveSync Help on the PC and
follow the instructions for configuring
Bluetooth on your PC to support
ActiveSync.
2. Tap Start > Programs > ActiveSync.
3. Tap Menu > Connect via Bluetooth.
Make sure that the device and the PC are
within 10 meters of each other.
4. Tap Sync.
5. After finishing the synchronization, tap
Menu tab > Disconnect Bluetooth.
6. Turn off Bluetooth to preserve battery
power if not used.
Please note
Before you connect to the PC via
Bluetooth, please make sure that you
have set up a Bluetooth partnership
with the PC: Tap Start > Settings >
Connections tab > Bluetooth. For
more details, please refer to Chapter 6
Camera and Video.
178
11.4 Using ActiveSync tools
Outlook E-mail
Once you’ve established the connection
partnership between your device and
the other mobile device, you can start
synchronization. The information you can
synchronize includes Contacts, Calendar,
Outlook E-mail, Tasks, and Notes.
After you have selected Inbox for
synchronization in ActiveSync, Microsoft®
Outlook E-mail messages are synchronized
as part of the general synchronization
process. During synchronization:
To select a specific data source:
3. Launch ActiveSync on your PC, and turn
the synchronization for specific information
types on or off as necessary.
11
Synchronization
1. Tap Start > Programs > ActiveSync.
2. Tap Menu tab> Options.
● Messages are updated from the Inbox
folder on your PC or the Microsoft®
Exchange server to the Inbox folder of the
Outlook E-mail account on your device.
You can only synchronize information
directly with an Microsoft® Exchange
Server if you are running Microsoft®
Outlook® 2002 or later. By default, you’ll
receive messages from the last three
days only, the first 100 lines of each new
message, and file attachments of less
than 100KB in size.
● Messages in the Outbox folder on your
device are transferred to Exchange
or Outlook and then sent from those
programs.
● Messages on the two computers are
linked. When you delete a message on
your device, the message will also be
deleted from your PC the next time you
synchronize.
Information for
synchronization
Status of
synchronization
● Messages in subfolders of other E-mail
folders in Outlook are synchronized
only if they have been selected for
synchronization in ActiveSync. For
information on initiating Outlook
E-mail synchronization or changing
synchronization settings, see ActiveSync
Help on the PC or Connections Help.
179
Please note
Text messages (SMS) and Multimedia
messages (MMS) are not received
through synchronization. Instead,
they are sent to your device via your
network operator.
Synchronization
11
Calendar
You can synchronize Calendar items on
your device with calendar items on your PC
or Microsoft® Exchange Server. You can
only synchronize information directly with
a Microsoft® Exchange Server if you are
running Microsoft® Outlook® 2002 or later.
Calendar synchronization is automatically
selected in ActiveSync.
Calendar items entered on one computer are
copied to the other during synchronization.
Handwritten notes and drawings are saved
as metafiles (pictures).
Contacts
Contacts stored on your device can be
synchronized with Outlook contacts stored
on your PC or with Microsoft® Outlook® 2002
or later.
New items entered in one location are
copied to the other during synchronization.
Handwritten notes and drawings are saved
as pictures when synchronizing with your
PC, but are removed when synchronizing
with a server. For more information on
synchronization, see ActiveSync Help on
the PC.
Tasks
Tasks stored on your device can be
synchronized with Outlook on your PC. Task
synchronization is automatically selected in
ActiveSync.
New items entered on one computer
are copied to your device during
synchronization. Handwritten notes and
drawings are saved as metafiles (pictures).
For more information on synchronization,
see ActiveSync Help on the PC.
Notes
Notes can be synchronized between your
PC and O2 Xda Flame either through notes
synchronization or file synchronization.
Notes synchronization synchronizes the
notes on your device with Outlook Notes on
your PC. File synchronization synchronizes
all notes on your device with My Documents
folder on your PC.
To synchronize your notes through
notes synchronization, first select Notes
information type for synchronization in
ActiveSync. The next time you synchronize,
all notes in My Documents and its subfolder
on your device will appear in Outlook Notes
on your PC. Notes that contain only text will
appear as regular notes in Outlook on your
PC, while notes containing written text or
drawings will appear in the device format.
In addition, all notes in the Notes group in
Outlook on the PC will appear in Notes on
the device.
To synchronize your notes as files, in
ActiveSync, select Files information type for
synchronization and clear Notes information
type. When you select Files, My Documents
folder is created on your PC’s desktop.
180
All .pwi files placed in My Documents folder
on your device and all .doc files placed
in \ My Documents folder on your PC will
be synchronized. Password-protected
files cannot be synchronized. ActiveSync
converts documents during synchronization.
For more information on synchronization or
file conversion, see ActiveSync Help on
the PC.
Whenever ActiveSync cannot successfully
synchronize your information, it displays an
error on your device and your PC.
Viewing error information
Press Action button when the error text
is displayed. ActiveSync will then display
more information about the error that
has occurred. Some types of errors can
interfere with automatic synchronization.
If you suspect that a scheduled automatic
synchronization has not occurred, you
should attempt to manually synchronize
your information. Successfully completing
manual synchronization will reset automatic
synchronization. For more information, see
Chapter 11.4 Using ActiveSync tools.
11
Synchronization
Please note
When you delete or change an item
on either your PC or device, the item
is changed or deleted in the other
location the next time you synchronize.
If you synchronize your notes using file
synchronization and then later decide
to use notes synchronization, all of
your notes will be synchronized with
Outlook on your PC and will no longer
be stored in My Documents folder.
11.5 ActiveSync Errors
Please note
Most firewall applications are intended
to block network traffic and secure
the PC from incoming network
connections. Since ActiveSync
uses TCP ports for data transfer
with Devices, to avoid this potential
experience, you will need to manually
allow this traffic to be unblocked by
Firewall applications for the Device
using ActiveSync. You will need to add
ActiveSync application processes into
Firewall Programs Exception List.
181
Synchronization
11
182
Chapter 12
Managing your O2 Xda Flame
12.1
12.2
12.3
12.4
12.5
12.6
12.7
Self Diagnostics
O2 AutoConfig
Memory Management
Power management
Removing Programs
Installing my own applications
O2 AutoInstall
12.
Managing your O2 Xda Flame
12.1 Self Diagnostics
You can perform self-diagnostics,
selectively or fully.
Managing your O2 Xda Flame
12
184
There are two test options: You can tap Menu tab to Select All test items and tap Run to start
a comprehensive test. You can also select the desired testing items by checking the boxes.
12.2 O2 AutoConfig
This application provides a user-friendly
way to set up operator specific settings,
including GPRS, WAP, and MMS.
12
1. During every soft/hard reset, the operator ID obtained from the SIM card will be compared
with the current setting. If they don’t match, a dialog box will ask if you want to perform
network configuration now. Once confirmed, the AutoConfig will be launched to configure
your device to the current preferred network.
2. When the AutoConfig is launched via the Programs menu, the same detection process
will be carried out and possible selections will be listed in the preferred network.
Managing your O2 Xda Flame
The AutoConfig process can be performed as soon as the SIM card is accessible. It is
activated in 2 ways.
Please note
The AutoConfig process is started only when the device is in the HOME network (not
international roaming). The AutoConfig process is also started once the SIM card has
been changed.
185
12.3 Memory Management
To access details on available memory, tap
Start > Settings > System tab > Memory.
Your device memory is made up of
Managing your O2 Xda Flame
12
•
Main Storage
•
Program
•
Storage Card (if available)
Menu
Memory
Purpose
Storage (non volatile)
Stores data in the root folder, including your PIN data, E-mails
and files stored under My Documents.
Program (volatile)
Dynamic memory for program execution.
Storage Card
186
Memory
Purpose
Storage card memory
Displays the amount of Free and In use memory.
Running Programs
Memory
Purpose
Running Programs
Displays a list of all running programs. Tap the program name
to Activate, Stop or Stop All.
When the memory is insufficient, this device cannot automatically allocate memory. You may
follow the steps below to free up more memory:
1. Tap Start > Programs > File Explorer.
2. Tap and hold selected items.
3. Tap Cut on the pop-up menu.
4. Switch to Storage Card category.
5. Tap and hold and then tap Paste.
Deleting unwanted files
1. Tap Start > Programs > File Explorer.
2. Tap and hold selected items.
Managing your O2 Xda Flame
Moving some files to micro SD card
12
3. Select Delete.
Saving attachments to microSD card
1. Tap Start > Messaging > Menu > Tools > Options > Storage tab.
2. If you have inserted a storage card, check Store attachments on storage card.
3. E-mail attachments will automatically be saved to storage card.
Clearing histories and deleting files from Internet Explorer
1. Tap Start > Internet Explorer > Menu > Tools > Options > Memory tab.
2. Tap Clear History and Delete Files to delete browsed web page related records.
187
Device Performance
•
Device performance can be affected by
the amount of free Program memory
available to run applications. Stop
programs you are not using by tapping
Start > Settings > System tab >
Memory > Running Programs tab and
select the running program that you
want to stop.
•
Free up memory by removing unused
programs, tap Start > Settings >
System tab > Remove Programs and
select the program that you want to
remove, then tap Remove.
Managing your O2 Xda Flame
12
12.4 Power management
To power on your O2 Xda Flame
While the phone is powered off, press Power key on the top of the phone to power it on.
To power off your O2 Xda Flame
While the power is on, press and hold Power key on the top of the phone for about 3 seconds
to turn off the device.
To reduce the power consumption of your device, you may change the backlight duration and
brightness level. Also, you can save more power by setting the phone to turn off automatically
if it is not in use for a specific period of time.
To check battery power level
Tap Start > Settings > System tab > Power > Battery tab. A bar indicates the remaining
battery power level.
To turn off the device automatically
Tap Start > Settings > System tab > Power > Advanced tab and select the duration before
your device turns off by itself. This feature controls the screen standby time.
To Optomize the CPU
Tap Start > Settings > System tab > Power > CPU Optimize tab and select whether to
optimize the CPU automatically, for Power saving, or for Performance.
188
12.5 Removing Programs
Your O2 Xda Flame is powered by Windows Mobile 5.0. It allows installation and removal of
external applications downloaded from the web, purchased from stores or sent to you from
friends over Bluetooth, E-mail, or other means.
Application Tips
To remove the programs:
1. Tap Start > Settings > System tab > Remove Programs.
2. Tap the application to remove and tap the Remove button.
Please note
Always try to install applications to your Storage Card instead of the Device in order to
leave more Main Storage space for your PIN, E-mail and other system applications.
12
Managing your O2 Xda Flame
When you install new applications to your O2 Xda Flame, you will be
prompted if the application you are trying to install is from an
unknown publisher. You should only continue if you are certain the
application is from a trusted source. For example:
http://www.microsoft.com/windowsmobile/catalog/.
12.6 Installing my own applications
All programs pre-installed in the device will be saved in ROM (Read Only Memory) and are
not removable. Data saved in ROM will not be lost by accident. All programs that you installed
will be saved in RAM (Random Access Memory).As long as there is sufficient space in this
device, you may install suitable programs by preference.
Adding programs through ActiveSync
1. Before installing the program, please make sure that your O2 Xda Flame processor is
suitable for the software. Tap Start > Settings > System tab > About >Version tab to
check for information of this device.
2. Download the desired software to your computer (Please select software that is designed
for Pocket PC and this device).
3. Read installation instructions, readme file, or accompanied programs provided to you.
4. Connect your computer with this device.
5. Install the executable file to your computer.
189
Managing your O2 Xda Flame
12
If the file contains installation program, the installation wizard will automatically activate.
Please follow the instructions on screen. Once the installation on your computer is completed,
the program will automatically be installed to this device. If this file does not contain any
installation program, an error message will show on the screen and tell you this program is
invalid, which is not suitable for your computer. You must move this program to this device
manually. If you cannot find any installation instructions for this program, please use “Browse”
function of ActiveSync to copy program file to Program Files folder in this device. After
completing installation, tap Start > Programs, and then select the program icon to launch that
program.
Adding programs through Internet
You may download software suitable for this device from Internet.
1. Before installing the program, please make sure that your O2 Xda Flame processor is
suitable for the software.
Tap Start > Settings > System tab > About > Version tab to check the information about
this device.
2. Directly download programs to this device by using Internet Explorer on this device (Please
select programs designed for Pocket PC and this device).
3. Read installation instructions, readme file, or accompanied programs provided to you.
4. Run the installation executable file on your computer.
Adding programs to Start menu
Tap Start > Settings > Personal tab > Menus.
1. Check the programs to be displayed on Start menu.
2. Tap OK to save settings and return to Personal tab screen.
190
12.7 O2 AutoInstall
O2 Auto Installer provides you with a list of ready-to-install applications for your O2 Xda Flame.
These optional applications can help you do more with your device. When you need them,
you can choose to install them anytime by tapping Start > Programs > O2 AutoInstall >
check the box next to the application and tap Next to start.
12
Managing your O2 Xda Flame
191
Managing your O2 Xda Flame
12
192
Chapter 13
TV Connection and Control
13.
TV Connection and Control
The O2 Xda Flame supports connection to a TV set or projector for viewing photos and videos
with others, making presentations, or to enjoy a richer console gaming experience on a larger
screen.
TV Connection and Control
13
1. Connect the TV out connector to the TV out port and the audio plug into the audio jack at
the bottom of the phone.
2. Connect the 3 color ends to the appropriate sockets of the TV set or Projector.
3. Switch your TV to the AV channel and you will be able to see the same image as is on your
O2 Xda Flame.
Please note
Your O2 Xda Flame could be connected to any display device which is equipped with
an AV connector. (e.g. TV (NTSC only), Projector, DVD player or Setbox, and so on.)
If you would like to change the display mode from portrait to landscape, you can select
the screen mode from Start > Settings > System tab > Screen. Screen Orientation
enables the End User to switch the orientation of the touch screen between Portrait and
Landscape modes.
TV
194
Chapter 14
Troubleshooting
14.1 Glossary
14.2 Troubleshooting
14.
Troubleshooting
14.1 Glossary
Roaming
Troubleshooting
14
Your phone will go into roaming services
when you are not in your home network.
For more information on roaming services,
please contact your network operator.
Handover
Your phone will perform a soft handover
without affecting the call or data transmission
when moving from one base station to
another, from one network to another or
when the signal strength degrades with
neighboring cell sites of stronger signal
strength detected.
Tri-band
Different operators/countries may operate
on different GSM frequencies. The O2 Xda
Flame is a tri-band Pocket PC Phone that
can switch between these three frequencies
(900, 1800, and 1900 MHz).
SIM card
A Subscriber Identity Module (SIM) is a
removable smart card, roughly the size
of a postage stamp, that securely stores
the key identifying a mobile phone service
subscriber. The SIM card allows users to
change phones easily by removing the SIM
card and inserting it into another mobile
phone, thereby eliminating the need for
activation of the new mobile phone on the
network. The use of a SIM card is mandatory
in the GSM world.
196
PIN and PUK
Access to a phone is most often protected
by a code known as “PIN”– Personal
Identification Number. Your SIM card comes
with a default PIN that you can change to
any code. If you forget your code, or by
mistake enter a faulty code three times, the
SIM card will lock. To unlock it, you must
enter the Personal Unblocking Key, or “PUK”
code, which you can get from your network
operator.
USIM card
The equivalent of a SIM in UMTS is called
the Universal Subscriber Identity Module
(USIM). It is an application for UMTS mobile
telephony running on a UICC smart card
which is inserted in a 3G mobile phone.
It stores user subscriber information,
authentication information and provides
storage space for text messages.
3G
3G Systems are intended to provide a
global mobility with wide range of services
including telephony, paging, messaging,
Internet and broadband data. International
Telecommunication Union (ITU) started the
process of defining the standard for the
third generation systems, referred to as
International Mobile Telecommunications
2000 (IMT-2000). In Europe, European
Telecommunications Standards Institute
(ETSI) was responsible for the UMTS
standardisation process.
UMTS
Universal Mobile Telecommunications
System (UMTS) is one of the thirdgeneration (3G) mobile phone technologies.
The currently most common form uses
W-CDMA as the underlying air interface,
is standardized by the 3GPP, and is the
European answer to the ITU IMT-2000
requirements for 3G cellular radio systems.
SMS
WCDMA
MMS
W-CDMA (Wideband Code Division Multiple
Access) is a type of 3G cellular network.
W-CDMA is the higher speed transmission
protocol used in the Japanese FOMA system
and in the UMTS system, an advanced
3G system, designed as a replacement for
the ageing 2G GSM networks deployed
worldwide. More technically, W-CDMA is
a wideband spread-spectrum mobile air
interface that utilizes the direct sequence
Code Division Multiple Access signaling
method (or CDMA) to achieve higher
speeds and support more users compared
to the older TDMA signaling method of
GSM networks. W-CDMA is a competitor to
CDMA2000.
Multimedia Messaging Service (MMS) is a
standard for telephony messaging systems
that allow sending messages which include
multimedia content (images, audio, video,
rich text) and not just text messages as in
Short message service (SMS).
14
Troubleshooting
To differentiate UMTS from competing
network technologies, UMTS is sometimes
marketed as 3GSM, emphasizing the
combination of the 3G nature of the
technology and the GSM standard which it
was designed to succeed.
Short Message Service (SMS) is a service
available on most digital mobile phones
(and other mobile devices e.g. a Pocket PC,
or occasionally even desktop computers)
that permits the sending of short messages
(also known as text messages, or more
colloquially SMSes, texts or even txts)
between mobile phones, other handheld
devices and even landline telephones.
PIN2
PIN2 is a security code that you can obtain
from your network operator.
IMEI
IMEI stands for International Mobile.
Equipment Identifier and is a number that’s
unique to your phone.
WAP
FDD 1
The FDD 1 (Frequency Division Duplex
1 (FDD, W-CDMA)) is one of the UMTS
frequencies, their Paired uplink and downlink
frequencies are 1920-1980 and 2110-2170
MHz, channel spacing is 5 MHz and raster is
200 kHz. An Operator needs 3 - 4 channels
(2x15 MHz or 2x20 MHz) to be able to build
a high-speed, high-capacity network.
Wireless Application Protocol (WAP) allows
you to access information and entertainment
services.
GPRS
General Packet Radio Service (GPRS) is
a mobile data service available to users of
GSM and D-AMPS mobile phones. GPRS
data transfer, with throughput rates of up to
40 kbit/s, is typically charged per megabyte
of transferred data independently of the user
actually has transferred data.
197
CSD
CSD stands for Circuit Switched Data,
which is a wireless service protocol used
for WAP. It allows you to have continuous
WAP connection at a transmission rate of
9.6Kbit/s. Charges are billed per minute of
connection time, not data base.
Troubleshooting
14
URL
Uniform Resource Locator or URL is an
address system used on the Internet. All
homepages have a unique address, allowing
browsers to distinguish one from an other.
APN
Access Point Name, a setting for GPRS.
ISP
Internet Service Provider.
14.2 Troubleshooting
Why can’t I turn on my device when I
press the power key?
Either you didn’t press the key long enough,
or the device has shut down because the
battery power level is too low to make calls.
Please recharge the battery.
How do I suspend the screen display or
wake up the device?
Press and hold the power key to turn off the
device. If the screen display is off, press the
power key to wake up your device.
Why does my device display
“INSUFFICIENT MEMORY” when I open a
file or a program?
The device memory is shared by both
storage and programs. You can free up
some memory by removing some of the
rarely used programs you installed or
removing rarely used files.
Why doesn’t the screen respond
accurately to my stylus taps?
Tap Start > Settings > System tab >
Screen > General tab. Select Align Screen
to align the screen.
Why does my O2 Xda Flame launch wrong
programs or ignore my command when I
press a device key?
Tap Start > Settings > Personal tab >
Buttons and check whether the programs
assigned to each key is correct. You
can change these key assignments by
preference.
My phone displays ‘Insert SIM’, what
does this mean?
Insert the SIM card before you can use the
device. If it is already installed, remove and
198
clean the metal contacts area with a dry
cloth, and then insert it again. If the problem
persists, your SIM card may be damaged,
contact your service provider or call our
service hotline for help.
My phone displays ‘EMERGENCY ONLY’,
what does this mean?
Your SIM card is not properly installed or
configured, or you are out of network range.
My phone displays ‘NO NETWORK’, what
does this mean?
Insert the SIM card before you can use the
device. If it is already installed, remove and
clean the metal contacts area with a dry
cloth, and then insert it again.
Some calls are not processed?
Certain call barring function may have been
set to restrict device usage. Check the call
barring status and cancel as necessary.
Why does the screen freeze and not
respond to my commands or input?
Reboot the system to free up memory. The
system shall operate more efficiently. If the
system still lags after rebooting, you will
need to clean boot (i.e. Hard Reset) your O2
Xda Flame. To clean boot, press and hold
the Wireless Manager key and the Camera
& Video key, and then press the Soft Reset
key. Your O2 Xda Flame will reset to factory
defaults after reboot.
14
Troubleshooting
My phone displays ‘INVALID or Missing
SIM’, what does this mean?
The phone is SIM-locked and will not accept
the inserted SIM card.
Insert the correct SIM card or contact your
network operator.
My phone is not running well. How can I
check where my phone goes wrong?
Tap Start > Programs > Self Diagnostics
to run diagnostic tests for your system.
Otherwise, have your warranty card and
phone ready and contact your local dealer.
Please note
When you perform a clean boot
on your O2 Xda Flame, all your
personalized settings, information, and
programs installed will be removed.
The system will reset to factory
defaults. It is recommended to backup
all your data and programs before
doing a clean boot.
Someone else is receiving my calls. What
is wrong?
Call Forward feature could have been
activated. Cancel call forwarding function as
necessary.
Can I send and receive emails and surf
the Mobile Internet on my phone?
Yes. Your phone has Web capability, which
means that you can access the Mobile
Internet from your phone. For sending and
receiving E-mails, please refer to the user
manual or contact O2 Customer Service.
199
My O2 Xda Flame can’t establish a successful connection with ActiveSync.
Please make sure you have installed ActiveSync 4.2 or later on your computer. You can find
ActiveSync in the Getting Started CD, or you can download the latest version from Microsoft’s
website. Please make sure you have connected your O2 Xda Flame to the computer by
plugging in the USB cable to both your O2 Xda Flame and the computer. Make sure that you
are not running another program that uses the same serial port. If the connection still fails,
remove ActiveSync on your computer and reinstall it.
Troubleshooting
14
200
Why are there double entries in my Contacts list?
You may have selected Show SIM Contacts in Contacts menu. If you have already copied
your SIM contacts to your O2 Xda Flame, then you do not need to select this option.
Why can’t my O2 Xda Flame make any sound alerts?
Tap on the speaker icon at the top right corner of the screen, and then adjust the alert or
ring volume. You may also use the volume key on the left side of your O2 Xda Flame to adjust
volume.
Chapter 15
Safety Information
15.1
15.2
15.3
15.4
15.5
Safety information
Phone Care
Driving Safety
Other Safety
Cautions
15.
Safety Information
15.1 Safety information
Read this information
Safety Information
15
202
Your O2 Xda Flame Pocket PC Phone has been designed, manufactured and tested not
to exceed the limits for exposure to electromagnetic fields recommended by the Council
of the European Union and the FCC rule of the United States. These limits are part of
comprehensive guidelines developed by independent scientific organizations.
European standards provide for the amount of radio frequency electromagnetic energy
absorbed by the body when using a phone to be measured by reference to the Specific
Absorption Rate (SAR). The SAR limit for the general public is currently 2 watts per kilogram
averaged over 10 grams of head tissue (<2.0W/kg @ 10g) and the FCC public is currently 1.6
watts per kilogram averaged over 1 grams of head and body tissue (<1.6W/kg @ 1g).
The maximum SAR values for the O2 Xda Flame are
• 0.751 W/kg @10g (CE)
• 0.461 W/kg @1g (FCC) head
• 0.339 W/kg @1g (FCC) body
15.2 Phone Care
You should never attempt to open the phone casing. There are no user-serviceable parts
inside and you might damage sensitive electronic circuits and components. Unauthorized
disassembly will void the warranty.
You should never leave your phone in the window of your car or otherwise expose it to
strong sunlight or excessive heat for a prolonged period. This may damage it.
If you pack your phone in your suitcase during travel, beware of damage. Cramming a
suitcase may crack the LCD display. Remember to switch off your wireless connections
during air travel.
As with all other radio devices, touching the built-in antenna area during telephone
conversation may impair the quality and lead to shorter standby time due to increased power
consumption.
15
Safety Information
You should never handle your phone with wet hands or expose it to moisture or liquids of
any kind. Continuous changes from a cold to a warm environment may lead to condensation
inside the phone, resulting in corrosion and possible damage.
The battery
Your phone is equipped with a high-performance Li-Polymer battery. Optional battery types
may not be available; check with your local retailer. Observe the maintenance guidelines and
your battery should give you a long service life.
•
The battery operating performance is subject to operator network conditions and the
number of applications activated at any point in time. To ensure optimum battery operating
performance, avoid leaving unused applications activated for a long period of time.
•
To ensure optimum battery life span, you are encouraged to charge the battery only when
it is fully depleted and re-charge until it is full.
•
Before you use the battery for the first time, charge the battery for at least 4 hours.
•
Do not overcharge the Li-Polymer battery, as this can result in a reduction in battery
performance and lifespan. The recommended maximum charge time is 2.5 hours.
•
Avoid repeated short charging. You are recommended to charge the battery only when it is
flat in order to optimize the lifespan of the battery.
•
Avoid charging in strong heat or extreme cold environment. The battery has its optimum
performance in an ambient temperature of 0°C to +45°C.
•
Don’t store a battery near a fire or heat source.
•
Use only the battery approved by the manufacturer.
•
Never replace the battery with a non-approved battery.
203
•
Never soak the battery in water or any other fluid.
•
Never try to open the battery as it contains substances that may be harmful if swallowed or
allowed to come into contact with unprotected skin.
•
Never short-circuit the battery, as it may overheat and cause a fire. Keep it away from
jewellery and other metal objects.
•
Never dispose of the battery in a fire. It could explode and release harmful substances into
the environment.
15
•
Never dispose of the battery with your regular household waste. Take it to a hazardous
material collection point.
Safety Information
•
Do not touch the battery terminals.
204
Caution
There is a risk of explosion if a battery is replaced by an incorrect type.
The charger
•
Use only the charger supplied with your phone.
•
Never pull the charger cord to release it from the mains – pull the charger itself.
Memory card
Do not remove or insert a memory card or turn off the handset while data on the card is
being edited.
•
Do not touch the metal terminals with your hands or metal objects.
•
Do not bend the memory card or subject it to violent impacts. Keep it away from water and
high temperatures.
•
Keep all memory cards out of the reach of small children.
•
Do not short circuit the contact points or expose it to liquids or moisture. When not in use,
keep it in the antistatic container it came in.
•
Do not use force when inserting or handling the card, and do not expose it to excessive
heat or strong magnetic fields.
15
Safety Information
•
Cleaning and storing
•
Your phone should always be handled with care and protected from dirt, dust and
dampness. To avoid scratches, never place your phone face down.
•
If cleaning is necessary, switch the phone off and wipe carefully with a soft cloth. Use a
cotton swab to clean the camera lens. Allow the phone to dry completely before switching
it on. Never use solvents for cleaning.
•
If you are not going to use your phone for some time, fully charge the battery and store the
phone in a dry place away from direct sunlight. Your phone should be switched off during
storage. Recharge every 6 to 12 months.
•
Never expose your phone to heat or strong sunlight.
•
Never expose your phone to moisture or liquids of any kind.
•
Do not paint your phone or otherwise block the keypad, microphone or earpiece function,
i.e. with stickers.
205
Safety Information
15
15.3 Driving Safety
15.4 Other Safety
Never use handheld phones while driving. It
is an offence while driving to hold a phone or
cradle it in your neck, at any point during the
setup, making or taking of a phone call, text
message or any other data related to mobile
communication. Use of fully installed car kits
are still permitted, as are the use of alternate
handsfree accessories.
Most modern electronic equipment is
shielded from RF energy.
In the interest of safety, we would
recommend to use a cradle while using any
form of handsfree accessory.
While driving, we recommend that you use
voicemail wherever possible, and that you
can listen to your messages when you are
not in the car. If you must make a handsfree
call when driving, keep it brief.
An airbag inflates with great force. Do not
place objects, including both installed or
portable wireless equipment, in the area
over the airbag or in the airbag deployment
area. If in-vehicle wireless equipment is
improperly installed and the air bag inflates,
serious injury could result.
Warning
Failure to follow these instructions may
lead to serious personal injury and
possible property damage.
However, certain electronic equipment may
not be shielded against the RF signals from
your Pocket PC phone.
Pacemakers
The Health Industry Manufacturers’
Association recommends that a minimum
separation of six (6”) inches be maintained
between a phone and a pacemaker to avoid
potential interference with the pacemaker.
These recommendations are consistent
with the independent research by and
recommendations of Wireless Technology
Research.
If you have a pacemaker:
•
Always keep your phone more than six
inches from your pacemaker when turned
on.
•
Do not carry your phone in a breast
pocket.
•
Use the ear opposite to the pacemaker to
minimize potential interference.
•
If you have any reason to suspect that
interference is taking place, turn your
phone off immediately.
Hearing aids
Some digital phones may interfere with
some hearing aids. In the event of such
interference, call O2 Customer Service to
discuss alternatives.
206
Other medical devices
Aircraft
If you use any other personal medical
device, consult the manufacturer of your
device to determine if it is adequately
shielded from external RF energy. Your
physician may be able to assist you in
obtaining this information.
Regulations prohibit using your phone while
in the air. Switch off your phone before
boarding an aircraft or turn off the wireless
connections.
Hospitals or healthcare facilities may be
using equipment that could be sensitive to
external RF energy.
To avoid interfering with blasting operations,
turn your phone off when in a ‘blasting area’
or in areas posted: ‘Turn off two-way radio.’
Obey all signs and instructions.
Vehicles
RF signals may affect improperly installed or
inadequately shielded electronic systems in
motor vehicles. Check with the manufacturer
or its representative regarding your vehicle.
You should also consult the manufacturer of
any equipment added to your vehicle.
Posted facilities
Turn your phone off where posted notices
require you to do so.
Magnetic media
Magnetic fields generated by Pocket PC
Phone may damage data on magnetic
storage media, such as credit cards,
computer discs or tapes. Do not place your
phone next to such media.
You should never expose your phone to
strong magnetic fields as this may cause
temporary malfunction.
Potentially explosive
environments
Turn your phone off when in any area with a
potentially explosive environment and obey
all signs and instructions.
15
Safety Information
Turn your phone off in healthcare facilities
when any regulations posted in these areas
instruct you to do so.
Blasting areas
Sparks in such areas could cause an
explosion or fire resulting in bodily injury or
even death.
Areas with a potentially explosive
environment are often, but not always,
clearly marked. They include fuelling areas
such as gas stations, below decks on boats,
fuel or chemical transfer or storage facilities,
vehicles using liquified petroleum gas (such
as propane or butane), areas where the air
contains chemicals or articles, such as grain,
dust, or metal powders, and any other area
where you would normally be advised to turn
off your vehicle’s engine.
Choking
Keep your phone away from children as the
SIM card and other small parts present a
choking hazard.
207
15.5 Cautions
Your Pocket PC Phone is a high quality piece of equipment. Before operating, read all
instructions and cautionary markings on (1) Universal AC Adapter (2) Battery and (3) Product
Using Battery.
Safety Information
15
208
•
Do not use this equipment in an extreme environment where high temperature or high
humidity exists.
•
Do not abuse the equipment. Avoid striking, shaking or giving it a shock. When not using
the unit, lay it down to avoid possible damage due to instability.
•
Do not expose this equipment to rain or spilled beverages.
•
Do not use unauthorized accessories.
•
Do not disassemble the phone or its accessories. If service or repair is required, return the
unit to an authorized service center. If the unit is disassembled, a risk of electric shock or
fire may result.
•
Do not short-circuit the battery terminals with metal items.
Chapter 16
Technical Specifications
16.1
16.2
16.3
16.4
Technical Specifications
Declaration of Conformity
About this User Manual
Mandatory Statements
16.
Technical
Specifications
16.1 Technical
Specifications
Technical Specifications
16
• Operating Temperature:
O2 Xda Flame has its optimum performance
in an ambient temperature of -10°C to +55°C.
• Power Supply:
• Physical Size:
1. Travel Charger: Universal AC adapter
(100~240Vac) with 4 plugs for different
countries
1. Dimensions: 74 (W) x 126 (L) x 17.5 (T)
mm
2. Charging time by traveler charger: 2.5
hours
2. Weight: 190g (battery included)
3. Battery: 3.7V 1620mAh Lithium Polymer
• System Information:
4. USB cable with PC (personal computer)
1. Modem: EMP U250
5. Charging time by USB cable with PC:
3.5 hours
2. Application processor: Intel PXA 270
(Bulverde 520 MHz)
• Battery Usage life estimate:
3. Operating system: Windows Mobile 5.0
1. Video talk time: up to 2.5 hours
4. System Memory: 64MB NOR Flash, 128
MB SDRAM
2. GSM talk time: up to 6 hours
5. User Memory: 2GB NAND Flash
6. Expansion: Micro-SD card slot
• Display:
1. Display: 262K Transflective TFT LCD,
3.6 inch with touch panel
2. Resolution: VGA 480x640 pixel
• Network:
1. GSM Tri-band : GSM 900/DCS 1800/
PCS 1900
2. UMTS one band: WCDMA 2100 (FDD I)
3. GPRS: Class 10, Type B
4. Bluetooth: 2.0 + EDR (2.4GHz)
5. WLAN: 802.11 b/g (2.4GHz)
6. IrDA: FIR/CIR
3. Video playing time (MP4, WMV): up to 9
hours
4. Audio playing time (MP3, WMA): up to
10 hours
5. PDA (GSM off or UMTS off): up to 12
hours
6. GSM Standby time: up to 200 hours
7. UMTS Standby time: up to 170 hours
• Camera Module:
1. Main (Backside): 2M pixel Auto Focus; 4X
Digital Zoom; Strobe Flash light
2. Sub (Front): VGA 300K pixel
3. Mirror: For self portrait shoot
• System Connector:
1. Power charging: Mini USB connector
2. Earphone: 2.5 mm ø phone jack
3. Data I/O: Mini USB connector for USB 2.0
OTG full speed of up to 12Mb/s.
4. Analog I/O: TV-out connector
210
camcorder
• Video:
JAVA: KVM, MIDP 2.0, CLDC 1.1
•
Self Diagnostics
•
Adobe Reader LE
•
Modem Link
•
Internet Sharing
• Audio:
•
CodeWallet Pro 6
1. Speaker: Video Conference (Two-way
video call capability)
O2 Applications
2. Audio Output: Dual Speaker, 3D surround
sound
•
O2 Connect
•
O2 SMS Plus
3. Audio Format: AMR, MP3, AAC, WMA,
Midi
•
O2 AutoInstall
•
O2 Phone Plus
• Security:
•
O2 Themes
1. AES, SSL, HTTPS, WTLS, TLS, SIM Lock
and Device Lock
•
O2 Menu
•
O2 MediaPlus
Accessories
•
O2 AutoConfig
Universal AC adapter, Battery, Stereo
wired headset, TV-Out AV cable, Mini USB
cable, USB Host cable, Stylus. For more
accessories option, please contact O2 Retail.
Entertainment
2. Video Output: TV out cable with AV
terminal (for TV and projector)
3. Video Format: MPEG4, H.263, H.264,
WMV, 3GP, 3GP2
Applications
•
Microsoft Windows Mobile 5.0 standard
applications: Pocket MSN, Pocket
Outlook, Pocket Internet Explorer,
Windows Media Player 10, Excel Mobile,
PowerPoint Mobile, Word Mobile,
Terminal Services Client, Pictures &
Videos, Calculator, Games, ActiveSync,
File Explorer, Video Telephony, 3D game,
Remote Control, SRS Enhancer.
•
Integrated MMS client
•
FM radio with RDS
•
SIM Toolkit
•
Camera and video capture utility: camera,
16
Technical Specifications
•
1. Video Telephony: Video Conference (Twoway video call capability)
Integrated Music Player, MP3 player, video
capture and playback, integrated 2 MP
camera.
Organizing features
Calendar, Alarm, Task, Notes.
211
16.2 Declaration of
Conformity
Important SAR Information
Technical Specifications
16
Your wireless phone is a radio transmitter
and receiver. It is designed and
manufactured not to exceed the emission
limits for exposure to radio frequency (RF)
energy set by the FCC of USA. These limits
are part of comprehensive guidelines and
establish permitted levels of RF energy for
the general population. The guidelines are
based on standards that were developed by
independent scientific organizations through
periodic and thorough evaluation of scientific
studies. The standards include a substantial
safety margin designed to assure the safety
of all persons, regardless of age and health.
The exposure standard for wireless mobile
phones employs a unit of measurement
known as the Specific Absorption Rate, or
SAR. The SAR limit set by the FCC is 1.6
W/kg. *
Tests for SAR are conducted with the phone
transmitting at its highest certified power
level in all tested frequency bands. Although
the SAR is determined at the highest
certified power level, the actual SAR level
of the phone while operating can be well
below the maximum value. This is because
the phone is designed to operate at multiple
power levels so as to use only the power
required to reach the network. In general,
the closer you are to a wireless base station
antenna, the lower the power output.
Before a phone model is available for sale
to the public, it must be tested and certified
to the FCC that it does not exceed the limit
established by the government adopted
212
requirement for safe exposure. The tests
are performed in positions and locations
(e.g., at the ear and worn on the body) as
required by the FCC for each model. The
highest SAR value for this model phone
when tested for use at the ear is 0.461 W/Kg
and when worn on the body, as described in
this user guide, is 0.339 W/Kg. (Body-worn
measurements differ among phone models,
depending upon available accessories
and FCC requirements). While there may
be differences between the SAR levels of
various phones and at various positions,
they all meet the government requirement
for safe exposure.
* In the United States and Canada, the SAR
limit for mobile phones used by the public
is 1.6 watts/kg (W/kg) averaged over one
gram of tissue. The standard incorporates a
substantial margin of safety to give additional
protection for the public and to account for
any variations in measurements.
Use only the supplied or an approved
antenna. Unauthorized antennas,
modifications, or attachments could impair
call quality, damage the phone, or result in
violation of FCC regulations. Do not use
the phone with a damaged antenna. If a
damaged antenna comes into contact with
the skin, a minor burn may result. Please
contact your local dealer for antenna
replacement.
This transmitter must not be co-located
or operated in conjunction with any other
antenna or transmitter.
Body-worn Operation
FCC Part 15 Notice
This device complies with part 15 of the
FCC Rules. Operation is subject to the
following two conditions: (1) This device
may not cause harmful interference, and
(2) this device must accept any interference
received, including interference that may
cause undesired operation.
Warning: This device has been tested and
found to comply with the limits for a Class
B digital device pursuant to Part 15 of the
Federal Communications Commissions
Rules and Regulations. These limits are
designed to provide reasonable protection
against harmful interference when the
equipment is operated in a commercial
environment. This equipment generates,
uses, and can radiate radio frequency
energy and, if not installed and used in
accordance with the instruction manual,
may cause harmful interference to radio
communications. However, there is no
guarantee that interference will not occur in
a particular installation.
turning the equipment off and on, the
user is encouraged to try and correct the
interference by one or more of the following
measures:
. Relocate this device
. Increase the separation between the device
and the receiver
. Connect the device into an outlet on
a circuit different from that of other
electronics. Consult the dealer or an
experienced radio technician for help.
FCC Radiation Exposure Statement
Important Note: To comply with FCC RF
exposure compliance requirement, the
antenna used for this transmitter must not be
co-located or operating in conjunction with
any other transmitter.
Caution:
16
Technical Specifications
This device was tested for typical body-worn
operations. To comply with RF exposure
requirements, a minimum separation
distance of 1.5 cm must be maintained
between the user’s body and the handset,
including the antenna. Third-party belt-clips,
holsters, and similar accessories used by
this device should not contain any metallic
components. Body-worn accessories that
do not meet these requirements may not
comply with RF exposure requirements and
should be avoided.
Any changes or modifications not expressly
approved by the party responsible for
compliance could void the user’s authority to
operate this equipment.
If this equipment does cause harmful
interference to radio or television
reception, which can be determined by
213
16.3 About this User
Manual
Technical Specifications
16
214
This document is provided as a user manual
to the O2 Xda Flame Pocket PC Phone
and to this system only. O2 Xda Flame is a
trademark and model name of the O2 group
of companies.
The latest version of the user manual can be
found on our website http://SeeO2.com.
Year of Manufacturing: 2007
16.4 Mandatory Statements
We hereby declare that the O2 Xda Flame is
in conformity with all essential requirements
of Directive 1999/5/EC.
Index
A
B
Backlight 47
Battery life 29
Block Recognizer 32
Bluetooth 162
Bluetooth headset 166
Bonds 163
Browsing the Internet 174
C
Calculator 144
Call History 57
Camera 103
Capture mode 104
Cautions 208
Certificates 47
Charging the battery 30
Chatting 149
Cleaning 205
Clock & Alarms 47
COM ports 168
Conference calls 62
Contacts 134
Contact information 64
CPU Optimize 188
Device lock 68
Device security 67
Disconnecting 173
Downloading messages 89
Drawing on the screen 35
Driving safety 206
E
E-mail 86
E-mail Setup 87
Emergency calls 61
Ethernet 172
Excel Mobile 138
Index
About 47
ActiveSync Errors 181
ActiveSync tools 179
Adding a Device 152
Adding programs 189
Adobe Reader LE 155
D
F
File Explorer 145
Flash light 11
Flying 54
FM Radio 116
G
Games 144
Glossary 196
GPRS 161
GPS 48
H
Hard reset 37
Headset Volume Limitation 48
215
Index
I
N
IMAP4 95
In-call options 61
Inserting the battery & SIM/USIM card 28
Installing ActiveSync 177
International calls 59
IP info 169
Navigation pad 53
Network Card Settings 172
Notes 136
Learning buttons 153
LED 9
LED Status 13
Letter Recognizer 34
Lock/unlock 26
O2 AutoConfig 185
O2 AutoInstall 191
O2 Connect 146
O2 MediaPlus 114
My Music 118
My Pictures 120
My Radio 116
My Settings 122
Alarm 123
Personalization 125
Sleep timer 124
My Videos 121
O2 SMS Plus 148
O2 Themes 45
Outlook 130
Outlook E-Mail 95
Owner Information 42
M
P
Making a call 55
Making a connection 172
Managing messages and folders 95
Memory 48
Memory card 205
Memory Management 186
Microsoft Exchange E-mail 96
Microsoft Passport 96
MIDlet Manager 156
Modem 165
MSN Messenger 96
MSN Options 42
Multimedia messages (MMS) 79
Password 42
PDF 155
Personal settings 41
Phone 43, 52
Phone care 203
Photo Contacts 65
Photo resolution 105
Pictures & Videos 141
Pocket Internet Explorer 174
Pocket MSN 96
POP3 95
Power 48
PowerPoint Mobile 139
J
JAVA Midlet 156
K
Keyboard 33
Keypad tone 43
L
216
O
Power button 11
Power management 188
Power Save Mode 170
Programs 16
R
S
Safety 202
Screen 49
Screen Orientation 32
Screen tapping and Calibration 31
Search for a file 145
Self Diagnostics 184
Sending Information 164
Sending vCards 150
Settings menu 19
Set pictures as background 144
Soft reset 37
Sounds & Notifications 45
Speakerphone 62
Speed Dial 57
SRS 128
Synchronization 176
Synchronization type 178
System settings 47
Tasks 135
TCP/IP settings 172
Terminal Services Client 172
Text message 73
The battery 203
Today 45
Transcriber 34
Troubleshooting 198
TV out 194
U
Index
Read messages 75
Receiving/Ignoring a call 59
Receiving attachments 91
Recording 111
Recording a message 36
Regional Settings 49
Remote Control 151
Remove Programs 49
Removing Programs 189
RF signals 206
Ring tone 43
T
USB OTG Connection 158
V
Video Telephony 60
View mode 109
Voicemail 85
W
Wi-Fi 169
Windows Media Player 10 118
Wireless Manager 160
Word Mobile 137
WOW HD 128
WOW HD Settings 49
Writing on the screen 35
217
218
Index