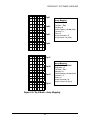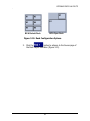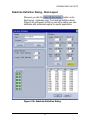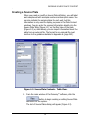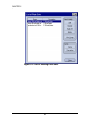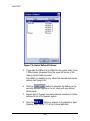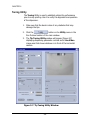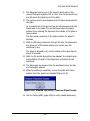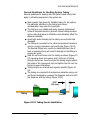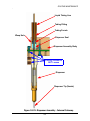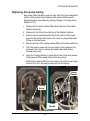
1
Piezorray™ Non-Contact Microarraying System Operation Manual PerkinElmer Life and Analytical Sciences 2200 Warrenville Road Downers Grove, IL 60515 [email protected] Doc. Reorder No. 1694256 Printed in U.S.A. Publication No. 1694256 Rev B © PerkinElmer, Inc., 2004 Trademark Acknowledgement Registered names, trademarks, etc. used in this document, even when not specifically marked as such, are protected by law. is a registered trademark of PerkinElmer, Inc. PerkinElmer® and ScanArray® are registered trademarks of PerkinElmer, Inc. Piezorray™, PiezoTip™ and PiezoTipnology™ are trademarks of PerkinElmer, Inc. PlusOne™ is a trademark of Amersham Biosciences SpeedVac® is a registered trademark of Thermo Savant, Inc. Snoop® is a registered trademark of Nupro Company Tween® is a registered trademark of ICI Americas, Inc. Teflon® is a registered trademark of E.I. Du Pont De Nemours and Company Marprene® is a registered trademark of Watson-Marlowe Limited Microsoft® and Windows® are registered trademarks of Microsoft Corp. Release History Part Number Revision 1694256 B Publication Date 01-Mar-2004 Notices The information contained in this document is subject to change without notice. Except as specifically set forth in its terms and conditions of sale, PerkinElmer makes no warranty of any kind with regard to this document, including, but not limited to, the implied warranties of merchantability and fitness for a particular purpose. PerkinElmer shall not be liable for errors contained herein for incidental consequential damages in connection with furnishing, performance or use of this material. Copyright Information This document contains proprietary information that is protected by copyright. All rights are reserved. No part of this publication may be reproduced in any form whatsoever or translated into any language without the prior, written permission of PerkinElmer, Inc. Copyright © 2004 PerkinElmer, Inc. Produced in the USA. Table of Contents CheckLists Piezorray™ Checklists . . . . . . . . . . . . . . . . . . . . . . . . . . . . . . . . . . . . . . 1 Tip Breakage Precautions . . . . . . . . . . . . . . . . . . . . . . . . . . . . . . . . . . . . . . . . . . . . Guidelines for Piezorray™ Liquids . . . . . . . . . . . . . . . . . . . . . . . . . . . . . . . . . . . . . . System Power Up Sequence . . . . . . . . . . . . . . . . . . . . . . . . . . . . . . . . . . . . . . . . . . Checklist for Printing Arrays . . . . . . . . . . . . . . . . . . . . . . . . . . . . . . . . . . . . . . . . . . . Daily Startup Checklist . . . . . . . . . . . . . . . . . . . . . . . . . . . . . . . . . . . . . . . . . . . . . . . End-of-Day Maintenance Checklist . . . . . . . . . . . . . . . . . . . . . . . . . . . . . . . . . . . . . If printing continues into the night; . . . . . . . . . . . . . . . . . . . . . . . . . . . . . . . . . . . . If overnight printing is NOT ongoing . . . . . . . . . . . . . . . . . . . . . . . . . . . . . . . . . . . End-of-Week Maintenance Checklist . . . . . . . . . . . . . . . . . . . . . . . . . . . . . . . . . . . . Monthly Maintenance Checklist . . . . . . . . . . . . . . . . . . . . . . . . . . . . . . . . . . . . . . . . 1 2 2 3 4 5 5 5 5 6 Chapter 1 Introduction . . . . . . . . . . . . . . . . . . . . . . . . . . . . . . . . . . . . . . . . . . . . . . . 7 Patent Acknowledgement . . . . . . . . . . . . . . . . . . . . . . . . . . . . . . . . . . . . . . . . . . . 7 System Overview . . . . . . . . . . . . . . . . . . . . . . . . . . . . . . . . . . . . . . . . . . . . . . . . . . . 8 Optional Equipment . . . . . . . . . . . . . . . . . . . . . . . . . . . . . . . . . . . . . . . . . . . . . . . . 11 Physical Space Requirements . . . . . . . . . . . . . . . . . . . . . . . . . . . . . . . . . . . . . . . . 12 Working Area . . . . . . . . . . . . . . . . . . . . . . . . . . . . . . . . . . . . . . . . . . . . . . . . . . . 12 Weight . . . . . . . . . . . . . . . . . . . . . . . . . . . . . . . . . . . . . . . . . . . . . . . . . . . . . . . . . 12 Electrical Requirements . . . . . . . . . . . . . . . . . . . . . . . . . . . . . . . . . . . . . . . . . . . . . 13 System Electrical Requirements . . . . . . . . . . . . . . . . . . . . . . . . . . . . . . . . . . . . . 13 Fuse Ratings . . . . . . . . . . . . . . . . . . . . . . . . . . . . . . . . . . . . . . . . . . . . . . . . . . . . 13 Environmental Requirements . . . . . . . . . . . . . . . . . . . . . . . . . . . . . . . . . . . . . . . . . 14 Required Supplies . . . . . . . . . . . . . . . . . . . . . . . . . . . . . . . . . . . . . . . . . . . . . . . . . 14 Recommended Supplies and Accessories . . . . . . . . . . . . . . . . . . . . . . . . . . . . . . . 14 i Chapter 2 Piezorray™ Software Overview . . . . . . . . . . . . . . . . . . . . . . . . . . . . . . 15 The Libraries . . . . . . . . . . . . . . . . . . . . . . . . . . . . . . . . . . . . . . . . . . . . . . . . . . . . . . The Main Window . . . . . . . . . . . . . . . . . . . . . . . . . . . . . . . . . . . . . . . . . . . . . . . . . . Sample Mapping . . . . . . . . . . . . . . . . . . . . . . . . . . . . . . . . . . . . . . . . . . . . . . . . . . . Array Mapping Method . . . . . . . . . . . . . . . . . . . . . . . . . . . . . . . . . . . . . . . . . . . . Pattern Mapping Method . . . . . . . . . . . . . . . . . . . . . . . . . . . . . . . . . . . . . . . . . . . Custom Mapping Method . . . . . . . . . . . . . . . . . . . . . . . . . . . . . . . . . . . . . . . . . . All Tip Mode . . . . . . . . . . . . . . . . . . . . . . . . . . . . . . . . . . . . . . . . . . . . . . . . . . . . Tip 1 Mode . . . . . . . . . . . . . . . . . . . . . . . . . . . . . . . . . . . . . . . . . . . . . . . . . . . . . Sample Aspiration Order . . . . . . . . . . . . . . . . . . . . . . . . . . . . . . . . . . . . . . . . . . . Substrate Regions . . . . . . . . . . . . . . . . . . . . . . . . . . . . . . . . . . . . . . . . . . . . . . . . . Sets and Super Sets . . . . . . . . . . . . . . . . . . . . . . . . . . . . . . . . . . . . . . . . . . . . . . . . Side Shooting . . . . . . . . . . . . . . . . . . . . . . . . . . . . . . . . . . . . . . . . . . . . . . . . . . . . . Piezo-Electric Dispensing . . . . . . . . . . . . . . . . . . . . . . . . . . . . . . . . . . . . . . . . . . . . Deck Coordinate System . . . . . . . . . . . . . . . . . . . . . . . . . . . . . . . . . . . . . . . . . . . . 16 18 19 20 22 24 24 24 27 29 29 30 31 31 Chapter 3 Defining Deck Layouts . . . . . . . . . . . . . . . . . . . . . . . . . . . . . . . . . . . . . 33 Overview of Deck Layouts . . . . . . . . . . . . . . . . . . . . . . . . . . . . . . . . . . . . . . . . . . . Calibrating an Existing Deck Layout . . . . . . . . . . . . . . . . . . . . . . . . . . . . . . . . . . . . Calibrate Deck Layout - General Page . . . . . . . . . . . . . . . . . . . . . . . . . . . . . . . . Calibrate Deck Layout - Source Page . . . . . . . . . . . . . . . . . . . . . . . . . . . . . . . . . Calibrate Deck Layout - Substrates Page . . . . . . . . . . . . . . . . . . . . . . . . . . . . . . Calibrate Deck Layout - Labware Page . . . . . . . . . . . . . . . . . . . . . . . . . . . . . . . Creating a New Deck Layout . . . . . . . . . . . . . . . . . . . . . . . . . . . . . . . . . . . . . . . . . Create Deck Layout - General Page . . . . . . . . . . . . . . . . . . . . . . . . . . . . . . . . . . Create Deck Layout - Source Page . . . . . . . . . . . . . . . . . . . . . . . . . . . . . . . . . . Create Deck Layout - Substrates Page . . . . . . . . . . . . . . . . . . . . . . . . . . . . . . . Create Deck Layout - Labware Page . . . . . . . . . . . . . . . . . . . . . . . . . . . . . . . . . Locate Position Dialog - Deck Layout . . . . . . . . . . . . . . . . . . . . . . . . . . . . . . . . . . . Substrate Definition Dialog - Deck Layout . . . . . . . . . . . . . . . . . . . . . . . . . . . . . . . ii 34 35 36 38 41 45 50 52 54 57 64 69 73 Chapter 4 Defining Source Plate Content . . . . . . . . . . . . . . . . . . . . . . . . . . . . . . . 77 Source Plate Overview . . . . . . . . . . . . . . . . . . . . . . . . . . . . . . . . . . . . . . . . . . . . . . 77 Creating a Source Plate . . . . . . . . . . . . . . . . . . . . . . . . . . . . . . . . . . . . . . . . . . . . . 79 Chapter 5 Creating Plate Sets . . . . . . . . . . . . . . . . . . . . . . . . . . . . . . . . . . . . . . . . 85 Plate Set Overview . . . . . . . . . . . . . . . . . . . . . . . . . . . . . . . . . . . . . . . . . . . . . . . . . 85 Creating a Plate Set . . . . . . . . . . . . . . . . . . . . . . . . . . . . . . . . . . . . . . . . . . . . . . . . 87 Chapter 6 Creating Dispense Patterns . . . . . . . . . . . . . . . . . . . . . . . . . . . . . . . . . 91 Dispense Pattern Overview . . . . . . . . . . . . . . . . . . . . . . . . . . . . . . . . . . . . . . . . . . 91 Creating a Dispense Pattern . . . . . . . . . . . . . . . . . . . . . . . . . . . . . . . . . . . . . . . . . . 92 Chapter 7 Creating Protocols. . . . . . . . . . . . . . . . . . . . . . . . . . . . . . . . . . . . . . . . . 97 Protocol Overview . . . . . . . . . . . . . . . . . . . . . . . . . . . . . . . . . . . . . . . . . . . . . . . . . . 97 Creating a Printing Protocol . . . . . . . . . . . . . . . . . . . . . . . . . . . . . . . . . . . . . . . . . . 98 Protocol - General Page . . . . . . . . . . . . . . . . . . . . . . . . . . . . . . . . . . . . . . . . . . . 99 Protocol - Mapping Page . . . . . . . . . . . . . . . . . . . . . . . . . . . . . . . . . . . . . . . . . 100 Protocol - Array / Pattern / Custom Mapping Page . . . . . . . . . . . . . . . . . . . . . . 101 Protocol - Aspirate Settings Page . . . . . . . . . . . . . . . . . . . . . . . . . . . . . . . . . . . 113 Protocol - Dispense Settings Page . . . . . . . . . . . . . . . . . . . . . . . . . . . . . . . . . . 116 Protocol - Wash Settings Page . . . . . . . . . . . . . . . . . . . . . . . . . . . . . . . . . . . . . 118 Protocol - Error Handling Page . . . . . . . . . . . . . . . . . . . . . . . . . . . . . . . . . . . . . 120 Protocol - Other Settings Page . . . . . . . . . . . . . . . . . . . . . . . . . . . . . . . . . . . . . 122 iii Chapter 8 Preparing for Printing . . . . . . . . . . . . . . . . . . . . . . . . . . . . . . . . . . . . . 125 Define the Print Protocol . . . . . . . . . . . . . . . . . . . . . . . . . . . . . . . . . . . . . . . . . . . . Populate the Deck with Substrates . . . . . . . . . . . . . . . . . . . . . . . . . . . . . . . . . . . . Turn on the Substrate Vacuum . . . . . . . . . . . . . . . . . . . . . . . . . . . . . . . . . . . . . . . Turn on the Optional Environmental Enclosure . . . . . . . . . . . . . . . . . . . . . . . . . . Prepare the Samples . . . . . . . . . . . . . . . . . . . . . . . . . . . . . . . . . . . . . . . . . . . . . . Populate the Deck with a Source Plate . . . . . . . . . . . . . . . . . . . . . . . . . . . . . . . . Start the Print Run . . . . . . . . . . . . . . . . . . . . . . . . . . . . . . . . . . . . . . . . . . . . . . . . Choose a Protocol . . . . . . . . . . . . . . . . . . . . . . . . . . . . . . . . . . . . . . . . . . . . . . Choose Targeting for Targeted Dispensing . . . . . . . . . . . . . . . . . . . . . . . . . . . Enter a Run Note . . . . . . . . . . . . . . . . . . . . . . . . . . . . . . . . . . . . . . . . . . . . . . . Specify the Number of Samples to Print . . . . . . . . . . . . . . . . . . . . . . . . . . . . . . Specify the Number of Slides to Print . . . . . . . . . . . . . . . . . . . . . . . . . . . . . . . . Select the GAL File Output . . . . . . . . . . . . . . . . . . . . . . . . . . . . . . . . . . . . . . . . Click the Start! Button . . . . . . . . . . . . . . . . . . . . . . . . . . . . . . . . . . . . . . . . . . . . Correction Runs . . . . . . . . . . . . . . . . . . . . . . . . . . . . . . . . . . . . . . . . . . . . . . . . Locate Position Dialog - Targeting . . . . . . . . . . . . . . . . . . . . . . . . . . . . . . . . . . . . Printing Arrays in Plate Wells . . . . . . . . . . . . . . . . . . . . . . . . . . . . . . . . . . . . . . . . iv 125 126 127 127 128 128 130 131 133 136 136 136 136 137 137 138 141 Chapter 9 System Utilities and Procedures . . . . . . . . . . . . . . . . . . . . . . . . . . . . 145 Prime Utility . . . . . . . . . . . . . . . . . . . . . . . . . . . . . . . . . . . . . . . . . . . . . . . . . . . . . . Standard Wash Utility . . . . . . . . . . . . . . . . . . . . . . . . . . . . . . . . . . . . . . . . . . . . . . Deep Cleaning Utility . . . . . . . . . . . . . . . . . . . . . . . . . . . . . . . . . . . . . . . . . . . . . . Standby Utility . . . . . . . . . . . . . . . . . . . . . . . . . . . . . . . . . . . . . . . . . . . . . . . . . . . . Labware Utility . . . . . . . . . . . . . . . . . . . . . . . . . . . . . . . . . . . . . . . . . . . . . . . . . . . Camera Dispense Positions . . . . . . . . . . . . . . . . . . . . . . . . . . . . . . . . . . . . . . . Washbowl Position . . . . . . . . . . . . . . . . . . . . . . . . . . . . . . . . . . . . . . . . . . . . . . Trough Positions . . . . . . . . . . . . . . . . . . . . . . . . . . . . . . . . . . . . . . . . . . . . . . . . Home/Tip Change/User Defined Positions . . . . . . . . . . . . . . . . . . . . . . . . . . . . Park Position . . . . . . . . . . . . . . . . . . . . . . . . . . . . . . . . . . . . . . . . . . . . . . . . . . . Tuning Utility . . . . . . . . . . . . . . . . . . . . . . . . . . . . . . . . . . . . . . . . . . . . . . . . . . . . . Start-of-Day Procedure . . . . . . . . . . . . . . . . . . . . . . . . . . . . . . . . . . . . . . . . . . . . . End the Standby Mode . . . . . . . . . . . . . . . . . . . . . . . . . . . . . . . . . . . . . . . . . . . Check the System Liquid Reservoir . . . . . . . . . . . . . . . . . . . . . . . . . . . . . . . . . Fill the Wash Reservoir . . . . . . . . . . . . . . . . . . . . . . . . . . . . . . . . . . . . . . . . . . . Empty the Waste Reservoir . . . . . . . . . . . . . . . . . . . . . . . . . . . . . . . . . . . . . . . Clean and Fill the Buffer Trough . . . . . . . . . . . . . . . . . . . . . . . . . . . . . . . . . . . . Clean and Fill the Cleaning Solution Trough . . . . . . . . . . . . . . . . . . . . . . . . . . Fill the Reservoir for the Optional Enclosure . . . . . . . . . . . . . . . . . . . . . . . . . . Perform the Deep Cleaning Utility . . . . . . . . . . . . . . . . . . . . . . . . . . . . . . . . . . . Perform the Prime Utility . . . . . . . . . . . . . . . . . . . . . . . . . . . . . . . . . . . . . . . . . . Perform the Tip Tuning Utility . . . . . . . . . . . . . . . . . . . . . . . . . . . . . . . . . . . . . . Optional Chiller Setup . . . . . . . . . . . . . . . . . . . . . . . . . . . . . . . . . . . . . . . . . . . . End-of-Day Procedure . . . . . . . . . . . . . . . . . . . . . . . . . . . . . . . . . . . . . . . . . . . . . v 146 148 149 152 153 157 158 160 160 161 162 165 165 165 166 166 167 168 169 169 169 169 170 171 Chapter 10 Routine Maintenance. . . . . . . . . . . . . . . . . . . . . . . . . . . . . . . . . . . . . . 173 PiezoTip Sonication Utility . . . . . . . . . . . . . . . . . . . . . . . . . . . . . . . . . . . . . . . . . . Change Syringes Utility . . . . . . . . . . . . . . . . . . . . . . . . . . . . . . . . . . . . . . . . . . . . Fast Flush Utility . . . . . . . . . . . . . . . . . . . . . . . . . . . . . . . . . . . . . . . . . . . . . . . . . . Run Peri-pump Utility . . . . . . . . . . . . . . . . . . . . . . . . . . . . . . . . . . . . . . . . . . . . . . Camera to Tip Calibration Utility . . . . . . . . . . . . . . . . . . . . . . . . . . . . . . . . . . . . . . Set Pressure Offsets Utility . . . . . . . . . . . . . . . . . . . . . . . . . . . . . . . . . . . . . . . . . . Flush Pressure Verification Utility . . . . . . . . . . . . . . . . . . . . . . . . . . . . . . . . . . . . . Empty Tips Utility . . . . . . . . . . . . . . . . . . . . . . . . . . . . . . . . . . . . . . . . . . . . . . . . . Silanate Tips Utility . . . . . . . . . . . . . . . . . . . . . . . . . . . . . . . . . . . . . . . . . . . . . . . . Sodium Hydroxide Cleaning Utility . . . . . . . . . . . . . . . . . . . . . . . . . . . . . . . . . . . . Service Utilities . . . . . . . . . . . . . . . . . . . . . . . . . . . . . . . . . . . . . . . . . . . . . . . . . . . Helium Sparging Setup Procedure . . . . . . . . . . . . . . . . . . . . . . . . . . . . . . . . . . . . Starting the Liquid Path Procedure . . . . . . . . . . . . . . . . . . . . . . . . . . . . . . . . . . . . End-of-Week Maintenance Procedure . . . . . . . . . . . . . . . . . . . . . . . . . . . . . . . . . Monthly Maintenance Procedure . . . . . . . . . . . . . . . . . . . . . . . . . . . . . . . . . . . . . Backing Up the Database . . . . . . . . . . . . . . . . . . . . . . . . . . . . . . . . . . . . . . . . . . . Restoring the Database . . . . . . . . . . . . . . . . . . . . . . . . . . . . . . . . . . . . . . . . . . . . Replacing Dispensers . . . . . . . . . . . . . . . . . . . . . . . . . . . . . . . . . . . . . . . . . . . . . . XY Tip Offsets Procedure . . . . . . . . . . . . . . . . . . . . . . . . . . . . . . . . . . . . . . . . . . . Replacing Syringes . . . . . . . . . . . . . . . . . . . . . . . . . . . . . . . . . . . . . . . . . . . . . . . . Replacing Pressure Transducers . . . . . . . . . . . . . . . . . . . . . . . . . . . . . . . . . . . . . Replacing Valves . . . . . . . . . . . . . . . . . . . . . . . . . . . . . . . . . . . . . . . . . . . . . . . . . Replacing Tubing . . . . . . . . . . . . . . . . . . . . . . . . . . . . . . . . . . . . . . . . . . . . . . . . . General Guidelines for Handling System Tubing . . . . . . . . . . . . . . . . . . . . . . . Dispenser to Pressure Transducer . . . . . . . . . . . . . . . . . . . . . . . . . . . . . . . . . . Pressure Transducer to Valve . . . . . . . . . . . . . . . . . . . . . . . . . . . . . . . . . . . . . Valve to System Liquid Reservoir . . . . . . . . . . . . . . . . . . . . . . . . . . . . . . . . . . . Replacing Peri-pump Tubing . . . . . . . . . . . . . . . . . . . . . . . . . . . . . . . . . . . . . . . . Replacing Deck Tubing . . . . . . . . . . . . . . . . . . . . . . . . . . . . . . . . . . . . . . . . . . . . . Tip Maintenance Procedures . . . . . . . . . . . . . . . . . . . . . . . . . . . . . . . . . . . . . . . . Routine Tip Cleaning . . . . . . . . . . . . . . . . . . . . . . . . . . . . . . . . . . . . . . . . . . . . Clearing a Clogged Tip . . . . . . . . . . . . . . . . . . . . . . . . . . . . . . . . . . . . . . . . . . . External Surface Cleaning . . . . . . . . . . . . . . . . . . . . . . . . . . . . . . . . . . . . . . . . Sodium Hydroxide Cleaning . . . . . . . . . . . . . . . . . . . . . . . . . . . . . . . . . . . . . . . Silanate Tip Coating . . . . . . . . . . . . . . . . . . . . . . . . . . . . . . . . . . . . . . . . . . . . . vi 174 175 176 178 179 183 184 186 187 190 191 192 195 197 198 200 200 201 206 211 214 217 218 219 222 223 224 225 228 230 231 232 233 234 234 Chapter 11 Reporting Results . . . . . . . . . . . . . . . . . . . . . . . . . . . . . . . . . . . . . . . . 235 Run Results . . . . . . . . . . . . . . . . . . . . . . . . . . . . . . . . . . . . . . . . . . . . . . . . . . . . . 235 Output Files . . . . . . . . . . . . . . . . . . . . . . . . . . . . . . . . . . . . . . . . . . . . . . . . . . . . . 239 The Event Log . . . . . . . . . . . . . . . . . . . . . . . . . . . . . . . . . . . . . . . . . . . . . . . . . . . 241 Appendix A Sample Mapping Summary . . . . . . . . . . . . . . . . . . . . . . . . . . . . . . . . . 243 Array Mapping - All Tip Mode . . . . . . . . . . . . . . . . . . . . . . . . . . . . . . . . . . . . . . . . Pattern Mapping - All Tip Mode . . . . . . . . . . . . . . . . . . . . . . . . . . . . . . . . . . . . . . Array Mapping - Tip 1 Mode . . . . . . . . . . . . . . . . . . . . . . . . . . . . . . . . . . . . . . . . . Pattern Mapping Samples - Tip 1 Mode . . . . . . . . . . . . . . . . . . . . . . . . . . . . . . . . Sample Aspiration Order . . . . . . . . . . . . . . . . . . . . . . . . . . . . . . . . . . . . . . . . . . . 96 Well Source Plate . . . . . . . . . . . . . . . . . . . . . . . . . . . . . . . . . . . . . . . . . . . . 384 Well Source Plate . . . . . . . . . . . . . . . . . . . . . . . . . . . . . . . . . . . . . . . . . . . 244 245 246 247 248 249 249 Appendix B Piezorray™ Liquid Compatibility . . . . . . . . . . . . . . . . . . . . . . . . . . . . 251 Sample Materials . . . . . . . . . . . . . . . . . . . . . . . . . . . . . . . . . . . . . . . . . . . . . . . . . Proteins . . . . . . . . . . . . . . . . . . . . . . . . . . . . . . . . . . . . . . . . . . . . . . . . . . . . . . . Nucleic Acids . . . . . . . . . . . . . . . . . . . . . . . . . . . . . . . . . . . . . . . . . . . . . . . . . . Buffer Solutions . . . . . . . . . . . . . . . . . . . . . . . . . . . . . . . . . . . . . . . . . . . . . . . . . . Cleaning Solutions . . . . . . . . . . . . . . . . . . . . . . . . . . . . . . . . . . . . . . . . . . . . . . . . Proteins . . . . . . . . . . . . . . . . . . . . . . . . . . . . . . . . . . . . . . . . . . . . . . . . . . . . . . . Nucleic Acids . . . . . . . . . . . . . . . . . . . . . . . . . . . . . . . . . . . . . . . . . . . . . . . . . . System Liquid . . . . . . . . . . . . . . . . . . . . . . . . . . . . . . . . . . . . . . . . . . . . . . . . . . . . Wash Solution . . . . . . . . . . . . . . . . . . . . . . . . . . . . . . . . . . . . . . . . . . . . . . . . . . . . vii 251 251 252 252 252 252 252 253 253 Appendix C Plate Content Files. . . . . . . . . . . . . . . . . . . . . . . . . . . . . . . . . . . . . . . . 255 Plate Contents File Format . . . . . . . . . . . . . . . . . . . . . . . . . . . . . . . . . . . . . . . . . . First Line of Header Information . . . . . . . . . . . . . . . . . . . . . . . . . . . . . . . . . . . . Second Line of Header Information . . . . . . . . . . . . . . . . . . . . . . . . . . . . . . . . . Sample Data - Third and Following Lines . . . . . . . . . . . . . . . . . . . . . . . . . . . . . Creating a Plate Content File . . . . . . . . . . . . . . . . . . . . . . . . . . . . . . . . . . . . . . . . To Create a Plate Content File . . . . . . . . . . . . . . . . . . . . . . . . . . . . . . . . . . . . . 255 256 256 257 258 259 Appendix D Troubleshooting. . . . . . . . . . . . . . . . . . . . . . . . . . . . . . . . . . . . . . . . . . 261 Dispensing Issues . . . . . . . . . . . . . . . . . . . . . . . . . . . . . . . . . . . . . . . . . . . . . . . . . Recommended Good Practices . . . . . . . . . . . . . . . . . . . . . . . . . . . . . . . . . . . . Dispenser Images . . . . . . . . . . . . . . . . . . . . . . . . . . . . . . . . . . . . . . . . . . . . . . . System Related Issues . . . . . . . . . . . . . . . . . . . . . . . . . . . . . . . . . . . . . . . . . . . Dispenser Related Issues . . . . . . . . . . . . . . . . . . . . . . . . . . . . . . . . . . . . . . . . . Array Printing Issues . . . . . . . . . . . . . . . . . . . . . . . . . . . . . . . . . . . . . . . . . . . . . . . 261 262 262 264 266 269 Appendix E Regulatory and Safety Compliance . . . . . . . . . . . . . . . . . . . . . . . . . . 271 Explanation of Symbols . . . . . . . . . . . . . . . . . . . . . . . . . . . . . . . . . . . . . . . . . . . . Regulatory Compliance . . . . . . . . . . . . . . . . . . . . . . . . . . . . . . . . . . . . . . . . . . . . Safety . . . . . . . . . . . . . . . . . . . . . . . . . . . . . . . . . . . . . . . . . . . . . . . . . . . . . . . . EMI and Susceptibility . . . . . . . . . . . . . . . . . . . . . . . . . . . . . . . . . . . . . . . . . . . . Quality Management System . . . . . . . . . . . . . . . . . . . . . . . . . . . . . . . . . . . . . . Radio Frequency Interference . . . . . . . . . . . . . . . . . . . . . . . . . . . . . . . . . . . . . Electrical Safety . . . . . . . . . . . . . . . . . . . . . . . . . . . . . . . . . . . . . . . . . . . . . . . . . . Ionizer Precautions . . . . . . . . . . . . . . . . . . . . . . . . . . . . . . . . . . . . . . . . . . . . . . Moving the System Safely . . . . . . . . . . . . . . . . . . . . . . . . . . . . . . . . . . . . . . . . . . System Cleaning . . . . . . . . . . . . . . . . . . . . . . . . . . . . . . . . . . . . . . . . . . . . . . . . . . viii 272 273 273 273 273 274 277 277 277 278 PIEZORRAY™ CHECKLISTS CheckLists Piezorray™ Checklists Some common guidelines and checklists are given below for typical operations. The details for the individual items in the checklists are described as indicated within the pages of this User Manual. Lists include: Tip Breakage Precautions (page 1) Guidelines for Piezorray™ Liquids (page 2) System Power Up Sequence (page 2) Checklist for Printing Arrays (page 3) Daily Startup Checklist (page 4) End-of-Day Maintenance Checklist (page 5) End-of-Week Maintenance Checklist (page 5) Monthly Maintenance Checklist (page 6) Tip Breakage Precautions These are the actions that most frequently result in broken or damaged dispensers. Moving the Dispensers with the safety caps attached. Using a Source Plate that does not match the Deck Layout definition. Not properly positioning the Source Plate in the plate holder. Using too large of a step size when defining labware positions. 1 CHECKLISTS Guidelines for Piezorray™ Liquids This summary of liquid guidelines is extracted from Appendix B (page 251). System Liquid should be HPLC grade water, filtered to 0.2 µm and continuously degassed. Four liters should last approximately one month, depending on usage. Wash Solution should be deionized water, free of particulates. Four liters should last approximately one day, depending on usage. Buffer Solution should be filtered to 0.2 µm and selected as appropriate for your samples. Buffer should be replaced daily. Cleaning Solution should be filtered to 0.2 µm and selected as appropriate for your samples. Cleaning Solution should be replaced daily. Sample reconstitution buffer filtered to 0.2 µm and selected as appropriate for your samples. Reconstituted samples should be completely thawed and free of particulate. Pipette into a compatible microplate and centrifuge to degas. System Power Up Sequence When powering up the system, use the following sequence: Turn on power to the computer and allow it to completely boot up to the operating system desktop. Turn on power to the Piezorray™ instrument. The power switch is located on the front panel of the system, above the peri-pump. Turn on power to the optional Environmental Enclosure. The power switch for the pump is located on the back of the Hepa Filter Control (HFC) box and the ionizer power switch is located on the Ionizer Driver on top of the HFC box. 2 PIEZORRAY™ CHECKLISTS Checklist for Printing Arrays The following checklist is a summary of the printing process (page 125). Populate the Deck with Substrates (Slides) according to the Deck Layout Turn on Vacuum Prepare Samples in a 96-well or 384-well microplate Populate the Deck with a Source Plate according to the Deck Layout Click the Start Button Choose a Protocol to Print Choose Targeting if Necessary for Targeted Dispensing Enter a Run Note if Desired Specify the Number of Samples to Print Specify the Number of Slides to Print (Duplicate Substrates) Select the GAL File Output if Desired Watch the first couple of aspirate cycles to verify expected operation. 3 CHECKLISTS Daily Startup Checklist This checklist is compiled from the Start-of-Day Procedure (page 165). Click the Stop button to end the Standby mode (page 165). Check the level of System Liquid in the Reservoir (page 165). Check for proper operation of the degassing system (page 165). Fill the Wash Reservoir (page 166). Empty the Waste Reservoir (page 166). Clean and Fill the Buffer Trough (page 167). Clean and Fill the Cleaning Solution Trough, if necessary (page 168). Fill the reservoir for the optional enclosure if installed, and turn on the enclosure pump, (page 165). If the Park mode was used instead of the Standby mode, Run the Prime Utility 2 Times (page 146). Perform the Deep Cleaning Utility (page 149). Perform the Prime Utility 2 Times (page 146). Perform the Tip Tuning Utility to get good drops from each tip (page 162). Turn on the Optional Chiller (page 170). 4 PIEZORRAY™ CHECKLISTS End-of-Day Maintenance Checklist This checklist is extracted from the End-of-Day Procedure (page 171). If printing continues into the night; Define the protocol to leave the system in Standby Mode (page 122). If overnight printing is NOT ongoing Turn Off the Vacuum Pump. Turn Off the optional Chiller. Turn Off the optional Enclosure Pump. Store the Source Plate appropriately for sample viability. Perform the Deep Cleaning Utility (page 149). Run the Standby Utility (page 152). End-of-Week Maintenance Checklist This checklist is a reminder for the End-of-Week Maintenance Procedure (page 197). Check that the System Liquid reservoir contains at least 1 L of System Liquid. Check that the Wash reservoir contains at least 3 L of Wash Solution. Clean and rinse the Water reservoir for the optional enclosure. Empty the Waste container. 5 CHECKLISTS Monthly Maintenance Checklist This checklist summarizes the Monthly Maintenance Procedure (page 198) required for the system. Disconnect the tubing from the Dispensers. Run the Fast Flush utility with 70% Isopropyl Alcohol (collect the waste for separate disposal). Allow the alcohol to soak in the tubing for 10 minutes. Clean, Fill and Degas the System Liquid reservoir. Run the Fast Flush utility three times using System Liquid (collect the waste for separate disposal). Reconnect the tubing to the Dispensers. Run the Prime utility three times. Run the Peri-Pump utility with 70% Isopropyl Alcohol (collect the waste for separate disposal). Allow the alcohol to soak in the washbowl for 10 minutes. Replace the Wash supply line tubing on the Wash reservoir. Run the Peri-Pump utility three times with Wash Solution (collect the waste for separate disposal). Check the He supply tank to ensure adequate gas for sparging. Wipe down the outer surfaces of the instrument with a damp, lint free cloth. Wipe down both the inside and outside panel surfaces of the optional enclosure with a damp, lint-free cloth. Dispose of collected alcohol according to best laboratory practices. Back up the Database. 6 INTRODUCTION Chapter 1 Introduction The Piezorray™ system is a non-contact microarray printing system that deposits quantitative and repeatable sub-nanoliter volumes onto any type of substrate. This system uses the PerkinElmer piezoelectric microdispensing technology to print high-density arrays for: Gridding biochemical samples onto substrates (biochips) or microplates. High Throughput Screening in miniaturized assays. Patent Acknowledgement The use of the Piezorray™ system for certain applications in fabricating microarrays may require a license from one or more third parties that have patents in this area. The following companies are some of those that have patents related to microarrays: Affymetrix, Inc. Incyte Genomics Oxford Gene Technology, Ltd. Hyseq, Inc. PerkinElmer Life and Analytical Sciences does not encourage or suggest that this equipment be used in any way that would infringe on any existing patent rights. Consult your own legal advisors for counsel on non-infringing or licensed use of this instrumentation in fabricating microarrays. 7 CHAPTER 1 System Overview The Piezorray™ system (Figure 1-1) consists of a low volume high accuracy dispensing system and a precision robotic positioning mechanism. The dispensing system uses the PerkinElmer PiezoTipnology™ to dispense very small volumes of sample material onto a substrate. This technology uses pressure control and a piezoelectric collar to squeeze out consistent drops of approximately 333 pL volume. The system is configured with four dispensers mounted together in a dispense head for increased throughput. Each dispenser has an independent fluid path with individual pressure control components in the system. The system is equipped with an active washbowl to minimize carryover and sample contamination. The wash solution in the washbowl is actively changed throughout each wash cycle with a peristaltic pump (peri-pump). The peri-pump in the system supplies fresh wash solution in one side of the washbowl for cleaning the tips while simultaneously evacuating used solution from the other side. The washbowl is also internally equipped with a high frequency transducer to sonicate the liquid and improve the tip cleaning action. The dispense head is mounted to the robotic system that precisely moves the dispensers in three axes. The horizontal motion of the dispense head in two dimensions over the deck produces arrays and accesses system labware positions. The vertical motion controls the tip height and is used to access liquid levels in labware, dispense without splashing and travel safely over the deck without damaging the tips. The system may be equipped with two cameras to help in setting up and verifying the system. The first camera is standard and is used to verify dispensing operations. This camera is mounted horizontally on the deck and the robotic stage moves the dispense head to the camera when required. The second camera is optional and is mounted vertically with the dispense head. This camera is used to align dispensing targets. This targeting camera is delivered with an auxiliary light source to illuminate the substrates during targeting. 8 INTRODUCTION Figure 1-1. The Piezorray™ System. The labware deck supports the stationary positioning of critical components of the system. These critical components include: The active washbowl The buffer trough The cleaning trough Dispenser tuning camera Six holder positions for labware 9 CHAPTER 1 Of the six holder positions, one of them will be the location of the Source Plate (96-well or 384-well plate). The other positions can support dispense labware for printing arrays. You can print arrays into the bottoms of microplate wells or onto other substrates such as microscope slides. One type of labware holder supports single microplates and another holder type supports up to five substrates the size of standard microscope slides. Figure 1-2. The Piezorray™ with Optional Enclosure. 10 INTRODUCTION Optional Equipment Optional equipment or accessories available for the Piezorray™ system include: Extended Tip Option For printing arrays into the bottoms of microplates Labware Holders Additional labware holders to locate and support labware on the deck. Holders are available for: ) Note: Plate Holder for microplates for any deck position or option Plate Holder for 384 MJR microplates for any deck position or option Slide Holder for a left column position on a cooled deck Slide Holder for a right column position on a cooled deck Slide Holder for a left column position on a non-cooled deck. Slide Holder for a right column position in a non-cooled deck All Slide Holders support up to five substrates of standard microscope slide size (1 inch by 3 inches - 2.54 cm by 7.62 cm) Vertical Positioning Camera For visual positioning and targeted dispensing on substrates Environmental Enclosure Option System enclosure to maintain dust free environment for improved reliability Heating and Cooling Option Recirculating heating or cooling bath for each holder position on the deck to maintain temperature while printing arrays. Helium Sparging Option For degassing system liquid High Volume Reservoir Option Large wash liquid reservoir 11 CHAPTER 1 Physical Space Requirements Height: Width: Depth: 18 in. (46 cm) 51 in. (130 cm) - includes X-axis motion clearance 30 in. (77 cm) Working Area Basic System Height: Width: Depth: 30 in. (77 cm) - includes tubing loop clearance 85 in. (216 cm) - includes space for computer 30 in. (77 cm) With Optional Enclosure Height: Width: Depth: 31 in. (79 cm) - closed door enclosure height 48 in. (122 cm) - open door clearance 55 in. (140 cm) - enclosure width 85 in. (216 cm) - includes space for computer 39 in. (100 cm) Weight Basic System (approximate) Net Weight: 225 lb (102 kg) Shipping Weight: 325 lb (148 kg) With Optional Enclosure (approximate) Net Weight: 320 lb (146 kg) Shipping Weight: 420 lb (191 kg) 12 INTRODUCTION Electrical Requirements Installation/Overvoltage Category Pollution Degree 2 Class I II System Electrical Requirements Basic System Piezorray™ system computer and monitor ultrasonic washbowl vacuum pump light source for optional Vertical Positioning Camera 100-130 Vac, 13.0 A, 50-60 Hz 200-250 Vac, 7.25 A, 50-60 Hz Optional Cooler The optional Cooler should be powered through an indpendent circuit to handle the potential current requirement. 100-130 Vac, 12.0 A (separate circuit), 50-60 Hz 200-250 Vac, 6.0 A (separate circuit), 50-60 Hz Optional Enclosure Make sure that the circuit used to power the optional enclosure is sufficient to handle the required current. An independent circuit may be required. 100-130 Vac, 4.0 A, 50-60 Hz 200-250 Vac, 2.0 A, 50-60 Hz Fuse Ratings Piezorray™ Instrument 100-130 Vac, 3.0 A (5x20 mm, time-delay) 200-240 Vac, 2.0 A (5x20 mm, time-delay) Optional Enclosure 100-130 Vac, 5.0 A (5x20 mm, time-delay) 200-240 Vac, 2.0 A (5x20 mm, time-delay) 13 CHAPTER 1 Environmental Requirements Temperature: 66-70 ºF (19-21 ºC) controlled Relative Humidity: 30-40% controlled Altitude: <6500 ft (2000 m) Consult the factory for higher elevations. Clean Laboratory Environment (Clean Room Class 10,000 or better recommended) Required Supplies HPLC grade water or equivalent for system liquid Deionized water free of particulates for tip washing optional Environmental Enclosure HPLC grade methanol HPLC grade acetone Other cleaning solutions Tween® 20 SDS NaOH (for proteins) Basic laboratory ware: transfer pipettes, pipettors flasks, beakers, bottles microplates centrifuge, SpeedVac® to degas plates clean room wipes, free of lint or loose particles Recommended Supplies and Accessories Helium Sparging kit for degassing system liquid. Also requires: 99.999% Ultra High Purity Helium Supply 2 stage high purity Helium Regulator Customer Maintenance Kit. Kit includes: Replacement pressure transducers Replacement syringes Replacement valves Replacement tubing Replacement tubing fittings Replacement fuses 14 PIEZORRAY™ SOFTWARE OVERVIEW Chapter 2 Piezorray™ Software Overview This overview chapter discusses several important concepts for the Piezorray™ software. Information necessary for specific tasks is generally included in those descriptions for operation in this User Manual. There are, however, some concepts that tend to cross the natural task boundaries and are included here for your understanding of the software. Information to support the following concepts can be found in this chapter. The Libraries (page 16) The Main Window (page 18) Sample Mapping (page 19) Array Mapping Method (page 20) Pattern Mapping Method (page 22) Custom Mapping Method (page 24) All Tip Mode (page 24) Tip 1 Mode (page 24) Sample Aspiration Order (page 27) Substrate Regions (page 29) Sets and Super Sets (page 29) Piezo-Electric Dispensing (page 31) Deck Coordinate System (page 31) 15 CHAPTER 2 The Libraries The Piezorray™ software allows you to create standard building blocks to support the use of the Piezorray™ system in your lab. These building block definitions are stored so that they can be used again, much like a set of libraries (Figure 2-1) from which you can simply pick-and-choose based on your application. These libraries include: Deck Layouts or labware configurations for your specific applications Source Plate content definitions Plate Set definitions to group specific source plates together for printing runs Dispensing Patterns that determine the spot locations for producing repeatable arrays during a print run. Protocols that specify aspiration and dispensing parameters for a particular printing run and select specific entries from the libraries listed above. Deck Layout Library Pattern Library Source Plate Library Plate Set Library Protocol Library Print Run Figure 2-1. Piezorray™ Library Configuration. 16 PIEZORRAY™ SOFTWARE OVERVIEW The Piezorray™ software itself (Figure 2-2) leads you step-by-step through these library item definitions. The buttons in the upper left corner of the main window are ordered such that you can use them sequentially to create the building blocks necessary for a print run. After you have created an entry in one of these libraries, you can use it as part of a protocol definition. Figure 2-2. The Main Piezorray™ Software Window. 17 CHAPTER 2 The Main Window Using the Edit buttons in the upper left corner of the window, you can select the individual libraries where you can modify or add to the entries found there. Using the Run Protocol buttons in the lower left corner of the window, you can start and stop print runs and perform the programmed utility functions to maintain the system. In the center of the main Piezorray™ software window, the deck layout and array progress during a printing run are shown. You can click on one of the tabs (Figure 2-3) at the top of the window to view the run report, event log or additional help such as an online version of this User Manual, if you need assistance. Figure 2-3. Main Software Display Options. With a printing run in progress, the source plate and substrate images in the center portion of the window will represent the progress of the run by indicating the samples in the source plate and the spots on the substrate that are completed. Buttons at the top of the substrate image let you zoom in or out to view the substrate printing with greater resolution. The Auto Update check box below the substrate image will scroll the substrate image, if necessary, to show the newest spots in the window whenever the image is updated. On the right side of the window, you can see the status of the individual dispensers and the progress of the current print run. When the system is idle (between print runs), the main window shows the deck layout and the protocol name for the protocol that was last edited or printed. 18 PIEZORRAY™ SOFTWARE OVERVIEW Sample Mapping When printing arrays to substrates, it is important to be able to identify what sample is associated with each printed spot. In the Piezorray™ system, this is called sample mapping. There are three Mapping Methods and two Tip Modes in the Piezorray™ software to aid in configuring sample mapping for you print runs. Array Mapping Pattern Mapping Custom Mapping All Tip Mode Tip One Mode The Array Mapping and Pattern Mapping methods involve automatic determination of where each sample will be printed. This mapping is determined by a set of rules that are applied in the software according to your selections. Alternatively, Custom Mapping requires you to specifically indicate where each sample is to be dispensed during the printing run. This method gives you maximum flexibility over mapping samples to spots, but can be a tedious endeavor if your arrays are very large or complex. The Tip Modes affect sample mapping by imposing mapping restrictions based on tip spacing. In All Tip mode, each tip is individually mapped to dispense the sample. In Tip 1 mode, mapping is limited to the tip number one, with mapping for the remaining tips fixed by their physical distance from the first tip. By ensuring that all four tips can be simultaneously aligned to their mapped spots, all four tips can be dispensed at the same time, reducing the time it takes to print the four samples, increasing throughput. 19 CHAPTER 2 Array Mapping Method To print rectangular arrays and let the system map the samples to the spots in the most efficient way, choose Array Mapping. Array Mapping creates rectangular arrays, and attempts to fill them sequentially according to a set of rules defined in the Protocol. You determine the rules by your choices in the Protocol. When you have selected the Array Mapping method, there will be five sets of parameters available to control the mapping rules. These parameters are: Number of Replicates Replicate Layout Dispensing Orientation Array Size Array Set Size The Number of Replicates is simply the number of individual spots that should be dispensed for each sample. The Replicate Layout determines how the replicates are laid out (or grouped) on the substrate (Figure 2-4). Replicates may be grouped together (Sequential), appear in sample order (Wrap) or appear in sample order per array (By Set). The Dispensing Orientation determines whether sequences of samples are dispensed down the arrays (By Column) or across the arrays (By Row). This orientation applies both to the order that rows and columns of individual arrays are filled as well as the order in which arrays in an Array Set are filled (Figure 2-4). Array Sets are discussed on page 29. The Array Size parameters determine the number of rows and columns to create in each individual array. Depending on the number of replicates required, this affects the mapping of samples by setting the number of spots in an array. The Array Set Size parameters determine the number of arrays to create on the substrate. Arrays are repeated in a rectangular pattern according to the number of Horizontal and Vertical Arrays that you enter. The maximum number of samples required in the Source Plate is determined by the combination of the number of Replicates, the size of the Arrays and the size of the Array Set. 20 PIEZORRAY™ SOFTWARE OVERVIEW Orientation By Col Array Mapping Layout = Sequential Replicates = 5 Tip Mode = All Tips Samples = 10 Arrays Horizontal = 2 Arrays Vertical = 3 1 1 2 2 2 2 6 6 6 7 7 7 7 7 8 1 1 2 1 1 2 1 2 2 2 3 4 3 3 4 3 3 4 2 3 3 3 3 3 4 4 4 8 8 8 8 9 9 9 9 9 4 5 5 4 5 6 5 5 6 6 7 7 6 7 7 6 7 8 4 4 5 5 5 5 5 6 6 10 10 10 10 10 8 8 9 8 9 9 8 9 9 10 10 10 10 10 Orientation By Col Array Mapping Layout = Wrap Replicates = 5 Tip Mode = All Tips Samples = 10 Arrays Horizontal = 2 Arrays Vertical = 3 1 2 3 4 5 6 Layout = By Set Replicates = 6 Tip Mode = All Tips Samples = 9 Arrays Horizontal = 2 Arrays Vertical = 3 Orientation By Row 4 5 6 7 8 9 8 1 9 2 10 3 10 3 1 4 2 5 6 7 8 7 10 3 8 1 4 9 2 5 9 10 1 2 3 4 5 6 7 8 1 4 9 2 10 3 1 4 5 6 7 6 9 7 10 8 7 8 10 1 3 4 6 7 8 9 10 Orientation By Col Array Mapping Orientation By Row 1 1 1 1 4 7 2 5 8 3 6 9 9 2 5 10 1 3 4 6 7 2 5 8 9 10 2 3 5 6 Orientation By Row 1 2 3 4 5 6 7 8 9 1 2 3 4 5 6 7 8 9 1 4 7 2 5 8 3 6 9 1 4 7 2 5 8 3 5 9 1 2 3 4 5 6 7 8 9 1 2 3 4 5 6 7 8 9 1 4 7 2 5 8 3 6 9 1 4 7 2 5 8 3 6 9 1 2 3 4 5 6 7 8 9 1 2 3 4 5 6 7 8 9 1 4 7 2 5 8 3 6 9 1 4 7 2 5 8 3 6 9 Figure 2-4. Array Mapping Demonstrations. 21 CHAPTER 2 Pattern Mapping Method Pattern Mapping is similar to Array Mapping, except that a predefined pattern of spots is printed instead of a rectangular array. Pattern Mapping prints spots according to a Pattern that you have defined in the Pattern Library. The Patterns are then printed according to a set of rules defined in the Protocol. You determine the rules by your choices in the Protocol. When you have selected the Pattern Mapping method, there will be four sets of parameters to control the mapping rules. These parameters are: Number of Replicates Replicate Layout Dispensing Orientation Pattern Set Size The Number of Replicates is simply the number of individual spots that should be dispensed for each sample. The Replicate Layout determines how the replicates are laid out (or grouped) on the substrate (Figure 2-5). Replicates may be grouped together (Sequential), appear in sample order (Wrap) or appear in sample order per array (By Set). In Pattern Mapping, the order in which a Pattern is filled is determined by the Pattern layout itself. Patterns are always filled from top to bottom and left to right. When you create a Pattern for the Pattern library (page 16) the list of spots that will be printed is generated according to the spot position in the Design Grid. The Patterns are filled in the Pattern Set from top to bottom and then from left to right. The Pattern Set Size parameters determine the number of Patterns to create on the substrate. Patterns are repeated in a rectangular structure according to the number of Horizontal and Vertical Arrays that you enter. The maximum number of samples required in the Source Plate is determined by the combination of the number of Replicates, the size of the Patterns and the size of the Pattern Set. 22 PIEZORRAY™ SOFTWARE OVERVIEW 1 1 1 1 1 2 2 2 3 3 3 4 4 4 4 4 5 6 6 6 6 7 6 7 1 2 3 4 5 7 2 2 3 3 8 8 8 8 9 5 5 5 5 10 11 11 10 11 11 11 12 7 7 7 8 13 13 14 14 13 14 13 13 14 14 9 9 9 10 10 9 10 12 12 12 12 9 9 13 1 10 10 11 11 8 12 12 14 2 3 4 5 6 13 3 14 1 2 4 5 1 2 3 4 11 1 12 13 14 2 3 6 1 2 3 4 5 7 7 11 13 8 8 9 9 6 10 10 12 14 4 5 6 7 8 6 1 2 3 4 1 2 3 4 5 7 6 9 10 11 8 12 1 2 3 4 1 2 3 4 5 7 1 2 3 4 9 10 11 8 12 Layout = Sequential Replicates = 5 Tip Mode = All Tips Samples = 14 Arrays Horizontal = 2 Arrays Vertical = 3 Pattern Mapping Layout = Wrap Replicates = 5 Tip Mode = All Tips Samples = 14 Arrays Horizontal = 2 Arrays Vertical = 3 5 9 11 13 6 14 7 8 10 12 9 10 11 8 12 6 7 Pattern Mapping 5 7 6 9 10 11 8 12 5 7 6 9 10 11 8 12 5 7 6 Pattern Mapping Layout = By Set Replicates = 6 Tip Mode = All Tips Samples = 12 Arrays Horizontal = 2 Arrays Vertical = 3 9 10 11 8 12 Figure 2-5. Pattern Mapping Demonstrations. 23 CHAPTER 2 Custom Mapping Method Custom Mapping is not limited by the rules regulating the position or order of spots that are printed. Each sample is mapped individually to a specific spot or spots on the substrate. Mapping the samples to the substrate creates a pattern in the regions defined for the substrate. The spots within the patterns are then mapped to specific sample positions in the Source Plate(s). Mapping includes the individual numbers of replicates and individual dispense volumes for each substrate location as well. If you want to perform Custom Mapping on complete arrays, simply define a full rectangular Pattern that represents your array and then map the spots of this array as any other Custom Mapped pattern. All Tip Mode In the All Tip mode, mapping is performed for each dispensing tip. Each tip is dispensed independently, so that tip spacing does not restrict the mapping of an aspirated sample to particular array positions. All Tip mode is the most flexible when it comes to mapping samples to spots. Throughput is the trade-off for this mapping flexibility. Tip 1 Mode In Tip 1 mode, mapping is based on dispensing samples simultaneously from all four tips, with each tip creating its own array. This requires that the 9 mm spacing of the tips automatically determine where spots will be mapped, based on the location of tip number one (Figure 2-7 and Figure 2-7). Tip 1 mode is the fastest dispensing mode, since all four tips can dispense at once. Mapping restrictions are the trade-off for this throughput advantage. 24 PIEZORRAY™ SOFTWARE OVERVIEW 1 1 5 1 10 25 1 1 5 2 17 26 1 5 5 9 18 33 2 2 6 3 12 27 2 2 6 4 19 28 2 6 6 11 20 34 3 3 7 3 3 7 3 3 7 3 3 7 3 7 7 3 7 7 4 4 8 4 4 8 4 4 8 4 4 8 4 8 8 4 8 8 1 1 2 1 1 2 1 1 2 1 1 2 1 2 2 1 2 2 3 3 4 3 3 4 3 3 4 3 3 4 3 4 4 3 4 4 5 5 6 5 5 6 5 5 6 5 5 6 5 6 6 5 6 6 7 7 8 7 7 8 7 7 8 7 7 8 7 8 8 7 8 8 Tip #1 Array Mapping Tip #2 Tip #3 Replicates = 5 Tip Mode = Tip 1 Samples = 8 Vertical Spacing = 9 mm (fixed) Columns = 3 Rows = 3 Arrays Horizontal = 2 Arrays Vertical = 4 (fixed) Tip #4 Tip #1 Array Mapping Tip #2 Tip #3 Source Plate = 384-Well Replicates = 5 Tip Mode = Tip 1 Samples = 8 Vertical Spacing = 9 mm (fixed) Columns = 3 Rows = 3 Arrays Horizontal = 2 Arrays Vertical = 4 (fixed) Tip #4 Figure 2-6. Tip 1 Mode - Array Mapping. 25 CHAPTER 2 1 5 1 1 1 5 5 1 1 5 5 5 1 9 1 9 1 5 5 9 1 5 5 9 2 2 6 6 2 2 6 6 2 6 2 6 2 10 2 10 2 6 6 10 2 6 6 10 3 3 7 7 3 3 7 3 7 3 7 3 11 3 11 7 7 11 3 7 7 11 4 4 8 4 8 8 4 4 8 4 8 4 12 4 12 8 8 12 4 8 8 12 1 1 2 1 2 2 1 1 2 1 2 1 9 1 9 2 2 9 1 2 2 9 3 3 4 4 3 3 4 4 3 4 3 4 3 11 3 11 3 4 4 11 3 4 4 11 5 5 6 5 5 6 Tip #3 Tip #4 Tip #1 Pattern Mapping Tip #2 6 5 6 5 6 5 13 5 13 5 6 6 13 5 6 6 13 7 7 8 7 8 8 7 7 8 7 8 7 15 7 15 8 15 7 8 Replicates = 5 Tip Mode = Tip 1 Samples = 12 Vertical Spacing = 9 mm (fixed) Arrays Horizontal = 2 Arrays Vertical = 4 (fixed) 2 1 8 Tip #2 8 4 7 Pattern Mapping 7 3 6 Tip #1 Source Plate = 384-Well Replicates = 5 Tip Mode = Tip 1 Samples = 12 Vertical Spacing = 9 mm (fixed) Arrays Horizontal = 2 Arrays Vertical = 4 (fixed) Tip #3 8 Tip #4 8 15 Figure 2-7. Tip 1 Mode - Pattern Mapping. 26 PIEZORRAY™ SOFTWARE OVERVIEW Sample Aspiration Order The order in which samples are aspirated from the source plate is dependent on the plate type and the physical spacing of the tips. The physical dimension of the dispensers limits the system to 9 mm tip spacing. Since all four tips will access the source plate at the same time, the wells that are accessible to the tips must be 9 mm apart as well. For 96-well plates, this has no impact on how the samples that get aspirated, the wells are, by definition, 9 mm apart. On 384-well plates, however, the rows in the plate are accessed somewhat alternately (Figure 2-8). This source plate access will not have any affect on the mapping of samples to your substrate arrays. The Piezorray™ software compensates for the numbering of the samples when the sample map is generated. Mapping is based on the actual source order numbering in the plate, with the samples actually being aspirated 27 CHAPTER 2 96 Well Source Plate 1 3 5 7 9 11 13 1 3 5 7 9 11 13 1 3 5 7 9 11 13 1 3 5 7 9 11 13 2 4 6 8 10 12 2 4 6 8 10 12 2 4 6 8 10 12 2 4 6 8 10 12 Like numbers indicate where the tips access the Source Plate for simultaneous aspiration. Number sequence indicates sequential access of the four tips. 384 Well Source Plate 1 5 2 6 10 9 13 1 5 2 6 10 1 5 2 6 10 1 5 2 6 10 3 7 11 4 8 12 3 7 11 4 8 12 3 7 11 4 8 12 3 7 11 4 8 12 9 13 9 13 9 13 Figure 2-8. Aspiration Order from Source Plates. 28 PIEZORRAY™ SOFTWARE OVERVIEW Substrate Regions Substrates that are physically subdivided into smaller usable areas are defined with dispensing regions. These regions may be defined by physical barriers, treated areas or any other subdivisions (physical or conceptual) to the substrate. You can create or modify substrates and substrate regions using the Substrate Definition dialog (page 73) while generating Deck Layouts. When dispensing to substrates with physical barriers of vertical dimension between regions (such as when dispensing to microplates), the Tip 1 mapping mode (page 24) is enforced. This limitation is imposed to protect the non-dispensing tips from damage due to contact with border areas of the substrate or plate. Sets and Super Sets Sets and Super Sets are layout tools to help speed up the often repetitive work of creating array layouts on the substrates. Sets are regular replications of either Arrays or Patterns, depending on the mapping method that you have chosen (page 19). Multiple Arrays or Patterns in a Set are structures to be filled on the substrate. Super Sets are used to create exact copies of Array Sets or Pattern Sets. Super Sets duplicate the mapping as well as the structures from which they are copied. The original set can consist of one or more Arrays or Patterns, depending on the mapping method. All of the duplicated Sets must fit on a single substrate. 29 CHAPTER 2 Side Shooting Side Shooting is a special mode that may be enabled on your Piezorray system if necessary. The Side Shooting mode performs a non-array dispense off the side of the substrates to make sure that the tips are ready to dispense at each slide. This mode may prove useful if your mapping tends to introduce significant delays between dispenser firings. Due to the very small volumes used, any evaporation of liquid in the tips will cause concentration variation between the first drop and subsequent drops that may be dispensed. This first drop effect results in higher concentrations of sample in the first drop out of the dispenser if there is even a few seconds between aspirating and first firing or between firings of any single dispenser. Side Shooting occurs every time that the dispense head moves from one slide to another or from the source plate to the first slide. All four tips are dispensed in an area off to the side of the substrate, outside the arraying area defined. Side Shooting is dispensed before the head moves to the array position on the substrate. Side Shooting occurs every time the head returns to a substrate. If you decide that you need this feature, use the button to access the Edit Parameters window and Enable the Side Shooting mode for your system. 30 PIEZORRAY™ SOFTWARE OVERVIEW Piezo-Electric Dispensing There are four basic parameters that are important to firing the piezo-electric dispensers in the system. These parameters, once set, should not need to be changed unless new dispensers are installed in the system. These parameters are: Voltage Pulse Width Pressure Sample + Buffer Volume These and other physical factors can affect the quality of the drops dispensed from the system. These parameters can be adjusted for a given dispenser to Tune the dispensers for optimum performance (page 19). Deck Coordinate System An absolute coordinate system is used to locate labware and dispense locations on the Piezorray™ deck. There are three axis in the coordinate system to represent the real space in which the dispense head moves over the deck (Figure 2-9). The axes are defined as: X Axis - Horizontal plane measured from left to right across the deck of the instrument. Range = 0 to +350. Y Axis - Horizontal plane measured from front to back across the deck of the instrument. Range = 0 to +350. Z Axis - Vertical plane measured from high to low above the deck of the instrument. Range = 0 to -45. 31 CHAPTER 2 +Z +Y +X Figure 2-9. Deck Coordinate System. The coordinates for the Home position (where the system initializes) are 350, 350, 0, corresponding to the right rear corner of the deck (near the washbowl). The 0, 0 coordinates define a position in the left front corner of the deck. The safe Z height over the entire deck is typically defined at -20, with the full downward travel at -45. 32 DEFINING DECK LAYOUTS Chapter 3 Defining Deck Layouts In this chapter, you will find information and procedures for: Overview of Deck Layouts (page 34) Calibrating an Existing Deck Layout (page 35) Calibration involves identifying a coordinates for a precise starting point for Source Plates and Substrates on the deck. Creating a New Deck Layout (page 50) Creating a Deck Layout involves choosing the physical labware configuration and identifying coordinates for nominal locations of the Source Plate and all Substrates on the deck. Locate Position Dialog - Deck Layout (page 69) Use the Locate Position dialog to move the dispense head around the deck so that Dispense Tip1 acts as a pointer to define the coordinates for the labware. Substrate Definition Dialog - Deck Layout (page 73) Use the Substrate Definition dialog to specify custom substrate sizes and define substrate region configurations for specific applications. 33 CHAPTER 3 Overview of Deck Layouts The Deck Layouts define how the deck is configured. The Deck Layout determines the physical locations of the permanent labware, Source Plate, and substrates used for printing arrays. There are three permanent labware locations and up to six holder locations that you can define. The permanent locations identify the positions for the washbowl, cleaning trough and buffer trough on the deck. Define the rest of the deck layout to identify the type of labware that is in each holder position on the deck. One holder location will be allocated to the Source Plate labware, which is either a 96-well or 384-well microplate containing your samples. Well positions for both a 96-well Source Plate and a 384-well Source Plate can be defined and calibrated in each Deck Layout. The type of Source Plate is determined by the protocol used for a print run. The remaining five holder positions identify the locations where printing substrates will be placed. Standard substrate holders supplied with your system can support from 1 to 5 slides as printing substrates. A typical substrate is a standard 1 inch by 3 inch (2.54 cm by 7.62 cm) flat surface (e.g. microscope slide) with or without predefined target locations. Some applications may choose to print arrays in the bottoms of microplate wells or to other targeted locations. The type and number of printing substrates is defined when you create the Deck Layout. Each deck position can support one microplate holder or one substrate holder. Appropriate holders must be used to accurately position the printing substrate on the deck. Printing substrates are positively positioned and secured in the holders using a vacuum source (slides) or spring clips (microplates). 34 DEFINING DECK LAYOUTS Calibrating an Existing Deck Layout 1. From the main window of the Piezorray™ software, click the button to calibrate an existing Deck Layout. The List of Deck Layouts dialog will appear with the list of currently defined Deck Layouts (Figure 3-1). 2. Choose an existing Deck Layout name in the list and click the Layout. button to calibrate an existing named Deck Figure 3-1. List of Deck Layouts Dialog. 35 CHAPTER 3 Calibrate Deck Layout - General Page 1. On the General page of the Deck Layout definition (Figure 3-2), check the identifying name and description for the Deck Layout. Figure 3-2. Deck Layout Definition - General Page. 2. Make sure that the Deck Configuration matches your array requirements. You cannot change the configuration for a Deck Layout that has already been defined. There are two configurations that may appear (Figure 3-3). Piezorray Default Deck is the standard choice and uses labware holders to position plates and substrates (slides) on the deck. Piezorray Open Deck is intended for substrates requiring custom size and position definitions. The requirements of these substrates prevent the use of the conventional labware holders on the deck. 36 DEFINING DECK LAYOUTS BCA Default Deck BCA Open Deck Figure 3-3. Deck Configuration Options. 3. Click the button to advance to the Source page of the Deck Layout definition (Figure 3-4). 37 CHAPTER 3 Calibrate Deck Layout - Source Page Figure 3-4. Deck Layout Definition - Source Page. 1. Click on the holder position within the Deck View image (H1, H2, H3, H4, H5 or H6) to identify the location of the Source Plate labware on the deck. The Source location will be indicated by a yellow color and the label Src in the image. The most efficient location for the Source Plate on the deck is typically position H2 due to the proximity of the washbowl, buffer trough, cleaning trough and Dispenser Tuning Camera (horizontal camera). 2. Place a plate holder on the deck in the source location indicated in step 1. Make sure that the locating pins on the bottom of the plate holder are positively engaged in the holes on the deck surface and the holder sits flat on the deck. 38 DEFINING DECK LAYOUTS 3. Place a 96-well microplate in the plate holder on the deck in the source location (step 2). Make sure that the plate is firmly positioned against the tabs and springs in the holder (Figure 3-5). Tabs Springs Figure 3-5. Source Plate Mounting. 4. Click the button within the 96-well Source Location section of the page (Figure 3-6). The Locate Position dialog (page 69) will appear so that you can define the positioning coordinates for the first well in the 96-well source plate. Use the controls to move Tip 1 until it lines up with the center of well A1 on the plate. Vertical tip height in a source plate is the height at which sample will be aspirated from the wells. 39 CHAPTER 3 Figure 3-6. Source Plate Location Definitions. 5. Replace the plate in the source plate holder (step 2) on the deck with a 384-well microplate. Make sure that the plate is firmly positioned against the tabs and springs in the holder (Figure 3-5). 6. Click the button within the 384-well Source Location section of the page (Figure 3-6). The Locate Position dialog (page 69) will appear so that you can define the positioning coordinates for the first well in a 384well source plate. Use the controls to move Tip 1 until it lines up with the center of well A1 on the plate. Vertical tip height in a source plate is the height at which sample will be aspirated from the wells. 7. Click the button to advance to the Substrates page of the Deck Layout definition (Figure 3-7). 40 DEFINING DECK LAYOUTS ) Calibrate Deck Layout - Substrates Page Note: If you intend to print arrays in the bottoms of microplate wells, be sure to reference the special procedure documented on page 141. Figure 3-7. Deck Layout Definition - Substrate Page. 1. Click on one of the substrate holders (H1, H2, H3, H4, H5 or H6) in the Deck View portion of the page to select a position for calibration. 2. Place substrates in all positions of the selected substrate holder (step 1) on the deck. Make sure that the substrates are positively located against the raised edge of the substrate holder and the left alignment pins (Figure 3-8). 41 CHAPTER 3 Raised Alignment Edge Alignment Point (Corner) - Position 1 Left Alignment Pins - Position 1 1 2 3 3 4 5 Figure 3-8. Substrate Positioning in Holder. 3. Turn on the Vacuum Source to secure the substrates on the holder. If the vacuum gauge on the manifold reads at least 10 inches of Hg, this will ensure that there are no vacuum leaks in the system. 42 DEFINING DECK LAYOUTS 4. Click the button within the First Substrate section of the page (Figure 3-9). The Locate Position dialog (page 69) will appear so that you can define the positioning coordinates for the upper left corner of the first substrate in the holder. Use the controls to move Tip 1 until it lines up with the upper left corner of the first substrate (slide) in the holder (Figure 3-8). Vertical tip height above a substrate is measured with the yellow clearance shim (Figure 3-10) supplied with the system. Move the tip vertically and check the clearance between the substrate and the dispenser tip with the yellow clearance shim. The glass tip should just contact the shim, but not bind. Figure 3-9. First Substrate Definition. 43 CHAPTER 3 Shim Clearance Substrate Shim Figure 3-10. Substrate Dispense Height. 5. Click the button to advance to the Labware page of the Deck Layout Definition (Figure 3-11). Coordinates for slide positions on every holder in the deck layout are calculated from the calibration of a single point on one holder on the deck. 44 DEFINING DECK LAYOUTS Calibrate Deck Layout - Labware Page Labware positions are stored in only one place in the system. If you change these positions from ANY Deck Layout or from the Labware utility (page 45), you will change the labware location for EVERY Deck Layout defined in the system. Use caution when changing the labware positions. Figure 3-11. Deck Layout Definition - Labware Page. 1. Click the button within the Washbowl Location section of the page (Figure 3-12). 45 CHAPTER 3 Figure 3-12. Washbowl Location Definition. The Locate Position dialog (page 69) will appear so that you can define the coordinates for the washbowl. Visual alignment in the center of the opening is sufficient for the X coordinate. There should be approximately 1 mm clearance between the end of the washbowl opening and the body of dispenser #1 to define the Y coordinate (Figure 3-13). The dispenser bodies above the tips should not contact the washbowl in any direction. Vertical tip height for the washbowl starts by using the yellow clearance shim (Figure 3-14) supplied with the system to find the top of the washbowl. Move the tip vertically and check the clearance between the top of the washbowl and the dispenser tip by placing the yellow clearance shim on top of the washbowl and sliding it under the tip from the side. The glass tip should just contact the shim, but not bind. Record the value for the shim height shown in the Z coordinate field. Set the Step Size to 10 mm and click button one time. Change the Step Size to 0.1 mm and click the button one more time. The Z coordinate value should now be 10.1 mm less than the shim height value. This new value is the Z height for tips in the washbowl. 46 DEFINING DECK LAYOUTS Tip # 1 ~ 1 mm Clearance Washbowl Figure 3-13. Washbowl Position. Shim Clearance Washbowl Shim Figure 3-14. Washbowl Height Measurement. 47 CHAPTER 3 2. Click the button within the Buffer Location section of the page (Figure 3-15). The Locate Position dialog (page 69) will appear so that you can define the coordinates for the Buffer Trough. The Buffer Trough position is defined by visually examining the location of the tips with respect to the cover of the trough. Visual alignment in the center of the access holes in the cover is sufficient for the X and Y coordinates. Click the button and remove the cover from the trough. Lower the tip back down into the trough until it is approximately two millimeters off the bottom of the trough. Fill the trough with about 20 µL of liquid and make sure that the liquid level does not get above the glass tip onto the dispenser body. Figure 3-15. Buffer Location Definition. 48 DEFINING DECK LAYOUTS 3. Click the button within the Cleaning Location section of the page (Figure 3-16). The Locate Position dialog (page 69) will appear so that you can define the coordinates for the Cleaning Trough. The Cleaning Trough position is defined by visually examining the location of the tips with respect to the cover of the trough. Visual alignment in the center of the access holes in the cover is sufficient for the X and Y coordinates. Click the button and remove the cover from the trough. Lower the tip back down into the trough until it is approximately two millimeters off the bottom of the trough. Fill the trough with about 20 µL of liquid and make sure that the liquid level does not get above the glass tip onto the dispenser body. Figure 3-16. Cleaning Location Definition. 4. Click the Deck Layout. button to complete the calibration of this 49 CHAPTER 3 Creating a New Deck Layout 1. From the main window of the Piezorray™ software, click the button to create a new Deck Layout. The List of Deck Layouts dialog will appear with the list of currently defined Deck Layouts (Figure 3-17). 2. Click the Layout button to begin creating a new Deck Or Click the button to create a new Deck Layout based on an existing layout currently indicated in the list 50 DEFINING DECK LAYOUTS Figure 3-17. List of Deck Layouts Dialog. 51 CHAPTER 3 Create Deck Layout - General Page 1. On the General page of the Deck Layout definition (Figure 318), enter an identifying name and description for the new Deck Layout. You will need to select the Deck Layout by name when you define a Protocol, so make sure you use a name that you can identify later. Figure 3-18. Deck Layout Definition - General Page. 2. Select the Deck Configuration that best matches your array requirements. There are two configurations from which to choose (Figure 319). Piezorray Default Deck is the standard choice and uses labware holders to position plates and substrates on the deck. Piezorray Open Deck is intended for substrates requiring custom size and positioning on the deck. The requirements of these substrates prevent the use of the conventional labware holders on the deck. 52 DEFINING DECK LAYOUTS BCA Default Deck BCA Open Deck Figure 3-19. Deck Configuration Options. 3. Click the button to advance to the Source page of the Deck Layout Definition (Figure 3-20). 53 CHAPTER 3 Create Deck Layout - Source Page Figure 3-20. Deck Layout Definition - Source Page. 1. Click on the holder position within the Deck View image (H1, H2, H3, H4, H5 or H6) to identify the location of the Source Plate labware on the deck. The Source location will be indicated by a yellow color and the label Src in the image. The most efficient location for the Source Plate on the deck is typically position H2 due to the proximity of the washbowl, buffer trough, cleaning trough and Dispenser Tuning Camera (horizontal camera). 2. Place a plate holder on the deck in the source location indicated in step 1. Make sure that the locating pins on the bottom of the plate holder are positively engaged in the holes on the deck surface and the holder fits flat on the deck. 54 DEFINING DECK LAYOUTS 3. Place a 96-well microplate in the plate holder on the deck in the source location (step 2). Make sure that the plate is firmly positioned against the tabs and springs in the holder (Figure 3-21). Tabs Springs Figure 3-21. Source Plate Mounting. 4. Click the button within the 96-well Source Location section of the page (Figure 3-22). The Locate Position dialog (page 69) will appear so that you can define the positioning coordinates for the first well in the 96-well source plate. Use the controls to move Tip 1 until it lines up with the center well A1 on the plate. Vertical tip height in a source plate is the height at which sample will be aspirated from the wells. 55 CHAPTER 3 Figure 3-22. Source Plate Location Definitions. 5. Replace the plate in the source plate holder (step 2) on the deck with a 384-well microplate. Make sure that the plate is firmly positioned against the tabs and springs in the holder (Figure 3-21). 6. Click the button within the 384-well Source Location section of the page (Figure 3-22). The Locate Position dialog (page 69) will appear so that you can define the positioning coordinates for the first well in the 384-well source plate. Use the controls to move Tip 1 until it lines up with the center of well A1 on the plate. Vertical tip height in a source plate is the height at which sample will be aspirated from the wells. 7. Click the button to advance to the Substrates page of the Deck Layout definition (Figure 3-23). 56 DEFINING DECK LAYOUTS ) Create Deck Layout - Substrates Page Note: If you intend to print arrays in the bottoms of microplate wells, be sure to reference the special procedure documented on page 141. Figure 3-23. Deck Layout Definition - Substrate Page. 1. Click on one of the substrate holders (H1, H2, H3, H4, H5 or H6) in the Deck View portion of the page that was not identified as the Src position. 2. Click on a substrate type in the Available Substrates list in the lower left corner of the window. Substrate types are predefined and identified by the name shown in the list. 57 CHAPTER 3 3. Click the button to populate the holder with a regular, one or two dimensional array of the substrate type currently highlighted in the Available Substrates list. The Auto Layout dialog (Figure 3-24) will appear for you to define the substrate layout on the holder. The default values in the dialog represent the five substrates that fully populate the standard substrate holders. Click the button after making any changes to the layout dimensions or substrate spacing. The Substrates in Holder list on the right will be populated with the number of substrates defined. Or Click the button to add single substrates of the selected type into the Substrates in Holder list on the right. Typically, holders are populated with the same substrate for all available positions. The exception to this rule is when you are using the Custom Mapping method in your protocol. In this instance, you will position each sample dispense manually and the substrates can each be different. ) Note: Do NOT add more than one microplate substrate in each holder position. Or Click the button to create or modify the currently selected substrate definition. Substrate definitions include the overall substrate size and the region configuration, if any, for the substrate. The Substrate Definition dialog (page 73) will appear so that you can define coordinates for the substrate and substrate regions. The currently selected substrate in the Available Substrates List will appear in the new dialog when it opens. This substrate definition can be modified or used as a model for a new substrate. 58 DEFINING DECK LAYOUTS 4. ) Note: Place substrates in all positions of the selected holder (step 1) on the deck. Do NOT use Auto Layout to populate the Deck Layout with microplates as substrates. Make sure that the substrates are positively located against the raised edge of the substrate holder and the left alignment pins (Figure 3-25). Figure 3-24. Auto Layout Dialog. 59 CHAPTER 3 Raised Alignment Edge Alignment Point (Corner) - Position 1 Left Alignment Pins - Position 1 1 2 3 4 5 Figure 3-25. Substrate Positioning in the Holder. 5. Turn on the Vacuum Source to secure the substrates on the holder. If the vacuum gauge on the manifold reads at least 10 inches of Hg, this will ensure that there are no vacuum leaks in the system. 60 DEFINING DECK LAYOUTS 6. Click the button within the First Substrate section of the page (Figure 3-27). The Locate Position dialog (page 69) will appear so that you can define the coordinates for the upper left corner of the first substrate in the holder. Use the controls to move Tip 1 until it lines up with the upper left corner of the first substrate (slide) in the holder (Figure 3-25). Vertical tip height above a substrate is measured with the yellow clearance shim (Figure 3-26) supplied with the system. Move the tip vertically and check the clearance between the substrate and the dispenser tip with the yellow clearance shim. The glass tip should just contact the shim, but not bind. Shim Clearance Substrate Shim Figure 3-26. Substrate Dispense Height. 61 CHAPTER 3 7. Click the button within the Last Substrate section of the page (Figure 3-27). The Locate Position dialog (page 69) will appear so that you can define the coordinates for the upper left corner of the last substrate in the holder. Use the controls to move Tip 1 until it lines up with the upper left corner of the first substrate (slide) in the holder. Vertical tip height above a substrate is measured with the yellow clearance shim (Figure 3-26) supplied with the system. Move the tip vertically and check the clearance between the substrate and the dispenser tip with the yellow clearance shim. The glass tip should just contact the shim, but not bind. Figure 3-27. Substrates Definition. 62 DEFINING DECK LAYOUTS 8. Click the button to calculate and store the coordinates for the first spot on each substrate in the holder. Or Alternatively, select each substrate in the Substrates in Holder list (right side) and identify the position of the first substrate for each one individually (Figure 3-28). Figure 3-28. Individual Substrate Positioning. 9. Repeat steps 1 through 8 for each holder defined in the deck layout. 10. Click the button to advance to the Labware page of the Deck Layout Definition (Figure 3-29). 63 CHAPTER 3 Create Deck Layout - Labware Page Labware positions are stored in only one place in the system. If you change these positions from ANY Deck Layout or from the Labware utility (page 57), you will change the labware location for EVERY Deck Layout defined in the system. Use caution when changing the labware positions. Figure 3-29. Deck Layout Definition - Labware. 1. Click the button within the Washbowl Location section of the page (Figure 3-30). 64 DEFINING DECK LAYOUTS Figure 3-30. Washbowl Location Definition. The Locate Position dialog (page 69) will appear so that you can define the coordinates for the washbowl. Visual alignment in the center of the opening is sufficient for the X coordinate. There should be approximately 1 mm clearance between the end of the washbowl opening and the body of dispenser #1 to define the Y coordinate (Figure 3-31). The dispenser bodies above the tips should not contact the washbowl in any direction. Vertical tip height for the washbowl starts by using the yellow clearance shim (Figure 3-32) supplied with the system to find the top of the washbowl. Move the tip vertically and check the clearance between the top of the washbowl and the dispenser tip by placing the yellow clearance shim on top of the washbowl and sliding it under the tip from the side. The glass tip should just contact the shim, but not bind. Record the value for the shim height shown in the Z coordinate field. Set the Step Size to 10 mm and click button one time. Change the Step Size to 0.1 mm and click the button one more time. The Z coordinate value should now be 10.1 mm less than the shim height value. This new value is the Z height for tips in the washbowl. 65 CHAPTER 3 Tip # 1 ~ 1 mm Clearance Washbowl Figure 3-31. Washbowl Position. Shim Clearance Washbowl Shim Figure 3-32. Washbowl Height Measurement. 66 DEFINING DECK LAYOUTS 2. Click the button within the Buffer Location section of the page (Figure 3-33). The Locate Position dialog (page 69) will appear so that you can define the coordinates for the Buffer Trough. The Buffer Trough position is defined by visually examining the location of the tips with respect to the cover of the trough. Visual alignment in the center of the access holes in the cover is sufficient for the X and Y coordinates. Click the button and remove the cover from the trough. Lower the tip back down into the trough until it is approximately two millimeters off the bottom of the trough. Fill the trough with about 20 µL of liquid and make sure that the liquid level does not get above the glass tip onto the dispenser body. Figure 3-33. Buffer Location Definition. 67 CHAPTER 3 3. Click the button within the Cleaning Location section of the page (Figure 3-34). The Locate Position dialog (page 69) will appear so that you can define the coordinates for the Cleaning Trough. The Cleaning Trough position is defined by visually examining the location of the tips with respect to the cover of the trough. Visual alignment in the center of the access holes in the cover is sufficient for the X and Y coordinates. Click the button and remove the cover from the trough. Lower the tip back down into the trough until it is approximately two millimeters off the bottom of the trough. Fill the trough with about 20µL of liquid and make sure that the liquid level does not get above the glass tip onto the dispenser body. Figure 3-34. Cleaning Location Definition. 4. Click the Deck Layout. button to complete the definition of this 68 DEFINING DECK LAYOUTS Locate Position Dialog - Deck Layout Whenever you click a button, a button or a button while defining or calibrating a Deck Layout (see above), the Locate Position dialog will appear. This dialog lets you move the dispense head in order to visually determine deck coordinates for the various labware positions in the system. To specify deck coordinates, use Tip 1 (rear most tip on the system) as a pointer. ) Note: The Camera method is not appropriate for use in defining the Deck Layout. Neither the depth of field nor the field of view for this camera makes it practical to use when defining the labware positions in the Deck Layout. 69 CHAPTER 3 Figure 3-35. Locate Position Dialog - Tip 1 Targeting Mode. The message area at the top of the window indicates the labware coordinates that you are locating. 1. Make sure that the Tip1 mode is selected as the method of targeting location coordinates on the deck. 70 DEFINING DECK LAYOUTS 2. Click on the button to move the dispense head to the deck coordinates shown in the Intended Position fields. Visually verify that the position of Tip 1 is aligned with the target location on the labware. 3. Use the , , and motion control buttons to move the dispense head until Tip 1 is aligned with the target location on the labware. Tips often need to be positioned vertically in order to visually determine the optimal X and Y positioning. Choose the Step Size from the drop-down list to move the dispense head in larger increments (faster) or smaller increments (safer) per click of the motion buttons. Choose the motion Speed from the drop-down list to move the dispense head Fast (faster) or Slow (safer) for each click of the motion buttons. ) Note: Use 1 mm or smaller increment for vertical motions. Use the 9 mm increment for single step motion between 96-well plate positions or dispenser spacing. ) Note: Use Slow speed for any vertical motion to prevent tip damage. 4. ) Note: Click on the button to enable control of the vertical motion for the dispense head. The label on the button ( or ) indicates the current state of the Z Controls and will toggle when clicked. ) Caution: It is possible to damage the dispenser tips if you run them into stationary objects on the deck. 71 CHAPTER 3 ) 5. Use the and motion control buttons to control the vertical tip height of the position you are currently defining. 6. Click on the button to disable control of the vertical motion for the dispense head. Note: The label on the button ( or ) indicates the current state of the Z Controls and will toggle when clicked. 7. When you click the button, the coordinates displayed in the Intended Position fields (including any hidden Z coordinate) will be stored as the new values for the labware position. 72 DEFINING DECK LAYOUTS Substrate Definition Dialog - Deck Layout Whenever you click the button on the Deck Layout - Substrates page, The Substrate Definition dialog (Figure 3-36) will appear so that you can edit or define your own substrates with customized regions for specific applications. Figure 3-36. Substrate Definition Dialog. 73 CHAPTER 3 ) Note: Be sure you understand the ramifications on other protocols that use the substrate before modifying existing substrate regions. Create a new substrate if you have any concerns regarding existing protocols. 1. Click the button to create a new substrate definition with the dimensions and parameters that are currently visible in the dialog. You will supply a unique and descriptive name for the new definition. 2. Modify the descriptive name, if desired, that will appear in the Available Substrate List when defining a Deck Layout. 3. Modify the Description field, if desired. 4. Enter the overall size of the substrate, in mm, for the Length and Width fields for the Substrate Dimensions. Limits for the substrate size values are interdependent with the region size, number of regions, offset values and spacing values. 5. Enter values for the number of columns and number of rows that will determine the number of regions on the substrate. The entire substrate can consist of a single, large region or multiple, smaller, regions in a rectangular grid array. Limits for the fields that determine the number of regions are interdependent with the substrate size, region size, offset values and spacing values. 6. Enter the horizontal and vertical spacing between regions on the substrate. Limits for the spacing values are interdependent with the substrate size, number of regions, regions size and offset values. ) Note: Applications that will use the Tip 1 mode must have regions defined at 9 mm spacing. 74 DEFINING DECK LAYOUTS 7. Enter offset values that will determine where the first region starts with respect to the calibration point for the substrate (Figure 3-25). Limits for the offset values are interdependent with the substrate size, number of regions, region size and spacing values. 8. Enter values to define the size of the regions (all regions will be the same size) on the substrate. Limits for the region size values are interdependent with the substrate size, number of regions, offset values and spacing values. 9. Click the button to generate the list of region dimensions that will define the dispensing areas of the substrate. 10. Click the button to save the new or modified substrate definition and return to the Deck Layout - Substrates screen to continue defining the deck layout. Your new or modified substrate definition should be available for your selection when you return. 75 CHAPTER 3 This page is intentionally left blank. 76 DEFINING SOURCE PLATE CONTENT Chapter 4 Defining Source Plate Content In this chapter, you will find information and procedures for: Source Plate Overview (page 77) Creating a Source Plate (page 79) Source Plate Overview The Source Plate library (Figure 4-1) stores definitions that identify the contents of Source Plates for the system. These predefined plates can then be used and reused as appropriate for repeated printing of arrays from a sample library. Source Plates will later be gathered into Plate Sets that are then referenced by the Protocol for printing arrays. Source Plates are grouped and identified by the plate type, either 96-well or 384-well. When selecting Source Plates to group into Plate Sets, all of the plates in the set must be of the same type. Make sure that the physical plates match the type selected or tip damage may result. Two fields are supplied so that you can enter a sample number and/or a sample name for each sample in the source plate. Certain scanning and analysis products (e.g. ScanArray® microarray scanner) are able to pick up these identifiers from the data stream and maintain positive ID throughout the test cycle to the scanning and reporting of analyzed data. 77 CHAPTER 4 Figure 4-1. List of Existing Source Plates. 78 DEFINING SOURCE PLATE CONTENT Creating a Source Plate When you create or modify a Source Plate definition, you will label each sample well with a sample number and descriptive name. You can also indicate the sample status for each well, but this information is only used for display purposes in the Plate Content windows. You can enter the required information directly into the Source Plate Table (Figure 4-2), on the Map View of the plate (Figure 4-3) or, alternatively, you can import information about the plate from an external file. The format for an external file must conform to the guidelines detailed in Appendix A (page 243). Figure 4-2. Source Plate Contents - Table View. 1. From the main window of the Piezorray™ software, click the button to begin creating or editing Source Plate definitions for the system. The List of Source Plates dialog will appear (Figure 4-3). 79 CHAPTER 4 Figure 4-3. Source Plate Contents - Map View. 2. Click the definition. button to create a new Source Plate Or Click the button to create a new Source Plate definition based on an existing definition. Or Click the definition. button to edit an existing Source Plate The Plate Contents Table (Figure 4-4) will appear. 3. Enter a descriptive name for the Source Plate. You will need to select the plate by name when you define a Plate Set, so make sure you use a name that you can identify later. 80 DEFINING SOURCE PLATE CONTENT 4. Enter a numeric barcode ID for the plate, if desired, to help in plate identification. Figure 4-4. New Source Plate Contents Table. 5. Click on the button to choose the type of plate that you want to use for this source plate. A list of Plate Types will appear (Figure 4-6) for you to pick from. Choose the appropriate Plate Type, either 96-well or 384-well, for a list of available plates of that type. Choose a desired plate from the list and click the 81 button. CHAPTER 4 6. From either the Table View or the Map View, enter the Sample Number, descriptive Sample Name and well status for each well in the plate. Well Status is only used for display purposes within the Plate Content windows. Available selections are shown in Figure 4-5. Since the status is not used for anything else, you can define your own interpretations for each label. Figure 4-5. Available Well Status Selections. Figure 4-6. Plate Type List. 82 DEFINING SOURCE PLATE CONTENT 7. Alternatively, click the to read the information that defines a Source Plate from a comma delimited ASCII file (the Plate Content File). The Plate Content File must conform to the format outlined in Appendix C (page 255). When you import from a file, the information for each and every sample in the plate will receive new information from the file. Any existing information already defining the plate will be replaced by the information from the file. This includes clearing label information and tagging the status as Empty for any wells not specified in the Plate Content File. The plate name, description and type will remain the same. 8. Click the button to complete the Source Plate definition and store it for future use. 83 CHAPTER 4 This page is intentionally left blank. 84 CREATING PLATE SETS Chapter 5 Creating Plate Sets In this chapter, you will find information and procedures for: Plate Set Overview (page 85) Creating a Plate Set (page 87) Plate Set Overview Plate Sets are groups of one or more Source Plates to be printed in a single protocol run. The Plate Set contains an ordered list of predefined Source Plates to be used for a print run. Only one Source Plate at a time can be located on the deck, but multiple plates can be used sequentially, if you change Source Plates when prompted. Source Plates are grouped and identified by the Plate Type, either 96-well or 384-well. When selecting Source Plates for a Plate Set, all of the plates in the set must be of the same type. Make sure that the physical plates used match the plate type for the set or tip damage may result. Individual Source Plates can be part of more than one Plate Set, but only one Set will be selected for a Protocol to use in a Print Run. Remember, that you may only choose Plate Sets for a Protocol, not individual Source Plates. If you have a single Source Plate for a print run, be sure to create a Plate Set with only the one Source Plate in it. 85 CHAPTER 5 Figure 5-1. List of Existing Plate Sets. 86 CREATING PLATE SETS Creating a Plate Set Creating a Plate Set is simply a matter of choosing one or more Source Plates to use in a print run. Only one Source Plate may be on the deck at a time, but you will be prompted when to change Source Plates if the Plate Set contains multiple plates. Remember that all of the plates in a set must be of the same type, either 96-well or 384-well plates. 1. From the main window of the Piezorray™ software, click the system. 2. Click the scratch. button to create or edit a Plate Set for the button to create a new Plate Set from Or Click the button to define a new Plate Set based on the definition of an existing set. Or Click the list. button to modify an existing Plate Set The Plate Set definition dialog will appear (Figure 5-2). 3. Enter a descriptive name and description for the Plate Set. You will need to select the Set by name when you define a Protocol, so make sure you use a name that you can identify later. 4. Choose the Plate Type that you want to use for the Plate Set, either 96-well plates or 384-well plates. Defined Source Plates of the selected type will appear in the list on the left (Plates Not in the Set) for you to choose. If you are modifying an existing Plate Set, you will not be able to change the type of Source Plates. 87 CHAPTER 5 5. Click on one or more plates listed on the left to select them for the Plate Set. Use the standard Windows® conventions, Shift-Click and CtrlClick to select multiple Source Plates at once. Figure 5-2. Plate Set Definition Window. 6. Click the button to add Source Plates from the left hand list (Plates not in Set) to the right hand list (Plates in Set). 7. Click the button to remove Source Plates from the right hand list (Plates in Set) and put them in the left hand list (Plates not in List). 88 CREATING PLATE SETS 8. Click the buttons to change the order of the Source Plates in the Plates in Set list. During the print run, the Plates in Set list will be used in the order that the names appear, top to bottom. 9. Click the Set. button to complete and store the Plate 89 CHAPTER 5 This page is intentionally left blank. 90 CREATING DISPENSE PATTERNS Chapter 6 Creating Dispense Patterns In this chapter, you will find information and procedures for: Dispense Pattern Overview (page 91) Creating a Dispense Pattern (page 92) Patterns are a concept used in mapping samples to printed spots for the Piezorray™ system. When you define a protocol, you need to identify the method of mapping that you will use. Two of those three mapping methods, Pattern Mapping and Custom Mapping, can use predefined patterns when defining sample mapping. Patterns are created separately from the protocol so that you can use a defined Pattern in any protocol as necessary. If you are not using Pattern Mapping or Custom Mapping for any of your protocols, you do not need to use the Pattern Definition features described in this chapter. Dispense Pattern Overview Dispense Patterns are created against a rectangular Design Grid. You will determine the size and spacing of the Design Grid so that you can lay out the Dispense Pattern for your application. The Design Grid consists of a rectangular array of individual spot locations that you can select for dispensing. The individual spots that you have selected will result in the Dispense Pattern to be printed. Sample Mapping into a Pattern is determined by the spot position in the Design Grid. 91 CHAPTER 6 Creating a Dispense Pattern To create a Dispense Pattern, you will start by creating a rectangular grid to help define the spots that you want in your Pattern. 1. Click the Pattern for the system 2. Click the button to create or modify a Dispense button to create a new Dispense Pattern. Or Click the button to create a new Dispense Pattern based on an existing Pattern. Or Click the button to modify an existing dispense Pattern on the system. The Pattern Definition window will appear (Figure 6-1). 92 CREATING DISPENSE PATTERNS Figure 6-1. Pattern Definition Window. 3. Enter a descriptive name and description for the Pattern. You will need to select the Pattern by name when you define a Protocol, so make sure you use a name that you can identify later. 93 CHAPTER 6 4. Start by defining the Design Grid for your Pattern (Figure 6-2). Enter the Row and Column Counts to define the dimensions for the Design Grid. Enter the Row and Column Offsets (in microns -µm) to determine the initial offset from the labware coordinates defined in the Deck Layout (page 95) to the top left corner spot in the Design Grid. Enter the Row and Column Spacing (in microns - µm) to define the space between rows and between columns within the Design Grid. The grid will appear in the lower half of the window. Zoom In or Out on the Design Grid if necessary to see the spot detail or overall Pattern using the Zoom In and Zoom Out buttons as necessary. 94 CREATING DISPENSE PATTERNS Column Spacing Row Offset Row Spacing Column Offset Figure 6-2. Design Grid Parameters. 5. Use the mouse to click or drag over each sample position in the Design Grid that you want to receive a sample. The coordinates of the marked sample positions and the order in which they are mapped (not the order they are selected) appears in the table in the upper right corner of the window. Click a marked sample position to remove the spot from the pattern. 6. Click the Dispense Pattern. button when you finished creating the The Pattern will be saved according to the descriptive name that you supplied in step 3 for later use. 95 CHAPTER 6 This page is intentionally left blank. 96 CREATING PROTOCOLS Chapter 7 Creating Protocols In this chapter, you will find information and procedures for: Protocol Overview (page 97) Creating a Printing Protocol (page 98) Patterns are a concept used in mapping samples to printed spots for the Piezorray™ system. When you define a protocol, you need to identify the method of mapping that you will use. One of those three mapping methods is called Pattern Mapping. Patterns are created separately from the protocol so that you can use a defined Pattern in any protocol as necessary. If you are not using Pattern Mapping for any of your protocols, you do not need to use the Pattern Definition features described in this chapter. Protocol Overview The Printing Protocol is where all of the information required to print arrays comes together. In the Protocol, you choose the Deck Layout and Plate Set, define sample mapping, specify aspirate and dispense parameters, determine tip wash settings, choose error handling characteristics and configure the start and stop routines for the print run. ) Note: It is strongly recommended that you NOT use the Piezorray computer for other purposes while printing arrays. This includes editing or creating Piezorray™ Protocols, Deck Layouts, Dispense Patterns, Source Plate Content, Source Plate Sets, etc. 97 CHAPTER 7 Creating a Printing Protocol 1. Click the button to create or modify a Printing Protocol for the system. 2. Click the button to create a new Protocol. Or Click the button to create a new Protocol based on an existing definition. Or Click the button to modify an existing dispense Protocol on the system. 98 CREATING PROTOCOLS Protocol - General Page Figure 7-1. Protocol Definition - General. 1. On the General page of the Protocol definition (Figure 7-1), enter a descriptive name for the Protocol. 2. Click the Layout Name button to choose a Deck Layout from the library. 3. Click the button to advance to the Mapping page of the Protocol definition. 99 CHAPTER 7 Protocol - Mapping Page Figure 7-2. Protocol Definition - Mapping. 1. Click on a selection button to choose the Mapping Method (page 99) for the Protocol. 2. Click on a selection button to choose the Tip Mode (page 99) for the Protocol. Your choice of Mapping Method and Tip Mode will determine what the mapping page will look like. 3. Click the button to advance to the specific mapping type page of the Protocol definition. 100 CREATING PROTOCOLS Protocol - Array / Pattern / Custom Mapping Page Each of the mapping methods from which you had to choose on the Mapping page of the Protocol definition has its own mapping definition page. The Mapping page for each of these methods is described separately below. Refer to the following pages for the Mapping method that you have chosen. Array Mapping Page (page 101) Pattern Mapping Page (page 104) Custom Mapping Pages (page 106) Array Mapping Page Figure 7-3. Protocol Definition - Array Mapping. 101 CHAPTER 7 1. Click on the Plate Set button and select the name of the appropriate Plate Set for this Protocol from the list. Selecting the Plate Set at this point determines the type of Source Plate(s) that can be expected for the Protocol. A visual representation appears in the Source Plate portion of the window. 2. Choose the number of Replicates per Set that you want to use. This value indicates the number of replicates for each sample that you want printed in the Array Set. This does not apply to Super Sets which replicate the entire Array Set on a substrate. 3. Select the Replicate Layout that you want to use to map your samples (page 99). Three Replicate Layout selections are available to choose from: 4. Sequential - replicates are grouped together Wrap - appear in sample order By Set - appear in sample order per array Select the Dispensing Orientation that you want to use to map your samples (page 99). This orientation applies both to the order that rows and columns of individual arrays are filled as well as the order in which arrays in an Array Set are filled. Two Dispensing Orientation selections are available to choose from: 5. By Column - dispensed down the arrays By Row - across the arrays Enter the number of columns and rows to define the size of arrays. A representation of the array will appear in the Array Layout portion of the window. 6. Enter a value in µm for the center-to-center spacing between the spots of an array. The same spacing value is used in both dimensions. 102 CREATING PROTOCOLS 7. Enter the number of Horizontal and Vertical Arrays that you want in an Array Set (page 99). A representation of the multiple arrays that make up the Array Set is shown in the Array Layout portion of the window. 8. Enter values in millimeters for Horizontal and Vertical Spacing between the arrays in the Array Set. A representation of the multiple arrays in the Array Set will appear with relative spacing in the Array Layout on Substrate portion of the window. When arrays overlap in the set, it will show up colored red in this display. 9. Enter the number of Horizontal and Vertical Sets that make up a Super Set (page 99). A representation of the Super Sets will appear in the Array Layout on Substrate section of the window. Super Sets are used to create exact copies of Array Sets, duplicating the mapping as well as the structure. All of the duplicated Sets must fit on a single substrate. 10. Enter values in millimeters for the Horizontal and Vertical Spacing between Array Sets in a Super Set. 11. Enter values in millimeters for the Horizontal and Vertical Offset of the first Super Set from the top left corner of the substrate. 12. Click the button to advance to the Aspirate page of the Protocol definition. 103 CHAPTER 7 Pattern Mapping Page Figure 7-4. Protocol Definition - Pattern Mapping. 1. Click on the Plate Set button and select the name of the appropriate Plate Set for this Protocol from the list that appears. Selecting the Plate Set at this point determines the type of Source Plate(s) that can be expected for the Protocol. A visual representation appears in the Source Plate portion of the window. 2. Choose the number of Replicates per Set that you want to use. This value indicates the number of replicates for each sample that you want printed in the Pattern Set. This does not apply to Super Sets which replicate the entire Pattern Set on a substrate. 104 CREATING PROTOCOLS 3. Select the Replicate Layout that you want to use to map your samples (page 99). Three Replicate Layout selections are available to choose from: 4. Sequential - replicates are grouped together Wrap - appear in sample order By Set - appear in sample order per array Click on the Patterns button and select the name of the desired Pattern from the list that appears. A visual representation of the Pattern will appear in the Pattern Layout portion of the window. 5. Enter the number of Horizontal and Vertical Patterns that you want in a Pattern Set (page 99). A representation of the multiple arrays that make up the Pattern Set is shown in the Pattern Layout portion of the window. 6. Enter values in millimeters for Horizontal and Vertical Spacing between the Patterns in the Pattern Set. A representation of the multiple Patterns in the Pattern Set will appear with relative spacing in the Pattern Layout on Substrate portion of the window. When Patterns overlap in the set, it will show up colored red in this display. 7. Enter the number of Horizontal and Vertical Sets that make up a Super Set (page 99). A representation of the Super Sets will appear in the Pattern Layout on Substrate section of the window. Super Sets are used to create exact copies of Pattern Sets, duplicating the mapping as well as the structure. All of the duplicated sets must fit on a single substrate. 8. Enter values in millimeters for the Horizontal and Vertical Spacing between Pattern Sets in a Super Set. 9. Enter values in millimeters for the Horizontal and Vertical Offset of the first Super Set from the top left corner of the substrate. 10. Click the button to advance to the Aspirate page of the Protocol definition. 105 CHAPTER 7 Custom Mapping Pages Custom Mapping requires two pages to define the mapping. The Locate Patterns page (Figure 7-5) The Sample to Spot Mapping page (Figure 7-7) The Locate Patterns page defines the particular Pattern or Patterns to create in the substrate regions. The Pattern must already be defined for the system (page 109) and the Deck Layout that you have chosen must include the region definitions. 1. On the Locate Patterns page, choose either “All Substrates Are Identical” or “Some Substrates Are Unique” to indicate whether the content of each substrate is to be mapped the same or not. Figure 7-5. Protocol Definition - Locate Patterns. 106 CREATING PROTOCOLS 2. Click the regions. button to populate the list of If you selected the “All Substrates Are Identical” option, the regions defined for the first substrate will appear in the list and all other substrates will have the same content defined. If you selected the “Some Substrates Are Unique” option, every region defined for every substrate in the Deck Layout will appear in the list. 3. Click on a region entry in the list to specify a Pattern to be used in that region. Use the standard Windows® conventions, Shift-Click and CtrlClick to select multiple regions in the list at once. 4. Click on the button to choose from the list of defined Patterns (Figure 7-6) that appears. Dispense Patterns are defined separately (page 108). After choosing a pattern from the list, the name of the button will change to the name of the pattern so that you can tell what pattern is currently selected. 107 CHAPTER 7 Figure 7-6. List of Defined Patterns. 5. If you want the Pattern to be offset into the region, enter X and Y Offset values (measured from the upper left corner of the region) into the fields provided. This offset is in addition to any offset that was defined into the pattern itself (page 108). 6. Click the button to associate the Pattern to the currently selected regions in the list, along with any defined offset values. 7. Repeat steps 3 through 6 as many times as necessary to define patterns for all of the desired regions. 8. Click the button to advance to the Sample to Spot Mapping page (Figure 7-7) of the Protocol definition. 108 CREATING PROTOCOLS Figure 7-7. Protocol Definition - Sample to Spot Mapping. 9. Click the button and select the name of the appropriate Plate Set for this Protocol from the list. Plate Sets are defined separately (page 109). After choosing a pattern from the list, the name of the button will change to the name of the pattern so that you can tell what pattern is currently selected. 10. Click on the button and choose a plate name from the set you selected in the previous step. The plate will be represented in the graphic on the left. 109 CHAPTER 7 11. Click on the button and choose one of the substrates from those that you located patterns for on the Locate Patterns page (page 106). The substrate will be represented with its regions in the graphic on the right. 12. Click on the desired well in the plate representation to map that sample. Information about the marked well will appear in the Well Information box above the graphic. Use the standard Windows® conventions, Shift-Click and Ctrl- Click to select multiple wells at once. 13. Choose the Number of Replicates that you want to create for the samples marked in the source plate. This Number of Replicates is applied to the current mapping in process only. Changing this value later does NOT change the number of replicates mapped to the sample. 14. Choose the Volume, in number of drops, that you want the spots mapped to these samples to have. This Volume is applied to the current mapping in process only. Changing this value later does NOT change the volume mapped to these spots. 15. Select the Replicate Order that you want to use to map this sample (Figure 7-8). Replicate Order selections are: Sequential - replicates are grouped together Wrap - appear in sample order This Replicate Order is applied to the current mapping in process only. Changing this value later does NOT change the order that the replicates are mapped on the substrate. 110 CREATING PROTOCOLS 2 Sequential 2 2 8 9 2 8 3 8 2 3 8 9 3 3 3 4 4 4 4 4 5 6 6 6 6 7 6 7 1 1 1 1 1 9 9 10 10 9 10 1 2 3 4 5 6 By Wrap 9 9 13 1 10 10 11 11 8 12 12 14 2 7 3 4 5 6 1 2 3 4 5 5 5 5 10 11 11 10 11 11 11 12 12 12 12 12 13 3 14 1 2 4 5 7 7 11 13 8 8 9 9 6 10 10 12 14 7 7 7 8 13 13 14 14 13 14 13 13 14 14 11 1 12 13 14 2 3 4 5 6 7 8 5 9 11 13 6 14 7 8 10 12 Figure 7-8. Replicate Order - Custom Mapping. 16. Determine the spot on the substrate representation that you want mapped to the currently indicated sample well and click on it. If multiple samples are selected, mapping will proceed from the selected spot, down and across the spots to fill the pattern. If more wells are selected than spots are available in the pattern, the extra samples are not mapped. Multi-sample mapping will NOT cross from one pattern to the next on the substrate. Mapping the spot will change the spot color from black to gray to indicate that the spot is now mapped. The selected sample well, indicated Number of Replicates, indicated Volume and indicated Replicate Order are all part of the mapping for that spot. If you click on a spot that is already mapped, that spot will be remapped according to the sample well and parameters that are currently indicated at the time. Right-click a spot in the substrate representation in order to unmap it. 111 CHAPTER 7 17. Repeat steps 12 through 16 until you have mapped all of the desired samples to spots on the substrate. If there are multiple Source Plates in a Plate Set, remember to choose the appropriate plate (step 10) prior to mapping the spots. If there are multiple Substrate definitions (Some Substrates are Unique was selected on page 106), remember to choose the appropriate substrate (step 11) prior to mapping the spots. 18. Click the button to advance to the Aspirate Settings page of the Protocol definition. 112 CREATING PROTOCOLS Protocol - Aspirate Settings Page Figure 7-9. Protocol Definition - Aspirate Settings. 1. Enter the Aspirate Volume in µL to be aspirated for each sample. This volume should be sufficient to print all of the spots on the deck from a sample. You need to determine the dispense volume per spot and the number of spots to be dispensed, including sample replicates, array sets and super sets according to your mapping selections. Recommended value is from 1 to 3 µL. 113 CHAPTER 7 2. Enter the Post-Aspiration Delay time. This delay time is measured in seconds and provides an idle time before the tip is raised from the sample well. Select a Delay Time that will make sure that the sample liquid has time to be aspirated into the glass tips of the dispensers. The Delay Time will depend on the volume and viscosity of the sample liquid. Recommended value is 0.1 second. 3. Choose an Exit Condition in addition to the Post-Aspirate Delay, that must be met before the dispenser is removed from the sample well. The additional delay is determined by measuring the pressure in the liquid path for a selected condition. Choices include: 4. None - Tips are lifted from the sample immediately following the Post-Aspirate Delay Time. Pressure Exceeds - Tips are removed from the sample when the Pressure in the liquid path exceeds the value entered. Pressure is measured in mbar. Recommended pressure is 1.0 mbar. Pressure Delta Within - Tips are removed from the sample when the pressure change over a one second interval is less than the value entered. Enter the volume of buffer to be aspirated with each sample from the Source Plate. Enter the Buffer Volume to be aspirated in µL. The buffer volume plus the sample volume should be greater than 13 µL plus the dispense volume. This will ensure that the dispenser is completely filled with liquid and the air gap is moved above the dispenser for reliable pressure change damping. 5. Enter the Post-Aspiration Delay time. This delay time is measured in seconds and provides an idle time before the tip is raised from the buffer trough. Select a Delay Time that will make sure that the buffer liquid has time to be aspirated into the glass tips of the dispensers. The Delay Time will depend on the volume and viscosity of the buffer liquid. Recommended value is 0.1 second. 114 CREATING PROTOCOLS 6. Choose an Exit Condition that must be met, in addition to the Post-Aspirate Delay, before the dispenser is removed from the sample well. This additional delay is determined by measuring the pressure in the liquid path for the selected condition. Choices include: 7. None - Tips are lifted from the sample immediately following the Post-Aspirate Delay Time. Pressure Exceeds - Tips are removed from the buffer when the Pressure in the liquid path exceeds the value entered. Pressure is measured in mbar. Enter the volume of air to be aspirated with each sample from the Source Plate. Enter the Air Gap Volume to be aspirated in µL. This volume should be sufficient to provide adequate damping of pressure transitions in the liquid path. Pressure changes occur during vertical motions of the dispense head and whenever dispensing occurs. 8. Click the button to advance to the Dispense Settings page of the Protocol definition. 115 CHAPTER 7 Protocol - Dispense Settings Page Figure 7-10. Protocol Definition - Dispense Settings. 1. Enter the number of drops that you want dispensed for each spot.. The volume of each drop is normalized to 333 pL to ensure repeatable spots. 2. Enter the Pre-Dispense Negative Pressure for dispensing. Pressure in the liquid path is an important factor in reliable piezo-electric dispensing (page 110). This parameter determines the pressure that must be attained by the system after moving the dispense head and before firing the dispensers. The pressure in each liquid path must reach this value. The target pressure is entered in mbar. Recommended value is negative 5 mbar. 116 CREATING PROTOCOLS 3. Click the button enable or disable Pre-Dispense Verification. Pre-Dispense Verification at Source will dispense a small volume of sample back into the microplate well that is the source for the sample. The liquid path is monitored for an expected pressure change that verifies proper operation of the dispenser. A good verification indicates that the actual sample dispenses at the substrate will probably be good as well. 4. Enter a Pre-Dispense Volume, in drops, that you would like to use for the Pre-Dispense Verification. Recommended value is from 60 to 120 drops. 5. Click the button to enable or disable Post-Dispense Verification. Post-Dispense Verification at Source will dispense a small volume of sample into the microplate well that is the source for the sample. The liquid path is monitored for an expected pressure change that verifies proper operation of the dispenser. A good verification indicates that the actual sample dispense at the substrate was probably good as well. ) Note: 6. If a pre- or post-dispense error is detected, a corrective wash action is performed automatically during the next normal wash cycle. This corrective wash will take a few seconds longer than a normal wash procedure. Enter a Post-Dispense Volume, in drops, that you would like to use for the Post-Dispense Verification. Recommended value is from 60 to 120 drops. 7. Enter a volume of sample to be recovered to the original source position for the sample. After the sample has been printed, the system will return to the source position and dispense the recovery volume back into the source well. For expensive samples, you may even be able to accept sample that has been diluted with system liquid or buffer if it can be repurified. 8. Click the button to advance to the Wash Settings page of the Protocol definition. 117 CHAPTER 7 Protocol - Wash Settings Page Figure 7-11. Protocol Definition - Wash Settings. 1. Enter a Syringe Wash Volume in µL that you want to use to flush out the inside of the dispense tips during a wash cycle. The Syringe Wash flushes system liquid out through the dispense tips into the washbowl to wash the inside of the dispensers. 2. Enter the time that you want the washbowl peri-pump to run during a wash cycle. The volume of system liquid used to wash the outside of the dispense tips during a wash cycle is determined by the length of time that the peri-pump runs. Typical pump delivery is 2.5 mL per second. 118 CREATING PROTOCOLS 3. Choose whether to enable or disable Sonication during the wash cycle. Sonication operates the piezo-electric dispenser ultrasonically to clean aid in cleaning the insides of the tips. The ultrasonic agitation in the washbowl itself is always on during the wash cycles. 4. Choose whether to use a Cleaning solution during the wash cycles. Cleaning solution can be aspirated from the Cleaning Solution Trough on the deck before the wash cycle starts. 5. If Cleaning Solution is enabled, enter a volume in µL of Cleaning Solution to aspirate for every wash cycle. Typically, the aspirate volume for cleaning solution should be greater than the sample aspirate volume. 6. If Cleaning Solution is enabled, enter a time in seconds for the Soak Duration that you want to use when cleaning the tips. The Soak Duration is the time that the cleaning solution is allowed to remain soaking inside the tips. 7. If Cleaning Solution is enabled, enter a Flush Volume in µL of system liquid that you want to use when flushing the cleaning solution out of the dispensers and into the washbowl. 8. Click the button to advance to the Error Handling page of the Protocol definition. 119 CHAPTER 7 Protocol - Error Handling Page Figure 7-12. Protocol Definition - Error Handling. 1. Click one of the option buttons to select an error-handling mode errors that occur during a Pre-Dispense Verification. If the expected pressure change during a Pre-Dispense Verification does not occur, the selected recovery operation will be evoked. 120 CREATING PROTOCOLS 2. Choose Abort Test to perform a wash cycle at the washbowl as defined on the Wash Settings page before parking the dispensers at the washbowl. The print run will be terminated after the dispensers are parked. Or Choose Ignore Error to have the error logged, but ignored. All four tips will attempt to dispense the requested volume at their mapped destinations. Or Choose Skip Sample to the dispenser(s) that fail the PreDispense Verification disabled for the remainder of the current sample. The other dispensers will dispense the requested volume at their mapped destinations. Or Choose Retry to perform a wash cycle at the washbowl as defined on the Wash Settings page. The same four samples are re-aspirated, and the Pre-Dispense Verification is repeated. ) Note If you choose a Sample Volume to Recover on the Dispense Settings page, sample recovery occurs before the wash cycle begins. 3. If you selected the Retry option, enter the Number of Times to Retry to determine how many times you want to try passing the Pre-Dispense Verification before giving up. Each retry, regardless of which tip fails the verification, counts toward the number of retries. 4. If you selected the Retry option, click one of the option buttons to select an action if all retry attempts fail. You can choose Abort, Ignore Error or Skip Sample, which function the same as described above for a first failures. 5. Click the button to advance to the Other Settings page of the Protocol definition. 121 CHAPTER 7 Protocol - Other Settings Page Figure 7-13. Protocol Definition - Other Settings. 1. Enter the number of Syringe Cycles to use at the beginning of a Print Run to ensure the dispensers are completely primed. This defines a short Prime sequence to update the priming in case there has been evaporation in the dispenser tips since the last run was printed. 2. Enter a time duration in seconds that you want to run the peripump during the start-of-run prime sequence. Since priming occurs into the washbowl, you need to run the peri-pump that supplies and evacuates the washbowl to make sure that washbowl is not overfilled during this priming sequence. 122 CREATING PROTOCOLS 3. Click the Park Tips option button if you want to perform a single cleansing prime sequence at the washbowl before moving to a safe park position out of the way on the deck. Or Click the Standby option button to move the dispensers to the washbowl and enter into the standby mode. This automatic Standby mode is the same as using the Standby utility (page 110) to manually start the Standby mode from the Utilities menu. 4. If you choose the Park Tips option, enter the number of Syringe Cycles to use in the end-of-run cleaning prime. This final priming sequence of the run helps to make sure the dispensers are clean. 5. Enter a time duration in seconds that you want to run the peripump during the end-of-run prime sequence. Since priming occurs into the washbowl, you need to run the peri-pump that supplies and evacuates the washbowl to make sure that the washbowl is not overfilled during this priming sequence. 6. Click the Protocol. button to complete the definition of the The protocol is stored as a Protocol Library entry and is available as a selection for a Print Run. 123 CHAPTER 7 This page is intentionally left blank. 124 PREPARING FOR PRINTING Chapter 8 Preparing for Printing This chapter describes the procedures to prepare the system for a printing run. Define the Print Protocol (page 125) Populate the Deck with Substrates (page 126) Turn on the Substrate Vacuum (page 127) Turn on the Optional Environmental Enclosure (page 127) Prepare the Samples (page 128) Populate the Deck with a Source Plate (page 128) Start the Print Run (page 130) Choose a Protocol (page 131) Choose Targeting for Targeted Dispensing (page 133) Enter a Run Note (page 136) Specify the Number of Samples to Print (page 136) Specify the Number of Slides to Print (page 136) Select the GAL File Output (page 136) Correction Runs (page 137) Locate Position Dialog - Targeting (page 138)) Printing Arrays in Plate Wells (page 141) Define the Print Protocol Printing protocols are defined and stored ahead of time (page 128). Once it comes time to print the run, it is simply a matter of selecting the appropriate protocol from the list. Be sure to name your protocols so that you can tell what each one does when the list is presented for your selection. 125 CHAPTER 8 Populate the Deck with Substrates Populate the deck with substrates for dispensing arrays. The deck will support five substrate holders, each of which can position five substrates. Each enabled substrate holder must be fully populated (all five positions filled) with slides to ensure that the substrates are adequately secured for the run. Substrate positions that you want to use are indicated to the software in the Deck Layout definition. Be sure to populate those holders that are defined in the Deck Layout for the printing protocol. Entire holders can be disabled so that they do not need to be populated with slides if they are not needed for the run. To disable a holder, disengage the quick connect fitting on the appropriate port of the vacuum manifold (Figure 8-1). Any number of holders can be enabled as necessary to support the required number of substrates to be printed (page 136). Figure 8-1. Vacuum Manifold. 126 PREPARING FOR PRINTING Turn on the Substrate Vacuum You can leave the vacuum pump running all day, if desired. The quick disconnect fittings at the manifold act to shutoff vacuum to an unused substrate holder when the fitting is disengaged. Determine the substrate holders that you are using and engage the appropriate quick connect fitting at the vacuum manifold. To disengage the vacuum to one of the holders, press the release lever on the quick connect fitting and let the tubing fitting pop out of the manifold fitting. The two parts of the quick connect fitting (the tubing end and the manifold port) remain together but not engaged. In this position, vacuum for the associated holder is off at the manifold. To reengage the quick connect fittings, simply push the appropriate tubing fitting into the manifold until it clicks. When engaged, vacuum for that holder is on at the manifold. The holder position number associated with each fitting is etched in the vacuum manifold to indicate the holder that you are enabling or disabling. When the deck is populated and the vacuum to all populated holders is enabled, make sure that the gauge on the vacuum manifold reads at least 10 inches of Hg. This will ensure that there are no leaks in the vacuum system that may cause substrates not to be secure on the holder. Turn on the Optional Environmental Enclosure If the system is equipped with the optional Environmental Enclosure, turn on the power using the separate power switch located on the HEPA Filter Control Box. Check that power switch for the ionizer (located on the ionizer driver) is turned on. The ionizer can be powered on continuously. 127 CHAPTER 8 Prepare the Samples Samples need to be completely thawed and totally reconstituted as necessary to create a liquid sample free of particulate matter. Reconstitute your samples and pipette them into a microplate. Spin and vacuum degas the Source Plate for 1 minute. If your samples are frozen, make sure that they are thoroughly thawed before using them. Thaw samples slowly without introducing gas into the liquid. Minimum sample volume is dependent on the plate or container. 20 µL sample volumes are recommended. In a conical 384 well plate, a minimum sample volume of 8 to 10 µL should be observed. Non-aqueous sample material may require tuning the dispenser parameters with your actual sample material (page 136). Populate the Deck with a Source Plate With the samples prepared in a microplate as described above, place the plate into the Source Position on the deck. The Source Position is identified for the software in the Deck Layout definition. Be sure to place the Source Plate in the position shown in the Deck Layout for the printing protocol. Typically, the Source Plate should be placed in holder position 2 on the deck. This is the most efficient location in terms of access to the commonly used labware (e.g. washbowl, buffer trough, cleaning trough, destination substrates). Be sure to orient the Source Plate with well A1 in the upper left corner so that sample mapping will correspond with the sample locations. Make sure that the plate is firmly positioned against the tabs and springs in the holder (Figure 8-2). If the optional Environmental Enclosure is installed, close the door and allow the system to stabilize temperature and humidity for 15 to 30 minutes before initiating the print run. 128 PREPARING FOR PRINTING Tabs Springs Figure 8-2. Source Plate Mounting. 129 CHAPTER 8 Start the Print Run ) Note: It is strongly recommended that you NOT use the Piezorray computer for other purposes while printing arrays. This includes editing or creating Piezorray™ Protocols, Deck Layouts, Dispense Patterns, Source Plate Content, Source Plate Sets, etc. Click the button to begin the printing run. A message box will appear asking you for information regarding this particular run (Figure 8-3). Figure 8-3. Start Protocol Run. 130 PREPARING FOR PRINTING The following paragraphs describe the information being requested in this startup window. The information includes: Choose a Protocol (page 131)l Choose Targeting for Targeted Dispensing (page 133) Enter a Run Note (page 136) Specify the Number of Samples to Print (page 136) Specify the Number of Slides to Print (page 136) Select the GAL File Output (page 136) Click the Start! Button (page 137) Correction Runs (page 137) Choose a Protocol When you start a run, you need to choose which protocol to use for the run. The protocol definition specifies all of the information (Plate Set, mapping parameters, deck layout and dispensing parameters) required to print the desired arrays. If you are going to use a Correction Run to follow up and create spots that fail to print during the initial printing run, make sure that the protocol that you select has the Pre-Dispense Verification enabled (page 130) so that failed spots are detected and logged. 1. Click the Select Protocol button to choose a protocol for the print run. The Select Protocol window (Figure 8-4) will appear with the current list of defined protocols from which to choose. 131 CHAPTER 8 Figure 8-4. Select Protocol List. 2. Click on a protocol name in the list to highlight the desired protocol for run. 3. Click the close the list. button to use the highlighted protocol and The selected protocol name will appear on the Select a Protocol button (Figure 8-3) to indicate the protocol that will be used for the print run. 132 PREPARING FOR PRINTING Choose Targeting for Targeted Dispensing Targeted Dispensing is a special mode where the sample must be dispensed into physically specific area on the substrate. This mode is most often used for targeted dispensing onto gel pads or other subdivided substrates or when creating arrays in the bottoms of microplate wells. Using this mode lets you align the dispense head to the physical properties of the substrate. The targeting mode is only available if the vertical camera is installed. 1. Click the access the targeting mode. button to The Target Substrates window will appear (Figure 8-5) with a list of substrates on the deck. Each substrate defined for the Deck View in use (selected in the protocol) will appear in this list. 2. Choose one of the substrates from the list to align. The substrate selected should be one of the substrates that is actually populated on the deck (page 126). 133 CHAPTER 8 Figure 8-5. Target Substrates Window. 134 PREPARING FOR PRINTING 3. Click the button to line up the dispense head with the target spot in the upper left corner of the selected substrate. The standard Locate Positions window will appear in the camera mode (page 138) so that you can precisely line up the targets on the substrate. 4. Use the controls in the Locate Position window to visually align the reticule in the camera image with the target spot in the upper left corner of the substrate. 5. Click the button to line up the dispense head with the target spot in the upper right corner of the selected substrate. With a second reference point on the substrate, skew correction can be calculated and implemented for targets that are not square to the dispense head. The standard Locate Positions window will appear in the camera mode (page 138) so that you can precisely line up the targets on the substrate. 6. Use the controls in the Locate Position window to visually align the dispense head with the target spot in the upper right corner of the substrate. 7. Repeat the targeting process for each substrate on the deck. 135 CHAPTER 8 Enter a Run Note Enter any text to describe this particular run. Run Notes appear in the Results tab of the main software window and on printed reports for the run. Specify the Number of Samples to Print Enter the number of samples from the Source Plate that you want to print in arrays. This value must be less than the number of samples in the Plate Set in use (selected in the protocol). This will be the number of plates in the plate set times the number of wells in each plate of the set. Remember plates may only be partially filled with samples. Source Plates are presumed to be filled (and therefore used) in a columnar mode (i.e. for 96-well plates, wells A1 through H1, then A2 through H2, then A3 through H3, …, then A12 through H12 and then to the next plate). Specify the Number of Slides to Print Enter the number of slides (substrates) that you want printed with arrays. This value must be any number less than five times the number of holders in use by the Deck Layout in use (selected by the protocol). Each slide will be a duplicate of the first slides arrays and mapping. The number of slides that you indicate here will determine how many duplicate slides you will create with the run. Select the GAL File Output Mark the check box to create a GAL file output (page 138) from the print run. The GAL file contains the sample mapping and array dimension information for each spot in each array on the substrate. With this check box marked, a file is created in the Piezorray directory. The file will have a name generated by the system that includes the protocol name, the run date, the run time and “Gal” as a GAL file indicator. For example: Array24x16_2003-05-13_134307_Gal.gal 136 PREPARING FOR PRINTING Click the Start! Button After entering the information required in the Start Protocol Run window, click the button. Additional prompts will appear reminding you to populate the deck with Substrates (page 126) and a Source Plate (page 128). After that, the printing protocol should run unattended (except for changing Source Plates if the Plate Set calls for multiple plates). Correction Runs Examine the Results tab report to determine if any spots failed to dispense (Pre-Dispense Verification must have been enabled for the protocol). If any failed dispenses are reported, examine the tips and sample volumes to determine what caused the failure and correct whatever problems are detected. Perform any Correction Run before moving the substrates on the deck. Only the last printing run will be able to be corrected for the failed dispenses. Click the button to start a follow-up run to print only those samples that were identified as failed dispenses. Spots printed during the correction run will appear in their original intended positions in the arrays. 137 CHAPTER 8 Locate Position Dialog - Targeting Whenever you click the button or the button in the targeting mode (see above), the Locate Position dialog will appear. This dialog lets you move the dispense head in order to visually align the dispensers with physical targets on the substrates. To specify deck coordinates for substrate targets, use the Target By Camera mode. Turn on the auxiliary light source and adjust the intensity of the light as necessary. Position the end of the fiber optic cable to adequately illuminate the substrate. ) Note: The Tip 1 method is not appropriate for use in Targeting. The visual alignment method is not sufficient for aligning the dispensers with physical substrate targets. Figure 8-6. Locate Position - Camera Targeting Mode. 138 PREPARING FOR PRINTING The message area at the top of the window indicates the labware coordinates that you are locating. 1. Make sure that the Camera mode is selected as the method of targeting. 2. Click on the button to move the dispense head to the deck coordinates shown in the Intended Position fields. Visually verify whether the reticule on the camera image is aligned with the target location on the substrate or target plate. 3. Use the , , and motion control buttons to move the dispense head until the camera is aligned with the target location. Choose the Step Size from the drop-down list to move the dispense head in larger increments (faster) or smaller increments (safer) per click of the motion buttons. Choose the motion Speed from the drop-down list to move the dispense head Fast (faster) or Slow (safer) for each click of the motion buttons. ) Note: Use 1 mm or smaller increment for vertical motions. Use the 9 mm increment for single step motion between 96-well plate positions or dispenser spacing. ) Note: Use Slow speed for any vertical motion to prevent tip damage. 139 CHAPTER 8 4. If the camera image of the substrate surface is not in focus, click the button to enable control of the vertical motion for the dispense head. ) Note: The label on the button ( or ) indicates the current state of the Z Controls and will toggle when clicked. ) ) Caution: It is possible to damage the dispenser tips if you run them into stationary objects on the deck. 5. Use the and motion control buttons to control the vertical height of the dispense head. 6. Click on the button to disable control of the vertical motion for the dispense head. Note: The label on the button ( or ) indicates the current state of the Z Controls and will toggle when clicked. 7. When you click the button, the current coordinates in the Intended Position fields will be stored as the target location. 140 PREPARING FOR PRINTING Printing Arrays in Plate Wells You can choose to use 96-well microplates as the dispensing substrate, creating arrays in the bottoms of the wells. Substrate definition to support this application requires a somewhat different approach from either source plate definitions or other substrate definitions. For this application, the plate substrate calibration will define the first dispense location in the first well, rather than the substrate reference or the well center. Use the following procedure to define the plate substrate. Tip: During the substrate definition process, use a sealed, 96-well plate so that you can see the dispenses on top of the plate seal to verify the locations and sizes of the arrays. This implies that the Z-height is temporarily defined at a safe level for moving above the top of the plate. Dispense at least 10 drops during trial runs to ensure visibility on the plate seal. When the application setup is verified, calibrate the Deck Layout again to reposition the Z-height for the substrate to dispense at the bottom of the wells. 1. While creating a Deck Layout, choose a microplate for the substrate (Figure 8-7). Create the substrate (page 73), if necessary, to define a microplate substrate with regions corresponding to each of the wells. Use the following parameters for the substrate definition: X Width = 108 mm Y Length = 72 mm Number of Columns = 12 Number of Rows = 8 Spacing X = 9 mm Spacing Y = 9 mm Offset X = 0 mm Offset Y = 0 mm Region Area Width = 4.0 mm Region Area Length = 4.0 mm 141 CHAPTER 8 Figure 8-7. Deck Layout for Arraying into Plate Wells. 2. Make sure that only ONE plate substrate is selected for each holder (Figure 8-7). 3. Click the or button for the First Substrate calibration to use the Locate Position dialog (page 69) and define the first dispense position at the farthest upper left point accessible to Tip 1 in well A1. 4. Click the button to calculate and store the dispense coordinates for the microplate substrate in the holder. 5. Save the Deck Layout so that you can use it when creating a protocol below. 6. Create a separate protocol (page 97) for dispensing into microplate wells, identifying the Deck Layout, defined above, to use a microplate as the substrate. You can choose either Array Mapping or Pattern Mapping (dispense pattern already defined) for the Protocol. 142 PREPARING FOR PRINTING 7. When mapping the source samples to substrate locations (Figure 8-8), make sure to set the following parameters: Array Set Horizontal Spacing = 9.0 mm SuperSet Horizontal Offset* = 0.0 mm SuperSet Vertical Offset* = 0.0 mm * remember that the first dispense location was actually used to define the substrate (step 3). No offset is required. 8. On the Dispense Settings page for the protocol, set the Dispense Volume to 10 drops. When running the trial array, 10 drops of buffer should be easily visible on the top of the sealed plate. 9. Save the protocol. Figure 8-8. Protocol for Arraying into Microplate Wells. 143 CHAPTER 8 10. Fill a source plate with buffer and use it to print a trial array run (page 130). 11. Examine the plate when the printing is complete and verify that ALL of the spots on top of the plate seal are within the confines of the wells, visible through the sealer film and positioned as desired. Adjust the substrate calibration in the Deck Layout to reposition the first spot of an array into the well area. Adjust the array mapping in the Protocol to reposition the array offset within the well area, adjust the size of the array or change the internal spacing of the array. Adjust the size or internal spacing of a dispense pattern on the Pattern Definition screen. 12. When the arrays are printed in the well areas as desired, recalibrate the Z-height in the Deck Layout to dispense in the bottom of the plate wells and redefine the dispense volume in the Protocol to dispense the desired volume of sample. 144 SYSTEM UTILITIES AND PROCEDURES Chapter 9 System Utilities and Procedures There are several utilities built in to the system software to support your routine operation of the system. The following operational utilities and common procedures are discussed below. System Utilities Prime Utility (page 146) Standard Wash Utility (page 148) Deep Cleaning Utility (page 149) Standby Utility (page 152) Labware Utility (page 153) Tuning Utility (page 162) Daily Procedures Start-of-Day Procedure (page 165) End-of-Day Procedure (page 171) 145 CHAPTER 9 Prime Utility The Prime utility is used during several procedures in keeping the Piezorray system dispensing reliably. Priming fills the dispensers with System Liquid, displacing air from the dispensers and fluid path to improve PiezoTip™ dispensing. Use the Prime utility when: Using the Start of Day Procedure (page 165) Air is suspected in the Dispensers Troubleshooting or Resolving dispensing problems You can also manually Prime to prepare the tips for dispensing from the Tuning utility or automatically when you run a Protocol. To run the Prime utility: 1. Make sure that the deck is clear of any obstacles that may damage the tips. 2. Click the button in the Utilities menu in the Run Protocol section of the main window. The dispense head will move over the washbowl. 3. A very slow syringe stroke starts. The pressure in the liquid lines is monitored to detect plugged tips that may damage the pressure transducers. 4. During the Priming sequence, the Peri-pump will run occasionally for five seconds at a time to make sure that the washbowl does not overflow. 146 SYSTEM UTILITIES AND PROCEDURES 5. With the dispenser tips above the washbowl, the system will run ten syringe strokes at normal pump speed. 6. The Peri-pump will run for five seconds to evacuate the washbowl. Washbowl sonication is turned on whenever the Peri-pump is active. 7. The tips are lowered into the washbowl and ten more syringe strokes pump liquid through the tips while they are under water. The Peri-pump will run for five seconds to evacuate the washbowl. Washbowl sonication is turned on whenever the Peri-pump is active. 8. When all syringe strokes and peri-pump operations are complete, the tips are raised and left directly above the washbowl. 147 CHAPTER 9 Standard Wash Utility The Standard Wash Utility allows you to wash the dispenser tips manually, without performing a print run. The parameters for the Standard Wash are defined by the system and are separate from those defined in the individual protocols. Typically, you may choose to perform a Standard Wash immediately before a print run to ensure the cleanliness of the tips or when troubleshooting dispensing problems 1. Make sure that the deck is clear of any obstacles that may damage the tips when the dispense head moves. 2. Click the button from the Utilities menu in the Run Protocol section of the main window. The dispense head will move into the washbowl. 3. The peri-pump will turn on for ten seconds to supply wash liquid to the washbowl and wash the tips. Whenever the peri-pump is on, washbowl and tip sonication are also turned on. 4. The syringe pumps will pump 100 µL of system liquid through the tips into the washbowl. 5. The syringe pumps are pre-loaded with system liquid in preparation for system dispensing. 6. The tips are raised and left directly above the washbowl. The progress of the wash is reported as a real time percentage in the Run Status frame of the main window. If necessary, you can use the before it is done. button to interrupt the Wash utility 148 SYSTEM UTILITIES AND PROCEDURES Deep Cleaning Utility This procedure is intended to maintain optimal dispenser performance of the system. You should perform this procedure as part of the Start-of-Day procedure and before a print run if performance becomes degraded or several hours have elapsed between runs. A Deck Layout identifying the Source Plate position must be defined and calibrated. If sample material is still in the tips, you should run the Prime utility to flush it out. ) Caution: Use only a 96-well microplate for the Deep Cleaning utility. Any other plate will damage the tips! 1. ) Fill wells A1, B1, C1 and D1 of a 96-well microplate with an appropriate cleaning solution for the sample type (e.g. 20-100% Methanol, up to2% Tween® 20 in water, up to 2% SDS in water, etc). Record the cleaning solution that you use. Caution: If Acetone or a solvent of similar aggressiveness is used, the microplate should be made of polypropylene or other impervious material. 2. Click the button on the Utility menu in the Run Protocol section of the main window. At the prompt that appears, make sure that you place the microplate with the cleaning solution in the Src position on the deck. The current Deck Layout definition identifies the Src position as shown on the Printing tab of the main screen. 3. Click the is in place. button in the message box after the plate Make sure that the microplate is properly positioned against the stops and is held securely by the retaining clips on the plate holder (Figure 9-1). 149 CHAPTER 9 Tabs Springs Figure 9-1. Source Plate Holder. 4. The dispensers are raised to the Safe Z height above the deck to prevent damage to the tips and moved over the washbowl. 5. The Peri-pump turns on and flushes the Washbowl. 6. A very slow syringe stroke starts to detect excessive backpressure. The pressure in the liquid lines is monitored to detect plugged tips that may damage the pressure transducers. 7. The tips lower into the washbowl. 8. Two syringe strokes flush system liquid through the Dispensers and into the Washbowl. 9. The washbowl peri-pump runs to clear the washbowl. 150 SYSTEM UTILITIES AND PROCEDURES 10. The Dispensers rise out of the washbowl and aspirate an 8 µL air gap. The air gap volume is determined by the volume of the air gap defined in the dialog for the Tuning utility. 11. The tips move to the Cleaning Plate in the Src position and aspirate 33 µL of cleaning solution. 12. The tips are sonicated while they remain in the cleaning solution. 13. The progress of the Deep Cleaning utility is reported in the Run Status frame on the main screen. 14. After tip sonication is complete, the tips are moved back into the washbowl and the peri-pump is run again for 10 seconds. The washbowl sonication is on whenever the peri-pump is turned on. 15. Two syringe strokes of system liquid are pumped through the tips to flush out the cleaning solution. 16. The syringe pumps are moved to a mid stroke position and the peri-pump is run for ten more seconds to wash the outside of the tips. 17. With the tips still in the washbowl, the pressure is checked after 20 seconds to see if it has changed. Pressure is recorded in the event log if there are problems at the end of the Deep Cleaning utility. If no pressure problems are encountered, no log entry is made. 18. The tips are raised out of the liquid and left above the washbowl. 19. The peri-pump runs to clean out the washbowl itself. Repeat this procedure with additional cleaning solutions, if necessary. Be sure to use a clean plate for each new cleaning solution. After the Deep Cleaning utility is complete, run the Prime utility to prepare the tips for printing. 151 CHAPTER 9 Standby Utility The Standby utility keeps the liquid path charged with degassed system liquid so that the system can be ready to print arrays. Leaving the system in Standby mode for long or short idle periods between printing runs will help maintain optimal dispensing performance and minimize startup maintenance following idle time. You can take the system out of Standby mode by clicking the button. The Standby mode will abort within one minute after clicking button. 1. Make sure that the Wash Bowl location is defined and that the deck is cleared of any obstacles that may damage the tips. 2. Click the button on the Utility menu in the Run Protocol section of the main window. 3. The dispense head will move to the washbowl and a very slow syringe stroke starts to detect excessive backpressure. The pressure in the liquid lines is monitored to detect plugged tips that may damage the pressure transducers. 4. The tips are lowered into the washbowl and ten syringe strokes pump liquid through the tips while they are under water. 5. The Peri-pump will run for ten seconds to evacuate the washbowl. Washbowl sonication is turned on whenever the Peri-pump is active. 6. The tips remain in the wash water at the end of the Standby cycle. 7. Steps 4 through 6 are automatically repeated every 60 minutes for 100 cycles. This frequency is enough to keep the system in Standby mode over a long, three-day weekend, but not so long as to run out of wash liquid if the reservoir was filled. 152 SYSTEM UTILITIES AND PROCEDURES Labware Utility The Labware utility lets you assign and review physical locations and coordinates of key deck positions. The absolute deck coordinates (page 152) of these locations are shown in the Physical Positions list. You can individually edit the following physical positions on the deck: Washbowl location Camera Dispense location for each tip Buffer Trough location Cleaning Trough location Home location (system initialization) Park location (protected location in washbowl) Tip Change location (ease of maintenance tip change position) User defined location (any convenient location that you may use for common operations such as unclogging tips) Labware locations are stored in the system database and archived in a separate backup file for convenience. The values used by the system come out of the database, so a restored database (page 152) will potentially contain outdated labware definitions. The backup file is not restored with the database, so you may be able to recover your most recently defined labware locations if you want them. Click the button to retrieve ALL of the labware definitions from the archive file and insert them into the database at one time. 1. Make sure that the deck is clear of any obstacles that may damage the tips. 2. Click the button on the Utility menu in the Run Protocol section of the main window. 3. The Labware Dialog window will appear displaying all of the hardware positions currently assigned in the Physical Positions list. 153 CHAPTER 9 Figure 9-2. Labware Dialog Window. 4. To edit a labware position, highlight an item in the Physical Positions list. Refer to the special instructions for defining various labware positions on: 5. Washbowl Position (page 158) Camera Dispense Positions (page 157) Buffer Trough Position (page 160) Cleaning Trough Position (page 160) Home Position (page 160) Park Position (page 161) Tip Change Position (page 160) User Defined Position (page 160) Whenever possible, mark the Lock Z Movement to Safe Travel check box to restrict ALL movements to a safe height above the deck. 154 SYSTEM UTILITIES AND PROCEDURES 6. Click button to move the tips to the current coordinates for the item location selected. 7. Use the , , and motion control buttons to move the dispense head until either the first dispenser tip or the crosshair of the camera image is aligned with the selected labware. Choose the Step Size from the drop-down list to move the dispense head in larger increments (faster) or smaller increments (safer) per click of the motion buttons. ) Note: Use 1 mm or smaller increment for vertical motions. Choose the motion Speed from the dropdown list to move the dispense head Fast (faster) or Slow (safer) for each click of the motion buttons. ) Note: 8. ) Use Slow speed for any down motion to prevent tip damage. Click on the button to raise the dispenser tips to a safe height above the level of the deck. Caution: When moving the tips from the Labware Utility, it is possible to damage the dispenser tips if you run them into stationary objects on the deck. 155 CHAPTER 9 9. Use the and motion control buttons to control the vertical tip height of the position you are currently defining. Vertical tip height in a source plate is the height at which sample will be aspirated from the wells. If you are using the camera to adjust the vertical position of the dispense head, use extra care not to damage the tips during vertical motions. Adjust the vertical coordinate by bringing the top surface of the substrate into focus in the camera image. 10. Click the button when you have the alignment for the selected labware where you want it. The coordinates displayed in the Current Position fields will be stored as the new values for the labware position. 11. Click the button to save edited labware positions and exit the window. 156 SYSTEM UTILITIES AND PROCEDURES Camera Dispense Positions The Camera Dispense positions need to be defined for each of the four tips. These positions are used to locate the indicated dispenser in front of the horizontal camera for tuning and examining the tips. To locate this position, move the dispense head around in front of the camera so that the tip is positioned inside the reticule on the camera image window. Side to side in the reticule represents the X axis movement. Vertical alignment on the horizontal reticule line represents the Z axis and clarity of focus on the tip itself represents the Y axis motion. Figure 9-3. Camera Dispense Position Alignment. 157 CHAPTER 9 Washbowl Position The washbowl position is stored in only one place. If you change this position from ANY Deck Layout or from here in the Labware utility, you have changed the washbowl location for EVERY Deck Layout defined in the system. Use caution when changing the washbowl position. The washbowl position is defined by visually examining the location of the tips with respect to the washbowl opening. Visual alignment in the center of the opening is sufficient for the X coordinate. There should be approximately 1 mm clearance between the end of the washbowl opening and the body of dispenser #1 to define the Y coordinate (Figure 9-4). The dispenser bodies above the tips should not contact the washbowl in any direction. Tip # 1 ~ 1 mm Clearance Washbowl Figure 9-4. Washbowl Position. 158 SYSTEM UTILITIES AND PROCEDURES Vertical tip height for the washbowl starts by using the yellow clearance shim (Figure 9-5) supplied with the system to find the top of the washbowl. Move the tip vertically and check the clearance between the top of the washbowl and the dispenser tip by placing the yellow clearance shim on top of the washbowl and sliding it under the tip from the side. The glass tip should just contact the shim, but not bind. Record the value for the shim height shown in the Z coordinate field. Set the Step Size to 10 mm and click button one time. Change the Step Size to 0.1 mm and click the button one more time. The Z coordinate value should now be 10.1 mm less than the shim height value. This new value is the Z height for tips in the washbowl. Click the three axes. button to accept the values for all Shim Clearance Washbowl Shim Figure 9-5. Washbowl Height Measurement. 159 CHAPTER 9 Trough Positions The trough positions are stored in only one place. If you change these positions from ANY Deck Layout or from here in the Labware utility, you have changed that trough location for EVERY Deck Layout defined in the system. Use caution when changing the trough positions. The two trough positions are defined by visually examining the location of the tips with respect to the cover of the trough. Visual alignment in the center of the access holes in the cover is sufficient for the X and Y coordinates. To adjust the vertical tip height in the troughs, click the button and remove the cover from the trough. Lower the tip back down into the trough until it is approximately two millimeters off the bottom of the trough. Fill the trough with about 20 mL of liquid and make sure that the liquid level does not get above the glass tip onto the dispenser body. Home/Tip Change/User Defined Positions The Home position Tip Change positions and the User Defined position are defined for your convenience when performing tip maintenance. For personal convenience or comfort, you may define these three positions anywhere on the deck. Simply move the dispense head to the desired position on the deck, including Z height and click the button to accept the values for all three axes. For each of these positions, the defined coordinates are only used from this Labware utility window to move the dispense head to the. 1. Select the Home, Tip Change or User Defined position in the list of Physical Positions. 2. Click the 3. Perform whatever maintenance is required. button. 160 SYSTEM UTILITIES AND PROCEDURES Park Position The Park position is a location defined within a secondary cavity in the washbowl. This cavity is a location where the tips can be protected from accidental damage. The Park position is defined by visually examining the location of the tips with respect to the Park cavity in the washbowl (Figure 96). Visual alignment in the center of the cavity is sufficient for the X and Y coordinates. To set the height in the Park position, run the dispensers down into the Park cavity in the washbowl until the tip alignment plate on the dispense head is close but just clears the top of the washbowl body. Drain Cavity Washbowl Dam Sonication Shield Wash Cavity Park Cavity Figure 9-6. Washbowl Features. 161 CHAPTER 9 Tuning Utility The Tuning Utility is used to establish optimal tip performance prior to array printing. Use it to verify the alignment and operation of the dispensers. 1. Make sure that the deck is clear of any obstacles that may damage the tips. 2. Click the button on the Utility menu in the Run Protocol section of the main window. 3. The Tip Tuning Utility window will appear (Figure 9-7) displaying dispensing parameter controls and a Live Video image area that shows whatever is in front of the horizontal camera. Figure 9-7. Tip Tuning Utility Window. 162 SYSTEM UTILITIES AND PROCEDURES 4. In the Aspirate Settings portion of the window, choose appropriate volumes to emulate the tip loading that will occur during an actual printing run. To dispense actual sample material, a 96-well Source Plate with samples in wells A1, B1, C1 and D1 or a 384-well Source Plate with samples in wells A1, C1, E1 and G1 must be located in the calibrated Src location of the active Deck Layout (layout currently displayed in the main software window). If you choose to aspirate sample from a plate, make sure that the physical Source Plate matches the Source Plate type selected in the Aspirate Settings. 5. Before dispensing, make sure that the tip is clean and the dispenser is primed. The button and the button are provided in the Tip Tuning utility window for your convenience. 6. Click the button to load the tip with the liquid volumes defined for the Aspirate Settings. 7. Choose one of the dispenser tips in the Current Dispenser portion of the window to view the selected tip in the Live Video window. The selected tip will move in front of the horizontal camera and will appear in the Live Video window. 8. Make sure that the image of the tip is in sharp focus and is properly aligned with the reticule in the Live Video window. If the tip image is not properly aligned, adjust the appropriate Camera Dispense position using the Labware utility (page 153). 9. Click the indicated. button to dispense the number of drops The dispensers are fired at 50 drops per second, so a value of 500 drops to dispense will take approximately 10 seconds. 163 CHAPTER 9 10. Examine the image of the drops in the Live Video window (Figure 9-7). The drop image should appear stable, with no satellites and positioned within the target box on the reticule. If drops do not meet these criteria: Adjust the pressure if dispenser does not produce any drops. Recommended pressure is negative 5 mbar. Adjust the Pulse Width if satellites appear in the image. Adjust the Voltage if the drop does not fall within the target box on the reticule. Prime the dispenser if the drop fires out of line to fall outside the target box on the reticule. 11. Adjust the strobe delay to view the progression of the drops out of the dispenser tip. Be sure to return the Strobe Delay to 250 µsec before calculating drop volume in the next step. 12. Click the button to dispense in front of the camera and calculate the average volume of a single drop. Drop volume is calculated as the syringe displacement during the test, divided by the number of drops dispensed. 13. Record the volume of the drop from this dispenser. Ideally, the target volume for each dispenser in the system is 333 pL and they should all be within ± 17 pL of each other (at 500 drops dispensed). Increase the number of drops to improve the accuracy of the drop volume calculation. Adjust the voltage as necessary to vary the drop volume. 14. Repeat steps 7 through 13 for each dispenser tip in the system. 15. Click the “OK” button to close the Tip Tuning utility. 164 SYSTEM UTILITIES AND PROCEDURES Start-of-Day Procedure You need to perform the following procedures at the beginning of every day that arrays will be printed. Following these procedures will help to maintain the system and ensure reliable operation. End the Standby Mode Click the button to end the standby mode, presuming of course, that you have left the system in the Standby mode as recommended. The Standby mode should end within one minute of clicking the button. Check the System Liquid Reservoir Check the System Liquid Reservoir every morning before you start printing. If the bottle is at least half full, you should have an adequate supply for the days runs as well as to support the Standby mode for overnight maintenance of the liquid lines. If you need to add liquid to the reservoir: 1. Carefully unscrew the cap from the System Liquid Reservoir. Be careful to not twist or tangle the tubing through the cap. 2. Lift the cap to one side. The tubing should not be completely removed from the reservoir bottle. If the tubing ends remain submerged in the liquid at all times, the system prime is maintained. You should be able to pour in fresh system liquid without removing the tubing from the reservoir. 3. Fill the reservoir with clean, system liquid (HPLC grade water) filtered to 0.2 µm. 4. Replace the cap on the System Liquid Reservoir. Be careful to not twist or tangle the tubing through the cap. 5. Check that sparge stone and the free tubing end in the reservoir are on opposite sides of the bottle for on-line degassing is operating properly. System liquid needs to be continuously degassed. Recommended degassing method is continuous on-line Helium sparging (page 164). Dispense reliability is not guaranteed for Vacuum degassing methods. 165 CHAPTER 9 Fill the Wash Reservoir Check the Wash reservoir at the start of every printing day to ensure sufficient liquid to print arrays. Also check the level before leaving the system in Standby mode for extended periods of time (longer than overnight). 1. Remove the cap from the Wash reservoir. 2. Add Wash solution to fill the reservoir. Four liters of wash solution should be sufficient for a days run, including overnight Standby mode, depending on usage. Four liter containers for Wash and Waste are standard on the system. 20 liter containers are optional. 3. Replace the cap on the reservoir. Make sure that the Marprene® tubing from the peri-pump to the cap is not twisted or kinked. Empty the Waste Reservoir Empty the waste reservoir at the start of every printing day to make sure that this container does not overflow during the course of the day. 1. Remove the cap from the waste reservoir. 2. Empty the waste reservoir. Typically, the waste from the washbowl will not require special disposal, but you should check local requirements for the types of sample materials that you are using. 3. Rinse the waste reservoir with clean water. 4. Replace the cap on the reservoir. Make sure that the Marprene® tubing from the peri-pump to the cap is not twisted or kinked. 166 SYSTEM UTILITIES AND PROCEDURES Clean and Fill the Buffer Trough At the beginning of every printing day, empty and refill the Buffer Trough with fresh Buffer solution. 1. Loosen the thumbscrew securing the Buffer Trough to the deck of the system. 2. Remove the cover from the Buffer Trough. 3. Remove the Buffer Trough from the deck and empty it. 4. Rinse and clean the Buffer Trough and cover. 5. Replace the Buffer Trough on the deck. Make sure that alignment pin and thumbscrew are seated properly. If you return the trough to the same physical location on the deck, the labware coordinates do not need to be recalibrated. You may choose to mark the location of the trough on the deck so that you can return it to the same position. 6. Fill the Buffer Trough on the deck with 15 to 20 mL of Buffer solution. Buffer solution should be clean liquid, filtered to 0.2 µm. Refer to Appendix B for a list of buffer solutions that have been used successfully in the Piezorray™ system. 7. Replace the cover on the trough to prevent dust or particles from entering. The covers to the troughs are keyed so that they can only seat properly in one orientation. 167 CHAPTER 9 Clean and Fill the Cleaning Solution Trough If you are using a Cleaning Solution in your Protocols, you should clean and refill the Cleaning Solution Trough every morning. 1. Loosen the thumbscrew securing the Cleaning Solution Trough to the deck of the system. 2. Remove the cover from the Cleaning Solution Trough. 3. Remove the Cleaning Solution Trough from the deck and empty it. 4. Rinse and clean the Cleaning Solution Trough and cover. 5. Replace the Cleaning Solution Trough on the deck. Make sure that alignment pin and thumbscrew are seated properly. If you return the trough to the same physical location on the deck, the labware coordinates do not need to be recalibrated. You may choose to mark the location of the trough on the deck so that you can return it to the same position. 6. Fill the Cleaning Solution Trough on the deck with 15 to 20 mL of Cleaning Solution. Your choice of Cleaning Solution is based on the sample material that you are using. Refer to the Cleaning Solution compatibility list in Appendix B. Cleaning Solution should be clean filtered through a 0.2 µm filter. 7. Replace the cover on the trough to prevent dust or particles from entering. Be sure that the tip access holes are facing toward the rest of the labware on the deck. 168 SYSTEM UTILITIES AND PROCEDURES Fill the Reservoir for the Optional Enclosure If the optional Environmental Enclosure is installed, the water reservoir that provides humidity to the enclosure should be filled at the start of each day. 1. Make sure that the power to the enclosure pump is off. The switch is located on the back of the control box. 2. Remove the top from the reservoir bottle. Unscrew the bottle from the cap so that the tubing attached to the cap does not get twisted or kinked. Lay the cap assembly aside on a clean surface to prevent dust or contaminants from entering the system. 3. Fill the reservoir to the fill-line (approximately 5 L) with distilled or distilled-deionized water. Fresh water should be clean filtered through a 0.3 µm filter. 4. Reassemble the bottle to the cap, taking care to not twist or kink the tubing. 5. Turn on the power to the enclosure pump. Temperature and humidity inside the enclosure should stabilize within 30 minutes after closing the doors. Perform the Deep Cleaning Utility Perform the Deep Cleaning utility that is described on page 149. Perform the Prime Utility Perform the Prime utility that is described on page 146. Perform the Tip Tuning Utility Perform the Tuning utility (page 162) to make sure that each dispenser is producing drops that appear within the reticule rectangle on the image. 169 CHAPTER 9 Optional Chiller Setup If the optional chiller is installed for the plate and/or substrate holders on the deck, turn on the power to the chiller. To prevent possible sample contamination due to condensation in the source plate, the temperature control for the chiller should be set above the dew-point temperature for the instrument environment. 1. Measure the dew-point temperature with an accurate dew-point meter placed on the deck of the system. Allow at least 5 minutes for the dew-point meter to stabilize and record the dew-point temperature. ) Note: 2. If the enclosure option is installed, close the door and allow the meter to stabilize in the operating environment of the system. Set the control on the cooling system to a temperature that is 2 to 4 C above the dew-point temperature measured in the system. You may need to monitor and adjust the chiller temperature periodically throughout the day in order to maintain a plate temperature above dew point. 170 SYSTEM UTILITIES AND PROCEDURES End-of-Day Procedure The End-of-Day procedure should be performed at the end of every working day unless the system is printing an overnight run or a more extended down time is expected. If you need to print arrays into the night, define the protocol to leave the system in Standby mode when the print run is finished. If the system is not printing arrays when you are leaving for the evening, go ahead and perform the following procedure to help maintain reliable performance of the system. 1. Turn Off the Vacuum Pump. 2. Turn Off the optional Chiller. 3. Turn Off the optional Enclosure Pump. The power switch is located on the back of the control box for the Environmental Enclosure option. You can leave the power to the ionizer turned on through the night without adverse effects. 4. Store the Source Plate appropriately for sample viability. Storage methods may include refrigeration, freezer, environmental controlled cabinet, covers, seals, etc. 5. Perform the Deep Cleaning utility described on page 149. 6. Run the Standby Utility described on page 152. 7. Leave the power to the Piezorray system and the computer On overnight. 171 CHAPTER 9 This page is intentionally left blank. 172 ROUTINE MAINTENANCE Chapter 10 Routine Maintenance There are utilities built in to the system software to support necessary maintenance functions. The maintenance utilities and procedures that are discussed below are: Utilities PiezoTip Sonication Utility (page 174) Change Syringes Utility (page 175) Fast Flush Utility (page 176) Run Peri-pump Utility (page 178) Camera to Tip Calibration Utility (page 179) Set Pressure Offsets Utility (page 183) Flush Pressure Verification Utility (page 184) Empty Tips Utility (page 186) Silanate Tips Utility (page 187) Sodium Hydroxide Cleaning Utility (page 190) Setup Procedures Helium Sparging Setup Procedure (page 192) Starting the Liquid Path Procedure (page 195) Periodic Maintenance Procedures End-of-Week Maintenance Procedure (page 197) Monthly Maintenance Procedure (page 198) Backing Up the Database (page 200) 173 CHAPTER 10 Corrective Maintenance Procedures Replacing Dispensers (page 201) XY Tip Offsets Procedure (page 206) Replacing Syringes (page 211) Replacing Pressure Transducers (page 214) Replacing Valves (page 217) Replacing Tubing (page 218) Replacing Peri-pump Tubing (page 225) Replacing Deck Tubing (page 228) Tip Maintenance Procedures Routine Tip Cleaning (page 231) Clearing a Clogged Tip (page 232) External Surface Cleaning (page 233) Sodium Hydroxide Cleaning (page 234) Silanate Tip Coating (page 234) PiezoTip Sonication Utility The Tip Sonication utility allows you to turn on the PiezoTip™ dispensers at a frequency that will help clean the glass tips. Use this utility in conjunction with the deep cleaning (page 234) and tip maintenance (page 230) procedures. The Dispense head remains stationary in whatever position it was last left before invoking the utility. This sonication is performed in the high audible frequency range, so you may be able to hear the tips buzzing during this operation. Tip sonication will cycle on for 5 seconds and then off for 10 seconds. The utility will run for 5 minutes of ON time, resulting in 15 minutes of total time for the utility. Click the button to manually stop the utility before the full time has elapsed. 174 ROUTINE MAINTENANCE Change Syringes Utility The Change Syringe utility is intended to assist you in changing syringes on the system during maintenance operations (page 211). This utility draws the syringe plungers all the way down to facilitate the removal of the syringes. 1. Click the button on the Utility menu in the Run Protocol section of the main window. The list of maintenance utilities will appear. 2. Select the Change Syringes utility from the list and click the button to start the sonication. The syringe pumps are activated to fully retract the plungers. 3. When the plungers are fully retracted, a message box (Figure 10-1) will appear indicating that you may now safely change the syringe. If you click the the utility will finish. button, the syringes will return and If you click the button, the utility will conclude without returning the syringes to their closed position. Figure 10-1. Remove Syringe Message Prompt. 175 CHAPTER 10 Fast Flush Utility The Fast Flush Utility flushes large volumes of water through the system liquid tubing. Fast Flush facilitates maintenance procedures such as cleaning the fluidics system, changing the liquid tubing lines, and purging trapped air from the system. 1. Make sure that the deck is clear of any obstacles that may damage the tips. 2. Click the button on the Utility menu in the Run Protocol section of the main window. The list of maintenance utilities will appear. 3. Select the Fast Flush utility from the list and click the button to start the utility. A pop-up window will prompt you to disconnect the dispensers from the liquid line. 4. Loosen the two screws securing the tubing bracket to the top of the head assembly (Figure 10-2) and to allow the tubing to slide through. 5. Disconnect the lines and place them into a small container (Figure 10-2) to catch the waste. Install the protective caps to the tops of the dispensers to prevent dust contamination during the Fast Flush utility. 176 ROUTINE MAINTENANCE Tubing Bracket Tubing Disconnected Waste Collection Figure 10-2. Fast Flush Utility - Dispensers Disconnected. 177 CHAPTER 10 6. Click the button to begin flushing the tubing after all of the lines are disconnected from the dispensers. 7. A very slow syringe stroke starts in order to detect excessive backpressure. The pressure in the liquid lines is monitored to detect problems that may damage the pressure transducers. 8. The system will execute 24 more syringe strokes at varying speeds to flush the system liquid lines. The progress of the utility execution is reported in the Run Status frame in the main menu screen. 9. After the pump strokes have completed, re-connect the lines to the dispensers. Be sure to re-connect the liquid lines back to the same dispensers. 10. Run the Prime utility to check for any leaks in the tubing/ connector interface. Run Peri-pump Utility The Run Peri Pump utility manually activates the Peri Pump and to run it for a period of time. Use this utility to initially prime the washbowl and clean the washbowl tubing during monthly maintenance. 1. Click the button on the Utility menu in the Run Protocol section of the main window. The list of maintenance utilities will appear. 2. Select the Run Peri-pump utility from the list and click the button to start the utility. The Peri-Pump will run for 30 seconds. 178 ROUTINE MAINTENANCE Camera to Tip Calibration Utility The Camera to Tip Calibration utility lets you define the difference in coordinates between the vertical targeting camera (optional) and Tip 1. When you use the camera for locating physical substrate targets, this needs to be converted into coordinates for the tips in order to dispense onto these targets. 1. Click the button on the Utility menu in the Run Protocol section of the main window. The list of maintenance utilities will appear. 2. Select the Camera to Tip Calibration utility from the list and click the button to start the utility. The Camera to Tip Offsets window (Figure 10-3) will appear. 3. Place a HydroGel slide in the first position of the substrate holder in deck position #1 and fill the rest of the holder with regular slides. Figure 10-3. Camera to Tip Offsets Window. 179 CHAPTER 10 4. Turn on the Vacuum source and make sure the slides are secure in the holder. 5. Enter a value of 1 for the Number of Drops. Larger values will be easier to see on the slide, but keeping this value as small as visible is more accurate when locating the spot. 6. Indicate the location of the source liquid that you want to dispense. You can place the liquid in a 96-well plate, a 384-well plate or the buffer trough. 7. Choose a liquid that will be easy to see in the camera image when dispensed (e.g. 1xPBS or 3xSSC/salt buffers). 8. If you chose one of the microplate sources in step 6, fill wells A1, B1, C1 and D1 of a 96 well plate or A1, C1, E1 and G1 of a 384 well plate with the liquid that you selected in step 7 and place the plate in the Source Position on the deck. Or If you chose the buffer trough source in step 6, fill the buffer trough with 20 mL of the liquid that you selected in step 7. 9. Click the button to clean the tips. 10. Click the button to fill the dispenser with liquid from the Source Plate or Buffer Trough as indicated in step 6. 11. Click the HydroGel slide. button to make a set of arrays on the Four arrays, one from each tip, will be created. Each array is one row by four columns so that they are easy to find on the slide. 180 ROUTINE MAINTENANCE 12. When the system is done creating arrays, click the button. The Locate Positions window will appear in the Target By Camera mode (Figure 10-4). Turn on the auxiliary light source and adjust the intensity of the light as necessary. Position the end of the fiber optic cable to adequately illuminate the substrate. Figure 10-4. Locate Position - Camera To Tip Offset Mode. 181 CHAPTER 10 13. Using the controls in the Locate Position window (page 181), move the dispense head until the top left spot on the slide (first spot in the Tip # 1 array) is aligned with the image reticule. Click the button when you first enter the Locate Position window. The camera will move to the first spot on the slide according to the last camera offset position. Use the X, Y and Z controls to find the top left spot and calculate the new camera offset. 14. When the camera image is aligned with the spot, click the button in the Locate Position window to accept the coordinates of this new position. The change in position that you traveled from the Original Position will be used to calculate the Camera to Tip offset values. 15. Click the button in the Camera to Tip Offsets window to store the Camera to Tip offset value for use in the targeting mode. 182 ROUTINE MAINTENANCE Set Pressure Offsets Utility You should run the Set Pressure Offsets Utility whenever you perform maintenance on the fluidic system such as installing new tips or changing the tubing. This utility stores pressure offset values for the pressure transducer in each liquid path so that all of them are measuring the same. 1. Click the button on the Utility menu in the Run Protocol section of the main window. The list of maintenance utilities will appear. 2. Select the Set Pressure Offsets utility from the list and click the button to start the utility. 3. The dispense head will move to the washbowl at a safe height and run the peri-pump for four seconds to fill the washbowl. 4. The syringe pumps execute a single stroke of the syringes. 5. The peri-pump runs for ten seconds to fill the washbowl. 6. The syringe pumps execute two complete strokes of the syringes. 7. The tips are submerged in the washbowl. 8. The washbowl peri-pump runs again. 9. The syringe pumps execute a half stroke of the syringes with the tips in the wash water. 10. The pressure is monitored while it settles from the last syringe stroke. 11. The pressure offset values are saved independently for each liquid path. 183 CHAPTER 10 Flush Pressure Verification Utility The Flush Pressure Verification is intended to detect blockage in the dispenser tips before damage can occur from over pressure. 1. Click the button on the Utility menu in the Run Protocol section of the main window. The list of maintenance utilities will appear. 2. Select the Flush Pressure Verification utility from the list and click the button to start the utility. 3. The dispense head will move over the washbowl. 4. A very slow speed syringe stroke is performed. The liquid lines are monitored for abnormal pressure readings during the syringe stroke that would indicate tip blockage. 5. A faster syringe stroke is performed. The pressures in the liquid lines are monitored and entered in the event log. 6. Twenty syringe strokes are performed. The pressures in the liquid lines are monitored and entered in the event log. 7. The peri-pump runs to fill the washbowl. 8. The tips are lowered into the washbowl to remove any drops that may be left there. 184 ROUTINE MAINTENANCE 9. The tips are raised to the Safe Z height and left above the washbowl. A message box appears (Figure 10-5) to report current and recommended pressure limits (in DAC units) that indicate potential clogging in the system. Click the button to accept and store the recommended new pressure limits, visible in the Edit System Parameters window in mBar. Click the button to reject the new recommendations and retain the current pressure limit values already stored. Figure 10-5. Flush Pressure Verification Confirmation. 185 CHAPTER 10 Empty Tips Utility The Empty Tips utility draws air into the system through the dispenser tips. This functionality is useful when you are changing dispensers or trying to remove trapped air from a dispenser. 1. Click the button on the Utility menu in the Run Protocol section of the main window. The list of maintenance utilities will appear. 2. Select the Empty Tips utility from the list and click the button to start the utility. 3. The dispense head will move up to make sure that the tips are not immersed in any liquid. 4. 200 µL of air will be aspirated through the tips (2 syringe strokes). 5. Click the button to end the utility without aspirating the full 200 µL volume. Actual tip volume is 37 µL (41.5 µL for the long tip option). Early termination can only be invoked after the first syringe stroke (100 µL), 186 ROUTINE MAINTENANCE Silanate Tips Utility This utility applies a coating to the outside of the dispenser tips to prevent wetting of the tip. It is important that this coating NOT get on the inside of the glass tips, as liquid surface tension with the inner surface is essential to reliable piezo-electric dispensing. The Silanate Tips utility uses a commercially available product called PlusOne™ Repel-Silane ES to coat the glass tips. 1. Click the button on the Utility menu in the Run Protocol section of the main window. The list of maintenance utilities will appear. 2. Select the Silanate Tips utility from the list and click the button to start the utility. 3. A message will appear (Figure 10-6) prompting you to prepare a 96-well plate with cleaning solution (100% Methanol) in the first four wells (A1, B1, C1 and D1) and the PlusOne™ Repel-Silane ES solution in the next four wells (E1, F1, G1 and H1). The use of methanol is optional. If you choose to NOT use the methanol, simply leave the first four wells (A1, B1, C1 and D1) empty. Due to the volatility of the silane solution, you may choose to supply the silane just before it is needed (step 7 below). Another message will appear at that time to prompt you. The silane MUST be in the second set of four wells of the plate (E1, F1, G1 and H1) as indicated. Figure 10-6. Silanate Tips Utility - Plate Setup Prompt. 187 CHAPTER 10 4. Place the plate on the instrument deck and click the button to continue. The plate should be placed in the Source Plate position according to the Deck Layout that is currently shown on the main screen of the software 5. The dispense head will move up and over to the washbowl location and the dispensers are flushed and washed. 6. The dispense head moves to the Source Plate and aspirates 100 µL of methanol from the first four wells in the plate (wells A1, B1, C1, D1). 7. A message box will appear (Figure 10-7) prompting you to make sure that the silane solution is available in the Source Plate. Either the silane is already in the plate from step 3 above or, due to the volatility of the solution, you decided to supply the silane solution just before it is needed. To supply silane now, you can either: Or 8. Add silane to wells E1, F1, G1 and H1 of the Source Plate Replace the Source Plate with another plate that has silane solution in wells E1, F1, G1 and H1 Click the button to continue the Silanate Tips utility. Figure 10-7. Silanate Tips Utility - Reminder Prompt. 188 ROUTINE MAINTENANCE 9. The dispense head moves to the second set of wells in the Source Plate and aspirates 100 µL of air into the tips while they are still above the liquid level of the plate. 10. The syringes start a slow dispense and the tips are lowered into the plate. Air is pushed out of the tips as they are being lowered into the silane wells in the plate. The air discharge keeps the silane solution from entering the tips while the outside of the glass is being coated. The tips remain immersed in the silane solution for about 5 seconds. 11. With air still being pushed out through the tips, the dispensers are raised out of the silane solution and moved over the washbowl to dry. The silane is allowed to dry on the outside of the glass tips for about 30 minutes. 12. After the 30 minute drying time has elapsed, the remaining air and methanol (if used) in the dispensers is flushed into the washbowl. 13. The dispensers are lowered into the washbowl where the tips are thoroughly washed. 14. When tip washing is complete, remove the plate with silane solution from the system as indicated (Figure 10-8). Figure 10-8. Silanate Tips Utility - Remove Silane Prompt. 15. Use the Tuning utility (page 189) to verify reliable dispensing. 189 CHAPTER 10 Sodium Hydroxide Cleaning Utility This utility is intended to clean the inside of the tips with Sodium Hydroxide (NaOH) without significant exposure to the outside of the tip. This cleaning solution will help remove contaminants that may interfere with the required surface tension between the liquid and the glass walls inside the tip. At the same time, this utility minimizes exposure of NaOH to the outside surfaces of the tips where it can result in tip wetting and dispensing problems. ) Note: 1. Always use a freshly prepared Sodium Hydroxide solution filtered to 0.2 µm. Click the button on the Utility menu in the Run Protocol section of the main window. The list of maintenance utilities will appear. 2. Select the Sodium Hydroxide Cleaning utility from the list and click the 3. button to start the utility. A prompt will appear (Figure 10-9), indicating that you need to prepare a 96-well plate with cleaning solution (Sodium Hydroxide at 100 mM concentration) in wells A1, B1, C1 and D1. Figure 10-9. Sodium Hydroxide Cleaning Utility Prompt. 190 ROUTINE MAINTENANCE 4. Place the plate on the instrument deck in the Source Plate position according to the Deck Layout that is currently shown on the main screen of the software and click the to continue. button 5. The dispense head will move up and over to the washbowl location and the dispensers are flushed and washed. 6. The dispense head moves to the Source Plate with the cleaning solution and aspirates 30 µL (about the volume of the dispenser itself) of the NaOH solution from the plate. 7. The tips are immediately moved to the washbowl and immersed in the wash solution to minimize the exposure of the outer surface of the glass to the cleaning solution. Only the inside surface of the tips should be cleaned using the NaOH solution. Outer surfaces are coated to resist liquid adhesion to the glass and should not be cleaned with this aggressive cleaner. 8. Tip sonication is cycled on and off for approximately eight minutes while the dispensers are immersed in the wash water. 9. The cleaning solution is flushed from the tips and the dispensers are raised from the washbowl to complete the procedure. 10. Use the Tuning utility (page 190) to verify reliable dispensing. If tip wetting issues arise during the Tuning utility, perform the Silanate Tips utility (page 187) to coat the outer glass surfaces. Service Utilities Two utilities in the list of Advanced Utilities are intended for use by the PerkinElmer Service Engineer. These utilities are: Strobe LED Test - Turns on the Camera Strobe LED for the Tuning Camera (horizontal camera) to ensure that the strobe lighting works. XY Ship - Moves the dispense head to the specific X and Y coordinates where the shipping clamps can be installed to restrict movement during shipment. 191 CHAPTER 10 Helium Sparging Setup Procedure Helium sparging is a popular and effective method of degassing your system liquid in the system reservoir. When properly used, Helium sparging will remove 80 to 90% of dissolved gases within 30 minutes. Helium de-aerates the system liquid by drawing unwanted gases like oxygen and nitrogen from solution as they equilibrate with the Helium bubbles. Helium has a very low solubility in water, so Helium sparged liquid is nearly gas free. This simple procedure will greatly enhance the performance of the Piezorray™ system. You will need the following equipment to implement a sparging system. Helium Sparging option for the system Supply of Helium gas 2-stage regulator capable of supplying from 5 to 30 psig Flow meter capable of monitoring from 4 to 10 mL/min flow rate Sparging stone and necessary tubing to reach your system liquid reservoir 1. Secure the Helium supply near the area where your Piezorray™ system is located. 2. Attach the regulator to the Helium supply 3. Connect tubing between the regulator, flow meter and check valve (Figure 10-10). Be sure to follow all flow directions on the components being connected. 192 ROUTINE MAINTENANCE Figure 10-10. Helium Sparging Configuration. ) Note: Handle the tubing at least 6 to 8 inches from the ends to make sure that you do not contaminate the system liquid with dirt, grime or oils. Use powder free gloves whenever possible 4. Safely route the supply tubing from the check valve to the system liquid reservoir. 5. Insert the free end of the tubing from the check valve through the opening in the reservoir cap and attach the sparging stone to the end of the tubing. Do not touch the sparging stone with your bare fingers. Rinse it with methanol and air dry before installing. 6. Connect one end of another piece of tubing to the system liquid manifold on the Piezorray™ system. 7. Insert the free end of the tubing from the Piezorray™ system through the opening in the reservoir cap. 8. Attach the reservoir cap and immerse the ends of both pieces of tubing, one with the sparging stone and the other without, in the system liquid of the reservoir. Position the tubing within the reservoir to make sure that bubbles cannot directly enter the system liquid line from the sparging stone on the Helium line. Make sure that the ends of the tubing remain submerged in the liquid at all times. 193 CHAPTER 10 9. Turn on the Helium regulator and open the flow meter. Leak test all of the Helium connections the system using Snoop® leak detection fluid. ) Note: Make sure that any liquids that you use with this system are degassed, filtered, HPLC grade quality (nanopure preferred). 10. It is recommended that you keep the system liquid reservoir at least half full whenever the sparging system is active. 11. For initial sparging, turn on the Helium regulator and set the flow rate to 7 mL/min on the flow meter. The flow meter supplied in the Helium Sparging Kit comes with a standard scale and a correlation chart for Helium with the sapphire float used in the gauge. 7 mL/min corresponds to a setting of about 58 to 60 on the scale. Maintain this flow rate for 30 minutes. 12. Reset the Helium flow rate to 4 mL/min on the flow meter. On the flow meter supplied in the Helium Sparging Kit, 4 mL/ min corresponds to a setting of about 38 to 40 on the scale and is sufficient to maintain degassed liquid in the system. At the recommended flow rate, a leak-free, 220 cubic foot cylinder of Helium should last for more than 2.5 years of daily use. It is more efficient to leave the Helium turned on all the time. Do not turn off the Helium flow without FIRST rinsing the sparging stone and attached tubing in methanol and drying them under Helium flow. 194 ROUTINE MAINTENANCE Starting the Liquid Path Procedure Use powder free gloves for handling the ends of the tubing that go into the System Liquid reservoir. Skin cells (derma), oils and dust can contaminate the System Liquid. ) ) 1. Remove the tubing lines from the System Liquid reservoir and place them in a clean container of 100% methanol. 2. Loosen tubing clamp on the dispense head. 3. Remove the tubing lines from each dispenser and cap the inlets with supplied dust covers. 4. Place a small container beneath the free tubing ends to catch flushed liquid. Caution: Starting system liquid path requires the Fast Flushing utility. Fast Flushing runs the syringes pumps at high speed and will damage the pressure transducers if the dispensers remain connected. You will be prompted to disconnect the tubing from the dispensers at the start of the Fast Flush utility. It is not possible to Fast Flush a single channel. 5. Run the Fast Flush utility to fill the tubing with the 100% methanol. 6. At the end of the Fast Flush utility, let the methanol soak in the tubing for 30 minutes. Warning: Safety glasses should be worn to prevent damage to your eyes while flicking the tubing ends in the following step. 7. Remove the tubing from container of 100% methanol and flick the tubing ends with your finger to create an air gap. 195 CHAPTER 10 8. Dilute the concentration of methanol in the container to 20% methanol and let it stand for a few minutes for the exothermic reaction to settle. 9. Run the Fast Flush utility to replace the 100% methanol in the tubing lines with 20% methanol. 10. Remove tubing from the container of 20% methanol and flick the tubing ends with your finger to create an air gap. 11. Install the ends of the tubing into the System Liquid reservoir. Make sure that the tubing ends are on opposite sides of the reservoir from the sparging stone so that helium bubbles do not directly enter the fluid path. 12. Run the Fast Flush utility 2 times to completely replace the methanol in the tubing with system liquid. 13. Connect ends of the tubing to the dispensers and tighten the fittings securely. Make sure to connect the tubing back to the same dispensers they were removed from. 14. Run the Prime utility (page 193) three times. 15. Run the Set Pressure Offsets utility (page 183). 196 ROUTINE MAINTENANCE End-of-Week Maintenance Procedure The End-of-Week maintenance consists primarily of preparation steps for running the Standby mode over an extended weekend. 1. Make sure that the System Liquid reservoir has at least one liter of degassed system liquid. It is calculated that the system will use 8 mL of system liquid per hour at the default factory settings for the Standby mode. For a long, three day weekend, the system liquid volume of one liter slightly exceeds the estimated 672 mL required by the system. 2. Make sure that the wash reservoir contains at least three liters of wash liquid. It is calculated that the system will use 25 mL of wash liquid per hour at the default factory settings for the Standby mode. For a long, three day weekend, the wash liquid volume of three liters exceeds the estimated 2.1 liters required by the system. 3. Empty the Waste container for the wash liquid so that it will not overflow during the course of a weekend in Standby mode. The waste volume above will generate 2.77 liters of waste over the course of a long, three day weekend, given the default factory parameters for the Standby mode. An empty waste container can hold this volume of waste, but any residual volume in the container may cause an overflow. 4. Make sure that the power to the enclosure pump is off. The power switch is located on the back of the control box. 5. Remove the top from the reservoir bottle. Unscrew the bottle from the cap so that the tubing attached to the cap does not get twisted or kinked. Lay the cap assembly aside on a clean surface to prevent dust or contaminants from entering the system. 6. Empty the reservoir and rinse the inside of the reservoir with clean water and dry it thoroughly with a lint-free cloth. 7. Leave the bottle empty and reassemble the bottle to the cap, taking care to not twist or kink the tubing. 197 CHAPTER 10 Monthly Maintenance Procedure This Monthly Maintenance should be performed regularly in order to keep the system dispensing reliably. This procedure will flush and soak the liquid tubing to kill most bacteria, spores and fungi that can grow in the system liquid reservoir. 1. Loosen the knurled nut connecting the tubing to the top of each dispenser and disconnect the tubing from the dispensers. Place the dust caps on the tops of the dispensers. Make sure that you know which dispenser each piece of tubing is connected to. 2. Place the free ends of the tubing into a small container to collect the waste from the procedure. 3. Loosen the cap from the system liquid reservoir and remove the tubing from the bottle. 4. Place the tubing ends from the system liquid reservoir directly into a container of 70% Isopropyl Alcohol. 5. Run the Fast Flush utility with 70% Isopropyl Alcohol (collect the waste for separate disposal). 6. Allow the alcohol to soak in the tubing for 10 minutes. Remove the tubing from the alcohol reservoir and allow the ends to air dry during this soaking time. 7. Clean, Fill and Degas the System Liquid reservoir. 8. Replace the tubing ends in the System Liquid reservoir and secure the cap. 9. Run the Fast Flush utility three times using System Liquid (collect the waste for separate disposal). 10. Reconnect the tubing ends to the Dispensers. Be sure to reconnect the tubing to the same dispensers. 11. Run the Prime utility three times. 198 ROUTINE MAINTENANCE 12. Disconnect the tubing from the top of the Wash Solution reservoir 13. Place the tubing end from the Wash Solution reservoir directly into a container of 70% Isopropyl Alcohol. 14. Run the Peri-Pump utility with 70% Isopropyl Alcohol (collect the waste for separate disposal). 15. Allow the alcohol to soak in the washbowl and tubing for 10 minutes. Remove the tubing from the alcohol reservoir and allow it to air dry during this soaking time. 16. Clean and Fill the Wash reservoir. 17. Replace the Wash supply line tubing on the Wash reservoir. 18. Run the Peri-Pump utility three times with Wash Solution (collect the waste for separate disposal). 19. Check the He supply tank to ensure adequate gas for sparging. 20. Wipe down the outer surfaces of the instrument with a damp, lint-free cloth. 21. Wipe down both the inside and outside panel surfaces of the optional enclosure with a damp, lint-free cloth. 22. Dispose of the collected alcohol according to best laboratory practices. 23. Backup the Database (page 200). 199 CHAPTER 10 Backing Up the Database The Piezorray™ database stores all the information that you define (i.e. Deck Layouts, Labware Locations, Plates, Patterns, Protocols) in a database file on your hard drive. The database is located in the bin directory with the program files. Make a copy of the Piezorray™ database to ensure that you always have a backup. 1. Exit the Piezorray™ software to allow access to the database. 2. Start Windows® Explorer (right click the Start button on the taskbar and choose Explore from the list that appears.) 3. Navigate to the program folder (usually C:\.Program Files\Piezorray\Bin), and highlight the file named Piezorray.mdb. 4. Choose the Copy command from the Edit menu. 5. Navigate to another location accessible to the system and click the Paste command from the Edit menu. 6. Restart the Piezorray™ software. Restoring the Database 1. Exit the Piezorray™ software to allow access to the database. 2. Start Windows® Explorer (right click the Start button on the taskbar and choose Explore from the list that appears.) 3. Navigate to the backup location and highlight the file named Piezorray.mdb. 4. Choose the Copy command from the Edit menu. 5. Navigate to the program location another location (usually C:\.Program Files\Piezorray\Bin) and click the Paste command from the Edit menu. 6. When a message box appears asking if you want to replace the file with the backup file, click the Yes button. Remember that any library entries (including Deck Layout and Labware locations) created or modified since the backup file was created will NOT be available when you restore the file. 7. Restart the Piezorray™ software. 200 ROUTINE MAINTENANCE Replacing Dispensers You will need to remove and replace Dispenser tips if they become damaged. ) Caution: Use care using tools in the vicinity of the exposed glass tips of the dispensers. The nozzles are very fragile and any contact may damage them. 1. Use the Labware utility to move the dispense head to the Change Tip position near the front of the deck (page 200). Figure 10-11. Change Tip Labware Position. 2. Disconnect the fluid line from the top of the defective dispenser assembly. Cap the inlet with the dust covers. 3. Disconnect the electrical connection from the cable assembly (Figure 10-12) for the defective dispenser assembly that you are removing. Do not try to disconnect the cable from the dispenser assembly itself. 4. Loosen the setscrew (Figure 10-13) securing the defective dispenser to the head assembly. 201 CHAPTER 10 Electrical Connector (finger tighten only) Figure 10-12. Dispenser Electrical Connections. Dispenser Assemblies 4 Dispenser Alignment Plate 3 2 Dispenser Nozzles 1 Dispenser Mounting Setscrews Alignment Plate Mounting Screws Figure 10-13. Dispenser Mounting Diagram. 202 ROUTINE MAINTENANCE Fluid Lines Dispenser Control Lines Dispenser Assemblies (qty. 4) Weep Holes (qty. 4) Dispenser Mounting Setscrews (qty. 4) Optional Targeting Camera Mounting Dispenser Alignment Plate Figure 10-14. Dispenser Head Assembly. 203 CHAPTER 10 5. Push the entire individual dispenser assembly straight up out of the head assembly. Do not pry dispensers out of the head assembly, damage to the head bracket will result. 6. Carefully install the protective cap to the old dispenser. 7. Carefully remove the protective cap from the new dispenser. 8. Install the replacement tip into the dispenser assembly. Make sure that the tip is inserted straight and that the assembly body is oriented as shown in Figure 10-14. Avoid any contact with the inlet glass capillary. Make sure that the entire assembly seats flat against the head bracket. Figure 10-15. Installation of Dispenser Assembly. 9. Make sure that the entire bottom flat surface of the dispenser assembly is seated fully against the top surface of the head bracket (Figure 10-15). 10. Tighten the setscrew (Figure 10-13) to secure the new dispenser. Do not over tighten this screw. Gentle pressure is sufficient to secure the dispenser. 11. Re-attach the Dispenser Assembly cable to the electrical connector. Finger Tighten Only. 204 ROUTINE MAINTENANCE 12. Start the liquid path for the system (page 195). The dispenser will be reconnected and the system will be primed during this procedure. 13. Check for a leaking connection to the dispenser at the Weep Holes (Figure 10-14) on the backside of the dispenser assembly bodies. 14. Run the Labware Utility (page 203) to define the Tuning positions for the new tip in front of the camera. If the new dispenser image does not appear at the same height as the old dispenser (relative alignment in the reticule), loosen the dispenser set screw and physically alter the height of the dispenser. If the new tip is of significantly different height (> 10 µm difference), then labware, dispense heights and aspirate heights throughout the system will need to be changed. 15. Run the Tuning utility (page 203) to verify the dispensing parameters for the new dispenser. 16. Run the XY Tip Offsets procedure (page 206) to determine the tip-to-tip offsets. 17. If the targeting camera is installed, run the Camera to Tip Calibration utility (page 179) to determine the camera to tip offsets for the targeting mode. 205 CHAPTER 10 XY Tip Offsets Procedure The determination of Tip Offsets provides correction required to print regularly spaced arrays in the All Tip mode (page 179). This procedure uses the measurement of spot locations to calculate the difference to for tip-to-tip offset spacing corrections. This procedure requires access to an imaging instrument such as the ScanArray® Express scanner that provides measurement of spot positions printed on a substrate and uses a coordinate system compatible with the Piezorray™ system. 1. Run the Tuning utility (page 179) to be sure that each tip is dispensing properly with drops appearing in the reticule box. 2. Click the button to access the Edit System Parameters window (Figure 10-16). Figure 10-16. Edit System Parameters Window. 206 ROUTINE MAINTENANCE 3. Scroll down until you find the parameters for Tip1Xoffset. Tip2 X Offset, Tip3Xoffset, Tip1Yoffset, Tip2YOffset, Tip3Yoffset and Tip4Yoffset. 4. Enter zero values for the X offset and Y offset parameters for any tips that have been reinstalled or replaced. Zero out all values to recalculate offsets for all of the dispensers. This will remove any correction from being applied when the protocol is run. 5. Click the button to save the new values. 6. Prepare the first eight positions of a 384-well microplate using Cyanine 3 or Cyanine 5 labeled samples. 7. Place the prepared microplate on the deck in the position defined for the Source Plate in the Deck Layout used by the “XY Offset Calib” protocol. 8. Fill a substrate holder with five clean 1” x 3” glass slides. 9. Turn on the power to the vacuum pump to secure the slides. 10. Click the button to begin a protocol run. 11. Click the Protocol button and select the “XY Offset Calib” protocol from the list. 12. Enter “8” for the Number of Samples and “1” for the Number of Substrates. 13. Click the Calib” protocol. button to begin printing the “XY Offset 14. Scan the slide that was created by the “XY Offset Calib” protocol. 15. From the scanned image (Figure 10-17), measure and record the values in microns (µm = 0.001 mm) for the Absolute columns in the table below. Be sure that you measure to the same location within each spot (i.e. center to center, left side to left side, top side to top side, etc.) and to measure either spots 1, 3, 5 and 7 or spots 2, 4, 6 and 8 within a single column. These spots represent simultaneous dispensing from each of the four tips in the system. 207 CHAPTER 10 Tip Tip Tip Tip #1 #2 #3 #4 Absolute X (µm) X1 X2 X3 X4 Absolute Y (µm) Y1 Y2 Y3 Y4 Offset X (µm) 0 X1-X2 X1-X3 X1-X4 Offset Y (µm) 0 Y2-Y1-1000 Y3-Y1-2000 Y4-Y1-3000 Tip2Xoffset = X1 - X2 Tip2Yoffset = Y2 - Y1 - 1000 Tip 1 Tip 2 Tip 3 Tip 4 { { { { Figure 10-17. XY Tip Calibration - Before Offsets Applied. 208 ROUTINE MAINTENANCE 16. Calculate the Offset columns for the table above. The extra value in the Y offset calculations (1000, 2000 and 3000) result from 500 µm vertical spacing defined in the protocol. The spacing for spot 1 to spot 2 is 500 µm and spot 1 to spot 3 is 1000 µm. Therefore, the spacing for spot 1 to spot 5 is 2000 µm and spot 1 to spot 7 is 3000 µm. 17. Convert the offset values from microns (µm) to millimeters (mm). 1 µm = 0.001 mm. 18. Click the button to access the Edit Parameters window (Figure 10-16). 19. Scroll down until you find the parameters for Tip1Xoffset. Tip2 X Offset, Tip3 Xoffset, Tip1Yoffset, Tip2YOffset., Tip3Yoffset and Tip4Yoffset. 20. Enter the appropriate calculated X offset and Y offset values from step 16 for any tips that have been reinstalled or replaced. Enter all values if all offsets were zeroed out in step 4. Each offset value is measured from Tip 1. Therefore, the Tip 1 offset values (Tip1Xoffset and Tip1Yoffset) will ALWAYS be zero. Be sure to enter the offset values in millimeters. 21. Once all of the offsets are entered, click the to save the new values. button 22. To verify the accuracy of the offsets, repeat steps 8 through 16. You should get an image from the scanner with the offsets applied to correct the spacing of the spots (Figure 10-18). 209 CHAPTER 10 Figure 10-18. XY Tip Calibration - After Offsets Applied. 210 ROUTINE MAINTENANCE Replacing Syringes This procedure describes the replacement of the syringe on the syringe pump. If the plunger does not seal completely with the glass walls of the syringe barrel, either replace the plunger seal or replace the entire syringe. Either way, you need to remove the existing syringe from the system and then reinstall the new or reworked syringe. ) Note 1. The Piezorray™ Maintenance Kit contains the necessary parts for this procedure. Click the button on the Utility menu in the Run Protocol section of the main window. The list of maintenance utilities will appear. 2. Select the Change Syringes utility from the list and click the button to start the sonication. The syringe pumps are activated to fully retract the plungers. 3. When the plungers are fully retracted, a message box (Figure 10-19) will appear indicating that you may now safely change the syringe. Figure 10-19. Remove Syringe Message Prompt. 4. Rotate the body of the syringe about a quarter of a turn to disconnect it from the valve at the top (Figure 10-20). 5. Lower the barrel of the syringe down onto the plunger rod. 6. Loosen the thumbscrew at the bottom of the plunger. 7. Remove the syringe from the system. 211 CHAPTER 10 4 Way Valve Plunger Seal Syringe Barrel Plunger Guide Plunger Rod Thumbscrew Figure 10-20. Syringe Mounting. 212 ROUTINE MAINTENANCE 8. To replace the plunger seal in a syringe, disassemble the parts of the syringe. Reagent seal replacement is a preventive maintenance procedure only. This is not recommended for leaking syringes as corrosion of the plunger rod may cause abrasive surfaces and premature failure of new seals. 9. Unscrew the plastic plunger guide from the bottom of the syringe barrel. Withdraw the plunger from the syringe barrel. Unthread the existing plunger seal from the end of the plunger rod. Replace the plunger seal with a new seal from the Maintenance Kit. Assemble the new or repaired syringe. Make sure that the seal is fully threaded onto the end of the plunger rod. Rinse the new seal by stirring the plunger in a container of 100% methanol. Insert the plunger rod fully into the syringe barrel. Screw the plastic plunger guide onto the glass barrel of the syringe. Manually aspirate several full syringe strokes of methanol to rinse and condition the syringe. 10. Position the new or repaired syringe in the syringe pump so that you can secure the bottom of the plunger to the pump with the thumbscrew. 11. Grasping the metal collar on the syringe (not the glass barrel), raise the barrel of the syringe and connect it to the bottom port on the valve with a quarter turn motion. 12. In the Remove Syringe window, click the button to drive the plungers up into the syringes and finish the utility. Click the button to finish the utility without driving the plungers to into the syringes. 13. Restart the liquid path for the system (page 195). 213 CHAPTER 10 Replacing Pressure Transducers Transducers can become worn or damaged during operation of the system. Replace transducers individually as necessary to maintain reliable operation of the system. 1. Lift the end of the system liquid tubing for the defective transducer out of the system liquid reservoir and run the Prime utility two or three times to empty the specific fluid line of any liquid. Pressure Transducers Figure 10-21. Pressure Transducer Location. 2. Remove the two screws that secure the tubing bracket to the front wall of the system and remove the bracket from the system. 3. Remove the two screws securing the tubing bracket to the top of the head assembly (refer to Figure 10-2 for location) and remove the bracket from the system. 214 ROUTINE MAINTENANCE 4. Disconnect the knurled tubing fitting from the top of the defective pressure transducer. Support the mating fitting on the transducer and do not allow it to rotate. Liquid Lines to Dispensers Tubing Bracket Pressure Transducers Fittings Liquid Lines to Syringe Valves Figure 10-22. Pressure Transducers. 5. Disconnect the knurled tubing fitting from the bottom of the defective transducer. Support the mating fitting on the transducer and do not allow it to rotate. 6. Disengage the pressure transducer from the clips that secure it to the front wall of the system. The transducer clips have a small latch on each side that secures the transducer to the system. Release these latches with a small flat tool through the notches in the front of the transducer body and pressing gently outward. 215 CHAPTER 10 7. Disconnect the electrical connection from the bottom of the transducer by carefully pulling the connector straight down off the four pins. Remove the failed pressure transducer from the system. 8. Connect the transducer to the electrical cable and slide the transducer into the clip on the front panel. Electrical connection faces down when mounted. 9. Reconnect the tubing fitting to the bottom of the transducer. Make sure to connect transducer #1 to Tip #1, etc. 10. Reconnect the tubing fitting to the top of the transducer. Make sure to connect transducer #1 to syringe #1, etc. 11. Route the tubing to the dispensers such that it is not kinked or pinched and replace the tubing bracket on the top of the dispense head. Make sure that the tubing is clearly routed through the slots in the bracket before tightening the mounting screws. 12. Route the tubing to the syringe pumps such that it is not kinked or pinched and replace the tubing bracket on the front panel of the system. Make sure that the tubing is clearly routed through the slots in the bracket before tightening the mounting screws. 13. Restart the liquid path for the system (page 195). 14. Run the Prime utility three times to completely prime the new liquid lines with system liquid. 216 ROUTINE MAINTENANCE Replacing Valves The typical life of the valve in pure water applications is over 500K cycles. 1. Remove the syringe from the pump with the defective valve (page 211). 2. Disconnect the knurled tubing fittings from both sides of the defective valve. 3. Remove the knurled nut and stopper plug from the top port of the valve. 4. Remove the two screws holding the valve to the pump and pull the valve straight out of the front panel of the system. 5. Install the new valve in the system, aligning the D-shaped valve shaft with the mating hole in the front panel of the system. 6. Secure the valve to the front panel of the system with two screws. 7. Insert the shaft of the stopper plug through the knurled nut from the inside and screw the plugged nut into the top port of the new valve. 8. Secure the fittings from the tubing to the ports on each side of the valve body. 9. Replace the syringe in the system (page 211). 10. Restart the liquid path for the system (page 195). 217 CHAPTER 10 Replacing Tubing Tubing should be replaced as necessary due to buildup or contamination that cannot be cleaned or damage due to pinching, kinking or deformation. The Piezorray™ Tubing Kit (PPN 7601636) contains a complete set of system liquid path tubing. The Tubing Kit is part of the Maintenance Kit (PPN 7601861) and comes with tubing pre-cut, bundled and labeled for their intended use. Tubing segments can be replaced individually, and as such are discussed separately below. The tubing for each channel in the system is unique due to the lengths involved. Be sure to replace defective tubing segments with new tubing intended for the same location. Each channel consists of the following segments: Dispenser to Pressure Transducer Pressure Transducer to Valve Valve to Reservoir 218 ROUTINE MAINTENANCE General Guidelines for Handling System Tubing General guidelines for dealing with the system liquid tubing that apply to all tubing segments in the system are: Wear powder free gloves for handling tubing for the system. Pay particular attention to the tubing ends where contamination may enter the liquid path. The tubing is very reliable and rarely requires replacement unless it becomes kinked or pinched. Kinked tubing develops micro-cracks that allow air infiltration and ultimately affect the dispense reliability. Avoid tight radius bending as the tubing can be kinked and damaged. The tubing is connected to the valve and pressure transducer using a reverse compression nut and ferrule (Figure 10-23). The knurled fittings only need to be hand tightened. Use of tools or excessive force will result in damage to the fittings or component ports. Slide the nut and ferrule onto the tubing as shown (Figure 1023) exposing about one quarter inch (.063 mm) of tubing through the ferrule. Insert and hold the tubing snugly against the inside of the component port and tighten the nut over the ferrule to secure the tubing. Tubing lengths are channel and segment specific (Figure 1024). The tubing is connected to the dispenser assembly using a nut and ferrule designed to compress the dispenser seal onto both the dispenser and the tubing (Figure 10-25) 0.25” (0.6 mm) Nut Tubing Ferrule Port . Figure 10-23. Tubing Ferrule Installation. 219 CHAPTER 10 Figure 10-24. Liquid Lines Tubing Chart. 220 ROUTINE MAINTENANCE Liquid Tubing Line Tubing Fitting Tubing Ferrule Weep Hole Dispenser Seal Dispenser Assembly Body Factory Screws Do NOT Loosen Dispenser Dispenser Tip (Nozzle) Figure 10-25. Dispenser Assembly - Internal Cutaway. 221 CHAPTER 10 Dispenser to Pressure Transducer 1. Use the Labware utility to move the dispense head to the Change Tip position near the front of the deck (page 221). 2. Remove the screws securing the two tubing brackets to the top of the dispenser head and the front panel of the system. 3. Unscrew the knurled nut securing the defective tubing to the top of the dispenser. 4. Unscrew the knurled nut securing the defective tubing segment to the top of the pressure transducer. 5. Disengage the defective tubing from the tubing bundle going to the dispensers. 6. Remove the nut and ferrule from each end of the defective tubing. 7. Choose the appropriate length tubing segment for Tube C (Figure 10-24) in the channel that has the defective tubing. 8. Install a nut and ferrule combination on each end of the replacement tubing. Make sure that the nut and ferrule are oriented as shown in Figure 10-23. 9. Secure the pressure transducer end of the new tubing to the pressure transducer. Notice the difference in the knurled nuts that secure the tubing ends. The dispenser end is a straight nut with no shoulder. 10. Route the tubing with the other liquid lines in an easy arc to the dispensers. 11. Secure the free end of the tubing to the top of the dispenser. 12. Replace the tubing brackets on the top of the dispense head and on the front panel of the system. Make sure that the tubing is clearly routed through the slots in the bracket before tightening the mounting screws. 13. Gather the liquid lines together to make a neat bundle from the head clamp to the pressure transducers. Make flat neat bundles and secure with the metal foil tape. 14. Restart the liquid path for the system (page 195). 222 ROUTINE MAINTENANCE Pressure Transducer to Valve 1. Use the Labware utility to move the dispense head to the Home position near the rear of the deck (page 195). 2. Unscrew the knurled nut securing the defective tubing segment to the bottom of the pressure transducer. 3. Unscrew the knurled nut securing the defective tubing segment to the side of the valve on the syringe pump. 4. Disengage the defective tubing from the tubing bundle going to the syringe pump valves. 5. Remove the nut and ferrule from each end of the defective tubing. 6. Choose the appropriate length tubing segment for Tube B (Figure 10-24) in the channel that has the defective tubing. 7. Install a nut and ferrule combination on each end of the new replacement tubing. Make sure that the nut and ferrule are oriented on the tubing as shown in Figure 10-23. 8. Secure the pressure transducer end of the new tubing to the bottom of the pressure transducer. 9. Route the tubing along with the other liquid lines valve on the syringe pump. 10. Secure the free end of the tubing to the left side of the valve on the syringe pump. 11. Gather the liquid lines together to make a neat bundle from the pressure transducers to the valves. 12. Restart the liquid path for the system (page 195). 223 CHAPTER 10 Valve to System Liquid Reservoir 1. Use the Labware utility to move the dispense head to the Home position near the rear of the deck (page 195). 2. Unscrew the nut securing the defective tubing segment to the right side of the valve on the syringe pump. 3. Remove the tubing from the cap on the System Liquid Reservoir. 4. Disengage the defective tubing from the tubing bundle going to the System Liquid Reservoir. 5. Remove the nut and ferrule from the end of the defective tubing. 6. Choose the appropriate length tubing segment for Tube A (Figure 10-24) in the channel that has the defective tubing. 7. Install a nut and ferrule combination on one end of the new replacement tubing. Make sure that the nut and ferrule are oriented on the tubing as shown in Figure 10-23. 8. Secure the knurled nut from the new tubing to the valve on the syringe pump. 9. Route the tubing along with the other liquid lines to the System Liquid Reservoir. 10. Feed the free end of the new tubing through the hole in the cap of the System Liquid Reservoir. Make sure that the end of the tubing is guided to the side of the reservoir away from the sparging stone. Helium bubbles from the stone should not directly enter the open ends of the system liquid lines. 11. Gather the liquid lines together to make a neat bundle from the valves to the System Liquid Reservoir. 12. Restart the liquid path for the system (page 195). 224 ROUTINE MAINTENANCE Replacing Peri-pump Tubing Peri-pump tubing tends to wear out over time from the mechanical motion of the pump head. Replace both pieces of Marprene® tubing whenever you make any tubing changes in the peri-pump (Figure 10-27). 1. Disconnect the quick release fitting from the top of the Wash Solution Reservoir. 2. Disconnect the fitting from the top of the Waste Container. 3. Remove the screws that secure the front portion of the deck cover to the system and remove the cover to expose the lower fitting on the washbowl. 4. Disconnect both of the quick release fittings from the washbowl. 5. Turn the locking screw on the peri-pump cover a quarter turn and open the cover to expose the head rollers and tubing through the pump. 6. Open the Tubing Clamps on each side of the pump and remove both pieces of Marprene® tubing from the pump. Extend the crank handle from the center hub of the pump head and use it to turn the pump head and free the tubing. Tubing Clamps Locking Screw Crank Handle Figure 10-26. Peri-pump Access. 225 CHAPTER 10 Figure 10-27. Peri-pump Tubing Chart. 226 ROUTINE MAINTENANCE 7. Remove the quick release fittings from each end of both pieces of tubing for reuse. Four fittings in all are required to replumb the peri-pump. Notice that the two wash supply fittings have a smaller barb than the waste fittings. 8. Insert the barbed end of the quick release fittings for the wash supply (smaller barbs) into each end of the smaller diameter replacement tubing. The smaller diameter tubing is also shorter in length (9.5 feet 2.9 meters). 9. Insert the barbed end of the quick release fittings for the waste tubing (larger barbs) into each end of the larger diameter replacement tubing. The larger diameter tubing is also longer in length (11 feet 3.33 meters). 10. Connect the smaller diameter tubing to the upper port on the washbowl using the quick connect fitting. 11. Connect the larger diameter tubing to the lower port on the washbowl using the quick connect fitting. 12. Open the Tubing Clamps and route the larger diameter tubing from the washbowl around the peri-pump head in a clockwise direction to the Waste Container (Figure 10-27). Extend the pump handle from the center hub of the pump head and use it to turn the pump head and free the tubing if necessary. 13. Open the Tubing Clamps and route the smaller diameter tubing from the washbowl around the peri-pump head in a counterclockwise direction to the Wash Solution Reservoir (Figure 10-27). Extend the pump handle from the center hub of the pump head and use it to turn the pump head and free the tubing if necessary. 227 CHAPTER 10 14. Turn the pump head using the crank handle and make sure that each piece of tubing will stay in the tracks provided. 15. Collapse and secure the crank handle in the center hub of the peri-pump head. Close the peri-pump cover and secure it with a quarter turn on the latch screw. 16. Replace and secure the deck cover on the system. Verify the Buffer Trough, Cleaning Trough and Camera Dispense positions using the Labware utility (page 226). 17. Run the Peri-pump utility (page 178) three times to fill the wash supply tubing and the washbowl. Replacing Deck Tubing The tubing to support the vacuum and optional cooling features are routed underneath the deck covers. You should not need to replace this tubing to maintain the system. If problems or leaks should arise, or you want to customize the deck configuration, the standard tubing layout is shown in Figure 10-28 below. You will need to remove the screws and both the front and rear deck covers in order to access these plumbing components. Upon reassembly, you need to verify the positions for the Buffer Trough and the Cleaning Trough using the Labware utility (page 229). 228 ROUTINE MAINTENANCE Figure 10-28. Vacuum and Coolant Tubing Chart. 229 CHAPTER 10 Tip Maintenance Procedures The dispenser is a very delicate precisely constructed glass capillary. The flat nozzle end of the capillary is approximately 250 microns in diameter with a 70 micron inner diameter. Debris lodged in the inner diameter or a build up near the opening will interfere with drop formation and dispensing. There are several types of dispenser cleaning and a tip coating procedure that you can perform, depending on the symptoms involved. You may choose to perform these procedures on a regular basis as a preventative measure, before any problems arise. These procedures include: Routine Tip Cleaning (page 231) Clearing a Clogged Tip (page 232) External Surface Cleaning (page 233) Sodium Hydroxide Cleaning (page 234) Silanate Tip Coating (page 234) 230 ROUTINE MAINTENANCE Routine Tip Cleaning This procedure is performed without removing the dispensers from the system. It makes use of standard procedures and utilities of the system and should be part of your regular daily and weekly care process. ) Caution: If tips have been exposed to proteins, the use of organic solvents such as methanol or acetone is NOT appropriate. These organic compounds will cause residual proteins to denature and bond to the glass surfaces of the tips. Use Tween®-20 for systems dispensing protein class compounds 1. Run the Start of Day utility (page 229) with 100% methanol. 2. Run the Tip Tuning utility (page 229) and observe the cleaned tip while it is dispensing. If it is still misfiring, run the next step. 3. Rerun the Start of Day utility (page 229) with 100% acetone. Be sure to use a polypropylene microplate. 4. Rerun the Tip Tuning utility (page 229) and observe the cleaned tip while it is dispensing again. If the tip still misfires then proceed with one of the more aggressive cleaning procedures described below. 231 CHAPTER 10 Clearing a Clogged Tip This procedure is performed without removing the dispensers from the system. This procedure is recommended whenever you receive an Over Pressure error during a sample run or when using the Prime Tips utility. You will need to have the Dispenser Maintenance Kit available to complete this cleaning procedure. This procedure requires extreme care to prevent irreparable dispenser damage. When attaching the tubing from the Dispenser Maintenance Kit, use direct upward pressure. Any sideways movement or pressure will break the glass dispenser tip. 1. Unscrew the system fluid line from the top of the dispenser assembly. 2. Fill the large syringe from the maintenance kit half full with 100% methanol. Do not use methanol if the tips have been used with protein samples. 3. Carefully slip the tubing that is attached to the large syringe onto the glass nozzle tip of the dispenser. Be very careful to exert NO lateral force on the glass tip or breakage will occur. 4. Run the Tip Sonication utility (page 174) and apply pressure to the syringe piston whenever you can hear the sonication. Sonication cycles on and off for 15 minutes. 5. Carefully flick the barrel of the syringe while slowly applying pressure to the plunger. This will alternate little pockets of air in the syringe stream that will help to clear the dispensers. Methanol should shoot out of the top of the dispenser if clear. 6. Repeat step 5 three more times. 7. Reconnect the system fluid line to the top of the dispenser and run the Prime utility (page 232). 8. Click the button to end the sonication. 232 ROUTINE MAINTENANCE External Surface Cleaning The Dispenser tips can become contaminated by physical debris from sample, buffer dyes, etc. These materials will compromise the surface energy of the glass. ) Caution: While handling the dispenser assembly, avoid skin contact with either end of the glass capillary. Tiny bits of skin will end up on the inlet glass inner diameter or in the nozzle opening. This will increase the risk of clogging the dispenser. 1. Soak a clean room laboratory wipe with 100% methanol or 70% Isopropyl alcohol. 2. Use the Labware utility (page 232) to send the Dispense Head to the Home position or any other convenient deck location. 3. Gently wipe the outer glass surfaces of the glass tips on the dispensers with an easy downward motion. 4. Encrusted debris can be gently scrubbed lens paper wetted with alcohol. 5. Run the Tip Tuning utility (page 232) and observe the cleaned dispenser. If poor dispenser performance persists, perform the Sodium Hydroxide Cleaning procedure below. 233 CHAPTER 10 Sodium Hydroxide Cleaning If other cleaning methods above prove ineffective in cleaning the tips and you are still experiencing clogging or unreliable dispensing, particularly if proteins are involved, use the Sodium Hydroxide Cleaning utility (page 190) to internally clean the dispenser tips. If tip wetting issues arise after cleaning the tips with Sodium Hydroxide, perform the Silanate Tips utility (page 187) to coat the outer glass surfaces. Silanate Tip Coating If tip wetting on the outside of the tips is causing dispensing problems, use the Silanate Tips utility (page 187) to treat outside surfaces of the dispenser tips. 234 REPORTING RESULTS Chapter 11 Reporting Results Two tabs in the main software window (Figure 11-1) contain reports of the activity of the system. The Results tab generates a report of the printing runs. Format of the reports is selectable and can be viewed or printed. The Log tab maintains a record of activity, progress and errors that occur during the operation, setup and maintenance of the system. Format of these reports is also selectable and can be viewed or printed as desired. Figure 11-1. Main Software - Report Tabs. Run Results Each printing run produces a Results report that contains the status of each spot in the arrays printed. The Results report is available on the Results tab (Figure 11-2) found on the main software screen. This report can be in one of two formats, depending on the information that you want to see, either the Results format or the Gene Array List (GAL) format. The Results format reports everything that is known about the run, the protocol and the system. The GAL format contains information specific to the spots produced and is compatible with scanning systems such as the ScanArray® imaging system. 235 CHAPTER 11 Figure 11-2. Results Tab - Results Report Format. The information included in the Result format includes: Run Information (date, time, user, etc.) Protocol Information (protocol definition parameters) Tip Information (tuning parameters) Pressure Parameters Information (pressure limit parameters) System Parameters Information (current system parameters) Map Information (array location, source location, tip used, status, volume, etc.) The information in the GAL format (Figure 11-3) is a shorter set of information about the spots that includes the sample id information available from the Plate Content. GAL reports include: Arrayer System Information (instrument and software information) Mapping Information (array position, sample id, status and volume) 236 REPORTING RESULTS Figure 11-3. Results Tab - GAL Report Format. The Results reports can be filtered (Figure 11-4) to include only the information of interest to you. Simply choose the type of data that you want to see in the Mapping Information portion of the report. The reports, as they are currently viewed on the Results tab, can also be printed out if desired. 237 CHAPTER 11 Figure 11-4. Results Filter Dialog. 238 REPORTING RESULTS Output Files A tabbed ASCII file for the Results report format is automatically generated for each printing run. This file is created in the Piezorray directory and is named: ProtocolName_RunDate_RunTime_Run.txt Example: Array24x16_2003-05-13_134307_Run.txt A tabbed ASCII file for the GAL format report may be generated if requested (page 238). The GAL file conforms to a standardized format for passing information to scanning and imaging systems used to analyze arrays on substrates. This format provides a link to the original sample id for each spot in the printed arrays. The GAL file is also created in the Piezorray directory and is named: ProtocolName_RunDate_RunTime_Gal.gal Example: Array24x16_2003-05-13_134307_Gal.gal A third file may also be generated that contains only a list of those spots that were not printed due to some kind of error. These errors are flagged as either Correctable or Uncorrectable, depending on what caused the error to occur. Spots in the arrays that were NOT PRINTED because of correctable errors may be recovered with a Correction Run (page 238). The Error file is also created in the Piezorray directory and is named: ProtocolName_RunDate_RunTime_Error.txt Example: Array24x16_2003-05-13_134307_Error.txt The following excerpt from a GAL file (Figure 11-5) shows some samples that were not printed in the array (not enough samples selected to fill the array) and a pre-dispense error for Tip #2. 239 CHAPTER 11 ATF 1.0 8 7 "Type=GenePix ArrayList V1.0" BlockCount=1 BlockType=0 URL=Http://www.perkinelmer.com/microarray "Block1= 2000, 2000, 200, 8, 300, 8, 300" Supplier=PerkinElmer ArrayerSoftwareName=Piezorray ArrayerSoftwareVersion=1.0 "Block" "Row" "Column" "ID" "Name" 1 1 1 N/A N/A 1 2 1 empty empty 1 3 1 N/A N/A 1 4 1 N/A N/A 1 5 1 empty empty 1 6 1 empty empty 1 7 1 empty empty 1 8 1 empty empty 1 1 2 N/A N/A 1 2 2 empty empty 1 3 2 N/A N/A 1 4 2 N/A N/A 1 5 2 empty empty 1 6 2 empty empty 1 7 2 empty empty 1 8 2 empty empty 1 1 3 N/A N/A 1 2 3 empty empty 1 3 3 N/A N/A 1 4 3 N/A N/A 1 5 3 empty empty 1 6 3 empty empty 1 7 3 empty empty 1 8 3 empty empty 1 1 4 N/A N/A 1 2 4 empty empty 1 3 4 N/A N/A 1 4 4 N/A N/A 1 5 4 empty empty 1 6 4 empty empty 1 7 4 empty empty 1 8 4 empty empty 1 1 5 N/A N/A 1 2 5 empty empty 1 3 5 N/A N/A 1 4 5 N/A N/A 1 5 5 empty empty 1 6 5 empty empty 1 7 5 empty empty 1 8 5 empty empty "Status" OK Pre-Dispense Failure OK OK Not Dispensed Not Dispensed Not Dispensed Not Dispensed OK Pre-Dispense Failure OK OK Not Dispensed Not Dispensed Not Dispensed Not Dispensed OK Pre-Dispense Failure OK OK Not Dispensed Not Dispensed Not Dispensed Not Dispensed OK Pre-Dispense Failure OK OK Not Dispensed Not Dispensed Not Dispensed Not Dispensed OK Pre-Dispense Failure OK OK Not Dispensed Not Dispensed Not Dispensed Not Dispensed Figure 11-5. Sample GAL File Output. 240 "Volume" 1 1 1 1 1 1 1 1 1 1 1 1 1 1 1 1 1 1 1 1 1 1 1 1 1 1 1 1 1 1 1 1 1 1 1 1 1 1 1 1 REPORTING RESULTS The Event Log In addition to the results of the printing runs, an event log is also maintained for the system. The event log is found on the Log tab and tracks physical (if not always visible) events that happen while the system is running. Events occur during print runs, but also during maintenance activities, utilities and idle time. The log keeps track of when events happen, as well as who was logged onto the system at the time and what type of event is being recorded. Some events are activities beginning and some entries report the progress, completion or failure of an activity. Figure 11-6. Log Tab - Event Log. As with other reports generated by the system, you can filter the log (Figure 11-7) to view only information of interest to you. You can also sort the log based on any of the information in the log and print out the log if necessary. 241 CHAPTER 11 Figure 11-7. Log Filter Dialog. 242 SAMPLE MAPPING SUMMARY Appendix A Sample Mapping Summary This Appendix summarizes the sample mapping parameters and their impact. The mapping example figures from Chapter 2 are gathered and reorganized on the following pages. Complementary configurations are shown on opposing pages for ease of comparison. In the following sections, numbers in the charts indicate the sequential sample numbers given to the samples in the source plate wells. Samples are numbered sequentially in the source plates (Figure A-1). Array Mapping - All Tip Mode (page 244) Pattern Mapping - All Tip Mode (page 245) Array Mapping - Tip 1 Mode (page 246) Pattern Mapping Samples - Tip 1 Mode (page 247) 1 2 3 4 5 6 7 8 9 10 11 12 A B C D E F G H 1 9 17 25 33 41 49 57 65 73 81 89 2 10 18 26 34 42 50 58 66 74 82 90 3 11 19 27 35 43 51 59 67 75 83 91 4 12 20 28 36 44 52 60 68 76 84 92 5 13 21 29 37 45 53 61 69 77 85 93 6 14 22 30 38 46 54 62 70 78 86 94 7 15 23 31 39 47 55 63 71 79 87 95 8 16 24 32 40 48 56 64 72 80 88 96 Figure A-1. Sample Numbering in Source Plate. In the final section, the like numbers in the charts indicate where the tips access the Source Plate for simultaneous aspiration. The number sequence indicates the sequential order of aspirates for the tips. Sample Aspiration Order (page 248) 243 Array Mapping - All Tip Mode Orientation By Col Array Mapping Layout = Sequential Replicates = 5 Tip Mode = All Tips Samples = 10 Arrays Horizontal = 2 Arrays Vertical = 3 Orientation By Row 1 1 1 1 1 2 2 2 2 6 6 6 7 7 7 7 7 8 1 1 2 1 1 2 1 2 2 2 3 4 3 3 4 3 3 4 2 3 3 3 3 3 4 4 4 8 8 8 8 9 9 9 9 9 4 5 5 4 5 6 5 5 6 6 7 7 6 7 7 6 7 8 4 4 5 5 5 5 5 6 6 10 10 10 10 10 8 8 9 8 9 9 8 9 9 10 10 10 10 10 Orientation By Col 4 5 6 Orientation By Row Layout = Wrap Replicates = 5 Tip Mode = All Tips Samples = 10 Arrays Horizontal = 2 Arrays Vertical = 3 4 5 6 7 8 9 8 1 9 2 10 3 10 3 1 4 2 5 6 7 8 7 10 3 8 1 4 9 2 5 9 10 1 2 3 4 5 6 7 8 1 4 9 2 10 3 1 4 5 6 7 6 9 7 10 8 7 8 10 1 3 4 6 7 8 9 10 Array Mapping 1 2 3 4 5 6 7 8 9 1 2 3 4 5 6 7 8 9 1 4 7 2 5 8 3 6 9 1 4 7 2 5 8 3 5 9 1 2 3 4 5 6 7 8 9 1 2 3 4 5 6 7 8 9 1 4 7 2 5 8 3 6 9 1 4 7 2 5 8 3 6 9 1 2 3 4 5 6 7 8 9 1 2 3 4 5 6 7 8 9 1 4 7 2 5 8 3 6 9 1 4 7 2 5 8 3 6 9 Array Mapping 1 2 3 Orientation By Col Layout = By Set Replicates = 6 Tip Mode = All Tips Samples = 9 Arrays Horizontal = 2 Arrays Vertical = 3 244 1 4 7 2 5 8 3 6 9 9 2 5 10 1 3 4 6 7 2 5 8 9 10 2 3 5 6 Orientation By Row SAMPLE MAPPING SUMMARY Pattern Mapping - All Tip Mode 1 1 1 1 1 2 2 2 3 3 3 4 4 4 4 4 5 6 6 6 6 7 6 7 1 2 3 4 5 7 2 2 3 3 8 8 8 8 9 5 5 5 5 10 11 11 10 11 11 11 12 7 7 7 8 13 13 14 14 13 14 13 13 14 14 9 9 9 10 10 9 10 12 12 12 12 9 9 13 1 10 10 11 11 8 12 12 14 2 3 4 5 6 13 3 14 1 2 4 5 1 2 3 4 11 1 12 13 14 2 3 6 1 2 3 4 5 7 7 11 13 8 8 9 9 6 10 10 12 14 4 5 6 7 8 6 1 2 3 4 1 2 3 4 5 7 6 9 10 11 8 12 1 2 3 4 1 2 3 4 5 7 1 2 3 4 9 10 11 8 12 Layout = Sequential Replicates = 5 Tip Mode = All Tips Samples = 14 Arrays Horizontal = 2 Arrays Vertical = 3 Pattern Mapping Layout = Wrap Replicates = 5 Tip Mode = All Tips Samples = 14 Arrays Horizontal = 2 Arrays Vertical = 3 5 9 11 13 6 14 7 8 10 12 9 10 11 8 12 6 7 Pattern Mapping 5 7 6 9 10 11 8 12 5 7 6 9 10 11 8 12 5 7 6 9 10 11 8 12 245 Pattern Mapping Layout = By Set Replicates = 6 Tip Mode = All Tips Samples = 12 Arrays Horizontal = 2 Arrays Vertical = 3 Array Mapping - Tip 1 Mode 1 1 5 1 1 5 1 1 5 1 1 5 1 5 5 1 5 5 2 2 6 2 2 6 2 2 6 2 2 6 2 6 6 2 6 6 3 3 7 3 3 7 3 3 7 3 3 7 3 7 7 3 7 7 4 4 8 4 4 8 4 4 8 4 4 8 4 8 8 4 8 8 1 1 2 1 1 2 1 1 2 1 1 2 1 2 2 1 2 2 3 3 4 3 3 4 3 3 4 3 3 4 3 4 4 3 4 4 5 5 6 5 5 6 5 5 6 5 5 6 5 6 6 5 6 6 7 7 8 7 7 8 7 7 8 7 7 8 7 8 8 7 8 8 Tip #1 Array Mapping Tip #2 Tip #3 Source Plate = 96-Well Replicates = 5 Tip Mode = Tip 1 Samples = 8 Vertical Spacing = 9 mm (fixed) Columns = 3 Rows = 3 Arrays Horizontal = 2 Arrays Vertical = 4 (fixed) Tip #4 Tip #1 Array Mapping Tip #2 Tip #3 Tip #4 246 Source Plate = 384-Well Replicates = 5 Tip Mode = Tip 1 Samples = 8 Vertical Spacing = 9 mm (fixed) Columns = 3 Rows = 3 Arrays Horizontal = 2 Arrays Vertical = 4 (fixed) SAMPLE MAPPING SUMMARY Pattern Mapping Samples - Tip 1 Mode 1 5 1 1 1 5 5 1 1 5 5 5 1 9 1 9 1 5 5 9 1 5 5 9 2 2 6 6 2 2 6 6 2 6 2 6 2 10 2 10 2 6 6 10 2 6 6 10 3 3 7 7 3 3 7 7 3 3 3 7 7 11 3 3 7 7 11 3 7 7 11 4 4 8 4 8 8 4 8 4 8 4 12 4 12 8 4 8 8 12 4 8 8 12 1 1 2 2 1 1 2 1 2 1 2 1 9 1 9 2 1 2 2 9 1 2 2 9 3 3 4 4 3 3 4 4 4 3 3 4 11 3 3 4 4 11 3 4 4 11 5 5 6 5 6 6 5 6 5 6 5 13 5 13 6 5 6 6 13 5 6 6 13 7 7 8 8 7 7 8 7 8 7 8 7 15 7 15 8 15 7 8 Tip #2 Source Plate = 96-Well Replicates = 5 Tip Mode = Tip 1 Samples = 12 Vertical Spacing = 9 mm (fixed) Arrays Horizontal = 2 Arrays Vertical = 4 (fixed) Tip #3 Tip #4 Tip #1 Pattern Mapping Tip #2 11 5 7 Pattern Mapping 11 4 3 Tip #1 8 8 Tip #3 Tip #4 8 15 247 Source Plate = 384-Well Replicates = 5 Tip Mode = Tip 1 Samples = 12 Vertical Spacing = 9 mm (fixed) Arrays Horizontal = 2 Arrays Vertical = 4 (fixed) Sample Aspiration Order The order in which samples are aspirated from the source plate is dependent on the plate type and the physical spacing of the tips. The physical dimension of the dispensers limits the system to 9 mm tip spacing. Since all four tips will access the source plate at the same time, the wells that are accessible to the tips must be 9 mm apart as well. For 96-well plates, this has no impact on the samples that are aspirated. The wells are, by definition, 9 mm apart. On 384-well plates, however, the rows in the plate are accessed somewhat alternately. This source plate access will not have any affect on the mapping of samples to your substrate arrays. The Piezorray™ software compensates for the numbering of the samples when the sample map is generated. Mapping is based on the actual source order numbering in the plate, with the samples actually being aspirated 248 SAMPLE MAPPING SUMMARY 96 Well Source Plate 1 3 5 7 9 11 13 1 3 5 7 9 11 13 1 3 5 7 9 11 13 1 3 5 7 9 11 13 2 4 6 8 10 12 2 4 6 8 10 12 2 4 6 8 10 12 2 4 6 8 10 12 Like numbers indicate where the tips access the Source Plate for simultaneous aspiration. Number sequence indicates sequential access of the four tips. 384 Well Source Plate 1 5 9 13 2 6 10 1 5 2 6 10 1 5 2 6 10 1 5 2 6 10 3 7 11 4 8 12 3 7 11 4 8 12 3 7 11 4 8 12 3 7 11 4 8 12 9 13 9 13 9 13 249 This page is intentionally left blank. 250 PIEZORRAY™ LIQUID COMPATIBILITY Appendix B Piezorray™ Liquid Compatibility Some of the liquids that have been used successfully in the Piezorray™ system are listed below. Other materials need to be carefully verified for acceptable performance. Listed below are: Sample Materials (page 251) Buffer Solutions (page 252) Cleaning Solutions (page 252) System Liquid (page 253) Wash Solution (page 253) Sample Materials Sample materials generally fall into one of two categories, Proteins or Nucleic Acids. Examples of materials that have been successfully dispensed are shown in the lists below. PerkinElmer provides a Proof-of-Concept program to verify satisfactory results with other sample materials if necessary. Proteins Up to 10 mg/ml Hemoglobin Up to 3 mg/ml immunoglobulins Up to 2 mg/ml BSA and biotin labeled BSA Up to 1 mg/ml Monoclonal anti-human antibodies (IL-1b, IL-6, TNFa, IFNg) Up to 1 mg/ml Streptavidin or Avidin Up to 1 mg/ml Alkaline phosphatase Cyanine 3, Cyanine 5, Texas red, and Alexa 647 labeled immunoglobulins Peptides (2kDa) at concentrations of 100ug/ml up to 1mg/ml Polyclonal antibodies (approx. 150kDa) up to 2-3mg/ml 251 Nucleic Acids Up to 2 mM DNA Purified PCR products up to 2000 base pairs Up to 0.02mM dye labeled dNTPs and ddNTPs Up to 0.1-mg/ml lambda phage DNA digest (up to approx 8.5 kB) Texas red, Cyanine 3, Cyanine 5, Tamra and Fluorescein labeled DNA Amine modified DNA 33 P labeled DNA Buffer Solutions Examples of buffer solutions that have been successfully used in the PiezoTip™ dispensers are shown in the lists below. Up to 0.2M sodium phosphate, pH 7-9 or 1X PBS, pH 7-8 Up to 0.15M sodium phosphate, pH 7 Up to 0.2M sodium phosphate, pH 9 plus 0.1M Na Sulfate 0-40% glycerol Up 0.1M Na Acetate, pH 4-5 10 mM Na Acetate pH 5 plus 0 to 10% glycerol 10 mM Na Acetate pH 5, 0.05% NaN3 plus 0 to 40% glycerol* Up to 100 mM Borax, pH 9.0 Up to 3X SSC, plus 0-5% glycerol 1X Phosphate Buffered Solution (PBS) Cleaning Solutions Some of the common Cleaning Solutions used to reduce carryover during protocol runs are listed below: Proteins 0.1% Tween® in Phosphate Buffered Solution (PBS) at PH 7.2 2% Tween® in water Nucleic Acids Methanol 2% Sodium Dodecyl Sulphate (SDS) in water Acetone (use only in polypropylene plates) 252 PIEZORRAY™ LIQUID COMPATIBILITY System Liquid System Liquid is HPLC grade water or equivalent. It must be filtered to 0.2 µm and be continuously degassed to ensure reliable dispenser operation. Wash Solution Wash Solution is generally deionized water free of particulates. 253 This page is intentionally left blank. 254 PLATE CONTENT FILES Appendix C Plate Content Files The Piezorray™ software uses information in the plate content files to create plate definitions in the system database. These plate definitions are then used by the printing protocols to create array content files (.txt or .gal files) that identify each spot printed in the microarrays. The array content files are used to maintain positive sample identification through image quantitation after scanning. You can import plate well data into the Piezorray™ software from comma-delimited ASCII files (.txt or .csv files) as described on page 83. You can also easily create plate content files with applications such as Microsoft® Notepad or Microsoft® Excel by cutting and pasting gene list information into a structured file format. The format required for a plate contents file, and instructions for creating a file are described below. Plate Contents File Format A plate contents file consists of: two lines of header information describing the entire plate, followed by a line of data for each well or sample in the plate. A description of each line in the file is given below. Generally, a comma is required at the end of each line. Do not use any spaces or tabs after the commas within a line. 255 First Line of Header Information The first header line is as follows: Product,Version,Platecontent, Where: Product is the name of the instrument using this plate contents file. Version is the software version number. Platecontent, is a required text string at the end of the line. For example, PerkinElmer Piezorray,2.0,Platecontent, Second Line of Header Information The second header line is as follows: Plate,Plate Name,Plate Barcode,Description,# Cols,# Rows, Where: Plate is a required text string at the beginning of the line. Plate Name is the text name of the plate (up to 40 characters). Plate Barcode is the barcode identifier of the plate, if used. This field may be left blank. Description is the text description of the plate. # Cols is the number of numeric columns in the plate. (12 for 96-well plates and 24 for 384-well plates). # Rows is the number of alphabetic rows in the plate (8 for 96-well plates and 16 for 384-well plates). For example, Plate,96-well Control Plate,678-593,Pos/Neg controls,12,8, 256 PLATE CONTENT FILES Sample Data - Third and Following Lines The third and following lines, one for each well or sample in the plate, are as follows: Row,Column,SampleNum,SampleName,Status, Where: Row is the alphabetic row identifier of the well (A-H for 96well plates and A-P for 384-well plates). Column is the numeric column identifier of the well (1–12 for 96-well plates and 1-24 for 384-well plates). SampleNum is the unique GenBank Ascession Number or other alphanumeric identifier of the sample. SampleName is the name of the gene or sample. Status indicates the status of the sample: 0 = empty well (no sample) 1 = full 2 = control sample 3 = sample in well is bad For example, A,1,M21304,HUMGLP,1, You can use an accession number, a gene name, or both to identify your samples. We recommend that at least one of these two fields be filled in for every well. The “Empty” and “Bad” designations will pass through to the array content files. The Piezorray™ system will not attempt to aspirate from those wells of the plate that are labeled as “Empty”. The “Control” designation changes the color of spot location diagrams during printing, but does not affect the .gal file. Successive lines each contain information about the sample in a specific well and there should be a line for each sample you wish to identify. When the file is imported, omitted wells - those for which a line is not included - are assumed to be empty. 257 Creating a Plate Content File A plate contents file can easily be created using Microsoft® Excel or Microsoft® Notepad. The example below shows the first few lines of a Microsoft® Excel spreadsheet that will generate a generic 96-well plate contents file. Note that in a plate contents file, lines beginning with the # character are treated as comments, which are used in this example to indicate the contents of the individual entries on the line below. This sample spreadsheet, and a similar one for creating a generic 384-well plate contents file, are installed on the Piezorray™ system in the folder C:\Program Files\Piezorray\Bin. Using one of these files as a starting point, you can create a plate contents file. 258 PLATE CONTENT FILES To Create a Plate Content File 1. Locate the C:\Program Files\Piezorray\Bin directory on your Piezorray™ system. Open either the 96-well or 384-well sample spreadsheet in Microsoft® Excel. Cut and paste in accession numbers and gene names from your own or a published gene list or website, creating a unique plate contents file for each plate in your library. Assign a status to each sample, or use the default status of “1” or full. When you have created and saved a Microsoft® Excel file, save it as a comma delimited plate content file with the default .csv suffix: Click Save As… from the File menu Select CSV (Comma delimited) in the Save as type: dialog box. Enter a new filename that will enable you to identify the plate import file later. The resulting file may be imported directly into the Piezorray™ software as described on page 83. Alternatively, a file can be created directly from within any generic text editing software package, such as Microsoft® Notepad, by following the file structure described in the first section of this appendix. See Plate Contents File Format (page 255). 259 This page is intentionally left blank. 260 TROUBLESHOOTING Appendix D Troubleshooting This chapter describes various recommended solutions to more commonly experienced Piezorray™ performance issues. Topics not discussed within this chapter will require contacting your PerkinElmer Service Representative. The discussions below are typically related to performance issues that you can correct through the use of standard protocol, instrument utilities, and calibration/correction techniques. The following performance related issues and discussions are found in this chapter: Dispensing Issues (page 261) Array Printing Issues (page 269) Dispensing Issues Many of the quality related issues associated with printing arrays can be traced to poor dispenser performance. Consistent adherence to the recommended maintenance schedules and procedures should keep your Piezorray™ system functioning reliably. 261 Recommended Good Practices Typically, the dispensers will perform well if you follow these guidelines: Keep the dispensers clean. Develop effective wash processes for each type of sample printed. Different samples require different wash parameters. Keep the system fluids clean, filtered, and de-gassed (page 253). Be sure to restart the liquid path according to recommended guidelines (page 195) after any liquid path components are replaced. Check the dispenser performance using the Tuning utility (page 162) periodically to ensure proper drive parameters. Faithfully use the Deep Cleaning utility (page 149) at the beginning of each printing day with application specific cleaning agents. Dispenser Images Some examples of dispensing images are shown below. Figure D-1. Proper Dispensing. 262 TROUBLESHOOTING Figure D-2. Improper Dispensing - Drop Out of Range. Figure D-3. Improper Dispensing - Satellite Drops. 263 System Related Issues Symptoms Action/Resolution Air in Syringes • Replace any worn syringe seals or syringes (page 211). • Replace any worn or damaged system liquid tubing (page 218). • Perform the Starting the Liquid Path procedure (page 195). • Check for Helium directly entering the system liquid lines (page 192). • Check for sufficient system liquid level in the reservoir (page 165). Overpressure warnings or shutdowns • If error occurs during the Fast Flush utility, replace a defective pressure transducer (page 214). • Clean any clogged or contaminated tips (page 230). • Replace any pinched or kinked system liquid lines (page 218). • Perform the Monthly Maintenance procedure to clean out the system liquid lines (page 198). 264 TROUBLESHOOTING Symptoms Action/Resolution Leaks • Tighten any loose fittings or connections on the system liquid tubing, syringe, 4-way valve, dispensers or transducers. (do not over-torque). • Replace any worn syringe seals or syringes (page 211). • Replace any worn valve or valve fittings (page 217). • Replace any damaged or kinked system liquid lines (page 218). • Replace any broken or damaged dispensers (page 201). • Replace any damaged or worn peri-pump tubing (page 225). Large Drops Hanging on Tips after Priming Stops • Re-prime the liquid path (page 146). No Dispensing • Make sure to follow the specified power up sequence; computer first, instrument after the operating system desktop appears. (improper communication initialization can result in problems with the dispenser driver, dispense image strobe, pressure control, etc.) • Check the that the system liquid is degassed and the Helium flowrate is sufficient (page 192). 265 Dispenser Related Issues The majority of the time, the root cause of Dispenser Related issues can be traced to the dispensers themselves; specifically, dirty tips, improperly tuned tips or trapped air in the tips. Symptoms Action/Resolution Tip Produces Satellites • Clean (page 230) and re-prime the tip (page 146). • Re-tune the dispenser (page 162). Tip is wetting (Face of tip accumulates fluid during Tuning) • Clean (page 230) and re-prime the tip (page 146). • Deep Clean the tips (page 149). (Drops wick to the side of the tips during Priming) • Perform the Silanate Tips utility (page 187). Tip fires on an angle • Clean (page 230) and re-prime the tip (page 146). (not in line with the dispenser axis) • Replace the dispenser if it has become irreversibly hydrophilic (page 201). • Deep Clean the tips (page 149). • Check for wetting on the tip face during Tuning (see Tip Wetting symptom above). • Perform the Silanate Tips utility (page 187). Tip fires poorly (drops sputter as they emerge) • Clean (page 230) and re-prime the tip (page 146). • Re-tune the dispenser (page 162). • Deep Clean the tips (page 149). • Check for samples degassing (page 128). • Check for minimum sample volume (page 128). Drop does not appear in the Target Box • Re-tune the dispenser (page 162). 266 TROUBLESHOOTING Symptoms Action/Resolution Column disconnecting from the nozzle tip • Clean (page 230) and re-prime the tip (page 146). • Re-tune the dispenser (page 162). • Run the Set Pressure Offsets utility (page 183). • Check the Dispense Pressure defined in the protocol (page 116). • Perform the Sodium Hydroxide Cleaning utility (page 190). Tip Clogged or Obstructed (Overpressure Warning) • Clean (page 230) and re-prime the tip (page 146). • Make sure buffer is filtered to 0.2 µm. • Check salt concentration of buffer and reduce buffer concentration if necessary. • Replace the dispenser (page 201). No Dispense • Check for min volume defined in the protocol (samplevol+buffervol >13µL+dispensevol - page 113). • Check the aspirate height for sample and buffer with respect to the defined aspirate volumes. • Check that the samples and the buffer are adequately degassed. • Check for the audible tip sonication sound using the • PiezoTip Sonication utility (page 174) to verify operational dispense drivers. 267 Symptoms Action/Resolution Salt Deposits on Tips • Clean (page 230) and re-prime the tip (page 146). • Reduce buffer concentration or increase wash parameters. Broken/Chipped/Cracked Tips • Replace Dispenser (page 201). No Live Video image • Hardware failure, call for service. 268 TROUBLESHOOTING Array Printing Issues Issues related to the quality and production of the arrays and spots are shown in the table below. Symptom Action/Resolution Arrays are missing spots • Clean (page 230) and re-prime the tips (page 146). (Pre-Dispense Verification enabled and Error Recovery set to Skip) • Re-tune the dispensers (page 162). • Check that the wells of the source plate contain sufficient sample volume (page 128). • Check that the buffer trough is full of buffer solution filtered to 0.2 µm. • Check the Dispense Pressure defined in the protocol (page 116). • Check for min volume defined in the protocol (samplevol+buffervol >13µL+dispensevol - page 113). • Check that the tips are not submerged during the Pre-Dispense Verification. Arrays are missing rows • Clean (page 230) and re-prime the tips (page 146). • Run the Fast Flush utility (page 176). • Check for tip wetting in the Tuning utility (page 162). Spot size varies • Re-tune the dispensers (page 162). • Check the slide coating. • Check the salt concentration of the sample and buffer. 269 Symptom Action/Resolution Spots are out of position • Clean (page 230) and re-prime the tips (page 146). • Re-run the XY Tip Offsets procedure (page 206). Spots have satellites • Clean (page 230) and re-prime the tips (page 146). • Re-tune the dispensers (page 162). Array is misaligned in the X or Y direction • Check that the dispenser set screws are tight and re-run the XY Tip Offsets procedure (page 206). Arrays are skewed on the substrate • Verify sufficient vacuum to secure the slides (page 127). • Check that the slides are registered to the top and left stops on the holders. • Check that the slides did not move. • Check that the slide holder is seated properly on the deck. Array quality (intensity) differs across the substrate • Check the dispense height at each slide holder to verify deck flatness. Spots are off target • Run the Camera to Tip Calibration utility (page 179). • Enable Side Shooting to reduce first drop effects. • Verify sufficient vacuum to secure the slides (page 127). • Check that the slides did not move. • Check that the slide holder is seated properly on the deck (page 126). 270 REGULATORY AND SAFETY COMPLIANCE Appendix E Regulatory and Safety Compliance This Appendix provides information required by certain regulatory agencies. Compliance with specific regulations are listed, as are explanations of specific symbols used on the system and safety concerns. 271 Explanation of Symbols Francais: Deutsch: Symbol Signification des symboles Erklarung der Symbole Explanation L’explication Erklarung Alternating Current Courant alternatift Wechselstrom Protective Earth Ground Mise a la terre Schutz -Erdun On (Supply) Marche (alimentation) Ein Off (Supply) Arret (alimentation) Aus Caution-Attention: Risk of Electrical Shock Attention Risque de choc Vorsicht Spannug Gefahrliche Caution (refer to accompanying documents) Attention: Voir les documents cijoints Vorsicht Siehe Begleitinformation Serial Out Sortie serie Serieller Ausgang Printer Imprimante Drucker Monitor Moniteur Bildschirm Fuse Label 1 Current Warning Etiquette d'advertissement relatif au type et au courant du fusible Sicherung/ Stromstarke Avertissement: Warnung: Courant de fuite Hoher Leckstrom eleve, Mettre Erdung sicherstellen correctement a la terre Warnung: Avertissement: Warning Laserstrahlung, niche Appareil 5 laser Laser Product Avoid in den lichtstrahl exposition au Direct Exposure to faisceau dangereuse blicken, nsicht bare Beam laser Appareil A laser de Class 3B Laser Laserklasse 3B classe 3B Warning High Leakage Current, Ensure Proper Grounding 272 REGULATORY AND SAFETY COMPLIANCE Regulatory Compliance The Piezorray system complies with the following regulatory agency requirements: Safety Low Voltage Directive 73/23/EEC IEC 1010-1 1990 A1/A2 CENELEC EN61010-1:1993 Safety requirements for Electrical Equipment for Measurement, Control, and laboratory use. As shown in Test Report (Ref. No LR32929-098C) Canadian Standards Association. CSA Standard Safety requirements for Electrical Equipment for CAN/CSA C22.2 No. 1010.1- Measurement, Control, and laboratory use. 92 As shown in Test Report (Ref. No LR32929-098C) Canadian Standards Association. EMI and Susceptibility EMC Directive 89/336/EEC CENELEC EN50081-1 CENELEC EN61000-4-2 CENELEC EN61000-4-3 CENELEC EN61000-4-4 CISPR Publication 22 class A, as shown in Test Report (DLS 7295, April 1999) IEC Publication 801-2, as shown in Test Report (DLS 7318, April 1999) IEC Publication 801-3, as shown in Test Report (DLS 7318, April 1999) IEC Publication 801-4, as shown in Test Report (DLS 7318, April 1999) Quality Management System Underwriters Laboratories ISO-9001, BS 9001 and ANSI/ASQ Q 9001-1994. The development, manufacture, and support of life science research instrumentation and associated consumables and services. As shown in FN A12250. 273 Radio Frequency Interference English This equipment must be used only by authorized personnel, in a controlled laboratory environment. This equipment must only be used with IEC listed accessories (computer, printer, monitor, etc.). RFI Compliance This equipment has been tested and found to comply with the limits of CENELEC EN 60326-1, class A device. Any changes or modifications not expressly approved by PerkinElmer could adversely affect compliance. Use only shielded interface cables with this equipment. If the instrument is received in a damaged condition, request an immediate inspection by the carrier and local technical service representative. PerkinElmer is not responsible for damage occurring during transit. However, PerkinElmer will assist in ensuring a satisfactory settlement from the carrier. Upon receipt of all damage/inspection reports, PerkinElmer will arrange for either instrument repair or replacement. For proper ventilation of this equipment, a distance of 15cm must be maintained from this unit to any other surface. 274 REGULATORY AND SAFETY COMPLIANCE Francais Ce materiel doit etre utilise seul par Personnel autorise, a commande dans un l'environnement du Laboratoire. Ce materiel, faut seul est utilise avec IEC a Inscrit des Accessoires. (Ordinateur, Imprimeur, Moniteur, [etc]) RFI Acquiescement Ce materiel a ete teste et a trouve conformer a avec les limites de VFG 243, VDE 0871 et En 50 0821. Tous changements ou modifications pas expressement approuve Instrumente par PerkinElmer pouvait, [incorrigible] effectue I'acquiescement. Utilisez seul a prot6g6 des cables de l'interface avec ce materiel. Si l'instrument est recu dans une condition endommagee, demande une inspection immediate par le porteur et representant du service local technique. PerkinElmer n'est pas responsable pour degat produit pendant passage. De quelque maniere que, PerkinElmer aidera dans assurer un reglement satisfaisant du porteur. Rapporte sur recu de toute inspection du degat PerkinElmer arrangera la reparation de l'instrument a I'un ou l'autre ou remise en place. Pour ventilation adequate de ce materiel, une distance de 15cm doit etre maintenue, de cette unite 6 toute autre surface. 275 Deutsch Bitte nur gleichwertige Ersatzsicherungen des angegebenen Typs verwenden. An das Gerat darf nur IECregistriertes Zubehor angeschlossen werden (Computer, Drucker, Monitor usw.). Funkentstorung Das Gerat wurde getestet und entspricht den Vorschriften von VFG 243, VDE 0871 und EN 50 0821. Durch fnderungen oder Umbauten, die nicht ausdrucklich von PerkinElmer genehmigt wurden, wird die Zulassung u.U. hinfallig. Mit diesem Gerat nur isolierte Schnittstellenkabel verwenden. Weist das Gerat bei der Entgegennahme Schaden auf, verlangen Sie bitte eine sofortige Inspektion durch den Spediteur und den zustandigen Kundendienstvertreter. PerkinElmer ist fur Transportschaden nicht haftbar, setzt sich jedoch gern dafur ein, mit dem Spediteur eine befriedigende Losung auszuarbeiten. Nach Eingang aller Schadens und Inspektionsberichte veranlaRt PerkinElmer entweder die Reparatur oder den Umtausch des Gerats. Fur ordnungsgemasse Ventillation darf dieses Gerat nicht naher als 15cm von einer Wand entfernt aufgestelit werden. 276 REGULATORY AND SAFETY COMPLIANCE Electrical Safety ) Warning: Be sure to use the proper plugs and good earth ground connections to prevent electrical shock. For systems operating at voltages other than 117 VAC or 220 VAC, a locally approved 3-prong plug may be required to correctly power the system. Correct wiring specifications are given below: Live (L) Neutral (N) Earth (E) Brown Lead Blue Lead Green/Yellow Lead Ionizer Precautions Normal operation and maintenance operations can be safely performed without turning off the power to the ionizer. ) Warning: Use reasonable precautions when working in the vicinity of the ionizer, located inside the optional Environmental Enclosure. Minor, low voltage shocks are possible. Moving the System Safely ) Caution: The Piezorray system is very heavy. Do not attempt to move the system without sufficient assistance. Do not move the system fully assembled. Disconnect the computer and all external plumbing connections prior to moving the instrument. Disassemble the optional Environmental Enclosure, if installed, prior to moving the instrument. Use both hands when lifting or moving the system. Carry the system only from the bottom. 277 System Cleaning Clean the outer surfaces of the system by wiping them with a damp, lint-free cloth and common laboratory cleaner. Do not use organic solvents when cleaning the outer surfaces of the system. Clean both the inside and outside surfaces of the optional Environmental Enclosure with a damp, lint-free cloth and common laboratory cleaner. Do not use organic solvents to clean the enclosure panels. 278