1
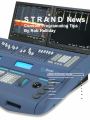
S T R A N D News
Console Programming Tips
By Rob Halliday
INSIDE THIS SPECIAL EDITION:
A introduction to programming tips
2
Automod
3
Dynamic Shapes
4
Update
6
Macros
9
ATC Pages
11
SoftPatch
13
Console Release 2.8.5
15
Console programming tips revisited The complete collection of Strand News programming tips by Rob Halliday
Welcome to the Collected Console Tips!
Over the last couple of years, Strand’s Quarterly Newsletter has featured a console programming tip in every
issue. These started partly as a response to people asking for advice, and partly as a response to the occasional
comment from people (-usually people who hadn’t actually used the products!) that Strand’s consoles were
somehow ‘not proper moving light consoles’.
The proof is in the shows, though. Over the last nine years, this console has been my ally through countless
productions of all types and sizes. The British tour of Blood Brothers was the first. A year later, Martin Guerre
and Jesus Christ Superstar in the West End. In the time since then shows including Les Misérables around the
world, Oklahoma! in London, New York and on tour around the USA, Oliver! in London, Australia and now an
American tour. Miss Saigon, where one Strand 520i replaced the four control systems that had previously been
necessary to control that show’s complex lighting rig. Most of the shows in London and around the UK run on
these consoles. This autumn Strand’s consoles will be found controlling some of the biggest new shows in the
West End, including The Woman In White and Mary Poppins. With many of these shows the consoles are not
even just being moving light consoles: they are being lighting consoles, controlling entire rigs, combinations of
large numbers of moving lights, conventional lights, colour scrollers, projectors, smoke and haze machines and
much more besides. These consoles let programmers do what they need to do for this kind of show quickly, efficiently and reliably. They have extra tools useful when working as a lighting team - the off-line editor, handheld
remotes, the dongles allowing laptops to be remote controls and video displays, multi-user capability. The software continues to improve, adding new features in response to user comments and the demands from new lighting technology. Most importantly, people trust them.
What is true is that the consoles don’t necessarily score well in those short trade show demos. They are not
flash-bang consoles. They won’t patch your rig, create your effects, plot your show and pour you a drink with the
press of a button. They’re a bit like control system construction kits: you have to invest a little time, but you can
make them work in a way that suits you. And once you’ve set them up you can move that set-up with you from
show to show, thanks to the console’s ability to load and merge parts of shows and to quickly modify information
through ranges of cues, groups, effects and submasters.
The Console Tips were intended as a way of showing you how to make the best use of that tool: tricks and tips
for setting things up and using commands in ways that people don’t necessarily know they can be used. They’re
not a replacement for a manual: the manual (and console help file) will tell you the syntax of a command: the
how but not the why. In any case, most people
don’t read manuals! The Console Tips are a ‘real
world’ guide, led by tasks you might need to perform on a show. Make a channel a bit brighter
through all the cues? You could do that one cue
at a time, but a quicker way would be to use the
powerful UPDATE command. Replace one light
with another? Again, you could do it manually but
why not use AUTOMOD?
These things, and more, are now gathered together here. I hope you find them useful. And if
you have specific problems or questions, let us
know and maybe a future Console Tips will give
you the answer: email
[email protected].
Rob Halliday.
Page 3
Console Programming Tips - AutoMod September 02
AutoMod, or Automatic Modification, is a feature that has
been available in Strand consoles from back in the time of
the Galaxy range. Its basic aim is to deal with situations
such as “My downstage centre warm cover light has
blown. I can’t replace it now, but I need light downstage
centre for the rest of the show. The cool cover light will be
better than nothing!” To achieve this on many consoles
you’d have to go through the show manually re-plotting
cues to use the cool light (let’s say this is channel 2)
instead of the warm light (channel 1, say). And you’d have
to remember to change it back the next day after fixing the
warm light!
With AutoMod on 300-, 400- and 500- series consoles,
you tell the console to replace channel 1 with channel 2,
then let it do the rest!
Go into the AutoMod display by pressing:
{MORE} {AUTOMOD} (these are soft keys)
Then type: [2] {A-MOD FROM} [1] [*]
The screen will show “2.1 = 1.1”, which means that channel 2 will be replacing channel 1 when you turn AutoMod
on.
Turn AutoMod on by pressing: {A-MOD ON}
Note: A “USING AUTOMOD” reminder will appear in
the corner of the screen.
Now run some cues, and you will see that whenever channel 1 used to come on, channel 2 will now come on to the
same level instead. Channel 2 will, of course, continue to
do it’s own cues as well, and if it ends up trying to do two
jobs in one cue, the higher level will take precedence. If
channel 2’s lamp is brighter or dimmer than 1’s, use:
tively:
[2]<UPDATE>{UPDATE A-MOD}<CUE>[1]<THRU>
[10][*]
would have applied the rule to just channel 2, so
channel 2 would now have copied channel 1’s behaviour in cues 1 through 10, but channel 1 would
have carried on doing whatever it was doing.
This is particularly useful when transferring moving
light information such as colour and gobo reference
groups from show to show. For example, if you had a
Pirouette as channel 1, and you added nine more
Pirouettes as channels 2 through 10, you would want
them all to have the same group information, particularly for colour, so enter:
[2] <THRU> [10] {A-MOD FROM} [1] [*]
<UPDATE>{UPDATE
<THRU>[999][*]
A-MOD}<GROUP>[1]
to copy all information; or
[2]<THRU>[10]{A-MOD
{COLOUR}[*]
<UPDATE>{UPDATE
<THRU>[999][*]
FROM}[1][@]<ATT>
A-MOD}<GROUP>[1]
to copy just the colour information, and the job is
done!
[2] {A-MOD FROM} [1] [@] [5] [*], or
[2] {A-MOD FROM} [1] [@] [+] [5] [*]
to scale channel 2’s intensity - in this case, to make it always 50% dimmer or 50% brighter than channel 1.
Though AutoMod has historically provided ‘on-the-fly’
modification, it is now possible to apply AutoMod changes
permanently (perhaps if it turned out that the show looked
better with the cool light downstage!):
<UPDATE>{UPDATE A-MOD} <CUE>[1]<THRU>[10][*]
will apply AutoMod rule changes permanently to cues 1
through 10. In the example above, channel 2 would now
have replaced channel 1 in cues 1 through 10. Alterna-
Programming at the London Eye for Nokia
Page 4
Dynamic Shapes—December 02
[1.91] [+] [.92] [@] [96]
Dynamic Shapes
One of the most exciting features introduced with the new
version of the Strand operating system, GeniusPro/Lightpalette version 2.6, is Dynamic Shapes: the
ability for the console to make automated lights move in
complex patterns without you first having to write complex
chases!
Using Dynamic Shapes for the first time requires a little
learning curve: setting up and using the system is slightly
different from using other parts of the console, since it is a
type of behaviour that has not been available before.
Starting with an empty show, patch a moving light as you
would normally:
[PATCH] [1] [@] [1] {@FIXTURE} [36][*]
to patch a Vari*Lite VL6 addressed as DMX1 to channel 1.
Dynamic Shapes are controlled using extra, ‘virtual’ attributes for each moving light. By default, these are not created
when you patch a fixture so that older shows load into the
console exactly as they did prior to version 2.6. To create
the Shape attributes, go into the channel sub-menu in
Patch, where you will find a new option:
[PATCH] {CHAN>} [1] {ADD SHAPE}
This will add the Shape attributes to channel 1; you can
specify individual channels or ranges of channels in the
usual way, but note that you are specifying a channel number here rather than a DMX address.
If you switch back to Live and select channel 1 then
(provided you have set the Smart Channel Display setup
option to Tracker or Tracker Preset) you will see that channel 1 has the attributes you’d expect for the moving light
you patched, plus nine new attributes numbered .91 to .99:
PProfile, TProfile, PSize, TSize, PSpeed, TSpeed, PPhase,
TPhase, PTRotate. P in each case refers to Pan, T to Tilt.
If you now look under the Console’s Profile display:
[MORE] {PROF DISP>}
you will find that the console now arrives with additional
profiles as standard, many of these designed to be used as
Dynamic Shapes. This is the part that feels different, at
first: when you set attributes .91 PProfile and .92 TProfile,
you are not setting them to a level: you are setting them to
follow a profile. So:
will make channel 1’s pan and tilt follow a sine wave,
giving instant movement based around the position
the light started in. (If in Single-Digit entry mode, you
will have to type [@][9.6]; if in Command Line entry
mode, you will have to press [*] to complete the command; if you load an older show that writes over
these profiles you can get them back by deleting your
custom profile, using the Archive screen to re-load
your custom profile to a different profile number if you
want to keep it. )
However, you may not immediately see the light
move: the shape’s size will probably be set to 0 and
its speed may be set to 50%, which means ‘stopped’
(51% to FL increases the speed in one direction,
49% to 0 in the other). By using the left- and righthand keys above the trackball (or the attribute selection button on an external trackball on a 300-series
console) you will be able to bring these attributes under the control of the rotary encoders and adjust
them to set the size and speed of the movement. Of
the other attributes, Phase allows you to adjust the
point on the movement shape where the movement
starts, and PTRotate allows you to rotate the shape.
As the light is moving, you will not normally see the
Pan and Tilt values on the screen change: these continue to show the light’s base position. To see what
the light is actually doing, you can change the channel display mode by pressing
[SHIFT] [GROUP-DISPLAY] [GROUP-DISPLAY]
which will switch to the CONTROL display. Now the
Pan and Tilt attributes will show what the light is actually doing (though if you hit RECORD, the base value
for the position will still be recorded). Pressing
[SHIFT]+[GROUP-DISPLAY] again will return the
display to normal.
Experimenting with different profiles on pan and tilt
can produce lots of variations in movement, and
you’re not limited to the supplied shape profiles - any
profile you create can be used. To help you get going, 2.6 provides combinations of profiles, phase,
sizes and speeds to create some common shapes:
these are held as new special groups numbered
992.1 to 992.8, each with a fairly self-explanatory
name. So, typing
[1] [@] [GROUP] [992.1][*]
will make channel 1 move in a circle (-best seen with
moving mirror lights; the behaviour of a moving head
light will depend on the circle’s size and origin). You
might prefer to copy these groups to groups in the 1
Page 5
to 750 range, so they behave as reference groups and
you’d therefore see the light’s Shape attributes saying
‘Circle’. Alternatively, you can store your own combinations
of profiles and sizes into groups: there is now a function
filter called Shape to make storing these combinations easier:
[1] [UPDATE] [GROUP] [1] [@ATT] {Shape}
Dynamic Shapes not only make movement chases quicker
to program than using conventional effects, they also make
possible movement patterns that would be hard or impossible to achieve using conventional effects: for example, a
light moving in a circle where the circle’s size increases
over time. To achieve this, you’d create a cue that set the
light’s Profile, Speed, Phase and Rotation (probably in a
part cue with a zero second attribute time), but left its size
at 0. Then in the next cue you’d slowly increase its size to a
suitable maximum value over a slow time: the light would
start moving in ever-increasing circles! Or vary the Rotate
attributes over time across a range of lights to have them
start moving in sync and slowly change to running out-ofsync with each other. Or put these attributes on submasters
to be able to manually vary Dynamic Shapes.
The only other thing you might want to create is a way of
quickly stopping Dynamic Shapes - for example, a group
that set all of the Shape attributes to zero except PSpeed
and TSpeed which would be set to 50%, and a Macro to set
that group. That way, even when you get completely carried away with Dynamic Shapes, you can always bring the
lights back to a sensible state! (- keep in mind that if you
have Dynamic Shapes running and run Cue 0 to fade the
lights out before you go to dinner, the
Shapes will still be running! Make
sure you stop them so your lights get
a dinner break, too!)
Page 6
Update - March 03
Update Cue
Update is one of the most powerful, versatile - yet often
misunderstood - features in the current family of Strand
lighting consoles. It lets you update cues that already exist,
allowing either channels that have been changed or channels that you specify to be stored into cues, rather than
storing an entire state as the Record command does.
If you’re just working through a show one cue at a time,
and the cues don’t overlap, and you have no submasters
up, and you’re not running any effects, then using record
and using update are interchangeable. But consider the
following scenarios:
- you’re in a cue, but the houselights are up on a sub
(because the cleaners are vacuuming the auditorium). You
need to make changes to the cue but don’t want to record
the houselights into the cue - which means you can’t use
Record (though yes, in this instance you could use the
REC-SUB key!)
- you’re in a cue, you’ve brought up a bunch of channels
for focusing. You want to add one of those channels to the
cue without adding the others - which means you can’t use
Record.
- you’re in cue 10. The lighting designer turns on a channel, but wants it to come on in cue 5 and then stay on. You
could do this by going back to cue 5 and making the
change, or by switching to preview, going back a to cue 5
then setting the channel again, but both are a bit longwinded.
- a long, slow cue is running. You add a channel and want
to store it into the cue, but you can’t use record because
the cue hasn’t finished running - record would store the
partially completed state as the cue.
- you have a number of overlapping cues running. You
want to add a channel to one of the cues, but you can’t use
record because you’re not in the completed state of any of
the cues.
Though there are many ways of achieving these things,
Update Cue (obtained by typing [UPDATE] then [CUE], or
holding down SHIFT and pressing the [CUE] key) is probably the quickest.
Update Cue can be used in two ways: with and without
specifying channel numbers.
If you just type [UPDATE] [CUE] [x] [*], any channels
that have been altered by the channel controller (and
so are shown in red on the channel display, or in
green on the channel display of a remote console)
are stored into cue x - effectively those channel levels are merged with the existing cue. If you’re in cue
10, and go
[UPDATE] [CUE] [10] [*]
this is almost the same as going [CUE] [10]
[RECORD] - except that channels held up on a submaster (those houselights!) wouldn’t be added to the
cue by the UPDATE command (since they’re not
red). But if cue 10 was still running and you went
[UPDATE] [CUE] [10] [*]
the adjusted channels would be stored into cue 10
correctly, leaving the rest of the cue as it was,
whereas
[CUE] [10] [RECORD] [RECORD]
would have re-recorded the cue as its partially completed state. And while in cue 10 you could have
typed
[UPDATE] [CUE] [5] [*]
to store the adjusted channels into cue 5. You could
also type
[UPDATE] [CUE] [5] [THRU] [10] [*]
to store the adjusted channels into all of the cues
from 5 to 10.
Incidentally, if you're in a cue and just want to
change that cue, you only need to type [UPDATE] [*],
which will update into the currently selected cue in
the same way that just going [RECORD] [RECORD]
(or [RECORD] [*] [*] in command line mode) without
specifying a cue number will record over the currently
selected cue. In tracking or q-only mode, you can
also use [UPDATE] [TRACK] or [UPDATE] [QONLY]
as you would with a record command.
Note also that if you type [SHIFT]+[CLR] on an
empty command line, any ‘red’ channels are cleared
from being red. This means that they will not be
stored by an UPDATE command, so you could bring
some channels up for focusing, [SHIFT]+[CLR] them,
then bring up some lights that you actually need to
plot into a cue. UPDATE would then store the lights
you wanted but not the lights that were just up for
focusing.
Sometimes you’ll bring up lots of lights, but only want
to store the lights that were already in a cue into that
cue at a new level. [UPDATE] {CHANSIN} - CHANSIN appears on the right-hand softkeys after you
press UPDATE - will do this for you, only storing
Page 7
modified channels into that cue if they were already in that
cue. This can be particularly useful in tracking mode, since
it will avoid you having lights running on through cues and
into a blackout cue where you hadn't earlier set them to go
off. UPDATE] {CHANSIN} [CUE] [1] [*]
[UPDATE] [CUE] [1] [QONLY] [*]
would let the channels that were already in the cue track on
at their new level, but put any new channels into just cue 1.
The other option on these softkeys, ADDALL, stores channels into cues even if they weren't previously in that cue.
This is the default behaviour for UPDATE CUE but, as we
shall see in future editions of Strand News, not for UPDATE
GROUP (and also not for cues in software versions prior to
2.4).
You can also make Update more specific: you can specify
which channels you want it to store - a feature sometimes
known as ‘selective store’ on other moving light consoles.
So, for example,
[1] [+] [2] [UPDATE] [CUE] [1] [*]
will take channels 1 and 2 and store them at their current
level into cue 1, regardless of any other channels that have
been set, and regardless of whether or not channels 1 and
2 have actually been changed. Or
[1] [+] [2] [UPDATE] [CUE] [1] {ATTSONLY} [*]
will just store the attributes of channels 1 and 2 (if they
have any) into cue 1, leaving the intensities set as they
were in the cue. ATTSONLY appears on the centre softkeys on the 530 and 550; on 520s and 300s which don't
have the centre LCD display press the [REC MODE] key to
bring it up on the right-hand softkeys. You’ll also find an
INTS ONLY command there, which just stores intensities
leaving attributes set as they are.
Or you can type
[1] [+] [2] [UPDATE] [CUE] [1] [@ATT] {position}
to access the function filters - after you press the [@ATT]
key (called the [ATTRIB] key on 300 consoles), the function
filters will appear on the right-hand softkeys to let you store
selected combinations of attributes - in this case, those for
position. We'll be looking at function filters more in a future
issue of Strand News.
You can also use all of these commands on more than one
cue at a time:
[1] [+] [2] [UPDATE] [CUE] [1] [THRU] [10] [*]
or any combination thereof. This is useful if you need to
store a new colour through a sequence of cues:
[1] [+] [2] [UPDATE] [CUE] [1] [THRU] [10] [@ATT] {colour}
[*]
will store the new colour through the ten cues, leaving intensities and other attributes changing as they were changing. If the console is set in tracking mode, the colour
change will continue to track on after the last cue
specified unless you use QONLY to limit the range
you mean to change:
[1] [+] [2] [UPDATE] [CUE] [1] [THRU] [10] [QONLY]
[@ATT] {colour}[*]
These commands also work in the PREVIEW displays, allowing you to take the information from the
cue you’re previewing and store it into another cue or
sequence of cues elsewhere in the show.
Finally, you can make modifications to channels
through ranges of cues. For example:
[1] [UPDATE] [CUE] [1] [THRU] [10] [@] [50] [*]
will set channel 1 at 50% through these cues (“put
the wing workers on at 50% through the entire
show”). Note that you'll have to vary how you type the
level depending on whether you're in single digit,
double digit or command line entry mode ([SETUP] >
Channel Control Mode).
[1] [UPDATE] {CHANSIN} [CUE] [1] [THRU] [10] [@]
[+] [10] [*]
will put channel 1 up 10% through these cues (“make
1 brighter through the first scene”). Or you can go @level to turn the light or lights down. {CHANSIN} ensures that the light doesn’t go up to 10% from zero in
any cues where it wasn't originally on. Note that this
command raises or lowers the level by a specified
amount; it is also possible to scale the level (i.e.
make it half as bright) using AUTOMOD.
[1] [UPDATE] [CUE] [1] [THRU] [10] [@]
{COPYFROM} [2] [*]
will make channel 1 do the same as channel 2
through these cues (“we’ve split a pair of lights into
two channels, make them do the same as each other
for now”)
Page 8
[1] [UPDATE] [CUE] [1] [THRU] [10] {FROM} [50] [@] [30]
[*]
will put channel 1 to 30 whenever it was at 50, but not
change it when it was at any other level (“this venue has
weird dimmers - 50% always seems too bright, so just pull
it down to 30 whenever it’s at 50”).
[1] [UPDATE] [CUE] [1] [THRU] [10] {FROM} [TEXT] [stars]
[TEXT] [@] [GROUP] [10] [*]
will set any of channel 1’s attributes that were set to a reference group called ‘stars’ (i.e. to the stars gobo) to the reference group 10 (which might be a dots gobo). FROM appears as a softkey after you type UPDATE CUE. (“put the
lights in orange wherever they were in red”).
And, as described in the Fall 2002 Strand News, if you’ve
defined a complex set of Auto-Mod rules, you can use UPDATE to apply them to the show permanently:
[UPDATE] {UPDATE A-MOD} [CUE] [1] [THRU] [10] [*]
UPDATE A-MOD appears as a softkey after you type UPDATE (“I liked those temporary changes we did last night,
make them permanent”)
Again, all of these commands work in either live or preview. The easiest way to see them in action is probably to
switch to the cross-reference view ([PREVIEW] {XREF})
display so that you can see how channels change through
a sequence of cues as you use UPDATE. Try it in a quiet
moment on a little show with just a few channels (or at
home on the off-line editor) to see what it can do for you.
And, if you’re nervous about using any of the UPDATE
CUE THRU CUE commands on a real show, why not just
save the show first? It only takes a few seconds, and will let
you pull back the cues if do you get a cue-range update
command wrong.
Macintosh Computers with
Strand Consoles
Attention Apple Macintosh
users: you can now use your
computers with and alongside Strand 500-series lighting consoles in a variety of
ways via the magic of VirtualPC, a software package
which emulates a PC on a
Macintosh. Using VirtualPC you can:
• Run Strand’s off-line editor software on your
Macintosh, allowing you to create and edit
showfiles away from a console. The off-line
editor supports all of the functionality of the
consoles apart from DMX output.
• Connect your Macintosh to a ShowNet network as a remote console. This allows you full
access to the data in a system’s main console,
but independently of the user of that console you can configure your own channel and cue
display format, and look at or even edit cues,
groups, subs and effects in preview.
• Connect your Macintosh to a ShowNet network as a node, allowing you to see the same
screen display as the operator of the main console.
• Connect to a ShowNet network wirelessly, if
there is a wireless base station in the network
and you have an Apple AirPort card (or equivalent) fitted to your Macintosh.
• Run WYSIWYG on your Macintosh; when
the Mac is connected to a ShowNet network
this will allow you to see what your rig is doing
graphically, including the ability to look at cues
in preview in WYSIWYG. WYSIWYG can run
alongside the remote and node software - in
other words, you could have three windows on
your Macintosh screen, one showing you the
operator’s view, one showing your own view,
and one showing a WYSIWYG view.
To run Strand’s software you just need the PCDOS version of VirtualPC; for WYSIWYG you will
need a Windows 98 or later version of VirtualPC.
Further information about VirtualPC can be found
at www.connectix.com; an information sheet giving full details of how to configure Macintosh
computers for use with Strand systems can be
found on the Strand website,
www.strandlighting.com.
At the design table at Oklahoma! On Broadway
Page 9
Macros September 03
Macros
How many times have you typed ‘@0’? Wouldn’t life
be easier if this was a single keypress....With macros, it can be.
A macro is a collection of keystrokes that can be
repeated at any time without the need to re-key.
There are thousands of potential uses for macros,
whether it be that ‘off’ key, applying reference
groups (to allow one-button selection of gobos and
colours in moving lights), or grabbing commonlyused combinations of lights.
There are two ways of storing a macro: you can
either have the console learn your actions as you
type the command - which means that you can
check that the command works as you’re typing it or you can ‘blind edit’ the macro, specifying the command sequence without actually carrying out the
actions.
To record a macro ‘live’, you type:
[MACRO][number]{LEARN}
where the number can be any macro number in the
range 0-2999 or one of the console’s macro keys
(USER or P1-P7 on all consoles, P8-P14 on 520
consoles, or the softkey-style macro buttons in the
centre of 500-series consoles). The console will display ‘MACRO LEARN’ on the right-hand side of the
screen, and whatever you then type will be recorded
into the macro. To finish recording, press
[MACRO][MACRO].
To create a macro blind, switch to the macro screen
by pressing the [MACRO DISPLAY] key (ctrl-F10 in
off-line editors). You can select a macro by scrolling
up and down using the trackball or by typing
[MACRO][number]
then pressing
[*][*]
to create the macro and start editing it. As you type
commands they now appear in the macro but do not
have any immediate effect. Press
[MACRO][MACRO] to finish editing; you can also
give the macro a text label as a reminder of it’s function.
However you store your macro, there are some
things to consider. General purpose’ macros (@0)
are often more useful than ‘specific’ macros (1@0).
But some console commands change depending on
the Channel Control Mode the console is set to - @0
would turn off a light in Direct 1 Digit but not in Com-
mand Line - so changing this setting will affect
some macros.
Also, remember that macros are just sets of
commands with no intelligence. Switch to the
SETUP screen then record a macro that
changes a setting. Switch to the LIVE screen
and run that macro - you won’t see the result
you expect because the macro doesn’t contain the keypress to switch the console to
SETUP mode. Be sure to make your macro
do everything it needs to do - including switching to the right mode first.
Macros that change console settings need
particular care because the macro will just
record cursor movements rather than absolute
cursor positions and, if you’re not careful, will
change whatever setting the cursor happens
to be on next time it’s used. The console includes functions to help with this: in any
SETUP screen press [*] and the cursor will
jump to the top left-hand setting; press the
{DEFLT} softkey and that setting will jump to
its default value. Your macro could then step
through the various settings to get to the one
you want. So, for example if you wanted a
macro that always switched CC Auto Hold
Mode to ON, the safe version would be:
[SETUP][*][TRACKBALL
DOWN]{DEFLT}[+][LASTSCREEN]
Other useful tricks? Well, the little-known
SHIFT-NEXT command is great in macros.
Switch to the GROUP PREVIEW display and
create group 1 and group 2. NEXT and LAST
will move the cursor between them. Now select group 2 then press [SHIFT][NEXT]; the
command line will show GROUP 3 even
though group 3 doesn’t exist - the console has
picked the next available whole group number
(and will do the same for cues, effects and
more).
This allows for a ‘store position in next available group’ macro. Say 500 is the highest
group you want to use for positions, try the
macro:
[UPDATE]{ADD
ALL}[GROUP][500][LAST][SHIFT][NEXT][
@ATT]{position}[*]
Playing back macros is also easy. Consoles
have either 7 or 14 ‘P’ keys providing direct macro
playback of macros P1-P7/P14. You can also use
the SHIFT key with these P keys to give a further
seven or fourteen macros - ‘SP’ in the macro
screen. 500-series consoles have four (520) or six
(530, 550) macro keys in the centre of the console
called macros LCD1-4 or 6 because on 530/550
console the macro’s text label will appear in the LCD
screen above the key. All consoles also have a
USER macro key; SHIFT-USER is also a macro.
You’ll also find HH1-4 listed; these are the macro
keys offered by some handheld remotes. V macros
are those on the screens of LCD-monitor 300-series
consoles.
Not enough macro keys? Well, holding [SHIFT] and
pressing the 0-9 keys will run the corresponding
macro number. If you need more, the submaster
bump keys can also trigger macros. In the Submaster Display screen, set 'Bump’ mode to say ‘Mac’;
that submaster’s flash button is now a macro button
completely independent of the submaster, and will
run macro 100+sub number (ie. sub 1, macro 101).
The [SHIFT] key can be used here, too: holding shift
plus the sub button runs macro 300+sub number
(shift-sub-1, macro 301). The gap of 200 is because
300-series consoles can have up to 196 submasters
fitted.
You can also use submaster faders to run macros set the macro number under the ‘Mac’ column in the
submaster screen. That macro will be run when the
sub is lifted from 0 or its flash button is pressed, provided the bump button is not turned off or set to
‘Mac’ mode (in which case it would be running an
entirely different macro from the sub fader). When
you do run out of keys you can run macros by typing
[MACRO][number][*]
Or you can run macros from the various external
Macro tablets that are compatible with the console perhaps allowing you to create an active visual representation of your rig.
Cues can also run macros. In the cue preview screen,
move the cursor across to the ‘Cmd’ column and set it to
‘M’ then the number of the macro you want to run. The
macro will be triggered when the cue is run or after the
specified delay time. This makes for some very interesting
possibilities. Need a 99-step chase, 1 channel per step?
Write a macro that adds an effect step then adds the next
channel to that step. Trigger the macro from a cue. And
write a second cue that loops back to the first 99 times.
Run the cues and watch your effect create itself! Incidentally, if macros run from cues ever seem not to work, try
changing the ‘Cue Sheet Macros’ setting ([REPORT]{ADV
SETUP}{SHOW SETUP}) from ‘Last Handheld’ to ‘Main
Page 10
Console’....
As with all elements of a show, you can move macros from show to show (renumbering them if necessary) via the ARCHIVE screen - the numbers corresponding to macro keys are listed in the HELP
screen. In the very latest software versions you’ll
also find a few more macros are pre-defined. You
can change these macros, of course, but by default
SP1 has always been a function to print a copy of
the screens. SP2, SP3 and SP4 are now predefined as CHANSTEP, ODD and EVEN; these are
commands that have been in the console for a
while for selecting ranges of lights (all odd, all even,
every third light and so on) but which don’t have
‘real’ buttons so haven’t been discovered by many
people! Now you can move them to the macro key
of your choice, then:
[1][THRU][20][CHANSTEP][3][@][6][*]
to set every third light between 1 and 20 to 60%.
An Update on Update
In the June 2003 newsletter we looked at the use of
UPDATE for selectively storing information from
lights into reference groups. This could become tedious because of the need to specify lights in
the update command having already selected them
while setting them - in other words, to have to type:
[1][+][3][+][5][+][6][+][9]
[UPDATE][GROUP][1][@ATT]{position}[*]
The latest software versions (from 2.6.6 - note the
new naming scheme) offer a quicker alternative. Set
your lights as before then just type: [UPDATE]{ADD
ALL}[GROUP][1][@ATT]{position}[*]
Any lights that had been selected - ie. showing in red
on the channel display of a main console - will have
their position stored in group 1, as they would always
have done, but will now also automatically
set to group 1.
The only potential risk with this is of storing information for other lights you'd been adjusting or had accidentally selected. In that case, you can still specify
channel numbers before the UPDATE command. Or
store those changes first then press [SHIFT][CLR] on
an empty command line before positioning the lights;
this sets any 'red' channels back to being unselected:
their new levels will be preserved but they will now be
ignored by the UPDATE command.
Page 10
ATC Pages December 03
ATC Pages
At some point, whether they realize it or not, someone
using a Strand 500-series console will come to accept
that of the controls on the right-hand side of the console,
the wheel always controls intensity, the trackball always
controls the pan and tilt of moving lights, and the four rotary encoders control the other functions of a light - colour, gobo, iris, focus or whatever.
When you select a light that has more than four functions
the console presents some of the functions on the rotary
encoders - the functions selected are shown in the
‘Rotary’ window on the cue playback screen, and at the
same time are indicated on the channel display (if you are
in Tracker of Tracker Preset display mode). If the functions you need are not selected you move to other combinations of functions by pressing the left- or right-hand key
above the trackball. Alternatively, holding down the centre
key above the trackball presents six sets of functions on
the channel control LCD softkeys.
What relatively few people explore is the way this behavior is controlled: what decides which combinations of a
light’s functions land on which encoders at any time? The
answer is what the console calls ATC Pages - ATC standing for ‘attribute control’.
Most people will have noticed ATC Pages on the console’s Archive screen. This implies that, as with most areas of the functionality of these consoles, the way that
these encoders behave can be customized very easily and such customization can dramatically improve a operator’s efficiency when dealing with moving lights.
Exploring further is a matter of pressing [MORE]{NOTES
DISP}{LOAD FILE}{ATC PAGE}. This loads the console’s
ATC PAGE file into its text editor. Scroll down and you’ll
find that this file contains three sets of information.
Function Filters: [F1]-[F6]
These are the console’s ‘function filters’ - quick ways of
selecting combinations of attributes when storing information in or recalling information from cues, groups, submasters or effects - for example, with the command
[1] [UPDATE][GROUP] [1] [@ATT]{position}
to store the position of light 1 into reference group 1.
(Note: the @ATT key is called ATTRIB on 300-series consoles)
The use of function filters has been described in earlier
newsletters, particularly the Summer 2003 issue. By de-
fault, the console arrives with a standard setup of
which attributes fall under which ‘category’ of filter position, colour, beam, focus or whatever: the numbers listed under each filter are the console’s attribute numbers, with ‘>’ used to indicate a range of
attributes. A full listing of the attribute numbers can
be found in the user manual, in the Fixture Library
file ([MORE]{NOTES DISP}{LOAD FILE}{FIXT
LIB}), or can be seen on the left of the channel control screen when you select a moving light.
You can customize both what each filter is called
and the attributes it contains by editing the details
here. For example, if you often store position and
index together (so that the orientation of a gobo is
stored with its position) you might want to create a
specific filter for that combination. To do this, edit
the [F6] entry to read:
[F6][P+Idx]
3 > 4, 23
Then save the changes by pressing {SAVE FILE}.
Now every time you use [@ATT]{P+Idx} the console will select and use attributes 3, 4 and 23 - pan,
tilt and index.
Attribute Display Order: [D1]
This is the ‘Display order’ setting for the console multiple console systems will have [D1]-[D5] to govern the display order for each console in the system. This setting governs the order in which attributes are displayed on the console’s screen in
Tracker and Tracker Preset displays. By default,
attributes are arranged in numerical order. But if
you’re using a moving light that has both a colour
wheel and colour mixing you might prefer to see
colour (attribute 2) then colour mixing (attributes 11,
12 and 13) then pan and tilt, in which case you
could amend the [D1] listing to say:
[D1]
1, 2, 11, 12, 13, 3 > 10, 14 > 99
Attribute Control Pages: [1]-[99]
These are the real ‘attribute control pages’. Each
entry is a combination of functions listed in the order:
what the intensity wheel controls, what left-right
movement of the trackball controls, what up-down
movement of the trackball controls, what the top
rotary encoder controls, what the second rotary
controls, what the third rotary controls, what the
bottom rotary controls.
So, for example, the entry:
[53][C-M-Y]
Page 12
1,
3,
4,
2,
11,
12,
13
would give control of intensity on the wheel, pan and tilt on
the trackball then colour, cyan, magenta and yellow on the
four rotaries (on a 300-series console the four attributes
would highlighted on the channel control screen, then
you’d select each in turn using the buttons on the trackball/mouse),
Some of the standard pages have names such as ‘VL5’ but the names are purely descriptive; these are pages that
have been created to be useful for these lights rather than
pages that will only work with these lights.
The standard combination of pages can slow you down in
two ways. When you select a light, the console attempts to
find the best match of functions to the light you have. But
sometimes it will find a partial match (so that it finds iris
and focus, which you need, on a page that also has zoom
and diffusion, which your light doesn’t have - leaving two
encoders wasted). And sometimes, depending on the
page it previously had selected, it will find a page that
matches the functions but in a different order - which can
lead to confusion when focus, for example, sometime appears on the third encoder and sometimes on the fourth.
The solution is to customize the ATC Pages to your
needs. Start by deleting all of the standard ATC pages.
Then just make the ones you need. So, for example, if you
have a show that has colour scrollers, colour mixing washlights and spotlights that have iris, focus, gobo and zoom
then just make the pages:
[51][Col]
1, 3,
4,
2,
11,
12,
13
[52][Beam]
1, 3,
4,
5,
6,
8,
53
(Each number is separated by a comma and a push of the
TAB key)
Why pages 51 and 52 rather than 1 and 2? Because
pages 51-56 are the ones that appear on the channel control LCD display when you hold down the centre trackball
key, allowing you to jump straight to them if you want to.
Though in this case you wouldn’t have to since the console
would always select the right page for the light you selected, unless you selected a combination of fixture types
using [THRU] or [+].
If you have lights with more functions then you’ll no-doubt
need more pages, and in some cases you might want the
same attribute to appear in more than one page (so that
you can use the colour wheel with the colour mixing of a
washlight, and with the gobo function of the spotlight).
The two most useful tricks are to figure out the combina-
tions of functions you’ll want to access together (for
example, focus and index with gobo so that you can
quickly choose a gobo then set its orientation and
softness), and to ensure that when one attribute
appears in more than ATC Page, it always appears
on the same rotary - focus always on the bottom
encoder, for example. That removes the momentary hesitation of deciding which encoder to reach
for. Conversely, you don’t have to include a particular attribute anywhere - if your lights have a strobe
function but you know you’re never going to use it,
and don’t want to select it accidentally, don’t include
that parameter in any of the ATC Pages. If you do
later need to take control of it, either edit the ATC
Pages file again or select it directly [1.41][@][level], or 1.41 then use the intensity wheel
for the strobe of channel 1.
For certain situations, you might want to customize
things further. For example, everyone who’s been
taught the console has probably been told that ‘the
intensity wheel always controls intensity, the trackball always controls pan and tilt’. But you can see
that’s only true because the standard ATC Pages all
start ‘1, 3, 4’, and you can also now see that these
can be changed. Users who have come to the 500series from other consoles might prefer to have pan
and tilt controlled by the rotary encoders rather than
the trackball, for example, in which case:
[51][Pos]
1,
0,
0,
0,
0,
3,
4
(attribute 0 is used to force an encoder to do nothing)
And occasionally, having a fifth attribute controller
available simultaneously can be useful - for example, with moving lights that offer framing shutters to
have the ability to rotate the whole shutter set. In
that case, why not use the four rotaries to control the
shutters plus the intensity wheel to control the rotation of the whole shutter assembly? Or, for a light
that uses two attributes per shutter, make two ATC
Pages (assuming 68 is the shutter rotation attribute,
72-79 are the shutter attributes):
[56][Shut]
68,
3,
4,
72,
73,
74,
75
[57][Shut2]
68,
3,
4,
76,
77,
78,
79
Page 13
Softpatch March 04
Softpatch
The softpatch is now a familiar tool in lighting consoles.
Manual consoles were hard-wired so that fader 1 operated
dimmer 1. Today’s control systems let you decide which
channel number controls which dimmer or dimmers. If you
want to, you can therefore create a numbering system to
suit the way you work whether by function (channels 1 to
10 are the front lights, channels 101-110 the backlights),
geography (channels 101 to 110 the lights on bridge 1, 201
to 210 the lights on bridge 2) or any other method you
choose.
The softpatch is also invaluable if a dimmer fails (plug the
light into a different dimmer, change the softpatch so that
the channel controls the new dimmer, run the show as normal), and has to be used when dealing with moving lights
to match a channel to a moving light’s type and DMX address.
Unlike some other consoles, in which a ‘600 channel’ console always contains channels 1 to 600 and each channel
can control one ‘thing’ (one light, one scroller, one function
of a moving light - so 600 lights, or 300 lights each with
one scroller), Strand consoles have a number of
‘intensities’ plus an additional number of ‘attributes’; the
REPORT or PATCH screens will show you how many your
console has. So in a 200 channel 300- or 500-series console you could have 200 lights plus 200 scrollers.
You’re also not restricted to using channel numbers within
the console’s number of channels. By default, when you
clear a show from a console, you are given a ‘one to one’
patch, each channel controlling a dimmer of the same
number. So a 600 channel console would have channels 1
to 600 patched, and if you tried to patch a channel number
outside that range, you wouldn’t be allowed to because all
600 channels are used.
However, it is possible to delete channels you don’t want.
Note that this is not the same as unpatching a channel. If
you unpatch a channel from a dimmer:
[dimmer number] [@] [*]
that channel still exists in your show. It still has levels
stored in cues. You can still see the channel number and
its levels on the channel screen. It's just not driving any
dimmers - so the light won’t actually come on.
On the other hand, if you delete a channel:
{CHAN>} [chan number] {DELETE CHAN} {DELETE
CHAN}
then that channel is gone from the show, forever (-so be
careful if you try this!!). But there is now one channel slot
‘spare’ - the channel count, on the top-right of the
patch screen, would now say Intensity: Total 600,
InUse 599, Free 1. So you could now patch a channel 1001:
[dimmer number] [@] [1001] [*]
In many cases it can be advantageous to delete all
of the channels in the console before entering the
soft-patch for a new show:
[PATCH] {CHAN>} [1] [THRU] [6000] {DELETE
CHAN} {DELETE CHAN}
As you then patch your show, now using any channel numbers between 1 and 9999, only the channel
numbers you actually patch are created. This means
that when you’ve completed your patch, the show
only contains the channels you actually have. A bonus is that patching or typing errors are easy to spot:
on the LIVE channel screen a light-grey channel
number means an unpatched channel, which in this
case must be because you’ve either patched the
channel then used the same dimmer for a different
channel or just mis-typed a number somewhere.
Also, in any of the channel display modes that arrange channels horizontally (LP+, GENIUS+ and
others), the console inserts a vertical line wherever
there is a gap in channel numbers - so, if you’d created only channels 1 and 3 then there would be a
line between them. Some find that this makes a useful visual break between blocks of related channels,
such as between those bridge 1 and bridge 2 channels.
Other patch tricks? Well, while most people will step
through patching one light at a time, it is also possible to patch ranges of lights in one go:
[1] [THRU] [10] [@] [101] [THRU] [110] [*]
to patch dimmers 1 to 10 to lights 101 to 110 respectively, or
[1] THRU [10] [@] [110] [THRU] [101] [*]
to patch in reverse, dimmers 1 to 10 to lights 110 to
101. And the same works with scrollers:
[first dmx address] [@ATT] [first chan] THRU [last
chan] [*]
(note [@ATT] is called [ATTRIB] on 300-series consoles), and with moving lights, which can be a useful
way of getting the console to figure out the DMX addresses of each light for you:
[first start address] [@] [1] [THRU] [10]
{@FIXTURE}[fixture number] [*]
will get the console to patch fixtures 1 to 10 in turn.
Page14
Incidentally, if you can never remember the fixture numbers, try using the NEXT and LAST keys:
[address] [@] [1] {@FIXTURE} [1] [NEXT] or [LAST]
As you type the fixture number the corresponding fixture
name will appear on the bottom of the screen; NEXT or
LAST will then step through the library until you find the
fixture you need.
You can also patch non-dim channels - channels which
switch on and off rather than fading up and down - using
the {@NON} softkey:
[dimmer] {@NON} [channel number] [*]
In general, the [@], {@NON} and [@ATT] keys can be
used again after the channel number to modify the behaviour of the patched channel:
[1] [@] [1] [@] [80] to proportionally patch channel 1
(patched to dimmer 1) to 80% -ie. so that the dimmer’s
output will never go above 80%
[101] {@NON} [2] {@NON} [50] to set 50% as the level at
which channel 2 switches dimmer 101 to full (over-riding
the default level set in the SHOW SETUP screen)
[2.201] [@ATT] [3] [@ATT] [15] to set the scroller of
channel 3 (address 201 on DMX stream 2) to be a 16frame (15 plus frame 0) scroller, again over-riding the default number of frames set in the SHOW SETUP screen. If
you’ve already patched the light, you don’t need to type the
channel number again:
[101] {@NON} {@NON} [40]
The {CHAN>} patch sub-menu gives you more options for
dealing with channels. {DELETE CHAN} we’ve already
seen. {RENUM CHAN} is invaluable if you decide that the
light you had called channel 1001 would be better known
as channel 1. Rather than having to change the patch then
re-plot all of the cues, groups, subs and effects (either
manually or by using AUTOMOD), you can do it in one go:
[1001] {RENUM CHAN} [1] [*] [*]
Provided channel 1 doesn’t already exist, all the changes
will be done for you.
This same sub-menu also offers the functions {ADD
SHAPE}, used for adding the extra attributes used by the
console’s Dynamic Shapes - see the Winter 2002 newsletter - and {CLEAN ATTS}, a function which will remove any
stray, unused attributes that are no longer patched to anything.
Back to the main patch menu, then {SET>} brings more
options. {.DMX/OUTPUT} lets you chose whether you see
the dimmer numbers/ DMX addresses in the format ‘513’
(which will usually be the first address on the second
stream of DMX) or ‘2.1’ (which is the same thing in a more
human-friendly form!). You can always use either format
when entering addresses, ie:
[513] [@] [1] [*]
and
[2.1] [@] [1] [*]
will achieve the same thing.
{LIVE=} and {EDIT=} reflect the fact that the console
contains two patches. They are called Patch 1 and
Patch 2; the ‘status’ box in the top-right of the patch
screen will usually say ‘Live 1, Edit 1’, reflecting the
fact that you are editing patch 1 and patch 1 is also
the patch controlling the output. Pressing {LIVE=}
and {EDIT=} will toggle to the other patch. This is the
first thing to check if you either can’t see channels
you’re sure you patched earlier on-screen (you’re
probably editing the wrong patch) or the patched
channels don’t seem to be controlling the lights properly (you’re probably using the wrong live patch).
{SET DISPLAY>} lets you decide whether you want
to see the patch in DMX address order or channel
order; the other options are for use with faultreporting dimmers. And {COPY/SWAP>} is a great
but under-used menu for making block changes to
the patch. For example, if your dimmers 1 to 24
failed and you had to move all of those lights up to
dimmers 401 to 424, you could just go:
[1] [THRU] [24] {MOVE PATCH} [401] [*] [*]
and have the console do it for you in one go. As their
name suggests, {SWAP PATCH} will swap sets of
dimmers, while {COPY PATCH} will copy one section of the patch to another.
If you need to control dimmers directly, bypassing
the softpatch, you can do so using the [DIMMER]
key in either LIVE or PATCH:
[DIMMER][1][@][80]
will set dimmer 1 to 80%; [NEXT] and [LAST] will
then step through adjacent dimmers one at time.
During this, the warning ‘DIMMERS UNPATCHED’
appears to remind you that you are bypassing the
softpatch. To get things back to normal don’t type:
[DIMMER] [1] {@] [0]
since that would set dimmer 1 to 0% (- a useful way
of holding a problem light out), but rather type:
[DIMMER] [1] {RE-PATCH}
or, if you wanted to return every dimmer you’d controlled this way to normal operation, either
[DIMMER] {RE-PATCH}
or the fractionally quicker
[DIMMER] [DIMMER]
Page 15
Introducing version 2.8 Summer 04
Introducing 2.8
Continuing the evolution and improvement to their console
software that has been ongoing since the 430 console first
appeared in 1995, Strand have now released GeniusPro/Lightpalette software version 2.8. Let’s take a look
and see what this adds to make our lives easier!
Trackback
The most powerful new feature is TRACKBACK.
Many console users are familiar with tracking on the 500series and consoles from other manufacturers. Historically,
tracking is the descendent of the way that manual ‘one preset’ consoles, such as the piano boards used on Broadway, were operated: in cue 1, the electricians might put
channel 1 to 50%, channel 2 to 60% and channel 3 to FL.
In cue 2, they would move channel 1 to 30%. In cue 3, they
would move channels 2 and 3 to 20%. In cue 4, they would
move all of the channels to 0%. In other words, a channel
would be put to a level, and would then stay there (track)
until there was an instruction for it to do something else,
while a cue would be a list of changes to particular channels.
Contrast this with ‘non tracking’ or ‘state’ style operation.
This is the descendent of the two- or three-preset manual
consoles that were common in the UK. Here an operator
would set a complete lighting state on one set of faders. He
or she would then set the next state on a second set of faders, then cross-fade from one set to another before clearing the first set and using it to set cue 3. Generally the cue
sheet therefore described a level for every channel in every
cue. Occasionally a cue would be so simple that it wasn’t
worth wasting a complete set of faders for - perhaps a
practical light was switched on, requiring just one channel
to be moved to full. Here the operator’s cue sheet might
note that this was a ‘move fade’, to be carried out by manually moving the appropriate fader on the current ‘live’ fader
bank.
In time, US computer consoles - the Lightpalette family adopted the tracking style of operation, but with the advantage that the console could always figure out how to get the
complete ‘look’ of a given lighting cue back on stage, even
when jumping around out of sequence - something that
was quite hard for the piano board operators to do from
their list-of-changes cue sheets! Conversely, UK/European
computer consoles, such as the Galaxy family, adopted the
‘state’ approach where each cue contained a level for
every channel and ‘move fades’ could be used in special
cases where only certain channels had to change in a cue.
The current 300- and 500-series consoles can work in either way: choose by pressing [REPORT] then {ADV
SETUP>} then {SHOW SETUP>} then setting CUE
TRACKING to OFF (for state operation: complete
states plus move fades) or either ON or THIS CUE
ONLY for tracking-style operation.
The mode of choice will sometimes depend on the
operator or lighting designer’s experience or preference, but generally if you’re dealing with moving
lights you’ll want to use the console in tracking
mode: you usually want a moving light to track because if you point it somewhere, you want it to stay
there until you move it somewhere else! Complex
shows, particularly those with overlapping cues, also
benefit from tracking operation: making changes that
run through long sequences of cues is easier, and it
allows multiple cues to run at the same time since
each cue will only affect the channels it has instructions for. It’s therefore very easy to make a slow sunrise (cue 10 has the sun channel coming to full over
five minutes) with lots of quick changes of specials
then happening downstage of it (cues 11 to 20 each
change to a different special in one second).
In TRACKING ON mode, recording or updating a
cue, or modifying a channel in the preview screen,
will cause that change to track forwards until the
next cue where the light has an existing instruction
to do something different - unless you press the
TRACK/QONLY key to make the change QONLY,
limiting the change to just that cue (conversely, in
THIS CUE ONLY mode, a change will only affect
one cue unless TRACK/QONLY is pressed to make
the change TRACK).
The new Trackback function allows changes to track
backwards through the show as well as forwards. For
example, you might reach the middle of a sequence
before you notice a light is too bright. Before, the
quickest way to make the change through the entire
sequence of cues after setting the new levels was
either to use UPDATE to store the changes into the
first cue in the sequence, from where they’d then
track forwards (but this meant you had to know
where the channels first came up), or to go to PREVIEW, scroll up until you found the cue where the
channels came up then go [channels][@][LIVE] to
‘pull’ the current levels from live into the previewed
cue, from where they would track forwards (but this
would be cumbersome if different channels came up
in different cues).
Now you can just type
[UPDATE] [SHIFT] [TRACK/QONLY] [*]
Page 16
which would appear on the command line as
[UPDATE] [TRACKBACK] [*]
This would make your channels track backwards through
the show to the point where they actually came to their
levels, and track forwards through the show until they next
changed level or were ‘blocked’ with an instruction to go to
the same level (since we’re in TRACKING ON mode and
didn’t specify that we wanted the change QONLY).
If we’d wanted the change to track backwards to its start
cue (a function some other consoles call ‘updating the
source’ of the channel’s level) but not to track forwards, we
could type:
[UPDATE] [TRACKBACK] [QONLY] [*]
struction for that light; the new level stops in the cue
before that instruction. Trackback goes backwards to
an existing instruction then changes that instruction
as well. This is the behaviour you actually want to
happen! Where you need to be careful, though, is if
you have a moving light set to a position in cue 1
(say), come on in cue 2, fade out in cue 3, then track
on in that position through subsequent cues. In cue
20, you might then set it to a new position and turn it
on. Trackback looks like the perfect way to get the
light positioned in advance for this cue and store its
intensity in that cue all in one command:
[1] [UPDATE] [CUE] [20] [TRACKBACK] [*]
but this would have tracked back and changed the
original position set in cue 1, making the position for
cue 2 incorrect! To make the best use of Trackback
for this kind of use you might want to consider
‘blocking’ the attributes for moving lights after they’re
used in cues, to ‘protect’ them from backwardstracking changes. As always, at the very least you
should beware of this possibility when selecting how
to store changes into a cue.
Trackback is a powerful new tool in the programming armoury, though. The easiest way to get comfortable with it is to try it for yourself - perhaps in the
[PREVIEW]{XREF} display, where it’s very easy to
see changes run through blocks of cues!
Miss Saigon on tour in Manchester
TRACKBACK can be used wherever the QONLY/TRACK
might currently be used - for example, when recording a
cue, updating a cue or setting a channel’s level or other
attributes directly in the cue preview screen whether by
specifying a level directly, using a reference group or using
@CUE x or @LIVE.
The main thing to note is that a channel that wasn’t previously on won’t track backwards, since otherwise it would
be too easy to make lots of channels suddenly appear
back through to the start of the show!
You should also note that TRACKBACK’s behaviour is
actually subtly different from that of TRACK. When a
change tracks forward, it tracks until it finds the next in-
Also New
Other new features since 2.6.15, the last general
release version, include:
- AutoMoveWhileDark will now run every time you
load a cue into a playback. This is particularly useful
if you have to jump over some cues: load the next
cue you want to run and AutoMove will get the lights
in the right place ready for that cue.
- [GOTO] [CUE] [number] [*] now shows channel
colour coding (purple for going up, green for going
down) relative to the previous cue in the cuelist
rather than the previous state on stage, which has
been its behaviour until now. [CUE] [number] [GO]
and [CUE] [number] [CUT] retain the old behaviour.
- You can now use function filters to move sets of
attributes to different parts of part cues, rather than
having to use attribute numbers. For example, in
preview scroll to part 2 of a cue then type
[chans] [@ATT] {position} {SOFTBLOCK} [*]
to just move pan and tilt of the specified channels
into that part.
- There are now more function filters - 12 instead of
6. Configure in the ATCPAGE file as before (see the
Winter 2003 Newsletter), access them using the
centre LCD keys or F7-F12 on an external keyboard.
Page 17
- A console will now display a warning in its Status window
if a network node goes offline, allowing the problem to be
investigated as soon as possible.
As with all recent software versions, you can find a full list
of what’s changed by pressing [HELP] then selecting
{LINKS} then {NEW FEATRS} - don’t forget to download
and install the updated console help files at the same time
as you download and install the new console software!
At the time of writing, 2.8.5 is the current release version.
As always, it is freely downloadable at the Strand website,
www.strandlighting.com.
Rob Halliday
Rob Halliday began lighting at school with a collection of Strand Patt 23s and 123s; he subsequently
spent several years with Britain’s National Youth
Theatre with a wider selection of equipment! Since
then he has worked on productions throughout the
UK and in Australia, America, Japan, Korea, Singapore, Russia, Lebanon, Belgium, Denmark, France,
Germany and Hong Kong. Much of his time is spent
working as a Lighting Programmer on shows including Les Misérables, Ragtime, Oklahoma!, Anything
Goes, My Fair Lady, Miss Saigon, The Witches of
Eastwick, Pan, Putting It Together, Martin Guerre and
the forthcoming Mary Poppins. He also lights shows
(including, recently, The Wiz, Sweeney Todd, A Little
Night Music, Maggie May, The Fix and Is There Life
After High School) and writes about technical theatre
for magazines including Lighting+Sound International
and Lighting Dimensions. Rob is a regular contributor
to Strand News with his Console Tips column.
Strand News is published quarterly and is available
by email or by download from the Strand Lighting
Website. If you would like to receive the newsletter
write to us at [email protected]. The
newsletter can also be found on our website at
www.strandlighting.com and selecting the Support
and Newsletter.