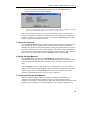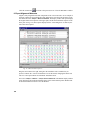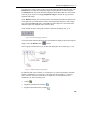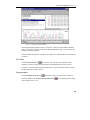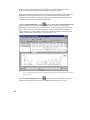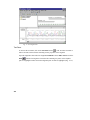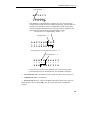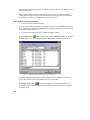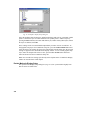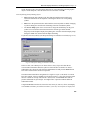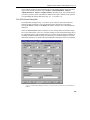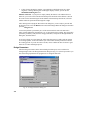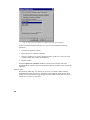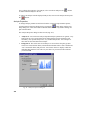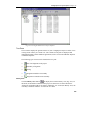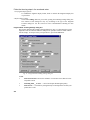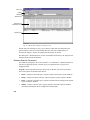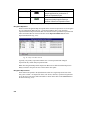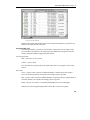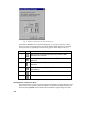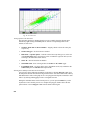
1
Vector NTI Suite 7.0
User’s Manual
including
Xpression NTI
InforMax, Inc.
7600 Wisconsin Avenue
Bethesda, MD 20814
Vector NTI Suite7.0 User’s Manual, including Xpression NTI
Published by:
InforMax, Inc.
7600 Wisconsin Avenue, Suite #1100
Bethesda, MD 20814
www.informaxinc.com
Copyright © 2001 InforMax, Inc. All rights reserved. This book contains proprietary
information of InforMax, Inc. No part of this document, including design, cover design, and
icons, may be reproduced or transmitted in any form, by any means (electronic,
photocopying, recording, or otherwise) without prior written agreement from InforMax, Inc.
The software described in this document is furnished under a license agreement. InforMax,
Inc. and its licensors retain all ownership rights to the software programs offered by
InforMax and related documentation. Use of the software and related documentation is
governed by the license agreement accompanying the software and applicable copyright
law.
Vector NTI Suite is a registered trademark of InforMax, Inc. in the United States and other
countries. Logos of InforMax, Inc. are also trademarks registered in the United States and
may be registered in other countries. Other product and brand names are trademarks of their
respective owners.
Printed in the United States of America
InforMax, Inc. reserves the right to make changes, without notice, both to this publication
and to the product it describes. Information concerning products not manufactured or
distributed by InforMax, Inc. is provided without warranty or representation of any kind,
and InforMax, Inc. will not be liable for any damages.
This version of the Vector NTI Suite 7.0 User’s Manual, including Xpression NTI l was
published in August 2001.
InforMax, Inc. Technical Support
Toll-free number: 877-357-3114
E-mail: [email protected]
Table of Contents at a Glance
CHAPTER 1 INTRODUCTION TO THE VECTOR NTI SUITE 7.0
USER’S MANUAL INCLUDING XPRESSION NTI ...................................................... 1
CHAPTER 2 AN OVERVIEW OF VECTOR NTI SUITE AND
XPRESSION NTI................................................................................................................. 3
CHAPTER 3 THE VECTOR NTI AND XPRESSION NTI USER
INTERFACES.................................................................................................................... 11
CHAPTER 4 VECTOR NTI SUITE AND XPRESSION NTI
TOOLBARS ....................................................................................................................... 23
CHAPTER 5 TUTORIAL: MOLECULE DISPLAY WINDOWS ............................... 53
CHAPTER 6 TUTORIAL: MOLECULE EDITING..................................................... 67
CHAPTER 7 TUTORIAL: FORMATTING MOLECULE GRAPHICS .................... 77
CHAPTER 8 TUTORIAL: DATABASE EXPLORER.................................................. 89
CHAPTER 9 TUTORIAL: PCR ANALYSIS AND PRIMER DESIGN .................... 101
CHAPTER 10 TUTORIAL: MOLECULE CONSTRUCTION.................................. 115
CHAPTER 11 TUTORIAL: MOLECULE DESIGN................................................... 125
CHAPTER 12 TUTORIAL: ADVANCED MOLECULE DESIGN ........................... 135
CHAPTER 13 TUTORIAL: GEL DISPLAY WINDOWS;
RESTRICTION DIGESTION ........................................................................................ 143
CHAPTER 14 TUTORIAL: INTERNET CONNECTIVITY AND
TOOLS.............................................................................................................................. 151
CHAPTER 15 TUTORIAL: ALIGNX .......................................................................... 159
CHAPTER 16 TUTORIAL: BIOPLOT ........................................................................ 171
CHAPTER 17 TUTORIAL: CONTIGEXPRESS ........................................................ 179
CHAPTER 18 DATABASE EXPLORER ..................................................................... 215
CHAPTER 19 MOLECULE DISPLAY WINDOWS; FORMATTING
GRAPHICS ...................................................................................................................... 259
CHAPTER 20 EDITING MOLECULE CONTENT.................................................... 291
CHAPTER 21 OLIGO, PRIMERS AND OTHER SEARCH AND
ANALYSES ...................................................................................................................... 307
CHAPTER 22 MOLECULE CONSTRUCTION ......................................................... 349
CHAPTER 23 MOLECULE DESIGN .......................................................................... 365
CHAPTER 24 GEL DISPLAY WINDOWS.................................................................. 385
CHAPTER 25 REPORT GENERATION ..................................................................... 397
CHAPTER 26 SHARED DATABASES ........................................................................ 405
CHAPTER 27 ALIGNX .................................................................................................. 411
CHAPTER 28 BIOPLOT................................................................................................ 439
CHAPTER 29 CONTIGEXPRESS: PROJECT EXPLORER.................................... 457
i
CHAPTER 30 CONTIGEXPRESS: FRAGMENT AND CONTIG
WINDOWS .......................................................................................................................481
CHAPTER 31 CONTIGEXPRESS: GROUP OPERATIONS ON
FRAGMENTS...................................................................................................................507
CHAPTER 32 BLAST SEARCH AND BLAST VIEWER...........................................519
CHAPTER 33 ALIGNX BLOCKS .................................................................................537
CHAPTER 34 3D-MOL...................................................................................................551
CHAPTER 35 TOOLS MANAGER...............................................................................565
CHAPTER 36 MISCELLANEOUS VECTOR NTI TOOLS.......................................571
CHAPTER 37 XPRESSION NTI: EXPRESSION DATABASE
EXPLORER......................................................................................................................593
CHAPTER 38 XPRESSION NTI: EXPRESSION DATA VIEWER ..........................633
APPENDIX A TECH SUPPORT AND WEB SITE......................................................713
APPENDIX B REFERENCES ........................................................................................715
APPENDIX C ASCII FORMAT; IUB CODES.............................................................723
APPENDIX D PARENT-DESCENDANT RELATIONSHIPS IN
VECTOR NTI...................................................................................................................725
INDEX ...............................................................................................................................731
ii
Table of Contents
CHAPTER 1 INTRODUCTION TO THE VECTOR NTI SUITE 7.0
USER’S MANUAL INCLUDING XPRESSION NTI ...................................................... 1
The Vector NTI User ......................................................................................................... 1
The Vector NTI Suite User’s Manual Format ................................................................... 1
Conventions Used in this Manual...................................................................................... 2
CHAPTER 2 AN OVERVIEW OF VECTOR NTI SUITE AND
XPRESSION NTI................................................................................................................. 3
Introduction ....................................................................................................................... 3
Database............................................................................................................................. 3
Features and functions of Vector NTI Suite ...................................................................... 5
Molecule Display............................................................................................................... 6
Gel Display Windows........................................................................................................ 7
Align X .............................................................................................................................. 7
BioPlot ............................................................................................................................... 8
ContigExpress.................................................................................................................... 8
Internet Tools..................................................................................................................... 8
Miscellaneous Tools .......................................................................................................... 9
Xpression NTI ................................................................................................................. 10
CHAPTER 3 THE VECTOR NTI AND XPRESSION NTI USER
INTERFACES.................................................................................................................... 11
Introduction ..................................................................................................................... 11
Launching Vector NTI..................................................................................................... 11
Launching Xpression NTI ............................................................................................... 11
Online Help...................................................................................................................... 11
The Application Workspace ............................................................................................ 12
Miscellaneous Interface Features .................................................................................... 18
Pane Manager .................................................................................................................. 20
CHAPTER 4 VECTOR NTI SUITE AND XPRESSION NTI
TOOLBARS ....................................................................................................................... 23
Introduction ..................................................................................................................... 23
Molecule Display/Gel Display windows ......................................................................... 23
AlignX Toolbars .............................................................................................................. 27
Dot Matrix Toolbar, AlignX............................................................................................ 30
Similarity Table Toolbar, AlignX.................................................................................... 30
BioPlot Toolbars.............................................................................................................. 31
ContigExpress Toolbars .................................................................................................. 33
ContigExpress-Fragment Window .................................................................................. 34
ContigExpress- Contig Window...................................................................................... 37
iii
AlignX Blocks Toolbars ..................................................................................................40
3D Mol Toolbars..............................................................................................................42
Citation Viewer Toolbars.................................................................................................44
PubMed/Entrez Search Toolbars......................................................................................45
BLAST Search Toolbars ..................................................................................................45
BLAST Viewer Toolbars .................................................................................................46
Database Explorer Toolbars.............................................................................................48
Xpression NTI: Expression Database Explorer Toolbars ................................................49
Xpression NTI: Expression Viewer Toolbars ..................................................................50
CHAPTER 5 TUTORIAL: MOLECULE DISPLAY WINDOWS................................53
Introduction......................................................................................................................53
1. Launch Vector NTI ......................................................................................................53
2. Inspect the Vector NTI Workspace and Database Explorer Windows ........................53
3. Create and Inspect a Molecule Display Window for pBR322 .....................................54
4. Arrange the Display Window Conveniently ................................................................55
5. Select a Fragment or a Feature in the Graphics Pane...................................................56
6. Examine pBR322’s Nucleotide Sequence....................................................................58
7. Work with pBR322’s Text Description .......................................................................61
8. Link pBR322’s Text Pane to the Graphics and Sequence Panes .................................62
9. Print pBR322’s Text Description, Graphical Map, and Sequence...............................63
10. Create a Display Window for 41BB_HUMAN .........................................................63
11. Create a Display Window for 1B14_HUMAN ..........................................................65
12. Close the Display Windows and Exit Vector NTI .....................................................66
CHAPTER 6 TUTORIAL: MOLECULE EDITING .....................................................67
Introduction......................................................................................................................67
1. Launch Vector NTI ......................................................................................................67
2. Open a Display Window for pBR322 ..........................................................................67
3. Edit pBR322’s General Data........................................................................................67
4. Edit My pBR322’s Sequence .......................................................................................69
5. Revert to Database Version of My pBR322.................................................................71
6. Insert a New Sequence Fragment.................................................................................71
7. Edit the TC(R) Signal...................................................................................................72
8. Delete the P2_P Signal and Add a New Signal............................................................73
9. Change the Starting Coordinate of My pBR322 ..........................................................74
10. Close the Display Window and Exit Vector NTI.......................................................75
CHAPTER 7 TUTORIAL: FORMATTING MOLECULE GRAPHICS.....................77
Introduction......................................................................................................................77
1. Launch Vector NTI ......................................................................................................77
2. Open pBR322 in a New Display Window ...................................................................77
3. Arrange the Display Window Conveniently ................................................................77
4. Change the Arrangement Setup....................................................................................78
iv
5. Change the Graphics Setup of CDS Signals................................................................ 78
6. Turn on the Picture Editing Mode ............................................................................... 81
7. Turn the TC(R) Arrow to Blue Cross-Hatching ............................................................ 81
8. Enlarge the TC(R) Arrow .............................................................................................. 82
9. Format TC(R)’s Label ................................................................................................... 83
10. Add a Text Annotation .............................................................................................. 83
11. Experiment with Styles.............................................................................................. 84
12. Save the pBR322 Molecule Display to a Molecule Documentfile............................ 85
13. Use the Saved Style Sheet to Format Molecule Display Windows ........................... 86
14. Close the Display Window and Exit Vector NTI ...................................................... 87
CHAPTER 8 TUTORIAL: DATABASE EXPLORER.................................................. 89
Introduction ..................................................................................................................... 89
1. Launch Vector NTI...................................................................................................... 89
2. Inspect the Database Explorer Window ...................................................................... 89
3. Experiment with View Options ................................................................................... 90
4. Experiment with Selection and Menus and Edits ........................................................ 91
5. Learn About Subbases ................................................................................................. 91
6. Search the Database..................................................................................................... 92
7. Examine Vector NTI’s User Field Manager................................................................ 95
8. Define a New User Field ............................................................................................. 96
9. View the New Field in Database Explorer .................................................................. 97
10. Examine Vector NTI’s Contact Manager .................................................................. 99
11. Close the Molecule Display Windows and Exit Vector NTI................................... 100
CHAPTER 9 TUTORIAL: PCR ANALYSIS AND PRIMER DESIGN .................... 101
Introduction ................................................................................................................... 101
1. Launch Vector NTI and Open a Molecule Display Window .................................... 101
2. Select the Region of ColE1........................................................................................ 101
3. Prepare for PCR Analysis.......................................................................................... 101
4. Perform PCR Analysis............................................................................................... 108
5. Inspect the PCR Analysis Folder............................................................................... 108
6. Perform Oligo Analysis on a PCR Sense Primer....................................................... 108
7. Save a PCR Primer to the Database........................................................................... 109
8. Add Restriction Enzyme Sites to the PCR Primers ................................................... 110
9. Inspect the New PCR Analysis Results ..................................................................... 112
10. Save the PCR Product to the Database and Open a Display Window..................... 112
11. Arrange the View of the Product ............................................................................. 113
12. Close Display Windows and Exit Vector NTI......................................................... 114
CHAPTER 10 TUTORIAL: MOLECULE CONSTRUCTION.................................. 115
Introduction ................................................................................................................... 115
1. Launch Vector NTI.................................................................................................... 115
2. Create Display Windows for pBR322 and pUC19.................................................... 116
v
3. Arrange the Display Windows ...................................................................................116
4. Define the First Fragment (from pUC19) ..................................................................116
5. Define the Second Fragment (from pBR322) ............................................................119
6. Inspect the Goal List ..................................................................................................119
7. Enter General Information About the New Molecule ................................................120
8. Attempt to Construct the New Molecule....................................................................121
9. Fill in the AvaI Site of the pBR322 Fragment to Make it Blunt ................................122
10. Inspect Your New Molecule ....................................................................................123
11. Close the Display Windows and Exit Vector NTI ...................................................124
CHAPTER 11 TUTORIAL: MOLECULE DESIGN ...................................................125
Introduction....................................................................................................................125
1. Launch Vector NTI and Create Display Windows for pbr322 and puc19 .................126
2. Arrange Display Windows.........................................................................................126
3. Define the Recipient Fragment (from pUC19)...........................................................127
4. Define the Donor Fragment (from pBR322)..............................................................127
5. Inspect the Goal Molecule Definition List.................................................................128
6. Enter General Information for Your New Molecule ..................................................128
7. Prepare to Design the New Molecule.........................................................................129
8. Set Your Preferences for Molecule Design................................................................130
9. Design the New Molecule..........................................................................................131
10. Inspect the New Molecule........................................................................................132
11. Inspect the Design Plan............................................................................................132
12. Print Out the Design Plan.........................................................................................133
CHAPTER 12 TUTORIAL: ADVANCED MOLECULE DESIGN............................135
Introduction....................................................................................................................135
1. Launch Vector NTI, Open and Arrange Display Windows .......................................135
First Design: Complicated Recipient .............................................................................135
2. Define the Recipient Fragment ..................................................................................136
3. Define the Donor Fragment........................................................................................136
4. Inspect the Goal Molecule Definition List.................................................................137
5. Enter General Information for Your New Molecule ..................................................137
6. Prepare to Design the New Molecule.........................................................................138
7. Set the Design Preferences.........................................................................................138
8. Design the New Molecule..........................................................................................138
9. Inspect the New Molecule..........................................................................................138
10. Inspect the Graphical Map and Text Description of Your New Molecule...............139
Second Design: Complex Donor Fragment ...................................................................140
1. Define Recipient.........................................................................................................140
2. Define Donor..............................................................................................................140
3. Inspect the Goal List ..................................................................................................141
4. Design the New Molecule..........................................................................................141
vi
5. Inspect and Print the New Molecule.......................................................................... 141
CHAPTER 13 TUTORIAL: GEL DISPLAY WINDOWS;
RESTRICTION DIGESTION ........................................................................................ 143
Introduction ................................................................................................................... 143
1. Launch Vector NTI.................................................................................................... 143
2. Create a New Gel and Open a Display Window ....................................................... 143
3. Create a Sample and Add it to the Gel ...................................................................... 144
4. Add Gel Markers ....................................................................................................... 145
5. Arrange the Gel Display Window Conveniently....................................................... 146
6. Inspect the Gel Display Window Text Pane.............................................................. 146
7. Change Display Color for a Fragment....................................................................... 147
8. Run the Gel................................................................................................................ 147
9. Gel Animation ........................................................................................................... 148
10. Optimize the Gel Display ........................................................................................ 148
11. Change to a Polyacrylamide Gel from the Electrophoresis Profile ......................... 149
12. Estimate Fragment Separation Time ....................................................................... 149
13. Save the Gel Display Window to a Gel Document File .......................................... 149
14. Close the Gel Display Window ............................................................................... 150
15. Calculate Restriction Fragments.............................................................................. 150
CHAPTER 14 TUTORIAL: INTERNET CONNECTIVITY AND
TOOLS.............................................................................................................................. 151
Introduction ................................................................................................................... 151
1. Launch Vector NTI and Open pBR322 in a New Display Window.......................... 151
2. Select the Whole Sequence of pBR322 and Use the BLAST Search Tool ............... 151
3. Display the Result of the Query in a Molecule Display Window.............................. 153
4. Save or Open the Result of the Query Using the Save Button .................................. 154
5. Use Alignment and Analysis Tools ........................................................................... 154
6. Saving Search Results as Comments......................................................................... 156
7. Close the Molecule Display Windows and Exit Vector NTI..................................... 158
CHAPTER 15 TUTORIAL: ALIGNX .......................................................................... 159
Introduction ................................................................................................................... 159
1. Launch AlignX from the Database Explorer ............................................................. 159
2. Examine AlignX Display Window............................................................................ 160
3. Add Molecule to Alignment ...................................................................................... 163
4. Inspect the Phylogenetic Tree.................................................................................... 163
5. Review the Alignment Parameters and Matrix.......................................................... 164
6. Examine the Alignment Pane .................................................................................... 164
7. Edit the Alignment..................................................................................................... 165
8. Generate Dot Matrix Plot........................................................................................... 165
9. Export Alignment Molecules..................................................................................... 168
10. Copy and Print an AlignX Pane............................................................................... 169
vii
11. Save the Project and Close AlignX ..........................................................................169
CHAPTER 16 TUTORIAL: BIOPLOT.........................................................................171
Introduction....................................................................................................................171
1. In Vector NTI, Open a Molecule Display Window for pSV2-dhfr; Create a New
Protein by Translating a CDS.........................................................................................171
2. Launch BioPlot from a Vector NTI Molecule Display Window ...............................172
3. Review the BioPlot Display Window ........................................................................173
4. Examine and Modify Plot Properties .........................................................................174
5. Modify Plot Layouts ..................................................................................................174
6. Format the DHFR Sequence ......................................................................................175
7. Open a DNA Project in BioPlot .................................................................................176
8. Add New Analyses to BioPlot ...................................................................................176
9. Copy, Paste, and Print BioPlot Panes.........................................................................177
10. Close the Display Window and Exit Vector NTI.....................................................178
CHAPTER 17 TUTORIAL: CONTIGEXPRESS.........................................................179
Introduction....................................................................................................................179
Session 1 Project Explorer .............................................................................................179
1. Open a ContigExpress Window .................................................................................179
2. Open a CE Project and Add a Fragment to the Project ..............................................179
3. Examine the CE Project Explorer Window................................................................181
4. Create Assemblies of Contigs ....................................................................................181
5. Review and Modify Viewing Options .......................................................................184
6. View Contents in the Tree and Content Panes...........................................................186
7. Manage Fragment Lists and Project Items .................................................................187
8. Save and Close a CE Project ......................................................................................188
Session 2 Working in Fragment Window ......................................................................188
1. Open and Inspect the Fragment Window...................................................................188
2. Sequence Selection Techniques .................................................................................191
3. Display ORFs and Translate the Nucleotide Sequence..............................................193
4. Edit the Nucleotide Sequence in the Sequence Pane .................................................196
5. Edit a Sequence in the Chromatogram Pane ..............................................................199
6. Close the Fragment Window......................................................................................200
7. Edit and Save a Fragment Included in an Assembly..................................................200
8. Exit ContigExpress.....................................................................................................201
Session 3 Working in the Contig Window.....................................................................201
1. Open and Examine a Contig Window........................................................................201
2. Review the Contig in Contig Alignment Pane ...........................................................208
3. Edit a Fragment in the Alignment Pane .....................................................................211
4. Exit ContigExpress.....................................................................................................213
viii
CHAPTER 18 DATABASE EXPLORER ..................................................................... 215
Introduction ................................................................................................................... 215
Opening Vector NTI Database Explorer ....................................................................... 216
Elements of Vector NTI Database Explorer .................................................................. 216
Database Tables............................................................................................................. 217
Database Subbases......................................................................................................... 217
Database Objects ........................................................................................................... 218
Database Search............................................................................................................. 222
Citation Table ................................................................................................................ 229
BLAST Results Table.................................................................................................... 231
Database Management Operations ................................................................................ 231
Operations on Subbases................................................................................................. 232
Operations on Database Objects.................................................................................... 238
Edit Menu Commands ................................................................................................... 244
Explorer Display Options .............................................................................................. 245
Opening Explorer Window At Startup .......................................................................... 247
Database Reports ........................................................................................................... 247
Explorer Shortcuts ......................................................................................................... 248
Open/Save As Dialog Boxes ......................................................................................... 249
Contact Manager............................................................................................................ 249
User Field Manager ....................................................................................................... 251
Editing User Fields in Individual Objects ..................................................................... 256
User Fields Tab.............................................................................................................. 256
User Fields in Molecule Display Windows ................................................................... 257
CHAPTER 19 MOLECULE DISPLAY WINDOWS; FORMATTING
GRAPHICS ...................................................................................................................... 259
Introduction ................................................................................................................... 259
Opening Molecules in Molecule Display Windows ...................................................... 259
Elements of a Molecule Display Window ..................................................................... 262
Molecule Display Setup................................................................................................. 271
DNA/RNA Display Setup.............................................................................................. 272
Protein Molecule Display Setup .................................................................................... 278
Picture Editing Mode: Formatting and Annotating Pictures ......................................... 282
Styles ............................................................................................................................. 286
Saving Molecules .......................................................................................................... 289
Molecule Export ............................................................................................................ 290
CHAPTER 20 EDITING MOLECULE CONTENT.................................................... 291
Introduction ................................................................................................................... 291
Edit Operations in a Molecule Display Window........................................................... 291
Edit Operations in Molecule Editor............................................................................... 295
ix
CHAPTER 21 OLIGO, PRIMERS AND OTHER SEARCH AND
ANALYSES.......................................................................................................................307
Introduction....................................................................................................................307
PCR Primers...................................................................................................................308
Sequencing Primers........................................................................................................326
Hybridization Probes......................................................................................................332
Oligonucleotide Analysis ...............................................................................................335
Mutagenesis....................................................................................................................343
Calculating Restriction Fragments .................................................................................345
ORFs and Motifs Search ................................................................................................345
Back Translation ............................................................................................................346
Broadcast Selection........................................................................................................347
CHAPTER 22 MOLECULE CONSTRUCTION..........................................................349
Introduction....................................................................................................................349
Molecule Types: Basic And Constructed.......................................................................349
Methods of creating new DNA/RNA molecules............................................................349
Tools for Creating New DNA/RNA Molecules.............................................................350
Describing Component Fragments in the Fragment Wizard..........................................351
The Goal Molecule Definition List (Goal List) .............................................................354
Constructing a New Molecule........................................................................................354
CHAPTER 23 MOLECULE DESIGN ...........................................................................365
Introduction....................................................................................................................365
Creating a New DNA Molecule Using Design ..............................................................365
Describing the Goal Molecule........................................................................................366
The Goal Molecule Definition List (Goal List) .............................................................372
Starting the Design.........................................................................................................373
Defining Design Fragments in Fragment Editor ............................................................374
Design Parameters..........................................................................................................376
Design Preferences.........................................................................................................378
Advanced Design Preferences........................................................................................379
The Design Process ........................................................................................................380
Returning to the Pre-Design State..................................................................................381
The Design Description Folder ......................................................................................382
CHAPTER 24 GEL DISPLAY WINDOWS ..................................................................385
Introduction....................................................................................................................385
Opening a Gel Display Window ....................................................................................385
Elements of a Gel Display Window...............................................................................387
Gel Samples and Gel Markers........................................................................................387
The Gel Sample List.......................................................................................................390
Panes in a Gel Display Window.....................................................................................391
Copying Gel Display Window Data...............................................................................395
x
Printing from Gel Display Windows ............................................................................. 396
CHAPTER 25 REPORT GENERATION ..................................................................... 397
Introduction ................................................................................................................... 397
Starting the Report Generation Wizard ......................................................................... 397
The Report Generation Process: .................................................................................... 397
Print Preview and Print.................................................................................................. 402
Saving Report Templates............................................................................................... 402
Relation Report.............................................................................................................. 403
Report Templates........................................................................................................... 404
CHAPTER 26 SHARED DATABASES ........................................................................ 405
Introduction ................................................................................................................... 405
Creating a New Shared Database .................................................................................. 405
Managing a Shared Database......................................................................................... 409
Exchanging Data with a Shared Database ..................................................................... 410
Disconnecting from a Shared Database......................................................................... 410
CHAPTER 27 ALIGNX .................................................................................................. 411
Introduction ................................................................................................................... 411
Launching Align X ........................................................................................................ 411
Features of the AlignX Workspace................................................................................ 411
AlignX Projects ............................................................................................................. 422
Initiating an Alignment.................................................................................................. 424
Setting Alignment Parameters ....................................................................................... 425
Templates....................................................................................................................... 432
Similarity Table Analysis .............................................................................................. 433
Dot Matrix Analysis ...................................................................................................... 434
Other AlignX Features................................................................................................... 436
Alignment Algorithms ................................................................................................... 437
CHAPTER 28 BIOPLOT................................................................................................ 439
Introduction ................................................................................................................... 439
Launching BioPlot......................................................................................................... 439
Features of the BioPlot Workspace ............................................................................... 439
Elements of BioPlot Display Windows ......................................................................... 441
BioPlot Projects ............................................................................................................. 447
Other BioPlot Features .................................................................................................. 451
Analyses Descriptions ................................................................................................... 451
Adding Custom Protein Analyses.................................................................................. 455
CHAPTER 29 CONTIGEXPRESS: PROJECT EXPLORER.................................... 457
Introduction ................................................................................................................... 457
Launching ContigExpress.............................................................................................. 457
Features of the ContigExpress Workspace .................................................................... 457
CE Project Explorer....................................................................................................... 457
xi
General Project Explorer Operations .............................................................................463
Operations in Project Explorer.......................................................................................475
CHAPTER 30 CONTIGEXPRESS: FRAGMENT AND CONTIG
WINDOWS .......................................................................................................................481
Introduction....................................................................................................................481
Features of the ContigExpress Workspace.....................................................................481
General User Actions .....................................................................................................482
External Tools Usage .....................................................................................................484
Fragment Window..........................................................................................................485
Contig Window ..............................................................................................................493
Operations in Either the Contig Pane or Alignment Pane of Contig Window...............501
CHAPTER 31 CONTIGEXPRESS: GROUP OPERATIONS ON
FRAGMENTS...................................................................................................................507
Introduction....................................................................................................................507
Fragment Trimming .......................................................................................................507
Fragment Ends Trimmer dialog box ..............................................................................507
Calling Secondary Peaks................................................................................................515
Executing Calling Peaks Changes..................................................................................517
CHAPTER 32 BLAST SEARCH AND BLAST VIEWER...........................................519
Introduction....................................................................................................................519
BLAST Search Dialog Box............................................................................................519
BLAST Search Results ..................................................................................................526
BLAST Viewer ..............................................................................................................526
CHAPTER 33 ALIGNX BLOCKS .................................................................................537
Introduction....................................................................................................................537
Opening AlignX Blocks:................................................................................................537
Features of the AlignX Blocks Workspace ....................................................................537
AlignX Blocks Projects..................................................................................................543
AlignX Blocks Parameters.............................................................................................547
Templates .......................................................................................................................549
Other AlignX Blocks Features .......................................................................................550
CHAPTER 34 3D-MOL...................................................................................................551
Introduction....................................................................................................................551
Opening 3D-Mol ............................................................................................................551
Elements of 3D-Mol.......................................................................................................552
Viewing Graphics...........................................................................................................555
Graphics Pane Display Properties ..................................................................................559
Viewing Options ............................................................................................................561
Saving 3D-Mol Session Results.....................................................................................564
xii
CHAPTER 35 TOOLS MANAGER .............................................................................. 565
Introduction ................................................................................................................... 565
Configuring Vector NTI Tools ...................................................................................... 565
CHAPTER 36 MISCELLANEOUS VECTOR NTI TOOLS ...................................... 571
Introduction ................................................................................................................... 571
PubMed/Entrez Search .................................................................................................. 571
Citation Viewer.............................................................................................................. 575
GCG Converter.............................................................................................................. 577
Matrix Editor ................................................................................................................. 582
CSV Oligo Files Importer.............................................................................................. 585
VNTI 7 License Manager .............................................................................................. 588
CHAPTER 37 XPRESSION NTI: EXPRESSION DATABASE
EXPLORER ..................................................................................................................... 593
Gene Expression Overview ........................................................................................... 593
Gene Expression Terminology ...................................................................................... 593
Expression Database Explorer Introduction .................................................................. 595
Opening Expression Database Explorer ........................................................................ 595
Elements of Expression Database Explorer................................................................... 595
Database Tables............................................................................................................. 596
Database Subsets ........................................................................................................... 596
Database Objects ........................................................................................................... 597
Database Search............................................................................................................. 598
Gene Ontology Manager................................................................................................ 600
Database Management Operations ................................................................................ 602
Operations on Subsets ................................................................................................... 602
Operations on Database Objects.................................................................................... 605
Explorer Display Options .............................................................................................. 606
Database Reports ........................................................................................................... 608
Explorer Shortcuts ......................................................................................................... 608
User Field Manager ....................................................................................................... 608
Database Tools .............................................................................................................. 615
Database Object Properties............................................................................................ 625
Importing Experiments into the Expression Database................................................... 632
CHAPTER 38 XPRESSION NTI: EXPRESSION DATA VIEWER ......................... 633
Introduction ................................................................................................................... 633
Launching the Expression Viewer................................................................................. 633
The Expression Viewer Workspace............................................................................... 633
Tools and Algorithms .................................................................................................... 658
Expression Data Exchange ............................................................................................ 701
Importing Expression Experiments ............................................................................... 705
Saving Expression Experiments .................................................................................... 709
xiii
APPENDIX A TECH SUPPORT AND WEB SITE......................................................713
APPENDIX B REFERENCES ........................................................................................715
AlignX-Basic Alignment Algorithms ............................................................................715
ContigExpress ................................................................................................................715
BioPlot ...........................................................................................................................716
BLAST ...........................................................................................................................716
Substitution Matrices .....................................................................................................716
Properties Plots...............................................................................................................717
Gene Expression.............................................................................................................719
Miscellaneous.................................................................................................................720
APPENDIX C ASCII FORMAT; IUB CODES.............................................................723
Format for ASCII Sequence Files ..................................................................................723
IUB Formats recognized by Vector NTI........................................................................723
APPENDIX D PARENT-DESCENDANT RELATIONSHIPS IN
VECTOR NTI...................................................................................................................725
Overview of Parent-Descendant Relationships..............................................................725
Viewing Parent-Descendant Relationships ....................................................................726
Managing Parent-Descendant Relationships..................................................................727
INDEX ...............................................................................................................................731
xiv
Introduction to Vector NTI Suite 7.0 User’s Manual Including Xpression NTI Chapter 1
Chapter 1 Introduction to the Vector NTI Suite 7.0 User’s Manual Including
Xpression NTI
This Vector NTI Suite 7.0 User’s Manual, including Xpression NTI is for users of the
Vector NTI/Vector NTI Suite 7.0 and Xpression NTI software packages developed by
InforMax, Inc., Bethesda, Maryland. The manual describes the Vector NTI Suite and
Xpression NTI software and provides the information on how to optimize their use.
The Vector NTI User
Clients using Vector NTI and/or the Vector NTI Suite and the Xpression NTI components
are expected to have some familiarity with window environments and web browsers. Vector
NTI uses a convenient graphical user interface (GUI).
It is recommended that Vector NTI and Xpression NTI users at all levels review the three
introductory chapters in this user’s manual. Their purpose is to familiarize the Vector NTI
and/or the Xpression NTI client with the user’s manual structure and conventions, the
Vector NTI Suite and Xpression NTI software, and the Vector NTI and the Xpression NTI
environments.
The Vector NTI Suite User’s Manual Format
The manual is written to assist you, the Vector NTI Suite user and or the Xpression NTI
user, to master the software quickly, with little reading. To be a useful and simple-to-use
resource, it contains:
•=
Section I: Four introductory chapters, 1-4, covering Vector NTI basics.
•=
Section II: Vector NTI Suite Tutorial chapters, chapters, 5-17, enabling VNTI users at
any level to learn independently how to use components of the Vector NTI Suite.
•=
Section III: Reference tools, chapters 18 through 26, organized around the functions
and features of Vector NTI.
•=
Section IV: Vector NTI Suite Applications, chapters 27 through 36, covering additional
components of the Vector NTI Suite.
•=
Section V: Xpression NTI, chapters 37 and 38, describing the functions and features of
Xpression NTI.
•=
Section VI: Appendices
•=
A complete index
Using the manual, you will be able to easily look up and find descriptions of specific
features and functions. In addition, the Vector NTI Suite and Xpression NTI Installation
Guide will accompany this manual in a separate document. Electronic versions of the
Vector NTI Suite 7.0 User’s Manual, including Xpression NTI and the Vector NTI Suite,
including Xpression NTI Installation Guide are also available at the InforMax Inc. website:
http://www.informaxinc.com/support/tutorials.html.
1
Conventions Used in this Manual
The following table uses various typefaces to differentiate between regular text and menu
commands, keyboard keys, toolbar buttons, dialog box options and text that you type. The
following table describes how conventions are represented in this manual.
Convention
Description
Menu command
Sequential Menu commands
Database > Explore
TEXT IN SMALL CAPS
Keyboard key that you press
The Enter Key ENTER
TEXT IN SMALL CAPS +
TEXT IN SMALL CAPS
Keys that you press together
Press SHIFT+ CTRL, then release
both.
TEXT IN SMALL CAPS
followed by
TEXT IN SMALL CAPS
Keys that you press in
sequence
Press ENTER, followed by ENTER
Icon
Small picture on a toolbar
button that you press
Click the Zoom In button (
enlarge the image
) to
Boldface type
Options or tabs that you
select in dialog boxes, list
boxes, or drop-down menus
Buttons that you click
In the Restriction Enzymes dialog
box, select the enzyme(s) and
press the Add button.
Italic boldface type
Text that you type
In the New Molecule dialog box,
enter the molecule name, my
pBR322.
Note:
Highlights a particular
concept or extends the
current topic
Note: To calculate Separation
Time, at least two fragments must
be selected.
Important:
Or
Warning!
Highlights information of
which you should be
particularly aware
Important: Once parentdescendant relationships have
been disconnected, they CANNOT
be reconnected.
Table 1. 1 User Manual Conventions
2
Example
Bold and Capitalized
Command
Capitalized command >
Capitalized command
Vector NTI Suite and Xpression NTI Overview Chapter 2
Chapter 2 An Overview of Vector NTI Suite and Xpression NTI
Introduction
Vector NTI Suite a suite of desktop applications, is a comprehensive set of sequence
analysis software tools specifically designed for the molecular biologist to study, visualize,
manipulate, construct and store biological molecules. With this system, you can:
•=
Easily navigate and search the user-defined, password-protected molecule and enzyme
databases
•=
Access molecules across a network with user-defined and password-protected databases
•=
Generate recombinant strategies and protocols and design and analyze PCR primers and
other oligos
•=
Animate virtual gels for restriction fragment analysis
•=
Analyze physiochemical properties of molecule sequences
•=
Assemble contigs from text sequences or chromatograms
•=
Create and customize publication-quality graphics
•=
Take advantage of full internet connectivity with more than 20 internet sites for
searching and importing annotated molecules back into Vector NTI Suite
While all of the Suite components are fully capable of functioning independently of one
another, the program integrates data, analyses and presentations easily among the
applications.
The desktop expression application, Xpression NTI, is a comprehensive program
independent of Vector NTI Suite, designed to store, manage and analyze expression data.
With this software, you can:
•=
Manage expression data in the Expression Database Explorer
•=
Merge primary gene expression results
•=
Display graphic representations of expression data
•=
Filter, sort and cluster expression results for data analysis
Database
The Vector NTI database provides storage and organization functions for molecules and
other objects used in cloning strategies, molecule manipulation and analysis, and sequence
analysis. Database objects include DNA/RNA and protein molecules, restriction enzymes,
oligonucleotides (including PCR primers, sequencing primers and hybridization probes), gel
markers. BLAST search results, and citations.
3
In the Database Explorer window, you can:
•=
Create new objects
•=
Edit and delete old objects
•=
Perform database searches
•=
Organize objects into convenient groups (subbases)
•=
Import and export objects
•=
Create Vector NTI “archives” of objects to share with other users.
•=
Format references according to bibliographic styles assigned to various professional
publications
General database functions let you make backup copies of the database in the specified
subfolder of your hard drive or floppy disk, restore all database files from a backup and
compress the database by removing all unnecessary data from the datafiles and database
tables.
Vector NTI also has two additional data managers:
•=
Contact Manager to create, modify, and organize the address data of persons or
organizations with which you frequently communicate.
•=
User Field Manager to define data fields to describe your database objects.
Organizing your Biological Objects
Using the Vector NTI database, you can conveniently organize and effectively manage a
large amount of molecular biology data. Database objects can be organized into an arbitrary
number of subbases. The Database Explorer has convenient commands for creating and
managing subbases of all database objects.
Description fields of database objects allow you to describe any object property in formal
and semiformal ways. Vector NTI serves as a global “organizer” for your biological data.
Database Search
Vector NTI lets you search for database objects using many types of data as search
conditions. These include, for example, form (circular/linear), storage type (basic,
constructed, translated), size, description/comment/user fields text, and so forth.
Import/Export Functions
You can import molecules (including their feature tables) from GenBank/GenPept,
EMBL/SWISS-PROT and FASTA formats. You can also import nucleotide or amino acid
sequences from an ASCII file of flexible format, and Vector NTI will automatically create
the new database molecule and assign the sequence to the molecule.
4
Vector NTI Suite and Xpression NTI Overview Chapter 2
Archives—A Tool For Sharing Database Information
Vector NTI lets you place your molecules, enzymes, oligonucleotides and gel markers into
archives that can be transferred to another computer (Mac or PC) and read by Vector NTI.
This allows you to share objects with colleagues, or to place them simultaneously on several
computers. As molecules are archived, Vector NTI verifies the consistency of all
information.
Important: The Vector NTI Database is completely independent of the Xpression NTI
Database and each database has its own unique viewer. It is not possible to exchange objects
between the Xpression NTI and Vector NTI applications.
Features and functions of Vector NTI Suite
Creating New Molecules
There are five different ways of creating new DNA/RNA and protein molecules in Vector
NTI:
1.
Importing from GenBank/GenPept, EMBL/SWISS-PROT and FASTA formats or from
an ASCII file of flexible format. The sequence and Feature map are converted from the
file, and the new molecule becomes part of the Vector NTI database.
2. Creating new molecules from user-defined nucleotide or amino acid sequences. These
can be manually entered or pasted from the clipboard and the sequence entered as a
new molecule.
3. Translating a coding region of an existing DNA or RNA molecule to create new protein
molecules.
4. Construction of new DNA/RNA molecules from user-defined compatible component
fragments from other molecules.
5. Design of new DNA/RNA molecules from components in a user-defined fragment list,
using Vector NTI’s built–in biological knowledge to design the recombination process.
All new molecules are integrated into the database and can participate in all further
operations and analyses.
Creating New Enzymes, Oligos, and Gel Markers
Enzyme, oligonucleotide, and gel marker objects can be created “from scratch” using
Vector NTI’s editors or by importing them by a REBASE database.
Oligos and Primers
Vector NTI can design PCR primers, sequencing primers and hybridization probes and save
them to the database for future use. Using parameters you have defined, Vector NTI can
analyze those primers and probes or those you have defined yourself to determine the best
ones for optimal experimental results.
5
Editing Database Objects
Full molecule editing capabilities are available in Vector NTI, either from Database
Explorer or the Molecule Display window. In Molecule Display windows, you can edit
molecules by inserting, deleting and replacing sequence fragments and features. You can
also modify a molecule’s display format and general data. When your editing is complete,
you can save the molecule into the database to make the changes permanent.
Parent-Descendant connections
As you modify molecules, Vector NTI monitors and manages parent-descendant
connections to insure data consistency through all the descendants (see Appendix D, page
725).
Generating Restriction Maps
Restriction maps of DNA/RNA molecules can be quickly generated in Vector NTI. For
unsequenced molecule regions, you may enter the known positions of restriction sites. All
the molecule descendants inherit these sites.
Molecule Display
Molecule display windows are Vector NTI’s convenient graphical user interface (GUI) for
inspecting and editing text description, graphical maps and analyses and sequences of
DNA/RNA and protein molecules. They are also powerful and convenient graphical tools
for selecting fragments for molecule construction and design and for preparing publicationquality images.
Molecule display windows consist of text, graphics and Sequence Panes.
Text Pane
A display window’s Text Pane contains a general molecule description and folders
describing a molecule’s features, search results, cloning strategies and protocols, and
biological data.
Graphics Pane
A molecule display window’s Graphics Pane contains a graphically displayed or linear
molecule map. In the Graphics Pane, you can visually select and “prepare” fragments for
construction and design of new molecules, search for probes and primers, or for restriction
maps.
All graphics objects are movable, resizable and editable.
Sequence Pane
A molecule display window’s Sequence Pane contains the formatted nucleotide or amino
acid sequence of a molecule.
6
Vector NTI Suite and Xpression NTI Overview Chapter 2
•=
For DNA/RNA molecules, Vector NTI can show restriction sites, motifs, ORFs and
functional signals and translated reading frames.
•=
For protein molecules, Vector NTI can display protein features together with the amino
acid sequence.
You can print any molecule display window or you can save it to an external file or
clipboard. From the clipboard, you can insert maps, sequences and molecule descriptions
directly into word processing documents.
Creating Molecule Documents
You can save all the information from a molecule display window to a permanent storage by
creating a Molecule Document file. Since the Molecule Document format is based on
GenBank/GenPept formats, not only Vector NTI, but any program able to import
GenBank/GenPept files can also import Vector NTI Molecule Documents.
Gel Display Windows
Gel Display windows can be created for different types of electrophoresis. The Gel Display
window’s Graphics Pane replicates the results of an actual gel.
Creating Gel Display Windows
To create a new Gel Display window you must define its parameters, as to electrophoresis
and buffer types, electrophoresis conditions and display parameters.
You can modify the settings of a Gel Display window at any time after creation for better
separation of the molecules’ fragments.
Creating Gel Samples and Gel Markers
In Vector NTI, a gel lane may contain either a Gel Sample, or a Gel Marker, user-generated
or from the database. Gel Samples are created by “cutting” database molecules with
restriction enzymes. Gel Markers, sets of fragments of known lengths, can be loaded either
from the database or can be user-generated.
Running the Gel
After a Gel Display window is created, and your samples and markers have been “added” to
the “lanes,” you can run a gel according to selected time increments or animation settings.
You can color-code specific fragments or define “separation distances” or time lengths to
better visualize fragment separation. Because of the simplicity of their generation, Gel
Samples are created on the spot for short-term use, but are not stored in the Vector NTI
database.
Align X
In AlignX, you can:
7
Perform multiple sequence alignments on either proteins or nucleic acids without
reformatting between applications and computer platforms.
•=
In the alignment, link, localize and compare important domains in individual sequences
•=
Generate plots of similarity and sequence complexity
AlignX features include multicolor presentation, alignment editing, sequence comparison
dot plots, phylogenetic trees, sequence and structure alignments, and similarity distribution
plots. AlignX reads all standard text formats such as FASTA, GenBank, EMBL, SWISSPROT, GenPept, and ASCII text.
BioPlot
BioPlot is a comprehensive set of protein and nucleic acid sequence analysis tools, offering
over fifty different predefined protein scales linked with Feature maps and sequences.
BioPlot is formatted so that plots can be filed, overlapped, scaled, moved, and formatted to
fit your presentation needs. Sequence regions can be highlighted by changing font face, size,
and color and the plots linked to a molecule feature table. The use of a standard text file
format in all programs eliminates the need to reformat data for use in any Vector NTI Suite
modules.
ContigExpress
ContigExpress is a program for assembling many small fragments – either text sequences or
chromatograms from automated sequencers – into longer, contiguous sequences. You can
manage fragments and assemblies in an Explorer window, and open fragments and contigs
in display windows for further study and manipulation. The multi-pane windows link
sequences with their properties, chromatograms and graphic representations.
You can edit nucleic acid fragments directly with the chromatograms in full view. Changes
are tracked and an edit history is maintained. The contigs generated are then saved and
managed as GenBank, EMBL or FASTA files. No exporting or reformatting of proprietary
file formats is necessary. Just drag and drop into Vector NTI to map and analyze.
Internet Tools
Vector NTI has Internet-friendly applications, allowing you to share your data and results of
your work with your colleagues and to use remote bio-services for analyzing your data.
Molecule Documents are automatically converted to HTML files, which you can then
publish on a WWW site. You can analyze your data using Internet tools built into Vector
NTI.
BLAST Search/BLAST Viewer
Vector NTI Suite provides you with a search engine for launching BLAST searches of the
GenBank databases at the National Center for Biotechnology Information website. Results
are listed in the BLAST Search dialog box from which they can be opened and reviewed in
8
Vector NTI Suite and Xpression NTI Overview Chapter 2
BLAST Viewer, displaying a linear representation of aligned hit elements from the hit
molecules.
Miscellaneous Tools
PubMed/Entrez Search, Citation Viewer and Citation Table of Database Explorer
These tools work in tandem to provide a practical and efficient way to search public
databases for molecules or citations, retrieve them, complete with molecule files or abstracts
that can be viewed and stored.
GCG Converter
GCG Converter is a tool in the Vector NTI Suite that converts sequences in GCG file
formats so that they can be imported into the Suite.
Matrix Editor
Matrix Editor allows inspection of and editing of matrices. Matrices are used in two Vector
NTI Suite applications, AlignX and AlignX Blocks. Matrices can be viewed in either
program in the Alignment Setup dialog box, but editing can only take place in Matrix
Editor.
AlignXBlocks
AlignX Blocks is a program for locating, analyzing and editing blocks of localized sequence
similarity among multiple protein sequences and linking them into a composite multiple
alignment.
3D-Mol
The 3D-Mol application of Vector NTI Suite allows you to visualize and manipulate 3dimensional molecule structures described in a standard PDB (Protein Data Bank) file in a
user-friendly environment.
CSV Oligo Files Importer
The CSV Files Importer utility allows you to import oligo lists into the Vector NTI
database. The oligo list to be imported must be in one of three file formats for use with the
CSV utility: Comma delimited format (.csv format), Tab delimited format or Semicolon
delimited format.
Tools Manager
Vector NTI 7.0 is shipped with more than 20 tools providing connection to various Internet
servers. You can add your own tools connecting Vector NTI to local or remote programs
using the configuration mechanism described in this chapter. All of the Vector NTI tools are
organized and managed using Tools Manager.
9
License Manager
Vector NTI 7.0 consists of three types of licenses: static, dynamic and trial license, with an
additional demo mode for the purpose of demonstrating the Vector NTI Suite software. The
various license types were developed to meet users needs. For example, users in different
industrial, scientific and educational environments require different sharing and allotment
privileges. These privileges are all administered through the License Manager.
Xpression NTI
Sophisticated techniques using microarrays allow scientists to characterize the mRNA
expression level of thousands of genes simultaneously. A typical expression experiment
generates thousands of data points, presenting serious challenges for storing and processing
data. The desktop expression application, Xpression NTI, is a comprehensive program,
independent of Vector NTI, designed to store and manage gene expression data. It provides
the algorithms for processing and examining the data from single and multiple expression
experiments.
Xpression NTI can merge primary expression run results. Filtering, sorting and clustering
algorithms, parameterizations or profiling methods can be used to analyze and organize
data. Huge volumes of quantitative data are displayed graphically to find inherent patterns
of gene expression, both on a broad scale (“birds-eye” view) and fine scale (gene by gene).
Xpression NTI consists of two closely associated parts, the Expression Database Explorer
and the Expression Viewer. The software is designed to work with gene expression data,
managing the data by means of the Expression Database Explorer and analyzing and
manipulating it in the Expression Viewer window. The Expression Viewer window also
provides an interface for working with separate experiments not stored in the Expression
Database. From the Expression Viewer window, experiments can either be saved to the
Expression Database or to an independent file on the hard drive.
Important: The Xpression NTI Database is completely independent of the Vector NTI
Database and each database has its own unique viewer. It is not possible to exchange objects
between the Xpression NTI and Vector NTI applications.
10
Vector NTI and Xpression NTI User Interfaces Chapter 3
Chapter 3 The Vector NTI and Xpression NTI User Interfaces
Introduction
This chapter introduces you to the Vector NTI and Xpression NTI user interfaces and, in
specific cases, to Molecule Display windows, a powerful graphical tool for displaying and
editing molecules. Included in this chapter are global operations used routinely in many of
the Vector NTI Suite and Xpression NTI applications.
Vector NTI runs on both Windows and Macintosh platforms. Xpression NTI runs on a
Windows platform. All window manipulations techniques standard for given platforms can
be used with the programs, such as moving and sizing windows, menus, toolbars, selecting
objects and so forth.
This chapter assumes that you are familiar with Molecule Display windows and with basic
display window techniques, such as maximizing windows, changing the sizes of text and gel
panes, switching between panes, etc.
Launching Vector NTI
To launch Vector NTI, double-click its icon in the program group or folder in which you
installed the software. When the program is launched, the empty Vector NTI workspace is
displayed. By default, the local Database Explorer window is displayed on top of it (you
may turn this feature off). The Database Explorer is described in detail in Chapter 18.
Launching Xpression NTI
To launch Xpression NTI, double-click its icon in the program group or folder in which you
installed the software. When program is launched, the Xpression NTI Database Explorer is
displayed. The Xpression NTI Database Explorer is described in detail in Chapter 37.
Online Help
The Online Help has been written to assist you, the Vector NTI Suite or Xpression NTI
user, in mastering the software.
In either of the applications, there are several avenues for receiving assistance through the
Online Help:
•=
Press the Help button (
help topic.
•=
Press the Help button, then click on any command from the menu bar, opening the
associated help topic.
•=
Press F1 from an open dialog box, opening its associated help topic.
•=
Select Help > Help or Using Index from the menu bar of the application. In the Online
Help that opens, you can browse through the Table of Contents or the Index, or launch
a word search of the Online Help application.
), then click on any toolbar button, opening the associated
11
If pressing F1 fails to open an Online Help topic, select Help > Help Topics, opening
Online Help. Proceed with a Browse through the Table of Contents or Index or do a word
search. Your topic may be in the Help files, but inadvertently not linked to its associated
dialog box.
Topics may be titled by their function rather than the dialog box name. For example, the
New Molecule dialog box associated topic is named “Creating a New Molecule.”
The Application Workspace
A typical Vector NTI of Xpression NTI display window can include:
•=
Text information, including object descriptions, features, recombinant strategies and
analysis results
•=
Graphical features of a molecule, a gel, or a contig assembly
•=
Analytical features of a molecule
•=
A pairwise or multiple alignment
•= Appropriate sequences
From database or display windows:
•=
Local databases can be searched
•=
Public domain database searches can be launched through the Internet
•=
Text descriptions, graphical maps and sequences are edited
•=
Graphical representations may be formatted
•=
DNA/RNA and protein molecules and search results are stored in a database
•=
Preparation of publication-quality figures is supported.
Important: The Xpression NTI Database is completely independent of the Vector NTI
Database, and each database has its own unique viewer. It is not possible to exchange
objects between the Xpression NTI and Vector NTI applications.
Viewer Display Window Description
The display window title bar shows the name of the molecule on display or the name of the
folder being displayed.
Every display window has a menu bar. Options in the submenus vary according to the
specific application being used.
Shortcut menus associated with folders, molecules or objects from which they are opened
provide many options for operations with those items. To view a shortcut menu, right-click
while the cursor is hovering over the object.
A shortcut menu is opened with a right click with the cursor paused over the related item.
12
Vector NTI and Xpression NTI User Interfaces Chapter 3
All display windows contain two or more toolbars and variants relative to the active display
pane.
•=
The Main Toolbar contains tools for major program functions, such as opening, saving,
and printing Display windows, undoing and re-doing actions, launching major
subsections of the program such as the Database Explorer, etc.
•=
The Window Toolbar has several different variants according to the activated pane of
the topmost display window.
Many menu and toolbar options are consistent throughout the Vector NTI Suite; many are
also consistent in Xpression NTI. Toolbar commands are often duplicated on the menu bar
and shortcut menus, offering several means of accomplishing the same objective.
For information on all toolbars specific to Vector NTI and Xpression NTI applications, refer
to Chapter 4. Toolbar buttons pertaining to operations and objects being described
throughout the manual are displayed as needed.
When you launch Xpression NTI, the Xpression NTI Database Explorer opens. Expression
Data Viewer can only be launched from the Xpression NTI Database Explorer. For details,
see Chapter 3.
When you launch Vector NTI, the empty workspace is displayed, super-imposed by the
Database Explorer window. Once you minimize Database Explorer and open a molecule in
the Molecule display window, the following features can be viewed. See Fig. 3.1.
Viewer Panes
Most display windows in the Vector NTI Suite are divided into four sections, or panes:
•=
A Text Pane holds folders containing text descriptions and analyses results for a
molecule shown in the Display window.
•=
A Graphics Pane displays a graphical depiction of a molecule. Features, restriction
sites, motifs, etc. are shown by labeled symbols.
•=
An Analysis Pane allows certain types of DNA and protein sequence analysis properties
to be performed and the results to be viewed as linear graphics.
•=
A Sequence Pane shows a nucleotide or amino acid sequence and functional features of
a molecule.
Variations of this will be explained in appropriate chapters.
13
Main
Menu
Main
Toolbar
Pane
Selection
Toolbar
Pane
Toolbar
Text Pane
Graphics
Pane
Sequence
Pane
Fig. 3. 1 Molecule display window
Viewer Window Operations
The following global operations for viewer windows apply to the Vector NTI Suite
applications and to Xpression Data Viewer. For details about operations specific to each
application, refer to the appropriate chapters.
Activating a Pane
Click anywhere in a pane to activate it or click on the pane buttons appearing at the left of
the lower toolbar.
Note: Clicking in a pane sometimes selects an entire molecule. To avoid this, use the
toolbar buttons to activate the pane.
Re-sizing of the Display Panes
Split bars separate the text, graphics, and Sequence Panes. Re-size the panes by dragging the
split bar that divides the panes. Position the cursor on the split bar until it changes to a two\headed arrow. LEFT-CLICK and drag to reposition the split bar.
Scrolling the Text Pane
Scroll bars appear when the contents of a pane exceed the viewing area. Move the scroll
bars vertically or horizontally to reposition the pane contents for easier viewing. If the active
pane is a Text Pane, it can also be scrolled with the arrow keys on the keyboard.
Layout Options
•=
14
Select View > Maximize Pane to expand the size of an activated pane to full screen
size. Select View > Restore Layout or press the ESC button to return to the original
pane layout.
Vector NTI and Xpression NTI User Interfaces Chapter 3
•=
Select View > Edit Pane Layout to open the Pane Manager for modifying the
arrangement of the panes in the workspace. For more details, refer to page 20.
Viewer Display Panes
Text Pane
Text Pane folders contain descriptions of molecules and other objects, their characteristics
and features, search results, methods and protocols.
Opening and Closing Folders
To open or close a folder, click the small square located to the left of the folder, doubleclick on the folder or line, select View > Toggle Folder or select the folder and press
ENTER.
Opening or closing a folder does not affect its state.
Expanding and Collapsing Folders
Opening of a folder simultaneously with some or all of its subfolders is called expanding
that folder. Closing a folder simultaneously with some or all of its subfolders is called
collapsing that folder. A folder and its subfolders are called a branch.
The View menu (and the shortcut menu) has commands for expanding and collapsing
folders and subfolders in various combinations:
Command
Result
Expand One
Level
Opens the focused folder; makes sure all subfolders are closed
Expand Branch
Opens the focused folder and all of its subfolders
Expand All
Opens every folder and subfolder in the text pane
Collapse Branch
Closes the focused folder and all of its subfolders
Collapse All
Closes every folder and subfolder in the text pane
Collapse
Around
Closes all folders and subfolders, except any highlighted folders
and their parents
Table 3. 1 View menu commands for expanding and collapsing folders and subfolders
Corresponding toolbar buttons: Expand Folder (
Branch (
), Expand Branch (
) and Collapse
)
Linking the Display window panes
Linking the panes of a display window gives the Text Pane control over the information
displayed in the Graphics and Sequence Panes. When linked, information from any open
folder in the Text Pane is displayed in the Graphics and Sequence Panes, while information
in closed folders is not displayed. Certain minimum information is always displayed,
15
however: a molecule name and length in a Graphics Pane and the nucleotide or amino acid
sequence in a Sequence Pane.
To link panes, activate the Text Pane and press the Link Panes button (
Window toolbar.
) on the
Linking panes reduces clutter, displaying only those objects that are important to your
current task and lets you display symbols hidden by Vector NTI’s Standard Arrangement of
graphics objects. The Standard Arrangement of DNA/RNA molecules’ graphics displays a
maximum of 70 restriction sites plus 70 motifs, displayed to show as many different
enzymes and motifs as possible.
You can override this display by linking the panes and opening the text folders for the only
signals whose every occurrence you want to display.
Use the linked panes to create attractive publication-quality figures without switching to the
Picture Editing mode and editing the picture manually. With the panes linked, close all
folders, then open the folders of the signals you want to display, and then click the
Standard Arrangement button (
). Symbols and labels will be redistributed to take
maximum advantage of available space.
Finding Objects on Graphics and Sequence Panes
Some objects, described in the Text Pane, are also displayed in the graphics and Sequence
Panes. To find the position of the object, select its line in the Text Pane and press the Find
) in the window toolbar, select Edit > Find or press CTRL+ F. The object will
button (
be selected on the Sequence and Graphics Panes. The Find command is disabled if the
selected line does not describe the object, displayed in two other panes.
Note: Vector NTI finds only single objects like a restriction site, not multiple objects like all
restriction sites for a certain REN.
Graphics Pane
Zooming the Graphical Map In and Out
To enlarge a graphical map, activate the Graphics Pane and click the Zoom In button (
on the Window Toolbar or choose View > Zoom In. The keyboard shortcuts are ] and
SHIFT + ]. To zoom in by a small increments, SHIFT + CLICK the Zoom In button.
To zoom out from a graphical map (reduce it by 50%), click the Zoom Out button (
)
on the Window toolbar or choose View > Zoom Out. The keyboard shortcuts are [ and
SHIFT + [.To zoom out by a small increments, hold down the SHIFT key and click the
Zoom Out button.
16
)
Vector NTI and Xpression NTI User Interfaces Chapter 3
If the current display is linear, change the horizontal zoom factor only using CTRL +
CLICK on the Zoom In or Zoom Out button. Changing only the horizontal zoom factor
changes the internal aspect ratio of the graphical display; this ratio is saved when you save
Display Setup and can be applied to other Display windows as well.
To fit a graphical map to the current size of the Graphics Pane, click the Fit to Window
button (
) on the Window toolbar or choose the equivalent command in the View menu.
To zoom into a selection on the graphics map, making the selection the current size of the
Graphics Pane, click the Fit Selection to Window button (
) on the toolbar or choose
the equivalent command in the View menu. In some display windows, you can select the
View Selection button (
Molecule.
). To return to the original view, select View > View Whole
One button is specific to the Gel Display window: Press the True-Scale View button (
)
to display the gel in an approximation of true scale. When you select this display option,
Vector NTI looks up the pixel size (dot pitch) of your monitor and displays the gel based on
that value.
Sequence Pane
Formatting Sequence Text
To format sequence text, select it by click + dragging the mouse across the text. Because the
Sequence Pane is active, you can use any of the following buttons or keystrokes to format
the text.
Button
Keystroke
Description
CTRL-B
Set or clear bold character(s) attribute
CTRL-I
Set or clear italic character(s) attribute
CTRL-U
Set or clear underline character(s) attribute
Font style dropdown menu
--
Select font name for character(s)
Font size drop-down
menu
--
Select font size for character(s)
--
Select font color for character(s)
--
Select background color for character(s)
Table 3. 2 Formatting sequence text
17
Miscellaneous Interface Features
Selection Techniques
To select text in a Molecule Viewer display window’s Text Pane, click on the line you wish
to select. To select multiple lines in a Sequence or Text Pane, press the mouse button and
drag across the lines you wish to select.
To make a selection in a display window’s Graphics Pane, choose View > Edit Picture
) to enter the Picture
with an active Graphics Pane or press the Edit Picture button (
Editing mode and click on any object or label to select it. To select more than one object,
click on each object in turn while holding down the SHIFT key.
To select text in a Sequence Pane, click and drag the mouse across the text.
You can select an entire pane by making that pane the active pane and choosing Edit >
Select All.
Copying Display Window Text, Graphics or Sequences Image To The Clipboard
Copying in Vector NTI and Xpression NTI can take several different forms:
Edit > Camera or Camera Button (
)
The Camera feature copies the graphical representation, or “takes a picture” of the selection
or activated pane contents. The contents are copied to the clipboard from where they are
pasted into a new page or slide in other running applications.
Activate a pane or make a selection, then press the Camera button or choose Edit >
Camera. In the dialog box that opens, choose the range and destination for the copied pane.
•=
Range - Specify the range of data to be copied. The selection option is unavailable if a
selection is not defined in the active pane.
•=
Copy To - Specify the destination of the copy operation. If the File option is selected,
the Copy To dialog box opens where the name of the output file can be specified.
Note: If nothing is selected, the entire pane is copied. The format of this dialog box may
vary slightly in different applications.
Copying Sequence or Alignment Pane Data
In copying the contents of a Sequence or Alignment Pane to the clipboard, the Camera
dialog box offers two formats for the copy:
18
•=
Metafile picture: only the snapshot of the Sequence or Alignment Pane will be copied
to the Clipboard
•=
Text: you can further specify to print either the entire alignment or only the selected
part of it (if there is selection at the moment). Sequences may or may not be wrapped. It
can then be pasted into any text processor.
Vector NTI and Xpression NTI User Interfaces Chapter 3
Note: A double-stranded sequence copied from Vector NTI becomes single-stranded when
it is pasted.)
The Clipboard stores Vector NTI text, sequence, alignment and graphical representations in
both RTF (Rich Text Format preferred by word processors) and in plain text format (for email and other applications preferring plain text).
Note: The RTF representation might not have exactly the same look as the sequence in the
Sequence Pane due to limitations of RTF.
Vector NTI graphics are stored as Windows Metafile (Windows).
Edit > Copy or Copy Button (
)
This copy feature transfers actual sequence and annotations, the molecule file, rather than
just the graphical representation. Molecules copied this way can be shared and used in other
Vector NTI Suite applications.
Text Pane data is copied a plain multilane text. Sequence data is copied as a plain text
string. All sequence formats recognized by Vector NTI can be pasted from the Clipboard.
Graphics Pane data is copied as a Windows Metafile.
Make the selection, then press the Copy button or select Edit > Copy. The copied data is
copied clipboard or file in text format. Preserves formatting and enables easy data exchange
with other applications.
Copying Raw Sequence
To copy real sequence data to the Clipboard, select a sequence region and choose Edit
Copy. The sequence is copied in the plain text format without formatting or line numbering.
This “raw” format is suitable for pasting into other molecular biology software including
programs in the Vector NTI Suite. The shortcut for the copy operation is Ctrl + C.
Edit > Copy To Command
This copy command saves a whole molecule or selection of a molecule to various file
formats, including saving a DNA/RNA sequence to a protein translation. If the whole
sequence is chosen, you have a choice of saving to GenBank, EMBL, FASTA, plain
sequence or amino acid translation (for DNA molecules). For a selection, the file format
choices are FASTA, plain sequence or amino acid translation (for DNA selections).
Open a molecule, make the selection, if desired, and choose Edit > Copy To from the pull
down menu. Choose the desired file type and storage location. Choose whole molecule or
selection.
The Edit > Copy To command is implemented in Vector NTI and the Vector NTI Database
Explorer.
19
Printing from Display Windows
Display windows are printed one pane at a time. To print a pane, activate it, then press the
Print button (
) on the main toolbar or choose File > Print.
Note: Print copies are similar to the screen display, so adjust the picture on screen before
printing.
Page Setup
Text and Sequence Panes are printed in a standard format. For the text and sequence, you
can change the content of what is printed, but not the layout. If a Text Pane is activated, any
open folder is printed.
Graphical maps can be printed out at any size and in various positions on the page.
To change the size and position of a graphical map’s printout, select File > Page Setup. In
the dialog box, set the margins (in inches) for your printout. Select File > Print Setup to
specify the page orientation and size. Click OK to print.
Print Preview
To see a preview on your screen of what the printout will look like, choose Molecule >
Print Preview or press the Print Preview button (
).
If you want to print just a selection, use the camera option. Select the region, click the
camera on the Main Toolbar, paste the copied selection to a new application (such as word
processing software) and print from there. (See next section.)
Exporting Molecule Data
BioPlot allows simple export of a molecule as GenBank (GenPept for proteins), EMBL
(SWISS-PROT for proteins), FASTA, or as text sequence. To export a molecule to an
external file, choose File > Save As and select file type in the standard File save dialog box.
Pane Manager
In most components of the Vector NTI Suite, you can modify the layout of the display
panes. To open the Panes Layout Editor, sometimes called Pane Manager, where you can
modify display pane layout, select View > Change Panes Layout.
The main elements of the Pane Manager editor dialog box (Fig. 3.2) are the hierarchy layout
tree, the preview panel, and the drop-down menu (with a list of predefined layouts).
20
Vector NTI and Xpression NTI User Interfaces Chapter 3
Fig. 3. 2 Pane Manager editor dialog box
The hierarchy layout tree represents the current layout (always the last settings used), while
the node (Vertical, Horizontal, or Tabular) describes the relationship between the panes.
Options for modifying the pane layout appear on the shortcut menu, opened from the
Vertical, Horizontal and Tabular nodes or from the Text, Graph or Sequence Pane leaves.
Shortcut menu options are as follows:
•=
Change Layout - For Vertical, Horizontal, or Tabular nodes, this operation changes the
relationship between underlying leaves (designated with green icons).
•=
Dismiss - This operation does not affect the root node. It removes the selected node,
and shifts all of the underlying leaves to control of the root node. For example, if you
dismissed Horizontal in the above graphic, the Text, Graph, and Sequence Panes
would all be displayed vertically.
•=
New sublayout -This adds a new node in the designated area.
•=
Up - This will move the node or leaf up in the tree.
•=
Down - This will move the node or leaf down in the tree.
You can also change the parent node for any node or leaf. All you have to do is just drag the
node or leaf and drop it to new parent node.
The Predefined Layouts drop-down menu contains a list of predefined pane layouts.
The preview panel of the editor shows the layout for the current state of the hierarchy tree
and is redrawn immediately when you change the layout. This panel is immediately redrawn
after the state of the hierarchy tree is changed. The Info Pane is generally known as the Text
Pane in most Vector NTI applications.
21
Press the OK button after editing the layouts to apply your changes to the real panes or
press CANCEL to discard your changes.
Notes About Pane Manager:
22
•=
You cannot add or delete a pane leaf. You can only move these leaves and configure
their output.
•=
The Tabular selection places tabs at the bottom of each pane in the window.
•=
The Predefined option Standard returns the layout to the original.
Vector NTI Suite and Xpression NTI Toolbars Chapter 4
Chapter 4 Vector NTI Suite and Xpression NTI Toolbars
Introduction
This chapter gives a brief pictorial overview of toolbar buttons and descriptions of their
functions as they are used in Vector NTI Suite and Xpression NTI software.
The buttons described in this chapter are divided according to the application. Within each
module, there is a Main Toolbar section containing buttons used for major program
functions, such as opening and saving projects, adding molecules, etc. In most modules
there is a Pane Selection Toolbar with buttons used to switch between the active panes. A
Pane Toolbar containing buttons for manipulating the active display window follows the
Pane Selection Toolbar.
A brief description of the functions of each tool on each toolbar is presented below. Many
toolbar commands can be launched from the menu bar, from a shortcut menu or from
keystrokes.
Molecule Display/Gel Display windows
Molecule Display/Gel Display Main Toolbar
Button
Description
open an existing project
save the current project
create a display window for a new gel
send the active window as an Email document
copy data to clipboard
undo the previous editing action
redo the previous editing action
display a print preview
print the active pane
open the local database explorer
connect to a shared database
23
Button
Description
prepare the local and shared database explorer window for data
exchange
add a new fragment to the goal list
add selection to the oligo list
add selected fragments to the to gel sample list
open the goal molecule definition list
open the oligo list
open gel sample list
execute the last tool
access information about Vector NTI
open Vector NTI World Wide Web home page
displays online help
Table 4. 1 Molecule Display/Gel Display Main toolbar
Molecule Display/Gel Display Pane Selection Toolbar
Button
Description
switch to the Text Pane
switch to the Graphics Pane
switch to the Gel Graphics Pane
switch to the Sequence Pane
Table 4. 2 Molecule Display/Gel Display Pane Selection toolbar
Molecule Display/Gel Display Text Pane Toolbar
Button
Description
display setup
view molecule fragment
24
Vector NTI Suite and Xpression NTI Toolbars Chapter 4
Button
Description
create a new gel sample
add a gel marker from the database to a new lane
add selected fragments to the gel sample list
add a new lane containing the gel sample list fragment
find the selected signal in other panes
link panes
expand current folder
expand current folder and all subfolders
collapse current folder and all subfolders
delete a molecule from the project
add selection to the oligo list
Table 4. 3 Molecule Display/Gel Display Text Pane toolbar
Molecule Display/Gel Display Graphics and Gel Graphics Pane Toolbar
Button
Description
display setup
view molecule fragment
create a new gel sample
add a gel marker from the database to a new lane
add selected fragments to the gel sample list
add a new lane containing the gel sample list fragment
reverse the gel one increment of time per click.
track gel run time
25
Button
Description
advance the gel one increment of time per click.
animate gel run
calculate the time for separation of selected fragments
add feature
graphics display setup
search for nucleotide sequence
circular display
linear display
increase graphs’ horizontal scale
decrease graphs’ horizontal scale
scale graphs to fit the pane window
true scale display of gel
standard arrangement
translate currently selected nucleotides in direct strand
translate currently selected nucleotides in direct complementary
strand
edit picture
add annotation
Table 4. 4 Molecule Display/Gel Display Graphics and Gel Graphics Pane toolbar
Molecule Display Sequence Pane Toolbar
Button
Description
display setup
view molecule fragment
26
Vector NTI Suite and Xpression NTI Toolbars Chapter 4
Button
Description
add feature
search for nucleotide sequence
cut out current selection while copying it to the
clipboard
copy current selection to the clipboard
paste data from the clipboard
toggle one/two strands mode
translate currently selected nucleotides in direct
strand
translate currently selected nucleotides in direct
complementary strand
clear all translations currently shown
toggle the bold mode for the selected character(s)
toggle the italic mode for the selected character(s)
toggle the underline mode for the selected
character(s)
choose the font size for the selected character(s)
choose the font name for the selected character(s)
choose the background color for the selected
character(s)
choose the font color for the selected symbols
Table 4. 5 Molecule Display Sequence Pane toolbar
AlignX Toolbars
AlignX Main Toolbar
Button
Description
open an existing project
saves the current project
27
Button
Description
adds a molecules to the project
multiple alignment
multiple alignment using profile
add molecule(s) to existing alignment
options for pairwise, multiple, profile alignments
open Dot Matrix window
display a print preview
print active pane
copy data to clipboard
displays online help
Table 4. 6 AlignX Main toolbar
AlignX Pane Selection Toolbar
Button
Description
switch to the Text Pane
switch to the PhylogeneticTree Pane
switch to the Graphics Pane
switch to the Alignment Pane
Table 4. 7 AlignX Pane Selection toolbar
AlignX Text Pane Toolbar
Button
Description
expand current folder
expand current folder and all subfolders
collapse current folder and all subfolders
28
Vector NTI Suite and Xpression NTI Toolbars Chapter 4
Button
Description
delete a molecule from the project
find the selected signal in other panes
Table 4. 8 AlignX Text Pane toolbar
AlignX Phylogenetic Tree Pane Toolbar
Button
Description
remove a molecule from alignment
save phylogenetic tree to .ph file
Table 4. 9 AlignX Phylogenetic Tree Pane toolbar
AlignX Graphics Pane Toolbar
Button
Description
increase graphs’ horizontal scale
decrease graphs’ horizontal scale
scale graphs to fit the pane window
zoom graphs to selection
toggle the vertical axis
toggle the legends
toggle the legends position
open the analysis dialog box
open plot setup dialog box
Table 4. 10 AlignX Graphics Pane toolbar
AlignX Alignment Pane Toolbar
Button
Description
open edit alignment dialog
remove a molecule from alignment
29
Button
Description
open alignment display setup dialog
Table 4. 11 AlignX Alignment Pane toolbar
Dot Matrix Toolbar, AlignX
The Dot Matrix application is accessible within AlignX. Window.
The molecules’ selection toolbar has 2 drop-down menu controls to select the pair of
molecules for a Dot Matrix.
Dot Matrix Main Toolbar
Button
Description
open Dot Matrix setup
undo previous zoom
redo previously undone zoom
maintain isotropic scaling
show grids on zoomed matrix
display a print preview
print active pane
copy data to clipboard
display online help
Table 4. 12 Dot Matrix Main toolbar
Similarity Table Toolbar, AlignX
The Similarity Table application is accessible from the Alignment drop down menu in the
AlignX window.
Similarity Table Main Toolbar
Button
Description
show similarity values on the top section of the table
show divergence values on the top section of the table
30
Vector NTI Suite and Xpression NTI Toolbars Chapter 4
Button
Description
show similarity values on the top and divergence values on the
bottom
print the current table
copy the current table to the clipboard
Table 4. 13 Similarity Table Main toolbar
BioPlot Toolbars
BioPlot Main Toolbar
Button
Description
open an existing molecule
save a BioPlot project
copy data to the clipboard
paste data from the clipboard
open the analyzer setup dialog
open the analyses list dialog
display a print preview for the active pane
print the active pane
open the camera dialog
displays online help
Table 4. 14 BioPlot Main toolbar
BioPlot Pane Selection Toolbar
Button
Description
switch to the Text Pane
switch to the Plot Pane
switch to the Sequence Pane
Table 4. 15 BioPlot Pane Selection toolbar
31
BioPlot Text Pane Toolbar
Button
Description
expand the current folder
expand the current folder and all subfolders
collapse the current folder and all subfolders
find the selected feature in the other panes
Table 4. 16 BioPlot Text Pane toolbar
BioPlot Plot Pane
Button
Description
toggle the vertical axis
toggle the legends
toggle the legends position
open the plot setup dialog
increase the plots horizontal scale
decrease the plots horizontal scale
scale the plots to fit the pane window
zoom the plots to selection
switch to the edit layout mode
switch to the overlapped mode
bring the active plot(s) to the top
send the active plot(s) to the bottom
Table 4. 17 BioPlot Plot Pane
BioPlot Sequence Pane
Button
Description
toggle one/two strands mode
32
Vector NTI Suite and Xpression NTI Toolbars Chapter 4
Button
Description
translate currently selected nucleotides in direct
strand
translate currently selected nucleotides in direct
complementary strand
clear all translations currently shown
switch to the format mode
toggle the bold mode for the selected sequence
toggle the italic mode for the selected sequence
toggle the underline mode for the selected sequence
choose the font name for the selected sequence
choose the font size for the selected sequence
choose the background color for the selected
sequence
choose the font color for the selected sequence
Table 4. 18 BioPlot Sequence Pane
ContigExpress Toolbars
Project Explorer Toolbar
Button
Description
locate and open an existing ContigExpress Project
save a ContigExpress Project to file
view the Tree pane in History mode
view the Tree pane in Content mode
assemble the currently selected fragments
dismiss an assembly
open the assembly setup options
33
Button
Description
copy the currently selected item(s) to clipboard
paste data from the clipboard
rename currently selected item
delete currently selected item(s) from the project
displays the properties of the selected item(s)
view the List pane in Large Icons mode
view the List pane in Small Icons mode
view the List pane in List mode
view the List pane in Details mode
enable the Show Contigs filter in List pane
enable the Expand Contigs filter in List pane
enable the Show Unassembled Fragments filter in List pane
enable the Show Other Fragments filter in List pane
invoke the Camera for the List pane
enables easy access to specified topics
Table 4. 19 Project Explorer toolbar
ContigExpress-Fragment Window
CE-Fragment Window Main Toolbar
Button
Description
save changes in active window back to project
cut out current selection while copying it to the clipboard
copy current selection to the clipboard
paste data from the clipboard
34
Vector NTI Suite and Xpression NTI Toolbars Chapter 4
Button
Description
undo the previous editing action
redo the previous editing action
open camera dialog
open viewing options dialog
display a print preview for active pane
print the active pane contents
display online help
Table 4. 20 CE-Fragment Window Main toolbar
CE-Fragment Window Pane Selection Toolbar
Button
Description
switch to the Text Pane
switch to the Sequence Pane
switch to the Chromatography Pane
Table 4. 21 CE-Fragment Window Pane Selection toolbar
CE-Fragment Window Text Pane Toolbar
Button
Description
Expand the current folder
Expand the current folder and all subfolders
Collapse the current folder and all subfolders
Find the selected feature in the other panes
Table 4. 22 CE-Fragment Window Text Pane toolbar
CE-Fragment Window Sequence Pane Toolbar
Button
Description
search for nucleotide sequence
35
Button
Description
find previous ambiguous nucleotide
find next ambiguous nucleotide
set line width (number of nucleotides shown in one
line)
toggle one/two strands mode
translate currently selected nucleotides in direct
strand
translate currently selected nucleotides in
complementary strand
toggle one/three-letter protein translation codes
toggle shows ORFs for selected sequence
toggle shows/hides peaks from deleted bases
clear all translations currently shown
switch to format mode
choose the font name for the selected sequence
choose the font size for the selected sequence
toggle the bold mode for the selected sequence
toggle the italic mode for the selected sequence
choose the background color for the selected
sequence
choose the font color for the selected sequence
Table 4. 23 CE-Fragment Window Sequence Pane toolbar
CE-Fragment Window Chromatogram Pane Toolbar
Button
Description
search for nucleotide sequence
find previous ambiguous nucleotide
36
Vector NTI Suite and Xpression NTI Toolbars Chapter 4
Button
Description
find next ambiguous nucleotide
zoom in chromotogram graph
zoom out chromotogram graph
show/hide A trace on the chromatogram toggle
show/hide C trace on the chromatogram toggle
show/hide G trace on the chromatogram toggle
show/hide T trace on the chromatogram toggle
show/hide peaks for deleted bases toggle button
Table 4. 24 CE-Fragment Window Chromatogram Pane toolbar
ContigExpress- Contig Window
CE-Contig Window Main Toolbar
Button
Description
Save changes in active window back to project
cut out current selection while copying it to the clipboard
copy current selection to the clipboard
paste data from the clipboard
undo the previous editing action
redo the previous editing action
open camera dialog
open viewing options dialog
display a print preview for active pane
print the active pane contents
37
Button
Description
display online help
Table 4. 25 CE-Contig Window Main toolbar
CE-Contig Window Pane Selection Toolbar
Button
Description
switch to the Text Pane
switch to the Graphics Pane
switch to the Alignment Pane
Table 4. 26 CE-Contig Window Pane Selection toolbar
CE-Contig Window Text Pane Toolbar
Button
Description
expand the current folder
expand the current folder and all subfolders
collapse the current folder and all subfolders
find the selected feature in the other panes
assemble fragments selected in the Text Pane
assemble all fragments except the selected fragments
Table 4. 27 CE-Contig Window Text Pane toolbar
CE-Contig Window Graphics Pane Toolbar
Button
Description
move fragment left
move fragment
move fragment right
reverse complement fragment
show ORFs on the graphics display
38
Vector NTI Suite and Xpression NTI Toolbars Chapter 4
Button
Description
zoom in contig graph
zoom out contig graph
fit the graph to screen
Table 4. 28 CE-Contig Window Graphics Pane toolbar
CE-Contig Window Alignment Pane Toolbar
Button
Description
move fragment left
move fragment up and down
move fragment right
reverse complement fragment
move fragment back to the left
move fragment back to the right
show/hide chromatogram in the highlighted fragment
translate consensus sequence in the first frame
translate consensus sequence in the second frame
translate consensus sequence in the third frame
find sequence fragment
find a previous ambiguous symbol in the consensus
find a next ambiguous symbol in the consensus
Table 4. 29 CE-Contig Window Alignment Pane toolbar
39
AlignX Blocks Toolbars
AlignX Blocks Main Toolbar
Button
Description
open file or workspace
save current file
add file(s) to the project
search for blocks in highlighted sequences
AlignX Blocks parameter setup
link selected area
unlink selected area
undo link operation
redo link operation
print preview
print current page
copy an item to a file or to the clipboard
display online help
Table 4. 30 AlignX Blocks Main toolbar
AlignX Blocks Pane Selection
Button
Description
switch to the Text Pane
switch to Block List Pane
40
Vector NTI Suite and Xpression NTI Toolbars Chapter 4
Button
Description
switch to Schematic Pane
switch to Alignment Pane
Table 4. 31 AlignX Blocks Pane Selection
AlignX Blocks Text Pane
Button
Description
expand folder
expand branch
collapse folder
delete folder from project (see below)
find signals (see below)
Table 4. 32 AlignX Blocks Text Pane
AlignX Blocks Block List Pane
Button
Description
edit selected block
Table 4. 33 AlignX Blocks Block List Pane
AlignX Blocks Schematic Pane
Button
Description
define new block
Table 4. 34 AlignX Blocks Schematic Pane
AlignX Blocks Alignment Pane
Button
Description
AlignX Blocks parameter setup
define new block
Table 4. 35 AlignX Blocks Alignment Pane
41
3D Mol Toolbars
3D-Mol Main Toolbar
Button
Description
load file
save file
print preview
save as function
copy an item to a file or the clipboard
display online help
Table 4. 36 3D-Mol Main Toolbar
3D-Mol Pane Selection Toolbar
Button
Description
switch to Text Pane
switch to the 3D Pane
switch to Sequence Pane
Table 4. 37 3D-Mol Pane Selection Toolbar
3D-Mol Text Pane Toolbar
Button
Description
expand folder
expand branch
collapse branch
mark selection feature(s) to be shown in the 3-D structure
unmark selection feature(s) shown in the 3-D structure
42
Vector NTI Suite and Xpression NTI Toolbars Chapter 4
Button
Description
clear all marked regions
show marked atoms
hide marked atoms
Table 4. 38 3D-Mol Text Pane toolbar
3D-Mol Graphics Pane Toolbar
Button
Description
maximize Graphics Pane to fit the screen. Press Esc to return back
to three pane mode
scale the 3D molecule to fit the pane window
zoom the 3D molecule to selection
invert selection
unmark all
show marked atoms
hide marked atoms
show all atoms
hide marked atoms
switch to movement mode
measure distance between two atoms
measure valent angle between three atoms
measure torsion (dihedral) angle between four atoms
remove measurement marks
colors marked atoms to make them more visible
Table 4. 39 3D-Mol Graphics Pane toolbar
43
3D-Mol Sequence and Alignment Panes Toolbar
Button
Description
mark selection
unmark selection
mark all
show marked atoms
hide marked atoms
Table 4. 40 3D-Mol Sequence and Alignment Panes toolbar
Citation Viewer Toolbars
A brief description of the functions of the main toolbar is presented below:
Citation Viewer Main Toolbar
Button
Description
back to previous document
go to next document
open an existing document
save the active document with a new name
copy data to the clipboard
copy an item to a file or the clipboard
print the active document
display the full page
bring up database explorer window
display online help
Table 4. 41 Citation Viewer Main toolbar
44
Vector NTI Suite and Xpression NTI Toolbars Chapter 4
PubMed/Entrez Search Toolbars
A brief description of the functions of the main toolbar is presented below:
PubMed/Entrez Search Main Toolbar
Button
Description
back to previous document
go to next document
terminate query process
open a new window for a new search
open an existing parameter file
save parameter
copy data to the clipboard
undo a performed action
display online help
perform a search using the submitted conditions
Table 4. 42 PubMed/Entrez Search Main Toolbar
BLAST Search Toolbars
A brief description of the functions of each tool on the main toolbar, pane selection toolbar,
and pane toolbars are presented below:
BLAST Search Main Toolbar
Button
Description
open a new window for a new search
open an existing parameter file
save parameter
back to previous document
go to next document
options for specifying technical settings
45
Button
Description
display online help
perform a search using the submitted conditions
Table 4. 43 BLAST Search Main toolbar
BLAST Viewer Toolbars
A brief description of the functions of each tool on the main toolbar, pane selection toolbar,
and pane toolbars are presented below:
BLAST Viewer Main Toolbar
Button
Description
back to previous document
go to next document
open an existing document
save the active document with a new name
copy an item to a file or the clipboard
print the active document
display the full page
bring up database explorer window
display online help
Table 4. 44 BLAST Viewer Main toolbar
BLAST Viewer Pane Selection Toolbar
Button
Description
switch to the Text Pane
switch to the Sequence Profile/Hit Distribution Pane
switch to the Query-Hit Alignment Map Pane
46
Vector NTI Suite and Xpression NTI Toolbars Chapter 4
Button
Description
switch to the Hit Map Pane
switch to the Alignment Pane
Table 4. 45 BLAST Viewer Pane Selection toolbar
BLAST Viewer Text Pane Toolbar
Button
Description
expand current folder
expand current folder and all subfolders
collapse current folder and all subfolders
Table 4. 46 BLAST Viewer Text Pane toolbar
BLAST Viewer Sequence Profile/Hit Distribution Pane Toolbar
Button
Description
increase graphs’ horizontal scale
decrease graphs’ horizontal scale
scale graphs to fit the pane window
options for specifying technical settings
Table 4. 47 BLAST Viewer Sequence Profile/Hit Distribution Pane toolbar
BLAST Viewer Hit Map Pane Toolbar
Button
Description
increase graphs’ horizontal scale
decrease graphs’ horizontal scale
scale graphs to fit the pane window
options for specifying technical settings
Table 4. 48 BLAST Viewer Hit Map Pane toolbar
47
BLAST Viewer Alignment Pane Toolbar
Button
Description
options for specifying technical settings
Table 4. 49 BLAST Viewer Alignment Pane toolbar
Database Explorer Toolbars
Database Explorer Main Toolbar
Button
Description
back to previous document
go to next document
create a new subbase
dismiss a subbase
search the database
creates a local or shared database exchange
copy data to the clipboard
paste data on a clipboard
creates new object in the database objects pane
edits object selected in the database objects pane
renames the selected object
deletes objects
displays the properties of the selected object(s)
view mode displays large icons, small icons, list and details
48
Vector NTI Suite and Xpression NTI Toolbars Chapter 4
Button
Description
copy an item to a file or the clipboard
display online help
Table 4. 50 Database Explorer Main toolbar
Xpression NTI: Expression Database Explorer Toolbars
Expression Database Explorer Main Toolbar
Button
Description
go to Expression Viewer
back to previous subset
go to next subset
create a new subset
dismiss a subset
search the database
creates new object in the database objects pane
edits object selected in the database objects pane
renames the selected object
deletes objects
displays the properties of the selected object(s)
view mode displays large icons, small icons, list and details
copy an item to a file or the clipboard
display online help
Table 4. 51 Expression Database Explorer Main toolbar
49
Xpression NTI: Expression Viewer Toolbars
Expression Viewer Main Toolbar
Button
Description
go to Expression Database Explorer
open a file
save the current experiment to a file or to the database
cut selection to the clipboard
copy selection to the clipboard
paste from the clipboard
begin an Expression Database search session
undo the last operation
redo the last operation
print preview the active pane
print the active pane
copy an item to a file or the clipboard
display online help
Table 4. 52 Expression Viewer Main toolbar
Expression Viewer View Toolbar
Button
Description
zoom in on the active pane
zoom out the active pane
fit image to pane window
show/hide ruler toggle
show/hide grid lines toggle
tag the selection/add to a group
50
Vector NTI Suite and Xpression NTI Toolbars Chapter 4
Button
Description
untag the selection/remove from a group
shows Distribution Map bin properties
Table 4. 53 Expression Viewer View toolbar
Expression Viewer Tools Toolbar
Button
Description
data clustering options
data sorting options
data filtering options
plot analysis options
data processing options
Table 4. 54 Expression Viewer Tools toolbar
51
52
Tutorial: Molecule Display Windows Chapter 5
Chapter 5 Tutorial: Molecule Display Windows
Introduction
This tutorial chapter introduces you to the Vector NTI interface and Display windows,
Vector NTI Suite’s primary means for displaying and manipulating DNA/RNA/ protein
molecules, gels, and other search and analysis features.
At the end of this tutorial session, you will be able to:
•=
Create and become familiar with Molecule Display windows for DNA and proteins
•=
Navigate the Vector NTI interface
•=
Manipulate molecule graphics, sequences, and Text Panes
•=
Review molecule data
•=
Select and examine molecule fragments
•=
Link molecule features for selective display in all panes
•=
Display amino acid translations of the nucleotide sequence and open corresponding
proteins
Follow the steps of the tutorial in the order shown. Figures show what your screen should
look like at various points along the way.
1. Launch Vector NTI
To launch Vector NTI, double-click its icon in the program group or folder where installed
Vector NTI.
The first time you enter Vector NTI after installation, the database is empty. Vector NTI
asks permission to import an initial set of database objects from Vector NTI archives. Press
the OK button in the confirmation dialog boxes for the creation of all objects.
The DNA molecules, proteins, enzymes, oligos, and gel markers are imported to form the
initial Vector NTI database.
2. Inspect the Vector NTI Workspace and Database Explorer Windows
Vector NTI first appears on the screen with an empty workspace, superimposed by the
Database Explorer window.
53
Fig. 5. 1 Database Explorer window
The Database Explorer window (Fig. 5.1) shows the contents of a DNA/RNA molecules or
Proteins database table. The Vector NTI database is a collection of molecules and laboratory
data, organized for easy retrieval and management in Vector NTI’s Database Explorer.
The Explorer window can be closed without exiting Vector NTI. You can activate or reopen
the Database Explorer window at any time using the Local Database button (
main toolbar of the Vector NTI workspace.
) on the
You will work extensively with the Database Explorer tutorial, chapter 8, but for now close
the Explorer by clicking on the Close button (
) at the upper right of the title bar.
3. Create and Inspect a Molecule Display Window for pBR322
A Molecule Display window displays text information including a description of a
molecule, features and a graphical map of the molecule and its sequence. Before proceeding
any further, however, let’s open a molecule in the so that you can review the features as they
are discussed.
On the Molecule Display main (upper) toolbar, press the Open button (
). In the Open
dialog box, select the DNA/RNA Molecules tab. The DNA/RNA (MAIN) database is
selected in the drop-down menu. On the molecule list, scroll to pBR322 and double click on
it opening its Molecule Display window.
54
Tutorial: Molecule Display Windows Chapter 5
Main
menu
Main
Toolbar
Pane
Selection
toolbar
Pane
toolbar
Text
Pane
Graphics
Pane
Sequence
Pane
Fig. 5. 2 Molecule Display window for pBR322
A Molecule Display window title bar displays the name of the open object. In the display
) in the upper right
window that opens for pBR322 (Fig. 5.2), click the maximize box (
corner on the title bar. The window expands to fill the entire Vector NTI workspace.
A Molecule Display window is divided into three panes: a Text Pane (upper left) containing
folders with descriptions of a molecule and analysis results, a Graphics Pane (upper right)
displaying a graphical depiction of the molecule map including labeled features and
restriction sites, and a Sequence Pane (lower) displaying the molecule’s nucleotide or amino
acid sequence.
All Vector NTI Suite windows have a Main Menu and toolbars where many different
options and operations can be initiated. While many toolbar buttons are consistent in all
display windows, many toolbar buttons are context-sensitive. All Vector NTI Suite toolbar
buttons are summarized in Chapter 4 of this manual. As you are introduced to various
operations in the tutorial chapters, however, the toolbar buttons you will use are displayed
appropriately.
4. Arrange the Display Window Conveniently
To modify the relative sizes of the display panes, you can move the vertical and horizontal
split bars. Move the cursor arrow to the split bar where it changes to a two-ended arrow.
CLICK + DRAG with the left mouse button to move the split bar. Additionally, each pane
has its own scroll bars when the pane content exceeds its display area.
55
To activate the different panes of the display window, click the Text Pane (
), Graphics
) or Sequence Pane (
) buttons on the Window Toolbar. (You can also
Pane (
activate each pane by clicking it.) Note how the Windows Toolbar changes, giving you
different tools for each pane.
Switch to the Graphics Pane. Move the horizontal and vertical split bars to enlarge the
Graphics Pane viewing area.
Click on each of the following buttons to resize the graphical map:
•=
The Zoom In button (
•=
The Zoom Out button (
) enlarges the image
) reduces the image
) fits the image to the size of the window.
•= The Fit to Window button (
Now reduce or increase the map size in increments by holding down the SHIFT key and
clicking the Zoom buttons. Using the scroll button on your mouse while holding down the
shift key has the same effect as clicking the Zoom buttons.
5. Select a Fragment or a Feature in the Graphics Pane
Now let’s study Vector NTI’s selection techniques.
Make sure the Graphics Pane is active. Choose Edit > Set Selection on the menu bar,
opening the Set Selection dialog box. Enter the range 100 bp – 1000 bp and click OK.
A selection wireframe highlights the fragment on the molecule map (Fig. 5.3), with a caret
(short darkened line perpendicular to the wire frame) marking one end of the wireframe.
The selection position is displayed in the status bar at the bottom of your screen. The caret
position is also indicated on the status bar. The selection is simultaneously highlighted in the
Sequence Pane.
56
Tutorial: Molecule Display Windows Chapter 5
Wireframe
Fig. 5. 3 A selection wireframe highlights the fragment on the molecule map
Modifying the Selection
Click on the status bar with the mouse, opening the Set Selection dialog box again. Change
the setting to 200 bp – 2000 bp.
You can reposition the 5’or 3’ ends with the mouse by “dragging and dropping”. Move the
cursor to the 5’ end, identified when the cursor changes shape to a crosshair with the 5’
mark (
). Click and drag the 5’ caret to a new position near the start of the molecule
(“12:00 o’clock”).
Hold the Shift key down and press the right or left keyboard arrows. This moves the cursor
1 nucleotide (NT) at a time. Follow this in the Status Bar. Move the 5’ end to “1 bp”.
Press the END key to move the caret to the 3’ end (or click the cursor on the 3’ end). Press
and hold the SHIFT key while moving the left or right arrows to modify the selection. Move
the 3’ end to 1250 bp.
Hold down the SHIFT + CTRL keys and press the right or left arrow several times. Note
that the caret now moves 10 NT at a time. Release the CTRL key, hold down SHIFT and
press the left arrow. The caret is moving 1 NT at a time again. If you hold down the arrow
keys while holding the SHIFT key, the caret moves rapidly through the sequence. Release
the SHIFT key and press HOME. The caret returns to the 5’ end.
To make a new selection, click anywhere in the blank area inside the molecule map,
selecting the entire map. Click on the caret and drag the wireframe clockwise. Release the
mouse.
57
Tip: If you wish to deselect everything and are having problems doing so in the Graphics
Pane, click anywhere in the Sequence Pane.
Selecting Features
Locate the tetracycline resistance gene, TC®, on the graphics map. Pause the cursor over
the functional segment or label for a moment. A pop-up message with details about the
functional signals appears under the cursor.
To simplify selection of a functional signal on a graphical map, the paused cursor changes
to a hand (
). Click once over the TC®, selecting the gene. A wireframe selecting the
gene appears and the selected signal changes color. The gene sequence is concurrently
selected in the Sequence Pane.
Selection Techniques Summary for the Graphics Pane
When making or altering fragment selections, there are several general points to remember:
•=
Click and drag the mouse to select a region
•=
Click on a feature to select it
•=
Press SHIFT + right or left arrow to adjust an existing selection one nucleotide at a
time.
•= Press CTRL + SHIFT + right or left arrows to move the caret 10 nucleotides at a time.
Note: A selected fragment is simultaneously highlighted on the Sequence Pane. Vector NTI
always displays selection in both panes no matter where you make the selection.
6. Examine pBR322’s Nucleotide Sequence
Now let’s work with pBR322’s nucleotide sequence.
Drag the horizontal split bar up for better viewing of the nucleotide sequence. The
nucleotides are displayed in 10 NT blocks. Restriction sites appear by name above their
recognition sites. Motifs and ORFs also can be displayed by turning those options on the
Molecule Display Setup to be discussed later in this chapter.
Click anywhere in the Sequence Pane to activate it. Any prior selection disappears and the
blinking caret is placed at the position where you placed the cursor.
When the DNA/RNA Display Window opens, the displayed sequence is double stranded.
Click on the Double/Single Strand button (
display (Fig. 5.4).
58
) to change to a single stranded sequence
Tutorial: Molecule Display Windows Chapter 5
Single sequence
strand
Fig. 5. 4 Single-stranded sequence display
Scroll to the top of the sequence, using the scroll bar to the right of the sequence.
Select the first few lines of the sequence by clicking and dragging the mouse left to right
along the line and down through the sequence. The nucleotides are highlighted as you drag
and their coordinates are displayed in the selection box on the status bar. The selection also
shows within a wireframe in the Graphics Pane. Release the mouse.
To translate the selected sequence into amino acids, press the Translate Direct (
) and
Translate Complementary (
) buttons. The corresponding amino acids appear above
(direct strand) and below (complementary strand) the highlighted sequence (Fig. 5.5).
Numerals to the left of the sequence row indicate the phase of the translations. For the
Direct strand translation, phases are determined by the position of the first selected
nucleotide relative to the beginning of the molecule. They are designated +1, +2, or +3.
Complementary strand translation phases are determined by the position of the last selected
nucleotide relative to the end of the molecule. They are designated -1, -2, or –3.
59
Double sequence
strand
Amino acids
Fig. 5. 5 Selected double sequence strands translated into amino acids
To change from the 3-letter amino acid code to a 1-letter code, choose the Display Setup
button (
) and select Display Setup on the dropdown menu.
Fig. 5. 6 Molecule Display Setup dialog box
In the Molecule Display Setup dialog box (Fig. 5.6), choose the Sequence Set-up button
and then the 1-letter code radio button in the Sequence Setup dialog box. Click OK in both
60
Tutorial: Molecule Display Windows Chapter 5
dialog boxes. Inspect your selection. This dialog box is also used to modify or specify the
display of other features such as restriction sites. motifs and ORFs.
Click on the Erase Translations button (
) on the toolbar to erase the translations.
7. Work with pBR322’s Text Description
Click in the Text Pane or click the Text Pane button to activate the Text Pane. Drag the
vertical split bar to the right to enlarge the Text Pane.
The Text Pane is made up of folders that can be opened or closed by double clicking or
clicking on the ( ) to the left of the folder name. Open and review the contents of each of
the folders. Note particularly the following:
General Description Folder: This folder contains the molecule description. Close the
folder by clicking on it.
),
Feature Map Folder: Select this folder and press the Expand Branch button (
opening all of the Feature map subfolders. Move through the subfolders until you come to
the TC® in a subfolder of the CDS (Coding DNA Sequence) folder. Note the coordinates
shown.
Select the TC® folder and press the Find button (
). This selects the gene in the
Sequence and Graphics Panes. Close the folders with a double click.
The Find button can also be used to locate ORFs, motifs and other objects. Select the
appropriate folder in the Text Pane and press the Find button again. The keyboard
equivalent is CTRL + F.
Restriction Map Folder: Click on this folder to open it. Click on the Expand Branch
button (
) in the Window Toolbar, opening all restriction map subfolders.
Each subfolder contains a restriction site, listed alphabetically. Restriction sites which are
present at least once on pBR322 have active (colored) folders showing all of the site’s
positions on the molecule and its recognition sequence. To the right of each enzyme’s name,
its recognition sequence and cleavage points are displayed. Inactive folders (grayed out) are
for restriction endonucleases with no sites on the molecule.
The set of restriction enzymes listed in the Text Pane and searched for on all DNA
molecules when you open them is defined in the Molecule Display Setup dialog box. To
) on the Window
examine the list of selected enzymes, press the Display Setup button (
Toolbar and choose Display Setup on the dropdown menu. Press the Rmap Setup button,
opening the Restriction Map Setup dialog box (Fig. 5.7).
61
Fig. 5. 7 Restriction Map Setup dialog box
In this dialog box, you can add (or remove) any enzymes you wish to be searched for on all
open DNA molecules. Do not change the default settings. Press Cancel in both dialog boxes
to return to the Display window.
Locate the ApaLI folder in the Text Pane. The folder is open, showing a list of all ApaLI
sites on the pBR322 molecule. Click on the first site line to select it and press the Find
button (
) on the Window Toolbar. The ApaLI site is selected on the Graphics Map and
in the Sequence Pane. Move to those panes to verify this, then return to the Text Pane.
Close the Restriction Map Folder with a double-click.
8. Link pBR322’s Text Pane to the Graphics and Sequence Panes
In Vector NTI’s Display Windows, you can link panes so that the graphics and Sequence
Panes display only those objects whose folders are open in the Text Pane.
Press the Link Panes button (
) on the Window Toolbar. Most of the information
disappears from the graphical map, leaving only the molecule name and length. In the Text
Pane, open the Feature map folder and only the subfolders for the TC® gene (in the CDS
subfolder) and the Restriction Map folder with only the following enzyme folders open:
ApaLI, AvaI, BamHI, EcoRI and PstI. Because only open folders are now linked with the
Graphics Pane, only those features are illustrated in the Graphics Pane. (Make sure the
folders are closed for any features you do not want displayed.) Note that the sites and
functional signals appear on the graphic map as you open them in the Text Pane. The
sequence fragments are also highlighted at the same time.
62
Tutorial: Molecule Display Windows Chapter 5
Activate the Graphics Pane and press the Standard Arrangement button on the Window
Toolbar (
) to rearrange the restriction site labels for optimum display (Fig. 5.8).
Fig. 5. 8 Standard arrangement of restriction site labels for optimum display
Turn off the text/graphics link by clicking the Link Panes button in the Window toolbar.
Now the graphics and Sequence Panes are complete and unaffected by opening or closing
text folders.
9. Print pBR322’s Text Description, Graphical Map, and Sequence
To print the Text Pane contents, first make sure the Text Pane is active. Choose View >
Expand All from the menu bar. This opens all folder and subfolders.
Click on the Print button (
are printed.
). The contents of all open folders in pBR322’s Text Pane
Print the graphics and Sequence Panes in the same manner, activating each pane first. The
pBR322’s sequence printout consists of five pages of a standard format.
10. Create a Display Window for 41BB_HUMAN
Click on the Local Database button (
) on the Main Toolbar to open Database Explorer.
63
In the Database Table drop-down menu in the upper left, click on the arrow and select the
Protein Molecules table. Select the Protein Molecules (MAIN) subbase in the All Subbases
window.
Double-click on the 41BB_HUMAN molecule in the Database Protein Molecules list in the
right pane. A Molecule Display window opens for 41BB_HUMAN (Fig. 5.9) containing its
text description, analysis results, graphical Feature map, and sequence:
Analysis tables
Fig. 5. 9 Molecule Display window for 41BB_HUMAN
Double-click on the Analysis folder in the Text Pane, opening two tables showing the
results of the automatic protein analysis.
Select both tables by opening a shortcut menu with a right click on the Analysis Folder.
Choose the Select Folder command.
Press the Camera button (
) or choose Edit > Camera on the menu bar. In the Camera
dialog box, choose the range Selection and destination of your data Clipboard.
Press the Copy button, switch to a word processor program and paste the result into a new
or existing document. The results are displayed in a standard tabular form as shown here,
(in a truncated version):
64
Tutorial: Molecule Display Windows Chapter 5
Analysis
Length
Molecular Weight
1 microgram =
Molar Extinction
coefficient
1 A[280] corr. to
A[280] of 1 mg/ml
Isoelectric Point
Charge at pH 7
Entire Protein
255 aa
27897.66 m.w.
35.845 pMoles
11250
2.48 mg/ml
0.40 AU
8.13
3.72
Table 5. 1 Results of an automatic protein analysis in a word processor program=
Amino Acid(s)
Charged
(RKHYCDE)
Acidic (DE)
Basic (KR)
Polar (NCQSTY)
Hydrophobic
(AILFWV)
A Ala
C Cys
D Asp
E Glu
F Phe
Number
count
83
% by weight
% by frequency
33.00
29.00
25
29
90
67
10.00
13.00
32.00
24.00
9.00
11.00
31.00
24.00
11
25
11
14
16
3.02
9.33
4.51
6.34
8.14
4.31
9.80
4.31
5.49
6.27
Table 5. 2 Results of an automatic protein analysis in a word processor program=
11. Create a Display Window for 1B14_HUMAN
Return to the Database Explorer window, the Protein Molecules table and select the Protein
Molecules (MAIN) subbase.
Double-click the 1B14_HUMAN protein in the molecules list, opening it in the Molecule
Display window. Arrange the panes conveniently.
Note that with a large Feature map, the Graphics Pane appears crowded. To make it more
convenient to work with, use the “link mode” described above in step 8 to display fewer
features. Alternatively, Vector NTI allows you to limit the view by choosing a fragment of
the molecule for closer inspection (Fig. 5.10).
Select the region 231 aa –276 aa using the techniques described for DNA molecules.
Click on the View Molecule Fragment button (
) and choose View Selection (231 aa –
276 aa) from the popup menu. All three views are rearranged to display only the selected
fragment.
65
Fig. 5. 10 Viewing a molecule fragment
Double-click on the Analysis folder in the Text Pane. Note that the analysis tables now
show values for the selected fragment as well as for the entire protein.
Most of the other techniques for manipulating Protein Molecule Display windows are
exactly the same as for DNA/RNA Display windows.
12. Close the Display Windows and Exit Vector NTI
To complete your first session with Vector NTI, select Molecule > Close on the menu bar,
closing the display windows.
To exit Vector NTI, select File > Exit.
66
Tutorial: Molecule Editing Chapter 6
Chapter 6 Tutorial: Molecule Editing
Introduction
This chapter introduces you to operations of Molecule Display Windows that allow you to
edit a molecules’ Feature map and sequence. Although in this chapter you will work only
with DNA molecules, all operations are applicable to protein molecules as well.
At the end of this tutorial session, you will be able to:
•=
Create a Molecule Display window for a molecule
•=
Edit the general data, Feature map, and sequence for a DNA molecule
•=
Rename, describe and save a molecule in the database
•=
Alter starting coordinates for a DNA molecule
Follow the steps in the order shown. Figures show what your screen should look like at
various points along the way.
1. Launch Vector NTI
Launch Vector NTI by double-clicking its icon in the program group or folder in which you
installed Vector NTI.
2. Open a Display Window for pBR322
Activate the Database Explorer window and switch to the DNA/RNA molecules table.
Select the DNA/RNA Molecules (MAIN) subbase and double-click on the pBR322
molecule.
A display window opens in the workspace, containing pBR322’s text description, graphical
features, and restriction maps, and sequence. Maximize the Display window and arrange its
panes conveniently.
3. Edit pBR322’s General Data
At the top of the Text Pane, double-click the pBR322 name. This opens the Edit pBR322
dialog box (Fig. 6.1):
67
Fig. 6. 1 Edit pBR322 dialog box (DNA/RNA Molecule tab shown)
First, let’s add a keyword to the list of pBR322’s keywords. Choose the Keywords tab and
enter My own plasmid in the keyword drop-down menu. Press the Add button. Now the
keyword list contains two keywords: “ATCC” and “My own plasmid”. Switch to the
DNA/RNA Molecule tab, and change the description of the molecule to “My pBR322.”
Press the OK button.
Vector NTI updates the General Description folder in the Text Pane to show the new
properties. An asterisk now appears on the title bar, indicating that the molecule in a
window is a modified version of the pBR322 molecule stored in the Vector NTI database.
To save the modified pBR322 into the database under a new name, select Molecule > Save
As from the menu bar and enter My pBR322 to the DNA/RNA text box. Press OK.
The modified molecule is stored under the new name and updated in the display window.
The title bar and both the text and Graphics Pane show the new name “My pBR322”. The
title bar is no longer marked as modified (asterisk) because the displayed molecule is
exactly the same as the database molecule “My pBR322”.
Open a Display window for pBR322 to make sure that the original molecule was not
modified. To do so, click the Open button (
68
) on the Main Toolbar and select pBR322
Tutorial: Molecule Editing Chapter 6
on the Database DNAs/RNAs page. To continue, close all extra Display windows except
“My pBR322”.
4. Edit My pBR322’s Sequence
Activate the Sequence Pane and select the fragment 21 bp–40 bp (Fig. 6.2) using either the
drag and select method or the Set Selection dialog box described in the previous chapter.
Note that the selected sequence contains ClaI and HindIII sites.
Selected fragment
21 bp–40 bp
Fig. 6. 2 Display window for pBR322 with selected fragment 21 bp–40 bp
Choose Edit >New > Replace Sequence 21 bp–40 bp from the menu bar. In the Replace
Sequence dialog box (Fig. 6.3), use arrow keys to move the caret to the position “before 26
bp” (the caret position is displayed at the bottom of the dialog box). Press the Backspace
key twice to delete C and T to the left. Type A twice so that the resulting sequence is
TCAAAGATAAGCTTTAATGC. The status line on the bottom of the dialog box displays
“inserted 2, deleted 2” message.
69
Fig. 6. 3 Replace Sequence dialog box
Press the OK button to finish editing the fragment. In the updated Display window (Fig,
6.4), the ClaI site on the modified fragment has disappeared.
Fig. 6. 4 Display window with updated sequence
70
Tutorial: Molecule Editing Chapter 6
5. Revert to Database Version of My pBR322
The “My pBR322” molecule in the display window is now flagged (with an asterisk) as
modified because it differs from the version of “My pBR322” currently saved in the
database.
To return to the database version, choose Molecule > Revert To Saved In Database from
menu bar. Press OK in the confirmation dialog box.
The molecule in the display window returns to its database state and the window is no
longer marked as modified (no asterisk). Notice that ClaI site returned to its place in the
original sequence.
6. Insert a New Sequence Fragment
In general, editing a molecule sequence requires the adjustment of its Feature map. In this
step we will insert a new sequence fragment into our molecule and look at the resulting
Feature map.
Before you start, notice that the current AP(R) position is 3293 bp–4156 bp; the TC(R)
position is 86 bp–1276 bp. To see the positions of the features, pause the mouse cursor over
the feature or its label on the graphics map. A popup label appears, displaying the name and
position of the feature under the cursor.
Place the caret at 200 bp using the mouse, arrow keys, or Edit > Set Caret Position.
Choose Edit > New > Insert Sequence at 200 bp from the menu bar, opening the Insert
Sequence dialog box. Type in ten Ts (the number of nucleotides you entered is shown at the
bottom of the dialog box). Press OK to insert the sequence.
Vector NTI figures out that the modification you made requires an adjustment in the Feature
map. The dialog box appears with the message “CDS TC(R) is affected by sequence
editing.” Press the Keep button to leave the feature in a Feature map. Note that the inserted
nucleotides are highlighted in the sequence (Fig. 6.5).
Place the mouse cursor over AP(R) again to determine its position. Note that AP(R) has
been moved 10 nucleotides clockwise and is now positioned at 3303 bp–4166 bp.
71
Inserted
nucleotides
Fig. 6. 5 Inserted nucleotides are highlighted in the sequence
Vector NTI automatically moves all features located after the insertion but it does not move
any features before the insertion. If the insertion point is inside a feature and you decided to
keep the feature, Vector NTI automatically moves only the 3’ end of the feature. Observe
that the 3’end position of TC(R) was changed to 1286 bp.
7. Edit the TC(R) Signal
Double-click on the TC(R) signal or its name in the Graphics Pane. (The mouse cursor
changes to a hand over features and their names). Alternatively, click on the signal once and
choose Edit > Feature Properties from the menu bar or choose Feature Properties from
TC(R)’s shortcut menu. (To display a shortcut menu for any object, right click on the object.
The shortcut menu contains commands appropriate for the item to which you are pointing.)
In the Molecule Feature dialog box that opens, you can change the name, type or description
of the feature as well as its position on the molecule. Change the name of the signal to “Old
TC(R)” and its description to “10 bp fragment inserted”. Press the OK button. Vector NTI
updates the Display window to show the new name of the signal (Fig. 6.6).
72
Tutorial: Molecule Editing Chapter 6
New name of signal
Fig. 6. 6 Display window showing new name of the signal
8. Delete the P2_P Signal and Add a New Signal
Vector NTI allows you to easily add and delete features in a Feature map. To delete the
P2_P promoter from the Feature map, select it with a click on the label in the Graphics Pane
and choose Edit > Delete Feature From FMap from the menu bar. Alternatively, select
P2_P and choose Delete Feature From FMap from the shortcut menu. Press the OK
button in the confirmation dialog. P2_P is deleted from the Feature map and disappears
from the Display window.
Let’s add a new feature to the Feature map of My pBR322. First, select region 3000bp–3500
bp and press the Add Feature button (
) on the Window toolbar. Alternatively, you can
choose Edit > New > Add Feature to FMap. In the Molecule Feature dialog box, Vector
NTI puts the currently selected region into the From and To fields. By default, the “Misc.
Feature” type is assigned to new DNA/RNA features in the Feature Type panel, but you
may change the type to any other type. Name the new feature New Feature and press the
OK button. The new feature appears in the text and Graphics Panes of the Display window
(Fig. 6.7).
73
New Feature
Fig. 6. 7 New feature appears in the Graphics Pane
To save the modified My pBR322 into the database, choose Molecule > Save As from the
menu bar. Press the OK button, then OK again to overwrite the version of My pBR322
currently stored in the database.
9. Change the Starting Coordinate of My pBR322
The Molecule menu options control the operations that can be performed on a molecule as a
whole. Let’s change the starting coordinate of My pBR322 so that all features after the
inserted fragment have the same coordinates they have in the original pBR322 molecule.
Choose Molecule > Operations > Advanced (DNA/RNA) > Change Starting Coordinate
from the menu bar. In the dialog box that opens, enter a new starting coordinate. Since the
length of the inserted fragment was 10 bp, the new starting coordinate should be 1 bp + 10
bp = 11 bp. Enter 11 into the New Start field and press the OK button. Press OK in the
confirmation dialog. Vector NTI recalculates the Feature map and updates the Display
window. Verify that the new coordinates of AP(R) feature are the same as in the pBR322
(Fig. 6.8): 3293 bp–4156 bp and “Old TC(R)” is now at 76bp–1276bp.
Notice that the Display window is not marked as modified. For all commands from the
Molecule menu, Vector NTI always operates on the molecule in the database and updates
the Display window if required. If a molecule in a Display window was modified but not
saved at the time you choose a command, Vector NTI asks you to save the modified
molecule into the database and then repeat the command.
74
Tutorial: Molecule Editing Chapter 6
Fig. 6. 8 New coordinates of AP(R) feature
10. Close the Display Window and Exit Vector NTI
You have finished your session with Vector NTI. Close the Molecule Display window using
the Close command option in the Molecule menu. Quit Vector NTI with the File menu’s
Exit command.
75
76
Tutorial: Formatting Molecule Graphics Chapter 7
Chapter 7 Tutorial: Formatting Molecule Graphics
Introduction
In this chapter, you will learn to edit the representation of molecule graphics maps in a
Molecule Display window. Although here you work only with DNA molecules, all
techniques described in this chapter work equally well for protein molecules.
There are four ways to modify the text and graphics in the Graphics Pane. At the end of this
tutorial session, you will be able to:
•=
Use the Arrangement Setup Palette to modify the standard display of a molecule
•=
Modify the Graphical Display Setup for a DNA molecule and save the settings for use
with other molecule displays
•=
Format object graphics and labels manually in Picture Editing mode
•=
Define label and feature styles for a graphical image
•=
Save the molecule’s graphical representation to a Molecule Document file.
Note: The operations in this tutorial have no effect on the molecule itself, but only on its
graphical display.
Follow the steps in the order shown. Figures show what your screen should look like at
various points along the way.
1. Launch Vector NTI
Launch Vector NTI by double-clicking its icon in the program group or folder in which you
installed Vector NTI.
2. Open pBR322 in a New Display Window
To open database molecules using a new method, activate the main workspace window by
clicking on its title bar. This causes the Database Explorer to minimize. In the active
) on the Main Toolbar. In the Open dialog box,
workspace, click the Open button (
select the Database DNAs/RNAs tab and the DNA/RNA Molecules (MAIN) subbase. Scroll
to pBR322 and double click on it to open a new Molecule Display window.
3. Arrange the Display Window Conveniently
Click the maximize box (
) in the upper right corner of the Molecule Display window.
Click the Graphics Pane button (
) to activate it. Use the split bars and scroll bars to get
a convenient display of pBR322’s graphics map. Now SHIFT + CLICK the Zoom In (
)
77
and Zoom Out (
) buttons on the window toolbar to resize the graphics map until its
labels are easily readable.
4. Change the Arrangement Setup
Vector NTI automatically rearranges the symbols and labels on the graphics map when you
change the set of restriction enzymes, edit the functional map of the molecule, etc. This is
called the Standard Arrangement.
To change the parameters of Standard Arrangement, press CTRL while you press the
Standard Arrangement button (
) on the Window Toolbar. The Arrangement Setup
Palette appears, where you can change the standard arrangement settings like size of labels
and width of signals.
Experiment with the Standard Arrangement formatting by pressing
several of these buttons. The arrow buttons alter the molecule
features display, while the “A” buttons modify the text display.
When you are satisfied with the arrangement results, press the
Standard Arrangement button again to close the palette.
5. Change the Graphics Setup of CDS Signals
Using the Graphics Display Setup dialog box, you can change the predefined display styles
for elements of feature and restriction maps. You can specify that newly defined styles be
available for all features or that they be dedicated to only a specific feature type.
To modify the way CDS (Coding DNA Sequence) signals are displayed, right click on one
of the CDS signals in the Graphics Pane and choose CDS Display Setup from the shortcut
menu. In the Graphics Display Setup dialog box, the CDS feature type is automatically
selected. Here you will specify that all features of the same type (CDS) are formatted in the
same way.
78
Tutorial: Formatting Molecule Graphics Chapter 7
Fig. 7. 1 CDS Display Setup
Using the check boxes, you can even choose whether or not to display labels for a selected
feature type. You can choose label styles including font, color and text format and symbol
shapes and styles.
Press the More button near the Label Style drop-down menu. In the Properties dialog box
that opens, click the Font button. In the Font dialog box, choose Bold font style, and scroll
to the blue color and select it. Press OK. Now choose the Line tab on the Properties dialog
box and select a shade of blue to match the font color and press OK.
If you are asked whether you want to create a shared style to be used for all feature types or
a specific style that would be used for CDS signals only, press No to create a unique style
named “CDS Label”. This means that this style is available to format only CDS features.
This is indicated now in the Label Style box by the term CDS Label (Fig 7.2).
To change the symbol style, click the More button near the Symbol Style box and choose
the Fill tab. On the Fill tab, select light blue color. Press OK to close the dialog box. When
asked what kind of style you want to create, choose Yes to create a shared style. Vector NTI
assigns a sequential number to the new style (Shape 5) and allows you to use this style to
format not only CDS signals but other features as well.
79
Fig. 7. 2 Creating a unique style named “CDS Label”
Press OK. This closes the Graphics Display Setup dialog box and automatically rearranges
pBR322’s Graphics Pane to show the new display style for CDS signals (Fig. 7.3).
Fig. 7. 3 Graphics Pane shows new display style for CDS signals
The style modification you just made has no effect on the molecules displayed in other
Display windows. Vector NTI associates a style sheet with every Display window in the
system. A style sheet is a collection of different kinds of display settings such as Graphics
display settings (like those you just modified), sequence settings like 1-letter or 3-letter
translations and Feature map settings
All settings in the current style sheet are accessible from the Molecule Display Setup dialog
box you examined in the previous tutorial.
To save your modified style sheet, making it easily available to use with other molecules,
click on the Display Setup button (
) on the Window toolbar and choose the “Save
Settings As” command from the popup menu. Type the name Blue in the Save As dialog
box and press OK. To save unused styles, press No.
Close all display windows and reopen the pBR322 window. When first displayed, it uses the
Default style sheet. Click on the Display Setup button on the Window toolbar. The list of
available style sheets in the dropdown menu now has two elements: “Default” and “Blue”.
Choose the “Blue” style sheet, applying the style you just defined to the Display window.
CDS signals are now shown in blue.
80
Tutorial: Formatting Molecule Graphics Chapter 7
6. Turn on the Picture Editing Mode
If you prefer, you can format graphical maps manually and change the display style for
individual features and elements of other graphical maps.
The Vector NTI Graphics Pane can operate in two different editing modes:
•=
Molecule Editing mode (the default) where you can modify a molecule itself, such as
adding functional features, restriction sites or inserting or deleting residues in a
molecule. This was covered in Chapter 6.
•=
Picture Editing mode where you can format individual labels, arrows and symbols of a
molecule’s graphical maps. Operations on the graphics in this mode do not modify the
molecule itself.
To switch the Graphics Pane into the Picture Editing mode, activate the Graphics Pane and
press the Edit Picture button (
) on the Window Toolbar.
Note: Vector NTI automatically reverts out of Picture Editing mode back to Molecule
Editing mode as soon as you select a sequence fragment in a Sequence Pane or perform
some operation on a molecule.
7. Turn the TC(R) Arrow to Blue Cross-Hatching
Locate the arrow representing the TC(R) (tetracycline resistance gene) symbol on the
graphics map. Let’s change its current pattern to cross-hatching and its color to light green,
and then enlarge the arrow.
Verify that the Picture Editing mode is on. (View > Edit Picture should display an enabled
Picture Editing mode button.) Point the cursor at TC(R) (the cursor changes shape to a
pointing hand) and double-click on the arrow. In the Properties dialog box, click on the Fill
tab. On the Fill tab, click in the pattern box. Select the crosshatched pattern in the scrolldown list, and click on it (Fig. 7.4).
Fig. 7. 4 Selecting the cross-hatched pattern in the Pattern field
81
In the color selection box, choose green and click on OK. Immediately after the color
change, the arrow’s colors are inverted, showing that the signal is currently selected. Click
in the graphical map outside the TC(R) arrow, deselecting it. The new pattern and color are
displayed.
8. Enlarge the TC(R) Arrow
To enlarge the TC(R) arrow, click on it, selecting it.: “Drag boxes” or “handles” now appear
at its corners. Note: If you do not see drag boxes after you click on the arrow, the pane is
not in Picture Editing mode.
Fig. 7. 5 Making the arrow thicker and thinner by dragging the handles
Move the cursor to the drag boxes at the tail of the arrow where the cursor turns to a thin
four-pointed arrow (
). Click and hold the left button on one of the drag boxes, and move
the mouse a bit. Practice making the arrow thicker and thinner by dragging the handles (Fig.
7.5). The drag boxes at the front of the arrow are for changing the shape of the arrowhead.
Feel free to experiment with them on your own.
To drag the arrow radially inwards or outwards on the map, move the cursor to the middle
). Press and
of the TC(R) arrow where it changes to a thick white four-pointed arrow (
hold the left button and drag mouse inward or outward. CTRL + shift + left button-drag
moves the arrow around the circle.
Remember, although the functional symbol graphics may have changed position on the
graphics map, the actual molecule remains unaffected because you are in Picture Editing
Mode. The double key combination has been designed with the drag to prevent you from
moving functional signals out of position on the graphical map by accident.
82
Tutorial: Formatting Molecule Graphics Chapter 7
To undo any changes you make in the graphical map, press the Undo button on the main
toolbar (
), or by press CTRL + Z.
9. Format TC(R)’s Label
To change the formatting of the TC(R) label, double-click on it, opening the Properties
dialog box for the label (Fig. 7.6).
Fig. 7. 6 Properties dialog box for the label
Select the Text tab and press the Font button. Set the font to 18-point bold italic in the Font
dialog box (Fig. 7.7). Press the OK buttons in both dialog boxes. Reposition the label using
LEFT-CLICK + drag. Practice selecting and dragging other labels around the screen.
Fig. 7. 7 Changing the formatting of the TC(R) label
Undo the reposition changes by pressing the Standard Arrangement button (
) on the
toolbar. If the picture was modified, Vector NTI displays a confirmation dialog before
proceeding.
10. Add a Text Annotation
To add a text note indicating that TC(R) is to be cloned into pUC19, click the Annotation
button (
) on the Window Toolbar. In the Annotation dialog box, enter the words Clone
83
into pUC19 in the Annotation Text Field and press OK. Your text appears, selected, just
above the center of the molecule. Drag the annotation directly under the TC(R) label (Fig.
7.8). Double-click on the annotation and press Font in the Properties dialog box. Change the
font to Arial 10 point bold. Press the OK buttons in both dialog boxes.
Fig. 7. 8 Adding a text annotation
An annotation can be removed by selecting it and choosing Edit > Delete Annotation on
the menu bar. Select Yes to confirm the deletion.
11. Experiment with Styles
Styles allow us to assign a single format to many objects in a centralized, organized fashion.
They work much like styles do in word processing software.
The plasmid pBR322 has 3 CDSs, TC(R), AP(R) and ROP. On the graphical map, locate all
three CDSs and their labels. In step 5, you defined the unique style “CDS Label” that can be
used to format all CDS labels. Then you modified the features and labels in the pBR322
Molecule Display window to reflect the new formatting. In step 9, you modified the TC(R)
label and now its format attributes are different from those prescribed by the style “CDS
Label” style. Vector NTI permits graphics objects to be formatted differently than
prescribed by their styles. This simplifies graphics map editing and allows one to change a
style using the formatted object as a template.
Click on the TC(R) label and open its associated shortcut menu with a right click. The
Redefine ‘CDS Label’ Style by Example menu item is enabled because the format
attributes of the TC(R) label are different from those prescribed by its style. Click on the
Redefine… command.
The CDS Label Style is changed and all three CDS labels automatically change format as
well.
Note: Although the style is changed, it still has not been saved to the Display Setup Profile.
See Step 12.
A simple alternative way to redefine a new formatting style for labels or features in the
same display window is to use the Copy/Paste feature. Right-click on the Ap(R) signal and
open the Properties dialog box from the shortcut menu. Reformat the fill pattern and color
on the Fill tab and click OK. Now select the re-formatted object and select Copy Style from
the shortcut menu. Select the TC(R) arrow and select Paste Style (Fig. 7.9) from a new
84
Tutorial: Formatting Molecule Graphics Chapter 7
shortcut menu. You can redefine the set style by selection the Redefine… option on the
shortcut menu.
Fig. 7. 9 Using the Copy/Paste feature to redefine a new formatting style for labels
You can use styles for automatic formatting of functional symbols—arrows, blocks, etc.—
as well as for text. Styles for graphics objects store not only color and pattern attributes, but
also geometrical characteristics such as width and arrowhead dimensions. This is a powerful
feature for creating publication-quality figures.
In spite of the fact that the graphical formatting of pBR322 in the Display Window was
changed, the molecule is not marked as modified (with an asterisk on the title bar).
Graphical modifications of molecules are not stored in the database, but in a molecule
document file. The actual molecule in the window was not changed; it remains in the Vector
NTI database as it was originally.
12. Save the pBR322 Molecule Display to a Molecule Documentfile
You can save the contents of the pBR322 Display window with its graphical formatting
changes in a Molecule Document file (not the database). Select Molecule > Save As > Save
as File tab.
In the dialog box, name the file pBR322.gb and press OK. If Vector NTI was configured
for Internet publishing, a confirmation dialog box appears asking your permission to create
an HTML file describing the molecule. Press Yes, and Vector NTI notifies you that an
HTML file is created.
Note: The Molecule Document file you created is completely independent of the Vector
NTI database. It contains all the molecule information and any results of molecule analyses
and the graphical representation of the molecule. Think of a Molecule Document as a selfcontained “snapshot” of your work with a molecule. You can exchange Molecule
Documents with your colleagues, publish them on the Internet, send them through electronic
mail, etc.
85
To close the pBR322 molecule window, select Molecule > Close on the menu bar.
Vector NTI now detects that the style sheet associated with the pBR322 Display window
has changed (remember that you redefined the “CDS Label” style) and requests
confirmation to save them to the profile. Click Yes. In the Save Current Display Settings As
dialog box that opens, select Blue from the Settings Name drop-down menu, confirm, and
press OK. Since you already have a style sheet named Blue, choose Yes for Save Unused
Styles. This overwrites the original Blue style sheet with the modified one. Sometimes this
option does not appear until you try to close the molecule.
After the modified style sheet is saved, Vector NTI closes the pBR322’s Display window.
Now open the Molecule Document you created, with Molecule > Open > Molecule File
tab, and select the name of the saved document file from the file list. Your Molecule
Document opens with all of your changes preserved.
Note: Every style required by a document is saved within the molecule document itself.
This means that, unlike molecules opened from the database, the pBR322 molecule
document will always look the way you formatted it before saving to a molecule document
file.
Note that the window title now reflects the fact that the Molecule Display window displays
the molecule data from the document, not from the Vector NTI database. No matter how
many times you modify the molecule and save it back to the molecule document, pBR322 in
the database remains unchanged.
Note: Vector NTI does not support the whole range of molecule operations on the
molecules in molecule documents. Sometimes, Vector NTI prompts you to save the
molecule into the database first and repeat the operation on the molecule saved in the
database. The Demonstration version has extra restrictions on the kind of operations you can
perform on such “external” molecules.
13. Use the Saved Style Sheet to Format Molecule Display Windows
Now we can use the saved settings to format other molecules as well. Close the pBR322
) on the main toolbar. In the Open dialog box
Display window. Click the Open button (
on the Database DNAs/RNAs page, select the M13 molecule from the molecule list and
press OK. All CDS features and labels display the default settings. In the Molecule Display
window, press the Display Setup button. Select the Blue style sheet from the Setup Profile
list on the dropdown menu and press OK. In the Molecule Display Window for the M13
molecule, note that all CDS labels now have the formatting we defined in a “CDS Label”
style (Fig. 7.10).
86
Tutorial: Formatting Molecule Graphics Chapter 7
Fig. 7. 10 Using a saved style sheet to format Molecule Display windows
You can define and give name to several independent Display Setup settings like Blue and
use them to reformat graphics representation of molecules in Molecule Display windows.
To switch to another style sheet, click on the Display Setup button in the Window toolbar,
and select the name of the style sheet in the popup menu. Vector NTI reformats the active
display window according to setting you choose.
14. Close the Display Window and Exit Vector NTI
To finish your session with Vector NTI, close the Molecule Display Window using
Molecule > Close on the menu bar. Exit Vector NTI using File > Exit.
87
88
Tutorial: Database Explorer Chapter 8
Chapter 8 Tutorial: Database Explorer
Introduction
This tutorial introduces you to Vector NTI’s Database Explorer, a simple and flexible
interface for managing and manipulating various kinds of objects in the Vector NTI
database. The Explorer format makes it relatively simple to store, sort, and manage
information such as molecules created in your laboratory, enzymes stored in your freezer,
molecules with particular antibiotic resistance capabilities or oligonucleotides designed for
PCR.
At the end of this tutorial session, you will be able to:
•=
Navigate the VNTI Database Explorer
•=
Use menu and toolbar commands
•=
Alternate between database subbases
•=
Select and edit listed subbase objects
•=
Search the database for objects with specified features
•=
Create new subbases
•=
Add new user-fields to database objects
•=
Use User-Field Manager to display new user-field columns
•=
Use Contact Manager to manage contact information
Follow the steps of the tutorial in the order shown. Figures show what your screen should
look like at various points along the way.
1. Launch Vector NTI
Launch Vector NTI using techniques learned in previous tutorial sessions. When you open
Vector NTI for a new session, the Database Explorer window opens automatically. You can
minimize or close the Database Explorer without exiting VNTI. You can maximize or
reopen the Database Explorer window at any time using the Local Database button (
on the Main Toolbar of the Vector NTI workspace.
)
2. Inspect the Database Explorer Window
Maximize the Vector NTI Database Explorer window. This window displays the contents of
local and shared databases. The databases are organized into several tables containing
subbases of the respective type. Each Database Explorer window has two panes, the
Subbase Pane on the left and the selected subbase Database Objects Pane on the right.
Locate the database Table box in the upper left-hand corner of the screen and click on the
drop-down menu arrow to view the various Database Tables. To alternate between database
89
tables, select a table from the drop-down menu dropdown menu or select from the Table
menu on the menu bar.
Protein Molecules
(MAIN) subbase
Subbase contents
in database
Fig. 8. 1 A list of protein subbases is displayed in the Subbase Pane
In the Database Table drop-down menu, select the Protein Molecules table. The list of
protein subbases is displayed in the Subbase Pane, initially containing only one subbase
called Protein Molecules (MAIN) (Fig. 8.1).
The subbase contents are listed in the Database Objects Pane. This subbase contains all of
the protein molecules in the database. The contents of each of the (MAIN) default subbases
are maintained by Vector NTI similarly with all of the respective database objects for that
table. Scroll through the list of proteins to become familiar with the database format.
The Vector NTI Database Explorer window has a single toolbar containing the most
frequently used commands. Most commands can also be initiated from the menu bar. For
details about the Database Explorer toolbar refer to Chapter 4. Toolbar buttons are included
in the tutorial as needed.
3. Experiment with View Options
Pull down the View menu to review the available viewing options. (Options are duplicated
by toolbar buttons.) You can view your molecules as large or small icons, a compact list and
a tabular form with columns showing various object properties (the “details” mode).
90
Tutorial: Database Explorer Chapter 8
By default, the Database Explorer shows proteins in the details mode. Click on each of four
mode buttons at the right of the toolbar to view the object list in each mode, and then switch
back to the details mode.
To sort database objects in ascending or descending order, select View > Arrange Icons or,
if you are in the details mode, click on the column headers. Click on the Length column
header several times to sort the molecules by length. Adjust the widths of the column by
click + dragging the small lines separating the column headers.
4. Experiment with Selection and Menus and Edits
The Database Explorer window combines several standard selection techniques. Select
multiple objects by:
•=
SHIFT + CLICK to
select all objects within a range
•=
CTRL + CLICK to
select non-contiguous objects in a list
•=
“wireframe” selection (press the mouse button somewhere outside item names / icons
and drag the selection rectangle)
Some menus are disabled when nothing is selected. Object and subbases have shortcut
menus listing various associated commands.
To rename both subbases and database objects, click on the name of the item to be renamed,
wait a second, then click on the same name again. Clicking two times in rapid succession is
interpreted as double-click, but waiting momentarily before the second click is interpreted
as an in-place editing request. An active edit text box opens on the item name, allowing you
to edit the name.
5. Learn About Subbases
In the Protein Molecules (MAIN) table, click on the Name column header (Database
Objects Pane) to sort the list by name in alphabetic order. Select the 41BB_HUMAN and
41BB_MOUSE molecules and press the New Subbase button (
) on the toolbar. Vector
NTI creates a new subbase called Group 1. Name the new subbase 41BB in the active text
box and press ENTER. The new subbase is selected in the left pane and its contents are
listed in the right pane (Fig. 8.2).
91
New subbase
Fig. 8. 2 Creating a new subbase
You can easily add objects to subbases by drag-drop operations within the Database
Explorer window. Other subbase operations are available from the Table menu or from the
subbase shortcut menu.
Note: The difference between Vector NTI’s subbases and Vector NTI’s file system’s
folders is basic. Because a subbase is a set of objects grouped by a specified criteria, one
object can exist in several different subbases at one time. On the other hand, one object
cannot exist in several folders at the same time, but you can make a copy of an object to
place it in another folder. Note that the 41BB_HUMAN and 41BB_MOUSE molecules
were not moved out of the MAIN subbase. You just created another group (subbase) based
on their common features.
6. Search the Database
The Database Explorer has a sophisticated searching capability enabling you to search by
different criteria and logically combine search results.
Let’s find all DNA molecules containing an ampicillin resistance gene, create a new
subbase for them and add appropriate user fields. Open the DNA/RNA (MAIN) molecule
database and press the Search button (
) on the Database Explorer’s toolbar, opening
the Molecule Database Search dialog box (Fig. 8.3):
92
Tutorial: Database Explorer Chapter 8
Fig. 8. 3 Molecule Database Search dialog box
Check the Features Filter option and press the Features Setup button. In the Search
Conditions: Features dialog box, click the < Add button, opening the Add Features dialog
box (Fig. 8.4) where you choose the feature for which to search. Select CDS in the Feature
Type window. Click the Add only features of this type… radio button. Browse through the
list in the right pane, locate the AP® and check its box.
Fig. 8. 4 Add Features dialog box
Click OK, closing the box and adding the AP® feature to the Search Conditions: Features
dialog box (Fig. 8.5).
93
Fig. 8. 5 Adding a new feature to the Search Conditions: Features dialog box
Click OK to return to the Database Search dialog box.
Make sure that all filters except the Attributes and Feature Filters are unchecked and that the
“DNA/RNA (MAIN)” subbase is selected in the “Look in” drop-down menu. Click the
Start Search button. Vector NTI scans the entire DNA/RNA table, locating all molecules
with an ampicillin resistance gene.
When the Insert Search Results dialog box opens to select a subbase for the search results,
enter a new subbase name, Ampicillin Resistance (Fig. 8.6).
Fig. 8. 6 Insert Search Results dialog box with new subbase name, Ampicillin Resistance
94
Tutorial: Database Explorer Chapter 8
Press OK. Vector NTI informs you of the number of items in the result set. Click OK again
to confirm the creation of the new subbase.
The subbase is created (you can see it in the All Subbases Pane), but the Search dialog box
is not closed. This is so that you could refine your search using the result set as an input set
of a next search. Press the Close button to close the Search dialog box.
7. Examine Vector NTI’s User Field Manager
Each of the .columns in a subbase Objects Pane is a user field displaying identifying
characteristics of subbase objects. A user field can contain any laboratory-specific and userspecific information necessary to provide an appropriate description of the object. For
instance, you might identify all of the enzymes that are stored in your laboratory so they can
easily be sorted in a larger database. User Fields can be imported, exported, displayed,
printed and managed just as the regular database fields.
Click the new Ampicillin Resistance subbase to open it and view its molecules, all of which
presumably contain an ampicillin resistance gene. Now let’s add the ampicillin user field to
the molecules so that feature will be displayed in a user field column. That will allow you to
sort molecules with that feature in the (MAIN) database.
Choose Database > User Field Manager from the menu bar, opening the User Fields
Manager dialog box (Fig. 8.7):
Fig. 8. 7 User Fields Manager dialog box
This dialog box allows you to define new User Fields and to perform global operations on
user fields such as Edit, Rename, Delete as well as Import/Export operations. Importing and
exporting allows you to exchange your list of field definitions with your colleagues.
95
Vector NTI maintains a local list of descriptions of “known” User Fields that are presented
to the user when he or she creates new database objects. This list can be viewed and
modified using the User Field Manager.
Note: Field definitions and field values are stored and exported with database objects. When
these objects are imported, Vector NTI helps you to add the field definitions to the local
User Field definitions list.
8. Define a New User Field
Click on the New button (
) in the upper left of the User Field Manager dialog box,
opening the User Field Definition dialog box.
Enter Ampicillin Resistance in the Name box, and using the Type drop-down menu, select
One of Predefined Strings. In the Predefined Values text box, type Ampicillin Resistance
and click the Add button (Fig. 8.8).
Fig. 8. 8 User Field Definition dialog box
Click OK, closing the window. Your field description is added to the field list.
96
Tutorial: Database Explorer Chapter 8
Fig. 8. 9 Assigning values to molecules listed in the Ampicillin Resistance subbase
Now let’s assign this value to all molecules listed in the Ampicillin Resistance subbase we
just created. Back in the User Field Definitions box, in the large window (Field Definition
List), select the newly listed Ampicillin Resistance. Now in the box in the lower right
corner, select [+] DNA/RNA Main to open the DNA/RNA subbases; select the subbase
Ampicillin Resistance. In the Global Operations area, click the Set ‘Ampicillin
Resistance’ in button (Fig. 8.9). In the Ampicillin Resistance dialog box that opens, select
the field value string Ampicillin Resistance and click OK. Click OK to confirm your
action to insert the field value. Vector NTI performs the operation and returns you back to
the User Field Manager. Press Close.
9. View the New Field in Database Explorer
Now let’s customize the Database Explorer view to display the new field. Back in the
DNA/RNA (MAIN) Table Explorer window, in the Database Objects Pane, open a shortcut
menu associated with a column heading. Select Columns. The Columns dialog box allows
you to control the display and order of columns in the details view of the Explorer window
(Fig. 8.10).
In the Available Fields box, select Ampicillin Resistance and click the Forward button
(
), moving the field to the Displayed Fields box. Click the Move Up button several
times to move the Ampicillin Resistance column just below the Length column. The
descending order in the list is the left to right display order of the columns.
97
Fig. 8. 10 Columns dialog box
Press the OK button, updating the Database Explorer to display the new field as a column in
the list pane (Fig. 8.11). This also returns you to the DNA/RNA Molecules (MAIN)
subbase.
New field in List
Pane
Fig. 8. 11 Updating the Database Explorer to display the new field as a column in the list
pane
98
Tutorial: Database Explorer Chapter 8
Scroll through the Objects Pane, noting that Ampicillin Resistance is noted for some of the
objects. Now click on the Ampicillin Resistance column heading, sorting the objects
according to this feature. Click again and note the sorting changes. While molecules in this
subbase can be sorted according to this new user field, as you may expect, all DNA
molecules in the Ampicillin Resistance subbase display “Ampicillin Resistance” in that
column. You could create a column for any feature by which you wish to sort molecules
using these same steps.
Sorting by the Ampicillin Resistance column takes longer than sorting by other columns like
Length. This is because the Ampicillin Resistance column is not cached in index tables and
thus is slower to access. Caching requires extra memory, but it usually makes sense to turn
it on for fields that are displayed as columns in the list pane.
To turn on caching of Ampicillin Resistance, open the User Field Manager dialog box
again. Double-click on the Ampicillin Resistance definition to edit it, check the Cache In
Index Table box and press OK. Vector NTI asks for confirmation and then rescans the
database and rebuilds the database indices. Close the User Field Manager dialog box and try
again to sort the DNA molecules by clicking on the Ampicillin Resistance column header.
Sorting should work faster now.
10. Examine Vector NTI’s Contact Manager
The Contact Manager is a tool for creating, updating, deleting and organizing contact
records. This list, to simplify tracking of database objects, is automatically updated when
you import molecules or proteins created by your colleagues. You can enter any suitable
information about yourself; this information then is attached to your molecules and is
automatically added to the contact list of those colleagues who import your molecules.
Select Database > Contact Manager, opening the Contact Manager dialog box (Fig. 8.12):
99
Fig. 8. 12 Contact Manager dialog box
This dialog box displays a list of all stored contact records. There are five operation buttons
in the upper left corner of the Contact Manager allowing you to perform various operations
on the contact records, including Add New, Edit, Rename and Delete.
11. Close the Molecule Display Windows and Exit Vector NTI
You have now taken a close look at Vector NTI’s Database Explorer capabilities. Close all
Display windows and exit Vector NTI as you learned in previous tutorials.
100
Tutorial: PCR Analysis and Primer Design Chapter 9
Chapter 9 Tutorial: PCR Analysis and Primer Design
Introduction
This chapter introduces you to tools for designing and analyzing PCR primers and
procedures. At the end of this tutorial session, you will be able to:
•=
Design and analyze PCR primers using Vector NTI’s primer design tool
•=
Add restriction enzymes to PCR primers
•=
Set parameters for optimum primer/target interactions and successful PCR
•=
Save primers and PCR results in the database
•= View and analyze PCR results
Note: Press the F1 key to open Online Help for all of the dialog boxes in this tutorial.
1. Launch Vector NTI and Open a Molecule Display Window
•=
Launch Vector NTI using techniques described in previous tutorials.
•=
Using techniques learned in earlier tutorials, open a Molecule Display window
containing ColE I. Maximize the ColE1 window.
2. Select the Region of ColE1
•=
Click the Graphics Pane button (
Pane.
•=
Using the technique described in the first tutorial, select the 5200–6400 region of
ColE1, the target fragment for PCR.
) on the Window Toolbar to activate the Graphics
3. Prepare for PCR Analysis
Note: Press the F1 key to open Online Help for all of the dialog boxes in this tutorial.
To perform .PCR analysis on the selected fragment, select Analyze > Find PCR Primers
on the menu bar. The Find PCR Primers dialog box appears (Fig. 9.1):
101
Fig. 9.1 Find PCR Primers dialog box
With this dialog box, you can direct Vector NTI to search for convenient sense and
antisense primers according to your specifications and to check primers’ uniqueness.
Press the More>> button on the lower right to enable a complete view of the Find Primers
dialog box (Fig. 9.2):
Fig. 9. 2 Find Primers dialog box
102
Tutorial: PCR Analysis and Primer Design Chapter 9
The Primer tab allows you to designate basic parameters for the PCR reaction and the
primers that are generated. After pressing the More>> button, you can also define primers
yourself and attach short sequences at the 5’ and/or 3’ ends of the product. (If you want the
PCR target length to be the full extent of the selected target region, you will want to change
the Minimum Product Length to reflect that!)
Note: The calculation. for Tm is dependent on primer and salt concentrations; varying these
concentrations can greatly affect the Tm for any given primer. Make sure to adjust these
parameters according to your reaction conditions when performing your own PCR analysis
to ensure that you obtain accurate Tm values.
For this tutorial, review the options on the Primer tab, but leave all the options unchanged.
Press the Amplicon tab (Fig. 9.3). The options on this tab allow you to customize
parameters relating to the resulting PCR product. %GC content for the product or a portion
of the product next to the primer annealing site and allowed bases adjacent to the primer
annealing site can be specified.
Fig. 9. 3 The Amplicon tab allows you to customize parameters relating to the resulting PCR
product
Review the options, but leave all the options unchanged.
Press the Structure tab (Fig. 9.4). The options on this tab set acceptable limits for
nucleotide repeats, palindromes and hairpin loops for the primers. You can also check your
primers/product for a selected group of restriction sites from this tab.
103
Fig. 9.4 The Structure tab sets acceptable limits for nucleotide repeats, palindromes and
hairpin loops for the primers
Inspect all options, leaving them unchanged.
Press the Pairs tab (Fig. 9.5). Options on this tab specify how closely parameters such as
Tm and %GC, etc. must match between two primers in a generated primer set.
Fig. 9.5 The Pairs tab specifies how closely parameters must match between two primers in a
generated primer set
Inspect all options, leaving them unchanged.
104
Tutorial: PCR Analysis and Primer Design Chapter 9
Press the Similarity tab (Fig. 9.6). The options on this tab determine the similarity
relationship between the primers and the target sequence.
Fig. 9.6 The Similarity tab determine the similarity relationship between the primers and the
target sequence
Inspect all options, leaving them unchanged.
Press the 3’ end tab (Fig. 9.7). The options on this tab allow you to set specifications for the
3’ end of the primers generated by VNTI. Parameters such as dG and specific nucleotide
content for the 3’ end of both sense and antisense primers can be set here.
Fig. 9.7 The 3’ end tab allows you to set specifications for the 3’ end of the primers generated
by VNTI
105
Inspect all options, leaving them unchanged.
Press the Uniqueness tab (Fig. 9.8). The options on this tab determine the uniqueness of the
primers generated with respect to the PCR product. These parameters can be used to help
ensure that generated primers bind to the desired template area with greater specificity than
to the rest of the PCR product.
Fig. 9.8 The Uniqueness tab determines the uniqueness of the primers generated with respect
to the PCR product
Inspect all options, leaving them unchanged.
Press the Qualities tab (Fig. 9.9). These parameters govern primer quality by determining
how much weight should be assigned to parameters specified on the other tabs of the Find
Primers dialog box. These values affect scoring functions that evaluate the quality rating of
the primer sets generated.
106
Tutorial: PCR Analysis and Primer Design Chapter 9
Fig. 9.9 The Qualities tab governs primer quality by determining how much weight should be
assigned to parameters specified on the tabs of the Find Primers dialog box
Inspect all options, leaving them unchanged.
Press the Filters tab (Fig. 9.10). On this tab, you can select features that should either be
excluded or included as regions to be considered for primer design. For example, if your
sequence contains Repeat features, you may want to exclude them to obtain primers with
greater specificity. Features can be added or removed by pressing the + and – buttons.
Fig. 9. 10 The Filters tab selects features that should either be excluded or included as regions
to be considered for primer design
107
Leave all the options unchanged as you inspect them.
Notice the Load and Save buttons on the lower left of each tab in the Find Primers dialog
box. These buttons allow you to save your PCR settings to a file and load the settings file in
for subsequent analyses. This precludes having to reset the various parameters manually for
frequently used PCR condition settings. You need only save/load the settings in one of the
tabs and the parameters for all the tabs in the Find Primers dialog box will be saved/loaded.
4. Perform PCR Analysis
In the Find Primers dialog box, press the OK button in the lower center, initiating the PCR
analysis. When it is finished, a new folder is created and added to the Text Pane of the
ColE1 Display window.
5. Inspect the PCR Analysis Folder
Move the split bars as necessary to optimize viewing in the Text Pane. In the open PCR
Analysis folder, inspect the subfolders.
•=
Each subfolder describes one possible set of primers for amplifying a fragment of the
length within the maximum and minimum lengths specified in the Find Primers dialog
box.
•=
The subfolders are listed in order of decreasing primer set quality rating which is
calculated based on the importance factors assigned in the Qualities tab in the Find
Primers dialog box. (Generally, maximum rating = 171.)
•=
Each subfolder contains useful information for the PCR reaction such as product
melting temperature, optimum annealing temperature, sense and antisense primers with
their melting temperatures, free energies, etc.
The sense and antisense primers are indicated with the symbol “
” followed by their
nucleotide sequences. (In Vector NTI, this same symbol is used to mark oligonucleotides
created by many of the program’s functions such as PCR analysis, molecule design, and
hybridization. You can perform oligo analysis on any nucleotide sequence marked by this
symbol in the Text Pane of a Molecule Display window.)
6. Perform Oligo Analysis on a PCR Sense Primer
To perform oligo analysis on the sense primer given in the first subfolder of the PCR
Analysis folder, scroll through the Text Pane and verify that the folder labeled “#1:
Product of length 901” is open. (Open it by double-clicking it.)
Inside this subfolder, position the cursor on top of the sense primer, represented by the line
ATTACTCTTTTGAATGGTACTCCTG. Open the corresponding shortcut menu by right
clicking on the primer sequence. Choose the Analyze command, opening the Oligo
Analysis dialog box (Fig. 9.11):
108
Tutorial: PCR Analysis and Primer Design Chapter 9
Fig. 9. 11 Oligo Analysis dialog box
In this dialog box you can set numerous parameters for oligonucleotide analysis. Leave the
default parameters unchanged and press the Analyze button.
Note: The calculation. for Tm is dependent on primer and salt concentrations; varying these
concentrations can greatly affect the Tm for any given primer. Make sure to adjust these
parameters according to your reaction conditions when performing your own oligo analysis
to ensure that you obtain accurate Tm values.
The analysis results appear in the dialog box. Note the biochemical and structural
parameters in the Results column. Press the Dimers & Hairpin Loops button to inspect the
dimers and hairpin loops that may form if this primer is used.
Press the F1 key to view Vector NTI’s on-line help information for this dialog box. Press
the Close button.
7. Save a PCR Primer to the Database
Now let’s save the same primer to the database for future use. Right-click on the
ATTACTCTTTTGAATGGTACTCCTG line in the Text Pane, to open the corresponding
shortcut menu and select Save To Database. This opens the New Oligo dialog box, with the
General tab activated (Fig. 9.12).
109
Fig. 9. 12 New Oligo dialog box with the General tab activated
Enter Sense primer - ColE1 in the name box and click on the Oligo tab. The oligo sequence
and description appear automatically in their respective text boxes.
Click on the Keywords tab. Click in the New Keyword entry box and enter PCR-COLE1.
Press the Add button to add your new keyword to the keyword list. Then select the existing
SENSE_PRIMER keyword and add it to the keywords list too.
Press the OK button. The primer is saved to the database under the name Sense primer ColE1.
8. Add Restriction Enzyme Sites to the PCR Primers
You will load the sense primer you just saved to the database and then attach sequences to
the 5’ and 3’ ends of the product to allow convenient cloning. Vector NTI will then find an
optimum antisense primer.
Activate the Graphics Pane again and make sure the 5200–6400 region is still selected.
Check the status bar. Open the Find Primers dialog box again by selecting Analyze > Find
PCR Primers on the menu bar.
Locate the User-Defined Primers box in the Find Primers dialog box by pressing the
) to the right of the Sense
More>> button on the Primers tab. Press the Browse button (
Primer box. In the dialog box that appears, showing oligonucleotides saved in the database,
110
Tutorial: PCR Analysis and Primer Design Chapter 9
select the “Sense primer - ColE1” oligo you just saved and click OK. The “Sense primer ColE1” oligo is loaded into the Sense Primer text box (Fig 9.13). Note that you are not
specifying the anti-sense primer, but leaving that up to Vector NTI.
To attach a BamHI cloning site to the 5’ end of your sense primer, locate the Attach to 5’
Terminus of Sense Primer box and press its Browse button. In the Choose Database
Enzyme dialog box that opens, select the MAIN Enzymes subbase. Scroll down to find and
select BamHI. Click OK. The BamHI recognition site is entered into the Attach to 5’
Terminus of Sense Primer box.
To attach a HindIII cloning site to the 5’ end of the antisense primer, locate the Attach to 5’
Terminus of Antisense Primer box and press its Browse button. In the dialog box, select the
MAIN Enzyme subbase and HindIII and click OK. The HindIII recognition site is entered
into the Attach to 5’ Terminus of Antisense Primer box.
Fig. 9.13 The “Sense primer - ColE1” oligo is loaded into the Sense Primer text box
Locate and check the Check Primers for Restriction Sites From check box on the Structure
tab, directing Vector NTI to search for certain restriction sites in the PCR product-plusprimer fragment you are creating. The restriction sites searched for are listed in the
Restriction EndoNuclease subbase shown in the Check Cloning Sites for Enzymes From
111
drop-down menu. Choose the Palindromes/Non-Ambiguous subbase from the list (Fig.
9.14).
Fig. 9. 14 Searching for certain restriction sites in the PCR product-plus-primer fragment on
the Structure tab
Now press OK at the lower center of the Find Primers dialog box. Press OK when Vector
NTI shows the warning dialog box. Click OK to override the previous PCR analysis results.
A new PCR analysis is performed using the additional information you have entered.
9. Inspect the New PCR Analysis Results
Inspect the subfolders of the new PCR Analysis results in the Text Pane. Note that this time,
all of the new options use the same sense primer, “Sense primer - ColE1”, and that the REN
sequences have been attached at the 5’ ends of both primers. (They are separated from the
primers by a space.) Only the antisense primers vary because they were not defined in the
last dialog box.
The RENs appearing beneath each primer indicate those from the selected
Palindromes/Non-Ambiguous subbase whose recognition sequences are found within the
generated fragment. The number of times that a REN recognition sequence is found within
the PCR product is indicated. If no number is given after a REN’s name, then that REN is
found only in the primer or the attached sequence and not within the product.
10. Save the PCR Product to the Database and Open a Display Window
Place the mouse cursor on the folder labeled “#1: Product of length 914,” and open the
shortcut menu with a right click. Choose the Save to Database and Create Window
command. In the dialog box that opens, in the Name field, enter PCR Product 1, and click
112
Tutorial: PCR Analysis and Primer Design Chapter 9
OK. Choose the Main subbase and click OK. The molecule is saved to the database, and a
new Molecule Display Window is created containing the molecule.
11. Arrange the View of the Product
Arrange the new Molecule Display window to show your PCR product conveniently.
on the Window Toolbar.
Activate the Text Pane, and click the Link Panes button (
Most of the symbols in the Graphics Pane disappear because most of the folders in the Text
Pane are closed.
Place the cursor on the Feature map folder and open the shortcut menu. Choose the Expand
Branch button (
), opening the Feature map folder and all its subfolders open. Now the
signals are displayed in the Graphics Pane.
Locate the Restriction Map folder and open it with a double-click. Open the BamHI and
HindIII folders by double-clicking them. These sites now appear in the Graphics Pane.
Activate the Graphics Pane and press the (Fig. 9.15). Arrange the graphics to fit the window
so that the restriction sites and primers can be seen. (Use the SHIFT + Zoom In (
) and
) buttons.) Use the CTRL + Zoom buttons to change only the horizontal
Zoom Out (
dimensions of the graphical map. (You can enhance your picture further using picture
editing techniques described in Chapter 6.)
113
Fig. 9. 15 Standard Arrangement of restriction site and functional signal labels
12. Close Display Windows and Exit Vector NTI
This concludes the PCR analysis tutorial. Close all Molecule Display windows using the
techniques described in previous tutorials: File > Close, then File > Exit.
114
Tutorial: Molecule Construction Chapter 10
Chapter 10 Tutorial: Molecule Construction
Introduction
This chapter introduces you to creation of a new DNA molecule by Construction. In Vector
NTI terminology, Construction means creating a DNA molecule from fragments that are
completely defined and made compatible by the user.
At the end of this tutorial session, you will be able to:
•=
Use Fragment Wizard to define the needed fragments for the Goal Molecule Definition
List
•=
Name and describe the new molecule in the Construct Molecule dialog box
•=
Verify that the fragments are correctly defined
•=
Direct Vector NTI to construct your new molecule
•=
Modify the fragment termini biochemically, when necessary, to allow completion of the
Construction process
DNA molecules can be composed of: fragments of existing DNA molecules, linkers,
adaptors, dummy fragments and so forth. Most of the fragments you will use to create new
molecules are fragments of existing molecules, and most of the work involved in creating a
new molecule is in defining them. Fragments like linkers and adaptors are much easier to
describe.
The Fragment Wizard guides you through the process of describing a new molecule
fragment. In addition to using the Fragment Wizard, you can define fragments using the
Fragment Editors available from the Construct / Design Molecule dialog box. While they
can describe fragments of all types, Fragment Editors are most convenient for defining
linkers, adaptors, and so forth.
Molecules that you or Vector NTI create from fragments of existing molecules are called
constructed molecules. Molecules that you import or describe by hand are called basic
molecules because they enter the database as complete units rather than being built in
Vector NTI from fragments.
For more information regarding other methods of adding new molecules to Vector NTI’s
database, such as design, importing molecules, assembling a molecule from a sequence text
file, refer to Chapters 11 and 12.
Follow the steps in the order shown. Figures show what your screen should look like at
various points along the way.
1. Launch Vector NTI
Launch Vector NTI using techniques you learned in previous tutorials.
115
2. Create Display Windows for pBR322 and pUC19
Fig. 10. 1 Opening two Display Windows
Using the techniques you learned in previous tutorials, click the Open button and open
pBR322. Then click the Open button again to open pUC19. Two display windows are now
open, one for each plasmid (Fig. 10.1). You can move from one to the other by selecting the
molecule in the drop-down Window menu on the Main Toolbar. Maximize each window.
3. Arrange the Display Windows
Expand the working space for the Graphics and Sequence Panes by reducing the Text Pane
in each Display window. Adjust the graphical map for each plasmid so you can easily read
the features and labels.
4. Define the First Fragment (from pUC19)
The first fragment of the goal molecule includes most of pUC19, with the 5’ end of the
fragment being the SmaI restriction site and the 3’ end being the EcoRI restriction site. The
second fragment is from pBR322, the 5’ end being the EcoRl site and the 3’ terminus being
the AvaI restriction site.
Activate the Graphics Pane of the pUC 19 Display window. Click the Add Fragment to
Molecule Goal List button (
) to open the Fragment Wizard (Fig. 10.2).
This dialog box guides you through the process of fragment selection, with several
sequential screens describing the corresponding actions you should take. If you make a
mistake you can return to the previous step using the Back button. You can drag the dialog
116
Tutorial: Molecule Construction Chapter 10
box out of the way (left-click with the cursor on the blue title bar) when necessary so you
can see the SmaI and EcoRI restriction sites on the molecule graphical map.
Fragment Wizard
Fig. 10. 2 The Fragment Wizard guides you through the process of fragment selection
•=
First screen (Fig. 10.2): Select the Construction Fragment option. Leave the Insert
Inverted option unchecked, and click the Next button to proceed.
Fig. 10. 3 The second screen of the Fragment Wizard determines the 5’ terminus
117
•=
Second screen (Fig. 10.3): To determine the 5’ terminus of the new fragment, click on
the SmaI restriction site label in the Graphics Pane. The Set to a Restriction Site option
is automatically checked and the name and position of the restriction site is displayed in
the Fragment Wizard. Click the Next button in the dialog box to proceed.
Fig. 10. 4 The third screen of the Fragment Wizard determines the 3’ terminus
•=
Third screen (Fig. 10.4): To define the 3’ terminus of a new fragment, hold the
SHIFT key and click on the EcoRI restriction site label in the Graphics Pane. The
Set to a Restriction Site option is automatically checked and the name and position
of the 3’ end are displayed.
Note: If you do not hold down the shift key when selecting the 3’ end, Fragment Wizard
reverts to choosing the 5’ site.
Both labels in the Graphics Pane are now highlighted. The selected fragment is indicated by
the wireframe in the Graphics Pane. Click the Finish button in this screen to complete the
definition of the fragment.
Fig. 10. 5 Adding the first fragment to the Molecule Goal list
118
Tutorial: Molecule Construction Chapter 10
Check the description of the fragment in the New Fragment message box: 5’ SmaI, and 3’
EcoRI. If there is an error, press the Cancel button and return back to the Fragment Wizard.
Otherwise, press the Add to List button, adding the first fragment to the Molecule Goal list
(Fig. 10.5).
5. Define the Second Fragment (from pBR322)
On the toolbar, select Window > pBR322 which opens the corresponding Molecule Display
window. Activate the Graphics Pane. Press the Add Fragment to Molecule Goal List
) to display the Fragment Wizard dialog box again. Move the dialog box so that
button (
you can see the EcoRI and the AvaI restriction sites on the graphical map.
•=
First screen: Select the Construction Fragment option. Leave the Insert Inverted
option unchecked, and click the Next button to proceed.
•=
Second screen: To determine the 5’ end of the new fragment, click on the EcoRI
restriction site label in the Graphics Pane. The Set to a Restriction Site option is
automatically checked, and the name and position of the restriction site are displayed.
Click the Next button to proceed.
Third screen: To define the 3’ terminus of the new fragment, hold down the SHIFT key
and click on the AvaI restriction site label in the Graphics Pane. The Set to a Restriction Site
option is automatically checked and the name and position of the restriction site are
displayed.
Click the Finish button to complete the definition of the fragment.
In the New Fragment message box, verify the fragment definition: 5’ EcoRl and 3’AvaI. If
the description of the fragment is correct, press the Add to List button. The second
fragment is added to the Molecule Goal list.
6. Inspect the Goal List
To verify that. the fragments in the Goal Molecule Definition List are correct, click the
) on the Main Toolbar. This opens the Lists dialog box (Fig.
Open Goal List button (
10.6), where the two fragments are listed in the Fragments section.
119
Fig. 10. 6 Lists dialog box
7. Enter General Information About the New Molecule
Press the Run button. Click in the Name field text box in the Construct Molecule dialog box
(Fig. 10.7) and enter the name of the new molecule, TUTORIAL1.
Fig. 10. 7 Construct Molecule dialog box
The radio buttons on the bottom describe the choices for the new molecule start. The first
fragment in the list of component fragments is always considered the “recipient” molecule.
Click the Recipient’s Start button to position the start of the new molecule at the same
place where pUC19 starts. (If you prefer, you can choose any nucleotide of any component
fragment as the starting coordinate of the new molecule by checking the Position ... of
Fragment # ... button. By default, it’s the first nucleotide of the first fragment.
120
Tutorial: Molecule Construction Chapter 10
Press the General Info button, opening the General Data dialog box where you can specify
general information about the new molecule (Fig. 10.8).
Fig. 10. 8 General Data dialog box, where you can specify general information about the new
molecule
•=
Click in the Description field and type Tutorial molecule #1.
•=
In the Extra-Chromosome Replication field, check Bacteria.
•=
In the Replicon Type field, select Plasmid.
•=
In the text entry box of the Key Word area, enter your last name. Press the Add button
to add your last name to the list of keywords for this molecule. Keywords are a
convenient way to find molecules you created—just search Vector NTI’s database for
all molecules with your last name as a keyword.
•=
Press OK to return to the Construct Molecule dialog box.
8. Attempt to Construct the New Molecule
Press the Construct button in the upper right corner of the Construct Molecule dialog box.
In the Insert Molecule into Main subbase dialog box, name your subbase Tutorial and
confirm the creation of the subbase. Click OK. Vector NTI attempts to construct your new
molecule and save it into the database. Vector NTI soon informs you that the left end of
fragment #1 (the SmaI site) is incompatible with the right end of fragment #2 (the AvaI site).
VNTI cannot process your molecule. Because you are constructing a molecule in which you
have defined the fragments, you try to figure out why your fragments are incompatible. If
you were to check the fragment termini, you would learn that the blunt 5 ‘end of the pUC19
fragment can ‘t link with the cohesive 3 end of the pBR322 fragment. You need to modify
these termini to make them compatible.
Click OK in message dialog boxes to return to the Construct Molecule dialog box.
121
9. Fill in the AvaI Site of the pBR322 Fragment to Make it Blunt
Close the Construct Molecule dialog box to return to the Lists dialog box. In the Fragments
section, click on the second fragment in the list (“Molfragment of pBR322”). As you make
the selection, the Edit button becomes enabled (Fig. 10.9).
Fig. 10. 9 Enabling the Edit button in the Lists dialog box
Press the Edit button, opening the Fragment Editor dialog box (Fig. 10.10).
Fig. 10. 10 Fragment Editor dialog box
Click on the Right Terminus button, because you need to modify the AvaI site that makes
up this fragment’s right terminus. The Terminus Editor dialog box opens (Fig. 10.11).
122
Tutorial: Molecule Construction Chapter 10
Fig. 10. 11 Terminus Editor dialog box
Because you need to perform a biochemical “operation” on the ends of the fragment, in the
Terminus Editor, look in the Biochemical Operations section in the lower left corner.
Although VNTI can handle up to 3 sequential biochemical operations per terminus, you
need to perform only one, filling in the cohesive Aval site. Click in the first biochemical
operations box. From the list of allowable options, choose Completely Filled In. Then click
OK in the Terminus Editor and OK in the Fragment Editor, returning you to the List dialog
box
Press the Run button on the Lists dialog box to launch the Construct Molecule dialog box.
Press the Construct button. Press OK to confirm that the “Tutorial” subbase should be
used. In the new dialog box, press the Overwrite button to overwrite your previously saved
TUTORIAL1. Vector NTI analyzes your molecule and this time enters it into the database.
10. Inspect Your New Molecule
After creating the new molecule and saving it to the database, a new Molecule Display
window opens with your new molecule. Find TC(R) on TUTORIAL1’s graphical map. The
molecule’s functional and restriction maps are created them automatically. Vector NTI’s is
able to create the maps and nucleotide sequences for new molecules with complete
accuracy, even in the most complicated cloning situations.
123
Fig. 10. 12 Inspecting the two fragments used to create your new molecule
In the Text Pane, open the folder called “Component Fragments”. The two fragments that
you used to make this molecule are listed (Fig. 10.12). Their subfolders describe the left and
right termini of each fragment.
Congratulations, you have created your first new molecule with Vector NTI! You
defined all of the necessary restriction sites and biochemical operations to clone a fragment
from pBR322 into pUC19 in the user-defined process called Construction. In Vector NTI’s
Design mode, described in the next chapter, the program itself determines the recombinant
strategy.
11. Close the Display Windows and Exit Vector NTI
To finish your session with Vector NTI, close the Molecule Display windows and exit the
program using the methods you learned in previous tutorials.
124
Tutorial: Molecule Design Chapter 11
Chapter 11 Tutorial: Molecule Design
Introduction
This chapter introduces you to the creation of a new molecule by Design, Vector NTI’s term
for using its built-in biological knowledge for new molecule creation. In Design, the user
defines the molecule fragments, but the restriction sites, methods of terminus modification,
etc., are left up to Vector NTI. The Design process results in a construction plan which takes
advantage of the best possible restriction sites and recombinant strategy.
At the end of this tutorial session, you will be able to:
•=
Define the recipient and donor fragments for Design, using the Fragment Wizard
•=
Confirm the correct order of recipient and donor fragments in the Design Molecule
dialog box
•=
Name and describe the new molecule
•=
Specify Design parameters and preferences
•=
Direct Vector NTI to design the new molecule
Fragments are described as they were for molecule construction. Fragments for Design,
however, must consist of exactly one recipient fragment from the parent molecule, which
must be listed first in the Goal Molecule Definition List, and one or more donor fragments.
Every nucleotide in the designated recipient fragment is included in the final molecule.
Vector NTI searches the parent molecule nucleotides outside of the recipient fragment to try
to find convenient restriction sites for inserting donor fragment(s).
You may want to indicate a specific restriction site at one or both ends of the recipient
fragment. If a terminus of the recipient fragment is a restriction site, then Vector NTI
automatically uses that restriction site in building the new molecule. You may request to
save or lose such a specific restriction site. If it is not specified that the site should be
retained, then that site may disappear from the final created molecule even if you did not
specify that the site must be lost.
Fragments other than that listed first on the list are called donor fragments. Because the
purpose of donor fragments is to carry functional signals into the recipient, you should
describe a donor fragment, not by its termini, but by the functional signals it contains. Thus
when you define a donor fragment in a Molecule Display window, you should click on
specific functional signals. Every nucleotide of these specific functional signals is included
in the goal molecule, but nucleotides outside these functional signals may or may not be
included in the goal molecule. Without at least one functional signal, a fragment cannot be
treated as a donor fragment.
A donor fragment can contain flanking regions outside the functional signals. In describing
a donor fragment, if you drag the edges of the selection zone beyond the functional signals
you have targeted, the fragment will be defined as the functional signal(s) plus flanking
125
nucleotides. You have defined the maximum allowable flanking regions. Vector NTI tries to
reduce the flanking regions of donor fragments to be as small as possible, but does not go
outside of these flanking regions when looking for restriction sites.
In this exercise you will perform essentially the same cloning procedure as you did in the
Construction tutorial. This time, however, you will simply define the fragments and allow
Vector NTI to design the rest.
Follow the steps of the tutorial in the order shown. Figures show what your screen should
look like at various points along the way.
1. Launch Vector NTI and Create Display Windows for pbr322 and puc19
Launch Vector NTI using techniques you learned in previous tutorials. Open Molecule
Display windows containing the molecules pBR322 and pUC19.
2. Arrange Display Windows
Do not maximize each window this time, but select Window > Tile Vertical. The display
screen for both molecules appears at the same time, making it easy to work with them side
by side (Fig. 11.1). Activate either window (indicated by a dark blue title bar) with a left
click. Using the split bars, reduce the Text and Sequence Panes for each molecule to
optimize viewing the molecule maps. Use the shift + Zoom buttons to arrange the panes so
you can easily read the features and labels.
Fig. 11. 1 Displaying two screens using Tile Vertical feature
126
Tutorial: Molecule Design Chapter 11
3. Define the Recipient Fragment (from pUC19)
For the goal molecule, the recipient fragment is most of the pUC19 molecule. (Molecule
pBR322 provides the donor fragment.) In the pUC19 Display window, activate the Graphics
Pane. Press the Add Fragment to Goal List button (
), opening the Fragment Wizard.
You learned in the previous tutorial that Fragment Wizard guides you through the process
fragment selection.
•=
First screen: Select the Design Recipient Fragment option and click Next.
•=
Second screen: For the 5’ terminus of the new fragment, in the Set To A Position
option, enter 500 in the text box. Click Next.
•=
Third screen: Enter 250 in the Set to a Position text box to define the 3’ terminus.
Click the Finish button to complete the definition of the recipient fragment.
Fig. 11. 2 New Fragment message box
In the New Fragment message box, check the description of the fragment (Fig. 11.2). If
correct, press the Add to List button, adding the recipient fragment to the Molecule Goal
list.
In the Graphics Pane, the recipient fragment is marked with a wireframe. Note that the
polylinker near the 2 o’clock position is outside the selection. If you included the polylinker
in the selection, Vector NTI would not be able to use those restriction sites because every
nucleotide included within the selection zone in the recipient fragment will be included in
the final molecule.
4. Define the Donor Fragment (from pBR322)
In the pBR322Display window, activate the Graphics Pane, then press the Add Fragment
to Molecule Goal List button (
) opening Fragment Wizard again.
•=
First screen: Select the Design Donor Fragment radio button. Click Next.
•=
Second screen: Move the cursor until it is over the TC(R) arrow or label in the
Graphics Pane. Drag the Fragment Wizard out of the way, if necessary. The cursor
changes to a hand (
), indicating that you are pointing directly at a functional signal.
Click once to select the entire TC(R) signal. The selection wireframe appears, aligned
127
directly with the start and end of TC(R). The name of the signal is displayed in the
Fragment Wizard.
Click the Finish button. The default values are used to complete the definition of the
fragment. Continuing with the Fragment Wizard allows specifications for more complicated
design, to be covered in the next chapter.
3’ and 5’ termini are listed
as Undefined
Fig. 11. 3 New Fragment message box, with 3’ and 5’ termini of the donor fragment described
as “Undefined”
In the New Fragment message box, check the donor fragment description. Note that the 3’
and 5’ termini of the donor fragment are described (correctly) as “Undefined” (Fig. 11.3).
Press the Add to List button, adding the donor fragment to the Molecule Goal list.
5. Inspect the Goal Molecule Definition List
Press the Open Goal List button (
) in the main toolbar, opening the Lists dialog box.
Notice that the Design button is selected, indicating that Vector NTI already has recognized
that your fragments are for Design and not Construction.
In the Goal Molecule Definition List appearing in the Fragments section of the dialog box,
inspect the two fragments you defined. For the recipient fragment, (pUC 19, listed first,) the
termini are defined by nucleotide positions. For the donor fragment (pBR322, listed
second), the termini are not defined, (NODEF), but the fragment must contain the TC(R)
descriptor.
Note: For Design to proceed correctly, recipient and donor fragments must be listed
correctly. If one is listed incorrectly, select it and use the Up and Down buttons to
reposition it.
6. Enter General Information for Your New Molecule
Press the Run button. Although this box is almost identical to the Construct Molecule
dialog box, in the previous chapter, its name and operational mode have changed to Design
Molecule. This is a result of the molecule building process you designated in the Fragment
Wizard.
128
Tutorial: Molecule Design Chapter 11
In the Name text box, enter the name of the molecule, TUTORIAL2. Press the General
Info button. In the General Data dialog box, in the Description field, enter Tutorial
molecule #2.
Set the Extra-Chromosome Replication type to Bacteria and the Replicon Type to Plasmid.
To enter your last name as a keyword, select it from the existing keyword list in the dropdown menu and press the Add button.
Press OK to return to the Design Molecule dialog box (Fig. 11.4).
Check the Recipient’s Start button in the radio button group on the bottom of the Design
Molecule dialog box to position the start of the new molecule at the same place where the
recipient molecule (pUC19) starts.
Fig. 11. 4 Entering general information for your new molecule in the Design Molecule dialog
box
7. Prepare to Design the New Molecule
Press the Design button in the upper right corner of the Design Molecule dialog box. When
asked, select the “Tutorial” subbase you created in the last tutorial, and press OK to
continue. The Design Parameters dialog box opens (Fig. 11.5):
129
Fig. 11. 5 Design Parameters dialog box
Here you can select the subbases of restriction endonucleases (RENs) that Vector NTI
considers when designing the new molecule. For example, you could create a subbase
listing the RENs you have on hand in the laboratory and tell Vector NTI to design the new
molecule using only those enzymes.
You can also indicate the transformation systems to be used in your experiments as well as
the presence or lack of extra-chromosome replication capability of your molecule in those
transformation systems. You can permit or forbid the use of dephosphorylation as a
preselection method, etc.
Make sure that the Palindromes/Non-Ambiguous REN subbase is selected. For this tutorial,
leave all other parameters at their default values.
8. Set Your Preferences for Molecule Design
Now click on the Preferences button, opening the Design Preferences dialog box (Fig.
11.6) In this box, you can choose the parameters you prefer to create new molecules. You
can designate which genetic engineering techniques are permissible and assign priorities for
use of the permissible techniques. You can set preferences in the categories of fragment
isolation, fragment ligation, and terminus modification.
130
Tutorial: Molecule Design Chapter 11
Fig. 11. 6 Design Preferences dialog box, where you can choose the parameters you prefer to
create new molecules
You may find it useful for Vector NTI to design the same goal molecule several times,
changing the design preferences each time. This gives you several alternatives for
constructing your molecule.
Let’s change the preferences for fragment ligation: Turn off the check box for blunt–blunt
ligation. In blunt-blunt ligation, both the donor and the recipient have only blunt termini.
Since we are deactivating this option, Vector NTI will make sure that all fragments have at
least one cohesive end.
Below the check boxes are priority lists specifying which of the techniques are preferable.
Leave these at their default values.
With the Advanced Preferences, accessible through the Design Preferences dialog box,
you could alter the way Vector NTI’s evaluates possible design paths. For this tutorial,
ignore the Advanced Design Settings.
Press the OK button, accepting the Design Preferences and returning to the Design
Parameters dialog box.
9. Design the New Molecule
Press the Start Design button. Vector NTI generates many possible ways of cloning the
donor into the recipient and seeks the best solution using its biological knowledge and the
preferences you indicated. An optimum cloning method is quickly found and the goal
molecule is created based on that best option.
131
10. Inspect the New Molecule
When the design is complete Vector NTI opens a new Molecule Display window containing
the molecule you have created (Figure 11.7).
Fig. 11. 7 Inspecting the new molecule you have created
Maximize and inspect the graphical map and text description of your new molecule. In the
Text Pane, the new Design Description folder contains instructions for creating
TUTORIAL2 at the laboratory bench.
11. Inspect the Design Plan
In the Text Pane, open the Design Description folder and its subfolder labeled Step #1.
132
•=
Vector NTI uses the SmaI and EcoRI sites of the recipient, and the EcoRI and MluNI
sites of the donor. The donor fragment has short flanking regions on either side of the
functional signal TC(R). The sites chosen are compatible, so no biochemical operations
are necessary to modify the termini.
•=
With the selected restriction sites, each fragment has one cohesive end and one blunt
end, so blunt–blunt ligation is avoided as requested. The selected cloning option gives
the required orientation of the cloned fragment in the recipient.
•=
One of the recipient’s restriction sites—SmaI—is lost after ligation. This allows
preselection of ligated molecules using SmaI before transformation. Because the
recipient’s SmaI site is lost in the successful cloning process, this prescreening
eliminates improperly ligated fragments. As only one transformation system (bacteria)
Tutorial: Molecule Design Chapter 11
was designated, Vector NTI suggests no alternatives. If you had permitted several
transformation systems, Vector NTI would have chosen the system that involves the
least effort.
•=
For clone analysis after transformation, Vector NTI suggests using the restriction
enzyme BspDI. Its recognition site is new in the recombinant molecule and does not
exist in the recipient.
•=
For alternative methods of clone analysis, the system recommends an oligonucleotide
for colony hybridization and PCR primers to use in that technique.
•=
Vector NTI lists restriction sites close to the cloned fragment that can be used to isolate
the cloned fragment from the recombinant molecule: EcoRI and XbaI. (SmaI and
MluNI have disappeared in the new molecule.) Vector NTI has only considered the
restriction endonucleases in the REN subbase selected in the Design Parameters dialog
box.
•=
The Design Description folder shows what sites the recombinant lacks, and lists all
unique sites on the recombinant, divided into two groups, those inside the cloned
fragment and those outside.
If the design were to consist of more than one cloning step, similar information would be
given in a separate folder for each stage of the process.
12. Print Out the Design Plan
To print the design plan generated for your new molecule, activate the Text Pane of the
TUTORIAL2 Display window. Close all of the folders, then open the Design Description
folder and the Step #1 subfolder. Press the Print button (
) on the Window Toolbar, and
the open folders in the Text Pane are printed to your printer. You now have a hard copy of
the Design Plan for TUTORIAL2.
133
134
Tutorial: Advanced Molecule Design Chapter 12
Chapter 12 Tutorial: Advanced Molecule Design
Introduction
In the previous two tutorials, you were introduced to simple molecule creation using Vector
NTI’s Construction and Design tools. This chapter introduces you to more complex Design
procedures. In the first scenario, you will assign some complex conditions to the recipient
molecule, leaving the donor fragment relatively simple. In the second, you will use a
relatively simple recipient but make the donor fragment more complex. Since you are
probably getting tired of pBR322 and pUC19, let’s change molecules. You will now use
BPV1 and SV40.
At the end of this tutorial session, you will be able to:
•=
Define the recipient and donor fragments for Design using Fragment Wizard, placing
complex requirements upon the recipient.
•=
Define the recipient and donor fragments for Design using Fragment Wizard, placing
complex requirements upon the donor.
•=
Describe the new molecule
•=
Design the new molecule.
Follow the steps in the order shown. Figures show what your screen should look like at
various points along the way.
1. Launch Vector NTI, Open and Arrange Display Windows
Launch Vector NTI using techniques you learned in previous tutorials.
Using techniques you learned in previous tutorials, open Molecule Display windows for
molecules BPV1 and SV40. Select Window > Tile Vertical to work with the molecules
side by side. Since you will be working with the molecules’ graphical maps, arrange the
display windows conveniently.
First Design: Complicated Recipient
In the first complex design, you will insert SV40’s LARGE_T gene into the second ApaLI
site of BPV1. You will direct Vector NTI to save the 5’ ApaLI site and prohibit blunt–blunt
fragments. If the donor has ApaLI sites appropriate for cutting the cloned fragment, then the
problem will be simple. If not, the system must take a more complicated approach to
perform the insertion.
135
2. Define the Recipient Fragment
In the BPV1 Display window, activate the Graphics Pane. Open the Fragment Wizard using
the Add Fragment to Goal List button (
follow these steps:
) as you did in the previous tutorials, and
•=
First screen: Select the Design Recipient option. Press the Next button.
•=
Second screen: To define 5’ terminus, click on the label of the ApaLI restriction site #2
in the Graphics Pane (nucleotide 7631, or about the 11 o’clock position). Click the Next
button to continue.
•=
Third screen: Select Save Site to save the ApaLI site on 5’ end of the recipient
fragment. Press the Next button.
•=
Fourth screen: To define the 3’ terminus, press SHIFT + CLICK on the same ApaLI
site. The name and the position of the site are now displayed in the Fragment Wizard.
Press the Finish button to complete the definition of the recipient fragment.
Fig. 12. 1 New Fragment message box, with 3’ and 5’ termini of the recipient fragment set on
the same ApaLI site
In the New Fragment message box, inspect the recipient fragment. Note that the 3’ and 5’
termini of the recipient fragment are set on the same ApaLI site (Fig. 12.1). Press the Add
to List button, adding the recipient fragment to the Molecule Goal list.
3. Define the Donor Fragment
Switch to the SV40 Display window and activate its Graphics Pane. Open the Fragment
Wizard again:
136
•=
First screen: Select the Design Donor option on the first screen; press the Next button.
•=
Second screen: Click on the LARGE_T signal’s symbol or label in the Graphics Pane
to select it. Press the Finish button in the Fragment Wizard.
Tutorial: Advanced Molecule Design Chapter 12
Fig. 12. 2 Added donor fragment to the Molecule Goal List
Inspect the donor fragment in the New Fragment message box, and press Add to List
button. (Fig. 12.2) The donor fragment is added to the Molecule Goal List.
4. Inspect the Goal Molecule Definition List
Press the Open Goal List button (
) in the main toolbar, opening the Lists dialog box.
The Fragments section of the dialog box contains the Goal Molecule Definition List, listing
the two fragments you defined. The recipient fragment (BPVI) must be the first in the Goal
Molecule Definition List. (If it is not, select the fragment, then click the Up button to move
it into the correct position.)
Highlight the SV40 fragment and press the Edit button, opening the Fragment Editor dialog
box. Click the Inverted check box to change LARGE_T’s direction to match the recipient’s
direction and press OK.
You could leave LARGE_T in its original orientation if you want to; the system will design
your new molecule either way. We have changed LARGE_T to Inverted only to
demonstrate that Vector NTI can clone fragments in different orientations.
5. Enter General Information for Your New Molecule
Press the Run button. Enter the name and description for you new molecule as you learned
in previous tutorials:
•=
Name the molecule TUTORIAL3.
•=
Press the General Info button, opening the General data dialog box:
•=
In the Description field, enter Tutorial molecule #3.
•=
Set the Replicon Type to Plasmid,
•=
Turn on the Bacteria Extra-Chromosome Replication option.
•=
Enter your name as a keyword.
•=
Press OK to return to the Design Molecule dialog box.
137
•=
Check the Recipient’s Start button in the radio button group just above the Component
Fragments section to position the new molecule start at the same place (if possible)
where the recipient molecule (BPV1) starts.
6. Prepare to Design the New Molecule
Press the Design button in the upper right corner of the Design Molecule dialog box. When
asked for a subbase name, select the Tutorial subbase you created before; press OK to
continue.
The Design Parameters dialog box appears. Leave all the settings at their default values and
move on to the next step.
7. Set the Design Preferences
Click on the Preferences button, opening the Design Preferences dialog box. Note that the
blunt–blunt ligation box is already turned off. Vector NTI remembers your previous design
preferences so that you do not have to set them every time you design a new molecule.
Below the check boxes are priority lists specifying which of the techniques are preferable.
Leave these at their default values.
Press the OK button to accept the Design Preferences and return to the Design Parameters
dialog box.
8. Design the New Molecule
Press the Start Design button. As before, an optimum cloning method is quickly found, and
the goal molecule is constructed based on that best option.
9. Inspect the New Molecule
When the design is complete Vector NTI opens a new Molecule Display window containing
the molecule you have created (Fig. 12.3).
138
Tutorial: Advanced Molecule Design Chapter 12
Fig. 12. 3 Inspecting the new molecule you have created
10. Inspect the Graphical Map and Text Description of Your New Molecule
Activate the Text Pane, and open TUTORIAL3’s Design Description folder and the Step #1
subfolder. Review the description of how to create TUTORIAL3. In particular, note the
following:
•=
You defined a specific ApaLI site on the recipient molecule as the site into which the
donor fragment was to be cloned. You also requested that Vector NTI save this site in
the recombinant molecule. ApaLI was not a unique site, so Vector NTI had to use
partial digestion to isolate the recipient. Then the system had to find a way to insert the
donor fragment. There may have been no good sites available on the donor fragment to
fit into the recipient’s ApaLI site; therefore, Vector NTI excised the donor fragment
with convenient sites that did not require partial digestion and left short flank regions,
BamHI and AvrII. These termini were then filled in completely and ApaLI linkers were
attached to the blunt ends. This fragment was then cloned into the recipient.
•=
You can be sure the cloned fragment contains no ApaLI sites (Vector NTI checked this
when selecting a linker) and that there were no easier ways to perform this cloning.
•=
The rest of TUTORIAL3’s Design Description is similar to the Design Description of
TUTORIAL2, designed in the previous tutorial. However, because the 5’ and 3’ termini
of the recipient for TUTORIAL3 are identical, we need to know how to distinguish
clones with the proper orientation. Thus a new paragraph appears in TUTORIAL3’s
139
design description, recommending that the AvrII and ApaLI restriction sites would
allow you to distinguish correct and parasitic orientations in gel.
You may print out this design plan if you wish, and then proceed to the next design task.
Second Design: Complex Donor Fragment
You will now design a second molecule based on BPV1 and SV40, this time making the
donor more complicated rather than the recipient.
1. Define Recipient
Return to the BPV1 Display window’s Graphics Pane and open the Fragment Wizard:
•=
First screen: Select the Design Recipient option and press the Next button.
•=
Second screen: Select the Set to a Position option and enter 5000 as the position of the
5’ terminus. Press the Next button.
•=
Third screen: To define the 3’ terminus, select the Set to a Position option again; enter
2500. Press the Finish button.
Inspect the results in the message box, and press the Add to List button. The recipient
fragment is added to the Molecule Goal List.
2. Define Donor
Switch to the SV40 Display window’s Graphics Pane and open the Fragment Wizard.
•=
First screen: Select the Design Donor option and press the Next button.
•=
Second screen: Click on the LARGE_T signal’s symbol or label in the Graphics Pane
to select it. Press the Next button.
•=
Third screen: The default option on the next screen is “Leave terminus Undefined”.
Do not change this option; press the Next button.
•=
Fourth screen: On this flank region screen, you can specify the maximum size of the
flank region or let Vector NTI use all available space outside the selected signal. Select
the Use flank region no larger than option. You can either enter the maximum length
in the text box or select the fragment in the Graphics Pane. Move your cursor over the
5’ end of the selection wireframe in the Graphics Pane (indicated by the
symbol).
Click and drag the 5’ end to the position at about nucleotide 2250. The current position
is displayed in the status bar. (Remember you can use shift + right and left arrow keys
to fine-tune the selection.) The edit box in the Fragment Wizard shows you the
maximum size of the flank region (it should be about 400 nucleotides). When you are
finished, press the Next button to go to the 3’ terminus screen.
•=
140
Fifth screen: Specify here that Vector NTI should use the NcoI restriction site at
nucleotide 38 to cut the 3’ terminus of the donor fragment. Select the Use specific site
option, SHIFT + CLICK on the NcoI restriction site at nucleotide 38. (Drag the
Fragment Wizard out of the way, if necessary). The name and the position of the
Tutorial: Advanced Molecule Design Chapter 12
restriction site appear in the Fragment wizard screen. Press the Finish button to
complete the definition of the donor fragment.
Fig. 12. 4 New Fragment message box, with 5’ terminus described as “Undefined,” specified
maximum length of a flank region, and 3’ terminus set to the NcoI site
In the New Fragment message box, inspect the selected donor fragment. Note that the 5’
terminus is described as “Undefined,” with the specified maximum length of a flank region
and the 3’ terminus is set to the NcoI site (Fig. 12.4). Press the Add to List button, adding
the donor fragment to the Molecule Goal list.
3. Inspect the Goal List
Click the Open Goal List button to open the List dialog box and inspect the fragments you
have defined. The recipient fragment (BPV1) must be listed first in the Goal Molecule
Definition List. Double-click the donor fragment, opening the Fragment Editor. One end of
the donor is determined by a restriction site, while the other end has a flank region defined.
This makes the situation considerably more complicated than our previous cases, where the
donors were more simply defined. Click the Inverted check box and press OK.
4. Design the New Molecule
Press the Run button. Enter the name TUTORIAL4 and enter the other necessary
information about the new molecule. Check the Recipient’s Start button to make the start
of the new molecule at the same place (if possible) where the recipient molecule (BPV1)
starts.
Press the Design button in the upper right corner of the dialog box. Select the “Tutorial”
subbase for the molecule and press OK to continue. Leave the Design Preferences at their
default settings and press the Start Design button. After a few moments, Vector NTI
produces a workable design for the molecule you have requested.
5. Inspect and Print the New Molecule
In the new Molecule Display window containing TUTORIAL4, inspect the Step #1
subfolder of the Design Description folder. In this case, despite the more complex
conditions you specified, Vector NTI found a simple and convenient design. Both donor and
recipient can be isolated at the NcoI and BamHI sites, so the cloning is straightforward.
141
You specified a maximum flank region of about 400 nucleotides; Vector NTI found a good
BamHI site, allowing the actual flank region to stay within the assigned limit.
If you wish, print out the design description and/or graphical map of TUTORIAL4.
142
Tutorial: Gel Display Windows; Restriction Digestion Chapter 13
Chapter 13 Tutorial: Gel Display Windows; Restriction Digestion
Introduction
This chapter introduces you to Vector NTI’s Gel Display windows, powerful tools for
running and analyzing Gel electrophoresis. Vector NTI predicts the results of actual Gel
electrophoresis experiments and displays them in text and graphics form.
At the end of this tutorial session, you will be able to:
•=
Open a new Gel Display window
•=
Create a gel marker (size standard)
•=
Add samples and gel markers to a “virtual” gel
•=
“Run” the gel and animate it
•=
Calculate the time needed to separate a specific fragment
•=
Manipulate gel graphics
Follow the steps in the order shown. Figures show what your screen should look like at
various points along the way.
1. Launch Vector NTI
Launch Vector NTI using techniques learned in previous tutorials. Open the Vector NTI
workspace window and maximize it.
2. Create a New Gel and Open a Display Window
Click the New Gel button (
) on the Main Toolbar to create a new Gel. In the Gel Setup
dialog box that opens (Fig. 13.1), you can define your own gel and electrophoresis
parameters, such as:
•=
gel type (agarose, polyacrylamide, ...)
•=
gel concentration
•=
gel dimensions
•=
voltage
•=
electric field type (steady, pulse)
143
Fig. 13. 1 Gel Setup dialog box, where you can define your own gel and electrophoresis
parameters
Leave all of the default gel settings.
From the Electrophoresis Profile drop down menu, select the Examples of Agarose Gel and
press OK. Your new gel opens in the Gel Display window. Maximize the window.
3. Create a Sample and Add it to the Gel
The Display window that opens displays an empty gel ready to receive samples. Your
sample will consist of the SV40 molecule cut by the HaeIII and HindIII restriction
endonucleases.
Click the Create Gel Sample button (
) on the Window toolbar. In the Create Gel
Sample dialog box that opens (Fig. 13.2), in the Molecules box, select SV40. In the
Enzymes box, scroll to select HaeIII and HindIII. As you select the molecule and RENs,
their names appear in the Selected for Gel Sample column on the right side of the dialog
box.
In the Sample Name box near the bottom of the dialog box, enter Sample I. In the
Description box, enter SV40 cut by Haelll and Hindlll.
144
Tutorial: Gel Display Windows; Restriction Digestion Chapter 13
Fig. 13. 2 Create Gel Sample dialog box
Press the Add to Gel button in the upper left corner of the dialog box. Vector NTI cuts
SV40 with the two RENs and adds the resulting fragments to the gel shown in the active Gel
Display window. Press the Close button to close the dialog box.
4. Add Gel Markers
Now let’s add three gel markers as size standards for the gel.
) on the Window toolbar. The dialog box that
Click the Load Gel Marker button (
opens displays the gel markers currently stored in the database. Add the following gel
markers:
•=
Lane 2: Select the PBR322-Haelll gel marker; click OK.
•=
Lane 3: Select SPP-EcoRI; click OK.
No lambda-HindIII size marker appears in the VNTI database. Because it’s a commonly
used size standard, let’s create our own. Select Gel > Create Gel Marker on the menu bar.
In the New Gel Marker dialog box, on the General tab, enter Lambda HindIII. On the Gel
Marker tab, enter each fragment size, then press the Add button: 23130, 9416, 6557, 4361,
2322, 2027, 560. Click OK.
•=
Lane 4: Select Lambda HindIII, your newly created gel marker. Click OK.
145
5. Arrange the Gel Display Window Conveniently
Using the split bars, scroll bars and Zoom buttons, arrange the Gel Display window to your
liking (Fig. 13.3).
Fig. 13. 3 Arranging the Gel Display window
6. Inspect the Gel Display Window Text Pane
Activate the Text Pane of your Gel Display window by pressing the Text Pane button
) and inspect its contents. The General Description folder describes the electrophoresis
(
parameters. There is also a folder for each lane of the gel.
Open the folder “1. Sample 1” by doubling click on it or clicking on [+]. Open the folder
representing the longest fragment in the sample, labeled 861. For this fragment, the source
molecule is SV40, and the ends of the fragment are the HindIII site found at position 4003
and the HaeIII site found at position 4864. Note that the source of the fragment is described.
There are also subfolders for each fragment in decreasing order of length. Close the Sample
1 folder with a double-click.
Double click the folder labeled “ SPPI –EcoRl” the gel marker found in lane 3 of the gel,
and open the subfolder “ 8000”. Note that it is empty. The folder is empty because for gel
marker fragments, only the length is stored in the database.
146
Tutorial: Gel Display Windows; Restriction Digestion Chapter 13
7. Change Display Color for a Fragment
You can use the Text Pane to change the color and style for displaying fragments. Open the
SAMPLE1 folder again. Scroll down to a folder labeled “540 [length of fragment]” and
open its associated shortcut menu.
Choose Sample Fragment Properties. In the dialog box that opens, you can choose line
style and color for this fragment. Leave the line unchanged, but change the color to green.
As the gel runs, you can locate the 540-bp fragment by looking for the green color.
8. Run the Gel
To run the gel, activate the gel pane. Press the Fit To Window button (
gel display to fit exactly within the current window.
), causing the
Press the Step Forward button ( ) in the Window Toolbar. The time indicator increases
by fifteen minutes, and the fragments advance in the “gel”. Press the Step Forward button
several more times.
Press the Step Backward button ( ) in the Window toolbar. The time indicator and gel
display now back up.
Now click once in the time indicator box to activate it. Enter 1:30 in the time indicator box,
and press Enter. The gel display is set for 1 hour and 30 minutes of elapsed time.
Fig. 13. 4 Running the gel
147
As the gel advances and retreats, note how the scale at the left of the gel keeps track of the
fragment sizes (Fig. 13.4).
9. Gel Animation
Press the Animation button (
) on the window toolbar to view a continuous simulation
of a Gel electrophoresis. The gel now runs continuously at the speed specified in the Gel
Setup dialog box when you created the gel.
When the gel time indicator reaches three or four hours, press the Animation button again
to stop the run. The fragments are now well separated.
10. Optimize the Gel Display
Press the Zoom In button (
) several times until fuzzy gray bars appear around the lines
representing the DNA fragments (Fig. 13.5). Using the scroll bar, move down along the gel
until your green fragment appears. The gray bars show the minimum distance by which
fragments must be separated so that you can distinguish them in the gel.
Note that the gray bars of many fragments touch each other. This indicates that you will not
be able to distinguish those fragments in the gel. The size of the gray bars is determined by
the Separation Distance parameter, defined in the Gel And Display Setup dialog box
described in step 2.
Fig. 13. 5 Optimizing the Gel Display
Press the True Scale button (
laboratory.
148
), which sizes the gel to represent its true scale in a
Tutorial: Gel Display Windows; Restriction Digestion Chapter 13
Press the Fit To Window button (
exactly within the current window.
) again, and the graphical gel display is sized to fit
11. Change to a Polyacrylamide Gel from the Electrophoresis Profile
Change the parameters of the gel by clicking on the Gel and Display Setup button (
) in
the Window Toolbar. In the Electrophoresis Profile drop-down menu in the dialog box,
select Example of Polyacrylamide Gel and click OK. The electrophoresis parameters are
changed. While the contents of the lane have not changed, as you view your gel again, note
that the positions of the various fragments have been altered.
12. Estimate Fragment Separation Time
Some fragments in our gel are still too close together to distinguish. To estimate how long
the gel would have to run to separate them, use VNTI’s built in calculator: Activate the
Graphics Pane. In the Time Indicator box of the Window Toolbar, type in 2 hours and 30
minutes (2:30) and click ENTER. Press the Fit to Window button to resize the gel to its
standard size.
Press the Fit to Window button (
In button (
) to set the gel to its standard size and press the Zoom
) three times to magnify the view of the gel.
Review the first lane of the gel, containing SAMPLE1. With the scroll bar, scroll down until
you find the section of the gel containing fragments with lengths between 500 and 700 bp.
(You will see three fragments just above the 500-bp mark.) The middle fragment (length
540 bp) is green, because you set its display color in step 7 of this tutorial. The fragments’
gray borders overlap with each other, indicating that these fragments are still too close
together to be distinguishable on the real gel.
Move the cursor to Lane 1, where it changes into a horizontal I-beam (
). Place the
mouse cursor above the three fragments. Left-click + drag the mouse (I-beam) downwards,
highlighting all three unseparated bands.
Press the Calculator button (
) in the Window Toolbar. A message appears, telling you
that the gel would have to run for 5 hours and 30 minutes to separate the selected fragments.
This gives you a general idea of what to expect in an actual gel run. Click OK. The gel
moves immediately to the position at that time elapse. Scroll down so you can view the
fragments.
Click anywhere in the gel pane to remove the selection.
13. Save the Gel Display Window to a Gel Document File
To save the data in the Gel Display window, including gel settings and fragments positions,
select Gel > Save as Document from the menu bar.
149
A dialog box appears, asking you for a filename. Name the file Tutorial.gd and press the
OK button. The gel is saved in a Gel Document file.
To close the Gel window, select Gel > Close.
Now open the saved Gel Document you created. Select Gel > Open Document, and select
the name of the saved document file from the file list. Your Gel Document opens, and all
your fragments and settings have been preserved.
14. Close the Gel Display Window
You have now taken a first look at Vector NTI’s Gel Display windows and restriction
digestion features. Close the window using Gel > Close.
15. Calculate Restriction Fragments
One of the simple options in VNTI is creating restriction fragments of molecules.
Using techniques you have learned, open and maximize the pATH23 Molecule Display
window. Select Analyze > Restriction Fragments on the menu bar. Deselect all of the
RENs listed. Then select ApaLI and EcoRI. Click OK.
Inspecting the Text Pane reveals that all of your resulting fragments are noted, with their
size, source, and the restriction sites producing those fragments.
Identify several of the restriction fragments on the molecule map by placing the cursor on
the appropriate line in the Restriction Fragments folder (Text Pane) and opening the shortcut
menu. Select Find. Clicking this option results in the selection of the fragment on the
graphics map. Close the windows.
150
Tutorial: Internet Connectivity and Tools Chapter 14
Chapter 14 Tutorial: Internet Connectivity and Tools
Introduction
This chapter introduces you to Vector NTI tools that provide connections to external
programs and Internet services.
At the end of this tutorial session, you will be able to:
•=
Send data from Vector NTI to several public WWW servers
•=
Perform a simple BLAST search, alignment and analysis
•=
Save Internet search results as Comments in a database file
Follow the steps in the order shown. Figures show what your screen should look like at
various points along the way.
1. Launch Vector NTI and Open pBR322 in a New Display Window
Launch Vector NTI by double-clicking its icon in the program group or folder in which you
installed Vector NTI. Click the Open button (
) on the main toolbar. Open the Molecule
Viewer for pBR322 using the techniques you learned in previous tutorials. Maximize the
Molecule Display window.
2. Select the Whole Sequence of pBR322 and Use the BLAST Search Tool
Select Tools > Compare Against > GenBank via BLAST on NCBI Server.
Note: Some World Wide Web browsers require the Internet connection to be established
before you start the browser. If your TCP/IP stack or other Internet connection software
cannot be started “on the fly” you need to connect before selecting any of Vector NTI’s
Internet-related commands.
In the Sequence Data dialog box of the BLAST viewer (Fig. 14.1), choose the range and
strand of the sequence to be sent to the server: Whole Sequence / Direct Strand.
Fig. 14. 1 Sequence Data dialog box of the BLAST viewer
151
Press OK to continue. Your selected browser may open automatically or a list of available
browsers may open.
If appropriate, select the name of your WWW browser from the list and press OK to
continue. This configures Vector NTI’s connection to the WWW for all subsequent
connections.
Note: The standard Vector NTI distribution contains support modules for many popular
WWW browsers. If your WWW browser is not in the list, try selecting one of the
“Autodetect” modules from the displayed list. The latest additions to the list are available on
the Vector NTI WWW home page: http://www.informaxinc.com/
Vector NTI opens the BLAST Search page in the WWW browser (Fig. 14.2). (The page
may look only similar to this, depending on your browser).
Fig. 14. 2 BLAST Search page in the WWW browser
This page is Vector NTI’s gateway to the NCBI BLAST Search server and contains the
options that can be used to change various BLAST search parameters. In the Database
section select the “vector” database.
The sequence of pBR322 is already entered in the Query Sequence field. Press the Search
button.
Note: At this step, your WWW browser may display a dialog box or start a program to
establish an Internet connection. Enter the required parameters and continue.
Once an Internet connection with the NCBI server has been established, you may receive a
screen saying your request has been placed in a BLAST queue. To proceed, click on
152
Tutorial: Internet Connectivity and Tools Chapter 14
Format Results. The response time for the BLAST results varies depending on the server
load. If you receive an error, return to the request page and click on the BLAST search
using sequence data link on the top of the page to get information about BLAST server
operation. If the server is busy, try waiting several minutes and resubmit the query.
Note: Since the interface of WWW servers changes from time to time, you may receive a
message that the requested resource is not found. This means that Vector NTI’s server
gateway page is obsolete. The latest versions of Vector NTI gateway pages are available on
the Vector NTI WWW home page.
When you receive the results from the BLAST server, click on the second molecule link (at
the time of this writing (4/2000), the first hit was pBR322 itself and second hit was
U03501/YRP7). Another page appears, containing the GenBank description of the molecule
(Fig. 14.3):
Fig. 14. 3 Web page containing the GenBank description of the molecule
3. Display the Result of the Query in a Molecule Display Window
To transfer the result of the query back to Vector NTI, highlight the GenBank text starting at
the word “LOCUS” and ending with the “//” at the end of the sequence. Select Edit > Copy
from the menu bar (or its analog in your browser) to copy the selected text to the clipboard.
Switch back to the Vector NTI workspace and select Tools > Open > DNA-RNA Molecule
from Clipboard > in GenBank Format from the menu bar (Fig. 14.4). Vector NTI opens
your molecule in a new Display window, automatically generating the restriction map and
graphics representation of the molecule.
153
Fig. 14. 4 Transferring the result of the query back to Vector NTI
4. Save or Open the Result of the Query Using the Save Button
An alternative way to transfer search results from the NCBI server to Vector NTI is to use
the Save button on the query’s GenBank report. You can also use the Save button to save
the query molecule to your hard drive as an independent file.
Switch back to the U03501/YRP7 GenBank report and locate the Save button just above the
text of the GenBank report. Press the Save button. The File Download dialog box appears.
If you choose the Open option, your browser will try to load the document into the
associated application. If Vector NTI was configured correctly, a new window should
appear in its workspace showing the U03501 molecule. If you choose the Save option, you
can specify a file name and a location to store the U03501 molecule as a file on your hard
drive.
5. Use Alignment and Analysis Tools
The standard distribution of Vector NTI has several tools to perform sequence alignment
and analysis. To perform the alignment, switch to the Database Explorer window. (Click the
VNTI Database Explorer button on the taskbar at the screen bottom, or open it using the
Local Database button (
) or select Database > Explore on the menu bar. Select the
Proteins table from the drop-down menu.
154
Tutorial: Internet Connectivity and Tools Chapter 14
Vector NTI displays the list of proteins in the database. CTRL + CLICK on
41BB_HUMAN and 41BB_MOUSE to select both. Choose Align > Multiple Sequences
on BCM Server from the Database Explorer menu bar. Vector NTI opens the browser and
displays the BCM Search page containing the sequences of the selected proteins in FASTA
format (Fig. 14.5).
Fig. 14. 5 BCM Search page
Press the Submit button to start the ClustalW alignment (the default option). If the BCM
server is not too busy, you will receive the response in 5-10 seconds. Scroll through the
screen to review the text-based alignment results.
To analyze a protein using the ProtScale program on the ExPASy server in Switzerland,
return to the Database Explorer window and click on the 41_HUMAN protein again to
select it. Choose Tools > Compare Against > PROSITE Database via ScanProsite on
ExPASy Server from the Database Explorer’s menu bar.
When you see the ScanProsite page containing the sequence of 41_HUMAN in the browser,
press the Start The Scan button. If the ExPASy server is not too busy, you will receive the
response in 2-5 seconds.
Searches are performed in PROSITE for biologically significant protein patterns and
profiles for known protein families and domains. When the search results are available,
click on the button on the task bar, opening the results window. Scroll the page to review the
155
pattern matches listed in their numerical and graphical form. For details, click on the site ID
links, such as PDOC00001 for the glycosylation site, opened and illustrated in Fig. 14.6.
Fig. 14. 6 Site ID link for PDOC00001 (glycosylation site)
6. Saving Search Results as Comments
Vector NTI allows you to associate any text data with database objects in the form of
comments. Let’s save the search results to the database for future reference.
Select the resulting hits, starting with hit [1], by dragging the mouse across and down the
page. Do not include the sequence, which is already stored in the Vector NTI database.
Choose Edit > Copy or press CTRL-C to copy results to the Clipboard Return to Database
Explorer, and with 41_HUMAN still selected in the Database Explorer window, select
Protein > Edit from the Explorer’s menu bar.
In the tabbed Edit dialog box that opens, you can edit various information associated with
the protein molecule (Fig. 14.7). Click on the Comments tab, scroll to a point at the end of
the existing comment text and click to set the text cursor for insertion.
156
Tutorial: Internet Connectivity and Tools Chapter 14
Fig. 14. 7 Edit dialog box, where you can edit information associated with the protein
molecule
Now press CTRL-V to paste the search results from the Clipboard.
Fig. 14. 8 Editing the resulting text
157
Edit the resulting text to your liking and press the OK button to save it to the database (Fig.
14.8).
The search results are now saved in the database for later retrieval. To view the comments
from 41_HUMAN’s Display window, double-click on the Comments line in the Text Pane
of a Molecule Display window for 41_Human.
7. Close the Molecule Display Windows and Exit Vector NTI
You have now taken a first look at Vector NTI’s Tools for Internet connection. To close all
display windows, select Molecule > Close; to exit the program, select File > Exit from the
menu bar. If you are not going to continue your work with the Internet, close the WWW
browser and disconnect, if necessary.
158
Tutorial: AlignX Chapter 15
Chapter 15 Tutorial: AlignX
Introduction
This chapter introduces you to operations of AlignX. The simultaneous alignment of many
nucleotide or amino acid sequences is an essential tool in molecular biology. Multiple
alignments are used to find diagnostic patterns, characterize protein families, as well as to
detect or demonstrate a similarity between new sequences and existing families of
sequences. They are also useful in predicting secondary and tertiary structures of new
sequences, suggesting oligonucleotide primers for PCR and serving as an essential prelude
to molecular evolutionary analysis.
At the end of this tutorial session, you will be able to:
•=
Import molecules from other Vector NTI Suite applications into AlignX
•=
Describe elements of the AlignX user interface
•=
Create an alignment, and add molecules to an alignment
•=
Modify alignment graphics and sequence
•=
Edit an alignment
•=
Create and interpret an AlignX Dot Matrix
•=
Export molecules from AlignX into other Vector NTI applications
Follow the steps of the tutorial in the order shown. Figures show what your screen should
look like at various points along the way.
1. Launch AlignX from the Database Explorer
Using techniques you learned in previous tutorials, open the Vector NTI Suite Database
Explorer. Now open AlignX by double-clicking its icon in the program group or folder in
which you installed Vector NTI. In the Database Explorer, active the Protein table and
select the Protein Molecules (MAIN) subbase. In the Database Objects List Pane, scroll to
the molecules 5HIA for human, rat, and mouse. Click the cursor at the right bottom of the
last of the three proteins, and drag a box around all three molecules. This is a new way to
select a group of objects in a subbase list (Fig. 15.1).
159
Fig. 15. 1 Selecting a group of objects in a subbase list
Now position the Database Explorer window and the AlignX window side by side, and click
and drag the selected molecules into the AlignX viewer. Now in the protein list, also select
and drag into AlignX the 41BB Human molecule.
An alternative method is to select the molecules in Database Explorer and select Align >
AlignX – Align Selected Molecules.
2. Examine AlignX Display Window
When you open AlignX, even after bringing molecules in, three of the panes are empty.
After you initiate the alignment, the alignment results will appear in the empty panes.
In the Text Pane, select the 5H1A molecules. Press the Align button (
alignment that now appears in the display window.
160
), initiating the
Tutorial: AlignX Chapter 15
Fig. 15. 2 AlignX Display window
The AlignX Display window consists of a menu bar, three toolbars and context menus
specific for each pane (Fig. 15.2). The AlignX Display window includes the Text Pane, the
Phylogenetic Tree Pane (still empty), the Analysis Pane and the Alignment Pane. The panes
are divided by split bars that can be moved to resize the panes.
All of the toolbar functions are summarized in Chapter 4. Toolbar buttons are described in
this tutorial as needed.
As in the other Vector NTI Suite applications, to apply a command from the main menu in a
given pane (Print, Print Preview, Camera), that pane must be active. The active pane can be
toggled with the Switch Panes (
,
,
,
) buttons in the Pane Selection Toolbar
or by clicking anywhere in the pane you want to activate.
In the Text Pane, double click on a molecule folder to open and review it. Move the split bar
at the bottom of the pane and open some of the subfolders. A Text Pane folder and its
subfolders contain a thorough description of the molecule. Data includes molecule type and
form, user-defined fields (from Vector NTI) and standard fields (such as GenBank),
comments, references and so forth.
The default Analysis Pane contains three graphical representations of alignment results.
Move the lower split bar and the split bars between the graphs and/or use the scroll bar to
better view them.
•=
The first graph displays the alignment quality profile. The specific values (in a 0-1
range) are assigned to each residue at a given alignment position in each aligned
161
sequenced depending on whether the residue is identical, similar or weakly similar to
the corresponding residue of the consensus sequence. The values for each residue at a
given position are added together and the number of the sequences in the alignment
normalizes the resulting value. The default values are 1, 0.5 and 0.2 for identical,
similar and weakly similar residues respectively.
•=
The second graph displays the statistical significance profile (Absolute Complexity of
an alignment. It is calculated as a sum of all pairwise residue substitution scores at a
given alignment position normalized by the number of pairs in the alignment. The
scores are taken from the residue substitution matrix used for alignment calculation.
•=
The third graph displays the statistical significance (Absolute Complexity) of an
alignment for a selected molecule to the consensus sequence. The graph is calculated in
a manner identical to the one in the second graph.
The Alignment Pane is described in step 4.
You can add additional analyses to the graphics pane by activating the Graphics Pane and
choosing View > List of Analyses from the drop down menu or press the Analysis List
button (
) to open the Analysis List setup dialog box (Fig. 15.3):
Fig. 15. 3 Analysis List setup dialog box
162
Tutorial: AlignX Chapter 15
The dialog box lists all of the analyses available for DNA or protein, depending on the type
of aligned molecules. Currently displayed analyses are listed in the Selected Analyses box.
To add an analysis, select it in the Available Analyses list box and click the Add Analysis
button (
) to move it to the Selected Analyses list. Alternately, you can move an analysis
to the lower list by double clicking on it.
The plot display order is determined by the order the analyses are listed in the Analysis List
setup box. To modify the order, select an analysis and move it up by clicking the Move Up
button (
analyses.
). Click OK to close the Analysis list setup dialog box and generate the new
3. Add Molecule to Alignment
To add a molecule toyour alignment, select the 41BB Human molecule in the Text Pane and
). You can add as many molecules as you like to
click the Add to Alignment button (
the alignment as long as they are listed in the Text Pane.
4. Inspect the Phylogenetic Tree
Note that now the Phylogenetic Tree Pane shows in its specific pane (Fig. 15.4).
Phylogenetic analysis is the means of studying presumed evolutionary relationships. An
inferred evolutionary history is displayed in a treelike diagram suggesting the inherited
relationships between the molecules. In Vector NTI, the tree is only calculated when there
are more than 3 molecules in the alignment.
Fig. 15. 4 Phylogenetic Tree Pane
The phylogenetic tree is built using the Neighbor Joining method (NJ) of Saitou and Nei.
The NJ method works on a matrix of distances between all pairs of sequence to be analyzed.
These distances are related to the degree of divergence between the sequences. The
phylogenetic tree is calculated after the sequences are aligned.
163
5. Review the Alignment Parameters and Matrix
Click the Alignment Setup button (
) on the Viewer Toolbar to see how you can adjust
different parameters for the alignment. Select each of the tabs in the dialog box to quickly
review the settings. Leave the last tab, Score Matrix selected.
All algorithms designed to evaluate pairwise sequence alignment are based on systems that
assign scores to aligned residues, detecting similarities between differing sequences. This
page displays the matrix, BLOSUM 62, used to generate your multiple alignment. Amino
acids that are identical or similar in alignment score higher than those less similar. The most
common of many different scoring systems are based on substitutions of amino acids in
related proteins.
BLOSUM matrices are calculated from local, ungapped alignments of distantly related
sequences. The matrix scores represent the minimum percent identity of the blocks used to
construct the matrix; greater numbers represent lesser distances.
In Vector NTI, you can modify matrices using the Matrix Editor. Customized matrices can
also be devised and stored in the database for shared or private use.
Leave the settings unchanged. It is a good idea when performing the various analyses in
Vector NTI applications to run them first using the default settings. Review the results, then
change the parameters as you like before running the analyses again.
6. Examine the Alignment Pane
Now move the split bars up to optimizing viewing of the Alignment Pane. Sequences of all
the molecules included in the alignment are displayed here, with their names listed at the
left of the corresponding sequence. Residues in the alignment are colored according to the
following scheme:
Alignment Color
Interpretation
black on window default
color
non-similar residues
blue on cyan
consensus residue derived from a block of similar
residues at a given position
black on green
consensus residue derived from the occurrence of
greater than 50% of a single residue at a given
position
red on yellow
consensus residue derived from a completely
conserved residue at a given position
green on window default
color
residue weakly similar to consensus residue at
given position
Table 15. 1 Alignment color scheme
164
Tutorial: AlignX Chapter 15
Move the horizontal scroll bar at the bottom of the Alignment Pane. Drag the mouse across
some of the sequence, selecting it. Note that the corresponding region is selected in the
Analysis Pane as you do so.
The sequence names remain stationary at the left of the Alignment Pane no matter how the
sequences are repositioned horizontally. If the list of molecules listed in the Alignment Pane
is longer than the size of the pane, a vertical scroll bar appears as well. Vertical scrolling
affects both sequences and their names but the consensus sequence remains visible at the
bottom of the pane.
7. Edit the Alignment
After inspecting the alignment, press the Edit Alignment button (
) on the Viewer
Toolbar to open the Alignment Editor dialog box (Fig. 15.5). This dialog box displays rows
of selected molecule names and sequences.
Fig. 15. 5 Alignment Editor dialog box, which displays rows of selected molecule names and
sequences
Scroll the sequences to find the 3’ end of the 41BB Human molecule. Click and drag to
select EEEGGCEL. Note that as you do so, two of the Move Selected Block buttons in the
bottom of the dialog box become enabled. Click the (
) button, which moves the
selected block one space to the right. (The (
) button would move the block to the
extreme right of the gap.) Because editing an alignment can only occur when selected
residue(s) are shifted into an adjacent gap, the arrows are only enabled when the selection
block is next to a gap into which the selection may be shifted.
8. Generate Dot Matrix Plot
To perform a Dot Matrix analysis, select open a Dot Matrix window by pressing the Dot
) on the main toolbar. A Dot Matrix window opens in a separate modal
Matrix button (
popup window (Fig. 15.6). In the drop-down menu at the top of the screen, select 5H1A
165
Human (the first selected molecule in the AlignX window.) In the second drop-down menu,
select, 5H1A mouse, launching the Dot Matrix.hn
Fig. 15. 6 Dot Matrix analysis
The Dot Matrix analysis is primarily a method for finding all possible matches of residues
between two sequences. One sequence (A) is listed across the top of a page and the other
sequence (B) is listed down the left side.
The graphical representation of a Dot Matrix is a dashed rectangle in which any region of
similar sequence is revealed by a diagonal row of dots. The molecule selected first
corresponds to the horizontal axis, its name being shown in the right top corner of the Dot
Matrix rectangle. The second molecule corresponds to the vertical axis. Each axis has its
own scale that initially displays the sequence positions.
When the Dot Matrix is first calculated, it is shown as a representation of the full length of a
molecule. Because it is difficult to analyze specific molecule regions when several thousand
residues are represented, click and hold the left mouse button within the Dot Matrix
rectangle while dragging the mouse, displaying the tracking dotted rectangle (Fig. 15.7).
166
Tutorial: AlignX Chapter 15
Fig. 15. 7 Selected region of the Dot Matrix
When the mouse button is released, the selected region is enlarged to the entire Dot Matrix
rectangle (Fig. 15.8).
Fig. 15. 8 Enlarged region of the Dot Matrix
167
Click the Undo Zoom (
) to return to the previous screen. Close the Dot Matrix window.
9. Export Alignment Molecules
AlignX is fully integrated with other components of the Vector NTI suite. As an example of
exporting a molecule from AlignX into other applications, select the molecule 5H1A in the
Text Pane and select Analyze > Back Translation. The display window that opens displays
the original amino acid sequence in the upper pane, and the back translated sequence in the
lower pane. In Fig. 15.9, that sequence displayed is the “most ambiguous” as shown by the
scale above the sequence.
Fig. 15. 9 Back translated sequence
Drag the scale button to the right, noting how the translation code is modified as you
proceed. Uncheck the “3 letters in translation” box at the bottom, changing the amino acid
code to 1-letter representation. Exit the Back Translation mode.
Now select Analyze > BioPlot – Analyze Selected Molecule. The BioPlot display window
opens, displaying physiochemical characteristics of the 5H1A Human protein. BioPlot will
be discussed in the next tutorial. Close the BioPlot.
168
Tutorial: AlignX Chapter 15
10. Copy and Print an AlignX Pane
The Copy and Print features work the same in AlignX as in the other Suite components. To
copy the contents of a pane and paste them exactly as they appear in AlignX, activate the
pane and click the Camera button (
such as a word processing document.
). Paste the copied material in any other application,
Print pane contents in the usual manner, by pressing the Print button (
).
11. Save the Project and Close AlignX
You can save your project if you choose by selecting Project > Save As and selecting your
project destination in the Save As dialog box. The next time you open Align X, the last
several opened projects are listed under the Project menu option. Selecting a project from
that list opens it.
Close AlignX in the same way you closed other applications of Vector NTI: select Project
> Exit.
This ends your tutorial session with AlignX.
169
170
Tutorial: BioPlot Chapter 16
Chapter 16 Tutorial: BioPlot
Introduction
This chapter introduces you to the Vector NTI Suite application, BioPlot. BioPlot performs
certain types of DNA and protein sequence analyses and displays the results as linear
graphics. This allows you to visualize the physio-chemical characteristics of a molecule,
which may be useful for inferring the potential structure/function of molecule regions.
At the end of this tutorial session, you will be able to:
•=
Launch BioPlot for a molecule you create by translating DNA in Vector NTI.
•=
Examine and modify plot properties
•=
Modify plot layout
•=
Format sequence text
•=
Add new analyses to the display window
Follow the steps in the order shown. Figures show what your screen should look like at
various points along the way.
1. In Vector NTI, Open a Molecule Display Window for pSV2-dhfr; Create a
New Protein by Translating a CDS
For the first part of this tutorial, you will create a new protein in Vector NTI by translating a
coding DNA sequence (CDS) found by using the ORF tool in a Molecule Display window.
When you create the new protein, a new Molecule Display window opens from which you
will then launch BioPlot. BioPlot can also be launched from Database Explorer or by
double-clicking its icon in the program group or folder where you installed Vector NTI.
Using techniques you learned in previous tutorials, in Vector NTI open a display window
for pSV2dhfr. To launch the ORF Setup dialog box, select Analyze > ORF or choose View
> Display Setup, check the ORF box and click the ORF Setup button. Review the ORF
settings in the ORF Setup dialog box and leave them as they appear. Click OK.
The ORF tool finds all open reading frames on the molecule according to the parameters set
in the ORF Setup dialog box. Found ORFs are displayed in the graphics pane represented
by arrows that indicate whether the ORF is found on the direct or complementary strand of
the DNA/RNA molecule’s sequence. ORFs on the direct strand point clockwise; ORFs on
the complementary strand point counter-clockwise.
Click on the arrow for the ORF that corresponds to the functional signal for the gene
entitled “DHFR” (dihydrofolate reductase). The amino acid sequence translation from the
selected ORF will form the basis for the new molecule.
171
ORF for DHFR
Fig. 16. 1 Black arrows represent ORFs, which correspond to specific regions on the
sequence
Translate the ORF DNA to protein by selecting Molecule > Create New > Using
translation procedure (Protein) > Direct Strand. A New Protein Molecule dialog box
opens with a default name of Translation of pSV2dhfr for the new molecule. Change the
name to DHFR and click OK. A new Molecule Display window for the new protein opens.
2. Launch BioPlot from a Vector NTI Molecule Display Window
In the new Molecule Display window, select Analyze > BioPlot-Analyze Selected
Molecule.
BioPlot opens featuring the new protein (Fig. 16.2). If you had selected BioPlot – Open
New Window, BioPlot would have opened with empty panes, waiting for you to create a
new project. Maximize the window by clicking the Maximize button (
172
).
Tutorial: BioPlot Chapter 16
Fig. 16. 2 BioPlot with the new protein
3. Review the BioPlot Display Window
The BioPlot interface is similar to those of other Vector NTI Suite applications: it consists
of a menu bar, three toolbars that are context sensitive, a Text Pane, a Plot Pane, and
Sequence Pane. Maximize the Display window and arrange its panes conveniently, using
the split bars and scroll bars as you have in other tutorials.
The Pane selection buttons (
), (
), and (
) are for quick navigation between panes.
Other toolbar buttons are summarized in the Toolbar chapter, Chapter 4. Toolbar buttons
used in this tutorial are displayed as needed.
In the Text Pane, open each of the folders with a double-click and review them. They
contain descriptions of the molecule being analyzed in BioPlot. You’ll note that
dihydrofolate reductase is a small protein, 187 amino acids. The General Description folder
verifies that the molecule was translated from a fragment of pSV2-dhfr.
Click in the Plots Pane to activate it. The Plot Pane displays visual results of physiochemical analyses as plots that you can manipulate as you have done with graphics in other
display windows.
Activate the Sequence Pane by clicking on the Sequence Pane button (
). If the
sequence is long enough, you can navigate through the Sequence Pane by moving the
vertical scroll bar. As in other Vector NTI applications, the cursor position in the Sequence
Pane is noted on a pop-up label when the cursor is paused or on the Status Bar when you
click in a certain position.
173
4. Examine and Modify Plot Properties
Click in the Plots Pane to activate it, then click on the Zoom In button (
) two times,
enlarging the plot. Move the horizontal split bar down to increase the Plots Pane viewing
area. A plot’s vertical axis shows the minimal and maximal values of analysis results; the
horizontal axis displays either numerical positions in the sequence or residues, if the scale of
the plot is enlarged sufficiently.
To review properties of any plot, click on it, then click the Properties button (
),
opening the Properties dialog box. Open this dialog box for the hydrophobicity plot. The
Analysis tab displays the specific reference for this analysis, and the hydrophobicity index
at pH 3.4 for each residue in the protein. Select the Datagram tab (Fig. 16.3) and change the
color of the plot to bright red. Click OK.
Fig. 16. 3 Datagram tab of the Properties dialog box
5. Modify Plot Layouts
Click the Edit Layout button (
) on the toolbar. Click on the Enable Overlapping
). Now plots can now be repositioned anywhere in the pane, even being
button (
superimposed upon each other. Left-click on the hydrophobicity plot and drag it on top of
the hydrophilicity graph (Fig. 16.4). Note how, in this case, the two graphs almost perfectly
complement each other.
174
Tutorial: BioPlot Chapter 16
Fig. 16. 4 Hydrophobicity plot superimposed on top of the hydrophilicity graph
Drag the hydrophobicity plot back to its original position. Now move the cursor to one of
the small black selection boxes at the bottom of the plot, where it changes to a vertical twoheaded arrow. Drag the box down, modifying the plot height.
Turn off the Enable Overlapping option by clicking on the button again. With only the Edit
Layout button still on, a plot can be moved, but dropped only in specific positions. Click
and drag the lower plot to the top of the pane. When the cursor shape changes from
, a new position is allowed. When the cursor shape changes to
invalid. The upper pane now repositions itself in the lower position.
to
, the new position is
Press the Edit Layout button again to turn off that mode.
Select a region of the sequence on the plot using the click + drag technique. Note that the
same region is selected in the Sequence Pane. Increase the scale of the selected region in the
). Note that now you can read the
Plots Pane by clicking the Zoom to Selection button (
individual residues in the Plot Pane. To discern the plot data for a specific residue, pause
the cursor over the residue position and read the popup label. Return to the original scale by
clicking the Fit to Window button (
).
6. Format the DHFR Sequence
Reposition the horizontal split bar so you can easily work in the Sequence Pane and activate
the pane. Sequence text can be formatted in much the same way as you would in a word
processor. Select aa #131-140. Click on the Format button (
buttons you may be familiar with. Click on the Bold (
16.5).
), enabling the text format
) and Italics (
) buttons (Fig.
175
Fig. 16. 5 Formatting the DHFR sequence
To reverse these actions, with the text still highlighted, click on the Bold and Italics buttons
again. You can even change text color if you wish.
7. Open a DNA Project in BioPlot
You have launched BioPlot from a Vector NTI window with a protein molecule you created
by translating DNA. Now let’s open a BioPlot project containing a DNA molecule from the
Vector NTI DNA/RNA database.
In the BioPlot window, select File > Open. Browse for the DemoProjects folder in the Open
dialog box. Open the DemoProjects folder and click on DNA (or DNA.apf, if your computer
is set to show file extensions). Click OK and BioPlot reads the file format and opens the
display window for the DNA molecule, ColE1. Use the split bars to enlarge and optimize
the display of the Plot Pane.
8. Add New Analyses to BioPlot
Since a DNA molecule is now open in BioPlot, the displayed default analyses have
changed. Since an important part of configuring BioPlot is the selection of analyses to
perform for a molecule, let’s add some analysis to those already displayed. Press the
Analysis List button (
176
) to open the Analysis List setup dialog box (Fig. 16.6).
Tutorial: BioPlot Chapter 16
Fig. 16. 6 Analysis List setup dialog box
The dialog box lists all of the analyses available for the molecule type open in BioPlot
(DNA). Currently displayed analyses are listed in the Selected Analyses box. In the
Available Analyses list box, select Melting Temperature (GC content). Click the Add
Analysis button (
) to move it to the Selected Analyses list. Using an alternative
method, move Nucleic Acid Distribution to the lower list by double clicking on it.
The plot display order is determined by the order the analyses are listed in the Analysis List
setup box. To modify the order, select Nucleic Acid Distribution and move up by clicking
the Move Up button (
). Click OK to generate the new analyses.
9. Copy, Paste, and Print BioPlot Panes
As in other applications of the Vector NTI Suite, you can copy display window contents to
the Clipboard or to a file. Make sure the Plot Pane is active. Position the plots for the
) and select All and
display you would like to copy. Press the Camera button (
Clipboard in the dialog box that opens. Open a new word processing document and paste
the Clipboard contents to it. The Camera feature copies and pastes pane contents exactly as
you have specified and selected, even the colors in the copied pane.
177
The contents of any BioPlot pane can be printed the same as you do in other Vector NTI
Suite Applications, by clicking the Print button (
Print Preview button (
). To see a preview first, click the
).
10. Close the Display Window and Exit Vector NTI
Close BioPlot by selecting File > Close. If you wish, You have finished your session with
Vector NTI. Close the Molecule Display window using the Close command option in the
Molecule menu. Quit Vector NTI by selecting File > Exit.
178
Tutorial: ContigExpress Chapter 17
Chapter 17 Tutorial: ContigExpress
Introduction
ContigExpress is a program for assembling many small DNA fragments, both text
sequences and chromatograms from automated sequencers, into longer contiguous
sequences or “contigs”.
Work in ContigExpress takes place in a ContigExpress Project, a file where you store
fragments, their assemblies, and assembly options related to your current task. In
ContigExpress, fragments can be edited directly, with the chromatograms in full view.
Changes are tracked and a history is maintained. The contigs generated can then be saved,
exported into other applications of the Vector NTI Suite or exported to third-party tools
available on the WWW.
This tutorial can be completed in one session or divided into three sessions as noted. At the
end of this tutorial, you will be able to:
•=
Create a ContigExpress project
•=
Navigate and manipulate the CE Project Explorer window
•=
Assemble contigs
•=
Edit fragments and contigs in the Fragment Window or the Contig Window
Follow the steps of the tutorial in the order shown. Figures show what your screen should
look like at various points along the way.
Session 1 Project Explorer
1. Open a ContigExpress Window
Launch ContigExpress (CE) by selecting it in the program group or folder in which you
installed the Vector NTI Suite. You can also launch ContigExpress from most other Vector
NTI Suite applications. ContigExpress opens with an empty Project Explorer.
2. Open a CE Project and Add a Fragment to the Project
To open the project, in the Project Explorer window select Project > Open Project. Browse
for the Vector NTI Suite\Demo Projects folder (this is found under Program Files if a
default installation has been performed). Open the Demo Projects folder and double-click on
Demo Projects.cep to open the project in the Project Explorer window. There will be 13
fragments listed in the List Pane of the Project Explorer (Fig. 17.1):
179
Fig. 17. 1 Fragments listed in the List Pane of the Project Explorer
Most files saved from an automatic sequencer have an .abi extension. Add one other
fragment to the list by selecting Project > Add Fragments > From ABI file…
This option opens the Import Sequence From dialog box (Fig. 17.2). Select Sample 1303.abi
and click Open.
Fig. 17. 2 Import Sequence From dialog box
180
Tutorial: ContigExpress Chapter 17
Note: Sometimes the names of the imported fragments do not directly correspond to their
original file names – ContigExpress assigns names that are found inside the imported files
to the newly imported fragments. (In this example, Sample1303.abi becomes xb-control on
the list).
3. Examine the CE Project Explorer Window
As you noted, CE opens to an empty Project Explorer window to which you added a list of
molecules. The window is similar to other Vector NTI Suite windows with a title bar, menu
bar and tool bar (Fig. 17.3). The Tree Pane on the left and the List Pane on the right are
divided by a movable split bar. A Status Bar at the screen bottom displays the Project
Explorer status.
All of the toolbar buttons are summarized in Chapter 4. Toolbar buttons are described in this
tutorial as needed.
Fig. 17. 3 Examining the CE Project Explorer window
4. Create Assemblies of Contigs
Choose the Assembly Algorithm
There are two different assembly algorithms to choose from in CE, Linear Assembly and
Pairwise Assembly. The advantages and disadvantages of each algorithm are discussed in
Chapter 29 (page 469). For the purposes of this tutorial, we will use the Pairwise Assembly
algorithm.
181
From the menu, choose Assemble > Assembly Setup or choose the Assembly Setup button
on the toolbar. The Assembly Setup dialog box (Fig. 17.4) appears (more detailed
information about Assembly Setup can be found in Chapter 29):
Fig. 17. 4 Assembly Setup dialog box
Choose the Algorithm tab on the Assembly Setup dialog box. Select the Pairwise Assembly
radio button and press the OK button to register the change and close the dialog box.
Assemble Sequences
To assemble a contig, select all fragments except xb-control, with SHIFT + CLICK at the
names beginning and ending the list at RB 1. Click the Assemble Selected button (
This button is enabled only when at least two fragments are selected.
).
(If you want to select all the sequences in the CE Project window for assembly, right click
on the first sequence in the list and choose Select All from the shortcut menu.)
An Assembly Progress dialog box allows you to monitor the assembly process or cancel the
assembly at any time.
After the contig assembly is completed, the Tree Pane shows an assembly (Assembly 1).
Select the assembly with a click. All of the project fragments are listed in the List Pane,
beginning with the contig (Contig 1) made from two fragments (Fig. 17.5). An assembly can
be made up of one or more contigs.
182
Tutorial: ContigExpress Chapter 17
Fig. 17. 5 Tree Pane showing an assembly (Assembly 1)
Let's create another assembly, a “child” of Assembly 1. For this, select fragments from
ba16d8.abi to ba16d2.abi (Fig. 17.6) and click the Assemble Selected button (
) again:
Fig. 17. 6 Selecting fragments from Assembly 1
183
Another Assembly (Assembly 1.1) derived from Assembly 1 is listed in the Tree Pane (Fig.
17.7). The numbering system (Assembly 1.1) shows its relationship to the parent contig.
Fig. 17. 7 Assembly 1.1, derived from Assembly 1, is listed in the Tree Pane
5. Review and Modify Viewing Options
The List Pane presently contains only one column listing the identification code of each
fragment. Lets modify the viewing options to display more information for each fragment.
Select View > Options, opening the Options dialog box (Fig. 17.8):
Fig. 17. 8 Options dialog box
184
Tutorial: ContigExpress Chapter 17
This dialog box, similar to those in other Vector NTI Suite applications, has three tabs. The
Details View tab controls the information displayed in the List Pane of Project Explorer.
The Status Bar tab controls the information displayed on the Status Bar for a selected item
in the CE project explorer. The Copy Fragment/Contig tab controls the copy format for
fragments and contigs.
On the Details View tab, the top to bottom order of the Displayed Fields corresponds to the
left to right order of columns in the List Pane. In the Displayed Fields pane, select Length
line, and click the Move Up button. Click OK. Note that Length now is the column to the
immediate right of the fragment names in the List Pane.
On the toolbar, the List Format group of buttons control the list display (Fig. 17.9):
Fig. 17. 9 List Format group of buttons
Click each of these buttons and observe how the information display of the Project Explorer
changes. Leave the Details button (
) selected.
The next group of buttons allows you to filter data displayed in the List Pane (Fig. 17.10):
Fig. 17. 10 Filter Data group of buttons
By default all four of these buttons, or viewing filters, are selected, showing the maximum
amount of information. To see how they work, make sure that Assembly 1.1 in the Tree
Pane is selected. Note that no matter how you display the list, all fragments are still
identified by one of the following icons:
•=
Contigs (
•=
Fragments included in the assembly (
•=
Fragment not included in the assembly (
)
)
)
185
•=
Fragments not considered for the assembly (
)
Now click the Show Contigs button (
), turning it “off”. Contig 2 and its fragments,
ba16d8.abi and ba16d9.abi are no longer displayed in the List Pane (Fig. 17.11):
Fig. 17. 11 Using the Show Contigs button
Click this button again to restore the original display, then click Expand Contigs button
), turning it “off”. Now the fragments included in Contig 2 are excluded from the
(
display (the contig is not “expanded”):
Click the Expand Contigs buttons again to restore the original display. Click each of the
remaining two buttons, turning them off then on again in turn: the Show Unassembled
Fragments button (
) and the Show Other Fragments button (
). Note the fragments
that are excluded and included in each display. Finish with all filters enabled (all buttons
pushed) as it was in the original display.
You can use any combination of enabled and disabled data filter for list display.
6. View Contents in the Tree and Content Panes
The currently enabled viewing mode in the Tree Pane is called the History View. It shows
the historical relationship between the assemblies in a tree form.
186
Tutorial: ContigExpress Chapter 17
Click the Content View button (
).
Fig. 17. 12 Viewing contents in the Tree and Content Panes
The Content View does not display the mutual relationships of the assemblies, but it does
enable you to open each assembly from the Tree Pane, displaying each assembly’s contents
in the List Pane (Fig. 17.12). To return to History View, which displays assembly
relationships (trees) but not their contents in the Tree Pane, click the History View button
(
).
7. Manage Fragment Lists and Project Items
ContigExpress can use the Windows clipboard for copy and paste operations.
Select fragment RB 1 and click the Copy button (
in the right pane). Click the Paste button (
Pane:
) (enabled when anything is selected
) and a Copy of RB 1 appears in the List
Project Explorer allows you to change the names of the project items and delete them from
the project. Select the fragment Copy of RB 1 and click the Rename button (
the text box (Fig. 17.13).
), enabling
Fig. 17. 13 Renaming project items
In the text box, change the name to 123 and press Enter, renaming the fragment.
187
Select 123 and click the Delete from Project button (
). Confirm the action. Fragment
123 is deleted from the project and the display is reset to the upper level of the project
(Fragments (MAIN)).
Select Assembly 1.1 and fragment ba16d8.abi in this assembly. Click the Delete from
Project (
) button. ContigExpress warns you that the selected fragment is included in
several assemblies and deleting this fragment will delete them as well (Fig. 17.14).
Fig. 17. 14 Deleting items from a project
Click No, indicating the deletion will not continue. If you had clicked Yes, all assemblies
would have been deleted.
8. Save and Close a CE Project
Even though you may wish to continue the tutorial, save and close the project and then open
it again to become familiar with these functions.
To save the project, select Project > Save As. Name the project Tutorial Project and select
the Demo Projects as the destination.
To close your project, select Project > Close Project. ContigExpress reverts to its initial
state, with an empty workspace. You can either start a new project by importing the
fragments or open an existing project from the disk.
Exit ContigExpress as you would close any other Windows application.
Session 2 Working in Fragment Window
1. Open and Inspect the Fragment Window
Open the CE Project Explorer and select Project on the menu bar. The name of the project
you worked with last is shown in the used projects list at the bottom of the drop down menu.
Select Tutorial Project, opening it in Project Explorer. In the Project Explorer List Pane,
double-click the fragment ba16d12.abi to open it in a Fragment window. Maximize the
window and arrange the panes conveniently by dragging the split bars with a mouse.
188
Tutorial: ContigExpress Chapter 17
Fig. 17. 15 Fragment Display window
The Fragment Display window consists of a title bar, a menu bar, three toolbars and three
panes: a Text Pane, a Sequence Pane and a Chromatogram Pane (Fig. 17.5). The panes are
divided by movable split bars.
All of the toolbar functions are summarized in Chapter 4. Toolbar buttons are described here
as needed.
Text Pane
Click the Text Pane button (
) to activate it. The Text Pane lists properties of the
fragments, such as its name, general description, chromatogram data (if any, features.
Click the + to the left of the General Description line to open and view the folder contents.
Double click on the folder to close it.
Sequence pane
Click the Sequence Pane button (
) to activate it. Only one strand of the sequence is
shown by default. Click the Show Two Strands button (
of the sequence (Fig. 17.16):
), now displaying both strands
189
Fig. 17. 16 Displaying two strands of a sequence
To modify the number of sequence blocks displayed per line, clicking the Lane Width
) and enter 15 in the Blocks per Line: field of the dialog box. Click OK and the
button (
number of blocks per line increases as directed (Fig. 17.17).
Fig. 17. 17 Modify the number of sequence blocks displayed per line
Using the same technique, change the blocks amount back to 10.
Chromatogram Pane
Click the Chromatogram Pane button to activate it (Fig. 17.18). The vertical scroll lever
on the left side of the Chromatogram Pane can be used to resize chromatogram peak height.
190
Tutorial: ContigExpress Chapter 17
Fig. 17. 18 Chromatogram Pane
Individual base traces can be displayed or removed by pressing the corresponding Show
Trace toggle buttons (
) on the toolbar or by choosing View > Show Traces for the
particular base you want to show or hide. For example, if you want to hide the
chromatogram trace for Ts only, make sure that the Show Trace - T button is not pressed,
but that the Show Trace - A, C and G buttons are pressed. Press each button to see the
effect on the Chromatogram Pane.
2. Sequence Selection Techniques
In ContigExpress, the cursor in the Sequence Pane becomes a short line vertical blinking Ibeam called a caret ( ). A selected sequence is highlighted and marked at one end (the
“active” end) with a caret. The current position of the caret is always shown in the Position
Box on the status bar (Fig. 17.19):
191
Position box
Selection box
Fig. 17. 19 Position Box on the status bar
Click this box to open a Set Caret Position dialog box (Fig. 17.20) that can be used to
position the caret anywhere in the sequence:
Fig. 17. 20 Set Caret Position dialog box
Click on the Selection box on the Status Bar, opening the Set Selection dialog box (Fig.
17.21). Set the selection to 10 bp – 30 bp and press OK:
Fig. 17. 21 the Set Selection dialog box
The selection is highlighted in the Sequence Pane and shown in the Selection Box on the
status bar (Fig. 17.22):
192
Tutorial: ContigExpress Chapter 17
Highlighted
selection
Fig. 17. 22 Highlighted selection in the Sequence Pane
To modify the 5’ and 3’ ends with the mouse:
•=
Click the 5’ end of the selection, moving the caret [note its change to a 5’ mark ( )] to
that position and activating the 5’ end. CLICK + DRAG the 5’ end to a position near
the start of the molecule. Observe the selection box as you drag. The caret remains with
the end of selection you are dragging.
•=
The end of the selection marked with the caret can also be moved with arrow keys on
the keyboard. Hold the SHIFT + CLICK the left or right arrow keys to move the 5’ end
of selection one nucleotide at a time. (If you hold down CTRL + SHIFT + use the
arrow keys, the selection is changed 5 nucleotides at a time.) When the 5’ end is placed
on the start of the molecule (1 bp), release the SHIFT key.
•=
To set a selection with the mouse, click anywhere in the blank area inside the sequence
and drag the caret with the mouse, releasing when the selection is complete.
Note that the selected fragment is also displayed concurrently in the Chromatogram Pane.
This occurs no matter where the selection was made.
3. Display ORFs and Translate the Nucleotide Sequence
Display ORFs for the Sequence
In the Fragment Window, activate the Sequence Pane and change to double-stranded
sequence display using previously described techniques. Choose View > ORFs from the
menu or press the Show ORFs button (
) on the toolbar. ORFs are displayed for the
direct and complementary strands (Fig. 17.23):
193
Fig. 17. 23 Displaying ORFs
If single-stranded sequence is displayed, only the ORFs for that strand are shown.
Translate the Nucleotide Sequence
Select the ORF region from 7 to 24 bp. The Chromatogram Pane has also made the
corresponding selection and has scrolled its graph to make selection.
) on the Window Toolbar. ContigExpress
Now click the Translate Selection button (
shows the amino acid abbreviations above the selected sequence (Fig. 17.24):
194
Tutorial: ContigExpress Chapter 17
Fig. 17. 24 ContigExpress shows the amino acid abbreviations above the selected sequence
To translate the complementary strand of the selection, click Translate Complementary
button (
). If the sequence is displayed as single-stranded, the pane automatically
switches to two-strand mode to show the complementary translation below the selection
(Fig. 17.25):
Fig. 17. 25 Translating the complementary strand of the selection
Click the Show 1-letter AA codes button (
abbreviations in the translations.
) to cycle between 1 and 3 letter
To delete all translations, click Clear All Translation button (
click Show Two Strands button (
) [an “eraser”]. Also
) to return to 1-strand display.
195
Notice when you return to single-strand sequence display, the ORFs display changes to
direct ORFs only. Click on the Show ORFs button (
) to remove the ORFs display.
4. Edit the Nucleotide Sequence in the Sequence Pane
To edit in the Sequence Pane, make a selection from 176 to 180 bp. Press the DELETE key
on your keyboard. The selected symbols are moved under the line, with downward pointing
arrows (↓) taking their place (Fig. 17.26):
Fig. 17. 26 Editing the nucleotide sequence in the Sequence Pane
The arrows in place of the deleted symbols show where residues have been deleted. The
residues below the arrows show what has been deleted.
Now move your attention to the Chromatogram Pane. There is a sequence above and one
below the graph. Before we started editing, they were identical. The sequence above the
graph reflects all your editing commands, the sequence below always remains in its original
form, thus giving you a useful reference to track and compare your changes. Note that the
deletion resulted in each deleted nucleotide being replaced by a dash (-) in this sequence.
Back in the Sequence Pane, move the caret in the Sequence Pane to position 171 and type
“TTT”. Three symbols with upward pointing arrows (↑ ) below them are inserted at the
caret position (Fig. 17.27):
196
Tutorial: ContigExpress Chapter 17
Fig. 17. 27 Arrows (↑ ) are inserted at the caret position in the Sequence Pane
In this case, the arrows indicate that symbols were inserted in a sequence (“added to” the
sequence) into a position, not substituted for other nucleotides. The sequence above the
graph in the Chromatogram Pane also shows the insertion (in another color). Note that a gap
appeared in the graph because there is no data to build chromatograms for newly inserted
symbols.
Make a selection from 175 to 176 bp and type “GG”. The symbols “AA” that were selected
are replaced by “GG”, and “AA” is shown below “GG” to help you track the changes (Fig.
17.28):
Fig. 17. 28 Tracking changes in the Sequence Pane
197
In this case, the chromatogram does not change because the “GG” symbols were not
inserted; they just replaced exactly the same number of original residues.
By default, the peaks for deleted bases are still shown in the chromatogram. This means that
although bases have been deleted, they are still considered part of the sequence during
translation. Deleted peaks can be removed using the Show Deleted Peaks toggle function,
allowing translation in the new/resulting reading frame.
Press the Show Deleted Peaks toggle (
) button or choose View > Show Deleted Peaks
from the menu to turn off the Show Deleted Peaks function. When a message appears
indicating the fragment will switch to read only mode, choose Yes. Make a selection across
the area where you have deleted bases from 166 to 186/182 bp and translate the sequence
using techniques previously described. Notice the translation considers the deletions in the
sequence and proceeds according to the new frame (Fig. 17.29).
Fig. 17. 29 The translation considers the deletions in the sequence and proceeds according to
the new frame
Press the Show Deleted Peaks button (
) again to reactivate the function. Notice the
translation now includes the peaks, as if no deletions have been made (Fig. 17.30).
198
Tutorial: ContigExpress Chapter 17
Fig. 17. 30 Using the Show Deleted Peaks button
Erase your translation using techniques described earlier.
You can use the Undo and Redo commands to reverse or restore your editing actions. If you
) Main toolbar button several times, it becomes disabled and both
click the Undo (
Sequence and Chromatogram panes return to their original sequences.
5. Edit a Sequence in the Chromatogram Pane
Activate the Chromatogram Pane active by clicking the Chromatogram Pane (
Toolbar button.
) Window
In the top sequence in the Chromatogram Pane, select “T” at bp 175 and type C. As in the
Sequence Pane, “T” is replaced by “C”. Note that each of these actions is simultaneously
reflected in the Sequence Pane.
Now select “GG” at bp 180 – 181 and type TTT. Notice the differences each time you enter
T. The first two are considered to be replacement residues (since you have selected 2
symbols before typing). The third one is treated as an insertion because all selected symbols
are already replaced.
Play with editing in both panes to become familiar with all features, but do not be afraid to
edit too much. You can restore the original sequence by selecting Fragment > Revert to
Saved.
199
Note that all editing operations are reflected in both the Sequence and Chromatogram Panes.
They can be summarized as follows (NTs = nucleotides):
Action
How to Perform
Sequence Pane Result
Chromatogram Pane
Result
Delete
Select
residues; press
Delete
(↓) replaces NTs; NTs
moved below strand
(- - - -) appear in
upper sequence
Insert
Place caret;
type new NTs
(↑) appears below new
NTs; new NTs are
colored
A break appears in
the chromatogram
Replace
Select NTs;
type new NTs
New NTs appear in
strand; replaced NTs
moved below strand
New NTs appear in
upper sequence; no
break in
chromatogram
Table 17. 1 Editing operations for Sequence and Chromatogram Panes
6. Close the Fragment Window
Select Project > Close to close the Fragment window. If asked, confirm the operation.
7. Edit and Save a Fragment Included in an Assembly
Return to ContigExpress Project Explorer. In the Tree Pane, double click on Assembly 1,
opening it in the List Pane. Double-click fragment ba16d8.abi in Contig 1.
In the Fragment window. go to any position in the Sequence pane and type a T.
Because this fragment is included in at least one assembly; changing the length of an
assembly fragment renders the assembly to be invalid. Therefore, the assembly would be
deleted if this edit fragment proceeds. You are warned about that (Fig. 17.31):
Fig. 17. 31 Warning regarding deleting the edit fragment s
Click Yes to continue editing. T is inserted in the sequence.
). You are again warned that
Close the Fragment Window by clicking the Exit button (
saving the fragment with a changed length will delete all assemblies containing this
fragment.
200
Tutorial: ContigExpress Chapter 17
Select Yes. The Fragment Window closes and you are returned to Project Explorer. Note
that all assemblies have disappeared because they all contained the fragment we have just
edited.
Note: If editing a fragment doesn’t change its total length (for example, you have replaced
one symbol with another), then the assemblies containing it are not discarded.
8. Exit ContigExpress
Close ContigExpress by selecting Project > Close Project. When asked whether to save the
changes, click No so you can continue to use the project with the assemblies created in the
first part of this tutorial.
Session 3 Working in the Contig Window
Selecting and opening a fragment brings up Fragment Window. Selecting and opening a
contig, opens a Contig Window.
1. Open and Examine a Contig Window
Re-open ContigExpress as you have done before. Load the Tutorial Project that you created
in Session 1 by selecting Project > Tutorial Project. In the Project Explorer window,
select Assembly 1 and double-click on Contig 1 in the List Pane, opening the Contig
Window (Fig. 17.32). Maximize the window.
Contig Window has many elements similar to the Fragment Window: a title bar, menu bar
and two tool bars and three panes: a Text Pane, a Graphics Pane and an Alignment Pane.
Arrange the panes conveniently by dragging the split bars with a mouse. A Status Bar at the
screen bottom displays the Project Explorer status.
All of the Contig Window toolbar buttons are summarized in Chapter 4. Toolbar buttons are
described in this tutorial as needed.
201
Fig. 17. 32 Contig Window
Text Pane
To activate the Text Pane, click on the Text Pane button (
). The Text Pane is similar to
other Text Panes with its folders containing various properties of the fragment.
Open the Fragment Folder and select fragment ba16d9.abi. Choose Edit > Find or click the
) button. This fragment is located in the remaining two panes: in the Graphics
Find (
pane it is highlighted in blue and in the Alignment pane its name is highlighted (Fig. 17.33):
202
Tutorial: ContigExpress Chapter 17
Fig. 17. 33 Using the Text Pane on the Contig Window
It is possible to perform additional assemblies from the Contig Window without returning to
the CE Project Window. The Assemble Selected toolbar button (
) becomes accessible
when two or more sequences are selected in the Text Pane. The Assemble All But Selected
(
) button becomes available when there are at least two unselected sequences and one
selected sequence in the Text Pane (Fig. 17.34). The Assemble All But Selected feature is
similar to Assemble Selected, except that it excludes the selected fragment(s) when
attempting to assemble a Contig.
203
Fig. 17. 34 Assemble All But Selected feature excludes the selected fragment(s) when
attempting to assemble a Contig
When either of these commands is executed, the new assembly is performed and added to
the CE project as a child assembly of the assembly that the current Contig is a part of. For
example, if the Contig is part of Assembly 1, the new assembly will be called Assembly 1.1.
Graphics Pane
Click the Contig Graph button (
) in the Window toolbar to activate the Graphics Pane.
The Graphics Pane contains horizontal arrows representing the relative positions of the
fragments forming the contig. The arrowheads indicate the direct or complementary position
of the respective fragment.
Below the fragment arrows is a scale, or Weight Graph, with position markers for this
contig. The Weight Graph displays the quality of the assembly. Move the scroll bar on the
Weight Graph so that you can view the region at about position 270. Note the green vertical
line there. Position the cursor at that site and click.
By default, the data in this pane is drawn in “Fit to screen” mode.
) many times to enlarge the graph. You may need to use the
Click the Zoom In button (
horizontal scroll bar to keep the site you marked in view as you enlarge the area. When the
maximal zoom is reached, the Zoom button becomes disabled.
204
Tutorial: ContigExpress Chapter 17
Fig. 17. 35 The nucleotide at bp 274 appears to be unresolved
The negative peak in the Weight Graph line indicates a position where the assembly is poor.
In the Alignment Pane, look at the symbols at the same position. The nucleotide at bp 274
appears to be unresolved (Fig. 17.35). Instead of having to thoroughly examine all
nucleotides sequences throughout the assembly, you can see the “bad” points with just one
glance at the Weight Graph.
For details regarding the weight calculation, refer to Chapter 30.
Click the Fit to Screen toolbar button (
) to return to the standard display mode.
You can make selections in the Contig Window frames using techniques you have already
learned. Select nucleotides from 435 to 483 bp. Note that the selection in the Contig
Graphics Pane is concurrently selected in the active fragment of the Alignment pane,
scrolled to show this selection (Fig. 17.36):
Fig. 17. 36 Selecting nucleotides 435 to 483 bp
205
ORFs can be displayed in the Graphics Pane of the Contig Window by activating the
Graphics Pane and either choosing View > Show ORFs from the menu or pressing the
Show ORFs button (
) on the toolbar. Click the Show ORFs button.
Fig. 17. 37 The ORFs display area appears below the fragment display in the Graphics pane
The ORFs display area appears below the fragment display in the Graphics pane (Fig.
17.37). Green bars in the ORFs display area represent individual ORFs. Click on a green bar
to highlight the ORF in both the Graphics and Sequence Panes (Fig. 17.38).
206
Tutorial: ContigExpress Chapter 17
Fig. 17. 38 Clicking on a green bar highlight the ORF in both the Graphics and Sequence
Panes
Parameters for the ORFs search can be configured in the Contig View Options dialog box.
Choose View > View Options from the menu in the Contig Window to launch the dialog
box. Select the ORF tab on the Contig View Options dialog box (Fig. 17.39).
Fig. 17. 39 Contig View Options dialog box
Acceptable start and stop codons can be designated here. Minimum ORF size for the search
can also be set, as well as the option to show nested ORFs.
207
2. Review the Contig in Contig Alignment Pane
Click the Alignment button (
) in the Window Toolbar to activate the Contig Alignment
Pane (Fig. 17.40). The Alignment Pane displays the nucleotide sequences of fragments
forming the contig and the contig itself with respect to the positions of the fragments in the
contig.
Let’s study the elements of the Alignment Pane:
Fragment names list
Fragment sequence
(partially selected)
Fragment
Current Position
Scale
Consensus sequence
(nucleotide format)
Consensus sequence
(symbol format)
Fig. 17. 40 Contig Alignment Pane
•=
The fragments names list contains all fragments used in this contig
•=
The scale gives a reference for all fragments and the consensus shown in the alignment
•=
The fragment current position is the relative (counted from the fragment start)
position of the currently shown left end of the respective fragment.
•=
The consensus sequence (nucleotide format) shows the nucleotide consensus for the
assembly.
•=
The consensus sequence (symbol format) shows the symbol consensus for the
assembly. In the symbol consensus, blank spaces indicate identical residues, dots (•)
indicate positions containing Ns and plus symbols (+) indicate ambiguity and/or gaps.
A specific sequence fragment can be found in the Alignment Pane using the Find feature.
Click on the ba16d9.abi fragment name in the Alignment pane list to select it. Launch the
Find sequence dialog box either by choosing Edit > Find from the menu or by pressing the
208
Tutorial: ContigExpress Chapter 17
) on the toolbar. When Find dialog box appears, type in the sequence
Find button (
CAGTATATCCG (Fig. 17.41).
Fig. 17. 41 Find dialog box
Press the Find Next button. The Alignment Pane displays the region from 419 to 429 bp
where the sequence has been found; the found sequence is highlighted (Fig. 17.42).
Sequence 419 to
429 bp
Fig. 17. 42 The Alignment Pane displays the region from 419 to 429 bp
Click on the ba16d8.abi fragment name in the Alignment Pane. Right-click anywhere in the
Alignment Pane, opening the shortcut menu. Select Show Chromatogram for ba16d8.abi.
Select nucleotides 419 through 429. (Notice that selecting an area of sequence in the
Alignment Pane also selects that area in the Graphics Pane.)
The chromatogram for the selected fragment is shown below its sequence, the same as it
was in the Chromatogram Pane of the Fragment window (Fig. 17.43):
209
Fig. 17. 43 The chromatogram for the selected fragment is shown below its sequence
Right-click anywhere in the Alignment Pane. Select Show All Chromatograms from the
shortcut menu. Now the chromatograms for both molecules are displayed (Fig. 17.44):
Fig. 17. 44 Using the Show All Chromatograms feature
Right-click anywhere in the Alignment Pane and choose Hide All Chromatograms from the
shortcut menu. Chromatograms in the Alignment Pane are no longer displayed.
The consensus sequence can be translated in the Alignment pane in any one or all of the
three direct frames. Translate the consensus sequence in the first frame by activating the
Alignment Pane and choosing View > Consensus Translation > 1st frame from the menu
or by pressing the Consensus Translation 1st Frame toggle button on the toolbar. Translate
the consensus sequence in the second and third frames by choosing their respective menu
commands or toolbar buttons (Fig. 17.45).
210
Tutorial: ContigExpress Chapter 17
Fig. 17. 45 Translating the consensus sequence
Translations can be removed by pressing the Consensus Translation buttons again or by
deselecting the translation options from the View > Consensus Translation menu.
3. Edit a Fragment in the Alignment Pane
Fragments can be edited in the Alignment pane of the Contig Window. Make a selection
from 419 to 429 bp and select Edit > Delete Sequence. Because this fragment takes part in
some other assemblies besides the current one, a warning appears (Fig. 17.46):
Fig. 17. 46 Warning regarding deleting a sequence
Click Yes to accept the changes. If you check the Make contig read-only box, the Yes option
is disabled. When you proceed with the deletion, the bases are deleted from the
chromatogram and the gap is closed. A vertical bar appears in the sequence marking the
position where the deletion was made (Fig. 17.47). The consensus is changed in that bases
to the right of the deleted region now move to the left, filling the gap.
211
Fig. 17. 47 A vertical bar appears in the sequence marking the position where the deletion
was made
If you save the edited contig and open the edited fragment in the Fragment Window, the
editing changes are reflected in the fragment sequence.
Undo/Redo functions can be used to revert or repeat the changes you make. Click the Undo
button until it becomes disabled and the fragment and the consensus return to their original
state.
Select bp 35 “N” and type T. The “N” is replaced in both the fragment sequence and the
consensus sequence (Fig. 17.48).
Fig. 17. 48 Replacing the fragment sequence and the consensus sequence
Once a fragment has been edited in the Contig Window, fragments can be realigned as
needed by either saving the contig and reassembling it or by using the Move Fragment
buttons on the toolbar to manually slide the fragment into place.
212
Tutorial: ContigExpress Chapter 17
The only limitation of editing in the Contig window is that it invalidates other assemblies
containing the newly edited fragment and causes those assemblies to be dismissed.
Fragment in-place editing and update of the consensus on the fly makes the Contig
Alignment pane a convenient tool for working with contigs after their initial assembly.
Note: Once editing has been performed in a Fragment/Contig Window, the edits must be
saved in both the Fragment/Contig Window AND the CE Project Window to ensure that the
changes are retained.
4. Exit ContigExpress
Now you have finished the ContigExpress tutorial.
Close ContigExpress as you would close any other Windows application.
213
214
Database Explorer Chapter 18
Chapter 18 Database Explorer
Introduction
The Vector NTI database is a collection of molecules and laboratory data, organized for
easy retrieval and management in Vector NTI’s Database Explorer. Seven different types of
objects are stored and organized in databases and subbases in Database Explorer:
•=
DNA/RNA molecules are annotated with Feature maps. Upon import from other
sources, molecule data is parsed and stored in an internal format. Users can add
molecules to the database through import or creating basic or constructed molecules.
•=
Protein molecules are also annotated with Feature maps. Like DNA molecules, upon
import from other sources, protein molecule data is parsed and stored in an internal
format. Users can add molecules to the database through import or creating basic
molecules.
•=
Restriction enzymes are imported from the REBASE database; data for the 229
enzymes in the Vector NTI database is parsed and stored in an internal format. Users
can add other restriction enzymes from the REBASE file included in the Vector NTI
software.
•=
Oligonucleotides in the database are user-defined except for several included in the
Vector NTI software for demonstration purposes.
•=
Gel markers commonly used in molecular biology laboratories are included initially in
the Vector NTI software, but new gel markers can be created by the user.
•=
Citations for physiochemical analysis of molecules in BioPlot and other Vector NTI
analyses are stored in Database Explorer.
•=
BLAST results can be stored independent of molecules in a BLAST Results database.
Very similar in functionality to the Windows 95/98/Windows NT interface, Database
Explorer supports intuitive browsing of local and shared Vector NTI databases, clipboard
data exchange, drag and drop operations and other functions typical of window-based
database management.
From the Exploring Database window, you can perform the following:
•=
Create new molecules
•=
Sort, Edit and delete molecules
•=
Search the database for text sequence, motifs, feature types, keywords etc.
•=
Organize our data into convenient groups (subbases)
•=
Import and export data (this is inactive in the demo version)
•=
Open the other applications of Vector NTI Suite—AlignX, BioPlot and ContigExpress.
215
Parent-Descendant relationships (to keep track of your constructs), user fields, comments,
keywords etc., are kept for all molecules in the database
All database molecules and other objects can be placed into “archives”—data files of special
format—that can be transferred to another computer (Mac or PC) and read by Vector NTI
there. Through archives, you can share molecules, constructs, or other objects with your
colleagues, or use them simultaneously on several computers (for instance, at work and at
home).
In the Vector NTI archives:
•=
All DNA/RNA molecule information is written to and read from an archive file. This
includes molecule component fragments (if the molecule is constructed from other
molecules) and parent-descendant connections between molecules.
•=
Vector NTI automatically checks the consistency of molecule archive information
adding necessary parents (including DNA parents of translated protein molecules) or
disconnecting them if you have neglected to transfer them to the archives.
•=
When the archive is loaded into a new database, Vector NTI checks the information
consistency on any of database molecules and recalculates them if necessary.
Important: The Vector NTI Database is completely independent of the Xpression NTI
Database, and each database has its own unique viewer. It is not possible to exchange
objects between the Xpression NTI and Vector NTI applications.
Opening Vector NTI Database Explorer
The Vector NTI Database Explorer can be opened from several sources:
•=
Database Explorer opens automatically in the Vector NTI workspace every time you
initiate a Vector NTI session.
•=
Database Explorer can be opened and used independently by selecting the Database
Explorer in the Vector NTI Suite options under Start > Programs on your computer.
•=
From a Molecule Display window, press the Local Database button (
Database Explorer.
) to open
In this User’s Manual, the term “Explorer” refers to Vector NTI Explorer, not to Windows
Explorer.
Elements of Vector NTI Database Explorer
The Database Explorer window consists of a menu bar, a toolbar, Table drop-down menu in
the upper left corner, a Subbase Pane on the left and a Database <Object > Pane on the right
of the window (Fig. 18.1).
216
Database Explorer Chapter 18
Fig. 18. 1 Elements of Vector NTI Database Explorer
Database Tables
Vector NTI databases (both local and shared) consist of several tables: the Molecule Table,
the Enzyme table etc. The Explorer window displays the contents of one table at a time.
You can alternate between tables by selecting a table from the Table menu or the Table
drop-down menu in the top left corner of the Explorer window.
Database Subbases
Each database table contains a list of subbases, groups of objects (molecules, enzymes, etc.)
organized into logical categories. You might have one subbase for each of your molecule
families, one for each taxonomic group, etc.
•=
The principal subbase is called Main and all database objects are always included in
Main. Other subbases are merely windows into Main, showing a subset of the contents
of Main; they do not serve as containers for molecules. Because of this, a database
object can be included in any number of subbases without increasing the amount of disk
storage the object occupies.
•=
Subbases are created, edited and deleted through the Database Explorer.
•=
When you select a subbase in the left pane, Explorer lists the subbase contents in the
right pane and displays table- and subbase-related commands on the menu bar and
toolbar buttons on the toolbar. When you select one or more database objects in the
217
right pane (activating the Object Pane), the menu bar displays object-related menu
options and toolbar buttons.
•=
To alternate between panes, click on a pane to activate it or use the F6 keyboard
shortcut. To open context-sensitive shortcut menus, click on subbases or database
objects with a right click. The shortcut menu displays commands appropriate for the
object under the cursor.
Database Objects
Each database object is described by a set of fields, describing various object data. Each
object type defines its own set of fields: System fields are common for all database objects;
other fields are specific for a particular object type. A user may also define additional user
fields.
Database Object System Fields
Most of the object system fields, assigned names by Vector NTI, are accessible from
various parts of the program’s user interface. Some of them, however, are only visible in
specialized object type-specific dialog boxes or display windows.
Here is the full list of named system fields displayed by Vector NTI:
Field name
218
Used in:
N(DNA/RNAs)
P(proteins)
E(enzymes)
O(oligos)
G(gel markers)
C(contacts)
U(user field defs)
Description
Name
Name of an object
NPEOGCU
Local/Foreign
Object’s ‘ownership’ status in the local
database
NPEOG
(local DB only)
Original
Author
Original author (creator) of an object
NPEOG
Created
Date of an object’s creation (See Date
and Time section following)
NPEOG
Author
Author of the last modification to an object
(see following section)
NPEOG
Modified
Date of the last modification to an object
NPEOG
Submitted by
The name of a Vector NTI user who
submitted the object
NPEOG
(shared DB only)
Description
Description string
NPEOGU
Form
Circular or Linear
N
Database Explorer Chapter 18
Field name
Used in:
N(DNA/RNAs)
P(proteins)
E(enzymes)
O(oligos)
G(gel markers)
C(contacts)
U(user field defs)
Description
Storage Type
Basic, Designed or Constructed
NP
Fully
Processed?
Molecule’s construction status
N
Length
Length of a molecule/oligo/enzyme’s
recognition string in bp
NPOE
DNA/RNA
Nucleic acid type
NO
Degenerate?
Is an oligo degenerate?
O
Oligo
Sequence
Oligo’s nucleotide sequence
O
Recognition
String
Enzyme’s recognition string
E
Terminus
Type
Enzyme’s terminus type
E
Palindromic?
Is an enzyme palindromic?
E
Ambiguous?
Is an enzyme ambiguous?
E
Number of
Fragments
Number of fragments in a gel marker
G
Longest
Fragment
Length of the longest fragment in a gel
marker
G
Shortest
Fragment
Length of the shortest fragment in a gel
marker
G
Telephone
Phone part of the Contact info
C
E-mail
E-mail part of the Contact info
C
Field Type
User field type
U
Indexed?
Is user field cached/indexed?
U
Default
Default value of a user field
U
List of
Predefined
Values
List of predefined values of a user field
U
Record #
Database record ID number
NPEOG
Table 18. 1 Named system fields displayed by Vector NTI
219
In addition to the system fields named above, every database object has comments and
keywords associated with it. These fields are accessible from within specialized object
editors and Display windows.
Note: All automatically updated fields, user-defined fields and comments are searchable.
Using the database search interface described later in this chapter, you can perform string
context searches through any of the fields above for any database objects.
Of the general system fields data itemized in the above table, only Author and Date and
Time display features are independent of object types. Their sources and modification
options are summarized below.
Author Information
Information regarding authors and :times of creation and modification for all database
objects is stored in the following named System Fields:
•=
Original Author: name of Vector NTI user who created the object,
•=
Author: name of Vector NTI user who last modified the object,
•=
Creation Date: date and time when the object was created,
•=
Modification Date: date and time when the object was last modified in the local Vector
NTI database.
When you start Vector NTI for the first time, in the Author Information dialog box you can
identify yourself as Vector NTI user and author of all modifications and new objects you
create in the local database. By default, it presents the name given to the Vector NTI
Installation program. This information is automatically attached to all database objects you
create and/or modify when you export them, copy to shared databases etc.
Note: Changes you might make later to Author Information do not affect information stored
in database objects you submitted to shared databases earlier.
220
•=
An object you create in your database is marked as a “Local Object” naming you as
both the author and the original author. While author information is not displayed on
local objects while you view or edit them, the data does follow the object and is
displayed when exported or viewed by another VNTI user.
•=
When you import an object or transfer it from a VNTI Shared Database into your local
database, if you are the author the object is still marked as Local. If the author is
someone else, then the object is marked as “Foreign” and the author information is
always displayed when you are viewing or editing the object.
•=
The original author (creator) of an object, either “Local” or “Foreign”, never changes. If
you modify a “Foreign” object, however, it becomes “Local” and you become its new
“immediate” author.
Database Explorer Chapter 18
•=
If you are importing an object in which author or original author information is not
stored in your contact database, VNTI lets you update the contact and author data in
your database.
To review or edit author data, select View > Author Infor… opening the Author
Information dialog box where you can do that.
Date/Time Display
To change the date/time display format, select Edit > Options on the menu bar of the main
Vector NTI’s window. On the: General tab of the Options dialog box, select the standard US
date format (for example, 03/20/96 04:20PM) or a regional date/time format , the default
format recognized by your computer. Change this format using the Windows Control
Panel/Regional (or International) dialog box.
Authors, original authors, and times of creation and modification for all database objects are
updated automatically by Vector NTI and should not, in normal circumstances, be modified
manually. If such a need occurs, use the <database object > > Set System Attributes
command for setting values of these fields in the Vector NTI Database Explorer.
User-defined Fields
For information management functions, user-defined fields are associated with any database
object (molecules, oligos, etc.). A User Field containing laboratory-specific and userspecific descriptions can be imported, exported, displayed, printed and managed just as the
regular database fields.
While previously defined User Fields are maintained and presented when you create new
database objects, imported objects may contain fields not described on the local list. Vector
NTI helps you to add their descriptions to the list whenever you try to edit the information
contained in these fields. Vector NTI also allows you to import and export User Field
Definitions across several VNTI databases.
The “User Fields Manager” section on page 251 of this chapter contains the detailed
description of all User Fields-related operations. For a detailed example of how to use the
User Fields Manager, walk through the Database Tutorial in Chapter 8.
Comments
Each database object can contain a text comment of unlimited length. Vector NTI
automatically converts stored comments when importing or exporting molecules from/to
GenBank/GenPept and EMBLSWISS-PROT files.
Comments can be edited in the Comments tabs of the objects’ editors or immediately in the
Molecule Display window (for molecules only). In a Molecule Display window, double
click on the Comment line or click on the Comment icon to open the Comment Editor
containing the molecule comment.
221
Keywords
Each database: object can contain a list of associated keywords that are very useful for
database searches. Keywords can be edited in the Keywords tabs of the object’s editors.
To enter keywords, in the keywords text box, type a new word or select an item from the list
of existing keywords. Press the Add button to move the keyword into the keyword list. To
remove an item from the list of keywords, select the item(s) you want to remove and press
the Remove button.
Database Search
You can perform a database search to locate any type of object stored in the database. In
general, search procedures launched from Database Explorer follow these basic steps:
1.
2.
3.
4.
5.
6.
Select the appropriate Database Table type and select Database > Search on Explorer’s
menu bar or click the Search button (
) on the toolbar.
In the <Object > Database Search dialog box, verify the Database Table type.
In the Search dialog box, (Fig. 18.2) check the boxes for the filters to be included in the
search. Press the enabled filter buttons to open dialog boxes.
In the Conditions Filter dialog boxes that open, define additional search parameters.
(See detailed descriptions of filters below.) Only those molecules that satisfy all the
conditions you define are found in the search. Click OK in each to return to the Search
dialog box.
When you are satisfied with the search setup, press the Start Search button.
If Vector NTI finds any objects by a database search, the appropriate Subbase Name
dialog box appears. Enter a name of new subbase or choose a subbase name from those
listed. All objects found will be placed in the specified subbase overwriting the existing
subbase content (if any).
Note: If the specified subbase already exists, Vector NTI empties it before adding found
objects. You can refine your search by using the resulting subbase to limit the search space
of the next search.
Database search filter parameters specific to particular database objects are outlined below.
Specific settings are not discussed unless they need clarification.
DNA/RNA and Protein Molecule Database Searches
The Molecule Database Search dialog box (Fig. 18.2) for DNA/RNA and protein molecules
are identical except for the database shown in the Look In drop-down menu. Differences in
the specific filter setup dialog boxes are specified in the discussion for each.
222
Database Explorer Chapter 18
Fig. 18. 2 Molecule Database Search dialog box
Attributes Setup Dialog Box (DNA):
Fig. 18. 3 Attributes Setup dialog box (DNA)
Attributes Setup Dialog Box (Protein):
Fig. 18. 4 Attributes Setup dialog box (Protein)
223
If all conditions in a group are checked, or if all conditions in a group are blank, that group
has no effect on the search.
Text Setup Dialog Box (Identical for DNA and Protein):
Fig. 18. 5 Text Setup dialog box
To add a new substring, enter the text and click the Add button (Fig. 18.5). To remove a
substring, highlight it and click the Remove button. Check the fields to be searched for the
text substrings. Check Match Case for case-sensitive text substrings.
Keywords Setup Dialog Box (Identical for DNA and Protein):
Fig. 18. 6 Keywords Setup dialog box
224
Database Explorer Chapter 18
Press the Add button to select from the list of existing keywords (Fig. 18.6). To remove a
keyword from the box, select it and press the Remove button. To clear the Keywords box,
press the Remove All button. Note: You cannot add keywords in this dialog box.
Ancestors Setup Dialog Box (Identical for DNA and Protein):
Fig. 18. 7 Ancestors Setup dialog box
Molecules that have as a direct ancestor any one of the molecules shown in this dialog box
will be found by the search. Ancestors for proteins in this context are DNA molecules.
To add a molecule to this box, press Add. Select from the database molecules list and click
OK. To remove a molecule from the ancestors list, select the molecule in the dialog box and
press Remove, or to clear the list, press Remove All.
Oligo & Peptides Setup Dialog Box (DNA and Protein):
Fig. 18. 8 Oligo & Peptides Setup dialog box
To search in the DNA/RNA database, to add an oligonucleotide for similarity search, press
the Add Oligos button. To add a peptide for similarity search, press the Add Peptide
button. In the dialog box that opens, enter the name and appropriate query sequence, as
225
prompted, for the database search. (For a protein database search, only the Add Protein
button is enabled.)
To remove a search condition from the list box, select the condition and press Delete. To
clear the Oligonucleotides/Peptides box, press Clear.
Feature Setup Dialog Box (Identical for DNA and Protein):
Fig. 18. 9 Feature Setup dialog box
To add a feature to the search conditions, press the Add button (Fig. 18.9). In the dialog box
that opens (Fig. 18.10), define restrictions for the molecule search. Feature types differ for
DNA/RNA searches and protein searches.
Fig. 18. 10 Add Features dialog box
226
Database Explorer Chapter 18
Select a feature type in the left pane and optionally, using the radio button, one or more
feature names. If you define a type of feature but no specific feature names, the search
condition is defined as any feature of that type.
To remove a search condition from the Features list, select the condition and press Remove.
To clear the Features list, press Remove All.
Enzyme Database Search
When you launch an enzyme search, the following Search dialog box opens (Fig. 18.11):
Fig. 18. 11 Enzyme Database Search dialog box
•=
Recognition String Filter: Enter a nucleotide string that must be found in the
recognition site of the desired enzyme.
•=
Attributes Filter: Specify enzyme attributes necessary for the search. “Ambiguous”
recognition site means the site containing any nucleotide besides A, T, G, or C.
•=
Text Filter: Check the Text Filter button to filter search results based on text inside
various object fields. Refer to page 224 for a description of the Text Filter Condition.
•=
Keywords Filter: Refer to page 225 for a description of the Keywords filter. Note:
You cannot add keywords in this dialog box.
Oligo Database Search
When you launch an Oligo database search, the following dialog box opens (Fig. 18.12):
227
Fig. 18. 12 Oligo Database Search dialog box
•=
Nucleotide String Filter: Enter a Nucleotide String filter that must be found in the
sequence of the desired enzyme.
•=
Attributes Filter: Check to limit the search space to DNAs only or RNAs only. If both
are checked or unchecked, the filter has no effect.
•=
Text Filter: Check the Text Filter button to filter search results based on text inside
various object fields. Refer to page 224 for a description of the Text Filter Conditions.
•=
Keywords Filter: Refer to page 225 for a description of the Keywords filter. Note:
You cannot add keywords in this dialog box.
Gel Marker Database Search
When you launch a search in the Gel Marker Database, the following dialog box opens (Fig.
18.13):
228
Database Explorer Chapter 18
Fig. 18. 13 Gel Marker Database Search dialog box
•=
Attributes Filter: Check to limit the search space to gel markers with specified length
of the longest fragment. If all are checked or unchecked, the filter has no effect.
•=
Text Filter: Check the Text Filter button to filter search results based on text inside
various object fields. Refer to page 224 for a description of the Text Filter Condition.
•=
Keywords Filter: Refer to page 225 for a description of the Keywords filter. Note:
You cannot add keywords in this dialog box.
Citation Table
The Citation Table in Database Explorer is a convenient vehicle in the database for storing
citations retrieved through the Vector NTI PubMed Search engine, from the NCBI website
or from other searches. In addition, the Citation Table section of Database Explorer provides
complete bibliographic conversion features described below.
One of the most convenient features of the Citation Table is its ability to generate citations
and bibliographies for thesis, dissertations and other publications. Bibliographies are
generated according to the rule of scientific journals.
229
Formatting Bibliographic References
To format each bibliography record, you must insert a tag in the document where the
reference is to be cited. In Database Explorer Citation Table, select the desired reference.
From its associated shortcut menu, select the Copy Tag command. Then go to your word
processor document and paste it. For example, the tag at this point might read [Smith, J.
1994 #213].
After finishing the writing, save your document as Rich Text Format (*.rtf) file.
When you are ready to prepare your manuscript, select the Citations Table in Database
Explorer. Open a shortcut menu in the subbases pane and select Format Manuscript. In the
dialog box that opens (Fig. 18.14), browse for the RTF file you want to format.
In the Format Reference For drop-down menu, select a journal name. Click the Start button.
The tagged document will be formatted into the document with properly formatted citations
and bibliographies.
Fig. 18. 14 Format Manuscript dialog box
To place selected citations onto the Clipboard formatted according to the rules of specific
journal, select the citation(s) and open the shortcut menu in the Database Objects pane.
Select Copy as Bibliography. In the dialog box that opens (Fig. 18.15), select the journal
whose formatting the bibliography should follow. Click OK.
230
Database Explorer Chapter 18
Fig. 18. 15 Copy Bibliography dialog box
Then proceed to your word processing document and paste the citations. They will be in the
format for the journal you selected.
Note: In the Database Explorer, one cannot edit citations downloaded from NCBI.
BLAST Results Table
The BLAST Results table is a repository for BLAST results you wish to store. The subbases
and objects are managed and manipulated exactly as with other database subbases and
object described elsewhere in this chapter.
To open BLAST results from the Database Explorer, double-click on the selected results in
the Database Objects Pane.
Database Management Operations
Backup, Restore and Cleanup
Three general functions (all initiated by choosing options under the Database menu of
Database Explorer) relate to the entire database:
•=
Database Backup makes a copy of your database in a specified directory or folder. For
instance, you may back up the data to removable storage to make a permanent, safe
record of your database. Making such a backup is the only way to be sure your data is
safe in the case of hard drive failure.
•=
Database Restore restores all database files from the last backup. Your database is
restored from a specified directory or folder, overwriting all current database files.
•=
Database Cleanup removes from the data files and database tables all the “garbage”
data that may accumulate when you extensively create and delete database objects. This
also serves as a recover function when files or tables are lost or damaged. Although
these data do not affect Vector NTI functionality, it is wise to perform Database
Cleanup once a week.
231
Operations on Subbases
To initiate any of the following operations on a subbase, select the subbase name in the left
pane of Database Explorer. Press the toolbar buttons as described or choose Table or Edit or
corresponding shortcut menu commands. Descriptions of each operation are included
below.
Creating a New Subbase
To create a new subbase and/or add objects to it, follow one of the following options:
•=
) to create a new
Select Table > New > Subbase or click the New Subbase button (
(empty) subbase with a default name, Group 1. You can edit this name in the enabled
text box; press enter to confirm.
•=
Select Table > New > Subbase (Using Subbase Editor) to create a new subbase and
select its contents using the Edit Subbase dialog box described below under Editing a
Subbase.
•=
A simple way to add new molecule or other object to a subbase is to open the source
subbase in the Subbase Pane. Select and drag selected objects from the list to the new
subbase. The objects are now listed in the original subbase and the new subbase.
•=
To create a new subbase and place objects in it at the same time, select objects for the
new subbase in the Database Objects Pane and click the New Subbase button (
).
Editing a Subbase
In the Subbase Pane, select a subbase to be edited and select Table > Edit Subbase. This
option is not available for subbases where the content is maintained automatically. This
opens the Edit Subbase dialog box (Fig. 18.16):
232
Database Explorer Chapter 18
Fig. 18. 16 Edit Subbase dialog box
•=
The Source Subbases column shows all of the subbases in your Vector NTI database
table except the one you are editing. The buttons below this column control how
subbase objects in subbases selected in the Source Subbases column are displayed in
the Source Content column:
o
Intersection: Each molecule that is present in all highlighted subbases is
displayed in the Source Content column. Molecules not included in all selected
subbases are thus excluded.
o
Difference: Each unique molecule from selected subbases, in other words, a
molecule present in only one of the highlighted subbases is displayed.
Molecules that occur in more than one subbase are thus excluded.
Union: All molecules that is present in any of the selected subbases is
displayed.
If only one subbase is highlighted, the Intersection, Difference, and Union buttons are
disabled, and all the objects in that subbase are shown in the Source Content column.
o
•=
The Source Content column shows combinations of objects present in the subbases
highlighted in the Source Subbases column. See descriptions under the previous bullet.
•=
The Resulting Content column shows the contents of the subbase you are editing.
To add objects to a subbase, highlight one or more subbases in the Source Subbases
Column. In the Source Content column, highlight the object names or use the Select All and
Unselect All buttons in that column to highlight or deselect all objects at once. When the
233
objects you want are highlighted, press the Add button to add them to the Resulting Content
column. Click OK to exit the dialog box. The objects are now listed in the original subbase
and the new subbase.
Removing Molecules from a Subbase
In the Subbase Pane, select the subbase to be edited. Select Table > Edit Subbase or Edit
from the shortcut menu. The Resulting Content column in the Edit Subbase dialog box (Fig.
18.16) shows the current contents of the subbase you are editing. To remove objects from
the subbase, highlight their names in the Resulting Content column and press the Remove
button. Select All and Unselect All buttons below the Resulting Content column allow you
to highlight or deselect all objects in the column. Click OK to exit the dialog box. Database
objects that are removed continue to exist in the database and other subbases where they
were included before this operation.
For alternative ways of removing objects from a subbase, see Operations on Database
Objects on page 238.
Rename Subbase
Select Table > Rename Subbase or press the Rename button (
). In the enabled text
box, edit the name. This operation does not affect the subbase contents or database objects.
This option is not available for subbases where the content is maintained automatically.
Dismiss Subbase
Select Table > Dismiss Subbase or press the Dismiss Subbase button (
). This
operation removes a selected subbase, but does not affect the database objects. They are still
stored in the database and exist in other subbases where they were included before this
operation. To empty the subbase first, use the Clear Subbase operation.
Clear Subbase
Select Table > Clear Subbase to exclude all objects from the selected subbase. The
subbase itself is emptied but not removed. This operation does not affect database objects;
they are still stored in the database and included in all other subbases where they were
included before this operation. This option is not available for subbases where the content is
maintained automatically.
Delete Contents
Select Table > Delete Contents from Database to physically delete from the database all
objects of the specified subbase. If you choose OK in the confirmation dialog box, the
objects in the subbase are permanently deleted from the Vector NTI database, and the
subbase itself is removed.
234
Database Explorer Chapter 18
Subbase Summary
Select Table > Subbase Summary to create a text file containing a summary of the
specified subbase. In the Write Summary To dialog box that opens, indicate the directory or
folder and file name where the summary will be stored. Press the OK button and Vector
NTI creates the summary.
Subbase Properties
Select Table > Properties or the Properties button (
selected subbase.
) to display properties for the
Import Molecules into a Subbase
To import molecules into a subbase using drag and drop, use one of the following
techniques:
•=
Import Molecule(s) or Sequence(s) From Text File(s): Highlight the molecule file
name(s) in Windows Explorer (Note: molecule files must be in accepted formats, see
below). Drag and drop the highlighted name(s) onto the desired subbase in the VNTI
Database Exploring window.
•=
Import Directory of Files: For a folder containing multiple molecule files (in accepted
formats, see below), drag and drop the folder onto the desired subbase in the Exploring
Local VNTI Database window. All the molecules in the folder are imported into the
subbase.
To import molecules into a subbase using menu options, select Table > Import, then one of
the following options:
•=
Import Molecule From Text File imports DNA/RNA or protein molecule data from a
GenBank/GenPept, EMBL/SWISS-PROT, or FASTA file. Vector NTI imports all
molecule data including feature table (if any).
In the Import Molecule dialog box, choose the appropriate import file format—
GenBank, EMBL, or FASTA for DNA/RNA molecules and GenPept, SWISS-PROT or
FASTA for proteins and press OK. In the Import dialog box, browse for the source and
file to be imported and click OK. Vector NTI reads the file, checks all data, creates the
new molecule, and displays its data in the Molecule Editor dialog box. After entering or
editing the data, press OK. Vector NTI saves the new molecule in the database.
•=
Import Sequence From Text File imports a nucleotide or amino acid sequence text
file, creating a new DNA/RNA or protein molecule with the sequence. This must be in
ASCII format. In Import dialog box, browse for the source and file to be imported and
click OK. Vector NTI reads the file, checks all data, creates the new molecule, and
displays its data in the Molecule Editor dialog box. After reviewing or editing the data,
press OK, saving the new molecule in the database.
For ASCII format details, see Appendix C.
235
•=
Import From Vector NTI Archive imports objects from a Vector NTI archive. In the
Import dialog box, browse for the source and archive file to be imported and click OK.
•=
Import Objects From Directory of Text Files, (option for molecules and oligos only),
imports molecules and oligonucleotides from text files that must be in the GenBank
format (DNA/RNA molecules), GenPept format (protein molecules) or Vector NTI’s
oligo text format (oligonucleotides). In the Import dialog box, browse for the List File
and open. When Vector NTI exports the objects into a directory of text files (see below),
it automatically creates the appropriate List File.
Notes on Molecule Import:
•=
In Vector NTI versions prior to 6.0, import and export functions could be performed
from the Molecule Display window. In version 7.0, they can be performed only through
Database Explorer.
•=
GenBank, GenPept and EMBL feature tables usually do not contain names for features.
When importing, Vector NTI assigns “artificial” names for the features so that they will
be recognizable on a graphics map. You can change features’ names after import using
Vector NTI’s Molecule Editor, or assign names to features before import, by adding
“label=<name > ” descriptors in the flatfile for any desired features. Here is a
sample GenBank/EMBL feature description with a defined feature name:
CDS 86..1276
/label=TC(R)
For more information about GenBank/GenPept /EMBL Feature Table descriptors, see
GenBank/GenPept /EMBL documentation.
Import Enzymes into a Subbase
Restriction endonucleases can be imported into Vector NTI from the REBASE database,
which is available through anonymous ftp site, ftp.neb.com. To obtain further information
refer to the website: http://rebase.neb.com/rebase/rebase.html. For a recent review of the
REBASE database see Nucleic Acids Research 22: 3628-3639, 1994.
Each REBASE release contains several data files in different formats. Vector NTI uses
Bairoch format, so you can download the bairoch.### file where ### indicates the current
version (for example, 506 indicates June 1995). Distributive version of Vector NTI contains
the last release of the REBASE bairoch.### file in the Vector NTI working directory.
To import restriction endonucleases into the Enzymes Table, select Table > Import, then
one of the following options:
236
•=
Enzymes From Archive: Browse for the Archive file and open.
•=
From REBASE Database: Browse for Vector NTI Suite > bairoch.###file (see
above) and select it in the Read REBASE Enzymes dialog box (Fig. 18.17). Click
Database Explorer Chapter 18
Open. In the dialog box that opens, select the subbase or name a new subbase where
objects will be inserted. This file includes all enzymes in the Bairoch file.
Fig. 18. 17 Read REBASE Enzymes dialog box
•=
New From REBASE Database: Browse for Vector NTI Suite > bairoch.###file and
select it in the Read REBASE Enzymes dialog box (Fig. 18.18) and click Open. In the
dialog box that opens, select the subbase where objects will be inserted. This file
includes only enzymes in the Bairoch file not currently included in the Vector NTI
Enzymes database.
Vector NTI reads the file, checks all data, and loads REBASE enzymes to the REBASE
Enzymes dialog box (Fig. 18.18):
Fig. 18. 18 REBASE Enzymes dialog box
237
To filter the enzymes in the Source Enzymes / Selected columns, check on or off the
appropriate boxes in the Use REBASE Subbase group in the lower right corner of the
dialog box and press the Hide Others button. This is particularly convenient when wish to
identify restriction enzymes based on certain criteria.
When all the desired enzymes are in the Selected list, press Import Selected button to
import them into Vector NTI.
Export Subbase
Export Subbase Into Vector NTI Archive
Select Table > Export > Subbase into Archive to export all objects of the specified
subbase to a VNTI archive. In the File Save dialog box, indicate the directory or folder, and
file name for archive storage. Press the OK button.
Export All Subbase Objects Into Directory of Text Files (molecules and oligos only)
Select Table > Export > Subbase to Directory of Text Files to export all objects of the
specified subbase into a directory of text files in GenBank (DNA/RNA molecules), GenPept
(protein molecules) or Vector NTI’s oligo text format (oligonucleotides). In the dialog box,
browse for the location and enter the file name under which the subbase is to be stored.
Operations on Database Objects
To perform various operations on an individual database object or group of objects selected
in the Object Pane of the Database Explorer. Select menu options from the leftmost menu
that corresponds to the currently displayed table type. Most of the following options appear
with all database objects. Most commands are also available from the objects’ shortcut
menu. When available from toolbar buttons, they are shown. Menu commands specific for
certain objects are discussed in the next section.
•=
Open: opens display windows for selected objects; available only for DNA/RNA and
protein molecules.
•=
Edit: includes editing options for an object selected in the Database Objects Pane, such
as user fields, comments, keywords, etc. This command is enabled only with a single
selected object. You can also use the Edit button (
238
).
•=
New: includes options for creating a new subbase for selected object(s) or creating a
new molecule or object. For specific details, refer to creating new <specific object > in
the index.
•=
Import…: operations are described in the previous section
•=
Export: operations are described in the previous section
•=
Exclude from Subbase Tree Pane History view excludes selected objects from the
current subbase. Objects are still stored in the database and are included in all other
subbases where they were included before this operation.
Database Explorer Chapter 18
•=
Delete from Database: Physically deletes a selected object from the database.
(Confirmation is requested before deleting the object.) If a DNA molecule is deleted,
Vector NTI scans all its descendants and disconnects them from the deleted molecule.
You can also use the Delete button (
•=
).
Rename: renames the selected object. If a DNA molecule is renamed, Vector NTI
scans all its descendants and also changes molecule’s name in all component fragment
descriptions of all the molecule’s descendants. You can also use the Rename button
(
).
•=
Duplicate: makes copies of the selected database objects. The replicas of selected
objects are created in the database and included in the current subbase. The replica of
an object named ‘x’ will be called ‘Copy of x’. Note: Copies of objects are not related
to original objects. Thus, “copies” do not track further changes you may make to the
originals.
•=
Properties: displays the properties of the selected object(s). If one object is selected, all
the named object fields with their values are displayed. Some object data (like sequence
and comments) are not stored in named fields and are not displayed in the properties
dialog box. For molecules, the property dialog box has two extra tabs: Parents and
Descendants, displaying Parent and Descendant trees for the selected molecule. You
can also use the Properties button (
•=
).
Set System Attributes: Allows manual modification of the automatically updated
fields of the selected objects - Author, Original Author and Creation Date in the Set
System Attributes dialog box. If checked, the drop-down menu (edit box in case of
Creation Date) below the check box is activated for setting the value of the appropriate
field.
The Author and the Original Author fields can be set only with the names of contacts
already stored in the contact database. The Creation Date field must be set with a date and
time in the USA format: “MM/DD/YY H:MIN AM(or PM)” where H is from 1 to 12. For
more information refer to pages 220-7.
DNA/RNA Molecule Operations
These operations are applicable to DNA/RNA molecules only:
•=
New Molecule Using Sequence Editor creates a new DNA/RNA molecule, entering
the nucleotide sequence manually using Sequence Editor. The Molecule Editor dialog
box is described in Chapter 20.
•=
Delete with Descendants from Database physically deletes the selected DNA
molecule together with its descendants (DNA/RNA and protein molecules) from the
Database. Confirmation is requested before deletion.
239
Protein Molecule Operations
This operation is applicable to protein molecules only:
•=
New Molecule Using Sequence Editor lets you create a new protein molecule, entering the
amino acid sequence manually using Sequence Editor. The Molecule Editor dialog box is
described in Chapter 20.
Enzyme Operations
These operations are applicable to RENs (restriction endonucleases) only.
•=
New Enzyme opens the Enzyme Editor tabbed dialog box where you can create a new
database enzyme in the Enzyme Editor (Fig. 18.19):
Fig. 18. 19 Enzyme Editor tabbed dialog box
Enter information about the new REN as follows:
240
•=
General Tab: Enter the name of the REN in the Name text box.
•=
Enzyme Tab:
o
Enter the enzyme’s recognition string in the Recognition String text box
o
In the Cleavage Point field on the Enzyme tab, enter the number of the
nucleotide immediately after the direct-strand cleavage point. The following
figure demonstrates how cleavage points of palindromic sites are defined.
Database Explorer Chapter 18
Cleavage Point = 2
A A T A T T
1
2
3
4
5
6
T T A T A A
o
If the REN has a non-palindromic recognition site, the Cleavage Point on
Complementary Strand field will be enabled. In this field, enter the number of
the nucleotide immediately after the complementary-strand cleavage point.
The following figure demonstrates how cleavage points are defined for nonpalindromic sites on both direct and complementary strands:
Cleavage Point on Complementary Strand = 10
Cleavage Point = 8
A A G T N N N N N N
1
2
3
4
5
6
7
8
9
10
T T C A N N N N N N
Cleavage Point on Complementary Strand = -4
Cleavage Point = -2
N N N N N N N A A G T
-7
-6
-5
-4
-3
-2
-1
1
2
3
4
N N N N N N N T T C A
The preview box on the Enzyme tab helps you to enter cleavage points.
o
In the Description box on the Enzyme tab, enter the REN’s description.
•=
User Fields tab: Add custom data in a form of fields. For details, refer to page 256.
•=
Comments tab: Enter text comments.
•=
Keywords tab: Enter key words for the REN, following the directions on page 222.
When all data is correct, choose OK to save the enzyme and return to the Database
Explorer.
241
Oligo Operations
These operations are applicable to oligonucleotides only.
•=
New Oligo opens the New Oligo dialog box where you can create a new database oligo
(Fig. 18.20). The New Oligo and Edit Oligo dialog boxes are the same.
Fig. 18. 20 New Oligo dialog box
Enter information about the new (or to-be-edited) oligo as follows:
242
•=
General Tab: Enter the name of the oligo.
•=
Oligo Tab:
o
Nucleotide Sequence: Enter or edit the oligo’s nucleotide sequence. Valid
characters: ATUCG.
o
Select the oligo type.
o
Complementary box: Check to replace the oligo sequence with the
complementary one
o
Description box: Enter or edit the oligo’s description.
•=
User Fields Tab: Add custom data in a form of fields. For details, refer to page 256.
•=
Comments Tab: Enter text comments.
•=
Keywords Tab: Enter keywords for the oligo. For details, see page 222.
Database Explorer Chapter 18
When all data is correct, choose OK to save the oligo and return to the Database Explorer.
Analyze Oligo: With an oligo highlighted in the Database Objects pane, select Analyze >
Analyze Oligo or Analyze Oligo Duplexes to open corresponding dialog boxes. These
dialog boxes are both described in Chapter 21.
Gel Marker Operations
These operations are applicable to oligonucleotides only.
•=
New Gel Marker opens the Gel Marker Editor tabbed dialog box (Fig. 18.21) where
you can enter (or edit data) for a gel marker.
Fig. 18. 21 Gel Marker Editor tabbed dialog box
You may enter information about the new (or edited) gel marker as follows:
•=
General Tab: Enter the name of the gel marker.
•=
Gel Marker Tab:
•=
o
Fragments list box: Lists by length all the fragments making up the marker. To
add a fragment to the marker, enter its length in bp in the New Fragment box
and press Add. The fragment is added to the fragment list. To remove a
fragment from the marker, select it in the Fragments box and press the Delete
button.
o
Description box: Enter the gel marker’s description.
User Fields Tab: Add custom data in a form of fields. For details, refer to page 256.
243
•=
Comments Tab: Enter text comments.
•=
Keywords Tab: Enter keywords for the gel marker. For details, refer to page 222
When the information is correct, choose OK to save the Gel Marker and return to the
Database Explorer.
Drag and Drop
You can transfer objects by selecting them and using the LEFT-CLICK + DRAG technique
to move them to another location. The result of drag/drop is equivalent to copy/paste
operations, except that drag/drop leaves the Clipboard contents unchanged.
If you right-click + drag, when you drop, you have the option to Copy [Here] or Cancel the
operation. In case of transfer between subbases of the same database, a third option, Move
Here, allows you to combine two operations: add selected objects to another subbase and
exclude them from the current subbase. The Move operation is not available if the source
subbase has its contents maintained automatically.
Edit Menu Commands
The menu options under Edit are available for all database objects and are typical of other
Windows Explorer applications. They are described as follows:
Copy/Paste
•=
Copy copies selected database objects and places them in subbases of the same
database, local and shared databases, and databases and the file system. Selected
objects, their source and names are copied to the Clipboard. You can also use the
). This mode of Copy copies meaningful biological data to be
Copy button (
pasted into other biological analysis/management applications.
Notes about Copy:
•=
Copy using the Camera feature, by pressing the Camera button (
), copies data as it
appears on the computer screen for pasting into a word processor for, for example,
preparation of publication documents.
•=
Because only one copy can exist on the Clipboard at one time, the Copy command
replaces previous Clipboard contents.
•=
Paste, pastes copied data in one of four possible locations: (You can also use the Paste
button (
244
).
Database Explorer Chapter 18
o
The same subbase of the same database where they were copied. This is an
alternative way to duplicate copied objects.
o
Into another subbase of the same database where they were copied.
o
Into another database such as a shared database. The resulting actions create a
temporary archive for selected objects1 and import it into the target database.
To a file system or vice versa. If you paste copied objects to the Windows
95/98 or Windows NT Explorer, Vector NTI Explorer automatically creates an
archive file containing copied objects2. If you paste files from the Windows
Explorer to Vector NTI Explorer, the files are imported into the target
database. Vector NTI Explorer is usually able to recognize the types of the
pasted files automatically and take appropriate actions. When it cannot
determine the type of imported files, it allows you to select the type or cancel
the operation.
Note: If database objects are renamed or are modified after copying to the Clipboard, when
you Paste the object you may get unexpected results. Remember that the actual data are
collected when you paste data, not when you copy them.
o
Explorer Display Options
The Explorer’s database object pane can work in one of four view modes, selected under the
View menu or by clicking on the View Mode button arrow, displayed at the right end of the
toolbar (Fig. 18.22): Icons, Small Icons, List and Details. By default, the Database Explorer
shows objects in the Details mode.
Fig. 18. 22 Display options
In the first three modes, only object icons and names are displayed. The Details view
displays object icons, names and the values of object fields displayed in columns.
1
In case the transfer of molecules, the archive may also contain parents of the selected
molecules. See the Explorer Options section for details.
2
For molecules, the type of the created file depends on the Explorer settings. See the
Explorer Options section for details.
245
Options Dialog Box
To view or modify options related to the current database table display, select View >
Options to open the Options dialog box (Fig. 18.23). To set options for a table other than
the active one, switch to that table first. All of your settings are preserved between Vector
NTI sessions.
Fig. 18. 23 Options dialog box
Details View Tab
On the Details View tab, you can select the fields to be displayed (in columns) for each
object type, change the order of columns and the text alignment of each column.
Currently displayed columns are listed in the Displayed Fields list box. To customize the
displayed columns, in the Available Fields list box, select fields to be displayed and press
the (
) button. To remove fields, select them in the Displayed Fields list, and click the
) button. To modify the alignment of displayed data, select among the Alignment radio
(
buttons. The descending order in the list is the left to right display order of the columns. To
modify that, select fields and use the Move Up and Move Down buttons. Click OK to apply
the settings.
This page can also be opened with a right click on any column heading in Database
Explorer. When opened from that source, it is called the Columns page.
Status Bar Tab
This tab allows you to choose the type of information displayed on the Status Bar for a
single selected object in the object pane. The default selection, Description, describes the
item selected. If you select one of the fields, that value for the selected object is displayed.
The 1 item selected option simply describes the selection.
246
Database Explorer Chapter 18
Tips Tab
When you pause the mouse pointer over an object in the list pane of the Explorer, a popup
message (a ‘tip’) appears containing information about the object under the mouse pointer.
On the Tips Tab, you can configure what is displayed.
Copy Molecule(s) tab (DNA/RNA or Proteins Molecules Table)
These two tabs let you select the preferred file format for a single molecule or a set of
molecules export (either via copy/paste or drag/drop to the file system or other programs).
Each tab includes detailed explanations of the available options.
Note: ‘Parents’ for proteins are ‘DNA parents’.
Click OK to apply your settings to database display. All of the settings in the Database
Options dialog box are preserved between Vector NTI sessions.
Modifying Database Object Column Widths
Column width settings can be changed directly. Move the cursor to the divider between
columns where it changes to a two-headed arrow. Drag the divider right or left with the
cursor until the column is the desired width.
Sorting Objects in Database Explorer
If you are in the Details View Mode, click on the column header to sort column contents.
Clicking on the same column header for a second time reverses the sorting order.
To select descending or ascending sorting order for columns, or sort database objects by
name or any of the displayed fields in any view mode, select View > Arrange Icons.
Opening Explorer Window At Startup
By default, Vector NTI opens the local Explorer window for Molecule tables at the time you
start the program. To turn this feature on or off, select Edit > Options on the menu bar of
Vector NTI’s workspace window. Check or uncheck the Open Local Explorer At Startup
box on the General tab of the Options dialog box.
Database Reports
Reports on Database Explorer’s contents, suitable for word processing and spreadsheet
programs, can be generated. The Database Objects Pane should contain all objects you
would like to include in the report. If you do not have a subbase containing all objects you
need, select them and create a new subbase or generate the report on selected objects only.
To prepare a report:
1.
2.
Select a database table and object subbase. Make sure Explorer is in the Details View
mode.
To select the objects’ fields to be displayed, right click on a column heading, select
Columns, opening the Columns display dialog box. Move the fields between the Fields
247
3.
4.
5.
6.
columns, as described above in the Display View Tab section. Click OK to apply the
settings.
Sort your objects by clicking on column’s headers.
Select Edit > Camera or press the Camera button (
) on the Explorer’s toolbar. In
the Camera dialog box, select the objects to be included in the report its destination.
Switch to a word processor, spreadsheet or database application and paste/import the
report data there.
Vector NTI copies the report data in one of two different formats, depending on the
copy location:
•=
Plain text format with the TAB character used as column separator and the
newline character as a row separator (sometimes called the “CSV” format)
when copying to the Clipboard.
•=
Rich Text format (RTF) when copying to a file.
Explorer Shortcuts
Database Explorer offers many shortcuts to make your work more productive:
•=
Drag one or more molecules from the local database Explorer window onto the main
Vector NTI window or into other Vector NTI Suite applications
•=
Drag molecules or other database objects into subbases
•=
Open Windows Notepad and drag/drop a molecule on its window. The molecule is
displayed in the text format you chose for file system export (see Copy Molecule page
in Explorer Options section).
Here is the list of useful Vector NTI Explorer keyboard shortcuts:
Shortcut
Action
F2
Rename
F3
Search
F4
Select table
F5
Refresh
F6 or TAB
Switch to another pane
Enter
Open selected object
Ctrl+Enter
Show Properties
Table 18. 2 Vector NTI Explorer keyboard shortcuts
248
Database Explorer Chapter 18
Open/Save As Dialog Boxes
Fig. 18. 24 Open and Save As dialog boxes
Many features of Vector NTI Explorer are available in the Open and Save As dialog boxes
(Fig. 18.24) appearing in many situations such as when you open a Molecule Display
window or save a modified molecule to the database. These dialog boxes display object lists
in the same way the Explorer does. You can:
•=
select between Small Icons, List and Details view modes
•=
choose object fields to be displayed in the Details mode
•=
sort by any one of displayed fields
•=
display the Object Properties dialog box for selected objects.
Select the view modes with the buttons on the upper right or from the shortcut menu. Since
there are no menu bars, select Properties (with an object selected), Options or Columns from
a shortcut menu from an object or column header (in the Details view). You can also use the
Properties button (
Tab on page 246.
). The Columns page is managed as described under Detail View
Contact Manager
Vector NTI is increasingly used as a communication tool for exchanging information
between researchers. Contact Manager is a tool for creating, updating, deleting and
organizing contact records.
To launch Contact Manager, select Database > Contact Manager:
249
Fig. 18. 25 Contact Manager dialog box
The Contact Manager dialog box displays a list of all stored contact records (Fig. 18.25).
Many user interface features of the Contact Manager are similar to those of the Open/Save
As dialog boxes described above. You can choose record properties to be displayed, sort by
any one of the displayed properties and display the record properties dialog for selected
objects. For operations on the Contact List, press one of the following buttons:
Add New or Edit Contact Records
•=
250
Press the Add New (
) or Edit buttons (
) to open the Contact Information
dialog box (Fig. 18.26), where you can enter new data or edit the data for a current
contact. Only the Name box is mandatory for the new contact record. All other fields
may be left empty and edited later if you don’t know the appropriate data.
Database Explorer Chapter 18
Fig. 18. 26 Contact Information dialog box
Choose OK to save the contact record and return to the Contact Manager.
•=
Delete (
) deletes the selected contact record from the list. Confirmation is requested
before the contact record is deleted.
•=
Rename (
•=
Properties (
) displays the properties of the selected contact record. Only indexed
contact fields—Telephone and E-mail—are displayed in the Properties dialog box. Use
the Edit operation to view/edit the entire contact record.
) changes the name of the selected contact record in an edit box.
User Field Manager
The User Field Manager dialog box maintains a list of user field definitions necessary to
provide an appropriate description of the object. Some interface features of the User Field
Manager are similar to those of the Contact Manager just described. You can add User Field
Definitions, select properties to be displayed, sort by displayed properties and modify User
Field Definition properties.
Tip: To walk through a detailed exercise using the User Field Manager to create a new field
definition and apply its values to a group of database object, see the Database Tutorial,
Chapter 8.
Select Database > User Field Manager, opening the User Field Manager dialog box (Fig.
18.27):
251
Fig. 18. 27 User Field Manager dialog box
The operation buttons in the upper left corner perform various operations, described below,
on the User Field Definitions. Select the User Field Definition in the list, then press the
appropriate button. The Add New operation does not require any items to be selected.
Note: You cannot use the name of a system field (See the System Fields Table on page 218
as the name of a new User Field you define. If you really want to name your field ‘Default’,
you can use ‘default’ or ‘DEFAULT.’ Vector NTI field names are case-sensitive.)
•=
252
Add New (
) or Edit (
) (with a field selected) opens the User Field Definition
dialog box (Fig. 18.28) where you can create or edit User Field Definitions.
Database Explorer Chapter 18
Fig. 18. 28 User Field Definition dialog box, where you can create or edit User Field
Definitions
•=
Name: In the text box, enter (or edit) the name of the new user field. The user field will
appear under this name in the descriptions of database objects and in the Database.
•=
Type: Select the data type that the user field will accommodate from the data type
choices listed in the drop-down menu:
•=
o
String - arbitrary text string, including numbers and symbols (e.g. a word,
sentence or description)
o
Yes/No - binary field which may be set only to “Yes” or “No”
o
List of Strings - list of arbitrary text strings of any length
o
One of Predefined Strings - field which may be set only to one of predefined
text strings from a user-defined list
o
List of Predefined Strings - field which may be set only to any subbase of
predefined text strings from a user-defined list
Cached Fields: Any User Field can be indexed and “cached” in the database tables.
Cached fields are stored in a special memory subsystem from which they can be more
quickly recalled. To cache a User Field, check Cache in the Index Table. Because
cached fields occupy more RAM in your computer, we recommend caching only
frequently used fields, for instance, those displayed in the Database Explorer in the
Details mode of the Vector NTI Explorer or in the Open/Save As dialog boxes.
If Vector NTI Explorer slows down when displaying an object’s fields in the Details View
mode, open User Field Manager, select the field, press the edit button and cache the field.
253
Because cached and ordinary fields have no functional differences, you can turn this option
on or off any time you need it.
•=
Default Values: Any User Field may have a default value or values that are displayed
when you attempt to fill the previously blank field of the database object. To change the
default, press the Change button.
•=
Predefined Values: This section is enabled only for fields of the One of Predefined
Strings and List of Predefined Strings types. For those fields, enter one or more value
strings to choose from. These values are displayed as a list of available options when
you try to fill or change the actual object’s fields. Use the text box and the Add and
Delete buttons to define the predefined values for the User Field.
•=
Description: Enter a description of the field to help you fill or edit the value of the field
in a database object. The description entered here is displayed in the field value dialog
box for this field as well as the popup label displayed whenever you pause the cursor on
the field name in the User Fields tab of object editors (see below).
Note: To save space on your computer’s screen and still allow you to see which predefined
values are selected, you may define these values using the ‘abbreviated’ format: abbrev=full
form as shown below (these are some of predefined values for a sample “Commercial
Sources” field for enzymes):
A=Amersham Life Sciences-USB
B=Life Technologies Inc, Gibco-BRL
C=Minotech Molecular Biology Products
D=Angewandte Gentechnologie Systeme
Vector NTI displays only abbreviated form (for example A, B, D) in the Explorer windows
and other places, but you will see the full forms in value-editing dialogs.
Click OK to return to the User Field Manager.
When you have edited data, Vector NTI automatically rebuilds the database indices.
Back in the User Field Manager:
254
•=
Rename (
) lets you change the name of a selected User Field. In the enabled text
box, change the field name. After renaming a User Field, Vector NTI automatically
rebuilds the database indices.
•=
Delete (
) deletes a selected User Field Definition from the Field Definitions list
and, optionally, to delete field values from database objects. Confirmation is requested
before deletion.
•=
You are also asked to confirm whether to delete the appropriate User Field values from
all database objects. Deleting only the User Field Definition does not affect consistency
of the database information. When you delete the Field Definition from the list, Vector
Database Explorer Chapter 18
NTI no longer prompts you to fill this field in new objects and existing objects where it
was blank. However, unless you delete the field value from database objects, Vector
NTI still stores and displays the existing field data in the database objects. If you try to
edit the existing value of that “unlisted” field in any database object, Vector NTI will
ask you to add the definition of the field back to the User Field Definition List before
proceeding.
•=
Properties (
) display the properties of the selected User Field Description. These
properties can be also displayed in the User Field Manager dialog box by opening the
shortcut menu from the list headings and selecting Columns.
Import/Export
To simplify the maintenance and sharing of User Fields across several databases and/or
several computers, you can save your User Field Definitions as “archives.”
To export User Field Definitions to the archives, press the Export button. In the dialog box
that opens, select the definitions to be exported and press OK. In the standard File Save
dialog box, locate the directory and archive file name for storing the exported definitions.
Press OK to create the archive.
To import User Field Definitions from the archive, press the Import button. In the dialog
box, locate the directory and archive file to be read. Press the OK button, initiating the
import. After importing, Vector NTI automatically rebuilds the database indices.
Set In/Clear In
In the User Field Manager, you can assign or “set” a value or clear all values for a particular
User Field in a group of database objects.
•=
To set a value for a user field:
Select the user field in Field Definition List (large window). In the database tree in the lower
right corner, select a subbase of database objects that the field would pertain to. You may
choose all database objects regardless of their type or a particular subbase for database
objects of a particular type (molecules, enzymes, oligos or gel markers). If you don’t want
to overwrite existing values of the User Field in the selected group of objects, check the Do
not overwrite... box.
In the Global Operations section, press the Set In <user field > button. In the dialog box
that opens, specify the field value string to be set and press OK. Vector NTI shows a
description of the action about to be performed, asks for your confirmation, then inserts the
specified value into the appropriate objects in the subbase you selected.
•=
To clear all values of a user field:
Select the user field. Choose a subbase of database objects in the database tree. You can
choose all database objects regardless of their type or a particular subbase for database
objects of a particular type (molecules, enzymes, etc.)
255
Press the Clear In <user field > button. Vector NTI warns you of the action about to be
performed. If you confirm the operation, it clears the values of the specified user field in the
specified objects.
To set or clear fields in a set of individual objects not currently represented by an existing
subbase, close the User Field Manager, create the required subbase in Database Explorer
and return to the User Field Manager. Alternatively, you may change field values in
individual objects by editing them in the Explorer one by one as described below.
Editing User Fields in Individual Objects
When a User Field is defined in the User Field Manager, you can edit it for any database
object using the User Fields tab in the Edit <object name > dialog box (Fig. 18.29). To open
the Edit dialog box from Database Explorer, select the object in the Object Pane and press
) or select Edit > <Object Name > or the corresponding command
the Edit button (
from the shortcut menu:
User Fields Tab
Fig. 18. 29 Edit <object name > dialog box
All of the tabs of this dialog box except the User Fields tab are discussed in the section,
Editing Database Objects in this chapter. User Fields shows a list of all User Fields
currently applied to the object being edited and the list of blank fields defined in the local
User Field Definition list but not yet specified for the current object.
256
Database Explorer Chapter 18
To set or edit any field, double-click the field name or select the field name and press the
Change Value button. If the field you want to edit is not listed in the local User Field
Definition list, enter the field definition first. When added, the appropriate field value dialog
box is displayed. To quickly clear any User Field of the object, select the name of the field
and press the Remove Value button.
User Fields in Molecule Display Windows
You can view and edit User Fields tab from Molecule Display windows. To open the Edit
dialog box, select Edit > <object > Properties or in the Text Pane, select Molecule
Properties on the shortcut menu opened from the topmost folder <Object Name > or click
on the (
) box to the left of the <Object Name > folder.
257
258
Molecule Display Windows; Formatting Graphics Chapter 19
Chapter 19 Molecule Display Windows; Formatting Graphics
Introduction
A Molecule Display window displays text information, including a description of a
molecule, features and a graphical map of the molecule and its sequence. For DNA/RNA
molecules you can also see restriction sites, ORFsmotifs, PCR analysis, etc. The Molecule
Display window includes powerful graphical tools allowing you to:
•=
manipulate and analyze DNA/RNA and protein molecules
•=
visually select fragments of DNA molecules for recombination
•=
prepare publication-quality figures
A Molecule Display window enables editing in two modes:
•=
Molecule Editing mode: you can modify a molecule’s functional features and
restriction map and sequence. Molecule editing is covered in Chapter 6.
•=
Picture Editing mode: you can modify the graphical formatting of the molecule’s
image, allowing you to create publication-quality illustrations.
Molecules can be saved in the Vector NTI Database or as Molecule Documents. Molecule
Document files contain all the information from Molecule Display windows, including the
molecule analyses results, as well as graphics display settings you may have formatted or
modified for that particular molecule. Molecules in the database maintain consistency in
their internal files and graphical representation.
Opening Molecules in Molecule Display Windows
The display window can open for a molecule from the Vector NTI database, from a
Molecule Document File or from a file in a public format recognized by Vector NTI:
GenBank/GenPept, EMBL/SWISS-PROT, BLAST, and FASTA.
Molecule Database Files
Molecules are stored in the Vector NTI database as GenBank/GenPept, EMBL/SWISSPROT, BLAST, or FASTA files.
Molecule Document Files
Molecule Document files saved in Vector NTI contain all the information contained in a
Molecule Display window such as graphical representation and molecule analysis results as
well as the molecule itself in a portable format suitable for information exchange. Because
the Molecule Document format is based on GenBank/GenProt, any other program able to
import GenBank/GenProt files could import Molecule Documents.
All molecule document files, imported and even those created within Vector NTI, are
considered external files. Vector NTI restricts the set of operations you can perform on
molecules opened from external files. To be able to perform all molecule operations on a
259
molecule from a Molecule Document, you will be prompted to first save the molecule in the
Vector NTI database.
When opening a molecule from an external file, you can view it in a Molecule Display
window before saving it into the Vector NTI database. You still need to save the molecule
in the database to analyze it, construct other molecules from it, etc.
Opening a Molecule from the Database
•=
From Vector NTI’s Database Explorer:
Select the molecule table and subbase in the upper left corner. In the Database Objects Pane,
scroll to the molecule and select <molecule type > > Open on the menu bar or double-click
on the molecule name in the list.
•=
From the Vector NTI workspace or a Molecule Display window:
Press the Open button (
) on the main toolbar or choose Molecule > Open. In the Open
dialog box (Fig. 19.1), select either the Database DNAs/RNAs or Database Proteins tab.
Fig. 19. 1 Database DNAs/RNAs tab of the Open dialog box
From the Look In drop-down menu, select the subbase where your molecule is located,
scroll to the molecule, select it and double-click on it or click OK.
The Display Setup button (
) in the Open dialog box is to modify the default set of
parameters used to create the Molecule Display window contents. See page 271 for details
on Display Setup.
260
Molecule Display Windows; Formatting Graphics Chapter 19
Note: The number of data fields displayed for objects in the Open dialog box can be
modified. Select Options from the shortcut menu associated with this dialog box. In the
Options dialog box that opens, select fields from the Available Fields list, press the (
)
button to move them to the Displayed Fields list. For more information on using this dialog
box, refer to page 246 in Chapter 18.
Opening a Molecule from a Molecule Document File
To open a molecule from a Molecule Document file, press the Open button (
) on the
main toolbar or choose Molecule > Open. In the Open dialog box, select the Molecule File
tab. Browse to the location of the molecule file, select it and click OK.
Opening a Molecule from a Molecule Shortcut File
Molecule Shortcut files contain the names of database molecules along with the Display
Setup parameters. When you open a database molecule via the Shortcut file, Vector NTI
uses the Display Setup parameters stored in the file.
To open a database molecule via a Shortcut file, choose Molecule > Open Shortcut. Select
the name of the Shortcut file from the file list. To set up a Molecule Shortcut file, see p. 290.
Opening a Molecule from a File in Public Format
Opening a molecule from GenBank, GenPept, EMBL, SWISS-PROT, BLAST and FASTA
files is an alternative to importing the molecule into the Vector NTI database. See page 235
for import details.
To open a molecule from an external file, choose File > Open Molecule From Text File;
select the type of file and the name of the file.
Opening a Molecule from a Sequence File
Vector NTI lets you sequence files in one of several formats as an anonymous molecule.
To open a molecule from an external sequence file, choose File > Open Sequence From
Text File and select the name of the file.
261
Elements of a Molecule Display Window
Title bar
Main toolbar
Molecule Display
toolbar
Text Pane
Graphics Pane
Sequence Pane
Fig. 19. 2 Molecule Display window
A Molecule Display window is divided into three panes: a Text Pane (upper left), a
Graphics Pane (upper right) and a Sequence Pane (bottom) (Fig 19.2).
The Molecule Display window title bar shows the name of the open molecule. Vertical and
horizontal split bars separating the panes can be moved using the click and drag technique to
resize the viewing areas.
Each pane has scroll bars when the pane contents exceed the viewing area. These allow
vertical and horizontal movement through the pane.
The Text Pane has folders containing descriptions and analyses of the molecule currently
open.
The Graphics Pane displays a graphical depiction of the molecule map. Features, restriction
sites, motifs, etc. are shown by symbols. Each symbol typically has a label connected to it
by a dropline.
The Sequence Pane of a DNA/RNA molecule depicts the nucleotide sequence with selected
functional signals, restriction sites, motifs, ORFs, and protein translations. The Sequence
Pane of a protein molecule displays the amino acid sequence and selected features.
262
Molecule Display Windows; Formatting Graphics Chapter 19
Menu Bar and Toolbars
The menu options for the Molecule Display window are discussed when corresponding
operations are described. Many menu options have corresponding toolbar buttons and
shortcut menu commands.
Many objects and features have associated shortcut menus opened with a right click on the
item.
The Main Toolbar remains fairly consistent through the entire Vector NTI Suite, while other
toolbars vary according to the display window and the active pane. Because Vector NTI has
many toolbars corresponding to different display windows, active panes and applications,
toolbar operations are covered separately in Chapter 4. Throughout the User’s Manual,
however, toolbar buttons are displayed as needed for operations being describe.
Molecule Display Window Panes
Text Pane
The Text Pane of a Molecule Display window contains a thorough description of the
molecule, including common database information, Feature map, and results of analyses as
well as molecule type-specific information such as restriction maps, ORFs, motifs for
DNA/RNA molecules and physiochemical analyses. The content of the Text Pane depends
on a specific Display Setup.
Folders
The Text Pane is divided into a hierarchy of folders and subfolders. A folder and its
subfolders are called a branch. Text Pane can contain the following folders:
Folder
Contents
General Description
Molecule name, length, notes, etc.
Standard Fields
All standard field descriptions in the
molecule’s file: for example, keywords,
original source, public database IDs.
Component Fragments
(DNA/RNA)
Describes the fragments from which the
molecule is constructed
Design Description
(DNA/RNA)
Design plan determined by Vector NTI’s
built-in biological knowledge
References
Literature references applying to the
molecule
Feature map
Feature map of the molecule
Restriction Map
(DNA/RNA)
Restriction map of the molecule
Open Reading Frames
(DNA/RNA)
ORFs found on the molecule
263
Folder
Contents
Motifs (DNA/RNA)
Motifs found on the molecule
PCR Analysis
(DNA/RNA)
Results of PCR analysis
Sequencing Primers
(DNA/RNA)
Results of sequencing primer search
Hybridization Probes
(DNA/RNA)
Results of hybridization probes analysis
Protein Analysis
(Proteins)
Results of common physiochemical analyses
Annotations
Text annotations added by the user
Table 19. 1 Text Pane folders on the Molecule Display window
Opening and Closing Text Pane Folders
The general rules for opening and closing Text Pane folders and subfolders are summarized
as follows:
•=
Click on the + at the left of the folder name to open it; click on the – to close it.
•=
Double click on a folder name to open it; double click again to close it.
•=
Click on the Expand Branch button (
) to open it; click on the Expand All button
(
) to open a folder and all of its subfolders. Click on the Collapse Branch button
(
) to close all related folders.
Finding Molecule Features on Graphics and Sequence Panes
To display molecule features described in the Text Pane in the corresponding region of the
molecule in the Graphics and Sequence Panes, open the folder containing the feature and
). The corresponding
select the feature by clicking on its name. Press the Find button (
region is marked with a wireframe in the Graphics Pane and highlighted in the Sequence
Pane.
The Graphics Pane
The Graphics Pane graphically displays molecule maps, including features, restriction sites,
and motifs, and user annotations. Features represented as clockwise arrows appear on the
direct DNA strand; counter-clockwise arrows represent features on the complementary
DNA strand.
Circular and Linear Displays
Circular DNA molecules can be displayed in either circular (Fig. 19.3) or linear form (Fig.
19.4). Linear DNA/RNA molecules and proteins can only be viewed in linear form.
264
Molecule Display Windows; Formatting Graphics Chapter 19
Choose circular or linear display format for a circular DNA molecule with the Circular
Display (
) or Linear Display (
) buttons on the Window toolbar of the Graphics
Pane or with the equivalent commands in the View menu.
Fig. 19. 3 DNA molecule displayed in circular form
Fig. 19. 4 DNA molecule displayed in linear form
265
Standard Arrangement
Standard Arrangement sets all symbols to standard sizes, sets labels to a standard font size,
and arranges text to prevent or to minimize overlap. When a display window opens, it
appears in its default Standard Arrangement settings. After modifying graphics formats, you
can return a Graphics Pane to its Standard Arrangement by pressing the Standard
Arrangement button (
) on the Graphics Pane Window toolbar or choosing View >
Standard Arrangement. While certain changes you have made to the layout in the Picture
Editing mode such as label repositioning are lost, many object attributes such as colors,
patterns, and font as well as relative symbol sizes are unaffected. Hidden objects remain
hidden and the way objects overlap is not affected.
Setting up the Standard Arrangement
To change the sizes of symbols and labels in the Standard Arrangement, press CTRL + the
Standard Arrangement button (
Setup Palette:
) on the Viewer toolbar, opening the Arrangement
With this palette, you can change standard sizes and layout of the
two kinds of graphics objects: symbols, such as arrows representing
functional signals, and labels. Vector NTI redraws the Graphics
Pane to display changes each time you press a button in this palette.
The Arrangement Setup Palette has three sets of buttons:
•=
Stretch Symbols (
) and Shrink Symbols (
) buttons respectively increase and
decrease the standard thickness of symbols by ~15%. Hold down the SHIFT key while
pressing a button to change thickness in small increments.
•=
Stretch Labels (
) and Shrink Labels (
) buttons respectively increase and
decrease the standard size of labels by ~15%. Hold down the SHIFT key while pressing
a button to change size in small increments.
•=
Spread Labels (
) and Condense Labels (
) buttons respectively spread out
and compress labels on the linear layout. Hold down the SHIFT key while pressing a
button to move labels in small increments.
Press the Standard Arrangement button again to close the palette.
Selecting Signals and Sites
In the Graphics Pane, elements of the functional and restriction maps, ORFs, and motifs can
be selected, enlarged or reduced and have various operations performed on them. In brief, to
select regions or sites, use the left click + drag method, or click on the feature or its label.
Selected regions are marked with a wireframe.
266
Molecule Display Windows; Formatting Graphics Chapter 19
Note: For detailed instructions on selection and viewing options, refer to Chapter 3.
Viewing a Selected Molecule Region
Although a display window always shows an entire molecule, the window can be
configured to show only a fragment of an opened molecule. This is useful for manipulating
a small region of a larger molecule.
To view only a selected region, activate a Graphics or Sequence Pane and select the targeted
region. Click on the View Molecule Fragment button (
or select View Selection the shortcut menu.
), select View > View Selection
Only the selected region of the molecule is now displayed in the Graphics and the Sequence
Panes. The list of functional signals, restriction sites and motifs in the Text Pane now
reflects only those objects located inside the selected region.
To return to the view of the entire molecule, click on the View Molecule Fragment button
again and choose View Whole Molecule from the drop-down menu.
Multi-component Features Display
Exons
Intron
Fig. 19. 5 A multi-component feature; this example has two exons and one intron
A multi-component feature is a feature that contains introns and exons. The example shown
above has two exons and one intron, shown graphically on a molecule (Fig. 19.5). The
ordinary feature is shown as a wide arrow on the Graphics Pane. Coding sequences, or
exons, are shown as filled parts of the arrow, while the intervening sequences, or introns, are
shown as a gap within the arrow.
267
Selecting and Translating Exons
When a DNA molecule containing a non-contiguous multi-component CDS is open in a
molecule display window, the user can translate the exons three ways. Click on any of the
exons to select the entire CDS. Translate commands are enabled on the shortcut menu.
The first two options create a new protein. The last simply displays the translation of the
selected area in the Sequence Pane.
Translate with New Protein
This command translates each non-contiguous component or exon as a separate entity, and
combines the translated amino acids into a new protein molecule. Because reading frames
may be shifted in translating split codons in this method, (for example, a single base at the
end of an exon is not combined with the first two bases at the beginning of the next exon),
the resulting amino acid sequence may not match the valid spliced protein sequence.
Translate with Splicing into New Protein
This command translates the multiple non-contiguous components or exons as one coding
sequence and “splices” them, including split codons, into a resulting protein that matches
the valid corresponding protein.
This command is only enabled for sequences annotated as multi-component CDSs; Vector
NTI recognizes them as such and can translate them accordingly.
In the above cases, a new molecule display window opens featuring the new protein.
Changing the Settings for Graphics Pane
For changing Graphics Pane settings, see Display Setup later in this chapter. For editing a
molecule or modifying its graphical format in the Graphics Pane itself, refer to Molecule
Editing in Chapter 20.
The Sequence Pane
A Sequence Pane displays a molecule’s nucleotide or amino acid sequence as well as
selected features.
Features
268
Display
Position on Sequence
Functional
features (labeled)
deep red serrated
lines
Above—direct strand; protein
Below—complementary
RENs (labeled)
blue wavy lines
Above only
Motifs (labeled)
deep red serrated
lines
Above—direct
Below—complementary
Molecule Display Windows; Formatting Graphics Chapter 19
Features
ORFs
Display
dark blue arrows
Position on Sequence
Above—direct
Below—complementary
Phase indicators in left margin
Table 19. 2 Selected features of Sequence Pane
Selective display of these features is defined by corresponding commands under the
Analyze menu option. They can also be defined in Display Setup, discussed later in this
chapter.
Changing the Settings for Sequence Display
To change the settings for sequence display, select parameters in the Display Setup dialog
box, discussed in detail on page 271.
Navigating the Sequence
In the Sequence Pane, the cursor becomes an I-beam ( ) that you can move with the
mouse or the arrow keys. Pause the cursor over a sequence position for a few seconds, and a
pop-up label identifies its exact position on the sequence.
Selecting Regions of the Sequence
There are several methods for selecting a sequence in the Sequence Pane:
•=
Use the LEFT-CLICK + DRAG technique, dragging the cursor across the nucleotides.
•=
Select Edit > Set Selection. Enter the residue range in the dialog box that opens.
•=
Click on the Set Selection box on the Status Bar, opening the Set Selection dialog box.
Enter the residue range in the dialog box.
The selection range is always display in the Set Selection box on the Status Bar.
The general rule for modifying sequence selections is to hold the SHIFT key (to alter the
selection by small increments) or the SHIFT + CTRL keys (to alter the selection by large
increments) as you press the left and right arrows.
A selected fragment in the Sequence Pane is marked simultaneously with a wireframe in the
Graphics Pane.
A selected fragment in the Sequence Pane is marked simultaneously with a wireframe in the
Graphics Pane.
Translation
Select the region you wish to translate. Press the Translate Direct Strand (
) or
Translate Complementary Strand (
) buttons in the Window toolbar, or choose the
corresponding commands from the View menu.
269
Translations of the direct strand appear above the sequence; translations of the
complementary strand appear below the sequence.
You can select three- or one-letter amino acid codes through the Display Setup dialog box,
discussed on page 271 in this chapter.
To turn off protein translations, press the Clear All Translations button (
View > Clear All Translations.
) or choose
Phase Indicators for ORFs and Protein Translations
Phase indicators in the left margin of the Sequence Pane show the phases of ORFs and
protein translations. For translations of the direct strand, the phase is determined by the
position of the first selected nucleotide relative to the beginning of the molecule. For the
complementary strand, the phase is determined by the position of the last selected
nucleotide relative to the end of the molecule.
Finding Sequence Fragments
To quickly find a defined fragment on a sequence, in the Sequence (or Graphics) Pane, press
), select Edit > Find Sequence or press CTRL + F. In the Find
the Find button (
Sequence dialog box (Fig. 19.6), enter the desired sequence, indicate the strand to search,
choose exact or degenerate matching and set the acceptable mismatch tolerance. The
sequence can contain any standard IUPAC symbols for nucleotide sequences. (See
Appendix C.)
Fig. 19. 6 Find Sequence dialog box
Press the Find Next button. The search begins from the current caret position or the current
selection. A located fragment is automatically selected in the Sequence Pane. If none are
found, the caret does not move from its current position.
270
Molecule Display Windows; Formatting Graphics Chapter 19
Editing a Molecule Sequence
Instructions for editing a molecule sequence and its text attributes are found under Molecule
Editing in Chapter 20.
Molecule Display Setup
Vector NTI uses Display Setup parameters to create the Molecule Display window contents.
You can edit Display Setup before or after a display window is created, assign names to
different settings and store them in as a Setup profile, and change the default Setup settings.
To open the Display Setup dialog box, press the Display Setup button (
Window toolbar. Select Display Setup from the drop-down menu.
) on the
The Display Setup dialog box has two modifications: one for DNA/RNA molecules and
another for proteins. The mode that opens corresponds to the molecule display window from
which it was launched. Fig. 19.7 is the Display Setup dialog box for DNA/RNA molecules.
Fig. 19. 7 Display Setup dialog box for DNA/RNA molecules
To apply a previously saved Setup Profile to a current display window, select the Profile in
the Setup Profile drop-down menu. Click OK.
Use the check boxes to indicate the information to be displayed in the Molecule Display
window. Click on the Setup buttons (described below) to open corresponding dialog boxes
where you can specify in more detail what information should be displayed for each
category. Click OK in each to return to Display Setup.
271
DNA/RNA Display Setup
Feature Map Setup
Press the FMap Setup button to select the types of features to be displayed in the Display
window’s Sequence Pane. Some features appear by default in the Text and Graphics Panes.
The Feature Map Setup dialog box appears (Fig. 19.8):
Fig. 19. 8 Feature Map Setup dialog box
Press the Add button to select one or more of available feature types. Click the Remove
button to remove previously selected feature types. Remove All empties the list.
Motifs Setup
Press the Motifs Setup button to open the Motifs Setup dialog box (Fig. 19.9) that controls
the motifs map display.
272
Molecule Display Windows; Formatting Graphics Chapter 19
Fig. 19. 9 Motifs Setup dialog box
The list box in the upper part of the dialog box contains motifs already chosen for a search.
•=
Add New adds new motifs and Edit lets you edit a highlighted motif. Both of these
operations take place in the Oligo Editor dialog box.
•=
Remove removes selected motifs
•=
Analyze initiates an analysis of a highlighted motif
•=
Oligo List loads oligos from the Oligo List.
•=
Oligo Database uses the Vector NTI oligo database as a source for motifs to be
searched for
•=
Save To Database saves the selected motif to the oligo database.
•=
Find Sites Press the Similarity button to specify the similarity between motif and
molecule sequence for the motif’s site to be accepted. In the Find Motif Locations
dialog box (Fig. 19.10) that opens, choose the method for calculating the similarity and
the similarity requirements.
273
Fig. 19. 10 Find Motif Locations dialog box
•=
With Best Similarity Only selects only those motif sites that received the best relative
score
•=
With Similarity >= Similarity Threshold displays all motif sites that have a similarity
more than or equal to the similarity you specified in the Similarity Threshold box.
•=
To filter out all the motif sites that do not meet the specific requirement for 3’ end
similarity, check the Last box and enter the number of nucleotides on 3’ end that
should have 100% similarity.
Any motifs that have more sites than specified in the Maximum Number Of Sites box in the
Motifs Setup dialog box (Fig. 19.9) are displayed as grayed-out folders in the Text Pane;
they are not displayed at all in graphics or Sequence Panes.
•=
Similarity Between Ambiguous Nucleotides specifies acceptable similarity between
ambiguous nucleotides (if any). The Average, Minimum, and Maximum buttons
indicate that the average, minimum, and maximum possible similarity will be
calculated respectively for any nucleotide pair. For instance, if you are calculating
similarity between N and A, then the average similarity is 25%, the minimum similarity
is 0%, and the maximum similarity is 100%. In case of R and A they are 50%, 0%, and
100%; in case of R and T—0%, 0%, and 0%. For clarification of these IUB nucleotide
symbols, see Appendix C.
N-N
N-R
N-A
R-W
R-A
R-T
Maximum
100
100
100
100
100
100
Average
25
25
25
25
25
25
Minimum
0
0
0
0
0
0
Table 19. 3 Average, minimum, and maximum possible similarity
Click OK to return to the Motifs Setup dialog box.
•=
274
Sorted By Select the motifs sorting procedure to be used for the Motifs folder. Choose
the Motif String radio button to sort motifs alphabetically or the Number of
Molecule Display Windows; Formatting Graphics Chapter 19
(Recognition Sites) radio button to sort motifs by their number of sites on the
molecule. Motifs are listed before motifs with more sites.
•=
Strands to Search Turn these boxes on or off to specify the strand(s) to be searched.
•=
Ignore Outside / Ignore Inside Enter these regions to specify additional limitations on
the motif sites to be displayed. Specify the Ignore Motifs With Sites Outside Region
to display only those motifs located inside the region. Specify the Ignore Motifs With
Sites Inside Region to display only those motifs located outside the region.
Sequence Setup
Press the Sequence Setup button to indicate how the sequence should be displayed in the
Display window’s Sequence Pane. The Sequence Setup dialog box appears (Fig. 19.11):
Fig. 19. 11 Sequence Setup dialog box
Set the number of nucleotides per block in the sequence display (10 is default), the number
of blocks per line (5 is default) and whether protein translations should be shown in one- or
three-letter code (three is default). Check the Prefer Single-Stranded Display box if you
prefer the molecule sequence displayed as single-stranded in the Sequence pane. Set the
default font name, size, color and effect characteristics.
Restriction Map Setup
Press the RMap Setup button to specify the restriction sites to be displayed. The Restriction
Map Setup dialog box (Fig. 19.12) displays in the Use Enzymes column the restriction
enzymes, also called RENs, whose sites are shown by default.
Click the Add button to select database enzymes to be added. To remove enzymes from the
display list, select the enzyme and click Remove. The Remove All button clears the list.
275
Fig. 19. 12 Restriction Map Setup dialog box
•=
The Sort Site… radio buttons determine how the restriction sites are displayed in the
Text Pane. Enzyme Name sorts the RENs alphabetically. By Number of Recognition
Sites sorts the RENs by the number of their sites on the molecule.
•=
Permitted Terminus Types check boxes filter the types of RENs displayed.
•=
Ignore RENs Having More Than … Sites removes from the restriction map RENs
that cut too frequently. RENs with more sites than the number in this field will be listed
but grayed out in the Restriction Map folder in the Text Pane. They will not be
displayed at all in the graphics and Sequence Panes.
•=
Ignore RENs Cutting Outside Region causes only those enzymes with sites inside the
region to be displayed.
•=
Ignore RENs Cutting Inside Region causes only those enzymes with sites outside the
region to be displayed.
Picture Type Checkbox
If you check the Prefer Linear checkbox in Display Setup, Vector NTI uses linear display
for both circular and linear molecules.
ORF Setup
Press the ORF Setup button to open the ORFs Setup dialog box (Fig. 19.13) for specifying
how open reading frames are displayed.
276
Molecule Display Windows; Formatting Graphics Chapter 19
Fig. 19. 13 ORFs Setup dialog box
•=
In the Minimum ORF Size field, enter the minimum ORF size in codons.
•=
Check the Nested ORF check box to look for nested ORFs, (ORFs that have the same
stop codon but different start codons.)
•=
In Start and Stop Codons fields, enter start and stop codons for the new viewer’s
ORFs. Press the Default Start & Stop button to set the start and stop codons to the
following conventional values: Start codons—ATG, GTG; Stop codons—TAA, TGA,
TAG.
•=
Check the Include Stop Codon in ORF box if you want the stop codon to be
considered part of the ORF. Otherwise, the stop codon is not considered part of the
ORF and is not included.
ORF Names
•=
Old Style: ORF# (sequential)
•=
New Style: Nucleotide position of ORF start, direct or complementary, sequential #
Graphics Display Settings
You can edit the graphical styles for graphical map elements directly from the Display
Setup dialog box or in the Graphics Pane in Picture Editing mode. Press the Edit button in
the Graphics Display Settings group, opening the Graphics Display Setup dialog box (Fig.
19.14).
277
Fig. 19. 14 Graphics Display Setup dialog box
Select the graphical map element type and define the shape and style for a particular symbol
picture as well as the style for a label attached to the symbol picture. Add new styles by
pressing the More buttons (one button adds label styles, another adds symbol styles). When
the styles are defined, click OK.
These settings can be saved and loaded independently in VNTI versions 5.0 and later. To
load graphics map styles from a Molecule Setup file, press the Load From File button and
select the name of an existing file. Select the Setup Profile from the dialog box; the selected
settings are applied to the current Molecule Display window. To save current graphics map
styles, name the Setup Profile in the text box, press the Save To File button and enter a
name and location for the new Molecule Setup file.
Note: You can edit also existing styles directly in the Graphics Pane of a Molecule Display
window as described later in this chapter.
Protein Molecule Display Setup
The options in the Display Setup dialog box (Fig. 19.15) for a protein differ slightly from
that for nucleic acid molecules.
278
Molecule Display Windows; Formatting Graphics Chapter 19
Fig. 19. 15 Display Setup dialog box for a protein
Feature Map Setup
With a protein in the Molecule Display window, press the FMap Setup button to select the
types of features to be displayed in the Display window’s Sequence Pane. (Many features
appear by default in the text and Graphics Panes.) The Feature Map Setup dialog box for
proteins differs from that for DNA/RNA only in the features listed. The functionality of the
dialog box is identical to the DNA/RNA Feature Map Setup box. See page 272.
Press the Add button to select one or more of available feature types. Click the Remove
button to remove previously selected feature types. Select the Remove All button to delete
the list.
Sequence Setup
Press the Sequence Setup button to open the Sequence Setup dialog box (Fig. 19.16):
Fig. 19. 16 Sequence Setup dialog box
279
In this dialog box, set the number of amino acids per block in the sequence display and the
number of blocks per line. Set the default font name, size, color and effect characteristics.
Picture Type
Ordinarily, if you select a protein fragment and click the View Selected Fragment button
for closer inspection, the selected region “expands” to fill the entire Graphics Pane. If the
Prefer Constant Horizontal Resolution check box is checked in the Protein Display Setup
dialog box, the current protein display is “not scalable,” meaning that the current visual
length of graphics features is retained instead of stretching the picture to fit in the window.
Graphics Display Settings
The Display Setup Graphical Map settings for proteins are managed exactly as explained on
page 277.
Saving the Display Setup Settings in a Setup Profile
The upper part of the Display Setup dialog box contains a list of saved setup settings called
Setup Profile. Add your newly defined settings to the Profile list by pressing the Save
Settings As button. Enter a name for these settings and click OK. In the future, you can
apply at once all of the settings saved in a Profile to a new molecule opened in a Molecule
Display Window. Open a saved setting by selecting the Profile name in this list or View >
Display Profile.
Vector NTI always uses the default Display Setup when you open a molecule from the
database in a new Molecule Display window, with two exceptions:
1.
2.
As you open a molecule from the Vector NTI workspace window, you can specify the
Display Setup for the new display window. To do this, choose Molecule > Open from
the Vector NTI window, select the Database tab for the type of molecule you want to
open (DNA/RNA or Protein) and press the Display Setup button. In the Molecule
Display Setup dialog box that opens, select the Settings Profile you want from the list
of saved profiles.
If you open a molecule from the database via a Molecule Shortcut file, the settings
stored in the shortcut file are used instead of the (Default) entry in the Setup Profile.
Sequence Pane
Change Text Character Display Attributes
Character display attributes in the Sequence Pane can be changed in a manner as you would
in a word processor program. To change the font name, font size, font color and font
attributes (bold, italic, underline) for any character in a nucleotide sequence, highlight these
characters and click the corresponding buttons on the toolbar. For further information, refer
to Chapter 3.
To preserve text formatting between sessions, save the Vector NTI molecule as a Molecule
Document.
280
Molecule Display Windows; Formatting Graphics Chapter 19
Cut, Copy and Paste
To Cut, Copy, or Delete a region of the molecule’s sequence, select the region and choose
the appropriate command from the Edit menu. If a region to be deleted overlaps with
features, a confirmation dialog box opens, allowing you to keep or remove affected features.
All the features inside the deleted region will be removed without confirmation; positions of
other features will be adjusted accordingly.
A copied sequence is placed on the Clipboard in the standard text format, so you can freely
exchange the sequence data between Vector NTI and other applications. All sequence
formats recognized by Vector NTI can be pasted from the Clipboard. Sequence formats are
described in detail in Chapter 15 (Import section).
To paste a sequence from the clipboard, set the cursor to the insert position. Choose Edit >
Paste Sequence, opening and displaying the sequence in the Insert Sequence dialog box.
Press the OK button, and the sequence is inserted at the cursor position. If the insertion
point is within a feature, a confirmation dialog box opens, to let you keep or remove the
affected features. The positions of all features surrounding the insertion point are updated
automatically.
Insert a new sequence fragment manually by setting the cursor at the insertion point; choose
Edit > New > Insert Sequence. In the Insert Sequence dialog box, enter the sequence to be
inserted. For more information on editing a sequence, see Chapter 20.
Finding Protein Sequence Fragments
To quickly find a defined fragment on a sequence, in the Sequence (or Graphics) Pane, press
), select Edit > Find Sequence or press CTRL + F. In the Find
the Find button (
Sequence dialog box (Fig. 19.17), enter the desired sequence and set the acceptable
mismatch tolerance. The sequence can contain any standard IUPAC symbols for amino acid
sequences. (See Appendix C.)
Fig. 19. 17 Find Sequence dialog box
Press the Find Next button. The search begins from the current caret position or the current
selection. A located fragment is automatically selected in the Sequence Pane. If none are
found, the caret does not move from its current position.
281
Picture Editing Mode: Formatting and Annotating Pictures
Vector NTI has two modes of operation in Graphics Panes.
•=
Molecule Editing mode (default) in which the Graphics Pane serves as a visual
environment for viewing and editing the content of a molecule itself. In molecule
editing, you are changing the nature of the molecule map and sequence. Selecting DNA
molecule fragments for Construction and Design also take place in Molecule Editing
mode. See Chapters 22 and 23 for details about Construction and Design. Molecule
Editing mode is discussed in Chapter 20, Molecule Editing.
•=
Picture Editing mode where you can edit the graphical representation of an image such
as format and arrange individual graphics symbols and labels. This mode is useful for
preparing publication-quality figures of the molecule.
When in Picture Editing mode, Vector NTI changes the way it selects objects in the
Graphics Pane: the elementary units of selection are graphics objects like labels and
symbols, not elements of the molecule content. In Picture Editing mode, you can reposition
and reformat labels and symbols, hide objects to prevent them from being displayed, and
format multiple objects at once using centralized style sheets.
Notes about Picture Editing Mode:
•=
If you intend to edit the molecule itself, it is recommended that you perform that first
before you format molecule graphics.
•=
Picture editing changes are not saved in database, but in a Molecule Document file.
To activate Picture Editing Mode, in an active Graphics Pane, press the Edit Picture button
) on the toolbar. When the Graphics Pane is in the Picture Editing mode, the button is
(
shown in depressed state and View > Edit Picture is checked.
All of the following operations are performed in Picture Editing mode.
Formatting Objects on the Graphical Map
To format an object in the Graphics Pane, select the object by clicking on it or its label.
Review selection techniques in Chapter 3. To format more than one graphics object at a
time, HOLD SHIFT + CLICK on each.
Selected objects in Picture Edit mode are displayed with selection boxes or “handles” at
each corner. If this is not the case, check to make sure the Edit Picture button is depressed.
When the graphics objects to be formatted are selected, choose Edit > Properties, press
ALT + ENTER or select Properties from the associated shortcut menu.
In the Properties dialog box, select Line, Fill, or Text attributes (if a label is selected). If a
single symbol is selected, you may also change its Shape.
282
Molecule Display Windows; Formatting Graphics Chapter 19
On the Properties tabs, select the pattern and color for Lines and Fill for selected graphics
objects. On the Shape tab, click the down arrow for selections. Click OK.
Note the following about formatting objects:
•=
Lines associated with symbols are the lines that surround the main symbol. Lines
associated with labels are the droplines connecting the labels to its corresponding
symbol.
•=
Fill refers to the pattern and color with which the selected symbols are filled. Changing
a symbol’s filling does not affect the formatting of the line around that symbol.
•=
The Default Shape option forces Vector NTI to assign the default shape to the given
symbol. You can edit the association between the element type and the default
shape/style in the Graphics Display Setup dialog box accessible from the Display Setup
dialog box. Note: You cannot undo the Shape formatting.
If you have selected (a) label(s), the Properties dialog box includes a Text field (Fig. 19.18).
Fig. 19. 18 Properties dialog box includes a Text Tab
In the text box, enter ordinary text or choose from a variety of special codes that are
converted into information about the symbol to which the label is attached. To insert a
substitution code, choose the code from the Substitutions box and press the Insert button.
The code is inserted at the current caret position.
This substitution model allows assignment of a single text “style” to all labels of a certain
kind. For example, if the text attribute for all restriction sites is “@N (@S)” then the actual
label for a SmaI site 5354 bp will look like “SmaI (5354)” with the REN name and site
position substituted for @N and @S. You might want to experiment with the different
substitution models.
Using the Font button on this tab, choose the font, font style, font size, effects, and display
color attributes of labels you selected. Attributes of currently selected font are displayed to
283
the right of the Font button. Note: The font size you choose is not necessarily equal to the
font size on the screen or on the printed output. Displayed objects are stretched and shrunk
as the picture magnification is changed.
Annotations
To insert a text annotation on a graphical map, press the Add Annotation button (
) in
the Window toolbar or choose Edit > New > Add Annotation. In the Annotation dialog
box, enter the text of a new annotation label. Click OK to return to the Molecule Display
window where the annotation is highlighted and selected with handles. Click and drag it to
the location you choose in the Graphics Pane.
You can move annotations, change their font and formatting using the label formatting
techniques described above.
Note: Annotations are elements of the graphical representation of the molecule only and are
not stored in the database. To save an annotation, you need to save the display window as a
Molecule Document. To associate text information with a molecule itself, not its temporary
graphical representation, use the Comments or User Fields described in Chapter 18.
Deleting Annotations
To delete an annotation, select it in the Graphics Pane, and choose Edit > Delete
Annotation, or to delete an annotation from a Text Pane, click the annotation subfolder to
select its line, and press the Delete Annotation button (
choose Edit > Delete Annotation.
) in the Window toolbar or
To delete annotations from the Graphics Pane, select them in the Picture Editing mode and
choosing Edit > Delete Annotation.
Note: Annotation subfolders are the only folders of the Text Pane that can be deleted.
Undo and Redo
You can undo/redo movement and formatting of graphics objects, redefinition of styles, etc.
Undo/Redo also works in the Sequence Pane. The list of actions, tracked by undo/redo as
well as the size of the undo buffer can be changed in the Undo/Redo tab, accessed from
Edit > Options.
284
•=
To undo an action, press the Undo button (
Undo Formatting.
•=
To redo an action, press the Redo button (
Redo.
) in the main toolbar or choose Edit >
) in the main toolbar or choose Edit >
Molecule Display Windows; Formatting Graphics Chapter 19
Changing the Sizes And Shapes of Symbols
To change the size or shape of a symbol, click the Edit Picture button (
); you cannot
modify a graphic unless the Graphics Pane is in Edit Picture mode. Next, select the object
to be changed with a mouse click. Black drag boxes will appear at its corners. Move the
). Click and drag the
cursor to any drag box, changing it to a thin four-headed arrow (
black box, causing the symbol to change shape and/or size (Fig. 19.19). Release the mouse
when the symbol has the new shape you want.
Fig. 19. 19 Changing a symbol’s shape and/or size
Moving Objects on the Graphical Map
To move a graphics object around the Graphics Pane, select the symbol or label. When the
cursor placed in the middle of the selected object turns into a four-headed arrow (
click and drag the object to the new location.
),
As labels are dragged, their droplines follow, tracking the connection to the object to which
they refer.
Most symbols representing features, restriction sites, etc., do not move completely freely
around the graphical map. They do move freely perpendicular to the “sequence” bar/ring,
but Vector NTI prevents them from moving parallel to the sequence bar without your
permission. This is to keep the objects in the places corresponding to their actual locations
in the nucleotide or amino acid sequence.
To move a symbol parallel to the sequence bar of a graphical map, press and hold CTRL+
SHIFT and drag the object. Note: This does not change the coordinates of the feature in the
Feature map. To change the coordinates you need to edit the feature in the Molecule Editing
mode described in Chapter 20.
285
Changing the Display Order Of Overlapping Graphics Objects
To change the display order of overlapping graphics objects, select them; choose View >
Picture Element > Bring To Front or Send To Back or the corresponding commands
from the shortcut menu. To make these changes, the Graphics Pane must be in Edit Picture
mode.
The following image demonstrates the results of bringing the DNA ring to the front of a
circular molecule display (Fig. 19.20):
Fig. 19. 20 Bringing the DNA ring to the front of a circular molecule display
Hiding Graphics Objects
To hide an object, select it and choose Edit > Hide. If you hide symbols, their labels remain
visible unless you hide them specifically. The Hide feature is useful if you don’t want
objects to appear on a final picture or if you want to have more room for better layout of
important picture elements.
Restoring Hidden Graphics Objects
To restore hidden graphics objects to the Graphics Pane’s display, press the Undo button
(
) or Edit > Undo. You can also activate the Text Pane, link the text and Graphics
Panes, and open the folder(s) containing the hidden graphics objects.
Styles
A style is a named set of formatting attributes for graphics objects. Styles in Vector NTI
work much the same as they do in most word processing programs. Styles provide a
convenient and powerful way to organize the formatting of graphical maps.
Each style contains one or more of the following attributes: line, fill, text, and shape.
286
Molecule Display Windows; Formatting Graphics Chapter 19
Although Vector NTI has standard styles for symbols and labels, you can also define your
own. Once created, styles can be saved together with other parameters in the Display Setup
Profile or in Vector NTI Setup files.
To learn what style a graphics object has, turn on the Picture Editing mode, select the object
and select View > Picture Element > Style or Style from the shortcut menu. The style box
in the Picture Element Style dialog box shows the style of the selected object. If more than
one object is selected, the style box shows the style of the last object selected. The last
selected object is displayed with small squares around it.
Assigning Styles to Graphics Objects
To assign an existing style to a graphics object, select the object(s) to which you want to
assign a style and choose View > Picture Element > Style or Style from the shortcut menu.
In the Style box in the Picture Element Style dialog box, choose an existing style from the
pull-down list, or type a name, and press the OK button.
If you select an existing style or type its name, that style is assigned to the selected graphics
object(s), and the object(s) assume its format.
If you type a name that is not in the style list, a new style with the format of the currently
selected object(s) is created. If the selection includes more than one graphics object, a newly
created style contains only those attributes that are the same for all selected objects.
A style is the base format for a graphics object. You may make additional formatting
changes to graphics objects using the methods described in preceding sections.
Redefining a Style’s Format
To redefine the style of a graphic object, select the object, open the Properties dialog box,
opened from the shortcut menu and make the desired changes for the object. Click OK.
Select View > Picture Element > Style or select Style from the shortcut menu. In the Style
drop-down menu, the name of the current style is displayed. Press OK, signaling that you
wish to apply the new format to an existing style. In the Reapply Style dialog box (Fig.
19.21) that opens, choose the redefine operation you wish to occur and click OK:
Fig. 19. 21 Reapply Style dialog box
287
To accomplish the same end, you could select View > Picture Element > Redefine
<name> Style by Example or the corresponding command from the shortcut menu.
If you have chosen the Redefine Style option, any objects (even unselected ones) that
currently have that style will automatically change format to reflect the style’s new settings.
If you have chosen the Return Formatting to Style option, then the selected objects’ format
is restored to that Style’s format. Edit > Undo or the Undo button restores the former style.
Copy and Paste Styles
Once you have modified a symbol or label with a new format, you can easily reformat other
objects with the same format. Select the modified object, and select Copy Style from the
shortcut menu associated with the modified object. Move the cursor to another feature or
label, and select Paste Style from the shortcut menu.
Saving Styles
The set of the styles and Standard Arrangement parameters appearing in the Molecule
Display Window is a part of the Display Setup settings.
To save a display window’s current styles, choose the Edit > Display Setup or press the
Display Setup button (
) in the Window toolbar and choose Display Setup from the
drop-down menu. In the Display Setup dialog box, there are two options for saving styles:
Save Settings As saves all the settings in Display Setup. The settings are given a name that
is then listed in the Display Setup drop-down menu. Properly saved Setup Profiles are easily
retrieved and applied to display windows. Press this button and enter the name you want to
assign to the current settings.
Save To File saves current graphics display settings that you have defined. They are not as
easily retrieved as when you use the Save Settings As option. This option could be used, as
an example, when you are focused on preparing graphics for publications and wish to
transfer formatting instructions from one display window to another. In the standard File
Save dialog box, choose a file name for current styles and Standard Arrangement
information.
Loading Styles
To apply a saved Display Profile to a Molecule Display window, choose a profile entry
name from the list in the Display Setup drop-down menu or in the Settings Profile dropdown menu in the Display Setup dialog box. If you make the selection, box, Vector NTI
loads the styles as well as other settings from the profile but does not apply them to the
active window right away. Modify the settings if you like; press the OK button or press the
Cancel button to leave the current window’s settings unchanged. (If you press the OK
button, the active display window is immediately reformatted according to selected styles.)
288
Molecule Display Windows; Formatting Graphics Chapter 19
To retrieve styles saved in a separate setup file, press the Load From File button in the
Graphics Display Settings box of the Display Setup dialog box. Choose a setup file from the
standard File Open dialog box. Press the OK button in the Display Setup dialog box to
apply new setup to the active Display window.
Saving Molecules
Vector NTI allows for two kinds of permanent storage for molecules:
•=
In the Vector NTI’s database.
The database supports parent-descendant connections between molecules. It saves
automatic tracking of modifications, search, and many other operations on the set of
molecules as a whole.
•=
In a Vector NTI Molecule Document file.
Molecule Documents save all the information contained in a Molecule Display window
such as graphical representation and molecule analysis results. In this format, the
molecule itself is in a portable format suitable for information exchange. The Molecule
Document format is based on GenBank/GenPept, so that not only Vector NTI but also
any other program able to import GenBank/GenPept files could import a Molecule
Document.
A Molecule Document for a constructed molecule does not contain or track the molecule’s
parents and thus, unlike the database, it is not suitable for storing related molecules.
To save a molecule, click the Save As button (
the Save As dialog box (Fig. 19.22):
) or select Molecule > Save As, opening
Fig. 19. 22 Save As dialog box
289
Select the appropriate destination tab for the storage of your molecule.
Save in <Molecule> Database
Select the subbase where the molecule is to be stored. Enter (or modify) the molecule name
in the text box at the bottom of the dialog box and click OK.
Save as (Molecule Document) file
On the Save as File tab, browse for the destination where the document is to be saved. Enter
a file name and click OK.
If Vector NTI is configured for Internet publishing, you will see one more dialog box asking
your permission to create an HTML file for the molecule. This HTML file will contain a
brief description of the molecule and a hypertext link to the Molecule Document file.
Creating A Molecule Shortcut File For A Database Molecule
Molecule Shortcut files contain the name of a database molecule along with the Display
Setup parameters. When you open a database molecule via the Shortcut file, Vector NTI
uses the Display Setup parameters stored in the shortcut file.
To create a shortcut file, open the molecule in a Display window, set the desired Display
Setup parameters and select Molecule > Create Shortcut. In the standard File Save dialog
box, enter a file name and location for the new Shortcut file.
Molecule Export
Exporting a Molecule to a GenBank/GenPept, EMBL/SWISS-PROT or FASTA file
Vector NTI allows you to easily export a molecule opened in a Molecule Display window to
GenBank/GenPept, EMBL/SWISS-PROT, or FASTA file. For details about using Vector
NTI’s complete export capabilities, refer to the Database Explorer, described in detail in
Chapter 18.
To export a molecule to an external file, choose Molecule > Operations > Export. Select
the type and name of the file in the standard File Save dialog box.
Exporting a Molecule Sequence to a File
To easily export the sequence of a molecule in an active Molecule Display window, choose
Molecule > Operations > Export Sequence. In the standard File Save dialog box, choose
the name and location of a sequence file.
290
Editing Molecule Content Chapter 20
Chapter 20 Editing Molecule Content
Introduction
DNA/RNA and protein molecules can be edited in two environments:
•=
A Molecule Display window Graphics Pane, allowing editing of the molecule content
in the graphics-oriented environment.
o
•=
Molecule Display windows give you immediate visual feedback and more
automatic processing (that is, automatic adjustment of functional signal
coordinates on sequence insertions and deletions).
Molecule Editor, a text-based dialog box opened from a Molecule Display window of
either molecule type.
o
Editing a molecule in the Molecule Editor is more convenient if you want, for
example, to delete ten functional signals from the functional map.
o
Molecule Editor is the only way to create a molecule from scratch. (Molecule
Display windows cannot show molecules of zero length).
Edit Operations in a Molecule Display Window
Molecule Editing
Vector NTI has two modes of editing operations in Graphics Panes.
•=
Molecule Editing mode (default) in which the Graphics Pane serves as a visual
environment for viewing and editing a molecule map and sequence and for selecting
DNA molecule fragments for construction and design. In Molecule Editing mode, the
molecule itself can be modified. Molecule Editing mode is the subject of this chapter.
•=
Picture Editing mode where the graphical display of an image such as the format and
arrangement of individual graphics objects is edited. This mode is useful for preparing
publication-quality figures of the molecule. Picture Editing mode is discussed in
Chapter 19.
A Molecule Display window opens in Molecule Editing mode by default. Molecule Editing
mode is used for viewing and editing graphical maps of a molecule, viewing ORFs and
motifs (for DNA molecules), and editing molecule’s sequence. This mode is also used to
select DNA molecule fragments for construction and design.
If the display window is in Picture Editing mode, the Edit Picture button (
depressed state and View > Edit Picture is checked.
) is shown in
Selection Techniques on the Graphical Map
The following techniques can be used for making selections in Molecule Editing mode:
291
•=
On the Graphics Map, point the cursor at a symbol or label. If pointing at a restriction
). With the cursor
site or motif, the cursor becomes a crosshair with a word “site” (
paused at the site, a pop-up label appears, giving the type and site position. If pointing
) and upon pausing, it
at a functional feature or an ORF, the cursor becomes a hand (
displays a message telling you the type, name, and location of the feature or ORF. Click
on the symbol, site or its label to select it.
•=
Choose Edit > Set Selection. In the Set Selection dialog box, enter the coordinates of
the region to be selected. Both start and end nucleotides are included in the selection, so
to select the nucleotides or amino acids 50 through 60 you should enter From: 50, To:
60. Press OK. The coordinates of the selection are shown in the Selection Box on the
status bar at the bottom of the screen.
•=
Click on the Set Selection box on the Status bar, opening the Set Selection dialog box.
Enter the region coordinates in the Set Selection box. Click OK.
A selected region is marked with a selection wireframe on the Graphics Pane (Fig. 20.1).
Concurrently the selection is highlighted in the Sequence Pane.
Fig. 20. 1 Wireframe selection on the Graphics Pane
A caret (heavy black marker) appears at the “active” end on the wireframe and the sequence
at either the 5’ or 3’ end (a or c end for proteins). The caret position is also shown in the
caret position box on the status bar.
The caret makes it easy to modify the ends of the selection in the Graphics Pane:
292
Editing Molecule Content Chapter 20
•=
To activate an end of the selection, click on it with the mouse or click on the HOME or
END key.
•=
Hold the cursor over the active end; when it changes shape to the cross-hair with the 5’
) (or 3’, or a/c mark), click the mouse button and drag the end to the desired
(
position (watch the selection box on the status bar while you are dragging it). Drag the
3’ end of the selection in the same way.
•=
To move the active end of the selection one residue at a time, hold the SHIFT + LEFT
or RIGHT ARROW key to move the active end of selection one nucleotide/amino acid
at a time.
•=
To move the caret 10 residues at a time, hold down the CTRL key (do not release the
SHIFT key) with arrow keys. When the CTRL + SHIFT + LEFT or RIGHT ARROW
key.
Note: If you release your hold on the ctrl + shift keys, you will lose your current selection.
Setting The Caret Position On The Graphical Map
To set the caret to a position of the molecule, choose Edit > Set Caret Position or click on
the Set Caret box on the Status Bar. In the Set Caret Position dialog box, enter the
coordinate of the nucleotide/amino acid following the caret. The coordinates start from 1; so
to set the caret before the first nucleotide of the molecule you should enter 1. Press OK. The
position of the caret appears on the Graphics and Sequence Panes and in the caret position
box on the status bar.
Note: Setting a coordinate in a Set Selection or Set Caret Position dialog box replaces any
previous selection.
Selection Techniques for Choosing DNA Fragments for Recombination
The simplest way to select DNA fragments for recombination is to use the Fragment
Wizard, discussed in detail in Chapters 22 and 23. However, if you wish, you may select
regions as described above.
To select more than one functional signal at a time, click on each while holding down the
SHIFT key. The wireframe will include all selected signals (plus intervening nucleotides).
Press the TAB key to move the selection ends to the next gap between selected functional
signals; press SHIFT + TAB moves the selection ends to the previous gap between selected
functional signals. If you prefer to select features without intervening nucleotides, select the
fragments one by on and add them to the Goal List individually.
To set a 3’ or 5’ end of the selection to a restriction site, press HOME or END to move the
caret to the desired end of the selection and hold down the SHIFT key while clicking on the
label of the restriction site. If an end of the selection zone is set to a restriction site, an @
symbol appears in front of that end’s coordinate in the status bar.
293
After the fragment is defined, click on the Add Fragment to Goal List button (
),
identify the role in construction or design the fragment will play, and press Finish.
Editing The Molecule Map
The elements of a molecule map can be divided into two categories.
1.
2.
Items explicitly described in the molecule data (features on DNA/RNA and protein
molecules and restriction sites on un-sequenced regions of a DNA molecule). These can
be edited.
Items calculated automatically from the DNA molecule’s nucleotide sequence (ORFs,
motifs, and restriction sites on sequenced regions of the molecule) each time the
molecule is displayed. These are not stored with the molecule; these cannot be edited.
Editing operations are as follows:
•=
To edit a feature of the graphics map, double-click on it or select it and choose Edit
> Properties, select Properties from the shortcut menu or press ALT + ENTER. The
Properties dialog box opens, where you can edit the properties of the selected object.
The Properties dialog box for automatic objects does not contain editable fields.
•=
To add a feature to a molecule, select the corresponding region of the molecule and
choose Edit > New > Add Feature To FMap. In the Molecule Feature dialog box, you
can describe the new feature.
•=
To add an ORF to a DNA molecule’s Feature map, select the ORF you want to add
and choose Edit > New > Add ORF to FMap. In the Molecule Feature dialog box,
you can name the feature (all fields are initialized with the information taken from the
selected ORF).
•=
To add restriction sites to unsequenced regions of a DNA molecule, move the caret to
the desired position and choose Edit > New > Add REN Site to RMap. In the
Restriction Sites dialog box, the Site Positions field shows the current caret position.
You can enter more than one site position separated by space. Select the name of the
enzyme and press OK. Vector NTI adds the sites modifying the nucleotide sequence
accordingly.
•=
To delete an element from the molecule map, select the element. Choose Edit >
Delete, select the Delete from the shortcut menu or press DELETE on the keyboard. To
remove “automatic” objects from the graphics map display, you must change the
parameters in Display Setup.
Notes about molecule editing:
294
•=
If you have chosen an “automatic” feature to delete, a window appears reminding
you that this feature cannot be deleted.
•=
You can rescind all molecule content edits by selecting Molecule > Revert to
Saved.
Editing Molecule Content Chapter 20
Editing the Sequence from the Sequence Pane
Sequence editing operations in the Sequence Pane are similar to those in the Graphics Pane.
Three editing operations make use of the standard Clipboard (Cut, Copy, and Paste)
operations. Others allow you to insert literal fragments or modify existing fragments.
The copied sequence on the Clipboard is in the standard text format, for free exchange of
the sequence data between Vector NTI and other applications.
To Paste (“insert”) a cut or copied sequence, set the cursor, which in the Sequence Pane
becomes a vertical I-beam (
Edit > Paste Sequence.
), to the insert position. Paste with a toolbar button or select
To insert a new sequence fragment manually, click the I-beam at the insertion position;
choose the Edit > New > Insert Sequence. In the Insert Sequence dialog box, enter the
sequence to be inserted. Click OK. If the inserted sequence will affect a feature , you are
given the option to delete the feature (Delete or Delete All) or keep it (Keep or Keep All) in
its modified form.
Once the sequence is inserted, you can delete it manually or select Molecule > Revert to
Molecule in Database to return to the unedited version.
Edit Operations in Molecule Editor
To open the Molecule Editor dialog box:
From Molecule Display window:
•=
Molecule > Create New > Using Sequence Editor (DNA/RNA) or > Using Sequence
Editor (Protein) opens Molecule Editor (Fig. 20.2) for a new molecule
•=
Edit > <Molecule> Properties opens Molecule Editor for the open molecule
From Database Explorer:
•=
Select the DNA/RNA or Protein subbase in the drop-down menu, select a molecule in
Objects list and click on the Edit button (
Menu Bar.
) or <Molecule type >> Edit on the
The figure shows the DNA/RNA Molecule tab of the Molecule Editor opened from
Database Explorer (Figure 22.2):
295
Fig. 20. 2 DNA/RNA Molecule tab of the Molecule Editor
The Molecule Editor contains information for one molecule at a time. Note these points
about the Molecule Editor:
•=
Most tabs for protein or DNA/RNA are basically the same. Any variations are
mentioned below.
•=
Molecule Editor opened from Database Explorer has one additional tab for sequence
and feature editing. Sequence editing of an open molecule must be performed in the
Sequence Pane of the Molecule Display window itself.
•=
To be edited with the Molecule Editor, a molecule must be fully processed. For
instance, when you are trying to construct a DNA molecule from incompatible
component fragments, Vector NTI saves the entered molecule’s data but does not
process the molecule completely. It allows you to load molecule data from the database
into the Construct/Design Molecule dialog box, edit its component fragments, and
reconstruct the molecule. But you cannot load a molecule into the Molecule Editor until
it’s fully processed.
•=
The Molecule Editor can be used to describe a new molecule from scratch. The
Molecule Editor is almost identical for New Molecule (creating a new molecule from
scratch) or for Edit Molecule. The New Molecule mode lets you enter all data including
a sequence.
Note: You must enter a new molecule’s nucleotide sequence using the Sequence Editor
(Fig. 20.6) to be able to save the new molecule. If the new DNA molecule is unsequenced, it
296
Editing Molecule Content Chapter 20
is easier to construct it first from one DUMMY fragment using Construct/Design Molecule
dialog box, and then enter its functional and restriction maps loading the molecule from the
database into the Molecule Editor.
•=
If you have made any changes to a molecule in the Molecule Editor, you must press the
Molecule Editor’s OK button to enter the new information into the database.
Note: When a molecule is created during the design or construction process, its nucleotide
sequence and functional map are generated automatically from its parents. You may add
new functional signals to the map or delete or edit automatically-generated functional
signals or edit an automatically generated nucleotide sequence. In that case, the system
disconnects the molecule from its parents to avoid data inconsistency. The system prompts
you if such a situation occurs.
Each of the tabs of DNA/RNA and protein Molecule Editors are discussed below.
The General Information Tab
Fig. 20. 3 The General Information tab displays current status of the database object and
other general molecule data
The General Information tab has the same format for all database objects (Fig. 20.3). On
this tab, enter or edit a name for the new molecule. There is no text box for entering the
name, but moving the cursor close to the molecule name changes the pointer to an I-beam,
enabling text entry.
297
The DNA/RNA Molecule Tab
Fig. 20. 4 DNA/RNA Molecule tab
•=
Molecule type: Circular/linear and DNA/RNA
•= Extra-Chromosome Replication: Transformation systems in which the molecule is
capable of extra-chromosome replication.
•=
Replicon Type: The source of the replication origin for the molecule
•= Description: single-line description of the molecule.
The information in these fields appears in the General Description folder when the molecule
is loaded into a Display window.
The Protein tab contains a one-line molecule description.
The Sequence and Maps Tab (DNA/RNA)
This tab appears only when the Edit <molecule > dialog box is opened from Database
Explorer (Fig. 20.5).
298
Editing Molecule Content Chapter 20
Fig. 20. 5 Sequence and Maps Tab (DNA/RNA)
Editing Sequence
From the Sequence and Maps tab, click the Edit Sequence button to open the Sequence
Editor to edit the sequence of the molecule (Fig. 20.6).
Fig. 20. 6 Using the Sequence Editor to edit the sequence of the molecule
Edit the sequence using standard text editing techniques, Cut, Copy, and Paste through the
Clipboard.
299
Press the Find button to specify a string to find in the sequence and the search direction (up
or down). Click Find Next to launch the search and Cancel to leave the Find dialog box.
Press the OK button to save any changes you made in the sequence and to return to the
Sequence and Maps tab of the Molecule Editor.
Editing the Feature Map
To add an item to a molecule’s Feature map, press the Add button in the Feature map pane
of the Sequence and Maps tab. (This dialog box can also be accessed by: Select Edit > New
> Add Feature to Fmap or right-click on a feature in the Graphics Pane. Select Feature
Properties from the shortcut menu.) The Molecule Feature dialog box appears (Fig. 20.7):
Fig. 20. 7 Molecule Feature dialog box
To add a feature, select a particular Feature Type in the classification tree on the left. Enter
the specific name of the feature in the Feature Name field. To see a list of specific names for
) next to the Feature Name field, opening
each feature type, press the Browse button (
the Feature Name dialog box, which lists the specific names available for that feature type
(Fig. 20.8):
300
Editing Molecule Content Chapter 20
Fig. 20. 8 Feature Name dialog box, which lists the specific names available for that feature
type
After selecting a feature signal name, press OK.
Back in the Molecule Feature dialog box, select feature positions by using one of two
formats:
1) Simple: In the From and To fields, enter the starting and ending coordinates of the
functional signal you are adding.
Check Complementary if the signal is located on the complementary strand.
Note: Vector NTI uses the currently accepted convention for the coordinates of
complementary features. All coordinates are given as if on the direct strand, from the
leftmost to the rightmost nucleotide of a signal, as shown in Fig. 20.9:
Vector NT coordinates of signal
Start of
Molecule
5’
3’
From
To
3’ Direct Strand
5’ Complementary Strand
Fig. 20. 9 Defining feature position coordinates
2) GenBank/EMBL format: Set a complex location string that describes the positions of
the exons and location of the features. The full description of location string format can
be found in the GenBank or EMBL sources. For your convenience, you can always see
the original location string of the feature.
301
In the Description text box, enter notes about the feature you are adding.
Press OK to add your feature and return to the Sequence and Maps tab.
To edit a feature: Double-click or highlight the feature in the Feature map pane and press
Edit. The Molecule Feature dialog box (Fig. 20.7) opens loaded with the feature you
selected. Make any changes you want, and press OK to apply your changes or press Cancel.
To remove a feature from a molecule’s Feature map: Highlight the feature in the Feature
map pane and press Delete.
Editing the Restriction Map
To add a restriction site to the molecule’s restriction map: Press the Add button in the
Restriction Map group of the Sequence and Maps tab (Fig. 20.5), opening the Restriction
Sites dialog box (Fig. 20.10): (You can also access this dialog box by selecting Edit > New
> Add REN Site to Rmap.)
Fig. 20. 10 Restriction Sites dialog box
In the Enzyme Name field, enter the name of the restriction endonuclease or press the
Browse button (
) to see a list of RENs in the Vector NTI database.
In the Site Positions field, enter the nucleotide position numbers where the sites of the
enzyme you have chosen are found, separated by spaces.
To edit a restriction site: Double-click it or highlight the item you want to edit and press
Edit. The Restriction Sites dialog box appears, loaded with the site you selected. Make any
changes you want. and press OK to register your changes or the Cancel. Vector NTI returns
you to the Molecule Editor.
To remove an item from the restriction map: Highlight the item and press the Delete button
in the Restriction Map group. Sometimes Vector NTI does not allow removal of a restriction
site if it is not entered manually.
302
Editing Molecule Content Chapter 20
Sequence and Features Tab (Protein)
Fig. 20. 11 Sequence and Features tab (Protein)
This tab’s functionality is the same as that of the Sequence and Maps tab of the DNA/RNA
Molecule Editor, however, only sequence and Feature map editing are supported.
The User Fields Tab
Fig. 20. 12 User Fields tab
303
The User Fields tab (Fig. 20.12), used for adding custom data for a molecule in the form of
fields, has the same format for all database molecules. It contains a list of all User Fields
currently applied to the object being edited as well as the list of blank fields defined in the
local User Field Definition list but are not yet applied to that object.
•=
To fill or edit any field, double-click on the field name or select the field name and
press the Change Value button. If the field you want to edit is not listed in the local
User Field Definition list, Vector NTI asks you to enter the field’s definition first.
When the field definition is added to the local definition list, Vector NTI displays the
appropriate field value dialog box.
•=
To clear any User Field for the object, select the name of the field and press the
Remove Value button.
•=
Refer to Chapter 18 for more user field details.
The Comments Tab
The Comments tab (Fig. 20.13) has the same format for all database objects. Enter text
comments of unlimited length about the molecule.
Fig. 20. 13 Comments tab
The Keywords Tab
The Keywords tab (Fig. 20.14) has the same format for all database objects. This tab lets
you enter keywords useful for database search.
To add a keyword for the molecule, type a new word or select an item in the list of existing
keywords. Press the Add button to move the keyword into the keyword list.
304
Editing Molecule Content Chapter 20
To remove an item from the keyword list, select item(s) press the Remove button.
Fig. 20. 14 Keywords tab
305
306
Oligos, Primers, Search and Analyses Chapter 21
Chapter 21 Oligo, Primers and Other Search and Analyses
Introduction
This chapter describes Vector NTI’s oligonucleotide analysis functions: the design,
execution and analysis results for PCR primers, sequencing primers, and hybridization
probes. The chapter also covers “silent mutation” analysis, ORFs and motif searches,
calculation of restriction fragments, back translating and broadcasting selections.
A major focus of molecule search and analysis in Vector NTI revolves around working with
primers, oligos and probes. Because of the numbers of various dialog boxes that open as you
proceed through the design and analysis of these short sequences, you may want to review
the following table of primer, oligo and probe dialog boxes that summarizes the features and
purposes of each.
Dialog Box
Purpose
Find PCR Primers
Specify limits for PCR primer search such as length of
target sequence, output options, attach restriction sites,
etc.
Amplify Selection
Similar to Find PCR Primers except that primer
hybridization domains upstream and downstream from
the target sequence can be specified. Primers will be
generated anywhere within the designated upstream
and downstream domains.
Amplify Features
Similar to Find PCR Primers except that multiple
features of a specific type can be selected for
amplification. Use this dialog box when you need to
amplify multiple features from a single molecule.
Sequencing
primers
Set parameters for sequencing and primer regions and
primer; analyze primers.
Similarity of
<technique>
primers
Determine relationship of complementarity between
primers and target sequence. Therefore, the number of
nucleotides on 3’ end required to have 100%
complementarity with target.
Primer/Oligo
Parameters
Set acceptable limits for primer/probe interaction with
target sequence. Also relates to formation of secondary
structures between the oligos themselves.
307
Dialog Box
Purpose
Primer/Oligo
Quality Specifics
Assigns “importance factors” to different primer
parameters. Importance factors are integers between 1
to 10, all relating to parameters specified in other dialog
boxes, such as %GC, Tm, and so forth. These
parameters determine how much weight should be
given to each of the named specifications. For minimal
importance, enter 1; maximal, enter 10.
Hybridization
Probes
Set parameters for target region, output options; analyze
probes.
Oligo List
Lists all oligos in the oligo database. From this dialog
box, add new, edit, or analyze oligos.
Edit/New Oligo
Enter new or edit oligo data, including name, sequence,
user fields, comments, keywords.
Oligo Analysis
Set limits for annealing conditions with target sequence;
analyze oligo for meeting specified criteria.
Dimers and
Hairpin Loops
Examine oligo’s dimer and hairpin loop structures.
Oligo Duplexes
Generate all possible duplexes of selected oligos.
Table 21. 1 Primer, oligo and probe dialog boxes
PCR Primers
Vector NTI locates primers for performing PCR analysis on a DNA molecule fragment
selected in the Graphics Pane of a Molecule Display window. (Vector NTI can also evaluate
user-defined primers.) After selecting the target sequence for primer design, the maximum
and minimum product length and primer parameters are determined. Vector NTI evaluates,
rates and sorts several primer options. You can further fine-tune the primers and annealing
parameters if you wish, generate and display a PCR product in a Molecule Display window,
save the primers (or product) in the database, or use the product in recombinant cloning
strategies.
Vector NTI provides three different modes of PCR amplification: Find PCR Primers,
Amplify Selection and Amplify Features. The Find PCR Primers mode allows you to find
primers for a DNA selection within the selected region. The Amplify Selection mode allows
you to define allowed regions upstream and downstream of the selected area for primer
design. The Amplify Features mode allows you to amplify one or more selected features in
a molecule.
This section covers preparation for PCR analysis; the Find PCR Primers, Amplify Selection
and Amplify Feature dialog boxes; the results of PCR analysis presented in PCR Analysis
folders; and operations with PCR primers and PCR products.
308
Oligos, Primers, Search and Analyses Chapter 21
Open a Display window for the DNA molecule selected for PCR analysis. Select the target
region of the molecule and choose either Analyze > Find PCR Primers, Analyze >
Amplify Selection or Analyze > Amplify Feature, depending on the type of PCR analysis
you want to perform. (These commands are disabled if no target is defined.) This opens the
corresponding PCR Analysis dialog box (Fig. 21.1, 21.10 and 21.11).
Find PCR Primers Dialog Box
The Find Primers dialog box (Fig. 21.1) allows you to search for convenient sense and
antisense primers according to your specifications and to check primers’ uniqueness.
Pressing the More>> button on the Primer tab enables complete view of the Find Primers
dialog box.
Notice the Load and Save buttons on the lower left of each tab in the Find Primers dialog
box. These buttons allow you to save your PCR settings to a file and load the settings file in
for subsequent analyses. This precludes having to reset the various parameters manually for
frequently used PCR condition settings. You need only save/load the settings in one of the
tabs and the parameters for all the tabs in the Find Primers dialog box will be saved/loaded.
Fig. 21. 1 Find Primers dialog box allows you to search for convenient sense and antisense
primers
309
Primer Tab
The options in the Primer tab allow you to set parameters for PCR primer search and define
primers and/or primer attachments, if desired:
Primer Tab Parameters – Find Primers Dialog Box
310
Region of
Analysis
Enter the start and end coordinates of molecule’s target
region.
Product Length
Enter the maximum and minimum lengths of the molecule
target region. Note: Unless you specify differently here, the
minimum amplicon length may be less than the target
sequence you selected.
Maximum
Number of
Output Options
Enter the number of sense-antisense primer pairs to be
found. The actual result may contain fewer than this
number if there are not enough possible primers.
Salt
Concentration
Enter the PCR reaction salt concentration in mMol, if
known.
Probe
Concentration
Enter the value of probe concentration in pMol, if known.
dG Temperature
Enter the temperature in degrees Celsius to be used for
calculating free energy values.
Tm
Enter limits in degrees Celsius for primer melting
temperature (Tm) (temperature at which 50% of primer is a
duplex) and the difference between Tm for sense and
antisense primers.
%GC
Enter the limits of G/C percentage in the primer and the
difference between GC percentages for sense and
antisense primers.
Length
Enter primer length limits. Note: Nucleotide sequences
such as RENs attached to a primer’s 5’ end are included
when calculating primer length.
DNA/RNA radio
button
Select the type of target nucleotide sequence.
More>> and
Less<< buttons
Extend or contract the lower portion of the Primers tab,
which contains the user-defined primer and primer
attachment fields.
User-Defined
Primers
Enter user-defined primer sequences or a primer from the
oligo database. The search engine checks the
compatibility of the primers according to primer
parameters.
Oligos, Primers, Search and Analyses Chapter 21
Primer Tab Parameters – Find Primers Dialog Box
Enter a short (=/<18 bp) nucleotide sequence (if any) to be
attached to the 5’ end of either primer, or choose from
recognition sites of database RENs. (To select RENs to
Attach to 5’
Terminus of
(Anti)Sense
Primer
add, click the Browse button (
).) This sequence, while
considered in primer parameters, does not affect the
calculation of complementarity between primer and
molecule. A sequence can be attached to the primer
whether or not the primers are user-defined or designed
by Vector NTI.
Table 21. 2 Primer tab parameters – Find Primers dialog box
Note: The calculation for Tm is dependent on primer and salt concentrations; varying these
concentrations can greatly affect the Tm for any given primer. Make sure to adjust these
parameters according to your reaction conditions when performing your PCR analysis to
ensure that you obtain accurate Tm values.
Amplicon Tab
Press the Amplicon tab (Fig. 21.2). The options on this tab allow you to customize
parameters relating to the resulting PCR product. %GC content for the product or a portion
of the product and allowed bases adjacent to the primer annealing site can be specified.
Fig. 21. 2 Amplicon tab on Find Primers dialog box
Amplicon Tab Parameters – Find Primers Dialog Box
Amplicon %GC
Enter the minimum and maximum for the desired
%GC content in the PCR product.
Next to Primer
Choose accepted bases for the four successive bases
311
Amplicon Tab Parameters – Find Primers Dialog Box
Annealing Site
adjacent to the primer annealing site. Set minimum
and maximum %GC range for a specified length of the
amplicon adjacent to the primer annealing site.
Table 21. 3 Amplicon tab parameters – Find Primers dialog box
Structure Tab
Press the Structure tab (Fig. 21.3). The options on this tab set acceptable limits for
nucleotide repeats, palindromes and hairpin loops for the primers. You can also check your
primers/product for a selected group of restriction sites from this tab.
Fig. 21. 3 Structure tab on Find Primers dialog box
Structure Tab Parameters – Find Primers Dialog Box
312
Nucleotide Repeats
Enter the maximum permitted length of nucleotide
repeats in primers.
Palindromes
Enter the maximum permitted length of palindromes in
primers.
Oligos, Primers, Search and Analyses Chapter 21
Structure Tab Parameters – Find Primers Dialog Box
Hairpin Loops
Stem Length: Enter the minimum number of base
pairs in a hairpin stem. (This value is also used as a
minimum stacking length for primer-primer
complementarity and primer-primer 3’ end
complementarity.) Permitted with dG: Check the
Permitted box for hairpin loops; enter the minimum
permitted value for free energy of hairpin loops.
Primers with hairpin loops which have free energy
values > /= to this number will be accepted.
Check Hairpin
Loops, Palindromes,
Nucleotide Repeats
and Dimers Only
Within 3’ Region of
...
Check this box and enter the length of a 3’ region if all
of a primer’s features (repeats, palindromes, hairpin
loops, dimers) should be checked only within that 3’
region.(If this box is empty, the whole primer will be
evaluated.)
Check Primers For
Restriction Sites
From
Check to find possible cloning sites inside primers and
attached nucleotide sequences (if any). In the dropdown menu, specify the REN subbase. Enzymes will
be checked for the presence of their sites in the
primers and attached sequences, and within the PCR
product.
Table 21. 4 Structure tab parameters – Find Primers dialog box
Pairs Tab
Press the Pairs tab (Fig. 21.4). Options on this tab specify how closely parameters such as
Tm and %GC, etc. must match between two primers in a generated primer set.
313
Fig. 21. 4 Pairs tab on Find Primers dialog box
Pairs Tab Parameters – Find Primers Dialog Box
Tm Difference
Enter difference in degrees Celsius between Tm for
sense and antisense primers.
%GC
Enter the difference between GC percentages for
sense and antisense primers.
Primer-Primer
Complementarity
Check the Permitted box for primer-primer
complementarity; enter the minimum permitted value
for duplex free energy.
Primer-Primer 3’
End
Complementarity
Check the Permitted box for primer-primer 3’ end
complementarity; enter the minimum permitted value
for duplex free energy.
Table 21. 5 Pairs tab parameters – Find Primers dialog box
Similarity Tab
Press the Similarity tab (Fig. 21.5). The options on this tab determine the similarity
relationship between the primers and the target sequence.
314
Oligos, Primers, Search and Analyses Chapter 21
Fig. 21. 5 Similarity tab on Find Primers dialog box
Similarity Tab Parameters – Find Primers Dialog Box
Best Fit
Check this button to specify the search for site(s) with
maximum similarity with no set threshold.
With Similarities > =
Similarity Threshold
Check this button to indicate similarity site search
above the specified similarity threshold.
Similarity Threshold
Enter the percentage of minimally acceptable
similarity.
Last ... Nucleotides
Must Have 100%
Similarity
Check and specify the number of nucleotides
necessary to have 100% complementarity with the
target sequence at the 3’ end.
Similarity Between
Ambiguous
Nucleotides
The Average, Minimum, and Maximum buttons specify
the acceptable similarity between an ambiguous
nucleotide pair. For instance, if you are calculating
similarity between N and A, the average similarity is
25%, the minimum similarity is 0%, and the maximum
similarity is 100%. In case of R and A they are 50%,
0%, and 100%; in case of R and T - 0%, 0%, and 0%.
See similarity chart on page 274.
Table 21. 6 Similarity tab parameters – Find Primers dialog box
315
3’ End Tab
Press the 3’ end tab (Fig. 21.6). The options on this tab allow you to set specifications for
the 3’ end of the primers generated by VNTI. Parameters such as dG and specific nucleotide
content for the 3’ end of both sense and antisense primers can be set here.
Fig. 21. 6 3’End tab on Find Primers dialog box
3’ End Tab Parameters – Find Primers Dialog Box
dG <=
Specify the maximum permitted value of 3’ end free
energy.
Length for Analysis
Enter the length of the primer’s 3’ region that should
be analyzed.
Sense Primer 3’
Nucleotides
Check the nucleotide boxes to specify permitted last
primer nucleotides for the sense primer.
Antisense Primer 3’
Nucleotides
Check the nucleotide boxes to specify permitted last
primer nucleotides for the antisense primer.
Table 21. 7 3’ End tab parameters – Find Primers dialog box
Uniqueness Tab
Press the Uniqueness tab (Fig. 21.7). The options on this tab determine the uniqueness of
the primers generated with respect to the PCR product. These parameters can be used to
help ensure that generated primers bind to the desired template area with greater specificity
than to the rest of the PCR product.
316
Oligos, Primers, Search and Analyses Chapter 21
Fig. 21. 7 Uniqueness tab on Find Primers dialog box
Uniqueness Tab Parameters – Find Primers Dialog Box
Uniqueness Checks
for
Choose the area of the molecule to check for primer
uniqueness. Either the entire molecule or the Amplicon
only can be selected for the uniqueness check.
Max Allowed
Similarity with
Amplicon
Check this box and enter the similarity threshold to
check primer uniqueness on the molecule. Primers
which have parasitic hybridization with similarity > /=
this threshold will be rejected. Note: this similarity
threshold must be </= the minimum similarity required
for hybridization of user-defined primers (if any).
Max Consecutive
Match for Entire
Primer
Check this box and enter the maximum acceptable
match of consecutive bases for the entire primer and
the Amplicon.
Primer 3’ End
Check the first box and enter the number of
consecutive 3’ bases that must match the amplicon
with 100% similarity. Check the second box and
specify the maximum acceptable % match between
the Amplicon and the designated number of bases on
the 3’ end of the primer.
Table 21. 8 Uniqueness tab parameters – Find Primers dialog box
317
Qualities Tab
Press the Qualities tab (Fig. 21.8). These parameters govern primer quality by determining
how much weight should be assigned parameters specified on the other tabs of the Find
Primers dialog box. These values affect scoring functions that evaluate the quality rating of
the primer sets generated.
Fig. 21. 8 Qualities tab on Find Primers dialog box
The importance factors are integers between 1 to10 used in calculating the score evaluating
primer/oligo quality. The lower the factor, the less weight given in the calculation. For
example, for minimal importance, enter 1 in the appropriate box. For maximum importance,
enter 10.
Filters Tab
Press the Filters tab (Fig. 21.9). On this tab, you can select features that should either be
excluded or included as regions to be considered for primer design. For example, if your
sequence contains Repeat features, you may want to exclude them to obtain primers with
greater specificity. Features can be added or removed by pressing the + and – buttons.
318
Oligos, Primers, Search and Analyses Chapter 21
Fig. 21. 9 Filters tab on Find Primers dialog box
Filters Tab Parameters – Find Primers Dialog Box
Apply Feature
Reject Filter
Check the Apply Feature Reject Filter box and press
the + and – buttons to add or remove features from the
list. This tells VNTI to avoid making primers to the
region of the specified feature(s). A maximum allowed
overlap of the primer with the feature’s 5’ and 3’ ends
can be specified.
Apply Feature
Include Filter
Check the Apply Feature Reject Include box and press
the + and – buttons to add or remove features from the
list. This tells VNTI to include these features in the
amplicon when making primers. The maximum
acceptable distance from the primer ends to the
feature ends can be specified.
Table 21. 9 Filters tab parameters – Find Primers dialog box
Amplify Selection Dialog Box
The Amplify Selection feature is similar to Find PCR Primers except that primer
hybridization domains upstream and downstream from the target sequence can be specified.
Primers will be generated anywhere within the designated upstream and downstream
domains. Like the Find PCR Primers dialog box, pressing the More>> button enables
complete view. Only the tabs and parameters that differ from the Find PCR Primers dialog
box will be discussed here.
319
Primer Tab
The options in the Primer tab (Fig. 21.10) allow you to set parameters for PCR primer
search and define primers and/or primer attachments, if desired:
Fig. 21. 10 Primer tab on Amplify Selection dialog box
Primers Tab Parameters – Amplify Selection Dialog Box
Before
Provides additional upstream region where the Primer
may be made.
Amplicon Must
Include Region of
Molecule
Set the 5’ and 3’ positions for region of the molecule
that must be included in the final amplified product.
After
Provides additional downstream region where the
Primer may be made.
Table 21. 10 Primers tab parameters – Amplify Selection dialog box
Amplify Features Dialog Box
Amplify Features is similar to Find PCR Primers except that VNTI will find the best
primers for amplifying the designated feature(s) within the region of analysis indicated. Like
the Find PCR Primers and Amplify Selection dialog boxes, pressing the More>> button
enables complete view. Only the tabs and parameters that differ from the Find PCR Primers
dialog box will be discussed here.
320
Oligos, Primers, Search and Analyses Chapter 21
Primer Tab
The options in the Primer tab (Fig. 21.11) allow you to set parameters for PCR primer
search and define attachments, if desired. User-defined primers are not allowed:
Fig. 21. 11 Primer tab on Amplify Features dialog box
Primer Tab Parameters – Amplify Features Dialog Box
Region of Analysis
Specify the 5’ and 3’ boundaries of the region for
primer analysis. Features to be amplified must be
within the chosen region. The number of features in
the selection is indicated.
Every Amplicon
Length
Specify the range for acceptable minimum and
maximum product length. VNTI determines primers
that will produce products within the set length range.
User-Defined
Primers
This feature is NOT present.
Table 21. 11 Primer tab parameters – Amplify Features dialog box
321
Features Tab
The Features tab (Fig. 21.12) allows you to specify the features you want amplified, how
many of the chosen features you want in one amplicon and whether primer-feature overlap
is permitted:
Fig. 21. 12 Features tab on Amplify Features dialog box
Features Tab Parameters – Amplify Features Dialog Box
Add Features to
Amplify
Press the <Add… button to display the feature list.
From the list, choose the features you would like to
amplify.
Features per
Amplicon
Designate the minimum and maximum number of
features you want to occur in the amplicons.
Feature-Primer
Overlap
To allow feature-primer overlap for the selected
features, check the appropriate box/boxes and specify
the minimum and maximum permitted base overlap.
Table 21. 12 Features tab parameters – Amplify Features dialog box
Filter Tab
The Filter tab (Fig. 21.13) allows you to specify the features you do not want amplified as
part of the product:
322
Oligos, Primers, Search and Analyses Chapter 21
Fig. 21. 13Filter tab on Amplify Features dialog box
Filter Tab Parameters – Amplify Features Dialog Box
Apply Feature
Reject Type Filter
To Primer Design
Check this box to enable the features reject filter. Add
or remove features with the <Add…, >Remove… and
>Remove All buttons
5’ End Overlap
Check the box and specify the maximum permitted
overlap of the primer and the rejected feature(s) for the
5’ end.
3’ End Overlap
Check the box and specify the maximum permitted
overlap of the primer and the rejected feature(s) for the
3’ end.
Table 21. 13 Filter tab parameters – Amplify Features dialog box
The PCR Analysis Folder
After all of the parameters are defined in the Find PCR Primers, Amplify Selection or
Amplify Features box, click OK to analyze/design the primers.
During PCR primer analysis, Vector NTI generates a number of primer options that satisfy
the conditions defined in the PCR Analysis dialog. These options are inserted into your
Molecule Display window’s Text Pane as subfolders of the PCR Analysis folder (Fig.
21.14):
323
Fig. 21. 14 PCR Analysis folder
In the PCR Analysis Folder, the primer results are sorted in descending order according to
their rating values calculated based on the importance factors assigned in the Qualities tab.
The subfolder titles are numbered and show the length and rating of the PCR products they
contain. The typical maximum rating is 171, although higher ratings are occasionally seen.
Each subfolder contains:
•=
The coordinates of molecule’s region included in the PCR product.
•=
Melting temperature for the product
•=
Optimum annealing temperature for the PCR reaction
•= GC percentage of the product.
The next two folder sections describe the sense and antisense primers, each identified at the
left with the primer icon (
324
).
•=
The complementarity between the primer and its target sequence
•=
The actual primer sequence in the 5’ 3’ direction (with attached sequence, if any)
•=
The primer length in nucleotides
•=
The primer melting temperature
•=
The primer’s GC percentage
Oligos, Primers, Search and Analyses Chapter 21
•=
Primer values for enthalpy, entropy, and free energy.
If the Cloning Sites box was checked in the PCR Analysis dialog box (Fig. 21.1), the
primer section also contains a line showing cloning sites found in the product and its
primers and attached sequences. A number in parentheses after the cloning site name
indicates the number of times that site occurs in the PCR product.
The last line in each product folder shows the difference in the melting temperatures and GC
percentages of the sense and antisense primers.
Operations with PCR products
Place the cursor on a PCR product folder line in the Text Pane and open the shortcut menu
with its options:
•=
Save as Molecule in Database saves the product as an independent molecule in the
database. This option first opens the New DNA/RNA Molecule tabbed dialog box
(described in Chapter 20 ). Enter a name in the text box on the General tab. You can’t
tab to the other pages without a name. The Description field on the DNA/RNA
Molecule tab automatically defines the origin of the fragment. After entering data, press
the OK button to save the product to the database.
•=
Save to Database and Create Display Window option saves the fragment in the
database and immediately opens it in a display window. The option first opens the New
Database Molecule dialog box, described immediately above. After entering
information, press OK. The molecule is saved to the database and is immediately
loaded into a Molecule Display window for your review.
•= Find PCR Product option selects in the Graphics Pane and Sequence Panes the exact
region of the molecule included in the PCR product. You can perform the same
operation by pressing the Find button (
Edit > Find PCR product.
) with the product folder selected or select
Operations with PCR Primers
Wherever you see the oligo symbol to the left of a primer sequence, (
), you can
perform various oligo functions. Place the mouse cursor on the oligo line and open a
shortcut menu with these options:
•=
Analyze opens the Oligo Analysis dialog box (Fig. 21.12) for performing oligo
analysis.
•=
Add to Oligo List adds the primer to the Oligo List (Fig. 21.10). This may be useful if
you want to investigate possible duplexes between sense and antisense primers, for
example.
•=
Save To Database stores it in the database for future use.
325
Sequencing Primers
To find primers for sequencing a DNA molecule fragment when the molecule is opened in a
DNA Molecule Display window, select the target sequence of the molecule—the region to
be sequenced. If the sequencing region is long enough, it is divided by Vector NTI into
sequencing domains, areas in which a single sequencing reaction will take place. The size of
the primer hybridizing domain may then be set (the region in which primers are sought) as
well as other desired primer parameters. Several primer options are evaluated and sorted
from best to worst.
To prepare for sequencing primer design, open a sequence or Molecule Display window for
the molecule and select the region for analysis, using ordinary selection techniques
(described in Chapter 3).
Select Analyze > Sequencing Primers. This command is disabled if no selection zone is
defined. This opens the Sequencing Primers dialog box (Fig. 21.15).
Sequencing Primers Dialog Box
Fig. 21. 15 Sequencing Primers dialog box
The options in this dialog box allow you to set parameters for sequencing primer search:
Sequencing Primers Dialog Box Parameters
326
DNA/RNA
Select the type of nucleotide sequence.
Sequencing
Region
Enter the start and end coordinates of the sequencing
region.
Sequencing
Domain
Enter the number of bases for a single sequencing reaction.
Oligos, Primers, Search and Analyses Chapter 21
Sequencing Primers Dialog Box Parameters
Primer
Hybridizing
Domain
Enter the length of region where primers for each
sequencing domain should be sought.
Maximum
Number of
Primer Options
for Each
Domain
Enter the number of primers to be found for each
sequencing domain. (The actual result may contain fewer
primers than this number if there are not enough possible
primers.)
User-Defined
First Primer
Enter a user-defined nucleotide sequence to be evaluated
as a primer for the FIRST sequencing domain instead of
leaving primer search to Vector NTI.
Press the Analyze button to analyze a specified primer in
the Oligo Analysis dialog box (Fig. 21.12).
Press the Primer Similarity button to specify similarity
requirements in the Similarity of sequencing Primers dialog
box (Fig. 21.2) . (See table 21.3)
Press the Primer Parameters button to set parameters for
sequencing primers in the Primer/Oligo Parameters dialog
box (Fig. 21.3). (See Table 21.4 for description.)
Press the Primer Quality Specifics button to open the
Primer/Oligo Quality Specifics dialog box (Fig. 21.4 ) for
assigning “importance factors” to sequencing primers.
Analyze
Primer
Similarity
Primer
Parameters
Primer Quality
Specifics
Table 21. 14 Sequencing Primers dialog box parameters
After all parameters are defined, click OK to search for the primers. During primer analysis,
Vector NTI generates a number of primer options that satisfy the conditions you have
defined. The primer options appear in the Text Pane as subfolders (Fig. 21.14).
Primer Similarity Dialog Box
Press the Primer Similarity button in the [Sequencing Primer] [Hybridization Probe]
Analysis box to open this dialog box to specify similarity requirements for the
primer(s)/probe (Fig. 21.16).
327
Fig. 21. 16 Primer Similarity dialog box
Primer Similarity Dialog Box Parameters
Best Fit
Check this button to specify the search for site(s) with
maximum similarity with no set threshold.
> = Similarity
Threshold
Check this button to indicate similarity site search
above the specified similarity threshold.
Similarity Threshold
Enter the percentage of minimally acceptable
similarity.
Last ... Nucleotides
Must Have 100%
Similarity
Check and specify the number of nucleotides
necessary to have 100% complementarity with the
target sequence at the 3’ end.
Similarity Between
Ambiguous
Nucleotides
The Average, Minimum, and Maximum buttons specify
the acceptable similarity between an ambiguous
nucleotide pair. For instance, if you are calculating
similarity between N and A, the average similarity is
25%, the minimum similarity is 0%, and the maximum
similarity is 100%. In case of R and A they are 50%,
0%, and 100%; in case of R and T - 0%, 0%, and 0%.
See similarity chart on page 274.
Table 21. 15 Primer Similarity dialog box parameters
Primer/Oligo Parameters Dialog Box
Press the Primer Parameters button in the [Sequencing Primer] [Hybridization Probe]
Analysis box to open this dialog box to specify acceptable limits for the interaction of the
primer(s) or hybridization probes (oligo) with the selected target sequence (Fig. 21.17).
328
Oligos, Primers, Search and Analyses Chapter 21
Fig. 21. 17 Primer/Oligo Parameters dialog box
Primer/Oligo Parameters
dG Temperature
Enter the temperature in degrees Celsius to be used for
calculating free energy values.
Probe
Concentration
Enter the value of probe concentration in pMol, if known.
Salt
Concentration
Enter the value of salt concentration in mMol, if known.
% Formamide
When hybridizing in formamide, enter the formamide
concentration in %.
Length
Enter primer length limits. Note: Nucleotide sequences
such as RENs attached to a primer’s 5’ end are included
when calculating primer length.
%GC
Enter the limits of G/C percentage in the primer and the
difference between GC percentages for sense and
antisense primers.
Tm
Enter limits in degrees Celsius for primer melting
temperature (Tm) (temperature at which 50% of primer is a
duplex) and the difference between Tm for sense and
antisense primers.
329
Primer/Oligo Parameters
3’ End
Specify parameters for the primer’s 3’ end. In the Length
for Analysis field, enter the length of the primer 3’ region
that should be analyzed. In the dG <= field, specify the
maximum permitted value of 3’ end free energy. Check
the nucleotide boxes to specify permitted last primer
nucleotides.
Hairpin Loop
Stem Length > =
Enter the minimum number of base pairs in a hairpin
stem. (This value is also used as a minimum stacking
length for primer-primer complementarity and primerprimer 3’ end complementarity.)
Palindromes <=
Enter the maximum permitted length of palindromes in
primers.
Nucleotide
Repeats <=
Enter the maximum permitted length of nucleotide repeats
in primers.
Hairpin Loops
Check the Permitted box for hairpin loops; enter the
minimum permitted value for free energy of hairpin loops.
Primers with hairpin loops which have free energy values
> /= to this number will be accepted.
Primer-Primer
Complementarity
Check the Permitted box for primer-primer
complementarity; enter the minimum permitted value for
duplex free energy.
Primer-Primer 3’
End
Complementarity
Check the Permitted box for primer-primer 3’ end
complementarity; enter the minimum permitted value for
duplex free energy.
Check All
Features Only
Within 3’ Region
of …
Check this box and enter the length of a 3’ region if all of a
primer’s features (repeats, palindromes, hairpin loops,
dimers) should be checked only within that 3’ region.(If this
box is empty, the whole primer will be evaluated.)
Primers/Oligos
Must Be Unique
With Similarity ...
Check this box and enter the similarity threshold to check
primer uniqueness on the molecule. Primers which have
parasitic hybridization with similarity > /= this threshold will
be rejected. Note: this similarity threshold must be </= the
minimum similarity required for hybridization of userdefined primers (if any).
Table 21. 16 Primer/Oligo parameters
330
Oligos, Primers, Search and Analyses Chapter 21
Primer/Oligo Quality Specifics Dialog Box
Press the [Primer]/[Oligo] Quality Specifics button in the [Sequencing Primer]
[Hybridization Probe] Analysis box to open this dialog box to assign “importance factors”
to different primer/oligo parameters (Fig. 21.18).
Fig. 21. 18 Primer/Oligo Quality Specifics dialog box
The importance factors are integers between 1 to10 used in calculating the score evaluating
primer/oligo quality. The lower the factor, the less weight given in the calculation. For
example, for minimal importance, enter 1 in the appropriate box. For maximum importance,
enter 10.
The Sequencing Primers Folder
Fig. 21. 19 Sequencing Primers folder
331
The Sequencing Primers folder (Fig. 21.19) contains one subfolder with primers for each
sequencing domain in the analyzed region. Subfolder titles are numbered and show the
length and boundaries of the sequencing domains. Each subfolder contains:
•=
The primer sequence, in the 5’ 3’ direction
•=
The primer hybridization site and primer similarity for that site
•=
The primer length in nucleotides
•=
Melting temperature for the primer
•=
GC percentage of the primer
•=
Values for enthalpy, entropy, and free energy
), you can
Wherever you see the oligo symbol to the left of a primer sequence, (
perform various oligo functions. The shortcut menu associated with these primers, launched
by right clicking on the primer sequence, has these options:
•=
Analyze opens the Oligo Analysis dialog box (Fig. 21.12) to perform oligo analysis.
•=
Add to Oligo List adds the primer to the Oligo List (Fig 21.10). This may be useful if
you want to investigate possible duplexes between sense and antisense primers, for
example.
•=
Save To Database stores it in the database for future use.
Hybridization Probes
Hybridization probes analysis is used to design oligonucleotides that will hybridize with a
selected molecule fragment, within specified parameters. Vector NTI can generate a set of
oligos or use user-defined or database-stored oligos to test for hybridization efficiency with
a target molecule.
Open a Molecule Display window for the molecule and select the region for analysis, using
ordinary selection techniques (described in Chapter 3).
Select Analyze > Hybridization Probes. This command is disabled if no selection zone is
defined. This opens the Hybridization Probes dialog box (Fig. 21.20).
332
Oligos, Primers, Search and Analyses Chapter 21
Hybridization Probes Dialog Box
Fig. 21. 20 Hybridization Probes dialog box
Set parameters in this dialog box for successful hybridization of your probes with your
target fragment:
Hybridization Probes Dialog Box Parameters
Search Region
Enter the start and end coordinates of the region
where oligos should be hybridized:
DNA/RNA
Select the type of nucleotide sequence.
Maximum Number of
Output Options
Enter the number of oligos you would like to find. The
actual result may contain fewer oligos than this
number if there are not enough possible oligos.
User-Defined Oligo
(s)
Enter an oligo’s nucleotide sequence or choose an
oligo from the oligo database to check hybridization
qualities of a specific oligo.
Enter oligo subbase name or choose a name from
oligo subbases if you want to check hybridization
qualities of all oligos in this subbase.
Press the Analyze button to analyze a specified oligo.
This button brings up the Oligo Analysis dialog box
(Fig. 21.12).
Press the Oligo Similarity button to open the Probe
Similarity dialog box (Fig. 21.2) to specify similarity
requirements. (See Table 21.3)
Analyze
Oligo Similarity
333
Hybridization Probes Dialog Box Parameters
Oligo Parameters
Oligo Quality
Specifics
The Oligo Parameters button opens the Primer/Oligo
Parameters dialog box (Fig. 21.3). for setting
parameters for probes. (See Table 21.4 for
description.)
Press the Oligo Quality Specifics button to open the
Primer/Oligo Quality Specifics dialog box (Fig. 21.4)
for assigning “importance factors” to probes.
Table 21. 17 Hybridization Probes dialog box parameters
The Hybridization Probes Folder
Hybridization probe analysis generates oligos that will hybridize with the target sequence
and stores them in the Hybridization Probes folder (Fig. 21.21) in the Text Pane.
Fig. 21. 21 The Hybridization Probes folder
If a user-defined oligo was specified, the Hybridization Folder contains only that oligo, if it
could hybridize in the defined conditions. The Hybridization folder contains one subfolder
for each probe for the analyzed region.
Subfolder titles show the name of the oligo contained within.
334
Oligos, Primers, Search and Analyses Chapter 21
For each oligo, the subfolders contain:
•=
The nucleotide sequence of the probe in the 5’-3’ direction
•=
The oligo hybridization site and similarity
•=
The oligo length in nucleotides
•=
The oligo melting temperature
•=
The oligo GC percentage
•=
Oligo values for enthalpy, entropy, and free energy.
), you can perform
Wherever you see the oligo symbol to the left of a probe sequence, (
various oligo functions. Place the mouse cursor on the oligo line and right click to open a
shortcut menu with these options:
•=
Analyze opens the Oligo Analysis dialog box (Fig. 21.12) to perform oligo analysis.
•=
Add to Oligo List adds the primer to the Oligo List (Fig 21.10). This may be useful if
you want to investigate possible duplexes between sense and antisense primers, for
example.
•= Save To Database stores it in the database for future use.
Oligonucleotide Analysis
This section describes Vector NTI’s oligonucleotide functions, including the Oligo List and
the Oligo Editor, Oligo Analysis, and Oligo Duplexes dialog boxes.
The Oligo List
The Oligo List is a data clipboard for listing and analyzing oligonucleotides from a display
window or from the database. Oligonucleotides can be user-defined or determined by
selecting a target sequence and letting VNTI design an oligo for the sequence. From this
central list, you can add new oligos or select existing ones for editing and analysis.
335
Fig. 21. 22 Oligo List dialog box
To open the Oligo List dialog box (Fig. 21.22), in a Molecule Display window, press the
Show Oligo List button (
) on the Main Toolbar or choose List > Oligo List. Buttons in
the box are summarized as follows:
Oligo List Dialog Box Parameters
Add
Opens the Oligo Editor dialog box (Fig.21.23) to enter a new
oligo to the Oligo list.
Load
Loads oligos into the list from the VNTI oligo database.
Save
Press Save to Database button (
database.
Edit
Opens the Oligo Editor dialog box (Fig. 21.23) to edit the
selected oligo.
Remove
Removes the selected oligo from the Oligo List.
Analyze
Initiates oligo analysis on the selected oligo. (See Fig. 21.24)
Duplexes
Investigates the duplexes on one or more oligos. (See Fig.
21.24)
Table 21. 18 Oligo List dialog box parameters
336
) to save it in the
Oligos, Primers, Search and Analyses Chapter 21
Oligo Editor Dialog Box
To open the New/Edit Oligo dialog box, called the Oligo Editor:
•=
Database Explorer: select the Oligo subbase in the drop-down menu, select an oligo
from the list in the Object Pane and double-click on it, select Oligo > Edit or press the
Edit button (
•=
).
Molecule Viewing window: In the Text Pane showing oligos, highlight an oligo and
either right click and select Add to Oligo List from the shortcut menu or click on the
Add to Oligo List button (
) and press Add New in the Oligo List dialog box.
The dialog box that opens is the same for a new oligo or one to be edited (Fig. 21.23).
Fig. 21. 23 Oligo Editor dialog box
The Oligo Editor contains information for one oligo at a time. In the New Oligo dialog box,
you will enter all data including the oligo sequence (except when opened from an oligo in a
Text Pane folder. In that case, the sequence is already entered.) To enter or modify
information about an oligo on the tabs:
General: Enter or edit the name of the oligo. In the Edit Oligo dialog box, there is no text
box for entering the name, but moving the cursor close to the molecule name changes the
pointer to an I-beam, enabling text entry.
Oligo:
•=
Select a radio button for the oligo type.
•=
Check the complementary box to replace the oligo with its complementary sequence.
337
•=
In the Nucleotide Sequence box, enter or edit the standard I.U.B. base code characters
for the molecule sequence. (See Appendix C.)
•=
Enter the oligo’s description.
User Fields: Modify custom data in a form of fields (see Chapter 18 for User Fields
details.)
Comments: Enter text comments about the oligo.
Keywords: To add a keyword for the oligo, type a new word or select an item in the list of
existing keywords. Press the Add button to move the keyword into the oligo’s keyword list.
To remove an item from the keyword list, select it and press the Remove button.
Exit Oligo Editor by clicking OK or Cancel.
Oligo Analysis Dialog Box
Oligonucleotides for analysis can be selected by selecting a target sequence and letting
VNTI design an oligo for the sequence or entering a user-defined oligo.
•=
Select a target sequence in an open Molecule Display window, and select Analyze >
Oligo Analysis; the oligo selected by Vector NTI is displayed in the text box of the
Oligo Analysis dialog box (Fig. 21.24) that opens.
or
•= Open the Oligo Analysis dialog box first with Analyze > Oligo Analysis, and then
enter a user-defined oligo sequence in the Oligonucleotide text box.
•= You can also select an oligo listed in a Text Pane folder and select Analyze from the
shortcut menu.
338
Oligos, Primers, Search and Analyses Chapter 21
Fig. 21. 24 Oligo Analysis dialog box
Select radio buttons for molecule type, and check Complementary to replace the oligo with
its complement.
The Parameters column lets you accept default settings or specify acceptable limits for the
interaction of the oligo with its selected target sequence. Settings are summarized as
follows:
Oligo Analysis Parameters
dG
Temperature
Enter the temperature in degrees Celsius to be used for
calculating free energy values.
Probe
Concentration
Enter the value of probe concentration in pMol.
Salt
Concentration
Enter the value of salt concentration in mMol.
%Formamide
When hybridizing in formamide, enter the formamide
concentration in %.
3’ End Length
(bp)
Specify the length of the oligo 3’ region which should be
analyzed.
Palindromes
Enter the minimum length of palindromes to search for.
Nucleotide
Repeats
Enter the minimum length of nucleotide repeats to search for.
339
Oligo Analysis Parameters
Stem Length
Enter the minimum number of base pairs in a hairpin or dimer
stem.
Table 21. 19 Oligo Analysis parameters
Note: The calculation for Tm is dependent on primer and salt concentrations; varying these
concentrations can greatly affect the Tm for any given primer. Make sure to adjust these
parameters according to your reaction conditions when performing your oligo analysis to
ensure that you obtain accurate Tm values.
After these parameters are set, press Analyze. Results are summarized in the same dialog
box as follows:
Oligo Analysis Results
Mol. Wt
Molecular weight of the oligo.
%GC
Therm. Tm
The percentage of G and C in the oligo.
The melting temperature (temperature at which 50% of the
oligo is a duplex) calculated by the Nearest-Neighbors
method. This is useful for short oligos, < ~35 bp.
% GC Tm
The %GC Tm field shows the melting temperature calculated
by the %GC method. This is useful for long oligos, > ~35-40
bp.
dG
The free energy values of the entire oligonucleotide.
3’ End dG
The free energy of the 3’ end of the oligo.
dH
The enthalpy of the entire oligo.
dS
The entropy of the entire oligo.
Palindromes
Examine the palindromes in the oligo.
Nucleotide
Repeats
Examine the nucleotide in the oligo.
Table 21. 20 Oligo Analysis results
Press the Dimers & Hairpin Loops button to examine the oligo’s dimers and hairpin loops.
Both are undesirable secondary structures that interfere with hybridization or amplification
efficiency.
340
Oligos, Primers, Search and Analyses Chapter 21
Dimers & Hairpin Loops Dialog Box
Fig. 21. 25 Dimers & Hairpin Loops dialog box
Note: In the graphical depiction of dimers and hairpin loops, vertical lines indicate the
primary interaction, based on the stem length set and plus symbols indicate secondary
interactions. The greater the dG value, the weaker the interaction; secondary interactions are
not considered in the dG calculation.
Dimers
Dimers are formed when one oligo anneals to another oligo. See the Dimer example in the
upper pane of Fig.21.13. Examine the dimers the oligo contains. Press the Next (
button to view the next dimer. Press the Prev button (
)
) to view the previous dimer.
Hairpin Loops
Hairpin loops are formed when an oligo doubles back on itself. See the Hairpin Loop
example in the lower pane of Fig. 21.25. Examine the hairpin loops the oligo contains. Press
) to view the next hairpin loop. Press the Prev button (
the Next button (
the previous hairpin loop.
) to view
Note: To avoid any of the observed results in your final product, modify the oligo or the
parameter settings and re-analyze the oligo.
Oligo Duplexes Dialog Box
This dialog box is opened by pressing the Duplexes button in the Oligo List dialog box or
by selecting Analyze > Oligo Duplexes. The Oligo Duplexes dialog box (Fig. 21.26) allows
you to generate all possible duplexes of selected oligonucleotides.
341
Fig. 21. 26 Oligo Duplexes dialog box
The upper pane shows oligonucleotides that are currently in the workspace. Select one oligo
to analyze self-duplexes. Select any two oligos to analyze their cross-duplexes. Options in
the dialog box are summarized as follows:
•=
Analyze analyzes duplexes of the selected oligos when one or two oligos are selected,
press to generate and. If less than one or more than two oligos are selected, the Analyze
button is disabled.
•=
Save Results: Save results to the database.
•=
Add New opens the Oligo Editor to enter a new oligo for the Oligo Duplexes
workspace.
•=
Remove: removes selected oligos from the workspace.
•=
Database: adds oligos to the workspace from the oligo database.
•=
Oligo List: adds oligos to the workspace from the Oligo List.
•=
dG Temperature: enter the temperature in degrees Celsius to be used for calculating
free energy values.
•=
Stem Length: enter the minimum acceptable number of base pairs in a hairpin or dimer
stem.
The display pane at the bottom shows the dimers found in oligos selected in the top display
window. The stem length and dimer dG are shown. Use the scroll bar to move left or right
342
Oligos, Primers, Search and Analyses Chapter 21
along the dimer. Press the Next button (
button (
) to view the next dimer. Press the Previous
) to view the previous dimer.
Note: In the graphical depiction of duplexes, vertical lines indicate the primary interaction,
based on the stem length set and plus symbols indicate secondary interactions. The greater
the dG value, the weaker the interaction; secondary interactions are not considered in the dG
calculation.
Mutagenesis
In a DNA/RNA Molecule Display window, you can search for “silent mutations” which, in
any selected region, do not affect amino acid translation of the selected DNA but result in
presence or disappearance of one or more restriction sites. You can search separately for
direct or complimentary sequence strand mutations.
To search for the silent mutations make sure that Display Setup contains Restriction Map
options for an at least one restriction enzyme. Select a region of a molecule in the display
window and choose Analysis > Mutagenesis/Direct (Complementary) Strand.
In the Choose Restriction Enzymes dialog box that opens, select one or more restriction
enzyme sites to be analyzed. Select at least one enzyme.
Note: You can only analyze restriction sites for the enzymes listed in the dialog box. To
modify the enzyme selection, select Analyze > Restriction Sites to open the Restriction
Map Setup dialog box where you can modify the list of RENs in use. For a discussion of
Restriction Map Display Setup, see Chapter 19.
Click OK to initiate the mutagenesis search. Vector NTI analyzes the selected region of the
molecule and attempts to generate suitable silent mutations. The reading frame for amino
acids is defined by the start of the selected region so that the first three nucleotides of the
selected region form the first codon.
Note: The program is able to find both “single” (just one nucleotide altered) and “multiple”
(several neighbor nucleotides altered) mutations for any elementary event (appearing and/or
disappearing of at least one site) significantly widening the set of possible solutions
compared to just “single”-mutation analysis.
The analysis results are listed in the Mutagenesis folder (Fig. 21.27) of the Text Pane of the
display window.
343
Fig. 21. 27 Mutagenesis folder
The folder contains a list of mutation options that result in the appearing and/or
disappearing of at least one restriction site. The options are sorted by the position of the first
altered nucleotide. If you selected the complementary strand option, mutation coordinates
on both complementary and direct strands are listed.
To identify a mutation region on the molecule for each mutation option, set the cursor on a
numbered line under the Region line. Press the Find button (
), the CTRL + F keys,
select Edit > Find Mutation, or the corresponding command on the shortcut menu. This
locates the nucleotides to be altered according to the mutation option.
344
Oligos, Primers, Search and Analyses Chapter 21
Calculating Restriction Fragments
From an open DNA/RNA Molecule Display window, you can calculate restriction
fragments that are the result of cutting the molecule with any subbase of enzymes
constituting the restriction map.
With a Molecule Display window open, select Analyze > Restriction Fragments. In the
dialog box that opens, all enzymes are selected by default. Press Unselect and select at least
one restriction enzyme in the list for “digesting” your molecule.
Note: To modify the enzyme you can use for calculating restriction fragments, select
Analyze > Restriction Sites to open the Restriction Map Setup dialog box. Here you can
change the list of RENs in use. For a discussion of Restriction Map Display Setup, see
Chapter 19.
Vector NTI calculates the appropriate restriction fragments and lists the results in the
Restriction Fragments folder of the Text Pane.
To easily identify a restriction fragment on the molecule map in the Graphics Pane, set the
cursor on the appropriate line in the Restriction Fragments folder. Press the Find button
(
), or select Edit > Find Fragment or the corresponding command on the shortcut
menu.
ORFs and Motifs Search
You can use Vector NTI tools to search for ORFs and user-defined motifs on DNA
molecules. Both searches are launched from setup dialog boxes where you define
parameters for the search. To initiate either search, in a Molecule Display window select
Analyze > Orfs or Analyze > Motifs or press the Display Setup button (
) and select
Display Setup from the dropdown menu. In the Display Setup dialog box, press the Motifs
Setup or ORFs Setup button, opening the corresponding dialog box. The parameters in
these boxes are discussed in depth in Chapter 19.
After setting parameters, click OK to launch either search.
ORFs Search Results
ORFs search results are displayed in a Text Pane folder, listing the ORF regions meeting the
criteria specified in the search. ORFs are displayed as black arrows in the Graphics Pane.
Phase indicators in the left margin of the Sequence Pane show the phases of the ORFs. For
the direct strand, the phase is determined by the position of the first select nucleotide
relative to the beginning of the molecule. For the complementary strand, the phase is
determined by the position of the last selected nucleotide relative to the end of the molecule.
An example of ORFs search results is shown is Fig. 21.28. To eliminate the ORF arrow
display, return to the Display Setup dialog box and uncheck ORFs Setup.
345
Fig. 21. 28 ORFs search results
Motifs Search Results
Motifs found in a motifs search are displayed in a Motifs folder in the Text Pane and
concurrently on the molecule map in the Graphics Pane (not shown). The shortcut menu that
opens from a selected motif lists three commands specific to motifs:
•=
Motif Site Properties displays the site and the percent similarity of the query motif
with that found on the molecule at that site
•=
Add Motif Site to F(eature)Map opens the Molecule Feature dialog box (Fig. 20.7)
where you can name and categorize the motif before adding it to the molecule.
•=
Find Motif site (in the Graphics Pane) positions the caret at the motif site on the
molecule map.
Back Translation
The Back Translation feature of the Vector NTI Suite allows you to obtain a DNA sequence
from a protein sequence by reversing the translation process. The codon usage can be set by
selecting any of the options from the drop down menu in the Back Translation dialog box.
The ambiguity is defined in a codon usage table. There are a variety of pre-set codon usage
settings available.
Access to the Back Translation dialog box is through the Analyze menu option of most
Vector NTI Suite applications where proteins can be displayed or selected. You can also
open Back Translation through the Vector NTI Suite program files. From the Back
Translation dialog box, select File > Open to open previously saved protein documents into
the Back Translation dialog box (Fig. 21.29).
346
Oligos, Primers, Search and Analyses Chapter 21
Fig. 21. 29 Back Translation dialog box
To vary the level of codon ambiguity, slide the slider from "Most ambiguous" to “Most
Probable” or any setting in between. The resulting sequence can be copied by pressing the
Copy All or Copy Selection buttons at the bottom of the screen. The resulting sequence can
be pasted in a new molecule in Vector NTI.
Broadcast Selection
The Broadcast Selection feature of the Vector NTI Suite allows you to select a region in the
sequence pane of an opened molecule in one Vector Suite application and then transfer that
selection to the same molecule that is currently open in other Vector NTI Suite applications.
The Broadcast Selection feature can be accessed from the shortcut menu visualized by right
clicking on a selection in the sequence pane of any of the Vector NTI Suite applications
(Fig. 21.30):
347
Fig. 21. 30 Broadcast Selection feature
Choose the Broadcast Selection entry from the shortcut menu to mark that sequence area in
the same molecule currently open in any other Vector NTI Suite application.
348
Molecule Construction Chapter 22
Chapter 22 Molecule Construction
Introduction
This chapter describes the essentials of creating new molecules with Vector NTI. Features
of two important dialog boxes used for molecule creation—the Construct/Design Molecule
dialog box, and the Molecule Editor—are discussed
This chapter covers the following points:
•=
descriptions of molecule types: basic and constructed
•=
differentiating in Vector NTI between molecule Construction and Design
•=
preparing fragments for Construction using Fragment Wizard
•=
using the Construct/Design Molecule dialog box as a tool for molecule creation
•=
modifying component fragments termini with biochemical operations
•=
using Molecule Editor to prepare molecule fragments
•=
importing molecules
Molecule Types: Basic And Constructed
Molecules in Vector NTI can be of two fundamental types: basic and constructed.
Basic molecules are not built from component fragments. Their sequences, Feature map,
and restriction maps of unsequenced regions (DNA molecules only) are entered by the user
or imported from other databases.
Constructed molecules are built from one or more fragments. For DNA molecules, these
can be fragments of existing DNA molecules, linkers, adaptors, etc. The Feature map and
nucleotide sequences of parent molecules are automatically transferred to a constructed
DNA molecule. You can add features to the Feature map in addition to those obtained from
the ancestors. Constructed DNA molecules are created by Construction or Design, Vector
NTI terms for recombinant processes that are differentiated below.
Protein molecules can be constructed by translating a certain region of a DNA molecule. A
constructed protein molecule does not receive any Feature map from its parent DNA
molecule.
Methods of creating new DNA/RNA molecules
In Vector NTI, there are four different ways of creating new DNA/RNA molecules:
349
Basic Molecules:
Importing molecules or sequences (including their feature tables) in the following formats:
GenBank, GenPept, EMBL, SWISS-PROT, FASTA, and ASCII text. You can also import
molecule data from “quasi-GenBank” files (that is, GCG’s “GenBank” output files).
Molecule import is discussed on page 235.
Creating new molecules “from scratch.” You can define a molecule’s nucleotide or amino
acid sequence by hand or paste it from the clipboard and enter the sequence as a new
molecule, describing the feature and restriction maps if you wish. This is described in
Chapter 20.
Constructed Molecules:
Construction of new DNA/RNA molecules from compatible components fragments from
other molecules, linkers, adaptors, etc. In Construction the fragments and restriction sites
are entirely defined the user.
Design of new DNA/RNA molecules from components also in a user-defined fragment list.
In Design, however, instead of personally choosing the restriction sites, methods of terminus
modification, etc., the user turns the Design process over to Vector NTI. The software takes
advantage of the best possible restriction sites and genetic engineering techniques to design
the recombination process.
Tools for Creating New DNA/RNA Molecules
For creating new molecules, Vector NTI must be in Molecule Editing mode, the default
mode when the Molecule Display window opens.
Vector NTI has three important tools for creating new constructed molecules: the Fragment
Wizard, the Construct/Design Molecule dialog box and the Molecule Editor. The process of
creating a molecule generally follows these steps, in an active Graphics Pane:
1.
2.
3.
4.
5.
6.
Define the component fragments for the recombinant molecule using Fragment Wizard.
Add defined fragments to the Goal Molecule Definition List.
Open the Construct/Design Molecule dialog box where you set construction
parameters.
Name, select data and describe the new molecule.
Verify and edit, where needed, the component fragments in the Goal Molecule
Definition List.
Initiate molecule construction.
If construction is successful, your molecule is entered into the database and is opened in a
new Molecule Display window.
The Molecule Editor is the tool for editing existing database molecules and for creating new
basic molecules from scratch. For details, refer to page 295.
350
Molecule Construction Chapter 22
Construction Tips:
•=
Before you begin, open display windows for all of the molecules that are fragment
sources. If you have several display windows open concurrently, the source molecule
for your fragment must be the topmost window.
•=
It is sometimes convenient to work with two Molecule Display windows on display at
the same time. Select Window > Tile Vertical. For each window, resize the Graphics
Pane and molecule maps using the split bars, scroll bars and Zoom buttons to optimize
viewing of the graphics. Click in a display window to activate it; an active window is
designated by a dark blue Title Bar.
Describing Component Fragments in the Fragment Wizard
The Fragment Wizard guides you through several steps required to fully define molecule
fragments suitable for construction or design. While in view, it allows you to continue to
work in the Graphics Pane to select the fragment, while providing visual feedback and
explanation of the actions.
To define a fragment using Fragment Wizard, open a display window for the molecule to be
the source of a fragment.
Activate the Graphics Pane and press the Add Fragment To Goal List button (
), or
select List > Add Fragment to Goal List, opening the Fragment Wizard dialog box (Fig.
22.1):
Fig. 22. 1 Fragment Wizard dialog box
The Fragment Wizard screen changes to display the entry fields and descriptions
corresponding to the current step in the fragment definition process.
At any point in the process, you can choose to Cancel, go Back a screen, go to the Next
screen, or Finish the process using the appropriate buttons. (Finish goes directly to the last
step, skipping all the remaining steps, if any. Fragment Wizard goes through all the steps
you skipped and supplies the missing information using default values and the coordinates
of the current selection in the Display window.)
351
In the first “screen”:
Select the fragment type (Fig. 22.1) and process: Construction fragment, Design Recipient
fragment and Design Donor fragment. Since this chapter covers Construction, select
Construction Fragment.
Design donor and design recipient fragments are discussed in Chapter 23.
When Construction fragment is selected, you can specify that the fragment should be
inverted in the constructed molecule by checking the Insert Inverted box. Press the Next
button to proceed.
In the second screen (Fig. 22.2):
Specify the 5’ terminus of a new fragment. The options are:
•=
1.
Set to a position on the molecule map (in one of the two following ways)
Enter the coordinate in the text box or CLICK in the Graphics Pane of the display
window. In the latter case, the option button will be selected automatically and the caret
position is displayed in the position field of the dialog box and on the Status Bar. Use
left or right arrows to reposition the caret.
Tip: If, when you click in the Graphics Pane, the entire molecule is selected (as
indicated by the wire frame), click in the Sequence Pane to deselect, and begin again.
2.
Specify the start of the molecule
To set the 5’ terminus at the start of the molecule, select the Start of Molecule option in
the dialog.
•=
Specify a restriction site.
Click on the site or its label in the Graphics Pane. The name of the restriction endonuclease
and the position of the site are displayed in the Set to a Restriction Site box.
Note: If the Fragment Wizard screen limits your view of the molecule map, click on its title
bar and drag it out of the way.
Fig. 22. 2 Specifying the 5’ terminus of a new fragment
Press the Next button to proceed.
352
Molecule Construction Chapter 22
In the third screen (Fig. 22.3):
Specify the 3’ terminus of the fragment. Options are:
•=
1.
2.
Specify a position on the molecule map (in one of the two following ways)
Enter the position in the text box or SHIFT + CLICK in the Graphics Pane on a
position, restriction site or label, automatically selecting this option. The 5’-3’ selection
is now indicated with a wireframe in the Graphics Pane and in the set selection box on
the Status Bar. Reposition the 3’ end using SHIFT + the left or right arrows.
Specify the Start or End of the Molecule
The selection is indicated with a wireframe and on the Status Bar.
•=
Specify a restriction site.
SHIFT + CLICK on the site or its label in the Graphics Pane.
Tip: The SHIFT key must be held down for all actions in the Graphics Pane for setting
the 3’ end. If you neglect to do this, your actions will change the 5’ terminus and
Fragment Wizard will revert to screen 2.
Fig. 22. 3 Specifying the 3’ terminus of the fragment
Press the Finish button, completing the fragment definition.
Review the description of the selected fragment in the New Fragment message box (Fig.
22.4).
Fig. 22. 4 New Fragment message box
353
If you made a mistake, press Cancel to return to the Fragment Wizard. Otherwise, press the
Add to List button, adding the fragment to the Goal Molecule Definition List and closing
the Fragment Wizard.
Now go to the Molecule Display window for the molecule source of the second
Construction fragment and define it using the Fragment Wizard in the manner just
described. After reviewing your fragment as before in the New Fragment dialog box, enter it
into the Goal Molecule Definition List.
The Goal Molecule Definition List (Goal List)
The Goal Molecule Definition List is a list of fragments that will be combined to create a
new molecule.
You can add fragments to the Goal Molecule Definition List using the Fragment Wizard as
just described or you can add them directly from the Construct dialog box.
To see the Goal Molecule Definition List, press the Open Goal List button (
) on the
Main Toolbar or choose List > Molecule Goal List. At the bottom of the Lists dialog box
(Fig. 22.5) that opens, the Fragments display lists the fragments currently on the Goal
Molecule Definition List.
Fig. 22. 5 Lists dialog box
Constructing a New Molecule
The Construct & Design Molecule Dialog Boxes
In these dialog boxes, you can describe the new molecule to be constructed (or designed)
and saved into the Vector NTI database. Also you can open it for an existing constructed or
designed database molecule to reconstruct/redesign it, that is, after changing its component
fragments.
354
Molecule Construction Chapter 22
To open the Construct or Design dialog box, first open the Lists dialog box from a Molecule
) or selecting Molecule >
Display window by clicking the Open Goal List button (
Create New > Using Construct/Design Procedure (DNA/RNA) or selecting List >
Molecule Goal List. Press the Run button on the Lists dialog box to display the Construct
or Design Molecule dialog box. The dialog box is automatically loaded with the new
molecule described through Goal Molecule Definition List.
Note: There are two operational modes—a mode for molecule Construction and mode for
molecule Design. The appropriate mode is set automatically when you designate the
component fragment type in Fragment Wizard. The title of the box “Construct Molecule” or
“Design Molecule” reflects the mode. (If this dialog box is opened before the method is
designated, the box title is also Construct Molecule.) Because Construction is the subject of
this chapter, we will refer to it as Construct Molecule dialog box (Fig. 22.6).
Fig. 22. 6 Construct Molecule dialog box
Enter or select the dialog box fields as follows:
•=
Name - enter a new name for the molecule to be constructed
•=
Circular/Linear - the form of the molecule.
•=
DNA/RNA - molecule type
•=
Click the General Info button to enter molecule description information:
o
Description - notes about the molecule
o
Extra-Chromosome Replication - transformation systems
355
o
Replicon Type - molecule’s replicon type
o
Keywords - keywords useful for database search. See page 222.
o
Click OK to return to the Construct dialog box.
All of the General Info data will appear in the General Description folder when
the molecule is loaded into a Display window.
•=
Recipient’s Start - start of the new molecule is as close as possible to the start of the
“recipient” component fragment (the first fragment listed of the Component
Fragments).
•=
Position ... specify a specific nucleotide of a specific fragment as the starting nucleotide
of the new molecule. (By default, the first nucleotide of the first fragment.)
The Component Fragments Field
The Fragments field in the Lists dialog box contains the Goal Molecule Definition List.
Constructed molecules consist of one or more component fragments that can be verified,
entered, deleted, repositioned or edited in this field. In addition, you can add new fragments
of five types, described below in the section on adding new fragments.
To perform an operation on a fragment, select it and press one of the following enabled
buttons:
•=
Edit: This action can also be initiated by double-clicking the fragment. In the dialog
box that opens, you can edit fragment information. The specific dialog box appears
depends on the type of the fragment you have highlighted. Five fragment types
(described below in the section on adding new fragments) each have their own Edit
dialog box.
•=
Delete: The selected fragment disappears from the list.
•=
Reposition a fragment: To change the position of a fragment in the list, highlight the
fragment you want to move, and press the Up or Down buttons to change its position in
the list.
The molecule will be constructed from the fragments in the order shown, so changing the
positions in the list changes the resulting molecule. The fragment listed first is always
considered the “recipient” fragment.
Adding New Component Fragments
To add a new fragment to the list of component fragments, press the Add button above the
Fragments field and choose the desired fragment type from the drop down list. In the
corresponding Fragment Editor dialog box that opens, you can enter information about the
new fragment:
•=
356
Dummy: A Dummy fragment can be created for a recombinant molecule as a last
resort when a DNA fragment length is known but the exact sequence is not. Residues in
Molecule Construction Chapter 22
Dummy fragments are added as “nucleotides” only. They will appear in a sequence as
“N”.
When you add or edit a Dummy fragment, the Dummy Fragment dialog box (Fig. 22.7)
appears where you can enter the number of unsequenced nucleotides the fragment
contains:
Fig. 22. 7 Dummy Fragment dialog box
Dummy fragments have blunt termini. A Dummy fragment must be inserted into a vector
with compatible linkers or adaptors flanking the sequence. To add REN sites to ends of a
Dummy fragment, see the Linker section below.
•=
Sequence: Sequence fragments are user-specified oligonucleotides. When you add or
edit a Sequence fragment, the Sequence Fragment dialog box appears (Fig. 22.8):
Fig. 22. 8 Sequence Fragment dialog box
In the Nucleotide Sequence field, enter an oligonucleotide up to 120 units long. With the
radio buttons, indicate direct or complementary orientation.
Sequence fragments have blunt termini. A Sequence fragment must be inserted into a vector
with compatible linkers flanking the sequence. To add REN sites to ends of a Sequence
fragment, see the Linker section below.
•=
Linker: Linker fragments are single restriction sites that can have short flanking
sequences. They are used to link together longer fragments in Construction or Design.
When you add or edit a Linker fragment, the Linker Fragment dialog box (Fig. 22.9)
appears:
357
Fig. 22. 9 Linker Fragment dialog box
In the Restriction Site field, enter the name of the restriction endonuclease being used or
press the Browse button (
) to select from a list of RENs in the database.
In the Left Nucleotides and Right Nucleotides fields, you can enter nucleotide sequences
flanking the restriction site.
Once the restriction site is in place, select the radio button that indicates whether the linker
should be the whole restriction site or whether it will attach at the left end or the right end of
another sequence or dummy fragment.
If you click whole, then both ends of the Linker are blunt. If you click Left, the 5’ end is
blunt and the 3’ end is the restriction site. If you click Right, the 3’ end is blunt and the 5’
end is the restriction site.
Examples:
If you want restriction site Linkers to be attached on each end of a sequence to be cloned,
you must generate a right and a left Linker. In the following example, the Left Linker will
ligate to the 5’ end of the digested recipient fragment and the Right Linker will ligate to its
3’ end.
Construction Tip: To add linkers at each end of a Dummy or Sequence fragment, they
should be listed in the Component Fragment list in the following order:
358
•=
Recipient Fragment
•=
Linker (Left Linker)
Molecule Construction Chapter 22
•=
•=
Dummy or Sequence
•=
Linker (Right Linker)
Adaptor: Adaptor fragments are like linkers except that you enter or edit nucleotides
manually in the Adaptor Fragment dialog box (Fig. 22.10). Adapters are often specialordered from a synthesizer vendor, as they tend to be linkers that are “adapted” to the
given experiment/need at hand.
Fig. 22. 10 Adaptor Fragment dialog box
In Vector NTI, an Adaptor consists of a 5’ or 3’ left terminus, a central double-stranded
part, and a 5’ or 3’ right terminus, although any part of an Adaptor fragment is optional.
Enter these segments in the appropriate fields of the dialog box. Although the example in
Fig. 22.10 has staggered ends, they could be blunt.
•=
Add Fragment:
There are three choices available from the Add Fragment selection, adding a fragment from
the molecule that is currently in focus in the VNTI workspace, adding a fragment of a
molecule in the VNTI database or adding a fragment using the Fragment Editor. The first
two choices will open the appropriate molecule and launch the Fragment Wizard. The third
choice will launch the Fragment Editor.
Note: Although you can add molecule fragments using the Fragment Editor, it is much more
convenient to add them either in advance using the Fragment Wizard—the tool specifically
designed for visual selection of molecule fragments from Molecule Display windows (See
page 351) or via the first two choices on the Add Fragment list, which also use the Fragment
Wizard.
Fragments of existing molecules are the key part of most constructed molecules. Press the
Add button and select the Add Fragment > with Fragment Editor choice, or select a
component fragment in the list and click the Edit button to open the Fragment of Molecule
dialog box (Fig. 22.11) where you add or edit such a fragment:
359
Fig. 22. 11 Fragment of Molecule dialog box
Options in this dialog box are summarized as follows:
•=
Construct/Design Recipient/Design Donor: molecule fragment type
•=
Parent Molecule: Enter the name of the source molecule for the fragment to be added,
or press the Browse button (
) to select a molecule from the Vector NTI database.
•=
Inverted: Check to insert the fragment in the inverted orientation.
•=
Restriction Sites Counted From Nucleotide: Enter the position in the parent molecule
from which restriction site occurrences should be counted. This field is important when
this fragment is taken from a selection display window, where the numbering of sites in
the selection display window may not correspond to the numbering of sites in the
molecule as a whole. Usually the value of this field is 1.
•=
Termini: To describe a fragment from an existing molecule, you must describe its left
and right termini. Brief descriptions of the termini are displayed next to the
corresponding buttons. Click each of the <…Terminus > buttons to define the termini.
Editing the Termini of Fragment of Molecule-type Component Fragments
Press the Left Terminus or Right Terminus buttons in to open the Terminus Editor dialog
box (Fig. 22.12).
360
Molecule Construction Chapter 22
Fig. 22. 12 Terminus Editor dialog box
The Left (and Right) Terminus dialog box options are summarized as follows:
Terminus Type:
•=
Restriction site: If the terminus is a restriction site, enter its name in the text box, or
press the Browse button (
) to select from a list of the RENs in the database.
The restriction site chosen here determines the form of the terminus (blunt, 5’, 3’). The
terminus can be further modified by biochemical operations, as described below.
•=
Nucleotide context: If the terminus is a nucleotide context (oligonucleotide), enter the
sequence in the text box.
This type of terminus is blunt.
•=
Position: If the terminus is a position in the molecule’s nucleotide sequence, enter its
position in the text box.
This type of terminus is blunt.
•=
Start / End of Molecule: If the terminus is the start or end of the parent molecule, click
the appropriate radio button.
This type of terminus is blunt.
•=
Not Defined (NODEF): Click this button if the terminus is undefined.
A fragment with one or more NODEF termini can only be used for automatic molecule
Design, discussed in the next chapter.
361
Site or Context Data
If the terminus is a restriction site or nucleotide context, theses fields are enabled where you
are required to indicate where on the parent molecule the site or context can be found.
•=
Enter an integer value in the Number field to use that occurrence of the site or context
on the parent molecule.
In place of a number, you can enter an area of the molecule within which the site or
context occurs only once:
•=
Enter a value in the Point and Region fields to look for the site or context within
(Region) nucleotides of the (Point) nucleotide of the parent molecule.
Vector NTI uses the Point and Region fields only if the Number field is empty.
Biochemical Operations
Termini of Restriction Site type can be treated with up to three consecutive biochemical
operations, performed in the sequence listed in the Terminus Editor dialog box. The
operations are performed in the order in which they are listed.
These operations from the lists in the Biochemical Operations drop-down menus have the
following effects:
•=
None leaves the terminus untreated.
•=
Completely filled in fills in cohesive fragment termini to make them blunt.
•=
Incompletely filled in fills in cohesive fragment termini to within a few nucleotides of
being blunt.
•=
S1-treated cuts cohesive termini down to blunt.
•=
Bal31 treated cuts off a given number of nucleotides from both strands.
•=
3’-5’ exonuclease treated cuts off a given number of nucleotides in the 3’-5’ direction.
•=
5’-3’ exonuclease treated cuts off a given number of nucleotides in the 5’-3’ direction.
Click OK to return to the Fragment Molecule dialog box (Fig. 27.6).
The For Design Only subsection of this dialog box is enabled only in Design mode and is
described in Chapter 23.
Click OK to return to the Lists dialog box. Press the Run button to launch the Construct
Molecule dialog box.
362
Molecule Construction Chapter 22
The Control Fields and Commands
In Construction mode, the following mode is enabled: Create All Possible Constructs...
When checked, the system creates all possible constructions (up to 24) that can be obtained
from the molecule component fragments. This option allows Vector NTI to include even the
parasitic constructs (inserts in the wrong orientation) in the reaction mix.
The Open Display Windows for All field is active only when the Create All Possible
Constructs box is checked or the specified number of design output options is more than
one. If this box is checked, and more than one molecule is created during the construction or
design process, Molecule Display windows are opened for each new molecule immediately
after completing the procedure. If this box remains unchecked, a new Molecule Display
window opens automatically for just the molecule with the name specified in the Name
field.
Note: In Design, display windows are not created for intermediate molecules, but only for
the final option(s).
Once all parameters are set in the Construct Molecule dialog box, press the Construct
button to initiate the process.
Naming of Construction Recombinants
If you start a construction task for a goal molecule with a name that causes a conflict with
an existing set of construction options, Vector NTI informs you of the conflict and asks
permission to delete the existing options. To avoid this, choose a different name for the new
goal molecule or rename old construction options.
For additional constructs, Vector NTI creates names on the basis of the name of the “main”
constructed molecule. If the name of the molecule is <MOLNAME >, the name of the first
additional construct will be <MOLNAME > _#1, the name of the second additional
construct will be <MOLNAME > _#2, etc.
As Construction proceeds, Vector NTI creates a special subbase for the molecules, named
by the program on the basis of the name of the “main” constructed molecule. If the name of
the molecule is <MOLNAME > , then the name of the subbase containing additional
constructs will be <MOLNAME > _$Construction Options.
363
364
Molecule Design Chapter 23
Chapter 23 Molecule Design
Introduction
This chapter describes the creation of DNA molecules through Design.
In Design, you can describe the list of fragments in very general or very specific terms. You
can also describe preferences for techniques used in creating the molecule, such as how
fragments may be isolated from their parent molecules, how termini may be modified, etc.
In contrast to the Construction technique described in Chapter 22, in Design Vector NTI
does the rest, taking advantage of the best possible restriction sites and genetic engineering
techniques to engineer the molecule.
This chapter describes:
•=
The overall procedure for designing a DNA molecule
•=
How to describe a goal molecule using Display windows, Fragment Wizard, and the
Molecule Editor
•=
How to start the design process
•=
How to set your preferences for design techniques
•=
What Vector NTI actually does during the design process, and how you can control the
process
•=
Discussion of the design plans Vector NTI generates.
Creating a New DNA Molecule Using Design
For creating a molecule by Design, the Molecule Display window must be in Molecule Edit
mode, the default mode when the window is opened.
The process of creating a new molecule with Vector NTI’s Design capabilities generally
follows these steps in an active Graphics Pane:
1.
2.
3.
4.
Describe your goal molecule by defining its recipient and donor fragments and placing
them in the Goal Molecule Definition List in the proper order using Fragment Wizard.
Open the Lists dialog box, loaded with the component fragments for your Goal
Molecule.
Open the Design Molecule dialog box, enter general information for the new molecule
and initiate the Design.
When the Design Parameters dialog box appears, set the appropriate parameters and
your design preferences.
365
5.
Start the design process. Vector NTI searches for optimum Design options. If Design is
successful, your molecule is entered into the database and opens in its new Molecule
Display window.
6. In the Text Pane of the display window containing the goal molecule, open the Design
Description folder to inspect the design plan Vector NTI has generated.
If you are not satisfied with the design plan, you can choose to redesign the molecule by
changing the description of the goal molecule or using different parameters.
Describing the Goal Molecule
In Design, you must define one recipient fragment, listed first in the Goal Molecule
Definition List, and one or more donor fragments.
The simplest way to define fragments for Design is to use the Fragment Wizard and the
Graphics Pane to visually define fragments. You can then use the Fragment Editor to finetune fragment descriptions. Fragments can be defined by hand in the Design Molecule
dialog box, but it is much more tedious and much less effective than using Fragment
Wizard. Refer to Chapter 22 for a detailed description of Fragment Wizard. Here we will
describe how to use it to define design recipient and design donor fragments.
Defining the Recipient Using Fragment Wizard
•=
The recipient fragment of the goal molecule remains unaffected during the Design
process. All nucleotides within the recipient fragment you defined are included in the
goal molecule. This means that any polylinker sites used for cloning must be outside
the recipient fragment.
•=
The recipient must be listed as the first fragment in the Goal Molecule Definition List.
This will be covered later in the chapter.
•= The recipient must come from a circular molecule stored in the Vector NTI database.
To define a recipient fragment, open the Display window for the recipient molecule. If you
have several display windows open concurrently, you can display the source molecules
concurrently by selecting Window > Tile Vertically or make sure the source molecule for
your garment is the topmost window. Activate its Graphics Pane and press the Add
), or select List > Add Fragment to Goal List,
Fragment To Goal List button (
opening The Fragment Wizard dialog box (Fig. 23.1).
366
Molecule Design Chapter 23
Fig. 23. 1 Fragment Wizard dialog box
The Fragment Wizard dialog box content changes to display the entry fields and
descriptions corresponding to the current step in the fragment definition process.
At any point in the process, you can choose to Cancel, go Back a screen, go to the Next
screen, or Finish the process using the appropriate buttons. (Finish goes directly to the last
step, skipping all the remaining steps, if any. Fragment Wizard goes through all the steps
you skipped and supplies the missing information using default values and the coordinates
of the current selection in the Display window.)
In the first “screen”:
Select the kind of fragment you wish to define from three choices: Since this chapter covers
Design, choose the Design Recipient Fragment option and press the Next button to go to
the second screen of Fragment Wizard:
In the second screen (Fig. 23.2):
To specify the 5’ terminus of the fragment, select one of the following options. Vector NTI
will look for good cloning sites in the region upstream from the position you specify.
•=
1.
Specify a position on the molecule map (in one of the two following ways)
Enter the coordinate in the text box or click in the Graphics Pane of the display
window. In the latter case, the Set to a Position button will be selected automatically
and the caret position is displayed in the position field of the dialog box (and on the
Status Bar). To reposition the caret, use the right and left arrow keys.
Tip: If, when you click in the Graphics Pane, the entire molecule is selected (as
indicated by the wire frame), click in the Sequence Pane to deselect, and begin again.
2.
Specify the start of the molecule by selecting the Start of Molecule option in the dialog
box.
•=
Specify a restriction site.
To set the terminus to a restriction site, click on the site or its label in the Graphics Pane. If
selected, Vector NTI must use that site in cloning. For Design, you may be setting an
unrealistic limitation. If the site is not convenient, for example, requiring complicated
partial digestion, the cloning may be very difficult.
367
Note: If the Fragment Wizard screen limits your view of the molecule map, left click on
Wizard’s blue title bar, and drag it out of the way.
Fig. 23. 2 Specifying the 5’ terminus of the fragment
When the 5’ terminus is set, press the Next button to proceed.
In the third screen (Fig. 23.3):
This screen appears only if you specified that the 5’ terminus should be set to a palindromic
restriction site. If that was not your choice, move on the to the description of the fourth
screen.
You are asked to specify whether the site should be saved or lost in the designed molecule.
Your options are: Save Site, Lose Site or Don’t Care. If you do not specify that site is to be
saved or lost, its fate will be unpredictable. Choose the desired option and press the Next
button to advance to the next screen of the dialog box.
Fig. 23. 3 Specifying whether the site should be saved or lost in the designed molecule
368
Molecule Design Chapter 23
In the fourth screen:
Specify the 3’ terminus of the fragment. Vector NTI will look for good cloning sites in the
region following the position you specify. Options are:
•=
1.
2.
Specify a position on the molecule map (in one of the two following ways)
Enter the position into the text box or SHIFT + CLICK in the Graphics Pane and adjust
the caret position using shift-arrow key combinations described in Chapter 3.
Specify the end of the molecule
•=
Specify a restriction site.
SHIFT + CLICK on the site or its label in the Graphics Pane. If selected, Vector NTI
must use that site in cloning. For Design, you may be setting an unrealistic limitation. If
the site is not convenient, for example, requiring complicated partial digestion, the
cloning may be very difficult.
Tip: The shift key must be held down for all actions in the Graphics Pane for setting the 3’
end. If you neglect to do this, your actions will change the 5’ terminus and Fragment Wizard
will revert to screen 2.
If you specified that the 3’ terminus is set at a palindromic restriction site, you can go to the
next screen and specify that the site should be saved or lost in the designed molecule.
Choose the desired option and press the Finish button to complete the definition of the
fragment.
If you did not specify a palindromic restriction site, the Next button is disabled; press the
Finish button, signifying completion of fragment definition.
Fig. 23. 4 Adding the fragment to the Goal Molecule Definition List
Review the description of the selected fragment in the New Fragment message box. If you
made a mistake, press Cancel button to return to the Fragment Wizard. Otherwise, press the
Add to List button (Fig. 23.4), adding the fragment to the Goal Molecule Definition List
and closing the Fragment Wizard.
Notes about Design:
•=
If you later edit the recipient fragment in the List/Design Molecule dialog box, any
biochemical operations you order to be performed on the termini of the recipient
369
fragment will be ignored. During the Design process, Vector NTI chooses all
methods of terminus modification itself.
•=
The recipient fragment always has direct orientation. The Inverted box in the
recipient’s Fragment Editor dialog is disabled during the Design process.
Defining the Donors Using Fragment Wizard
Donors are fragments that Vector NTI inserts into the recipient fragment (vector) to produce
the goal molecule. Donor fragments in Design must carry functional signals into the
recipient.
When performing Design, Vector NTI requires all fragments except the first in the Goal
Molecule Definition List to be donor fragments. Donor fragments can come from circular or
linear molecules stored in the database.
To define a donor fragment, open the display window for the donor molecule. (If you have
several display windows open concurrently, the source molecule for your fragment should
be the topmost window.) Activate its Graphics Pane and press the Add Fragment To Goal
List button (
) on the Window toolbar or select List > Add Fragment to Goal List,
opening The Fragment Wizard dialog box.
In the first screen:
Select the Design Donor Fragment option and press the Next button to go to the second
screen of the Fragment Wizard.
In the second screen (Fig. 23.5):
•=
To select the desired functional signals to be carried on the donor fragment into the
recipient, click on the signal or its label in the Graphics Pane. To select more than one
signal, hold down the SHIFT + CLICK. Note: If the Fragment Wizard screen limits
your view of the molecule map, left click on Wizard’s blue title bar, and drag it out of
the way.
•=
To deselect a selected signal, hold down SHIFT + CLICK again.
Fig. 23. 5 Selecting the desired functional signals to be carried on the donor fragment into the
recipient
370
Molecule Design Chapter 23
The names of the signals you selected are displayed in the Fragment Wizard dialog box.
If the donor molecule is circular and you have chosen more than one signal, Fragment
Wizard lets you choose the place of the “gap” between signals where Vector NTI will look
for a convenient place to cut the donor molecule. To move the gap clockwise, press the right
arrow button on the Fragment Wizard; counterclockwise, press the left arrow button. To
illustrate this, select more than one signal and experiment. When the desired signals are
selected, press the Next button to go to the next screen.
In the third screen (Fig. 23.6):
The next screen for specifying the 5’ terminus for design offers two selections:
•=
Leave Terminus Undefined if you want Vector NTI to choose restriction sites for you
•=
Use Specific Site to use a restriction site to cut the signals from the donor molecule.
Fragment Wizard prompts you to hold down the SHIFT key and click on the restriction
site or its label in the Graphics Pane. The site label is selected and the name of the site
and its position are shown in the Fragment Wizard dialog box. If selected in this way,
Vector NTI is forced to use that site in cloning. If the site is not convenient, for example,
requiring complicated partial digestion, you will be responsible for the difficulty of the
cloning situation.
Fig. 23. 6 Specifying the 5’ terminus for design
Press the Next button to go to the next screen.
In the fourth screen (Fig. 23.7):
If you have chosen the Use Specific Site option, this screen lets you specify the 3’ terminus
for design. The required actions are the same as for the 5’ terminus screen described above.
If you have chosen the Leave Terminus Undefined option, this screen asks you to specify
the maximum size of the 5’ flank region (if you came from the 5’ terminus definition
screen) or 3’ flank region.
371
Fig. 23. 7 Specifying the 3’ terminus for design, or specifying the maximum size of the 5’ flank
region
•=
Use Flank Region No Larger Than … bps limits the region within which cloning
sites may be sought (thus limiting the size of the resulting flank region). At the prompt,
enter either the maximum length of the flank region in the dialog’s text box or move the
appropriate end of the selection in the Graphics Pane into the gap beyond the edges of
the selected functional signals. In this case, the selection in the Graphics Pane shows a
maximum possible flank region. You can use all available techniques for extending a
selection in the Graphics Pane: drag the appropriate end of the selection, SHIFT-click
on the desired position, etc. For details on Selection Techniques, refer to Chapter 3.
•=
Do Not Limit the Size of a Flank Region allows Vector NTI to search all available
space for restriction sites.
When you are finished with the description of both termini of the donor fragment, the Next
button becomes disabled. Press the Finish button to complete the definition of the donor
fragment.
The New Fragment message box is displayed with the description of the selected donor
fragment. If you made a mistake, press the Cancel button to return to the Fragment Wizard
dialog. Otherwise, press the Add to List button. The fragment is added to the Goal
Molecule Definition List and the Fragment Wizard dialog box is closed.
The Goal Molecule Definition List (Goal List)
The Goal Molecule Definition List (Fig. 23.8) (in the Fragments tab at the bottom of the
Lists dialog box) is a list of fragments to be combined to create a new molecule. In addition
to adding fragments to the Goal Molecule Definition List using the Fragment Wizard, you
can add them directly from the Lists dialog box.
To see the Goal Molecule Definition List, press the Show Goal List button (
) or choose
List > Molecule Goal List. In the Lists dialog box (Fragments tab) that opens, the
Fragments display box lists the fragments currently in the Goal Molecule Definition List.
372
Molecule Design Chapter 23
Fig. 23. 8 Goal Molecule Definition List
Note: The first fragment listed is considered the “recipient fragment.” If a fragment is listed
in incorrect order, select it and click the Up or Down buttons to reposition it.
Starting the Design
Although the goal molecule component fragments are ready for processing by Vector NTI’s
Design mode, remember that VNTI decides on the optimum Design fragment termini and
cloning strategies.
To begin the design of your new molecule, open the Lists dialog box by clicking on the
Open Goal List button or selecting List > Molecule Goal List.
Open the Design Molecule dialog box by pressing the Run button on the Lists dialog box.
Note: The Construct/Design Molecule dialog box has two operational modes—a mode for
molecule construction and mode for molecule design. Because you have defined fragments
in this chapter for Design, in this mode, the dialog box title is the Design Molecule. See
Chapter 22 for details on the Construct Mode.
Enter or select the dialog box fields as follows:
•=
Name
•=
Circular/Linear - the form of the molecule.
•=
DNA/RNA - molecule type
•=
Click the General Info button to enter molecule description information:
o
Description - notes about the molecule
o
Extra-Chromosome Replication - transformation systems
o
Replicon Type - molecule’s replicon type
o
Keywords - keywords useful for database search. Refer to page 222 for
details.
373
o Click OK to return to the Design dialog box.
All of the General Info data will appear in the General Description folder when
the molecule is loaded into a Display window.
•=
Recipient’s Start - start of the new molecule is as close as possible to the start of the
“recipient” component fragment (the first fragment listed of the Component
Fragments).
•=
Position ... - specify a specific nucleotide of a specific fragment as the starting
nucleotide of the new molecule. (By default, the first nucleotide of the first fragment.)
The Component Fragments Field
Designed molecules consist of one or more component fragments. Use the Fragments field
in the Lists dialog box to verify or enter this information.
You may edit, delete, and change the order of the fragments in the Component Fragments
field, and you may add new fragments of five types. These operations are described in
Chapter 22.
It is essential in molecule design that the recipient fragment is first in the Fragments list,
followed by the donor fragments. If you need to change this order, highlight the fragment(s)
to be moved and press the Up or Down buttons until they are in the correct order.
Defining Design Fragments in Fragment Editor
An alternative to using Fragment Wizard for defining design fragments is to enter them
manually into the Fragments tab of the Lists dialog. To do this, press the Add button and
choose Add Fragment > with Fragment Editor to open the Fragment of Molecule dialog
box (Fig. 23.9).
Fig. 23. 9 Fragment of Molecule dialog box
374
Molecule Design Chapter 23
Options in the Fragment Editor dialog box are summarized as follows:
•=
Donor recipient/donor fragment
•=
A donor fragment created with a Display window always has a defined parent
molecule name
•=
Change the orientation of a donor fragment by checking the Inverted box.
•=
Left/Right Terminus buttons open the Edit Terminus dialog box (Fig. 22.12). The way
you defined the termini initially governs which sections are enabled in this dialog box.
For more information on modifying termini, refer to Chapter 22.
•=
In Design, all donor fragments carry functional signals called descriptors into the
recipient. To add or remove descriptors from a donor fragment, use the For Design
Donors Only section of this dialog box. To add a descriptor, press the Add button,
opening the Fragment Descriptor dialog box (Fig. 23.10):
Fig. 23. 10 Fragment Descriptor dialog box
To define a descriptor for the donor fragment, choose the type of signal and enter the name
of the signal, if necessary. If the signal is on the complementary strand, check the
Complementary box. (If you do not enter a signal name, the descriptor is added to the
donor fragment and is treated as any signal of the specified type.)
Note: The Fragment Descriptor dialog box is the only way to add a descriptor containing
any signal of a specified type. Such a descriptor cannot be added from a display window.
Click OK to return to the Fragment of Molecule dialog box (Fig. 23.9).
•=
To remove a descriptor from a donor fragment’s description, highlight it in the
Descriptor(s) box and press the Delete button.
375
•=
If after leaving the Display window you would like to add flank regions to a donor
fragment, or change flank regions set through a Display window, you can use the
Maximum Flank Region boxes.
Subbase of Parents – If you prefer to simply identify the feature to be added to the new
molecule, you can let Vector NTI decide which specific molecule of the subbase is used as
the source for the functional signal. In the Subbase of Parents drop-down menu, select the
subbase where the parent molecules might be sought.
After entering and verifying the data in the Lists dialog box, you are ready to proceed with
the design process. Press the Run button to launch the Design Molecule dialog box and then
press the Design button.
Vector NTI performs a preliminary save of the current molecule state. The molecule’s
name, general information, fragment list, etc. are saved and can be recalled. The system then
performs a preliminary analysis of the design possibilities, and opens the Design Parameters
dialog box, described below.
If you start a design for a goal molecule with a name that causes a conflict with an existing
set of design options, Vector NTI informs you of the conflict and ask permission to delete
the existing options. If you do not want to do this, choose a different name for the new goal
molecule or rename old design options.
Design Parameters
After the Design is initiated, in the interim dialog box that opens, select a subbase for
storing Design results. The Design Parameters dialog box (Fig. 23.11) then opens where you
can set the Design parameters the program uses to design the molecule.
Fig. 23. 11 Design Parameters dialog box
376
Molecule Design Chapter 23
Options in the Design Parameters dialog box are summarized as follows:
•=
REN Subbases displays the list of restriction endonucleases that Vector NTI will
consider in the current Design task.
•=
Transformation System(s) and Extra-Chromosome Replication specifies the
capabilities for the current Design process.
•=
Dephosphorylation Permitted allows dephosphorylation to be used as a
preselection method.
•=
Try to Lose Junction Sites directs the loss of junction sites if possible without
increasing cloning complexity. Lost sites are then used for efficient preselection.
This box is a request, not a command, and Vector NTI may save the site if that
results in a more convenient design option. If, in the Fragment Wizard, you
specified that sites be saved or lost in the description of the recipient, they will
automatically be saved or lost regardless of whether this box is checked.
•=
Fragment List Gives Order of Cloning Steps inserts the first donor into the
recipient in the first cloning step, the second donor in the second cloning step, etc.
If this box is unchecked, the order of cloning steps is based on the most convenient
restriction sites.
•=
Fragment List Gives Order in Goal Molecule places the donor fragments in the
goal molecule in the same order in which they are listed in the goal molecule
description. If this box is unchecked, the placement order is based on the most
convenient restriction sites.
•=
Delete Region specifies the number of nucleotides to be deleted from the recipient
molecule during cloning. This may be disabled, depending on how the fragments
were defined.
•=
Phage Size May Be Changed By is enabled if the recipient molecule is a phage,
which may lose its functionality due to length changes. If you want to preserve
phage functionality in the goal molecule, it may be useful to prevent the goal
molecule from being much different in length than the recipient molecule. Enter
the maximum change in length (%) for phages in the field. If this field is enabled
and specified, then the lengths of the goal molecule and all intermediate
recombinants produced by the Design process are kept within the specified length
limits.
•=
Preferences opens the Design Preferences dialog box. See next section.
•=
PCR Primers
Vector NTI can use PCR amplification to isolate donor fragments. The system also will
propose primers for PCR amplification of cloned fragments in all molecules produced
by the Design process, including the goal molecule.
•=
Press the Parameters or Quality buttons under PCR Primers to set the desired
parameters or Quality Specifics of PCR primers. Refer to Chapter 21 for the details
of the dialog boxes that open with these commands.
377
The primers used will satisfy the conditions set by the user in the PCR Analysis dialog
box.
When all design parameters are set as you desire, press the Start Design button.
Design Preferences
Although much of the Design process is decided by Vector NTI, you can select preferred
techniques for designing the molecules. Press the Preferences button in the Design
Parameters dialog box (Fig. 23.11) to open the Design Preferences dialog box (Fig. 23.12):
Fig. 23. 12 Design Preferences dialog box
In this dialog box, you can set preferences in the categories of fragment isolation, fragment
ligation, and terminus modification.
Depending upon your Design results, you may find it useful to have Vector NTI design the
same goal molecule several times, changing the design preferences each time. This gives
you several alternatives for constructing your molecule.
The parameters for this dialog box are as follows:
•=
Fragment isolation: Vector NTI isolates fragments for cloning using convenient
restriction sites whenever possible. If no convenient restriction sites are present, partial
digestion or PCR can be used to isolate fragments. Check the isolation methods you
will permit:
o
378
Partial Digestion (Simple): Partial Digestion with 1 site inside required
fragment and 3 sites total.
Molecule Design Chapter 23
o
Partial Digestion (Medium): Partial Digestion with 1 site inside required
fragment and not more than 6 sites total.
o
Partial Digestion (Complicated): Partial Digestion with more than 1 identical
site inside required fragment.
o
PCR
•=
Ligation: Check the junction types you will permit Vector NTI to use in designing
molecules. Cohesive...Cohesive junction means both ligated fragments have two
cohesive ends, each longer than 1 nucleotide; Cohesive...Short junction means both
ligated fragments have one cohesive and one short (exactly 1 nucleotide) end, etc.
•=
Terminus modification: Check the methods you will permit to make termini
compatible.
Other Preferences
•=
Separation in Gel: Specify the minimum relative difference in length (%) for
separating fragments in gel.
•=
Complicated Partial Digestion: Specify the maximum number of restriction sites
inside the required fragment and the total number of sites on the molecule that are
acceptable for fragment isolation using complicated partial digestion.
Priorities
What’s Better – rate priorities for the techniques and ligation types by moving them in the
corresponding lists. To reposition any item, select it and press the Up and Down buttons.
Items near the top of the lists have higher priority than items lower in the lists.
Advanced Design Preferences
Press the Advanced button in the Design Preferences dialog box to open the Internal Design
Parameters dialog box (Fig. 23.13) to fine-tune Vector NTI’s heuristic search for molecule
design options. Default settings are given in italics.
Fig. 23. 13 Internal Design Parameters dialog box
379
•=
Depth of Backtracking: Specify the number of steps Vector NTI should retrace in its
search algorithm to design a molecule if it hits a dead-end in finding a molecule
according to the defined parameters. 5
•=
Min. Rating for Acceptance: Specify the minimum acceptable rating to immediately
accept an option and end the current search step. Vector NTI rates design options on an
integer scale of 1 to 8. The higher the number, the longer Vector NTI continues
searching for a better construct according to the defined parameters. 3
•=
Min. Rating to Avoid Next PD Level: If Vector NTI cannot achieve a minimum rating
for acceptance (see previous point), it may try the next more complicated level of PD
(partial digestion.) For instance, if you have listed Simple Digest first (under What’s
Better in Fig. 23.12), then Medium and then Complicated as partial digest preferences,
Vector NTI tries to use the Simple Digest first. If it cannot reach the minimum rating
for acceptance as specified, then it will use the next level of partial digestion, (medium)
and so forth. Specify the rating below which the system will try more complicated
partial digestion. 1
•=
Min. Rating to Avoid PCR: If Vector NTI cannot achieve a minimum rating for
acceptance (see second point above), it will try to apply PCR. Specify the rating below
which the system will try PCR. 1
•=
Immediate Break When There Are Enough Backtracking Options: If checked,
Vector NTI stops searching for further solutions once it finds enough alternatives for
backtracking. Checking this option can result in faster searches. Default Yes. When this
option is checked, the optimum design option will usually be among those found, but
sometimes the system may find something better if permitted further search
Click OK twice to return to the Design Parameters dialog box.
Note: InforMax recommends that you not change these parameters until you have
developed extensive experience with Vector NTI’s Design capabilities.
The Design Process
When you press the Start Design button in the Design Parameters dialog box, Vector NTI
begins the Design process. An interim “Designing...” dialog box appears, showing you the
progress of the design and allowing you to break and accept at certain points, or cancel the
design entirely.
The design process consists of several stages:
1.
2.
380
Vector NTI collects all the information it needs to perform the design. The message
“Collecting necessary data...” is displayed on the screen.
Vector NTI creates restriction maps for all molecules, which may be involved in the
design. If many maps need to be created (for example, if you chose a large subbase of
molecules as potential donors) and if many restriction endonucleases are involved,
Vector NTI may take a relatively long time to create all the maps.
Molecule Design Chapter 23
3.
Vector NTI begins to perform cloning steps. In each step, one donor fragment is cloned
into the recipient.
4. When each cloning step is complete, Vector NTI constructs the best recombinant it
obtained for that step, models cloning analysis after transformation, searches for
important restriction sites in the recombinant, etc.
5. If a cloning step produces the goal molecule, that is, if no donors remain to be cloned,
Vector NTI finishes the Design task and enters the goal molecule into the database.
6. If donor fragments remain, the system moves on to the next cloning step.
7. When the Design process is complete, all intermediate recombinants (if any) are stored
in a new subbase in the database, called name_$Intermediate, where name is the goal
molecule’s name. A Molecule Display window opens only for the final molecule.
If you start a Design task for a goal molecule with a name that causes a conflict with an
existing set of intermediate recombinants, Vector NTI informs you of the conflict and ask
permission to delete the existing intermediates and turn the existing designed molecule into
a basic molecule. If you do not want to do this, choose a different name for the new goal
molecule.
The recombinants are named as follows: name_$step number_variant number, where name
is the goal molecule’s name, step number is the number of the cloning step, and variant
number is the number of the variant of this step, if more than one variant has been
generated.
From a special subbase created for the Design result molecules, you can open, examine
and/or delete the intermediate recombinants as desired. If you delete intermediate
recombinants, the goal molecule becomes a basic molecule.
From the moment Vector NTI begins making restriction maps, the Cancel button is active.
Press it if you want to abort the design at any point. If you cancel the design, the
information in the Design Molecule dialog box remains unchanged.
During each cloning step, if at least one acceptable design option has been found, the
Accept Now button is active. Press it to stop further search and accept the best option
already found for the current cloning step. You may wish to turn off the Immediate Break
When There Are Enough Backtracking Options check box in the Advanced Design
Preferences, and control the depth of the heuristic search for each cloning step with the
Accept Now button.
Returning to the Pre-Design State
When Vector NTI designs molecules, it saves the original goal description (list of recipient
and donor fragments) in the database along with all other information about the new
molecule. After the molecule has been designed, you can return it to its original state.
This is useful if you want to try several different designs based on the same goal molecule
description. Design the molecule one way and inspect the results in a Molecule Display
381
window. If you are not satisfied with the results, change the design parameters or design
preferences, and try again until you are satisfied,
Select Molecule > Operations > Advanced DNA/RNA > Design. An intercept dialog box
opens reminding you that you will be overwriting the new molecule with the original
fragments. Click Yes to continue with the new Design. The Lists/Design Molecule dialog
box opens again loaded with the original Design component fragments you selected.
If you cannot achieve a satisfactory design by changing the design parameters and
preferences, try changing the description of the goal molecule. Change the molecule names
each time so you will have a record of your attempts.
If you still cannot achieve a satisfactory design, try changing the internal design parameters
to influence Vector NTI’s heuristic searches for design options.
The Design Description Folder
The Molecule Display window for the final new molecule automatically opens upon the
conclusion of Design. At a later time, you can open a Molecule Display window for newly
designed intermediate molecules stored in the database. In either case, the Text Pane of the
display window contains a Design Description folder with subfolders for each cloning step
used to create the molecule. In each cloning step, one donor fragment is cloned into the
recipient.
Cloning Step Subfolders
Each cloning step subfolder of the Design Description folder contains the following
information:
•=
Result Molecule: Name of the recombinant obtained in this cloning step. If this is the
final cloning step, the name of the recombinant is the same as the name of the goal
molecule. If this is an intermediate recombinant, the name is formed according to the
rules given previously in this chapter.
•=
Recipient
•=
382
o
The name of the molecule used as the recipient
o
The restriction sites used as the left and right termini
o
If and how the termini were modified
o
If partial digestion was used in this cloning step, the number of sites inside the
required fragment and the total number of sites on the molecule
Donor
o
The molecule used as the donor
o
Whether the fragment was inserted in complementary orientation,
o
The restriction sites used as the left and right termini of the donor
Molecule Design Chapter 23
o
If and how the termini were modified
o
If partial digestion was used in this cloning step, the number of sites inside the
required fragment and the total number on the molecule
o
The actual flank regions on each end of the donor fragment, that is, the
distance in nucleotides between the first or last nucleotide in the fragment and
the appropriate boundary of the nearest functional signal
o
If the donor fragment was obtained through PCR amplification, the PCR
primers used are displayed in the 5’-3’ direction. If a restriction site was
attached to the 5’ end of the primer, that site is also shown here.
•=
Ligation Junction types: cohesive or blunt.
•=
Lost restriction sites on the recipient indicates sites lost during cloning
•=
Donor fragment orientation indicates if the ligation conditions prevent parasitic donor
fragment orientations.
•=
Preselection The recommended preselection method
o
If one or both recipient sites are lost after ligation, they will be recommended
for effective preselection.
If sites are not lost, the system will recommend dephosphorylation (if that was
permitted in the Design Parameters dialog box).
The ability to perform preselection influences the choice of methods of clone analysis
after transformation.
o
•=
Transformation system: The recommended transformation system for clone analysis.
This information is useful if the user allowed more than one transformation system to
be used. Vector NTI considers the size of recombinants, their replicon types, and extrachromosome replication capabilities.
•=
Recommended method(s) for clone analysis: Recommended methods for clone
analysis after transformation. Vector NTI proposes the most reasonable set of four
possible methods: Screening, Colony Hybridization, Restriction Analysis, and PCR
amplification of the cloned fragment. These recommended methods are based on a
number of conditions: ligation type, full or partial digestion, preselection, etc.
•=
Recommendations for restriction analysis: The recommended restriction sites give
distinguishable gel patterns for the result molecule (recipient with insertion) and the
recipient without insertion.
The following information is given even if these methods were not recommended for clone
analysis.
•=
Recommended oligonucleotide for colony hybridization: The oligonucleotide will
successfully hybridize with the inserted fragment.
383
384
•=
Primers for PCR: allow amplification of the region closest to the boundaries of the
cloned fragment.
•=
If the ligation conditions permit parasitic donor orientations, restriction sites for
restriction analysis are recommended to identify the clone with required donor fragment
orientation.
•=
Important restriction sites for the result molecule are listed and categorized: sites
missing on the molecule, unique sites located within the cloned fragment, and unique
sites located outside the cloned fragment.
Gel Display Windows Chapter 24
Chapter 24 Gel Display Windows
Introduction
Vector NTI’s Gel Display windows are graphical tools designed for supporting your
electrophoresis work.
In a Gel Display window you can:
•=
Add gel markers and samples to gel lanes.
•=
View general electrophoresis data or specific fragments in Text Pane folders.
•=
Assign colors and line formats to individual gel fragments.
•=
“Run” a gel in increments or animation for a specific length of time.
•=
Enlarge or reduce a gel for optimum visualization.
•=
Move gel samples or markers to and from the Gel Sample List, a data clipboard or
display windows.
Opening a Gel Display Window
Gel Display windows can be opened in two ways: by opening a new display window or by
opening a previously saved Gel Document file.
Opening a New Gel Display Window
To open a new Gel Display window, press the New Gel button (
) on the Main Toolbar,
or choose Gel > Create New. The Gel Setup dialog box (Fig. 24.1) opens for setting gel
parameters:
Fig. 24. 1 Gel Setup dialog box
385
Options in the Gel Setup Dialog Box
•=
•=
•=
•=
•=
Electrophoresis Profile: Select from preset settings or previously saved settings
o
Save Settings As… Click to name and save new settings specified in this
dialog box.
o
Remove Saved Setting Select an entry in the profile list and click this button
to remove it
Electrophoresis Type
o
Agarose gel with constant electric field
o
Polyacrylamide (Constant Field)
o
Pulse Field (Agarose gel)
Electrophoresis Parameters Default settings are in italics.
o
gel concentration
1.0 %
o
electric field
2.5 V/cm
o
gel length
15.0 cm
o
pulse time (for pulse field EP)
2 sec
View Parameters
o
Time increment (time span that each gel modeling iteration adds or subtracts
from the gel run)
o
Animation speed (time increments in minutes added to the gel run for each
second of real time during animation.)
o
Separation distance (the minimum distance by which fragments must be
separated in order for you to distinguish them in the gel.)
Buffer All possible buffers are represented by two types.
o
Tris-Acetate (TAE)
o
Tris-Borate (TBE).
Click OK to close the settings box and open a Gel Display window. See the Electrophoresis
Profile bulleted point to the save the settings.
To modify the settings of a Gel Display window at any time, press the Display Setup button
(
), or select Edit > Gel Display Setup. The Gel Setup dialog box opens where you can
change data for the open display window.
386
Gel Display Windows Chapter 24
Opening a Gel Document File
Gel Display window contents can be stored in a Gel Document file. To open an existing Gel
Document file, select Gel > Open Document. In the standard File Open dialog box, browse
for the directory or folder and file name of the Gel Document to be opened. Click Open.
Elements of a Gel Display Window
A Gel Display window is divided into two sections, or panes: a Text Pane and a Gel Pane,
divided by a split bar. When the Gel Display window is first opened, it remains empty until
you create your gel.
The Gel Display window toolbar has two different variants, depending on whether the
active pane is the Text Pane or the Gel Pane. The Gel Display toolbars are displayed in
Chapter 4. Toolbar buttons are displayed as needed for operations being described in this
chapter.
Gel Samples and Gel Markers
Vector NTI gels can contain two types of data:
1.
2.
Gel samples: fragments to be analyzed in a Gel Display window. They are created for
short-term use. If saved to the database, they become gel markers.
Gel markers: sets of fragments of known lengths used as standards for measuring
migration speed. Gel markers are stored and loaded from the Vector NTI database.
Creating and Adding a Gel Sample to a Gel
To create a gel sample for one gel lane, press the Create Sample button (
) on the
Window toolbar or choose Gel > Create Gel Sample, opening the Create Gel Sample
dialog box (24.2):
387
Fig. 24. 2 Create Gel Sample dialog box
In the left column, select a DNA/RNA Molecules subbase and one or more molecules from
that subbase.
In the center column, select a Source Enzyme Subbase and one or more enzymes from that
subbase.
The right column of the dialog box shows molecules and enzymes currently selected for
creating the sample. To remove a molecule or enzyme from the Selected for Gel Sample
column, deselect it in the source column or double-click on its name in the Selected for Gel
Sample column.
Add a sample name and description in the text box at the bottom of the dialog box. The gel
data is identified in Text Pane folders by the name and description you enter in these boxes.
When the gel sample is defined, press one of the action buttons at the top of the dialog box.
388
•=
Press the Add to Gel button to add the sample to one lane in the active Gel Display
window. Select new molecules and enzymes for each lane and click Add to Gel. If
there is no active Gel Display window, this button is disabled.
•=
Press the Add to Gel Sample List button to add the sample to the Gel Sample List. The
Gel Sample List dialog box is described below.
•=
To save the sample as a gel marker, press the Save as Gel Marker button. This opens
the New Gel Marker dialog box (Fig. 24.3). You must have a molecule selected to open
Gel Display Windows Chapter 24
this dialog box here. To open the New Marker dialog box without having a molecule
already selected, choose Gel > Create Gel Marker.
The New Gel Marker dialog box opens to the General tab of the dialog box. Enter a name
for the new marker. When the name is entered, select the Gel Marker tab.
Fig. 24. 3 New Gel Marker dialog box
The Fragments list box lists by length all fragments making up the current sample.
•=
To add a fragment to the sample, enter its length in bp in the New Fragment box and
press the Add button.
•=
To remove a fragment from the sample, select it in the Fragments box and press the
Delete button.
Tip: If by chance you press Enter instead of the Add key, thus closing the dialog box
before you are finished, go to Database Explorer and the Gel Markers table. Double click on
the new gel marker you were creating. It opens in an Edit Gel Marker dialog box where you
can continue the process.
On the Gel Marker tab you can also edit the sample’s description, shown in the Description
text box. The User Fields, Comments, and Keywords tabs are the same as for other kinds of
database objects; they are described in chapter 20.
Press the OK button to return to save the sample as a gel marker and to return to the Create
Gel Sample dialog box. To add the new marker to the gel, click Close to exit the dialog box.
389
Adding a Gel Marker to a Gel
To add a gel marker to a gel, click the Add Marker Lane button (
) on the Gel Toolbar.
In the Choose Database Gel Marker dialog box (Fig. 24.4), select the gel marker and click
OK, adding it to a gel lane. (If you have created your own gel marker, you will see it listed
in this dialog box.)
Fig. 24. 4 Choose Database Gel Marker dialog box
The Gel Sample List
The Gel Sample List (24.5) is a data clipboard for mixing gel sample fragments taken from
various sources within Vector NTI. This is an alternative way to prepare gel markers.
Fig. 24. 5 Gel Sample List
390
Gel Display Windows Chapter 24
Viewing the Gel Sample List
To open the Gel Sample List, press the Open Gel Sample List button (
Toolbar or choose List > Gel Sample List.
) on the Main
To remove a fragment from the Gel Sample list, select the fragment and press the Remove
button. To remove multiple fragments, select all the desired fragments press the Remove
button.
To save the Gel Sample List as a gel marker, press the Marker button. This opens the Gel
Marker Editor, described previously.
Adding Fragments to the Gel Sample List
To add a fragment to the Gel Sample List, select it in the Gel Pane by CLICKING +
DRAGGING over its bands with the mouse. Then press the Add to Gel Sample List button
(
), or choose List > Add Selection to Gel Sample List.
If the Gel Sample List is empty, the fragments you have selected will be added to the list. If
the Gel Sample List is not empty, you will be given the option of adding the currently
selected fragments to the existing set, or of having the selected fragments override the
existing set.
Loading Fragments from the Gel Sample List
To load fragments from the Gel Sample List to the gel, press the Add Lane from Gel
), or choose the Edit > New > Add Lane from Gel Sample List.
Sample List button (
All of the fragments currently contained in the Gel Sample List are added to a new lane of
the active Gel Display window.
Panes in a Gel Display Window
Once a gel has been created, the contents of the two panes become apparent (Fig. 24.6):
391
Fig. 24. 6 Text Pane and Gel Pane of a Gel Display window when a gel has been created
Text Pane folders contain a listing of electrophoresis gel data pertinent to the gel shown in
the Display window, and information about the samples loaded into the gel’s lanes.
The Gel Pane shows a graphical depiction of an electrophoresis gel you have just loaded.
To switch back and forth between the panes, use the Switch Pane buttons on the Gel Pane
Toolbar (
), (
). The display window panes can be manipulated using the scroll bars
and split bars, as explained in detail in Chapter 3.
Gel Display Window Text Pane
The Gel Display window’s Text Pane contains one or more folders that can be opened,
closed, expanded, collapsed, etc. as described in Chapter 3.
The Gel Display window Text Pane always has a General Description folder, containing
data about the gel itself, including parameters set in the Gel Setup dialog box. The folder
also shows the separation distance, time increment, and animation speed for this gel.
The Text Pane also contains a folder for each occupied lane. Folders can contain a:
392
•=
line giving the length range of the fragments in the lane
•=
description of the contents of that lane
Gel Display Windows Chapter 24
•=
subfolders (gel sample), labeled by fragment length, for each fragment in the lane. For
gel samples created and not yet saved, the subfolders contain a description of the source
of the fragment, for example, “Source: ColE1; HaeII(5419) HaeII(1012)”. The numbers refer to the REN site position on the source molecule
map.
•=
subfolders (gel marker), while giving the fragment lengths, do not provide fragment
sources
Modifying Fragment Properties
You can use the Text Pane to set the color and pattern with which a fragment is displayed in
the Gel Pane. This is convenient for tracking the progress of a particular fragment as you
run your simulated gel.
To set a fragment’s display color, select the specific fragment’s folder in the Text Pane.
Select Edit > Sample Properties or Sample Fragment Properties from the shortcut menu.
In the Properties dialog box, choose a pattern and color for the fragment, and click OK. The
fragment is displayed in the Gel Pane with the appropriate pattern and color. You may not
be able to see it until you run your gel.
To simply view the properties for an entire lane, highlight the folder for that lane. Select
Edit > Lane [#n] Properties, or select the corresponding option from the shortcut menu or
press ALT + ENTER.
The Gel Display Window Gel Pane
The Gel Display window Gel Pane displays a simulated gel, the lanes of the gel running
vertically in the pane. Each lane is numbered at the top of the lane in a box called a “well.”
As the gel progresses, a size scale runs down the left side of the Gel Pane, showing fragment
sizes in bp. To activate the Gel Pane, click on the toggle switch on the Gel Pane Toolbar.
Step Forward, Step Back and Animation
The Time box on the Display window toolbar (
) tracks the time the gel “has
been running”, in the form hours:minutes. To set a new time, click this box to activate it,
enter the new time and press ENTER.
Click the Step Forward (
) and Step Back (
one increment of time per click.
) buttons to advance or reverse the gel
Click the Animation button (
) to start the gel running continuously. To stop the
animation, press the Animation button again or the Step Forward or Step Back button.
(The time increment and the animation speed were set in the Gel Setup dialog box [Fig.
24.1)
393
Gel Lanes
A Gel Display window can contain any number of lanes. You can select a lane by clicking
on its well.
To change the lane width, move the mouse cursor to the division between any two wells
where the cursor changes to a double-ended arrow (
). Drag the cursor left or right.
Since all of a gel’s lanes are displayed with the same width, if you change the width of one
lane, all of the other lanes change as well.
To perform other operations on lanes, place the cursor within the lane’s well and open a
shortcut menu, with these options:
•=
Lane [#] Properties displays the properties for the selected lane.
•=
Move Left moves a lane one slot to the left. (Or click on the well and select Edit >
Move > Move Left.)
•=
Move Right moves a lane one slot to the right. (Or click on the well and select Edit >
Move > Move Right.)
•=
Delete deletes the selected lane. (Or click on the well and choosing Edit > Delete
Lane.)
•=
Select All selects all fragments in the lane.
•=
Add to Gel Sample List adds all selected fragments to the Gel Sample List.
•=
Save as Marker launches the New Gel Marker dialog box, allowing you to save the
selected fragments as a gel marker.
Selecting Fragments
To select fragments in the Gel Pane, drag the cursor that becomes a horizontal I-beam (
vertically across the fragments to be selected. All fragments in the highlighted selection
zone are selected.
There are two reasons for selecting fragments:
1.
2.
Selected fragments can be copied to the Gel Sample List or saved as a gel marker.
If the selected fragments are too close to distinguish, VNTI can calculate how long the
gel would have to run to separate them (Separation Time).
Copying fragments to the Gel Sample List and calculating separation times are described
below.
Zooming In and Zooming Out
The Gel Pane Zoom buttons, which operate as in other Vector NTI windows, allow you to
enlarge or reduce the gel lane display. Use of these buttons is described in detail in Chapter
4.
394
)
Gel Display Windows Chapter 24
) is specific to the Gel Display window: Press this button
The True Scale View button (
to display the gel in an approximation of true scale. When you select this display option,
Vector NTI looks up the pixel size (dot pitch) of your monitor and displays the gel based on
that value.
Separation Distance
After the Gel Pane has been enlarged several times, gray bars representing separation
distances appear around each fragment. Separation Distance is the minimum distance by
which fragments must be separated in order to be distinguishable.
The separation distance is specified in the Gel Setup dialog box (Fig. 24.1).
To eliminate the gray zones, click the Zoom Out button several times.
Calculating Separation Times
To calculate a separation time, select any number of fragments, at least two of whose gray
bars are touching. Press the Calculate Separation Time button (
) on the Window
toolbar or choose Analyze > Calculate Separation Time. The minimum time necessary to
separate the selected fragments is displayed. The gel running time is then set to that value.
Note: To calculate Separation Time, at least two fragments must be selected.
Vector NTI prompts you if any one of the selected fragments would reach the end of the gel
before all selected fragments have separated.
Modifying Fragment Properties
Note: To modify fragment properties to more easily track fragment migration, refer to the
section Modifying Fragment Properties under Gel Display Window Text Pane earlier in this
chapter.
Copying Gel Display Window Data
To copy information from a Gel Display window to the Clipboard or a file, use Vector
NTI’s Camera feature. General directions for using this feature are described in Chapter 3.
Directions specific for the Gel Display window are given here.
When the pane to be copied is activated, click on the Camera button (
). Select in the
dialog box that opens the range and destination of the copied material. The dialog box that
opens from the Gel Pane is unlike most of the other Camera dialog boxes, but is specific for
the data to be copied (Fig. 24.7).
395
Fig. 24. 7 Camera dialog box specific to the gel data being copied
The copy options are described as follows:
•=
Lanes: Include selected lanes.
•=
Comb: Include lane numbers (above selected lanes).
•=
Scale: Include scale (to the left of selected lanes).
•=
Gray Zones: Include separation thresholds (gray rectangles around fragments).
•=
Borders: Include borders between lanes
•=
Colors: Use fragment colors
Copied Gel Pane information is in Windows Metafile format.
Printing from Gel Display Windows
Printing from Gel Display windows is done one pane at a time. To print a pane, select it and
press the Print button (
) on the main toolbar or choose Molecule > Print. In the
standard Print dialog box, click OK.
Further print details (Page Setup and Print Preview) are given in Chapter 3.
396
Report Generation Chapter 25
Chapter 25 Report Generation
Introduction
Vector NTI Report Generation Wizard is a convenient tool for customizing different types
of reports of DNA/RNA or protein molecule data. This chapter provides step-by-step
instruction for creating both reports and report templates using the Report Generation
Wizard.
Report results are presented in a hierarchal structure, similar to the Text Pane of the
Molecule Display window. The Print Preview reflects the actual appearance of the
generated report to be printed. The Vector NTI Camera feature copies selected information
to the Clipboard or file in text format, preserving the formatting and enabling easy data
exchange with other applications.
Two types of reports can be generated:
•=
General: This report represents general molecule(s) information, such as general
description, standard fields, VECTOR NTI specific fields, user-defined fields,
authoring information, comments, Feature maps, restriction maps, sequence,
components and fragments and all analyses performed for selected objects.
•=
Relation: The second report represents the parent/descendant relationship between
molecules as well as construction information.
Vector NTI report templates enable you to store the settings for generated reports and
retrieve them to use at a later time instead of default settings.
Starting the Report Generation Wizard
In Vector NTI v. 5.5, report generation could be initiated from Database Explorer. Because
report generation is not a database function but a molecule-based function, that option is no
longer available in Vector NTI v.7.0.
To generate a report on a molecule open in the Molecule Display Window, choose
Molecule > Reports > <report type > on the menu bar. Two of the options initiate Report
Generation Wizard. The third allows you to work with report templates. Each of the three
report options are discussed in this chapter.
The Report Generation Process:
Step 1: Opening the Report Generation Wizard Dialog Box
Selecting General or Relation (Reports) opens the same Report Generation Wizard dialog
box, shown in Fig. 25.1. For both types of reports, follow the outlined steps to collect the
required information.
397
Use the Next > and <Prev buttons at the bottom of the windows to proceed through the
steps. Cancel the process at any time by pressing the Cancel button, or at any step press the
Finish button to generate the report according to the current settings.
The first step offers two options:
•=
New Report lets you create a new report using the default settings. This initializes the
options with default settings.
•=
Begin a Report based on an existing template. This initializes the options with
previously saved settings.
Fig. 25. 1 Report Generation Wizard dialog box
Press Next to proceed with either a new General or Relation Report.
To generate a report from an existing template without altering any settings, press Finish
after selecting the desired template.
Step 2: Selecting General Options
In the Select General Report options window (Fig. 25.2), check the informational fields with
a left click or press the space bar. Due to the hierarchical organization of the fields, if you
include the parent item, all of the descendants are automatically included. Excluding
descendants automatically excludes their parent item as well. Grayed items indicate that the
item’s state cannot be changed. This notation usually indicates either mandatory fields or
398
Report Generation Chapter 25
information that could be included in the report, but are unavailable currently because they
were not generated prior to starting the generation wizard.
Note: The more fields that are selected for the report, the longer the report generation takes.
Fig. 25. 2 Select General Report Options window
•=
General description: This group of options consists of general information fields such
as name, molecule length, form, and molecule type and nature of the sequence.
Molecule name, type and length fields are mandatory and cannot be excluded from the
report information.
•=
Standard fields: Standard fields include object data found routinely with all Vector
NTI molecules and other objects. This includes for example, keywords, original source
database, accession numbers, sequence source and identifiers in Vector NTI.
•=
User-defined fields: Check to include all user-defined fields in the report
•=
Authors: Specify the original and/or current authoring information
•=
References: Enter any references associated with the molecule
•=
Comments: Add any comments associated with the molecule
•=
Feature map: Specify molecule Feature map information. If this field is checked, the
Wizard adds an additional step for adjusting Feature map information.
399
•=
Restriction map (DNA/RNA): Check this item to include a restriction map in the
report. The output can be represented either as a tree (similar to the restriction map
information in the Text Pane of the molecule display window), or as a table.
•=
Motifs (DNA/RNA): Check this item to include motifs in the report. The output can be
represented either as a tree (similar to the restriction map information in the Text Pane
of the molecule display window), or as a table.
•=
ORF (DNA/RNA): This outlines the ORF information that is present.
•=
Analyses: As analysis information is not stored in the database, these options are
available only if you start the Report Generation Wizard from a Molecule Display
Window. Your report can include only those analyses that have been performed on a
molecule and are shown as available options.
DNA/RNA molecules
Supported options are:
o
PCR analyses
o
Hybridization probes
o
Sequencing primers
o
Mutagenesis
o
Restriction fragments
Proteins
Supported options are:
•=
o
Protein properties
o
Acid content
o
Sequence: Check this option to include the molecule sequence.
Construction information: This option generates construction information for
complex molecules, including components and fragments of other molecules.
Click Next to proceed to the next window. If you have not selected Feature map, you will go
directly to Figure 25.4.
400
Report Generation Chapter 25
Step 3: Adjusting Feature Map Information
Fig. 25. 3 Set Feature Map Options window
This step is necessary if you choose to include Feature map information. Select from the Set
Feature Map Options window (Fig. 25.3) list the features to be separately included or
excluded from your report (according to the molecule type). All available feature types are
organized into the same tree structure that is in the Display Setup Profile window.
Step 4: Report Preview Window
Fig. 25. 4 Preview dialog box
401
The steps for either a General or Relation report end at a Preview dialog box (Fig. 25.4).
Pressing Finish at any step in the process also brings you directly to this dialog box. The
results, represented in a hierarchical structure, allow you to hide information you think
unnecessary by closing the appropriate branches.
Scroll through the Preview window with the scroll bars. ToolTips appear if you pause the
cursor over a partially visible item. Open shortcut menus on selected items to reveal
commands for expanding and collapsing folders and subfolders in various combinations.
This window lets you review the report and go Back if there is something you would like to
change, or Save the report as a template. If you are satisfied with the report, proceed with
a Print Preview or Print the report (details below) or use the Camera feature to copy the
report to the clipboard or to a file. For details about using the Camera/Copy feature, refer to
Chapter 3.
Print Preview and Print
To preview results before printing, press Print Preview. Navigate though the pages using
the Next Page and Prev Page buttons (Fig. 25.5). Use the Zoom buttons to enlarge or
reduce the image. To print the results, press the Print button.
To modify something, click the Close button, returning you to the report. You can go back
several steps and change the generation options, or you can expand or collapse some
branches to customize your report presentation.
Fig. 25. 5 Preview results before printing using the Print Preview feature
Saving Report Templates
To save the report format as a template, press the Save Template button, then enter a name
and press OK on the Save Report Template window to save it. Templates are saved
402
Report Generation Chapter 25
separately for report and molecule types. For example, when generating a relationship report
for DNA/RNA molecules, the Report Wizard offers you templates saved for the same type
of report and molecule type.
Fig. 25. 6 Save Report Template window
Relation Report
The Relation report includes information on parents, construction and descendants of the
molecules involved.
•=
The parents of a molecule are the molecules that were used in its construction. The
molecule itself is called the descendant.
•=
Construction information, similar to the construction information presented in the Text
Pane of Molecule Display Window, can be generated either for selected molecules
only, or for selected molecules and all of their parent molecules. The latter option
allows you to see the line of inheritance between the molecules.
Select Molecule > Report > Relation to generate a Relation Report.
Step 1
Step 1 in a Relation report takes place exactly as explained in Step 1 on page 397. Click
Next to proceed with a new report or Finish if you are using a Relation template.
Step 2
In Step 2 of a Relation Report, you can select the relationship information to be included in
this report. For an example, see Fig. 25.7. Click Next or Finish in this window to proceed
to the Preview window, similar to Fig. 25.4.
403
Fig. 25. 7 Selecting the relationship information to be included in the report
Report Templates
To save any report that you generate as a template, click the Save Template button in the
Report Preview window (Fig. 25.4). In the Save Report Template dialog box that opens,
name the new template. Press OK to save.
To use a saved report template to generate a new report, in an open Molecule Display
window, select Molecule > Reports > <report type >. In the Select Report Type dialog
box that opens, select Report based on existing template. Select the template you wish to
use and click Next to proceed. Then follow the steps beginning on page 397 to generate the
report.
Report templates are stored separately for DNA/RNA molecules and proteins. To rename or
delete a template, select Molecule > Reports > Templates. Use the drop-down menu at the
top of the Templates window (Fig. 25.8) to select the template type. Select the appropriate
template and press Delete to remove it or Rename to rename the selected template.
Fig. 25. 8 Templates window
404
Shared Databases Chapter 26
Chapter 26 Shared Databases
Introduction
Special databases, repositories of DNA/RNA or protein molecules, enzymes,
oligonucleotides, and gel markers, can be created and shared between several Vector NTI
users on a network.
Shared databases are not a replacement for local databases; each Vector NTI application still
must have its own local database. The local database is used in all operations: construction,
design, creation of viewers etc. The local database is also the place for storing private and
temporary data. The main purpose of the shared database is to store common data.
The only operations you can perform on shared databases are:
1.
2.
Copying data to/from the local database
Various database management operations such as creating and deleting subbases, etc.
Database searches. For instance, you may copy some of your molecules and enzymes
from your local database into the shared database. In order to use them in the design
process, your colleague must copy them to his/her local database first.
In addition to biological data, each database contains information about its creator and
registered users. Only the creator and registered users can have access to database data. The
database creator can also change database properties, remove registered users, and define
the password required to become a register user.
Note: Vector NTI shared databases use portable data format and file naming conventions to
ensure that both Macintosh and Windows users of Vector NTI can access common
databases. Shared databases can be located on a wide range of file servers—Vector NTI can
work using not only services native to each system, (Microsoft Network or AppleTalk) but
also various Unix (NFS or Samba) and NetWare services.
Creating a New Shared Database
Shared database capability is a purchased addition to Vector NTI Suite. When shared
database capability is purchased, you are issued a Vector NTI shared database license that
allows you to create shared databases. A shared database license is a special type of static
license that allows you to create any number of shared databases but it also limits the
number of users for each database you create. You do not need a shared database license to
access shared databases, but you should have a Vector NTI application version 3.1 or later.
Note: Shared databases can be accessed but cannot be created from Vector NTI using a
license that is shared through a network server (Dynamic License).
Before creating a shared database, you should find a place on your network (a computer,
storage volume and directory or folder) where the database will be located and accessible
from the computers of all potential users of the database. Users should be able to connect to
405
this location or mount the corresponding network drive and have read/write/delete
permissions for all files in database directory and its subdirectories. Good places for shared
databases are file servers that can be “visible” as storage devices to other computers in a
network. Vector NTI requires that a separate empty directory should be created for each
shared database.
When the network directory for a new shared database is arranged, press the Local/Shared
) or choose Database > Local/Shared Data Exchange. This
Data Exchange button (
opens the Connect To Shared Database dialog box (Fig. 26.1) where you can perform a
number of database management operations: create a new database, find the location of an
existing database, and edit database properties and user information.
Connecting to a Shared Database
Fig. 26. 1 Connect to Shared Database window
In the Connect to Shared Database dialog box, press the Create New Database button.
In the Create dbdef file dialog box that opens, enter a name and select the destination for the
shared database definition file (dbdef). Press Save.
In the Database Properties and Users dialog box that opens (Fig. 26.2), you can provide
additional information for the database users:
406
Shared Databases Chapter 26
Fig. 26. 2 Database Properties and Users dialog box
•=
Database Name: enter the name of the new database. This name will be displayed in
all dialog boxes and messages related to the database.
•=
Password Required To Register At Login: enter in the text box a registration
password that will be required to become a registered user of this database. If you
decided that the password is not necessary you can leave this field blank. If the
password is not blank, Vector NTI will ask you to confirm the password before you
leave the dialog box.
•=
User Information: enter appropriate user information
When you are finished press the OK button.
Vector NTI writes your data into the database definition file and creates the files and
directories required to store the database data. The database you just created has no
registered users. To be registered, a user should login to the database and enter the
registration password you specified in the Password Required to Register at Login box. This
procedure is described in details below.
Note: If anything goes wrong at this stage, check the network connection and make sure that
you have “write permissions” for the chosen directory. Then, delete all files in the directory
and repeat the last step.
In the Connect To Shared Database dialog box (Fig. 26.1) you will see the name and
location of the database you just created.
407
Finding the Location of an Existing Shared Database
If you are going to use an existing shared database you should specify the location of the
database. First, make sure that you have a working network connection to this location or
that the corresponding network drive is mounted and you have read/write/delete permissions
for all files in the database directory and its subdirectories.
Note: On some systems you can mount network drives from the standard File dialog boxes.
In this case, no separate step is required.
In the Connect To Shared Database dialog box (Fig. 26.1), press the Find Database button.
In the File Open dialog box, locate the shared database definition file (dbdef). Find the
database directory and press OK button. Vector NTI tries to read the database definition
file; if it succeeds, you will see the name and location of the database in the Connect To
Shared Database dialog box.
Editing Database Properties and User Accounts
When the location of a shared database you created is specified, you can edit the database
name and registration password. The creator of the database can also remove registered
users. To edit database properties and user account information, in the Connect to Shared
Database dialog box (Fig. 26.1), press the Edit Database Properties and User Accounts
button, opening the Database Properties And Users dialog box where you can modify the
corresponding database information.
Saving the Connections in a Connection Profile
When the location of a shared database is specified, you can enter login information that
will is displayed to other users of a shared database. This is a good way to communicate
your personal information such as name and phone number. When you are logged into a
shared database, Vector NTI displays this information in addition to the login time and the
information about your computer to other database users attempting to log in. In order to
return to this configuration later, you may save both database location and login information
in a connection profile.
To save the connections in a connection profile, in the Connect to Shared Database dialog
box (Fig. 26.1), press the Save Connection As button and enter the name of the connection
in the Save Connection As dialog box. Vector NTI stores the connection profile in the
preference file; each time you open the Connect To Shared Database dialog box you see the
stored connections list near the top of the dialog box. You can select stored connections
from this list. To delete the connection from the profile, press the Remove Connection
button.
Connecting to a Shared Database
When the location of a shared database is specified, to connect to the database, press the
Connect button. Vector NTI reads the information about the database creator and registered
users. If you are not a creator or registered user of the database and the database limit of
registered users is not reached, Vector NTI displays a dialog box allowing you to register.
408
Shared Databases Chapter 26
To register, choose Yes. If the user registration is protected by registration password, you
will be asked to enter the registration password in the Login Registration dialog box. If the
password is correct, Vector NTI adds you to the list of registered users of the shared
database.
If you are the database creator or registered user, you have full access rights to the database
data. However, if you are not going to write to the shared database this time, you can check
Read Only box. This guarantees that the shared database contents will not be accidentally
modified.
If you are not the database creator or registered user, you can choose to connect to the
database in a browse-only mode to look at the database contents.
Note: If Vector NTI cannot access the database at this or the subsequent stages, check the
network connection and make sure that you have write permissions for the files in database
directory and its subdirectories.
Managing a Shared Database
When your connection to the selected shared database is established, Vector NTI opens a
separate Database Explorer window for the shared database (Fig. 26.3). This window is a
close functional equivalent of the local Database Explorer window. In this shared Database
Explorer, you can search the database, manage subbases, rename and delete objects etc.
However, the concept of Vector NTI’s shared databases prevents you from manually
creating new objects in shared databases, opening Display Windows for objects stored in
shared databases and editing shared database objects in place using object editor dialogs.
Fig. 26. 3 Database Explorer window for the shared database
To modify a shared database object, you must copy it to your local database, modify it there
and put the modified copy back into the shared database as described in the next section.
Note: If the original object was submitted by another user, instead of replacing it, Vector
NTI creates a separate object. This new object has the same name but a different “Submitted
409
by” field, containing the Author Name you used to identify yourself in the Author
Information dialog box.
Exchanging Data with a Shared Database
Exchanging data between your local and shared databases is simple and intuitive. Open two
Explorer windows (one for local and another for shared database), then copy data between
them using drag-drop or copy/paste operations described in the Copying Objects section.
The simplest way to start data exchange is to select Database > Local/Shared Data
) in the Database
Exchange or press the Local/Shared Data Exchange button (
Explorer window. This command allows you to choose a shared database, connects to it (as
described in the previous sections), opens the shared database Explorer window and the
local Explorer window (if needed) and then tiles two Explorer windows on your screen.
You can place your objects into a shared database without worrying about possible name
conflicts with objects placed there by your colleagues. Vector NTI automatically stores the
name you used to identify yourself in the Author Information with the objects you put into a
shared database. This name is stored in the shared database in the “Submitted by” field of an
object (it can be different from both the Author and Original Author fields of the object). In
addition, Vector NTI automatically creates and maintains special subbases containing
objects that were submitted by the same users. The name alone is no longer a unique way to
identify an object in the shared database; two or more different objects can have the same
name provided that they came from different sources.
Disconnecting from a Shared Database
When you are finished exchanging data in the Shared Database Exchange dialog, press the
Close button. You will be disconnected from the shared database and the database can be
used by another user.
410
AlignX Chapter 27
Chapter 27 AlignX
Introduction
The simultaneous alignment of many nucleotide or amino acid sequences is an essential tool
in molecular biology. Multiple alignments are used to find diagnostic patterns, to
characterize protein families, and to detect or demonstrate a similarity between new
sequences and existing families of sequences. They are also useful for predicting secondary
and tertiary structures of new sequences, for suggesting oligonucleotide primers for PCR
and serving as an essential prelude to molecular evolutionary analysis.
The multiple sequence alignment application, AlignX, of the Vector NTI Suite is a
comprehensive program designed to conduct and manage multiple sequence alignment
projects. Align X uses a modified Clustal W algorithm (see page 424) and incorporates the
following features:
•=
Profile alignment
•=
Phylogenetic tree construction, displayed in graphical representation
•=
Use of residue substitution matrices
•=
Secondary structure consideration
•=
Multicolored alignment presentation
•=
Automatic consensus calculation
•=
Full alignment editing capabilities
•=
Dot Matrix comparison of any two sequences
Launching Align X
To launch AlignX, double-click its icon in the program group or folder in which you
installed the Vector NTI Suite. From Vector NTI Database Explorer, select Align >
AlignX-Open New Alignment Window or select a group of molecules then choose Align
> AlignX-Align Selected Molecules. You can also drag the selected molecules from the
Database Explorer into the AlignX workspace. From other Vector NTI applications, select
the molecules to be included in the alignment and choose Align > AlignX – Align Selected
Molecules.
Features of the AlignX Workspace
When AlignX is first opened, the display window is empty. As molecules are added to an
AlignX project, they are listed in the Text Pane. After aligning a group of molecules
selected in the Text Pane, alignment results then appear in the Graphics Pane and the
Alignment Pane.
411
Because it will be much easier for you to understand the AlignX features in a complete
display window, open a demo project into the workspace. Select Project > Open. Find the
Vector NTI Suite folder. (It is probably located in Program Files\Vector NTI\Demo
Projects.) Open the Protein.apr file, a sample alignment of 25 molecules.
The AlignX interface (Fig. 27.1) consists of a menu bar, three toolbars, an AlignX Display
window, with shortcut menus specific for each pane. A Dot Matrix window can be opened
from the AlignX display window when the Dot Matrix tool is launched.
Main
menu
Main
toolbar
Pane
Selection
toolbar
Pane toolbar
Text Pane
Phylogenetic
Tree Pane
Graphics
Pane
Alignment
Pane
Fig. 27. 1 AlignX interface
AlignX has three toolbars: the Main Toolbar, the Pane Selection Toolbar and a Pane
Toolbar. The Main Toolbar contains tools for major program functions, such as opening and
saving projects, adding molecules to the project, exporting molecules’ data in various
formats, and creating alignments.
All Vector NTI Suite toolbar buttons are summarized in Chapter 4 of this manual. As you
are introduced to various operations in this chapter, however, the toolbar buttons you will
use are displayed appropriately. Many toolbar commands can also be launched from the
menu bar or from a shortcut menu.
The AlignX Display window is divided into four panes: a Text Pane, a Phylogenetic Tree
Pane, a Graphics Pane, and an Alignment Pane separated by split bars. To apply a command
from the main menu in a given pane (Print, Print Preview, Camera), that pane must be
412
AlignX Chapter 27
active. The active pane can be toggled with the Switch Panes (
,
,
,
) buttons
in the Pane Selection Toolbar or by clicking anywhere in the pane you want to activate.
Split bars allow re-sizing of the four panes in the AlignX Display window. Scroll bars
appear when the contents of a pane exceed the viewing area, facilitating easier viewing of
pane contents.
Text Pane
The Text Pane contains a thorough description of each molecule included in the alignment
project. The information is organized in folders, named by molecule. Each top level
(molecule) folder contains the following subfolders:
Folder
Contents
General description
Molecule type, form (for DNA only), length, etc.
Proprietary fields
User defined fields (for molecules which came from Vector
NTI)
Standard fields
GenBank/SWISS-PROT-like fields: keywords, division, original
accession numbers, etc
Comment
Arbitrary text of any length associated with the molecule
References
Bibliographic references (in GenBank/SWISS-PROT format)
Feature table
List of molecule features
Table 27. 1 AlignX Text Pane folders
Folders and sub-folders can be opened with a double-click or by clicking on the + to the left
of the folder name.
For more information regarding the following Text Pane manipulations, refer to Chapter 3.
•=
Expanding and collapsing folders
•=
Shortcut menus
•=
Copying pane contents to the clipboard
Finding Signals on Graphical and Alignment Panes
Signals listed in the Feature map subfolder in the Text Pane can be found on molecule
graphics and/or sequences in the graphics and alignments panes ( only for those molecules
that are part of the current assembly). To visualize the positions of a signal in these panes,
select the feature in the Text Pane folder, then press the Find button (
) on the Text Pane
toolbar or select Edit > Find on the menu bar. The Find command is disabled if selected
line is not a signal with non-zero boundaries.
413
Phylogenetic Tree Pane
Phylogenetic analysis is the means of studying presumed evolutionary relationships. An
inferred evolutionary history is displayed in a treelike diagram suggesting the inherited
relationships between the molecules.
If there are more than 3 sequences in an alignment, a phylogenetic tree is shown in the
Phylogenetic Tree Pane. To activate this pane, click the Phylogenetic Tree button (
) on
the Pane Selection Toolbar. Scrollbars in the Phylogenetic Tree Pane enable you to view the
entire tree.
A phylogenetic tree in the Vector NTI Suite is built using the Neighbor Joining method (NJ)
of Saitou and Nei. The NJ method works on a matrix of distances between all pairs of
sequence to be analyzed. These distances are related to the degree of divergence between
the sequences. The phylogenetic tree is calculated after the sequences are aligned.
Exporting a Phylogenetic Tree
To export the phylogenetic tree into a .ph file for use with other applications, press the
(
) button on the Phylogenetic Tree Pane Toolbar or choose View > Export
Phylogenetic Tree on the menu bar or select Export Phylogenetic Tree from the shortcut
menu. Select or enter the file name to export to in the File Save dialog and press Save.
Interconnection with Other Panes
Any molecule selected in the Phylogenetic Tree Pane is selected concurrently in the
Alignment Pane.
Graphics Pane
To activate the Graphics Pane, click on the Graphics Pane button (
) on the Pane
Selection Toolbar. The graphical representation of an alignment contains three graphs in the
Graphics Pane. Graphs are divided by horizontal split bars that can be moved to change the
height of the display area.
Descriptions of the Graphs
414
•=
Alignment Quality Profile (upper graph): Specific values (in a 0-1 range) are assigned
to each residue at a given alignment position in each aligned sequence, depending on
whether the residue is identical, similar or weakly similar to the corresponding residue
of the consensus sequence. The values (1 (identical), 0.5 (similar), and 0.2 (weakly
similar) for each residue at a given position are totaled; the sum is divided by the
number of the sequences in the alignment, “normalizing” the resulting value.
•=
Absolute Complexity Profile of the Multiple Alignment: (center graph): This graph is
calculated as a sum of all pairwise residue substitution scores at a given alignment
position divided by the number of pairs in the alignment. The scores are taken from the
residue substitution matrix used for alignment calculation.
AlignX Chapter 27
•=
Absolute Complexity Profile of a Pairwise Alignment [for the selected molecule
relative to the consensus sequence] (lower graph): This graph is calculated in a manner
identical to the one in the second graph. Selection of a molecule in any pane results in
the calculation of this graph. This graph is the only one that changes according to which
molecule is selected.
All graphs display the values averaged in a window of a specific length (defined by
“window” parameter) that slides along the alignment.
You can add additional analyses to the graphics pane by activating the Graphics Pane and
choosing View > List of Analyses from the drop down menu or press the Analysis List
button (
) to open the Analysis List setup dialog box (Fig. 27.2):
Fig. 27. 2 Analysis List Setup dialog box
The dialog box lists all of the analyses available for DNA or protein, depending on the type
of aligned molecules. Currently displayed analyses are listed in the Selected Analyses box.
To add an analysis, select it in the Available Analyses list box and click the Add Analysis
button (
) to move it to the Selected Analyses list. Alternately, you can move an analysis
to the lower list by double clicking on it.
The plot display order is determined by the order the analyses are listed in the Analysis List
setup box. To modify the order, select an analysis and move it up by clicking the Move Up
415
button (
analyses.
). Click OK to close the Analysis list setup dialog box and generate the new
Adding Custom Protein Analyses
Specific values are used in the calculation of the various protein analyses. These values
differ depending on the particular analysis and are stored in small text files having a .pa2
extension. All .pa2 analysis files are stored in the Analyses subdirectory in the Vector NTI
Suite directory. The name of the analysis corresponds with the name of the .pa2 file.
For example, the Bulkiness analysis is characterized in the Bulkiness.pa2 file as follows:
[general]
author=Zimmerman J.M., Eliezer N., Simha R.
comment=Last modified 15/Mar/1996 by ELG
reference=J. Theor. Biol. 21:170-201(1968).
unique=s30
[data]
values=11.5,14.28,12.82,11.68,13.46,14.45,13.57,3.4,13.69,21.4,21.4,15.71,16.25,19.8,
17.43,9.47,15.77,21.67,18.03,21.57
The [general] section describes the attributes of the analysis and the [data] section contains
the list of values used for calculating the analysis. Values are listed according to the
alphabetical order of the acid coefficients.
You can create your own custom protein analysis by modifying the values in one of the
existing .pa2 files using a plain text editor, such as Notepad. Once modified, the new .pa2
file should be saved in the Analyses subdirectory under a new name that corresponds to the
new analysis type. If AlignX is open at the time the new .pa2 file is created, it must be
closed and reopened before the new analysis is recognized.
Plot Setup
To modify a particular graph in the Graphics Pane, click on the graph you want to change
and choose View > Plot Setup or right click on the graph you want to change and choose
Plot Setup from the shortcut menu.
416
AlignX Chapter 27
Fig. 27. 3 Analysis tab of Plot Setup dialog box
On the Analysis tab of the Plot Setup dialog box (Fig. 27.3), you can set the Window size,
that is the number of sequential residues used to calculate the average for each graph point.
The larger the number entered (Window size), the smoother the graph curve.
Fig. 27. 4 Datagram tab of the Plot Setup dialog box
On the Datagram tab of the Plot Setup dialog box (Fig. 27.4), you can modify the plot
color. Both the size of the window and plot color you select are specific for the selected
417
graph in the current project. You can also change the graph style and choose to show or hide
the horizontal axis for that graph here. These settings are stored within the project file and
applied to graph next time you load the project.
Zooming Graphs In and Out
Enlarging or reducing regions of alignment graphs is possible using the Zoom buttons. For
descriptions of their use, refer to Chapter 3.
Managing the Scales of the Graphs
Each graph has its own vertical and horizontal scales. Vertical scales are similar for each
graph and show the maximum and minimum values for the graph. On the horizontal scale,
either numerical positions in the sequence or residues can be shown, depending on the
degree of zooming in the graphics pane. If you would like to see the residue designations,
zoom in on the graphics pane. The vertical and horizontal scales can be further managed as
follows:
•=
As mentioned above, the horizontal axis can be shown or hidden for a particular graph
by checking or unchecking the Show individual axis box on the Datagram tab of the
Plot Setup dialog box.
•=
The Show Vertical Axis command is used to show or hide the vertical axis for all the
graphs. This command can be accessed from a button on the tool bar or the shortcut
menu launched by right clicking on the Graphics pane.
Graph legends can be removed from the pane by unselecting the Show Legends button
from the Pane Toolbar or by unchecking the Show Legend command from the shortcut
menu or the View menu. The Place Legends Below Plots command is used to toggle the
graph legends display from the right side of the graphs to below the graphs. The Place
Legends Below Plots command can be accessed either from the shortcut menu or from a
button on the toolbar.
If no items are checked, the graphs are shown without annotation.
Interconnection with Alignment Pane
Selections within the Graphics Pane are concurrently selected in the Alignment Pane. In
general, regions can be selected using the click + drag technique. Detailed selection
techniques are discussed in Chapter 3.
Alignment Pane
To activate the Alignment Pane, click on the Alignment Pane button (
Selection Toolbar.
) on the Pane
The Alignment Pane displays aligned sequences and the resulting consensus sequence.
Consensus residues are those that appear most commonly at a particular site. The
Alignment Pane has its own vertical and horizontal scrollbars. The last row in the pane
consists of the alignment consensus.
418
AlignX Chapter 27
Vertical scrolling affects both the aligned sequences and their names, but the consensus
sequence is not included in the scroll region: it remains visible as the bottom sequence. The
sequence names remain stationary at the left of the Alignment Pane no matter how the
sequences are repositioned horizontally. If the list of molecules listed in the Alignment Pane
is longer than the size of the pane, a vertical scroll bar appears as well. Vertical scrolling
affects both sequences and their names but the consensus sequence remains visible at the
bottom of the pane.
AlignX shows similarity and identity levels for the generated alignment in the Alignment
Pane. The Status bar displays the percent of similar and identical residues for entire
alignment or for a selected region on the alignment. When the mouse cursor is pointed to
any particular column within alignment, a popup label shows the percent of similar and
identical residues within an alignment column. The popup label option is disabled if only
two sequences are aligned.
Interconnection with Other Panes
When a molecule is selected in the Alignment Pane, it is selected in the Phylogenetic Tree
Pane as well. No phylogenetic tree is calculated when there are three or less sequences in
the alignment.
A selected region within the Alignment Pane is also selected concurrently in the Graphics
Pane.
Alignment Display Setup
To change a default set of alignment display parameters, press the Alignment Display
Setup button (
) on the Alignment Pane toolbar or choose View >Display Setup from
the menu bar or Display Setup from the shortcut menu. The Alignment Display Setup
dialog box opens with three property tabs: Consensus Calculation, Similarity Tables, and
Color Setup.
Consensus Calculation
A consensus sequence is a theoretical representative nucleotide sequence in which each
nucleotide represents either the residue seen most frequently at that same site in aligned
sequences, or is selected by other criteria. The Consensus Calculation tab specifies how the
consensus sequence, displayed as the bottom sequence in the Alignment Pane, is calculated
in Align X.
419
Fig. 27. 5 Consensus Calculation tab of Alignment Display Setup dialog box
On the Consensus Calculation tab (Fig. 27.5), you can select among the following
parameters:
•=
Consider only identical residues…
•=
Ignore gaps in the consensus calculation
•=
Specify a sequence to use as the consensus sequence. In this case, select one of the
sequences listed (those used in the alignment).
•=
Residue fraction
If the Use sequence as consensus checkbox is checked, the Consensus will not be
calculated but the sequence selected in the listbox below the checkbox will be used as the
consensus.
Similarity Tables
The Similarity Table (Fig. 27.6) allows you to review or to define residue similarity
information and values necessary for calculation of the alignment quality profile. Each
residue pair can be defined as being strongly or weakly similar to each other. The table is
editable only for amino acid residues.
420
AlignX Chapter 27
Fig. 27. 6 Similarity Tables tab of Alignment Display Setup dialog box
Alignment Color Scheme Setup
Residues in an alignment are colored according to the following scheme:
Color
Description
black on window default
color
non-similar residues
blue on cyan
consensus residue derived from a block of similar
residues at a given position
black on green
consensus residue derived from the occurrence of
greater than 50% of a single residue at a given
position
red on yellow
consensus residue derived from a completely
conserved residue at a given position
green on window default
color
residue weakly similar to consensus residue at
given position
Table 27. 2 Alignment color scheme
To modify alignment display colors, in the Alignment Display Setup dialog box, select the
Color Setup tab (Fig. 27.7).
421
Fig. 27. 7 Color Setup tab of Alignment Display Setup dialog box
Change the colors for the specific project using the drop-down menus, observing the
modifications in the preview box. Click OK to save color changes in the alignment project.
They will be applied to the alignment next time you open the project.
After any changes are saved, consensus and colors for residues in the Alignment Pane are
recalculated as well as values for all the three graphs in the Graphics Pane, and both panes
are redrawn.
AlignX Projects
Creating a New Project
When AlignX is launched, a new, empty alignment workspace is created. To create a new
alignment project while in the AlignX display window, select Project > New on the menu
bar. If you have any unsaved changes in an existing, and currently open project, AlignX
suggests changes should be saved.
In the dialog box that opens, select Yes to save changes, No to disregard changes or Cancel
to discard changes and continue work on the opened project. In the first two cases, the
current project will be closed and the workspace emptied.
Opening existing project
To open an existing project, choose Project > Open on the menu bar or press the Open
) on the Main Toolbar. In the Open dialog box, select the desired file
Project button (
and press Open. By default, alignment projects have an “*.apr” file extension. If the file is
422
AlignX Chapter 27
an alignment project, information about molecules, properties and alignments (if any)
appears in appropriate panes.
Another way to open an existing project is to drag and drop the project file on the AlignX
workspace.
Adding Molecules to the Project
Molecules for a new (or existing) project can be added to AlignX in these ways:
•=
In the Vector NTI Database Explorer, in either a DNA/RNA subbase or a protein
subbase, select a list of molecules, and drag them into the Text Pane of the empty
AlignX workspace. Molecules can be dropped in the AlignX workspace to be added to
the project if they are of an appropriate file format and molecule type.
•=
Select Project > Add files on the AlignX menu bar or click the Add Files button (
on the Main Toolbar. Choose the appropriate file of molecules from the Add files to
project dialog box, and click Open.
)
AlignX reads various file formats: GenBank and EMBL for DNA , GenPept and SWISSPROT for proteins, FASTA and Vector NTI archives for both DNA and proteins. The first
added molecule determines the molecule type. If you try to add molecules of a different type
later, a warning message appears and the inappropriate molecule is not added. If a
molecule’s type correlates with the current project, the molecule(s) are added to the project
and appear in the Text Pane.
If the program fails to define a file’s format, the file can be imported as a raw sequence. If
there are no molecules in the project, the molecule’s type must be selected before it is
possible to import the file (Fig. 27.8). If the project is not empty, the molecule type is
already defined and the raw sequence can be imported only if its file type matches the
current project.
Fig. 27. 8 Importing a raw sequence
Imported raw sequences appear in the Text Pane with the names such as NONAME, and
NONAME#2. Select Rename Molecule from the shortcut menu to rename the molecule.
423
Even after molecules are brought in the AlignX workspace, three of the panes are empty
until the alignment is created.
Alignment Import in MSF Format
In addition to its own projects, AlignX can open alignments of the MSF format. To open an
MSF project, choose Project > Import MSF Format from the menu bar. In the File Open
dialog box, select the MSF project to be opened. By default, MSF projects have an .msf
extension, but are not limited to it. AlignX tries to recognize the MSF format itself, not
simply by its file extension. You can also open an MSF project by dragging the file and
dropping it within the AlignX window. An MSF project imported into a new AlignX project
is initially named untitled. Select Rename Molecule from the shortcut menu to rename the
molecule.
The information contained within an MSF project is molecule type, name, length and
sequence. For this reason, Text Pane folders of MSF-format molecules contain no
information about creation and modification date, author, original access number,
references, and feature tables. Work is done with an MSF project just like any other AlignX
project.
Initiating an Alignment
There are two ways to initiate alignments. In the Text Pane, select the sequences to be
included in the alignment, then proceed with either a multiple alignment, or a profile
alignment.
Multiple Alignment
In a multiple sequence alignment in AlignX, all sequences included in the alignment are
“equally important.” AlignX uses a modified Clustal W algorithm in which pairwise
alignments are performed between sequences and the alignment tree proceeds using the
particular scoring matrix designated by the user in Alignment Setup (see page 431), whereas
in the traditional Clustal W, the algorithm chooses the scoring matrix or series of matrices
as the alignment progresses. (See page 715 for alignment algorithm references.)
To initiate a multiple alignment, press the Align button (
) on the Main Toolbar or select
Alignment > Align Selected Sequences from the menu bar. This function is enabled only if
more than one molecule is selected in the Text Pane.
Profile Alignment
A profile alignment in AlignX is based on aligning all selected sequences against a
reference sequence. This is based on the ClustalW algorithm. To initiate a profile alignment,
press the Align Profile button (
) on the Main Toolbar or choose Alignment > Align
Selected Sequences Using Profile on the menu bar. In the Select Profile dialog box (Fig.
27.9) that opens, select the molecule to be used as the first profile.
424
AlignX Chapter 27
Fig. 27. 9 Select Profile dialog box
This function is available only if more than 1 molecule is selected in the text view.
Adding a Molecule to an Alignment
To add a molecule to the alignment, select the molecule in the Text Pane or drag it in from
Database Explorer. Press the Add to Alignment button (
) or choose Alignment > Add
Selected To Alignment. A profile alignment using an existing alignment as the first profile
will be performed. This function is available when an alignment already exists and at least
one molecule that does not belong to alignment is selected in the Text Pane.
Removing a Molecule from an Alignment
To remove a selected molecule from the alignment (but retain it in the project), press the
Remove Molecule from Alignment button (
) on the respective pane’s toolbar or
choose View > Remove <molecule name> From Alignment or select the same command
from the shortcut menu. If you confirm removal of the molecule, the specified molecule is
removed and the phylogenetic tree, consensus and graphs are all recalculated the panes
refreshed. A molecule can be selected for removal either in the Text Pane, the Phylogenetic
Tree Pane or the Alignment Pane.
Removing a Molecule from the Project
To delete a selected molecule from the project, press the Delete Molecule from the Project
button (
) from the Text Pane toolbar, choose View > Delete From Project on the menu
bar or Delete From Project from the shortcut menu. If you confirm this operation, the
specified molecule will be deleted from the project. If the molecule is removed from the
alignment, the phylogenetic tree, consensus and graphs are recalculated and refreshed.
Setting Alignment Parameters
The first molecule added to an alignment defines the molecule type of the alignment (DNA
or protein). When initiated, a default set of alignment options is created for the defined
molecule type. To change these options, press the Alignment Setup button (
) on the
425
Main Toolbar or choose Alignment > Alignment Setup. The Alignment Parameters dialog
box opens with five property tabs: Pairwise Alignment, Multiple Alignment, Protein Profile
Alignment, Tree Construction Options and Score Matrix (Fig. 27.10).
Pairwise Alignment
The method for calculating pairwise distances is defined on the Pairwise Alignment tab.
Fig. 27. 10 Alignment Setup dialog box, with Pairwise Alignment tab displayed
Pairwise alignment parameters control the speed/sensitivity of the initial alignments:
•=
Fast (approximate) method
•=
Slow (more accurate) method uses two gap penalties (for opening or extending gaps)
and a full amino acid weight matrix.
By default, the slower method is used. There are two groups of parameters enabled on this
pairwise tab depending upon which method is chosen.
Note: Default settings are in parentheses: first number = DNA; second number = protein
Pairwise Alignment Parameters
Slow Options
426
Gap opening
penalty (15/10)
The penalty for the first residue in a gap
Gap extension
penalty (6.66/0.1)
The penalty for additional residues in a gap
AlignX Chapter 27
Pairwise Alignment Parameters
Fast Options
Number of K-tuple
matches (2/1)
Change the K-tuple value to limit the word-length the
search should use. A word-length of 2 is sensitive
enough for most protein database searches. The
general rule is that the larger the word length, the less
sensitive, but faster the search will be.
Number of best
diagonals (4/5)
Number of the k-tuple matches on each diagonal used
in the alignment
Window size (4/5)
The number of diagonals around each of the best
diagonals used
Gap penalty (5/3)
Penalty for the existence of a gap
Table 27. 3 Pairwise Alignment parameters
Multiple Alignment
These parameters control the final multiple alignment (Fig. 27.11).
Fig. 27. 11 Multiple Alignment tab of Alignment Setup dialog box
Note: Default settings are in parentheses: first number = DNA; second number = protein
427
Multiple Alignment Parameters
Gap opening penalty
(15/10)
The penalty for the first residue in a gap
Gap extension
penalty (6.66/0.05)
The penalty for additional residues in a gap
Gap separation
penalty range (8)
Tries to decrease the distances between gaps
Use end gap
separation penalty
Does not penalize for gaps introduced at the end of a
sequence
% identity for
alignment delay (40)
Delays the alignment of the most divergent
sequences; that is, sequences that are less identical
than the percentage shown will be introduced into the
alignment later.
Use residue-specific
gaps
Amino acid-specific penalties that increase or reduce
penalties at each position in the aligned sequence
Use hydrophilic
residue gap
Increases the chance of a gap within a region of
hydrophilic residues (if yes, specify in the following text
box)
Transition weighing
(For DNA only) Gives translations (A<- > G or C<- >
T) a specific weight. (0) means the transition is treated
as a mismatch while 1 gives the transition a match
score (0)
Table 27. 4 Multiple Alignment parameters
Protein Profile Alignment
This dialog box allows you to raise penalties for opening gaps in secondary structure
(protein) regions (Fig. 27.12).
428
AlignX Chapter 27
Fig. 27. 12 Protein Profile tab of Alignment Setup dialog box
Note: Default settings are in parentheses.
Profile Alignment Parameters
Use secondary structure in
first/second profile (yes or
no)
[If no in either profile, all
other parameters are
disabled]
Determines if the secondary structure
information is to be used in the indicated
profile
Gap penalty for helix core
residue (4)
For helix core residues breaking
Gap penalty for strand core
residue (4)
Gap penalty for structure
termini (2)
For introducing gaps at the end of a secondary
structure
Gap penalty for loop regions
(1)
Raises the penalty for introducing gaps in a
loop (By default this penalty is not raised.)
429
Profile Alignment Parameters
Number of residues
inside/outside a helix/strand
to be treated as terminal
Inside helix (3)
Outside helix (0)
Inside strand (1)
Outside strand (1)
Specifies the range of residues inside or
outside a helix or strand beyond the structure
Table 27. 5 Profile Alignment parameters
Phylogenetic Tree Construction Options
A phylogenetic tree is calculated from the alignment using the Neighbor Joining (NJ)
method. On the Tree tab (fig. 27.13), two parameters may be changed for tree construction
(neither of these are set initially):
Tree Construction Parameters
Use Kimura’s
correction
Corrects for the fact that observed distances underestimate
the actual evolutionary distance. For small divergence, this
option makes no difference. For greater divergence ( >
10%), substitutions can occur multiple times at different
sites. (Kimura, 1983)
Ignore positions
with gaps
When checked, any alignment positions where the
sequences have gaps will be ignored.
Table 27. 6 Tree Construction parameters
Fig. 27. 13 Tree tab of Alignment Setup dialog box
430
AlignX Chapter 27
Score Matrix
The Score Matrix tab (Figure 27.14) displays the matrix used to generate the current
multiple alignment. From this tab, you can also open other matrices for review or for
application to the alignment.
When a project is created, a residue substitution matrix from the corresponding template
(DNA or protein) is used. If either template file is not found, the default matrix is used
(swgapdnamt for DNA and blosum62mt2 for protein). To review other matrices for either
DNA or proteins, click the Select Matrix button. From the Matrices file, select any other
matrix to be loaded on the Score Matrix tab.
Fig. 27. 14 Score Matrix tab of Alignment Setup dialog box
Editing a matrix takes place in the Matrix Editor, accessible from the program files where
you installed the Vector NTI Suite. For further details regarding customizing or editing
matrices, refer to Chapter 36.
Editing the Alignment
To edit an alignment, press the Edit Alignment button (
) on the Alignment Pane
toolbar, or choose View > Edit Alignment from the menu bar or Edit Alignment from the
shortcut menu. This opens the Edit Alignment dialog box containing rows of molecule
names and sequences (Fig. 27.15).
431
Fig. 27. 15 Edit Alignment dialog box
To edit the alignment, select the desired region in the sequence by LEFT-CLICK + DRAG
through the sequence in the appropriate direction with the mouse or double-click with the
left mouse button within the sequence, selecting the entire region between two gaps. The
current selection, as well as its position in the sequence, is shown in the status bar of the
dialog box.
Editing can only occur by shifting selected sequences into adjacent gaps. Therefore, the four
buttons allowing movement of the selected block are enabled only when there is a gap to the
left or right of the selected region. To shift the block, press one or more of the following
buttons:
- to the beginning of the adjacent gap interval in the left direction
- one position left
- one position right
- to the end of the adjacent gap interval in the right direction
Click the OK button to save any changes and close the Alignment Edit dialog box. Click the
Apply button to save any changes and leave the dialog box open. This button is enabled
only when there are differences between the alignment shown in the Alignment Pane and the
edited alignment. The Cancel button discards all the changes made since the last use of
Apply.
Templates
Template files contain all the Alignment Setup, the Plot Setup, or the Alignment Display
Setup properties for the AlignX program. When an alignment project is being created,
AlignX locates the default template file (default.atp for protein and default.atn for DNA) in
432
AlignX Chapter 27
the main Vector NTI directory. If the file exists, the properties from it apply to the project.
If the file is not found, default predefined values from AlignX itself are used.
You can save current settings of the alignment project in a template file or apply settings
from an existing template to an open project. To save settings as a template, choose Edit >
Setup > Save to File and select the destination for the settings (or type the name of the new
template file). Default extension for template files is “atp” for proteins and “atn” for DNA.
To apply settings from an existing template to the open project, choose Edit > Settings >
Load from File and select the template file. Settings affecting the plot presentation (Plot
Setup) or the alignment presentation (Alignment Display Setup) take effect immediately.
The alignment properties (Alignment Setup) take effect only after the alignment is
recalculated. To do this, select and realign the same molecules from the Text Pane.
Similarity Table Analysis
The Similarity Table analysis shows similarity and/or divergence values for all possible
sequence pairs for the sequences that are included in the alignment.
To open the Similarity Table, choose Alignment > Show Similarity Table from the menu.
A Similarity Table window opens (Fig. 27.16):
Fig. 27. 16 Similarity Table window
There are three different modes of analysis accessible via the buttons on the top of the
Similarity Table dialog box. Press the Top Similarity button (
) to show similarity
) to show
values between the sequence pairs. Press the Top Divergence button (
divergence values for non-identical pairs. Press the Top-similarity, bottom-divergence
433
) to show pair similarity values at the top of the table and pair divergence
button (
values at the bottom of the table. You can also use the Print button to print the table or the
Camera button to copy the table to the Clipboard so that it can be pasted into another
application, such as Word or Excel.
Dot Matrix Analysis
The Dot Matrix analysis is primarily a method for comparing two sequences to find all
possible matches of residues. This method can also be used to find direct or inverted repeats
in protein and DNA sequences. It can predict regions in RNA that are self-complementary
and therefore might form a double-stranded region or secondary structure.
In the Dot Matrix method of sequence comparison, one sequence (A) is listed across the top
of a page and the other sequence (B) is listed down the left side. Starting with the first
positions in A and B, the program slides the window of n characters along the sequences
performing a comparison of adjacent positions in the windows. If the similarity of residues
in each position is above a certain cutoff, a dot is placed in the matrix in the position defined
by the starting positions of the window for both sequences. A diagonal line segment
indicates that the two sequences match consistently over an extended region.
A larger window size is generally used for DNA sequences than protein sequences since the
number of random matches is much greater for DNA.
Launching the Dot Matrix
To perform a Dot Matrix analysis, open a Dot Matrix window by pressing the Dot Matrix
button (
) or choosing Alignment > Show Dot Matrix Plot. A Dot Matrix window
opens in a separate modal popup window.
All molecules present in the alignment plus the consensus are available in both drop-down
menus at the top of the empty screen (Fig. 27.17). The molecule selected in the Alignment
Pane is shown in the first drop-down menu. The Dot Matrix is calculated when a new
selection is made in either drop-down menu (the second should not be empty). The
consensus is treated as a common molecule.
Fig. 27. 17 Dot Matrix window drop-down menus
The Dot Matrix window contains a menu bar, Main Toolbar, molecule selection toolbars,
status bar, and Dot Matrix Pane. All of the toolbar buttons for the Dot Matrix are displayed
and described in Chapter 4. Toolbar buttons are described in this section as needed.
Dot Matrix Pane
The Dot Matrix Pane is represented in the following example (Fig.27.18):
434
AlignX Chapter 27
Fig. 27. 18 Dot Matrix Pane
The graphical representation of a Dot Matrix is a dashed rectangle in which any region of
similar sequence is revealed by a diagonal row of dots. The molecule selected first
corresponds to the horizontal axis, its name being shown in the right top corner of the Dot
Matrix rectangle. The second molecule corresponds to the vertical axis. Each axis has its
own scale that initially displays the sequence positions. When changing the scales (resizing
Dot Matrix Window or zooming Dot Matrix Pane) it is possible to show residues along the
axes. Residues are displayed only if they can be displayed on both axes. When the scales
allow displaying of residues, a grid can be laid upon the Dot Matrix. To apply (or revoke) a
grid, press the
button or choose the Grid on Zoomed Matrix command from the
shortcut menu or the View menu.
There are two modes in displaying a Dot Matrix, alternated by pressing the Isotropic
Scaling button (
) or selecting View > Maintain Isotropic Scaling:
1.
Equal scales are used for both axes, meaning the diagonal rows of dots always have a
45° angle relative to the axes.
2.
Various scales for axes, that means that Dot Matrix always occupies maximum space in
the Dot Matrix Pane.
435
The scales for X & Y-axes change dynamically when you resize the Dot Matrix Window.
Also, the boundaries of regions currently displayed are shown for both molecules.
Resizing the Dot Matrix
When the Dot Matrix is first calculated, it is shown as a representation of the full length of a
molecule. Generally it is impossible to analyze molecules of several thousand residues each
when displayed in a 500 x 500 (approximate) screen matrix. To alleviate this problem, a
region of a Dot Matrix may be enlarged: click and hold the left mouse button within the Dot
Matrix rectangle while dragging the mouse, displaying the tracking dotted rectangle. When
the mouse button is released, the selected region is enlarged to the entire Dot Matrix
rectangle. The previous state is saved in the history list. Click the Undo Zoom (
Redo Zoom (
) and
) buttons for modifying the view of the selected region.
Dot Matrix Setup
Open the Dot Matrix setup (Fig. 27.19) by pressing the
button on the main toolbar or
by choosing the Matrix Setup command from the Matrix menu.
Fig. 27. 19 Dot Matrix Setup dialog box
Two parameters affect the Dot Matrix calculation:
Dot Matrix Setup
stringency (30% by default)
the minimal number of matches in the window
to cause a dot to be set in the matrix
window (5)
the size of the sliding window
Table 27. 7 Dot Matrix setup
Other AlignX Features
The following features can be performed in the AlignX display window. Details specific to
AlignX are outlined here. For more information refer to Chapter 3.
436
•=
Print and Print Preview
•=
Copying to the clipboard
AlignX Chapter 27
Data or graphics from any pane, including the Dot Matrix can be copied to the
Clipboard.
•=
Exporting molecules
To export a currently open AlignX project into the MSF format, choose Project >
Export MSF Format and enter the name of the file it is to be saved as.
•=
External tools
Alignment Algorithms
For details regarding alignment algorithms, refer to Appendix B.
437
438
BioPlot Chapter 28
Chapter 28 BioPlot
Introduction
BioPlot is a sequence analyzer that performs certain types of DNA and protein sequence
analyses, and displays the results as linear graphics. For proteins, amino acid scaling allows
the user to visualize the distribution of the particular physio-chemical properties along the
polypeptide chain, thus providing helpful hints about the functional properties of the protein
regions or domains. An amino acid scale is defined by a numerical value assigned to each
type of amino acid. The most frequently used scales are the hydrophobicity, hydrophilicity,
and the secondary structure conformational parameters scales, but many other scales exist
which are based on different chemical and physical properties of the amino acids. This
program provides about 60 predefined scales entered from the literature.
Launching BioPlot
To launch BioPlot, select or double-click its icon in the program group or folder in which
you installed Vector NTI Suite. To launch BioPlot from Database Explorer, with a molecule
highlighted, select Analyze > BioPlot – Analyze Selected Molecule, or select Analyze >
BioPlot – Open New Analyzer Window. From a Molecule Display Window or other
Vector NTI applications, make the same selections, although of course the molecule to be
analyzed will be that opened in the display window.
You can also drag a molecule from a partial Database Explorer screen or other Vector NTI
applications into an empty BioPlot workspace.
Features of the BioPlot Workspace
Depending upon how BioPlot is first opened, the display window may be empty. As a new
project is created or an existing BioPlot project is opened, the analysis results then appear in
the display window.
If your BioPlot display window is empty, open a demo project into the workspace before
you review its features. Select File > Open. Find the Vector NTI Suite folder. It is probably
located in Program Files\Vector NTI\Demo Projects. Open the DNA or protein.apf file.
The BioPlot interface (Fig. 28.1) consists of a menu bar, three toolbars, and a BioPlot
Display window, with shortcut menus specific for each pane.
439
Main
menu
Main
toolbar
Pane
Selection
toolbar
Pane
toolbar
Text
Pane
Plot Pane
Sequence
Pane
Fig. 28. 1 BioPlot interface
BioPlot has three toolbars: the Main toolbar, the Pane Selection toolbar, and the Pane
toolbar. The Main Toolbar contains tools for major program functions, such as opening
BioPlot analysis projects, importing molecule data from various formats, adding and
deleting analyses, etc. Many toolbar commands can also be launched from the menu bar or
from a shortcut menu.
All Vector NTI Suite toolbar buttons are summarized in Chapter 4. As you are introduced to
various operations in this chapter, however, the toolbar buttons you will use are displayed as
needed.
Each Display Window is divided into three section or panes: a Text Pane, a Plot Pane, and a
Sequence Pane. Split bars allow the resizing of the panes in the display window. In BioPlot,
the heavy line at the bottom or top of a graph is also a split bar. Each pane has its own scroll
bars, allowing vertical and horizontal movement through the pane.
As in the other Vector NTI Suite applications, to apply a command from the main menu in a
given pane (Print, Print Preview, Camera), that pane must be active. The active pane can be
toggled with the Switch Panes (
,
,
) buttons in the Pane Selection Toolbar or by
clicking anywhere in the pane you want to activate.
440
BioPlot Chapter 28
Elements of BioPlot Display Windows
Text Pane
To activate the Text Pane, click on the Text Pane button (
Toolbar.
) on the Pane Selection
The Text Pane contains a thorough description of the analyzed molecule. The information is
organized in a tree structure with the following folders:
Folder
Contents
General
description
Molecule type, form (for DNA only), length, etc.
Proprietary
fields
User defined fields (for molecules that came from Vector
NTI)
Standard
fields
GenBank/SWISS-PROT-like fields: keywords, division,
original accession numbers, etc
Comment
Arbitrary text of any length associated with the molecule
References
Bibliographic references (in GenBank/SWISS-PROT
format)
Feature
table
List of molecule features
Table 28. 1 BioPlot Text Pane folders
The following Text Pane manipulations are outlined in Chapter 3:
•=
Expanding and collapsing folders
•=
Opening the folder shortcut menus
•=
Copying pane contents to the clipboard
Plot Pane
The Plot Pane consists of the plots region, a common horizontal axis, and scrollbars.
A plot consists of a vertical axis, showing minimal and maximal values of analysis results,
and an individual horizontal axis, displaying either numerical positions in the sequence or
residues. Even if residues do not show initially, if you enlarge the region enough, individual
residues are displayed. The data region graphical analyses and the legend region displays
the name of each analysis. To change the width of the description section, drag the thin
vertical bar in the right corner of the common horizontal scale.
441
User Interaction Modes
BioPlot has two modes for working with plots.
•=
Regular Mode (default mode): In this mode, regions of data can be selected, the scale of
plots can be changed, and the data section can be scrolled. In this mode, the Plot Pane is
synchronized with the Sequence Pane. This means that a selected data region on the
Plot Pane is displayed concurrently in the Sequence Pane and vice versa.
•=
In the Plot Layout Mode: The plots are treated as pictures that can be arranged in a
number of ways, including changes in positions and the heights of the plots. To activate
the Plot Layout Mode, click the Edit Layout button (
) on the Plots Pane Toolbar.
This enables several edit buttons at the far right of the toolbar.
By default, plots do not overlap, but you can resize them by dragging horizontal separator
bars.
Plot Layout Mode
To perform any of the following operations, BioPlot must be in the Plot Layout Mode,
activated by pressing the Plot Layout button (
).
Selecting Plots
To perform certain actions on displayed plots, you must activate Plot Layout mode, by
clicking the Plot Layout button (
), then select one or more plots. To select a plot, click
on it with the mouse. If you hold the SHIFT key down, previously selected plots stay
selected; otherwise, they become unselected as you click on new selections. Selected plots
can be distinguished from unselected ones by the black boxes or “handles” in the corners of
the selected plot (Layout Mode only—see below).
Overlapping Plot Graphics
•=
If the Enable Overlapping option is turned on (with the Enable Overlapping button
(
), one plot can be superimposed on another (drag it into position). The overlapping
order can also be modified. To bring a plot to the front, use the Bring to Front button
(
) on the toolbar or select View > Bring to Top. To send a selected plot to the
back, press the Send to Back button (
Back.
•=
442
) on the toolbar or select View > Send to
When the Enable Overlapping option is turned off, superimposed plots return to their
original order.
BioPlot Chapter 28
Changing Plot Position
•=
If the Enable Overlapping option is on, the plot can be dragged and dropped anywhere
in the Plot Pane. Click on a plot + drag the mouse. The cursor shape is changes from
. It will be placed on top of other plots that might occupy the same position.
to
•=
If the Enable Overlapping option is off, the plot can be dropped in specific positions
only. When the cursor shape changes from
the cursor shape changes to
to
,a
new position is allowed. When
, the new position is invalid.
Changing Plot Height
Plot height can be changed only for a single plot at a time.
•=
To modify the plot height, move the cursor to one of the handles where it changes to a
two-headed arrow ( ). Drag the handles vertically to resize the plot.
o
If the Enable Overlapping option is on, handles appear at the top and bottom
of a graph.
o
If the Enable Overlapping option is off, handles appear only at the bottom of a
graph. Data selection
Regular Mode
Selecting Data
A region of data may be selected in the Regular Mode only. To select a region, press and
hold the mouse button and drag the mouse horizontally over the plot. To modify the current
selection either hold the SHIFT key down and click/drag in the plot area or resize the edges
of the existing selection by dragging them (the cursor changes to ).
By clicking outside the plot area or individual horizontal axis, BioPlot removes the selection
from plot.
Selecting a region on one of the plots also changes selected regions on all plots.
Changing Scale
As in other Vector NTI Suite applications, plot analysis graphs can be resized using the
Zoom buttons. The scale for all plots can be changed by using the Zoom In (
Zoom Out (
) and
) buttons or by selecting View > Zoom In or Zoom Out. Increase the scale
of a selected region in the Plots Pane by clicking the Zoom to Selection button (
). In
this case, now you can read the individual residues in the Plot Pane. To fit the entire plot
into the data section, use the Fit to Window button (
) or select View > Fit to Window.
443
Editing Analysis Properties
To modify individual properties and common display properties, double-click on a plot,
opening the Plot Properties dialog box. Alternatively, click on a plot once to select it, then
press the Properties button (
bar.
) or choose View > Properties command from the menu
In the Plot Properties dialog box, both the analysis parameters and the display setup for the
plot can be changed. The Analysis tab contains a short description of the analysis and some
analysis-dependent parameters. The Display tab changes the display attributes of the plot,
such as plot type and color. It also turns the display of the individual scale for the plot on or
off.
Changing Common Display Properties
The common display properties of all plots can be customized using buttons on the Plot
Pane toolbar of the View menu. The Show Vertical Axis command/buttons (
on/off the display of vertical axes on all plots. The Show Legend (
Position (
) turns
) and Legend
) buttons turn on/off and change position of the legends for all of the plots.
Display Setup for Analyses is discussed later in this chapter.
Sequence Pane
As in Vector NTI Suite applications, in BioPlot nucleotide or amino acid sequences can be
viewed, manipulated and formatted in the Sequence Pane. Regions of the sequence can be
copied and pasted to the Clipboard.
Sequence Pane Elements
In addition to the sequence, the Sequence Pane displays a molecule’s sequence features.
Features are shown with a horizontal line above the sequence (protein features and DNA
features on the direct strand) or below the sequence (DNA features on the complementary
strand). Labels also show the name of the feature.
The sequence can be scrolled up or down with the Sequence Pane’s scroll bar. If Sequence
Pane is the active pane, standard arrow keys may be used to scroll the sequence.
Navigating the Sequence Pane Using the Keyboard
Standard keyboard keys may be used to navigate the sequence:
444
BioPlot Chapter 28
Key
Description
Left
Move caret to previous position
Right
Move caret to next position
Up
Move caret position one line up
Down
Move caret position one line down
Home
Move caret position to the beginning of the current line
End
Move caret position to the end of the current line
Ctrl-PgUp
Move caret position to the beginning of sequence
Ctrl-PgDn
Move caret position to the end of sequence
Table 28. 2 Navigating a sequence using the keyboard
Selecting a Sequence Region
To select sequence regions, CLICK + DRAG the mouse across the sequence. Press SHIFT +
RIGHT or LEFT ARROW to start or extend a selection.
A selected region in the Sequence Pane is concurrently displayed on the plots in the Plot
Pane.
Changing Sequence Pane Properties
In BioPlot, double-strand mode is default mode for DNA/RNA sequences. To switch to a
single strand display, press the (
Strand.
) button on the pane toolbar or select View > Double
The length of a single line of a sequence and number of blocks per line can be adjusted as
well. Press the Setup (
) button on the toolbar or select the View > Properties to open
the Setup dialog box (Fig. 28.2):
445
Fig. 28. 2 Setup dialog box
Press the Setup button for a Sequence to control sequence display (Fig. 28.3):
Fig. 28. 3 Sequence Display Setup dialog box
To choose what features should be shown in the Sequence Pane, click on the Setup button
for Feature map in the Setup dialog box, opening the FMap Setup dialog box (Fig. 28.4):
446
BioPlot Chapter 28
Fig. 28. 4 FMap Setup dialog box
Click the Add button to add features for display. Feature Map Setup is discussed in detail in
Chapter 19.
Changing Sequence Character Display Attributes
Display attributes for selected sequence residues can be changed in the same way that text is
formatted in a word processor using the appropriate toolbar buttons. See Chapter 3 for
details.
Copying a Raw Sequence
To copy real sequence data to the Clipboard, select a sequence region and choose Edit >
Copy. The sequence will be copied in the plain text format without formatting or line
numbering. This “raw” format is suitable for pasting into other molecular biology software
including programs in the Vector NTI Suite. The keystroke for the copy operation is
Ctrl+C.
BioPlot Projects
Creating a New Project
When BioPlot is launched, a new, empty display window is opened. To create a new
project, you must import molecule information from various molecule file formats. To
import a molecule, select File > Open on the menu bar.
BioPlot reads the following file formats: GenBank and EMBL for DNA, GenPept and
SWISS-PROT for proteins. BioPlot also reads ASCII Text, FASTA, and Vector NTI
archives for both DNA and proteins.
447
In the File Open dialog box that opens, select the desired file and press Open. The program
tries to recognize which format is being used and whether the sequence is nucleic acid
(DNA/RNA) or amino acid (proteins).
If the program fails to define a file’s format, it will be suggested in the following dialog box
that the file be imported as a raw sequence (Fig. 28.5):
Fig. 28. 5 Importing a raw sequence
To create a new BioPlot project from Vector NTI, in Database Explorer, select a molecule,
then choose BioPlot > Analyze Select Molecule or BioPlot > Open New Analyzer
Window.
Opening an Existing Project
BioPlot can save a molecule and its an analysis list (with individual options) and displayed
character attributes, as a single file. At any time, BioPlot can restore the contents of this file
and continue to work with it. An aggregate set of molecule, options, and attributes is called
a BioPlot project.
To open an existing project, choose File > Open or press the (
) button on the toolbar.
In the Open dialog box, select the desired file and press Open. By default, BioPlot project
files have an “*.apf” file extension. If the file is an analyzer project, information about the
molecule, its analyses, and sequence display character properties (if any) appears in the
appropriate panes. Another way to open an existing project is to drop the project file on the
BioPlot window.
Analysis List Setup
The important part of configuring BioPlot is the selection of analyses to perform for a
molecule. To add or remove any analysis from the plot, open the Analysis List Setup dialog
box where you can choose from the list of available analyses.
To open the dialog box, press the Analysis List button (
) on the Main Toolbar, choose
Edit > Analysis List on the menu bar or press the Setup button for Analysis List in the
448
BioPlot Chapter 28
Setup dialog box described previously in this chapter. This opens the Analysis List Setup
dialog box (Fig. 28.6).
Fig. 28. 6 Analysis List Setup dialog box
The dialog box lists currently displayed analyses in the Selected Analyses box and a list of
50 predefined analyses in the Available Analyses box. Available analyses differ for
DNA/RNA and protein molecules. Citations for each analysis are noted in the dialog box.
To add one or more analyses to the displayed analysis list, in the upper list, select the
) button or double-click on each analysis to be
appropriate analyses and press the (
added. To see the same analysis with different parameters, you can add more than one
“instance” of the same analysis.
The relative position of an analysis in the Selected Analyses list determines the order in
which the plots appear in the Plot Pane. The list may be rearranged by moving a selected
analysis up or down by pressing (
) and (
) buttons.
Once analyses appear in the bottom box, properties of the selected analyses can be changed,
analyses may be moved up and down in analysis list, and analyses may be removed from the
449
list. To change the properties of an analysis, select it in the list and press the (
or double-click the analysis in the list.
) button
To remove an analysis from the displayed analysis list, select it in the analysis list and press
the (
) button.
Analysis Properties
To change analysis parameters and choose from the various plot representation options,
open the Analysis Properties dialog box by pressing the (
) button in the Analysis List
Setup dialog box, or the same button on the Plots Pane Toolbar or by double-clicking on a
plot in the Plot Pane.
The Analysis Properties dialog box has two tabs (Fig. 28.7).
1.
2.
Analysis tab: You can choose analysis-dependent analysis parameters. In general, every
analysis has its own version of this tab for editing analysis-specific parameters, but
fortunately, most protein analyses have very similar Analysis tabs. Two examples of
these tabs are described later in this chapter.
Datagram tab: This is the same for all analyses. You can choose the plot type (Bar
Chart, Line Chart, Boolean Chart), Threshold (the minimal relative value considered as
“true” for Boolean Chart) and plot color. You can also choose to display or hide the
individual horizontal axis. The effect of your choices is previewed on the tab before
you choose OK.
Fig. 28. 7 Analysis Properties dialog box
450
BioPlot Chapter 28
Other BioPlot Features
The following features can be performed in the BioPlot Display window. Details specific to
BioPlot are outlined here. For more information, refer to Chapter 3.
•=
Printing from BioPlot
•=
Copying data from BioPlot
•=
Exporting molecule data
Analyses Descriptions
DNA/RNA Analyses
Melting temperature and free energy are calculated using the “nearest neighbors” method.
Constants and algorithms used for calculation of thermodynamic parameters may be found
in the sources listed in Appendix D.
The full list of DNA/RNA analyses are as follows:
•=
Free Energy (dG) (kcal/mol)
•=
Enthalpy (dS) (kcal/mol)
•=
Enthropy (dS) (cal/K/mol)
•=
Melting Temperature (Thermodynamic) ©
•=
Melting Temperature (GC Content) ©
•=
GC Content (%)
•=
Nucleic Acid Distribution (%)
•=
Sequence Complexity
Protein Analyses
Nearly all protein analyses are based on ProtScale analyses. ProtScale allows the
computation and representation of the profile produced by any amino acid scale on a
selected protein.
An amino acid scale is defined by a numerical value assigned to each type of amino acid.
The most frequently used scales are the hydrophobicity or hydrophilicity scales and the
secondary structure conformational parameters scales. Many other scales exist which are
based on different chemical and physical properties of the amino acids.
The full list of ProtScale analyses is as follows: Full citations appear in Appendix B.
•=
Amino acid composition (%) in the SWISS-PROT Protein Sequence data bank
•=
Antigenicity value X 10
451
452
•=
Atomic weight ratio of hetero elements in end group to C in side chain
•=
Average area buried on transfer from standard state to folded protein.
•=
Average flexibility index.
•=
Average surrounding hydrophobicity.
•=
Bulkiness
•=
Conformational parameter for alpha helix (computed from 29 proteins).
•=
Conformational parameter for alpha helix
•=
Conformational parameter for beta-sheet (computed from 29 proteins).
•=
Conformational parameter for beta-sheet.
•=
Conformational parameter for beta-turn (computed from 29 proteins).
•=
Conformational parameter for beta-turn.
•=
Conformational parameter for coil.
•=
Conformational preference for antiparallel beta strand.
•=
Conformational preference for parallel beta strand.
•=
Conformational preference for total beta strand (antiparallel+parallel).
•=
Free energy of transfer from inside to outside of a globular protein.
•=
Hydration potential (kcal/mole) at 25øC.
•=
Hydropathicity.
•=
Hydrophilicity scale derived from HPLC peptide retention times.
•=
Hydrophobic constants derived from HPLC peptide retention times.
•=
Hydrophobicity (delta G1/2 cal).
•=
Hydrophobicity (free energy of transfer to surface in kcal/mole).
•=
Hydrophobicity indices at ph 3.4 determined by HPLC.
•=
Hydrophobicity scale (contact energy derived from 3D data).
•=
Hydrophobicity scale (pi-r).
•=
Hydrophobicity scale (pi-r).
•=
Hydrophobicity scale based on free energy of transfer (kcal/mole).
•=
Mean fractional area loss (f) (average area buried/standard state area).
•=
Mobilities of amino acids on chromatography paper (RF).
BioPlot Chapter 28
•=
Molar fraction (%) of 2001 buried residues.
•=
Molar fraction (%) of 3220 accessible residues.
•=
Molecular weight of each amino acid.
•=
Normalized consensus hydrophobicity scale.
•=
Normalized frequency for alpha helix.
•=
Normalized frequency for beta-sheet.
•=
Number of codon(s) coding for each amino acid in univerBioPlotl genetic code.
•=
Optimized matching hydrophobicity (OMH).
•=
Overall amino acid composition (%).
•=
Polarity (p).
•=
Polarity.
•=
Proportion of residues 95% buried (in 12 proteins).
•=
Recognition factors.
•=
Refractivity.
•=
Relative mutability of amino acids (Ala=100).
•=
Retention coefficient in HFBA.
•=
Retention coefficient in HPLC, pH 2.1.
•=
Retention coefficient in HPLC, pH 7.4.
•=
Retention coefficient in TFA.
ProtScale Algorithm
All of the ProtScale analyses use one algorithm:
W
Di =
j = −W 2
f (S i + j )
W
W
Di =
2
2
j = −W 2
for Average Method and
f (S i + j )∗ Wh j
W
for Weight Method.
453
where,
Di
- plot value in i th position
W
- window size
Si
- amino acid in i th position
f( )
- coefficient for amino acid from table of coefficients (specified for each
of analysis)
Wh j
- linear weight coefficient
For the ProtScale analyses, the Analysis tab in the Analysis Setup dialog box has the
following format (Fig. 28.8):
Fig. 28. 8 ProtScale analyses: Analysis tab of the Setup dialog box
In addition to ProtScale, analyses in BioPlot include the Sequence Complexity analysis. Full
citation is in Appendix X. For Sequence Complexity analysis, the Analysis tab in the
Analysis Setup dialog has the following format:
454
BioPlot Chapter 28
Fig. 28. 9 Sequence Complexity analysis: Analysis tab of the Analysis Setup window
Adding Custom Protein Analyses
Specific values are used in the calculation of the various protein analyses. These values
differ depending on the particular analysis and are stored in small text files having a .pa2
extension. All .pa2 analysis files are stored in the Analyses subdirectory in the Vector NTI
Suite directory. The name of the analysis corresponds with the name of the .pa2 file.
For example, the Bulkiness analysis is characterized in the Bulkiness.pa2 file as follows:
[general]
author=Zimmerman J.M., Eliezer N., Simha R.
comment=Last modified 15/Mar/1996 by ELG
reference=J. Theor. Biol. 21:170-201(1968).
unique=s30
[data]
values=11.5,14.28,12.82,11.68,13.46,14.45,13.57,3.4,13.69,21.4,21.4,15.71,16.25,19.8,
17.43,9.47,15.77,21.67,18.03,21.57
The [general] section describes the attributes of the analysis and the [data] section contains
the list of values used for calculating the analysis. Values are listed according to the
alphabetical order of the acid coefficients.
455
You can create your own custom protein analysis by modifying the values in one of the
existing .pa2 files using a plain text editor, such as Notepad. Once modified, the new .pa2
file should be saved in the Analyses subdirectory under a new name that corresponds to the
new analysis type. If BioPlot is open at the time the new .pa2 file is created, it must be
closed and reopened before the new analysis is recognized.
456
ContigExpress: Project Explorer Chapter 29
Chapter 29 ContigExpress: Project Explorer
Introduction
ContigExpress is a program for assembling many small fragments, both text sequences and
chromatograms from automated sequencers, into longer contiguous sequences or “contigs”.
Work in ContigExpress takes place in a ContigExpress Project, a file where you store
fragments, their assemblies, and assembly options related to your current task. In
ContigExpress, fragments can be edited directly, with the chromatograms in full view.
Changes are tracked and a history is maintained. The contigs generated are then saved and
managed as GenBank, EMBL or FASTA files. They can be exported into other applications
of the Vector NTI Suite for further analysis or visualization. Data can also be exported to
third-party tools available on the WWW.
Launching ContigExpress
To launch ContigExpress, double click on its icon in the program group or folder in which
you installed Vector NTI Suite. To launch ContigExpress from Vector NTI Database
Explorer, select Assemble > ContigExpress – Assemble Selected Molecules or >
ContigExpress – Open New Assembly Project. You can also launch ContigExpress from
most other Vector NTI Suite applications under the Assemble menu option.
Features of the ContigExpress Workspace
ContigExpress consists of three component windows:
•=
CE Project Explorer: This window is the first window you see when you launch
ContigExpress. In this window you open, save, and close the projects and set the
assembly options. Project Explorer is also where you can organize and assemble your
fragments contained in a project.
•=
Fragment Window: This is the workspace where you work with individual fragments
and chromatograms.
•=
Contig Window: Contig Window is the place where you review and edit contigs.
Fragment and Contig Windows are covered in Chapter 30.
CE Project Explorer
Project Explorer, similar to the Vector NTI Database Explorer, is central to the management
and assembly of fragments into contiguous sequences. When first opened, the display
window is empty. To review ContigExpress features in a complete display window, open a
demo project into the workspace. Select Project > Open Project. Find the Vector NTI
Suite folder (probably in Program Files\Vector NTI\Demo Projects.) and open
DemoProject.cep.
457
Elements of Project Explorer
The CE Project Explorer interface (Fig. 29.1) consists of a menu bar, a toolbar, a Tree Pane
on the left and a List Pane on the right side of the window.
Main menu
Main toolbar
Tree Pane
List Pane
Fig. 29. 1 CE Project Explorer interface
All Vector NTI Suite toolbar buttons are summarized in Chapter 4 of this manual. As you
are introduced to various operations in the chapters covering ContigExpress, however, the
toolbar buttons are displayed as needed. Many toolbar commands can also be launched from
the menu bar or from a shortcut menu.
The ContigExpress Project Explorer window is divided into two panes: a Tree Pane on the
left and a List Pane on the right. As a new project is created or an existing ContigExpress
project is opened, the fragment and Assembly folders are listed in the Tree Pane. Folders
can be opened (expanded) or closed (collapsed) as in the other applications of Vector NTI.
Status bars in Project Explorer show information about the items in the Tree and List panes.
The status bar above the display panes shows the current Tree Pane view mode and the
number of items contained in the selected project in the Tree Pane (Fig. 29.2).
The status bar at the bottom of the Project Explorer shows the amount and type of currently
selected item(s). It can be configured to show any property of a selected single item in the
List pane.
458
ContigExpress: Project Explorer Chapter 29
Fig. 29. 2 Viewing the Status bars in Project Explorer
Tree Pane
The Tree Pane displays the general structure of your ContigExpress Project in either of two
viewing modes: History or Content view. The contents of each pane are displayed and
manipulated similar to other Windows applications, such as Vector NTI Database Explorer
or Windows Explorer.
The following types of items can be found in the Tree pane:
•=
List of all fragments in the project
•=
Assembly of fragments
•=
Contig
•=
Fragment included in an assembly
•=
Fragment not included in an assembly.
History View
Click the History View button (
) to display the Tree Pane History view (Fig. 29.3). In
this mode, all assemblies contained in the project are shown in a tree that reflects their
“historical” relationship (that is, the order in which they were created). In History View, the
Assembly content list cannot be viewed in the Tree Pane.
459
List of all fragments
(Root)
Assembly with
descendants
(Node)
Assembly without
descendants (Leaf)
Fig. 29. 3 Tree Pane History view
The root of the tree is always the list of all fragments existing in the project. The tree nodes
are assemblies that have descendant assemblies, and the leaves are the assemblies that have
no descendants.
Content View
Click the Content View button (
) to display a “flat” list of all assemblies in the project
without displaying their mutual relationships. In Content View, you can display in the Tree
Pane the contigs in the assemblies and non-included fragments by clicking on the + button
at the left of assembly name.
As in the History View, the root of the tree always list all of the fragments existing in the
project. The tree nodes are the assemblies. Contigs and fragments that were attempted
unsuccessfully to be included are listed under the assemblies. Fragments successfully
included in the assemblies are listed inside the Contig Folders (Fig. 29.4).
460
ContigExpress: Project Explorer Chapter 29
Fragments not included in
assemblies
List of all fragments
(Root)
Assembly (Nodes)
Contig folder containing
fragments included in
assemblies
Fig. 29. 4 Contigs and fragments that were attempted unsuccessfully to be included are listed
under the assemblies
The following table summarizes the contents of each of the viewing modes:
Viewing Mode
Assemblies
Contigs
Fragments in
Assemblies
Fragments not
Included in
Assemblies
History View
Yes
Yes
No
No
Contents View
Yes
Yes
Yes
Yes
Table 29. 1 Viewing modes
List Pane
The List Pane shows the contents of an item currently selected in the Tree pane. When the
Fragments (MAIN) is selected in the Tree Pane, the List Pane displays all fragments of the
project (Fig. 29.5).
461
Fig. 29. 5 The List Pane shows the contents of all items in the project when Fragments
(MAIN) is selected in the Tree Pane
When an assembly is selected in the Tree Pane, the List Pane contains:
•=
one or more contigs
•=
the fragments that comprise contigs
•=
fragments that were considered in the assembly process, but were not included in the
final assembly.
The following types of items can be found in a List Pane. See Fig. 29.2. Note that the
symbols to the left of each list item identifies its place in the project:
•=
Contig
•=
Fragment not considered in an assembly
•=
Fragment included in the contig assembly
•=
Fragment considered but not used in the assembly (grayed out symbol)
A contig contains its fragments (Fig. 29.6):
Fig. 29. 6 Fragments included in the assembly display in the List Pane when the Contig folder
is selected
462
ContigExpress: Project Explorer Chapter 29
A fragment not included in a assembly contains no other items; therefore, nothing is shown
in the List pane when it is selected in the Tree pane.
On the toolbar, the List Format group of buttons control the list display. In the first three
modes, only item icons and names are displayed.
List Pane Formats
Action
Button
View the List pane in Large Icons mode
View the List pane in Small Icons mode
View the List pane in List mode
View the List pane in Details mode. In this mode, you can select the
properties shown in column for each item type.
Table 29. 2 List Pane format options
List Pane Filters
The next group of buttons filters data displayed in the List pane.
Button
Action
Enable the Show Contigs filter in List pane
Enable the Expand Contigs filter in List pane
Enable the Show Unassembled Fragments filter in List pane
Enable the Show Other Fragments filter in List pane
Table 29. 3 List Pane filter options
Sorting List Pane Columns
Objects are described in the List Pane by fields in columns. Sort column objects by clicking
on the property column headings (in Details mode). Reverse the order by clicking on the
same column header for the second time or by selecting View > Arrange Icons.
General Project Explorer Operations
Opening or Creating a Project
To open a project from a disk or other location, select Project > Open Project, click the
Open Project button (
) or use Ctrl-O. You can also drag and drop a project file from
Database Explorer into ContigExpress.
463
In the Open Project dialog box, browse the folders available on your computer and select an
existing project file (extension .CEP). Select the project file and press Open:
Fig. 29. 7 Open Project dialog box
If you get an error message, the selected project file probably has an invalid structure. If a
project is currently open in the CE Project Explorer and it has been changed since its last
save, you will be asked at this point to save the project. If you choose not to open a new
project at this stage, press Cancel.
For your convenience, the four most recently opened projects are listed at the bottom of the
Project menu option. Select Project > <PreviouslyOpenedProjectName> to open one of
those listed.
After successful loading, the panes of the Project Explorer are updated to show the new
project.
Import a Fragment to a Project
To import a fragment to a project, select Project > Add fragments > From <file> … or
from the shortcut menu, select List of all fragments > Add fragments > From <file >.
Select the name in the Import sequence from dialog box and click Open.
Alternatively, select one or several files/fragments in the Windows Explorer or Vector NTI
Explorer and drag them to ContigExpress Project Explorer and drop them to any of the
Project Explorer panes. They will instantly be added to the project.
Files must be in one of the following formats: GenBank (*.gb), FASTA (*.txt), ABI (*.abi),
EMBL (*.txt), Staden SCF (*.scf), ALF (*.alf), and plain text sequence file (*.txt).
The imported fragment(s) are added to the project and the list of all fragments is updated.
464
ContigExpress: Project Explorer Chapter 29
Selection Techniques
Selection techniques described here are unique to ContigExpress. General selection
techniques are described in Chapter 3.
Tree Pane:
In the Tree Pane, click on an item to select it. (Only one item can be selected at a time.)
Change the selection by clicking the item with the left mouse button or by moving the
selection bar with the cursor buttons on the keyboard.
List Pane:
The List Pane allows multiple item selections:
•=
To select a range of items: SHIFT + CLICK on the first and last item in the list
•=
To select non-contiguous items: SHIFT + CTRL + CLICK on each item
•=
To select a group of items contiguous to each other in the List Pane, click anywhere in
the blank area of the pane. Drag a box around the files you want to select.
•=
To select all the items in the List Pane, right-click on the first item in the list and choose
Select All from the shortcut menu.
When you select an item in the Tree Pane, the contents of the List Pane are updated to show
the contents of the newly selected item. The upper status bar is updated as well. The lower
status bar reflects selection changes in both panes of the Project Explorer.
To Select All Items, select Edit > Select All or use keystrokes CTRL-A.
To invert a current selection in the List pane (that is, make all currently unselected items
selected and vice versa), select Edit > Invert Selection.
Assembling Selected Items
To assemble a contig, select at least two items in the List Pane, and choose Assemble >
Assemble Selected Items, or press the Assemble button (
).
If one or several contigs are selected for assembly, the sequences of all fragments that
comprise the contig(s) are used as fragment sequences for the assembly process.
Since assembling is a lengthy process, a progress dialog box (Figure 29.8) appears showing
you the assembly steps. You can abort the process at any time by clicking the Cancel
button:
465
Fig. 29. 8 Assembly progress dialog box
If the assembly fails, and a contig could not be created from the selected fragments with the
selected setup options, you will be informed.
If the assembly succeeds, a new “child” assembly is created inside the current assembly.
The selection in the Tree Pane moves to the newly created assembly and the List Pane
shows its contents.
Setting Assembly Setup Parameters
When you create or open a Contig Express project, a default set of assembly options is used
for the project. To change these options, press the Assembly Setup button (
) or select
Assemble > Assembly Setup, opening the Assembly Setup dialog box (Fig. 29.9):
Fig. 29. 9 Assembly Setup dialog box
466
ContigExpress: Project Explorer Chapter 29
Contig Assembly
On the Contig Assembly tab, you can change or define the following parameters:
Contig Assembly Parameters
Minimum length of any
overlap (valid values: 0 100)
In the initial assembly, any overlap must be of
this length
Minimum identity
percentage of any overlap
(valid values: 0.0 - 1.0)
Any overlap/containment must be of identity
percentage of this setting
Cutoff score for overlap or
containment (valid values:
30 - 50)
Two contigs are merged if the score of the
overlapping alignment is at least this cutoff
score. This value is chosen according to the
value for score of a match.
Jump increment in check
for overlap (valid values:
0.0 - 10.0)
This parameter defines necessary conditions
for overlap or containment. Those conditions
are used to quickly reject pairs of fragments
that could not possibly have an overlap or
containment relationship. The dynamic
programming algorithm is only applied to pairs
of fragments that pass the screening. A large
value for jump increment means stringent
conditions, where the value for jump increment
is a floating point number at least 8.0.
Base 5’ position (valid
values: 0 - 99)
Base 5’ and Base 3’ are fragment positions
such that the 5’ end between base 1 and Base
5’, and the 3’ end after Base 3’ are of high
sequencing error rates, say more than 5%. For
mismatches and indels occurring in the two
ends, light penalties are used. For example, if
you know that the sequencing errors often
occur before some base at the beginning of the
fragment, and after some base at the end of
the fragment, you may enter that base
numbers as Base 5’ and Base 3’ position.
Base 3’ position (valid
values: 100 - 100000)
Table 29. 4 Contig Assembly Parameters
Alignment
On the Alignment tab (Fig. 29.10), you can define parameters for the alignments generated
between fragments in the creation of new contigs.
467
Fig. 29. 10 Alignment tab of Assembly Setup dialog box
Two specially chosen sets of substitution scores and indel penalties are used by the dynamic
programming algorithm: a heavy set for regions of low sequencing error rates and a light set
for fragment ends of high sequencing error rates. These scores are for the heavy set (that is,
after Base 5’ and before Base 3’ positions).
Alignment Parameters
468
Score of a match (valid
values: 0 - 5)
Score assigned matching nucleotides
Score of ambiguous match
(valid values: 0 - 4)
Score assigned to a match that includes an
ambiguous residue
Score of a mismatch (valid
values: -10 - 0)
Score assigned to mismatched nucleotides in
regions of low sequencing error rates
Light score of a mismatch
Score assigned to mismatches in fragments
ends (regions of high sequencing error rates)
Gap open penalty (valid
values: 0 - 5)
The penalty for the first residue in a gap
Gap extension penalty
(valid values: 0 - 5)
The penalty for additional residues in a gap in
regions of low sequencing error rates
ContigExpress: Project Explorer Chapter 29
Alignment Parameters
Light gap extension penalty
The penalty for additional residues in a gap in
fragments ends (regions of high sequencing
error rates)
Table 29. 5 Alignment Parameters
In the description field on each tab, enter text to name and distinguish the different sets of
parameters.
On either of these tabs, if you enter an invalid value (outside the permissible ranges) and
press any button except Load… and Cancel or if you change the current tab, you will be
asked to correct your action. ContigExpress informs you about the correct ranges and moves
the cursor to the offending field.
Algorithm
On the Algorithm tab (Fig. 29.11), you can choose the algorithm you would like
ContigExpress to use for contig assembly. There are two algorithms to choose from,
Pairwise Assembly and Linear Assembly.
Fig. 29. 11 Algorithm tab of Assembly Setup dialog box
469
Note: the Linear Assembly algorithm uses the Minimum Length of Any Overlap parameter
on the Contig assembly tab for its calculations. Other parameter settings on the Contig
assembly and Alignment tabs do not affect this algorithm.
Features of the Pairwise and Linear Assembly algorithms are outlined in the following table:
Algorithm
Pairwise Assembly
•= best for assembling ten or fewer fragments
•= faster initialization
•= lower memory use
•= may be faster for small numbers of fragments
•= more stringent default conditions
•= user can set more assembly parameters; allows
higher degree of assembly customization
Linear Assembly
•= best for assembling 11 or more fragments
•= slower initialization
•= higher memory use
•= faster assembly of large number of fragments
•= less stringent default conditions; may allow
assembly of fragments with smaller regions of
overlap
•= fewer parameters to set; only Minimum length of
any overlap parameter is used
Table 29. 6 Features of the Pairwise and Linear Assembly algorithms
Press the Load and Save buttons to read and save the parameters set in Assembly Setup.
The Open or Save dialog boxes open respectively where you can select a parameter set to be
loaded or a file where the parameter set will be saved. After loading a parameter set file, all
fields of the dialog box are updated.
Press OK to validate the entered parameters; they will apply to all future assemblies in the
project. Press Cancel to abort the action.
Editing an Item’s Data
To edit data about an item, select the item, then select Edit on the shortcut menu. In the Edit
dialog box (Fig. 29.12) you can change the name, description and comments of the item:
470
ContigExpress: Project Explorer Chapter 29
Fig. 29. 12 Edit dialog box
Click OK to confirm the changes; all instances of the item throughout ContigExpress are
updated to reflect the changes. Click Cancel to abort the action.
Editing Project Properties
To edit a project’s properties in ContigExpress, press the Properties button (
), or select
Edit > Properties. The corresponding keystroke is ALT-ENTER. This opens the Properties
dialog box (Fig.29.13) where you can review the properties of the selected item(s).
471
Fig. 29. 13 Properties dialog box
For several selected items, the only property shown is the number of selected items (Fig.
29.14):
Fig. 29. 14 Number of selected items property
472
ContigExpress: Project Explorer Chapter 29
Open Contig(s)/Fragment(s)
To view or edit one or more contigs or fragments, double-click the item or select Open in
its shortcut menu.
The Contig or Fragment Windows for each of the selected items is opened.
For further information on how to work in the Workspace, Contig, and Fragment Windows
see the respective chapters of this manual.
Dismiss Assembly
Dismissing an assembly deletes a selected assembly from the open project. When an
assembly item is selected in the Tree Pane or when the List Pane is active and shows the
contents of an assembly, click the Dismiss Assembly button (
) or select Edit >
Dismiss Assembly or the comparable option on the shortcut menu. If the assembly has
“child” assemblies, they will be dismissed as well. The Project Explorer display window is
updated to reflect the changes.
Dissolve Contig
Dissolving a contig removes the selected contig from the assembly, but leaves the rest of the
assembly intact. To execute the Dissolve Contig command, right-click on the contig in the
List Pane of the CE Project Window and choose Dissolve Contig from the shortcut menu.
Once the contig has been dissolved, the CE Project Explorer display window is updated to
reflect the change.
Delete Contig(s)/fragment(s) from Project
To delete selected item(s) from the project, select the item in the List Pane and click the
Delete button (
), select Edit > Delete from Project or press the keyboard DELETE
button. If any of the items to be deleted are included as a fragment in any assembly, you will
be warned that all assemblies (and their child assemblies) that contain the item will be
dismissed. You can confirm or cancel the action.
Rename Item
To rename a project item, select the item and press the Rename button (
), select Edit >
Rename or single click inside the name of the item to be renamed. Enter the new name in
the enabled text box. If the item that has been renamed is used elsewhere in the project, all
instances of the item will be renamed.
Operations Changing the Project Items
A fragment with the same sequence as a contig’s consensus and the same name as the
original contig can be created and added to the project. To convert an existing contig to a
fragment, select Project > Convert Contig to Fragment on the menu bar or select
Convert Contig to Fragment on the shortcut menu.
473
Trimming Fragments
Trimming fragments is often performed to remove unreliable (ambiguous) residues. To trim
one or more fragments selected in the Project Explorer List Pane, select Edit > Trim
Selected Fragments…. The Fragment Trimmer dialog box opens, listing all of the selected
fragments and suggested operations. See Fig. 31.1 and its related descriptions. Click OK to
proceed with trimming the fragment(s). If no action is suggested, the OK button is disabled.
Notes on Fragment Trimming:
•=
This group of actions is used to trim the selected fragments according to various
criteria.
•=
Because “trimming” applies only to fragments, if contigs are selected, they will be
skipped.
•=
If a fragment selected for trimming is currently open in its Fragment Window, initiating
the trimming mode in Project Explorer automatically forces the fragment into the readonly mode in the Fragment Window to avoid possible inconsistencies in the project
after a successful trimming.
•=
If any of these fragments were already changed in their respective windows, select Yes
to save the changes or No to lose the changes or Cancel to skip the fragment in
question.
Project Explorer reflects the changes if fragments are trimmed. If any of the changed
fragments are open in Fragment Windows, the respective windows are updated as well.
For further information on the Fragment Trimmer dialog box, including modifying
trimming settings, refer to chapter 31 of this manual.
Calling Secondary Peaks for Fragments
If conflicting residues appear on a chromatogram, you can alter the nucleotides as you wish.
With one or more fragments selected in the Project Explorer List Pane, select Edit > Call
Secondary Peaks… for Selected Fragments. The Call Secondary Peaks dialog box opens
(Fig. 31.7), listing all selected fragments will be presented to the user. Click OK to
continue.
Notes on Calling Secondary Peaks:
474
•=
Because this operation applies only to fragments, if contigs are selected, they will be
skipped.
•=
If a fragment selected for secondary peak search is currently open in its Fragment
Window, initiating this operation in Project Explorer automatically forces the fragment
into the read-only mode in the Fragment Window to avoid possible inconsistencies in
the project after a successful search.
•=
If any of these fragments were already changed in their respective windows, select Yes
to save the changes or No to lose the changes or Cancel to skip the fragment in
question.
ContigExpress: Project Explorer Chapter 29
For further information on the Call Secondary Peaks dialog box, refer to Chapter 31 of this
manual.
Make Reverse Complement
To generate reverse complement copies of selected contigs and fragments from the Project
Explorer List Pane, select the item and choose Make reverse complement from the
shortcut menu. If a contig is selected for this action, it is internally converted to a fragment
and then the action will be applied to it.
The reverse complement copies of the selected items are added to the project with names
Copy of <name >, derived from the names of the original items. The new item appears in
the List Pane.
Generate an Assembly Summary
To write a text file with an assembly summary, select an assembly in the Tree Pane, and
select Assembly Summary… on the shortcut menu.
In the Write Assembly Summary dialog box, enter a file name for the summary and press
Save. If the file with this name already exists, you can overwrite the file. Press Cancel to
abort the action.
Operations in Project Explorer
To review or modify viewing options in Project Explorer, select View > Options, or when
the Explorer is in Details mode, click on the property column headings. This opens the
Options dialog box with several tabs (Fig. 29.15). Note: the Options settings on each of the
tabs correspond to the item type selected in the Tree Pane when you open this Options box.
Fig. 29. 15 Options dialog box
475
The Details View tab controls the column displayed in the List Pane Details View mode.
Select the desired property names in the Available Fields box and move it to the Displayed
Fields box for List Pane display. The order of column display in the List pane reflects the
descending order of the list in Displayed Fields. To alter the order, select a field and click
the Move Up or Move Down button. To alter the text alignment for the selected item type,
select the appropriate radio button.
The second of the Option tabs is Status Bar (Fig. 29.16).
Fig. 29. 16 Status Bar tab of Options dialog box
This dialog tab allows you to choose the type of information displayed in the status bar
when there is a single selected item in the List Pane. You can designate one item property to
be displayed or just use the 1 item selected option.
The third of the Option tabs is Copy Fragment/Contig (Fig. 29.17). The option is common
for both item types:
476
ContigExpress: Project Explorer Chapter 29
Fig. 29. 17 Copy Fragment/Contig tab of Options dialog box
Here you can define the file format used when you drag an item outside of the Project
Explorer or copy it to the Windows Clipboard.
Copying Selected Fragments or Contigs
In Project Explorer, to copy a fragment or a contig select it and press the Copy button
(
). In the List Pane, press the Paste button (
). The copied object is added to the list
of objects, automatically named “Copy of <selected object>”.
Printing
You can print the contents of the Tree Pane in the CE Project Explorer window (Fig. 29.18
You can print the contents of the Tree Pane in the CE Project Explorer window. To review
what the printout of the Tree pane will look like before it is printed, select Project > Print
Preview:
477
Fig. 29. 18
In the print preview dialog box, you can resize the displayed output, send it to the printer, or
press Close to return to the Project Explorer. To define your printer options, select Project
> Print Setup. A standard Window Printer Setup dialog box opens.
To print a copy of the Tree Pane data, activate the Tree Pane. The Tree pane is always
printed in the History view mode with the tree completely expanded. Select Project > Print.
In the Print dialog box, click OK to print or Cancel to abort the action.
Exporting Items from the Project
To export contigs or fragments selected in the Project Explorer List Pane, select Project >
Export Item > To <file> or select Export Contig/Fragment > To <file> on the shortcut
menu. ContigExpress can export items in the following formats: GenBank (*.gb), FASTA
(*.txt), EMBL (*.txt), and plain text sequence file (*.txt).
In the Export <name > To dialog box, select or enter a file name and destination for the
exported item. Press Save to export the item to the entered file. You can overwrite an
existing file or press Cancel to abort the action.
Alternatively, you can select one or several contigs or fragments in the List pane and drag
and drop them to Windows Explorer or Vector NTI Explorer. The export format for dragged
and dropped files is defined by the setting on the options tab under View > Options > Copy
Fragment/Contig page.
478
ContigExpress: Project Explorer Chapter 29
You can return to other Vector NTI Suite programs or send ContigExpress data to AlignX
by selecting Align > <AlignX options> and to BioPlot by selecting Analyze > BioPlot –
Analyze Selected Molecule.
Saving and Closing a Project
To Save a Project to disk, click the Save button (
), select Project > Save, or use the
keystroke CTRL-S. Enter a file name and destination in the Save As dialog box. After the
project is successfully saved, the Save toolbar button and menu item are disabled until you
make any changes in the project.
To close a Project, select Project > Close Project. To save any changes, click Yes in the
dialog box that opens. If you select No, all changes are lost.
Exit Project Explorer
To exit Project Explorer, select Project > Exit, Project > Close Project, or use the keyboard
shortcut, Alt-F4. This operation closes the ContigExpress application. When you select this
action, the Project Explorer first closes the current project, giving you the option of saving
any changes.
479
480
ContigExpress: Fragment and Contig Windows Chapter 30
Chapter 30 ContigExpress: Fragment and Contig Windows
Introduction
ContigExpress offers two workspaces where you can work with fragments or contigs.
Fragment Viewer allows you to work with individual fragments. Contig Viewer allows you
to work with contigs or the fragments comprising them. To open fragments or contigs in
their respective viewers, select the item in Project Explorer and double-click on it or select
Open from the shortcut menu. Depending upon the item from which it was launched, a
Fragment Window or a Contig Window opens. This section reviews elements common to
both types of viewer windows.
Features of the ContigExpress Workspace
These workspace windows have many of the same features as the other applications of the
Vector NTI Suite: a menu bar, toolbars, and three panes and a status bar.
All Vector NTI Suite toolbar buttons are summarized in Chapter 4 of this manual. As you
are introduced to various operations in this chapter, however, the toolbar buttons are
displayed as needed. Many toolbar commands can also be launched from the menu bar or
from a shortcut menu.
The windows are organized and managed like in any Windows application. Several
windows can be opened in one workspace (Fig. 30.1).
Fig. 30. 1 Several Fragment Viewer windows or Contig Viewer windows can be opened in one
workspace
481
Fragment and Contig windows are divided into three panes. Split bars allow re-sizing the
three panes. Scroll bars appear when the contents of a pane exceed the viewing area,
facilitating easier viewing of pane contents.
Switching Between Panes
As in the other Vector NTI Suite applications, to apply a command from the main in a given
pane that pane must be active. The active pane can be toggled with the Panes buttons on the
Pane Selection Toolbar or by clicking anywhere in the pane you wish to activate. The
keyboard strokes are F6 (cycling clockwise through the panes) and SHIFT + F6 (cycling
counter clockwise).
Status Bar
The Status bar shows menu item help and information about the caret and selection
positions in the active window (Fig. 30.2).
Menu item
help
Position box
Selection
box
Fig. 30. 2 Status bar
The menu item help on the Status Bar is a short description of a selected menu item.
The Position Box shows the current caret position if relevant. In the Fragment Window, you
can position the caret using this box. As with selection positions, because the item can
contain gaps, the position is shown with gaps in the form: Counted/Not Counted.
The Selection Box displays the start and end positions of the item is selected in the active
window. Because the item can contain gaps, the positions are shown with gaps both counted
and not counted in the form: Counted/Not Counted.
General User Actions
Finding a Feature in Other Panes
A feature selected in a Feature Table folder in the Text Pane can be concurrently selected in
both other panes. Select the feature, then press the Find button (
or select Find on the shortcut menu opened from a folder.
) on the Pane Toolbar
Note: Because some features are circular, they bypass the endpoints of the fragment. Since
ContigExpress does not support circular selections, such a feature will not be correctly
located. The program warns you in such cases.
482
ContigExpress: Fragment and Contig Windows Chapter 30
Editing Fragment or Contig Properties
To edit some of a selected contig or fragment’s properties from the Text Pane, double-click
on the first line with the fragment or contig name or select Edit from the associated shortcut
menu.
In the Edit dialog box (Fig. 30.3), change the name, description or comments:
Fig. 30. 3 Edit dialog box
Click OK to confirm the changes or Cancel to abort the action.
After selecting OK, every instance of the fragment throughout ContigExpress is updated to
reflect the changes.
Saving a Current Window
To save a changed item in a window to the project, select Contig or Fragment > Save or
click the Save button (
). The keystroke is CTRL-S.
If a change affects other project items, Project Explorer makes the necessary changes, and
updates its display and the currently opened windows, if needed.
Closing a Current Window
To close the current window, select Contig or Fragment > Close or use the keystroke
CTRL-F4
If the item in the window you are closing has not been saved since its last change, you can
confirm saving the changes in the dialog box that opens.
483
Closing All Windows
To close all open windows (thus closing the Workspace), select: Contig or Fragment >
Close All or use the keystroke ALT-F4.
Selecting All Data
To select all data in the current pane, select Edit > Select all or select Select All on the
shortcut menu.
Deleting data
To delete a data selection from an item in the active pane, select Edit > Delete or press the
DELETE key on the keyboard. If no selection is currently defined, one nucleotide is deleted
at the caret position with this action. (If you delete in error, click on the Undo button (
).
The following features can be performed in ContigExpress windows. Details are given in
Chapter 3.
•=
Resizing the panes with the split bars.
•=
Scrolling data inside the panes using scroll bars and arrow keys
•=
Opening and closing Text Pane folders
•=
Opening shortcut menus
•=
Copying selected molecule and fragments
•=
Copying screen and pane contents
•=
Pasting files and text
•=
Exporting data to other Vector NTI applications or external programs
•=
Printing from ContigExpress windows
External Tools Usage
ContigExpress is integrated with the other components of the Vector NTI suite, making it
easy to launch Vector NTI, AlignX and BioPlot from ContigExpress and to easily exchange
data with them. It can also easily export data to third-party tools available on the WWW.
To invoke the tools, select Analyze, Align or Tools > <tool>. The tools listed in these
menus will work with the currently selected items.
For more information on the External Tools, refer to other chapters in the Vector NTI
documentation.
484
ContigExpress: Fragment and Contig Windows Chapter 30
Fragment Window
Launching a Fragment Window
To open a Fragment Window, select a fragment in CE Project Explorer and double-click on
it or select Open on its shortcut menu.
Features of a Fragment Window
As in the other applications of the Vector NTI Suite, the ContigExpress Fragment window
(Fig. 30.4) consists of a menu bar, two toolbars and is divided into three panes: Text Pane,
Sequence Pane and Chromatogram Pane. A shortcut menu associated with specific folders
or objects can be opened with a right click while the cursor is on the object. Toolbar buttons
are displayed in this section as needed. All of the toolbar buttons are described in Chapter 4.
Fig. 30. 4 ContigExpress Fragment window
As in the other Vector NTI Suite applications, to apply a command from the Main Menu in
a given pane, that pane must be active. The active pane can be toggled with the Switch Pane
buttons (
,
,
) in the Pane Selection Toolbar or by clicking in the pane you want
to activate. You can also activate the panes with the F6 and SHIFT-F6 keyboard buttons.
Text Pane
The Fragment Window Text Pane contains a thorough description of the fragment,
including length, date of creation, and chromatogram data.
Text Pane manipulations are outlined in the previous chapter and are also summarized in
chapter 3.
485
The Text Pane data is divided into a hierarchy of folders and subfolder. A Text Pane can
contain the following folders:
Folder
Contents
General
description
Molecule type, form (for DNA only), length, etc.
Proprietary fields
User defined fields (for molecules which came from
Vector NTI)
Standard fields
GenBank/SWISS-PROT-like fields: keywords, division,
original accession numbers, etc
Comment
Arbitrary text of any length associated with the molecule
References
Bibliographic references (in GenBank/SWISS-PROT
format)
Feature table
List of molecule features
Chromatogram
data (if available)
Data imported from fragment file processed by
sequencing machine (ABI files, for example)
Table 30. 1 Fragment Window Text Pane folders
Sequence Pane
The Sequence Pane shows the nucleotide sequence of the fragment with feature signals. In
this pane, the nucleotide sequence can be viewed, edited and manipulated and the sequence
display can be formatted. Any changes are immediately reflected in the Chromatogram
Pane. Regions of the sequence can be copied and pasted to/from the Clipboard. For more
details, refer to Chapter 3.
In addition to the sequence, the Sequence Pane displays a molecule’s nucleotide sequence
features. Features are shown with a horizontal line above the sequence (direct strand
features) or below the sequence (complementary strand features) together with labels
naming the feature.
Navigating the Sequence Pane Using the Keyboard
The text cursor in the Sequence Pane becomes an I-beam, also called a caret. Pause the
cursor of the sequence for a few seconds to display a popup label defining the exact position
of the cursor. The caret position or selection position is always indicated on the status bar.
Standard keyboard keys may be used to navigate the sequence and position the caret:
Key
486
Description
Left
Move caret to previous position
Right
Move caret to next position
Up
Move caret position one line up
ContigExpress: Fragment and Contig Windows Chapter 30
Key
Description
Down
Move caret position one line down
Home
Move caret position to the beginning of the current line
End
Move caret position to the end of the current line
CtrlPgUp
Move caret position to the beginning of sequence
CtrlPgDn
Move caret position to the end of sequence
Table 30. 2 Navigating the Sequence Pane using the keyboard
Another way to define an exact caret position is to press the Set Caret Position box on the
status bar. In the Set Caret Position dialog box that opens, enter the caret position and click
OK.
Finding Sequence Fragments
To search for a specific sequence in the Sequence Pane, activate the pane, then press the
Find button ( ) on the toolbar, or select Edit > Find.
Fig. 30. 5 Find dialog box
In the Find dialog box (Fig. 30.5), enter the sequence in the text box, with criteria for the
search, such as the strand to search, (direct or complementary), allow ambiguous symbols
and the search direction from the current caret position. If the matching sequence is found,
ContigExpress selects it and positions both the Sequence Pane and Chromatogram Pane to
make it visible. If the sequence is not found, you are informed and the caret remains in its
current position.
To display ORFs in the sequence, activate the sequence pane and choose View > Show
ORFs from the menu or press the Show ORFs button on the toolbar. If the sequence
display is double-stranded, ORFs for both strands are displayed; if the sequence is singlestranded, ORFs for the direct strand only are shown. For details on displaying ORFs in the
Sequence Pane, see Chapter 17.
487
To search for ambiguous symbols quickly, press the Find Previous Ambiguous ( ) or
Find Next Ambiguous ( ) buttons on the toolbar. Alternatively, you may choose
corresponding commands from the View menu.
For the following operations in the Sequence Pane, refer to Chapter 3:
•=
Changing Sequence Pane Properties
•=
Changing text display attributes
•=
Translating sequences
Chromatogram Pane
The Chromatogram Pane displays
•=
the chromatogram of the fragment if it was initially provided in the original imported
file used to create the fragment
•=
the sense and antisense sequences of the fragment
•=
fragment chromatogram graphs, if that data is available
•=
an original unedited fragment sequence at the top of the pane where it can be edited and
at bottom of the pane for reference only
Any editing changes in the Chromatogram Pane are immediately reflected in the Sequence
Pane. Regions of the sequence may be copied and pasted to/from the Clipboard.
Navigating the Chromatogram Pane Using the Keyboard
Standard keyboard arrow keys can be used to navigate the chromatogram.
A way to define an exact caret position is to pause the caret over a residue for a moment
allowing a popup label to identify its position.
To position the caret specifically, press the Set Caret Position box on the status bar. In the
Set Caret Position dialog box that opens, enter the caret position and click OK.
Resizing the Chromatogram
To re-size the chromatogram, use the Zoom In ( ) or Zoom Out ( ) buttons or select
View > Zoom In or Zoom Out or the corresponding commands on the shortcut menu.
Chromatogram peak height can be adjusted with the vertical scroll lever on the left side of
the Chromatogram Pane.
Fragment Window Operations
Editing a Sequence
Note: If the fragment you are editing in the Fragment Window is not included in any
assembly, then you can edit that fragment freely. When you save your changes using the
File/Save commands or by pressing CTRL-S, the fragment is not saved on a disk, but the
fragment in the main fragments list in the current project is updated. To save your changes
on disk, save your changes first in the Fragment Window, and then either save the current
488
ContigExpress: Fragment and Contig Windows Chapter 30
project or export the fragment to disk. You can perform these operations in Project Explorer
Window. See page 478 for more information on how to save projects and export fragments.
The fragment you are editing in Fragment Window can be included in an assembly or in
several assemblies. In this case, the logic becomes a bit more complex:
•=
If you don’t change the length of the fragment while editing, that is, you just replace the
symbols, then the consensus for all contigs where this fragment has been included is
recalculated after you save the fragment.
If you decide to insert or delete symbols, then the following warning message appears (Fig.
30.6):
Fig. 30. 6 Warning message regarding editing the fragment
If you press Yes, then you may edit the fragment freely. However, when you save your
changes into the project, the program asks you again to confirm that you want to save the
fragment and informs you that it will delete all assemblies that contain this fragment. Be
careful, as deleting assemblies is cannot be undone—you may lose your contigs forever!
If you press No, then any further attempt to insert or delete nucleotide symbols will be
ignored. No assemblies will be deleted after you save the fragment into the project.
You can edit the sequence in the Sequence or Chromatogram Panes in the same way you
would edit text in a word processor with the following exceptions:
•=
In the Sequence Pane, only the direct strand can be edited. The complementary strand is
automatically updated.
•=
In the Chromatogram Pane, only the top sequence can be edited. The original fragment
sequence at the bottom is included for reference only.
The valid symbols you can enter are A, T, G, C, N and other acceptable ambiguous
nucleotide designations specified by IUB codes (see Appendix C). Editing changes in either
pane are reflected in the other pane immediately.
Sequence editing techniques are detailed in the following table:
Editing
Operation
Delete a
nucleotide
Action
Position the caret to the left of the symbol to be deleted (note
caret position on the status bar); press DELETE. Residue is
d l t d d it
iti i “fill d” ith
489
Editing
Operation
Action
deleted and its position is “filled” with a gap.
Position the caret to the right of the symbol to be deleted;
press the BACKSPACE key. Residue is deleted and its position
is filled with a gap.
Insert a
symbol
Position the caret where the new symbol is to be inserted.
Type a valid symbol (A, T, G, C, N or other accepted
ambiguous code). The new symbol (colored) is inserted.
Replace a
symbol
Select the normal symbol (or gap symbol). Type a valid new
symbol (colored), which replaces the previous one. Several
symbols can be replaced at one time: select them and enter
the new symbols.
Paste a
sequence
from the
clipboard
Position the caret where the symbols are to be inserted, or
select the part of the sequence you want to be replaced.
Press CTRL-V or Edit > Paste…
Cut a
selection
Select the sequence region to be cut. Press CTRL-X or
choose Edit > Cut. The selected symbols are copied to the
clipboard and deleted from the sequence.
Table 30. 3 Sequence editing techniques
Cut, Copy and Paste options are also available on the shortcut menu opened from the
Sequence Pane.
All editing operations are reflected in both the Sequence and Chromatogram Panes. Editing
operations and results are summarized as follows:
Action
490
How to
Perform
Sequence Pane Result
Chromatogram Pane
Result
Delete
Select
residues;
press
DELETE
(↓) replaces NTs; NTs
(red) move below strand
(- - - -) appear in
upper sequence
Insert
Place caret;
type new NTs
(↑) appears below new
NTs; new NTs are green
New NTs are green;
a break appears in
the chromatogram
ContigExpress: Fragment and Contig Windows Chapter 30
Action
Replace
How to
Perform
Select NTs;
type new NTs
Sequence Pane Result
New NTs (blue) appear
in strand; replaced NTs
move below strand
Chromatogram Pane
Result
New NTs (green)
appear in upper
sequence; no break
in chromatogram
Table 30. 4 Editing operations and results
Calling Secondary Peaks
At times, it seems desirable to review secondary peaks on a chromatogram and even change
sequence residues based on unreliable chromatogram values. ContigExpress searches for
secondary peaks by looking for lower peaks that are at least as tall as some percentage of the
highest peak at a base call position. For details on calling secondary peaks, refer to Chapter
31.
Showing Deleted Peaks
By default, peaks for deleted bases are shown in the Chromatogram Pane of the Fragment
Window. Peaks for deleted bases can be removed from the chromatogram by using
choosing View > Show Deleted Peaks from the menu or by pressing the Show Deleted
Peaks toggle button on the toolbar. The advantage of removing deleted peaks is that the
fragment sequence can then be translated across a deletion region in the new frame resulting
from the deletion. Otherwise, if deleted base peaks are showing, translations proceed
without considering the deletions. For more information regarding Showing Deleted Peaks,
see Chapter 17.
Showing Traces
By default, all traces are shown in the Chromatogram Pane of the Fragment Window.
Traces for each base can be toggled off and on independently in the Chromatogram Pane.
Choose View > Show Trace > Trace<base> from the menu or press the Show Trace
button for the particular base on the toolbar to hide (or show) the trace for that base.
Window Viewing Options
To modify default viewing options for the Fragment Viewer, click on the Viewing Options
button (
) on the Viewer Toolbar or select View > View Options. This opens the
Fragment Viewing Options dialog box (Fig. 30.7):
491
Fig. 30. 7 General tab on the Fragment Viewing Options dialog box
On the General tab, you can review or change the default settings in the dialog box:
•=
Nucleotide Sequence length of a single line of a sequence, the number of blocks per
line, single or double stranded display (Sequence Pane)
•=
Search: default settings for the Find dialog box
•=
Translation: three- or one-letter protein codes displayed in the sequence translation.
•=
Gaps: default settings for the Do Not Count Gaps checkbox in the Set Caret Position
and Set Selection dialog boxes. The second checkbox, Gap Chromatogram on Base
Insertion, controls how new bases are inserted into an editable sequence. You may
either choose to gap a chromatogram graph on base insertion (check the box), or insert
a new base without changing a graph (leave the box unchecked).
On the ORF tab, you can set the parameters for ORFs display in the Fragment window (Fig.
30.8):
492
ContigExpress: Fragment and Contig Windows Chapter 30
Fig. 30. 8 ORF tab on the Fragment Viewing Options dialog box
•=
Nested ORFs: Check the box to display ORFs that occur within the main ORF.
•=
Minimum Size: Specify the minimum ORF size in codons that you want to display.
•=
Start Codons: Define acceptable start codons.
•=
Stop Codons: Define acceptable stop codons.
•=
Defaults button: Restores ORF dialog box default values.
Contig Window
Launching a Contig Window
To open a Contig Window, double-click on a contig in CE Project Explorer, or select Open
on a shortcut menu opened from a contig in Project Explorer. Contig Window is one of the
modes of the ContigExpress workspace described in Chapter 2.
Features of a Contig Window
The ContigExpress Contig Window (Fig. 30.9) consists of a menu bar, two toolbars and is
divided into three panes: a Text Pane, a Graphics Pane and a Contig Alignment Pane.
A shortcut menu associated with specific folders or objects can be opened with a right click
while the cursor is on the object. Toolbar buttons are displayed in this section as needed. All
of the toolbar buttons are described in Chapter 4.
493
Main
menu
Main
toolbar
Pane
Selection
toolbar
Pane toolbar
Text Pane
Graphics
Pane
Contig
Alignment
Pane
Fig. 30. 9 ContigExpress Contig window
As in the other Vector NTI Suite applications, to apply a command from the Main Menu in
a given pane, that pane must be active. The active pane can be toggled with the Switch Pane
buttons (
,
,
) on the Pane Selection Toolbar or by clicking in the pane you
want to activate. You can also activate the panes with the F6 and SHIFT-F6 keyboard
buttons.
Text Pane
The Contig Window Text Pane contains a thorough description of the contig displayed in
the window.
Text Pane manipulations are outlined in the previous chapter and are also summarized in
chapter 3.
The Text Pane data is divided into a hierarchy of folders and subfolders. A Contig Text
Pane can contain the following folders:
494
ContigExpress: Fragment and Contig Windows Chapter 30
Folder
Contents
General description
Name, creation date, length, etc.
Comment
Arbitrary text of any length associated with the contig
Fragments
List of fragments contained in the contig
Table 30. 5 Contig Text Pane folders
Graphics Pane
The Contig Window Graphics Pane (Fig. 30.10) contains horizontal arrows representing the
relative positions of the fragments forming the contig. The arrowheads indicate whether the
respective fragment is in the direct or complementary strand, with the names of the
fragments displayed above the fragment lines. When either of the Graphics or Alignment
Panes is active, one of the fragments is always highlighted with another color (usually dark
blue). This highlight is coordinated with highlights in the Sequence Pane to allow you to
locate the same fragment in all panes.
When the Contig Window first opens, all data in the Graph pane is in the Fit to screen
mode. In this mode all the graphical data for the complete contig is always shown in the
pane no matter how you resize the pane.
If you want to examine a part of the graph pane, you can resize the pane using the Zoom and
Fit to Screen buttons. Resizing of the pane does not affect the current scale of the graph. For
more information on using the Zoom buttons, refer to chapter 3.
By default, zooming is done horizontally. If you want to zoom vertically, press CTRL +
press the Zoom In button (
).
495
Fragment
name
Highlighted
fragm ent line
Fragment line
Scale with
position
markers
W eight graph
Fig. 30. 10 Contig Window Graphics Pane
Below the fragment arrows is a scale or Weight Graph, with position markers for this
contig. The Weight Graph displays the quality of the assembly. You may note on the graph
small green vertical lines dropping below the graph. If you position your cursor at one of
those sites and press the Zoom In button many times (until it is disabled), you can see the
exact nucleotide placement of each line in the graph. You will also note the negative peak in
the Weight graph line, indicating a position where the assembly is poor (Fig. 30.11). Refer
to the same position(s) in the chromatogram and you will see poorly resolved peaks.
496
ContigExpress: Fragment and Contig Windows Chapter 30
Negative peak
Fig. 30. 11 Negative peak in the Weight graph line
In the Weight Graph, each combination of two possible sequence symbols is assigned a
certain weight. For each position in the contig, the resulting weight is calculated from all
symbols at this position in the fragments available for this position and from the consensus
symbol at this position. The resulting weight is plotted as a point in the Weight Graph. Dips
in the line isolate places where the assembly is poor or nucleotides are mismatched.
By default, the highest weights are given to combinations of equal symbols, for example,
“AA” or “CC”. The weights can be changed in the Viewing Options dialog of the Contig
Window.
ORFs can be shown for the fragments in the Graphics Pane. Choose View > Show ORFs
from the menu or press the Show ORFs button to add the ORFs display to the Graphics
Pane.
Fig. 30. 12 Green bars depict ORFs in the fragments
497
Green bars in the ORFs display area depict ORFs in the fragments (Fig. 30.12). Clicking on
a green bar highlights that ORF in both the Graphics and Alignment Panes.
Open a Fragment In Another Window
From the Graphics Pane, double-click on a fragment line to open the fragment in a separate
Fragment Window.
Camera Specifics
While you can use the Camera feature to copy pane contents, only the currently visible
portion is copied to the clipboard or file. In this pane the Camera cannot copy entire
selections.
The data is copied to the clipboard or file in the Windows metafile format (WMF).
For more information on the Camera copy feature, refer to chapter 3.
Alignment Pane
The Contig Alignment Pane (Fig. 30.13) displays the nucleotide sequences of the fragments
that form the contig with overlapping regions aligned appropriately and displayed relative to
their positions in the contig. You can edit the sequences here and see how your actions are
reflected in the contig. The respective chromatograms for the sequences, also aligned
appropriately, can also be displayed on command.
Fragment names list
Fragment sequence
(partially selected)
Fragment
Current Position
Scale
Consensus sequence
(nucleotide format)
Consensus sequence
(symbol format)
Fig. 30. 13 Contig Alignment Pane
498
ContigExpress: Fragment and Contig Windows Chapter 30
The Contig Alignment Pane has the following main elements:
•=
The fragments names list (at the left) contains all fragments that are used in this
contig.
•=
The fragment current position (below the scale current position) is the relative
position of the left end of the fragment (counted from the fragment start) that is
currently shown.
•=
The scale (above the chromatogram alignments) gives a reference nucleotide position
for all fragments and the consensus shown in the alignment.
•=
The consensus sequence (nucleotide format) shows the nucleotide consensus for the
assembly.
•=
The consensus sequence (symbol format) shows the symbol consensus for the
assembly. In the symbol consensus, blank spaces indicate identical residues, dots (•)
indicate positions containing Ns and plus symbols (+) indicate ambiguity and/or gaps.
•=
The fragment itself includes its editable sequence and (if its chromatogram is switched
on) a chromatogram and original sequence (which does not change even if you edit the
fragment).
When either of the Graphics or Alignment Panes is active, one of the fragments is always
highlighted (its name in the fragment names list at the far left) and selected concurrently in
other pane. To highlight another fragment, simply click on it.
Finding Sequence Fragments
A specific sequence fragment can be found in the Alignment Pane using the Find feature.
Click on a fragment name in the Alignment pane list to select it. Launch the Find sequence
dialog box either by choosing Edit > Find from the menu or by pressing the Find button on
the toolbar. When Find dialog box (Fig. 30.14) appears, type in the sequence you want to
find.
Fig. 30. 14 Find dialog box
Press the Find Next button. If the sequence is found, the Alignment Pane displays the
region where the sequence has been found and highlights the area.
499
Find Next/Previous Ambiguous Symbol
To search a contig’s consensus sequence for ambiguous symbols (like “N” or “R”), click on
the Find Previous (
) or Next Ambiguous (
Previous or Next Ambiguous.
) buttons or select View > Find
If you start this search with a sequence selected, the search proceeds from the selection in
the specified direction. If there is no selection, the search starts from the start (Find Next) or
the end (Find Previous) of the contig.
If an ambiguous symbol is found, its position is selected and displayed. If there are no more
ambiguous symbols in the specified direction, you are informed as such.
Switch the Fragment’s Chromatogram On/Off
To alternate the display of the chromatogram with the original sequence of the highlighted
fragment, click on the Show Chromatogram button (
) on the Pane Toolbar or select
Show Chromatogram on the shortcut menu. You can also select View > Hide/Show All
Chromatograms or the corresponding command from the shortcut menu. If the fragment
does not have a chromatogram, you will be informed with an intercept message.
Editing Contig Fragments or Consensus
You can use the Alignment Pane to edit the fragments that comprise the contig, change their
positions or orientation or edit the consensus itself. All editing changes in the fragments
cause an immediate recalculation and redisplay of the contig’s consensus sequence. Editing
changes in the contig consensus are reflected immediately in the fragment sequences that
comprise the contig.
Although the basic sequence editing techniques are the same as in the Sequence Pane of the
Fragment Window, there are some editing limitations and specifics because the fragments
are incorporated in a contig. Since the fragments that are incorporated in a contig can also
be present in other contigs, such edit operations are allowed only after you confirm that you
are aware that any other assemblies containing the fragment will be dismissed:
Fig. 30. 15 Warning message regarding editing the contig
500
ContigExpress: Fragment and Contig Windows Chapter 30
Note: This warning only appears the first time you attempt editing changes (Fig. 30.15). If
you select Yes, you will be allowed to continue making more changes without warning.
Click Yes to accept the changes. If you check the Make contig read-only box, the Yes
option is disabled. If you select No, you are returned to the Contig Window.
If your changes are base deletions, the nucleotides are deleted from the chromatogram and
the gap is closed, unlike deletions in the Fragment Window, which are indicated by dashes
in the Chromatogram Pane. The consensus is changed in that bases to the right of the
deleted region now move to the left, filling the gap and a vertical marker appears in the
sequence at the position of the deletion.
Although there is now no indication in Contig Window that these changes were made, if
you were to save the edited contig, then re-open it and open the edited fragment in the
Fragment Window, the editing changes would be reflected in the sequence.
Undo/Redo functions can be used to revert or repeat the changes you make. Click the Undo
button until it becomes disabled and the fragment and the consensus return to their original
state. You can also select Contig or Fragment > Revert to Saved, depending upon the
open window.
To help you track modifications in the contig, new symbols are displayed with a different
color. If the chromatogram for the fragment is displayed, you can also compare the edited
sequence with the original sequence below the chromatogram.
Translating the Consensus
The consensus sequence translation can be displayed in the Alignment Pane in any one or
all of the three direct frames. Display (or hide) the consensus translation in a particular
frame by choosing the corresponding View > Consensus Translation > Frame command
from the menu or by pressing its Consensus Translation - <#> Frame button counterpart.
Operations in Either the Contig Pane or Alignment Pane of Contig Window
The following operations can be performed similarly in either the Contig or Alignment
Panes:
Highlight a fragment
To highlight a fragment, click on a fragment “arrow” in the Contig Pane or on a fragment
name in the Alignment Pane. The same fragment is concurrently selected in other panes of
the window.
Moving a Fragment
This action changes the position of a fragment in the contig. This operation is possible only
when there are adjacent gaps in the direction of its movement or if the fragment relocation
does not create any gaps in the contig.
501
Note: If the Move Fragment buttons and menu options are disabled when you try to edit, the
contig window may be in ‘Read-Only’ mode (indicated on the title bar). When you started
the editing, a message box appeared informing you that editing the contig would cause all
assemblies to be dismissed.
Three Methods to Move a (Highlighted) Fragment in the Contig Pane:
1.
Press CTRL + DRAG the highlighted fragment block to the new location. You will see
a transparent copy of the fragment following the movement of your cursor. The new
position of the fragment being dragged is shown in both a pop-up label and the
workspace Status Bar.
Since fragment block moving is not allowed to introduce gaps into the contig, your
ability to drag the block will be appropriately limited. When you release the left mouse
button, the fragment “drops” into the new position, the contig consensus is recalculated
and all panes of the Contig Window are updated. To cancel fragment moving, press Esc
while dragging the fragment. Fragment moving is cancelled if you switch to another
window before dropping the fragment.
2.
Select View > Move Fragment … or the corresponding command on the shortcut
menu. In the dialog box that opens, enter the fragment position change in base pairs and
select the move direction (right or left). Click OK to move the fragment to the new
position. The contig consensus is recalculated; all panes of the Contig Window are
updated.
3.
Click one of the Move Fragment buttons (
,
,
). One click moves the
highlighted fragment one position in the respective direction. When movement in any
direction is no longer possible, the respective button becomes disabled.
Two Methods to Move a (Highlighted) Sequence or Block in the Alignment Pane.
Note: The following editing changes may be easier to monitor if you make them in the
), select View >
Chromatogram View. Click the Show All Chromatograms button (
Show All Chromatograms or the comparable command on the shortcut menu.
1.
2.
To delete bases, select them and press DELETE. The consensus sequence at the pane
lower edge now reflects the discrepancy, although the contig does not give any clear
indication of the deletion.
Place the cursor between two nucleotides and press the space bar, creating a gap
(shown by dashes). Now select bases next to the gap, enabling the Move Fragment
button(s) (
,
). Press the button that allows you to shift the block into the gap (or
select View > Move Selected Fragment.
Reverse Complement a Fragment
To reverse a fragment in a contig, highlight the fragment, click the Reverse Complement
Fragment button (
), select View > Reverse Complement Fragment or the
corresponding command from the shortcut menu. The fragment will be reverse
502
ContigExpress: Fragment and Contig Windows Chapter 30
complemented, the contig consensus are recalculated and all panes of the Contig Window
are updated.
Window Viewing Options
To review or modify default viewing options for Contig Window, click on the Viewing
Options button (
). This opens the Contig Viewing Options dialog box (Fig. 30.16):
Fig. 30. 16 General tab of the Contig Viewing Options dialog box
The Weight Table on the General tab allows you change the nucleotide symbol weight
coefficients used in calculation of the Weight Graph data in the Graphics Pane. To change a
coefficient for any nucleotide symbol pair, click in the table cell that is formed by the
intersection of the nucleotide pair and enter a new value. The table has diagonal symmetry
because the order of the symbols in the pair is irrelevant; the changes in one half of the table
are instantly mirrored in the other half.
•=
Show Alignment As selects whether to show chromatograms in the Alignment Pane
•=
Gaps sets a default setting for the Do not count gaps checkbox in the Set Selection
dialog box
503
Fig. 30. 17 ORF tab of the Contig Viewing Options dialog box
The ORFs tab (Fig. 30.17) allows you to define the parameters for the ORFs search. Start
and stop codons can be defined here, as well as the minimum codon size for the search and
whether or not nested ORFs will be displayed. Pressing the Defaults button restores ORF
parameters to their default values.
Copy and Camera Features
The Copy feature is the same as in other panes except that only the selected part of a
highlighted fragment is copied. The Camera feature for this pane works in a slightly
different manner than it does in other windows.
When you select this action, you will see the Camera dialog box (Fig. 30.18):
504
ContigExpress: Fragment and Contig Windows Chapter 30
Fig. 30. 18 Camera dialog box
In the Metafile format, only the currently visible part of the Alignment Pane can be copied
to the clipboard. The data is copied in the Windows metafile.format (WMF).
In the Text format, you can select whether you want to copy a current selection or all data
available in the contig (it is not limited to the visible part). You can also set wrapping of the
copied sequences at every nth position. The data is copied in the plain text and Rich Text
(RTF) formats.
505
506
ContigExpress: Group Operations on Fragments Chapter 31
Chapter 31 ContigExpress: Group Operations on Fragments
Introduction
This chapter consists of operations performed on fragments to optimize contig assembly.
Operations covered are fragment and vector contamination trimming and calling secondary
peaks.
Fragment Trimming
Fragment trimming is an operation performed on chromatogram fragments to optimize
sequencing results and contig assembly. Trimming is performed on fragment ends to
remove unresolved or poor quality nucleotides based on chromatogram results. It is also
used to remove bases identical to restriction sites or other sequences from a vector. An
entire chapter is devoted to this operation because of its complexity.
All fragment trimming is a multi-step process in Vector NTI Suite. Steps in the process are
summarized as follows:
1.
Open the Fragment Ends (or Vector Contamination) Trimmer dialog box where
trimming can be performed on a group of fragments.
2.
Define the trimmer settings
3.
Calculate the trimming using the parameters you defined. A preview is provided so you
can see where the fragments will be trimmed.
4.
Select or unselect all of the ends to be trimmed
5.
Complete the trimming process by closing the dialog box with the OK button.
Fragment Ends Trimmer dialog box
In the ContigExpress Project Explorer, select the fragments to be examined and prepared for
trimming. Select Edit > Trim Selected Fragment Ends, opening the Fragment Ends
Trimmer dialog box (Fig. 31.1).
When first opened, the dialog box displays the default settings for the type of trim used.
While the dialog box is open, you can change the trimming settings and recalculate the trims
as many times as you wish.
The dialog box contains a scrollable list of Fragment Mini-windows for all the fragments
you selected for trimming in Project Explorer. To facilitate viewing the trim locations, this
dialog can be resized like any other window using the keyboard or mouse.
507
Fig. 31. 1 Fragment Ends Trimmer dialog box
The Fragment Trimmer dialog box buttons are described in the steps below. It is suggested
that you follow them as numbered.
The fragments you selected in the Project Explorer are listed in “mini-windows” in this
dialog box. Each mini-window shows one fragment with information on how the current
trim will affect it. In this window, you can select those trim locations to be used in the final
trim for the fragment in the project.
When the fragments are displayed as sequences (when the Display Sequence box is
checked), the Fragment Mini-window (Fig. 31.2) has the following elements. (Some of the
elements do not appear until after the calculation step):
508
ContigExpress: Group Operations on Fragments Chapter 31
Fig. 31. 2 Fragment Mini-window when fragments are displayed as sequences
•=
Fragment name is the name of the fragment in the ContigExpress Project;
•=
Fragment statistics show the number of good (non-ambiguous) bases and the number
of ambiguous bases in the fragment;
•=
Fragment sequence is the nucleotide sequence of the fragment; the ends that will be
trimmed are in lowercase and selected in the red color, all the rest will remain intact
after trimming;
•=
Trim statistics shows the amount of bases that will be trimmed off the fragment from
each end and the amount of ambiguous bases among them;
•=
Select trimming location boxes allow you to select the ends that will be trimmed.
Due to window size constraints, usually only the most important parts of the sequence, the
places around the trim locations, are displayed. Omitted parts of the sequence are replaced
with ellipses (…). To view the entire fragment in a Fragment Display Window (in ReadOnly mode), double click anywhere in a Mini-Window
To display fragments in a graphical form, with a bar differentiating (in different colors) the
parts for trimming from the remaining sequence part as seen below, uncheck the Display
Sequence box. The result is shown below (Fig. 31.3):
Fig. 31. 3 Fragment Mini-window when fragments are displayed in graphical form
509
Follow the trimming steps in the numbered order:
1. Set fragment display options
To establish the fragment display format, check or uncheck the Fragment Display box
or press alt-D.
2. Define trimmer settings
Click on the Settings button or press alt-S, opening the Trimming Settings dialog box.
The contents of this dialog box may vary according to the type of the Fragment
Trimmer dialog box. See the section on Vector Contamination Trimming for more
details.
Fragment Ends Trimming Settings dialog box
The settings defined in this Trimmer Settings dialog box (Fig. 31.4) determine how contig
fragments’ ends are trimmed. When the dialog box is opened, its fields are filled with the
current settings. To load previously saved parameters, press the Load button.
Fig. 31. 4 Fragment Ends Trimming Settings dialog box
5’ end:
510
•=
Trim off-scale bases removes the defined # of consecutive bases that are below
acceptable criteria
•=
Trimming until __ 5’ bases … can be based upon chromatogram quality
•=
Trim at least … is an arbitrary setting that may be based upon the fact that your
primers have “tails”
ContigExpress: Group Operations on Fragments Chapter 31
3’ end:
•=
Trim until __ 3’ bases … removes bases whose peaks do not meet the % value you
define
•=
From position … trim first… removes these bases if you can see that quality well into
the sequence is not good
•= Trim at least… removes bases that begin to be poorly resolved at the 3’ end
Post trimming
•=
Define maximum … set the length of the fragment that must be left after trimming
•=
Leading and trailing … removes poorly resolves nucleotides that may be left after
trimming
•=
Remove poly A/T… removes these nucleotides that may be present if the sequence
was flipped, producing a poly-T 5’ end.
Press Save to save these settings as a file to be used in the future. Press OK to apply the
new settings in the current trimming exercise and return you to the Fragment Ends Trimmer
dialog box. This also saves these settings as default settings for all future trim calculations.
To cancel changes, press the Cancel button.
If you calculated the trims before redefining these settings, you must recalculate after
closing the Settings dialog box to view trimmings according to the new settings.
3. Calculate the trim
Calculate! shows the potential trimming under the parameters you set in the Trimmings
Settings dialog box. To calculate the trim for all fragments using the current settings, press
the Calculate! button or press alt-C. Since trim calculation can be a lengthy process, a
progress dialog box appears with a progress bar (Fig. 31.5). Press the Cancel button or the
ESC key to stop the process.
Fig. 31. 5 Progress dialog box with progress bar
If the trim calculation process is allowed to complete, all fragments are updated with newly
calculated trim locations, displayed in red, lower-case nucleotides in the mini-windows.
511
4. Select trimming locations
Press the Select All or press Alt-A to select all of the trim locations displayed in the miniwindows for the final fragment trimming. click the Select All or Unselect All buttons or use
keystrokes Alt-A or Alt-U respectively. Note that all of the checkboxes for the ends are
checked as in this example:
For manually selecting trim locations on individual molecules for final fragment trimming,
press the Unselect All buttons in the Fragment Ends Trimmer dialog box. This unchecks the
5’ and 3’ boxes for each fragment in the mini-windows. In the mini-window(s) in which you
wish to select the trim locations, click on the appropriate fragment check boxes,
,
.
When a location is selected, the respective part of the fragment will be trimmed off when
the trimming is completed.
5. Confirm the proposed trimming operation
To open a Fragment Window for any fragment in a mini-window so that you can review and
compare prospective fragment trimming with the corresponding chromatogram, doubleclick anywhere in the mini-window. The Fragment Window that opens is in read-only mode.
As this window is created, the fragment that will remain after trimming is selected in the
fragment sequence, both in the Sequence Pane and in the top sequence of the Chromatogram
Pane. The fragment opened this way is always opened in read-only mode.
If the Fragment Window for the fragment already exists, the selection is made inside it and
it is brought to the foreground.
6. Complete the trimming operation
Once parameters and trimming conditions are established, click OK to close the dialog box
and proceed with the fragment trimming. To close the dialog box without changing the
fragments in the project, select the Cancel button or press the ESC key.
Vector Contamination Trimming Settings Dialog Box
The purpose of the Vector Contamination Trimming feature is to trim from sequenced
fragments any residues from your frequently used cloning vectors that may have been
amplified in the sequencing process.
In the Vector NTI Database Explorer, highlight the cloning vector in the List Pane, or open
a vector in a Molecule Display window and select a sequence such as a frequently-used
polylinker site. Select Tools > Send to > Polylinker to ContigExpress.
In the Sequence Data dialog box that opens, indicate whether you are sending the entire
sequence or the selection and the direct or complementary strand. Click OK, opening the
Choose Polylinker file name dialog box. In naming the sequence, make sure you retain the
512
ContigExpress: Group Operations on Fragments Chapter 31
.seq extension because this is the only way ContigExpress recognizes this sequence for the
trimming operation. Click Save to save the sequence in the VecContData folder.
Notes about sending sequences for vector trimming:
•=
From Database Explorer, you can send only one vector at a time.
•=
If you have been sequencing off of the complementary strand, be sure and indicate this,
as only one strand is forwarded to ContigExpress.
•=
In naming the sequence, make sure you retain the .seq extension because this is the only
way ContigExpress recognizes the sequence for the trimming operation.
Now in the Project Explorer in ContigExpress, select the sequenced fragments to be
trimmed and choose Edit > Trim Selected Fragments for Vector Contamination. This
opens the Fragment Vector Contamination Trimmer dialog box, (not shown but similar to
the Ends Trimmer dialog box).
In this dialog box, press the Settings button to open the Fragment Vector Contamination
Trimmer Settings dialog box (Fig. 31.6). The vectors or polylinker sites you selected in the
Database Explorer should be listed in the List Pane at the left. The Edit Pane where you can
edit the vector sequence is on the right.
Tip: If when you open this dialog box, the Polylinker List Pane is empty, there can be two
reasons/solutions:
1.
Return to the Project Explorer, and select your vector(s) or polylinker(s) as described
above.
2.
You may have selected the vector/polylinker correctly, but you lost the .seq extension
in naming them when they were saved in the VecContData folder.
513
Fig. 31. 6 Fragment Vector Contamination Trimmer Settings dialog box
The Common Settings in this dialog box are described as follows:
•=
Minimum vector overlap is the minimum number of bases in the fragment that
overlap with those on the clone. This setting must be 5 or greater.
•=
Minimum vector overlap with ambiguities includes poorly resolved residues
•=
Vector match threshold is the % required to match
•= Remove additional … from 5’/3’ end… refers to the additional bases to be removed
The polylinker list in the Polylinker List Pane on the left is updated every time you open this
dialog box. Check the Auto-refresh box to refresh the list every time you switch to
ContigExpress from another application where the Vector Contamination Settings dialog
box is open.
By default, a new polylinker is not selected for trimming and has no insertion points.
Editing a Polylinker
To select a polylinker for the trimming process, check the check box to the left of its name
and highlight it by clicking on it. The Polylinker Edit Pane to the right of the list shows the
contents of the selected polylinker. You can use this window for simple editing of the
polylinker sequence and for managing the insertion points of the polylinker. Editing
commands appear on the buttons; some are also available on a shortcut menu opened from
the Edit Pane.
514
ContigExpress: Group Operations on Fragments Chapter 31
Insertion points can be added to the polylinker using two methods:
1.
Manual adding: position the caret where you want to add the insertion point; press the
INSERT key or click the Add Insertion Point button.
2.
Import a group of insertion points using a file with an enzyme database (in Rebase
format). Click the Add REN sites button or select Add REN Sites… from the shortcut
menu. In the standard Open dialog box, you can select a Rebase file to be applied to the
polylinker or simply the Enzlist.dat in the VecContData folder. Select OK, and the
enzyme file is imported. The insertion points with the enzyme names are imported to
the polylinker. Click on the enzyme name to select it as an insertion point.
The following options control the points:
•=
Remove Insertion Point deletes a selected point. You can also press the DELETE key.
•=
Remove All Points (on the shortcut menu) remove all insertion points from a
polylinker
•=
Select All selects all insertion points. You can also just click on it. (Selected points are
blue; an unselected point is gray.) A corresponding option is also on the shortcut menu.
To be included in the trimming process, a point must be selected.
•=
Remove Selected deletes selected points. A corresponding option is also on the
shortcut menu.
To toggle the selection status of an insertion point, click it with the mouse.
Click on the OK button to return to the Trimmings dialog box.
Executing the Vector Contamination Trim Changes
To complete the trimming process, follow the steps beginning with number 5 on page 511.
After all fragments are processed, the Fragment Trimmer dialog is closed and the Project
Explorer contents are updated to reflect the changes.
Calling Secondary Peaks
ContigExpress can search for secondary peaks in a chromatogram by looking for lower
peaks that are as tall as a percentage you define of the highest peak at a base call position
(current threshold for secondary base calling). For example, a threshold or 70% would
display secondary bases with heights 70% of the taller peak. This is specifically used for
resolving the occurrence of double peaks in a chromatogram.
To initiate this process, in the ContigExpress Project Explorer window select fragments,
then select Edit > Call Secondary Peaks. This opens the Call Secondary Peaks dialog box
(Fig. 31.7) where you can review potential replacement bases determined by the search for
secondary peaks for the group of fragments you selected.
515
To facilitate viewing the fragment sequences, this dialog can be resized like any other
window by using the keyboard or mouse. The panes inside the dialog may be resized by
moving the split bars.
The dialog box opens with the default settings for this operation which you can change as
you wish. The dialog box has two panes: List Pane on the left with the fragments you
selected in the Project Explorer and the Sequence Pane on the right displaying the sequence
of the currently selected fragment in that list.
Fig. 31. 7 Call Secondary Peaks dialog box
The Call Secondary Peaks dialog box buttons are summarized as follows:
•=
Allow Ns to be replaced allows replacing the N nucleotide symbols.
•=
Allow edited bases to be replaced allows replacing of previously edited bases.
If either of the above settings are checked, the selected sequence is immediately regenerated
to display a preview of the base that would be changed in the sequence.
516
•=
Threshold for secondary base calling defines the percentage of the height of the
secondary peak in relation to the first for calling the secondary base
•=
Select all fragments indicates fragments to be saved into project after pressing OK
•=
Unselect all fragments indicates fragments are not to be saved in the project
ContigExpress: Group Operations on Fragments Chapter 31
List Pane
The List Pane shows the list of fragments you selected in Project Explorer for sequence
editing. Select any fragment in the list to see a preview of the changes in the Sequence Pane.
If you are satisfied with the results, check the box next to the fragment name to allow the
displayed changes for this fragment to be saved in the project.
Sequence Pane
This pane displays the preview of changes that will be applied to the sequence using the
current call peaks settings. The peaks that will be changed are shown in blue color. The
original peaks are shown right under the changed peaks so you can easily track changes.
The user operations in the Sequence Pane are basically the same as in the Fragment Window
Sequence Pane except that you cannot edit the sequence manually.
Status Bar
Status
line
Set caret
position
Set selection
range
Fig. 31. 8 Status bar of the Call Secondary Peaks dialog box
The status bar of the Call Secondary Peaks dialog box (Fig. 31.8) shows the name of
currently selected fragment in List Pane, and the number of peaks that have changed in its
sequence. The Set Caret Position and the Set Selection Range boxes shows the caret
position and a currently selected range of residues in the Sequence Pane. Pressing either of
these buttons opens a dialog box where you can set a caret position or range directly.
After you have previewed the changes, check the check box to maintain the changes while
you review other fragments. To select other fragments to be changed, click on their
fragment IDs in the List Pane.
Executing Calling Peaks Changes
The changes are applied for those fragments checked in List Pane only. To save your
changes in the project, press the OK button. If any of the affected fragments are included in
assemblies, you will be given the option of dismissing the respective assemblies or
canceling the changes for that particular fragment.
517
518
BLAST Search and BLAST Viewer Chapter 32
Chapter 32 BLAST Search and BLAST Viewer
Introduction
BLAST (Basic Local Alignment Search Tool) searches explore, using a DNA or protein
query sequence, available sequence databases for sequence similarity. BLAST programs
have been designed for speed, with a minimal sacrifice of sensitivity to distant sequence
relationships. BLAST scores have a well-defined statistical interpretation, making real
matches easy to distinguish from random background hits. BLAST uses a heuristic
algorithm that seeks local as opposed to global alignments and is therefore able to detect
relationships among sequences that share only isolated regions of similarity. (Altschul, et al.
1990).
BLAST Search Dialog Box
The BLAST search engine in Vector NTI initiates the search through a Vector NTI dialog
box, launching the search through the NCBI (National Center for Biotechnology
Information) server at the NCBI website (http://www.ncbi.nlm.nih.gov/blast/blast.cgi).
To open the BLAST Search window, select BLAST Search in the program group or folder
where you installed Vector NTI. You will need to choose the server for the search in the
small dialog box that opens (Fig. 32.1). (If you’re not sure, select NCBI BLAST Server).
Fig. 32. 1 BLAST Search dialog box for server selection
Click OK, opening the following dialog box:
519
Menu bar
Toolbar
Database
Selection bar
Sequence and
Parameters Pane
Results Pane
Fig. 32. 2 BLAST Search dialog box (Sequence tab)
The BLAST Search dialog box (Fig. 32.2) contains a small menu bar and toolbar with
options relating to search, viewing and help functions. All of the toolbar buttons are
described in Chapter 4, but they are displayed in this chapter as needed.
This dialog box is divided into three sections: the Database Selection bar, the Sequence and
Parameters Pane and the Results Pane.
Database Selection Parameters
The default search engine in the Vector NTI Suite v.7.0 is BLAST 2.0. Because BLAST 2.0
searches are gapped by default, you must specify as explained below if you prefer an
ungapped search.
Program - In the drop-down menu, specify the type of database search to be performed.
The search options are summarized as follows:
520
•=
blastn - compares a nucleotide query sequence against a nucleotide sequence database
•=
blastp - compares an amino acid query sequence against a protein sequence database
•=
blastx - compares a nucleotide query sequence translated into all reading frames against
a protein sequence database
•=
tblastn - compares a protein query sequence against a nucleotide sequence database
dynamically translated in all six reading frames (both strands)
BLAST Search and BLAST Viewer Chapter 32
•=
tblastx - compares the six-frame translations of a nucleotide query sequence against the
six-frame translations of a nucleotide sequence database. This program cannot be used
with the nr database.
Database: In the drop-down menu, select the GenBank database type the query sequence is
to be searched against. Many of the potential database type options are described below:
Menu Identifier
Description
nr
Peptide Sequence Database: All non-redundant
GenBank sequences and CDS translations.
Nucleotide Sequence Database: All
GenBank+EMBL+PDB sequences (no EST, STS, GSS
or phase 0, 1 or 2 HTGS sequences). No longer nonredundant.
EST
(+ human,
mouse, others)
Nucleotide Sequence Database: EST (Expressed
Sequence Tags).
Others includes all organisms except mouse and human
GSS
Nucleotide Sequence Database: Genome Survey
Sequence, includes single-pass genomic data, exontrapped sequences, and Alu PCR sequences.
HTGS
Nucleotide Sequence Database: Unfinished High
Throughput Genomic Sequences.
Patents
Protein sequences from the Patent division of GenBank.
Peptide Sequence Database: Saccharomyces cerevisiae
protein sequences—genomic CDS translations.
Nucleotide Sequence Database: Saccharomyces
cerevisiae genomic nucleotide sequences.
Yeast
Mito
Nucleotide Sequence Database: Mitochondrial DNA
sequences.
vector
Nucleotide Sequence Database: Vector subbase of
GenBank.
Peptide Sequence Database: Escherichia.coli genomic
CDS translations.
Nucleotide Sequence Database: Escherichia.coli
genomic nucleotide sequences.
E. coli
month
Peptide Sequence Database: All new or revised
GenBank CDS translation + PDB + SwissProt + PIR +
PRF released in the last 30 days.
Nucleotide Sequence Database: All new or revised
GenBank+ EMBL+DDBJ+PDB sequences released in
the last 30 days.
521
Menu Identifier
Description
Drosophila
genome
Peptide Sequence Database: Drosophila genome
proteins provided by Celera and Berkeley Drosophila
Genome Project.
Nucleotide Sequence Database: Drosophila genome
provided by Celera and Berkeley Drosophila Genome
Project.
PDB
Peptide and Nucleotide Sequence Database: Sequences
derived from the 3-dimensional structure from
Brookhaven Protein Data Bank.
kabat
Peptide and Nucleotide Sequence Databases: Kabat’s
database of sequences of immunological interest.
alu
Peptide Sequence Database: Translations of select Alu
repeats from REPBASE.
Nucleotide Sequence Database: Select Alu repeats from
REPBASE.
dbest
Nucleotide Sequence Database: Database of
GenBank+EMBL+DDBJ sequences from EST Divisions.
dbsts
Nucleotide Sequence Database: Database of
GenBank+EMBL+DDBJ sequences from STS Divisions.
epd
Nucleotide Sequence Database: Eukaryotic promoter
database.
Table 32. 1 GenBank database options
There are three tabs below the database selection section of the screen.
Sequence Tab
On this tab you can enter raw sequence (only) pasted from another application or select
Search > Open and locate the file for a sequence you wish to submit. If the sequence is not
in raw format, copy it to Notepad, which eliminates all characters except the text itself.
Select and copy the sequence from the Notepad and paste it into the text box on the
Sequence tab. If the BLAST Search module is launched from a Vector NTI Suite
application, the active molecule sequence is pasted in the Sequence tab.
Parameters Tab
On the Parameters Tab (Fig. 32.3), you can define parameters for the BLAST search.
Note: The parameters you can set on this tab are almost identical to parameters for the
Advanced BLAST searches at the NCBI website:
http://www.ncbi.nlm.nih.gov/blast/blast.cgi. For more information regarding these
parameters than is detailed here, refer to the website.
522
BLAST Search and BLAST Viewer Chapter 32
Fig. 32. 3 Parameters tab of the BLAST Search dialog box
Expect:
The statistical significance threshold for reporting matches against database sequences. The
default value of 10 means that in a database of the current size, 10 matches would be
expected merely by chance (stochastic model of Karlin and Altschul, 1990.) Hits showing a
statistical significance greater than the Expect threshold are not reported. Increasing the E
value above 10 produces a larger list with more low-scoring hits (chance matches). Lower
expectation value thresholds are more stringent, leading to fewer chance matches being
reported.
If your query peptide or nucleotide sequence is short, you might want to increase the Expect
value. Because a short query is more likely to occur by chance in the database, even a
perfect match can have low statistical significance and may not be reported. Increasing the E
value lets you look farther down the hit list and see matches that would normally be
discarded because of low statistical significance.
Filters:
•=
Low-complexity
This filter masks off segments of the query sequence that have low compositional
complexity (as determined by the SEG program of Wootton & Federhen, Computational
Chemistry, 1993). Regions with low-complexity sequence can create problems in sequence
similarity searching by producing artificial hits, sequences that are not truly related. Such
hits can produce high scores because of the presence of low-complexity regions.
•=
Human Repeats
This option masks Human repeats and is especially useful for human sequences that may
contain these repeats. This option is still experimental and may change in the near future.
•=
Mask for Lookup
523
This option masks only for purposes of constructing the lookup table used by BLAST. The
BLAST extensions are performed without masking. This option is still experimental and
may change in the near future.
Ungapped Alignment:
Check this box if you prefer ungapped alignments. BLAST 2.0 allows gapped alignments,
by default. Allowing gaps circumvents the problem of similar regions being broken into
several segments. The scoring of gapped alignments tends to reflect biological relationships
more closely.
Organism Limit:
This parameter lets you limit your database search to the most common organisms in
GenBank, listed in this drop-down menu, or enter an organism name in the form “Genus
species”, or leave the default “none”.
Query Genetic Codes:
Set to a positive integer to select the genetic code that will be used by blastx and tblastx to
translate the query sequence.
Expect value for inclusion in PSI-BLAST iteration 1:
This field is currently disabled. This option will be available in a future Vector NTI Suite
release.
Matrix Tab
This tab permits you to specify the scoring matrix for blastp, blastx, tblastn and tblastx. The
default matrix is BLOSUM 62. The valid alternative choices include PAM 30, 70, and
BLOSUM 45 and 80. No alternate scoring matrices are available for blastn.
Fig. 32. 4 Matrix tab of the BLAST Search dialog box, with gap penalties and lambda ratios
displayed
Select among the substitution matrices listed, with their gap penalties and lambda ratios
displayed (Fig. 32.4), which matrix to be applied to the BLAST search you are submitting.
524
BLAST Search and BLAST Viewer Chapter 32
BLAST Options
To specify technical settings for the BLAST Search, choose View > Options, opening the
following dialog box (Fig. 32.5):
Fig. 32. 5 Blast Options dialog box
Complete your selections in the box. Press the Proxy Configuration button to set proxy
server information (Fig. 32.6).
Fig. 32. 6 Internet Connection dialog box
Make sure that the proxy settings are filled in correctly; specifying whether or not your
connection to the Internet should be performed via a proxy server. Enter the address and
port number of that server. If your proxy requires a password, check the Proxy requires
authentication box and enter the user name and password information.
Click OK, OK, returning you to the BLAST Search Viewer.
525
Press the Submit button (
) to launch the BLAST search.
BLAST Search Results
As soon as you have submitted your query, the search is numbered and listed in the Status
Pane. This pane displays the following data about your search: data and time submitted, the
status of the search (waiting, error, completed, etc. etc.), and the identification number
assigned your query. Completed searches are listed also showing the number of identified
hits in the response.
BLAST Viewer
Opening BLAST Viewer
The BLAST Viewer for reviewing BLAST search results can be opened by either of two
methods:
1.
2.
Select the BLAST Viewer in the program group or folder where you installed Vector
NTI. If you choose this method, it opens as an empty viewer. You can open previously
) or by selecting BLAST
saved BLAST results by clicking on the Open button (
Results > Open.
Double-click on a BLAST Search result entry in the BLAST Search dialog box. See the
beginning of this chapter.
Elements of the BLAST Search Results Viewer
Blast Viewer displays the textual, sequence and graphical summary of the Blast search
results (Fig. 32.7). It consists of a menu bar, and two toolbars and three panes: Text,
Analysis and Alignment Panes.
All Vector NTI Suite toolbar buttons are summarized in Chapter 4 of this manual. The
toolbar buttons are displayed as needed in this chapter, however. Many toolbar operations
can also be launched from the menu bar or from a shortcut menu.
526
BLAST Search and BLAST Viewer Chapter 32
Fig. 32. 7 Blast Viewer
The BLAST Viewer is organized and managed like in the other display windows in Vector
NTI Suite. Several BLAST Viewers can be opened in one workspace. You can navigate
through the open display windows using the Back and Forward buttons (
,
).
As in the other Vector NTI Suite applications, to apply a command in a given pane that pane
must be active. The active pane can be toggled with the different panes buttons on the Pane
,
,
,
,
) or by clicking anywhere in the pane you wish
Selection Toolbar (
to activate. The keyboard strokes are F6 (cycling clockwise through the panes) and SHIFT +
F6 (cycling counter clockwise). Note that in this BLAST Search Viewer, each of the graphs
in the Analysis Pane is assigned a separate Pane button.
Two management features of the display window are designed to maximize viewing
flexibility:
Select View > Maximize Pane to expand the size of an activated pane to full screen
size. Select View > Restore Layout to return to the original pane layout.
2. Select View > Edit Pane Layout to open the Pane Manager for modifying the
arrangement of the panes in the workspace. For more details, refer to Chapter 3.
The Status bar shows the Hit Element Score from the Text Pane folder for the selected hit
element.
1.
527
In addition, the following pane manipulations are outlined in Chapter 3:
•=
Re-sizing the Text Pane with the split bars or arrow keys
•=
Scrolling the Text Pane
BLAST Search Results
Text Pane
The Text Pane of BLAST Viewer contains a description of the query molecule, including
common database information, a Feature map and a list of hit molecules. The Text Pane is
linked to analyses graphs in the Analysis Pane and the Alignment Pane.
The following Text Pane manipulations are outlined in Chapter 3.
•=
Opening or closing folders
•=
Opening the folder shortcut menu
The first line of the Text Pane lists the name of the query molecule. Double-click on the line
or click on the
at its left to open an Edit <molecule > dialog box. For details on editing
the molecule see chapter 20.
The second entry in the Text Pane contains information about the query sequence such as
the molecule length. This is followed by a folder of the Hit molecules, also displaying the
number of hits. Click on the + at the left of the folder to open all of the subfolders.
The hit molecules themselves are links to the NCBI website. If you click on the link, that
prompts the downloading of the molecule, thus opening it in a Molecule Display window.
For each hit molecule, the following information is provided:
528
•=
Its ID code and the number of hit elements (regions of local similarity) in the molecule.
•=
A brief summary relating to the matching region of the hit molecule to the query
sequence and the length of the matching region
•=
Score Folder(s) corresponding to the number of hit elements
BLAST Search and BLAST Viewer Chapter 32
Hit Element Description
Double-Click on a Score Folder for a particular hit element to open it. The folder displays
the statistical results for the hit element such as its expectation value, identities, etc.
Selecting a Score Folder for a hit element locates all of the hit elements for that hit molecule
in the Analysis Pane. However, just the hit element corresponding to the selected folder is
displayed in a colored mode. As you click on the other Score Folders in the Text Pane, they
are each highlighted in the Analysis Pane, in turn.
The statistical results in the Score Folder are described as follows:
•=
Score + (Bit Score): These indicate how close the identity of the match is to the query
sequence.
•=
Expectation: This value reflects the likelihood that the similarity between the
sequences would occur by chance when searching a database of a particular size. A
zero or extremely low number suggests that the match is so perfect that it is extremely
unlikely that the similarity would occur randomly. The E value describes random
background noise exists for matches between sequences.
•=
In a BLAST search, an E value of 1 assigned to a hit can be interpreted as meaning that
in a database of the current size one might expect to see 1 match with a similar score
simply by chance. For more detail about this score, see the BLAST parameters section
at the beginning of this chapter.
•=
Identities: the ratio (and percentage) of matching residues in the hit elements. The
numbers n/n refer to the number of identical residues out of the number of matches in
the hit element. This is important to consider when determining the significance of this
statistic. A high identity percentage may mean nothing if a low number of nucleotides
is being compared.
•=
Positives: the ratio (and percentage) of similar residues in the hit elements
•=
Query: The position numbers in the query sequence matching that of the hit element
are indicated by the start and end positions of the figures, such as 57[bp] – 93[bp]. The
strand that corresponds to the hit element is also shown.
•=
Hit: The position numbers in the hit sequence matching the query sequence are
indicated by the start and end positions of the figures, such as 42[bp] – 88[bp]. The
strand that corresponds to the hit element is also shown.
Analysis Pane
The Analysis Pane, displaying the graphical summary of the BLAST Search results, consists
of three panels: 1) the upper graph displays the Sequence Profile and the Hit Distribution, 2)
the center graph displays the Query-Hit Alignment, and 3) the lower graph displays the Hit
Map graph.
529
Sequence Profile Graph (upper pane)
The Sequence Profile Graph depicts how well the particular regions of a query molecule are
represented in a database it was searched against, allowing “unique” and “shared” regions of
a query molecule to be easily identified. Each residue of the query sequence is assigned a
value indicating the position-specific representation of this residue in a database.
The profile is calculated as follows: each residue is traced into all hit elements in which it is
included. The corresponding residue substitution score from a hit element is multiplied by a
logarithm of an expectation value of a particular hit element and the resulting value is
summarized over all hit elements. Each step in the resulting graph represents the profile of
each sequence residue.
If the database search utilized a translation of the original molecule as an intermediate step
(tblastx and blastx), the sequence profile graph is generated for all possible translation
frames.
Hit Distribution Graph (upper pane)
Each residue in the query sequence is traced to all hit elements in which it is included, and
100 percent identical. The number of hit elements per residue are tallied (summed up) and
plotted across the molecule.
Query-Hit Alignment Graph (center pane)
Each element on the Hit Distribution Graph positions the local similarity regions on the
query and hit molecules. The upper scale represents the query sequence while the lower
scale represents the currently selected molecule in the hits list. The hit element
corresponding to the currently selected Score Folder (Text Pane) is shown in color on the
map, while the other hit elements for the molecule are grayed out. To select another element
in the graph, you must return to the Text Pane and select a new Score Folder.
Hit Map Graph (lower pane)
The Hit Map graph provides a graphical overview of the hit sequences aligned to the query
sequence. The X-axis on this map represents residues along the query molecule. Each bar
drawn above the X-axis represents a molecule (or molecule fragment) that matches the
query sequence. The position of each bar relative to the linear axis of the query allows users
to see instantly the extent of the hits that align with single or multiple regions of the query.
Hit molecules are represented in decreasing order of similarity with the most similar hits
shown at the top and the least similar shown at the bottom. If one hit molecule contains
multiple hit elements, they are represented along the same Y-axis position, irrespective of
similarity scores.
To view the Name, score, bits and E-value of a hit, pause the cursor over the hit element bar
on the graph. Clicking on a hit element bar selects the hit element in the Text Pane. This
also changes the bar’s color to indicate the selected hit and displays the alignment between
the query and the hit sequences in the Query-Hit Alignment pane.
530
BLAST Search and BLAST Viewer Chapter 32
Zooming In and Out
Enlarging or reducing regions of the Analysis Pane is possible using the Zoom buttons.
Click in the pane for the graph to be resized. If you Zoom In sufficiently, you can see the
individual residues on the X axis. For more detailed about using the Zoom buttons, refer to
Chapter 3.
To view a specific selected region in one of the graphs, select Zoom to Selection from the
shortcut menu. To return to the normal mode, click on the Zoom to Fit button (
).
Note: In the Analysis Pane, only the upper and lower graphs can be resized.
Selecting Regions on the Analysis Pane
Regions of the graphs can be selected in the Analysis Pane by holding down the left mouse
button then dragging through the sequence. Selected regions are displayed concurrently on
other graphs and the Alignment Pane, (only if the Score Folder for the hit element
corresponding to the selected region is selected in the Text Pane.)
Hits listed in the Text Pane that correspond with the selection in the Analysis graphs can be
highlighted using the Select Hits function. To use the Select Hits function, highlight the
area of interest on the Analysis Pane graphs and choose Edit > Select Hits from the menu.
The Select Hits dialog box appears (Fig. 32.8):
Fig. 32. 8 Select Hits dialog box
There are four choices for mapping the selection to the hits in the Text Pane:
•=
Intersecting with selection – hits that contain any part of the selected area.
•=
Contained within selection – the entire length of the hit matches within the selection.
•=
Containing entire selection – hits contain the entire selection and, possibly, more.
•= All – hits with any of the above matching are found.
Select the radio button for the intersection option of your choice and press the OK button.
Hits corresponding in the Text Pane corresponding to the selection in the Analysis Pane and
the selected intersection option are highlighted.
531
Viewing/Changing Parameters of the Analysis Graphs
The graphs in the Analysis Pane display the values averaged in a window of a specific
length sliding along the x-axis of the graph by a specific step.
To view and modify the parameters of the Sequence Profile or Hit Distribution plots,
activate the upper graph pane by clicking on its Pane button, or click in the upper pane.
Select Plot Setup from its associated shortcut menu, opening the Plot Setup dialog box:
Analysis tab: Count Window Size is the length of the sliding window; the larger the Count
Window Size, the smoother the curve. Step Size is the width of each step on the plot.
Sequence Profile/Hit Distribution tabs: Modify the plot color and select the graph display
mode from Bar, Boolean, or Linear.
To view and modify the Hit Map graph properties, activate the Hit Map pane by clicking on
it or by pressing its activation button on the toolbar. Right-click on the Hit Map graph pane
and choose Properties from the shortcut menu or choose Edit > Properties from the menu
to launch the Properties dialog box. In the properties dialog box, you can change the display
color for hits and the selected hit and adjust the size of the graphic hits display.
Alignment Pane
The Alignment Pane displays the alignment of the hit element selected in the Text Pane and
the corresponding region on the query sequence. The query molecule, the currently selected
hit element and the resulting consensus sequences are shown.
Moving Around the Alignment
The Alignment Pane has its own horizontal scrollbar, if the sequences are sufficiently long
to warrant them. The sequence names remain stationary at the left in the Alignment Pane no
matter how the sequences are repositioned horizontally. The position number of the leftmost residue visible in each sequence is displayed immediately following each sequence
name.
Selection Techniques
Select molecules in the Alignment Pane by clicking on their names.
To select regions of the nucleotide or amino acid sequence alignments, use the click and
drag technique with the mouse. Selection applies only on the sequence of the currently
selected molecule. The selection is also shown on the graphs in the Analysis Pane.
Alignment Properties
To change a default set of alignment display parameters, From the Alignment Pane, select
). The Alignment
Properties from the shortcut menu or click on the Properties button (
Display Setup dialog box opens with three property tabs: Consensus Calculation, Similarity
Tables, and Color Setup.
532
BLAST Search and BLAST Viewer Chapter 32
Consensus Calculation
A consensus sequence is a theoretical representative nucleotide sequence in which each
nucleotide represents either the residue seen most frequently at that same site in aligned
sequences, or is selected by other criteria. The Consensus Calculation tab specifies how the
consensus sequence, displayed as the bottom sequence in the Alignment Pane, is calculated
in BLAST Viewer.
On the Consensus Calculation Tab, you can select among the following parameters:
•=
Consider only identical residues
•=
Ignore gaps in consensus calculation
•=
Specify a sequence to use as the consensus sequence. In this case, select one of the
sequences listed (those used in the alignment).
•=
Residue fraction
If the Use sequence as consensus checkbox is checked, the Consensus will not be
calculated but the sequence selected in the listbox below the checkbox will be used as the
consensus.
Similarity Table
The Similarity Table allows you to review or to define residue similarity information and
values necessary for calculation of the alignment quality profile. Each residue pair can be
defined as being strongly or weakly similar to each other. The table is editable only for
amino acid residues.
Color Setup
The Color Setup tab allows you to review or modify the current color setup scheme for the
Alignment Pane:
Color Scheme
Interpretation
black on window
default color
non-homologous residues
blue on cyan
consensus residue derived from a block of similar
residues at a given position
black on green
consensus residue derived from a single conservative
residue at a given position
red on yellow
consensus residue derived from completely
conservative residues at a given position
green on window
default color
residue weakly homologous to consensus residue at
given position
Table 32. 2 Color Setup tab interpretations of color scheme
533
Saving BLAST Search Results
To save BLAST search results into the database for future retrieval, select Blast Results >
). Select either of the two tabs in the Save As
Save As or press the Save As button (
dialog box (Fig. 32.9), depending on your preferred destination. The results can be saved in
the Vector NTI database or as a BLAST result file.
Fig. 32. 9 Save As dialog box, where results can be saved in the Vector NTI database or as a
BLAST result file
Select the subbase or folder (and file format for Results File) and enter a name for the
results (Fig. 32.10).
534
BLAST Search and BLAST Viewer Chapter 32
Fig. 32. 10 Selecting the subbase or folder, file format, and name for Results File
Click OK to save the BLAST results as a new database object, associated with the query
molecule. You can open search results for the query molecule from the Molecule Viewer
window.
To save individual BLAST hits into the VECTOR NTI database, select the desired search
hits and choose Save Selected Hits from the shortcut menu, opened by a right click on the
molecule name. Hits will be saved to corresponding molecules and can be viewed later in
the Molecule Viewer.
To open individual BLAST hits into VECTOR NTI, select the desired search hits and
choose Open Selected Hits from the shortcut menu, opened by a right click on the molecule
name. The molecule(s) can then be saved to the VNTI Database or to files on the hard drive.
Opening Query Molecule with Hits Displayed as Features
You can open the query molecule that was used for the BLAST search in Vector NTI with
the BLAST hits displayed on the molecule as features. If desired, you can then save the
annotated query molecule to the VNTI Database.
To open the query molecule in VNTI with the hit sequences displayed as features, choose
Edit > Open Query Molecule with Hits as Features command from the menu. A dialog
box appears allowing you to choose the feature type you want to use. Choose the desired
feature type, check the box to save existing query molecule features, if desired, and press
535
the OK button. The query molecule opens with the BLAST hits displayed as the chosen
feature type.
In the Text Pane of the new molecule, query hits are listed in the chosen feature type folder
in order of their occurrence on the query molecule. Hit feature names follow the convention
“Feature Type_#1 / #2” where
•=
Feature Type is the type of feature that was chosen when the Open Query Molecule
with Hits as Features command was executed
•=
#1 is the hit molecule number according to its listing in the BLAST Viewer and
•= #2 is the hit element number of the hit molecule.
The new molecule can then be saved to the VNTI Database or to a file on the hard drive.
Creating a New Database Subbase for BLAST Search Results
To create a new database subbase for storing BLAST search results, in the BLAST Viewer,
press the Database button (
), opening Vector NTI Suite’s Database Explorer. The
Explorer opens to the BLAST Results table. To create a new subbase for storing BLAST
Search results, follow the instructions given in Chapter 18.
Other BLAST Viewer Features
The following features can be performed in BLAST Viewer. Details are given in Chapter 3.
536
•=
Copying selected molecule IDs to the clipboard
•=
Exporting data to external programs
•=
Printing from the BLAST Viewer
AlignX Blocks Chapter 33
Chapter 33 AlignX Blocks
Introduction
AlignX Blocks is a program for locating, analyzing, and editing blocks of localized
sequence similarity among multiple protein sequences and linking them into a composite
multiple alignment.
The following definitions are important in the AlignX Blocks application:
•=
A Block is a set of sequence segments of the same length taken from several sequences
and aligned without gaps.
•=
A Local Alignment is an alignment that includes only the most similar regions (even
fairly small) of the sequences under consideration. Such regions may span several
sequences.
A Blocks project, including molecules, settings and blocks generated in AlignX Blocks can
be saved as a file. This enables you to restore the project later to continue working with it.
Opening AlignX Blocks:
To open AlignX Blocks, select it from the program group or folder where you installed the
Vector NTI Suite.
Features of the AlignX Blocks Workspace
When AlignX Blocks is first opened, the display window is empty. As molecules are added
to an AlignX Blocks project, they are listed in the Text Pane. After performing a Block
Search on a group of molecules selected in the Text Pane, blocks results appear in the other
panes.
You may want to open a demo project into the workspace before you review its features.
). Find the Vector NTI Suite folder,
Select Project > Open or press the Open button (
probably located in Program Files\Vector NTI\Demo Project, and open the Protein.bpr file.
The AlignX Blocks interface (Fig. 33.1) consists of a menu bar, three toolbars, an AlignX
Blocks display window, with shortcut menus specific for each pane. The AlignX Display
window includes four panes.
537
Main
menu
Main
toolbar
Pane
Selection
toolbar
Pane
toolbar
Text Pane
Schematic
Pane
Alignment
Pane
Block List
Pane
Fig. 33. 1 AlignX Blocks interface
AlignX Blocks has three toolbars: a Main Toolbar, the Pane Selection Toolbar and a Pane
Toolbar. All Vector NTI Suite toolbar buttons are summarized in Chapter 4 of this manual.
As you are introduced to various operations in this chapter, however, the toolbar buttons
you will use are displayed appropriately. Many toolbar commands can also be launched
from the menu bar or from a shortcut menu.
The AlignX Display window is divided into four panes: a Text Pane, the Block List Pane,
an Alignment Pane and a Schematic Pane. All panes are separated by split bars that allow
re-sizing of the panes. Scroll bars appear when the contents of a pane exceed the viewing
area, facilitating easier viewing of pane contents.
As in the other Vector NTI Suite applications, to apply a command from the main menu in a
given pane (Print, Print Preview, Camera), that pane must be active. The active pane can be
,
,
,
) buttons in the Pane Selection
toggled with the Switch Panes (
Toolbar or by clicking anywhere in the pane you want to activate.
You can maximize any active pane to fill the entire display space by selecting View >
Maximize Pane. Select View > Restore Layout to restore the original pane size.
538
AlignX Blocks Chapter 33
You can modify the pane arrangement in Pane Manager. Select View > Edit View Layout
to open the Pane Manager. For more details, refer to Chapter 3.
Text Pane
To activate the Text Pane, click on the Text Pane button ( ) on the Pane Selection
Toolbar. The Text Pane contains a thorough description of the molecules included in the
AlignX Blocks project. The information is organized in folders, named by molecule. Each
top level (molecule) folder contains the following subfolders:
Folder
Contents
General
description
Molecule type, length, etc.
Comment
Arbitrary text of any length associated with the molecule
Standard fields
GenBank/SWISS-PROT-like fields: keywords, division,
original accession numbers, etc
References
Bibliographic references (in GenBank/SWISS-PROT
format)
Proprietary fields
User defined fields (for molecules which came from
Vector NTI)
Analysis
Results of common physiochemical analyses
Feature table
List of molecule features
Table 33. 1 AlignX Display window Text Pane folders
Folders and sub-folders can be opened with a double-click or by clicking on the + to the left
of the folder name.
For more information regarding the following Text Pane manipulations, refer to Chapter 3.
•=
Using the scrolling bars
•=
Expanding and collapsing folders
•=
Copying pane contents to the clipboard
Finding Signals on Schematic and Alignment Panes
Signals or features listed in the Feature map subfolder in the Text Pane can be found in
Schematic and Alignment Panes. This feature is only enabled if the molecules are involved
in the blocks located in the Blocks Search, indicated by a blue arrow. To find the positions
of the signal in these panes, select the feature line, indicated by the tag icon (
), and
) from the Text Pane toolbar or select Edit > Find. The Find
press the Find button (
command is disabled if the selected line is not a signal with non-zero boundaries.
539
Block List Pane
All of the Blocks, found in a Block Search or manually defined, are shown in the Block List
Pane (Fig. 33.2). To activate this pane, click within the pane or click on its button (
).
Fig. 33. 2 AlignX Display window Block List Pane
Each line in the pane represents one block. The following columns (fields) are defined for
the block:
540
•=
Color representation: A color is assigned to each block automatically from the list of
available colors (defined in Project properties). The first block in the list gets the first
color, second block – the second color, etc. If there are more blocks than colors the
same colors are used again.
•=
Name: Initially, blocks found in a search have no name. Manually defined blocks are
automatically named “ud1”, “ud2”, etc. You can name or rename a block in the Block
Edit dialog.
•=
m: Number of sequences in a block
•=
Length: Length of the block, that is, the length of the sequence segments in the block.
Like segments for all the sequences in a block have the same length.
•=
MP-score: Mean Pairwise Score, calculated by dividing the SP-score of a block by the
number of possible pairwise combinations of component sequence segments.
•=
SP-score: Sum of the Pairs Score, composed of several sequence segments. Scores are
calculated for all possible segment pairs. The sum of all of the scores is the SP-score.
•=
Significance: Biological significance (see “Methods for Assessing the Statistical
Significance of Molecular Sequence Features by Using General Scoring Schemes” by
Samuel Karlin and Stephen F. Altschul. 1990).
•=
Offset: Minimal offset of the segment in the block.
AlignX Blocks Chapter 33
Block Selection and Highlighting
There are two methods of selection in the Block List Pane, each offering different
functionality. Both types of selection work independently and do not affect each other.
1.
2.
Single selection: Because this selection enables actions within a block, only one block
at a time can be selected with this method. Click on the block line outside of the colored
circle area. The highlighted selected block is shown concurrently in the Schematic and
Alignment Panes. To deselect the block, click on the block in the Schematic or
Alignment Panes
Multiple selection: This selection method allows no actions within blocks, but is only
for viewing them. Select one block by clicking within the colored circle area. Press
SHIFT + CLICK within circles to select a range of several blocks. Press CTRL + CLICK
within circles to select more than one non-contiguous block. To deselect the blocks,
repeat the clicks on the selected circles.
Blocks selected in this way are indicated by the black dot in the center of the colored circle
in the Block List Pane. The colored blocks on the Schematic and Alignment Panes
correspond to the selected circles, distinguishing one from the other. Mouse clicking within
Schematic and Alignment Panes does NOT remove this kind of selection.
Sorting Blocks in the Block List Pane
Initially blocks are sorted by the number of sequences in the block (m-column). The blocks
order in the Block List Pane can be changed, however, by sorting. Click on a column header
to sort; repeat the click to reverse the sorting order. Sorting is unaffected by selection of one
or more blocks.
Removing Blocks
To delete a selected block, choose View > Delete Block or the corresponding command
from the Shortcut menu. You can confirm or cancel the deletion.
Schematic Pane
This pane is designed for a schematic representation of blocks to facilitate analyses of their
position and relationship. Click in the pane or on the Schematic Pane button (
activate this pane.
) to
541
Fig. 33. 3 AlignX Display window Schematic Pane
Molecules included in the Block Search operation as well as manually added from the Text
Pane are displayed schematically as stretched rectangles (Fig. 33.1). A schematic
representation of one sequence occupies each row, with the name of its sequence displayed
to the left. The upper row of the pane is a ruler. Both molecule name and its sequence can be
scrolled in the vertical direction. There is no horizontal scrolling bar for this pane because
the display is calculated such that the longest rectangle fits the pane width.
You can change the order of the molecules in the pane by dragging a molecule with the
DRAG + DROP technique. The order of the molecules in the Alignment Pane reflects the
changes.
To select molecule(s) in the Schematic Pane, click on the name(s). Selections are
highlighted concurrently in the Alignment Pane. To select a region in the Schematic Pane,
click within the pane and drag a rectangle.
Note: In this pane, you can only select regions; you cannot select blocks.
Alignment Pane
The Alignment Pane (Fig. 33.4) is designed for viewing and analyzing sequential
information. To activate it, click within pane or click on the Alignment Pane button (
of the Pane selection toolbar.
Fig. 33. 4 AlignX Display window Alignment Pane
542
)
AlignX Blocks Chapter 33
Molecules included in the Block Search operation as well as those manually added from the
Text Pane are displayed as sequences in the Alignment Pane. The name of the molecule and
current position within the sequence appears to the left of its sequence. The upper row of the
Alignment Pane contains a ruler with a scale of residues.
The Alignment Pane has its own vertical and horizontal scrollbars. Both a molecule name
and its sequence can be scrolled in the vertical direction. When scrolled horizontally, the
sequence names remain stationary at the left of the Alignment Pane. The number to the left
of the sequence shows its current position.
Dragging the molecule (up or down) by the name and dropping it on the desired place can
change the order of the molecules in the pane. The order of the molecules in the Schematic
Pane is changed to reflect the order in the Alignment Pane.
Selection in the Alignment Pane
To select a molecule(s) in the Alignment Pane, click on its name. This selection is selected
concurrently in the Schematic Pane as well.
To select a region in the Alignment Pane, click and drag within the pane. The region inside
the tracking dotted rectangle is selected except for the “gapped” (or empty) areas. To
combine a new selection with a previous selection, press the CTRL button while starting the
new selection. To modify a selection, drag the edge of the selection to the right or left.
Selections are displayed concurrently in the Alignment and Schematic Panes.
AlignX Blocks Projects
A set of molecules, options and blocks opened and being worked on is called a AlignX
Blocks project. AlignX Blocks accepts following file formats: GenPept, SWISS-PROT,
FASTA and Vector NTI archives.
Opening an Existing Project
When AlignX Blocks is launched, a new, empty project is created. To open an existing
project, choose Project > Open or click on the Open Project button (
) on the Main
toolbar. Select the desired project name in the File Open dialog box. AlignX Blocks projects
have a “*.bpr” file extension by default. Select the desired file and click Open. If the file is
a valid AlignX Blocks project, information about molecules, properties and blocks (if any)
will appear in appropriate panes. An alternative way to open an existing project is to drag
and drop the project file on the AlignX Blocks workspace.
Creating a New Project
To create a new, empty project, select Project > New. If appropriate will be prompted to
save any changes in the currently opened project first. If you select Cancel, work may
continue on the opened project. If you select Yes to save changes or No to disregard
changes, the current project is closed and the workspace emptied.
543
Adding Molecules to the Project
To add molecules to a current project, press the Add Files button (
) or select Project >
Add Files. Only protein molecules in acceptable format can be added to the project.
Molecule(s) added to the project are listed in the Text Pane.
You can also add molecules to the project using the drag and drop technique if they are of
an appropriate file format and molecule type. If the program fails to define a file’s format, it
will be suggested the file be imported as a raw sequence. Imported sequences appear in the
Text Pane with the names: NONAME, NONAME#2, NONAME#3, etc.
Block Search
To search for blocks, select two or more molecules in the Text Pane and click Search for
Blocks button (
) or choose Blocks > Search for Blocks. The Block Search progress
dialog box opens, letting you monitor the search progress. Press the Cancel button to
interrupt the current search. Blocks located in the search (if any) are shown in the Block List
Pane, sequences of the selected molecules are displayed in the Alignment Pane and
schematic representations of the sequences in the Schematic Pane.
Adding Sequences to Block Sequence Space.
The term Block Sequence Space (BSS) designates all the sequences that are displayed in the
Schematic and Alignment Panes. Usually sequences are added to BSS as a result of a Block
Search. Selected sequences appear in both Schematic and Alignment Panes regardless of
whether or not either any block includes this particular sequence. To add a sequence
currently not present in a BSS, select Add Sequence from the shortcut menu opened from
the Text Pane. If a sequence already is included in a BSS, this menu item is disabled. A
sequence added using the Add Sequence command is also marked with blue arrow in the
Text Pane.
Defining a Block
In AlignX Blocks, you can search for blocks automatically or define blocks manually. To
define a block, select a region within the Alignment or Schematic Pane and click the Define
Block button (
), select Blocks > Define Block or the corresponding command from the
Shortcut menu. All the segments of the newly defined block will have an offset number
defined by the selection, and the length equal to the minimal segment length. All previous
selections are overwritten and the new block is selected in all three panes. Manually defined
blocks are named automatically as “ud1”, “ud2”, etc, but they can be renamed later.
Linking and Unlinking
Linking means aligning the currently selected sequence segments and creating “links”
between the residues appearing in each effected column. When residues are linked, they
remain in the same column despite any shifts that occur elsewhere in the alignment. Linked
residues are shown in upper case in the Alignment Pane and as wider rectangles in the
Schematic Pane.
544
AlignX Blocks Chapter 33
To link, first select sequence segments within the Alignment or Schematic Panes, or select a
block in the Block List pane. Press the Link button (
corresponding option on the shortcut menu.
) or select Blocks > Link or the
) or select Blocks >
To unlink selected sequence segment(s), press Unlink button (
Unlink or the corresponding command on the shortcut menu. Unlinking selected segment(s)
can cause segments in other sequences to also become unlinked.
To unlink all segments of all sequences, select Blocks > Unlink All.
When you perform Link functions, the previous state is saved in the history list.
) and Redo Link button (
) buttons on the Main toolbar
The Undo Link button (
allow navigation through the history list. Information about links is saved in saved in an
AlignX Blocks project and applied to Alignment Pane next time you open the project.
Color Setup
Colors for displaying linked and unlinked areas in the Alignment Pane can be changed in
the Link Color dialog box (Fig. 33.5). To modify the Link Color, click on the Link Color
) or select View > Color Setup or the corresponding command from the
button (
shortcut menu, opening the Link Color dialog box.
Fig. 33. 5 Link Color dialog box
This dialog box lets you select the background sequence color (Text color) and Linked text
color. Select the appropriate color(s) and click Apply to preview the selections. Click Close
to apply the changes and close the menu.
For more information regarding linking and unlinking, see the previous section.
545
Block Editing
To edit a block, press the Edit Alignment button (
), or choose Blocks > Edit Block or
the corresponding command from the shortcut menu, launched by right clicking on the
desired block or double click on the desired block. This opens the Edit Block dialog box
(Fig. 33.6).
Fig. 33. 6 Edit Block dialog box
In the Block Editor:
1.
2.
3.
4.
5.
546
Remove sequences from a block by clicking on their number (at the far left).
Narrow or widen a block by dragging the line separating it from the rest of the
sequence. All changes in block statistics are immediately displayed in the current line
(in the section below the Alignment Pane).
Name or rename a block in the block name text box.
Change a block’s color in the block color dropdown menu.
Press the Restore to original button to undo all changes.
6.
After changes are saved, the Block List, the Schematic and Alignment Panes are
updated.
7.
The block statistics in Block Editor are described as follows:
•=
m: number of sequences in a block
•=
Length: Length of the block, that is, the length of the sequence segments in the block.
Like segments for all the sequences in a block have the same length.
AlignX Blocks Chapter 33
•=
MP-score: Mean Pairwise Score. The MP-score is calculated by dividing the SP-score
of a block by the number of possible pairwise combinations of component sequence
segments.
•=
SP-score: Sum of the Pairs Score, composed of several sequence segments. Scores are
calculated for all possible segment pairs. The sum of all of the scores is the SP-score.
•=
Significant?: Significance of a block. Standard P-value (Karlin, Altschul, 1990)
Deleting a Molecule
To delete a selected molecule from the project, press the Delete from Project button (
or choose the Delete From Project from the shortcut menu.
)
If a selected molecule participates in one or more blocks, you will be asked to verify the
deletion. All blocks it participates in will be dismissed. If you confirm the deletion, the
specified molecule and all related blocks are removed from all panes.
AlignX Blocks Parameters
To review or modify AlignX parameters setup, click on the AlignX Blocks Setup button
) or select Blocks > AlignX Blocks Setup. This opens the AlignX Blocks Parameters
(
dialog box (Fig. 33.7).
On the three tabs, review or modify the following parameters:
Fig. 33. 7 AlignX Blocks Parameters dialog box (Parameters tab)
547
Parameters Tab:
•=
Pairwise score cutoff: the minimum segment pair score needed to mark a diagonal
•=
Min. sequences per block: the minimum length of sequence that block must span in
order to be reported
•=
Expectation value limit: the maximum threshold value required to make block
significant
Fig. 33. 8 Blocks’ Colors tab on the AlignX Blocks Parameters dialog box
Blocks’ Color Tab:
To change Block color(s), select the appropriate color from the palette then click OK.
There are two color listboxes on this tab: Block colors selected for this project and
Available Colors (Fig. 33.8). Double click on any color from the Available Colors list to
add it to the Blocks Colors list. To remove a color from the current block double click on
the color in the Block colors list.
548
AlignX Blocks Chapter 33
Fig. 33. 9 Score Matrix tab on the AlignX Blocks Parameters dialog box
Score Matrix Tab
The Score Matrix tab (Fig. 33.9) displays the matrix used to generate the current multiple
alignment in AlignX Blocks. From this tab, you can also open other matrices for review or
for application to the Blocks. Editing a matrix takes place in the Matrix Editor, accessible
from AlignX and AlignX Blocks.
When a project is created, a residue substitution matrix from the corresponding protein
template is used. If a template file is not found, the default matrix is used (blosum62mt2 for
protein) or enter the name of a new score matrix in the Name text box. To review other
matrices, click the Select Matrix button. From the Matrices file, select any other matrix to
be loaded on the Score Matrix tab.
For further details regarding customizing or editing matrices, refer to Chapter 36.
Templates
Templates are the files that contain all the properties for the AlignX Blocks program. An
AlignX Blocks project is created using default template file. You can also save current
settings of the AlignX Blocks project in a template file or apply settings from existing
template to the open project.
To save settings in a template choose Edit > Setup > Save to File. Enter or select the file to
which settings will be saved.
549
To apply settings from existing template to the project that is already open choose Edit >
Setup > Load from File. All the properties are applied after researching blocks.
Other AlignX Blocks Features
The following features can be performed in AlignX Blocks. Details are given in Chapter 3.
550
•=
Copying AlignX Blocks data to the clipboard
•=
Printing from AlignX Blocks
•=
Exporting molecules from AlignX Blocks
•=
Integrating AlignX Blocks with other Vector NTI applications and third-party tools on
the WWW.
3D-Mol Chapter 34
Chapter 34 3D-Mol
Introduction
The three-dimensional representation of a protein is directly linked to the linear sequence of
the protein. Therefore, the structural information about the protein regions derived from a
BLAST search, multiple alignment, mutation analysis, BLOCKS or Prosite database search,
etc. can be easily visualized on the protein structure. Similarly, 3D features of proteins, such
as protein-protein interaction sites or small molecule binding sites, can be mapped on the
linear protein sequence to elucidate functional properties of particular protein regions.
The resolved three-dimensional structures of biological macromolecules are stored as public
domain files in the Protein Data Bank (PDB). The classes designed for 3D-Mol allow
convenient extraction, storage and easy access to this information.
3D-Mol is the Vector NTI Suite application used for visualization and analysis of threedimensional information derived from PDB structures or structures created by user. The 3D
viewer is designed to simplify viewing and analyzing of tertiary structures of proteins,
nucleic acids and small organic and inorganic molecules. The viewer currently allows the
display molecules saved in PDB and M3D formats.
Opening 3D-Mol
To open 3D-Mol, select it in the program group or file where you installed the Vector NTI
Suite. When 3D-Mol is first opened, the display window is empty. As molecules are added
to a 3D-Mol project, they are listed in the Text Pane.
Opening 3-D Structure Files in 3D-Mol
To open 3-dimensional structure files in 3D-Mol, press the Open button (
) or select
File > Open. In the Open dialog box, select the file. Accepted file formats are: .pdb, .ent,
.m3d, .m3dc or .m3dz.
You can search for PDB files in the public database using the Suite application,
PubMed/Entrez Search. For database type, enter “structure.” When you receive the result(s),
copy the file(s) as a document and save it for opening in 3D-Mol, drag and drop it into this
application, or copy it in PubMed/Entrez Search and paste it into the 3D-Mol workspace.
For more information, refer to the PubMed/Entrez Search Online Help or to that topic in
Chapter 36 of this User’s Manual.
551
Main menu
Main
toolbar
Pane
Selection
toolbar
Pane
toolbar
Text
Pane
Graphics
Pane
Sequence
Pane
Fig. 34. 1 3D-Mol interface
Elements of 3D-Mol
The 3D-Mol interface (Fig. 34.1) consists of a small menu bar, three toolbars, and a 3-D
Mol display window, with shortcut menus specific for each pane. The 3D-Mol Main toolbar
contains tools for major program functions, such as opening and saving projects, adding
molecules to the project, exporting molecules’ data in various formats, and creating
alignments. The Pane Selection toolbar contains tools for optimizing the viewing of 3-D
structure(s). The Pane toolbar has three different modes, each activated by a different pane.
All Vector NTI Suite toolbar buttons are summarized in Chapter 4 of this manual. As you
are introduced to various operations in this chapter, however, the toolbar buttons you will
use are displayed appropriately. Many toolbar commands can also be launched from the
menu bar or from a shortcut menu.
The 3D-Mol display window consists of three main panes: the Text Pane that displays
information about molecules that are opened in 3D-Mol, the Graphics Pane used for the
visual display of 3-D structural data, and the Sequence Pane that can be switched between
two modes to display the sequence of proteins and/or nucleic acids or alignment of this
sequence with other sequences.
As in the other Vector NTI Suite applications, to apply a command from the main menu in a
given pane, that pane must be active. The active pane can be toggled with the Panes buttons
552
3D-Mol Chapter 34
(
,
,
) in the Pane Selection toolbar or by clicking anywhere in the pane you
want to activate.
All panes are separated by split bars, which allow re-sizing of the panes. Scroll bars appear
when the contents of a pane exceed the viewing area, facilitating easier viewing of pane
contents.
You can modify the 3D-Mol pane layout in Pane Manager. Select View > Edit View
Layout to open the Pane Manager where you can edit the display window layout. For more
details, refer to Chapter 3.
Under the Window menu option, you can select options that allow you to show or hide the
toolbars or status bar.
Text Pane
To activate the Text Pane, click on the Text Pane button ( ). The Text Pane contains a
thorough description of the molecule opened in 3D-Mol. The information is organized in
folders, named by molecule. Each top level (molecule) folder contains the following
subfolders:
Folder
Contents
General
description
ID number, its resolution (in structures solved by X-Ray
crystallography only), number of atoms, date of deposition into
the Protein Data bank, authors, etc.
Molecules
Each molecule in the display has its own folder listing residues
and atoms and other pertinent data
Atoms
Listed by element, ID, and nature
Table 34. 1 The 3D-Mol display window Text Pane folders
Folders and sub-folders can be opened with a double-click or by clicking on the + to the left
of the folder name.
For more information regarding the following Text Pane manipulations, refer to Chapter 3.
•=
Expanding and collapsing folders
•=
Copying pane contents to the clipboard
To review a structures text file, select View > View Remarks. This file usually contains
detailed descriptions of the molecule(s) being displayed.
553
Finding and Marking Signals on Schematic and Sequence Panes
Signals or features listed in molecule subfolders in the Text Pane can be marked and
displayed in the Graphics and Sequence Panes. Select the feature line in a Text Pane folder,
and press the Mark Selection button (
) or select View > Mark Selection. For the
feature(s) to be shown in the 3-D structure, click the Show Selection button (
leave the item(s) selected, but hidden, click the Hide Selection button (
). To
). To deselect
the item, press the Unmark Selection button (
) or select View > Unmark Selection.
You can mark multiple features, residues or atoms if you wish. To clear all marked regions,
press the Unmark All button (
).
Mark in radius
This menu option is accessible when the Text Pane is activated. Select any atom in Text
Pane. Select View > Mark in radius > Set a radius. Select all atoms, rotamers or monomer
to be displayed within that radius in the Graphics Pane.
Graphics Pane
Press the Graphics Pane button (
) to activate it. The Graphics Pane is used for the
visual display of the three-dimensional molecule structural information. The tools of
Graphics Pane allow rotation of the molecule(s) displayed there.
To select features of a molecule, mark part of the molecule use selection tools. All
selections except the selection of individual atoms are displayed concurrently on the
Sequence or Alignment Pane.
Point to any atom in the Graphics Pane to view a tooltip with information about this atom,
molecules and structures it belongs to.
Moving the Molecule(s)
The graphic representation of molecule(s) in Graphics Pane can be moved, rotated and
zoomed in and out.
Press and hold left mouse button or use arrow keys to rotate molecule(s) around vertical and
horizontal axes lying in the plane of the screen.
554
•=
Hold SHIFT + drag the left mouse button or use arrow keys to rotate molecule(s)
around the axis perpendicular (normal) to the plane of the screen.
•=
Hold CTRL + drag the left mouse button or use arrow keys to move molecule(s)
sideways without rotation.
3D-Mol Chapter 34
Resizing Molecule Graphics
In an active Graphics Pane, you can resize regions or the entire molecule in several ways:
•=
Hold CTRL+SHIFT + drag the left mouse button or use arrow keys to zoom in or zoom
out.
•=
To enlarge a selected region or feature of the molecule, press the Zoom to Selection
button (
•=
). To return to the normal view, press the Fit to Window button (
).
Expand the Graphics Pane to fill your entire monitor screen by clicking on the Full
). To return to normal view, open the shortcut menu by right
Screen Mode button (
clicking on the graphics screen and click on the same button, returning you to normal
view or click the ESC key.
For more details about viewing graphics, see that section below.
Sequence Pane
To activate the Sequence Pane, click on the pane or press the Sequence Pane (
) button.
From this pane you can mark and broadcast into the Graphics Pane single or multiple
selections of a protein, DNA or RNA sequence. Menu options and active toolbars in this
pane are similar to those described for the other panes.
Viewing Graphics
The obvious value of 3D-Mol lies in viewing and manipulating the graphics of 3dimensional structures. Click on the View button in the Graphics Pane to select among the
viewing options described below. Viewing options are available from all panes, although
the menu options vary according to the active pane.
Note: Most of the following commands are also available from shortcut menus, launched by
right clicking on the pane of interest, associated with each pane.
For optimizing viewing, several options for the representation of atoms, backbone, coloring
scheme, and mark types can be selected. The selections made in Atom, Backbone and
Colors menus are applied to all parts of molecule, whether visible or hidden.
View > Mark
These options and toolbar buttons control the display of marks in the Graphics Pane.
Command
Icon
Action
Invert
Reverse the marks, meaning unmark current
markings and make those currently unmarked
Show
Show all hidden marks
555
Command
Icon
Action
Hide
Hide marks
Clear
Clear all marks
Table 34. 2 Graphics Pane marking options
View > Show All; View > Hide All
These options and toolbar buttons control atom display.
Command
Icon
Action
Show All
All atoms are shown
Hide All
All atoms are hidden, leaving the back bone
displayed
Table 34. 3 Graphics Pane atom display options
View > Atoms:
These options govern the display of atoms in the molecule:
Command
Action
Off
Switch atom display off
Line
Represent atoms as lines
Stick
Represent atoms as sticks
Ball and Stick
Represent atoms as balls on sticks
Space Fill
Space-filling representation
Polyhedron
Represent atoms as balls without bonds
Table 34. 4 Molecule atom display options
These options are also available in the Properties dialog box opened from View >
Properties.
View > Backbone
These options control the display of the molecule backbone.
Command
556
Action
Hide
Switch backbone display off
CaWire
Represent backbone as a wire connecting Ca atoms
CaStick
Represent backbone as sticks connecting Ca atoms
Line Ribbon
Represent backbone as three-line ribbon
3D-Mol Chapter 34
Command
Action
Flat Ribbon
Represent backbone as flat (thin) ribbon
Solid Ribbon
Represent backbone as solid (thick) ribbon
Tube
Represent backbone as a tube
Schematic
Schematic representation (α-helices as cylinders, β-strands
as arrows)
Table 34. 5 Molecule backbone display options
These options are also available in the Properties dialog box opened from View >
Properties.
View > Color Scheme
You can define the color scheme for the structure graphics by selecting on of the following
options:
Command
Action
Element
Color by chemical element
Amino
Color by amino acid type
Structure
Color by secondary structure
Temperature
Color by temperature
Chain
Color by chain (different molecules colored differently)
Table 34. 6 Graphics color scheme options
These options are also available in the Properties dialog box opened from View >
Properties.
View > Molecules
This option allows you to select the molecule (box checked) or hide it (box unchecked). The
molecule(s) listed are those included in the displayed structure.
View > Measure Mode
Three measuring tools can be used in 3D-Mol to measure distances and angles in the
molecule(s). These tools are accessed from either toolbar buttons or the View > Measure
Mode menu, converting 3D-Mol to Measure Mode. Note: To return to Select Mode, click
the Select Mode button (
) or select the option from the View > Measure Mode menu.
557
Measure Mode
Icon
Function
Distance
Measure the distance between two atoms in
Ångstroms. To measure the distance, click on the
button, then click on successive atoms on the
structure. The Ångstrom units appear on the screen.
Angle
Measure the valent angle between three atoms in
degrees (not necessarily connected). Range –180:
+180
Torsion Angle
Measure the torsion angle between four atoms (not
necessarily connected) Range –180: +180. If torsion
angle has known designation in proteins this
designation is displayed.
Clear
[Measuring]
Marks
Remove the measuring marks
Table 34. 7 Measuring tool options
Note: You may find clicking on atoms easier if your image is in the ball and stick mode,
rather than the wire frame mode (select Atoms > Ball and Stick from the shortcut menu
launched by right clicking on the Graphics Pane). Also, it is often helpful to mark the region
to be measured, then zoom to that region before proceeding with your measurements.
View > Mark Type Options
View > Mark Type selects an appropriate mark tool. Click on Set Radius to define the
radius within which all atoms, rotamers or monomers are to be displayed (if those options
are selected) in the Graphics Pane. Structures with at least one atom within chosen radius
are selected. Select each of the following options as desired:
Command
Action
Atom
Mark individual atom by clicking on it
Atoms in radius
Mark all atoms in radius
Molecule
Mark whole molecule by clicking on one of its atoms
Monomer
Mark monomer (amino acid or nucleotide) by clicking on
one of its atoms
Monomer in radius
Mark monomers in radius
Rotamer
Mark side chain by clicking on one of its atoms
Rotamers in radius
Mark side chains in radius
Secondary
Structure
Mark secondary structure by clicking on one of its atoms
Set radius
Define the mark radius in Å, then click OK
Table 34. 8 Mark tool options
558
3D-Mol Chapter 34
View > Mark
This option controls the display of marks.
Command
Action
Clear
Clear or marks
Invert
Reverse the marks, meaning it unmarks current
markings and marks those currently unmarked
Table 34. 9 Mark display options
Graphics Pane Display Properties
You can apply changes both to selected elements and to all elements in the Graphics Pane
Display Properties dialog box, helping you to identify and analyze molecule features and
their relationships in the 3-dimensional structure. To open the Display Properties dialog box
(Fig. 34.2), select View > Display Properties. Most of the options on these tabs are also
available as submenu options under View > Atoms, Backbone or Colors.
Fig. 34. 2 Display Properties dialog box (Atoms tab)
Atoms Tab:
This tab governs the display of atoms in the molecule. Many of these options are also
available as View > Atoms submenu options.
Display Style
Action
Line
Represent atoms as lines
Stick
Represent atoms as sticks
559
Display Style
Action
Ball on stick
Represent atoms as balls on sticks
Space Fill
Space-filling representation
Polyhedron
Represent atoms as balls without bonds
Table 34. 10 Display style options
Apply To
Action
All atoms
Apply to all atoms
Selected atoms
Apply to all marked atoms
Table 34. 11 Apply To options
The following options in this dialog box are not available on the View > Atoms submenu
options:
Size/Scale
Action
Stick size
Stick size for stick and ball on stick representation
Ball size
Ball size for ball on stick representation
CPK scale
Scale of CPK representation in relation to element’s atomic
radius
Table 34. 12 Size/Scale options
Backbone Tab
This tab controls the display of the molecule backbone.
Command
Action
Off
Switch backbone display off
CaWire
Represent backbone as a wire connecting Ca atoms
CaStick
Represent backbone as sticks connecting Ca atoms
Line Ribbon
Represent backbone as three-line ribbon
Flat Ribbon
Represent backbone as flat (thin) ribbon
Solid ribbon
Represent backbone as solid (thick) ribbon
Tube
Represent backbone as a tube
Schematic
Schematic representation (α-helices as cylinders, β-strands
as arrows
Stick size
Stick size for CaStick representation
Table 34. 13 Molecule backbone display options
560
3D-Mol Chapter 34
Color Scheme Tab
On the Color Scheme Tab in the Display Setup dialog box, you can define the color scheme
for the structure graphics by selecting on of the following radio buttons.
Group Choice
Action
By Element
Color by chemical element
By Aminogroup
Color by aminogroup
By Secondary
Structure
Color by secondary structure
By Temperature
Color by temperature
By Chain
Color by protein chain or molecule
Table 34. 14 Color scheme choices
Viewing Options
The Viewing Options dialog box (Fig. 34.3) lets you select measuring tools and distance
and the quality and resolution of the displayed graphics in the Graphics Pane. To open this
dialog box, with the Graphics Pane activated, select View > Options. There are four tabs in
this dialog box:
Fig. 34. 3 Viewing Options dialog box (3DView Selection tab)
3D View Selection Tab
The Selection tab determines how atoms and other features are selected:
561
Feature Choice
Action
Atom
Mark individual atom by clicking on it
Atoms in radius
Mark all atoms in radius.
Molecule
Mark whole molecule by clicking on one of its atoms
Monomer
Mark monomer (amino acid or nucleotide) by clicking on
one of its atoms
Monomer in radius
Mark monomers in radius
Rotamer
Mark sidechain by clicking on one of its atoms
Rotamers in radius
Mark sidechains in radius
Secondary
Mark secondary structure by clicking on one of its atoms
Selection radius
Set selection radius in Ångstroms
Table 34. 15 View selection options
The options on the Selection Tab duplicate options available as submenu items under View.
3D View Colors Tab
Fig. 34. 4 Viewing Options dialog box (3DView Colors tab)
The options on the 3D View Colors tab (Fig. 34.4) of the Options dialog box determine the
color of the 3-structure in the Graphics Pane.
Double-clicking on the Background, Mark, Neighbor measure and Other measure boxes
or highlighting a color box and pressing the Change button opens a color palette where you
can select a new color for the respective fields. Pressing the Set Default button restores the
default color options.
562
3D-Mol Chapter 34
3D View Other Tab
The options on the 3D View Other (Fig. 34.5) tab of the Options dialog box determine the
quality of the 3-D structure in the Graphics Pane.
Fig. 34. 5 Viewing Options dialog box (3DView Other tab)
Quality options
Effect
Low
Low quality of tertiary structure rendering. Allows faster
rotations
Medium
Medium quality of tertiary structure rendering
High
High quality of tertiary structure rendering; slows rotations
Table 34. 16 View Quality options
Viewing options
Effect
Show tooltip on
graphics pane
Shows atoms information in tooltips (when pointed to by
mouse)
Measurement
mode auto stop
Remains in measuring mode. Does not switch to rotation mode
after each measurement then checked.
Apply atom style
to marked
atoms only
If checked, selected styles are applied to marked atoms only
Fast rendering
on move
If checked, shows atoms as wire while the molecule is rotated;
this setting increases the speed of rotations
Table 34. 17 Viewing options, other
563
The options on this tab duplicate options available as submenu items under View.
Sequence Tab
The options on the Sequence tab (Fig. 34.6) of the Options dialog box determine the format
of the sequence in the Sequence Pane.
Fig. 34. 6 Viewing Options dialog box (3DView Selection tab)
Sequence Parameter
Function
Length of Block
Number of residues that are grouped together
Blocks per Line
Number of blocks that appear on one line in the
Sequence Pane
Table 34. 18 Sequence viewing options
Saving 3D-Mol Session Results
To save 3-D Structures as files, press the Save button or select File > Save or Save As. The
session is saved as an .m3d file.
564
Tools Manager Chapter 35
Chapter 35 Tools Manager
Introduction
This chapter describes Vector NTI’s Tools, powerful vehicles for extending Vector NTI’s
functionality and providing connections to external programs and Internet services. The
chapter covers only general configuration topics. Each particular tool has its own
description in other chapters in this user’s manual.
Vector NTI 7.0 is shipped with more than 20 tools providing connection to various Internet
servers. You can add your own tools connecting Vector NTI to local or remote programs
using the configuration mechanism described in this chapter.
Configuring Vector NTI Tools
All registered tools can be accessed in the main menu options appropriate to the tools such
as Analyze, Align and Tools. In addition, Vector NTI stores the information describing
currently registered tools in the Tools Manager, where you can also create new tools or links
to tools and perform operations on existing tools.
To open Tools Manager, select that option under the Tools menu in any Vector NTI Suite
application including Database Explorer, or select Tools Manager in the program group or
folder where you installed the Vector NTI Suite.
Fig. 35. 1 Tools Manager
The Tools Manager (Fig. 35.1) displays folders containing all Vector NTI tools. Click on a
folder to open it, where its respective tools are displayed. Each folder and its tool contents
correlate with corresponding menu options on the Vector NTI Suite toolbars. The Info pane
in this dialog box displays, for a selected tool, its name, function, and input type.
565
Buttons in the dialog box perform the following operations:
•=
Create Tool opens the Tools Parameters dialog box with two modes:
o
To create a new tool from scratch, press the Create Tool button with a folder
selected. The dialog box is empty except for the folder name from which it
was launched.
o
To create a new tool based on an existing tool, select the tool in the left pane
and press the Create Tool button. In this instance, the dialog box opens loaded
with data for that tool. All fields can be edited.
•=
Rename enables the text box of a selected tool where you can rename it
•=
Create Folder creates a new folder in the list pane with an enabled text box for name
entry
•= Delete deletes a selected folder or tool
In addition, tools with a .tq extension can be edited. To modify a tool or its description,
double-click on a selected tool. This, too, opens the Tools Parameters dialog box (Fig. 35.2).
The name text box is disabled if opened in this manner.
Fig. 35. 2 Tools Parameters dialog box
Vector NTI displays the Tools dialog box with the following sections:
The Tool Parameters dialog box consists of five fields:
•=
566
Name Use the vertical bar character | to give your command a “segmented” name to
arrange a nested menu structure. The first part of the name (from the first character to
the first vertical bar) becomes the name of the menu item in the Tools menu, the second
part, from the first to the second vertical bar, becomes the name of the submenu item in
the first submenu, etc. The last segment of the name (from the last vertical bar to the
last character of the name) becomes the actual name of the command item, associated
with the tool description.
Tools Manager Chapter 35
For logical access to analysis tools, Vector NTI 7.0 places all tools with names starting
with “Analyze | ” at the end of the Analyze menu, etc.
•=
Description Contains a one-line description you can edit. This line is displayed on the
status bar when you browse through the tools menus. You can save the edited
description under a new or existing name. If saved under an existing name, the tool
description is replaced by the new description.
•=
Input Type: Lets you select the type and contents of the input information file Vector
NTI prepares for the tool before running it. The most frequently used Input Type
options are described below:
Input Type
Input information
(none)
The tool requires no input
<N > <Type > Molecule(s) in
<Format > format
<N > is “Active”, “Two”, “One
or more”, or “Two or more”
<Type > is “DNA/RNA” or
“Protein”
<Format > is
“GenBank/GenPept” or
“EMBL/SWISS-PROT”
Molecules are saved into the _molembl file
(EMBL/SWISS-PROT formats) or _molgbk
file (GenBank/GenPept formats). If more
than one molecule is selected, the file would
contain multiple records. Vector NTI can
prepare input from selection in the Database
Explorer or from the active Display window
(if just one molecule is required )
<N > <Type > Sequence(s) in
FASTA format
<N > is “Active”, “Two”, “One
or more”, or “Two or more”
<Type > is “DNA/RNA” or
“Protein”
Sequences are saved in the _fasta file. If
more than one molecule is selected, the file
would contain multiple sequences. Vector
NTI can prepare input from selection in the
Database Explorer or from the active Display
window (if just one sequence is required )
Active Document
Active document is saved in _doc file
Active Molecule in Extended
GenBank Format
Active molecule is saved in _molgbk file
(GenBank with Vector NTI extensions)
Link Data
Command string is taken from the
corresponding User Field
Table 35. 1 Input Type options
Note: On Windows platform, _seq, _fasta, _molembl, and _molgbk files have .txt
extension. Files are created in the Tools directory/folder.
•=
Script Allows you to select a Vector NTI script or executable program to be opened
after Vector NTI finishes preparing input information according to the Input Type
specification. Press the Browse button to select a script or program to be opened.
567
•=
Command: Contains an extra parameter string given to and interpreted by the script or
program you selected.
Note: Before sending a command string to a program or script, Vector NTI scans it for
symbols %1…%6 and performs the following substitutions:
•=
%1: full path to the data file (see the table above)
•=
%2: name of the molecule
•=
%3: selection start (if selection in the Display window was used)
•=
%4: selection end (if selection in the Display window was used)
•=
%5: current author’s e-mail address from the Author Info dialog
•=
%6: “aa” for protein data, “na” for DNA/RNA data
•=
When you finish entering or editing the tool fields, click OK.
Sorting Tools in Tools Manager
Items in the Tools Manager and all of its submenus are listed alphabetically, but you can
sort items by clicking tools and dragging them into new positions on the list. You can even
move tools to new folders. After you have made sorting changes, the corresponding menus
in Vector NTI applications will reflect the changes.
Adding a Web Link to the Tools List
To add Web links to your list of tools, in the Tools Manager select the folder where the new
item is to be stored. Select Open from its corresponding shortcut menu. This opens a
Windows Explorer window displaying large icons for all of the tools in that folder. Open
your Web browser to the page you would like the link to open. On the web browser screen,
click and drag from a “Create a Web Link” icon (In Netscape 4.7, the symbol (
) to the
) to the left of the URL
left of the Location text box. In Internet Explorer, the symbol (
in the location text box.) into the <Folder name > Explorer window.
Note: Adding or deleting command descriptions does not affect script or program files on
disk, only the description of the way Vector NTI opens the script or program is affected.
Program- and Script-based Tools
Each Vector NTI Tool can be configured either to invoke a certain program or execute a
script. Program-based tools are useful to open another molecular biology program to
perform an extra analysis of your sequence, alignment of several sequences or some other
operation, not supported by Vector NTI. These tools are platform- and environmentdependant and cannot be easily moved from one Vector NTI installation to another. Vector
NTI script-based tools, on the other hand, are designed to allow the creation of portable
tools easily transferable from one installation and platform to another.
568
Tools Manager Chapter 35
Script-based tools are executed by a separate script execution module (SXM) that hides the
platform-specific details from the script-writer. In addition, script execution modules serve
as intermediate communication and data exchange layers between Vector NTI and such
services as electronic mail or WWW servers. The basic set of high-level primitives covering
data exchange between scripts and Vector NTI, electronic mail and WWW browsers is
supplied together with SXM as a SXM runtime file (SXMRUN). The runtime layer allows
the configuration of some functions like access to the Web browser by supporting the
configuration function available as RECONFIG script and the corresponding Configure
Scripts tool. This tool displays a dialog box allowing you to choose a service you want to
configure and to select one of the available platform-specific Service Support Modules. For
example, you can choose one of several Web Browser Interface modules matching the Web
browser software installed on your computer.
InforMax supplies a basic set of tools/scripts with the standard distribution of Vector NTI
and provides on-line access to extra tools and scripts via the InforMax WWW site
(http://www.informaxinc.com/). The Tools page contains the latest versions and extensions
of platform-dependent part of Tools support like SXM runtime files for Windows and
Macintosh platforms, platform-specific service support modules etc. The Scripts page
contains platform-independent scripts in a form of self-installing packages as well as
technical information concerning the scripts.
569
570
Miscellaneous Vector NTI Tools Chapter 36
Chapter 36 Miscellaneous Vector NTI Tools
Introduction
This chapter contains several of Vector NTI’s miscellaneous features added in version 7.0.
The first three described features work well in tandem and provide a practical and efficient
way to search public databases for molecules or citations, retrieve them, complete with
molecule files or abstracts that can be viewed and stored. Some citations are included with
Vector NTI Suite, but you can expand and store and share references and abstracts as you
would any other database object.
PubMed/Entrez Search
This feature of the Vector NTI Suite is a client program for the NCBI Entrez/PubMed
search engines. Database searches are performed in much the same way they are in the
NCBI website: through the PubMed/Entrez Search Tool, you send a user query to
Entrez/PubMed. The convenience of this Vector NTI Suite tool lies in its connectivity to the
Internet and its ability to retrieve and list the results. From this list, you can easily view the
results in either a Molecule Display window or the Citation Viewer and store them in the
Vector NTI Suite database.
Results of the query, however, are only molecule or citation summaries, not the documents
themselves. Any operation that requires the entire document such as Export, Copy, Drag
and Drop, or Open will require that the selected documents be downloaded first.
Note: For this feature to work in your computer, an internet connection must be available
and properly configured and open. This especially applies to corporate networks where the
local networks have access to the Internet only via a corporate proxy server. Although the
program tries to determine whether or not to use a proxy, and the name of the proxy, the
Edit > Setting > Internet Settings should be the first place to look if the program is unable to
connect to the NCBI server or to download anything.
) in the program group or
To initiate a search, select the PubMed/Entrez Search icon (
folder where you installed Vector NTI. The PubMed/Entrez Search dialog box that opens is
untitled and remains so until you save the results under a name (Fig. 36.1).
571
Fig. 36. 1 PubMed/Entrez Search dialog box
Select the database to be searched in the Database drop-down menu.
The section below the drop-down menu is the Query Pane where you enter your query. The
pane is organized as a set of nested tables corresponding to nested brackets. It is possible to
assign each search term to a database field, such as article title, authors, MeSH terms.
Click the cursor in the blank row of the term text field, enabling the search fields drop-down
list at the right end of the row. Select a field to be searched. Click in the blank portion of the
row and enter the search keywords, name(s), or topics.
Notes:
•=
•=
When submitting a query like “cat”[All fields] , the NCBI server translates it as
“tomography, x-ray computed”[MeSH Terms] OR “cats”[MeSH Terms] OR cat[Text
Word] and searches for documents matching this translated query. If a space is to be
entered in your text string, be sure and enclose the entire string in quotation marks.
If, when you are entering or editing text, you press ENTER by mistake, the query will
be submitted. CTRL + ENTER also causes the query to be submitted.
To add a row to enter a new search condition, select Insert Row from the shortcut menu,
select Edit > Insert Row, or press the space bar, and enter new text. In the drop-down menu
to the left of the row, select Or, And or Not to qualify the search conditions.
572
Miscellaneous Vector NTI Tools Chapter 36
Defining Search Conditions
Before you initiate the search, select Edit > Settings, opening the Settings dialog box (Fig.
36.2).
Fig. 36. 2 Settings dialog box
•=
In the Common section, specify the number of document summaries acceptable per
results page and define the History buffer. Check the Save Results… box to save
downloaded summaries when you save a query.
•=
The History buffer contains the last queries and query results. You can move through
the history by using Back and Forward buttons on the PubMed/Entrez Search dialog
box.
•=
In the Publication Date section, enter publication dates to narrow the search to a
certain date range. In the Entrez date section, enter acceptable molecule submission
dates.
Click OK to return to the PubMed/Entrez Search dialog box.
Select Edit > Internet Settings to open the Internet Connection dialog box (Fig. 36.3).
Fig. 36. 3 Internet Connection dialog box
573
Internet Connection options allow you to specify whether or not connection to the Internet
should be performed via a proxy server. If you select the Use Internet Explorer settings
radio button, Vector NTI will attempt to detect and use your default settings to connect to
the Internet. If the default settings detection is not successful, select either Direct connection
if you do not use a proxy server or Use proxy server if you use a proxy server. In the case of
a proxy server, enter the proxy name or address and port number. If the proxy requires a
password, check the Proxy requires authentication box and enter the user name and
password. This facilitates access for the search through a proxy server.
Click OK to return to the PubMed/Entrez Search dialog box.
When you have entered all search conditions, press the Search button (
search results are displayed in the list pane in the bottom half of the dialog box.
). The
Reviewing Search Results
Article or molecule summaries are listed in the Results Pane. There are several techniques to
download the citation or molecule results:
•=
Double-click on its identification code for the selected object or select multiple objects
•=
Select Open from the shortcut menu associated with the object. DNA and protein
database search results open in a Vector NTI Display window. A citation abstract opens
in the Citation Viewer.
•=
Choose Copy from the shortcut menu. The item is downloaded and placed on the
Clipboard for pasting into Vector NTI Database Explorer. The object is downloaded.
•=
Select Export from the shortcut menu to download the selected item and places it in a
file you specify.
•=
Drag and drop selected object(s) from the Results Pane into Database Explorer or
Windows Explorer folders.
To open multiple search objects, select them from the search results list, and, depending on
the object type, drag and drop them into the Database Explorer, or the Citation Viewer
windows. Multiple objects open in cascaded multiple instances of the display windows.
If the search was performed against the PubMed database, the shortcut menu associated
with a selected search result lists a Related Articles option. Select this command to
download abstracts related to the selected article. The Query Pane changes to read Articles
related to #<idnumber >. In this case, you cannot modify the Query Pane. Actions in the
Results Pane are not affected.
Saving Search Results
If you select the Save option from the Search dialog box, the only thing that is saved is the
set of search parameters for launching future searches, with a .ps6 extension. Select the
object(s), choose Save As and in the dialog box that opens, name the file and its destination.
You may want to save it in the Citation folder under Vector NTI program files. To save the
574
Miscellaneous Vector NTI Tools Chapter 36
molecule or document abstract, open it first in the Molecule Display window or in Citation
Viewer and save your object from that location. To open the citation in Citation Viewer,
refer to details in the Citation Viewer section.
Modifying the PubMed/Entrez Display Window
To modify the column display in the results list in this window, open the shortcut menu with
the cursor on the column headings and select Columns. In the Columns dialog box that
opens, using the forward (
) and reverse (
) arrows, move column topics to the
Selected Columns list for display, or move them back to the Available columns list to
remove them from display. The descending order in the Selected Columns list corresponds
to left to right display in the results pane of the dialog box.
Items listed in the Results Pane columns can be sorted by clicking on a column heading.
Click again for reversing the list.
Right-click to the right of all of the buttons on the Rebar (toolbar) opens the popup menu
where you can turn on/off text labels and toolbar itself; in Settings dialog “Relative date”
and “From”/”To” edit fields are enabled only when corresponding radio button is selected;
translation of the query performed by NCBI server depends on database searched. For
instance, above example for cat[All fields] was translated to search against PubMed
database. In case of Nucleotide or Protein databases translation will look like “Felis
catus”[Organism]OR cat[Text Word] .; if PmShellEx.dll (or whatever it will be called on
release) is properly installed one can run PubmedSearch from Windows Find menu (Start- >
Find).
Citation Viewer
This feature of the Vector NTI Suite provides a vehicle for displaying and reviewing
citation abstracts downloaded by PubMed Search or created manually and stored in the
Vector NTI database or local file. Citations can be printed, edited and saved from Citation
Viewer.
To open Citation Viewer, select Citation Viewer in the program group or folder where you
installed Vector NTI. If opened from Database Explorer, Citation Viewer is empty and must
be loaded from other sources, listed below:
From the PubMed/Entrez Search results, or from the Citations Table in Database Explorer,
drag and drop citations into Citation Viewer. It helps if all of your screens are in “Partial
Screen Size” to do this. If you transfer multiple files, all of the abstracts will open in
Citation Viewer. You can alternate between references by pressing the Back and Forward
buttons on the toolbar (they resemble the Back and Forward buttons on your Web browser)
or you can select from the list of open citations under the Windows menu option.
575
Opening Citation Viewer
You can open an individual citation into the Citations Viewer window (Fig. 36.4) from the
PubMed/Entrez Search display window or from the Citations Table in Database Explorer.
Simply double-click the entry in either location to load Citations Viewer.
Citation viewer registers its file types, so double-clicking on some .ca6, .cq or .ct file in
Windows Explorer will cause Citation Viewer to run and open that file.
Fig. 36. 4 Citation Viewer
Elements of Citation Viewer
The Citations Viewer display window shares many of the same features found in other
Vector NTI Suite applications:
576
•=
The window title bar displays the name of the open object.
•=
Click the maximize box (
) in the upper right corner on the title bar to maximize the
window, filling the entire Vector NTI workspace.
•=
A display window is divided into two panes: a Text Pane containing folders with
descriptions of the citation such as author, source, and public database identification
data. The Abstract Pane displays the abstract for the citation.
•=
A vertical, movable split bar divides the two panes.
Miscellaneous Vector NTI Tools Chapter 36
•=
All Vector NTI Suite windows have a Main Menu and toolbars where many different
options and operations can be initiated. Most of the toolbar buttons in Citation Viewer
are similar to those you have seen in other display windows. All Vector NTI Suite
toolbar buttons are summarized in Chapter 4 of this manual. The toolbar buttons you
will use in this section are displayed when needed.
Back and forward buttons will bring up the previous or next viewed document if it is still
open.
Note: If the citation contains an URL to its full text or abstract in the Internet, a link to that
URL will be displayed in Text Pane. Clicking on it causes the default Internet browser to
open to the appointed location.
The following feature can be performed in Citation Viewer. Refer to Chapter 3 for details:
•=
Copying selected data to the clipboard
•=
Exporting data to external programs
•=
Printing data
•=
Modifying the Citation Viewer layout
•=
Saving data
GCG Converter
GCG Converter is a tool in the Vector NTI Suite that converts sequences in GCG file
formats so that they can be imported into the Suite.
To open this tool, select GCG Converter in the program group or folder where you installed
Vector NTI. This opens the GCG to Vector NTI Converter dialog box (Fig. 36.5) for
importing and converting the GCG files.
577
Fig. 36. 5 GCG to Vector NTI Converter dialog box
Press the Add button, opening a standard Open dialog box where you can browse for your
GCG files (Fig. 36.6). Select those you want to convert and import into Vector NTI; press
Open.
Fig. 36. 6 Open dialog box where you can browse for your GCG files
578
Miscellaneous Vector NTI Tools Chapter 36
The files are listed in the GCG Converter list box (Fig. 36.7). To convert all of the files to
VNTI format, press Convert or select those you wish to convert and press the Convert
Selected button.
Fig. 36. 7 GCG Converter list box
After the conversion process concludes, symbols appear to the left of each file name
indicating the resolution of the conversion process. Molecule types or Errors are also listed
in the Type column.
Shortcut menu options for each file listed are dependent upon the file symbol. For instance,
you can select Get Error Information from the shortcut menu from each of the files
showing an error message. You can also choose to remove the file from the list.
Symbol interpretations and the user solution are listed below.
Symbol
Interpretation
User Solution
Conversion was
successful
N/A
Sequence type could not
be discerned
In sc menu, select Set
Type. In the dialog box, in
drop-down menu select
DNA or Protein and click
OK.
579
Symbol
Interpretation
User Solution
Source file indicates one
sequence type, but a
wrong symbol is found in
the sequence; position is
specified
Select Open in Text Editor
(Notepad or other you have
specified. See Fig. 36.8.).
Verify and edit the error.
Re-convert.
Source file is empty or an
error was detected in
reading the first line in
the file
Select Open in Text Editor
(Notepad or other you have
specified). Correct source
file problem.
Sequence cannot be
detected in the source
file
Select Open in Text Editor
(Notepad or other you have
specified) to verify. Enter
sequence or copy and
paste from another file.
Table 36. 1 Symbols indicating the resolution of the conversion process
Fig. 36. 8 Opening the source file in a Text Editor (such as Notepad)
Other GCG Converter Operations
580
•=
Sort the columns by File Name, File Length or Type. Click on the column heading;
repeat the click to reverse the sort.
•=
Press the Remove or Remove all files to remove files from the list.
Miscellaneous Vector NTI Tools Chapter 36
•=
Click the Info button, opening an Information box displaying the nucleotide content of
the DNA molecule.
•=
Click the Edit button to open the text editor, where you can review or edit the file.
Importing into Vector NTI Database Explorer
In the Results section of the dialog box, the number of each type of molecule is displayed
beneath the type symbols, DNA and Protein (Fig. 36.9). To import converted molecules into
Vector NTI, select the molecule file(s) in the Files to Convert section and double-click on
the corresponding file type button in the Results section.
Fig. 36. 9 Importing into Vector NTI Database Explorer
If you have selected more than one molecule to be imported, a Multiple Entry dialog box
opens listed the molecules (Fig. 36.10).
581
Fig. 36. 10 Multiple Entry dialog box
Click Import to import them into the Vector NTI database. In the dialog box that opens,
specify the subbase where they will be placed. You might want to create a new subbase
labeled Converted from GCG.
If you press the Open button, molecule display windows will be opened and tiled for each
of the molecules on the list. You may see a message saying that not all of the restriction
sites, and motifs can be opened for some of them due to space limitations.
Matrix Editor
All algorithms designed to evaluate pairwise sequence alignment are based on systems
which rank aligned residues. Amino acids that are identical or similar in alignment score
higher than those less similar. Matrices generated with these assigned scores are used to
detect similarities between differing sequences. The most common of many different
scoring systems are based on substitutions of amino acids in related proteins.
PAM and BLOSUM substitution matrices are objects stored in the Vector NTI Matrices
folder. Customized matrices may also be devised and stored in Vector NTI for shared or
private use. Global alignments of closely related sequences are used to derive the PAM
matrices. Scores are based on extrapolated evolutionary differences between amino acids.
The greater the numbers, the greater the evolutionary divergence. (Dayhoff et al. 1978)
BLOSUM matrices are calculated from local, ungapped alignments of distantly related
sequences. The matrix scores represent the minimum percent identity of the blocks used to
construct the matrix; greater numbers represent lesser distances.(Henikoff and Henikoff
1993).
Matrix Editor allows inspection of and editing of matrices.
582
Miscellaneous Vector NTI Tools Chapter 36
Matrices are used in two Vector NTI Suite applications, AlignX and AlignX Blocks.
Matrices can be viewed in either program in the Alignment Setup dialog box, but editing
can only take place in Matrix Editor.
To open the Matrix Editor, select it in the program group or folder where you installed
Vector NTI. The Matrix Editor that opens is initially empty (Fig 36.11).
Fig. 36. 11 Matrix Editor (initially empty)
Press the Load Matrix button to open the Matrices folder (Fig. 36.12). Select the matrix
you wish to edit/review and click open.
583
Fig. 36. 12 Matrices folder
Fig. 36. 13 Matrix Editor (loaded)
The Matrix Editor (Fig. 36.13) consists of two tabs: Score Matrix and Stats-Table.
584
Miscellaneous Vector NTI Tools Chapter 36
The Score Matrix tab displays the name and order of the matrix residues. Use the scroll
bars to view the entire matrix. The arrow buttons in the lower left of the Editor can be used
to move the cursor vertically through the left-most column. To edit a cell, highlight a value
and enter the new value (Fig. 36.14).
Fig. 36. 14 Editing a matrix cell
The Save Matrix button is enabled only after you modify the name in the Name text box.
This is to prevent any of the default matrices in Vector NTI from being altered.
Press the Clear Matrix button to remove the currently displayed matrix from the Editor.
The Stats Tab displays the Lambda and Kappa parameters used to calculate the statistical
significance of high scoring segments or subalignments. On this tab, you can edit values in
the same way you do on the Score Matrix tab. To save the edited matrix, you must return to
the Score Matrix tab and modify the name, thus enabling the Save Matrix button. In the
dialog box that opens, specify the file for storing the matrix and click the Save button.
CSV Oligo Files Importer
You can import oligo lists into the Vector NTI database using the CSV Files Importer
utility. The oligo list to be imported must be in one of three file formats for use with the
CSV utility:
•=
Comma delimited format (.csv format)
•=
Tab delimited format
•= Semicolon delimited format
The CSV utility will recognize three fields from the oligo list file:
•=
Oligo Name
•=
Oligo Sequence
•= Oligo Description
The following is an example of an oligo list saved in .csv format from MS Excel and opened
in Notepad for viewing (Fig. 36.15):
585
Fig. 36. 15 Oligo list saved in .csv format from MS Excel and opened in Notepad
There are two steps in the oligo list import process:
•=
Step 1: Open the file in the CSV utility and convert it to a VNTI oligo archive file.
•=
Step 2: Import the oligo archive file into the VNTI Database.
To import an oligo list file in comma, tab or semicolon delimited format, launch the CSV
utility by choosing Start > Programs > Vector NTI Suite 7 > Tools > CSV Files Import
on your computer or double click on the CSV program executable where you installed it on
your hard drive.
The CSV Import dialog box opens. Press the Open button in the upper right corner of the
CSV dialog box. In the Open File dialog box, locate the file you want to import, select it and
press the Open button. The file, if in one of the accepted formats, opens in the CSV Import
dialog box (Fig. 36.16):
586
Miscellaneous Vector NTI Tools Chapter 36
Fig. 36. 16 CSV Import dialog box
Select the delimiter type, if not already pre-selected. Press the column-heading bar over
each data column and define the Name, Sequence and Description columns by choosing
from the drop down list. All three columns MUST be defined even if they contain no data.
For example, in the sample oligo file above, no description data exists, so the description
column in the CSV Importer contains no data, yet its column heading still must be defined
or the file conversion cannot proceed.
Highlight the oligo rows for those oligos you wish to import (do not select rows that contain
heading labels, if any). Press the Import button.
587
Icon for archive file
Fig. 36. 17 The archive icon indicates successful file conversion
If successful, the file is converted to a VNTI oligo archive file type and an icon for the
archive file is displayed on the lower portion of the CSV Import dialog box (Fig. 36.17).
Double clicking on the archive icon opens the VNTI Database Explorer window. You can
import the oligo archive into VNTI by dragging and dropping the icon from the CSV
Importer dialog box onto the desired oligo subbase in the Exploring Local VNTI Database
window.
You can save the oligo archive file to your hard drive by dragging and dropping to the
Desktop or to another location in Windows Explorer.
VNTI 7 License Manager
To satisfy the needs of users in different industrial, scientific or educational environments,
InforMax, Inc. has designed four types of Vector NTI licenses. These are all administered
through the License Manager (Fig 36.18).
•=
588
Static License: Purchased by one user for installation on one computer
Miscellaneous Vector NTI Tools Chapter 36
•=
Dynamic License: Purchased for installation on a server to be shared by a specified
number of users or “seats,” with the number of users at any one time being limited to
the number of “licenses” specified in the contract.
•=
Trial License: Allotted to a potential purchaser of Vector NTI software for a specified
number of days during which the user can review and use the software within certain
limits.
•=
Demo Mode: For the purposes of demonstrating the Vector NTI Suite software. Used
mostly by employees of InforMax, Inc.
License Manager usually opens automatically when you install Vector NTI Suite on your
computer. To open License Manager manually, select it in the program group or folder
where you installed Vector NTI Suite.
For a Static License, go directly to the Static License tab.
For the other three types of licenses, the Summary tab lists the Vector NTI Suite
applications for which you can specify the license type. Click on the row of the application
for which you wish to specify a license. In the drop-down menu at the right end of the row,
select the license type.
Select the tab that corresponds to your license type. In the appropriate text boxes, enter the
appropriate data.
•=
Static License Settings: In the License # box, enter your Vector NTI static license
number. Click the Get Registration Key button, prompting a link to the InforMax, Inc.
website where your new registration key will be displayed. Your web browser may need
to be open to do this. Copy the key from the web page. (Drag across it with your mouse
to highlight it and press CTRL + C.) Return to the License Manager, click the cursor in
the Registration Key text box and press CTRL + V, pasting the registration key in the
text box. Click the Apply button.
At this point, close License Manager and open any of the Vector NTI Suite applications by
selecting them in the program group or folder where you installed Vector NTI. An active
Static License is signaled by a green checkmark in the lower right corner of your screen
when the software is open.
589
Fig. 36. 18 License Manager (Summary tab)
590
•=
Dynamic License Settings: In the Server URL text box, enter the server URL or click
the Default URL button. Make sure that the proxy settings are filled in correctly if a
firewall is used at your site. An active DLS Vector NTI Suite is signaled by a small
green, blinking check mark on the lower right corner of Vector NTI. A denied DLS
shows a red blinking X.
•=
Trial License Settings (Fig. 36.19): enter your email address and the name of your
organization in the appropriate fields. Enter the server URL or click the Default URL
button to enter it automatically. Make sure that the proxy settings are filled in correctly
if a firewall is used at your site.
Miscellaneous Vector NTI Tools Chapter 36
Fig. 36. 19 Trial License Settings tab of License Manager
For both the Dynamic License Server and the Trial License, press the Internet Connections
Settings button, opening the Internet settings dialog box (Fig. 36.20). This dialog box
allows you to set your connection parameters. If the Use Internet Explorer settings button
is selected, License Manager will attempt to make the connection using your default
settings. If default detection is not successful, you can either choose the Direct connection
button if you do not have a proxy or choose the Use proxy server button and specify the
proxy name, port and password information.
Fig. 36. 20 Internet Settings dialog box
Press the OK button to return to the main License Manager dialog box.
591
For both the Dynamic License Server and the Trial License, press the Test Connection
button, opening the server connection tester (Fig. 36.21) This dialog box allows you to
review the status of your connection.
Fig. 36. 21 Dynamic License Server Connection Tester dialog box
The status of the connection is displayed. For a trial license, it will report that there are no
licenses available unless you have previously requested a trial license (see below). If the
server requires a password, it must be entered into this dialog box. If you want to alter your
proxy settings, press the Internet Connection Settings button. Once the settings are
reconfigured, press the Connect button to test the connection using the new settings.
To get a trial license, send the Hardware ID from the dialog box on the Trial License Tab to
[email protected] with your name, address, email address and phone number. A reply
will be received usually within an hour. After the reply has been received, testing the
connection will show that licenses are available.
592
Expression Database Explorer Chapter 37
Chapter 37 Xpression NTI: Expression Database Explorer
Gene Expression Overview
In the last few years, sophisticated techniques have been developed that allow scientists to
characterize the mRNA expression level of thousands of genes simultaneously. Microarrays
are an orderly arrangement of DNA elements fixed to a solid-state surface. In a typical
experiment or “run,” the arrays are hybridized with fluorescent or radiolabeled nucleic acids
that have been prepared from a biological sample of interest. An appropriate detection
device captures an image of the array elements, with stronger hybridizations yielding a
higher signal. The signal of a given element is proportional to the concentration of
complementary nucleic acid in the labeled sample. The image signals are converted to
numerical values that are then processed using statistical and graphical analysis methods.
Other high throughput expression analysis methods, such as SAGE (Serial Analysis of Gene
Expression), also result in the numerical representation expression values.
A typical expression experiment generates thousands of data points, presenting serious
challenges for storing and processing data. The desktop expression application, Xpression
NTI, is a comprehensive program, independent of Vector NTI, designed to store and
manage gene expression data. It provides the algorithms for processing and examining the
data from single and multiple expression experiments.
Xpression NTI can merge primary expression run results. Filtering, sorting and clustering
algorithms, parameterizations or profiling methods can be used to analyze and organize
data. Huge volumes of quantitative data are displayed graphically to find inherent patterns
of gene expression, both on a broad scale (“birds-eye” view) and fine scale (gene by gene).
Xpression NTI consists of two closely associate parts, the Expression Database Explorer
and the Expression Viewer. Xpression NTI is designed to work with gene expression data,
managing the data by means of the Expression Database Explorer and analyzing and
manipulating it in the Expression Viewer window. The Expression Viewer window also
provides an interface for working with separate experiments not stored in the Expression
Database. From the Expression Viewer window, experiments can either be saved to the
Expression Database or to an independent file on the hard drive.
To launch the Expression Database Explorer, selecting the Xpression NTI listing in the
Vector NTI Suite options under Start > Programs on your computer or double-click its icon
in the program group or folder in which you installed the Xpression NTI application.
Gene Expression Terminology
The main objects in the Gene Expression application are Expression Gene, Expression
Sample (Target), Expression Run and Experiment.
Expression Gene: Refers to a genetic entity rather than a specific sequence or array
element. Several sequences or array elements can correspond to one Expression Gene.
593
Expression Sample or Target: Describes the source of labeled RNA/DNA used to measure
the gene expression levels. A particular Expression Sample can be hybridized with many
individual chips (or put through multiple SAGE analyses), producing multiple Expression
Runs.
Expression Run: An array of numbers (equal in length to the number of Expression Genes
that were measured) that corresponds to the expression values obtained when an Expression
Sample is put through the measurement protocol (i.e. a microarray hybridization or a SAGE
run). Several Expression Runs might be derived from one Expression Sample.
Normalization algorithms, replica merges etc., essentially produce new Expression Runs.
Expression Run data can be absolute values or ratios. Ratio Expression Runs require
specification of a base Expression Run if the ratio is calculated by the software from the
original absolute values.
Primary Experiment: A collection of Expression Runs combined for simultaneous
analysis. For two-color microarray technology, a primary Experiment typically has two
Expression Runs (red and green channels).
Virtual Experiment: Using the normalization and merging functions, you can combine
Expression Runs together. Virtual experiments are the result of such merging events. Virtual
Experiments encompass multiple primary sources, yet portray the data as a single, unified
entity. This type of arrangement is particularly useful for merging sets of Expression Genes
that, for example, have been split onto multiple physical microarrays.
Expression Value: A measurement of gene expression represented in terms of absolute
signal or the ratio of two absolute signals.
Absolute Signal: Absolute numerical value derived for a given array element.
Ratio: A ratio of two signals, a measure of relative gene expression. In most cases the ratio
is calculated by dividing the absolute signals from an experimental Expression Run by those
from a reference Expression Run. Alternately, ratios can be pre-calculated prior to loading
data into Xpression NTI and used as the default data type.
Ratios are typically represented by their logarithms. Xpression NTI supports several ratio
types: ln, log2, log10, Fold Change (for Affymetrix data) and Diff Expr (a/b if a > b, -b/a if
a < b). The ratio type can be set during the import or you can select the ratio type when
converting Absolute Signal data to ratio format data in the Expression Database Explorer.
Currently, Xpression NTI stores up to three numbers for each data point. The first number is
always the expression value itself, which can be either an absolute signal or a ratio. The
other two numbers, defined by the importing program and described in the specifications for
these importers, describe the quality of the data itself. Those numbers can be confidence
limits, P-values or signal-to-noise ratios. For specific chip-types, one of the latter two
numbers could also be other quality measures imported into this field, such as the average
594
Expression Database Explorer Chapter 37
log ratio or sort scores (Affymetrix data). Expression filters can work with these numbers
and can be defined when selecting filter parameters.
Expression Database Explorer Introduction
The Expression Database is a collection of expression data organized for easy retrieval and
management in the Expression Database Explorer. Three different types of objects are
stored and organized in databases and subsets in the Expression Database Explorer:
•=
Expression Data
•=
Expression Genes
•= Expression Targets
Similar in functionality to the Windows 95/98/ NT Explorer interface, the Expression
Database Explorer supports intuitive browsing of databases, drag and drop operations and
other functions typical of window-based database management.
From the Exploring Database window, you can perform the following operations:
•=
Sort, Edit and delete items
•=
Search the database
•=
Organize your data into convenient groups (subsets)
•=
Import and export data (this is inactive in the demo version)
•=
Open an experiment in Expression Viewer
Important: The Xpression NTI Database is completely independent of the Vector NTI
Database and each database has its own unique viewer. It is not possible to exchange objects
between the Xpression NTI and Vector NTI applications.
Opening Expression Database Explorer
To open Expression Database Explorer:
•=
Select Programs > Xpression NTI > Xpression NTI under the Start > Programs on
your computer.
•=
From the Expression Viewer window by pressing the Go to Explorer toolbar button
(
) or by choosing File > Go To Explorer from the menu.
Elements of Expression Database Explorer
The Database Explorer window consists of a menu bar, toolbar, Database Table combo box
for selecting the database object type in the upper left, Subset Pane on the left and Database
<Object > Pane on the right of the window.
595
Fig. 37. 1 Expression Database Explorer
Database Tables
The Expression Database consists of several Tables:
•=
The Expression Data table
•=
The Expression Genes table
•= The Expression Targets table
The Explorer window displays the contents of one table at a time. You can alternate
between tables by selecting a table from the Table combo box in the top left corner of the
Explorer window.
Database Subsets
Each database table contains a list of subsets, groups of objects organized into logical
categories.
596
Expression Database Explorer Chapter 37
•=
A database object can be included in any number of subsets without increasing the
amount of disk storage the object occupies.
•=
Subsets are created, edited and deleted through the Database Explorer.
•=
When you select a subset in the left pane, Explorer lists the subset contents in the right
pane and displays table- and subset-related commands on the menu bar and toolbar
buttons on the toolbar. When you select one or more database objects in the right pane
(activating the Object Pane), the menu bar displays object-related menu options.
•=
To alternate between panes, click on a pane to activate it or use the F6 keyboard
shortcut. To open context-sensitive shortcut menus, right click on subset or database
objects. The shortcut menu displays commands appropriate for the object under the
cursor.
Database Objects
Each database object is described by a set of fields that display various object data. Each
object type has its own set of default fields. A user may also define additional user fields.
Database Object System Fields
Most of the object system fields are accessible from various parts of the program’s user
interface. Some of them, however, are only visible in specialized object type-specific dialog
boxes or display windows.
The following is a list of System Fields for Expression Experiments, Targets and Genes:
Field Name
Description
Name
Name of the Expression Experiment, Gene or Target
Description
Description of the Expression Experiment, Gene or
Target
No. of Genes
Number of genes in the Expression Experiment
No. of Expr. Runs
Number of runs in the Expression Experiment
Exp. Runs
Detailed information regarding the Expression
Experiment, Gene or Target
Chip Name
Name of the chip for the Expression Experiment
Abs/Ratio
Data type for the Expression Experiment, Absolute or
Ratio
Alternative Name
Alternate name for the Expression Gene
Source (Tissue)
Tissue type for the Expression Target
Treatments
Tissue treatment for the Expression Target
Table 37. 1 Database object system fields
597
Note: Many String-type automatically updated fields and user-defined fields are searchable.
Using the Database Search interface described in the Database Search section in this
chapter, you can perform string context searches on such fields.
User-defined Fields
For information management functions, User-Defined fields can be created and associated
with any database object. A User Field containing laboratory-specific and user-specific
descriptions can be imported, exported, displayed, printed and managed in the same way as
regular database fields.
Comments
Each database object can contain a text comment of unlimited length. Comments can be
edited in the Comments pages of the object’s Edit Properties dialog box. The Edit Properties
dialog box for an object can be launched by highlighting the object and choosing <object
type> > Edit from the menu or by right-clicking on the object listing in the Database
window and choosing Edit from the shortcut menu.
Database Search
You can perform a database search for any object type stored in the Expression Database. In
general, search procedures are initiated from the Database Explorer window by selecting the
appropriate Database Table type and choosing Database > Search from the menu or by
clicking the Search button (
) on the toolbar. This opens the Database Search Dialog
Box for the selected object Table (Fig. 37.2):
Fig. 37. 2 Expression Database text search
598
Expression Database Explorer Chapter 37
The Database Search dialog box consists of two tabs, a Text Search tab and a Query tab.
In the Text Search tab, you can designate the search text and select a field(s) (the field list
includes searchable System fields and User-Defined fields) and subsets(s) to search. If no
subset is selected, the main table is searched.
One of three search criteria can be used for the text search, All Words, Any Words or
Exact Phrase. An All Words search finds only those items that contain all query words
specified, regardless of the order and whether or not other words are present. An Any
Words search finds those items that contain one or more of the specified words. An Exact
Phrase search finds those items that contain the query words in the specified order and with
no extraneous words in between.
Fig. 37. 3 Expression Database query search
In the Query tab (Fig. 37.3), you can search the designated field in the selected subset(s)
according to the query criteria that you set. If no subset is selected, the main table is
searched. Click on the entry in the Field column and use the drop down box to select the
field to search. Click on the entry in the Operation column and use the drop down box to
select the operation type. One of four operations can be selected, Contains, Does Not
Contain, Equals or Not Equal. Enter the search value in the Value field.
To add another search criterion, right-click on the horizontal arrow to the left of the last
search criterion row and choose Insert Row from the shortcut menu. Alternately, press the
Insert key on the keyboard or press the Enter button while the cursor is in the Value column.
599
Configure the new criterion as described above. For multiple search criteria, use the Logic
text box to specify the logic, AND or OR, that will be used between criteria. If the AND
operator is used, only the records that meet both criteria will be returned. If the OR operator
is used, records meeting either search criteria will be returned.
Note: Parentheses are allowed in the Logic text box for grouping search criteria. Also, you
can use a criterion more than once in the Logic field. For example, the expression (#1 AND
#2) OR (#1 AND #3) entered in the Login field would find database entries that satisfy
either criteria #1 and #2 or criteria #1 and #3.
To remove a search criterion, highlight the row and press the Delete key on the keyboard or
right-click on the horizontal arrow next to the row and choose Delete Row from the shortcut
menu.
When you are satisfied with the search setup, press the Search button.
If the Expression Explorer search finds objects that satisfy the search criteria, the Insert
Search Result in Subset dialog box appears. Enter the name of a new subset or choose a
subset name from those listed.
All objects found will be placed in the specified subset OVERWRITING the existing subset
content (if any), indicated by the following warning (Fig. 37.4):
Fig. 37. 4 Search Results subset overwrite message
Note: If the specified subset already exists, Expression Database Explorer empties it before
adding found objects. You can refine your search by using the resulting subset to limit the
scope of the next search.
Gene Ontology Manager
The Gene Ontology Manager allows global editing of the currently displayed gene ontology
tree. Two sample ontology files, go.xml and yeast.xml, are included with the Desktop
Expression Application in Vector NTI. These sample ontology files can be copied, modified
and saved to create custom gene ontology files.
For more information on gene ontology, see the Gene Ontology Consortium web site,
http://www.geneontology.org.
The Gene Ontology Manager (Fig. 37.5)can be launched by choosing Database > Gene
Ontology Manager from the menu in the Expression Database Explorer:
600
Expression Database Explorer Chapter 37
Fig. 37. 5 Gene Ontology Manager
Predefined values for Molecular function, Subcellular localizations and Biological processes
are shown in the Gene Ontology tree. Use the New, Rename and Delete buttons above the
tree control to make any desired changes to the ontology tree. Press the Save button to save
the changes to the existing ontology file. To view a different ontology file, press the Find
Ontology File button (
file.
) to the right of the File text box and select the desired ontology
Three global operations can be performed on the Expression Genes table from the Gene
Ontology Manager dialog box:
•=
Setting a selected ontology annotation for all objects in a selected Expression Genes
subset.
•=
Deleting a selected ontology annotation for all objects in a selected Expression Genes
subset.
•= Deleting all gene annotations for all objects in a selected Expression Genes subset.
To delete all gene annotations for the objects in a subset, select the subset in the subset list
pane and press the Clear gene annotations in: button. To set or delete an annotation from
all objects in a subset, select the subset in the subset list pane, then select the annotation to
601
be added or deleted in the gene ontology tree pane and press the Set selected item for genes
in: or Clear selected item in: button, respectively.
Database Management Operations
Database Select, Backup, Restore, and Compact
There four general functions (all initiated by choosing options under the Database menu of
the Expression Database Explorer) that relate to the entire database:
•=
Select Database: opens an Expression database other than the default. This allows you
to have several different databases to work with and to alternately view those databases.
•=
Database Backup: makes a copy of your database in the specified directory or folder.
For instance, you may back up the data to removable storage to make a permanent, safe
record of your database. Making such a backup is the ONLY way to be sure your data
is safe in the case of hard drive failure.
•=
Database Restore: restores all database files from the selected backup. The first step in
the Database Restore process is to back up the current database, after which the restore
is performed. Upon executing the Database Restore command and choosing the
database file from which to restore, you will be asked to save the current database to a
file name of your choice before the Database Restore operation will complete. After
saving the current database, your database is restored from the specified directory or
folder, overwriting all current database files.
•=
Database Compact: removes from the data files and database tables any unnecessary
data that may accumulate from extensive creation and deletion of database objects.
Although these data do not affect functionality, it is wise to perform Database Compact
once a week.
Operations on Subsets
To initiate any of the following operations on a subset, select the subset name in the left
pane of Expression Database Explorer. Press the toolbar buttons as described or choose
Table or Edit or corresponding shortcut menu commands. Descriptions of each operation are
included below.
Note: Operation descriptions are shown on the Expression Database Explorer task bar when
the cursor is hovered over a button or menu item.
Creating a New Subset
To create a new subset and/or add objects to it, follow one of the following options:
•=
602
Select Table > New > Subset or click the New Subset button (
) to create a new
(empty) subset with a default name, New Subset 1. You can edit this name in the
enabled text box; press Enter to confirm.
Expression Database Explorer Chapter 37
•=
Select Table > New > Subset (Using Subset Editor) to create a new subset and select
its contents using the Edit Subset dialog box described below under Editing a Subset.
•=
A simple way to add new molecule or other object to a subset is to open the source
subset in the Subset Pane and click and drag selected objects from the list to the new
subset. The objects are now listed in the original subset and the new subset.
•=
To create a new subset and place objects in it at the same time, select objects for the
) or
new subset in the Database Objects Pane and click the New Subset button (
right-click on the selected objects and choose Add to Subset from the shortcut menu.
In the Choose Subset dialog box, type in the new subset name.
Editing a Subset
In the Subset Pane, select a subset to be edited and choose Table > Edit Subset from the
menu. This option is not available for subsets where the content is maintained
automatically. This opens the Edit Subset dialog box (Fig. 37.6):
Fig. 37. 6 Edit subset dialog box
•=
The Source Subsets column shows all of the subsets in your database. The buttons
below this column control how the subset objects in subsets selected in the Source
Subsets column are displayed in the Source Content column:
o
Intersection: Each object that is present in all highlighted subsets is displayed in
the Source Content column. Objects not included in all selected subsets are thus
excluded.
o
Difference: Each unique object from selected subsets (i.e. an object present in only
one of the highlighted subsets) is displayed. Objects that occur in more than one
subset are thus excluded.
o
Union: All objects that are present in any of the selected subsets are displayed.
603
Note: If only one subset is highlighted, the Intersection, Difference, and Union
buttons are disabled, and all the objects in that subset are shown in the Source
Content column.
•=
The Source Content column shows combinations of objects present in the subsets
highlighted in the Source Subsets column. See descriptions under the previous bullet.
•=
The Resulting Content column shows the contents of the subset you are editing.
Adding Objects to a Subset
To add objects to a subset, highlight one or more subsets in the Source Subsets Column. In
the Source Content column, highlight the object names or use the Select All and Unselect
All buttons in that column to highlight or deselect all objects at once. When the objects you
want are highlighted, press the Add button to add them to the Resulting Content column.
Click OK to exit the dialog box. The objects are now listed in the original subset and the
new subset.
Removing Objects from a Subset
In the Subset Pane, select the subset to be edited. Select Table > Edit Subset or Edit from
the shortcut menu. The Resulting Content column in the Edit Subset dialog box shows the
current contents of the subset you are editing. To remove objects from the subset, highlight
their names in the Resulting Content column and press the Remove button. Select All and
Unselect All buttons below the Resulting Content column allow you to highlight or deselect
all objects in the column. Click OK to exit the dialog box. Database objects that are
removed from the edited subset continue to exist in the database and other subset(s) where
they were included before this operation.
For alternative ways of removing objects from a subset, see the Operations on Database
Objects section below.
Renaming a Subset
Select Table > Rename Subset or press the Rename button (
). In the enabled text box,
edit the name. This operation does not affect the subset contents or database objects. This
option is not available for subsets where the content is maintained automatically.
Dismissing a Subset
Select Table > Dismiss Subset or press the Dismiss Subset button (
). This operation
removes a selected subset, but does not affect the database objects. They are still stored in
the database and exist in other subsets where they were included before this operation. To
empty the subset first, use the Clear Subset operation.
Clearing a Subset
To exclude all objects from the selected subset, select Table > Clear. The subset itself is
emptied but not removed. This operation does not affect database objects; they are still
stored in the database and included in all other subsets where they were included before this
604
Expression Database Explorer Chapter 37
operation. This option is not available for subsets where the content is maintained
automatically.
Deleting Contents
To physically delete from the database all objects in the specified subset, select Table >
Delete Contents. If you choose OK in the confirmation dialog box, all objects in the subset
are cleared from all subsets and permanently deleted from the Main database.
Operations on Database Objects
To perform various operations on an individual database object or group of objects, select
the object(s) in the Object Pane of the Database Explorer. Choose the desired operation
from the menu options on the left-most menu that corresponds to the currently displayed
table type (i.e. Table, Experiments, Genes or Targets). Most commands are also available
from the object’s shortcut menu. Some options are also available from toolbar buttons.
Commands specific for certain objects are discussed in the next section.
•=
Open: opens Expression Viewer for the selected objects (available only for Expression
Data).
•=
Delete: physically deletes the selected object from the database and all subsets.
(Confirmation is requested before deleting the object.) You can also use the Delete
). The Delete option is only available when an object is selected in the main
button (
database table, not a subset.
•=
Remove From Subset: removes the selected object from the current subset, but does
not delete the object from the main database table. You can also use the Remove From
Subset button (
).
•=
Rename: renames the selected object. You can also use the Rename button (
•=
Properties: displays the properties of the selected object. You can also use the
Properties button (
).
).
•=
Add To Subset: adds selected objects to the specified subset.
•=
Save To File: saves object to file.
Drag and Drop
You can transfer objects by selecting them and using the LEFT-CLICK + DRAG technique
to move them to another location. Objects can be copied from the main table or a subset into
another subset by clicking and dragging the object from the right pane in the Expression
Database Explorer onto the desired subset listing in the left pane.
605
Editing an Object’s Properties
An object’s properties can be edited by right-clicking on the object and choosing Edit from
the shortcut menu or by highlighting the object and choosing <data type> > Edit from the
menu or by pressing the Edit (
) button on the toolbar. Edit Properties dialog boxes for
the various objects are shown in the Database Object Properties section later in this chapter.
Explorer Display Options
The Explorer’s database object pane can work in one of four view modes, selected under the
View menu or by clicking on the View Mode button arrow, displayed at the right end of the
toolbar (Fig. 37.7): Large Icons, Small Icons, List and Details. By default, the Database
Explorer shows objects in Details mode.
Fig. 37. 7 Database object pane display options
In the first three modes, only object icons and names are displayed. The Details view
displays object icons, names and the values of object fields displayed in columns.
Columns Dialog Box
To view or modify options related to the current database table display, select View >
Columns to open the Columns dialog box, or right-click on list pane header or on the list
pane itself and select Columns from the shortcut menu. All of your settings are preserved
between Expression Explorer sessions.
606
Expression Database Explorer Chapter 37
Fig. 37. 8 Columns dialog box
In the Columns Dialog Box (Fig. 37.8), you can select the fields (columns) to be displayed,
change the order of columns and the text alignment of each column.
Currently displayed columns are listed in the Selected columns list box. To customize the
displayed columns, in the Available columns list box, select fields to be displayed and press
the (
) button. To remove fields, select them in the Selected columns list, and click the
(
) button. To modify the column alignment of displayed data, highlight the column
listing and select the appropriate Alignment radio button. To modify the order in which the
columns are listed in the Explorer window, select a field and use the Move Up or Move
Down buttons to move the field to the desired position. Click OK to apply the settings.
Modifying Database Object Column Widths
Column width settings can be changed directly. In the Expression Database Explorer
window, move the cursor to the divider between columns where it changes to a two-headed
arrow. Drag the divider right or left with the cursor until the column is the desired width.
Sorting Objects in Expression Database Explorer
If you are in the Details View Mode, clicking on the column header sorts the database
contents according to that column. Clicking on the same column header a second time
reverses the sorting order.
To select descending or ascending sorting order for columns, or to sort database objects by
name or any of the displayed fields in any view mode, select View > Arrange Icons and
choose the sort order and column on which to base the sort.
607
Database Reports
Reports on Database Explorer’s contents, suitable for word processing and spreadsheet
programs, can be generated. In preparation for creating a report, the Database Object Pane
should contain all the objects you would like to include in the report. If you do not have a
subset containing all the objects you need, either create a new subset or select the desired
objects in the Object Pane and generate the report on the selected objects only.
To prepare a report:
Select a database table and object subset. Make sure Explorer is in the Details View mode.
1. To select the objects’ fields to be displayed, right click on a column heading, select
Columns, opening the Columns display dialog box. Move the fields between the
Available and Selected columns text boxes to display the desired fields, as described
above in the Columns Dialog Box section. Click OK to apply the settings.
2. Sort your objects by clicking on column’s header.
3. Select Edit > Camera or press the Camera button (
) on the Explorer’s toolbar.
In the Camera dialog box, select the objects to be included in the report and its
destination.
4. Switch to a word processor, spreadsheet or database application and paste/import the
report data there.
5. Explorer prepares the report data in two formats:
•=
Plain text format with the TAB character used as a column separator and the
newline character as a row separator (sometimes called the “CSV” format);
•=
Rich Text format (RTF).
Explorer Shortcuts
The following is a list of useful Expression Explorer keyboard shortcuts:
Shortcut
Action
F2
Rename
F3
Search
F6
Switch to another pane
Enter
Open selected object
Ctrl+Enter
Show Properties
Table 37. 2 Expression Database Explorer keyboard shortcuts
User Field Manager
The User Field Manager dialog box maintains a list of user field definitions necessary to
provide an appropriate description of the object. In the User Field Manager, you can add
608
Expression Database Explorer Chapter 37
User Field Definitions, select properties to be displayed, sort by displayed properties and
modify User Field Definition properties.
Select Database > User Field Manager to open the User Field Manager dialog box (Fig.
37.9):
Fig. 37. 9 User Field Manager
Using the operation buttons in the upper left corner, you can perform various operations on
the User Field Definitions. Those operations are described below. To modify a User Field
Definition, select it in the list and press the appropriate button. The Add New operation does
not require any items to be selected.
Note: You cannot use the name of a system field for a user-defined field name (See the
System Fields table on page 218). Since field names are not case sensitive, if you want to
use a system name for a User Field, you cannot simply alter the capitalization of the name
either. For example, if you want to use the system field name “Description” for your userdefined field, you cannot use “description” or “DESCRIPTION”. However, you can use a
name such as “MyDescription”.
Creating and Editing User Fields
Pressing the Add New (
) or Edit (
) (with a field selected) buttons opens the User
Field Definition wizard (Fig. 37.10) where you can create or edit User Field Definitions.
609
Fig. 37. 10 Creating a User Defined Field (UDF); initial dialog box
•=
Name: In the text box, enter (or edit) the name of the new user field. The user field will
appear under this name in the descriptions of database objects.
•=
Type: Select the type of user field from one of the predefined types in the combo box:
o
String- arbitrary text string (including numbers)
o
Yes/No - binary field which may be set only to “Yes” or “No”
o
List of Strings - list of arbitrary text strings of any length
o
One of Predefined Strings - field which may be set only to one of predefined
text strings from a user-defined list
o
List of Predefined Strings - field which may be set only to any subbase of
predefined text strings from a user-defined list
o
URL – link to an external source, such as Entrez Database, file or www-page.
This type of User Defined Field has two parts, the Base – static portion (home
page) of the URL, e.g. “http://www.informaxinc.com/” and the Value –
location of an external source relative to Base (specific page), e.g. “products/”
(Fig. 37.14). If both Base and Value are present, the actual value of the field is
the concatenation of the Base and Value.
o
Integer – whole numbers
o Float – numbers containing decimals
The appearance of the next page of the wizard depends on the Field Type selected in the
first dialog box. For String, List of Strings, Integers and Float field types, the second page
appears as follows (Fig. 37.11):
610
Expression Database Explorer Chapter 37
Fig. 37. 11 Creating UDF; string, integer and float data types
Enter the default value, description (if desired) and press the Finish button.
For the Yes/No field type, the second page of the wizard appears as follows (Fig. 37.12):
Fig. 37. 12 Creating UDF; yes/no data types
611
Select the default value, enter a description (if desired) and press the Finish button.
For the List of Pre-defined Strings and One of Pre-defined String field types, the second
page appears as follows (Fig. 37.13):
Fig. 37. 13 Creating UDF; pre-defined string data types
Enter the desired value(s) and press the <<Add button to add it to the predefined value list.
To remove values from the list, highlight them on the left and press the Remove>> button.
Choose a default value from the list, enter a description and press Finish.
For the URL field type, the second page appears as follows (Fig. 37.14):
Fig. 37. 14 Creating UDF; URL data types
612
Expression Database Explorer Chapter 37
Enter the Base portion for the URL (web site), the Default Value (default page) and
description and press the Finish button.
In general:
•=
Default Values: Any User Field may have a default value or values. A default value
can be changed by highlighting the user field in User Field Manager and pressing the
Edit button. Note: Default values are used only for providing default entries into fields;
they are not considered user entered values and, therefore, are not searchable.
•=
Predefined Values: This section is enabled only for fields of the One of Predefined
Strings and List of Predefined Strings types. For those fields, enter one or more value
strings to choose from. These values are displayed as a list of available options when
you try to fill or change the actual object’s fields. Use the text box and the Add and
Remove buttons to define the predefined values for the User Field.
•=
Description: Enter a description of the field to help you fill or edit the value of the field
in a database object. The description entered here is displayed in the field value dialog
box for this field as well as the popup label displayed whenever you pause the cursor on
the field name in the User Fields page of object editors (see below).
Click Finish to save or Cancel to abort and return to the User Field Manager.
Note: Once a User Field has been created, its Field Type cannot be changed.
Renaming and Deleting User Fields
•=
The Rename button (
) lets you change the name of a selected User Field. In the
enabled text box, change the field name.
•=
The Delete button (
) allows you to delete a selected User Field Definition from the
Field Definitions list and, optionally, to delete field values from database objects.
Confirmation is requested before deletion.
Importing/Exporting User Fields
To simplify the maintenance and sharing of User Fields across several databases and/or
several computers, you can save your User Field Definitions to a file (.udf user defined field
file type).
To export User Field Definitions, press the Export button. In the standard File Save dialog
box, locate the directory and specify a file name for storing the exported definitions. Press
OK to save the file.
To import User Field Definitions from a .udf file, press the Import button. In the dialog box
that opens, locate the directory and .udf file to be read. Press the OK button, initiating the
import.
613
Using the Set In/Clear In Functions
In the User Field Manager, you can assign or “set” a value or clear all values for a particular
User Field for a group of database objects.
•= To set a value for a user field:
Select the user field in Field Definition List (large window). In the database tree in the lower
right corner, select a subset of database objects for which you want to set the field.
In the Global Operations section, if you don’t want to overwrite existing values of the User
Field in the selected group of objects, check the Do not overwrite... box. Press the Set In
<user field > button. In the dialog box that opens, specify the field value string to be set and
press OK. Expression Explorer shows a description of the action about to be performed,
asks for your confirmation, then inserts the specified value into the appropriate field for the
objects in the subset you selected.
•= To clear all values of a user field:
Select the user field. Choose a subset of database objects in the database tree. Press the
Clear In <user field > button. Expression Explorer warns you of the action about to be
performed. If you confirm the operation, it clears the values of the specified user field in the
specified objects.
To set or clear fields in a set of individual objects not currently represented by an existing
subset, close the User Field Manager, create the required subset in Database Explorer and
return to the User Field Manager. Alternatively, you may change field values in individual
objects by editing them in the Explorer one by one as described below.
Editing User Fields in Individual Objects
When a User Field is defined in the User Field Manager, you can edit it for any database
object using the User Fields page in the Edit Properties dialog box. To open the Edit
Properties dialog box from Expression Database Explorer, select the object in the Object
Pane and either press the Edit button or select <object type> > Edit from the pull down
menu or the corresponding command from the shortcut menu launched by right-clicking on
the object of interest:
614
Expression Database Explorer Chapter 37
Fig. 37. 15 Editing individual User Field values
The User Fields tab on the Edit Properties dialog box (Fig. 37.15) shows a list of all User
Fields currently applied to the object being edited and the list of blank fields defined in the
local User Field Definition list but not yet specified for the current object.
To set or edit any field, double-click on the field name or select the field name and press the
Change Value button. If the field you want to edit is not listed in the local User Field
Definition list (i.e. it has not yet been created), go back and define the field in the User Field
Manager. Once added, the appropriate field and its default value are displayed. To clear a
User Field from the object, select the name of the field and press the Remove Value button.
Tip: The value of a User Defined field of type URL is displayed in blue. Clicking on that
value opens the specified URL.
Note: Other tabs on this dialog box are discussed in the Editing Database Object Properties
section later in this chapter.
Database Tools
Normalizing Expression Data
Although normalization is optional, many experiments need to be normalized (averaged) in
order to make valid comparisons. Normalization can be performed either from the
Expression Database Explorer or the Expression Viewer windows and several normalization
options can be performed together. The choice of normalization algorithms differs
depending on whether absolute or ratio experiment(s) are to be normalized. Each algorithm
makes a statistical assumption that, if valid, allows for better representation of data. The list
of algorithms follows.
615
Note: dialogue boxes differ slightly depending on whether you choose to normalize a single
experiment or multiple experiments. For a single experiment, you have a choice of all
Expression Runs or base Expression Run to select as the reference. For multiple
experiments, you can choose any of the common Samples for the reference. This type of
normalization is used primarily for processing multiple two-channel data experiments that
have a common base Sample.
Normalizing Absolute Experiments
To normalize absolute experiment(s) from Expression Database Explorer, highlight the
absolute experiment(s) and choose Tools > Expression Data Processing > Normalization
from the Expression Database Explorer menu.
To normalize an absolute experiment from the Expression Viewer, open the experiment and
choose Tools > Data Processing > Normalization from the Expression Viewer menu or
click the Data Processing (
) button on the toolbar.
The Normalization of Absolute Experiment dialog box appears (Fig. 37.16):
Fig. 37. 16 Normalize Absolute Experiment dialog box
•=
616
Subtract background based on lowest percentile. This algorithm calculates the
background based on the tail of the distribution. Typically, the lowest two percentiles
are taken. Background is subtracted from all values in the Expression Run. To select
Expression Database Explorer Chapter 37
this algorithm, check the “Subtract background” checkbox, select the “Based on lowest
percentile” radio button and specify the desired percentile value in the text box.
•=
Subtract background based on negative controls. This algorithm assumes that genes
in the selected subset have zero expression levels. For each Expression Run, the
background is estimated as the average of the values of the selected genes and is
subtracted from all values in the Expression Run. To choose this algorithm, check the
“Subtract background” checkbox, select the “Based on negative controls” radio button
and select the gene subset in “Gene subset” combo box.
•=
Normalize by fitting to the straight line. This algorithm requires the user to specify a
reference Expression Run and is disabled for experiments with a single Expression
Run. All Expression Runs in the experiment are fitted to the reference Expression Run
that is left unchanged. To select this algorithm, check the “Normalize by fitting to the
straight line” checkbox.
•=
o
Global. This algorithm is similar to the above algorithm, but uses all Genes in the
experiment as a constant group of Genes. It works well for Expression Runs
measured for relatively similar samples (which have only few percent of
differentially expressed genes).
o
Based on the constant group of genes. Assumes that the selected group of Genes
are “housekeeping’ genes (i.e. have constant values in all Expression Runs of the
experiment). In other words, if the values of these genes in any pair of Expression
Runs are fitted to a straight line, they should produce a diagonal. The algorithm
proceeds by considering, in turn, all pairs of Expression Runs that contain the
reference Expression Run, fits them to a straight line and finds how different it is
from the diagonal by calculating two parameters (shift and angle). These
parameters are applied to modify all values in a given Expression Run. To select
this algorithm, select the “Constant group of genes” radio button and choose a
Gene subset and a base Expression Run in the appropriate combo boxes.
Normalize by equalizing the distribution. This option assumes that the distribution of
expression values over all Genes in the experiment is similar for all Expression Runs in
the Experiment. To choose this algorithm, select the “Normalize by equalizing the
distribution” checkbox.
o
Set average to 1. This normalization makes the median of distributions equal for all
Expression Runs in the selected Experiments and equal to 1. All values in an
Expression Run are divided by the mean for this Expression Run. To choose this
algorithm, select the “Set average to 1” radio button.
o
Set average to the average of the reference Expression Run. Similar to the above,
but all values in an Expression Run are divided by a scaling factor which is
calculated as the ratio between the averages of given and reference Expression
Runs. Values of the reference Expression Run do not change.
o
Set average and width to those of reference Expression Run. This normalization
makes both the median and variance of distribution equal between selected
617
Expression Runs and equal to those of the reference Expression Run. Although
formally making distributions more alike, this algorithm might not be justified. It is
applicable to data that follow the normal distribution. Absolute values in gene
expression experiments often can be better described by exponential distributions.
Dividing by an average or a scaling factor may be a better way to normalize data in
that case.
Note: All the algorithms described above change the ratios between Expression Runs,
because different parameters or scaling factors are applied to each Expression Run. In
other words, if you use an absolute experiment to generate ratios before and after
normalization, different values will be obtained. The last algorithm keeps the ratios
constant:
o
Set average of reference Expr.Run to 1. This method assumes that the
measurement error for all Expression Runs in experiment is the same. The same
parameters of normalization are applied to all Expression Runs in each
Experiment. All values in the experiment are divided by the average of the
reference Expression Run.
Normalizing Ratio Experiments
To normalize Ratio experiment(s) from Expression Database Explorer, highlight the Ratio
Experiment(s) and choose Tools > Expression Data Processing > Normalization from the
Expression Database Explorer menu.
To normalize a Ratio Experiment from the Expression Viewer, open the experiment in the
Viewer and choose Tools > Data Processing > Normalization from Expression Viewer
menu or click the Data Processing (
) button on the toolbar.
The Normalization of Ration Experiment dialog box appears (Fig. 37.17):
Fig. 37. 17 Normalize Ratio Experiment dialog box
618
Expression Database Explorer Chapter 37
•=
Normalize by constant group of genes. This algorithm assumes that genes in the
selected group do not change expression. In other words, their ratios have to be 1. All
values are scaled to make the average of ratios for the selected group of genes equal to
1.
•=
Normalize by equalizing the distribution. This algorithm is applicable only to
logarithmic and “Diff Exp” representations of ratios. They assume a symmetric form of
distribution. Either all Expression Runs in the Experiment will be centered around 0
(which corresponds to the average ratio of 1) or the reference Expression Run will be
centered around zero and other runs will be adjusted accordingly.
•=
Set average ratio of reference Expr. Run to 1. See description above.
•=
Set average ratio to 1. See description above.
Converting to Ratio
This function is only available for Absolute Signal expression data. The conversion
operation implicitly normalizes values across different experiments. Absolute experiments
can be converted to Ratio as long as they have more than one Expression Run.
To convert Absolute experiment(s) to Ratio experiment(s), select the experiment(s) in the
Expression Database Explorer and choose Tools > Expression Data Processing > Convert
to Ratio from the menu. To convert an Absolute experiment to Ratio in the Expression
Viewer, open the experiment in the Viewer and choose Tools > Data Processing >
Convert to Ratio from the menu or click the Data Processing (
to Ratio dialog box appears (Fig. 37.18):
) button. The Convert
Run 1
Fig. 37. 18 Convert to Ratio dialog box
All Expression Runs in the Experiment are divided by the base Expression Run; the base
Expression Run provides the denominator in the conversion calculation. Select the base
expression run in the “Base Expression Run” combo box in the Convert to Ratio dialog box
(see Fig. 37.18). Several ratio representations are available: different logarithms (log2,
log10, ln) and Diff. Expr. (x if (x > 1), -1/x if (x<1)). Ratio representation is also specified
in the Convert to Ratio dialog box.
619
The base Expression Run may contain negative or zero values, which create a mathematical
uncertainty (division by zero or logarithm of a negative value). Labeling the resulting ratios
as missing values can circumvent this problem. However, in that case all information about
these genes will be lost. This may be an undesirable consequence, because genes that are not
expressed in some samples and expressed in others, are often of the highest interest. To
avoid this type of data loss, negative/zero values can be substituted with the small, positive
value of estimated noise. Typically, noise is estimated as the average of the 2 lowest
percentiles of distribution.
Expression Data Merge
Two or more Experiments’ data can be merged by Genes or by Expression Runs. Also, it is
possible to merge the data of experiments that are replicas.
To access the merge commands, select the Experiments you want to merge in the
Expression Database Explorer window and choose Tools > Expressions Merge > <specific
merge command> from the menu (Fig. 37.19):
Fig. 37. 19 Expression Data merging tools menu
Merging by Genes
When merging expression data by Genes, Expression Runs from the first experiment are
added to a second experiment, forming a new experiment. The resulting Experiment has the
same number of Genes as each of the merged Experiments. The number of Expression Runs
equals the sum of the Expression Runs in the merged Experiments. The following
conditions must be met before a Merge by Genes operation can be performed:
620
Expression Database Explorer Chapter 37
•=
All experiments must have the same set of Genes.
•=
All experiments must have the same data type, Absolute or Ratio (and the same Ratio
Type/Representation for their Ratio data type).
•= All experiments must have the same chip name.
If the Experiments that are merged contain identical Expression Runs, their data are
averaged and stored in one Expression Run. Expression Runs are considered to be identical
if they have the same name and Target.
Merging by Expression Runs
When merging experiments by Expression Runs, Genes from the first Experiment are added
to another Experiment, forming a new Experiment. The resulting Experiment has the same
number of Expression Runs as the parental Experiments and the number of Genes equals the
intersection of Gene sets from the parental Experiments. The following conditions must be
met before a merge by Expression Run operation can be performed:
•=
All experiments must have the same set of Expression Runs.
•=
All experiments must have the same data type, Absolute or Ratio (and the same Ratio
Type/Representation for their Ratio data type).
Expression Runs in Ratio experiments are considered identical if they have the same Target.
Expression Runs in Absolute experiments are considered identical if they have the same
Target and Base Target.
If the merged Experiments contain identical Genes, the data for that Gene are averaged and
stored in one Gene.
The Chip Name for the resulting Experiment is left undefined.
Merging Replicas
An Experiment is considered to be a Replica of another Experiment if it has the same:
•=
Chip Name
•=
Data type, Absolute or Ratio (and the same Ratio Type/Representation for Ratio data
type)
•=
Genes set
•= Expression Runs set
Merging is not possible if one of the Experiments contains two or more Expression Runs
with the same Target. When Replica Experiments are merged, the data is averaged.
621
Pattern Search
This option, accessible from the Tools > Expression Pattern Search drop down menu in
the Expression Database Explorer, allows you to find Expression Runs with values similar
to the Expression Run of interest. Pattern Search is a three-step process:
Step 1: To start a Pattern Search, select the Expression Data Experiment of interest in the
Expression Database Explorer’s Object Pane and choose Tools > Expression Pattern
Search from the drop down menu. The Find Similar Expression Runs: Step 1 dialog box
opens (Fig. 37.20):
Fig. 37. 20 Pattern search, first dialog box
This dialog box allows you to select the Reference Expression Run to use as the sample of
interest and one or more Gene Subsets. The sample expression vector will be constructed
from the values obtained for only those genes in the selected experiment that are members
of the selected Gene Subset(s).
If more than one Gene Subset is selected, the Intersection, Union and Difference radio
buttons become available:
622
Expression Database Explorer Chapter 37
•=
Choose the Intersection radio button if you are interested in only those genes that
occur in all the selected Gene Subsets.
•=
Choose the Union radio button if you are interested in all the Genes in the selected
Gene Subsets.
•=
Choose the Difference radio button if you are interested in those Genes that are unique
to each of the selected Gene Subsets with respect to the other selected Gene Subsets.
Press Next to initiate the search for the Expression Runs containing selected set of genes.
The search may be interrupted at any time by pressing the Stop button.
Step 2: The list of Expression Runs containing the Genes selected for the similarity analysis
is shown in the Find Similar Expression Runs: Step 2 dialog box (Fig. 37.21):
Fig. 37. 21 Pattern search, second dialog box
Expression Runs may be manually excluded from the analysis by unchecking them in the
Expression Runs list. If normalization is desired, check the Normalize box. Designate the
number of most similar Expression Runs you want returned by the search. Choose a
Similarity Type to use for the expression vectors comparison:
•=
Euclidian distance – measures the distance between points in “expression space” in
terms of actual expression values, rather than measuring how related the data is.
Distance measurements are used simply for comparing the distance of values, not their
correlations with each other.
623
•=
Correlation Coefficient – measures the correlation or similarity between the data,
using the calculated correlations to measure how similar the data is – based on
similarities.
•=
Absolute Correlation – measures the correlation or similarity between the data without
smoothing the data.
•=
Minkowski Distance – similar to Euclidian distance, but a more complex calculation
that tends to average out the distances better.
•=
Jackknife Correlation – measures the correlation or similarity between the data,
removing the most extreme values to create a sort that is not biased by outlying data
points.
Note: For Similarity Type calculation formulas, see page 659. For Similarity Type
comparison table, see page 669.
Press Next to initiate evaluation of Expression Runs similarity or Back to return to Step 1.
The evaluation may be interrupted at any time by pressing the Stop button.
Step 3: In the Find Similar Expression Runs: Step 3 dialog box (Fig. 37.22), the table of
Expression Runs is displayed sorted by the Similarity Score, which is normalized to 100%.
The Targets and Experiments for each Expression Run are also listed.
Fig. 37. 22 Pattern search, third dialog box
Check the Expression Runs you want to save or press the Select All button to check all the
Expression Runs for saving. If you want to select only those Expression Runs above a
624
Expression Database Explorer Chapter 37
certain Similarity Score, highlight the Expression Run with the minimum acceptable Score
and press the Select Above button. This checks the highlighted Run and all Runs above it.
Press the Store button to create a new subset in the Expression Targets table in the database
that contains the selected items. Press Back to return to the Step 2 dialog box or Cancel to
close the window and abort the Pattern Search.
Database Object Properties
Properties can be reviewed and edited from the Expression Database Explorer by
highlighting the object and choosing <object type> > Edit from the pull down menu or by
selecting Edit from the shortcut menu launched by right-clicking on the object.
Properties can be reviewed and edited for an object opened in the Expression Viewer
window by choosing Edit > Properties from the menu.
Note: When an Expression Experiment is open in the Expression Viewer window, Gene and
Target properties cannot be edited.
Expression Data Properties
The Expression Data Properties dialog box has four tabs, the General, Target, Comments
and User Fields tabs.
On the General tab (Fig. 37.23), you can change the Name, Description and Physical chip
of the current Expression Data Experiment. All other fields are read-only.
Fig. 37. 23 Expression Data Properties, General tab
625
On the Targets tab (Fig. 37.24), you can see all targets included in the Expression
Experiment.
Fig. 37. 24 Expression Data Properties, Targets tab
On the Comments tab (Fig. 37.25), you can see and modify comments for the Expression
Data Experiment.
626
Expression Database Explorer Chapter 37
Fig. 37. 25 Expression Data Properties, Comments tab
On the User Fields tab (Fig. 37.26), you can remove User Defined fields or modify their
values.
Fig. 37. 26 Expression Data Properties, User Fields tab
627
Note: When Expression Properties are modified from the Expression Viewer Window, the
changes do not become saved permanently to the database until the Expression Experiment
is saved in the Expression Viewer window.
Expression Gene Properties
The Expression Gene Properties dialog box also has four tabs: General, Annotation,
Comments and User Fields.
On the General tab (Fig. 37.27), you can change the Alternative Name and Description of
the selected Expression Gene.
Fig. 37. 27 Expression Gene Properties, General tab
The Annotation tab (Fig. 37.28) shows two sets of data represented by two different tree
views. The upper tree shows properties from the Gene Ontology list for the current Gene.
The lower tree shows the current Gene Ontology tree, which is stored in a file and can be
edited in the Gene Ontology Manager dialog box (see the Gene Ontology Manager section
earlier in this chapter).
You can edit the data in the current Gene tree (upper tree) in this window. You can add
branches from the lower Gene Ontology tree by highlighting the desired branch and
pressing the Add Selected Item to Gene Properties button. You can add custom branches
by highlighting a branch in the upper tree and pressing the Create New Item button.
Highlighting a branch and pressing the Delete button deletes the highlighted branch.
628
Expression Database Explorer Chapter 37
Fig. 37. 28 Expression Gene Properties, Annotation tab
You can search for items in the Gene Ontology tree by typing the word(s) in the Find dialog
box and pressing the Find button. The asterisk (*) character can be used as a wild card
character in the search string. For example, if you want to find any word beginning with
abc, you can type abc* in the Find dialog box.
On the Comments tab, you can view and modify comments for the Gene.
On the User Fields tab, you can remove User Defined fields or modify their values.
Target Properties
The Target Properties dialog has four tabs: General, Treatments, Comments and User
Fields (Fig. 37.29).
629
On the General tab, you can change the Description and Tissue Name of the selected
Target.
Fig. 37. 29 Target Properties, General tab
You can select the Tissue Name from the existing Tissue Names list. Highlight the Tissue
Name value and click the Down Arrow button to select a different Tissue Name.
Press the Vertical Bar button next to the Down Arrow button to launch the Tissue Editor
(Fig. 37.30).
Fig. 37. 30 Tissue Editor dialog box
630
Expression Database Explorer Chapter 37
Using the Tissue Editor, you can add new tissues to the list, remove tissues from the list and
edit existing tissues’ properties, such as Name, Description, Cell Type, Cell State, Species
Type and Phenotypes.
On the Treatments (Fig. 37.31), tab you can add or modify treatments and change or
remove their values.
Fig. 37. 31 Target Properties, Treatments tab
You can open the Treatments Editor (Fig. 37.32) by pressing the Treatments Editor
button.
Fig. 37. 32 Treatment Editor dialog box
631
In the Treatments Editor dialog box, you can remove treatments, add new treatments and
modify existing treatments by changing their Names, Measurement Units and Descriptions.
Important: Removing a treatment in the Treatments Editor permanently deletes that
treatment from the Database.
On the Comments tab, you can view and modify the comments for the Target.
On the User Fields tab, you can remove or modify User Defined fields.
Importing Experiments into the Expression Database
See the Importing Expression Experiments section in Chapter 38, page 705.
632
Expression Data Viewer Chapter 38
Chapter 38 Xpression NTI: Expression Data Viewer
Introduction
The Expression Data Viewer is designed to display a graphical representation of gene
expression data results, usually generated by microarray experiments. It provides the
algorithms and workspace for processing and examining the data from single and multiple
expression experiments.
For general information on gene expression, see the introductory sections in Chapter 37, the
Expression Database Explorer chapter (page 593).
Launching the Expression Viewer
To open an Expression Database Experiment in the Expression Viewer, first open the
Expression Database Explorer using techniques described in Chapter 37. Double-click on an
Expression Data Experiment listing in the Object pane of the Expression Database Explorer
to launch the Expression Viewer and open the selected Expression Experiment.
An empty Expression Viewer window can be launched by choosing Experiments > Go to
Viewer from the Expression Database Viewer menu.
Experiments previously saved to the hard drive from the Expression Viewer can be opened
in the Viewer by double-clicking on their listings in Windows Explorer.
The Expression Viewer Workspace
The Expression Viewer (Fig. 38.1) workspace contains a Main Menu and toolbars at the top
of the window, the status bar at the bottom of the window and the viewing area. (Note: You
can change the toolbar layout by dragging buttons with the mouse.)
The viewing area is divided into the following six interconnected panes:
•=
Text Pane
•=
Gene Pane
•=
Histogram Pane
•=
Expression Run Pane
•=
Navigation Map Pane
•=
Distribution Map Pane
633
Text Pane
Gene Pane
Histogram
Pane
Expression Run
Pane
Navigation
Map Pane
Distribution
Map Pane
Fig. 38. 1 Expression Viewer workspace window
Split bars can be moved to change the sizes of all six panels. The Navigation Map and
Distribution Map panes have scroll bars, allowing vertical and horizontal movement through
the pane.
Each pane in the Expression Data Viewer houses one or more panels. Each panel is
accessible from its corresponding tab. Usage and interconnections of panes and panels are
described in this chapter.
Clicking the right mouse button in any of the Viewer panes launches the shortcut menu
containing a list of options specific for the pane.
Main Menu Items
The Expression Viewer Main Menu bar consists of nine submenus:
•=
634
File – Generic data operations: open files, open Expression Database Explorer, save,
print, exit, etc.
Expression Data Viewer Chapter 38
•=
Edit – General data manipulations: undo/redo last operation, clipboard exchange,
selection, basic Gene and Expression Run operations, edit Experiment properties, etc.
•=
View – Data presentation options: toolbar view, zooming, ruler and grid parameters,
etc. Pane specific viewing commands appear below the basic view options, depending
on which pane is currently activated.
•=
Sort – Expression Data sorting options: sort by Genes or by Expression Runs.
•=
Filter – Expression Data filtering options: Gene and Expression Run filtering tools, etc.
•=
Analyze – Expression Data analysis tools: create analyses based on Genes or
Expression Runs.
•=
Tools – Expression Data tools: process by Normalization or Converting to Ratio,
Export and Import expression related data.
•=
Window – Multiple Document Interface manipulations: window display options for
multiple opened Expression Experiments.
•=
Help – Context-sensitive Online Help.
Toolbars
Expression Data Viewer has three toolbars that duplicate the functions available from the
Main Menu and context menus. Each toolbar may be switched on or off by choosing View
> Toolbar from the Main Menu and selecting or deselecting the desired toolbar listing.
Toolbars can be moved left or right by clicking and dragging the positioning handle on the
left edge of the particular toolbar.
Main Toolbar
The Main Toolbar (Fig. 38.2) contains buttons that execute basic file functions and a
positioning handle for moving the toolbar as described above. The Main Toolbar buttons are
diagramed below:
Open
File
Go to DB
Explorer
Positioning Handle
Context
Help
Camera
Search
Paste
Paste
Redo
Print
Cut
Save
Undo
Print Preview
Fig. 38. 2 Expression Viewer Main toolbar
635
View Toolbar
The View Toolbar (Fig. 38.3) has buttons that are used for changing the view of the various
panes in the Expression Viewer and for Tagging/Untagging Genes and Expression Runs and
viewing Distribution bin properties:
Properties
Untag
Tag
Zoom in
Zoom Out
Positioning Handle
Show/Hide Grid
Show/Hide Ruler
Fit to window
Fig. 38. 3 Expression Viewer View toolbar
Tools Toolbar
The Tools Toolbar (Fig. 38.4) has buttons that execute various tool functions, such as Gene
and Expression Run clustering, sorting, filtering, plot analysis and data processing:
Data Processing
Plot Analysis
Filtering Options
Sorting Options
Clustering Options
Positioning Handle
Fig. 38. 4 Expression Viewer Tools toolbar
The Text Pane
The Text Pane provides general information about the Expression Experiment (a collection
of Genes and Expression Runs). It contains folders that store data generated by analyses and
other saved data. The basic Text Pane folders and their descriptions are as follows:
Folder Name
Experiment
636
Description
Contains the Experiment name, description and type of data
(Absolute Signal / Ratio and Ratio Type for Ratio
experiments).
Expression Data Viewer Chapter 38
Folder Name
Description
General
Shows the number of Genes and Expression Runs in the
Experiment, maximum and minimum expression values in
the Experiment and the number of Distribution bins.
Gene Profile
Shows a selected or user-defined gene profile saved as a
set of expression values corresponding to each Expression
Run in the Experiment.
Tagged Gene,
Tagged
Expression Run
Contain tagged Genes and Expression Runs. Genes or
Expression Runs can be tagged manually or as a result of
performed analyses.
Tree
Contains saved results from clustering analyses.
Table 38. 1 Text Pane folder descriptions
The Gene Pane
By default, the Gene Pane contains two tab panels, the Expression Run Signature Graph
tab and the Gene List tab. Four additional tab panels are added automatically, the BirdsEye Navigation map tab, Gene Dendrogram tab (hierarchical clustering), Gene Cluster
View tab (non-hierarchical clustering) and Similarity tab when the corresponding analyses
are performed.
Each panel is accessed using its corresponding tab. Descriptions for each of the panels and
images of their corresponding tabs are as follows:
Panel Name
Tab access icon
Description
Expression Run
Signature
Shows a graph of the values for all
Genes in the selected Expression
Run.
Gene List
Shows a list of all the Genes in the
Experiment and Gene related fields.
Birds-Eye Navigation
map
Enables navigation through the
Genes and Expression Runs in the
Expression Experiment.
Gene Clusters
Shows the results of non-hierarchical
clustering algorithms.
Gene Dendrogram
Shows the results of hierarchical
clustering algorithms.
Similarity
Shows the results of similarity sorts
and similarity analysis.
Table 38. 2 Gene Pane panel descriptions
637
Identifying Genes and Expression Runs on Graph
In the Expression Run Signature panel of the Gene Pane, move the mouse cursor to a point
on an Expression Run graph and a tool tip with the Expression Run name and Gene name
and its expression value at that position appears.
Fig. 38. 5 Expression Run Signature panel tool tip example
While the tool tip is displayed, press Shift + left mouse button and the Expression Run
whose graph the cursor is pointing to comes into focus.
Note: In Fig. 35.5, two Expression Runs are shown on the Expression Run graph.
Techniques for showing multiple Expression Runs or Genes on their respective graphs are
described in the Displaying Tagged Genes or Expression Runs on Graphs section later in
this chapter (See page 650).
The Histogram Pane
The Histogram Pane shows the statistical representation (profile) of the gene distribution
(genes/bin) for the selected Expression Run. The X-axis shows the gene expression values
and the Y-axis shows the number of genes with expression values within a particular range.
By default, the expression values on the X-axis are shown from lowest to highest
expression, starting with the lowest on the left. The orientation can be reversed by choosing
Flip Distribution from the shortcut menu launched by right clicking on the pane.
The data in the Histogram Pane mirror the data in the Distribution Map Pane. See the
Distribution Pane section below.
The Expression Run Pane
By default, the Expression Run Pane contains two tab panels, the Gene Signature tab and
the Expression Runs List tab. Two additional tab panels are added when their
corresponding analyses are performed, the Expression Run Clusters tab and the
Expression Run Dendrogram tab.
Each panel is accessed using its corresponding tab. Descriptions for each of the panels and
images of their corresponding tabs are as follows:
638
Expression Data Viewer Chapter 38
Panel Name
Tab access icon
Description
Gene Signature
Shows a graph of the values for all
Expression Runs for the selected
Gene.
Expression Runs
List
Shows a list of all the Expression
Runs in the Experiment and other
Expression Run related data fields.
Expression Run
Clusters
Shows the results of non-hierarchical
clustering algorithms.
Expression Run
Dendrogram
Shows the results of hierarchical
clustering algorithms.
Table 38. 3 Expression Run Pane panel descriptions
The graph in the Gene Signature panel is rotated 90o counterclockwise with respect to the
corresponding data in the Expression Run Signature panel in the Gene Pane. Higher values
are to the left on the graph. To rotate the graph 90 o for horizontal viewing, choose Rotate
from the shortcut menu opened by right clicking on the pane.
Data selections in the Expression Run Pane correspond to Expression Run selections made
in the Navigation Map pane, the Expression Run Signature tab in the Gene Pane, Expression
Runs List in the Expression Run pane and the Distribution Map pane.
The Navigation Map Pane (Eisengram Pane)
By default, the Navigation Map Pane contains one tab panel. The panel display consists of
rows and columns of colored boxes representing all data points that were measured for the
experiment. Data point values are indicated by virtue of the color and color intensity of the
boxes that represent them.
Additional tab panels are automatically added when different types of data representation
analyses are performed, such as Scatter Plot, Sammon Map and PCA (Principal Component
Analysis). These analyses can be performed for selected Genes or Expression Runs; a new
tab is added for each analysis when it is performed.
Descriptions of each of the panels and their corresponding tab images are as follows:
Panel Name
Tab access icon
Description
Navigation Map
Shows a display of all data points in the
Experiment.
Scatter Plot
Shows the results of a Scatter Plot
analysis performed on a selection of
Genes or Expression Runs.
639
Panel Name
Tab access icon
Description
Sammon Map
Shows the results of a Sammon Map
analysis performed on a selection of
Genes or Expression Runs.
PCA
Shows the results of a Principal
Component Analysis performed on a
selection of Genes or Expression Runs.
Table 38. 4 Navigation Map Pane panel descriptions
Navigation Map Rows
Each row in the Navigation Map corresponds to the measured expression levels for all genes
in a given Expression Run (One row = one Expression Run). The Y-axis, therefore,
represents different Expression Runs that were measured in the experiment. Expression Run
names and related data are shown in the table on the Expression Runs List tab in the
Expression Run Pane (Fig. 38.6):
Fig. 38. 6 Expression Runs List tab
Typically, one primary experiment contains one or two Expression Runs. Merged
experiments may contain many Expression Runs.
Note: The Navigation Map and the Expression Runs List are linked such that Expression
Run(s) selected in one panel are also selected in the other panel.
Navigation Map Columns
Each column corresponds to the hybridization results for a single Expression Gene of the
array (One column = one Expression Gene). The X-axis, therefore, represents all genes that
are on the chip. Gene names and related data are shown in the table on the Gene List tab in
the Gene Pane (Fig. 38.7):
640
Expression Data Viewer Chapter 38
Fig. 38. 7 Genes List tab
Note: The Navigation Map and the Genes List are linked such that Gene(s) selected in one
panel are also selected in the other panel.
Navigation Map Color
In the Navigation Map, a colored box represents the expression level of each gene. There
are two default color schemes in the Gene Expression module that correspond to data file
formats (Absolute and Ratio) supported by the software:
Absolute Signal Data:
Blue = base color (for zero values).
Yellow = positive values.
The color intensity is proportional to the signal value. There are no negative values in this
format.
Ratio Data:
Green = negative values (decrease in mRNA abundance compared to the base sample).
Greens of increasing intensity correspond to increasingly negative log ratios.
Red = positive values (increase in mRNA abundance compared to the base sample). Reds of
increasing intensity correspond to increasingly positive log ratios.
Black = log ratio of 0. (Ratio = 1 indicating that M=mRNA levels are unchanged).
White boxes on the Navigation Map indicate absent data, or data of low quality.
641
You can use the slider at the bottom of the Navigation and Distribution Maps to adjust the
color intensity of the panes for better viewing (Fig. 38.8):
Fig. 38. 8 Color intensity adjustment bar on Navigation Map panel
The Distribution Map Pane
The Distribution Map pane displays a graphical representation of the Gene distribution
according to the values in each Expression Run. For each Expression Run, Genes are
presorted based on their expression values and placed into a predefined number of bins. The
color intensity of each bin is proportional to the number of Genes in the bin (i.e. Genes with
values in a certain range), with yellow indicating positive values and blue indicating values
of zero. Since the Distribution Map and Histogram Panes mirror each other, the height of a
Histogram Y-axis point correlates with the intensity of the corresponding bin in the
Distribution Map.
Expression values are reported on the X-axis of the Distribution Map and Expression Runs
are reported on the Y-axis. By default, lower expression values are displayed on the left side
of the X-axis and higher expression values are displayed on the right side of the X-axis. The
orientation of the trace can be reversed by choosing the Flip Distribution command from
the shortcut menu launched by right clicking in the Distribution Map Pane. Reversing the
orientation allows you to view the Distribution Map in the same orientation as the Gene
Signature graph in the Expression Runs pane.
The image (
) is used to identify the Distribution Map.
Expression Data Array Manipulation
The state of the Experiment can be defined by the sets of Genes and Expression Runs and
their order in the Navigation Map.
642
•=
The order of Genes and/or Expression Runs on the Map is changed by the use of the
Sorting and Clustering tools.
•=
The content of the Experiment (defined by the number of Genes and Expression Run
sets) is changed by the use of the Crop to Selection and Remove wrt. Selection
Expression Data Viewer Chapter 38
options available on the Navigation Pane shortcut menu, the Delete option on the Gene
List or Expression Run List Pane shortcut menus, or by using Filtering tools.
Moving Back and Forward in Expression Data Viewer
Data Array Manipulations can be undone. Use the Undo (
) and Redo (
)
buttons or choose Edit > Undo or Redo from the menu to navigate back and forth between
these states.
Cropping to a Selected Region in the Navigation Map Pane
To run an analysis on a smaller group of Genes or Expression Runs than that included in the
entire experiment, select only the region of interest in the Navigation Pane by holding the
left mouse button down on one corner of the region and moving the cursor to the opposite
corner of the region you wish to view (Fig. 38.9). Select Crop to Selection from the
shortcut menu launched by right clicking in the Navigation Pane.
Fig. 38. 9 Region selected on the Navigation Map
Now only the selected region is shown in the Navigation Pane and the detail level is
automatically increased. All other information is deleted.
Removing with Respect to Selection in the Navigation Map Pane
To remove genes or expression runs from the Experiment using the Remove with Respect to
Selection command, select a region in the Navigation Pane using the technique described
above and choose Remove wrt. Selection from the shortcut menu in the Navigation Pane
(Fig. 38.10):
643
Fig. 38. 10 Remove with Respect to Selection dialog box
In the Remove With Respect To Selection dialog box, you can select objects to remove
based on a choice of removal patterns described as follows (Note: Patterns are described
moving from left to right and top to bottom as they appear on the dialog box above.):
Pattern
Icon
Action
1
Removes all Genes and Expression Runs that are NOT
included in the selection.
2
Removes Expression Runs that are NOT included in the
selection.
3
Removes Expression Runs that are included in the
selection.
4
Removes Genes and Expression Runs that are included in
the selection.
5
Removes Genes that are NOT included in the selection.
6
Removes Genes that are included in the selection.
Table 38. 5 Remove with Respect to options summary
Deleting Genes or Expression Runs
You can delete Genes or Expression Runs from the Experiment by selecting the Genes to be
deleted in the Gene List Pane or Expression Runs to be deleted in the Expression Run List
Pane and choosing Delete from the shortcut menu launched by right clicking in the pane.
644
Expression Data Viewer Chapter 38
Cropping to the Selected Area in the Distribution Map Pane
This filtering option retains genes with an expression value in the range selected in the
Distribution Pane for the selected Expression Run. To execute the Crop To Selection option,
select an Expression Run in either the Navigation or Distribution Pane, highlight the
expression region of interest in the Distribution Pane and choose Crop To Selection from
the shortcut menu launched by right clicking in the Distribution Pane.
Removing Selected Genes in the Distribution Map Pane
This filtering option has the opposite effect as the Crop To Selection feature described
above. Genes with expression values in the range selected in the Distribution Pane for the
selected Expression Run are removed. To execute the Remove Selected Genes option, select
an Expression Run in either the Navigation or Distribution Pane, highlight the region you
want to remove in the Distribution Pane and choose Remove Selected Genes from the
shortcut menu launched by right clicking in the Distribution Pane.
Viewing Options
Functions described in this section do not change the content of the view; they only affect
the display. Views in the various panes are linked horizontally and vertically. Because of
this, changing the selection or focus, scrolling and zooming in one pane evoke synchronous
changes in the other panes.
Activating a Pane
You can activate a pane by clicking in it with the left mouse button. Pressing the F6 key
activates panes in clockwise succession. All keyboard input is applied to the pane that is
currently active, as are all Main Menu and Toolbar functions.
Zooming the Pane View
To enlarge or reduce a pane image or fit the pane image to the existing window horizontally,
choose View > Zoom In, Zoom Out or Fit To Window, respectively, from the menu.
Alternately, choose Zoom In, Zoom Out or Fit to Window from the toolbar buttons or
shortcut menu launched by right clicking in any of the panes. To zoom a pane image
vertically, select Zoom In Vert, Zoom Out Vert from the menus or toolbar as described
above.
The Navigation Map Zoomed Out view (the default view) provides a “bird’s eye view” or
overview of general expression patterns. This is particularly meaningful after the data has
been sorted, filtered or clustered.
Zooming in on the Navigation Map to the maximum level allows you to compare individual
data, gene by gene. If you hover the cursor over one of the colored boxes representing a
gene, a pop-up label appears showing the expression value, Gene name and Expression Run
name that box represents. Note: Zooming in does not change the data that the colored boxes
represent.
Because they are linked, zooming the Navigation Map produces an equivalent effect on
other panels.
645
Keyboard shortcuts for the Zoom features:
Symbol
Function
+
Zoom In
-
Zoom Out
*
Fit To Window
Shift +
Zoom In Vertical
Shift -
Zoom Out Vertical
Ctrl +
Zoom In both directions
Ctrl -
Zoom Out both directions
Table 38. 6 Zoom feature keyboard shortcuts
Selection and Focus
A number of functions, such as Expand, Shrink, Add To Folder, Plot functions, Export etc.,
can be performed on a selected set of Genes or Expression Runs, or on the item currently in
focus (item selected with the cursor). A continuous range of items can be selected in the
Navigation Map or Graphics Views by clicking and dragging the mouse across the desired
area. To change the item in focus without resetting the current selection, hold the Ctrl key
while clicking with the mouse to reset the cursor.
In the Gene List and Expression Run List, you can select any set of items using the standard
Windows combinations to make the desired multiple selection. Press Shift + Click to select
an adjacent series of items or Ctrl + Click to select a nonadjacent series of items.
Changing the Color Intensity
You can use the slider at the bottom of the Navigation or Distribution Maps to adjust the
color intensity of the panes for better viewing (Fig. 38.11).
Fig. 38. 11 Color intensity slide bar adjuster
The Birds-Eye Navigation Map shares the color slider with Navigation Map and is
automatically updated for the same color intensity when the Navigation Map is adjusted.
Rotating the Gene Signature Graph
The Gene Signature graph in the Expression Run Pane may be rotated 90 degrees using the
Rotate command, reorienting the graph from vertical (default view) to horizontal.
In the default vertical view, the Expression values increase from right to left and the
Expression Runs are ordered from top to bottom, analogous to the orientation in the
Navigation and Distribution Map panes. In the rotated (horizontal) view, the Expression
values increase from bottom to top and the Expression Runs are ordered from left to right.
646
Expression Data Viewer Chapter 38
To rotate the Gene Signature graph, right click in the Expression Run Pane and choose
Rotate from the shortcut menu. To rotate the Gene Signature graph back to its original
orientation, repeat the procedure.
Flipping the Distribution Map and Histogram
The Flip Distribution command is used to reverse the order of the Expression values in the
Distribution Map and Histogram pane. By default, the Expression values in the Distribution
Map and Histogram pane increase from left-to-right. Flipping reorients the Expression
values so that they increase from right-to-left.
To flip the Distribution Map and Histogram, right click in either pane and choose Flip
Distribution from the shortcut menu. To flip back to the original orientation, repeat the
procedure. Since the distributions in the Distribution Map and Histogram mirror each other,
flipping the distribution in one pane also flips it in the other pane.
Setting Distribution Map and Histogram Detail
The number of bins available for holding Genes determines the Distribution Map and
Histogram detail level. You can change the number of bins to achieve the desired level of
detail. To set the detail level of the Distribution Map and Histogram, select Properties from
the shortcut menu launched by right clicking on the Distribution Map or Histogram panes
(Fig. 38.12).
Fig. 38. 12 Histogram and Distribution Map bin properties
Increasing the number of bins decreases the number of genes per bin, increasing the detail
level.
Customizing Graphics by Group Operations
Genes and Expression Runs can be tagged (grouped) in the Text Pane. Operations on
Tagged Gene and Expression Run groups in the text pane, which are described below in
detail, allow you to change the set of Genes and Expression Runs that are drawn in the
graphics windows of the Expression Run Signature panel (Gene Pane) and Gene Signature
panel (Expression Run Pane), respectively.
Working with Genes and Expression Runs
Working with Tagged Genes and Expression Runs in the Text Pane
The Expression Viewer provides a convenient mechanism for selecting interesting Genes or
Expression Runs from the Experiment and tagging them as user-defined groups in the Text
647
Pane (Fig. 38.13). Unique colors can be assigned to each Tag group to distinguish group
content when they are displayed on the Gene or Expression Run graphs and on the
Distribution Map.
Fig. 38. 13 Tagged Genes and Expression Runs shown in Text Pane
Tagged Genes and Tagged Expr. Runs folders appearing in the Text Pane are initially
empty. After tagging object(s) with a particular tag color, a sub-listing with that tag color is
added to the corresponding Tagged <object> folder. Various manipulations using Tagged
groups can be performed and are discussed below.
Tagging Genes and Expression Runs
There are several methods of adding Genes or Expression Runs to a Tag Group in the
Tagged Genes or Tagged Expr. Runs folders in the Text Pane.
To add items to a Tag Group, select the Genes or Expression Runs of interest in the
Navigation Map, Gene List or Expression Runs List and either:
•= Right click and choose Tag from the associated shortcut menu
Or
•= Choose Edit > Tag from the menu
Or
648
Expression Data Viewer Chapter 38
•=
Press the Tag (
) button on the toolbar:
Fig. 38. 14 Tagging Genes/Expression Runs shortcut menu
Choose the Tag group color for either the group of Genes or Expression Runs, depending on
what you want to tag (Fig. 38.14). Once the Tag group color has been selected, the new Tag
group will appear in either the Tagged Genes or Tagged Expr. Runs folder, depending on
the tagged object(s)’ type.
You can also add Genes or Expression Runs to a Tag group by highlighting them in the
corresponding List pane or Tag group in the Text Pane and using the standard Copy/Paste or
Cut/Paste command combinations available on the Edit menu and shortcut menus.
To rename a Tag group, right click on the group listing in the Text pane and choose
Properties from the shortcut menu. Specify the new name in the Properties dialog box and
press OK.
Untagging (Removing) Genes and Expression Runs from a Tag Group
To untag (remove) a tagged Gene or Expression Run, right click on it in the Text Pane and
choose Remove Tag from the associated shortcut menu or highlight the Gene or Expression
Run you want to untag in the Navigation Map, Gene List or Expression Runs List, right
click and choose Untag from the associated shortcut menu or Edit > Untag from the menu
649
or press the Untag (
remove.
) button on the toolbar. Choose the tag listing that you want to
You can also remove (untag) Genes and Expression Runs from a Tag group by highlighting
the Gene(s) or Expression Run(s) to be removed in the Text Pane and choosing Cut from
the shortcut menu launched by right clicking.
To delete an entire Tag Group, right click on the Tag Group heading in the Text pane and
choose Remove Tag <tag group name> from the shortcut menu.
Displaying Tagged Genes or Expression Runs on Graphs
Expression values of tagged Genes or Expression Runs can be shown on the Gene Pane
graph or Expression Run Pane graph, respectively. To show a tagged Gene or Expression
Run on its corresponding graph, right click on it in the Text Pane and choose Show On
Graph from the associated shortcut menu (Fig. 38.15).
Fig. 38. 15 Shortcut access of Show on Graph command
When a Gene or Expression Run is shown on its corresponding graph, it is marked with a
small, colored box to the left of its name in the Text Pane. Both the colored box and the
graph curve for the Gene or Expression Run are color keyed to the Tag Group color.
To remove Genes and Expression Runs from a graph, highlight the Gene(s) or Expression
Run(s) to be removed in the Text Pane, right click and choose Hide From Graph from the
650
Expression Data Viewer Chapter 38
shortcut menu. Note that the small, colored box to the left of the Gene or Expression run
name is also gone.
Displaying Genes and Expression Runs on the Distribution Map
To mark an Expression Run or show the Expression values for a tagged Gene on the
Distribution Map, right click on the tagged Gene or Expression Run in the Text Pane and
choose Show on Map from the shortcut menu.
You can show the Expression values for any gene (tagged or untagged) on the Distribution
Map by selecting the Gene in the Navigation Map.
Saving Tagged Genes and Expression Runs to Database
A group of tagged Genes or Expression Runs may be added to a Database Subset by right
clicking on the Tag Group heading in the Text Pane and choosing Save Group to Database
from the shortcut menu. Items in the Tag Group can be added to a new or existing subset.
Applying Subset as Group
A subset of Genes or Expression Runs may be added to an existing Tag Group of like items
by right clicking on the Tag Group heading in the Text Pane and choosing Apply Subset As
Group from the shortcut menu. The Select Subset dialog box appears (Fig. 38.16):
Fig. 38. 16 Applying Subset as Group, Select Subset dialog box
651
Choose the subset you want to add to the Tag group and press the Apply button:
Fig. 38. 17 Applying Subset as Group, Select Genes dialog box
Choose the subset items to be added in the upper part of the dialog box (Fig. 38.17). The
select items can be added to the existing Tag group or a new group can be specified. When
adding to an existing Tag group, if you want to clear the current contents of the group,
check the Untag all currently tagged with this tag box.
Note: Only those Genes or Expression Runs from the selection that are present in the
current experiment will be added to the Tag Group.
Finding the Closest Gene Subset
This tool searches the database and retrieves subsets that have similar content to the selected
Tag Group. The found items can be added to the query Tag Group or stored in a new Tag
Group.
The Find Closest Gene Subset algorithm first finds the intersection (common genes)
between the query subset (Tag Group) and database subset. It then employs a cumulative
binomial distribution to assign a similarity score. The similarity score (P-value) for the two
subsets is calculated as the probability of the subsets having, purely by chance, the number
of common genes equal to or greater than that found in the intersection. Another important
factor that influences the calculated P-value is the total number of Genes in the database.
The lower the P-value, the more similar the subset.
652
Expression Data Viewer Chapter 38
To find the closest Gene subset for a group of tagged Genes, right click on the Tag group
heading in the Text Pane and choose Find Closest Subset for <tag group name> from the
shortcut menu.
It can be particularly interesting when similar subsets (those that have a low P-value) are
formed based on different criteria. For example, if a cluster of genes shows high similarity
with a functional subset, it could form the basis for assigning those functions to the
unknown genes in the cluster.
Union and Intersection of Tag Groups
You can create a new Gene or Expression Runs Tag Group containing all of the items in
two or more existing Tag Groups of like object types (union) or the items common to two or
more existing Tag Groups of like object types (intersection).
To create a new Genes or Expression Runs Tag Group that contains all the items of two or
more existing groups, highlight the desired groups in the Text Pane, right click and choose
Union Groups from the shortcut menu. To create a new Tag Group containing items
common to two or more existing groups, highlight the desired groups in the Text Pane and
choose Intersect Groups from the shortcut menu launched by right clicking on the selected
groups.
Other Tag Group Operations
An Expression Experiment can be sorted or filtered by group of genes or Expression Runs
in a Tag Group. These options, Sort by Group and Filter by Group, are accessed from the
Tag Group shortcut menu and are described in detail in the Tools and Algorithms section
later in this chapter (see pages 664 and 675, respectively).
You can rename a Tag Group by right clicking on the group and choosing Properties from
the shortcut menu. Designate the desired name for the group in the Properties dialog box
(Fig. 38.18):
Fig. 38. 18 Renaming a Tag Group
Selection Techniques
Various different methods for selecting Genes or Expression Runs in the Expression Data
Viewer are described in the following sections.
653
Selecting in the Navigation Map Pane
Single selection: Click on the desired Gene (column) or Expression Run (row) in the
Navigation Map. A contrasting vertical line marks the single Expression Gene (Fig. 38.19).
The single Expression Run is sandwiched between the two contrasting horizontal lines.
Fig. 38. 19 Single selection on the Navigation Map
Multiple selection: Click the left mouse button in one corner and drag it to the opposite
corner of the region you wish to select, dragging from the upper left to the lower right. A
yellow rectangle marks the selected area (Fig. 38.20). For example, in the figure below,
three Expression Runs (rows) and many Expression Genes (columns) are selected.
Fig. 38. 20 Multiple selection on the Navigation Map
Note: Some algorithms (Scatter Plot and Sammon Map) require the selection of two Gene
or Expression Run boxes before they can be executed. In the case of a selection such as the
one above, the upper-most and lower-most Expression Runs or the very left-most and rightmost Genes in the rectangle selection are used for these types of analyses.
Selecting in the List Panels in the Gene and Expression Run Panes
Select the Gene List or Expression Run List tab. Hold down the Shift key on the keyboard
and click on the desired Genes or Expression Runs to select adjacent Genes or Runs (Fig.
38.21). Press the CTRL key and click to select nonadjacent Genes or Expression Runs.
Fig. 38. 21 Multiple genes selected in the Genes List panel
654
Expression Data Viewer Chapter 38
Identifying and Locating Genes and Expression Runs
On the Navigation Map: Point the cursor to a specific box on the Navigation Map. A tool
tip appears, showing the details about the corresponding Gene or Expression Run.
When a selection is made on the Navigation Map, the corresponding selection is made in the
Gene and Expression Run List panes and the List panes are scrolled to the selection area.
From the Gene List or Expression Run List: Select the objects in the Gene List or
Expression Runs List that you want to locate on the Navigation Map. The corresponding
selection is made on the Navigation Map and the Map is scrolled to the selected area, if
necessary.
From the Folder in the Text Pane: Double click on the Gene or Expression Run of interest
in the Text Pane or right click and select Show On Map from the shortcut menu. The Gene
or Expression Run is selected in all panes displaying it.
Working with the Distribution Map Pane
The Distribution Map Pane of the Expression Viewer displays a graphical representation of
Gene distribution based on their relative expression values in each Expression Run. Each
horizontal line on the Distribution Map represents the Gene distribution in a particular
Expression Run.
For each Expression Run, Genes are presorted based on their expression values and placed
into a predefined number of bins. All Genes that have expression values in a certain range
are grouped in the same bin. The color intensity of the bin is proportional to the number of
Genes in the bin. To view detailed information for a particular bin, position the cursor over
the region of interest on the Distribution Map and a tool tip appears showing information for
the bin (Fig. 38.22):
Fig. 38. 22 Bin tool tip in Distribution Map Pane
655
Displaying Gene Names
To view the names of the Genes in a particular bin, click on the bin of interest to set the
selection, right click and choose Display Gene Names from the shortcut menu. A dialog
box opens listing the names of corresponding Genes, which can be saved to a Tag group
(Fig. 38.23):
Fig. 38. 23 Displaying Gene names in a selected bin
Working with Gene Profiles
A Gene profile is a graphic representation of how a given Gene responds in different
Expression Runs in relation to other Genes in the Experiment. The profile is marked with
red bars on the Distribution Map, showing where the Gene of interest is positioned in the
Expression Run in relation to the other Genes. You can also create a user-defined virtual
Gene profile.
Displaying Gene Profiles
To display a Gene profile on the Distribution Map, select the Gene of interest (in the Tag
group of the Text Pane or in the Gene List pane) and choose Show Gene Profile from the
shortcut menu (Fig. 38.24):
656
Expression Data Viewer Chapter 38
Fig. 38. 24 Gene Profiles shown on the Distribution Map
Pause the cursor over each mark to display a label describing the marked bin.
Note: In the above figure, two profiles are shown. The profile on the left is statically
marked using the Show Gene Profile command, whereas the profile on the right is the
profile of the Gene that is currently in focus. A Gene profile of particular interest can be
quickly compared to the profile of any selected Gene in this way.
In the example below, in the second row from the top, the profile mark shows that the Gene
is highly expressed with a value similar to a small number of other Genes in the Experiment
(42 genes in the bin) (Fig. 38.25):
Fig. 38. 25 Distribution Map tool tip information
657
In the fifth row down, however, the same Gene is expressed with values similar to many
other Genes in the Experiment (162 genes in the bin).
Creating a Custom Gene Profile
The idea behind creating a custom or virtual Gene profile is that you can create a
hypothetical Gene profile and use it to find Genes in the experiment that match that profile.
For example, your virtual profile might define a gene that is expressed poorly in Expression
Runs using samples from a normal cell line, but highly expressed in a diseased cell line. In
this case, on the Distribution Map for your profile, you would position the marks in a
pattern that imitates those expression results.
To set a custom Gene profile, right click in the Distribution Pane and select Profile
Selection Mode from the shortcut menu. Click in the Distribution Map where you wish to
place profile marks. The marks ( ) are connected with a white line to enhance the profile
view. While in Profile Selection Mode, you can remove a profile mark by choosing Remove
<run> Value From Profile from the shortcut menu. To clear a regular gene or custom gene
profile, choose Clear Gene Profile from the shortcut menu.
Marked profile coordinates are displayed in the Gene profile folder in the Text Pane (Fig.
38.26):
Fig. 38. 26 Custom Gene Profile coordinates shown in Text Pane
After a virtual profile is defined, you can search for real genes with similar profiles by using
the Sort By Gene Profile command (see the Sorting Algorithms section, page 671).
Tools and Algorithms
Genes and Expression Runs as Vectors
All algorithms described in this section operate on vectors. Vectors are sets of real numbers
that describe points in multidimensional space. They are directly applicable to gene
658
Expression Data Viewer Chapter 38
expression in that the quantitative expression levels of n Genes in k Expression Runs define
n points in k-dimensional space.
For example, each Gene can be represented by a k-dimensional vector that describes
expression values of the given Gene in k Expression Runs.
Similarly, each Expression Run can be regarded as a vector in n-dimensional space, with n
being the number of Genes that produce expression levels for the Expression Run.
Example
For 6 genes that are subjected to 12 Expression Runs:
•=
One Expression Gene is a 12-dimensional vector. Each gene, therefore, has 12 data
points.
•=
One Expression Run is a 6-dimensional vector. Each Expression Run, therefore, has 6
data points.
In a Gene Vector sort, therefore, the software searches for similar Genes with similar data
points.
Statistical Examples
All the metrics can be applied to the values as they are or expression values can be
normalized to have mean = 0 and variance = 1 for a Gene across all Expression Runs or for
all Genes in an Expression Run.
Values that describe a single vector, x (x1, x2, x3, …. xK):
•=
Vector average (mean):
Σxi/K
•=
Vector length:
sqrt (Σxi2)
•=
Deviation:
sqrt( Σ(xi – xmean)2/K )
•=
Normalized deviation:
Deviation / Vector length
•=
Entropy:
ABS(MAX(xi) – MIN(xi)) for the normalized vector
Values that describe distance/dissimilarity or similarity between vectors,
x (x1, x2, x3, …. xK) and y(y1, y2, y3, yK):
659
•=
Euclidean distance:
sqrt ( Σ(xi – yi)2)
•=
Correlation coefficient:
Σ(xi – xmean)(yi – ymean)/K /( Dev(x) Dev(y) )
•=
Absolute correlation:
absolute value of correlation coefficient
•=
Minkowski metric:
Σ=(ABS(xi – yi))
•=
Jackknife correlation:
most distant pair of values.
calculated as correlation coefficient, but excludes the
Filtering and Sorting Data
In the Expression Viewer, Expression data can be organized, analyzed and displayed by
filtering or sorting. The methodology you choose is determined by how much you know
when you start and what you want to learn in the process. For example, in some instances,
you may choose to filter the data, and follow that with sorting.
Filtering and sorting algorithms can rearrange vectors based on two major types of values,
described as follows:
Type I:
•=
Expression Value—low expressing Genes have low Expression Values; high
expressing Genes have high Expression Values.
•= Vector Length—length of the Gene Vector.
Expression Value and Vector Length values help distinguish between low and high
expressing genes. On the other hand, when applied to Expression Runs with a large number
of Genes, they are expected to be basically the same for different Expression Runs and,
thus, can be used to reflect the quality of normalization or preprocessing of the data.
Type II:
•=
Deviation—variability of Gene expression between different Expression Runs, which
is calculated as the standard deviation for all data points of the same Gene.
•=
Normalized Deviation—Deviation values divided by vector length.
•=
Range—the highest expression value in the vector minus the lowest expression value in
the vector. This characterizes the range of the expression values in the vector.
Deviation and Range values reflect the degree of variability and should be low for
housekeeping and other Genes that do not change significantly across given Expression
Runs. Such Genes are typically of no interest for further studies and can be deleted from the
experiment. On the contrary, differentially expressed Genes are expected to have a highnormalized deviation or variability range and are potentially responsible for phenotypic
differences between Expression Runs.
660
Expression Data Viewer Chapter 38
Filtering Options
Filtering allows you to select Genes or Expression Runs of interest based on a number of
criteria that you define. Genes or Expression Runs that do not meet the criteria you set are
excluded from the Experiment.
Filtering can be performed by value. For example, you might define the threshold value in a
particular Expression Run to find all the Genes that have more than two-fold induction in
Expression Run #1, more than four-fold induction in Expression Run # 2, etc.
Similarly, filtering can be performed based on the deviations of expression values or other
quality measures (such as P-value or signal/noise ratio), if available. For example, in some
cases, it might be practical to discard all Genes that have more than 50% deviation from the
mean.
You may choose to exclude a Gene from consideration because of a high number of missing
values for this Gene.
Vector Filtering is applicable to both Genes and Expression Runs and uses the same criteria
as Vector Sorting.
Filtering operations for either Genes or Expression Runs are available from the Filter menu
or from the Filter button (
) on the toolbar (Fig. 38.27):
Fig. 38. 27 Data filtering options
There are different filtering options available, depending on whether you are filtering Genes
or Expression Runs. If you perform successive filtering operations, the effects are
cumulative.
Available filtering algorithms are summarized in the following table:
661
Filtering Algorithms
Filter Options
By Expression Value
Genes
Expression Runs
X
By Average Value
X
By Missing Values
X
By Groups
X
By Difference between Expression Runs
X
By Quality Statistics
X
By Using Similarity Graph
X
X
X
Table 38. 7 Filtering algorithm summary
Filtering Genes by Expression Value
Choose Filter > Genes by Expr. Value from the menu or press the Filter button and
choose the same option.
Fig. 38. 28 Filter by Expression Value dialog box
The Filter by Expression Value dialog box (Fig. 38.28) lists the Expression Runs in the
Experiment. To set or clear expression value cut-off limits:
662
Expression Data Viewer Chapter 38
•=
Highlight the desired Expression Run and press the Set Cut-offs button. In the dialog
box that opens (Fig. 38.29), enter the minimum and maximum allowed values. The cutoff limits will apply to all the Expression Runs you have set.
Fig. 38. 29 Set cutoffs dialog box
•=
To clear a cut-off, highlight the desired Expression Run and press the Clear Cut-offs
button.
Press the OK button to execute the filtering option.
Any genes that have expression values below or above the set cut-offs will be excluded
from the Experiment. Samples with no values are not considered in the filtering.
In the case of Ratio data, this option filters by fold-change, instead of by actual value. This
means that the cut-off values set for Ratio data are ratio values, not actual values.
Filtering Genes or Expression Runs by Average Value
Choose Filter > Genes (or Expression Runs) by Average Value from the menu or press
the Filter button and choose the same option.
Fig. 38. 30 Filter by Average Value dialog box
In the Filter by Average dialog box (Fig. 38.30), you can choose to Remove or Retain a
specific number of Genes or Expression Runs based on the lowest or highest average value
based on either the Mean Expression Value, Deviation, Normalized Deviation or Range.
Set the parameters as desired and press the OK button to execute the option.
663
Filtering Genes by Missing Values
Choose Filter > Genes by Missing Value from the menu or press the Filter button and
choose the same option.
Fig. 38. 31 Filter by Missing Value dialog box
In the Filter Missing Values dialog box (Fig. 38.31), enter the cutoff number for allowed
Missing Values. Genes in the Experiment that have that number or greater of missing
Expression values will be removed.
Press the OK button to execute the option.
Filtering Genes or Expression Runs by Group
Note: Before you can use this filter option, you must create at least one Genes or Expression
Runs group (Tag Group), visible in the Text Pane Tagged Genes or Tagged Expr. Runs
folders, respectively.
Once the Tag Group(s) has been created, choose Filter > Genes (or Expr. Runs) by
Group from the menu or press the Filter button and choose the same option. (You can also
right click on the Tag Group in the Text Pane and choose the Filter by Group command
from the shortcut menu.)
Fig. 38. 32 Filter Genes by Group dialog box
664
Expression Data Viewer Chapter 38
In the Filter Genes by Group dialog box (Fig. 38.32), highlight the name of the Group(s)
you want to use for filtering. Only Genes or Expression Runs in the selected Group(s) will
be retained after the filtering process.
Press the OK button to execute the option.
Filtering Genes by the Difference between Expression Run Groups
This option enables you to search for Genes that are differentially expressed between two
selected Expression Runs.
Note: To use the Filter by Difference option, you must have previously created at least two
Expression Run Tag Groups, visible in the Text Pane.
To launch the Filter by Difference dialog box, choose Filter > Genes by Difference
between 2 Expr. Run Groups from the menu or press the Filter button and choose the same
option.
Fig. 38. 33 Filter by Difference dialog box
In the Filter Genes by Difference dialog box (Fig. 38.33), choose the two different
Expression Run groups that you wish to use from the drop down boxes.
Select the radio button for the desired Inter-group Distance definition:
Distance Type
Mean Pair-wise
Description
Distance between two groups is the difference between
average values found separately for each group. This
distance is normalized by the average taken over all
Expression Runs in both groups.
665
Distance Type
Description
Fisher
Distance is the difference between group averages
divided by the sum of two group deviations.
Pair-wise Normalized
Distance is the difference between group averages
divided by the vector length (square root of the sum of
the squared values).
Kolmogorov –
Smirnov Statistics
A measure of the difference between two distributions. It
estimates whether or not two groups of values were
taken from the same distribution. Note: It is impractical
to apply this statistic to groups of less than eight
Expression Runs.
Table 38. 8 Inter-group Distance Types summary
Finally, specify the number of most differentially expressed Genes you want to retain.
Once you have set the parameters, press the OK button to execute the option.
Filtering Genes by Quality Statistics
The Filter Genes by Quality Statistics allows you to filter an Experiment according to
statistical data that may be present in the Experiment, such as standard deviation or Pvalues.
Note: Statistical data must be present in the Experiment before the Filter Genes by Quality
Statistics option is functional.
To launch the Filter Genes by Quality Statistics dialog box (Fig. 38.34), choose Filter >
Genes by Quality Statistics from the menu or press the Filter button and choose the same
option.
Run 1
Run 2
Fig. 38. 34 Filter Genes by Quality Statistics dialog box
666
Expression Data Viewer Chapter 38
Choose the statistical data you want to use for filtering from the drop down box. To set
minimum and maximum cut-off values for the statistical data type, highlight the desired
Expression Run and press the Set Cut-offs button.
Fig. 38. 35 Set Cutoffs dialog box
In the Set Cutoffs dialog box (Fig. 38.35), set the minimum and maximum cut-off values
and press OK. To execute the filtering function, press OK in the main dialog box.
Filtering Genes Using Similarity Graph
Note: The Filter Genes Using Similarity Graph option can only be selected after a Gene
Similarity Sort has been performed (see the Sorting Algorithms section below).
The Filter Genes Using Similarity Graph options allows you to remove Genes based on their
similarity to a selected Gene, specifically the Gene that was used for the Similarity Sort.
Once a Gene Similarity Sort has been performed, launch the Filter Using Similarity Graph
dialog box by choosing Filter > Genes Using Similarity Graph from the menu or by
pressing the Filter button and choosing the same option.
Fig. 38. 36 Filter Using Similarity Graph dialog box
667
The Gene used for the Similarity Sort is shown in the Filter Genes Using Similarity Graph
dialog box (Fig. 38.36). Genes above or below a specified percentage similarity to the
displayed Gene can be removed. Set the parameters as desired and press the OK button to
execute the option.
Sorting Algorithms
Sorting is generally a good tool to use when you know something about the data before you
begin. For instance, you may know something about one (or some) of the Genes in the
Experiment and want to find genes that are related. Sorting tools can accomplish this task.
Sorting operations are launched by choosing the particular sort command either from the
Sort menu or from the Sort (
) button on the toolbar (Fig. 38.37). (Some sorting
commands are accessed from the shortcut menu launched by right clicking on a Gene or
Expression Run in the corresponding List Pane or on a Tag Group in the Text Pane.)
Fig. 38. 37 Sorting menu options
The results from each sort produce a unique combination of Genes and Expression Runs,
visually sorted on the Navigation Map. For example, you may wish to sort results by heat
treatment of samples (Expression Runs) or by time points of sample extraction.
All sorting algorithms are initiated from a unique dialog box, except for the Sort Genes by
Expr. Runs Value in <Expression Run> and Sort by Group options, which are executed
immediately upon choosing their commands from the Sort menu or from the shortcut menu
launched by right clicking on a Tag Group in the Text Pane, respectively. Many of the
sorting options allow you to select among the following Similarity Types:
Similarity
Type
Euclidean
Distance
668
Basis of Similarity
Calculation
Expression level
magnitude
Description
Can be used to find Genes that have similar
expression profiles in terms of the
magnitude of their expression levels.
Expression Data Viewer Chapter 38
Similarity
Type
Basis of Similarity
Calculation
Description
Minkowski
Distance
Expression level
magnitude
Sum of all the absolute differences between
vector coordinates (i.e. it measures the
distance between points in “expression
space”).
Correlation
Coefficient
“Shape” of the
Gene profile
Captures a similarity in “shape” but places
no emphasis on the magnitude of the
measurements. Correlation Coefficient
similarity finds Genes with similar patterns
of response across Expression Runs and,
therefore, can be useful in finding coregulated genes.
Absolute
Correlation
“Shape” of the
Gene profile
Finds similar or inverse patterns of
response and, therefore, can be useful for
showing Genes that are repressed or
activated while the reference Gene is
activated.
Jackknife
Correlation
“Shape” of the
Gene profile
Distance calculated using all coordinates,
excluding the data points with the most
extreme values. Similar to Correlation
Coefficient, except that outlying values are
eliminated before the calculation is
performed.
Table 38. 9 Similarity Types summary
With the above five Similarity Types, similarity is determined based on either:
•=
Expression Level Magnitude, which calculates similarity based on Expression values,
placing no emphasis on the change in Expression values between Expression Runs
Or
•=
“Shape” of the Gene Profile, which calculates similarity based on the pattern of
Expression across Expression Runs (Expression Profile), placing no emphasis on the
actual Expression values
Note: For Similarity Type calculation formulas, see page 659.
Unlike filtering results, sorting results are not cumulative. Each new sort operation replaces
the previous sort results. Sorting operations can be performed with filtered data. With each
sorting operation, the rows and/or columns of the Navigation Pane are rearranged according
to the final assignment of each vector.
669
To open a Sort dialog box, choose Sort > <sort option> from the menu or press the Sort
button on the toolbar and selection the desired sorting option.
Sorting options for Genes and Expression Runs are summarized in the following table:
Sorting Option
Genes
Expression Runs
By Average Value
X
X
By Similarity to Selected
Gene/Expression Run Value
X
X
By Similarity to Gene Profile
X
By Expr. Run Values in Selected Run
X
By Difference between 2 Expr. Groups
X
By List Pane Fields
X
X
Sort by Group (Tag group in Text Pane)
X
X
Table 38. 10 Sorting options summary
Sorting Genes or Expression Runs by Average Value
Choose Sort > Genes (Expr. Runs) by Average Value from the menu or press the Sort
button and choose the same command.
Fig. 38. 38 Sort by Average Value dialog box
Select the radio button for the Value you want to sort by (Fig. 38.38). The Value type you
choose rearranges vectors corresponding to Genes or Expression Runs. In the case of Ratio
data, this option sorts according to fold-change instead of by actual value.
670
Expression Data Viewer Chapter 38
Sorting by Similarity to Selected Gene or Expression Run
Choose Sort > Genes (Expr. Runs) by Similarity to <selected Gene or Expression Run>
from the menu or press the Sort button and choose the same command.
Fig. 38. 39 Sort by Similarity to selection dialog box
Select the Similarity type for the comparison (Fig. 38.39). Check the Use normalized values
box if you would like the values normalized before comparison. Normalizing values before
sorting results in a sort according to general expression trends across Expression Runs
instead of the magnitude of individual values. Press OK to execute the sort.
This type of sort is equivalent to sorting by the expression profile of the selected Gene
shown in the title bar of the dialog box. You can achieve the same result by sorting by Gene
profile (see the following section).
Additionally, Genes (Expression Runs) can be sorted by their similarity to a user-defined
reference Gene (Expression Run).
Sorting by Gene Profile
To sort by Gene profile, first select a profile in the Distribution Map using techniques
described earlier. As mentioned before, the selected profile is basically a virtual Gene with a
user-defined pattern of expression.
For example, you may want to define a virtual Gene that shows a high level of expression in
one set of Expression Runs and low level of expression in another set.
Select Sort by Gene Profile from the shortcut menu opened by right clicking on the
Distribution Map Pane or choose Sort > Genes by Similarity to Profile or press the Sort
button and select the corresponding command.
671
Fig. 38. 40 Sorting by Gene Profile, Similarity Parameters dialog box
Choose the Similarity Type, check the Normalize option, if desired, and press the OK
button to execute the sort (Fig. 38.40). (See page 669 for an explanation of the various
Similarity Type options.)
The results of this sort are oriented so that the Genes with profiles most similar to the sort
profile are located at the extreme left of the Navigation Map. The results least similar to the
sort profile are located at the extreme right of the Navigation Map.
Sorting Expression Runs and Genes by List Pane Fields
To sort Expression Runs or Genes by List Pane fields, activate the corresponding List Pane.
Click on a field’s header to sort/reverse sort the table according to that field. To move
selected items to a new location, use the Move Up/Move Down options on the View or
shortcut menu or drag the selected items and drop them at the new location.
This changes only the order of the items in the table, but you can apply this change to the
whole Experiment by right clicking on the List Pane and choosing Apply Sorting to
Experiment from the View or shortcut menu (Fig. 38.41).
672
Expression Data Viewer Chapter 38
Fig. 38. 41 Applying List Pane field sorting to an Experiment
Targets and Expression Runs in the Experiment may be characterized by time, drug
concentration (time or drug series), or any other qualitative or quantitative parameter. By
Sorting in the List Pane, Expression Runs can be sorted by the value of any of those
parameters.
Sorting Genes by the Difference Between Two Expression Groups
This option enables you to sort according to differentially expressed Genes. To use the Sort
by Difference option, you must have previously created at least two Expression Run Tag
Groups, visible in the Text Pane.
To launch the Sort by Difference dialog box, choose Sort > Genes by Difference between
2 Expr. Run Groups from the menu or press the Sort button and choose the same option.
Fig. 38. 42 Sort by Difference between Groups dialog box
673
In the dialog box that opens (Fig. 38.51), you must specify two different Tagged Groups of
Expression Runs to use for the sort.
In addition, you must select an Inter-group Distance from among the following options:
Inter-group Distance
Description
Mean Pairwise
Distance
Distance between two groups is the difference between
average values found separately for each group. This
distance is normalized by the average taken over all
Expression Runs in both groups.
Fisher Distance
Distance is the difference between group averages
divided by the sum of two group deviations.
Pairwise Normalized
Distance is the difference between group averages
divided by the vector length (square root of the sum of
squared values).
Kolmogorov – Smirnov
Statistics
A measure of the difference between two distributions. It
estimates whether two groups of values were taken from
the same distribution. Note: It is impractical to apply this
statistic to groups of less than eight Expression Runs.
Table 38. 11 Inter-group Distance Types summary
The software sorts the Genes by the degree of distance in the values between the two
selected Groups. For each Gene, the distance is calculated based on its expression levels in
the two Expression Run Groups.
Upon execution of the Sort by Difference option, the Eisengram (Navigation Pane) is
rearranged according to the expression difference between the two Groups. In the simple
example of one sample in each Group, a Gene that is expressed very highly in Group 1 and
very minimally in Group 2 is displayed at the very left of the Eisengram. A Gene expressed
very minimally in Group 1 and very highly in Group 2 is displayed at the very right of the
Eisengram. All other Genes are positioned in between the two extremes, sorted by the
degree of their expression difference.
Sorting Genes by Expression Run Values in Selected Expression Run
The Sort Genes by Expression Run Values in <selected run> option sorts Genes according
to their expression values in the currently selected Expression Run, from lowest to highest
values. The sorted Genes are displayed in the Eisengram panel with the lowest expresser on
the left and increasing to the highest expressing Gene on the right, based on the expression
values for the selected Expression Run.
Note: This sorting option does not have an associated dialog box. The sort is performed
immediately upon choosing the corresponding command from the menu.
674
Expression Data Viewer Chapter 38
To Sort Genes by Expression Run Values in a Selected Expression Run, first select the
Expression Run of interest in the Expression Run, Eisengram or Distribution Map Panes.
Choose Sort > Genes by Expr. Run Values in <selected run> from the menu and the sort
is immediately performed.
Sorting Genes and Expression Runs by Group in the Text Pane
The Sort by Group option sorts Genes or Expression Runs according to the Tagged Gene or
Expression Run Group selected in the Text Pane. Since this sorting function operates on
Tagged Gene and Expression Run Groups, you must create such Groups, visible in the Text
Pane, before the Sort by Groups option can be performed.
Upon execution of the Sort by Group command, Genes in the selected Group are moved to
the left side of the Eisengram and Expression Runs are moved to the top of the Eisengram
panel. Genes and Expression Runs are correspondingly sorted in the other panes of the
Expression Viewer.
To Sort by Groups, create the desired Group and right click on its listing in the Text Pane.
Choose Sort by Group from the shortcut menu.
Note: This sorting option does not have an associated dialog box. The sort is performed
immediately upon choosing the corresponding command from the menu.
Clustering Algorithms
All clustering tools use sophisticated algorithms to discover the patterns of gene expression
inherent in the microarray data. The clustering tool is often a good place to start when you
have no initial hypothesis concerning the experimental data. Clustering algorithms group
Genes according to similarities in patterns of expression variation over all the samples. The
presence of a well-characterized Gene in a cluster or the correlation of the cluster with a
certain phenotype may suggest a biological role for unknown Genes.
The Expression Viewer offers a large choice of clustering algorithms that have their
advantages as well as shortcomings. All algorithms can be grouped either under Hierarchal
Clustering or Non-hierarchal Clustering. Of course, the best results are expected from the
algorithm that assumes a statistical model that is really present in data.
A quick overview of the different algorithms follows, along with a short description of
relevant statistical assumptions and possible applications for each algorithm.
It is a good idea to apply several clustering techniques consecutively, to compare clusters
produced by these techniques and to focus on clusters that are similar between different
algorithms.
It is often important to filter data before clustering. Invariant genes are equally attracted to
different clusters and induce chaining effects. The Filtering tool can be used to exclude
Genes or Expression Runs with low variance to avoid this effect. Sorting the data after
675
filtering can also be important; the typical order of operation when analyzing expression
data is filter > sort > cluster.
With each clustering operation, the rows or columns of the Navigation Pane are rearranged
according to the final assignment of each vector. The current clustering operation replaces
previous sorting and clustering operations for Genes or Expression Runs.
Note: Because of the nature of clustering algorithm mathematics, a particular clustering
operation often produces slightly different results when performed on the same data set.
That is to say, if a clustering operation is performed on one data set and the same operation
is performed on an identical data set, the results may differ. However, if the filter > sort >
cluster order of operation is followed, the results of a particular clustering operation for a
particular data set are likely to be more reproducible.
Hierarchical Clustering
Hierarchical clustering algorithms compute a dendrogram that assembles all objects into a
single tree. For details, see the Dendrograms section below.
Hierarchical algorithms impose a very strict structure on the data being analyzed. Such
structure may be intrinsic in phylogenetic studies, but is unlikely to be present in expression
data. As hierarchical algorithms are computationally heavier than other algorithms,
computational time increases by N2 where N is the number of elements to be clustered.
Therefore it is impractical to apply these algorithms for sets of more than 1000 – 5000
Genes or Expression Run. To overcome the speed-limitation of hierarchical algorithms, we
have implemented a procedure that leads to the construction of a non-binary tree (multiplethreshold algorithm). This is essentially a divisive algorithm that constructs a set of clusters
by combining elements if they have a distance less than a certain threshold from at least one
element in a cluster. As the threshold value gradually decreases with each step, a set of
nested clusters is formed that is displayed in the form of the non-binary tree.
In conclusion, hierarchical clustering can be used for viewing the global picture of data and,
in that sense, is similar to Sammon mapping.
) on the toolbar and
To initiate hierarchical clustering click the Clustering button (
choose either Analyze Genes Using Clustering or Analyze Expr. Runs Using Clustering or
select the analogous command from the Analyze drop down menu, opening the
corresponding Genes or Expression Runs Clustering dialog box (Fig. 38.43):
676
Expression Data Viewer Chapter 38
Fig. 38. 43 Clustering dialog box
Select among the five hierarchical clustering algorithms (last five algorithms in the list),
described below.
The first four of the algorithms belong to the Agglomerative Hierarchical Clustering
category of clustering. They all search for an NxN similarity matrix and sequentially merge
the most similar cases. The results of these methods can be displayed in the form of a binary
tree.
For any set of vectors, the similarity matrix contains similarity scores for all pairs of the
vectors. The matrix is scanned to identify the most similar pair of vectors and a node is
created joining these two vectors. Similarity between the node and other objects is
computed by averaging observations for the joined objects (the exact averaging procedure is
different for various hierarchical algorithms). The similarity matrix is updated with this new
node, replacing the two joined objects and the process is repeated again until only a single
object remains.
The four agglomerative hierarchical algorithms differ in how the similarity (or distance)
between a newly formed node and other objects (single vectors or nodes) is computed. In all
cases, this distance is computed based on measurements for the objects that are being joined
to form a node.
677
Hierarchical
algorithm
How algorithm handles Expression data
Single linkage
The dissimilarity between an object and a node is defined as
the smallest dissimilarity between an object and one of two
objects that form the node. The distance between two items, X
and Y, is the minimum of all pairwise distances between items
contained in X and Y.
Complete
linkage
Exactly the opposite of single linkage. The dissimilarity
between two nodes is now defined as the largest dissimilarity
between an object of one node and an object of another node.
The distance between two items, X and Y, is the maximum of
all pairwise distances between items contained in X and Y.
WeightedAverage
The node vector is computed as the average of vectors from
all primary objects (genes or Expression Runs) that give rise
to the objects to be joined.
UnweightedAverage
The node vector is formed as a simple arithmetic mean of
vectors of two elements to be joined. All observations for a
given element are treated equally.
K-mean
Divisive
Uses a different principle to build a binary tree. It starts by
splitting all objects into two clusters. To do so, it employs the
K- mean technique described in the non-hierarchical clustering
section (page 683), with the number of clusters being equal to
two. The procedure repeats for each daughter cluster and
continues until each cluster contains only one object.
Table 38. 12 Hierarchical Clustering algorithm summary
Note: Weighted and Unweighted Average algorithms assign a vector to each newly formed
node, which is computed by averaging observations for the joined objects.
Select among the Similarity types listed in the combo box. Similarity types are discussed in
the Sorting Algorithms section of this chapter (page 668).
Press the OK button to execute the selected clustering operation and generate the resulting
dendrogram. Note: The dendrogram for Gene clustering is displayed in the Gene Pane and
the dendrogram for Expression Run clustering is displayed in the Expression Runs Pane.
Dendrograms
The results of Hierarchical clustering appear in the form of dendrogram. The basic idea of a
dendrogram is that it assembles a set of items, such as Genes, into a tree where items
evaluated as very similar to each other are joined by very short branches. As item similarity
decreases, their branches increase in length. The clustering results of a microarray can,
therefore, provide a measure of the relatedness of Gene expression in each sample.
678
Expression Data Viewer Chapter 38
Dendrograms are useful for quickly estimating the number of clusters in the data and
identifying clearly separable clusters and outliers. The latter decrease efficiency of any
clustering algorithm and should be removed from the experiment for better results. You may
also consider removing clearly separable clusters (after saving them to Groups) to allow for
better processing of less prominent clusters.
For any dendrogram of n elements there are 2n-1 linear orderings consistent with the
structure of the tree. Therefore, after the tree is computed it is optimally arranged by
maximizing the similarity of adjacent elements in the ordering (Fig. 38.44).
Fig. 38. 44 Hierarchical Clustering dendrogram
Tree View Elements
Each node of a dendrogram has a value assigned to it; non-zero node values can be viewed
in a tool-tip (Fig. 38.45). This value reflects the dissimilarity between objects in a branch
specified by the node. End nodes include only one Gene or Expression Run and have a zero
value.
Fig. 38. 45 Dendrogram node tool tip
Once the tree is assembled, it can be cut at certain level to produce clusters. Depending on
the level chosen to cut the tree, the number of clusters and their content will vary. The
optimal number of clusters can be obtained by cutting the tree at different levels and
679
viewing the results or comparing simple statistics such the as intra and inter-cluster sum of
variances.
A horizontal red line in the Gene Pane or vertical red line in the Expression Runs Pane
defines the tree cutting level and can be dragged with the mouse. The result of tree cutting is
displayed graphically below the tree (or to the side of the tree, in the case of Expression Run
clustering) in the form of an array of clusters (Fig. 38.46).
Fig. 38. 46 Tree-cutting and resulting array of clusters
Below the clusters graphic, the Tree view displays Genes (Expression Runs), which are
stored in Tagged Groups, visible in the Text Pane. Genes (Expression Runs) are marked
with the color corresponding to the Text Pane tag color (Fig. 38.47). If the same gene is
included in several Tagged Groups, it will be marked with several colors.
Fig. 38. 47 Tagged Groups marked in the tree-view
This feature allows you to locate within the tree and clusters, the position of Genes or
Expression Runs of interest that you have tagged.
Selecting in the Tree View
The Tree view supports the concept of a selection and focused branch/cluster. Selected
continuous or non-continuous sets of Genes or Expression Runs are shown on the Tree as
inverted areas, whereas a focused branch or cluster is marked with a contrasting color (red
by default) (Fig. 38.48). The selected area and focused branch or cluster may differ.
680
Expression Data Viewer Chapter 38
Fig. 38. 48 Selection and focus in the Tree View
However, changing the focused branch also changes the selected area. In this case selection
and focus will be same.
Basic Selection Operations
•=
Clicking on a node sets the focus to the tree branch and selects the corresponding area
on the navigation panel.
•=
Clicking on a cluster sets the focus and selection to that cluster, selecting the
corresponding area on the Navigation panel.
•=
Clicking on an unselected cluster while pressing the CTRL key on the keyboard moves
focus to the new cluster and adds the area to the current selection.
•=
Clicking on a selected cluster while pressing the CTRL key on the keyboard moves the
focus to that cluster and removes the area from the current selection.
•=
Changing the tree cutting level removes focus from the cluster.
Tree View Operations
The following Tree view operations are available on the shortcut menu, which is launched
by right clicking on the Tree view:
•=
Zoom in and Zoom out commands change Tree view size.
•=
Close Window closes the Tree view window.
•=
Expand Branch command creates new tree view with the focused branch. You can use
the Undo and Redo toolbar buttons to switch between the view of the whole tree and its
branch.
•=
Extend Selection extends the selected area to the whole Gene (Exp. Run) size.
•=
Swap Branches command swaps child branches of the focused branch.
681
•=
Recalc Hot Cluster command manually calculates the Diameter and Variance values
displayed in the tool tip for very large clusters. Diameter and Variance values for a
cluster displayed in the tool tip when the mouse is hovered over the cluster are
calculated dynamically. For clusters containing 2500 items or more, these values cannot
be calculated dynamically and the tool tip will display Diameter and Variance values of
“n/a” with a message referring you to the Recalc Hot Cluster command on the shortcut
menu (Fig. 38.49). In such cases, you can calculate Diameter and Variance values for
the tool tip manually by executing the Recalc Hot Cluster command.
Fig. 38. 49 Recalc Hot Cluster message
682
•=
Tag command allows you to add the selected Genes to a new or existing Tagged Group
in the Text Pane.
•=
Untag command allows you to remove the selected Genes from a Tagged Group in the
Text Pane.
•=
Properties command opens the Tree View Properties dialog box where you can set
color and dimension properties for the tree and clusters.
•=
Add Tree to Folder command stores the Tree and related information to a folder in the
Text Pane. To restore a Tree from its folder, select it in its Text Pane folder, right click
and choose Show Clusterization from the shortcut menu (Fig. 38.50). The Tree view is
restored in the Gene Pane along with the Genes and Expression Runs order.
Expression Data Viewer Chapter 38
Fig. 38. 50 Text Pane shortcut menu; Show Clusterization command
Tree View and Navigation Operations
The Genes Tree view window will close if an operation changes the order or quantity of
Genes or Expression Runs (i.e. sorting, filtering, cropping to selection, etc.). Likewise, the
Expression Runs view window will close if an operation has changed the order or quantity
of Expression Runs or Genes. The only exception is the Expand Selected Area command,
as long as it does not change the Expression Run quantity for the Genes Tree or Gene
quantity for the Expression Runs Tree. In this situation the subtree of the original tree will
be cut and shown.
Operations that eliminate the Tree view window:
•=
Hierarchical or Non-Hierarchical Clustering
•=
Sorting and Filtering data
•=
Expanding current selection
•=
Data processing
Non-hierarchical Clustering
Non-hierarchical clustering methods classify the data into k clusters, which together satisfy
two requirements: each cluster has at least one object, and each object must belong to
exactly one group.
) on the toolbar
To initiate non-hierarchical clustering click the Clustering button (
and choose either Analyze Genes Using Clustering or Analyze Expr. Runs Using Clustering
or select the analogous command from the Analyze drop down menu, opening the
corresponding Genes or Expression Runs Clustering dialog box (Fig. 38.51):
683
Fig. 38. 51 Clustering dialog box
Non-hierarchical clustering requires you to choose a clustering algorithm and similarity type
and to define either the number of clusters, or a parameter describing cluster quality such as
diameter (the largest distance between two objects in a cluster), depending on which
clustering algorithm is selected. Algorithms that require defining the number of clusters
include different implementations of K-mean and Self-Organizing Maps (Som) algorithms.
There are four non-hierarchical algorithms from which to choose:
684
Non-hierarchical
algorithm
How algorithm handles Expression data
Batch K-mean
Implicitly minimizes the sum of intra-cluster variances. It starts
with a collection of items and a chosen number of clusters (k)
you want to find. The algorithm initially assigns vectors to
clusters at random. At each step, the median vector is
computed for each cluster and vectors are reassigned to the
closest center. The algorithm stops if no changes are made to
the content of clusters. Typically, 10 – 20 steps are enough
and the number of iterations does not depend on the number
of vectors or clusters.
Expression Data Viewer Chapter 38
Non-hierarchical
algorithm
How algorithm handles Expression data
SelfOrganizing
Map (SOM)
Overcomes one of the major drawbacks of K-mean clustering,
which proceeds in an entirely local fashion and produces an
unorganized collection of clusters. SOM imposes a partial
structure on the clusters and is easily scalable to large data
sets. One-dimensional Batch SOM, a generalization of the Kmean algorithm, reorders the elements on whichever axes are
selected.
At each step, median vectors are computed based not only on
the content of the cluster, but also its closest neighbors. The
neighborhood size (which is zero for K-mean) constitutes an
additional parameter that is equal to a minimum between 10
and Number of Cluster/4, which ever is less. Thus, if you
choose 50 clusters, this parameter starts at 10 and steadily
decreases. If you select 30, the parameter starts at 7 and
steadily decreases. Again, 10 - 20 steps are enough to ensure
good clustering results.
Iterative SOM
Goes through an iterative learning process. Each object
(Gene vector or Expression Run vector) in turn is applied to
the learning process, with the total number of iterations being
equal to 1000 x the number of clusters. The algorithm starts
by initializing reference vectors for each cluster (by random
assignment of k object vectors). During iteration the cluster
reference vector is found which is closest to the input vector.
This vector and its neighbors are shifted towards the input
vector by a certain decrement, which decreases with the
number of iterations. After the learning process is over,
objects are assigned to the closest clusters.
QT-Clust
Is to find large clusters that have a quality guarantee. The
algorithm uses the threshold value for cluster diameter to find
the set of clusters whose diameter does not exceed the given
threshold value. From all the diameter combinations, the
algorithm looks for the set of clusters with the largest size.
Note: For large thresholds (clusters with thousands of genes)
the computation time for this algorithm can be time
consuming.
Table 38. 13 Non-hierarchical Clustering algorithms
Cluster View Elements
Results of non-hierarchical clustering appear in a Cluster Panel in the corresponding Genes
or Expression Runs Pane as modified blocks corresponding to the clusters. In addition,
685
cluster blocks selected in the Gene or Expression Runs panes are highlighted in the
Navigation Pane (Fig. 38.52).
Fig. 38. 52 Cluster block and corresponding Navigation Pane selection
Pause the cursor over a cluster to see the number of objects in that cluster, the intra-cluster
variance (sum of squares of differences between the median vector and each object vector)
and the intra-cluster diameter (the largest distance between two objects in the cluster
measured in the same metric that was used for clustering) (Fig. 38.53).
Fig. 38. 53 Cluster tool tip
Viewing the Intersection Between Tagged Groups and Clusters
It is often helpful to see the overlap between current clusters and the results of the previous
clustering algorithm or functional classification of Genes (Expression Runs). If previous
results were saved into Tag Groups in the Text Pane, you can compare them to the current
cluster using the Show on Graph command. Choose Show on Graph from a selected
Group’s associated shortcut menu and the items in that Group are marked graphically in the
Cluster panel (as well as on the Gene or Expression profile graphs). Regions in the Gene
Clustering image are marked with the color corresponding to the Tag color of the Group in
the Text Pane. This functionality is applicable to any Group and works even if one object
686
Expression Data Viewer Chapter 38
belongs to several Groups. Using this technique, the intersection between Tagged Groups
and clusters can be easily visualized (Fig. 38.54).
Fig. 38. 54 Visualizing intersection between Tagged Groups and clusters
Selecting in Cluster View
Cluster view supports the concept of a selected and focused cluster (Fig. 38.55). A selected
continuous or non-continuous set of Genes (Expression Runs) is shown on the Cluster view
as an inverted area (or set of areas). The selected cluster is marked with a contrasting color.
Selected areas and the focused cluster can differ.
Fig. 38. 55 Cluster view selection
Basic Selection Operations
•=
Clicking on a cluster sets focus to that cluster and selects the corresponding area on the
Navigation panel.
•=
Clicking on an unselected cluster while pressing the CTRL key on the keyboard moves
the focus to that cluster and adds the area to the current selection.
•=
Clicking on a selected cluster while pressing the CTRL key on the keyboard moves the
focus to that cluster and removes the area from the current selection.
Cluster View Operations
The following operations are available on the shortcut menu, which is launched by right
clicking on the Cluster view.
687
•=
Zoom in and Zoom out commands change Cluster view size.
•=
Close Window closes the Cluster view window.
•=
Expand Focused Cluster command creates new cluster view with the focused cluster.
You can use the Undo and Redo toolbar buttons to switch between the view of the
whole cluster and the new cluster.
•=
Extend Selection extends the selected area to the whole Gene (Exp. Run) size.
•=
Recalc Hot Cluster command manually calculates the Diameter and Variance values
displayed in the tool tip for very large clusters. Diameter and Variance values for a
cluster displayed in the tool tip when the mouse is hovered over the cluster are
calculated dynamically. For clusters containing 2500 items or more, these values cannot
be calculated dynamically and the tool tip will display Diameter and Variance values of
“n/a” with a message referring you to the Recalc Hot Cluster command on the shortcut
menu. In such cases, you can calculate Diameter and Variance values for the tool tip
manually by executing the Recalc Hot Cluster command.
•=
Tag command allows you to add the selected Genes to a new or existing Tagged Group
in the Text Pane.
•=
Untag command allows you to remove the selected Genes from a Tagged Group in the
Text Pane.
•=
Properties command calls Cluster View Properties dialog box where you can set
cluster dimensions and color properties.
•=
Add Clusters to Folder command stores Clusters and related information to the Text
Pane folder. A Cluster View can be restored from the Text Pane folder by choosing
Show Clusterization from the shortcut menu launched by right clicking on the saved
Cluster listing in the Text Pane.
To save objects from these clusters into Text Pane Groups for further analysis select the
item(s) and choose the Tag command from the shortcut menu in the Navigator Pane or
Cluster view panel.
Cluster View and Navigation Operations
The Genes Cluster View window will close if an operation changes the order or quantity of
Genes or Expression Runs. Likewise, the Expression Runs Cluster View window will close
if an operation changes the order or quantity of Expression Runs or Genes. The only
exception to this is the Expand selected area command, as long as it does not change the
Expression Run quantity for Gene Clusters or Gene quantity for Expression Run Clusters. In
this situation the subset of the original Clusters will be shown.
688
Expression Data Viewer Chapter 38
Operations that eliminate the Cluster View window:
•