Download User Manual
Transcript
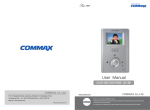
User Manual
VIDEO DOOR PHONE CDV-73BE
513-11, Sangdaewon-dong, Jungwon-gu, Seongnam-si, Gyeonggi-do, Korea
Int’l Business Dept. Tel. : +82-31-7393-540~550 Fax. : +82-31-745-2133
Web site : www.commax.com
PM0773BE0010
Printed In Korea / 2011.10.104
•
COMMAX
products.
• Thank
Thankyou
youfor
forpurchasing
purchasing
COMMAX
products.
•
read
thisthis
User’s
Guide
(in particular,
precautions
for safety)
before using
a product
followand follow
•Please
Pleasecarefully
carefully
read
User’s
Guide
(in particular,
precautions
for safety)
before
using aand
product
instructions
a product
exactly.
instructionstotouseuse
a product
exactly.
•
is is
notnot
responsible
for any
safetysafety
accidents
causedcaused
by abnormal
operationoperation
of the product.
•The
Thecompany
company
responsible
for any
accidents
by abnormal
of the product.
Table of Contents
9. Specification
Table of Contents ......................................................................1
ITEM
Warnings and caution ................................................................2
Wiring
1. Product overview ..................................................................4
Power source
2. Product characters & key features ........................................5
Communication way
Display
3. Operation ..............................................................................5
4. Display adjustment ................................................................6
5. Name of parts ........................................................................7
Call sound
Power consumption
6. Wiring Diagram ....................................................................7
7. Installation method ................................................................8
8. Trouble shooting ...................................................................9
Distance
Video duration time
Dimension
9. Specification .......................................................................10
1
Weight
Details
CAMERA 4wires(polarized), INTERPHONE 4wires
100-240V~, 50/60Hz
Simultaneous Conversation way (Hand-set)
7 TFT-LCD Digital
Entrance(individual entrance): electronic chime 2 times,
Interphone: electronic sound
Stand-by : 4.5 W(Max.)
On operation : 12 W(Max.)
Wire Pie 0.5mm
0.65mm 0.8mm
28m
50m
Stand-by/On the line
60sec/60sec
70m
315(W)x175(H)x53(D)
1.15kg
10
Warnings and caution
Make sure to follow the instructions to prevent any danger or property losses.
Warning
It indicates prohibition.
Death or serious
injury is expected.
It indicates prohibition of disassembly.
It indicates prohibition of contact.
It indicates dos and don’ts.
It indicates that the plug should be pulled out from the socket.
Do not put the plug in the socket
simultaneously.
It may generate abnormal heat
or cause a fire.
Do not connect to other products
while in use.
It may cause breakdown.
Do not forcibly bend the cord or
put a heavy object on the
product.
It may cause a fire.
Do not use water, thinner or a
detergent used to wash oil products
when you wash the exterior.
Make sure to wash it by using a dry cloth to
prevent any breakdown or electric shock.
Do not install the product in a
humid place.
It may cause an electric shock or
a fire.
Do not forcibly pull out the
cord from the socket.
If the cord is damaged, it may cause a
fire or an electric shock.
Do not put the plug in the
socket with a wet hand.
It may cause an electric shock.
Do not disassemble, repair or
modify the product.
It may cause a fire, an electric shock or
an injury due to malfunction of the
product.
Do not use AC circuit breaker.
It may cause an electric shock.
2
Warnings and caution
Caution
It indicates prohibition.
An injury or property
losses are expected
It indicates prohibition of disassembly.
It indicates prohibition of contact.
It indicates dos and don’ts.
It indicates that the plug should be pulled out from the socket.
3
If the socket holes are larger
than normal, do not put the
plug.
It may cause an electric shock
or a fire.
Make sure that dust or foreign
substances are not gathered
on the product.
Make sure to prevent foreign
substances from entering the
product.
It may cause a breakdown.
Do not put a heavy object on
the product.
It may cause a breakdown.
Do not disassemble or give an
impact to the product.
Avoid direct rays of the sun or
heating devices at a time of
installation.
Install the product in a flat and
stable place.
Otherwise, it may not function
properly.
Pull the plug if the product is
not used for a long time.
If the product generates strange
sound, make sure to pull the
plug immediately and contact
Commax service center.
1. Product overview
①
②
③
⑤ ⑥ ⑦ ⑧ ⑨ ⑪ ⑫ ⑬
⑩
④
No.
Details
Name
1
Handset
2
On/Off & Display LED
Indicates On/Off & Display status
3
N/A
No available
4
Volume control button
Control the call volume
5
Monitoring button(MONITOR)
View image from door camera and can talk
6
Interphone button(INTERPHONE) Intercommunication between the rooms
7
Door release button
Open the door during talk
8
Direction button
(UP/DOWN/LEFT/RIGHT)
Up, Down, Left, Right ,Down direction key
9
Power switch
Control the power supply of product
Handset
10 ENTER button
Execution button
11 COLOR
Adjust COLOR
12 CONTRAST
Adjust CONTRAST
13
Adjust BRIGHTNESS
BRIGHT
4
2. Product characters & key features
7” Wide Digital TFT-LCD
Surface mounted type installation
● Free voltage power
● Call and talk with 2 door cameras
● Call and talk with interphone
● Door release function
●
●
3. Operation
☞When Power switch ON after done installation, you can use it with LCD screen On.
1. Visitor call & monitoring
•If press call button on door camera, the visitors image will be shown on household monitor
with chime bell.
Display ON duration : 1min.
•With pick up the handset, you can talk through handset. If you want to finish the talk, put
down the handset.
Talkable duration : 1min.
•If users want to see the entrance on standby status, press MONITOR button to see the
image from door camera. In case CAM2 is installed, if you press MONITOR button one
more time, the image from CAM2 will be shown. If press MONITOR button once more,
the screen will be off.
•During talk with camera or monitoring, if users press OPEN button, the door will be
opened.
•During talk with visitors by handset, if users want to finish the talk, just put down the
handset.
5
2. Interphone function
☞With pick up the handset, if press INTERPHONE button, the connected interphone will be
called. If not press interphone button, there will be no more ringing tone chimed, so you
must press continually. On this stage, if pick up the handset of other party’s interphone,
users can talk each other.
•During talk with interphone, if there is call from entrance, door camera, interphone and
video phone can talk among.
3. Call volume control
☞If visitors press call button, there is occurred Sol, Mi, Do sound and users can control the
call volume by adjusting“call”part placed bottom part of product.
4. Display adjustment
[CONTROL MENU]
Contrast
Brightness
Color
Reset
Screen-Mode
Save & Exit
•When users want to adjust COLOR /CONTRAST /BRIGHT, first turn on LCD screen with
pressing Monitor button. And then, press the button which users want to adjust, then the
above Menu mode will be shown as above. With pressing left, right button, users can
decide the best status and if pick up and put down the handset or exit the current mode with
pressing Save & Exit button by pushing Enter key on center, the final status will be saved.
•The users can change the Screen mode to 4:3 from the full (It is not applied from reset)
If users want to return to default setting value of display status, please move to RESET
mode and then press ENTER button and then it will be returned to default setting value.
•Once done all display adjustments, move to Exit menu and then press ENT button.
Display adjustment mode will be stayed for 60sec. if there is no operation on display
adjustment mode.
6
5. Name of parts
manual
SCREW T4X18(2EA)
User manual
Video phone & Handset wired
Tp
Tp Rp
Connector
4P
(2EA)
Rp
Wall Mount Bracket
Fixing Screw
Vp
QTp
2PVpSHUNTQTp
(Only No. 1 camera is available
if you insert 2P shunt(short pin))
6. Wiring Diagram
•When CAMERA 2 port is used with connecting 2nd camera, the jump-cap is no needed,
but it is covered in factory release status.
7
7. Installation method
Installation method of monitor
SCREW T4 X 18(2EA)
145cm
SCREW M3 X 6(2EA)
Caution during installation
Avoid installation on place with magnetism, lots of moisture, directed light, and also closed
location from heating apparatus due to harmful effect.
● Its standard height from floor is 1450~1500mm to be installed.
● Hang the handset on the video phone after done installation.
●
8
8. Trouble shooting
If you think that the product has trouble, please first check below contents before you ask a repair.
Troubles
●
●
●
1.The power supply
code is missing or not.
2.The power supply switch
(down) is off or not.
1. Please connect the
power supply cord
2. Please turn on the power
supply switch (down)
pushing to the right.
A Call operation is not
performed.
1.The wiring between other
units is connected correctly
in good order or not.
2. The wiring is missing or not.
3. A Room id is set or not.
1. Please refer to connection
related page and manage.
2. Please connect correctly
to the terminal.
3. Please refer to Room id
setting related page.
1. A sound volume lies
in minimum or not.
1. Please adjust the sound
volume properly turning
to the right, as you want.
1. There is a strong reflected light behind the
visitor or not.
2. The screen control is
adjusted correctly.
1. Please change the angle
of camera lens.
2. Please initialize the
screen control.
The product does not
produce the sound.
(Call volume, Talk volume)
●
●
The screen is dark.
The screen is strange.
(Refer to setting related page)
We can see the visitor
image but no voice.
1. The connector on the
handset is properly
inserted to the product?
1.Please put the
connector properly again.
No stored image found
1. Auto recording is
assigned?
1.Please set the status of
“AUTO RECORD“
as “YES”
●
●
9
Actions
The power supply is
not on.
All works are stopped
(Door, function)
●
Check Point
Table of Contents
9. Specification
Table of Contents ......................................................................1
ITEM
Warnings and caution ................................................................2
Wiring
1. Product overview ..................................................................4
Power source
2. Product characters & key features ........................................5
Communication way
Display
3. Operation ..............................................................................5
4. Display adjustment ................................................................6
5. Name of parts ........................................................................7
Call sound
Power consumption
6. Wiring Diagram ....................................................................7
7. Installation method ................................................................8
8. Trouble shooting ...................................................................9
Distance
Video duration time
Dimension
9. Specification .......................................................................10
1
Weight
Details
CAMERA 4wires(polarized), INTERPHONE 4wires
100-240V~, 50/60Hz
Simultaneous Conversation way (Hand-set)
7 TFT-LCD Digital
Entrance(individual entrance): electronic chime 2 times,
Interphone: electronic sound
Stand-by : 4.5 W(Max.)
On operation : 12 W(Max.)
Wire Pie 0.5mm
0.65mm 0.8mm
28m
50m
Stand-by/On the line
60sec/60sec
70m
315(W)x175(H)x53(D)
1.15kg
10


