1
Express! User Manual
1o/fWIM!
Table Of Contents
Receive Menu Function
Xmodem Standard
Xmodem CRC-16
Ymodem
Ymodem Batch
Windowed Xmodem
SEAlink
Lmodem/Lmodem Batch
ASCII
Aborting File Transfers
Transfer Status Window
Send Menu Function
Xmodem Standard
Xmodem CRC-16
Ymodem
Ymodem Batch
Windowed Xmodem
SEAlink
Lmodem/Lmodem Batch
ASCII
Aborting File Transfers
Transfer Status Window
Buffer Menu Function
View
Load
Save
Print
Clear
Config Menu Function
Setting DEF Drive
Setting EXE Drive
Setting Columns
Setting Left Margin
Setting Word Wrap
Setting U/L Pause
Setting Memory Size
Edit Generic Macros
22
22
22
22
22
23
23
23
24
25
25
26
26
26
27
27
27
27
27
28
28
28
29
29
29
30
30
30
31
31
31
31
32
32
32
32
33
Table Of Contents
Load Configuration
Save Configuration
Misc Menu Function
Setting Background Color
Setting Background Intensity
Setting Foreground Intensity
Shell Menu Function
Shell Commands
Info Menu Function
Quit Menu Function
Exit Program
Run Piggyback Cart
Run Internal BASIC
Disable All Carts
Console Key Usage
Upgrade Policy
In Conclusion
as
34
34
35
35
35
35
36
37
38
39
39
39
39
39
40
41
42
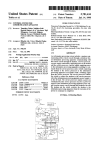
Welcome To Express!
Express! is the first fullfealuredtelecommunications program for
the Atari a-bit computer available in cartridge form. The advantage of
using a cartridge-based terminal program versus a disk-based program
are:
1) The cartridge version is available immediately without having
to wait for a program to load from disk. This allows a very fast transition
from DOS to the terminal program and back again, even while online.
2) The Express! cartridge will run without a disk drive or without
DOS being loaded in the computer. It is possible to run Express! on an
XE game machine without disk drives, making it a very inexpensive
communications setup.
Express! is an intuitive, easy to operate program. Its drop-down
menu system will have a novice telecommunicating in a matter of minutes. The advanced features which have been incorporated into the
cartridge will delight even the most demanding user. Express! also
incorporates the ability to run external command modules from disk,
ensuring that as your telecommunication needs expand in the future,
Express! will expand to meet them.
Throughout this manual, we will refer to a multiple keypress
operation with the following notation:
[SHIFT] [CONTROL] A
This means to hold down the SHIFT and the CONTROL keys
simultaneously and then press the A key.
We will also talk about 'selecting' an item. What we mean by this
is that as you move around the menus in Express!, the options will become 'highlighted' in inverse characters. When this highlighting occurs,
an item is considered selected.
Page 1
System Requirements
You'll need the following equipment in orderto use the Express!
terminal cartridge:
o Atari 800, 800XL, 130XE or XE game system with keyboard
o Monitor or television (color or black and white)
o Disk Drive (optional) (required for uploading/downloading functions)
o RS232 interface (Mia, PRC or 850) (optional with Atari SX212 modem)
o Hayes compatible modem (RS232 compatible) or Atari SX212 modem
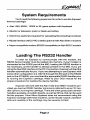
Loading The RS232 Handler
In order for Express! to communicate with the modem, the
RS232 device handler must be loaded into memory. If your modem is
connected to the RS232 port of the Mia, loading the RS232 handler is
not necessary, as the handler is already present in the Mia. If you are
using the Atari 850 interface orthe PR: Connection, Express! will load the
handler automatically for you. If you are attempting to use Express! with
some other configuration (Le. SX212 through the SIO port or the RS232
port on the ATR8000), you must load the appropiate RS232 handler prior
to running the Express! cartridge. Refer to your DOS manual for the
proper procedure for loading the device handler.
Express! will work with the Atari 1030 and XM301 modems provided you load an RS232 handler (commonly referred to as an 'R: handier') prior to running the cartridge. There are a few good public domain
handlers available on bulletin boards, as well as GEnie, that can be used
for this purpose. Orion Micro Systems does not recommend using the
Express! cartridge with these modems, as the results may be unpredictable and usability of the cartridge may be severely limited.
Page 2
Modem Settings
In order to use the Express! cartridge successfully with your
particular modem, the following settings will need to be made to your
modem either through the dip switches orthe 'soft set' switches on 2400
baud and higher modems:
o The modem hangs up and returns to command mode when the DTR
line is dropped.
o The modem should not force the carrier line ON.
o The modem should return 'result codes' in verbose or word form.
o The modem should recognize its own commands
In general, the current settings on your modem should work 'as
is'. If your particular modem cannot perform a DTR hangup, you will be
unable to use the 'Hang Up the Phone' option from the parm menu.
Instead, you should manually perform a hangup by typing '+++' from
terminal mode. When your modem responds with OK, type
'ATH'[RETURN]. Oryou can simply turn the modem off and back on to
terminate the connection.
If you currently have your modem set up to run BBS Express!
Professional, no modem setting changes are required.
Using Expanded Memory
The Express! terminal cartridge can use upto 512Kofexpanded
memory as a capture buffer if you are using an expanded aOOXL or
130XE. The only requirement to use this extra memory as a buffer is that
itfoIIows the bank select method utilized by the 'Peterson 130XE memory
upgrade' or lCD's 'Rambo' memory upgrade for the aOOXL's.
As an example, let's suppose you have a 130XE with the 576K
memory upgrade. You can set the memory size in the configuration
Page 3
E!fWIM!
menu to 576K, which will yield a 512K capture buffer. In this configuration, you would not be able to use any ofthis memory as an internal ramdisk, as it has all been reserved for Express's use.
Now let's say you want to use the extra memory for both a
ramdisk and extra buffer space. Assuming your ramdisk configuration
program allows you to do this (i.e, the RD.COM program from SpartaDOS), you can run your ramdisk program specifying the parameter to not
use the upper 64K of the normal 12BK of memory (i.e, RD DB: IE). This
would create a 448K ramdisk and leave the upper 64K free, which can
then be used by Express! as extra buffer space by setting the memory
size to 12BK in the configuration menu. This will give you an BOK capture
buffer (the normal 16K buffer space plus the extra 64K).
The key to remember when setting memory size in the configuration menu is that you are telling Express! 'This is how much free
memory I have in my computer NOT allocated for ramdisk use.
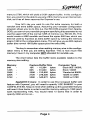
The chart below lists the buffer sizes available relative to the
memory size setting.
Memory
64K
128K
256K
320K
576K
Capture Buffer Size
16K - 16,384
bytes
B1,920
bytes
80K
212,992 bytes
208K
278,528 bytes
272K
528K
540,672 bytes
Computer Type
Stock 800 I BOOXL
Stock 130XE
'Rambo'ed 800XL
130XE wI 320K
130XE wI 576K
SpartaDOS X Users: In order to use this increased buffer size
feature with Express!, you will need to specify 'USE BANKED' in your
CONFIG.SYS file. Keep in mind when setting up this parameter that you
will need 4 free banks in order to set the memory setting to 128K (each
bank representing 16K). You would need 12 banks free in order to
specify 256K and so on...
Page 4
€tfWIM!
Starting Express!
Running Express! is as simple as plugging the cartridge in the
cartridge slot and turning the computer on as you normally would. Ifyou
are using an Atari BOO, plug Express! in the left cartridge slot. Once your
computer has booted, you may start the Express! cartridge by typing
CAR [RETURN] if running SpartaDOS or select the 'Run Cartridge'
option on your DOS menu to start Express! If you are running Atari 2.0
DOS, the cartridge will automatically gain control once DOS has loaded.
This is also true with SpartaDOS 3.x (if you do not have a STARTUP.BAT
file set up).
Express! is a stackable cartridge and may be placed virtually
anywhere in the stack. If you are using the ICD R-TimeB cartridge, we
recommend that you plug in the Express! terminal cartridge above this
cartridge. If you are using the ICD SpartaDOS X cartridge, Express!
should always be plugged in on top.
Each time Express! runs, it will look for the CONFIG.EXP file
(stores the user settable parameters) and the PHONE.LST file (stores
the dialing phone list entries) on drive 1 in the root directory and load
them into memory if they exist. We will discuss how Express! creates
these files later in this manual.
Holding down the [OPTION] key while booting your computer
(with the Express! cartridge installed) will cause the 'Express! Cartridge Control Menu' to appear on your screen. This allows you to
select which cartridge you want enabled when the computer boots. This
feature eliminates the need to plug cartridges out the computer. Simply
select how you want to boot your computer and the boot process will
continue, enabling or disabling cartridges based on your selection.
PageS
?fWIM!
Terminal Mode
Once the cartridge has finished loading the configuration file
and the phone list, you will be placed on the terminal mode screen. From
there, you can communicate with
your modem to change modem settings, access the drop down menu
system and communicate with a BBS
or another computer.
From the terminal mode
screen, you may manually dial a
BBS number by typing ATDT or AIDP
followed by the telephone number.
Set your translation to ASCII translation mode when dialing numbers
II
this way. (Note: it is possible to set
your translation mode to ATASCII
Terminal Mode Screen
mode and type modem commands
or dial phone numbers. If you prefer
setting the translation to ATASCII, instead of pressing the [RETURN]
key to terminate a command, press [CONTROL] M.)
ATDT123-4567 [RETURN] - will tone dial the number 123-4567
ATDP123-4567 [RETURN] - will pulse dial the number 123-4567
From time to time, you may want to connect with a friend from a
voice call. To perform this with Express!, set the duplexto HALF and the
baud rate and translation to match your friend's settings. To initiate a
connection, one of you must 'Originate' and the other must 'Answer'.
Agree on who will originate and who will answer. To originate, from the
terminal window type the command ATO [RETURN]. To answer, from
the terminal windowtypethe command ATA [RETURN]. Both modems
will go 'offhook' and match their carriers. Once this occurs, you can chat
back and forth through terminal mode and initiate file transfers.
Terminal mode can also be used to compose a message off-line
to later send to a BBS. To compose a message, set your duplex mode to
HALF and make sure your capture buffer is empty. Press the [SHIFT]
Page 6
CLEAR keys to clear the terminal mode screen. Now using the blank
terminal screen, compose the message. Keep in mind that you are
limited to the size of the terminal screen (approx. 22 lines) , although you
can save multiple screens to compose longer messages if needed.
Press the [SHIFT] [CONTROL] Y keys to buffer the terminal screen to
the capture buffer. If you want to continue with the message, clear your
screen and continue typing your message until you are either finished or
the screen is again full. Keep in mind that BBS's usually limit the size of
a message, so it's best to keep the message short. Now press the
[SHIFT] [CONTROL] Ykeys again to buffer the screen again. Once your
message is complete, you can use the SAVEfunction underthe BUFFER
option on the menu bar to save your message to a disk file. Later, when
you are online, use the send ASCII transfer mode to upload your message to the BBS's message base editor. Just remember to start a
message on the BBS as you normally would, but instead of keying the
message by hand, use the ASCII send function.
While online with a BBS, you may occasionally need to pause
the text to give you time to read it before continuing. Should that need
arise, the general rule of thumb is to press the [CONTROL] S key to
pause the BBS from sending data. To resume the data flow, press
[CONTROL] Q. Think of [CONTROL] S and [CONTROL] Q as a data off!
on switch while in terminal mode. Many BBS's recognize [CONTROL] S
to both start and stop the data flow. Experiment with the BBS's you call
to see which method works best for you.
Type Ahead Buffer - while in terminal mode, Express! offers
you the ability to utilize a type-ahead buffer. Pressing [SHIFT][CONTROL]
T once turns the type-ahead buffer ON. A TA> prompt will replace the top
menu bar. In this mode anything you type on the keyboard will not be
sent out over the modem until you press the [RETURN] key. Pressing
[SHIFT][CONTROL] T again will toggle to a 01: prompt. In this mode,
you can enter DOS commands as if you were in the OS Shell. While in the
DOS prompt mode, the last 10 commands are saved in a 'command line
recall' buffer. To recall a command, use the up\down arrow keys and the
command will appear in the command line. Once the command you are
looking for appears, press the [RETURN] key to perform the command.
Note: Commands may be up to 80 characters long. The com-
Page 7
mand line will scroll to the right if a typed command exceeds the right
screen boundary.
While in either the type-ahead mode or the DOS prompt mode,
you may press [ESC]ape to turn the menu bar back on while keeping the
mode you were in still turned on. Pressing [ESC]ape again will return
you tothe same mode you were in before. Pressing [SHIFT] [CONTROL]
T again turns the menu bar back on and disables the type-ahead buffer.
Turning The Screen OFF - from time to time, you may want to
turn the screen off. To accomplish this, press the [SHIFT] [CONTROL]
ATARIKEY. When the screen is turned off, processing speed increases
by approximately 30%. This can save quite a bit oftime in file transfers at
higher baud rates either through the modem or when null modeming to
another computer. Pressing [SHIFT] [CONTROL] ATARIKEY again will
turn the display back on.
Note: Turning off the screen will only speed up Express! if you
are communicating at 19200 baud. Express! will keep up with baud rates
through 9600 baud with the screen turned on.
Page 8
fftfW'M!
The Menu Bar
The Menu bar at the top of the screen contains the major functions of the cartridge. Pressing the [ESC]ape key activates the menu
system. Pressing [ESC]ape again deactivates the menus, placing you
back in terminal mode.
Upon activating the menu system, a drop down menu will
appear under the major function that you are currently using and will
display all the sub-functions available within the major function. To move
from one major function to another, use the left and right arrow keys
located beside the [CAPS] key. Once in a major function, use the up and
down arrow keys located beside the [RETURN] key. While using the
arrow keys to move around the menus, it is NOT necessary to hold down
the [CONTROL] key.
When you have selected the function that you wish to execute,
press the [RETURN] key.
When you are moving from side to side through the menu selections and you reach the menu selection closest to either side of the
screen, pressing the arrow key again in the same direction you were
moving will cause the next page of the menu bar to appear. To illustrate
this, press the [ESC]ape key to activate the menu system. Now repeatedly press the right arrow key to move to the right through the menus.
When you reach the buffer menu and press the right arrow again, the
second page of the menu bar will appear and the config menu selection
on the left side of the screen will be active. Continuing to press the right
arrow key will move the menu selection indicator to the right until it
reaches the right side of the screen. Pressing the right arrow key again
will flip back to the first menu bar page positioning you back to the left
side of the screen with the dial menu active.
Page 9
?fWIM!
Dial
Parms
I
Receive
I
Send
I
BUffer"
1st Menu Bar
Config
I
Misc
I
OS Shell
I
Info
I
Quit
0
2nd Menu Bar
Express! always remembers the last menu bar option that was
active. Therefore, when a function is executed and you re-activate the
menu bar, Express! will position you to the last active menu bar option
and the last active function within that option as a starting point. You
then select a new menu option to perform.
Regardless of how many levels deep you are in menus, the
[ESC]ape key will always return you to the previous menu you were on.
So, if you are in terminal mode and you activate a menu function and
wind up 3 levels deep in menus, pressing the [ESC]ape will back up a
level each time until you are finally back in terminal mode again.
Page 10
The Menu Functions
There are 10 major functions in the menu bar. They are:
Dial
- accesses the dialing and phone list functions.
Parms
- accesses the parms functions to allow the setting
of default values such as baud rate, translation, duplex, parity, comm
port, modem parameters, download pathname and hang up the phone.
Receive
- accesses the file transfer receive functions.
Send
- accesses the file transfer send functions.
Buffer
- accesses the capture buffer functions such as
loading, saving and viewing the capture buffer.
Config
- accesses the configuration functions such as
margin setting, word wrap mode, edit generic macros and load/save
config file.
Misc
- accesses the misc functions for setting the background and foreground color settings.
as
Shell- access the OS Shell to allow DOS commands to be
entered without having to drop back to DOS to perform these functions.
Info
-displays information aboutthe Express! cartridge.
Quit
- allows you to exit out ofthe cartridge back to DOS,
even while online. This option also allows you to control which cartridges
will be active when you exit.
Each ofthese 10 major functions are divided into sub-functions.
We will now discuss these sub-functions in detail.
Page 11
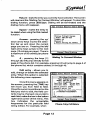
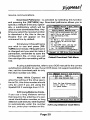
Dial Menu Function
To use the dial function, select it on the menu bar. The dial menu
will drop down allowing access to the sub-functions.
Load phone list - this option allows you to load a phone list
from disk. You will be prompted for a
filename to load.
Save phone list - this option allows you to save a phone list
to disk. The default phone list that
Express! uses when first loaded is a
file named PHONE.LST on drive 1.
You may create additional phone
lists and save them on other drives
and give them any name you want,
but these phone lists would later
have to be manually loaded using
the load phone list option.
Drop Down Dialing Menu
Clear phone list - this option allows you to clear a phone list that
is currentlyin memory. Use this option
when you want to start a new phone
list from scratch.
Dial from list - To dial from
the phone list, position to 'Dial from
List' with the up/down arrow keys
and press [RETURN]. The following menu will appear:
Using the up/down arrow
keys, position to the entry that you
wish to use. Once positioned, the
functions listed in the lower portion
of the screen act on the selected
entry.
I l. nldnjght
EXpO!!lS
2.
3.
4.
5.
6.
7.
8.
'J.
111.
[
D
II
•
Page 12
[dlt emnr
Dial urked
Exchange
Goto
e
2ill1l-f -" I
31111-F-"
31111-r-"
31111-r-"
31111-r-"
31111-F-"
31111-F-"
3118-F-"
31111-F-"
31111-r-"
Dial entrl/
lIark entry
now curao
Exit
Phone Ust Dialing Menu
Return - dials the entry you currently have selected. The screen
will clear and the 'Waiting For Connect Window' will appear. To abort the
dialing function, press [ESC]ape. Dialing will be terminated and the
dialing menu will reappear.
Space - marks the entry to
be dialed when using the Dial marked
function.
Dialing: nldnlght Ixp ....
Mu....r : 8114-379-4156
ti.-ut: 45
Arrows - pressing the up!
Ixpired: 8
down arrow keys moves the selecStatu,,: Ualtlng for connect
tion bar up and down the current
page you are on. Pressing the left!
right arrow keys jumps to the next
page (10 entries per page). There is
t. renl Phone Dlrecto
a maximum of 50 entries per phone
list.
Waiting To Connect Window
# - pressing the keys [1]
through [5] will jump directly to that
page in the phone list. For example, pressing [4] will jump to page 4 of
the phone list, which contains entries 31 through 40.
Edit entry - allows you to
add, change or delete the selected
entry. When this option is selected
the following menu appears:
Once this menu appears on
the screen, pressing the [TAB] key
will move you from field to field.
Once the cursor is positioned on the
field you wish to edit, the field contents may be changed. As you tab to
eachfield, notice the box in the bottom
right hand corner of the menu. This
box indicates the acceptable
keypresses for the particular field
being edited. For example, when
Buffer
tilt Phone L1.t tnt
Ilue: nldnlght Ixpress
Mwober: 8114-379-4156
""it: 45 seconds
llaud rate: 2488
Paritt:!tone
rertl .ooe: ASCII DupllllC: Full
Default protocol: VIIOl1...
AutoMatic IlaCros: Ve.
nacros for this entrv
1. 1"n"'PItIIPASS"!r'PStCOllDl'II"n
2.
3.
Page 13
ESC allortsl
Phone Entry Edit Menu
this menu first appears, the cursor is positioned in the first position ofthe
'NAME' field and the bottom right hand box indicates 'AlphaNum'. This
means this field will accept alphanumeric input (A-Z, a-z, 0-9, space and
any special characters). Enter the desired text in the field.
Next, using the [TAB] key, position the cursor down to the
'WAIT' field. Notice the box now indicates this field will accept only
numeric input. If you try to key in letters, they are ignored.
Now [TAB] down to the 'BAUD RATE' field. The box now indicates SPACEBAR. This means the field is a toggle field. Press the
SPACEBAR until the desired setting appears on the screen. Once you
see the desired setting, you can [TAB] to set the next field.
Once you are satisfied with the entry, press [RETURN] to accept
the changes and return to the dialing menu.
All ofthe input menus used by Express! follow this input convention. Listed below are the 'special function' keypresses available to you
in addition to the normal entry of data.
Input Menu 'Special' Keypresses and their purpose
[TAB]
Position to next entry field.
[BACKSPACE]
Move one character to left in currentfield
[SHIFT] [CLEAR]
Clear the current field
[SHIFT] [TAB]
Position to previous entry field
[SHIFT] [DELETE]
Erase characters from cursor to EOF
[CONTROL] [CLEAR]
Clear the current field
[CONTROL] [INSERT]
Insert character at current cursor position
[CONTROL] [DELETE]
Erase character under the cursor
[CONTROL] [LEFT ARROW] Move one character to left in current field
[CONTROL] [RIGHT ARROW] Move one character to right in current
field
[CONTROL] [UP ARROW]
Position to previous entry field (same as
SHIFT TAB)
[CONTROL] [DOWN ARROW]Position to next entry field (same as TAB)
Page 14
Macro keys - numbers 1 through 3 are the 'macro' keys associated with this phone list entry. You may enter any text (up to 29
characters) in these fields that you wish. Position to the macro you want
to edit using the [TAB] key, enter the macro text you want associated
with the macro and press [TAB] to continue to the next macro. When
finished, press [RETURN] to accept all the changes you've made.
What is a 'Macro' anyway? A macro is nothing more than a
group of characters that perform a repetitive function. For example,
everytime you logon to a BBS, you usually have to enter an 10 and
password to access the system. Instead of writing down on a piece of
paper your logon 10 and password, enter them into the phone entry as
'macros'. Nowtheywon't getthrown away the next time you clean upthe
computer area and they can also be sent over the modem using the
macro keys.
Once connected to a BBS, a macro can be sent out over the
modem by holding down the [SHIFT] [CONTROL] keys and then pressing 1,2 or 3 depending on the macro you want to send. Once you set up
your macros, going through the logon sequence for a BBS is as simple
as one keystroke.
In additional to the normal text which can be entered into a
macro, Express! recognizes 'control' sequences to perform special
functions. These special functions are:
"M
"p
"Px
"J
"x
- send a return
- pause 1 second before continuing
- pause x seconds where x is a value 1 to 9
- chain to the next macro
- send any control character
(l.e, "Z would send a CONTROL Z)
The example macro in entry #1 would perform the following
function when the [SHIFT] [CONTROL] 1 keys are pressed:
Macro 1 - 1"M"PMYPASS"M"PSECONOPW"M
o Send out over the modem the character '1' followed by a
Page 15
fftfWIM!
carriage return (M).
o Wait for 1 second (P) and send out the string 'MYPASS'
followed by a carriage return.
o Wait another 1 second (P) and send out the string 'SECONDPW
followed by a carriage return (M).
As you can see, this can automate an entire logon sequence to
a BBS with one keypress. To illustrate the use of the 'join macro'
command, let's consider the following three macros:
Macro 1 - 1"'M"'P'"J
Macro 2 - MYPASS"'M"'P'"J
Macro 3 - SECONDPW"'M
In this instance, the same function would occur as in the first example. The difference is that it is defined in 3 macros instead of one.
Pressing [SHIFT] [CONTROL] 1 would:
o Send out over the modem the character '1' followed by a
carriage return (M), wait for 1 second, then 'join' to the second macro.
o The second macro would then send out the string 'MYPASS'
followed by a carriage return, wait 1 second (P) and 'join' to the third
macro.
o The third macro would send out the string 'SECONDPW' followed by a carriage return (M).
Automatic Macros - the automatic macros setting allows you to
specify whether or not you want the first macro for the phone entry to be
automatically sent when you connect to the BBS. Setting this option to
'Yes' and setting your macros for proper response to the BBS's data
request prompts will execute an automatic logon without any keypresses
on your part.
Dial marked - will start dialing the entries which have been
marked with the 'Mark entry' function. Express! will dial the entry and wait
for a modem connection orthe 'Busy' message from the modem. If busy,
Express! will move to the next marked entry and dial it. Once all the
Page 16
JqfWIM!
interface does not support the DTR line on comm port 4 ( it always stays
on). If you use comm port 4 with Express!, you must hang up using the
'+++' followed by the ATH[RETURN] command. Refer to your modem
manual for additional information on this command and its usage.
Modem Parameters - is activated by selecting this function and
pressing the [RETURN] key. Modem parameters allow you to setthe
dialing prefix and suffix for your
particular modem. Most 'Hayes compatible' modems use ATDT (tone
dialing) or ATDP (pulse dialing) as
the dialing prefix and AM (carriage
return) to terminate commands to
the modem.
Assuming you have a 'Hayes
compatible' modem, set these parameters as follows:
Dial
Modem P8I8tneters Menu
Dialing Prefix
Dialing Suffix
ATDTorATDP
AM
Consult your modem user manual for the correct settings for
your particular modem.
Modem Initialization - this setting allows you to specify a
modem command that you want to send to the modem when the
Express! cartridge is started. This usually consists of a reset command
forthe modem, but can include setting the modems registers for turning
on/off the modem speaker or setting the register for speed dialing. Any
command that you can send to the modem in terminal mode can be
placed in the initialization string, limited only by the field size of 30
characters.
Note: If Express! starts and detects the presence of a carrier
signal, this initialization string is not sent to the modem. Express! would
assume you left the cartridge while online and are now returning to
Page 19
resume communications.
,
I
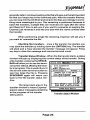
Download Pathname - is activated by selecting this function
and pressing the [RETURN] key. Download pathname allows you to
specify a 'default' drive and, optionDial IllHUJl ReceiYll I Send I Buffel"
ally, a subdirectory which will be
I IlMld I"ate : 9688 I
used to store downloaded files. AnySpecifl/ Default Download Path
time you select the receive function
[ntal" the d.-lvelpath_ that lIoo
would Ilke to use as lIOOI" default
to download a file, this is the pawhen d...nloading flies.
thname that will appear on the
-) DB:)
command line by default.
FOI" DOS 2. x, lIool" d...nload path
Simply key in the path name
you wish to use and press [RETURN]toterminate.lfthepathname
is changed and you want to make it
permanent, remember to save the
configuration file, or once you exit
the cartridge this new setting will be
lost.
Dould si.pll/ be the d.-I..... spec.
(Ie: 'DB:')
F01" SpartaDOS us....... you Nlf use
a full dr iv.. spec and path........
(Ie: 'D2:)DlPJl[SS>DOUIU.OAD)')
AIphalkuoIExp.-essl (c) 1989 OI-ion nicm Syst....s.. _
Default Download Path Menu
If using subdirectories, refer to your DOS manual for the correct
subdirectory delimiter to use. If your DOS does not support subdirectories, set the download path to only
the drive number (i.e. 08:).
Dial
Note: While Express! will
allow the setting of the drive specifierto D9:, this drive number should
only be used if you are using the
SpartaDOS X cartridge from I.G.D.
[ntel" the long distance code
to dial when a 't' is foond
I n a phone nu",ber:
Edit Long Distance Codeif you use a long distance service
that requires the entering of a personal identification number or long
distance code and you want Express!
to automatically enter the number Edit Long Distance Gode Menu
for you, enter your number on this
Page 20
menu. To make Express! send this number over the modem before
dialing the phone number, precede the phone number in the dialing
entry with an exclamation point. This feature is designed for use when
using other than a 'dial l' long distance carrier.
Hang Up The Phone - selecting this option and pressing [RETURN] will hang up the modem by dropping the DTR line. If you are
using the Atari SX212 modem connected through the 510 port, we
recommend that you not use this option to terminate a phone call.
Instead, use the +++ATH [RETURN] command from terminal mode. We
make this recommendation because the SX212 does not hang up consistently when the DTR line is dropped, but will hang up reliably when
using +++ATH [RETURN].
Page 21
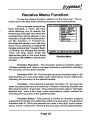
Receive Menu Function
To use the receive function, select it on the menu bar. The receive menu will drop down allowing access to the sub-functions.
Once a transfer protocol has
been selected, a menu will drop
down allowing you to specify the
filename(s) and path into which the
received files will be placed. If you
selected a single file transfer protocol like Xmodem or Ymodem-1k,
the single file transfer menu will drop
down. If you selected a multiple file
transfer protocol like Ymodem Batch
or SEAlink, the Multiple file transfer
menu will drop down. Enter the
appropriate data in the input fields
and press [RETURN] to start the file
transfer.
Dial
Panos
Vooodllll (llModerlkl
VIIOd... Batch
Ulndoued lIMod""
SEAl1nk
LIIOdIlll
LIIOdIlll Batch
Ex
, (c) 198'J Orion "Icra
Receive Menu
Xmodem Standard - This Xmodem protocol transfers data in
128 byte packets and uses a one digit checksum method for checking
the accuracy of the packet transfer.
Xmodem CRC-16 - This Xmodem protocol transfers data in 128
byte packets and uses a two digit 'cyclic redundancy check' method for
checking the accuracy of the packet transfer.
Ymodem - This protocol is actually 'Xmodem 1K', but over the
years has generally become known as Ymodem, meaning 'transfer one
file using Xmodem 1K packets'. This protocol transfers data in 1024 byte
packets and uses a two digit 'cyclic redundancy check' method for
checking the accuracy of the packet transfer.
Ymodem Batch - This protocol is similar to Ymodem except it
supports the transfer of multiple files within one execution. This protocol
transfers data in 1024 byte packets and uses a two digit 'cyclic redundancy check' method for checking the accuracy of the packet transfer.
Page 22
1?tfWIM!
Once Ymodem batch is selected, the multiple file transfer menu appears. You will be prompted for a filename, but all that needs to be
entered is the drive number and, optionally, a subdirectory name to
receive the transferred files. The filename is contained within the file
transfer packet, so the file you are receiving is saved on your system with
the same name as the file on the system that you are receiving the file.
Windowed Xmodem - This protocol is a 'sliding' window transfer protocol commonly supported by MS-DOS bulletin boards. Windowed Xmodem transfers data in 128 byte packets and uses a two digit
'cyclic redundancy check' method for checking the accuracy of the
packet transfer.
Sealink - This protocol is a 'sliding' window transfer protocol
commonly supported by MS-DOS bulletin boards. SEAlink transfers
data in 128 byte packets and uses a two digit 'cyclic redundancy check'
method for checking the accuracy of the packet transfer
Lmodem/Lmodem Batch - select Lmodem or Lmodem Batch
only when connected to a BBS Express! Professional bulletin board or
another Express! cartridge. Currently, these are the only two that support these transfer protocols. These protocols transfer data in 256 byte
packets and use a two digit 'cyclic redundancy check' method for
checking the accuracy of the packet transfer. Lmodem{Lmodem Batch
are sliding window protocols similar to SEAlink with a significant added
feature. If you are connected to another Express! cartridge, it will not be
necessary for the receiver to do anything to receive files. Once the
sender starts the transfer, the protocol handshakes with the receiver and
automatically starts the receive function on your side (the receiver must
be in terminal mode with the menu bar de-activated). The download pathname in the PARMS menu must be set for this function to work
correctly. Additionally, both the sender and receiver must be in ATASCII
translation mode to perform this transfer protocol. The reason is simple.
This is an ATARI specific protocol, hence ATASCII translation.
Lmodem Batch will receive one or more files, depending on the
sender. In general, when using Lmodem, it is desirable to use the batch
version of Lmodem. The shining feature of Lmodem is that it completely
removes the need forthe receiver to do anything to successfully down-
Page 23
load files. When connected to a BBS Express! Professional board, simply 'MARK' the files you want to receive and select the 'SEND MARKED
FILES'function on the BBS. Then sit back and let the protocol take care
of the rest! The transfer will start automatically without the need for you
to start the transfer on the terminal side. We think once you use this 'new'
protocol a few times, you'll wonder why it wasn't ALWAYS done like this
in the first place.
ASCII - select ASCII when the BBS you are connected to supports ASCII file transfers or you want to receive incoming text into a file
on your system. This function will save the file when the copy buffer fills
up.
A few words about protocols - Express! is the first terminal
program to bring 'windowed' protocols to the Atari 8-bit computer. As a
general rule, you should always use a windowed protocol if the host
system you are connected to supports them. Windowed protocols will
have the same throughput as Ymodem without the overhead of resending a 1K packet if an error occurs. If you are connected to an IBM PC
board, SEAlink would be the recommended protocol to use. If you are
connected to a BBS Express! Professional board, Lmodem is the protocol you should use.
Special Filename Search Function - Express! will search the
terminal screen for a filename whenever you perform a receive single file
transfer. If one is found, it will be placed in the filename input field for you
as a default filename. If this is not the name you want to save the file as,
simply backspace over the name and type in the name you want.
Automatic Renaming Of Existing Files - When you are performing 'Batch' receiving offiles, if Express! detects an existing filename
in your download path that is the same name as the file that you are
receiving, your existing file will NOT be overwritten. Instead, Express!
will change the last character in the filename it is receiving to a 1. As an
example, let's say you are downloading a file called 'SPELL.COM', and
that file already exists in your download path. Express! will rename the
incoming file to 'SPELL.C01' and check to see if that name exists. If it
does, Express! will rename it to 'SPELL.C02' and so on until it has tried
to rename the file up to 'SPELL.C09'. By Express! doing this for you, you
Page 24
are pretty safe in not downloading a file that will wipe outthat all important
file that you forgot was in the download path. After the transfer finishes,
you can pop into the OS Shell and rename the files accordingly to something more meaningful to you. This renaming is performed because in
batch file transfers, multiple files are received one right after the other
and there isn't time to ask you if you want to overwrite an existing file.
Express! just renames it and lets you deal with the name conflicts after
the transfer.
When performing single file receiving, Express! will ask you if
you want to 'overwrite the file'.
Aborting file transfers - once a file transfer has started, you
may abort the transfer by holding down the [OPTION] key. The transfer
will abort and a 'User aborted the transfer' message will appear. Press
any key to clear the message and resume terminal mode.
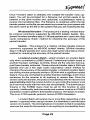
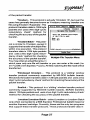
Transfer Status Window - When the file transfer starts, a status
window will pop up displaying the current status of the transfer. During
a file transfer, pressing the SPACEDial I Panos
Send I Buffer
BAR will allow you to see the termirile:
ril_.Ixt
nal screen without affecting the transPath: 00:)
fer in progress. This is useful if you'd
Sender: Express! Cart
At_pte: 1
Current bI ocJc: 8
like to look at the terminal screen to
Chec:bu.
type
in
.....:
CIIC-U.
see how large the file is. Pressing
Tota I bytes processed:
Tota I b\ites expected : 1681111
SPACEBAR again will return you
o SOIl
back to the file transfer status wino Ilk.
oCM
dow.
• Data
The large blank area in the
transfer window is where Express!
places status messages pertaining
to the progress of the transfer
taking place.
Page 25
oCIIC
Press OPT! 011 to abort transfer
Prees SPACE to see Tere screen
bOll"" Batch Recei .....
Transfer Status Window
i
Send Menu Function
To use the send function, select it on the menu bar. The send
menu will drop down allowing access to the sub-functions.
Once a transfer protocol has
been selected, a menu will drop
down allowing you to specify the
filename(s) and path from which to
send files. If you selected a single
file transfer protocol like Xmodem
or Ymodem-1 k, the single file transfer menu will drop down. If you selected a multiple file transfer protocol like Ymodem Batch or SEAlink,
the Multiple file transfer menu will
drop down. Enter the appropriate
data in the input fields and press
[RETURN] to start the file transfer.
! (cl 1989 Orion "Icro
[
Send Menu
Xmodem Standard - This Xmodem protocol transfers data in
128 byte packets and uses a one digit checksum method for checking
the accuracy of the packet transfer.
Entering a wildcard file spec
is permissible in single file send
protocols. Express! will search the
specified pathname for the first directory entry it finds and will send
that file. This mayor may not be the
file you wanted to send, so take care
when using wildcarding with single
file transfer protocols.
Xmodem CRC-16 - This
Xmodem protocol transfers data in
128 byte packets and uses a two
digit 'cyclic redundancy check'
method for checking the accuracy
Dial
Enter tlle filII naMe of the file
that you want to send:
IlaM: - - - - - - -
Pat.: DB:>
ESC abort.t-I- - - - t
Uind.-d M.od_ Send
Single File Transfer Menu
Page 26
ff!fWIM!
of the packet transfer.
Ymodem - This protocol is actually 'Xmodem 1K', but over the
years has generally become known as Ymodem, meaning 'transfer one
file using Xmodem 1K packets' . This
Dial I Panos I Receiue
I Buffer
protocol transfers data in 1024 byte
I
K.od. - Standard
packets and uses a two digit 'cyclic
I1Itltiple File Tnnsfer
redundancy check' method for
Enter the pathnalle ani filespec
checking the accuracy ofthe packet
of the files to send:
transfer.
1&
-e-
Na_:
Path: DB:>
Ymodem Batch - This protocol is similar to Ymodem, except it
supports the transfer of multiple files
within one execution. This protocol
-lESe abort.. !
IAlpha",,",'"
transfers data in 1024 byte packets
v.oo... Send
and uses a two digit 'cyclic redundancy check' method for checking
Multiple File Transfer Menu
the accuracy of the packet transfer.
You may enter an actual filename, in
which case only one file will transfer or you can enter a file mask (i.e,
01 :*.COM or 01 :Express>*.Com). All files matching the file mask will be
transferred.
ii
Windowed Xmodem - This protocol is a 'sliding' window
transfer protocol commonly supported by MS-DOS bulletin boards.
Windowed Xmodem transfers data in 128 byte packets and uses a two
digit 'cyclic redundancy check' method for checking the accuracy of the
packet transfer.
Sealink - This protocol is a 'sliding' window transfer protocol
commonly supported by MS-DOS bulletin boards. SEAlink transfers
data in 128 byte packets and uses a two digit 'cyclic redundancy check'
method for checking the accuracy of the packet transfer.
Lmodem/Lmodem Batch - select Lmodem or Lmodem Batch
only when connected to a BBS Express! Professional bulletin board or
another Express! cartridge. Currently, these are the only two programs
that support these transfer protocols. These protocols transfer data in
Page 27
256 byte packets and use a two digit 'cyclic redundancy check' method
for checking the accuracy of the packet transfer. Once Lmodem is selected, you will be prompted for a filename to send (wildcarding is permissible). After entering the appropiate input fields, press [RETURN] to
start the file transfer. Lmodem/Lmodem Batch are sliding window protocols similar to SEAlink with a significant added feature. If you are connected to another Express! cartridge, it will not be necessary for the receiverto do anything to receive files. Once the sender starts the transfer,
the protocol handshakes with the receiver and automatically starts the
receive function on their side (the receiver must be in terminal mode with
the menu bar de-activated). The download pathname in the PARMS
menu must be set for this function to work correctly. Additionally, both
the sender and receiver must be in ATASCII translation mode to perform
this transfer protocol. The reason is simple. This is an ATARI specific
protocol, hence ATASCII translation.
ASCII - use this option when you want to send a file to the BBS
(such as a precomposed message ).
Aborting file transfers - once a file transfer has started, you
may abort the transfer by pressing the [OPTION] key. The transfer will
abort and a 'Sender aborted the transfer' message will appear. Press any
key to clear the message and resume terminal mode.
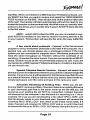
Transfer Status Window When the file transfer starts, a status
window will pop up displaying the
current status of the transfer. During
a file transfer, pressing the SPACEBAR will allow you to see the terminal screen without affectingthe transfer in progress. Pressing SPACEBAR again will return you back to
the file transfer status window. The
large blank area is reserved for
Express! to place transfer status
messages.
Dial I Panos I JleceIYlll&[ Buffer
File: FII_.Ext
Path: 18:>
Se1lder: Exp......, Cart
Currllnt "lock: Il
fltte.Dts: 1
Checksu. ty'pe In ...... : CIlC-16
Total 1lyt_ procened:
Total ";;tes ""-'ted : 161l1l8
o SOH
o BIle •
o CI1fl
• Data
oCIlC
Press OPT IOIl to abort transfer
Pr ...... SPACI to _ Tere 8CrtIlIn
V_.
Batch Send
Transfer Status Window
Page 28
fftfWIM!
Buffer Menu Function
To use the buffer function, select it on the menu bar. The buffer
menu will drop down allowing access to the sub-functions.
Select the sub-function you
wish to perform by using the up/
down arrow keys and then press
[RETURN].
View-select this option and
press [RETURN] to view the capture buffer.
While in the buffer viewer,
the following keys are active for moving around the buffer:
[CONTROL] up arrow
[CONTROL] down arrow
line.
[CONTROL] left arrow
character.
[CONTROL] right arrow
character.
[SHIFT) [CONTROL] up arrow
[SHIFT) [CONTROL) down arrow
page).
[SHIFT) [CONTROL] left bracket
[SHIFT) [CONTROL] right bracket
[SHIFT) [CONTROL] M
memory bank.
Ex es,,! (c) 198':1 Orion "Icro
Buffer Menu
- moves the cursor UP one line.
- moves the cursor DOWN one
- moves the cursor LEFT one
- moves the cursor RIGHT one
- moves UP 23 lines ( 1 page).
- moves DOWN 23 lines (1
- moves LEFT 10 characters.
- moves RIGHT 10 characters.
- toggles to next capture buffer
Load - select this option and press [RETURN] to load the
capture buffer from disk with a text file. You will be prompted for a
filename.
Page 29
Save - select this option and press [RETURN] to save the
capture buffer to disk. You will be prompted for a filename. Once the
buffer has been saved to disk, the buffer is cleared.
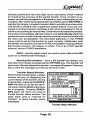
Print - select this option to
print the contents of the capture
buffer.
......... 1.
2
3
Clear - select this option to
clear the capture buffer. You will be
prompted with 'Is it OK to clear the
buffer?' Respond with 'Y'es or 'N'o.
Bank: 8
Capture Buffer Viewer
Page 30
.
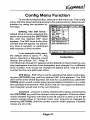
Config Menu Function
To use the config function, select it on the menu bar. The config
menu will drop down allowing access to the sub-functions. Select a subfunction by using the up/down arrow keys.
Setting The Def Drive default drive is set by selecting this
option and pressing the [RETURN]
key until the desired DEF drive
appears. The DEF drive is the drive
number that will appear 'by default'
any time a function is performed
that requires a drive number.
Col...""
: 411
Leh urgln: II
LIon! wrap : Ito
lJ/L Pa..... : 1
ne.,r size: £>4K
Edit enerie IlaCros
Load cont I gurat ioo
Sa.", eonf i ura t 1011
Express' (c) 19l1'J Orion nlero
In our example config menu,
the default drive is set to '1'. Any
ConfigMenu
action requiring a filename would
display the prompt 'D1:'. Keep in
mind that even though D1: appears as the default on the prompt line, you
may backspace over the drive designator and change it to a different
drive number. This would not change the default drive, only the drive
number for this one particular action.
EXE Drive - EXE drive is set by selecting this option and pressing the [RETURN] key until the desired EXE drive appears. The EXE
drive is the drive where Express! will look for a subdirectory called EXPRESS which would contain external executable modules to run under
the cartridge environment. With DOS's that do not support subdirectories, Express! would look in the root directory.
Columns - columns is set by selecting this option and pressing
the [RETURN] key until the desired columns appears. Columns determines whether Express! will write to the 40 column screen or to the 80
column screen when in 'terminal mode' only. Columns is changed by
pressing [RETURN] until the correct column width appears. Possible
values are 40 or 80.
Page 31
gjfWIM!
All menuing is always written to the 40 column screen regardless of the columns setting. This is due to the fact that the XEP80 is not
capable of displaying 'custom display lists' which are used by Express!.
In order to use 80 column in terminal mode, you must be running the
XEP80 under SpartaDOS X. No other 80 column configuration will worn
properly due to display speed limitations using the XEP80 with other
screen handlers.
SpartaDOS X Users: The DEVICE XEP80 statement would need
to be included in your config.sys to utilize the 80 column terminal mode
in Express!.
Left Margin - left margin is set by selecting this option and
pressing the [RETURN] key until the desired left margin appears. Left
margin sets the text left margin when displaying text to the screen. Possible values are 0, 1 or 2.
Word Wrap - word wrap is set by selecting this option and pressing the [RETURN] key until the desired word wrap setting appears.
Word wrap toggles between ON/OFF. Setting word wrap ON will automatically wrap an entire word to the next line if it can't fit on the current
display line.
U/L Pause - U/L pause is used in ASCII file transfers and
specifies the number of seconds to delay before sending the next line of
the text file. U/L pause may be set to any value between a and 9 by
pressing the [RETURN] key until the value you want appears in this field.
Some BBS's can accept ASCII transfers without any delay, while others
require time to process the received line before they can acceptthe next
line. If you're not sure what to set the pause to, start out with a value of
O. If the BBS seems to be dropping some of the characters, increase the
value and try again until the BBS is not dropping characters anymore.
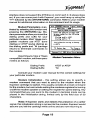
Memory Size - memory size is set by selecting this option and
pressing the [RETURN] key until the desired memory size appears.
As discussed in the 'Expanded Memory Section' of this manual,
this setting controls the amount of memory set aside for use as a capture
buffer. In a stock 64K Atari computer, Express! sets aside 16K as a
Page 32
capture buffer. Any additional memory that your computer has may be
used to increase the buffer size all the way up to a 528K capture buffer
when using an Atari 130XE with 576K of memory.
The chart below shows you the buffer size available relative to
the memory size setting you select:
Memory
64K
128K
256K
320K
576K
Capture Buffer Size
16K - 16,384
bytes
80K - 81,920
bytes
208K - 212,992 bytes
272K - 278,528 bytes
528K - 540,672 bytes
Computer Type
Stock 800 I 800XL
Stock 130XE
'Rambo'ed 800XL
130XE wi 320K
130XE wi 576K
Keep in mind when setting the memory size for use as a capture
buffer that you can't use the memory as a buffer and a ramdisk at the
same time.
SpartaDOS X Users: In order to use this increased buffer size
feature with Express!, you will need to specify 'USE BANKED' in your
config.sys file. Keep in mind when setting up this parameter that you will
need 4 free banks in order to setthe memory setting to 128K (each bank
representing 16K). You would need 12 banks free in order to specify
'256K and so on ...
Edit Generic Macros - this
option allows you to define up to 7
'generic' macros. Macros are edited by pressing [TAB] until you are
positioned to the macro that you
wish to edit. Once positioned, you
may change the macro.
These macros are defined
the same way you defined the 3
macros under each of the phone list
entries. Unlike the phone list macros, which are only active when you
dialed a phone entry, these 'generic'
Quit
4.
__
s.
6.
7.
B.
9.
18.
Note: These ....eros are Invoked by
press Ing sh I ft/contro 114-8.
A
J: Join next
Art: Return kev
"rx: Pause x
"?: Anv Achar
AlphaHuII
Express! eel 1989 Orion Micro Syst......
Edit Generic Macros Menu
Page 33
macros are active at all times without regard to which phone entry is
currently active. The generic macros are activated by holding down the
[SHIFT] [CONTROL] keys and pressing 4 through 0, corresponding to
the macro you wish to execute. In addition to the normal text which can
be entered, Express! recognizes 'control' sequences to perform special
functions. These special functions are:
"M
"p
"Px
"J
"x
- send a return
- pause for 1 second before continuing
- pause for x seconds where x is a value 1 to 9
- chain to the next macro
- send any control character
(l.e,
would send CONTROL Z)
"z
Load Configuration -when this option is selected, Express! will
load the last saved configuration file.
Save Configuration -when this option is selected, Express! will
save the current parameters to the configuration file. This file is called
CONFIG.EXP and is stored on drive 1 in the root directory. It is not
necessary to specify the drive and filename for the configuration file. Express! will save it automatically when this option is selected. Any time a
change is made to any of your settings and you want to make those
changes permanent, you should use this option to save your settings.
Page 34
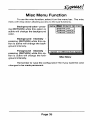
Misc Menu Function
To use the misc function, select it on the menu bar. The misc
menu will drop down allowing access to the sub-functions.
Background color - pressing [RETURN] while this option is
active will change the background
color.
Confiu
[jjjK]1 os Shell I Info I Quit
IBackground
co lor
Backuround Intens Itu
Foreground Intensltlf
I
Background intensity pressing [RETURN] while this option is active will change the background intensity.
Foreground intensity pressing [RETURN] while this option is active will change the foreground intensity.
Expresa'
(e)
19l1'J Orion "Icra SyatMs
MiscMenu
Remember to 'save the configuration' file if you want the color
changes to be made permanent.
Page 35
fftfWIM!
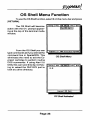
OS Shell Menu Function
To use the OS Shell function, select it on the menu bar and press
[RETURN].
The OS Shell will become
active with the 01: prompt appearing at the top of the terminal mode
window.
From the OS Shell you can
type commands as if you were atthe
command line in SpartaDOS. This
eliminates the need to exit the Express! cartridge to perform routine
DOS commands. If using Atari 2.0
DOS,this can save time by not having to reload the DUP.SYS just to
look at a drive directory.
Confl
Ix
, (c) 1'l8'J Orion nlcro
OS Shell Menu
Confl
D1:1
Ixpress' DOS She11
OS Shell Activated
Page 36
€tfWIM!
The following commands are supported:
Command
Function
DIR
DIRS
Dx:
EXIT
CWD
CREDIR
DELDIR
ERASE
PROTECT
UNPROTECT
TYPE
CLS
RENAME
COpy
Disk directory
Short directory
Change drive
Exit OSshell
Change directory
Create directory
Delete directory
Delete file
Lock a file
Unlock a file
View text file
Clear the screen
Rename a file
Copy file(s) - wildcards
allowed
Show disk info
Format a disk - if using
SpartaDos X cartridge,
will use SpartaDos X formatter, otherwise will format disk
in Atari 2.0 format.
Display command menu
X
CD
MD
RD
DEL(ETE)
VIEW
REN
CHKDSK
FORMAT
?
Unless you are running SpartaDOS, several commands (l.e.
CHKDSK,CREDIR,DELDIR, etc.) will be unavailable for execution.
Special Note: While TYPE and VIEW may be used interchangably, there is a subtle difference in their usage. VIEW will correctly
translate ASCII carriage return/linefeeds to the ATASCII carriage return
before displaying to the screen. TYPE will not perform any translation on
the file being displayed. You can tell if a file has ASCII CR/LF's (the file
was created on an MS-DOS machine) by TYPE'ing it and the sentences
seemto run on without carriage returns. If this isthe case, VIEW'ing it will
correctly display the file on your screen. Files created on the Atari computer will correctly display with either command.
Page 37
To print a file to the printer while in the
command and specify a destination of 'P:'.
i.e,
as Shell,
use the copy
Copy 01 :Text.Txt P:
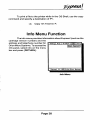
Info Menu Function
The info menu provides information about Express! (such as the
cartridge version number) and the
address and telephone number for
Orion Micro Systems. To access the
info panel, select info on the menu
bar and press [RETURN].
Express' ecl 1'l8CJ Orion nlcro Sy.. t ......
Info Menu
Page 38
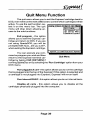
Quit Menu Function
The quit menu allows you to exit the Express! cartridge back to
DOS, even while online with a BBS and to control which cartridges will be
active. To use the quit function, select it on the menu bar. The quit
Exit Pro rail
menu will drop down allowing acIklD piggyback cart
cess to the sub-functions.
Ikln Internal IlASIC
Disable all carts
Exit program - this option
allows you to exit the Express! cartridge and return to DOS. If you are
not using SpartaDOS, you will be
prompted with 'Quit... are you sure?',
when exiting the Express! cartridge.
Express' ecl 1'l89 Orion Micro Syst_s
You can execute any command or program you wish and then
Quit Menu
return to the Express! terminal cartridge by typing CAR [RETURN] if
running SpartaDos or by selecting the 'Run Cartridge' option from your
DOS menu.
Run piggyback cart - this option allows you to run the cartridge
that is plugged into the top of the Express! If this option is selected and
a cartridge is not plugged into Express!, Express! will re-run itself.
Run internal BASIC -thls option allows you to run internal basic.
Disable all carts - this option allows you to disable all the
cartridges physically plugged into the computer.
Page 39
1o/fWIM!
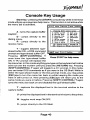
Console Key Usage
Start Key - pressing the [START] console key while in terminal
mode will pop up a keypress help menu. This function is not active while
the menu bar is activated.
Dial I Panos I Rac" I"" I Send I Buff"r
A - turns the capture buffer
ON/OFF.
D - jumps directly to the
dialing menu.
R - jumps directly to the
receive menu.
Presslna Shift Control Dlua:
A: Buff"r onloff U: Uortl wrap
D: Dialing ...00
0: 008 "hell
R: Receive fll"
S: Send fll"
T: Type-ahead
P: Para....ters
Y: Buffer scr""" Q: Quit
U: Pr I nt screen
[: VI"" Buff"r
H: Hang up phone
r: Online t l .
1-8: Outputs .acro 1 thrOU!fh 18
ESC: Outputs an ESCape character
T - toggles between typeahead buffer ON , a DOS command
%llll I Atarl I rull I Buffer:
8
prompt and type-ahead buffer OFF.
Pressing [SHIFT] [CONTROL] T
Press START for help menu
once turns the type-ahead buffer
ON. A TA> prompt will replace the
top menu bar. In this mode anything you type on the keyboard will not be
sent out over the modem until you press the [RETURN] key. Pressing
[SHIFT] [CONTROL] T again will toggle to a D1: prompt. In this mode,
you can enter DOS commands as if you were in the OS Shell. While in
either the type-ahead mode or the Dos prompt mode, you may press
[ESC]ape to turn the menu bar back on while keeping the mode you
were in still turned on. Now pressing [ESC]ape will return you to the
same mode you were in before. Pressing [SHIFT] [CONTROL] T again
turns the menu bar back on and disables the type-ahead buffer.
Y - captures the displayed text in the terminal window to the
capture buffer.
U - prints the displayed text in the terminal window to the printer.
W - toggles word wrap ON/OFF.
o - jumps directly to the OS Shell.
Page 40
S - jumps directly to the send file menu.
P - jumps directly to the parms menu.
Q - jumps directly to the quit menu.
E - jumps to the text buffer viewer.
H - jumps directly to the 'hang up phone' option.
F - displays current connect time in minutes. NOTE: time is only
correct if the entry was dialed from the dialing menu.
Upgrade Policy
From time to time, there may be upgrades available to the Express! cartridge to add additional features. While we wish we could give
these upgrades away, economics prevents us from doing so. Should
upgrades become available in the future, we will send you a new EPROM
to replace the current one in your cartridge at a reasonable cost. There
is no need to send us back the cartridge to take advantage of any
upgrade. Simply replace the existing EPROM with the new one. Send
any request for upgrades to:
Orion Micro Systems
ATTN: Express! Cart Upgrade
2211 Planters Row Drive
Midlothian, Virginia 23113
Page 41
In Conclusion
We hope you find the Express! terminal cartridge to be the most
powerful terminal program you have ever used on the Atari computer,
but we're not stopping here. Express! has built into it a feature by which
if it can't find what it's looking for in the cartridge, it will look for it on disk
(remember the EXE drive specifier in the CONFIG menu?). So what, you
say? Well... this means two things.
First, as we find more features to putin Express!, we'll be writing
programs to fill those needs. In order to use these new features, all you
have to do is place the programs in the EXPRESS subdirectory (root
directory for non-SpartaDOS users) of the EXE drive. Then by popping
into the OS Shell and typing the program name, Express! will run the
program. So as new file transfer protocols develop, Express! will meet
the challenge by expanding with new 'External' programs to be run
under the cartridge environment. These programs, as they are developed, will be placed on our Midnight Express! technical support board
in the Express! cart file sig and in our ORION MICRO SYSTEMS file sig
on GEnie.
MIDNIGHT EXPRESS!
(804) 379-4156
300/1200/2400 Baud
Secondly, this means you will be able to write 'External' programs to run under the Express! cartridge environment to fill a special
communications need you may have. We will be placing technical documentation on Midnight Express! and GEnie on how to write programs to
run under the Express! cartridge environment.
Happy modeming.... Orion Micro Systems
Page 42
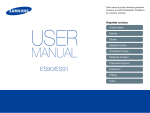
Notes: