1
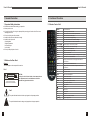
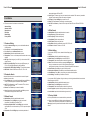
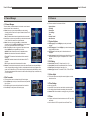
USER'S MANUAL
500 Plus
Digital Satellite PVR Receiver
500 Plus
UNIVERSAL SERIALBUS
WITH SMART CARD READER
USB2.0 INTERFACE
User's Manual
Table of contents
1. General Information -------------------------------------------------------------------------------------------------2
1.1 Important Safety Instructions -------------------------------------------------------------------------------------2
1.2 Markings on the Rear Panel --------------------------------------------------------------------------------------2
2. Control and Functions ---------------------------------------------------------------------------------------------3
2.1 Remote Control Unit ------------------------------------------------------------------------------------------------3
2.2 Front Panel ------------------------------------------------------------------------------------------------------------4
2.3 Rear Panel -------------------------------------------------------------------------------------------------------------4
2.4 Installation of receiver ----------------------------------------------------------------------------------------------5
3. Installation --------------------------------------------------------------------------------------------------------------6
3.1 Antenna Setting ------------------------------------------------------------------------------------------------------6
3.2 Automatic Search ----------------------------------------------------------------------------------------------------6
3.3 Manual Search -------------------------------------------------------------------------------------------------------6
3.4 Blind Search -----------------------------------------------------------------------------------------------------------7
3.5 Motor Setting ----------------------------------------------------------------------------------------------------------7
3.6 Factory Default -------------------------------------------------------------------------------------------------------7
4. Channel Manager ----------------------------------------------------------------------------------------------------8
4.1 Channel Manager ----------------------------------------------------------------------------------------------------8
4.2 Set Favourites --------------------------------------------------------------------------------------------------------8
5. Preference --------------------------------------------------------------------------------------------------------------9
5.1 System Options -----------------------------------------------------------------------------------------------------9
5.2 AV Setting --------------------------------------------------------------------------------------------------------------9
5.3 Video Adjust -----------------------------------------------------------------------------------------------------------9
5.4 Time Settings ---------------------------------------------------------------------------------------------------------9
5.5 Timer --------------------------------------------------------------------------------------------------------------------9
5.6 Parental Control ----------------------------------------------------------------------------------------------------10
5.7 About Receiver ------------------------------------------------------------------------------------------------------10
6. Game -------------------------------------------------------------------------------------------------------------------10
7. General Viewing Function ---------------------------------------------------------------------------------------10
7.1 Program Information
-------------------------------------------------------------------------------------------10
7.2 Channel List ----------------------------------------------------------------------------------------------------------11
7.3 EPG (Electronic Program Guide) -------------------------------------------------------------------------------11
7.4 Satellite List ----------------------------------------------------------------------------------------------------------11
7.5 Favourite List --------------------------------------------------------------------------------------------------------11
7.6 Multi Video Type ----------------------------------------------------------------------------------------------------11
7.7 Zoom Function ------------------------------------------------------------------------------------------------------11
7.8 Audio ------------------------------------------------------------------------------------------------------------------11
7.9 TV/Radio --------------------------------------------------------------------------------------------------------------11
7.10 TV/SAT mode(Optional) -----------------------------------------------------------------------------------------11
7.11 Recall ----------------------------------------------------------------------------------------------------------------11
8. USB Function --------------------------------------------------------------------------------------------------------12
9. Technical Specification -------------------------------------------------------------------------------------------13
10. Trouble Shooting -------------------------------------------------------------------------------------------------13
1
User's Manual
User's Manual
1. General Information
2. Control and Functions
1.1 Important Safety Instructions
2.1 Remote Control Unit
!
!
!
!
!
!
!
Read this user manual before starting your operation.
Never open the cover.
If you don't use this unit for long time, please pull the power plug out form the outlet. Do not use a
damaged power cord.
Do not touch the power with wet hands.
Install the dish with correct direction and angle.
Install the unit in place with:
Good Ventilation
Suitable Temperature
No Direct Sunrays
Low Humidity
Do not put heavy objects on the unit.
1.2 Marks on the Rear Panel
POWER
Turn on/off the STB
TV/SAT
Switch among TV/AV VCR mode
MENU
Show the main menu or exit back to previous menu
MUTE
Enable or disable the audio output
0-9
Select channels or enter programming
EXIT
Escape from present menu and save the settings
OK
Confirm the selected item or show the channel list
CH+/CH-( )( )
Channel change or move cursor up or down
VOL+/VOL-( )( ) Volume Control or move cursor left or right
SAT
Display the searched satellite list
EPG
Display the TV/Radio Program Guide
FAV
Display the favourite list
AUDIO
To set the output direction for speaker and change the Audio Language
TV/RADIO
Switch between TV and Radio mode
INFO
To display channel status or various program information for
current channel
General:
RECALL
Switch to the previous viewed channel
The marks appear on the rear panel of the receiver.
POS
Display position bar on the screen to adjust the antenna or for
Part 1
P/N
PAL/NTSC selection
MP
Multi-picture function
ZOOM
Zoom in the selected picture
TTX
Switch to teletext mode
SUB.T
Switch to subtitle mode
PAUSE
Pause the ongoing video and audio
REC
To record current channel
manual search
CAUTION
RISK OF ELECTRIC BHOCK
DO NOT OPEN
SHOCK HAZARO: DO NOT OPEN
RISQUE DE CHOC:NE PAS ENLEVER
CAUTION:
To reduce the risk of electric shock, do not remove the rear
panel. Equipment service and maintenance should be
undertaken only by trained technician.
Play or resume
Stop Play
Fast forward
Part 2
Fast backward
T/S
This symbol indicates that electric shock may happen due to improper operation.
Time shift
VOL
Increase or Decrease the volume
PAGE
Page up or page down
The symbol indicates that serious danger may happen due to improper operation.
2
3
User's Manual
User's Manual
2.2 Front Panel
2.4 Installation of receiver
Please refer to the right way for installation as following picture.
KEY
FUNCTION
Turn on/off receiver
MENU
Shows the main menu or back to previous menu
OK
Confirm the selection, or jump back to last menu
CH+/CH-
Channel change(Up/Down)
VOL+/VOL-
Volume Control(Up/Down)
2.3 Rear Panel
CONNECTOR
FUNCTION
LNB IN
Connect to satellite antenna cable
LOOP OUT
Connect to another receiver( IF loop through output
from digital tuner)
RS232
Connect to PC for software upgrade
VIDEO
Connect to TV’s video port
AUDIO R/L
Connect to TV’S audio port
ETHERNET
Connect the Ethernet port
RF OUT
UHF RF output to TV
Connect to digital audio amplifier
COAXIAL
POWER ON/OFF Power On/Off
4
5
User's Manual
3. Installation
!
This menu consists of sub-menus as shown below:
Antenna Setting
Automatic Search
Manual Search
Blind Scan
Motor Setting
Factory Default
3.1 Antenna Setting
!
!
!
!
!
!
!
!
!
Under the Antenna Setting menu, you can edit satellite data and
LNB information.
Press Red key to enter Automatic Search menu.
Press Green key to enter Manual Search menu.
Satellite Name: Select the satellite needs to search.
Transponder: To show or edit transponder information under current
satellite.
LNB Type: Select the type of your LNB. If you have universal LNB,
select universal.
LNB Freq (Low/High Freq): Enter the proper LNB frequency via
RCU or use the keypad displayed by pressing OK key.
Switches (22k, DiSEqC Switch Setting): To configure the antenna.
LNB Power: Select the LNB Power to Auto, Off, 14V or 18V.
3.2 Automatic Search
!
!
!
!
transponder between HOR and VER.
Search Type: FTA means only free to air channels can be searched. CAS means only scrambled
channels can be searched. Select All to search all channels.
NIT Search: Please Left/Right key to select On or Off.
Delete TP: Press Green key to delete the current transponder.
Set PID: Press Yellow key to set the PID and input the Video PID, Audio PID and PCR PID to
search.
3.4 Blind Search
!
!
!
!
!
!
!
Satellite Name: Select the satellite needs to be search.
Start Frequency: Edit the start frequency.
End Frequency: Edit the end frequency.
Start Symbol: Edit the start symbol rate.
End Symbol: Edit the end symbol rate.
Polarization: Select the polarization type as HOR, VER or ALL.
NIT Search: Select NIT search as On or Off.
3.5 Motor Setting
If you connect a DiSEqC1.2 motor, select the Motor Setup type to
DiSEqC1.2.
! Satellite Name: Select the satellite that needs to move.
! Motor Setup: Press Left/Right key to select DiSEqC1.2.
! Transponder: Select the transponder to check the signal level.
! Move: Select this item and then keep pressing Left/Right keys to
move your antenna east or west. Use the signal strength and signal
quality bars at the bottom of the screen to judge the best position of the antenna.
! Store Position: Press OK key to save the current position.
! Recalculate All Position: Press OK key to recalculate all satellite position.
! Goto Reference: Press OK key to move the motor to the reference position.
! Limit Setting: Press OK key to set West or East limit.
Automatic Search function is a convenient tool to search all preset
satellites at the same time.
! Press Up/Down key to choose desired satellite then press OK key to
confirm, a tickle will appear to indicate the selected satellite.
! Add TP: Press Green key to add TP into default TP list, which is
shown in the right of screen.
! Rename: Press Yellow key to rename the satellite.
! Scan: After selecting the desired satellite, press Blue key to start
channel search through various search modes.
If you connect a USALS positioner, first get to know your local longitude and latitude, then select the
Motor Setup type as USALS.
! Satellite Name: Select the satellite that needs to move.
! Motor Setup: Press Left/Right key to select USALS.
! Transponder: Select the transponder to check its signal level.
! Local Longitude: Input the local longitude through numeric keys.
! Local latitude: Input the local latitude through numeric keys.
3.3 Manual Search
3.6 Factory Default
!
!
!
!
6
User's Manual
Satellite Name: Select the satellite needs to search.
Transponder: Press Left/Right key to select your desired
transponder. Press OK key to activate TP list.
Frequency& Symbol Rate: Press Left/Right key to select the
appropriate item or use the numeric key of RCU to input the required
value.
Polarization: Press Left/Right keys to select the polarization of
!
!
Factory default allows user to restore the factory-reset values.
When you press OK key, the Warning window will appear, if you
select Yes, the system setup will be reset to the default values.
Warning: All previously set data and information will be lost after factory
default.
7
User's Manual
User's Manual
4. Channel Manager
5. Preference
4.1 Channel Manager
!
This menu allows you delete channels, lock channels, move channels,
rename channels, and sort channels etc.
! Delete: Move up or down and press OK key to select desired
channels to delete. Press the color keys to delete all, delete TP and
delete SAT channels.
Note: The deleted channel cannot be watched unless re-searched.
! Lock: Move up or down and press OK key to select desired channels
to lock. Password is needed to see locked channels.
! Move: Move up or down and press OK key to select desired
channels to move. Press RED and Up/Down keys or input numeric
keys to move the selected channel for new location.
! Sort: Press OK key to enter sort type menu. Select the sort order
through Up/Down key and press OK key to confirm.
Alphabet: All the channels will be sorted in alphabetical order.
Satellite: All the channels will be sorted in satellite order.
FTA->CAS: FTA channels will be listed ahead of the scrambled
channels.
CAS->FTA: Scrambled channels will be listed ahead of the FTA
channels.
FAV: Favourite channels will be listed ahead of the others.
! Rename: First select the channel needs to rename, then select Rename icon and press OK key to
confirm. A keypad dialog consisting of a title bar, an alphabet and function keys will appear on the
screen. Use the direction key of RCU to select the required character and press OK key to confirm.
Then the selected character will be shown in the title bar. After finishing the input, use direction key
of RCU to select OK.
This menu consists of sub-menus as follows:
System Options
AV Setting
Video Adjust
Time Settings
Timer
Parental Control
About Receiver
5.1 System Options
!
!
!
!
OSD Language: Press Left/Right key to select your desired
language.
OSD Transparence: Press Left/Right key to select the transparency
level of the MENU window.
OSD Timeout: Set the delay time for information banner to
disappeare.
Audio Language: Select the first language to listen if this language is
supported by current program. This depends on the TV content
provider.
5.2 AV Setting
!
!
!
!
Screen Ratio: Select the TV Screen format 4:3 or 16:9.
Screen Mode: Select the Screen Mode letter Box or Pan Scan.
Black Freeze: Select the back freeze No or Yes.
Monitor Type: Select the TV mode AUTO, PAL, NTSC or SECAM.
5.3 Video Adjust
4.2 Set Favourites
!
!
!
5.4 Time Settings
!
!
This menu allows user to set channel through 8 favourite types.
Press Up/Down key to select your favourite channel, and press OK
Key to confirm.
Press OK key again to remove desired channel from favorite list.
Press Red key to modify name of the favorite group.
!
!
!
!
This function allows user to adjust the screen brightness, contrast,
saturation and hue.
Set user's local time.
Select GMT of users' local area, and set the current date and time.
The unitwill get time information automatically from the satellite.
Summer Time: Select whether to use daylight saving for Local time.
5.5 Timer
!
!
8
10 timers could be set with various statues such as Off, Once, Daily
and Weekly.
Use the numeric of RCU to input the Hour and Duration Time.
9
User's Manual
5.6 Parental Control
!
!
!
!
Default password is “0000”
Parental Lock: Parental Lock menu is controlled by a password.
Install Lock: Installation menu in main menu is controlled.
To change the password as following steps:
1. Select Parental Lock.
2. Select the Current Password and input “0000”
3. Select the New Password and input a new PIN.
4. Select the Confirm Password and input the same new PIN.
Note: Do not forget the password. For further assistance, call your
local distributor.
5.7 About Receiver
!
This menu displays Software Version, Hardware Version and Date
information.
User's Manual
7.3 EPG (Electronic Program Guide)
!
!
!
!
Press EPG key to show Program Guide menu.
Naviagte EVENT: Press Red or Green key to navigate the information
in 7 days.
Detail Info: Press Blue key to display the detail information.
Timer: Press OK key to set the Timer.
7.4 Satellite List
!
Press SAT key to display satellite list, and press Up/Down and OK keys to enter channel list under
the selected satellite.
7.5 Favourite List
!
Press FAV key to enter favourite channel list, press FAV key again to choose favourite type.
7.6 Multi Video Type
!
Press MP key to enter Multi Video Type menu for 9, 12 or 16 options.
7.7 Zoom Function
!
6. Game
Pess Zoom key then press OK key, the selected picture within the frame will be enlarged.
7.8 Audio
Volume
!
!
This menu consists of Teris, Gobang, Canvas and Boxman games.
Press OK key to enter the corresponding sub-menu. User can play
the game via remote control.
!
!
!
Press Left/Right key to adjust the volume.
Press Mute key to mute volume and press Mute key again to resume the volume.
Press Left/Right key also to resume the mute function.
Audio Control
!
!
7. General Viewing Function
7.1 Program Information
!
Press Info key to check program information included in the current channel program.
Note: Progam information is not always sent with the channel
program.
7.2 Channel List
!
!
!
!
10
In full screen play mode, press OK key to display the channel list.
Press Up/Down and OK key to enter the desired channel.
Press RED key to enter the advanced channel list.
In advanced channel list, user can check all channels in different sort
type such as Alphabet/Satelite/FAV/CAS.
Press Audio and Left/Right keys to choose audio channel(Left, Right and Stereo).
Press Audio and Up/Down keys to choose audio language.
7.9 TV/Radio
While watching a TV channel, press TV/Radio key to switch between TV and Radio mode.
7.10 TV/SAT mode (Optional)
The TV/SAT key lets user change the mode from satellite to TV or VCR.
Press once to move to TV mode.
Press twice to move to VCR mode
Press three times to change back to satellite mode.
7.11 Recall
Press Recall key to switch to the previous channel.
11
User's Manual
8. USB Function
The unit with built-in USB port supports the following devices:
! USB portabe hard disc
! USB memory
USB function as listed below:
- PVR(Personal Video Record)
- Timeshift record
- Audio/Video file display
- Photo display
- Software Upgrade
- Format disk
- Delete/Rename disk file
- Device Info display
USB Browser
There are two parts under this menu:disk partition list and file list. User can switch between two lists with
left /Right keys. While the cursor in partition list, press OK key to choose disk partition. While the cursor in
file list, press OK key to enter directory or start to play current file.
Green key to play the current file. Blue key to stop playing. Yellow key to enter volume adjust menu. Red
key to ener USB functions list and detailed direction as follows:
Delete -- Delete current file
Rename -- Change the current file name
Show MP3 -- Switch to the mode which only display MP3 file.
Show PVR -- Switch to the mode which only display PVR record file.
Show Jpeg -- Switch to the mode which only display JPEG file.
Show BIN -- Switch to the mode which only display .bin file.
Show All Files -- Switch to the mode which display all supported files.
Format Disk -- Formatting the disk
Show Disk Information -- Display current disk partition informaitn, such as: Capacity, File system type,
Used space and Free space.
Set Record Path -- Place all recorded files into a folder by set record file path.
Switch to Order(Random) Play -- Set order or random play.
Switch to Auto(Manual) Play -- Set auto or manual play.
PVR Function
User can record any audio and video data to hard disk and watch these programs afterwards. There are
two record modes which is manually recorded or recorded by timer. For the manual record, you can record
another program under the current TP while watching the current program. Under the mode of manual
record, there will appear the channel list for
recording as the right picture for user to
choose what to record.
Record and Play menu:
Time shown in the left tells the timer duration
of playing and right time tells the total
recorded time.
12
User's Manual
9. Technical Specification
TRANSMISSION STANDARDS
DVB-S, MPEG-2
SATELLITE INPUT/DEMODULATION
Connector Type
Input Frequency
Signal Input Level
Band Switch Control
LNB Supply
Demodulation Type
Symbol Rate
AUDIO/VIDEO PROCESSING
Audio Decompression
Audio Outputs
Video Decompression
Video Buffer
Data Rate
Video Output
Video Format
POWER SUPPLY
Main input voltage
Power consumption
REAL PANEL
Connections
2XF Type(1 Input/1 Loop Through)
950 to 2150 MHz
- 65 to 25 dBm
22KHz
13.0 +0.5V/16V +0.7V, Max 500Ma
QPSK/FRC Coding(DVB prETS 300 421)
2<Rs<45 Mband(SCPC/MCPC)
MPEG-1 layer I and II / Musicamr
Stereo Channel/Dual Mono/Joint Stereo/ Mono
MPEG-2 Main Profile @ Main Levels With Lette
64 Mbits of SDRAM is provided
Up to 15Mbits/s (Max. burst rate: 228 Mbits/s)
PAL-25 frame @720 x 576; NTSC-30 frame @720x480
4:3, 16:9
100 - 240V AC @ 50Hz/60Hz±5%
Max. 30W
1 RF Input / 1 RF Loop through output
RF OUT / RF IN
2 x Audio L/R (RCA)
1 x Video Signal (RCA)
1 x RS-232 (9-pin D-sub male)
1 x Y/Pb/Pr Video Signal (3RCA)
1 x ETHERNET
10. Trouble Shooting
Problem
Possible Causes
No display light up on front panel Power Cord is not well plugged
No sound or picture, but the front The unit is in standby mode
panel red light is ON.
No sound or picture
The satellite dish is not pointing at the satellite.
Bad picture/Blocking Error
No picture(Video)
There is interference on your
digital satellite channel.
The RCU is not working.
No signal or weak signal
The satellite dish in not pointing at the satellite
Signal is too strong
Satellite dish is too small
LNB noise factor too high.
The LNB is faulty.
The system is connected by SCART cable and
TV is not in AV/EXT mode.
The system is connected using RF cable and the
output channel of the receiver interferes with an
existing terrestrial channel or Video Signal.
Out of battery
RCU is aimed at wrong direction
What To Do
Check whether power cord has been plugged
properly into power socket.
Press the standby button.
Adjust the dish. Check the Signal Level in the
Antenna Setup Menu
Check the cable connections. LNB and other
equipment connected between the LNB and the
receiver and adjust the dish.
Adjust the dish.
Connect a signal attenuator to the LNB input
Change to a larger dish
Change to an LNB with lower noise factor
Change the LNB
Check the UHF channel fixed in your system and
tune the UHF properly.
Change the receiver output channel to a more
suitable channel or connect the system using
SCART cable.
Change the battery
Aim the RCU at the unit, and make sure no blocks
between the front panel and RCU
Note: If you still cannot resolve the problem with above reference. Please contact the local dealer or their after-sales service center.
13